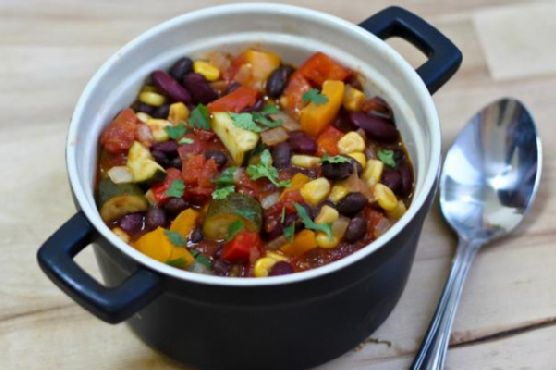
Last Tuesday, I found myself staring into the abyss that is my refrigerator, wondering what on earth I could whip up for dinner. You know those nights when you just can’t muster the energy to make anything extravagant but still crave something warm and satisfying? That’s when Smokey Rainbow Chili came to the rescue. Packed with colorful veggies and a kick of spice, this dish not only brightens up your plate but also your soul. Perfect for a chilly evening or when you need a bit of comfort without the fuss. It’s like a cozy blanket in a bowl, making it totally worth the little effort it takes to make.
Jump to Recipe
What You’ll Need
I bet you already have most of these tucked away in your pantry, just waiting to be transformed into something magical. Here’s what you’ll need:
- 2 tablespoons of olive oil
- 1 medium zucchini, diced
- 1 large red bell pepper, diced
- 1 large orange bell pepper, diced
- 1 diced fresh jalapeno pepper
- 4 cloves of garlic, minced
- 1 large onion, chopped
- 1 can (14.5 ounces) of stewed tomatoes with liquid
- 1 can (6 ounces) of tomato paste
- 1 can (15 ounces) of black beans, drained and rinsed
- 1 can (15 ounces) of whole kernel corn, drained
- 1 can (15 ounces) of red kidney beans, drained and rinsed
- 1 tablespoon of smoked paprika
- 2 tablespoons of chili powder
- 1 teaspoon of dried oregano
- 1/2 teaspoon of black ground pepper
- 1/4 teaspoon of cayenne pepper (or more if you’re feeling brave!)
How to Make Smokey Rainbow Chili
- In a large pot, heat the olive oil over medium-high heat. You want it shimmering, not smoking.
- Add the zucchini, red bell pepper, orange bell pepper, jalapeno, garlic, and onion. Cook them for about 5 minutes or until they’re just tender and the kitchen smells like heaven.
- Pour in the stewed tomatoes with their liquid and stir in the tomato paste until it dissolves evenly, giving you a beautiful, rich base.
- Add the black beans, corn, and kidney beans, mixing them well into the tomatoey goodness.
- Sprinkle in the smoked paprika, chili powder, oregano, black pepper, and cayenne. Each stir should reveal a little rainbow of color and promise of flavor.
- Bring the pot to a boil. Keep an eye out for those bubbling edges that signal it’s time to turn the heat down.
- Reduce the heat to low and let it simmer for about an hour, stirring occasionally. If your veggie chunks are on the larger side, you might want to let it simmer a bit longer until they’re perfectly tender.
Cook’s Notes
Here’s the deal: the longer you let this chili simmer, the deeper the flavors get, so if you’ve got the time, let it do its thing. But if you’re in a rush, 30 minutes of simmering can still do wonders. Just taste as you go and adjust the seasoning to your liking. If you like your chili super thick, reduce the simmering time or add a bit less liquid from the tomatoes.
Got leftovers? This chili tastes even better the next day. Just pop it in the fridge for up to 3 days, or freeze it for a rainy day. When reheating, you might need to add a splash of water or broth to get it back to the perfect consistency.
Make It Your Own
- Want some meat in there? Brown a pound of ground beef or turkey, and add it in after sauteing the veggies.
- For a vegan protein boost, throw in some crispy tofu cubes once the chili is done simmering.
- Craving more heat? Add an extra jalapeno or a splash of hot sauce to dial up the fire.
- If you’re a fan of smoky flavors, double up on the smoked paprika or add a drop of liquid smoke.
If you try this, I’d love to hear how it turns out — drop a comment or tag me! My DMs are open for all your kitchen triumphs and tribulations. Happy cooking, friends!
Related update: Roast Chicken with Apples and Rosemary
Related update: Vietnamese Beef-Noodle Soup With Asian Greens, Okay Vietnamese/japanese

The other day, I found myself staring aimlessly into my pantry, contemplating the eternal question: "What's for dinner?" It was one of those never-ending Tuesdays, and I needed a dinner that was like a warm hug — something quick, cozy, and just a bit zesty to shake off the day's blues. That's when Azteca Soup became my savior. With a refrigerator already stocked with fresh vegetables and a trusty can of tomatoes, it felt like the universe was nudging me toward this comforting bowl of delight. This soup is like a fiesta in a bowl; it’s rich, tangy, and just spicy enough to dance on your taste buds without setting off fire alarms. It’s easy enough to whip up on a weeknight, but impressive enough to make you feel like a kitchen goddess (or god, no discrimination here).
Jump to Recipe
What You'll Need
You might be surprised at how many of these ingredients are already in your kitchen. This list is all about bold flavors and easy pantry staples.
- Olive oil – for that luscious sauté start.
- 2 cloves garlic, minced
- 1 onion, chopped
- 1 jalapeno pepper, seeded and diced
- 2 celery stalks, chopped
- 1 can tomatoes, with juice reserved
- 1 teaspoon chili powder
- 1 teaspoon cumin
- 1 cup fresh corn kernels
- 2 tablespoons basil in ribbons
- 3 cups vegetable stock
- 2 tablespoons lime juice
- 1 avocado, diced
- Nacho chips
- Sour cream, for serving
- Basil shreds, for garnish
How to Make Azteca Soup
- In a medium saucepan, heat a splash of olive oil over medium heat. Toss in the garlic, onions, jalapeno pepper, and celery. Sauté until everything softens and becomes fragrant, about 5 minutes.
- Add the canned tomatoes, including the reserved juice, along with the chili powder and cumin. Cook this mixture down for about 10 minutes, stirring often. You'll know it's right when the tomatoes start breaking down, and the kitchen smells irresistible.
- Stir in the fresh corn and basil ribbons, followed by the vegetable stock. Bring it all to a gentle boil, then reduce the heat to a simmer. Let it bubble away for 15 minutes, letting all those flavors meld.
- Once done, remove the soup from heat. Stir in the fresh lime juice and diced avocado. The lime adds a bright kick, while the avocado brings a creamy contrast.
- Break a handful of nacho chips into each serving bowl. Ladle the hot soup on top, then add a generous dollop of sour cream. Scatter a few basil shreds and perch a nacho chip on top for good measure.
- Serve immediately to enjoy the full spectrum of flavors and textures. This makes enough for six people, whether it’s for a full lunch or a hearty starter.
Cook's Notes
Let's talk about a couple of things to keep in mind. First, sautéing your veggies just right is key — don't rush this step; it builds the flavor base. If you're making this ahead, the soup itself stores well in the fridge for a couple of days; just hold off on adding the avocado and chips until you're ready to serve. The avocado tends to go brown, and nobody wants soggy chips. Reheat gently, and add the fresh ingredients and garnishes once it's hot and ready to serve.
Make It Your Own
Here are some fun ways to tweak this soup to match your mood or pantry:
- Swap the chicken for crispy tofu: If you're in the mood for some protein, toss in some tofu cubes, pan-fried to crisp perfection.
- Heat lovers' edition: Throw in an extra jalapeno or a dash of hot sauce for an extra spicy kick.
- Cheese, please: Mix in a handful of shredded cheddar or jack cheese right before serving for a gooey, melty twist.
- Herbal touch: Substitute the basil with cilantro for a different but equally vibrant herbal note.
If you try this, I'd love to hear how it turns out — drop a comment or tag me! Sharing your kitchen adventures makes my day. I hope this Azteca Soup brings as much joy to your table as it does to mine. Happy cooking!

So there I was, staring into my fridge on a Wednesday night, contemplating the sad assortment of leftovers and a few random ingredients when inspiration struck. It was one of those evenings where cooking seemed more like a Herculean task than a simple pleasure, and I just needed something refreshing yet satisfying. Enter my Tuna and Tofu Cold Dish. This dish is like a cool breeze on a hot day—simple, refreshing, and oh-so-satisfying. It’s the perfect quick fix when you’re juggling work, life, and everything in between. Plus, it’s surprisingly elegant for how little effort it takes. Trust me, this one’s a keeper for those nights when you want to pretend you’re at a fancy restaurant without changing out of your pajamas.
Jump to Recipe
What You’ll Need
This is a no-fuss, ingredient-light dish. Chances are you already have most of this in your kitchen, just waiting to be transformed into something delicious.
- A block of silken tofu
- A can of tuna in water, drained
- White diced cherry tomatoes
- A dash of white pepper
- A pinch of salt
- A splash of extra virgin olive oil
- A few drops of vinegar
- Light Kikkoman soy sauce
- A clove of garlic, minced
- Freshly cracked black pepper
How to Make Tuna and Tofu Cold Dish
- Start by cutting your block of silken tofu into small, bite-sized blocks. Be gentle here—silken tofu is as fragile as my willpower at a dessert buffet!
- Open the can of tuna and drain it well. Once drained, place the tuna in a bowl and gently squash it with a fork. Mix in a dash of white pepper and a pinch of salt to bring out its flavor.
- Take your cherry tomatoes and slice them thinly. The goal is to get them to release their sweet and tangy juices.
- On a serving plate, carefully place the tofu blocks. Top them with your sliced cherry tomatoes and then the seasoned tuna.
- For the sauce, mix together a good splash of extra virgin olive oil, a few drops of vinegar, and a dash of light Kikkoman soy sauce. Add the minced garlic and freshly cracked black pepper.
- Drizzle this fragrant sauce over your tofu, tuna, and tomatoes.
- Finish by sprinkling with toasted sesame seeds and diced spring onion for that extra pop of flavor and crunch. Serve immediately and enjoy the calm in a chaotic weeknight!
Cook’s Notes
This dish is a lifesaver on busy nights. It’s all about the balance of textures and flavors—the creamy tofu, the robust tuna, and the crunchy veggies. Once assembled, it’s best eaten right away to enjoy the freshness of the ingredients. If you want to prep ahead, mix the sauce earlier in the day and keep it in the fridge. Just wait to dress the dish until you’re ready to serve, or the tofu might get over-marinated and lose its delicate texture.
Make It Your Own
- Swap the tuna for crispy tofu if you’re going plant-based. Just pan-fry tofu cubes until golden for a delightful contrast.
- Try adding sliced avocado for a creamy twist. It pairs beautifully with the tofu and tuna.
- For a spicy kick, mix a bit of Sriracha into the sauce. It’ll add warmth and complexity without overpowering the dish.
- Switch up the herbs by adding fresh cilantro or basil instead of spring onion for a different flavor profile.
If you try this, I’d love to hear how it turns out—drop a comment or tag me! Your feedback makes this kitchen adventure all the more fun. Bon appétit, my fellow food explorers!
Related update: Tuna and Tofu Cold Dish

Last winter, I found myself staring down a half-eaten box of candy canes—a festive gift from my overly enthusiastic neighbor. I adore peppermint, but there’s only so much peppermint tea one can drink! Desperate to create something my friends and family would devour, it hit me: those candy canes needed a sweet partner. Enter my Candy Cane Chocolate Marshmallows. Perfect for a cozy evening in your favorite fuzzy socks, these treats are surprisingly easy to make and look infinitely more impressive than the effort they require. They’re the kind of thing you whip up to wow guests during holiday gatherings or to simply satisfy that post-dinner sweet tooth while binge-watching your favorite show. Trust me, they’re a hit! Jump to Recipe
What You’ll Need
This recipe is like a scavenger hunt in your pantry; chances are you already have most of the goodies tucked away. Here’s what you’ll need:
- Candy canes – the stars of the show!
- Dark chocolate – for that rich, bittersweet contrast.
- Marshmallows – go for the big, fluffy kind.
- Milk chocolate – adds a creamy sweetness to balance the dark chocolate.
How to Make Candy Cane Chocolate Marshmallows
- First, let’s get those candy canes ready. Grab a few and crush them using the bottom of a sturdy glass or a mallet. You want pieces small enough to stick but not so tiny that they turn to dust. Set them aside.
- Set up a double boiler by placing a heat-safe bowl over a pot of simmering water. Make sure the bottom of the bowl doesn’t touch the water. Add the dark and milk chocolate to the bowl, stirring occasionally until the mixture is smooth and glossy.
- Now for the fun part—dip each marshmallow into the melted chocolate, ensuring it’s nicely coated but not drowning. Let the excess drip off back into the bowl.
- Immediately roll the chocolate-dipped marshmallow into the crushed candy canes. The pieces should stick to the chocolate, creating a delightful crunchy coating.
- Place each finished marshmallow on a sheet of wax paper. They’ll need to chill in the fridge for at least an hour, or until the chocolate has fully hardened.
Cook’s Notes
These little delights are pretty forgiving, so don’t stress if things get a bit messy. Here are a few pointers to keep you on track:
- If you don’t have a double boiler, don’t sweat it. Use a microwave in short bursts to melt the chocolate, stirring in between.
- Store your marshmallows in an airtight container in a cool, dry place. They should last up to a week, but honestly, they’ll probably disappear much sooner!
- To make ahead, prepare them up to two days in advance. They’re the perfect treat to have waiting for last-minute guests or unexpected sweet cravings.
Make It Your Own
- Try using white chocolate for a sweeter, milder twist. It pairs beautifully with peppermint!
- For a nutty crunch, roll the chocolate-coated marshmallows in finely chopped hazelnuts instead of candy canes.
- If you’re feeling adventurous, add a pinch of cayenne pepper to the melted chocolate for a spicy kick.
- Not a fan of peppermint? Substitute with crushed graham crackers and sprinkle with a touch of cinnamon for a s’mores vibe.
If you try this, I’d love to hear how it turns out—drop a comment or tag me in your marshmallow masterpiece! Happy indulging, and may your winter be as sweet as these treats!
Related update: Candy Cane Chocolate Marshmallows
Related update: Grandma Inez’s Pineapple Pie
Related update: Tuna and Tofu Cold Dish

Picture this: It’s a chilly Wednesday evening, and I’ve got exactly 15 minutes before my friends show up for our weekly Wine & Whine night. The fridge is looking a bit sparse, but I spot some leftover brie from last weekend and a carton of raspberries that are starting to look a tad too ripe. As I rummage through my pantry, I stumble upon a forgotten stash of phyllo shells. A lightbulb moment strikes—why not whip up some White Chocolate Raspberry Brie Cups? They’re quick, ooze class with minimal effort, and the combination of creamy, tangy, and sweet is an absolute game-changer. Trust me, these little bites are what every Wednesday evening dreams of becoming.
Jump to Recipe
What You’ll Need
You might already have most of these on hand, which means fewer trips to the store—score!
- Brie – The creamy heart of our cups.
- Athens phyllo shells – Crunchy, flaky, ready-to-go lifesavers.
- Raspberries – Fresh and slightly tart.
- Raspberry preserves – For that extra berry punch.
- White chocolate – The sweet base to balance it all out.
How to Make White Chocolate Raspberry Brie Cups
- Preheat your oven to 350 degrees. This gives us just enough time to assemble everything.
- Line a baking sheet with parchment paper. This helps prevent any sticky messes and makes cleanup a breeze.
- Place 1 teaspoon of white chocolate in the bottom of each phyllo shell. The chocolate will melt into a sweet, gooey foundation.
- Top with chunks of brie. Go generous here—the brie should be the star of the show.
- Add about 1/2 teaspoon of raspberry preserves on top of the cheese. This layer should start to glisten.
- Bake for 8 minutes, or until the corners of the phyllo shells turn golden and the cheese is bubbling away.
- Carefully remove from the oven and top with a small dollop of extra raspberry jam. Trust me, it’s worth it.
- Place back in the oven for just 1 more minute to let the jam settle.
- Finally, crown each cup with a fresh raspberry. Serve them hot—the contrast of temperatures is divine.
Cook’s Notes
Don’t overstuff the shells; they need some space to breathe and bake properly. If you’re prepping for a party, you can assemble these up to a day in advance. Just cover and refrigerate them, then bake right before serving. These cups are best enjoyed fresh, but if you have leftovers (unlikely!), store them in an airtight container in the fridge. Pop them back in a warm oven for a few minutes to re-crisp.
Make It Your Own
- Swap the brie for camembert if you’re feeling adventurous—another creamy delight.
- Try a darker chocolate for a less sweet, more sophisticated bite.
- Substitute the raspberry preserves with apricot jam for a surprise twist.
- Add a thin slice of prosciutto under the brie for a savory kick.
If you try this, I’d love to hear how it turns out—drop a comment or tag me! Wine & Whine nights are my favorite, and I hope these cups make yours special too.
Related update: White Chocolate Raspberry Brie Cups
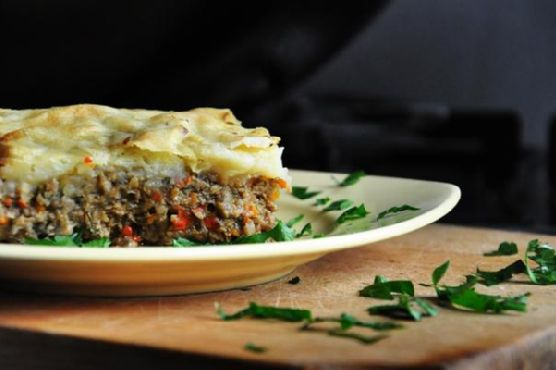
It was one of those crisp autumn evenings when the wind manages to sneak its way through every little crack in the window, and the leaves rustle just a bit too loudly. I was in my kitchen, fervently searching for something comforting yet uncomplicated enough to soothe the chill that had settled in my bones. And there it was—my answer in the form of a hearty, soul-warming Vegetarian Mushroom Shepherd’s Pie. It’s the kind of dish that’s a hug on a plate, warmly satisfying yet light enough that you won’t be falling asleep on the couch afterward. Trust me, this is a dish you’ll want to keep in your back pocket for those moments when you’re craving something cozy without all the fuss.
Jump to Recipe
What You’ll Need
It’s likely that you’ve got most of these ingredients chilling in your pantry or fridge right now. It’s a simple list, but when combined, the flavors really come alive.
- Red skin potatoes
- Soy granules
- Mushrooms
- Carrot
- Red bell pepper
- Diced onions
- Dill
- Parsley
- Dry eggs (or your favorite egg substitute)
- Sea salt
- Ground pepper
- Sweet paprika
- Dry thyme
- Unrefined sunflower oil
How to Make Vegetarian Mushroom Shepherd’s Pie
- Peel the red skin potatoes and place them into a large pot filled with water. Bring to a boil and let them bubble away until they’re tender and ready to be mashed.
- Once the potatoes are perfectly soft, drain and mash them. Let the mash cool while you get everything else ready—it should be smooth and slightly fluffy.
- Chop the mushrooms, carrot, and red bell pepper into manageable pieces, then add them into your food processor. Pulse until everything’s finely chopped and well mixed, creating a delightful, aromatic medley.
- In a large skillet, heat a splash of sunflower oil over medium heat until shimmering. Add the vegetable mixture, along with diced onions, chopped dill, parsley, soy granules, dry eggs, sea salt, ground pepper, sweet paprika, and dry thyme. Sauté for about 10 minutes until the mixture is fragrant, and the kitchen smells like comfort personified.
- Prepare a casserole dish by lining it with parchment paper. Divide the mashed potatoes into two portions, spreading the first half evenly as a base layer in the dish.
- Spoon the savory mushroom filling over the potato layer, ensuring it’s even and packed full of flavor.
- Spread the remaining mashed potatoes over the top of the filling, smoothing it out with a spatula like you’re icing a cake.
- Preheat your oven to 390°F (200°C). Slide your casserole into the oven and let it bake for 40 minutes until the top is golden and slightly crisp.
- Resist the urge to dive in immediately! Let it cool for at least half an hour to allow the flavors to settle and intensify.
Cook’s Notes
While this dish is pretty forgiving, a few tips can make it even better. If you’re tight on time, peel and chop the potatoes the night before and store them in water in the fridge. This way, they’ll be ready to go when you are. When mashing the potatoes, aim for smoothness, but a few lumps add a lovely rustic touch. Also, this pie is at its best when cooled slightly, so patience is key. Leftovers can be stored in an airtight container in the fridge for up to three days, and they reheat beautifully—just pop them back in the oven until they’re warmed through.
Make It Your Own
Feel free to tweak this recipe according to what’s in your fridge or what you’re craving:
- Swap the soy granules with cooked lentils for a different texture and earthy flavor.
- Use sweet potatoes instead of red skin potatoes for a sweeter topping that pairs beautifully with the savory filling.
- Add a sprinkle of cheese on top for a golden, melty finish—vegan cheese works just as well!
- Incorporate some corn or peas into the filling for an extra pop of color and sweetness.
If you try this, I’d love to hear how it turns out—drop a comment or tag me on social! I’m always excited to see your unique spins on this cozy classic.
Related update: Vegetarian Mushroom Shepherd’s Pie
Related update: Lamb In Red Mole Sauce
Related update: White Chocolate Raspberry Brie Cups

So there I was, staring at a pantry full of canned goods and feeling absolutely uninspired. You know those moments, right? When dinner needs to magically appear, but the motivation to whip up something grand is nowhere to be found? That’s when my trusty crockpot became my salvation, and this Crockpot “Refried” Beans recipe was born. Packed with hearty pinto beans and a kiss of cumin, it’s the kind of dish that mellows me out on a hectic Tuesday evening. Not to mention, it’s an absolute breeze to prepare. Whether you’re looking for a simple side or a filling for your tacos, this dish has you covered.
Jump to Recipe
What You’ll Need
Picture this: a short list of ingredients, most of which are probably lurking in your pantry right now. We’re talking about pantry staples here, folks, nothing too fancy.
- Pinto beans – the star of our show, dried and ready for action
- Water – simple enough
- Canned garlic – because chopping fresh is overrated (or maybe just too much effort today)
- Onion – for that subtle depth of flavor
- Cumin – gives that warm, earthy vibe to our beans
- Black pepper – just enough to make things interesting
- Salt – essential seasoning, obviously
How to Make Crockpot “Refried” Beans
- Rinse those pinto beans in a colander. Seriously, give them a good rinse until the water runs clear, and make sure to pick out any bad beans that are looking questionable.
- Combine all of the ingredients into your trusty crockpot. Toss the rinsed beans in, add the water, canned garlic, onion, cumin, black pepper, and salt. Give it a little stir to distribute the flavors.
- Notice any beans floating to the top? Go ahead and remove those. Floating beans often mean they’re not quite right, and we’re all about quality here.
- Cover the crockpot, set it on HIGH, and let it work its magic for 4 hours. The kitchen will start to smell warm and inviting — almost like a hug.
- After the 4 hours are up, switch the setting to LOW and let it continue to cook for another 2 hours. Patience, my friend, is key.
- Once cooked, uncover the crockpot and assess the liquid situation. Remove any excess liquid, but leave enough to reach your desired consistency when mashed. Remember, we’re aiming for somewhere between very liquidy, restaurant-style beans and the thicker, canned kind.
- Mash the beans using a potato masher. Go as smooth or chunky as you like — it’s your masterpiece.
- Serve them warm, and soak in the satisfaction of a meal well-crafted with minimal effort.
Cook’s Notes
So, a few things to keep in mind: using dried beans means you get to control the texture and sodium levels, which is a total win-win. As for storage, pop any leftovers into air-tight containers and they’ll chill in the fridge for up to 2 weeks. If you’re more of a plan-ahead person, freeze the beans in ziplock bags to enjoy at a later date. Just remember to thaw them in the fridge overnight before reheating.
Make It Your Own
Experimenting is half the fun, right? Here are a few ways to switch things up:
- Swap the pinto beans for black beans for a subtly different flavor profile.
- Feeling adventurous? Add a diced jalapeño to the crockpot for a spicy kick.
- Toss in a handful of chopped cilantro after mashing for a fresh, herbaceous finish.
- For a smoky twist, stir in a teaspoon of smoked paprika with the other spices.
If you try this recipe, I’d love to hear how it turned out! Drop a comment or tag me in your kitchen adventures. Happy cooking!
Related update: Crockpot "Refried" Beans
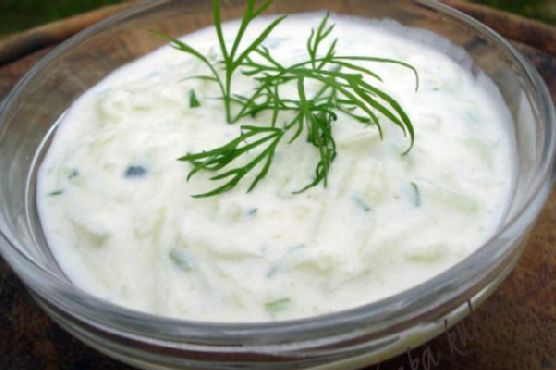
Oh, the joys of summer! Last week, I found myself standing in the kitchen, windows wide open, a warm breeze sneaking in with the scent of freshly cut grass. It was the kind of day that begged for something cool, creamy, and refreshing. That’s when it hit me—I needed tzadziki in my life, like, immediately. This is the kind of dish that doesn’t just fill your belly; it feels like a mini-vacation to the Mediterranean. It’s quick and straightforward but has that “made from scratch” vibe that’ll make you feel like a kitchen wizard. Seriously, if you’re looking for something to dollop on just about anything, tzadziki is your go-to. Jump to Recipe
What You’ll Need
You might already have most of these on hand, especially if you’re a fan of Greek cooking. Here’s what you’ll need:
- Cucumbers – The crunchy base of our dip.
- Sea salt – To draw out that extra moisture from the cuke.
- Yogurt – The creamy heart of the tzadziki.
- Sour cream – Adds a little tang and extra creaminess.
- Olive oil – Just a drizzle for richness.
- Vinegar – A splash to brighten up the flavors.
- Garlic – Because what’s tzadziki without garlic?
- White pepper – For a subtle heat that doesn’t overpower.
- Fresh dried dill – The herb that ties it all together.
How to Make Tzadziki
- Start by lightly salting the cucumbers. This isn’t just seasoning; it’ll help draw out the water. Let them sit for about 5 minutes.
- Once they’ve had a good cry, take small handfuls of the cucumbers and squeeze out as much water as you can. You’ll be surprised how much comes out!
- In a bowl, mix the yogurt, sour cream, olive oil, vinegar, garlic, and white pepper. You’re looking for a smooth, creamy blend here.
- Add the drained cucumbers and dill to your creamy mixture. Give it a good stir until everything’s well combined.
- Taste and adjust the seasoning. It might need a pinch more salt or a dash of vinegar to suit your taste.
- Chill the tzadziki in the fridge for at least two hours. This is where the magic happens as the flavors meld together.
Cook’s Notes
Ah, the art of tzadziki making! It’s all about getting those cucumbers nice and dry, so don’t skimp on the squeezing. Trust me, the less water, the creamier your dip. And while you’re at it, make sure you let it chill long enough. The flavors need time to develop, and patience is key here. Planning ahead? Make it the day before your gathering, and it’ll be even better! Store any leftovers in an airtight container in the fridge, and they’ll last a good three days. Just give it a stir before serving because the water might separate a bit.
Make It Your Own
- Spicy Kick – Add a pinch of cayenne pepper for a hint of heat.
- Herb Swaps – Try mint or parsley instead of dill for a different herbal note.
- Extra Creamy – Use full-fat Greek yogurt for an even richer texture.
- Vegan Twist – Swap the yogurt and sour cream for coconut yogurt to make it vegan-friendly.
If you give this a whirl, I’d absolutely love to hear how it turns out for you. Drop a comment or tag me in your creations. Happy dipping!
Related update: Tzadziki
Related update: Hummus with roasted orange peppers

It was one of those weeks where I was juggling a dozen things—work deadlines, a last-minute school project, and the usual life chaos. That’s when I stumbled upon the idea of making soup, a comforting pause in a hectic day. But I wanted something versatile enough to please everyone’s different tastes at home. Enter: One Soup, Two Ways. This recipe is like a choose-your-own-adventure book from my childhood, letting you decide between a comforting chunky vegetable soup or a smooth, creamy version. Perfect for when you want a warm hug in a bowl or to impress your family and friends without breaking a sweat. Plus, it’s one of those recipes where I bet you already have most of the ingredients lying around, so no emergency grocery runs are needed.
Jump to Recipe
What You’ll Need
You might be amazed at how these pantry staples transform into something delicious and heartwarming!
- Olive oil
- Garlic (because everything good starts with garlic, right?)
- Onion
- Carrots
- Celery
- Salt
- Canned tomato puree
- Canned corn
- Chicken broth
- Canned beans
- Dried herbs like thyme
- Whole cooking cream (for the creamy version)
- Turmeric
How to Make One Soup, Two Ways: Chunky Vegetables and Cream Of Vegetables
- Heat a drizzle of olive oil over medium-low heat in a soup pot that’s big enough to hold all the goodness you’re about to create.
- Sauté the garlic, onions, carrots, and celery in the pot. You want that garlic to get fragrant and the onions to turn translucent while the carrots and celery soften up, about 10 minutes.
- Sprinkle in the salt, give it a good stir, and cover the pot to let those veggies sweat it out.
- Pour in the tomato puree and canned corn, stirring them in well. Let that mixture cook for a few minutes until the tomato puree deepens in color.
- Add the chicken broth and turn the heat to high. Bring it all to a rolling boil, which infuses the flavors beautifully.
- Stir in the canned beans and dried herbs, feeling free to add a pinch more if you’re feeling adventurous. Let it simmer for a few more minutes.
- Here’s where you choose your path: For chunky soup, simply ladle it into bowls. For the creamy version, remove the pot from heat, stir in the whole cooking cream, and use an immersion blender to blend until smooth and velvety.
- Sprinkle turmeric over both versions for a pop of color and a hint of earthiness. It’s like the finishing touch that makes everything special.
Cook’s Notes
- This soup is a great “clean out the fridge” meal. Toss in any leftover veggies you’ve got on hand.
- Store leftovers in the fridge, in an airtight container, for up to 3 days. Reheat on the stove over low heat until warmed through.
- If you want to make it ahead, just stop before adding the cream and blend. The chunky version freezes like a charm!
Make It Your Own
- Swap out the chicken broth for vegetable broth to keep it vegetarian-friendly.
- Use crispy tofu instead of beans for a plant-based protein option.
- Add a dash of hot sauce or chili flakes for a spicy kick.
- Incorporate some cooked pasta or rice for a heartier meal.
If you try this, I’d love to hear how it turns out—drop a comment or tag me! Whether you’re slurping the chunky version or savoring the creaminess, enjoy every spoonful. Happy cooking!
Related update: One Soup, Two Ways: Chunky Vegetables and Cream Of Vegetables
Related update: Instant Pot Chicken Thighs
Related update: French Onion Marsala Soup

It was one of those lazy Sunday afternoons when the weather couldn’t decide if it wanted to be sunny or stormy. I found myself staring at an overabundance of tomatoes and peppers on my counter, all begging for attention before they started their slow decline. You know, that guilt-inducing moment when your produce is almost too ripe, taunting you with its fleeting freshness? That’s when I decided it was a perfect day to whip up a batch of my favorite Roasted Red Pepper & Tomato Salsa. It’s one of those recipes that rewards you with intense, smoky flavors and a satisfying texture—all with minimal effort. Plus, with the broiler doing most of the work, you’ll spend less time in the kitchen and more time curled up with a good book or catching the latest episode of your favorite show.
Jump to Recipe
What You’ll Need
This recipe is delightfully simple, and chances are you already have most of these ingredients hanging out in your kitchen, just waiting to be transformed into something magical.
- Tomatoes, ripe and juicy
- Red bell pepper, for that sweet, smoky touch
- Onion, because every good salsa needs a little bite
- Whole garlic cloves, roasted to mellow perfection
- Jalapeno pepper, for those who like a kick
- Olive oil, just a drizzle to bring it all together
- Smoked salt or sea salt, whatever you have on hand
- Fresh cilantro, for that bright, herby finish
- Lime juice, to add the perfect zing
- Cumin, a dash for warmth and depth
How to Make Roasted Red Pepper & Tomato Salsa
- Preheat your oven to broil. This step is where all the magic begins—the high heat will give your veggies that perfect char.
- Cut the tomatoes in half and the onions into quarters, then arrange them on a tin-foil lined baking sheet. Trust me, the foil makes clean-up a breeze.
- Add the red bell pepper, whole garlic cloves (leave the skins on for now), and the jalapeno pepper to the sheet. The hot pepper is where we bring the heat, so adjust to your liking.
- Drizzle everything with a bit of olive oil and a sprinkle of salt. This is where the flavor party starts.
- Pop the sheet under the broiler for about 10 minutes. You’re looking for those beautiful char marks—until the skins start to blacken and bubble.
- Remove from the oven and let your veggies cool for about 5 minutes. This gives you just enough time to pour yourself a refreshing drink.
- Once cooled, peel the skins from the tomatoes, pepper, and garlic. It’s a bit messy, but oh-so-worth it.
- Toss all the roasted goodness into a food processor, except for the cilantro and lime juice. Pulse 2-4 times. You’re going for a chunky texture, not smooth.
- Transfer to a bowl and mix in the fresh cilantro and lime juice. This is the part where your salsa gets its vibrant color and zing.
- Season with cumin and add salt to taste. Give it a quick stir, and you’re done! Serve it up with corn chips or toasted pita chips and dig in.
Cook’s Notes
Remember, the key to this salsa is the broil—don’t skip it! It gives the dish that lovely depth of flavor that you simply can’t achieve with raw veggies. If you’re making it ahead, you can store it in the fridge for up to three days in a sealed container. The flavors actually meld together even more beautifully as it sits. Just give it a good stir before serving. If you find your leftovers a bit too thick, a splash of lime juice or even a bit of water can help loosen things up nicely.
Make It Your Own
Here’s where you can let your creativity run wild with some easy variations:
- Swap the red bell pepper for a couple of yellow or orange peppers for a sweeter, milder salsa.
- If you’re not a fan of spice, leave out the jalapeno or replace it with a sweet pepper variety.
- For a smoky twist, replace the cumin with a teaspoon of smoked paprika.
- Want a fruitier version? Add in some mango chunks before serving for a sweet and spicy delight.
If you try this, I’d love to hear how it turns out—drop a comment or tag me! Your feedback and creativity make this journey even more fun. Happy cooking!
Related update: Roasted Red Pepper & Tomato Salsa
Related update: Tzadziki

It was one of those Tuesday evenings where everything felt a little upside down. My oven was on the fritz, my dinner plans had gone awry, and yet, that familiar sweet craving hit me like clockwork. As I rummaged through my pantry, the thought of something warm and comforting felt like the perfect antidote to my topsy-turvy day. Enter, cinnamon sugar fried apples. Not only are these little guys a quick fix for any sweet tooth, but they also bring a cozy vibe that feels like a warm hug on a plate. And honestly, who doesn’t love a recipe that transforms humble ingredients into something downright delicious?
Jump to Recipe
What You’ll Need
This recipe is all about simplicity — chances are you’ve got most of this in your kitchen already. Here’s what you’ll need:
- All-purpose flour
- Apples (crisp varieties like Granny Smith or Honeycrisp work great!)
- Brown sugar
- Cinnamon
- Eggs
- Granulated sugar
- Lemon zest
- Milk
- Oil (for frying)
- Salt
- Unsalted butter
How to Make Cinnamon Sugar Fried Apples
- In a large bowl, whisk together the all-purpose flour, a pinch of salt, granulated sugar, milk, lightly beaten eggs, lemon zest, and melted unsalted butter until the batter is smooth to the touch. Cover the bowl with plastic wrap and let it rest for 30 minutes to ensure the flour fully hydrates and the flavors meld beautifully.
- While the batter is resting, core and slice your apples into 1 cm thick rings. Aim for even slices as this will help them cook uniformly. Set them aside and start heating the oil in your preferred frying vessel over medium heat.
- Once your batter has rested and your oil is shimmering and ready, dip each apple slice into the batter, allowing any excess to drip back into the bowl. Gently lay the slices into the hot oil.
- Fry the apple slices until they are golden and fragrant, about 2-3 minutes per side. You’ll know they’re ready when the edges turn a beautiful golden hue and your kitchen is filled with the nostalgic aroma of apples and cinnamon.
- As each batch finishes, transfer the fried apples to a plate lined with double-layered paper towels to drain any excess oil.
- In a small bowl, combine the brown sugar and cinnamon. Sprinkle this delightful cinnamon sugar mixture generously over the warm apple slices. Serve immediately for that perfect combination of crispy, sweet, and spiced.
Cook’s Notes
Here’s the thing: frying can be a bit of a mess, but it’s so worth it. Make sure your oil is hot enough before dipping in the apples; otherwise, they’ll soak up too much oil and get soggy. A small kitchen thermometer can be handy if you’re unsure. If you’re planning to make these ahead of time, I’d recommend just prepping the batter and slicing the apples. Frying is best done right before serving to maintain that delightful crispiness. If you do end up with leftovers, a quick reheat in the oven at 350°F should do the trick.
Make It Your Own
Want to put your own spin on these cinnamon sugar fried apples? Here are some fun ideas:
- Instead of apples, try using firm pears for a slightly different but equally delicious twist.
- For a nutty crunch, toss in some chopped pecans or walnuts after sprinkling the cinnamon sugar.
- Want a caramel vibe? Drizzle some homemade or store-bought caramel sauce over the fried apples for an extra indulgent treat.
- Looking for a boozy kick? Add a splash of spiced rum to the batter for a grown-up version.
If you try this recipe, I’d love to hear how it turns out — drop a comment or tag me in your delicious creations! Whatever you do, make sure to enjoy each crispy, sweet bite. Happy cooking! 🍏✨
Related update: Cinnamon Sugar Fried Apples
Related update: Roasted Red Pepper & Tomato Salsa
Related update: Bacon Brownie Cupcakes

On one of those bustling weekday evenings when time seems to slip away faster than you can say “dinner,” I found myself staring into the fridge, hoping for a miracle. What I really wanted was something fresh and light but also satisfying. That’s when I remembered these Easy To Make Spring Rolls. They’re perfect for those nights when you want something delicious and impressive-looking without the fuss. Plus, they have this uncanny ability to make you feel like you’ve got your life together. Not bad for a dish that’s ready in under 30 minutes!
Jump to Recipe
What You’ll Need
This recipe is the epitome of a grab-and-go grocery list. Most of these ingredients are probably already lounging in your kitchen. Here’s what you’ll need to whip up these fresh bites of joy:
- Rice paper wrappers
- Cooked shrimp, halved
- Boston lettuce leaves
- Fresh basil, mint, and coriander leaves
- Red bell pepper, sliced into thin strips
- Chili pepper, thinly sliced (optional for a kick)
- Garlic, minced
- Fresh lime juice
- Nuoc cham for dipping
- Fish sauce
- Rice vinegar
- Sugar
- Water
How to Make Easy To Make Spring Rolls
- First, get all your ingredients prepped and within arm’s reach. Trust me, this will save you a lot of scrambling later.
- Fill a large bowl with warm water. Dip a rice paper wrapper in the water just until it softens—this means a couple of swishes should do it. It might feel slightly stiff as you take it out, but don’t worry.
- Lay the softened wrapper flat on a clean surface. In the center, line up two shrimp halves. It’s like creating a little shrimp runway!
- Top the shrimp with a few leaves of basil, mint, and cilantro. Add a layer of Boston lettuce, and maybe some red bell pepper strips and a slice of chili if you’re feeling spicy.
- Fold the sides of the wrapper inward over the filling. Start rolling from the end with the lettuce, tucking in the filling as you go for a snug little spring roll.
- Repeat with the remaining wrappers and ingredients. Once you’ve got your little spring roll soldiers lined up, cut them in half for easy handling.
- Serve them at room temperature with some nuoc cham for dipping. Don’t skip the dipping sauce—it’s the secret weapon!
Cook’s Notes
Dealing with rice paper wrappers can be a bit like handling a delicate flower. Too much time in the water and they’ll become a soggy mess. Not enough and they’ll tear when you try to roll. My trick? A quick dip and a confident hand. They’ll soften up perfectly by the time you start rolling. These rolls are best enjoyed fresh, but you can prepare all the components ahead of time and roll them just before serving. If you have leftovers, wrap them tightly in plastic wrap to keep them from drying out.
Make It Your Own
Feel free to get creative with these spring rolls. Here are some variations to consider:
- Swap the shrimp for crispy tofu to make it vegetarian-friendly.
- Add in slivers of cooked pork or chicken for a meatier bite.
- Include julienned carrots for an extra crunch and pop of color.
- Spice things up by adding a dash of Sriracha to the dipping sauce.
If you try this, I’d love to hear how it turns out—drop a comment or tag me on social media! Whether you’re a spring roll pro or a first-timer, I hope these become a fun and tasty part of your meal rotation. Enjoy every bite!
Related update: Easy To Make Spring Rolls

It was one of those frantic weeknights when the thought of cooking anything complicated felt like a Herculean task. The kids were hungry, my partner was stuck in traffic, and the fridge looked like it had been raided by a group of snack-hungry gremlins. That’s when I spotted the package of rice paper hiding behind the milk. In a flash, I knew what to do. These Vegetarian Spring Rolls with Garlic Lime Sauce were going to be our savior. They’re colorful, crunchy, and somehow manage to make you look like a culinary genius with minimal effort. Perfect for a quick dinner fix or when you want to impress without breaking a sweat.
Jump to Recipe
What You’ll Need
The beauty of this recipe is its simplicity — chances are, you already have most of these ingredients lurking around.
- Rice paper
- Butter leaf lettuce
- Carrots
- Jicama
- Red bell pepper
- Yellow bell pepper
- Thai basil
- Ginger
- Garlic
- Lime
- Hoisin sauce
- Sriracha
How to Make Vegetarian Spring Rolls With Garlic Lime Sauce
- First, julienne the red and yellow bell peppers, carrots, jicama, and Thai basil. Aim for strips about 1/8 inch thick and 2 inches long, like colorful little matchsticks.
- Fill a round pie pan or shallow plate with warm water. Delicately dip one piece of rice paper in the water, ensuring both sides are soaked — but no need to drown them!
- Carefully lay the rice paper on a flat, flour towel cloth. Wait about ten seconds for it to soften — it should feel silky and pliable.
- Gently peel the rice paper off the cloth and place half a butter leaf lettuce on top. Discard the ribbing to keep things smooth and easy to roll.
- Add a delicate layer of each vegetable on top of the lettuce, finishing with a sprinkle of Thai Basil. It’s like art — have fun with it!
- To roll: start at one end, fold the edge toward the middle, and repeat with the parallel side. Give it a little 90-degree turn and roll it snugly, like wrapping up a little gift.
- Cut each roll diagonally and arrange them on a serving platter, so they look all fancy and inviting.
- For the Garlic Lime Hoisin Sauce, use a mortar and pestle to crush the garlic and ginger together until fragrant. The aroma should make you smile.
- Whisk in fresh lime juice and a modest splash of Sriracha for that zingy, spicy kick. Finally, add the hoisin sauce and whisk until combined. Taste and adjust as needed.
Cook’s Notes
Rolling these can be a bit of a learning curve, but once you get the hang of it, you’re golden. Rice paper can be temperamental, so if it tears, just keep going — a little imperfection never hurt anyone. If you want to prep these in advance, keep the veggies prepped in the fridge and roll them just before serving to keep everything fresh. Leftover rolls can be stored in an airtight container in the fridge for a day, but the rice paper will lose some of its magic over time. The sauce, however, can be made days ahead and will only get better as the flavors mingle.
Make It Your Own
- Swap the jicama for cucumber for a refreshing twist.
- Replace Thai basil with cilantro if that’s more your vibe.
- For a protein boost, add slices of crispy tofu or tempeh.
- Feeling nutty? Toss in some crushed peanuts for extra crunch.
If you try this, I’d love to hear how it turns out — drop a comment or tag me! Whether it’s a weeknight fix or a dinner party appetizer, these spring rolls are sure to brighten your table and your tastebuds. Enjoy!
Related update: Vegetarian Spring Rolls With Garlic Lime Sauce
Related update: Easy To Make Spring Rolls
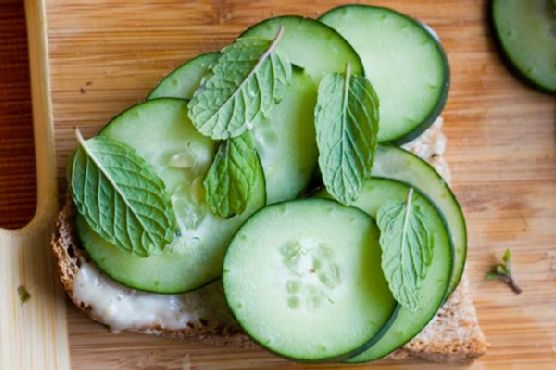
It was one of those gloriously lazy Sunday afternoons when the sun was streaming through the kitchen window, painting everything in a warm, golden hue. I found myself craving something simple yet sophisticated to nibble on while sipping a freshly brewed pot of Earl Grey. That’s when the idea of Cucumber Mint Tea Sandwiches popped into my head. These little bites are like a garden party in your mouth — refreshing, slightly spicy, and with a hint of sweet earthiness. They’re perfect for when you want to impress your friends but also fit perfectly into a no-fuss, no-mess vibe. Trust me, once you try these, they’ll become your go-to for every casual gathering or solo indulgence.
Jump to Recipe
What You’ll Need
Honestly, you probably have most of these ingredients lounging in your pantry or fridge already. And if not, they’re super easy to find on your next grocery run.
- Bread (your choice – think classy yet sturdy)
- Cucumber (cool, crisp, and refreshing)
- Wasabi Maple Spread (the secret zing)
- Black pepper grinder (for that fresh, subtle heat)
- Fresh mint leaves (fragrant and cooling)
- Fresh dill (herbaceous and bright)
- Vegenaise (creamy and delightful)
- Maple syrup (just a touch of sweetness)
- Wasabi powder (for that kick)
How to Make Cucumber Mint Tea Sandwiches
- Start by whipping together the wasabi maple spread. Combine vegenaise, a dash of maple syrup, and a sprinkle of wasabi powder until it’s smooth and slightly spicy.
- Thinly slice the cucumber. You can go for thick, crunchy slices if you’re feeling bold, or thin, silky ones for a more delicate bite. Either way, they should be refreshingly crisp.
- Gather your fresh mint leaves and dill. Rinse them under cold water and pat them dry with a clean kitchen towel. You want them to be fresh and vibrant.
- Spread a very thin layer of your wasabi maple spread on all the inside surfaces of the bread slices. It’s all about that flavor balance, not overpowering.
- Layer your cucumber slices neatly on top of the spread. Feel free to overlap them slightly. It’s like building a little cucumber brick wall.
- Add a layer of mint and dill. You can mix them up in each sandwich or go half mint, half dill if you like to keep your flavors organized.
- Grind some fresh black pepper over the top of the herbs and cucumbers. This will tie all the flavors together beautifully.
- Close each sandwich with another piece of bread and gently press down. Then, slice them into charming quarter cubes or triangles. Presentation is key!
- Plate the sandwiches, and if you’re feeling fancy, sprinkle a few edible flowers around for a pop of color and whimsy.
Cook’s Notes
These sandwiches are meant to be a fresh and light snack, so fresh ingredients are key. Make sure your cucumber is firm and your herbs are not wilting. Want to make them a few hours ahead? No problem! Just cover the platter with a slightly damp paper towel and wrap tightly with plastic wrap to keep everything moist and fresh. Leftovers (if you have any, which I doubt) can be stored in an airtight container in the fridge for up to a day — but they’re best fresh.
Make It Your Own
- Swap out the bread for a whole grain or seed variety for extra texture and flavor.
- Replace the wasabi maple spread with a spicy sun-dried tomato spread for a Mediterranean twist.
- Add a layer of thinly sliced radishes for an extra peppery crunch.
- Sprinkle a dash of red pepper flakes inside for those who love an extra spicy kick.
If you try this, I’d love to hear how it turns out — drop a comment or tag me in your tea-time creations! Happy sandwich making!
Related update: Cucumber Mint Tea Sandwiches
Related update: Vegetarian Spring Rolls With Garlic Lime Sauce

Last Tuesday, I found myself staring into the fridge at 7 PM, wondering what on earth I could whip up for a little evening gathering with friends. You know those days when you just need a recipe that’s not only impressive but also stress-free? That’s when I stumbled upon the forgotten block of *blue cheese* nestled next to a jar of *fig jam*. A brainwave hit me: Blue Cheese Tartlets with Fig Jam and Walnuts! These beauties are the perfect blend of savory and sweet, and trust me, they’re much easier to make than you’d think. Each bite is a little symphony of flavors and textures. Plus, they’re great for making ahead and pop in the oven the moment your guests ring the doorbell.
Jump to Recipe
What You’ll Need
The ingredient list for these tartlets is refreshingly simple. Chances are you already have most of these in your pantry:
- Blue cheese
- Butter
- Flour
- Fig jam
- Walnuts
- Orange zest
- (Optional) Fresh thyme leaves
How to Make Blue Cheese Tartlets With Fig Jam and Walnuts
- Preheat your oven to 350°F (175°C). Lightly grease the cups of your mini muffin pans unless they’re non-stick. No one wants a sticky situation!
- In a medium bowl, cream together the *blue cheese* and *butter*. The mixture should be smooth and creamy, with that unmistakable aroma of rich cheese.
- Add the flour to the bowl and use your hands to bring the dough together. It might take a little coaxing, but be patient — the dough will reward you with a tender crust.
- Divide the dough into 30 pieces and roll them into balls. If you prefer a more delicate shell, go for 36 pieces.
- Using lightly floured fingers, press each dough ball against the sides of the mini tart pan until the dough rises slightly above the rim. This ensures that lovely shell shape.
- Bake the shells for 15 minutes, until they are golden brown and smell like heaven. Let them cool in the pans for about 5 minutes, then transfer to a wire rack to finish cooling completely.
- Once cooled, spoon a dollop of *fig jam* into each tartlet shell. Top with a sprinkle of toasted *walnuts*, a touch of *orange zest*, and a few thyme leaves if you like.
Cook’s Notes
These tartlets are surprisingly versatile. You can prepare the tartlet shells ahead of time and store them in an airtight container. If you’re planning a party, they freeze beautifully — just bake frozen shells for 8 minutes at 325°F before filling them. Pro tip: when pressing the dough into the pan, keep a small bowl of flour nearby to dust your fingers and prevent sticking. And if you’re cooking for a big crowd, consider doubling the recipe because they disappear fast!
Make It Your Own
- Swap the blue cheese for *goat cheese* if you prefer something milder.
- Replace *fig jam* with a spicy *pepper jelly* for a kick.
- Use *pecans* or *hazelnuts* instead of walnuts for a different nutty flavor.
- Add a thin slice of prosciutto to each tartlet for a touch of saltiness.
If you try this, I’d love to hear how it turns out — drop a comment or tag me! These tartlets are really something special and I hope they bring a bit of joy to your kitchen and your taste buds. Enjoy every bite!
Related update: Blue Cheese Tartlets With Fig Jam and Walnuts
Related update: Cucumber Mint Tea Sandwiches

I remember the first time I tried to grill potato skins. It was a balmy summer evening, and my friends and I had decided on an impromptu barbecue to celebrate the end of a long workweek. We were short on the usual grilling staples, and I found myself rummaging through the pantry, just hoping to find anything that could be charred over an open flame. In a stroke of serendipitous genius—or desperation, depending on how you look at it—I stumbled upon a bag of baking potatoes. And so began my love affair with crispy, gooey, and utterly addictive grilled potato skins. They’re the perfect combination of crispy potato goodness and creamy, cheesy decadence, making them a crowd-pleaser that’s surprisingly easy to throw together. You won’t believe how fast these disappear once they hit the table.
Jump to Recipe
What You’ll Need
The beauty of this recipe is its simplicity. Chances are you already have most of these ingredients on hand.
- Baking potatoes
- Cooked bacon or finely-chopped ham
- Picante sauce
- Shredded cheddar cheese
- Sour cream
- Unsalted butter
How to Make Grilled Potato Skins
- First, preheat your oven to 375 degrees. Prick your baking potatoes all over with a fork to let them vent, then bake them for 50 to 60 minutes until they’re tender and can be easily pierced.
- Once the potatoes are cool enough to handle, cut each one in half lengthwise. Scoop out most of the insides, leaving a sturdy 1/4-inch shell. Save the scooped-out potato for mash or soup later!
- Melt some unsalted butter and brush the inside of each potato shell generously. This will help them get that delicious golden crispiness we’re after.
- Spoon about 2 teaspoons of picante sauce into each shell, spreading it around to coat the bottom. This adds a delightful zesty kick.
- Next, sprinkle a hearty amount of shredded cheddar cheese into each potato, followed by bits of your cooked bacon or ham. Really pack it in there—no one likes a stingy potato skin.
- Fire up your grill to medium heat. Place the potato skins directly over the coals, and let them grill uncovered for 10 to 12 minutes. You’ll know they’re ready when the skins are crisp and the cheese is bubbly and golden.
- If you’re feeling fancy, sprinkle with diced tomato and green onions right before serving. Finish with a generous dollop of sour cream on top.
Cook’s Notes
Grilled potato skins are pretty forgiving, but here are a few things to keep in mind:
- If you’re making these ahead of time, follow all the steps up to grilling and then store them in the fridge. When you’re ready to eat, pop them on the grill straight from the fridge. Just add a couple of extra minutes to the grill time.
- Leftovers can be stored in an airtight container in the fridge for up to three days. Reheat them in a 350-degree oven or a toaster oven until they’re heated through and crispy again.
- Make sure your grill is properly preheated before you start cooking. This ensures the skins get crispy rather than just drying out.
Make It Your Own
- Swap the bacon for crispy tofu to make it vegetarian-friendly.
- Use Monterey Jack or pepper jack cheese for a different flavor profile.
- Try adding black beans or corn for a southwestern twist.
- If you’re not a fan of picante sauce, substitute it with a mild salsa or even BBQ sauce for a smoky vibe.
If you try this, I’d love to hear how it turns out—drop a comment or tag me on social media! There’s nothing more satisfying than seeing your spin on these tasty potato skins. Enjoy every crispy, cheesy bite!
Related update: Grilled Potato Skins
Related update: Blue Cheese Tartlets With Fig Jam and Walnuts

On a Tuesday evening, after a day that felt like it just couldn’t decide between rain or shine, I found myself in dire need of comfort. The kind of comfort that only a cozy kitchen and the warm scent of spices can provide. That’s when the idea of making ginger cookies hit me. But not just any ginger cookies—ones that would be kind to everyone around my table, regardless of food allergies or dietary needs. So I whipped up a batch of these delightful gluten-free, soy-free, vegan ginger cookies. They’re the perfect blend of spicy and sweet, crispy on the edges yet chewy in the middle, and trust me—these cookies are destined to become a staple in your baking repertoire. Whether it’s a last-minute treat or a planned indulgence, they never fail to impress with their simplicity and flavor. Jump to Recipe
What You’ll Need
This recipe is a pantry hero. Chances are, you already have most of these ingredients tucked away in your kitchen.
- Dark brown sugar
- Coconut oil
- Molasses
- Chunky applesauce
- Red gluten-free flour
- Ground cinnamon
- Ground ginger
- Ground cloves
- Pumpkin spice blend
- Baking soda
- Cane sugar (for rolling)
How to Make Ginger Cookies – gluten free, soy free, vegan
- Preheat your oven to 350 degrees F. Line three half-sheet baking pans with parchment paper and set them aside.
- In a small shallow bowl, add cane sugar for rolling and set aside.
- In a small bowl, whisk together the flour, spices, and baking soda. Set this dry mixture aside.
- Using a stand mixer with a paddle attachment, or a bowl with a hand mixer, combine the dark brown sugar, coconut oil, molasses, and applesauce. Start on low speed to avoid a sugar storm, then increase to medium speed for about 2 minutes until everything is fully incorporated.
- Slowly add the flour mixture to the wet ingredients, a third at a time, ensuring a proper blend with each addition.
- Lay out a piece of wax or parchment paper, about a foot wide, to set the rolled cookies before their sugar bath.
- Roll the dough into 1-inch balls with light pressure, similar to how you’d roll a meatball.
- Transfer the cookie dough balls into the bowl with sugar, as many as you can fit at a time, and gently roll them to ensure all sides are coated. Repeat until all the dough is used.
- Place the sugared cookie dough balls onto the prepared baking sheets. Press down gently on each ball to just dent the top a bit.
- Bake in the preheated oven for 9-11 minutes. When done, let them cool on the baking sheets for 15 minutes before transferring them to a cooling rack to cool completely.
Cook’s Notes
These cookies are surprisingly adaptable yet truly shine in their original form. The dough can be made ahead of time and chilled for up to a day if needed. Just make sure to let it come back to room temperature before rolling into balls. Once baked, they store wonderfully in an airtight container in the refrigerator for up to a week. If you’re planning to make a large batch, these cookies freeze well for up to a month. Simply thaw them at room temperature, and they’ll be as good as fresh.
Make It Your Own
- For a nutty twist, try adding a tablespoon of almond flour to the dry ingredients for extra flavor and texture.
- If you’re not strictly vegan, replace the applesauce with an egg for a traditional cookie crumb.
- Add a teaspoon of vanilla extract to the wet ingredients for a more complex flavor.
- If you love a bit of heat, add a pinch of cayenne pepper to the spice mix for a surprising kick.
If you try this, I’d love to hear how it turns out — drop a comment or tag me! Whether you stick to the recipe or try some fun variations, these ginger cookies are sure to bring a smile to your face and a burst of warmth to your home.
Related update: Ginger Cookies- gluten free, soy free, vegan
Related update: Grilled Potato Skins
Related update: Luscious Lemon Bars

It was one of those unpredictable Tuesday evenings when the craving for something sweet and comforting hit me like a freight train. I rummaged through my pantry, hoping for inspiration, when my eyes landed on that lonely can of pineapple chunks. It instantly sparked the memory of a gluten-free, dairy-free noodle kugel I had whipped up on a similar night of culinary chaos. This dish is not just a savior for your midweek dessert dilemmas; it’s a luxurious treat that feels indulgent yet light. Plus, it’s a crowd-pleaser that accommodates almost every dietary restriction. So, here it is, an irresistible Noodle Kugel with Pineapple that will have you dreaming about your next slice before you’ve even finished the first.
Jump to Recipe
What You’ll Need
Good news: you likely already have most of these ingredients hiding in your kitchen! This kugel is proof that a few pantry staples can transform into something magical.
- Gluten-free spiral rice pasta
- Canned pineapple chunks (make sure to drain them!)
- Unsweetened vanilla coconut milk or coconut creamer
- Sunflower oil
- Egg yolks
- Xylitol (or regular sugar if you prefer)
- Evaporated cane sugar
- Ground cinnamon
- Ground nutmeg
- Kosher salt
- Cupcake liners
- Earth Balance soy-free margarine
- Red brown rice flour
How to Make Noodle Kugel with Pineapple-Gluten free, Dairy Free
- Preheat your oven to 350 degrees F. It’s about to get cozy in here!
- Fill a medium stockpot with water and set it over high heat. Once boiling, add 2 tablespoons of kosher salt. Toss in the gluten-free spiral rice pasta and stir well to prevent any sticking. Keep stirring occasionally and let it cook for 8-10 minutes. The pasta should have a slight bite to it.
- Once cooked, let the pasta sit in the hot water for a few minutes. Then, transfer it to a large glass or heatproof bowl. This will give it some time to cool off while you prep the other ingredients.
- In the meantime, grab another bowl and mix together the unsweetened vanilla coconut milk, coconut creamer, drained pineapple chunks, xylitol, evaporated cane sugar, a dash of ground cinnamon, ground nutmeg, and sunflower oil. Combine everything well. Trust your intuition and taste it—it should be sweet and spiced just right.
- Add the egg yolks to your mixture and stir until everything is creamy and well combined. The color will be warm and golden.
- Line two cupcake pans with cupcake liners. Fill each liner with the noodle mixture using a dry 1/4 cup measuring spoon, mounding it generously over the top. If some look dry, pour any remaining liquid evenly over them.
- Sprinkle a small amount of crumble over each kugel (about 1/2 teaspoon per kugel). It’s your chance to unleash your inner artist!
- Place the pans in the oven and bake for 40-45 minutes. The kugels should be golden, with a hint of crust on the edges. Allow them to cool for about 10 minutes before removing them from the pans. You can take the liners off before serving if you prefer an elegant presentation.
- Serve your noodle kugel hot or warm. There’s something magical about that first warm bite!
Cook’s Notes
- The key to a perfectly textured kugel is in the pasta. Make sure you don’t overcook it. Slightly al dente is the goal since it will continue cooking while baking.
- If you find yourself with leftovers, they store beautifully in an airtight container in the fridge for about 3 days. Reheat them in the oven to maintain that lovely texture.
- Don’t be shy with the spices. Cinnamon and nutmeg are what give this dish its comforting warmth. Feel free to adjust according to your taste.
Make It Your Own
- Swap the canned pineapple for fresh diced apples or pears for a different fruity twist.
- Replace the sunflower oil with coconut oil for a richer, tropical vibe.
- If you’re out of ground nutmeg, try using pumpkin pie spice for an autumnal flair.
- Add a handful of raisins or dried cranberries to the mixture for a burst of sweetness in every bite.
If you try this, I’d love to hear how it turns out—drop a comment or tag me! Remember, this kugel isn’t just a recipe; it’s a chance to bring warmth and sweetness to the everyday hustle. Happy baking!
Related update: Noodle Kugel with Pineapple-Gluten free, Dairy Free
Related update: German Rhubarb Cake with Meringue

It was one of those evenings when I stared blankly into my fridge, wondering what could possibly come together in 30 minutes or less. A couple of beefsteak tomatoes were teetering on the edge of being too ripe, alongside a baby eggplant that seemed to whisper, “Use me or lose me.” That’s when the idea of Tomato Cutlets hit me—a dish that feels both unexpected and comforting. It’s the kind of meal where crispy meets juicy, with just the right amount of tang from a squeeze of lemon. And the best part? You probably have most of the ingredients already lounging in your pantry or fridge, waiting to shine.
Jump to Recipe
What You’ll Need
Alright, let’s dive into the good stuff. You’ll find this ingredient list both accessible and forgiving. If you cook often, chances are you already have most of this hanging around.
- 2 beefsteak tomatoes, sliced into thick rounds
- 1 baby eggplant, halved
- 1 cup Italian bread crumbs
- 2 eggs, beaten
- Juice of 1 lemon
- 2 tablespoons olive oil
- 1/4 cup fresh Italian parsley, chopped
- Salt and freshly ground pepper to taste
- 1/4 cup grated fresh Romano cheese
How to Make Tomato Cutlets
- Start by setting up your breading station. In one bowl, have your beaten eggs ready. In another, spread out the Italian bread crumbs. This is where the magic begins.
- Dip each tomato slice into the egg wash, letting any excess drip off, and then press it into the bread crumbs. If you’ve got extra egg wash and crumbs, feel free to double-dip for an extra crunchy coating.
- Heat the olive oil in a large frying pan over medium heat. Once it shimmers, carefully place the breaded tomato slices into the pan. You should hear a satisfying sizzle.
- Cook the tomatoes for about 3-4 minutes on each side, until they’re golden and fragrant. Flip gently to keep the breading intact.
- Next, nestle the halved eggplant into the pan. Sprinkle with salt and pepper. Sauté for about 3-4 minutes on each side, aiming for a beautiful golden color.
- Once everything is cooked to perfection, transfer the tomatoes and eggplant to a serving plate. Drizzle with fresh lemon juice, scatter with chopped parsley, and finish with a generous sprinkle of Romano cheese.
Cook’s Notes
Here’s what I’ve learned along the way: When breading, don’t rush. Let the egg wash and crumbs work their coating magic. If you’re running low on egg wash or crumbs, just whisk another egg or toss in more crumbs—it’s not an exact science. As for the frying, medium heat is your friend; too hot, and the crumbs burn before the tomatoes are ready.
Got leftovers? Store them in an airtight container in the fridge, and they’ll last a couple of days. To reheat, a quick stint in the oven will bring back some of that initial crispiness. If you like to plan ahead, you can prep the breaded tomatoes and store them in the fridge for up to a day before frying.
Make It Your Own
Feel free to get creative with these cutlets. Here are a few ideas:
- Swap the tomatoes for zucchini slices for a different take on the cutlet vibe.
- Add a little kick by mixing red pepper flakes into the bread crumbs.
- Try using panko instead of regular bread crumbs for extra crunch.
- Replace Romano with Parmesan if that’s what you have on hand—it’s all about using what you’ve got.
If you try this, I’d love to hear how it turns out—drop a comment or tag me! Your kitchen adventures are what make this fun. Happy cooking!
Related update: Tomato Cutlets

Last Tuesday, I found myself staring at a lonely cabbage and some tomatoes in my fridge, wondering how I was going to transform these humble ingredients into something more exciting than their usual salad gig. I was craving something warm, comforting, and surprisingly quick because, you know, not all weeknight dinners should feel like a marathon. That’s when I remembered my fail-safe stir fry trick. This Stir Fried Cabbage and Tomatoes dish is like a warm hug on a chilly day — it’s savory, a touch sweet, and comes together faster than you can decide what to watch on Netflix. Trust me, this is the kind of dish that makes you look like you’ve got your life together, even if it’s just dinner.
Jump to Recipe
What You’ll Need
Gathering ingredients for this recipe is almost as easy as making it. Most of them are probably sitting quietly in your kitchen, waiting for their moment to shine.
- Beijing cabbage – coarsely shredded
- Diced tomatoes – as fresh as you can get
- Gloves garlic – because garlic is life
- Salt
- Sugar
- Ketchup – yes, the condiment extraordinaire
- Water
How to Make Stir Fried Cabbage and Tomatoes
- Start by giving your cabbage a good rinse and then coarsely shred it. You want the pieces to be bite-sized but not too tiny, allowing them to retain a slight crunch.
- Dice your tomatoes. The juicier, the better, as they’ll add a wonderful freshness to the dish.
- Heat a wok over medium-high heat, adding a splash of oil. When the oil shimmers, toss in the garlic. Sauté until golden and fragrant, about 30 seconds. Your kitchen should smell amazing already!
- Throw in the shredded cabbage. Stir-fry until it begins to soften. If it looks a bit dry, don’t hesitate to add a tablespoon or two of water to help it along.
- Now, add your diced tomatoes along with a pinch of salt, a dash of sugar, and a nice squirt of ketchup for that umami-rich depth. Pour in 2-3 tablespoons of water to create a light sauce.
- Stir everything together until well combined. The mixture should be juicy but not soupy. Cook until the tomatoes have broken down slightly and everything is melded together. This is when you taste and adjust seasoning if needed.
- Serve immediately. Your stir fry should be vibrant and steaming hot.
Cook’s Notes
This dish is all about balance. The sugar helps offset the acidity of the tomatoes and ketchup, so don’t skip it. If your cabbage feels too crunchy, just add a touch more water and give it a few more minutes — patience is key.
- This stir fry doesn’t hold up beautifully as leftovers, so try to enjoy it fresh. But if you do have some left, store it in an airtight container in the fridge and reheat gently.
- If you’re planning a dinner party, you can prep the cabbage and tomatoes ahead of time. Just keep them in separate containers in the fridge until you’re ready to cook.
Make It Your Own
- Add protein: Toss in some sliced chicken or crispy tofu for a heartier version.
- Switch up the veggies: Bell peppers or shredded carrots would be a lovely addition for some color and sweetness.
- Spice it up: Introduce a bit of heat with a sliced chili or a dash of hot sauce if you like things spicy.
- Herb it up: Finish with fresh cilantro or basil for an aromatic lift.
If you try this, I’d love to hear how it turns out — drop a comment or tag me! Cooking is all about experimenting and having fun, so make this stir fry your own and enjoy every bite.
Related update: Stir Fried Cabbage and Tomatoes
Related update: Tomato Cutlets