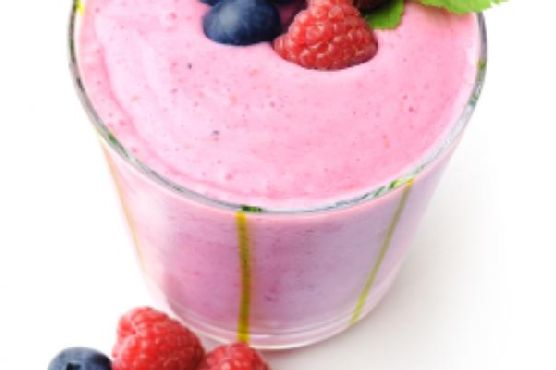
Picture this: It’s a sweltering summer afternoon, the kind where even the shade feels warm, and all you can think about is finding a way to cool down. I was sprawled out on my couch, contemplating the mysteries of life and my growing need for something refreshing. That’s when the idea hit me — a Green Tea Fruit Medley Smoothie! This drink is the perfect blend of rejuvenating and hydrating, with just enough sweetness from the fruit to make you feel like you’re indulging in a treat. The best part? It’s incredibly easy to whip up, which means more time for lounging and less time in the kitchen.
Jump to Recipe
What You’ll Need
You’re in luck because the ingredient list for this smoothie is delightfully simple. Chances are, you might already have most of these in your kitchen.
- 1 cup of boiling water
- 3 green tea bags
- 1 cup of fresh berries (I love using a mix of blueberries and strawberries!)
- 1/2 cup of pineapple juice
- 1/2 cup of vanilla yogurt
- A handful of ice cubes
How to Make Green Tea Fruit Medley Smoothie
- Start by preparing your tea. Steep the 3 green tea bags in 1 cup of boiling water for about 5 minutes. You’re looking for a nice, rich golden color and that earthy, aromatic green tea scent wafting through your kitchen.
- After the tea has steeped, gently squeeze out the bags to get every last bit of flavor, then discard them.
- In a blender, combine the brewed tea, fresh berries, pineapple juice, vanilla yogurt, and ice cubes. Blend until the mixture is smooth and creamy. You’ll know it’s ready when it has a luscious, thick consistency and a vibrant color.
Cook’s Notes
When it comes to making this smoothie, the key is the balance of flavors. If you find the smoothie too tart, add a bit more vanilla yogurt for sweetness. On the flip side, if it’s too sweet, a splash more of green tea can do wonders. If you’re preparing this ahead of time, store it in the fridge for up to a day, but give it a good shake before drinking as it might separate slightly. And remember, the freshest berries will give you the best flavor, so if you’re using frozen ones, let them thaw a bit first.
Make It Your Own
- Need a protein boost? Swap out the vanilla yogurt for Greek yogurt.
- Looking for a tropical twist? Add a handful of mango chunks instead of or alongside the berries.
- For a dairy-free version, use coconut yogurt — it adds a nice subtle flavor that pairs surprisingly well with the green tea.
- If you’re a mint fan, toss in a few fresh mint leaves for an extra refreshing kick.
If you try this, I’d love to hear how it turns out — drop a comment or tag me! There’s nothing like sharing a refreshing moment with friends, even if it’s virtually. Stay cool, my friends!
Related update: Green Tea Fruit Medley Smoothie
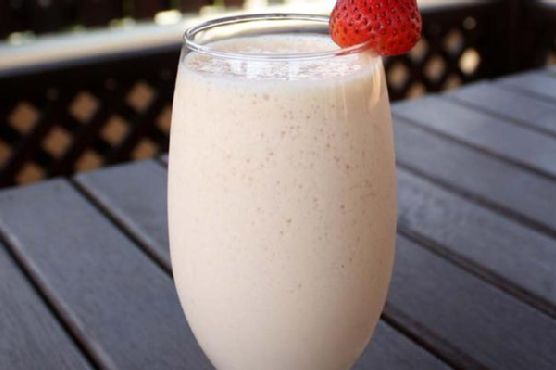
Imagine it’s one of those mornings where you’ve hit snooze one too many times, and now you’re racing through your kitchen in a flurry of panic. Your brain is still in bed but your body is desperately trying to catch up with the clock. It’s on these mornings that my Protein Strawberry Smoothie saves the day. It’s a quick, delicious way to fuel up, with a creamy texture that feels indulgent but is packed with goodness. And let’s be real, anything that helps you avoid a hangry rage before your first meeting is worth its weight in gold. Plus, it’s got that perfect balance of sweet strawberries and the smooth richness of almond milk, making it a versatile favorite you’ll find yourself coming back to again and again.
Jump to Recipe
What You’ll Need
This ingredient list is short and sweet, with a few pantry staples you probably already have on hand. Here’s what you’ll need:
- 1 cup of almond milk
- 1 banana
- 1/2 cup of fat-free Greek yogurt
- 1 tablespoon of honey
- 1 cup of ice
- 1 cup of fresh strawberries
How to Make Protein Strawberry Smoothie
- Toss your strawberries, banana, and Greek yogurt into the blender. The fruit should be fresh and ripe, which will give you that vibrant flavor burst.
- Pour in the almond milk, which adds a nutty base that balances the sweetness from the fruit.
- Add the honey. You’ll want just enough for a hint of sweetness without overpowering the strawberries.
- Throw in the ice. This will give your smoothie that chilly, refreshing feel that’s perfect for a morning pick-me-up.
- Blend everything on high until it’s smooth and creamy. You’ll know it’s ready when you see a beautifully pink, frothy mixture without any lumps.
Cook’s Notes
Don’t get too caught up in exact measurements here. This smoothie is pretty forgiving, so feel free to adjust based on what you have. If your bananas are smaller, use two. If your strawberries are extra-large, maybe go a bit shy on the cup measurement. Also, I recommend using fresh strawberries, but if you only have frozen, that’s totally fine—just skip the ice so it doesn’t turn into a frozen block! If you’ve got a busy morning ahead, you can prep the fruit the night before and store it in the fridge, then just throw it all in the blender when you’re ready. Leftovers can be stored in the fridge for a day, but be sure to give it a good stir before drinking.
Make It Your Own
- Swap the almond milk for coconut milk for a tropical twist.
- Add a tablespoon of your favorite nut butter for some extra protein and a richer flavor.
- If you’re not a fan of honey, replace it with a splash of maple syrup or agave nectar.
- For a green boost, toss in a handful of spinach. It won’t change the taste much but will kick up the nutrition!
If you try this, I’d love to hear how it turns out — drop a comment or tag me in your smoothie pics! Nothing makes my day more than seeing someone enjoy a recipe that’s made their morning just a bit brighter. Enjoy, and here’s to more deliciously lazy mornings!
Related update: Protein Strawberry Smoothie
Related update: Caramelized cranberries coconut pancakes
Related update: Green Tea Fruit Medley Smoothie
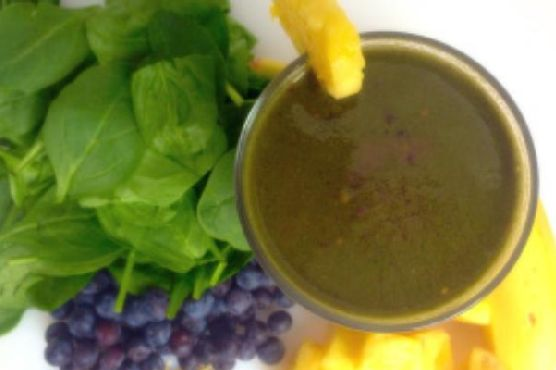
Okay, picture this: It’s a Wednesday morning, you hit snooze one too many times, and now you’re rushing around trying to make it out the door on time. You want something quick, healthy, and delicious to kick-start your day. That’s exactly how I stumbled upon this Tropical Banana Green Smoothie. I was in dire need of something refreshing and energizing, yet easy enough to throw together in less than five minutes. This smoothie checks all those boxes and more. It’s like a mini tropical vacation in a glass, and while it sounds fancy, it’s really just a few simple ingredients blended into creamy perfection. Trust me, one sip of this and you’ll forget all about your hectic morning. Jump to Recipe
What You’ll Need
This smoothie is all about using what you have on hand and embracing the refreshing flavors of the tropics. Chances are you already have most of this in your kitchen.
- 1 ripe banana
- 1 cup pineapple, fresh or frozen
- 1 cup coconut water
- 1/2 cup blueberries, fresh or frozen
- 1 scoop protein powder (vanilla works great!)
- 1 handful mixed spinach
How to Make TROPICAL BANANA GREEN SMOOTHIE
- Peel and slice the banana. If you’re using frozen pineapple, you can skip this step for now. If fresh, chop it into chunks. This will add to the creaminess.
- In a blender, add the banana slices and pineapple chunks. Pour in the coconut water. This will be the base of your smoothie, giving it that tropical flair.
- Throw in the blueberries and the scoop of protein powder. The blueberries add a pop of color and a hint of sweetness that complements the tropical vibes.
- Top it off with a generous handful of mixed spinach. Don’t worry; the taste is so mild, you won’t even notice it’s there (your body will, though!).
- Blend on high until the mixture is smooth and creamy. You’ll know it’s ready when there are no more visible chunks and the blend is a beautiful, vibrant green.
- Pour into your favorite glass, pop in a fun straw, and savor your mini-vacation in a cup.
Cook’s Notes
This smoothie is incredibly forgiving, so feel free to adjust the ingredient quantities to suit your taste. If you prefer a thicker smoothie, use frozen fruit or add a couple of ice cubes before blending. For those with a sweet tooth, a splash of honey or agave nectar can take it to another level.
It’s best enjoyed fresh, but if you’re in a time crunch, you can make it the night before. Just give it a quick stir or shake in the morning. As for leftovers, store in an airtight container in the fridge for up to one day; beyond that, it tends to lose its vibrancy and freshness.
Make It Your Own
- Swap the coconut water with almond milk for a creamier texture and a nutty undertone.
- Add a tablespoon of chia seeds before blending for an extra boost of fiber and omega-3s.
- Replace the spinach with kale for a more robust green flavor.
- For a tropical twist, throw in a few mint leaves during blending.
If you try this, I’d love to hear how it turns out — drop a comment or tag me! Let’s turn those chaotic mornings into something a bit more delightful, one smoothie at a time!
Related update: TROPICAL BANANA GREEN SMOOTHIE
Related update: Protein Strawberry Smoothie
It was one of those mornings where I woke up, looked in the fridge, and realized I was running late for everything. My mind was a blur, but my stomach was loud and clear: it needed something quick, filling, and delicious. Enter the Protein Strawberry Smoothie. It’s like a breakfast hug in a glass, bursting with fruity freshness and a protein punch to keep you going. Plus, it comes together in minutes — perfect for the days when your to-do list is longer than your patience.
Jump to Recipe
What You’ll Need
I bet you already have most of these ingredients in your kitchen, which means you’re just minutes away from sipping on this creamy delight. Here’s what you’ll need:
- 1 cup almond milk
- 1 banana
- 1/2 cup fat-free Greek yogurt
- 1 tablespoon honey
- 1 cup ice
- 1 cup fresh strawberries
How to Make Protein Strawberry Smoothie
- Start by grabbing your blender and pouring in the almond milk. This will be the liquid base that helps everything blend smoothly.
- Peel the banana and break it into chunks, tossing them into the blender. Bananas add natural sweetness and a creamy texture.
- Add the fat-free Greek yogurt next. This is where the protein magic happens, making your smoothie satisfying and rich.
- Drizzle in the honey. Adjust the sweetness to your taste, but remember, the strawberries will add their own sweetness too.
- Throw in the ice to make it nice and frosty. No one likes a warm smoothie!
- Top it all off with the fresh strawberries. They bring a bright, berry flavor that’s completely irresistible.
- Blend on high until everything is smooth and the color is a lovely pink. It should only take about a minute. Taste and adjust if needed — maybe a bit more honey or a splash of almond milk if it’s too thick.
- Pour into your favorite glass and enjoy immediately. It’s best when fresh and frothy!
Cook’s Notes
So, a few quick things to make sure your smoothie game is on point. If your smoothie ends up too thick, just add a bit more almond milk to loosen it up. Too thin? A few more ice cubes will do the trick. I love using fresh strawberries when they’re in season, but frozen will work in a pinch and will make your smoothie even thicker — just reduce the ice a bit. As for storing it, well, this smoothie is really best made fresh. If you do have leftovers, pop them in the fridge for a few hours, but know they might separate a bit (just give it a good shake or stir before drinking).
Make It Your Own
Here are a few fun ways to switch things up:
- Swap the almond milk for coconut milk for a tropical twist.
- Replace the banana with a ripe avocado for a lower-sugar, extra creamy version.
- Add a tablespoon of chia seeds before blending for an extra boost of fiber and omega-3s.
- Throw in a handful of spinach to sneak in some greens — you won’t even taste it!
If you try this, I’d love to hear how it turns out — drop a comment or tag me! Whether you’re sipping this on a bustling morning or a lazy afternoon, I hope it adds a bit of joy to your day. Cheers to easy, tasty nutrition!
Related update: Protein Strawberry Smoothie
Related update: TROPICAL BANANA GREEN SMOOTHIE
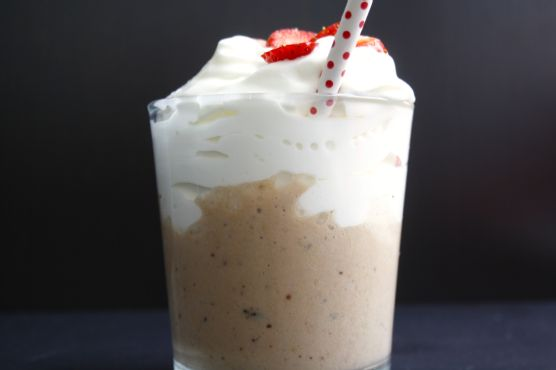
I was standing in my kitchen, staring at an overly ripe banana, when the craving hit me. You know the type: the need for something sweet, quick, and just a little nostalgic. It was one of those almost-summer days that call for a cold treat, but I didn’t want to fuss around with anything too elaborate. Enter the Banana Milo Milkshake — a creamy, chocolatey delight that somehow feels both indulgent and a bit healthy (thanks to that banana). This recipe is a breeze to whip up, and trust me, it’s like sipping on a childhood dream.
Jump to Recipe
What You’ll Need
I bet you have most of this stuff hanging out in your kitchen already. That’s my favorite kind of recipe — no need for a last-minute grocery run.
- Canned almond milk
- Banana – ideally ripe and sweet
- Milo chocolate malt powder – the star of the show
- Vanilla ice-cream – because why not?
- Strawberries – for a pop of color and flavor
- Whipped cream – a fluffy finishing touch
How to Make Banana Milo Milkshake
- In a blender, pour in about a cup of canned almond milk. It’s the creamy base for our shake.
- Add a heaping spoonful of Milo chocolate malt powder. The more, the merrier — but a couple of tablespoons should do the trick.
- Peel your banana and break it into chunks before tossing it into the blender. The riper, the sweeter!
- Scoop in a generous helping of vanilla ice-cream. One or two scoops, depending on how indulgent you’re feeling.
- Blend everything together until it’s smooth and frothy. Listen for that perfect whirring sound and watch as it turns a delightful chocolatey hue.
- Pour the luscious mixture into a tall glass. The anticipation is real!
- Top with a cloud of whipped cream. Don’t be shy; it’s the cherry-on-top moment without the cherry.
- Finally, sprinkle chopped strawberries over the whipped cream. They add a splash of color and a fresh, fruity note.
- Serve immediately, preferably with a straw, and let the cool, creamy goodness wash over you.
Cook’s Notes
If you’re anything like me, you’ll want to make sure your banana is at peak ripeness for the best sweetness. This milkshake is versatile, but using canned almond milk brings a lovely creaminess that other milk might not. You can make the whipped cream yourself or grab some from the store — both work wonders. And if you end up with leftovers (unlikely, but it happens), just cover and pop it in the fridge. Stir it up again before drinking, as it might separate a bit. But honestly, it’s best enjoyed fresh.
Make It Your Own
- For a nutty twist, swap canned almond milk with hazelnut milk.
- Want more chocolate? Add a drizzle of chocolate syrup before blending.
- For a tropical vibe, substitute the strawberries with chopped pineapple.
- Go dairy-free by using coconut milk ice-cream instead of vanilla ice-cream.
If you try this, I’d love to hear how it turns out — drop a comment or tag me! Whether you make it just like this or put your own spin on it, this Banana Milo Milkshake is sure to hit the spot. Stay cool, friends!
Related update: Banana Milo Milkshake
Related update: Protein Strawberry Smoothie
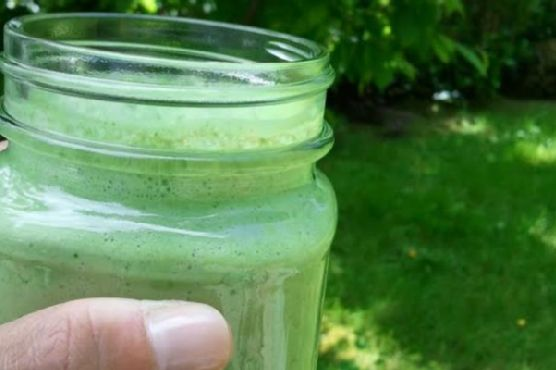
It was one of those mornings where hitting the snooze button was more tempting than ever. The kind of morning where a little pick-me-up is not just a want but a necessity. As I shuffled into the kitchen, I thought about something quick, healthy, and invigorating. Enter the Skinny Green Monster Smoothie. It’s like a jolt of energy in a glass, and it comes together in minutes. Trust me, this smoothie is both a morning lifesaver and a delightful way to sneak in those greens without sacrificing flavor. Just one sip, and you’ll be hooked—it’s the kind of recipe that keeps you coming back, not just for the taste, but for how it makes you feel: ready to tackle anything the day throws at you.
Jump to Recipe
What You’ll Need
I’ve gathered a list of ingredients that are both simple and likely already in your kitchen, so you can whip this up without a special trip to the grocery store. Here’s what you need:
- Frozen banana – it makes the smoothie creamy and naturally sweet.
- Baby spinach – don’t worry, you won’t even taste it!
- Peanut butter – adds a delicious richness and nutty flavor.
- Unsweetened vanilla almond milk – keeps it light and dairy-free.
- Fat-free plain Greek yogurt – for that extra creaminess and a protein boost.
How to Make Skinny Green Monster Smoothie
- Start by placing the frozen banana in your blender. It’s best to break it into chunks so it blends smoothly.
- Add a generous handful of baby spinach. Don’t worry—it’ll blend in seamlessly, giving you all the green goodness without overpowering the taste.
- Spoon in the peanut butter. This is where the magic happens as it brings richness and a subtle sweetness to the mix.
- Pour in the unsweetened vanilla almond milk. This will help everything blend together and give the smoothie a lovely vanilla hint.
- Add the fat-free plain Greek yogurt for an extra creamy texture. This also ups the protein quotient, making the smoothie more filling.
- Blend everything on high until it’s completely smooth and creamy. You should see a beautiful green hue and a velvety texture. If needed, scrape down the sides and blend again.
- Taste and adjust if necessary. Need it a bit sweeter? Add a touch more banana or a splash of honey. Too thick? A little more almond milk will do the trick.
Cook’s Notes
There’s not much that can go wrong with this smoothie, but here are a few pointers to keep it perfect every time. If your blender is having trouble with the frozen banana, let it thaw for a few minutes before blending. This smoothie is best enjoyed fresh, but you can refrigerate leftovers for up to a day. Just give it a good shake or stir before drinking. If you prefer it colder, throw in a few ice cubes before blending, but keep in mind this might dilute the flavors slightly.
Make It Your Own
There are plenty of ways to tweak this smoothie to suit your taste:
- Swap the peanut butter for almond or cashew butter if you’re feeling adventurous.
- Use coconut milk instead of almond milk for a tropical twist.
- Add a scoop of your favorite protein powder to make it a post-workout powerhouse.
- For a berry boost, toss in a handful of frozen blueberries or strawberries.
If you try this, I’d love to hear how it turns out—drop a comment or tag me! Whether you’re rushing out the door or lounging with a good book, this smoothie is a perfect companion. Enjoy and embrace your inner green monster! 🥤💚
Related update: Skinny Green Monster Smoothie
Related update: Easy Cheesy Pizza Casserole
Related update: Banana Milo Milkshake
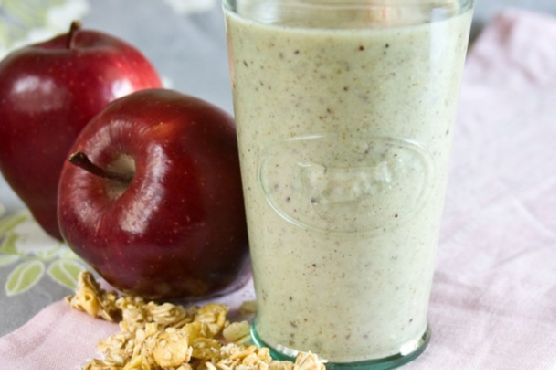
So, there I was, staring into my pantry on a crisp fall morning, craving something that screamed “autumn vibes” without going full-on pumpkin spice. That’s when the Apple Pie Smoothie idea hit me. It’s the kind of breakfast that makes you feel like you’ve done something right for the day—comforting, nostalgic, and just a little bit fancy without actually being a lot of work. This smoothie is like having dessert for breakfast, but it’s secretly healthy and totally acceptable to sip with your morning emails or after-school snack time. Seriously, you can whip this up in minutes and feel like an absolute genius for skipping the sad cereal route. Trust me, once you try it, you’ll wonder why apple pie wasn’t always a smoothie.
Jump to Recipe
What You’ll Need
This smoothie is all about cozy flavors that are probably hanging out in your kitchen already. No wild goose chases required—just simple, delicious ingredients.
- Red Delicious apple
- Apple sauce
- Fat free vanilla yogurt
- Milk
- Unsalted almond butter
- Maple syrup
- Grain granola
- Ground cinnamon
- Honey
- Ice cubes
How to Make Apple Pie Smoothie
- Start by slicing your red delicious apple into manageable pieces. Don’t worry about making them perfect—you’re blending them anyway!
- In your trusty blender, toss in the apple slices along with a generous scoop of apple sauce. This gives that extra apple pie oomph.
- Add a dollop of fat free vanilla yogurt to the mix. It’ll make the smoothie creamy and dreamy.
- Pour in a splash of milk. You know your blender best, so just enough to get things moving smoothly.
- Scoop in a tablespoon of unsalted almond butter. It adds a subtle nuttiness that works magic with apples.
- Drizzle in some maple syrup. It’s like the sweet whisper of an autumn forest.
- Sprinkle a dash of grain granola for extra texture and yum factor.
- Throw in a pinch of ground cinnamon. It’s the little spice that could, bringing all the flavors together.
- Add a touch of honey if you’re feeling like a little extra sweetness in your life.
- Finally, top it off with a handful of ice cubes for that refreshing chill.
- Blend everything on high until it’s as smooth as you want your morning to be. Give it a taste and adjust for sweetness if needed.
- Pour into your favorite glass, maybe add a sprinkle more of cinnamon or granola on top, and enjoy immediately!
Cook’s Notes
If you’re planning ahead, you can slice your apple the night before and store it in the fridge, soaked in a little lemon water to prevent browning. Just drain before you blend! This smoothie is best enjoyed fresh, but if you have leftovers (which is rare), store them in an airtight container in the fridge for up to a day. Give it a good shake before sipping, as it might separate a bit.
Make It Your Own
- Swap the red delicious apple for a Granny Smith if you prefer a tarter taste.
- Use almond milk or oat milk if you’re looking for a dairy-free option.
- Add a scoop of protein powder to make it a post-workout treat.
- Throw in a handful of spinach for a hidden veggie boost. The color changes, but the taste stays amazing!
If you try this, I’d love to hear how it turns out—drop a comment or tag me on your smoothie selfies! Happy sipping!
Related update: Apple Pie Smoothie
Related update: Simple Whole Wheat Crepes
Related update: Skinny Green Monster Smoothie
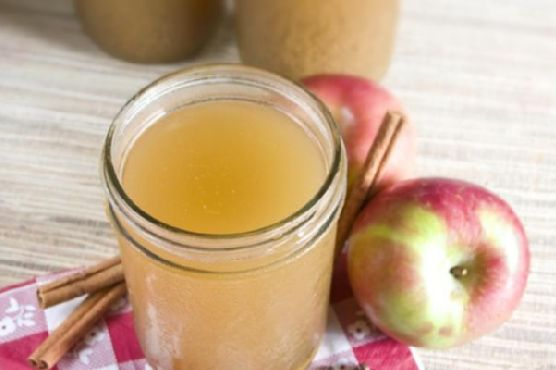
Last Tuesday, as the autumn breeze swept through my kitchen window, I found myself craving something warm and cozy. I had just returned from a brisk walk, the kind that leaves your cheeks rosy and fingers tingling. That’s when the idea of spiced apple cider popped into my head. It’s the perfect drink to transition into the cooler months – comforting, aromatic, and surprisingly easy to whip up. There’s something magical about the way the spices blend with the apple juice, evoking a sense of nostalgia and warmth. Plus, it fills your home with the most inviting aroma. Trust me, this spiced apple cider is exactly what you need on a chilly day, especially if you’re looking for a quick pick-me-up or a delightful way to impress your guests without spending hours in the kitchen.
Jump to Recipe
What You’ll Need
Most of these ingredients are already sitting in your pantry, waiting to be transformed into a cozy beverage.
- Allspice
- Freshly apple juice
- Cinnamon sticks
- Ginger
- Maple syrup
- Nutmeg
- Orange
- Water
How to Make Spiced Apple Cider
- In a large non-reactive pot, combine all the ingredients. Give them a gentle stir to ensure everything is well-mixed.
- Bring the mixture to a boil over medium-high heat. You’ll notice the aroma of spices filling your kitchen — that’s when you know you’re on the right track.
- Let it boil for about 5 minutes, just enough for the flavors to start mingling and becoming friends.
- Cover the pot, reduce the heat, and let it simmer gently for 30-40 minutes. This is when the magic happens, and the flavors deepen into a warm hug in a mug.
- Next, line a colander with cheesecloth and strain the cider. This will give you a smooth, clear drink free of any spice bits.
- Serve it warm in your favorite mug. And if it’s been one of those days, feel free to spike it with a little dark rum for an extra kick.
Cook’s Notes
When making this cider, patience is your best friend. Allowing it to simmer means the spices have the chance to really infuse the apple juice, creating that perfect balance of flavor. If you’re planning ahead, you can make the cider in the morning and reheat it gently before serving. The flavors will actually become more pronounced over time.
- Store any leftovers in the fridge for up to 4 days. Reheat gently on the stove or in the microwave.
- Be cautious when boiling; too high heat can evaporate your cider down more than you’d like.
Make It Your Own
- Swap the maple syrup with honey for a different layer of sweetness.
- Add a splash of lemon juice for a hint of citrusy brightness.
- Replace water with apple brandy for a stronger apple flavor and a boozy twist.
- Introduce star anise for an extra depth of flavor, giving your cider a slightly licorice note.
If you try this, I’d love to hear how it turns out — drop a comment or tag me! Your kitchen adventures are what make sharing these recipes so rewarding.
Related update: Spiced Apple Cider
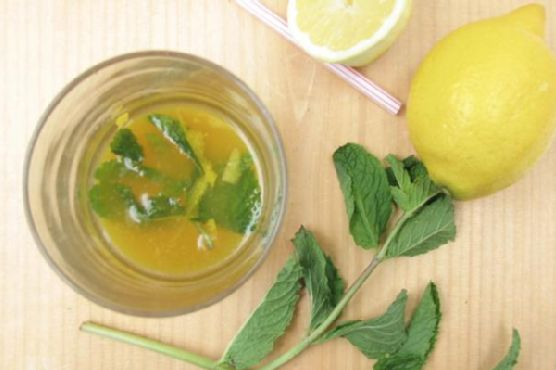
It was one of those sunny afternoons that just begged for something refreshing. I had spent the morning wrestling with my garden, pulling stubborn weeds and discovering a love for dirt under my nails. The sun felt like a warm hug, and by the time I was done, I craved something more than just plain water. I wanted zing, spice, and a little sparkle to stay energized for the rest of the day. That’s when the idea of making Turmeric Ginger Beer popped into my head. It’s vibrant, it’s zesty, and it’s surprisingly easy to whip up! Whether you’re lounging in the garden or need a pick-me-up after a long day, this drink is like sunshine in a glass.
Jump to Recipe
What You’ll Need
I bet you already have most of the ingredients for this concoction stashed away in your pantry or fridge. The magic lies in the harmony of spices and fresh ingredients that make this drink pop.
- Fresh ginger
- Turmeric
- Cardamom pods
- Coriander seeds
- Lemon zest
- Sugar
- Water
- Soda water
- Lemon juice
How to Make Turmeric Ginger Beer
- Start with the syrup: Grate the ginger and turmeric. Trust me, your kitchen will smell incredible.
- Place the ginger, turmeric, cardamom pods, coriander seeds, lemon zest, sugar, and water in a saucepan. Bring it to a boil.
- As the mixture boils, reduce the heat and let it simmer for 10 minutes. This is where the flavors deepen.
- Remove the pan from heat and let the spices infuse the syrup as it comes to room temperature. This step takes patience but is oh-so worth it.
- Strain the syrup through a regular strainer, then again through a fine-mesh tea strainer to catch all the bits. Store it in the fridge where it’ll keep for several weeks.
- Ready to mix? Measure 2 tablespoons of the syrup into an eight-ounce glass.
- Lightly crush a lemon peel and some mint leaves with the back of a spoon right in the glass. This releases their oils and aroma.
- Squeeze the juice from a quarter of a lemon into the glass. Add ice and top with soda water. Give it a gentle stir and enjoy!
Cook’s Notes
Here’s the thing: this syrup is your new best friend. Keep it in the fridge, and you’ll have an instant refresher whenever you need one. If you’re planning for a party, make it a day ahead — the flavors get even better with time. Just remember not to boil the syrup too aggressively, or you might end up with a bitter taste from the spices. To avoid a messy kitchen, use a spoon to peel your ginger and turmeric — it’s a neat little trick that saves time and effort.
Make It Your Own
- For a sweeter kick, swap soda water with ginger ale; it adds an extra ginger punch.
- Want something a little more exotic? Add a few crushed basil leaves for an aromatic twist.
- Swap lemon with lime for a tangier version — it’s a whole new vibe.
- Go alcohol-free for a kids’ version, or add a splash of rum for a sneaky adult twist.
If you try this, I’d love to hear how it turns out — drop a comment or tag me! Your experiences and twists make every recipe an adventure. Cheers to sunny days and flavorful sips!
Related update: Turmeric Ginger Beer
Related update: Sourdough Stuffing with Sage Sausage and Apples
Related update: Spiced Apple Cider
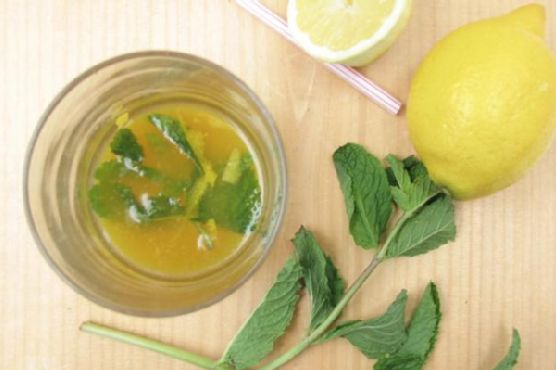
It was one of those lazy Saturday afternoons, the kind where the sun dips lazily through the blinds, splashing warm streaks of light onto your kitchen floor. The kind where you’re not rushing off anywhere, and all you want is a refreshing drink that feels both like a reward and a moment of pause. This was the day I stumbled into crafting my own Turmeric Ginger Beer, a concoction that is as much about the vibrant color as it is about the zingy, spice-laden flavors. This drink isn’t just a thirst-quencher; it’s an experience. It’s simple to put together and yet tastes like something you’d order on a dreamy vacation.
Jump to Recipe
What You’ll Need
This recipe shines in its simplicity and the likelihood that you already have most of these ingredients tucked away in your pantry. It’s a little spicy, a little sweet, and just perfect.
- 2-3 cardamom pods
- 1 teaspoon coriander seeds
- 2 inches of fresh ginger
- 1/4 cup of turmeric ginger syrup
- Zest of one lemon
- 1 cup of soda water
- 1/4 cup of sugar
- 1 tablespoon of turmeric
- 1 cup of water
How to Make Turmeric Ginger Beer
- Infuse the Syrup: Grate your fresh ginger and turmeric, breathing in that sharp, earthy aroma. It will wake up your senses! Combine them with the sugar, water, cardamom pods, and coriander seeds in a saucepan. Bring everything to a lively boil, then reduce the heat and let it simmer gently for about 10 minutes. You’ll know it’s ready when your kitchen smells like an exotic spice market.
- Let it Rest: Take the saucepan off the heat and let the spices infuse, giving the syrup time to absorb all those intricate flavors as it cools down to room temperature. Patience here pays off!
- Strain the Syrup: For a smooth syrup, strain it twice — first through a regular strainer and then through a fine-mesh tea strainer. This ensures no rogue seeds or ginger bits sneak through. Store this golden liquid in the fridge, where it’ll keep nicely for several weeks, ready to summon at a moment’s notice.
- Mix the Drink: To assemble your drink, measure out 2 tablespoons of the syrup and pour it into an eight-ounce glass. Lightly crush a piece of lemon peel and some mint leaves with the back of a spoon to release their oils and aroma. Squeeze the juice from one quarter of a lemon into the glass, then top with ice and soda water. Stir gently, letting the bubbles work their magic.
Cook’s Notes
Don’t rush the straining process; it’s key for that silky texture. If you’re storing the syrup, make sure it’s in an airtight container to keep the flavors fresh. This syrup is versatile and can even be used in other drinks or desserts. If you’re expecting guests, you can double or triple the syrup recipe — it keeps well, making it a great make-ahead option. Just mix with soda water right before serving for that fizzy freshness.
Make It Your Own
- Spicy Twist: Add a slice of fresh jalapeño to the syrup infusion for a spicier kick.
- Herbal Variation: Swap the mint for basil leaves for a completely different herbal fragrance.
- Citrus Swap: Use lime zest and juice instead of lemon for a tart and tangy tweak.
- Sweeten the Deal: Use honey instead of sugar for a richer, more rounded sweetness.
If you try this, I’d love to hear how it turns out — drop a comment or tag me! Whether you stick to the classic or add your own twist, this Turmeric Ginger Beer is bound to brighten your day. Cheers! 🍻
Related update: Turmeric Ginger Beer
Related update: Turmeric Ginger Beer
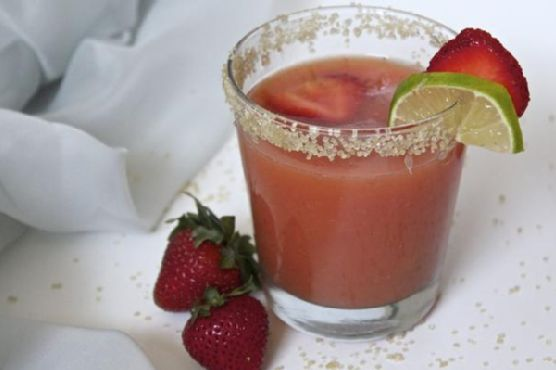
Picture this: it’s one of those sweltering summer afternoons where you can almost see the heat shimmering off the pavement. You’ve spent too much time in the sun, and all you can think about is something cold and refreshing to drink. That’s exactly where I found myself last week, which led me to this delightful concoction of Strawberry Mango Green Tea Limeade. It’s a breezy blend of fruity sweetness and slight tartness, with the earthy undertone of green tea, making it the perfect antidote to any overbearing summer day. And the best part? It’s so incredibly easy to make that you’ll find yourself pouring a second glass before you know it. Jump to Recipe
What You’ll Need
You might already have most of these ingredients lounging in your kitchen, just waiting to be turned into this refreshing treat:
- 1 cup strawberries, hulled and roughly chopped
- 1 mango, peeled, pitted, and chopped
- 1/4 cup lime juice (freshly squeezed is best!)
- 2 cups chilled green tea
- 1/2 cup simple syrup (adjust to taste)
How to Make Strawberry Mango Green Tea Limeade
- In a blender or food processor, combine the strawberries, mango, lime juice, and simple syrup. Blend until the mixture is smooth and vibrant in color.
- Grab a large pitcher and fill it halfway with ice. Pour the fruity puree over the ice, letting the coldness hug the flavors and enhance them.
- Add the chilled green tea to the pitcher. Give it a good stir, mingling the tea with the fruit until it becomes a delightful pinkish-orange hue.
- Pour the limeade into glasses, ensuring each glass gets a fair share of that icy goodness. Garnish with a wedge of lime and a fresh strawberry for a little extra flair.
Cook’s Notes
Here’s a little secret for you: the simple syrup is your best friend. Too tart? Add a splash more. Too sweet? Balance it out with a touch more lime juice. This recipe is all about finding that perfect harmony of flavors that dance on your taste buds.
If you’re planning ahead, the fruit puree can be made a day in advance. Just store it in an airtight container in the fridge and mix with the tea just before serving. And if you find yourself with leftovers (which, let’s be honest, rarely happens), store them in the fridge and enjoy within a day or two for best results.
Make It Your Own
- Swap out the green tea for jasmine tea for a floral twist that pairs beautifully with the mango.
- Use pineapple instead of mango if you want a more tropical punch.
- For a spiced kick, add a slice of fresh ginger to the blender—just a small one, trust me!
- If you’re feeling adventurous, a splash of coconut milk will turn this into a creamy, dreamy version that’s like summer in a glass.
If you try this, I’d love to hear how it turns out—drop a comment or tag me! Let’s see where your creativity takes this fruity concoction. Cheers to chilled glasses and sunny days! 🌞🍹
Related update: Strawberry Mango Green Tea Limeade
Related update: Turmeric Ginger Beer