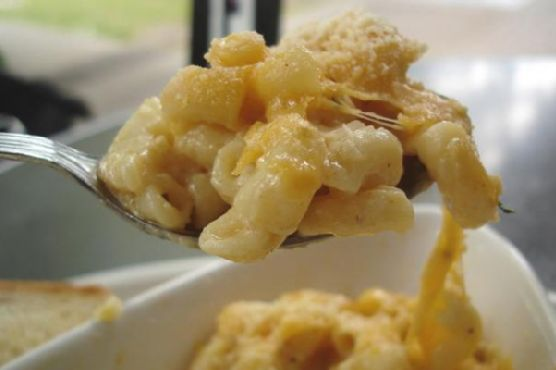
It was one of those Mondays where everything seemed to go sideways. You know the kind — you spill your coffee, your phone dies halfway through the day, and by the time you get home, the last thing you want to do is cook. That’s when it hit me: the ultimate comfort food savior, Classic Macaroni and Cheese. This dish is like a warm, cheesy hug that never lets you down. It’s rich, creamy, and surprisingly easy to whip up even when your day’s gone haywire. Plus, it’s got that golden crust on top that makes everything feel just a little bit better. Trust me, once you dig in, you won’t even remember why you were stressed in the first place.
Jump to Recipe
What You’ll Need
This is one of those recipes where you’ll likely have most of the ingredients chilling in your pantry, just waiting to be transformed into something magical.
- 6 tablespoons butter
- 1/4 cup all-purpose flour
- 1/8 teaspoon cayenne pepper
- Salt and white pepper, to taste
- 3 cups hot whole milk
- 3 cups grated sharp cheddar cheese
- 1 pound cooked short macaroni
- 1/2 cup heavy cream
- 1 cup fresh bread crumbs
How to Make Classic Macaroni and Cheese
- Preheat your oven to 350°F. Get your 8″ x 11″ baking dish ready — butter it up like you’re giving it a massage.
- Melt 6 tablespoons of butter in a medium saucepan over low heat. Toss in the flour and stir constantly for about 4 minutes until you have a nice roux going. It’ll smell slightly nutty and look golden.
- Add the cayenne pepper, and sprinkle in some salt and white pepper. Slowly whisk in the hot milk, 1/2 cup at a time, cooking until your sauce thickens up and coats the back of a spoon. You’re looking for a smooth, luscious texture here.
- Reduce the heat and stir in 2 cups of cheddar. Keep stirring until the cheese melts into silky perfection, about 2 minutes.
- In a large bowl, combine the cooked macaroni and the cheese sauce. Give it a taste and season with more salt if needed. Cheese loves salt, trust me.
- Sprinkle 1/2 cup of cheese at the bottom of your prepared baking dish. Layer a third of the pasta mixture on top, followed by another 1/2 cup of cheese. Repeat the layering process, ending with a final cheese layer.
- Pour the heavy cream over the assembled dish — it’s the secret to that extra creamy finish.
- Melt the remaining butter in a skillet and toss in the bread crumbs until they’re all buttery and gorgeous. Sprinkle this over the top of your macaroni and cheese.
- Bake for about 30 minutes, or until the crust is golden and calling your name. Let it rest for 15 minutes before serving; it’ll firm up a bit as it cools.
Cook’s Notes
Here’s the lowdown: Make sure to taste your sauce before you start layering. It should be slightly more seasoned than you think, as the pasta will absorb some of the saltiness. If you’re in a rush, assemble the mac and cheese earlier in the day and store it in the fridge until you’re ready to bake. Just add an extra 10 minutes to the baking time if it’s coming straight from the fridge. For leftovers (if you have any!), they keep for up to 3 days in the fridge. Reheat in the oven at 300°F until warm and bubbly again. Avoid the microwave unless you’re really in a pinch — it just won’t do this comforting dish justice.
Make It Your Own
Want to put your own spin on this classic? Here are a few fun ideas:
- Swap the sharp cheddar with a mix of smoked gouda and mozzarella for a smoky, melty twist.
- Add cooked, crispy bacon bits between the layers for a savory boost.
- Use panko breadcrumbs instead of fresh for an extra crunchy top layer.
- For a veggie boost, stir in some sautéed spinach or roasted broccoli with the macaroni.
If you give this Classic Macaroni and Cheese a try, I’d love to hear all about your cheesy adventures — drop a comment or tag me in your gooey masterpiece!
Related update: Classic Macaroni and Cheese
Related update: Arroz Con Pollo

Last Tuesday, I was staring at a package of sirloin steak, contemplating my usual grill routine, when the weather made its own plans with a sudden downpour. With the rain hammering against the window, I pivoted to a cozy baking approach that turned out to be a game changer. Who knew that throwing sirloin in the oven could result in such tender, flavorful goodness? This Baked Sirloin Steak comes together with ingredients you likely already have lounging in your pantry, and the result is a melt-in-your-mouth, savory dish that’s perfect for any night of the week. Trust me, it’s a keeper when the grill isn’t an option, or you just want to switch things up a bit.
Jump to Recipe
What You’ll Need
This dish leans on the classics, with a few flavor boosters that make it special without any fuss. Chances are you already have most of this in your kitchen:
- Butter
- Ketchup
- Lemon
- Pepper
- Salt
- Water
- White onions
- Worcestershire sauce
How to Make Baked Sirloin Steak
- Preheat your oven to 425 degrees. You want it nice and hot to seal in all those juicy flavors.
- Rub both sides of the steak generously with butter. This not only adds flavor but helps in creating a wonderfully golden exterior.
- Place the buttered steak on a greased rack set in a shallow pan. The rack lets the heat circulate, cooking the steak evenly.
- Sprinkle the steak with salt and pepper. Be generous; these are your primary seasonings.
- Arrange thin slices of lemon directly on top of the steak. Trust me, this step is non-negotiable. The lemon adds a fresh zing that cuts through the richness.
- Top the lemon with slices of white onion. As it bakes, the onion softens and sweetens, melding beautifully with the lemon and steak.
- In a small bowl, mix together ketchup, Worcestershire sauce, and a splash of water. Pour this saucy goodness over the steak.
- Bake for 30 to 45 minutes, depending on how you like your steak. At 30 minutes, it should be medium-rare; extend the time for more doneness. Look for the sauce to be bubbling and the onions golden and fragrant.
Cook’s Notes
Don’t skip the rack inside the shallow pan setup; it’s essential for mimicking that grill-like air circulation. If you’re aiming for a specific doneness, a meat thermometer can be your best friend. For medium-rare, you’re looking for about 135 degrees. If you find yourself with leftovers (unlikely, but hey, it happens), slices of this steak make for killer sandwiches the next day. Just wrap them up tightly and store in the fridge for up to two days.
Make It Your Own
- Swap the sirloin for a different cut of steak like ribeye or strip for a richer flavor.
- Try using red onions instead of white for a milder sweetness and a pop of color.
- Mix in a teaspoon of minced garlic with the butter for a subtle garlicky kick.
- For a spicy twist, add a dash of hot sauce to the ketchup mixture before pouring it over the steak.
If you try this, I’d love to hear how it turns out — drop a comment or tag me! Your feedback means the world, and I’m always here for a kitchen chat. Enjoy your steak adventure!
Related update: Baked Sirloin Steak
Related update: Classic Macaroni and Cheese

Let’s talk about the time I ambitiously decided to make enchiladas on a Wednesday night after one too many hours of doom-scrolling through Instagram. You know the ones—cheesy, gooey, and utterly comforting. I could already taste the spicy tang of green chilies, imagining it would somehow transform my week. Spoiler: it did. This Enchiladas Verdes recipe is not only a delicious weeknight hero but also a dish that’s forgiving enough for any kitchen mishaps. Didn’t roll the tortillas tight enough? No worries; it’s all going to melt together in a cheesy, saucy hug anyway. And trust me, the result is so satisfying, you’ll forget about that midweek slump. Jump to Recipe
What You’ll Need
What’s fantastic about this dish is you might already have most of the ingredients lounging around in your kitchen. If not, the list is simple and straightforward.
- Skinless boneless chicken breast or a quick swap with a store-bought rotisserie chicken.
- Green Anaheim chili peppers – these are the stars of the show.
- Canola oil
- Flour
- White diced onion
- White corn tortillas
- White shredded cheese
- Queso fresco
- Sour crema
- Salt
- Water
- Suero or buttermilk (canned buttermilk works, too)
How to Make Enchiladas Verdes (Green Enchiladas)
- Preheat your broiler and get those green chili peppers ready for roasting. Choose firm, meaty peppers—no wrinkles, please!
- Rinse the peppers and lay them on a foil-lined cookie sheet. Slide them under the broiler and keep an eye on them. Within minutes, you’ll see the skin begin to blister and turn black.
- Flip the peppers after about 5 minutes to get all sides evenly blistered. Once done, pop them into a plastic bag and cover with a towel, letting them cool. This makes peeling off the blackened skin a breeze.
- For the sauce, blend those roasted peppers, flour, and half of your suero or buttermilk until smooth and creamy. Pour this mixture into a skillet over medium-low heat.
- As it warms, gradually stir in more suero or buttermilk. Season with salt—around 2 teaspoons usually does the trick. If it’s too spicy for your taste, add crema. Too thick? Dribble in some water.
- Now, the chicken. Either boil your chicken breasts in a pot until done or just shred a rotisserie chicken. The choice is yours.
- For stacked style enchiladas, fry your tortillas in hot oil just until they’re soft, then drain. Dip each in the sauce before layering on plates with chicken, cheese, and onion. Go for three layers per serving.
- If you prefer oven-baked, preheat to 350°F. Spread sauce at the bottom of your baking dish, fry and fill the tortillas, then roll them up seam down in the dish.
- Drench with more sauce and sprinkle with crumbled queso fresco. Bake until everything’s gloriously warm, about 15 minutes.
- Serve with a dollop of sour crema and get ready to conquer the rest of your week!
Cook’s Notes
Here are a few tips I’ve picked up along the way:
- These enchiladas are flexible with make-ahead options. Prepare the sauce and chicken in advance, then just assemble when you’re ready.
- Store leftovers in an airtight container in the fridge for up to three days. Reheat in the oven for best results.
- Don’t skip the roasting of peppers, as it’s essential for that smoky flavor. If you find peeling them tricky, let them steam longer in the plastic bag.
Make It Your Own
- For a vegetarian spin, swap out chicken with crispy tofu or sautéed mushrooms.
- Mix in some black beans with the chicken for added texture and protein.
- Try using a mix of different cheeses like mozzarella for an extra gooey factor.
- Add avocado or cilantro as a fresh topping before serving.
If you try this, I’d love to hear how it turns out—drop a comment or tag me on social media! Enjoy your cozy, midweek escape with these Enchiladas Verdes.
Related update: Enchiladas Verdes (Green Enchiladas)
Related update: Baked Sirloin Steak

It was one of those rainy Tuesday afternoons where the chilly wind made its way through every crack in my window, and all I could think about was something warm and cozy to fill my kitchen with delicious smells. I found myself rummaging through my pantry, pulling out half-used bags of dried fruits and a forgotten jar of candied ginger. Instantly, the idea of scones popped into my head—specifically, Dried Fruit and Ginger Scones. This recipe is perfect for those moments when you crave a little treat that’s impressively tasty but doesn’t demand hours in the kitchen. The best part? I promise you, they’re so easy to make, you’ll almost feel like you’re cheating.
Jump to Recipe
What You’ll Need
The ingredient list is delightfully simple. Chances are, you already have most of these items tucked away in your kitchen.
- Flour
- Cake flour
- Baking powder
- Butter
- Heavy cream
- Whole milk
- Salt
- Turbinado sugar
- Dried apples
- Dried cranberries
- Candied ginger
How to Make Dried Fruit and Ginger Scones
- Position a rack in the middle of your oven and preheat to 425°F. If you’re feeling fancy and using a pizza stone, pop it in the oven to preheat too. Otherwise, line a cookie sheet with parchment paper—you’re ready to go.
- In a medium bowl, whisk together the flours, baking powder, 3 tablespoons of the sugar, and salt. It should look like a soft, powdery snow drift.
- Cut in the butter using a pastry blender, two knives, or your fingers, until you have pea-sized butter pieces that make the mixture look a bit like coarse sand with pebbles. Don’t worry if it looks a bit odd; this is what you want!
- Pour in the cream and milk (or go all in with just cream if you’re feeling decadent) and stir with a fork. You’re aiming for a sticky, shaggy dough that’s evenly moist.
- Add in the fruits and ginger. Work the mixture just enough to spread the goodies evenly, breaking up any ginger clumps. Expect your hands to get a little messy.
- Turn the sticky dough onto a floured surface, sprinkling a bit more flour on top. Pat it into a circle about 1-inch thick. Resist the urge to over-flour; we don’t want tough scones.
- Flour a pizza cutter or a sharp knife and slice the dough circle into 8 equal wedges. Flour in between cuts if things get sticky.
- With a bench scraper, spatula, or your brave hands, transfer the scones to your baking vessel. Leave a half-inch space between them so they can sashay their way to deliciousness.
- Sprinkle the tops with the remaining tablespoon of sugar. Bake for 13-15 minutes, until the tops are a lovely light golden and the scones smell irresistible.
- Let them cool on the baking sheet for at least 10 minutes—it’s tempting, but worth the wait. Enjoy them warm or after they’ve cooled. Both ways are pure bliss.
Cook’s Notes
These scones are pretty forgiving. The key is not to overwork the dough, which keeps them tender and fluffy. If you don’t have cake flour, all-purpose flour works too—just be a bit gentler when mixing. They’re best the day they’re made, but you can store them in an airtight container for a day or two. Reheat them in a warm oven if you want to revive that fresh-from-the-oven vibe. If you’re prepping ahead, you can freeze the unbaked scones; just add a couple of extra minutes to the baking time.
Make It Your Own
- Nutty Twist: Swap half of the dried fruits for chopped toasted almonds or walnuts for a crunchy surprise.
- Chocolate Indulgence: Substitute the candied ginger with dark chocolate chips for a sweet, rich variation.
- Zesty Citrus: Add finely grated orange or lemon zest to the dough for a refreshing aromatic lift.
- Herbal Infusion: Replace dried cranberries with dried cherries and throw in a teaspoon of dried rosemary for a sweet-herbaceous combo.
If you try this, I’d love to hear how it turns out—drop a comment or tag me! Your kitchen adventures make this foodie journey so much more fun. Happy baking!
Related update: Dried Fruit and Ginger Scones
Related update: Chouquettes

Picture this: It’s a blustery Tuesday evening, and you’ve just gotten home from a day that was long enough to make watching paint dry sound thrilling. You’re craving something that’s easy enough to not require a kitchen degree, but still feels like a cozy hug in a bowl. Enter my Cavatappi pasta with salmon crab surimi. This dish is a delightful tangle of flavors that hits the sweet spot between comfort food and seafood sophistication. The pasta’s curly tubes are perfect for catching all the saucy goodness, and the combination of salmon and surimi gives you that savory, oceanic touch without the need for a second mortgage. It’s a recipe that comes together in a flash, so you can have your taste of the Mediterranean with just a little bit of kitchen magic and minimal fuss. Curious yet?
Jump to Recipe
What You’ll Need
The best part about this ingredient list is that it’s likely you’ve already got most of these at your disposal. A few pantry staples, a couple of fresh herbs, and you’re in business.
- 8 oz Cavatappi pasta
- 2 tablespoons olive oil
- 2 cloves garlic, minced
- 1 can (6 oz) salmon fillets, drained
- 4 oz surimi crab sticks, sliced
- 2 plum tomatoes, chopped
- 2 tablespoons tomato puree
- 1 tablespoon red wine
- 1 teaspoon dried basil
- 2 tablespoons fresh basil, chopped
- 2 tablespoons fresh parsley, chopped
- 1 teaspoon sugar
- Salt and pepper to taste
- Grated Parmesan cheese for serving
How to Make Cavatappi pasta with salmon crab surimi
- First, get that pasta going. Cook the Cavatappi according to the package instructions until it’s al dente. Drain it, but don’t be too hasty — reserve a bit of that starchy cooking water like the little secret weapon it is.
- In a large skillet, heat up the olive oil over medium heat. Add the minced garlic and sauté it for about a minute. Keep an eye out – you want it just fragrant, not the golden brown of regret.
- Add the canned salmon and surimi crab sticks to the pan. Stir them gently, and let them simmer together for just a couple of minutes, like a friendly neighborhood chat.
- Time for the juicy bits: toss in the chopped tomatoes, tomato puree, dried basil, and red wine. Mix everything so it all gets to know each other, and let it simmer gently. You should start seeing those edges bubble in about 2-3 minutes.
- Sprinkle in the sugar, and season with salt and pepper. Stir it all together, letting the flavors meld into a harmonious sauce.
- Now, bring the pasta back into the fold. Add the Cavatappi to your sauce, turning it through until everything is well coated. If things look a bit too thick, a spoonful of that reserved pasta water will smooth it out beautifully.
- Serve immediately, with a generous sprinkle of Parmesan cheese and a touch of fresh, chopped basil for that finishing flair.
Cook’s Notes
Don’t be tempted to rush the garlic; it can go from golden to bitter in the blink of an eye. When simmering the sauce, keep it gentle—you’re coaxing out flavors, not boiling them away. This pasta dish is best enjoyed fresh, but if you happen to have leftovers, they’ll keep well in the fridge for up to two days. Just reheat gently, adding a splash of water if needed to get the sauce back to its luscious texture.
Make It Your Own
- Want to mix up the protein? Try swapping the salmon for some succulent shrimp or even crispy tofu for a vegetarian twist.
- If you’re a spice lover, a pinch of red pepper flakes tossed in with the garlic can add a nice kick.
- No wine on hand? A splash of chicken or vegetable broth works in a pinch and still adds depth.
- For a creamier version, stir in a splash of cream or a dollop of mascarpone cheese just before serving.
So there you have it! This Cavatappi pasta with salmon crab surimi is a surefire way to elevate any evening with minimal effort. If you try this, I’d love to hear how it turns out — drop a comment or tag me! Happy cooking! 🍝
Related update: Cavatappi pasta with salmon crab surimi
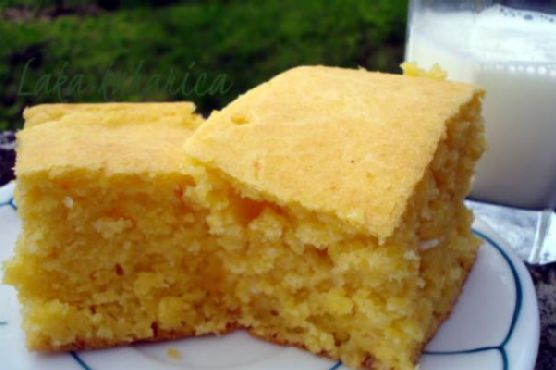
Last Tuesday, I found myself in one of those delightful culinary conundrums: a craving for something comforting yet uncomplicated, something that would warm the soul without demanding too much time or attention. The answer came to me as I stood in front of my pantry: Soft Croatian corn bread, or proja. This gem of a recipe is perfect for those moments when you want something special but don’t want to spend hours in the kitchen. It’s rich with the rustic flavors of corn and cheese, and the best part? You probably already have most of the ingredients on hand. Plus, it pairs wonderfully with soups and stews, making it a great choice for the changing seasons.
Jump to Recipe
What You’ll Need
In this recipe, the magic happens with just a few pantry staples and a couple of fresh items. Chances are, you already have most of this lying around:
- 1 cup all-purpose flour
- 1 teaspoon baking powder
- 1 cup corn grits
- 1 cup cornmeal
- 1 cup cottage cheese
- 3 large eggs
- 1 cup natural yogurt
- 1/4 cup olive oil
- 1 teaspoon salt
- 1 cup mineral water
How to Make Soft Croatian corn bread – proja
- Preheat your oven to 220°C (or about 430°F). Time to get that kitchen nice and toasty.
- In a large mixing bowl, crack in the eggs and sprinkle the salt. Whisk until the mixture becomes slightly frothy.
- Add the all-purpose flour, corn grits, cornmeal, and baking powder. Stir until everything is just combined.
- Pour in the olive oil and yogurt, mixing until you have a smooth batter that glistens with promise.
- Gradually add the mineral water, stirring consistently to achieve a thin, pourable batter. Don’t rush — let the batter tell you when it’s ready.
- Gently fold in the cottage cheese, ensuring it’s evenly distributed. The batter should be light and slightly lumpy.
- Lightly grease a baking pan with butter, then pour in the batter. Smooth the top with a spatula, giving it a little jiggle to settle.
- Bake in the preheated oven for about 30 minutes. You’ll know it’s done when the top is golden, and a toothpick inserted in the center comes out clean.
Cook’s Notes
Proja is forgiving, but here are a few tips to keep in mind. Make sure your batter is on the thinner side before baking; this ensures a tender crumb. If the top is browning too quickly in the oven, cover it with foil halfway through. Leftovers can be wrapped tightly and stored in the refrigerator for up to three days. To reheat, just pop a slice in the oven or toaster, and it comes back to life like magic.
Make It Your Own
Looking to add your own twist to this lovely loaf? Here are some fun variations:
- Swap the cottage cheese for feta for a tangier kick.
- Add a handful of chopped olives for a Mediterranean vibe.
- Mix in some sun-dried tomatoes for a pop of color and flavor.
- Replace the mineral water with beer for a richer, deeper flavor.
If you try this, I’d love to hear how it turns out — drop a comment or tag me! Your kitchen stories are always my favorite part. Happy baking, and remember: the best recipes are the ones that make you smile.
Related update: Soft Croatian corn bread – proja
Related update: Cavatappi pasta with salmon crab surimi

Picture this: It’s a random Tuesday evening, and I’m staring down a fridge that looks like a ghost town. There’s a near-empty bottle of white wine, a few lonely sage leaves, and some beef flank steaks that I really need to use up. That’s when the idea hit me — Meat rolls with prosciutto and sage. With a quick rustle through my pantry, I realized I had everything I needed. This dish is the ultimate hero for those nights when you crave something comforting yet deceptively fancy. You know what I mean? It comes together faster than you’d think, with the sage giving it an unexpected pop of earthy goodness. And guess what? It only looks fussy.
Jump to Recipe
What You’ll Need
You might find that you’ve got most of this hanging around already. No need for a special trip to the store, which is a win in my book.
- Beef flank steaks – Perfect for rolling and full of flavor.
- Similar seasoning (like Vegeta Natur) – Just a sprinkle for a bit of zing.
- Prosciutto – Salty, savory goodness that wraps the steak in love.
- Sage leaves – The secret ingredient that makes this dish sing.
- Corn starch – Magic thickener for the sauce.
- White wine – Adds a splash of sophistication.
- Olive oil – For that sauté start.
- Butter – Because everything’s better with butter.
- Black bell pepper – Freshly cracked for a bit of heat.
How to Make Meat rolls with prosciutto and sage
- First things first, wash and dry those beef flank steaks. Then, get a bit of a workout by flattening them out. This helps them roll up nice and tight.
- Grab your seasoning of choice and rub one side of each steak — you’re giving it a flavor boost.
- Lay a piece of prosciutto and a sage leaf on the other side of the steak. The prosciutto should cover the whole side like a cozy blanket.
- Time to roll! Start at one end and roll the steak up tightly. Secure it with wooden or metal toothpicks. Channel your inner sculptor here.
- In a bowl, whisk the corn starch into the white wine until it’s all mixed up and smooth. This will be your secret sauce.
- Heat up a mix of olive oil and butter in a pan. Once it’s hot, add the rolls and sauté them on all sides until golden brown. Your kitchen will smell amazing right about now.
- Pour in the wine mixture and season with freshly cracked black bell pepper. Give everything a stir.
- Cover the pan and let the rolls simmer on low heat for about 20 minutes. They should become tender and soak up all those flavors.
- Remove the toothpicks before serving. Trust me, no one likes a surprise toothpick in their dinner.
Cook’s Notes
Make sure to flatten those steaks evenly, or they’ll be tricky to roll. You want them to cook evenly, too. If you’re not into sage, a bit of rosemary can be a lovely swap, though the sage really adds something special here. Don’t rush the simmering stage — that’s when all the magic happens and the flavors meld together. Leftovers can be kept in an airtight container in the fridge for up to three days. A quick reheat, and they’re just as delicious.
Make It Your Own
- Swap the beef flank steaks for chicken breast if you’re feeling poultry instead of red meat.
- If you’re not a fan of prosciutto, try using thinly sliced turkey or ham for a different twist.
- For a non-alcoholic version, substitute the white wine with chicken or vegetable broth. You won’t miss a thing!
- Add a sprinkle of crushed red pepper flakes for some heat if you’re feeling spicy.
If you try this, I’d love to hear how it turns out — drop a comment or tag me! Happy cooking, and remember, it’s all about having fun in the kitchen.
Related update: Meat rolls with prosciutto and sage
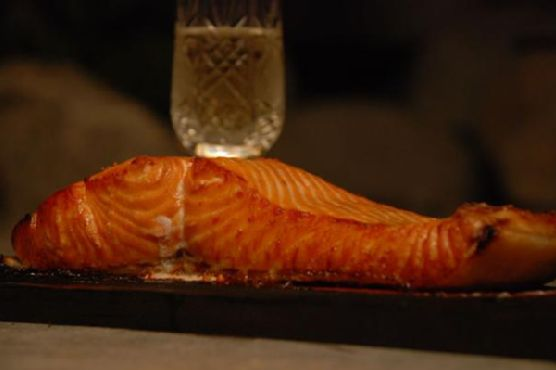
Last Thursday, I found myself staring into the fridge, hoping for inspiration to strike before my toddler demanded dinner. It was one of those days where you need something kinda fancy to feel like an adult—but it also had to be easy enough to not cause a breakdown. Enter: Wildwood Ovens Bourbon Apple Glazed Cedar Plank Salmon. This dish is the answer to those chaotic moments when you want to impress yourself and anyone lucky enough to be at the table. It’s a little sweet, a little smoky, and totally doable on a weeknight. The cedar plank makes it taste like it came from a restaurant, but really you just soaked a piece of wood and turned on the grill. Magic, right?
Jump to Recipe
What You’ll Need
The beauty here is that the ingredient list is straightforward, and there’s a good chance you’ve got most of this hiding in your pantry. A quick run to the store, and you’ll be ready to rock this impressive dish.
- Apple juice
- Brown sugar
- Cedar plank (make sure it’s food-safe!)
- 3-4 garlic cloves, minced
- 1 tsp kosher salt
- Freshly cracked black pepper
- Salmon filet (about 1.5-2 lbs is perfect)
- Bourbon whiskey
How to Make Wildwood Ovens Bourbon Apple Glazed Cedar Plank Salmon
- Start by soaking your cedar plank in water for at least 2 hours. This step is crucial to prevent any unplanned flare-ups and to infuse that lovely woody flavor into your salmon.
- Rinse the salmon under cold water and gently pat it dry with paper towels. This is essential as it helps the seasoning stick better and gives you a nice crisp finish.
- Grab a medium saucepan and set it over medium-high heat. Carefully pour in the bourbon—remember, no free-pouring from the bottle, unless you enjoy spontaneous kitchen pyrotechnics.
- Once the alcohol is reduced and you’ve got just a little left at the bottom of the pan, add in the apple juice, brown sugar, and minced garlic. Keep it on the heat until it’s reduced to about a third of its original volume. You’re looking for something just thinner than syrup.
- Season the salmon generously with salt and freshly cracked black pepper on both sides. Brush the skin side with a bit of olive oil.
- Place the seasoned salmon, skin side down, on the soaked cedar plank. Then, transfer the plank to a medium-high grill or a wood-fired oven preheated to 500°F, positioning it close to the fire for that authentic flavor.
- Using a probe thermometer, start checking the internal temperature of the salmon after about 10 minutes, and then every 5 minutes thereafter. Once it hits at least 100°F, brush on the apple glaze—every few minutes. This layering helps build up that gorgeous, sticky finish.
- Continue cooking until the salmon reaches your desired doneness; I aim for around 135°F for that perfect, juicy flakiness.
Cook’s Notes
Here are some extra tips for nailing this dish every time:
- Make sure your cedar plank is fully submerged while soaking, maybe putting a can or something on top to keep it under water.
- Don’t skimp on the glaze. The more layers you add, the richer the flavor.
- Leftovers (if you have any) can be kept in an airtight container in the fridge for a couple of days. Flake it over a salad for a quick next-day meal!
Make It Your Own
- Swap the bourbon for brandy if you prefer a slightly sweeter glaze.
- For a spicier kick, add a pinch of chili flakes to the glaze.
- No salmon? Try this glaze on chicken breasts or even tofu—just adjust the cooking time accordingly.
- Top with fresh herbs like dill or parsley for a pop of color and flavor right before serving.
If you try this, I’d love to hear how it turns out—drop a comment or tag me on social media! It’s always a win when we can turn a potential kitchen meltdown into a tasty triumph.
Related update: Wildwood Ovens Bourbon Apple Glazed Cedar Plank Salmon
Related update: Meat rolls with prosciutto and sage
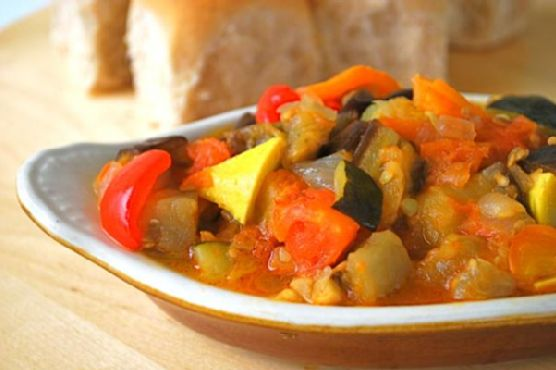
Last Wednesday, I found myself staring into the depths of my fridge, contemplating a lonely eggplant and a couple of sad zucchinis. It was one of those evenings when inspiration was as low as my vegetable crisper’s contents. But then, a little spark hit me—why not whip up a colorful and cozy Vegetarian Ratatouille? It’s one of those dishes that feels like a warm hug after a long day. Plus, it’s a melody of summer veggies that’s simple to throw together, making it a perfect midweek hero. Loaded with fresh flavors, it’s hearty without being heavy, and best of all, it can transform fridge odds and ends into something spectacular. So, if you’re ready to turn that produce drawer into a work of art, keep reading. Or, if you’re raring to get started—Jump to Recipe
What You’ll Need
This ingredient list is refreshingly straightforward. Chances are you already have most of these in your kitchen. Here’s what you’ll need for this vibrant veggie medley:
- Eggplant
- Zucchini
- Yellow squash
- Tomato
- Red bell pepper
- Orange bell pepper
- Onion
- Garlic
- Fresh basil
- Thyme
- Dried oregano
- Extra virgin olive oil
- Sea salt
How to Make Vegetarian Ratatouille
- Start by heating a good glug of extra virgin olive oil in a large saucepan over medium-low heat. Toss in the diced onion and minced garlic. Stir them around until the onions are translucent and the whole kitchen smells like a dream.
- Next, add in the chopped tomatoes. Give them a gentle stir and let them mingle with the onions and garlic until the flavors start to blend together.
- Now, it’s time to add the rest of the gang. Introduce the chopped eggplant, zucchini, yellow squash, red and orange bell peppers to the party. Sprinkle in some sea salt, a few sprigs of thyme, and a pinch of dried oregano.
- Lower the heat and let everything simmer gently for about 30 minutes. Stir occasionally, keeping an eye on the eggplant. You’ll know it’s done when it’s tender and the edges of the vegetables are starting to caramelize a bit.
- Before serving, toss in some freshly torn basil leaves for a burst of freshness. Give everything one last stir and get ready to dig in!
Cook’s Notes
Here’s the deal: Ratatouille is incredibly forgiving. If you have extra veggies on hand, like mushrooms or carrots, feel free to toss them in. Just keep an eye on the cooking time; firmer veggies might need a bit more time to tenderize.
- Worried about mushy vegetables? Make sure your heat is low enough to allow them to cook slowly and evenly.
- This dish can easily be made ahead of time. Store it in an airtight container in the fridge for up to three days. The flavors only deepen as it sits, making it an excellent leftover choice.
- If you’re serving this to guests, you can prepare it in advance and simply reheat gently on the stove before serving.
Make It Your Own
- For a protein boost, add in some chickpeas or white beans during the last 10 minutes of cooking.
- Swap the fresh basil for a handful of chopped parsley if that’s what you have on hand.
- Spice things up with a pinch of red pepper flakes for some heat.
- Transform it into a heartier meal by serving it over a bed of fluffy quinoa or couscous.
If you try this, I’d love to hear how it turns out — drop a comment or tag me! Your feedback means the world to me and keeps the inspiration flowing.
Related update: Vegetarian Ratatouille
Related update: Wildwood Ovens Bourbon Apple Glazed Cedar Plank Salmon
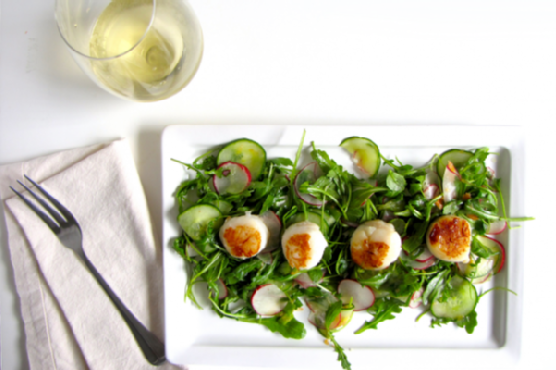
Picture this: It’s a Tuesday evening. You’ve just kicked off your shoes after a whirlwind day, and all you want is something fresh, zesty, and sophisticated on your plate without spending more time in the kitchen than you did in traffic. That’s where my Citrus Arugula Salad with Seared Scallops swoops in to save the day. It’s got that crisp, peppery bite from the arugula that I absolutely crave, the juicy pop of a Cara Cara orange, and the tender, buttery goodness of perfectly seared scallops. It sounds fancy, but trust me, it’s a cinch to throw together—and it’s bound to impress whoever’s lucky enough to join you at the table.
Jump to Recipe
What You’ll Need
Chances are you already have most of this in your kitchen, aside from maybe the scallops. But it’s the simple ingredients that really let those scallops shine.
- Arugula
- Cara Cara orange
- Radish
- English or Persian cucumber
- Green onion
- Salt
- Scallops
How to Make Citrus Arugula Salad with Seared Scallops
- First, thinly slice the radishes and cucumber. You want them delicate enough to complement the scallops, not overshadow them. Dice up the green onion, too.
- In a bowl, squeeze the juice and pulp from half of the Cara Cara orange. Add a pinch of salt and whisk it all together until it’s beautifully blended.
- Add in your radish and cucumber slices, along with a healthy handful of arugula. Toss it all together until every leaf and slice glistens with that citrusy goodness.
- Now, for the scallops: Heat a splash of oil in a pan over high heat. The pan needs to be hot, hot, hot—like sizzling enough that you can almost hear it pleading for the scallops.
- Gently place the scallops flat-side down in the pan. Space is key here, so if you have a lot of scallops, do them in batches. Crowding the pan is the enemy of that golden sear we’re aiming for.
- Let them sear undisturbed. The temptation to peek and prod is real, but resist! After a couple of minutes, check for that caramel-colored crust. Once you see it, flip them over.
- Plate your salad and place about four scallops on top. They should be served immediately to avoid any rubbery disappointments.
Cook’s Notes
Seared scallops are one of those things where less is more. Don’t overdo the seasoning; let their natural sweetness shine. Also, scallops are quick to cook and quick to turn rubbery if left too long. Watch them like a hawk, and you’ll be fine. If you want to make this ahead, prepare the salad components in advance and just sear the scallops right before serving. As for leftovers, the salad keeps well for a day, but the scallops are best enjoyed fresh out of the pan.
Make It Your Own
- Swap the arugula for spinach if you prefer a milder green.
- Replace the Cara Cara orange with blood orange for a deeper color and flavor.
- Try grilling the scallops for a smoky twist.
- For a vegetarian version, swap the scallops for crispy tofu slices.
If you try this, I’d love to hear how it turns out—drop a comment or tag me! Whether it’s a quick weeknight dinner or a date night delight, I hope you find this as much of a joy to make as it is to eat. Enjoy!
Related update: Citrus Arugula Salad with Seared Scallops
Related update: Vegetarian Ratatouille
Related update: Pear Salad With Walnuts and Blue Cheese
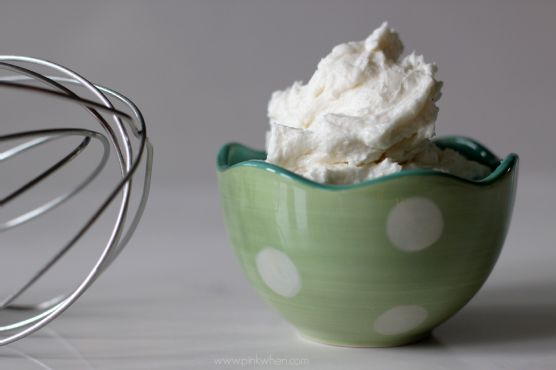
Picture this: It’s one of those afternoons when the craving for something sweet is impossible to ignore. Not just any sweet, but a slice of cake smothered in creamy, luscious frosting. I was halfway through baking a batch of cupcakes when disaster struck—no frosting in sight! With minutes to spare, I whipped out this trusty Old Fashioned Vanilla Buttercream Frosting recipe, and voilà, my cupcakes were saved. It’s quick and easy, with ingredients you probably have on hand, and it never fails to impress with its smooth, rich texture. Plus, there’s something about homemade frosting that just feels like a hug in dessert form.
Jump to Recipe
What You’ll Need
I love this recipe because it uses simple ingredients that work magic together. Chances are you already have most of this sitting in your pantry or fridge:
- Solid vegetable shortening
- Butter
- Vanilla extract
- Confectioners sugar
- Milk
How to Make Old Fashioned Vanilla Buttercream Frosting
- In a large mixing bowl, cream the butter and shortening together using an electric mixer. You’re aiming for a smooth, unified blend that’s a pale yellow in color.
- Add the vanilla extract, and continue mixing. The aroma will instantly start to fill your kitchen.
- Gradually sift in the confectioners sugar, adding it one cup at a time. Beat on medium speed, and scrape down the sides and bottom of the bowl often. This ensures everything is well incorporated.
- Once all the sugar is mixed in, the icing will seem a bit dry—don’t worry, this is normal!
- Add the milk to the mixture. Beat on medium speed for about 3 minutes. You’re looking for a light, fluffy texture that’s easy to spread.
- Keep the icing covered with a damp cloth until you’re ready to use it. This prevents it from drying out.
Cook’s Notes
A little tip I’ve picked up: Keeping the mixing bowl in the fridge when you’re not using it helps maintain the frosting’s consistency, especially if your kitchen tends to be on the warmer side. If you’re making this ahead of time, store it in an airtight container in the fridge for up to a week. When you’re ready to use it, just give it a quick re-whip in your mixer to bring back its creamy texture. Also, be generous with that vanilla—for that classic flavor, it’s key!
Make It Your Own
Here are a few fun variations to try if you’re feeling adventurous:
- Swap out the vanilla for almond extract for a nutty twist.
- Add a few tablespoons of cocoa powder to create a chocolate buttercream.
- Substitute the milk with heavy cream for a richer, thicker frosting.
- Mix in some food coloring to match the theme of your dessert or party.
If you try this, I’d love to hear how it turns out—drop a comment or tag me! There’s nothing more rewarding than seeing your creations come to life. Enjoy every sweet, frosted bite!
Related update: Old Fashioned Vanilla Buttercream Frosting
Related update: Apothic Granita and Vanilla Panna Cotta

So last Tuesday, I found myself staring at a bowl full of apples on my countertop, leftovers from my overly ambitious farmer’s market haul. My mind was set on something sweet and indulgent, but I didn’t want to spend ages prepping a fancy dessert or making a mess of my kitchen. Enter: Easy Homemade Apple Fritters. These little nuggets of joy are perfect for those times when you need a quick treat that feels special but doesn’t involve a ton of effort. They’re crispy on the outside and filled with warm, cinnamon-spiced apple goodness on the inside. Trust me, they’re like a cozy hug on a plate.
Jump to Recipe
What You’ll Need
You’ll love this recipe because chances are, you already have most of the ingredients in your pantry. Plus, it’s really all about letting those apples shine.
- 1 cup all-purpose flour
- 1 apple, peeled, cored, and diced
- 1 teaspoon baking powder
- 1 teaspoon cinnamon
- 1 egg
- 1/3 cup milk
- 1 tablespoon sugar
- 1/4 teaspoon salt
- Oil, for frying (I used vegetable oil)
- 1 cup powdered sugar
- 2 tablespoons milk (for the glaze)
How to Make Easy Homemade Apple Fritters
- In a mixing bowl, whisk together the flour, sugar, salt, baking powder, and cinnamon. You’ll want to inhale deeply because that cinnamon is going to smell divine.
- Gently stir in the milk and egg until the mixture is just combined. Over-mixing is the enemy here! We want it to stay light and fluffy.
- Fold in the diced apple. Make sure those apple pieces are well distributed—every fritter deserves its apple moment!
- Pour oil into a skillet so that it’s about 1 1/2 inches deep. Heat the oil on high. You’ll know it’s ready when a little dough thrown in pops right back up to the surface.
- Carefully drop heaping teaspoons of the dough into the hot oil. Watch them sizzle! Cook until the fritters are brown, about 2 minutes, then flip. Give them another 1-2 minutes to get golden on the other side.
- Transfer the fritters to paper towels to soak up any excess oil. A quick pit stop before they head to a cooling rack.
- For the glaze, stir the powdered sugar and milk together in a small bowl. It’ll be smooth and silky.
- Drizzle the glaze over the fritters. Wait about 3 minutes for the glaze to harden a bit, flip the fritters, and drizzle over the other side. They’re best served warm, so dive in!
Cook’s Notes
Here’s a few things I learned while making these fritters:
- Keep an eye on your oil temperature. If it’s too hot, your fritters will brown too quickly on the outside and stay raw on the inside.
- If you’re making these ahead of time, store them at room temperature in an airtight container for up to a day. Reheat in the oven to crisp them back up.
- Leftovers can be revived by popping them in a toaster oven for a few minutes. They won’t be as good as fresh, but still tasty.
Make It Your Own
- Swap the apple for another fruit like pears or peaches if you’re feeling adventurous!
- Add a pinch of nutmeg or ginger to the batter for an extra layer of spice.
- Try using maple syrup instead of powdered sugar for the glaze for a deeper, richer sweetness.
- For a savory twist, omit the sugar and cinnamon, and add sharp cheddar cheese and bacon bits to the batter.
If you try this, I’d love to hear how it turns out — drop a comment or tag me! Seriously, nothing makes my day more than seeing your kitchen creations. Enjoy every crispy, warm, and cinnamon-sweet bite!
Related update: Easy Homemade Apple Fritters
Related update: Old Fashioned Vanilla Buttercream Frosting
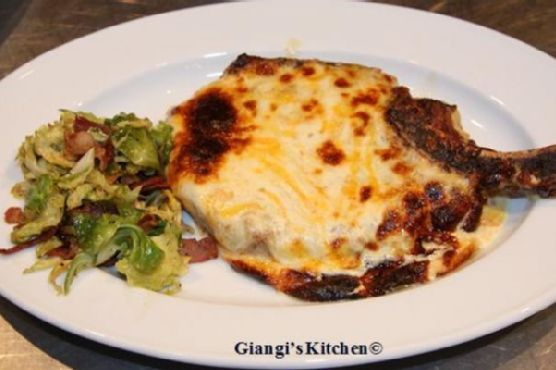
Last Tuesday evening, I was standing in my kitchen, staring into the fridge like it was an oracle with all the answers to my dinner dilemmas. It had been a long day, and I needed to whip up something that felt like a reward for surviving it. That’s when I spotted the pack of pork chops tucked away on the bottom shelf, right beside a wedge of Gruyère cheese that had almost been forgotten. The idea of Cheese Pork Chops was born, and let me tell you, this dish is a midweek savior. It’s got that special touch of comfort with gooey cheese and rich mustard cream, yet it’s simple enough to throw together while you’re half-distracted by a podcast or the kids’ homework.
Jump to Recipe
What You’ll Need
This is one of those recipes where you might just have everything you need already. It’s all about bold flavors with just a handful of ingredients.
- 2 tablespoons olive oil
- 2 tablespoons unsalted butter
- 4 pork chops (about 1 inch thick)
- Salt and pepper, to taste
- 1/2 cup heavy cream
- 2 tablespoons dijon mustard
- 1 cup shredded Gruyère cheese
How to Make Cheese Pork Chops
- Heat a heavy-bottom skillet over medium-high heat. Add the olive oil and butter, swirling them together until the butter melts and starts to slightly foam.
- Carefully place the pork chops in the skillet. Sauté for about 3 minutes on each side, letting them develop a lovely golden crust.
- Reduce the heat to medium. Cook the pork chops for an additional 5 to 6 minutes per side, until they’re just cooked through. Sprinkle with salt and pepper to taste. Remember, the juices should run clear when you test them.
- While the chops finish cooking, preheat your broiler. In a small bowl, whisk together the heavy cream, dijon mustard, and shredded Gruyère cheese until well combined.
- Transfer the cooked pork chops to an ovenproof dish. Spread the cheese-cream mixture generously over each chop.
- Place the dish under the preheated broiler for about 5 minutes. Keep a close eye on them—the cheese should be bubbly and slightly browned.
Cook’s Notes
One of the best things about this dish is how forgiving it is. If your chops are a bit thicker or thinner, just adjust cooking time accordingly. You want them juicy, not dry.
If you’re making this ahead of time, you can prepare the cheese mixture in advance and even sear the chops the night before. Just store them separately in the fridge and bring to room temperature before broiling.
Got leftovers? Lucky you! They’re fabulous sliced thin and tossed into a salad, or reheated gently in the microwave for a next-day lunch that will make your coworkers jealous.
Make It Your Own
- Spice it up: Add a teaspoon of chili flakes to the cheese mixture for a spicy kick.
- Herbaceous twist: Mix a tablespoon of chopped fresh herbs like thyme or rosemary into the cheese mixture.
- Cheese swap: Try shredded sharp cheddar or even blue cheese for a different flavor profile.
- Dijon alternative: Experiment with whole grain mustard for a bit more texture and tang.
If you try this, I’d love to hear how it turns out — drop a comment or tag me in your cheesy creations! Happy cooking, friends!
Related update: Cheese Pork Chops
Last Tuesday was one of those days where everything felt a little off-kilter. You know, the kind where your morning coffee just doesn’t hit right, and your afternoon is a blur of tasks that never seem to end? By the time dinner rolled around, I was craving something that would transport me far from the daily grind—something warm, comforting, and just a tad exotic. Enter: paella. Not only is it a dish that sounds fancy enough to impress, but it’s surprisingly simple to whip up. It’s got this amazing way of bringing a little Spanish sunshine to your table, even on the dreariest of evenings. Plus, it’s a one-pan wonder, so less time spent cleaning up means more time for Netflix or a good book. Trust me, once you’ve tasted this, you’ll see what all the fuss is about. Jump to Recipe
What You’ll Need
If your pantry’s got some basics and your local grocery store has a seafood section, you’re pretty much set. I love that this recipe starts with stuff you likely already have on hand!
- Smoky paprika
- Dried oregano
- Kosher salt
- Black pepper
- Chicken wings
- Littleneck clams
- Solid chorizo sausage
- Shrimp
- Extra virgin olive oil
- White diced onion
- Diced garlic
- Italian parsley leaves
- Whole .5 oz tomatoes
- Canned Spanish short grain rice
- Water
- Saffron
- Salt and pepper
- Green peas
- Lemon wedges
How to Make Paella for Four; A Wonderful Spanish Mixed Seafood Stew
- Start by mixing the smoky paprika, dried oregano, kosher salt, and black pepper. Rub this spice mix all over the chicken wings and let them chill in the fridge for an hour. This is where the magic begins—infusing the chicken with all those bold, earthy flavors.
- Take the chicken out of the fridge about 30 minutes before you’re ready to cook. They should be close to room temp, which helps them cook evenly.
- Heat half of the olive oil in your trusty 12-inch All-Clad stainless steel pan over medium-high heat. Toss in the chorizo rounds and let them sizzle away until they’re browned and fragrant. Remove them from the pan and set aside.
- Add the rest of the oil to the pan, then brown the chicken on all sides, savoring that sizzling sound. Once they’re golden brown, take them out and keep them with the chorizo.
- Turn the heat down to medium and add the onions, garlic, and parsley. This is your sofrito—a flavor-packed base that’s the heart of the dish. Cook until the onions are translucent and everything smells irresistible, about 2-3 minutes.
- Next, add the crushed and drained tomatoes. Give everything a good stir and let it cook for about 3 minutes until the flavors meld together.
- Stir in the rice, making sure it’s all cozy with the sofrito, for about 2 minutes. You want each grain to be coated with that delicious base.
- Return the sausage and chicken to the pan. Pour in the hot water and bring the mixture to a gentle simmer, cooking for about 5 minutes. Give it a stir now and then to keep everything mingling nicely.
- Now, place the clams artfully atop the rice. Resist the urge to stir! You want them just so.
- Let the paella cook for another 5 minutes, then position the shrimp, tails up, so they can steal the show. Continue to cook for about 10 minutes, until the clams have popped open, the shrimp are a lovely pink, and the rice is fluffy yet moist.
- Finally, check for socarrat. With a fork, gently feel the bottom of the pan. If you detect that legendary crispy crust, you’re golden. If not, crank up the heat for 30-45 seconds to get that perfect crackling finish, then serve immediately.
Cook’s Notes
Here are a few little nuggets of wisdom to ensure your paella is perfecto:
- If you’re short on time, you can season the chicken and let it sit while you prep the rest of the ingredients. It won’t be exactly the same, but life necessitates shortcuts sometimes!
- Leftovers? Pop them in an airtight container and they’ll keep in the fridge for up to two days. Paella is one of those dishes that tastes even better the next day, I promise.
- Be patient with the socarrat. It’s the best bit, but it requires a little trust in the process. If you don’t hear a slight crackle when you turn up the heat, give it a bit more time.
Make It Your Own
Feeling creative? Here are some twists to make this paella uniquely yours:
- Swap out the chicken wings for crispy tofu to make a pescatarian version.
- Substitute the clams with mussels if that’s what you’ve got on hand or prefer.
- Feeling spicy? Use a hot chorizo for an extra kick.
- Not a fan of saffron? Add a pinch of turmeric for a golden hue without the floral notes.
If you try this, I’d love to hear how it turns out—drop a comment or tag me! Your feedback keeps this kitchen creativity going. Enjoy the taste of Spain at your own table!
Related update: Paella for Four; A Wonderful Spanish Mixed Seafood Stew
Related update: Cheese Pork Chops

Picture this: it’s a rainy Wednesday evening, and I’m staring at my fridge like it’s going to magically suggest what I should make for dinner. Ever have those moments when nothing feels right, but takeout seems too tragic? That’s when I stumbled upon the perfect antidote — My Drunken Fish Fillet. It’s this crispy, golden, comforting dish that feels like a hug on a plate, without the takeout guilt. The beer in the batter makes everything delightfully light and airy, and honestly, it’s low-key impressive when you pull it off. Plus, who doesn’t love cooking with wine and beer? The kitchen smells divine, and it’s as much fun to make as it is to devour.
Jump to Recipe
What You’ll Need
Okay, so let’s talk about the magic ingredient list. The cool part? You probably have a bunch of this stuff hanging out in your pantry already. Here’s the breakdown:
- Fish – whatever fillet you’ve got; think tilapia or cod.
- Salt – to season the fish and the batter.
- White ground pepper – trust me, it adds just the right kick.
- Rice wine – this is where the magic (and the name) starts.
- Beer – pick something light, like a lager.
- White eggs – you’ll need both the yolk and the whites, separately.
- All-purpose flour – plus a little more for dusting if you’re feeling fancy.
- Oil – for frying, of course.
How to Make My Drunken Fish Fillet
Let’s break this down step-by-step so you can nail it every time:
- Start by combining your beer, egg yolk, flour, and half a teaspoon of salt. Whisk it well until you’ve got a thick, smooth batter. Pop this into the fridge for a good hour. This rest is crucial for texture!
- Meanwhile, sprinkle your fish fillets with salt and white ground pepper. Give them a pat so they’re nicely coated. Then, splash on the rice wine and let them marinate for about 15 to 20 minutes. The fragrance alone will brighten your day!
- When you’re ready to fry, beat the egg whites until they’re soft and foamy. Gently fold these into your chilled batter. This is where the light, airy magic happens.
- Heat up your oil until it’s shimmering. Dip your marinated fish fillets into the batter, ensuring they’re fully enveloped in that luscious mix. Fry them three pieces at a time, so they’re not overcrowded. Cook until they’re a beautiful golden brown and oh-so-crispy.
- For a quick dip, mix Yamasa soy sauce with a bit of wasabi from the tube and a squeeze of lemon juice. Simple but absolute perfection.
Cook’s Notes
Here’s the tea on making this dish truly sing. First off, make sure your oil is hot enough before you start frying. You want that sizzle! If it’s too cool, the batter soaks up oil and gets greasy. You can make the batter ahead (up to a day), just keep it covered in the fridge because that chill time is key. Leftover fillets (if you have any!) can be reheated in an oven to crisp them back up — avoid the microwave unless you love soggy regrets.
Make It Your Own
Want to switch things up? Here are some variations that keep things exciting:
- Swap the fish for crispy tofu. Just be sure to press the tofu well before marinating.
- Go gluten-free by using a gluten-free flour blend in place of all-purpose flour.
- Add a spicy twist by mixing a pinch of cayenne into the batter for a bit of heat.
- Try an Asian twist with panko breadcrumbs mixed into the batter for extra crunch.
If you try this, I’d love to hear how it turns out — drop a comment or tag me! I’m always here for your kitchen triumphs and even the occasional mishap. Happy frying!
Related update: My Drunken Fish Fillet
Related update: Paella for Four; A Wonderful Spanish Mixed Seafood Stew
Related update: Crunchy Prawn Skewers With Lemony Avocado Dip

Picture this: It’s a Tuesday evening, and the week’s already wearing me down. I’m craving something cheesy, comforting, and a little indulgent. You know, the kind of meal where the smell alone makes you feel like you’ve just wrapped yourself in a warm, delicious hug. Enter the Easy Cheesy Pizza Casserole. It’s like a giant pizza in a pan but with all the cozy vibes of a casserole. Plus, it’s a crowd-pleaser, perfect for family dinners or casual get-togethers with friends. The best part? It’s as easy as it is cheesy. Grab your apron, and let’s dive in!
Jump to Recipe
What You’ll Need
Trust me, this ingredient list reads like a love letter to your pantry. Chances are, you already have most of these on hand:
- Ground beef or bulk sausage mix
- Ricotta cheese
- Oregano
- Basil
- Parmesan cheese
- Pasta sauce or canned pizza sauce
- Crushed red pepper flakes
- Pepperoni
- Shredded mozzarella cheese
- Shredded aged provolone cheese
- Herbed parmesan drop biscuits (recipe follows)
- Baking mix
- Italian seasoning
- Milk
How to Make Easy Cheesy Pizza Casserole
- Preheat your oven to 375°F. This is a crucial step, so your biscuits start cooking right away.
- Brown the ground beef or sausage in a skillet over medium heat until it’s no longer pink. Drain the fat because nobody likes greasy casseroles.
- Stir in the pasta or pizza sauce and a pinch of crushed red pepper flakes. Let it simmer until everything is well-blended and smells heavenly.
- In a separate bowl, mix the ricotta cheese with oregano, basil, and Parmesan cheese. This will be your creamy layer of deliciousness.
- Prepare the biscuit dough by combining the baking mix with Italian seasoning and milk. Stir until just blended; lumps are okay here.
- Spray a 13 x 9-inch pan with non-stick spray. Drop the biscuit dough by teaspoons into the pan, spacing them evenly. Don’t worry about gaps; the dough will spread out beautifully in the oven.
- Layer the ground beef mixture over the biscuits, then dot with the ricotta mixture. You should start to see the makings of a masterpiece.
- Bake at 375°F for about 20 minutes or until the biscuits are puffed and just starting to turn golden. Your kitchen should smell like a dream by now.
- Increase the oven temperature to 425°F. Sprinkle mozzarella and provolone cheeses over the top and lay out pepperoni slices like you’re decorating a pizza.
- Return the casserole to the oven for about 10 minutes, until the cheese is melted and bubbling slightly. This is the moment you’ve been waiting for.
- Let it stand for 5 minutes before slicing. Patience is a virtue, and it’ll pay off when your slices come out picture-perfect.
- Optionally, sprinkle additional Parmesan cheese on top before serving. More cheese is always the right choice.
Cook’s Notes
A few quick tips to make sure your casserole is a hit:
- If you want to make this ahead, prepare the beef and ricotta mixtures and store them in the fridge. When ready to bake, just assemble everything, and you’re good to go.
- This casserole keeps well in the fridge for up to three days. Just cover and reheat in the oven to keep the biscuits from getting soggy.
- Be sure not to over-mix your biscuit dough; a gentle stir is all it takes. Over-mixing can make them tough.
Make It Your Own
Feel free to get creative and put your spin on this cozy dish:
- Swap the pepperoni for crispy tofu slices for a vegetarian twist that still packs plenty of flavors.
- Use spicy Italian sausage in place of ground beef for an extra kick.
- Try adding a layer of sautéed mushrooms and onions for an earthy depth of flavor.
- Go Hawaiian and add pineapple chunks along with ham or Canadian bacon for a sweet and savory combo.
If you give this Easy Cheesy Pizza Casserole a whirl, I’d be thrilled to hear how it turned out for you. Drop a comment or tag me on social media with your delicious creations. Happy cooking!
Related update: Easy Cheesy Pizza Casserole
Related update: My Drunken Fish Fillet
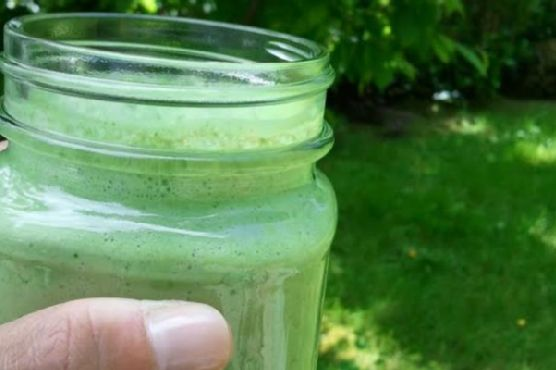
It was one of those mornings where hitting the snooze button was more tempting than ever. The kind of morning where a little pick-me-up is not just a want but a necessity. As I shuffled into the kitchen, I thought about something quick, healthy, and invigorating. Enter the Skinny Green Monster Smoothie. It’s like a jolt of energy in a glass, and it comes together in minutes. Trust me, this smoothie is both a morning lifesaver and a delightful way to sneak in those greens without sacrificing flavor. Just one sip, and you’ll be hooked—it’s the kind of recipe that keeps you coming back, not just for the taste, but for how it makes you feel: ready to tackle anything the day throws at you.
Jump to Recipe
What You’ll Need
I’ve gathered a list of ingredients that are both simple and likely already in your kitchen, so you can whip this up without a special trip to the grocery store. Here’s what you need:
- Frozen banana – it makes the smoothie creamy and naturally sweet.
- Baby spinach – don’t worry, you won’t even taste it!
- Peanut butter – adds a delicious richness and nutty flavor.
- Unsweetened vanilla almond milk – keeps it light and dairy-free.
- Fat-free plain Greek yogurt – for that extra creaminess and a protein boost.
How to Make Skinny Green Monster Smoothie
- Start by placing the frozen banana in your blender. It’s best to break it into chunks so it blends smoothly.
- Add a generous handful of baby spinach. Don’t worry—it’ll blend in seamlessly, giving you all the green goodness without overpowering the taste.
- Spoon in the peanut butter. This is where the magic happens as it brings richness and a subtle sweetness to the mix.
- Pour in the unsweetened vanilla almond milk. This will help everything blend together and give the smoothie a lovely vanilla hint.
- Add the fat-free plain Greek yogurt for an extra creamy texture. This also ups the protein quotient, making the smoothie more filling.
- Blend everything on high until it’s completely smooth and creamy. You should see a beautiful green hue and a velvety texture. If needed, scrape down the sides and blend again.
- Taste and adjust if necessary. Need it a bit sweeter? Add a touch more banana or a splash of honey. Too thick? A little more almond milk will do the trick.
Cook’s Notes
There’s not much that can go wrong with this smoothie, but here are a few pointers to keep it perfect every time. If your blender is having trouble with the frozen banana, let it thaw for a few minutes before blending. This smoothie is best enjoyed fresh, but you can refrigerate leftovers for up to a day. Just give it a good shake or stir before drinking. If you prefer it colder, throw in a few ice cubes before blending, but keep in mind this might dilute the flavors slightly.
Make It Your Own
There are plenty of ways to tweak this smoothie to suit your taste:
- Swap the peanut butter for almond or cashew butter if you’re feeling adventurous.
- Use coconut milk instead of almond milk for a tropical twist.
- Add a scoop of your favorite protein powder to make it a post-workout powerhouse.
- For a berry boost, toss in a handful of frozen blueberries or strawberries.
If you try this, I’d love to hear how it turns out—drop a comment or tag me! Whether you’re rushing out the door or lounging with a good book, this smoothie is a perfect companion. Enjoy and embrace your inner green monster! 🥤💚
Related update: Skinny Green Monster Smoothie
Related update: Easy Cheesy Pizza Casserole
Related update: Banana Milo Milkshake

Picture this: It’s a hectic Wednesday evening, and you’ve just walked through the door, shoes off, contemplating what to make for dinner. The fridge hums with half-empty bottles of condiments, and there’s a lone pack of pork chops staring back at you. This is the moment you realize the magic of Bruschetta Style Pork & Pasta. It’s the perfect blend of comforting pasta and savory pork, all wrapped in the tangy-sweet goodness of bruschetta flavors. It’s one of those dishes that feels fancy enough to impress but is wonderfully simple to throw together, ideal for those mid-week dinners when time is not on your side.
Jump to Recipe
What You’ll Need
This recipe is a lifesaver because chances are you already have most of the ingredients hanging around your kitchen. Here’s what you’ll need to whip up this delight:
- One package of bow tie pasta
- Freshly grated parmigiano reggiano
- A jar of Recipe Makers Chicken Bruschetta Pasta sauce
- 4-6 pork chops
How to Make What to make for dinner tonight?? Bruschetta Style Pork & Pasta
- First, give those pork chops a good wash and rinse. Pat them dry, then plop them into your skillet. You’ll want to cut them into bite-sized pieces so they cook quickly and soak up all those delicious flavors.
- Add half of the Basil Garlic simmer sauce from your Bruschetta Pasta kit into the skillet with the pork. You’ll know it’s working its magic when the kitchen starts to fill with a seriously drool-worthy aroma.
- Meanwhile, bring a pot of water to a boil and get your bow tie pasta cooking. Aim for al dente—that perfect balance of tender but still with a bit of bite.
- Once your pasta is done, drained, and ready, toss it into the skillet with the pork. Pour in the rest of the Basil Garlic Simmering Sauce, giving everything a nice mix so the pasta is well-coated.
- Now for the pièce de résistance: top the whole thing with the Chunky Bruschetta Finishing Sauce. Sprinkle generously with Parmesan, then cover the skillet. Let it all cook on low heat for 2 to 3 minutes, just until everything’s heated through and the cheese melts into gooey perfection.
Cook’s Notes
Here’s the deal: when cutting your pork, keep the pieces uniform in size to ensure even cooking. You want them golden but not overcooked. If you’re making this ahead, stop just before adding the Parmesan and Finishing Sauce. Store it in the fridge, and when you’re ready to eat, layer on the sauce and cheese, then heat through. Leftovers? They’re a dream. Just store them in an airtight container, and they’ll be good for up to three days. Reheat gently on the stove or in the microwave with a splash of water to keep everything from drying out.
Make It Your Own
Here are some ways you can switch things up:
- Swap the pork for crispy tofu for a vegetarian twist. Just pan-fry the tofu until golden before adding the sauces.
- Use zoodles or spaghetti squash instead of bow tie pasta for a low-carb version.
- Add a handful of fresh spinach to the skillet before serving for a pop of color and extra nutrients.
- For a spicy kick, toss in some red pepper flakes along with the Parmesan.
If you try this, I’d love to hear how it turns out—drop a comment or tag me! Cooking should be fun, stress-free, and delicious, so let’s make that happen. Happy cooking, friends!
Related update: What to make for dinner tonight?? Bruschetta Style Pork & Pasta

There was this one Thursday evening when I felt the chill in the air turning my fingers just a bit numb, and I craved something that felt like a warm hug. I was rifling through my pantry, hoping to discover a forgotten treasure, when I stumbled upon a jar of sauerkraut and a pack of knockwurst sitting in the fridge. Suddenly, inspiration struck. This dish is the epitome of comfort food — cozy, hearty, and surprisingly easy to throw together with a few pantry staples. The combination of savory knockwurst and tangy sauerkraut, all tied together with a hint of sweetness from molasses and the earthy warmth of spices, truly hits the spot on those brisk evenings when you just need a little extra comfort.
Jump to Recipe
What You’ll Need
This recipe is all about layering flavors with a minimal ingredient list — you’ll likely find many of these in your pantry already!
- 1 tablespoon butter
- 1 medium onion, chopped
- 1 cup beer
- 1 cup water
- 1 tablespoon cornstarch
- 2 tablespoons brown mustard
- 1 tablespoon molasses
- 1 teaspoon caraway seed
- 1/4 teaspoon ground allspice
- 1/4 teaspoon ground black pepper
- 1 medium rutabaga, peeled and chopped
- 1 pound cooked knockwurst
- 2 cooking apples, peeled, cored, and cut into wedges
- 1 can (about 14 ounces) sauerkraut
How to Make Knockwurst with Sauerkraut
- In a medium frying pan, melt the butter over medium heat. Add the knockwurst and cook, turning occasionally, until they’re browned and the edges are just starting to crisp — about 10-12 minutes.
- Meanwhile, drain the sauerkraut in a colander, rinse it under cold water, and let it drain again thoroughly. This step is crucial to avoid an overly sour dish.
- In a large pot, sauté the chopped onion over medium heat until the pieces are tender and translucent, but not browned. You’ll know it’s ready when the kitchen fills with that sweet, savory onion aroma.
- Pour in the beer and let it come to a gentle simmer. Meanwhile, in a separate bowl or measuring cup, mix together the water, cornstarch, brown mustard, molasses, caraway seed, ground allspice, and black pepper until smooth.
- Stir this mixture into the onion and beer in the pot. Cook and stir consistently until the sauce thickens and becomes bubbly. You’ll see it start to coat the back of a spoon — that’s when you know it’s ready for the next step.
- Add the chopped rutabaga to the pot, cover with a lid, and let it simmer for 15 minutes, allowing the rutabaga to become just tender.
- Finally, stir in the browned knockwurst, apple wedges, and sauerkraut. Cover the pot again and let everything simmer together for another 15 to 20 minutes, until the apples have softened and the flavors have melded beautifully.
Cook’s Notes
- When browning the knockwurst, be patient and let them get a nice brown crust. It adds a lovely depth of flavor that you don’t want to miss.
- The molasses adds a touch of sweetness but doesn’t overpower. If you prefer slightly less sweetness, you can reduce the amount to 1 teaspoon.
- This dish can be made ahead and actually tastes better the next day as the flavors have more time to develop. Simply store it in an airtight container in the fridge for up to 3 days. Reheat on the stove over low heat until warmed through.
Make It Your Own
- For a vegetarian twist, swap the knockwurst with crispy tofu cubes. You’ll get that savory satisfaction without the meat.
- Use sweet potatoes in place of rutabaga for a sweeter, more colorful dish.
- Add a handful of chopped kale or spinach at the end for a burst of color and nutrients.
- If you’re a spice lover, a pinch of red pepper flakes will add a nice kick.
If you try this recipe, I’d love to hear how it turns out for you! Drop a comment below or tag me in your culinary adventures. Enjoy every bite of this cozy, delicious meal!
Related update: Knockwurst with sauerkraut
Related update: What to make for dinner tonight?? Bruschetta Style Pork & Pasta
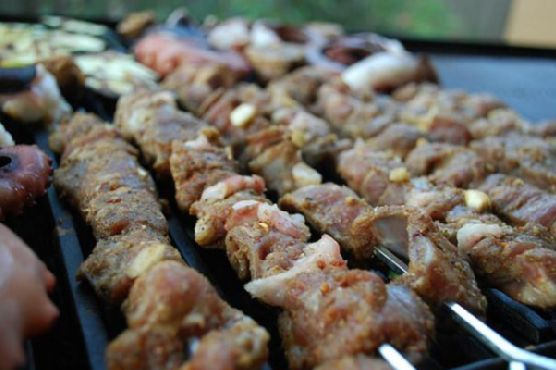
There I was, standing in my tiny kitchen on a Tuesday afternoon, staring at a leg of lamb I’d ambitiously bought during my last grocery run. It was one of those moments where you think, “What have I gotten myself into?” But then inspiration hit me like a delicious lightning bolt: Yogurt Marinated Lamb Skewers. It’s one of those recipes that sounds fancy enough to impress a dinner guest but is secretly simple enough for a weeknight. The magic is all in the marinade, full of spices that soak into the lamb, turning it tender and flavorful. So if you’re looking to impress someone (or just yourself), keep reading.
Jump to Recipe
What You’ll Need
I’m willing to bet you’ve already got most of this stuff hanging out in your pantry. The marinade is what truly makes this dish shine, infusing the lamb with a fragrant mix of spices and creamy yogurt.
- Vegetable oil
- Cumin
- Leg of lamb
- Nutmeg
- Paprika
- Plain yogurt
- Salt
- Turmeric
How to Make Yogurt Marinated Lamb Skewers
- Start by boning the leg of lamb, if it isn’t already done, and cut it into 1-inch cubes. This size is perfect for skewers and ensures even cooking.
- In a large bowl, combine the vegetable oil, cumin, nutmeg, paprika, plain yogurt, salt, and turmeric. Mix until everything is nicely blended and the mixture is aromatic.
- Add the lamb cubes to the marinade. Toss them until they’re well-coated. Cover the bowl and pop it into the refrigerator overnight. This is where the magic happens, as the lamb soaks up all those wonderful flavors.
- The next day, thread the marinated lamb cubes onto skewers. If you’re using wooden skewers, don’t forget to soak them in water for at least 30 minutes to prevent burning.
- Grill the skewers over charcoal, which gives them that beautiful smoky flavor. Cook them for about 7 minutes on each side, until they’re a rich, golden-brown and fragrant.
Cook’s Notes
So, here’s the thing: patience is key! Letting the lamb marinate overnight is what makes it so tender and flavorful. If you’re in a rush, a few hours will do, but try not to skimp on marinating time. As for grilling, charcoal gives the best flavor, but a grill pan on the stovetop works in a pinch. Once cooked, these skewers are best enjoyed fresh, but any leftovers can be stored in an airtight container in the fridge for up to three days. Reheat them gently to avoid drying out the meat.
Make It Your Own
Want to put your own spin on these skewers? Here are some ideas:
- Swap out the lamb for chicken thighs if you’re looking for a more budget-friendly option.
- Add a little lemon juice to the marinade for a citrusy kick that pairs beautifully with the spices.
- Try tossing in some fresh herbs like mint or cilantro at the end for a fresh pop of flavor.
- For a vegetarian twist, use crispy tofu instead of lamb, letting it marinate just as you would the meat.
If you give these Yogurt Marinated Lamb Skewers a go, I’d love to hear how they turned out for you. Drop a comment or tag me on social media. Let’s make deliciousness together!
Related update: Yogurt Marinated Lamb Skewers
Related update: Knockwurst with sauerkraut