
It was one of those chilly evenings when nothing but a steaming bowl of comfort would do. My kitchen counter was a mess of ingredients that promised warmth and nostalgia: ramen packets, a handful of mussels I had ambitively picked up at the market, and that last lonely scallion in the crisper. This, I decided, was the night for Neoguri (Spicy Seafood Ramen). Quick enough for a weeknight yet impressive with its depth of flavor, this dish is all about minimal effort with maximum impact. And honestly, who doesn’t love a meal that comes together in under 15 minutes but feels like a hug in a bowl?
Jump to Recipe
What You’ll Need
You probably have most of these already lurking in your kitchen. Just a quick note, make sure to use fresh mussels for the best experience.
- Neoguri ramen (spicy seafood flavor)
- 1 egg
- Mussels (fresh, ideally)
- 1 green scallion
- Seaweed (gim sheets are perfect)
How to Make Neoguri (Spicy Seafood Ramen)
- Start by bringing a pot of water to a rolling boil. This is the moment for a deep breath because things are about to get exciting.
- Add the mussels and the sauce packets from the Neoguri ramen. Let them party in the pot for about 5 minutes. If you’re using fresh mussels, watch them closely: they should open up. Any stubborn, closed mussels deserve to be tossed.
- Time to add the ramen noodles. Give them 2 to 3 minutes to soften and soak up all that spicy goodness.
- For the egg, you have options: beat it and drizzle while swirling the noodles for those lovely egg ribbons or slide it in gently to poach. Both ways are dreamy.
- While everything mingles and cooks, grab your scallion and seaweed. Slice the scallion thinly and tear or cut up your seaweed into munchable pieces.
- Transfer your ramen to a serving bowl, putting the mussels on display like the treasures they are, and sprinkle generously with scallion and seaweed.
Cook’s Notes
The wonderful thing about this ramen is how forgiving it is. If you’re using dried seaweed snacks instead of gim, it works just as well. For those planning ahead, fresh mussels can be stored in the fridge for a day or two if they’re kept cool and moist. Once cooked, the ramen doesn’t fare well as leftovers (it tends to become a soggy sea of sadness), so plan to savor it in one sitting. If you find yourself with extra scallions or seaweed, these make great additions to salads or other soups you’ll whip up during the week.
Make It Your Own
- Swap out the mussels for shrimp or clams if that’s what you have on hand.
- Use crispy tofu instead of mussels for a delightful vegetarian spin that’s still packed with protein.
- If you’re not a fan of spicy, try mixing in a little coconut milk or cream to mellow out the heat.
- Want more greens? Toss in some spinach or bok choy just before the noodles finish cooking for extra nutrients.
If you try this, I’d love to hear how it turns out — drop a comment or tag me on social media! Whether you’re a ramen novice or a seasoned pro, this dish is bound to hit the spot. Enjoy your bowl of cozy goodness!
Related update: Neoguri (Spicy Seafood Ramen)
Related update: Braised Pork: Filipino Humba
Related update: Cauliflower, Leek and Cheddar Cheese Soup

Okay, so picture this: it’s a dreary Tuesday morning, and I’m dragging myself into the kitchen with one eye barely open, the other desperately seeking caffeine. The thought of another bland bowl of oatmeal is honestly more than I can handle. Enter: Tropical Breakfast Quinoa. This dish has become my sunshine in a bowl — it’s like a mini-vacation for your taste buds, without the hassle of airport security. It’s quick to whip up, comforting in all the right ways, and just fancy enough that you feel like you’ve got your life together (at least until lunch). Whether you’re rushing off to work or settling down for a lazy Sunday brunch, this vibrant breakfast will transport you to a sunny beach with every bite. No passport required!
Jump to Recipe
What You’ll Need
This recipe is basically a tropical party for your pantry. Chances are you already have most of this hanging around.
- 2 cups of cooked quinoa
- 1 cup of light coconut milk
- 1/2 cup of crushed pineapple (canned or fresh)
- 1/2 teaspoon of cinnamon
- 2 tablespoons of maple syrup
- 1/4 cup of toasted coconut
- 1/4 cup of chopped pecans
- 1/2 cup of sliced strawberries
- A drizzle of balsamic vinegar (trust me, it works!)
How to Make Tropical Breakfast Quinoa
- Start by grabbing a medium-sized pot and tossing in your cooked quinoa, coconut milk, crushed pineapple, cinnamon, and maple syrup. Give it a good stir until everything is well combined and all the flavors are mingling like guests at a really great party.
- Turn up the heat until the mixture reaches a gentle boil. Then, reduce the heat to a simmer. Let it cook for about 5 minutes, stirring occasionally. You’ll know it’s ready when your kitchen smells like a tropical paradise and the mixture has thickened just a bit.
- Once your quinoa is ready, grab a bowl and spoon in a generous serving of the warm, tropical mixture.
- Top it off with a sprinkle of toasted coconut and chopped pecans for some crunch. Add a handful of sliced strawberries for freshness, and finish with a surprising drizzle of balsamic vinegar. The vinegar might sound weird, but it ties everything together with a subtle tang that just works.
Cook’s Notes
Here’s the deal with this recipe: it’s super forgiving. Don’t stress if your pineapple is fresh or canned; either works. The key is just to make sure your quinoa is cooked ahead of time. If you’re not a morning person, like me, make the quinoa the night before and save yourself some hassle. Leftovers can be stored in the fridge and reheated gently on the stove with a splash more coconut milk. Just remember, the strawberries and balsamic drizzle are best added fresh, right before serving to keep things vibrant and pretty.
Make It Your Own
- Nut Swap: If pecans aren’t your jam, try almonds or walnuts for a different crunch.
- Fruit Fiesta: Swap out the strawberries for mango or kiwi for an even more tropical twist.
- Sweet Tooth: Add a dollop of Greek yogurt or a scoop of vanilla ice cream (yes, for breakfast) if you’re feeling indulgent.
- Spice It Up: Add a pinch of nutmeg or cardamom for a bit of extra warmth and depth.
If you try this, I’d love to hear how it turns out — drop a comment or tag me in your breakfast masterpiece! Catch you in the kitchen. 😊
Related update: Tropical Breakfast Quinoa
Related update: Neoguri (Spicy Seafood Ramen)
Related update: Cheese and Leek Strata
Related update: Easy Weekday Breakfast Muffins

Picture this: It’s a lazy Sunday morning, and I’m still in my pajamas with zero plans to change that anytime soon. The weather outside is just right, and there’s a soft playlist humming in the background. Suddenly, a craving hits—something sweet, something warm, something that will make the house smell like a dream. Doughnuts! But not just any doughnuts. These are the kind of doughnuts that make you feel like you’ve conquered a small kingdom right from your kitchen. They’re golden, fluffy, and just the right amount of sweet without veering into dessert territory. Best part? These homemade wonders come together without any fancy equipment or ingredients you don’t already have. So, if you’re ready to make your kitchen smell like a bakery and indulge in some deliciously fluffy doughnuts, let’s get started!
Jump to Recipe
What You’ll Need
Who doesn’t love it when a recipe calls for things you likely already have on hand? We’re talking pantry staples here, folks.
- 2 cups of flour
- 1/4 cup of honey
- 1/4 cup of powdered milk
- 1 teaspoon of salt
- 1 cup of warm water
- 2 1/4 teaspoons of yeast
How to Make Doughnuts
- Start by mixing the warm water with the yeast and honey in a bowl. Whisk it all together and let it sit for about 15 minutes, or until the mixture becomes foamy. This is your yeast proving it’s ready to party!
- In a separate bowl, combine the flour, salt, and powdered milk. Pour the bubbly yeast mixture into this bowl.
- Knead the dough until it feels elastic and not sticky. This is your chance to work out any stress—think of it as dough therapy. Cover the bowl and let the dough rise until it doubles in size, which usually takes 1-2 hours. Patience is key here!
- Once your dough has risen to the occasion, roll it out on a lightly floured surface, but don’t make it too thin—you want them fluffy, not flat. Cut the dough into circles. If you have a doughnut cutter, great! If not, improvise with a small bowl or the mouth of a plastic bottle for the center hole.
- Let these cut-out beauties rise for another 45 minutes. You’re in the home stretch now!
- Heat up your oil to fry the doughnuts until they’re a delicious golden brown on both sides. This is where the magic happens, and your kitchen starts smelling irresistible.
- For a Vanilla Glaze, whisk 1 cup of powdered sugar with 30ml of milk and a teaspoon of vanilla. Drizzle over your doughnuts and add sprinkles if you’re feeling fancy.
- For a Chocolate Glaze, simply drizzle some chocolate sauce over the doughnuts and top with sprinkles. Voilà!
Cook’s Notes
When you’re knee-deep in doughnut making, a few insider tips go a long way. First, make sure your water is warm, not hot, to keep that yeast alive and thriving. If the dough feels too sticky, dust your hands with a bit of flour rather than adding more to the dough itself, which can make the doughnuts tough. These doughnuts are best eaten fresh, but if you have leftovers (lucky you!), store them in an airtight container. Just pop them in the microwave for a few seconds to bring them back to life.
Make It Your Own
The best part about doughnuts? They’re a blank canvas waiting for your creative touch.
- Spiced Doughnuts: Add a teaspoon of cinnamon and a pinch of nutmeg to the flour mixture for a cozy twist.
- Lemon Zest: Mix in a tablespoon of fresh lemon zest to the dough for a zesty kick.
- Coconut Glaze: Use coconut milk instead of regular milk in the glaze and sprinkle shredded coconut on top.
- Maple-Bacon: Drizzle with a maple glaze and top with crispy bacon bits for a sweet and savory delight.
If you try this recipe, I’d love to hear how it turns out—drop a comment or tag me in your doughnut adventures! Trust me, once you start making these at home, you’ll be finding excuses to whip them up just about every weekend. Enjoy the sweet smell of success!
Related update: Doughnuts
Related update: Tropical Breakfast Quinoa

The other day, I found myself on a typical Wednesday evening with a sudden, fierce craving for something warm, cheesy, and a little herby. The kind of comfort food you can savor with a cup of tea while staring out the window on a rainy day. As my pantry was a bit sparse, I knew I needed something quick and easy, yet utterly satisfying. That’s when Savory Cheese Dill Scones came to mind. They’re those magical little bites that feel fancy enough for company but are secretively easy to pull together. The kind of bake that makes you feel like a kitchen genius with minimal effort. So, let’s get scone-ing!
Jump to Recipe
What You’ll Need
You might be surprised how many of these you already have in your kitchen! The usual suspects of baking are here, alongside the stars of the show: cheese and dill. Here’s what you’ll need:
- 2 cups unbleached flour
- 1/2 cup whole wheat flour
- 1 tablespoon baking powder
- 1/4 teaspoon baking soda
- 1/2 teaspoon black pepper
- 1 tablespoon sugar
- 1/2 cup cold butter, cut into small pieces
- 3/4 cup buttermilk
- 1/2 cup coarsely shredded cheddar cheese
- 1/2 cup cottage cheese
- 3 tablespoons chopped fresh dill
- 1 small shallot, finely chopped
How to Make Savory Cheese Dill Scones
- Preheat your oven to 375°F, placing the rack in the middle position. This gives your scones the perfect balance of heat, making them rise nicely while staying tender and light.
- In a large bowl, whisk together the unbleached flour, whole wheat flour, baking powder, baking soda, black pepper, and sugar. This dry mix is your scone foundation.
- Add the chopped butter into the flour mixture. Use your fingers or a pastry cutter to blend until the mix resembles coarse crumbs. You want to see little bits of butter peeking through.
- Stir in both the cheddar and cottage cheese, followed by the fresh dill and shallot. The aroma will start making promises your taste buds will thank you for later.
- Pour in the buttermilk and gently fold the mixture with a spatula until just combined. Avoid overmixing; a rough dough will yield tender scones.
- Turn the dough out onto a floured surface and knead gently, just enough to bring it together — about 4 or 5 times.
- Pat the dough into a circle, approximately 1 inch thick. Cut into 8 wedges and place them on a baking sheet lined with parchment paper.
- Bake in your preheated oven for 20-25 minutes, until the scones are golden and the kitchen smells like heaven. Serve warm and swoon.
Cook’s Notes
These scones are best on the day they’re made, but if you have leftovers (lucky you!), store them in an airtight container for a day or two. They make a delightful breakfast, slightly warmed with a pat of butter. You can also freeze the unbaked scones on a tray, then transfer them to a bag once they’re solid. Bake them from frozen, adding a few extra minutes to the cooking time. Common pitfalls? Overworking the dough or letting the butter soften too much. Keep it chill for the chillest scones!
Make It Your Own
Here are some delicious twists to customize your scones:
- Swap the dill for chopped chives if you’re in a more oniony mood.
- Use gruyere instead of cheddar for a rich, nutty take.
- Add a handful of crispy bacon bits for a savory delight.
- Mix in some sun-dried tomatoes for a Mediterranean vibe.
If you try this, I’d love to hear how it turns out — drop a comment or tag me! Remember, cooking is just like life: best when shared and savored. Enjoy your baking adventure!
Related update: Savory Cheese Dill Scones

It was one of those Tuesday nights when the fridge was looking scarily empty, and yet, the thought of braving the grocery store felt like too much. That’s when I spotted the lone zucchini in the crisper drawer, looking like it might be the hero of dinner. With some eggs, a handful of basil, and a bit of cheese, this Zucchini & Basil Frittata came to life. It’s like an Italian hug in a skillet, perfect for a weeknight when you need something cozy but also have about 20 minutes of energy left in you. The beauty of this frittata is how it transforms humble ingredients into something that feels a bit more special.
Jump to Recipe
What You’ll Need
You probably have most of these on hand, which makes this recipe a lifesaver when you need a quick meal. Here’s what you’ll gather:
- Zucchini
- Salt
- Green onions
- Basil
- Cheddar cheese
- Eggs
- Grapeseed oil (or olive oil)
How to Make Zucchini & Basil Frittata
- First, shred your zucchini using a box grater or food processor. Place the shredded zucchini into a colander set over a bowl. Sprinkle with a little salt and let it sit for about 20 minutes to draw out the water. If you’re short on time, give it a squeeze with your hands to speed up the process.
- In a large mixing bowl, combine the shredded zucchini, chopped green onions, fresh basil, and grated cheddar cheese. Season with a bit more salt and stir everything until it’s well mixed.
- Crack the eggs into a separate bowl and beat them until smooth. Pour the beaten eggs into the vegetable mixture and stir until everything is happily combined.
- Preheat your oven to 350°F (175°C). While it’s warming up, heat 1 to 2 tablespoons of grapeseed oil in a 10-inch cast iron skillet over medium heat, ensuring the bottom and sides are well-coated.
- Pour the egg and veggie mixture into the skillet, spreading it out evenly. Let it cook for about 3 to 5 minutes, until the edges start to set and cook.
- Carefully transfer the skillet to the preheated oven. Bake for 12 to 15 minutes, or until the center is set and a toothpick comes out clean.
Cook’s Notes
Let’s talk about getting the most out of your frittata. It’s crucial to get rid of excess water from the zucchini; otherwise, the frittata might end up watery. If you’re planning ahead, you can shred the zucchini the night before, which makes assembling the dish a breeze the next day. Leftovers can be stored in an airtight container in the fridge for up to three days. Reheat gently in a skillet or microwave when ready to enjoy again.
Make It Your Own
Feel free to get creative with this recipe! Here are some swap ideas:
- Switch out the cheddar cheese for feta for a tangy twist.
- Substitute basil with fresh dill or parsley for a different herbal note.
- Add sliced cherry tomatoes for a burst of color and sweetness.
- Replace the zucchini with shredded carrots or thinly sliced bell peppers if you’re out of zucchini.
If you try this, I’d love to hear how it turns out — drop a comment or tag me! Can’t wait to see your delicious frittatas!
Related update: Zucchini & Basil Frittata

Picture this: It’s a rainy Tuesday evening, I’m rummaging through my pantry, and the undeniable craving for something warm, sweet, and savory strikes. My go-to? Braised Pork: Filipino Humba. There’s something about the combination of tender pork and the rich, slightly sweet sauce that just screams comfort food. You’d think a dish with such bold flavors requires hours, but this gem is surprisingly weeknight-friendly. The magic lies in the balance of flavors, a little patience, and a hint of adventure. So, let’s dive in and make this delightful dish that captures the heart of Filipino cuisine in every bite.
Jump to Recipe
What You’ll Need
This recipe is the definition of pantry-friendly with a sprinkle of exotic intrigue. Chances are you already have most of what you need.
- Pork belly – the king of tender, juicy cuts
- Pork butt shoulder – adds depth with its marbled fat
- Whole garlic – because who doesn’t love garlic?
- Vinegar – for that tangy kick
- Brown sugar – sweetens the pot
- Soy sauce – umami galore!
- Bay leaf – subtle fragrance
- Rice wine – adds complexity
- Star anise – a whisper of licorice
- Oregano – for a hint of earthiness
- Fermented black beans – rich and salty
- Whole peanuts – crunchy texture
- Olive oil – just a splash
- Paprika – a dash for color
- Water – to bring it all together
- Fried bananas – for that tropical twist
How to Make Braised Pork: Filipino Humba
- In a large mixing bowl, combine the diced pork belly and pork butt shoulder with the whole garlic cloves, vinegar, brown sugar, soy sauce, and rice wine. Give it a gentle stir until everything is well-coated. Pop this into the fridge for about 30 minutes to marinate. You’ll want those flavors to mingle and get cozy.
- Once marinated, transfer everything into a heavy-bottomed saucepan. Add water, fermented black beans, and whole peanuts. Bring this beauty to a rolling boil, and then watch as the kitchen fills with an irresistible aroma.
- When it reaches a boil, dial the heat down to a gentle simmer. Stir in the bay leaf, star anise, oregano, paprika, and a drizzle of olive oil. Let it simmer away for about an hour. During this time, the sauce will thicken, and the pork will become melt-in-your-mouth tender.
- Five minutes before you’re ready to serve, decide if you want the fried bananas in the mix or on the side. Either way, they add a delightful sweetness that complements the savory sauce. Taste and adjust seasoning if needed. Then, plate up and dive in!
Cook’s Notes
Don’t rush the marinating process; it’s where the flavor magic truly begins. If you’re short on time, a quick 15-minute marinade can work, but longer is always better. When simmering, keep the lid on to retain moisture, but check occasionally to ensure nothing sticks. Should you find yourself with leftovers (unlikely as that may be!), store them in an airtight container in the fridge. The flavors deepen overnight, making it even better the next day. You can reheat on the stove or microwave, just add a bit of water to loosen the sauce if needed.
Make It Your Own
- Swap the pork for chicken thighs if you’re in the mood for poultry. They’ll soak up the sauce beautifully and cook a bit faster.
- For a vegetarian twist, replace the meat with crispy tofu. Just skip the marinating step and add the tofu in the last 15 minutes of cooking.
- If peanuts aren’t your thing, try adding cashews for a creamier texture.
- Want more heat? Toss in a sliced chili or two with the other spices.
If you try this, I’d love to hear how it turns out — drop a comment or tag me! Cooking is all about sharing the joy, and I’m excited to hear your thoughts and twists on this classic dish. Happy cooking!
Related update: Braised Pork: Filipino Humba
Related update: Zucchini & Basil Frittata
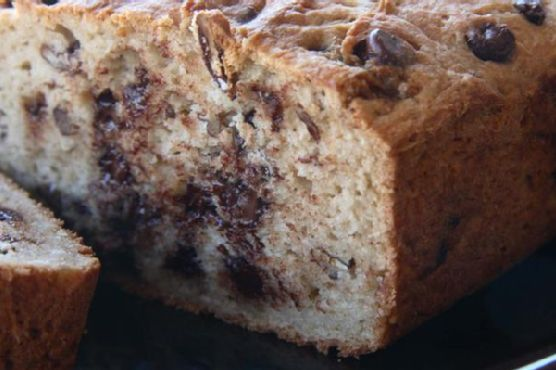
One chilly evening last fall, I found myself in the kitchen, craving something warm and comforting. My cupboard was a bit of a disaster, full of bits and bobs from baking adventures past. A half-used bag of gluten-free flour, some chocolate chips I had been furtively snacking on, and a nearly empty jar of pecans were calling to me. It was definitely a “use what you have” kind of night. As I pulled ingredients together, a gluten-free chocolate-pecan quickbread was born — a delightful mix of melty chocolate and crunchy pecans, wrapped in a tender, slightly sweet loaf. The best part? It made my entire kitchen smell like a cozy bakery on a crisp autumn day. If you’re looking for something that’s both indulgent and easy to whip up, this quickbread might just be your new favorite.
Jump to Recipe
What You’ll Need
The beauty of this quickbread lies in its simplicity. You likely have most of these ingredients on hand:
- Butter, for that irresistible richness
- Gluten-free flour, to keep things friendly for all tummies
- Sugar and brown sugar, for sweetness and a hint of molasses flavor
- Baking soda, to give our loaf a little lift
- Salt, to balance everything out
- Semi-sweet chocolate chips, because chocolate makes everything better
- Pecans, for that nutty crunch
- Eggs, to bind and add moisture
- Unsweetened applesauce, a sneaky moisture-hero
- Vanilla-honey Greek yogurt, for tang and tenderness
- Vanilla extract, because why not double down on vanilla goodness?
How to Make Gluten-Free Chocolate-Pecan Quickbread
- First things first, preheat your oven to 350 degrees Fahrenheit. Butter your trusty 5″x9″ loaf pan and set it aside.
- Gently heat the butter until it’s just melted. Set it aside to cool — you don’t want scrambled eggs in your bread!
- In a large bowl, combine the gluten-free flour, sugar, brown sugar, baking soda, and salt. Give it a good whisk to break up any lumps.
- Stir in the semi-sweet chocolate chips and pecans. This is starting to look delicious already, isn’t it?
- In a separate bowl, whisk together the eggs, applesauce, yogurt, vanilla extract, and the cooled melted butter.
- Pour the wet mixture into the dry ingredients and stir until just combined. Be gentle here; over-mixing is not our friend.
- Pour the batter into the prepared loaf pan, smoothing out the top with a spatula.
- Bake in your preheated oven for about an hour, or until a toothpick inserted into the center comes out clean. The top should be golden and your kitchen will smell heavenly.
- Allow the loaf to cool in the pan for 10 minutes before transferring it to a wire rack to cool completely. Patience, my friend!
Cook’s Notes
Let’s talk about some little tips that make a big difference. First, feel free to use whatever gluten-free flour blend you love; they all work here. Just make sure it has xanthan gum in it, or add a teaspoon if it doesn’t. If your loaf turns out a bit too crumbly, you may have over-mixed, which is easy to do. Treat the batter gently! As for storage, keep your quickbread in an airtight container at room temperature for up to three days. It also freezes beautifully — just slice and wrap individual pieces for easy snacking later.
Make It Your Own
Here’s where you get to play around:
- Swap the pecans for walnuts if you’re feeling nutty.
- Use dark chocolate chips for a more intense chocolate experience.
- Add a teaspoon of cinnamon to the dry mix for a warm, spicy touch.
- Substitute the vanilla-honey Greek yogurt for plain Greek yogurt and an extra teaspoon of honey if that’s what you have on hand.
If you try this, I’d love to hear how it turns out — drop a comment or tag me! Happy baking, and may your kitchen be filled with the sweet aroma of chocolate-pecan goodness.
Related update: Gluten-Free Chocolate-Pecan Quickbread
Related update: Candy Cane Chocolate Marshmallows
Related update: Braised Pork: Filipino Humba

Picture this: It’s a drizzly Saturday morning, and all you want is a breakfast that feels like a cozy hug. Well, these Caramelized Cranberries Coconut Pancakes are exactly that. They’re the perfect blend of sweet, tart, and fluffy, with a tropical twist that feels like a mini-vacation on your plate. I first whipped these up when I was rummaging through my pantry during a random craving for something sweet yet substantial. They came together almost effortlessly, and I realized they were the kind of pancakes that could impress without stress. Whether you’re feeding a crowd or just treating yourself, these bring a little sunshine to your morning, no matter the weather outside. Trust me, you don’t want to miss out on these.
Jump to Recipe
What You’ll Need
The beauty of this ingredient list is that it’s straightforward and likely already in your kitchen. Plus, we’re using a mix of whole wheat and coconut flour for that extra oomph.
- 1 cup fresh cranberries
- 1/4 cup brown sugar
- 1 tsp vanilla extract
- 1 cup coconut flour
- 1 cup whole wheat flour
- 2 tsp baking powder
- 1/2 tsp salt
- 2 large eggs
- 1 1/2 cups coconut milk
How to Make Caramelized Cranberries Coconut Pancakes
- Start by heating a nonstick saucepan over medium flame. Toss in the cranberries, brown sugar, and vanilla extract. Stir it up, cover, and let it cook for about 4-5 minutes until the cranberries are soft and juicy. Give them a good mash with your spoon. The aroma will be irresistible.
- Once done, take it off the flame and let it cool for a few minutes. This gives you time to gather the rest without burning your taste buds later.
- In a mixing bowl, combine all the dry ingredients: coconut flour, whole wheat flour, baking powder, and salt. Give them a good whisk so there are no clumps.
- In another bowl, beat the eggs and mix in the coconut milk. Now, add the cooled cranberry mixture to this and beat thoroughly. This will be your magic mixture.
- Pour the wet ingredients into the dry ones and mix just until combined. Let it stand for about 2 minutes, so everything gets cozy.
- Meanwhile, heat up your griddle or fry pan over medium flame and grease it with a cooking spray or oil of your choice. Let the sizzle tell you it’s ready.
- Pour a spoonful of the batter into the pan and shape it round. Let it cook for about 2 minutes or until you see those bubbles on the surface and the edges turning golden. Flip it over like a pro and cook the other side for another 2 minutes.
- Repeat with the remaining batter. Finish with a drizzle of your favorite sweetener and a dollop of cream if you’re feeling indulgent. Serve warm and dive in!
Cook’s Notes
Here’s the thing with pancakes: patience is your best friend. Don’t rush the process, and you’ll be rewarded with perfectly golden and fluffy bites. If you find your batter too thick (coconut flour can be tricky), feel free to add a splash more of coconut milk. Leftovers? They’re rare, but if you happen to have any, they store well in the fridge for a couple of days. Just pop them in the toaster or microwave to reheat.
Make It Your Own
- Nutty Twist: Add a handful of chopped walnuts or pecans to the batter for some crunch.
- Berry Swap: If cranberries aren’t your thing, try using blueberries instead for a sweeter pop.
- Dairy-Free Option: Use almond milk instead of coconut milk for a different nutty flavor.
- Spice It Up: Add a pinch of cinnamon or nutmeg to the dry ingredients for some warmth.
If you try this, I’d love to hear how it turns out. Drop a comment or tag me in your pancake adventures! Your kitchen is about to smell amazing.
Related update: Caramelized cranberries coconut pancakes
Related update: Doughnuts

Imagine it’s one of those mornings where you’ve hit snooze one too many times, and now you’re racing through your kitchen in a flurry of panic. Your brain is still in bed but your body is desperately trying to catch up with the clock. It’s on these mornings that my Protein Strawberry Smoothie saves the day. It’s a quick, delicious way to fuel up, with a creamy texture that feels indulgent but is packed with goodness. And let’s be real, anything that helps you avoid a hangry rage before your first meeting is worth its weight in gold. Plus, it’s got that perfect balance of sweet strawberries and the smooth richness of almond milk, making it a versatile favorite you’ll find yourself coming back to again and again.
Jump to Recipe
What You’ll Need
This ingredient list is short and sweet, with a few pantry staples you probably already have on hand. Here’s what you’ll need:
- 1 cup of almond milk
- 1 banana
- 1/2 cup of fat-free Greek yogurt
- 1 tablespoon of honey
- 1 cup of ice
- 1 cup of fresh strawberries
How to Make Protein Strawberry Smoothie
- Toss your strawberries, banana, and Greek yogurt into the blender. The fruit should be fresh and ripe, which will give you that vibrant flavor burst.
- Pour in the almond milk, which adds a nutty base that balances the sweetness from the fruit.
- Add the honey. You’ll want just enough for a hint of sweetness without overpowering the strawberries.
- Throw in the ice. This will give your smoothie that chilly, refreshing feel that’s perfect for a morning pick-me-up.
- Blend everything on high until it’s smooth and creamy. You’ll know it’s ready when you see a beautifully pink, frothy mixture without any lumps.
Cook’s Notes
Don’t get too caught up in exact measurements here. This smoothie is pretty forgiving, so feel free to adjust based on what you have. If your bananas are smaller, use two. If your strawberries are extra-large, maybe go a bit shy on the cup measurement. Also, I recommend using fresh strawberries, but if you only have frozen, that’s totally fine—just skip the ice so it doesn’t turn into a frozen block! If you’ve got a busy morning ahead, you can prep the fruit the night before and store it in the fridge, then just throw it all in the blender when you’re ready. Leftovers can be stored in the fridge for a day, but be sure to give it a good stir before drinking.
Make It Your Own
- Swap the almond milk for coconut milk for a tropical twist.
- Add a tablespoon of your favorite nut butter for some extra protein and a richer flavor.
- If you’re not a fan of honey, replace it with a splash of maple syrup or agave nectar.
- For a green boost, toss in a handful of spinach. It won’t change the taste much but will kick up the nutrition!
If you try this, I’d love to hear how it turns out — drop a comment or tag me in your smoothie pics! Nothing makes my day more than seeing someone enjoy a recipe that’s made their morning just a bit brighter. Enjoy, and here’s to more deliciously lazy mornings!
Related update: Protein Strawberry Smoothie
Related update: Caramelized cranberries coconut pancakes
Related update: Green Tea Fruit Medley Smoothie
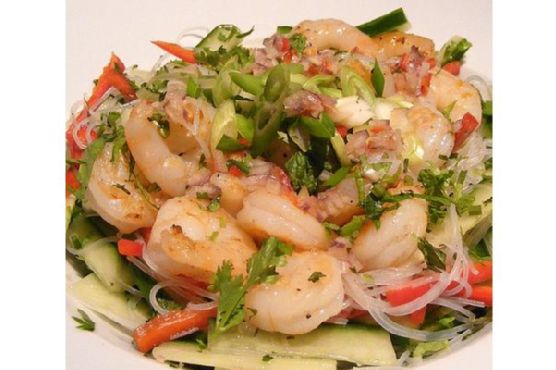
It was one of those evenings where the day seemed to stretch on forever, and all I could think about was something light yet satisfying to cap it off. The sun was setting, casting a warm glow across my kitchen, and I had a sudden craving for something that felt like a mini tropical escape. That’s when the idea of making Grilled Lemongrass Shrimp hit me. It’s the kind of dish that’s deceptively impressive but doesn’t demand hours of your time—perfect for a weeknight treat. The lemongrass adds a citrusy zing, while the chili paste gives it just the right kick. With a short marinating time, it’s as close to instant gratification as you can get with a grill. Plus, there’s something about skewering shrimp that feels like a fun party trick, even if it’s just you and your family.
Jump to Recipe
What You’ll Need
Chances are you already have most of this tucked away in your pantry, aside from maybe the lemongrass. But trust me, it’s worth hunting down for that signature aromatic flavor.
- Bamboo skewers soaked in water
- Lemongrass – the star of the show!
- Garlic
- Soy sauce
- Fish sauce
- Ground chili paste
- Pinch of salt
- Sugar
- Vegetable oil
- Water
- Raw shrimp – peeled and deveined
How to Make Grilled Lemongrass Shrimp
- Gather all your ingredients and a mixing bowl. Combine the chopped lemongrass, minced garlic, soy sauce, fish sauce, chili paste, salt, sugar, and a drizzle of vegetable oil in the bowl. Stir until it all comes together into a fragrant marinade.
- Add the shrimp into the bowl, making sure each one gets coated in the aromatic marinade. Let them marinate for 15 minutes—just enough time to sip on a cool drink and prep your grill.
- Thread the shrimp onto the soaked bamboo skewers. It’s all about that balance, so make sure the shrimp are spaced out evenly.
- Fire up your grill to moderate heat. If you’re using charcoal, wait until the coals are hot but no longer flaming. For a gas grill, a medium setting will do the trick.
- Place the skewers on the grill. The shrimp will cook quickly, so stay close. Turn them after about a minute or so, keeping an eye out for that beautiful pink hue and slightly charred edges. They’re done when they’re opaque and firm, about 2-3 minutes in total.
Cook’s Notes
If you’re like me and tend to get distracted, set a timer for the marinating and grilling time. You don’t want to overdo the shrimp—there’s nothing worse than rubbery seafood. If you don’t have a grill, a griddle pan on the stovetop works surprisingly well. Just make sure it’s hot enough to give you that lovely char. Leftovers, if you have any, are great cold in a salad or tossed into a noodle dish the next day.
Make It Your Own
- Swap the shrimp for chicken or tofu if you’re looking for a different protein. Adjust cooking times accordingly—chicken will take a bit longer.
- For a sweeter twist, add a splash of coconut milk to the marinade. It brings a creamy texture that pairs beautifully with the lemongrass.
- Throw in some chopped cilantro or mint into the marinade for a fresh, herbal kick.
- If you’re feeling brave, up the chili paste for more heat. Just have a cool drink at the ready!
If you try this, I’d love to hear how it turns out—drop a comment or tag me! It’s always fun to see how different kitchens bring their own flair to a dish. Enjoy your little slice of tropical heaven!
Related update: Grilled Lemongrass Shrimp

It was one of those dreary Tuesday afternoons — the kind that has you reaching for something sweet and comforting. And there I was, standing in my kitchen, craving something indulgent yet simple, when I remembered the half-used bag of sweetened coconut tucked away in the pantry. Enter: Coconut Macaroons with Chocolate Drizzle. This recipe is a delightful blend of chewy coconut goodness and rich chocolate, and the best part? You can whip it up with just a handful of ingredients. Perfect for last-minute cravings or impressing guests without breaking a sweat.
Jump to Recipe
What You’ll Need
Honestly, you probably have most of these ingredients lounging around your kitchen, just waiting to be transformed into something magical.
- 1 cup of flour
- 3 cups of sweetened coconut
- 1/2 teaspoon of salt
- 1 teaspoon of vanilla extract
- 1 can of sweetened condensed milk
- Optional: melted semi-sweet chocolate for drizzling
How to Make Coconut Macaroons With Chocolate Drizzle
- First, preheat your oven to 350°F (175°C). This is the moment to get your anticipation—and your oven—nice and toasty.
- In a large bowl, toss together the flour, coconut, and salt. Get in there with a spoon and make sure everything is mingling well.
- In a smaller bowl, mix the vanilla with the can of sweetened condensed milk. This mixture is your sweet elixir; make sure it’s smooth and unified.
- Pour the wet mixture into the dry ingredients. Stir together with a wooden spoon or your hands until you have a thick, sticky batter. Resist the urge to use a mixer unless it’s on the lowest speed—trust me on this, you don’t want a coconut explosion.
- Line your baking sheets with parchment paper. This will be your best friend for easy cleanup and perfect macaroons.
- Using a big spoon or an ice cream scooper, scoop generous mounds of batter onto the prepared baking sheets. Aim for consistency in size so they bake evenly.
- Bake in your preheated oven for about 20 minutes, keeping a close eye. You’re looking for that beautiful golden hue and a toasty coconut aroma.
- Once out of the oven, let them cool a bit. Then, get artsy with your melted chocolate drizzle. Alternatively, dip them halfway in chocolate for a more decadent treat.
Cook’s Notes
These macaroons are all about that rich, chewy texture with a hint of crispiness on the edges. Make sure not to over-mix your batter; just a few good turns to incorporate everything will do. If you make them ahead, they store well in an airtight container for up to a week—though I bet they’ll disappear much sooner. For freezing, allow them to cool completely and store in layers separated by parchment paper.
Make It Your Own
- Chocolate Lovers: Double up on the chocolate by mixing mini chocolate chips into the batter before baking.
- Nuts for Nuts: Add chopped almonds or macadamia nuts for a delightful crunch.
- Citrus Twist: Add a teaspoon of orange or lemon zest to the wet mixture for a zesty surprise.
- Spiced Up: Sprinkle a dash of cinnamon or nutmeg into the dry mix for a warm, spiced flavor.
If you try this, I’d love to hear how it turns out — drop a comment or tag me! Whether you stick to the classic or put your twist on it, these macaroons are sure to hit the sweet spot.
Related update: Coconut Macaroons With Chocolate Drizzle
Related update: Triple Chocolate Pumpkin Pie
Related update: Grilled Lemongrass Shrimp
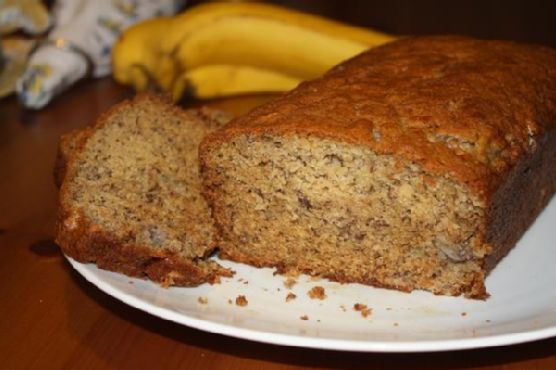
There’s something about the smell of banana bread baking that just instantly transports you to a place of comfort. It was a dreary Tuesday evening, and I was staring at a trio of overripe bananas languishing in my fruit bowl, a scene I suspect is familiar to many. These bananas had been begging to be transformed into something magical, and I knew just the recipe to do it. This traditional banana bread is like a warm hug in edible form—simple, reliable, and incredibly satisfying. Whether you’re trying to impress a last-minute guest or just want to make the most of those spotty bananas, this is the recipe you need. Plus, it’s almost guaranteed you have everything you need already in your pantry.
Jump to Recipe
What You’ll Need
Chances are you already have most of this sitting around your kitchen. We’re keeping it classic and straightforward, letting those bananas truly shine.
- Granulated sugar
- Unsalted butter, softened
- 2 large eggs
- 3 ripe bananas
- 2 tablespoons milk
- 1 teaspoon ground cinnamon
- 2 cups flour
- 1 teaspoon baking powder
- 1/2 teaspoon baking soda
- 1/2 teaspoon salt
How to Make Traditional Banana Bread
- Preheat your oven to 325 degrees F, and butter a 9x5x3-inch loaf pan. This is where your banana bread will take shape, so make sure it’s nicely coated to prevent sticking.
- Cream the sugar and butter in a large mixing bowl. You’re looking for a fluffy texture that feels as light as a cloud.
- Crack the eggs into the sugar mixture, one by one, beating well after each addition. This helps incorporate air, making your bread rise beautifully.
- In a small bowl, mash the bananas with a fork until they’re smooth but with a few small chunks remaining. Stir in the milk and cinnamon, giving your mixture that first hint of the aroma to come.
- In another medium-sized bowl, mix together the flour, baking powder, baking soda, and salt. It’s like setting the stage for a perfect bake.
- Fold the banana mixture into the butter mixture, stirring just until they’re happily combined.
- Add the dry ingredients to the banana mixture, stirring everything just until no flour pockets remain. Be careful not to overmix; we want tender, not tough.
- Pour the luscious batter into the prepared loaf pan. Level it out and pop it into the oven.
- Bake for about 1 hour, or until a toothpick inserted into the center comes out clean. The top should be golden and your kitchen will smell absolutely divine.
- Allow the bread to cool on a rack for at least 15 minutes before slicing. The waiting is hard, but worth it to avoid a crumbly mess when slicing.
Cook’s Notes
Banana bread is pretty forgiving, but a few pointers can make all the difference. Make sure your bananas are really ripe—almost too ripe to eat. They should be speckled brown and slightly mushy. This recipe works best with unsalted butter, but if all you have is salted, just reduce the salt a touch. If you’re baking ahead, this bread keeps well wrapped in foil or an airtight container for up to three days. You can also freeze slices individually for up to a month; just warm them in the oven before serving for that fresh-baked goodness.
Make It Your Own
Here are a few variations to consider if you’re feeling adventurous or just want to use up what you have:
- Swap the granulated sugar for brown sugar for a deeper, richer flavor.
- Fold in a handful of chocolate chips or chopped nuts right before baking for added texture and flavor.
- Add a teaspoon of vanilla extract when you add the eggs for a subtle twist that enhances the banana flavor.
- Replace the milk with Greek yogurt for a tangy touch and an extra moist crumb.
If you try this, I’d love to hear how it turns out—drop a comment or tag me! Whether you’re a seasoned baker or a newbie, this banana bread is sure to bring a bit of joy to your day. Happy baking!
Related update: Traditional Banana Bread
Related update: Coconut Macaroons With Chocolate Drizzle
Related update: Cheddar Chile Beer Bread
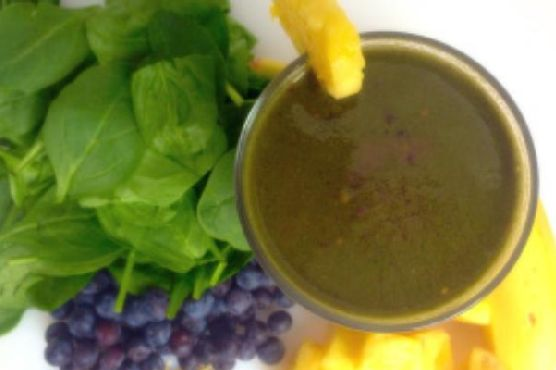
Okay, picture this: It’s a Wednesday morning, you hit snooze one too many times, and now you’re rushing around trying to make it out the door on time. You want something quick, healthy, and delicious to kick-start your day. That’s exactly how I stumbled upon this Tropical Banana Green Smoothie. I was in dire need of something refreshing and energizing, yet easy enough to throw together in less than five minutes. This smoothie checks all those boxes and more. It’s like a mini tropical vacation in a glass, and while it sounds fancy, it’s really just a few simple ingredients blended into creamy perfection. Trust me, one sip of this and you’ll forget all about your hectic morning. Jump to Recipe
What You’ll Need
This smoothie is all about using what you have on hand and embracing the refreshing flavors of the tropics. Chances are you already have most of this in your kitchen.
- 1 ripe banana
- 1 cup pineapple, fresh or frozen
- 1 cup coconut water
- 1/2 cup blueberries, fresh or frozen
- 1 scoop protein powder (vanilla works great!)
- 1 handful mixed spinach
How to Make TROPICAL BANANA GREEN SMOOTHIE
- Peel and slice the banana. If you’re using frozen pineapple, you can skip this step for now. If fresh, chop it into chunks. This will add to the creaminess.
- In a blender, add the banana slices and pineapple chunks. Pour in the coconut water. This will be the base of your smoothie, giving it that tropical flair.
- Throw in the blueberries and the scoop of protein powder. The blueberries add a pop of color and a hint of sweetness that complements the tropical vibes.
- Top it off with a generous handful of mixed spinach. Don’t worry; the taste is so mild, you won’t even notice it’s there (your body will, though!).
- Blend on high until the mixture is smooth and creamy. You’ll know it’s ready when there are no more visible chunks and the blend is a beautiful, vibrant green.
- Pour into your favorite glass, pop in a fun straw, and savor your mini-vacation in a cup.
Cook’s Notes
This smoothie is incredibly forgiving, so feel free to adjust the ingredient quantities to suit your taste. If you prefer a thicker smoothie, use frozen fruit or add a couple of ice cubes before blending. For those with a sweet tooth, a splash of honey or agave nectar can take it to another level.
It’s best enjoyed fresh, but if you’re in a time crunch, you can make it the night before. Just give it a quick stir or shake in the morning. As for leftovers, store in an airtight container in the fridge for up to one day; beyond that, it tends to lose its vibrancy and freshness.
Make It Your Own
- Swap the coconut water with almond milk for a creamier texture and a nutty undertone.
- Add a tablespoon of chia seeds before blending for an extra boost of fiber and omega-3s.
- Replace the spinach with kale for a more robust green flavor.
- For a tropical twist, throw in a few mint leaves during blending.
If you try this, I’d love to hear how it turns out — drop a comment or tag me! Let’s turn those chaotic mornings into something a bit more delightful, one smoothie at a time!
Related update: TROPICAL BANANA GREEN SMOOTHIE
Related update: Protein Strawberry Smoothie

It was one of those chaotic weeknights when I stumbled back into the kitchen after a long day, only to find a colorful assortment of bell peppers staring back at me from the fridge. They were practically begging to be turned into something delicious. I craved something that was not only quick to whip up but also packed with flavor and just the right amount of comfort. That’s when it hit me – a vibrant, flavor-packed Mexican stuffed bell pepper! These beauties come together effortlessly with a few pantry staples and a rotisserie chicken that I always keep around for emergencies. With a quick trip to the oven, they fill the house with mouthwatering aromas, and in no time, dinner is served. It’s the kind of recipe that feels satisfying and a little bit indulgent, but you know it’s good for you too.
Jump to Recipe
What You’ll Need
Let’s be honest, the best part about this recipe is that you probably have most of these ingredients on hand. Here’s what you’ll need to get started:
- Bell peppers (any color you love)
- Cooked brown rice
- Rotisserie chicken breast, shredded
- Frozen corn kernels
- Roma tomato, diced
- Red diced onion
- Black beans, drained and rinsed
- Fire roasted green diced chile
- Chili seasoning
- Minced garlic
- Low-fat shredded cheddar cheese
- Sour light cream
How to Make Blast Of Color Mexican Stuffed Bell Peppers
- Preheat your oven to 400 degrees. Feel that blast of warmth and imagine the deliciousness to come.
- In a large mixing bowl, toss together the cooked brown rice, shredded chicken, corn, diced tomato, onion, black beans, half a cup of shredded cheddar, garlic, green chile, and chili seasoning. Mix until everything is evenly distributed and it smells like a fiesta.
- Line a baking dish with foil and give it a spritz of cooking spray to prevent sticking.
- Take your bell peppers and cut off the tops, then scoop out the seeds. Stuff them generously with the chicken mixture, pressing it down to fill every nook and cranny, and heap some extra on top for good measure.
- Sprinkle each pepper with a bit more cheddar cheese, because let’s be honest, you can never have too much cheese.
- Bake in the preheated oven for 30 to 40 minutes. When the edges of the peppers start to bubble and the cheese turns golden, you know it’s ready.
- Let them cool just a bit, then top each pepper with a dollop of sour light cream before serving. Dig in and enjoy!
Cook’s Notes
These Mexican Stuffed Bell Peppers are a breeze to make, but here are a few things to keep in mind to ensure they turn out perfectly every time. Make sure your baking dish is large enough to fit all the peppers snugly so they stand upright and cook evenly. If you’re prepping ahead, you can mix the stuffing a day in advance and refrigerate it. Just stuff and bake when you’re ready. Leftovers can be stored in an airtight container in the fridge for up to three days. Just pop them in the microwave for a quick reheat.
Make It Your Own
Personalizing this dish is easy, and here are a few ideas to get you started:
- Swap the chicken for crispy tofu or ground turkey for a different protein option.
- Add a handful of fresh cilantro or parsley to the stuffing mix for a burst of freshness.
- If you like it spicy, throw in some jalapeño slices or a dash of hot sauce.
- Use quinoa instead of brown rice for a protein-packed alternative.
If you try this, I’d love to hear how it turns out — drop a comment or tag me! Cooking is all about experimenting and sharing, and I can’t wait to see your creations. Happy cooking!
Related update: Blast Of Color Mexican Stuffed Bell Peppers

It was one of those mornings where I woke up, looked in the fridge, and realized I was running late for everything. My mind was a blur, but my stomach was loud and clear: it needed something quick, filling, and delicious. Enter the Protein Strawberry Smoothie. It’s like a breakfast hug in a glass, bursting with fruity freshness and a protein punch to keep you going. Plus, it comes together in minutes — perfect for the days when your to-do list is longer than your patience.
Jump to Recipe
What You’ll Need
I bet you already have most of these ingredients in your kitchen, which means you’re just minutes away from sipping on this creamy delight. Here’s what you’ll need:
- 1 cup almond milk
- 1 banana
- 1/2 cup fat-free Greek yogurt
- 1 tablespoon honey
- 1 cup ice
- 1 cup fresh strawberries
How to Make Protein Strawberry Smoothie
- Start by grabbing your blender and pouring in the almond milk. This will be the liquid base that helps everything blend smoothly.
- Peel the banana and break it into chunks, tossing them into the blender. Bananas add natural sweetness and a creamy texture.
- Add the fat-free Greek yogurt next. This is where the protein magic happens, making your smoothie satisfying and rich.
- Drizzle in the honey. Adjust the sweetness to your taste, but remember, the strawberries will add their own sweetness too.
- Throw in the ice to make it nice and frosty. No one likes a warm smoothie!
- Top it all off with the fresh strawberries. They bring a bright, berry flavor that’s completely irresistible.
- Blend on high until everything is smooth and the color is a lovely pink. It should only take about a minute. Taste and adjust if needed — maybe a bit more honey or a splash of almond milk if it’s too thick.
- Pour into your favorite glass and enjoy immediately. It’s best when fresh and frothy!
Cook’s Notes
So, a few quick things to make sure your smoothie game is on point. If your smoothie ends up too thick, just add a bit more almond milk to loosen it up. Too thin? A few more ice cubes will do the trick. I love using fresh strawberries when they’re in season, but frozen will work in a pinch and will make your smoothie even thicker — just reduce the ice a bit. As for storing it, well, this smoothie is really best made fresh. If you do have leftovers, pop them in the fridge for a few hours, but know they might separate a bit (just give it a good shake or stir before drinking).
Make It Your Own
Here are a few fun ways to switch things up:
- Swap the almond milk for coconut milk for a tropical twist.
- Replace the banana with a ripe avocado for a lower-sugar, extra creamy version.
- Add a tablespoon of chia seeds before blending for an extra boost of fiber and omega-3s.
- Throw in a handful of spinach to sneak in some greens — you won’t even taste it!
If you try this, I’d love to hear how it turns out — drop a comment or tag me! Whether you’re sipping this on a bustling morning or a lazy afternoon, I hope it adds a bit of joy to your day. Cheers to easy, tasty nutrition!
Related update: Protein Strawberry Smoothie
Related update: TROPICAL BANANA GREEN SMOOTHIE
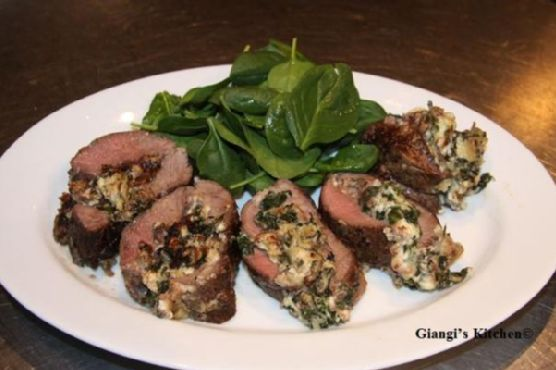
Picture this: It’s a Wednesday night, the middle of a chaos-filled week, and you’re staring into your fridge, half wishing it would magically produce something other than leftovers or eggs. It’s in moments like these that my Spinach and Gorgonzola Stuffed Flank Steak becomes a lifesaver. This dish is what I like to call my “secret weapon” — it sounds like a mouthful, but it’s surprisingly easy to pull together. Plus, it gives off this vibe that you’ve got your life together, even if you’re just trying to make it to the weekend. Think savory, melty gorgonzola mingling with fresh spinach, all hugged by a tender flank steak. Are you drooling yet?
Jump to Recipe
What You’ll Need
This ingredient list is refreshingly short and sweet, which means you can save that grocery store run for another day.
- Lean flank steak – the star of the show
- Olive oil – for a touch of richness
- Shallot – adds a subtle sweetness
- Spinach – fresh and vibrant
- Fresh bread crumbs – gives the stuffing a bit of body
- Blue gorgonzola – the cheesy dream
- Salt and pepper – the essentials
How to Make Spinach and Gorgonzola Stuffed Flank Steak
- Start by preheating your oven to 375°F (190°C). This is your cue to get things rolling.
- Next, butterfly the flank steak. Lay it flat on a cutting board and carefully slice through the long side, stopping just short of cutting it in half. If it’s already thin, just give it a good pounding with a mallet until it’s about 1/2 inch thick. Channel your inner chef!
- In a large skillet over medium heat, add 1 tablespoon of olive oil. Toss in the shallots and sauté until they’re soft and fragrant, about 2 minutes.
- Now, add the spinach. Stir occasionally until it’s just wilted, roughly 2 to 3 minutes. Transfer this mixture to a colander and let it cool. Once you can handle it, squeeze out all the moisture with your hands. Trust me, this step is crucial.
- In a medium bowl, combine the spinach with bread crumbs and gorgonzola. Season generously with salt and pepper, then mix it all up.
- Lay the steak flat on a piece of plastic wrap. Spread the spinach mixture evenly over it, leaving about a 1-inch border along the edges to prevent spillage.
- Using the wrap as an aid, roll the steak up starting from the edge closest to you. Press gently on the filling as you roll to keep it snug. Tie the roll with twine at 2 to 3-inch intervals to hold it all together.
- Season the outside with salt and pepper, then heat the remaining 2 tablespoons of olive oil in a large ovenproof skillet over medium-high heat.
- Sear the rolled steak on all sides until browned, about 2 minutes per side. The aroma will be irresistible at this point!
- Transfer the skillet to your preheated oven and roast for 20 to 25 minutes. When done, the steak should be firm but springy to the touch.
- Remove the steak from the oven, tent it with aluminum foil, and let it rest for 10 minutes. This is the hardest part – the waiting.
- When ready to serve, snip off the twine and slice into 1/2 inch to 1-inch thick slices. Voila! Enjoy your culinary masterpiece.
Cook’s Notes
If you’re looking for a shortcut, ask your butcher to butterfly the steak for you — major time saver. This dish works beautifully for make-ahead dinners. Simply prep it up to the point of searing, then chill in the fridge for a few hours, or even overnight. When you’re ready, just pick up where you left off. Leftovers (if there are any!) will keep well in the fridge for a couple of days and are delightful cold in a sandwich or reheated gently.
Make It Your Own
- Not a fan of gorgonzola? Swap it for creamy goat cheese or a melty Havarti.
- Add a layer of prosciutto before spreading the spinach mixture for an extra savory note.
- Throw in some chopped sun-dried tomatoes or roasted red peppers for a pop of color and flavor.
- For a twist, replace the spinach with arugula or baby kale — it’ll add a peppery kick.
If you try this, I’d love to hear how it turns out — drop a comment or tag me! Cooking should be fun, so let’s keep the conversation going. Happy cooking, friends!
Related update: Spinach and Gorgonzola Stuffed Flank Steak
Related update: Blast Of Color Mexican Stuffed Bell Peppers
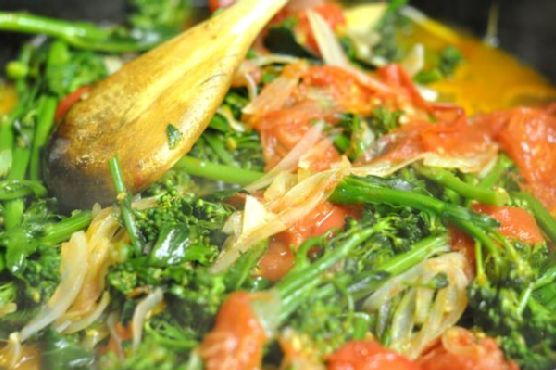
It was one of those chaotic Tuesday nights, you know the kind — the kind where you’re juggling an imaginary circus of tasks, and the last thing you want is to spend hours cooking. As I stood in front of my fridge, eyeing the contents like a puzzle to solve, I remembered a dish that never fails to impress with minimal effort: Broccoli Rabe and Breaded Veal Scallopini. This dish is a lifesaver when you want something that tastes gourmet but doesn’t require a culinary degree to execute. It’s elegant enough for company but simple enough for a weeknight. Plus, there’s the unbeatable combination of crispy breaded veal and the slightly bitter yet vibrant broccoli rabe. Trust me, it’s a winner.
Jump to Recipe
What You’ll Need
I promise, this recipe won’t send you on a scavenger hunt through specialty stores. Chances are you already have most of the ingredients hanging out in your pantry or fridge. Here’s what you’ll need:
- Broccoli rabe
- Veal scallopini
- Butter
- Egg
- Olive oil
- Salt and pepper
- Yellow onion
- Garlic clove
- Tomatoes
- Bread crumbs
How to Make Broccoli Rabe and Breaded Veal Scallopini
- Start by giving the broccoli rabe a good wash. Steam it for about three minutes until it’s a vibrant green but still slightly crisp. If you have a pressure cooker, even better — it’ll be done in no time.
- While your broccoli rabe is steaming away, thinly slice the yellow onion and peel a clove of garlic. Cut the garlic in half and remove the stem to mellow out the flavor a bit.
- In a deep pan, heat up a tablespoon or two of olive oil over medium heat. Toss in the sliced onion and garlic. Sauté until the onions are translucent and the garlic is fragrant — about three minutes.
- Add the steamed broccoli rabe to the pan, cover with a lid, and let it cook for another few minutes. You want it tender but not mushy.
- Chop your tomatoes into wedges — four or eight, depending on their size. Add them to the pan and let everything mingle together for a few more minutes. Season with salt and pepper to taste.
- Now for the veal: Season each piece of veal scallopini with salt and pepper. Dip them first in a beaten egg, and then in bread crumbs, ensuring an even coat.
- In another pan, melt a generous amount of butter over high heat. Pan-fry the veal for 1-2 minutes on each side until they’re golden brown and crispy. Remember, these cook fast, so keep an eye on them!
- Serve the veal alongside the broccoli rabe and tomato medley, and enjoy the delicious symphony of flavors.
Cook’s Notes
Okay, let’s chat about some practical stuff. First, make sure your veal is patted dry before you start breading. It helps the crumbs stick better. If you’re making this ahead of time, prepare the broccoli rabe and tomatoes and store them in the fridge. You can bread the veal in advance, but I recommend frying it right before serving for the best crunch. Leftovers? Store them in an airtight container and gently reheat them in a pan — the microwave will make the breading soggy, and nobody wants that.
Make It Your Own
Here are a few fun ways to switch things up!
- Swap the veal for chicken breast if that’s what you have on hand, or if you prefer chicken. It works just as well!
- Want a vegetarian version? Use crispy tofu as your protein. Just press it well before breading and frying.
- Add a sprinkle of grated Parmesan cheese to the bread crumbs for an extra layer of flavor.
- If you’re not a fan of broccoli rabe, broccolini or kale are great substitutes.
If you try this, I’d love to hear how it turns out — drop a comment or tag me! Cooking is all about experimenting and making it your own, so don’t hold back. Happy cooking!
Related update: Broccoli Rabe and Breaded Veal Scallopini
Related update: Spinach and Gorgonzola Stuffed Flank Steak
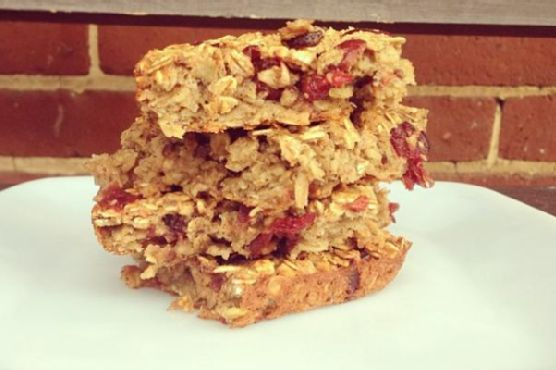
It was one of those chilly mornings where you can feel the crisp air sneaking through the cracks of your window, coaxing you to stay under the covers just a little longer. But I was determined to start my day with something as cozy as my fluffy duvet, so I headed to the kitchen and decided to whip up my favorite baked oatmeal with dried cranberries. This dish is a lifesaver on mornings like this because it warms you up from the inside out, and it’s the kind of comfort food that feels indulgent but is actually packed with goodness. Plus, it’s the perfect dish to make ahead for the week. I promise, once you try this, you’ll look forward to getting out of bed just for breakfast!
Jump to Recipe
What You’ll Need
I love this recipe because it uses a lot of pantry staples, so you’re likely to have everything you need on hand. Plus, the dried cranberries add that tart sweetness that makes every bite exciting.
- 2 cups dry oats
- 1 teaspoon baking powder
- 1/2 teaspoon cinnamon
- 1/4 teaspoon salt
- 1/4 cup flaxseeds
- 2 cups unsweetened almond milk
- 2 bananas, mashed
- 2 eggs
- 1 teaspoon vanilla extract
- 1/2 cup dried cranberries
How to Make Baked Oatmeal with Dried Cranberries
- Preheat your oven to 350°F (175°C). The warmth will soon fill your kitchen, hinting at the deliciousness to come.
- In a large bowl, mix the dry ingredients: oats, baking powder, cinnamon, salt, and flaxseeds. Stir until everything is well combined — you want the flaxseeds to be evenly distributed like little gems throughout the mixture.
- In a separate bowl, whisk together the liquid ingredients: almond milk, mashed bananas, eggs, and vanilla extract. Whisk until the mix is smooth and the bananas are well incorporated, giving off that lovely, sweet aroma.
- Pour the liquid mixture into the bowl of dry ingredients. Mix well until the oats are thoroughly soaked and the liquid is evenly distributed. It’ll look like a big, soupy mess, but don’t worry, it will transform in the oven!
- Spray a baking pan with non-stick spray. The size of the pan will determine the thickness of your oatmeal bars, so choose according to your preference. I like using a smaller pan to get thicker, chewier bars.
- Pour the oatmeal mixture into the prepared pan, spreading it out evenly. Sprinkle the dried cranberries on top, letting them fall where they may, like little jewels peeking out.
- Bake in the preheated oven for about 45 minutes. Your kitchen will be filled with the warm, inviting scent of cinnamon and baked bananas. The top should be slightly golden and the center set.
- Once done, let it cool for a few minutes before slicing. This is the hardest part, but trust me, it’s worth the wait!
- Enjoy a slice warm, perhaps with a drizzle of maple syrup or a dollop of yogurt. It’s the breakfast that feels like a hug!
Cook’s Notes
Baked oatmeal is incredibly forgiving, but here are a few tips to ensure success. If you prefer a sweeter dish, add a bit of honey or maple syrup to the wet ingredients. You can store leftovers in the fridge for up to a week, making it perfect for meal prep. Just reheat a slice in the microwave or enjoy it cold — both ways are delicious. If you find your oatmeal drying out in the fridge, a splash of almond milk during reheating will do the trick.
Make It Your Own
Here’s where you can let your creativity shine! Try these variations to keep things exciting:
- Swap the dried cranberries for chopped nuts like almonds or walnuts for a bit of crunch.
- If you’re a chocolate lover, sprinkle in some dark chocolate chips for a decadent twist.
- Trade the almond milk for coconut milk for a tropical flair.
- Mix in some fresh berries like blueberries or raspberries before baking for a burst of freshness in every bite.
If you try this, I’d love to hear how it turns out — drop a comment or tag me! I’m always excited to see how you make these recipes your own. Enjoy every cozy, delicious bite!
Related update: Baked Oatmeal with Dried Cranberries
Related update: Broccoli Rabe and Breaded Veal Scallopini
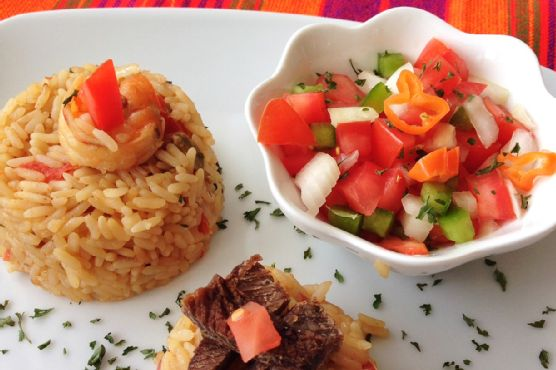
Imagine this: It’s a chilly, rainy Tuesday evening. I find myself staring into the pantry, looking for something that’ll warm me up, body and soul. I have a little bit of goat meat, some shrimp, and the usual pantry spices that seem to multiply on their own. It’s the kind of evening where you crave something comforting yet exotic, and that’s when I remember — Kenyan Pilau. It’s one of those dishes that sounds impressive but is surprisingly easy to whip up. The aroma of spices mingling in the kitchen is enough to make anyone feel like a culinary genius. It’s perfect for those weeknight dinners when you want to travel the world without leaving your kitchen.
Jump to Recipe
What You’ll Need
Trust me, you might already have most of these ingredients lounging around in your kitchen. And the hero of this dish? It’s definitely the spice mix that elevates a simple rice dish into something extraordinary.
- Black whole peppercorns
- Cardamom pods
- Cinnamon sticks
- Cumin seed powder
- Garlic
- Ginger
- Goat meat
- Onion
- Canned rice
- Salt
- Dressed shrimp
- Tomatoes
- Cooking spoon of vegetable oil
How to Make Kenyan Pilau
- First things first, season the goat meat well and set it to boil. You want it tender, like it’s ready to fall apart at a fork’s touch.
- Chop all your lovely spices — the peppercorns, cardamom, and cinnamon — and give them a good crush. This is where the magic begins.
- Heat up a cooking spoon of vegetable oil in a large pot. Once shimmering, add sliced onions and sauté until they’re golden brown, releasing a sweet aroma.
- Add the boiled goat meat to the pot and allow it to brown just a little more. This is where you start to feel like a pro chef.
- Stir in your crushed spices, letting their fragrance envelop the kitchen. Then, add the canned rice and chopped tomatoes, giving it all a good mix.
- Add the dressed shrimp, followed by 2 cups of water. Reduce the heat, cover the pot, and let it steam. Check occasionally to ensure the water is absorbed and the rice is soft.
- Once the rice is perfect, increase the heat briefly and stir to ensure all those fantastic spices soak into every grain. Serve it alongside some Kachumbari or your favorite salad.
Cook’s Notes
A little tip from my kitchen to yours: make sure you don’t rush the browning process for the onions and meat. This step deepens the flavor of the Pilau significantly. Feel free to make this dish ahead of time; it keeps well in the fridge for a couple of days and the flavors only get better. Just reheat gently to avoid drying out the rice. If you find yourself with leftovers, good news — they can be transformed into a delightful next-day lunch. Just add a splash of water before reheating to fluff it up again.
Make It Your Own
This Kenyan Pilau is versatile, and you can easily tweak it to fit your taste or pantry stock. Here are some ideas:
- Swap the goat meat with chicken thighs for a lighter version.
- Substitute the shrimp with crispy tofu for a vegetarian twist.
- Try using basmati rice instead of canned rice for a fragrant touch.
- Add a handful of peas or diced carrots for a pop of color and sweetness.
If you try this, I’d love to hear how it turns out—drop a comment or tag me! Whether you stick to the script or make it your own, this Kenyan Pilau is set to be a crowd-pleaser at your table. Happy cooking!
Related update: Kenyan Pilau

Last Tuesday, I found myself staring into the fridge, bleary-eyed and snacky, with no desire to make a big mess just to satisfy my craving for something warm and flavorful. It had been a long day, and I needed dinner on the table, pronto. Arroz Con Pollo fluttered into my mind like an old friend, promising that elusive blend of comfort and flavor without a crazy ingredient list. This one-pan wonder is my go-to for nights like this—simple enough for a weeknight but lush enough to feel like a treat. The best part? It’s a forgiving recipe that lets you swap in what you’ve got on hand. By the way, if you’re in a rush to get cooking, feel free to skip down to the nitty-gritty details. Jump to Recipe
What You’ll Need
Chances are you already have most of these ingredients chilling in your pantry or fridge. Here’s what you’ll need:
- Butter
- Garlic
- Chicken breasts
- Ground cumin
- Ground coriander
- Ground turmeric
- Onion
- Bell pepper
- Canned diced chiles
- Canned diced tomatoes
- Chicken broth
- Dried rice
- Chili powder
- Salt
- Onion powder
- Shredded cheese
How to Make Arroz Con Pollo
- Start by heating up a large pan over medium heat and melt the butter until it’s sizzling and aromatic.
- Add in the garlic and let it cook for a minute or two until it’s fragrant and just beginning to turn golden.
- Sprinkle your chicken breasts with about 1 teaspoon each of cumin, coriander, and turmeric. Toss them in the pan and cook until they are browned and cooked through.
- Once your chicken is fully cooked, toss in your diced onion and bell pepper. Stir everything together and let it cook for about 3 to 4 minutes, until the veggies start to soften.
- Add the canned diced chiles and tomatoes. Give it all a good swirl to combine.
- Pour in the chicken broth and add your dried rice. Stir gently to make sure everything is mixed well.
- Sprinkle in the remaining teaspoon of chili powder, cumin, and coriander, along with the salt, remaining turmeric, and onion powder.
- Bring the pot to a boil, then reduce the heat to low, cover, and let it simmer for about 20 minutes or until the liquid is absorbed and the rice is cooked through.
- Once the rice is perfectly cooked, grab your shredded cheese and generously spread it across the top of the chicken mixture. Cover the pan for another minute or two until the cheese melts completely into gooey perfection.
Cook’s Notes
This dish is pretty forgiving, but here are a few notes to make sure it’s perfect every time. If you find your pan getting too dry during the simmer, just add a splash more broth or water. Cooking times can vary depending on your stove and pot, so keep an eye on the rice after the 15-minute mark. If you want to prep ahead, you can chop your veggies and measure out spices a day in advance. Leftovers? They make for an awesome lunch the next day. Just store it in an airtight container in the fridge, and it should be good for about 3 days.
Make It Your Own
- Swap the chicken for crispy tofu if you’re leaning towards a plant-based version.
- Add in some frozen peas or corn during the last 5 minutes of cooking for a pop of sweetness and color.
- Use smoked paprika instead of chili powder for a smoky twist.
- Throw in some sliced olives or capers for a briny kick.
If you try this, I’d love to hear how it turns out—drop a comment or tag me! Remember, the best part of cooking is making it your own, so don’t be afraid to tweak it to suit your taste buds.
Related update: Arroz Con Pollo
Related update: Kenyan Pilau