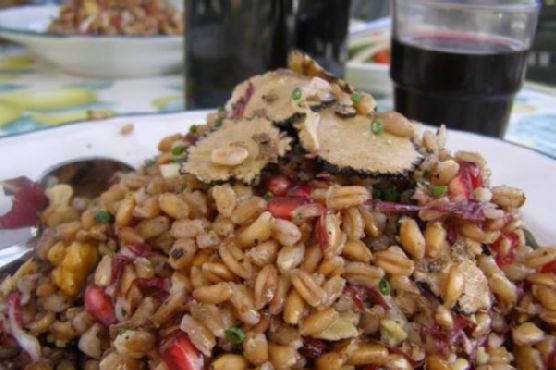
Fall Farro Salad with Pomegranate, Walnut & Truffles | Made by Meaghan Moineau

Picture this: It’s a chilly autumn afternoon, and the sun is giving off that perfect golden hue that makes everything look like a scene from a cozy movie. I’m in my kitchen, wearing my favorite oversized sweater, and I’ve got a craving for something that’s nourishing but still feels like a treat. Enter my Fall Farro Salad with Pomegranate, Walnut & Truffles. This dish is like a warm hug in a bowl, combining nutty farro with the sweet burst of pomegranate seeds, the earthy depth of truffles, and the crunch of walnuts. It’s quick to put together yet tastes like you’ve been working on it for hours. Trust me, this is the kind of recipe that’ll make you feel like a culinary genius with minimal effort, perfect for a weeknight dinner or impressing friends over a weekend brunch.

Jump to Recipe

What You’ll Need

Most of these ingredients are pantry staples, so you might already find them hanging out in your kitchen. Here’s what you need:

  • 1 cup farro
  • 2 tablespoons extra virgin olive oil
  • 1/2 cup pomegranate seeds
  • 1/2 cup walnuts, roughly chopped
  • 1/2 head radicchio, thinly sliced
  • 1/4 cup parmesan, shaved into ribbons
  • 2 teaspoons truffle oil
  • 1 tablespoon balsamic vinegar
  • Salt and pepper, to taste

How to Make Fall Farro Salad with Pomegranate, Walnut & Truffles

  1. Start by cooking the farro. Bring a pot of cold water to a boil, and don’t forget a pinch of salt. Toss in the farro and let it cook until it’s al dente—about 20-35 minutes. You can throw in some vegetable scraps like a carrot or celery if you have them, for added flavor.
  2. While the farro is cooking, toast the walnuts in a dry pan over medium heat. Keep an eye on them and stir occasionally, until they are golden and fragrant. This should take about 5-7 minutes.
  3. In a large bowl, whisk together the extra virgin olive oil, balsamic vinegar, truffle oil, salt, and pepper. This dressing will bring everything together with a luxurious, earthy flavor.
  4. Once the farro is cooked, drain it and let it cool slightly. You want it warm but not piping hot.
  5. Add the farro to the bowl with the dressing, and toss until the grains are well coated.
  6. Gently fold in the radicchio, pomegranate seeds, and toasted walnuts. The radicchio should soften slightly but remain crisp.
  7. Finish by shaving parmesan over the top. A vegetable peeler works wonders here for creating beautiful, thin ribbons.
  8. Give it a final toss, taste, and tweak any seasoning if needed. Serve immediately and enjoy the medley of textures and flavors!

Cook’s Notes

Let’s chat about farro for a second. It’s an ancient grain, so it’s a bit chewy and wonderfully nutty, perfect for absorbing all the dressing goodness. Don’t skimp on toasting your walnuts; it makes a world of difference in flavor. Also, this salad is best enjoyed fresh, but if you do have leftovers, they’ll keep in the fridge for a day or two. Just know that the radicchio might lose some of its crispness.

Make It Your Own

Feel free to remix this salad with these variations:

  • Swap the farro for quinoa if you’re looking for a gluten-free option.
  • Substitute walnuts with pecans or almonds for a different nutty dimension.
  • Try adding grilled chicken or crispy tofu for extra protein.
  • Love cheese? Crumbled goat cheese can replace parmesan for a tangier kick.

If you try this, I’d love to hear how it turns out — drop a comment or tag me! Cooking is all about experimenting and finding what makes your taste buds sing, so have fun with it.

Related update: Fall Farro Salad with Pomegranate, Walnut & Truffles

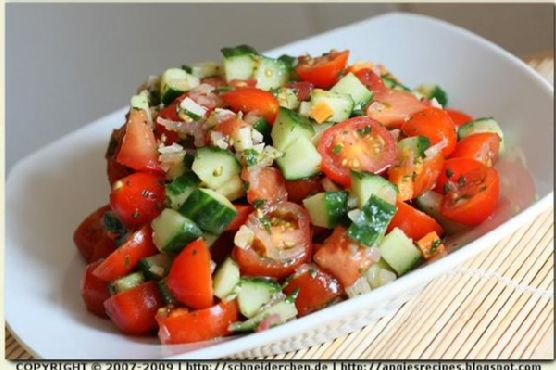
Related update: Tomato Cucumber Salad

Lebanese Kibbeh | Made by Meaghan Moineau

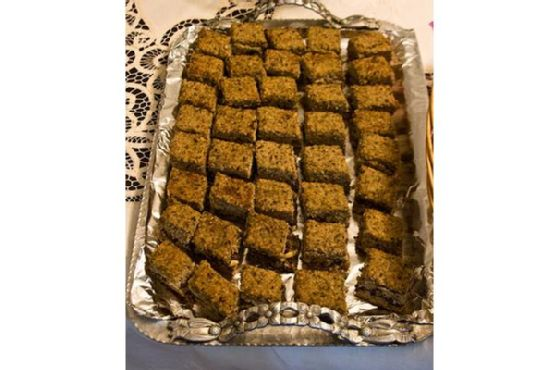
It was one of those Wednesday evenings when the fridge was looking particularly uninspiring, and the clock was ticking towards dinner time. My mind was juggling between making something quick, comforting, and, above all, something that wouldn’t require a trip to the store. That’s when I decided to whip up some Lebanese Kibbeh. With its flavorful layers and aromatic spices, it’s like a warm hug on a plate — quick to assemble but impressive enough to make you feel like a culinary genius. Plus, the way the kitchen smells when the Kibbeh is baking — it’s like a magical invitation for everyone to gather around the table.

Jump to Recipe

What You’ll Need

This recipe is all about transforming simple pantry staples into something extraordinary. Chances are you already have most of these ingredients in your kitchen:

  • Bulgur wheat
  • Lean lamb or veal
  • Onion
  • Butter
  • Salt & fresh ground pepper
  • Sprig of mint
  • Oil
  • Pine nuts
  • Ground allspice
  • Greek yogurt
  • Garlic
  • Fresh mint for garnish

How to Make Lebanese Kibbeh

  1. Preheat your oven to 375°F. This way, it’ll be all set to go once your Kibbeh is assembled.
  2. Rinse the bulgur wheat in a sieve, giving it a good shake to remove excess moisture. You want it just damp enough to blend easily.
  3. In a large bowl, mix the lean lamb, onion, and a generous seasoning of salt and pepper. Roll up your sleeves and knead until you get a thick, cohesive paste.
  4. Add the rinsed bulgur wheat into this meaty mix and blend until it’s all one happy family.
  5. For the filling, warm up the oil in a frying pan over medium heat. Toss in the onion and cook until golden — your kitchen should start smelling amazing right about now.
  6. Add the lamb (or veal) to the pan, stirring occasionally until the meat is evenly browned. Mix in the pine nuts, allspice, and another hit of salt and pepper.
  7. Oil up a large baking dish and spread half of the lamb and bulgur mix over the bottom, pressing it down to form an even layer.
  8. Spoon the flavorful filling over this layer, then top it with the remaining lamb and bulgur mix. Press down firmly using the back of a spoon for a neat finish.
  9. Pour melted butter over the top. Trust me, this is the magic touch that will make the top irresistibly crispy and golden.
  10. Slide the dish into the oven and let it bake for 40-45 minutes, until the top is beautifully browned.
  11. While the Kibbeh bakes, whip up a quick yogurt dip by blending Greek yogurt with crushed garlic. Spoon it into a bowl and finish with a sprinkle of chopped mint.
  12. Once your Kibbeh is done, let it rest for a few minutes before cutting into squares or rectangles. Serve it up with the yogurt dip and garnish with fresh mint.

Cook’s Notes

Making Kibbeh is quite forgiving if you keep a few things in mind. First, if your bulgur wheat seems too wet, squeeze it out well; excess moisture can make the layers soggy. When layering in the baking dish, press down firmly to avoid any air pockets. If you’re making this ahead, you can easily assemble the dish a few hours earlier, refrigerate it, and pop it in the oven when you’re ready. Leftovers are delightful for lunch the next day — simply reheat in a low oven until warm.

Make It Your Own

  • Switch up the protein: Try using ground beef or turkey for a different twist on the classic.
  • Nutty variation: Substitute the pine nuts with chopped walnuts for a different crunch.
  • Spice it up: Add a pinch of cayenne pepper to the filling if you like a bit of heat.
  • Herbaceous twist: Mix in some chopped parsley or cilantro into the bulgur mix for extra freshness.

If you try this, I’d love to hear how it turns out — drop a comment or tag me on social media! Cooking is all about sharing the love, after all. Let me know what variations you come up with. Happy cooking!

Related update: Lebanese Kibbeh

Related update: Japanese Chicken Donburi

Shrimp & Orzo | Made by Meaghan Moineau

Shrimp & Orzo: A Mediterranean Delight

Intro

There’s something magical about the way food can transport us to different places and times. I remember the first time I tasted a dish similar to Shrimp & Orzo. It was during a family vacation to a small coastal village in Greece. The sun was setting, casting a golden hue over the ocean, and our table was filled with an array of delightful dishes prepared by the local chef. Among them was a humble orzo dish, its aroma mingling with the salty sea breeze. That evening, with laughter echoing around us and the sun dipping below the horizon, I fell in love with the simplicity and freshness of Mediterranean cuisine.

Why You’ll Love It

Shrimp & Orzo is a perfect blend of flavors and textures that will transport you to the Mediterranean coast. This dish is not only delicious but also visually stunning, with vibrant colors from the tomatoes, parsley, and shrimp. It’s a one-pan wonder that makes for easy cleanup, and it’s packed with protein, making it a satisfying meal that’s perfect for any night of the week. The combination of orzo, fresh vegetables, and succulent shrimp creates a dish that’s both comforting and elegant, ideal for family dinners or casual entertaining.

Ingredients

  • 1 can (14 oz) diced canned tomatoes
  • 1/2 cup dry white wine
  • 1 fennel bulb, thinly sliced
  • 4 oz feta cheese, crumbled
  • 1/4 cup fresh parsley, chopped
  • 4 cloves of garlic, minced
  • Lemon wedges, for serving
  • 3 cups low sodium chicken broth
  • 2 tbsp olive oil
  • 1 medium onion, diced
  • 1 tsp dried oregano
  • 1 cup orzo pasta
  • 1/4 tsp crushed red pepper flakes
  • Salt & pepper, to taste
  • 1 lb fresh shrimp, peeled and deveined
  • 1/2 cup water

Instructions

  1. Preheat your oven to 400 degrees F. Season the shrimp with salt and pepper, then refrigerate until ready to use.
  2. Grease a 13×9-inch baking dish and set aside.
  3. In a large Dutch oven, heat the olive oil over medium-high heat until shimmering.
  4. Add the onion, fennel bulb, and 1/2 teaspoon salt. Cook, stirring frequently, until the vegetables are softened and starting to brown around the edges, about 10 minutes.
  5. Add the minced garlic and crushed red pepper flakes, cooking until the garlic is very fragrant, about 30 seconds.
  6. Add the orzo to the vegetables, stirring to coat it with oil. Continue cooking, stirring fairly constantly, for about 4 minutes, until the orzo has a toasty aroma.
  7. Add the white wine, cooking and stirring constantly until the liquid evaporates, about 1 minute.
  8. Add the chicken broth, water, and 1/4 teaspoon salt. Bring to a boil, then reduce the heat and simmer until the orzo is almost completely tender, about 12 minutes, stirring fairly constantly.
  9. Remove from heat and stir in the shrimp, tomatoes, oregano, and 1 tablespoon of parsley.
  10. Transfer the mixture to the prepared baking dish and sprinkle with the crumbled feta cheese.
  11. Bake for about 20 minutes, until the shrimp is cooked through and the feta is lightly browned.
  12. Before serving, sprinkle with the remaining parsley and fennel fronds. Serve warm with lemon wedges on the side.

Tips

  • Ensure the shrimp are peeled and deveined to save prep time.
  • If you prefer a milder flavor, reduce the amount of crushed red pepper flakes.
  • Use fresh ingredients for the best flavor, especially the parsley and fennel.

Variations & Substitutions

Feel free to experiment with this recipe! You can substitute the shrimp with chicken or tofu for a different protein option. If you’re not a fan of fennel, try using bell peppers or zucchini instead. For a more robust flavor, consider adding sun-dried tomatoes or olives. If you prefer a creamy texture, stir in a tablespoon of heavy cream before baking.

Storage

Leftovers can be stored in an airtight container in the refrigerator for up to 3 days. To reheat, place the desired amount in a microwave-safe dish and heat until warmed through. You can also reheat in the oven at 350 degrees F for about 10 minutes.

FAQ

Can I make this dish ahead of time?

Yes, you can prepare the dish up to the point of baking. Cover and refrigerate for up to a day. When ready to serve, bake in a preheated oven as directed, adding a few extra minutes if necessary to ensure it’s heated through.

What can I serve with Shrimp & Orzo?

This dish pairs well with a simple green salad or roasted vegetables. A crusty loaf of bread would also complement the meal nicely, perfect for soaking up any extra sauce.

Is there a substitute for feta cheese?

If you’re not a fan of feta, you can substitute with goat cheese or even a mild cheese like mozzarella for a different flavor profile.

Nutrition

This dish is a balanced meal offering protein from the shrimp, carbohydrates from the orzo, and a variety of vitamins and minerals from the vegetables. If you’re watching sodium intake, ensure you use low sodium broth and adjust the added salt to your taste.

Conclusion

Shrimp & Orzo is a delightful meal that brings the essence of Mediterranean cooking to your home. It’s a dish that’s easy to prepare, yet impressive enough to serve at a dinner party. Whether you’re reminiscing about past travels or simply seeking a comforting and flavorful meal, this recipe is sure to become a favorite. Enjoy the taste of the Mediterranean in every bite and share this delicious dish with your loved ones.

Related update: Shrimp & Orzo

Related update: Creamy Polenta with Egg, Arrabiata & Bacon

Greek-Style Baked Fish: Fresh, Simple, and Delicious | Made by Meaghan Moineau

Greek-Style Baked Fish: Fresh, Simple, and Delicious

Intro

The aroma of freshly baked fish mingling with herbs and spices transports me back to my grandmother’s kitchen in Athens. Every Sunday, our family gathered around a long wooden table, eagerly awaiting the unveiling of her signature dish: Greek-style baked fish. With its flaky texture, vibrant colors, and Mediterranean flavors, this dish was a celebration of simplicity and freshness. Today, I’m thrilled to share this cherished recipe with you, bringing a little piece of my heritage to your table.

Why You’ll Love It

This Greek-style baked fish recipe is a treasure trove of flavors and textures that will make your taste buds dance. Not only is it easy to prepare, but it’s also a healthy and nutritious meal that fits perfectly into a busy lifestyle. The combination of fresh vegetables, herbs, and tender fish creates a dish that’s both light and satisfying. Whether you’re looking for a quick weeknight dinner or an impressive dish for entertaining, this recipe is sure to become a family favorite.

Ingredients

  • Fish fillets
  • Red onion, sliced
  • Bell pepper, sliced
  • Tomato, chopped
  • Feta cheese, crumbled
  • Dried basil
  • Dried oregano
  • Olive oil
  • White wine
  • Salt & pepper
  • Lemon wedges
  • Fresh basil and/or oregano, for garnish
  • Cooked rice, for serving

Instructions

  1. Preheat the oven to 450 degrees F.
  2. Choose an oven-proof baking dish that your fish will fit in without overlapping and spray it with cooking spray.
  3. Lay the fish fillets in the baking pan in a single layer, season with salt and pepper.
  4. Top the fish with red onion and bell pepper.
  5. Sprinkle with dried basil and oregano, the tomato, and the feta cheese.
  6. Drizzle the white wine and olive oil over top.
  7. Grind some fresh pepper over the top.
  8. Bake uncovered for about 12 – 15 minutes or until the fish flakes easily with a fork.
  9. Squeeze the lemon wedges over the cooked fish, garnish with the fresh basil and/or oregano.
  10. Serve with hot cooked rice.

Tips

For the best results, use fresh fish fillets. If possible, visit your local fish market to find the freshest catch of the day. Don’t skimp on the herbs; they add a delightful aroma and flavor that make this dish truly special. If you’re using frozen fish, make sure it’s fully thawed and patted dry before cooking to ensure even baking.

Variations & Substitutions

This recipe is incredibly versatile. You can substitute the fish fillets with salmon or cod for a different twist. If you’re not a fan of feta cheese, try using goat cheese or ricotta for a milder taste. For a spicier kick, add a pinch of red pepper flakes before baking. Vegetarians can replace the fish with hearty vegetables like eggplant or zucchini for a delicious plant-based version.

Storage

Store any leftovers in an airtight container in the refrigerator for up to 3 days. To reheat, place the fish in a preheated oven at 350 degrees F until warmed through. Avoid microwaving, as it can make the fish rubbery. This dish is also great for meal prepping; simply prepare the ingredients ahead of time and bake when ready to serve.

FAQ

Can I use frozen fish for this recipe?

Yes, you can use frozen fish fillets. Just make sure they are completely thawed and patted dry before you start preparing the dish. This will help them cook evenly and maintain the right texture.

What type of white wine should I use?

Choose a dry white wine like Sauvignon Blanc or Pinot Grigio for this recipe. The acidity and flavor profile of these wines complement the dish’s ingredients without overpowering them.

Is there a non-alcoholic substitute for white wine?

If you prefer not to use wine, you can substitute it with an equal amount of chicken or vegetable broth. Add a splash of lemon juice for a hint of acidity that mimics the wine’s flavor.

Nutrition

This Greek-style baked fish is a nutritious meal packed with protein, healthy fats, and essential vitamins and minerals. Fish is an excellent source of omega-3 fatty acids, which are beneficial for heart health. The vegetables provide fiber and antioxidants, while olive oil adds a dose of healthy monounsaturated fats. Serve with brown rice for added fiber and a complete meal.

Conclusion

Infused with the flavors of the Mediterranean, this Greek-style baked fish is a simple yet exquisite dish that honors tradition while offering modern convenience. It’s a recipe that brings people together, creating lasting memories around the dining table. I hope this dish becomes as cherished in your home as it has been in mine. Bon appétit, or as we say in Greece, Kali Orexi!

Related update: Greek-Style Baked Fish: Fresh, Simple, and Delicious

Related update: Blackened Cajun Chicken

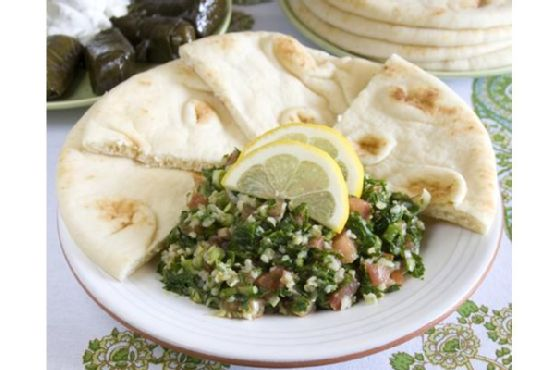
Lebanese Tabouleh | Made by Meaghan Moineau

Lebanese Tabouleh: A Taste of Tradition

Intro

There’s something magical about a dish that transports you back to a cherished memory, and Lebanese Tabouleh does just that for me. I recall warm summer afternoons spent in my grandmother’s kitchen, the air filled with the aroma of fresh herbs and the sound of laughter. She would meticulously chop parsley and mint, telling stories of her childhood in Lebanon. This dish is more than a salad; it is a celebration of heritage, a blend of fresh ingredients that come together in harmony. Today, I’m excited to share this traditional recipe with you, hoping it brings as much joy to your kitchen as it has to mine.

Why You’ll Love It

Lebanese Tabouleh is not just a salad; it’s a symphony of flavors that sings of freshness and vitality. You’ll love its vibrant colors and the way the ingredients complement each other to create a refreshing and satisfying dish. Whether you’re looking for a healthy side or a light main course, this tabouleh is perfect for any occasion. It’s vegan, packed with nutrients, and incredibly easy to make. The combination of lemon juice and olive oil dressing ties everything together, making each bite a delightful experience.

Ingredients

  • 1 cup cooked bulgur wheat
  • 2 bunches flat leaf parsley
  • 1 bunch fresh mint
  • 4 green onions
  • Juice from 2 lemons
  • 1/4 cup olive oil
  • 4 roma tomatoes

Instructions

  1. Remove stems from parsley and mint.
  2. Rinse leaves in a colander and pat dry with a paper towel.
  3. In a food processor, pulse parsley and mint until finely chopped.
  4. Transfer the chopped herbs to a large mixing bowl.
  5. Add green onions, tomatoes, and bulgur wheat to the bowl; stir to combine.
  6. Toss the mixture with lemon juice and olive oil.
  7. Refrigerate for an hour before serving to let the flavors meld together.
  8. Serve on its own or with pita bread. Enjoy!

Tips

For the best flavor, use the freshest ingredients you can find. Make sure to dry the parsley and mint thoroughly after washing to prevent the salad from becoming watery. If you don’t have a food processor, you can finely chop the herbs by hand—just be patient and take your time!

Variations & Substitutions

While traditional tabouleh uses bulgur wheat, you can substitute with quinoa for a gluten-free option. Feel free to add cucumbers or bell peppers for extra crunch and color. If you prefer a milder onion flavor, substitute green onions with shallots.

Storage

Tabouleh can be stored in an airtight container in the refrigerator for up to three days. Keep in mind that the herbs will lose their vibrant color over time, so it’s best enjoyed fresh. If the salad becomes too dry, simply toss it with a little more olive oil and lemon juice before serving.

FAQ

Can I prepare tabouleh in advance?

Yes, you can prepare tabouleh a day in advance. In fact, allowing the salad to sit for a few hours or overnight in the refrigerator can enhance the flavors as they meld together. Just make sure to store it in an airtight container to keep it fresh.

What can I serve with tabouleh?

Tabouleh pairs wonderfully with a variety of dishes. Serve it alongside grilled meats, roasted vegetables, or as part of a mezze platter with hummus, baba ganoush, and warm pita bread. It’s also a great topping for falafel wraps or as a refreshing side for a summer barbecue.

Nutrition

This tabouleh is a nutritious powerhouse. Packed with fresh herbs, it’s rich in vitamins A, C, and K. The bulgur wheat provides a good source of fiber and protein, while the olive oil offers heart-healthy fats. Overall, it’s a delicious way to enjoy a variety of nutrients in one dish.

Conclusion

Lebanese Tabouleh is more than just a salad; it’s a beloved dish that brings people together. Whether you’re sharing it with family and friends or enjoying it on a quiet afternoon, it’s a recipe that promises freshness, flavor, and a touch of nostalgia. I hope it becomes a favorite in your home, just as it is in mine. Happy cooking!

Related update: Lebanese Tabouleh

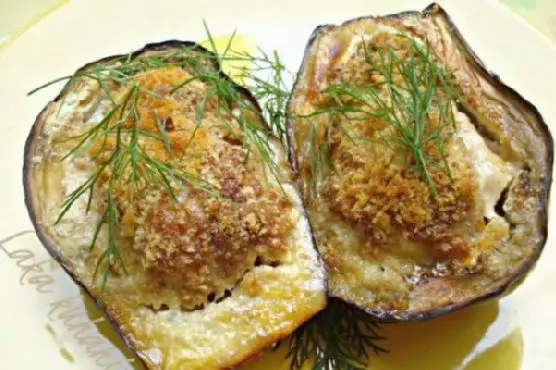
Mediterranean eggplants | Made by Meaghan Moineau

Mediterranean Eggplants: A Savory Delight

Intro

There’s something magical about the aroma of Mediterranean cooking wafting through the kitchen, instantly transporting you to a sun-drenched terrace overlooking the azure sea. For me, Mediterranean eggplants are more than just a dish; they are a nostalgic journey back to my grandmother’s kitchen, where I first learned the art of transforming simple ingredients into a feast for the senses. I remember the warmth of the oven, the sound of fresh sausage sizzling in the pan, and the gentle hum of my grandmother’s voice as she shared her culinary wisdom. Today, I’m excited to share this beloved recipe with you, hoping it brings as much joy to your home as it has to mine.

Why You’ll Love It

This Mediterranean eggplant dish is a delicious blend of flavors and textures that will tantalize your taste buds. Whether you’re a fan of Mediterranean cuisine or just looking to try something new, here are a few reasons why you’ll fall in love with this recipe:

  • Rich Flavor: The combination of feta and mozzarella cheese with savory sausage creates a deep, satisfying flavor profile.
  • Healthy Ingredients: Eggplants are a nutritious base, rich in fiber and antioxidants, perfect for a balanced diet.
  • Versatile: This dish can be served as a main course or a side, making it perfect for family dinners or potlucks.
  • Easy to Make: With straightforward instructions and common ingredients, this dish is accessible for both novice and experienced cooks alike.

Ingredients

  • 2 large eggplants
  • 200g fresh sausage (without casing)
  • 1 egg
  • 100g feta cheese, crumbled
  • 100g mozzarella cheese, shredded
  • 50g almonds, chopped
  • 1 tablespoon ground pepper
  • 4 tablespoons bread crumbs
  • 3 tablespoons olive oil
  • Fresh dill for garnish

Instructions

  1. Preheat your oven to 230°C (450°F). Line a baking sheet with parchment paper.
  2. Wash the eggplants and remove the stems. Cut them in half lengthwise.
  3. Using a spoon, carefully scoop out the middle of each eggplant half, leaving a thick border to create a shell.
  4. In a large bowl, combine the sausage meat, egg, feta cheese, mozzarella cheese, chopped almonds, and ground pepper. Mix until well combined.
  5. Stuff each eggplant shell with the sausage mixture, pressing gently to ensure it fills the eggplant evenly.
  6. Sprinkle each stuffed eggplant with about a tablespoon of bread crumbs and drizzle with olive oil.
  7. Place the stuffed eggplants on the prepared baking sheet and bake for 25 minutes, or until the tops are golden brown and the eggplants are tender.
  8. Remove from the oven and let cool slightly. Serve hot, garnished with fresh, chopped dill.

Tips

For the best results, follow these tips:

  • Choose firm and shiny eggplants without blemishes for the freshest taste.
  • If you’re short on time, prepare the stuffing mixture in advance and refrigerate until ready to use.
  • Adjust the seasoning to your taste, adding more pepper or herbs if desired.

Variations & Substitutions

This recipe is versatile and can be adapted to suit various dietary preferences:

  • Vegetarian: Replace the sausage with cooked quinoa or lentils for a vegetarian version.
  • Nut-Free: Omit the almonds and add extra cheese or breadcrumbs for a nut-free option.
  • Cheese Alternatives: Use goat cheese or ricotta instead of feta for a creamier texture.

Storage

To store leftover Mediterranean eggplants, follow these steps:

  • Allow the eggplants to cool completely before storing.
  • Place them in an airtight container and refrigerate for up to 3 days.
  • For longer storage, wrap each eggplant half in plastic wrap and freeze for up to one month. Reheat in the oven before serving.

FAQ

Can I prepare Mediterranean eggplants in advance?

Yes, you can prepare the stuffing mixture a day in advance and store it in the refrigerator. When you’re ready to cook, simply stuff the eggplants and bake as directed.

What can I serve with Mediterranean eggplants?

This dish pairs well with a simple green salad, roasted vegetables, or a side of couscous or quinoa for a complete meal.

How do I know when the eggplants are done?

The eggplants are done when they are tender to the touch, and the stuffing is golden brown on top. You can insert a fork or knife to check the tenderness of the eggplant flesh.

Nutrition

This dish is a wholesome and hearty meal that provides a good balance of protein, healthy fats, and fiber. While the exact nutritional content will vary based on portion sizes and specific ingredient brands, a serving of Mediterranean eggplants offers approximately:

  • Calories: 300
  • Protein: 20g
  • Fat: 18g
  • Carbohydrates: 15g
  • Fiber: 5g

Conclusion

Mediterranean eggplants are more than just a dish; they are a celebration of flavors and the joy of cooking. Whether you’re hosting a dinner party or enjoying a quiet evening at home, this recipe is sure to impress. I hope you and your loved ones enjoy these Mediterranean eggplants as much as my family and I have over the years. Happy cooking, and may your kitchen be filled with warmth and delightful aromas!

Related update: Mediterranean eggplants

Related update: Creamy White Chili

Related update: Stir Fry Mushrooms In Butter, Garlic And White Wine

Shrimp & Orzo | Made by Meaghan Moineau

Shrimp & Orzo: A Delightful Mediterranean Dish

Intro

There’s something magical about the aroma of simmering herbs and the salty sea breeze that instantly transports me back to my childhood summers spent on the Mediterranean coast. My grandmother used to prepare a similar dish, filling the kitchen with warmth and love. Today, I’m excited to share my version of this nostalgic recipe, Shrimp & Orzo, a flavorful blend of tender shrimp, aromatic vegetables, and creamy feta cheese, perfect for a cozy family dinner or a special occasion.

Why You’ll Love It

This Shrimp & Orzo recipe is a delightful combination of flavors and textures. The savory taste of shrimp blends beautifully with the earthy fennel and the tangy notes of feta cheese, creating a symphony of flavors in every bite. It’s a one-pan meal, making it easy to prepare and perfect for busy weeknights. Plus, it’s a wholesome dish that can be enjoyed by everyone, with plenty of room for customization.

Ingredients

  • 1 can diced tomatoes
  • 1/2 cup dry white wine
  • 1 fennel bulb, diced
  • 4 ounces feta cheese, crumbled
  • 1/4 cup fresh parsley, chopped
  • 4 cloves of garlic, minced
  • Lemon wedges, for serving
  • 2 cups low sodium chicken broth
  • 2 tablespoons olive oil
  • 1 large onion, diced
  • 1 teaspoon dried oregano
  • 1 cup orzo pasta
  • 1/2 teaspoon crushed red pepper flakes
  • Salt & pepper, to taste
  • 1 pound shrimp, peeled and deveined
  • 1 cup water

Instructions

  1. Preheat your oven to 400°F (200°C).
  2. Season the shrimp with salt and pepper, and refrigerate until ready to use.
  3. Grease a 13×9-inch baking dish and set aside.
  4. In a large Dutch oven, heat the olive oil over medium-high heat until shimmering.
  5. Add the diced onion, fennel bulb, and 1/2 teaspoon of salt. Cook, stirring frequently, until the vegetables are softened and start to brown around the edges, about 10 minutes.
  6. Add the minced garlic and crushed red pepper flakes. Cook and stir until the garlic becomes very fragrant, about 30 seconds.
  7. Add the orzo to the vegetables, stirring to coat the orzo with oil. Continue cooking and stirring for about 4 minutes, until the orzo has a toasty aroma.
  8. Add the white wine, cooking and stirring constantly until the liquid evaporates, about 1 minute.
  9. Pour in the chicken broth, water, and 1/4 teaspoon salt. Bring the mixture to a boil, then reduce the heat and simmer until the orzo is almost tender, about 12 minutes. Stir fairly constantly to prevent sticking, adjusting the heat as necessary to maintain a lively simmer.
  10. Remove the pot from heat and stir in the seasoned shrimp, diced tomatoes, oregano, and 1 tablespoon of parsley.
  11. Transfer the mixture to the prepared baking dish and sprinkle with crumbled feta cheese.
  12. Bake for about 20 minutes, until the shrimp is cooked through and the feta is lightly browned.
  13. Before serving, sprinkle with the remaining parsley and reserved fennel fronds. Serve with lemon wedges on the side.

Tips

To ensure the shrimp is perfectly cooked, keep an eye on them in the oven. They should be pink and opaque, which usually takes about 20 minutes. Also, feel free to adjust the level of crushed red pepper flakes to suit your spice preference.

Variations & Substitutions

If you don’t have fennel on hand, you can substitute it with celery for a milder flavor. For a dairy-free version, simply omit the feta cheese or replace it with a dairy-free alternative. If you prefer a vegetarian dish, swap the shrimp for chickpeas or artichoke hearts, and use vegetable broth instead of chicken broth.

Storage

Store any leftovers in an airtight container in the refrigerator for up to three days. To reheat, place the desired portion in a baking dish and warm in the oven at 350°F (175°C) for about 10-15 minutes, or until heated through. You can also reheat in the microwave, though the texture may vary slightly.

FAQ

Can I use frozen shrimp for this recipe?

Yes, you can use frozen shrimp. Just make sure to thaw them completely and pat them dry before seasoning and adding them to the dish.

What type of white wine should I use?

A dry white wine such as Sauvignon Blanc or Pinot Grigio works best for this recipe, adding a subtle depth of flavor without overpowering the dish.

Is it possible to make this dish gluten-free?

Absolutely! Simply substitute the orzo with a gluten-free pasta option of your choice, and ensure that all other ingredients are certified gluten-free.

Nutrition

This Shrimp & Orzo dish is packed with protein from the shrimp, healthy fats from the olive oil, and essential vitamins and minerals from the vegetables and herbs. It’s a balanced meal that can fit into a healthy diet. For a more detailed nutritional breakdown, consider using a nutrition calculator based on the specific brands and quantities you use.

Conclusion

Whether you’re reminiscing about sun-soaked Mediterranean vacations or simply looking for a comforting yet elegant meal, this Shrimp & Orzo recipe is sure to satisfy. It’s a dish that brings together the essence of the sea and the earth, with a hint of nostalgia in every bite. I hope it becomes a cherished part of your meal repertoire, just as it has in mine. Enjoy!

Related update: Shrimp & Orzo

Related update: Turkey Enchilada Bake

Mediterranean eggplants | Made by Meaghan Moineau

Mediterranean Eggplants: A Flavorful Journey

Intro

Ah, the flavors of the Mediterranean! They remind me of warm summer evenings spent on my grandmother’s porch, the sun setting over the sea, and the air filled with the scent of grilled vegetables. One of my fondest memories is her Mediterranean eggplants, a dish that perfectly captures the essence of a region that celebrates simplicity and bold flavors. Today, I’m thrilled to share this recipe with you, hoping it brings a touch of Mediterranean warmth to your home.

Why You’ll Love It

This Mediterranean eggplant recipe is a delightful blend of savory and creamy textures, punctuated by the nutty crunch of almonds. It’s a dish that’s as aromatic as it is delicious. The combination of feta and mozzarella cheeses adds a rich, tangy depth, while the fresh dill brings a hint of freshness. Whether you’re a seasoned cook or a beginner in the kitchen, you’ll find this recipe straightforward and immensely satisfying.

Ingredients

  • 2 large eggplants
  • 100g fresh sausage, without the casing
  • 1 egg
  • 100g feta cheese, crumbled
  • 100g mozzarella cheese, shredded
  • 50g almonds, chopped
  • 1 tablespoon bread crumbs
  • 2 tablespoons olive oil
  • 1 teaspoon pepper
  • Fresh dill for garnish

Instructions

  1. Preheat your oven to 230°C (450°F).
  2. Wash the eggplants thoroughly. Cut off the stems and then halve them lengthwise.
  3. Scoop out the middle of each eggplant half, creating a cavity for the filling.
  4. In a bowl, mix together the sausage meat, egg, feta cheese, mozzarella cheese, chopped almonds, and pepper until well combined.
  5. Using a spoon, stuff each eggplant half generously with the sausage and cheese mixture.
  6. Sprinkle approximately one tablespoon of breadcrumbs over each stuffed eggplant half and drizzle with olive oil.
  7. Place the stuffed eggplants on a baking sheet lined with parchment paper.
  8. Bake in the preheated oven for 25 minutes or until the eggplants are tender and the tops are golden brown.
  9. Serve hot, garnished with freshly chopped dill, chives, or basil.

Tips

For the best results, choose eggplants that are firm and glossy. If your eggplants are particularly large, you may need to adjust the baking time slightly. To avoid a soggy texture, ensure your stuffing mixture is not too wet by draining excess moisture from the ingredients before mixing.

Variations & Substitutions

If you’re looking for a vegetarian option, you can substitute the sausage with cooked quinoa or lentils. For a nut-free version, simply omit the almonds or replace them with sunflower seeds. Feel free to experiment with different herbs like oregano or parsley to suit your taste preferences.

Storage

These stuffed eggplants can be stored in an airtight container in the refrigerator for up to 3 days. To reheat, place them in an oven preheated to 180°C (350°F) until warmed through. Avoid microwaving to maintain the texture of the eggplants.

FAQ

Can I prepare the stuffing in advance?

Yes, you can prepare the stuffing mixture a day ahead. Store it in an airtight container in the refrigerator and use it when you’re ready to stuff the eggplants.

What side dishes go well with this dish?

This Mediterranean eggplant pairs beautifully with a simple green salad or a side of couscous. You might also enjoy it with a slice of crusty bread to soak up the juices.

Is this dish suitable for freezing?

While it is possible to freeze the stuffed eggplants, it is best enjoyed fresh. Freezing may alter the texture of the eggplants. If you do freeze, thaw them thoroughly and reheat in the oven for the best results.

Nutrition

This dish is a nutritious choice, packed with protein from the eggs and sausage, healthy fats from the olive oil and almonds, and fiber from the eggplants. It’s a balanced meal that fits well into a Mediterranean diet, known for its heart-healthy benefits.

Conclusion

These Mediterranean eggplants are more than just a meal; they’re a journey to the sun-drenched coasts of the Mediterranean. I hope this recipe brings as much joy to your table as it has to mine. Whether you’re cooking for family, friends, or just yourself, savor each bite and let the flavors transport you to a place where food is celebrated and shared with love. Bon appétit!

Related update: Mediterranean eggplants

Related update: Risotto With Fresh Peas

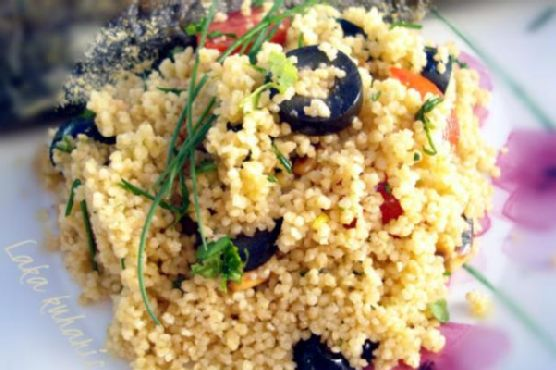
Couscous with olives | Made by Meaghan Moineau

Couscous with Olives: A Delightful Mediterranean Dish

Intro

There is something inherently comforting about the aroma of fresh herbs mingling with the warmth of freshly prepared couscous. It transports me back to my grandmother’s sun-drenched kitchen, where the smell of toasted pine nuts and simmering vegetable stock would fill the air like a warm embrace. Her laughter was as hearty as her meals, and every bite of her couscous with olives was a reminder of the love she poured into her cooking. Today, I want to share this cherished recipe with you, inviting you to create new memories around your table with this simple yet flavorful dish.

Why You’ll Love It

This couscous with olives recipe is more than just a meal; it’s an experience. Here are some reasons why you’ll fall in love with it:

  • Quick and Easy: Perfect for busy weeknights, this dish comes together in under 30 minutes.
  • Flavorful: The combination of black olives, fresh herbs, and toasted pine nuts creates a symphony of flavors.
  • Versatile: Whether you’re serving it as a main or a side, it pairs wonderfully with a variety of dishes.
  • Nutritious: Packed with wholesome ingredients, it’s a healthy choice that’s also delicious.

Ingredients

  • 1 cup couscous
  • 1 1/2 cups vegetable stock
  • 1/4 cup pine nuts
  • 2 tablespoons olive oil
  • 1/2 cup black olives, pitted and sliced
  • 1 cup cherry tomatoes, halved
  • 2 tablespoons fresh coriander, chopped
  • 2 tablespoons fresh chives, chopped
  • Black pepper to taste

Instructions

  1. Place the couscous grains into a large, heatproof bowl and pour over the hot vegetable stock. Cover the bowl and leave the couscous to soak up the stock for about 15 minutes, or until tender.
  2. While the couscous is soaking, toast the pine nuts in a dry frying pan over medium heat for about 3 minutes. Shake the pan occasionally to ensure even toasting and prevent burning. Once golden brown, set them aside.
  3. Once the couscous is ready, use a fork to fluff and separate the grains. This step is crucial to achieving a light and airy texture.
  4. Drizzle the olive oil over the couscous, then add the sliced black olives, cherry tomatoes, toasted pine nuts, fresh coriander, and chives. Gently combine all the ingredients.
  5. Season the couscous with freshly ground black pepper to taste. Serve the dish warm, allowing the flavors to meld beautifully.

Tips

Here are some helpful tips to ensure your couscous with olives turns out perfectly:

  • Stock Temperature: Make sure your vegetable stock is hot before pouring it over the couscous to ensure even cooking.
  • Toasting Pine Nuts: Keep a close eye on the pine nuts as they can quickly go from toasted to burnt.
  • Fresh Herbs: Always use fresh herbs for the best flavor. Dried herbs can be used in a pinch, but fresh is always preferred.

Variations & Substitutions

This recipe is highly adaptable, so feel free to make it your own:

  • Protein Boost: Add grilled chicken or chickpeas for a protein-packed version.
  • Different Nuts: Substitute pine nuts with slivered almonds or walnuts for a different crunch.
  • Herb Swap: Instead of coriander and chives, try parsley and mint for a refreshing twist.

Storage

This couscous dish stores well, making it an excellent option for meal prep:

  • Refrigeration: Store leftovers in an airtight container in the refrigerator for up to 3 days.
  • Reheating: To reheat, gently warm in a microwave or on the stovetop. Add a splash of water or stock to keep it moist.

FAQ

Can I use chicken stock instead of vegetable stock?

Yes, you can substitute chicken stock for vegetable stock if you’re not following a vegetarian diet. It will add a richer flavor to the dish.

What can I serve with couscous with olives?

This dish pairs well with grilled meats, roasted vegetables, or a simple green salad. It’s also delicious on its own as a light meal.

Can I make this dish ahead of time?

Absolutely! You can prepare the couscous in advance and store it in the refrigerator. Add the fresh herbs just before serving to maintain their vibrant flavor.

Nutrition

This couscous with olives is a balanced dish rich in carbohydrates, healthy fats from olive oil and pine nuts, and a variety of vitamins and minerals from the fresh ingredients. It’s a nutritious choice that’s also delicious and satisfying.

Conclusion

With its blend of textures and flavors, couscous with olives is a dish that brings people together, much like it did in my grandmother’s kitchen. Whether you’re sharing it with loved ones or savoring a quiet meal alone, may this recipe fill your home with warmth and your heart with joy. Enjoy every bite of this simple yet exquisite dish, and may it become a beloved staple in your culinary repertoire.

Related update: Couscous with olives

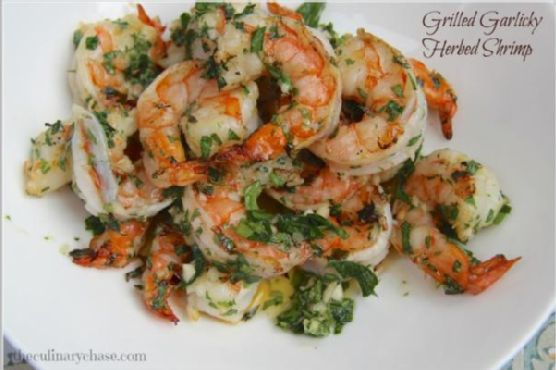
Grilled Garlicky-Herbed Shrimp | Made by Meaghan Moineau

Grilled Garlicky-Herbed Shrimp

Intro

Growing up, summers meant endless family gatherings by the beach, where the air was filled with the tantalizing aroma of grilled seafood. My father, always at the helm of the grill, would prepare his signature shrimp dish. The combination of garlic, fresh herbs, and a hint of lemon always drew everyone to the table. Today, I’m excited to share a recipe that captures that nostalgia: Grilled Garlicky-Herbed Shrimp. It’s a dish that’s simple yet bursting with flavor, perfect for bringing a slice of summer to your table anytime.

Why You’ll Love It

This recipe is a celebration of bold flavors and simplicity. The garlicky-herb marinade infuses the shrimp with a delightful zest, while the grilling process adds a smoky finish that enhances each bite. It’s quick to prepare, requires minimal ingredients, and is versatile enough for both casual family dinners and elegant gatherings. Plus, it’s a healthy, protein-rich dish that complements a variety of sides.

Ingredients

  • 1 teaspoon chili pepper flakes
  • 1/4 cup extra virgin olive oil
  • 1/4 cup finely chopped coriander leaves
  • 4 cloves garlic, minced
  • 1 pound large shrimp, peeled and deveined
  • Zest of 1 lemon
  • 1/4 cup finely chopped parsley

Instructions

  1. In a large bowl, combine chili pepper flakes, olive oil, coriander leaves, garlic, lemon zest, and parsley.
  2. Add the shrimp to the bowl and toss to ensure each piece is thoroughly coated in the marinade.
  3. Cover the bowl with plastic wrap and refrigerate for at least 4 hours or overnight for maximum flavor infusion.
  4. Preheat your grill to medium heat. Once hot, place the shrimp on the grill.
  5. Cook the shrimp for about 5 minutes, turning once, until they turn pink and are slightly charred.
  6. Serve immediately, perhaps with a roasted red pepper salad for a Mediterranean twist.

Tips

For the best results, use fresh shrimp as they tend to absorb flavors better than frozen ones. If using wooden skewers, soak them in water for at least 30 minutes before grilling to prevent burning. Always keep an eye on the shrimp while grilling to avoid overcooking, which can make them tough.

Variations & Substitutions

Feel free to customize this recipe to your liking. You can substitute the coriander leaves with basil or cilantro for a different herby flavor. If you prefer a bit more heat, increase the amount of chili pepper flakes or add a dash of cayenne pepper. For a citrusy twist, add a splash of lime juice to the marinade.

Storage

Store any leftover grilled shrimp in an airtight container in the refrigerator for up to 2 days. Reheat them gently in a skillet over low heat to avoid overcooking. While it’s best to consume them fresh, you can freeze the marinated shrimp before grilling for up to 2 months.

FAQ

Can I use a grill pan instead of an outdoor grill?

Absolutely! A grill pan on the stovetop works perfectly fine. Just ensure it’s preheated before adding the shrimp, and cook them as you would on an outdoor grill.

Is it necessary to marinate the shrimp overnight?

While marinating overnight yields the best flavor, a minimum of 4 hours will still allow the shrimp to absorb the delicious garlicky-herb essence. If you’re short on time, even 1 hour can impart good flavor.

Nutrition

Each serving of Grilled Garlicky-Herbed Shrimp (approximately 4-5 shrimp) provides approximately:

  • Calories: 220
  • Protein: 25g
  • Fat: 12g
  • Carbohydrates: 3g
  • Fiber: 1g

This dish is high in protein and healthy fats, making it a nutritious choice for those seeking a balanced meal.

Conclusion

Grilled Garlicky-Herbed Shrimp is a dish that brings together the warmth of family gatherings and the vibrant flavors of the Mediterranean. It’s easy to prepare, incredibly flavorful, and sure to impress anyone who takes a bite. Whether you’re reminiscing about summer barbecues or simply looking to add a new favorite to your recipe repertoire, this shrimp dish is a delightful choice. Enjoy it with loved ones and create new memories around the table.

Related update: Grilled Garlicky-Herbed Shrimp

Related update: Cheesy Bacon Burger with Spicy Chipotle Aiolo Sauce

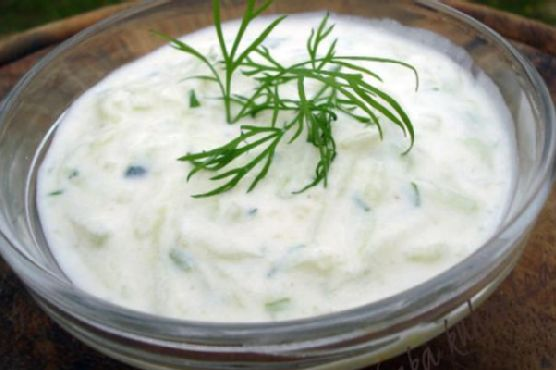
Tzadziki | Made by Meaghan Moineau

Tzatziki: A Creamy, Refreshing Mediterranean Delight

Intro

There’s something truly magical about family gatherings. For me, those memories often revolve around the kitchen table, surrounded by laughter, stories, and an array of delicious dishes. One staple that always graced our table was Tzatziki, a creamy and refreshing dip that has been a beloved part of my family’s culinary tradition for generations. Every time I make it, I’m transported back to those warm summer afternoons in my grandmother’s garden, where the scent of fresh herbs mingled with the sun-drenched air. Tzatziki was the star of those meals, cooling our palates and bringing us together in a shared love for simple, flavorful food.

Why You’ll Love It

Tzatziki is more than just a dip; it’s a versatile condiment that can elevate any meal. Whether you’re using it as a spread on sandwiches, a sauce for grilled meats, or simply as a dip for fresh vegetables, its creamy texture and refreshing taste make it a crowd favorite. It’s easy to make, requires only a few ingredients, and can be prepared in advance, making it perfect for entertaining. Plus, it’s a healthier alternative to many creamy dips, thanks to its yogurt base, which is rich in probiotics.

Ingredients

  • 2 large cucumbers
  • 1 teaspoon sea salt
  • 1 cup Greek yogurt
  • 1/2 cup sour cream
  • 2 tablespoons olive oil
  • 1 tablespoon vinegar
  • 2 cloves garlic, minced
  • 1/4 teaspoon white pepper
  • 1 tablespoon fresh dill, chopped (or 1 teaspoon dried dill)

Instructions

  1. Peel and grate the cucumbers. Lightly salt them, mix, and set aside for 5 minutes to help release the water.
  2. To remove as much water as possible from the grated cucumber, squeeze it in small quantities with your hands. This step is crucial to avoid a watery dip.
  3. In a medium bowl, mix together the yogurt, sour cream, olive oil, vinegar, garlic, and white pepper until smooth and well combined.
  4. Add the squeezed cucumbers and dill to the yogurt mixture. Mix thoroughly to combine all ingredients.
  5. Taste and adjust the seasoning as needed, adding more salt or white pepper to your preference.
  6. Chill the Tzatziki in the refrigerator for at least two hours before serving. This allows the flavors to meld beautifully.

Tips

For the best results, use full-fat Greek yogurt, which lends a rich creaminess to the dip. If you’re short on time, you can prepare the Tzatziki a day ahead; in fact, it often tastes even better the next day as the flavors develop further. When grating the cucumbers, use the large holes of a box grater to achieve the perfect texture.

Variations & Substitutions

If you’re looking to switch things up, consider adding a bit of lemon zest for a citrusy twist. You can also substitute the fresh dill with mint or parsley for a different flavor profile. For a vegan option, replace the yogurt and sour cream with coconut yogurt or a similar plant-based alternative. Experimenting with different herbs and spices can lead to delightful new versions of this classic dip.

Storage

Store any leftover Tzatziki in an airtight container in the refrigerator for up to 3 days. Stir well before serving, as some separation may occur. While Tzatziki is best enjoyed fresh, it can be stored in the freezer for up to a month. However, freezing may alter the texture, so it’s ideal to enjoy it fresh or refrigerated.

FAQ

Can I use a different type of yogurt?

While Greek yogurt is traditional and provides the creamy texture Tzatziki is known for, you can use regular yogurt if necessary. However, be sure to strain it through a cheesecloth to remove excess liquid and achieve a thicker consistency.

What can I serve with Tzatziki?

Tzatziki pairs wonderfully with a variety of dishes. Serve it with grilled meats like lamb or chicken, use it as a dip for fresh vegetables or pita bread, or spread it on sandwiches and wraps for an added burst of flavor.

Nutrition

Tzatziki is a nutritious addition to your meals, offering a good source of protein and probiotics from the yogurt. It’s also low in calories, making it a guilt-free option for those watching their intake. The healthy fats from olive oil and the freshness of cucumbers and herbs contribute to a well-rounded, wholesome dish.

Conclusion

Tzatziki is more than just a recipe; it’s a connection to tradition, family, and the vibrant flavors of the Mediterranean. Whether you’re recreating cherished memories or starting new traditions, this creamy dip is sure to become a staple in your culinary repertoire. Its simplicity and adaptability make it a delight to prepare and share. So gather your ingredients, invite some friends over, and enjoy the refreshing taste of homemade Tzatziki!

Related update: Tzadziki

Related update: Summer Rolls

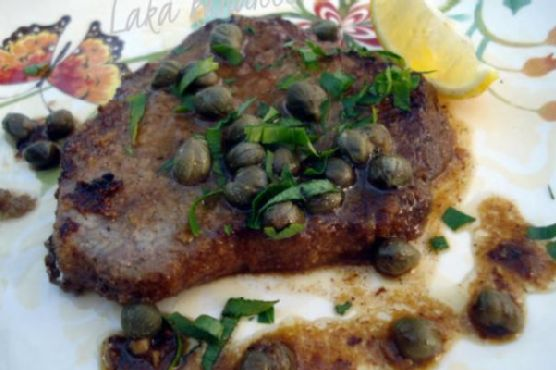
Steak with lemon and capers | Made by Meaghan Moineau

Steak with Lemon and Capers

Intro

There’s something magical about sharing a meal that transports you back to cherished memories. I remember sitting at my grandmother’s rustic wooden table, the aroma of a sizzling steak wafting through the air, mingling with the fresh scent of lemon and capers. It was a recipe she learned during her travels in the Mediterranean, a dish that quickly became a family favorite. Today, I’m thrilled to share this delightful recipe with you, hoping it becomes a beloved staple in your home as well.

Why You’ll Love It

This Steak with Lemon and Capers is a perfect blend of simplicity and sophistication. The tender, juicy steak paired with the tangy brightness of lemon and the unique, savory punch of capers creates a dish that’s both comforting and elegant. Whether you’re looking to impress guests or indulge in a special night in, this recipe is sure to deliver an unforgettable dining experience.

Ingredients

  • Beef steak
  • Butter
  • Capers
  • Dry white wine
  • Flour
  • Garlic
  • Black ground pepper
  • Lemon juice
  • Lemon wedges
  • Olive oil
  • Parsley
  • Salt

Instructions

  1. Flatten the steaks lightly with a meat mallet to ensure even cooking.
  2. In a shallow dish, combine flour, salt, and black ground pepper. Dip the steaks into the mixture, ensuring both sides are coated evenly.
  3. Heat a combination of butter and olive oil in a skillet over medium heat. Sauté the steaks for about 4 minutes on each side or until they reach your desired level of doneness.
  4. Remove the steaks from the pan and set them aside to rest.
  5. In the same pan, add the garlic and sauté for about 1 minute, stirring constantly to avoid burning.
  6. Pour in the dry white wine and lemon juice, stirring to combine. Allow the mixture to simmer for about 5 minutes to slightly reduce the liquid.
  7. Add the capers to the pan, stirring them into the sauce.
  8. Return the steaks to the pan, cover, and simmer over low heat for an additional 4 minutes to allow the flavors to meld.
  9. Garnish with fresh parsley and serve with lemon wedges for an extra burst of flavor.

Tips

For the best results, use a high-quality steak cut such as ribeye or strip loin. Make sure your pan is hot before adding the steaks to achieve a beautiful sear. Letting the steak rest after cooking allows the juices to redistribute, ensuring a juicy bite every time.

Variations & Substitutions

If you’re looking to change things up, consider substituting chicken breasts for the steak, adjusting the cooking time accordingly. For a non-alcoholic version, replace the white wine with chicken or beef broth. You can also add a tablespoon of mustard to the sauce for a tangy twist.

Storage

Store any leftovers in an airtight container in the refrigerator for up to three days. To reheat, gently warm the steak and sauce in a pan over low heat to avoid overcooking. Add a splash of water or broth if the sauce becomes too thick.

FAQ

Can I use a different type of meat for this recipe?

Absolutely! This recipe works beautifully with chicken or pork as well. Just keep in mind that cooking times will vary depending on the type and thickness of the meat.

What can I serve with Steak with Lemon and Capers?

This dish pairs wonderfully with a side of roasted vegetables or a simple green salad. For a heartier meal, consider serving it with mashed potatoes or a crusty loaf of bread to soak up the delicious sauce.

Is there a substitute for capers in this recipe?

If you don’t have capers on hand, olives can be a good substitute, providing a similar briny flavor. Just be sure to adjust the quantity to taste, as olives can be stronger in flavor.

Nutrition

While specific nutritional information will vary based on the cut and size of your steak, this dish is a great source of protein and vitamin C, thanks to the fresh lemon juice. The use of olive oil and butter provides healthy fats that contribute to the dish’s rich flavor.

Conclusion

This Steak with Lemon and Capers is more than just a meal; it’s a culinary journey that brings the vibrant flavors of the Mediterranean to your table. Whether you’re reminiscing about past travels or creating new memories in your kitchen, this dish is sure to delight and satisfy. I hope you enjoy this recipe as much as my family has over the years. Bon appétit!

Related update: Steak with lemon and capers

Related update: Traditional Garlic and Herb Crusted Prime Rib Roast

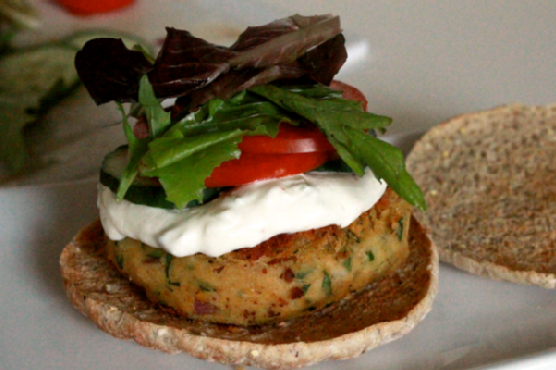
Falafel Burger | Made by Meaghan Moineau

Falafel Burger | Made by Meaghan Moineau

Title: "Savory Nostalgia: Crafting the Perfect Falafel Burger"
Description: Dive into the flavors of the Mediterranean with this Falafel Burger recipe, a delightful fusion of tradition and innovation. With simple ingredients and straightforward instructions, this dish promises to be a crowd-pleaser at any gathering. Join us as we share not only the recipe but also a cherished family memory that makes this dish truly special.

---


Falafel Burger: A Taste of Tradition and Innovation


As the aroma of sizzling chickpea patties fills the kitchen, I am instantly transported back to a warm summer evening at my grandmother's house. Our family would gather in her garden, the air rich with laughter and the scent of blooming jasmine. It was on one such evening that I first experienced the magic of falafel, a dish that would become a cherished part of our family traditions.


Fast forward a few years, and I found myself yearning to recreate that memory in a modern twist with the Falafel Burger. A perfect blend of tradition and contemporary flavors, this dish is an homage to those unforgettable summer nights.


Ingredients


- 1 can of chickpeas, drained and patted dry


- 2 tablespoons tahini


- 1 tablespoon sriracha sauce


- 2 cloves garlic


- A handful of fresh parsley


- 1/2 red onion, diced


- Peanut oil, for frying


- 1 cucumber, sliced


- 1 tomato, sliced


- Hamburger buns


- Tzatziki sauce


Instructions


1. Prepare the Chickpeas: Begin by patting the chickpeas dry with a paper towel. This step is crucial for achieving the perfect texture in your patties.
2. Puree the Base: Place the chickpeas and garlic into a food processor. Puree until smooth, ensuring no chunks remain for a consistent patty.
3. Incorporate the Flavors: Using your clean hands, mix in the tahini, sriracha, fresh parsley, and diced red onion into the chickpea mixture. The combination of these ingredients brings a balance of spice, freshness, and creamy texture.
4. Shape the Patties: Form the mixture into four equal patties. Set aside while you prepare your skillet.
5. Cook to Perfection: Heat peanut oil in a large skillet over medium heat. Once the oil begins to shimmer, carefully add the patties. Cook for three minutes on each side, or until they achieve a golden-brown crust.
6. Assemble the Burger: Remove the patties from the skillet and place each one in a hamburger bun. Top with two slices of tomato, two slices of cucumber, and a generous dollop of tzatziki sauce.
7. Serve Immediately: For the best texture and flavor, serve the burgers immediately while they’re hot and crisp.

A Family Memory


Every bite of this Falafel Burger takes me back to my grandmother's garden, where the simple joy of sharing food brought our family closer. The recipe has evolved, yet the essence remains the same—a celebration of flavor and family.


Difficulty: 4/10


Classification: Main Dish


This Falafel Burger is more than just a meal; it's a connection to the past and a promise of new memories to come. Whether you’re an experienced cook or a beginner, this recipe is both accessible and rewarding. Enjoy crafting these flavorful patties and perhaps, like me, you'll find yourself cherishing the memories they create.


---


Ready to bring a slice of Mediterranean tradition to your table? Try this Falafel Burger recipe today and let it become part of your family's culinary story.

Read more about Appetizers

Read more about Main Dishes

Read more about Desserts

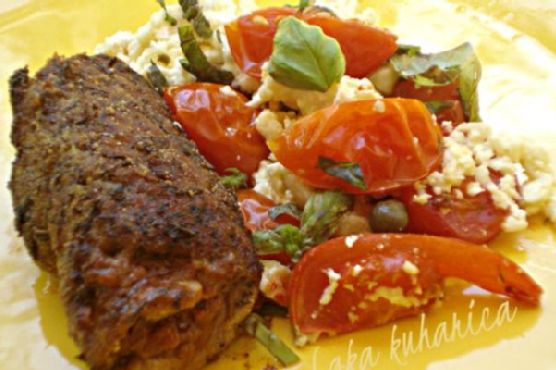
Steaks with pesto, tomatoes and feta cheese | Made by Meaghan Moineau

Steaks with pesto, tomatoes and feta cheese | Made by Meaghan Moineau

Title: “Savoring Memories: Steaks with Pesto, Tomatoes, and Feta Delight”
Description:

Dive into a culinary journey with our delectable Steaks with Pesto, Tomatoes, and Feta Cheese recipe. This dish, brimming with Mediterranean flavors, will become a beloved favorite at your dinner table. Discover how this delightful main dish, rated 6 out of 10 in difficulty, brings back cherished family memories, all while being a satisfying centerpiece for any occasion.

A Taste of Nostalgia: Steaks with Pesto, Tomatoes, and Feta Cheese

There’s something magical about the way food can transport us back in time, evoking fond memories and cherished moments. Growing up, Sunday dinners were a sacred ritual in our family. The kitchen buzzed with activity, the aromatic symphony of sizzling ingredients filling the air, and the anticipation of a hearty meal drew us all together. Among the array of delightful dishes, one stood out as a family favorite: Steaks with Pesto, Tomatoes, and Feta Cheese.

Ingredients You’ll Need:

Cherry Tomatoes
Feta Cheese (crumbled)
Capers
Whole Garlic Cloves
Black Cracked Pepper
Olive Oil
Fresh Basil
Lean Pork Steaks
Red Pesto Rosso
Cornflour
Dried Basil
Sea Salt
Black Pepper

Cooking Instructions:

1. Prepare the Tomato and Feta Bake:

– Preheat your oven to 200°C (392°F). Line a baking tray with baking paper.

– Place cherry tomatoes on the tray, scattering capers and whole garlic cloves among them.

– Sprinkle crumbled feta cheese over the mix, and drizzle with olive oil and a generous pinch of cracked black pepper.

– Roast in the oven for about 30 minutes or until the tomatoes are soft and bursting with flavor.

– Remove from oven, set aside, and garnish with fresh basil.

2. Prepare the Pork Steaks:

– While the tomatoes are roasting, use a meat mallet to flatten each pork steak.

– Spread a tablespoon of red pesto rosso on one side of each steak.

– Roll the steaks with the pesto on the inside and secure each roll with a toothpick.

3. Coat and Cook the Steaks:

– In a shallow plate, combine cornflour, dried basil, sea salt, and black pepper.

– Dredge the steak rolls in the flour mixture, ensuring they are lightly coated.

– Heat olive oil in a large skillet over medium-high heat.

– Brown the rolls, turning constantly for about 5-6 minutes until golden all around.

4. Serve:

– Remove the toothpicks from the steak rolls before serving.

– Plate the steaks alongside the roasted tomato, capers, garlic, and feta bake.

A Family Memory

This recipe takes me back to the cozy warmth of my grandmother’s kitchen. I remember the laughter and stories shared as we gathered around the table, the comforting aroma of roasted tomatoes mingling with the savory scent of pesto. Each bite was a celebration of flavors, a reminder of the love and effort poured into every meal. Her kitchen was a place where time stood still, and family bonds were strengthened over delicious food.

Difficulty Rating: 6/10

This dish is not overly complex, making it accessible for home cooks looking to create an impressive main dish. With a bit of preparation and attention, you’ll find yourself crafting a meal that not only pleases the palate but also creates lasting memories around the dinner table.

Indulge in the flavors of this cherished family recipe and let it become a staple in your home. With its rich textures and delightful taste, Steaks with Pesto, Tomatoes, and Feta Cheese are sure to transport you to your own treasured moments, creating new memories with each bite.

Read more about Appetizers

Read more about Main Dishes

Read more about Desserts

Also try: Blast Of Color Mexican Stuffed Bell Peppers

Also try: Beans With Smoked Pork Hock

Spinach, Tomato & Onion Couscous | Made by Meaghan Moineau

Spinach, Tomato & Onion Couscous | Made by Meaghan Moineau

Title: Savory Memories: Spinach, Tomato & Onion Couscous Delight


Description:

Uncover the warmth of family gatherings with our Spinach, Tomato & Onion Couscous recipe. This simple yet flavorful dish brings together the wholesome goodness of fresh vegetables, creamy feta, and nutty pine nuts, all nestled in fluffy whole-wheat couscous. Easy to prepare and bursting with Mediterranean flavors, this dish is perfect for any occasion. Join us as we dive into a nostalgic family memory while crafting this delightful main dish.

---


A Taste of the Past: Spinach, Tomato & Onion Couscous


When I think of Spinach, Tomato & Onion Couscous, I am instantly transported back to the cozy kitchen of my grandmother's home. The aroma of sautéed onions and the vivid colors of fresh vegetables always remind me of the Sunday afternoons we spent cooking together. It was a tradition that brought our family closer, a ritual that was more about sharing love than just sharing a meal.


Cooking with Grandma was a cherished time. She would let me stir the couscous, teaching me the importance of patience as we waited for it to absorb the boiling water, turning into fluffy grains. Her hands expertly chopped the onions and tomatoes, while I watched, eager to be part of the magic.


As the onions began to brown in the olive oil, their sweet scent filled the air, mingling with the freshness of the spinach and the tangy allure of tomatoes. Grandma’s secret was in the timing—sautéing just enough to wilt the vegetables but keeping the spinach a vibrant green. It was a delicate balance, much like the dance of family life.


The final touch was the addition of pine nuts, their richness contrasting beautifully with the creamy crumbled feta. Tossing everything together was like assembling a symphony of flavors, each ingredient playing its part in harmony. The couscous soaked up the juices of the vegetables, creating a melt-in-your-mouth experience that was both comforting and nourishing.


We would gather around the table, the couscous as the centerpiece, and share stories, laughter, and the warmth of being together. This dish was more than just food; it was a testament to family bonds and the joy of shared memories.


Recipe Difficulty: 3/10


Classification: Main Dish


---


Ingredients:


- 1 cup whole-wheat couscous


- 1 ½ cups water


- ½ teaspoon salt, divided


- 2 tablespoons olive oil


- 1 red onion, thinly sliced


- 2 tomatoes, diced


- 4 cups fresh spinach


- ¼ cup pine nuts


- ½ cup feta cheese, crumbled


- Salt and pepper to taste


Instructions:


1. Prepare the Couscous: In a small pan, bring the water and half of the salt to a boil. Add the couscous, stir, and cover with a lid. Remove from heat and let it sit for 5 to 7 minutes, allowing it to absorb the water.
2. Sauté the Vegetables: Heat a large pan over medium-high heat and add the olive oil. Once hot, add the sliced onions and sauté until they begin to brown. Add the diced tomatoes and the remaining salt, sautéing for another 20 to 30 seconds until the tomatoes start to wilt.
3. Add the Spinach: Stir in the fresh spinach, sautéing just until it wilts but remains bright green.
4. Finish with Pine Nuts: Incorporate the pine nuts into the vegetable mixture, then remove the pan from the heat. Season with salt and pepper to taste.
5. Combine and Serve: Pour the couscous into a large bowl, add the sautéed vegetables, and toss with the crumbled feta cheese. Top with additional feta and serve hot.

Relive the cherished moments of family gatherings with this simple yet heartwarming recipe. Whether it becomes a staple in your home or a special treat, Spinach, Tomato & Onion Couscous is sure to create delicious new memories.

Read more about Appetizers

Read more about Main Dishes

Read more about Desserts

Mediterranean Orzo Salad | Made by Meaghan Moineau

Mediterranean Orzo Salad | Made by Meaghan Moineau

Title: A Taste of the Mediterranean: Elevate Your Culinary Skills with a Zesty Orzo Salad
Description: Discover the vibrant flavors of the Mediterranean with our delightful Orzo Salad. This easy-to-follow recipe brings together fresh vegetables, aromatic herbs, and tangy feta for a refreshing meal that will transport your taste buds to sun-soaked shores. Dive into a nostalgic family memory that adds a personal touch to this culinary adventure.

---


There’s something magical about a dish that can transport you to a different place with just one bite. Our Mediterranean Orzo Salad does precisely that, capturing the essence of the sun-drenched Mediterranean region. This recipe combines fresh ingredients like orzo, crisp vegetables, and fragrant herbs, creating a symphony of flavors that’s both refreshing and satisfying.


Ingredients:


- Orzo


- Kosher salt


- Pine nuts


- Extra virgin olive oil (EVOO)


- Green onions


- Italian parsley


- Lemon zest


- Diced cucumber


- Green bell pepper


- Cherry tomatoes


- Red onion


- Pepperoncinis


- Feta cheese


- Red wine vinegar


Instructions:


1. Cook the Orzo: Begin by bringing a pot of water to a rapid boil. Generously salt the water and cook the orzo until tender, approximately 7-9 minutes. Drain and set aside to cool.
2. Toast the Pine Nuts: While the orzo is cooking, spread pine nuts on a baking sheet and toast lightly in the oven at 400°F. Once golden brown, remove from the oven and set aside.
3. Saute Aromatics: Heat two tablespoons of EVOO in a non-stick pan over medium heat. Sauté the chopped green onions for about 2 minutes. Add the parsley, lemon juice, lemon zest, toasted pine nuts, and cooked orzo. Sauté for an additional 3-4 minutes to allow the flavors to meld and absorb into the orzo. Remove from heat.
4. Combine Ingredients: In a large bowl, mix the sautéed orzo with diced cucumber, green bell pepper, cherry tomatoes, red onion, and pepperoncinis. Add the crumbled feta cheese, red wine vinegar, and the remaining six tablespoons of EVOO. Mix well to ensure all ingredients are evenly distributed.
5. Serve: This versatile dish can be refrigerated to let the flavors intensify or served immediately, perfectly fresh and vibrant.

Nostalgic Family Memory:


As I prepare this Mediterranean Orzo Salad, I’m flooded with memories of summer picnics by the sea with my family. Every year, we’d gather at my grandmother’s beach house, where the ocean breeze would mingle with the delicious aromas of her cooking. This salad was always the centerpiece of our picnic table, a dish that brought everyone together. My grandmother would laugh as she watched us devour it, her eyes twinkling with joy. To this day, each bite of this salad reminds me of those sun-drenched afternoons filled with laughter, love, and the simple pleasures of life.


Difficulty: 4/10


This Mediterranean Orzo Salad is straightforward to make, making it a perfect recipe for cooks of all levels. It’s a dish that allows you to enjoy the process and the result, without the stress of complicated techniques or hard-to-find ingredients.


Classification: Appetizer


This vibrant and flavorful salad is perfect as an appetizer, setting the stage for a delightful Mediterranean meal. Its refreshing taste and colorful presentation make it a standout dish that’s sure to impress your guests.


---


Embrace the flavors of the Mediterranean and bring a touch of sunshine to your table with this Mediterranean Orzo Salad. Whether it’s a cherished family gathering or a simple meal for yourself, this dish promises a journey of taste and nostalgia.

Read more about Appetizers

Read more about Main Dishes

Read more about Desserts

Sun Dried Tomato Stuffed Mushrooms | Made by Meaghan Moineau

Sun Dried Tomato Stuffed Mushrooms | Made by Meaghan Moineau

Savoring Nostalgia: Sun-Dried Tomato Stuffed Mushrooms


A Family Recipe That Transcends Generations


Introduction:

In the heart of every home, there’s a dish that sparks joy, evokes cherished memories, and unites family members around the dining table. For my family, that dish is Sun-Dried Tomato Stuffed Mushrooms. This delectable appetizer, with its rich blend of Mediterranean flavors, has been the centerpiece of our gatherings for as long as I can remember. Whether it's a festive holiday dinner or a casual Sunday brunch, these savory stuffed mushrooms never fail to bring a smile to our faces and warmth to our hearts.


Ingredients:

- White button mushrooms


- Bread crumbs


- Red diced roasted pepper


- Roasted garlic (from one bulb)


- Diced kalamata olives


- Diced onion


- Diced sun-dried tomatoes


- Olive oil


- Cream cheese


- Mozzarella


- Provolone


- Asiago


- Parmesan


- Romano


- Red pepper flakes


- Dried oregano


- Salt and pepper to taste


Instructions:

1. Preheat your oven to 350°F (175°C). Begin by cleaning the mushrooms and removing the stems. Lightly oil the mushroom caps and arrange them on a greased cookie sheet.


2. Finely dice the mushroom stems and set them aside. In a large bowl, combine cream cheese, mozzarella, provolone, asiago, parmesan, romano, half of the dried bread crumbs, red pepper flakes, and dried oregano. Stir until well combined. Season with salt and pepper to taste, then set aside.


3. Over medium heat, sauté the onions in olive oil until they become translucent. Add the diced mushroom stems and continue to sauté for one minute.


4. Stir in the roasted garlic, kalamata olives, roasted red peppers, and sun-dried tomatoes. Cook until the mixture is thoroughly heated.


5. Add the sautéed vegetables to the reserved cream cheese mixture and stir to combine.


6. Scoop one tablespoon of the mixture into each prepared mushroom cap. Sprinkle with the remaining bread crumbs and mozzarella cheese.


7. Bake in the oven for 20-25 minutes until the mushrooms are browned and the cheese is melted. Let them stand for 5 minutes before serving.


Difficulty Rating: 4/10
Classification: Appetizer
A Nostalgic Family Memory:

Every year, as the leaves turned golden and the air grew crisp, my grandmother would prepare her famous Sun-Dried Tomato Stuffed Mushrooms for our Thanksgiving feast. The kitchen would fill with the comforting aroma of garlic and roasted peppers, blending with the warm, creamy cheeses. As a child, I loved helping her mix the ingredients and stuff the mushroom caps, feeling as though I was contributing to our family tradition.


On one particular Thanksgiving, after the meal was devoured and the dishes were cleared, my grandmother shared a story of how she first discovered the recipe. She recounted her travels to the Mediterranean coast, where she fell in love with the vibrant flavors and simple yet exquisite ingredients that inspired her to create this dish. Listening to her tale, I realized that these mushrooms were more than just an appetizer; they were a symbol of her adventurous spirit and her love for family.


To this day, whenever I prepare Sun-Dried Tomato Stuffed Mushrooms, I'm reminded of my grandmother's laughter and the love she infused into every meal. These stuffed mushrooms continue to be a cherished part of our family gatherings, linking the past with the present and creating new memories for future generations to savor.

Read more about Appetizers

Read more about Main Dishes

Read more about Desserts

Lemony Greek Lentil Soup | Made by Meaghan Moineau

Lemony Greek Lentil Soup | Made by Meaghan Moineau

Lemony Greek Lentil Soup: A Hearty Bowl of Comfort and Tradition


Description


Dive into the rich flavors of the Mediterranean with our Lemony Greek Lentil Soup. This hearty, tangy dish is a beautiful blend of earthy lentils, fresh herbs, and zesty lemon juice. Perfect for chilly evenings or as a comforting main dish, this soup is a delightful journey into Greek culinary tradition. Whether you're a seasoned chef or a kitchen novice, this recipe is rated a manageable 5 out of 10 in difficulty and promises to fill your home with warmth and your heart with nostalgia.


---


Ingredients


- 1 cup brown lentils
- 8 cups water
- 1 carrot, chopped
- 1 teaspoon dried thyme
- 2 tablespoons lemon juice
- 1 teaspoon dried basil
- 1 tablespoon fresh thyme
- 1 teaspoon dried oregano
- Salt and black pepper, to taste
- 1 onion, chopped
- 3 cloves garlic, minced
- 2 tablespoons olive oil
- 1 can (28 ounces) whole canned tomatoes

- Crusty bread and soft cheese like St. Andre or Cambazola for serving


Instructions


1. Initial Cooking: In an 8-quart stockpot, combine the lentils, water, carrot, and 1 teaspoon of dried thyme. Cover and set over medium heat. Allow the mixture to cook for 15 minutes, then lower the heat slightly and let it simmer gently for about 30 minutes more.
2. Resting Phase: Once the lentils reach boiling point, turn off the burner and let the soup sit covered for 1 hour to allow the flavors to meld.
3. Flavor Infusion: After an hour, bring the soup back to a simmer. Stir in the lemon juice, dried basil, fresh thyme, oregano, salt, and black pepper. Let it simmer for another hour.
4. Sauté Aromatics: In a separate pan, slowly sauté the chopped onion and minced garlic in olive oil until the onion is tender and translucent.
5. Tomato Addition: Coarsely chop the canned tomatoes directly in the can using kitchen scissors. Add the tomatoes and the onion-garlic mixture to the soup. Adjust the salt to taste.
6. Final Simmer: Bring everything back to a boil, then reduce to a simmer for another hour. Keep the burner on its lowest setting, and let the soup sit with its lid slightly ajar until you're ready to serve.
7. Serving Suggestion: Serve hot with crusty bread and a side of soft cheese like St. Andre or Cambazola.

---


A Taste of Family Tradition


Growing up, my grandmother's kitchen was a haven of enticing aromas and laughter. Each autumn, as the leaves turned golden and the air grew crisp, she would prepare her signature Lemony Greek Lentil Soup. The recipe was passed down through generations, a cherished family heirloom that connected us to our Greek roots.


I remember the warmth of her kitchen, the chatter of family gathered around the table, and the comforting smell of thyme and oregano wafting through the air. We would sit, savoring each spoonful, as stories of our ancestors unfolded – tales of life in a small Greek village, where this simple yet flavorful dish symbolized sustenance and love.


Even today, as I prepare this soup, I am transported back to those cherished family gatherings. It's more than just a meal; it's a celebration of heritage, a reminder of loved ones, and a bowl of comfort that transcends time and place.


---


Conclusion


Our Lemony Greek Lentil Soup is more than just a dish; it's a journey into the heart of Greek culinary tradition, a nod to family memories, and a testament to the power of food to bring people together. With its rich, tangy flavors and hearty ingredients, this soup is an ideal main dish for any occasion. Enjoy it as part of your own family tradition, and let the nostalgic flavors carry you to a place of warmth and connection.

Read more about Appetizers

Read more about Main Dishes

Read more about Desserts

Mediterranean Orzo Salad | Made by Meaghan Moineau

Mediterranean Orzo Salad | Made by Meaghan Moineau

Title: Savoring Tradition: A Mediterranean Orzo Salad That Brings Family Together
Description: Dive into the flavors of the Mediterranean with our vibrant and refreshing Orzo Salad recipe. Infused with the zest of lemon, the crunch of fresh vegetables, and the creamy tang of feta cheese, this salad is the perfect dish to transport you to a sunny coastal escape. Rated 4 out of 10 in difficulty, this dish is an ideal appetizer or light main dish for any gathering. Discover how this recipe became a cherished family tradition.

---


A Journey of Flavors: Mediterranean Orzo Salad


There's something undeniably special about a dish that transcends mere ingredients and becomes a bridge to cherished memories. Our Mediterranean Orzo Salad is one such recipe—a symphony of flavors that not only delights the palate but also stirs the heart with nostalgia.


Ingredients:


- 1 cup orzo


- Kosher salt


- 1/4 cup pine nuts


- 8 tablespoons extra virgin olive oil (EVOO), divided


- 3 green onions, chopped


- 1/4 cup Italian parsley, chopped


- Zest and juice of 1 lemon


- 1 diced cucumber


- 1 green bell pepper, diced


- 1 cup cherry tomatoes, halved


- 1/4 cup red onion, finely chopped


- 1/4 cup pepperoncinis, sliced


- 1/2 cup feta cheese, crumbled


- 2 tablespoons red wine vinegar


Instructions:


1. Cooking the Orzo: Begin by bringing a pot of water to a rapid boil. Generously salt the water and add orzo, cooking until tender, approximately 7-9 minutes. Drain and set aside.
2. Toasting the Pine Nuts: While the orzo is cooking, spread pine nuts on a baking sheet and toast lightly in an oven preheated to 400 degrees Fahrenheit. Remove from oven and set aside.
3. Sautéing for Flavor: Heat two tablespoons of EVOO over medium heat in a non-stick pan. Sauté the chopped green onions for about 2 minutes. Add parsley, lemon juice, lemon zest, toasted pine nuts, and cooked orzo. Sauté for an additional 3-4 minutes, allowing the flavors to meld and absorb into the orzo. Remove from heat.
4. Combining Ingredients: In a large mixing bowl, combine the cucumber, green bell pepper, cherry tomatoes, red onion, and pepperoncinis with the orzo mixture. Add crumbled feta cheese, red wine vinegar, and the remaining six tablespoons of EVOO. Mix well until all ingredients are evenly coated.
5. Serving Suggestions: This salad can be refrigerated for later enjoyment or served immediately for a fresh and vibrant appetizer or light main dish.

A Taste of Tradition


Every time I prepare this Mediterranean Orzo Salad, I'm transported back to a sun-drenched summer afternoon at my grandmother's house. Her kitchen, filled with the fragrant aroma of fresh herbs and the warmth of family laughter, was the heart of our gatherings. She would meticulously prepare this salad, her hands deftly chopping vibrant vegetables and crumbling feta with care.


We would gather around her large wooden table, a motley crew of aunts, uncles, and cousins, eagerly anticipating the first bite. The salad, with its blend of tangy, crunchy, and creamy elements, was always the star of our meals, a testament to the simple yet profound joy of sharing food with loved ones.


This recipe, passed down through generations, remains a cherished symbol of our family heritage, a reminder of those joyful days spent together. It’s more than just a dish; it’s a celebration of tradition, love, and the enduring power of food to bring people together.


---


Difficulty: 4/10
Classification: Appetizer / Light Main Dish

Embrace the warmth of Mediterranean flavors and create new memories with this beloved Orzo Salad—a timeless dish sure to delight both your taste buds and your heart.

Read more about Appetizers

Read more about Main Dishes

Read more about Desserts

Mussels & Clams in White Wine {Cozze e Vongole} | Made by Meaghan Moineau

Mussels & Clams in White Wine {Cozze e Vongole} | Made by Meaghan Moineau

Title: A Taste of the Sea: Mussels & Clams in White Wine {Cozze e Vongole}
Description: Dive into the flavors of the sea with our Mussels & Clams in White Wine recipe, also known as Cozze e Vongole. This delightful dish is a perfect blend of savory and spicy, enhanced by the freshness of garlic, cherry tomatoes, and a dash of white wine. Whether you're looking for a light appetizer or a satisfying main dish, this recipe brings a taste of the Mediterranean to your table. Plus, discover a heartwarming family memory that makes this dish even more special. Difficulty: 5/10.

---


There’s something magical about the aroma of garlic sizzling in olive oil. It’s the kind of scent that wafts through the air, inviting everyone to gather around the kitchen, eager to see what delicious creation is underway. For me, the magic is in preparing Cozze e Vongole, or Mussels & Clams in White Wine, a dish that embodies the essence of the sea and brings back cherished family memories.


Growing up, summer weekends were synonymous with family gatherings at our beach house. The sun would dip below the horizon, painting the sky with hues of orange and pink, as we gathered around the large wooden table on the porch. My grandfather, a seasoned fisherman, would return from a day at sea, his catch of fresh mussels and clams brimming with the promise of a delightful dinner.


The preparation was a family affair. My grandmother would arm herself with a large frying pan, her weathered hands pouring a generous glug of golden olive oil. The garlic would hit the pan with a sizzle, its aroma mingling with the salty sea breeze. I remember the twinkle in her eyes as she tossed in chili flakes, giving the dish a gentle kick that mirrored her fiery spirit.


Once the clams and mussels were added, the kitchen would fill with the symphony of clattering shells and bubbling wine. As the white wine reduced, its steam carried with it the essence of the sea. Cherry tomatoes and fresh parsley added a burst of color, while the final touch—a glug of olive oil—brought everything together.


As we sat down to eat, the dish was more than just a meal; it was a celebration of family, of traditions passed down through generations. The mussels and clams, tender and juicy, were perfect for soaking up the tangy broth with crusty bread. Each bite was a reminder of those sun-kissed days and the love that went into every pot.


Today, I share this recipe with you, hoping it brings as much joy to your table as it has to ours. Mussels & Clams in White Wine is a dish that’s both simple and sophisticated, earning a difficulty rating of 5/10. Whether served as an appetizer or a main dish, it’s best enjoyed with a good company and a glass of crisp white wine.


Recipe: Mussels & Clams in White Wine {Cozze e Vongole}
Ingredients:

- Cherry tomatoes


- Chili flakes


- Fresh parsley


- Garlic


- Olive oil


- Salt


- White wine


Instructions:

1. In a large frying pan on low heat, add 3-4 glugs of olive oil and slowly cook the garlic until brown all over. Remove and discard the garlic (or leave it in if you like).


2. Turn the heat up, add in chili flakes and clams, and cook for about 30 seconds to 1 minute.


3. Add in the mussels. Turn up the heat and toss in the cherry tomatoes, sautéing for a moment or two.


4. Add a half glass of white wine and cover. Allow to sit covered for 1-2 minutes at most until the shells open.


5. Shut off the heat, add in your parsley. Finish with a bit of butter or a good glug of olive oil.


6. Top with arugula if you like. Serve immediately with plenty of good crunchy bread to dip and a glass of white wine.


May this dish transport you to the seaside, and may your kitchen be filled with laughter and love, just as mine was all those years ago. Bon appétit!

Read more about Appetizers

Read more about Main Dishes

Read more about Desserts