Pasta With Salmon Cream Sauce | Made by Meaghan Moineau
Title: Pasta with Salmon Cream Sauce: A Family Tradition on Every PlateDescription: Dive into the creamy goodness of Pasta with Salmon Cream Sauce—a dish that blends the richness of salmon with the comforting texture of pasta. Perfect for family dinners, this recipe not only pleases the palate but also brings cherished memories to the table. Discover the simple steps to recreate this hearty main dish and enjoy a nostalgic journey through a beloved family story.
---
Pasta with Salmon Cream Sauce: A Culinary Walk Down Memory Lane
There's something inherently comforting about pasta. It's versatile, filling, and when combined with the right ingredients, it can transform into a dish that evokes fond memories. The Pasta with Salmon Cream Sauce is one such recipe for my family—a dish that not only satiates our hunger but also binds us through shared stories and laughter.
The Ingredients of Love
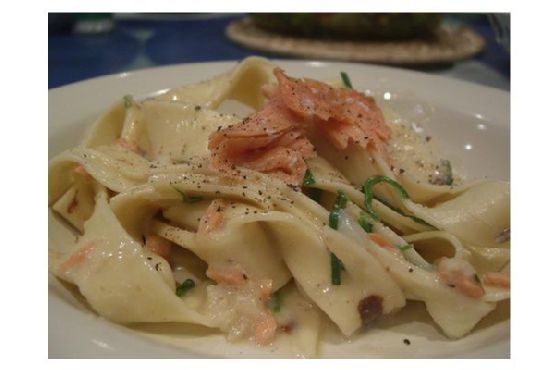
To create this delightful main dish, you'll need the following ingredients: butter, flour, milk, onion, parmesan cheese, parsley, peas, penne, pepper, and, of course, red salmon. These components come together to form a sauce that clings lovingly to each piece of penne, creating a harmonious blend of flavors and textures.
Step-by-Step Guide
1. Cook the Pasta:
Begin by cooking the penne in a large pot of boiling water until it reaches that perfect al dente texture—tender yet firm—usually around 10 to 12 minutes. Drain and set aside.
2. Prepare the Sauce:
In a saucepan, melt the butter over medium heat. Add the chopped onion, cooking until tender and fragrant. Stir in the flour to create a roux, cooking just long enough to eliminate the raw flour taste. Slowly whisk in the milk, bringing the mixture to a simmer while stirring constantly.
3. Add the Flavors:
Introduce the peas, chunks of red salmon, and the juices from the salmon into the simmering sauce. Season with freshly ground pepper. Add chopped parsley and a generous helping of parmesan cheese. Stir until the cheese melts and the sauce thickens slightly.
4. Combine and Serve:
Pour the luscious salmon cream sauce over the cooked penne, gently mixing to ensure each piece is coated. Serve immediately for the best experience.
Microwave Method:
For a quicker version, cook pasta as instructed. In a microwave-safe bowl, microwave butter and onion on Medium-High for about a minute, or until the onion is tender. Stir in flour, gradually whisk in milk, and proceed with the remaining steps.
A Nostalgic Tale
This dish always takes me back to Sunday dinners at my grandmother’s house. I remember the aroma of onions sautéing in butter, mingling with the subtle scent of salmon wafting through the air. My grandmother, standing at the stove with her apron tied around her waist, would hum softly as she prepared the meal. She would often share stories of her youth, recounting how this dish was a staple in her own mother’s kitchen. As we gathered around the table, the Pasta with Salmon Cream Sauce became more than just a meal—it was a symbol of continuity and love, a way to connect with our roots and with each other.
Difficulty Rating: 4/10
This dish is straightforward and perfect for a cozy family dinner. It requires basic cooking skills, making it accessible to both novice and seasoned home cooks.
Category: Main Dish
Pasta with Salmon Cream Sauce is a main dish that stands out with its rich, comforting flavors. It’s ideal for a family meal or a cozy dinner party, offering both nourishment and nostalgia in every bite.
---
Embrace the warmth of this delightful dish and allow it to create new memories around your dining table. Whether you're cooking for family or friends, Pasta with Salmon Cream Sauce is sure to become a cherished staple in your culinary repertoire.