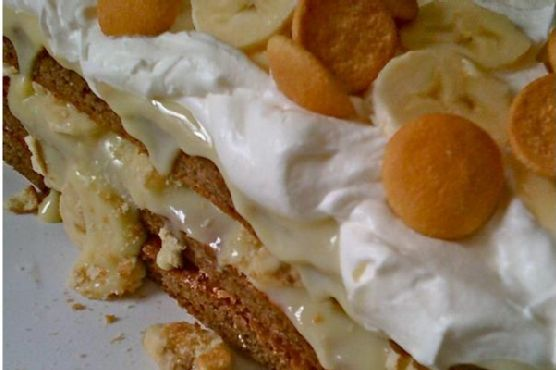
Banana Pudding Cake | Made by Meaghan Moineau

Alright, picture this: It’s Wednesday evening, halfway through a week that feels like it’s been two weeks long, and you’re in dire need of something indulgent but not overly complicated. That’s the exact moment I found myself in last week when I decided to whip up a Banana Pudding Cake. This isn’t just any banana dessert; it’s got layers of moist cake, creamy custard, and a light-as-air whipped cream topping that makes it feel like a hug on a plate. Plus, it’s a great way to use up those slightly too-ripe bananas staring you down on the counter. The best part? You probably have most of the ingredients already lying around. Trust me, this is the dessert you deserve after adulting so hard all week. Jump to Recipe

What You’ll Need

This isn’t your typical mile-long ingredient list. Chances are you already have most of this.

  • Bananas
  • Vanilla wafers
  • Egg yolks
  • Eggs
  • Flour
  • Sugar
  • Baking powder
  • Cocoa powder
  • Milk
  • Salt
  • Pudding
  • Vanilla extract
  • Heavy whipping cream
  • Powdered sugar
  • Whipped cream

How to Make Banana Pudding Cake

  1. Preheat your oven to 350°F (175°C). In a large bowl, beat the egg yolks with sugar until the mixture gets that pale, creamy consistency, and set it aside.
  2. In the bowl of an electric mixer, whip the egg whites until they form stiff peaks that hold their shape like a dream.
  3. Gently add the baking powder, processed wafers, and cocoa to the egg yolk mixture. It gets a bit thick and fudgy here; you’re on the right track.
  4. Drop about 1/4 of the whipped egg whites into the larger bowl and fold lightly to get things started. Then fold in the remaining whites carefully until no streaks remain.
  5. Line a jellyroll sheet pan with parchment paper, ensuring it covers all sides, and spray the paper with non-stick floured baking spray.
  6. Spread the cake batter evenly over the paper, making sure it covers the entire pan, and bake it in your preheated oven for 15-20 minutes. The cake should feel springy to the touch.
  7. Let the cake cool completely on the sheet—this will take at least 30 minutes to an hour, so patience, my friend.
  8. Meanwhile, mix sugar, flour, and salt in the top of a double boiler. If you don’t have one, improvise with a saucepan over another with boiling water.
  9. Blend in the egg yolks and milk, then cook uncovered while stirring constantly for 10 to 12 minutes, or until the mixture thickens nicely. Remove from heat and stir in the vanilla extract.
  10. Once your cake is cooled, carefully lift the parchment paper, remove the cake from the pan, and place it on a flat surface. Starting from the short end, cut into three even pieces.
  11. Assemble your masterpiece by placing the first layer of cake on a serving platter. Spread half of the custard over the top, then cover with a third of the banana slices and a third of the crumbled wafers.
  12. Top with the next piece of cake and repeat, making sure to reserve a few bananas and crumbled cookies for later. Spread the final amount of custard onto the top layer of cake.
  13. Refrigerate the whole cake for at least 2 hours or until you’re ready to serve. This chill time is crucial for the flavors to really meld together.
  14. Just before serving, whip up the cream topping. Combine all ingredients in a large mixing bowl and beat until the cream thickens and becomes stiff.
  15. Spread the whipped cream over the cake and top with the reserved banana slices and wafers right before serving to keep everything fresh and delightful.

Cook’s Notes

This cake is best made ahead, allowing time for the flavors to develop in the fridge. Just keep the final toppings off until serving time to avoid any sad, brown bananas. Store leftovers in an airtight container in the fridge for up to 3 days, though the bananas might start to look a little tired by then. Don’t worry, the taste will still be on point!

  • If you’re in a hurry, ready-made pudding can be used in place of homemade custard, but honestly, the homemade is worth the little extra effort.
  • To avoid the dreaded banana browning, toss the slices in a bit of lemon juice before layering them in the cake.

Make It Your Own

  • Go chocolatey: Sprinkle some mini chocolate chips between the layers for a chocolate-banana twist.
  • Nutty buddy: Add a layer of crushed pecans or walnuts for a bit of crunch.
  • Berry bliss: Substitute half of the banana slices with fresh strawberries for a fruity variation.
  • Gluten-free: Use gluten-free vanilla wafers and your favorite gluten-free flour blend for the cake.

If you try this, I’d love to hear how it turns out—drop a comment or tag me! Happy baking, friends. Let’s make mid-week desserts a thing, because why not?

Related update: Banana Pudding Cake

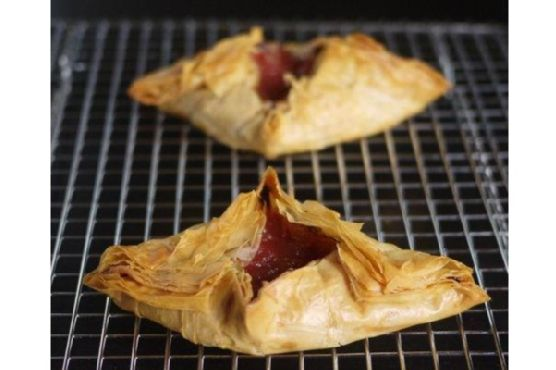
Related update: Crispy Rhubarb Pockets

Chocolate Chip Peanut Butter Mallow Dessert Bars | Made by Meaghan Moineau

Last Tuesday, I found myself in need of a pick-me-up. It was one of those dreary afternoons when everything seemed to drag. The sky was grey, the email inbox was overflowing, and honestly, I just wanted something sweet and gooey to make it all better. That’s when I remembered these Chocolate Chip Peanut Butter Mallow Dessert Bars. Trust me, they’re the kind of treat that can turn any day around. Quick to whip up, using ingredients you likely already have kicking around your pantry, these bars are a perfect mix of chocolatey, peanut buttery magic with a delightful marshmallow surprise. They’re everything you didn’t know you needed.

Jump to Recipe

What You’ll Need

This is one of those recipes where a quick pantry dive will probably yield most of what you need. The combination of these ingredients is pure joy.

  • 1 package of chocolate chip cookie mix
  • 1 egg
  • 3 tablespoons of milk
  • 1/2 cup of butter, melted
  • 1/2 cup of peanut butter
  • 1 cup of marshmallows
  • Drizzle of chocolate syrup

How to Make Chocolate Chip Peanut Butter Mallow Dessert Bars

  1. Preheat your oven to 375°F (190°C). While it warms, grab a mixing bowl and stir together the chocolate chip cookie mix, egg, milk, and melted butter until smooth. It should be creamy and thick but pliable enough to spread.
  2. Grease an 8×8 baking pan well. Trust me, you’ll thank yourself later. Spread the cookie mixture evenly into the bottom of the pan. The more even, the better it’ll bake.
  3. Pop the pan into the oven for 15-20 minutes. You’ll know it’s ready when the edges are golden and the center looks set and slightly puffed. Your kitchen will smell like heaven by now.
  4. Take the pan out and immediately spread the peanut butter evenly over the hot cookie base. The warmth will help it glide smoothly.
  5. Top the peanut butter layer with marshmallows. Feel free to sneak a few into your mouth — I won’t tell.
  6. Return the pan to the oven for a few more minutes, just until the marshmallows start to melt and get a little golden on the tips.
  7. Remove from the oven and use a spatula to spread the marshmallows evenly over the peanut butter layer, creating a gooey, sticky blanket.
  8. Drizzle the chocolate syrup over the top. Let it cool to set completely before cutting into squares. This is the hardest part — waiting! But I promise it’s worth it.

Cook’s Notes

Keep an eye on the marshmallows when you pop the pan back in the oven. They can go from beautifully melted to burnt in a blink. If you’re making these ahead, let them cool completely before storing them in an airtight container at room temperature. They’ll keep for about 3-4 days, not that they’ll last that long! For leftovers, a quick zap in the microwave will bring back that gooey goodness.

Make It Your Own

  • Nut Swap: Substitute the peanut butter with almond or cashew butter for a different nutty twist.
  • S’mores Style: Add a layer of crushed graham crackers in between the peanut butter and marshmallows for a classic s’mores flavor.
  • Extra Chocolatey: Mix in a handful of chocolate chips into the cookie dough batter for extra bursts of chocolate with every bite.
  • Spice It Up: Stir a teaspoon of cinnamon into the cookie mix for a warm, spiced undertone.

If you try this, I’d love to hear how it turns out — drop a comment or tag me! There’s nothing like sharing a good recipe and seeing everyone’s delicious results. Happy baking, and may your days be as sweet as these bars!

Related update: Chocolate Chip Peanut Butter Mallow Dessert Bars

Related update: Valentine's Day Potted Plant Ice-Cream Desserts

Lemon Bars | Made by Meaghan Moineau

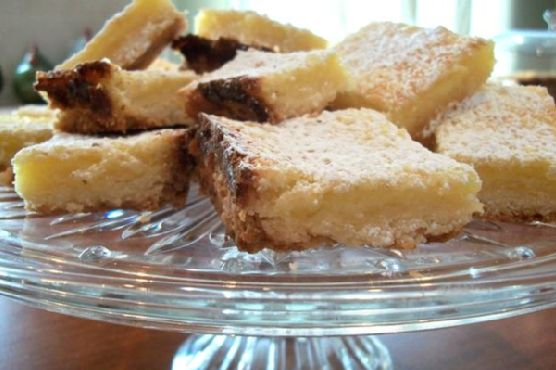
It was one of those sticky summer afternoons when the sun refused to set and the heat clung to every corner of my kitchen. I had just about given up on finding a dessert that felt right for the weather — something light and refreshing that wouldn’t require me to turn my kitchen into a sauna. That’s when the idea for these Lemon Bars hit me. They’re a sunshine-packed treat that’s as easy as they are impressive, giving you that sweet-tart zing without the fuss. Plus, they’re perfect for prepping ahead, which means more time for sipping iced tea on the porch. Whether you’re looking to whip up something special for a summer BBQ or just craving a burst of citrus, these Lemon Bars are your golden ticket.

Jump to Recipe

What You’ll Need

Chances are you already have most of this in your kitchen, making these bars a snap to put together.

  • Butter, melted
  • Cream cheese
  • Flour
  • Regular size containers of lemon pudding
  • Milk
  • Cool whip
  • Nuts, chopped
  • Powdered sugar

How to Make Lemon Bars

  1. Preheat your oven to 350°F. Mix the flour and melted butter together with a beater until combined. You’ll know it’s ready when it resembles coarse crumbs.
  2. Press this mixture firmly into the bottom of a 13 x 9 inch pan, creating a base layer. Bake it for about 20 minutes, or until it’s golden and fragrant.
  3. Remove from the oven and let it cool completely. Patience is key here!
  4. In a separate bowl, beat the cream cheese and powdered sugar until smooth and creamy. Blend in one cup of whipped topping. You’ll want a silky, spreadable texture.
  5. Once the pastry is cool, smoothly spread the cream cheese mixture over it, ensuring an even layer.
  6. Next, beat the instant pudding with milk until it thickens. Spread this lemony goodness over the cream cheese layer.
  7. Top everything with the remaining whipped topping, spreading it gently across the surface.
  8. Finish with a sprinkle of chopped nuts for a bit of crunch. Refrigerate overnight or for at least 3 hours. Let these bars chill until firm before serving.
  9. When ready to indulge, cut into 24 bars and enjoy the sunshine on a plate!

Cook’s Notes

These Lemon Bars are pretty forgiving, but there are a few things to keep in mind. Make sure the crust has time to cool completely before adding the cream cheese layer, as rushing this part can lead to a melty mess. For those moments when time isn’t on your side, pop your pan in the fridge to speed things up. If you’re planning ahead, rest assured these bars keep wonderfully in the fridge for up to three days. Just be sure to cover them tightly to keep them fresh.

Make It Your Own

  • Swap the nuts for toasted coconut to give it a tropical twist.
  • Use lime pudding instead of lemon for a zesty variation that’s equally delicious.
  • Add a layer of fresh raspberries between the cream cheese and pudding layers for a burst of berry flavor.
  • For a nut-free version, simply omit the nuts or replace them with white chocolate shavings.

If you try this, I’d love to hear how it turns out — drop a comment or tag me! There’s something magical about sharing food, and I hope these Lemon Bars bring a little sunshine to your day. Happy baking!

Related update: Lemon Bars

Related update: Oven Roasted Pears With Blackberry Sauce

Mini Spinach and Feta Quiches | Made by Meaghan Moineau

So there I was, staring at the contents of my fridge, wondering how I could whip up something that felt more like a brunch celebration and less like a “what’s-left-in-the-fridge” scramble. It was one of those days when you crave something cozy yet impressive, especially when your best friend calls and says she’s popping over in half an hour. Enter: Mini Spinach and Feta Quiches. They’re this magical combination of simplicity and elegance, bursting with savory flavors and just the right amount of cheese. Plus, they bake up quickly, so you can spend more time chatting and less time cooking. Trust me, these little quiches are worth every moment spent waiting for them to puff up in the oven. Perfect for a casual get-together or a solo treat with a cup of coffee.

Jump to Recipe

What You’ll Need

What’s great about these quiches is that they’re made with ingredients you probably have on hand or are easy to grab on a quick grocery run. Here’s the lineup:

  • Eggs – because what is a quiche without eggs?
  • Half-and-half – for that creamy, luscious texture.
  • Garlic – a subtle kick with lots of flavor.
  • Frozen spinach – convenient and just right for this dish.
  • Onion – for a touch of sweetness and depth.
  • Basil – fresh and aromatic, a lovely herbaceous note.
  • Low-fat shredded cheddar cheese – because cheese is life.
  • Feta cheese – tangy, crumbly, and oh-so-delicious.
  • Salt and pepper – essential for balancing flavors.

How to Make Mini Spinach and Feta Quiches

  1. Preheat your oven to 375°F (190°C). This is your time to collect your thoughts and maybe sip on some coffee, knowing deliciousness is coming soon.
  2. Set a large skillet over medium heat and coat it well with olive oil spray. Wait until the oil shimmers like a little lake under the sun.
  3. Add the garlic. Stir it around for about 30 seconds, just until it releases that irresistible aroma. No burnt garlic here!
  4. Add the chopped onion with a sprinkle of salt and pepper. Turn the heat up slightly to medium-high and cook, stirring often, until the onion turns a light golden brown.
  5. Now, fold in the spinach, chopped basil, and another pinch of salt and pepper. Lower the heat to medium and let it all mingle for about 10 to 15 minutes, stirring occasionally. Taste and adjust the seasoning if needed.
  6. Meanwhile, in a large bowl, whisk together the eggs, feta cheese, half-and-half, some more salt and pepper. Make sure it’s well blended, like a team of flavors ready to win.
  7. Spray your mini muffin pans generously with more olive oil spray. You don’t want any quiches sticking around here when it’s time to serve.
  8. Distribute the spinach mixture evenly among the muffin cups, about a tablespoon each. Follow this up with a tablespoon of the egg mixture in each cup.
  9. Bake in your preheated oven for 15 minutes, until the edges start to set and the tops look a little puffy.
  10. Pull out the pans and sprinkle each quiche with a touch of reserved shredded cheddar. Pop them back in the oven for about 5 more minutes, until the cheese on top is a beautiful golden brown.
  11. Let them cool slightly before serving. They’re delightful warm or at room temperature, with the flavors singing together perfectly.

Cook’s Notes

These quiches are ultra flexible, which is what I love most about them. You can make them a day ahead if you’re planning for a brunch or party. Just store them in an airtight container in the fridge and reheat gently in the oven or microwave. They stay good for about 3 days, though they rarely last that long at my house!

  • Don’t overfill the muffin cups. The filling puffs up a bit during baking, so leave a little space to avoid spillage.
  • If you’re chopping onions and they make you cry, try chilling them in the fridge for a bit beforehand. It helps, promise!

Make It Your Own

  • Protein Punch: Swap out the spinach for sautéed mushrooms and add some cooked, crumbled bacon for a heartier bite.
  • Spice it Up: Sprinkle a little smoked paprika or cayenne into the egg mixture for an unexpected kick.
  • Go Green: Use kale or Swiss chard instead of spinach for a different leafy green vibe.
  • Cheese Swap: Try sharp cheddar or even a nutty Gruyère if you’re out of feta. It’ll change the flavor profile in the best way.

If you try this, I’d absolutely love to hear how it turns out — drop a comment or tag me! May your kitchen be filled with the aroma of baking goodness and the satisfaction of a job deliciously done. 🍴✨

Related update: Mini Spinach and Feta Quiches

Fudgy chocolate cream cheese brownies with Baileys | Made by Meaghan Moineau

Last Wednesday, as the rain tapped against my kitchen window, a sudden craving for something rich, chocolatey, and indulgent hit me hard. It was one of those evenings where comfort food felt less like an option and more of a necessity. I rifled through my pantry, feeling the urge to concoct something that was both decadent and a tad boozy—a treat just for me. That’s when the idea of Fudgy Chocolate Cream Cheese Brownies with Baileys popped into my head. This is the kind of recipe that turns a gloomy night into a cozy one, with swirls of cream cheese dancing through the chocolate, accented by the warmth of Baileys. It’s not just dessert; it’s the dessert you make when you want to treat yourself to something special.

Jump to Recipe

What You’ll Need

Before you start, take a quick peek in your pantry. You might already have most of what you need. This ingredient list is straightforward, with a couple of stars to give it that wow factor.

  • Bittersweet chocolate
  • Butter
  • Cream cheese
  • Eggs
  • Flour
  • Espresso powder (optional, but it does wonders to elevate the chocolate flavor!)
  • Sugar
  • Vanilla extract
  • Baileys Irish Cream
  • Non-stick spray or butter and flour for the pan

How to Make Fudgy Chocolate Cream Cheese Brownies with Baileys

Let’s get down to business! Here’s how to bring this luscious creation to life:

  1. To whip up the chocolate layer, toss your bittersweet chocolate and butter into a large glass dish. Microwave them for about 1.5 minutes. Don’t panic if the chocolate looks like it hasn’t melted; give it a good stir, and it will melt into a velvety pool. If it’s still stubbornly chunky, give it a few more seconds in the microwave. Just avoid overheating—it’s a slippery slope to a burnt mess.
  2. Once your chocolate is all dreamy and melted, stir in the sugar and vanilla extract with a whisk. Let it cool down a tad; you don’t want scrambled eggs in your brownies.
  3. Now, beat in the eggs, one at a time, making sure each is well incorporated before adding the next. This is where the magic begins.
  4. Sift the flour over the chocolate mixture slowly, mixing as you go. The batter will start to look like a chocolate lover’s dream. Set this chocolatey goodness aside for a moment.
  5. For the cream cheese layer, pop the cream cheese in a bowl and give it a whirl with a hand mixer until it’s smooth and ready to mingle. Add sugar and mix again until it’s sweet and creamy.
  6. Beat in an egg and give it a splash of Baileys. Mix until everything’s just right.
  7. Prep your baking pan. Spray it with non-stick spray or butter and flour it. You can line it with parchment for easy lifting later—trust me, you’ll want to.
  8. Pour the chocolate mixture evenly into the pan, then drizzle the cream cheese mixture over it. Use a fork to create swirls so the cream cheese peeks through the chocolate. Don’t overdo it; you want distinct marbled patterns.
  9. Pop the pan into your preheated 350°F oven. Let it bake for about 35 minutes or until a knife comes out clean. The aroma will drive you wild, but patience, my friend—it’ll be worth it.
  10. Once baked, let it cool before slicing into perfect squares of indulgence. Enjoy!

Cook’s Notes

Here’s the inside scoop on making sure these brownies come out just right. Be patient with the chocolate melting process; stirring is your friend. If you rush and overheat, you’ll get a grainy texture—not cool. When blending the batters, gentle swirling is key for that beautiful marbled look. These brownies store well in an airtight container at room temperature for up to three days, but let’s be honest—they won’t last that long. If you’re thinking ahead, they freeze beautifully too. Just wrap them tightly in parchment and foil.

Make It Your Own

Want to add your own twist? Here are a few ideas:

  • Swap the Baileys for your favorite flavored liqueur like Kahlua or Amaretto for a different, yet delightful, boozy touch.
  • Add a handful of crushed nuts to the chocolate layer for a crunchy surprise in every bite.
  • Mix in a teaspoon of cinnamon into the chocolate for a warm, spicy note that pairs beautifully with the Baileys.
  • Looking for a non-alcoholic version? Use a splash of coffee instead of Baileys to deepen the chocolate flavor without the booze.

If you give this a go, I’d love to hear how it turns out for you. Drop me a comment or tag me with your brownie pics. Let’s share the love and the chocolate!

Related update: Fudgy chocolate cream cheese brownies with Baileys

Related update: Hot Cross Buns

Fudgy chocolate cream cheese brownies with Baileys | Made by Meaghan Moineau

Last Tuesday night, I had one of those cravings that you can’t shake off, no matter how many other snacks you try. You know the kind — rich, chocolaty, and just decadent enough to feel like a little celebration in the middle of your week. I found myself rummaging through the pantry, determined to whip up something that would hit all the right notes. That’s when I landed on these fudgy chocolate cream cheese brownies with a twist of Baileys. These are not your average brownies; they marry the dense, chocolatey goodness we all love with a lush swirl of cream cheese and a hint of Irish cream for a bit of grown-up indulgence. Perfect for a cozy night in or an impressive dessert when you’re hosting friends.

Jump to Recipe

What You’ll Need

It’s likely you already have most of these ingredients lying around, which means you’re just a few steps away from brownie heaven. A few key players make this dish truly special.

  • Bittersweet chocolate
  • Butter
  • Cream cheese
  • Eggs
  • Flour
  • Espresso powder (trust me on this)
  • Sugar
  • Vanilla extract
  • Baileys Irish Cream

How to Make Fudgy Chocolate Cream Cheese Brownies with Baileys

  1. First, let’s make the chocolate layer. Grab a large glass dish and toss in your bittersweet chocolate and butter. Give it a go in the microwave for about 1.5 minutes. It might still look whole when you take it out, but trust me, it’s ready to be stirred until smooth. If it’s stubborn, zap it for a few more seconds — just don’t overdo it, we don’t want scorched chocolate.
  2. Once the chocolate is silky, add in the sugar and vanilla. Stir with a whisk until it’s all well blended. Let it cool a little — you don’t want scrambled eggs in your brownies!
  3. After it’s cooled a bit, whisk in the eggs one by one. Make sure each egg is fully mixed in before adding the next.
  4. Now, sift the flour over your chocolate concoction, little by little, and fold it in gently. Set this aside; we’ll come back to it soon.
  5. For the cream cheese layer, grab a bowl and whip your cream cheese with a hand mixer until it’s nice and soft. Mix in the sugar until it’s well combined.
  6. Next, add the egg and beat until it’s just incorporated, followed by a generous splash of Baileys. Stir it all together until smooth.
  7. Now, it’s time to assemble! Prepare an 8″ square baking pan by spraying it with non-stick spray or lining it with parchment paper, making sure the paper hangs over the edges for easy lifting later.
  8. Pour the chocolate layer into your prepared pan and smooth it out. Then, pour the cream cheese mixture over the top. Use a fork to swirl the two layers together, creating pretty marble patterns. Just swirl — don’t mix them entirely!
  9. Pop it into a preheated oven at 350°F for about 35 minutes. You want a knife to come out clean from the center, but don’t let it overbake. Let it cool completely before slicing into indulgent squares.

Cook’s Notes

Don’t skimp on the chocolate quality — using a good bittersweet chocolate makes a world of difference. And while it might be tempting to skip the espresso powder, it actually enhances the chocolate flavor without making it taste like coffee. These brownies store well in an airtight container at room temperature for up to three days, or wrap them up and freeze for a longer treat stash. If you’re planning ahead, you can make these the day before and let them sit overnight — some say they taste even better the next day as the flavors meld!

Make It Your Own

  • Nutty Addition: Add a handful of chopped walnuts or pecans to the chocolate layer for a bit of crunch.
  • Spice It Up: Mix in a teaspoon of cinnamon or a pinch of cayenne to the chocolate batter for a warm, spicy kick.
  • Minty Fresh: Swap the Baileys for peppermint extract in the cream cheese layer for a refreshing twist.
  • Berry Bliss: Add a swirl of raspberry jam on top of the cream cheese for a fruity contrast.

If you give these brownies a whirl, let me know how they turn out! I’d love to hear your thoughts or see your creations — drop a comment or tag me in your posts. Happy baking, friends!

Related update: Fudgy chocolate cream cheese brownies with Baileys

Related update: Fudgy chocolate cream cheese brownies with Baileys

Rosemary Walnut Bread | Made by Meaghan Moineau

Picture this: It’s a chilly Saturday morning, the kind where the air feels sharp and the sky has that crisp blue tint that only autumn can deliver. The leaves have turned, and you’re wrapped up in your coziest sweater. A few weekends ago, I found myself in this exact scenario with a craving for something warm, hearty, and just a little bit special. Cue the Rosemary Walnut Bread! It’s the kind of bread that fills your kitchen with an aroma so enticing, you’ll want to bottle it as a candle. Plus, it’s a breeze to whip up, even if you’re still waking up from a glorious sleep-in. This recipe is a keeper for those who love a crusty loaf with the perfect hint of rosemary’s earthy magic and the crunch of walnuts.

Jump to Recipe

What You’ll Need

The beautiful thing about this Rosemary Walnut Bread is the simplicity of its ingredients — nothing fancy, yet it delivers big on flavor.

  • Cream cheese
  • Dry yeast
  • Eggs
  • Flour
  • Honey
  • Lemon zest
  • Milk
  • Olive oil
  • Rosemary
  • Salt
  • Walnuts

How to Make Rosemary Walnut Bread

  1. Start by combining the cream cheese, milk, salt, and honey in a medium mixing bowl. Sprinkle the dry yeast over the mixture and give it a gentle stir. Let it stand for about 5 minutes, allowing the yeast to activate — you’ll notice a frothy layer on top.
  2. Slowly stir in two cups of flour. The dough will start to come together. Cover the bowl with plastic wrap and tuck it into a warm spot (85°F is ideal) for about 15 minutes. During this time, the dough gets a chance to rest and begin to rise.
  3. Add the remaining flour, chopped walnuts, lemon zest, and chopped rosemary into the bowl. Crack in two eggs, and mix everything until the dough feels sticky and cohesive.
  4. Transfer the dough onto a floured surface and knead for a full 10 minutes. Think of this as your morning workout. The dough should feel smooth and elastic by the time you’re done.
  5. Rub a bit of olive oil onto the top of your dough and place it in a lightly oiled bowl. Cover with a damp cloth and let it rise for an hour until it doubles in size.
  6. Once the dough has risen, return it to the floured surface. Divide and shape it into two leaf-like loaves. This is your chance to get creative with your shaping skills!
  7. Make three diagonal slashes about half an inch deep across each loaf. These slashes will help the bread expand beautifully while baking.
  8. Brush the tops with a beaten egg for that irresistible golden crust, then let the loaves rise again for 30 minutes.
  9. Bake in a preheated 375°F oven for 40 minutes, until the loaves are golden and sound hollow when tapped on the bottom.
  10. Let the bread stand for about 20 minutes before slicing — if you can resist!

Cook’s Notes

Here are a few little nuggets of wisdom to help you along the way. If your kitchen runs cold, you can place the dough near the oven or a warm stove to help with rising. And when you’re kneading, don’t be afraid to add a sprinkle of flour if the dough feels too sticky. For storage, wrap your bread tightly in foil or a bread bag to keep it fresh for up to three days. It also freezes beautifully — just slice it, wrap it well, and pop it in the freezer.

Make It Your Own

  • Swap the walnuts for pecans if you fancy a different nutty flavor.
  • If rosemary isn’t your jam, try using thyme or sage for a unique herb twist.
  • Add a handful of dried cranberries for a sweet and tart combo that’s perfect for the holidays.
  • Experiment with whole wheat flour for a heartier loaf — just adjust the liquid slightly as it tends to absorb more moisture.

If you try this, I’d love to hear how it turns out — drop a comment or tag me! Happy baking, and may your kitchen be filled with warmth and the comforting scent of home-baked bread.

Related update: Rosemary Walnut Bread

Related update: Khachapuri

Peanut Butter Sriracha Cookies | Made by Meaghan Moineau

Picture this: It’s a Wednesday evening, the kind where you’ve been hustling all day but still crave something that feels like a hug on a plate. That’s when these Peanut Butter Sriracha Cookies waltzed into my chaotic kitchen. A little sweet, a little heat, these cookies tick all the boxes for something spectacularly different yet comfortingly familiar. It’s the kind of dessert that makes you feel like you’ve got your life together, even if just for a moment. Trust me, they’re worth the mini adventure of adding a spicy twist to our beloved peanut butter classic.

Jump to Recipe

What You’ll Need

So, here’s the good news: you probably have almost everything you need chilling in your pantry. This isn’t one of those recipes that sends you on a wild goose chase for exotic ingredients. But don’t underestimate the magic here; it’s all about that surprise kick of sriracha.

  • 1/2 cup unsalted butter, softened
  • 1 cup crunchy peanut butter
  • 1/2 cup sugar
  • 1/2 cup brown sugar
  • 1 tablespoon sriracha
  • 2 large eggs
  • 1 teaspoon vanilla extract
  • 1 3/4 cups all-purpose flour
  • 1 teaspoon baking powder
  • 1/2 teaspoon baking soda
  • 1/2 teaspoon salt
  • Granulated sugar, for rolling
  • Hershey’s chocolate kisses, for topping

How to Make Peanut Butter Sriracha Cookies

  1. Start by creaming together the unsalted butter, crunchy peanut butter, sugar, and brown sugar in a spacious mixing bowl. You’re looking for a smooth, creamy dream here.
  2. Slowly drizzle in the sriracha, then add the eggs and vanilla. Beat until everything is well combined and you have a beautifully cohesive mixture.
  3. In another bowl, whisk together the flour, baking powder, baking soda, and salt. This step is key to ensuring everything rises just enough.
  4. Gently mix the dry ingredients into the peanut butter concoction until you have a consistent dough. It should feel like the softest playdough ever.
  5. Here’s where it gets serious: refrigerate the dough for about an hour. This chill time helps the flavors meld and makes the dough easier to handle.
  6. Preheat your oven to a cozy 375 degrees Fahrenheit.
  7. Scoop the dough into 1-inch balls (a cookie scoop works wonders here). Dip the tops into granulated sugar for that sparkle and place on a cookie sheet.
  8. Use a fork to flatten each ball, creating that classic criss-cross pattern we all know and love.
  9. Bake for 8-10 minutes, just until the cookies start to brown. Keep an eye on them – do not over-bake unless you like cookies that double as hockey pucks.
  10. As soon as you pull them out of the oven, press a Hershey’s chocolate kiss into the center of each cookie. Let them cool on wire racks and then, my friend, indulge!

Cook’s Notes

Let me offer some pearls of wisdom: First, don’t skimp on the chill time—it’s essential for preventing spread. If you’re planning to bake ahead, you can make the dough and freeze it; just roll the dough into balls and freeze them on a tray before transferring to a bag. Bake them directly from frozen but add a couple more minutes to the baking time. As for leftovers, if there are any, store them in an airtight container at room temp for up to a week, though they rarely last that long in my house!

Make It Your Own

Why not put your own spin on these cookies? Here are a few ideas:

  • Substitute the peanut butter with almond butter if you’re feeling fancy or have a nut allergy to consider.
  • Kick it up a notch with more sriracha if you’re a heat seeker.
  • Try dark chocolate kisses instead of milk chocolate for a richer taste.
  • Add a handful of chopped peanuts for extra crunch if texture is your thing.

And there you have it! If you try this recipe, I’d love to hear how it turns out for you — drop a comment or tag me on social media. Can’t wait to hear what you think about this sweet and spicy twist!

Related update: Peanut Butter Sriracha Cookies

Related update: Chocolate Hazelnut Mousse

Chive and dill muffins | Made by Meaghan Moineau

One chilly autumn afternoon, I found myself digging through the fridge, searching for something — anything — that could transform into a warm, comforting snack. The day had that crisp edge that makes you want to cozy up with something fresh out of the oven. That’s when I spotted a lonely bunch of fresh chives and dill, remnants from last night’s dinner. An idea sparked, one that felt both adventurous and familiar: Chive and Dill Muffins. These little savory gems are the perfect answer to a craving for something cozy yet bright, offering a delightful mix of herbal freshness and subtle, buttery richness. And let’s be honest, they’re also a great way to justify eating a muffin at any time of day.

Jump to Recipe

What You’ll Need

Chances are you already have most of these ingredients lounging in your pantry, just waiting to become something delicious.

  • 1 cup all-purpose flour
  • 1/2 cup yellow cornmeal
  • 2 tablespoons sugar
  • 2 teaspoons baking powder
  • 1 teaspoon salt
  • 1/2 teaspoon baking soda
  • 1/4 teaspoon cayenne pepper
  • 1/4 cup fresh chives, chopped
  • 1/4 cup fresh dill, chopped
  • 1 cup plain yogurt
  • 2 large eggs
  • 1/2 cup (1 stick) unsalted butter, melted and slightly cooled

How to Make Chive and Dill Muffins

  1. Preheat your oven to 220°C (425°F). This high heat will give your muffins that beautiful rise and golden top.
  2. In a medium bowl, whisk together the flour, cornmeal, sugar, baking powder, salt, baking soda, and cayenne pepper. Once combined, gently stir in the chopped chives and dill, letting their fresh aroma fill your kitchen.
  3. In another medium bowl, whisk together the yogurt, eggs, and melted butter until smooth and creamy. The mixture should be a pale yellow, with small bubbles forming from the whisking.
  4. Add the yogurt mixture to the dry ingredients and stir just until blended. Be careful not to overmix; it’s okay if the batter is a bit lumpy. Those lumps will work themselves out during baking.
  5. Divide the batter among greased or silicone muffin cups, using about 1/3 cup batter for each. They should be about two-thirds full, giving them room to puff up beautifully.
  6. Bake in the preheated oven for 20 minutes, or until the muffins are puffed and golden. You’ll know they’re done when a toothpick inserted into the center comes out clean or with just a few crumbs attached.
  7. Let the muffins cool in their cups for a few minutes before removing. This brief wait allows them to set up perfectly. Serve warm for the best experience.

Cook’s Notes

Here’s where the magic happens — or at least where you avoid any potential hiccups. First, make sure your baking powder and soda are fresh; nothing’s worse than flat muffins. These muffins can be stored in an airtight container at room temperature for up to two days, but they’re best enjoyed fresh. If you want to make them ahead, you can freeze them for up to a month. Just thaw at room temperature and pop them in a warm oven for a few minutes to refresh their golden tops.

Make It Your Own

These muffins are already a little party of flavors, but if you’re feeling experimental, here are a few ideas:

  • Swap the chives for green onions for a milder flavor with a slight crunch.
  • Add 1/2 cup of grated cheddar cheese to the batter for an extra savory kick.
  • Mix in some finely chopped sun-dried tomatoes for a slightly sweet, tangy twist.
  • Replace the dill with fresh parsley and thyme for a different herbal profile.

If you try this, I’d love to hear how it turns out — drop a comment or tag me! Let’s swap stories about these delightful muffins and all their delicious variations.

Related update: Chive and dill muffins

Related update: Penne Arrabiata

Buttermilk Pound Cake | Made by Meaghan Moineau

Introduction

There’s something truly magical about a classic buttermilk pound cake. It takes me back to lazy Sunday afternoons in my grandmother’s kitchen, where the smell of freshly baked cake would fill the house, drawing everyone together. This recipe has been in our family for generations, cherished and passed down with love. The beauty of this cake lies in its simplicity, each ingredient playing a crucial role in creating a perfectly tender crumb and a rich, buttery flavor that leaves you reaching for just one more slice.

Why You’ll Love It

This buttermilk pound cake is the epitome of comfort baking. It’s wonderfully moist with a soft, dense crumb and a delightful hint of lemon and nutmeg that sets it apart from other pound cakes. Whether you’re a novice baker or a seasoned pro, this cake is straightforward and rewarding to make. Perfect for any occasion, it can be dressed up with a drizzle of glaze or enjoyed plain with a cup of tea or coffee. The versatility and timeless appeal of this cake make it a must-have recipe in your baking repertoire.

Ingredients

  • 2 cups all-purpose flour
  • 1/2 teaspoon baking soda
  • 1/2 teaspoon salt
  • 1 cup unsalted butter, softened
  • 2 cups white sugar
  • 4 large eggs
  • 1 tablespoon lemon zest
  • 1/4 teaspoon nutmeg
  • 1 teaspoon vanilla extract
  • 1 cup buttermilk

Instructions

  1. Preheat your oven to 325°F (165°C). Prepare a 9- or 10-inch tube pan by buttering it generously, lining the bottom with parchment paper, and buttering it again. For an extra special touch, coat the sides with sugar after buttering.
  2. In a medium bowl, sift together the flour, baking soda, and salt. Set this dry mixture aside for later.
  3. In a large mixing bowl, beat the softened butter and sugar together until creamy and light. This should take about 5 minutes of mixing.
  4. Add the eggs to the butter mixture one at a time, ensuring each egg is fully incorporated before adding the next. Mix in the lemon zest, nutmeg, and vanilla extract.
  5. Begin adding the dry ingredients and buttermilk alternately to the batter. Start with one-third of the flour mixture, mixing until just combined. Add half of the buttermilk, mixing again until just combined. Repeat, alternating between the dry ingredients and buttermilk, and finish with the last third of the flour mixture.
  6. Pour the batter into the prepared tube pan, smoothing the top with a spatula.
  7. Bake in the preheated oven for 70 to 75 minutes, or until a toothpick inserted into the center comes out clean.
  8. Allow the cake to cool in the pan for about 15 minutes before turning it out onto a wire rack to cool completely.

Tips

To ensure your pound cake is a success, here are a few tips: Make sure all your ingredients are at room temperature before you start; this helps them blend more smoothly and evenly. Don’t rush the creaming of the butter and sugar; this step is critical for incorporating air and achieving that perfect cake crumb. Lastly, be careful not to overmix once you begin adding the flour, as this can lead to a dense cake.

Variations & Substitutions

This buttermilk pound cake is wonderfully versatile. Feel free to swap the lemon zest for orange zest if you prefer a different citrus note. For a more spiced flavor, a pinch of cinnamon can be added along with the nutmeg. If you’re out of buttermilk, you can make a quick substitute by adding a tablespoon of lemon juice or vinegar to a cup of milk and letting it sit for 5 minutes.

Storage

Your buttermilk pound cake will stay fresh for up to 3 days if stored in an airtight container at room temperature. If you wish to keep it longer, wrap the cake tightly in plastic wrap and store it in the refrigerator for up to a week. This cake also freezes beautifully; wrap individual slices in plastic wrap, then aluminum foil, and store them in a freezer-safe bag for up to 3 months.

FAQ

Can I use a different type of pan?

Yes, you can use a loaf pan or bundt pan if you prefer. Just be sure to adjust the baking time accordingly and check for doneness with a toothpick.

Is it okay to use salted butter?

If you only have salted butter, you can use it, but omit the additional salt in the recipe to balance the flavors.

Nutrition

While I don’t have the exact nutritional breakdown, this recipe yields a rich and buttery cake. Keep in mind that it’s a treat best enjoyed in moderation. For those counting calories or managing dietary restrictions, consider using a sugar substitute or reducing the sugar by a third.

Conclusion

Making this buttermilk pound cake is like baking a slice of nostalgia. Its rich flavor, tender crumb, and delightful aroma will have you falling in love from the first bite. Whether you enjoy it plain or with a scoop of ice cream, this cake is a delightful reminder of life’s simple pleasures. I hope this recipe brings as much joy to your kitchen as it does to ours. Happy baking!

Related update: Buttermilk Pound Cake

Related update: Peanut Butter Sriracha Cookies