Triple Citrus Cake | Made by Meaghan Moineau
Title: Sweet Memories: Crafting the Perfect Triple Citrus Cake
Description: Discover the delightful blend of lemon, lime, and orange in our Triple Citrus Cake. This easy-to-follow recipe not only brings a burst of citrus flavor to your table but also a heartwarming family story that makes this dessert truly special.
—
Triple Citrus Cake: A Nostalgic Twist on a Classic Dessert
There’s something undeniably comforting about a slice of citrus cake. The zesty aroma, the moist crumb, and the delicate balance of sweet and tart flavors transport me back to my childhood summers at my grandmother’s house. Every June, as the sun warmed the garden, my family would gather, eager to savor her famous citrus cake—a tradition I am thrilled to share with you today.
Difficulty Level: 4/10
Classification: Dessert
Ingredients:
– 1 ½ cups flour
– 1 ½ teaspoons baking powder
– ¼ teaspoon salt
– ¾ cup lime yogurt
– 3 whole eggs
– 1 cup sugar
– 1 teaspoon vanilla extract
– ½ cup grapeseed oil
– Zest of 1 lemon
– 1 cup powdered sugar
– 2 tablespoons orange juice
Instructions:
1. Prepare Dry Ingredients: In a large bowl, whisk together the flour, baking powder, and salt. Set aside.
2. Mix Wet Ingredients: Using an electric mixer, beat the lime yogurt, eggs, sugar, vanilla extract, grapeseed oil, and lemon zest until well combined. The mixture should be smooth and slightly frothy.
3. Combine Ingredients: Gradually fold the dry ingredients into the wet mixture using a spatula. Mix until just incorporated, ensuring not to overmix.
4. Prepare the Pan: Coat a 9 x 5-inch loaf pan with floured baking spray, or line with parchment paper and spray with baking spray for extra ease. Pour the batter into the pan, smoothing the top evenly.
5. Bake: Preheat your oven to 350 degrees Fahrenheit. Bake the cake for 40-50 minutes, or until a cake tester inserted into the center comes out clean.
6. Cool: Allow the cake to cool in the pan for at least an hour. This step is crucial for the cake to set properly.
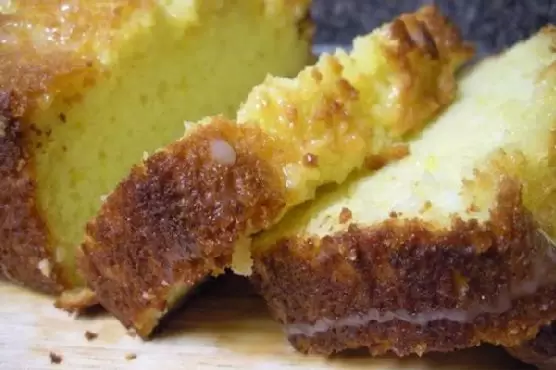
7. Glaze: Once the cake is cool, transfer it to a serving plate. In a small bowl, mix the powdered sugar with orange juice until smooth. Drizzle the glaze generously over the cake, allowing it to cascade down the sides.
A Slice of Family History
Each bite of this Triple Citrus Cake is more than just a taste of citrus delight; it’s a step back in time. I vividly remember my grandmother’s kitchen, bustling with laughter and the sweet scent of citrus. Her secret ingredient, she would say with a wink, was love. On sunny afternoons, we’d sit on the porch, sharing stories and slices of cake, the citrus flavors dancing on our tongues, blending perfectly with the warmth of family togetherness.
Making this cake today brings back those cherished memories, reminding me of the simple joys of life—family, love, and of course, a good slice of cake. It’s a tradition I hope to pass down, capturing the essence of those summer days in every zesty bite.
Whether you’re a seasoned baker or a novice in the kitchen, this Triple Citrus Cake is a delightful addition to any dessert repertoire. So go ahead, whip up this citrusy treat, and perhaps, create some sweet memories of your own.
Related update: No-Bake Fudge Brandy Brownies
Related update: Chocolate Nutella Walnut Cake