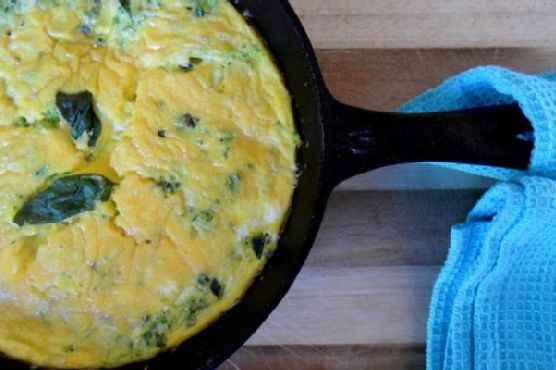
Zucchini & Basil Frittata | Made by Meaghan Moineau

Zucchini & Basil Frittata | Made by Meaghan Moineau

Title: Zucchini & Basil Frittata: A Taste of Home and Heart
Description: Dive into the warmth of family memories with our Zucchini & Basil Frittata recipe. Perfect for brunch or a light dinner, this dish brings together the fresh flavors of zucchini, basil, and cheddar cheese, combined effortlessly with eggs. Discover the joy of cooking this simple yet flavorful frittata that’s sure to become a family favorite.

---


A Family Tradition: The Zucchini & Basil Frittata


There’s something magical about Saturday mornings in my family home. As the sun peeks through the kitchen windows, casting a golden glow over the countertops, the familiar sizzle of a frittata begins to fill the air.


Years ago, on a particularly sunny morning, my grandmother taught me the art of making her famous Zucchini & Basil Frittata. I remember standing on a stool beside her, eyes barely reaching the countertop, watching in awe as she skillfully shredded zucchini with her trusty box grater, the faint scent of fresh basil wafting through the kitchen. The recipe was simple, she assured me, but it was the love and care we put into it that made it special.


Ingredients


- Fresh basil leaves


- 1 cup cheddar cheese, shredded


- 6 large eggs


- 1-2 tablespoons grapeseed oil (or olive oil)


- 3 green onions, finely chopped


- Salt, to taste


- 2 medium zucchinis


Instructions


1. Prepare the Zucchini: Start by shredding the zucchini using a box grater or a food processor. Place the shredded zucchini in a colander over a large bowl. Sprinkle with a little salt and let it sit for about 20 minutes to allow excess water to drain. If you're in a hurry, gently squeeze out the water with your hands. This step can be done ahead of time, and the zucchini can be stored in the refrigerator overnight if needed.
2. Mix Ingredients: In a large mixing bowl, combine the shredded zucchini, chopped green onions, basil leaves, cheddar cheese, and a pinch of salt. Stir well to mix all ingredients thoroughly.
3. Prepare the Eggs: In a separate bowl, crack the eggs and beat them until smooth. Pour the beaten eggs into the bowl with the other ingredients, stirring to ensure everything is well combined.
4. Preheat and Cook: Preheat your oven to 350 degrees F. In a 10-inch cast iron skillet, heat 1 to 2 tablespoons of grapeseed oil over medium heat, ensuring the sides are well coated. Add the egg and zucchini mixture to the skillet, spreading it evenly. Cook for 3 to 5 minutes, until the edges start to set.
5. Bake: Carefully transfer the skillet to the preheated oven. Bake for 12 to 15 minutes, or until the center is set and a toothpick inserted comes out clean.

A Nostalgic Note


As the frittata bakes, the house fills with a comforting aroma that transports me back to those cherished mornings with my grandmother. The joy of sharing this dish with my family, from my grandmother’s time to now, remains a treasured tradition. The Zucchini & Basil Frittata is more than just a meal; it's a reminder of love, legacy, and the simple pleasures of life.


Difficulty


Rating: 3/10
Classification: Main Dish

This delightful Zucchini & Basil Frittata is not only a testament to family traditions but also a celebration of fresh, wholesome ingredients. Whether you’re making it for a cozy brunch or a light dinner, it's destined to become a staple in your culinary repertoire. Enjoy every bite, and perhaps, create a new memory of your own.
Read more about Appetizers

Read more about Main Dishes

Read more about Desserts

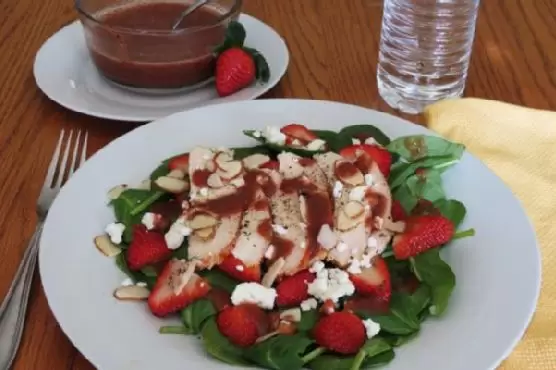
Spinach Salad with Strawberry Vinaigrette | Made by Meaghan Moineau

Spinach Salad with Strawberry Vinaigrette | Made by Meaghan Moineau

Title: A Taste of Summer: Spinach Salad with Strawberry Vinaigrette
Description: Dive into the refreshing flavors of our Spinach Salad with Strawberry Vinaigrette, a delightful dish that's both easy to prepare and bursting with vibrant colors and textures. This simple yet elegant salad combines the sweetness of strawberries with the savory notes of feta cheese and almonds, making it a perfect appetizer or light main dish. Join us as we explore this delightful recipe and share a nostalgic family memory that makes this salad extra special.

---


Spinach Salad with Strawberry Vinaigrette: A Family Favorite
Difficulty: 2/10
Category: Appetizer/Main Dish

---


There's something inherently special about the smell of fresh strawberries that instantly transports me back to my grandmother's kitchen. Every summer, our family would gather at her quaint countryside home, surrounded by fields ripe with the season's bounty. It was during these warm, sunlit afternoons that my grandmother would prepare her signature Spinach Salad with Strawberry Vinaigrette, a dish that has since become a beloved family tradition.


Ingredients:

- Fresh spinach leaves


- Strawberries (for salad and vinaigrette)


- Cooked chicken, sliced


- Feta cheese, crumbled


- Almonds, toasted


- Shallot, finely chopped


- Fresh thyme leaves


- Ground pepper, to taste


Strawberry Vinaigrette:

- Strawberries, hulled and sliced


- Balsamic vinegar


- Dijon mustard


- Water


Instructions:
1. Prepare the Vinaigrette: In a blender, combine a handful of sliced strawberries with a splash of balsamic vinegar, a teaspoon of Dijon mustard, and a dash of water. Blend until smooth and creamy. Set aside.
2. Assemble the Salad: On a large serving plate, arrange a generous bed of fresh spinach leaves. Top with sliced cooked chicken, crumbled feta cheese, and a sprinkle of toasted almonds for a delightful crunch. Add thinly sliced shallots and a few sprigs of fresh thyme.
3. Drizzle and Serve: Pour the strawberry vinaigrette over the salad, ensuring an even distribution of flavor. Finish with freshly ground pepper to taste.
4. Enjoy: Serve immediately and enjoy the blend of sweet, savory, and tangy flavors that celebrate the essence of summer.

---


A Nostalgic Memory:

As children, my siblings and I would eagerly assist in the kitchen, our hands sticky with strawberry juice as we helped prepare the vinaigrette. My grandmother, with her gentle smile and flour-dusted apron, would tell stories of her own childhood, weaving tales of picnics by the river and the secret family recipe passed down through generations.


This salad was more than just a meal; it was a celebration of family, love, and the simple joys of summer. Each bite is a reminder of those golden days, the laughter shared around the table, and the enduring legacy of flavors that connect us to our roots.


---


This Spinach Salad with Strawberry Vinaigrette is more than just a dish; it's a heartfelt tribute to the cherished memories that food can create. Whether you're enjoying it as a light appetizer or a main dish, may it bring warmth and joy to your table, just as it has to ours for generations.

Read more about Appetizers

Read more about Main Dishes

Read more about Desserts

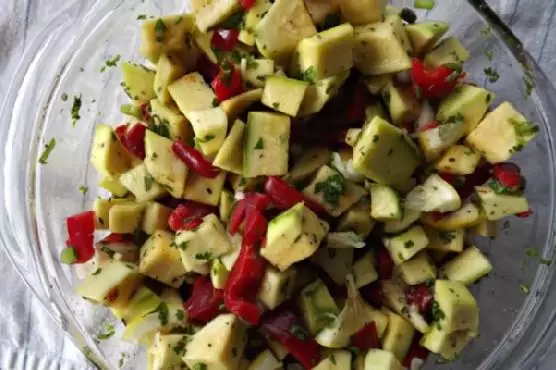
Simple Squash Salad | Made by Meaghan Moineau

Simple Squash Salad | Made by Meaghan Moineau

Title: A Taste of Home: Simple Squash Salad to Savor Summer Memories
Description: Discover the joy of summer with our Simple Squash Salad, a refreshing dish that captures the essence of sunshine and family gatherings. This easy-to-make appetizer is packed with vibrant flavors and a nostalgic touch that will transport you back to cherished family moments.

---


As the summer sun casts its golden glow over the horizon, there's nothing quite like gathering with family around a picnic table. For me, summer memories are flavored with the tang of vinegar, the zest of lemon, and the vibrant colors of fresh vegetables. Our Simple Squash Salad is not just a dish—it's a time machine that takes me back to those lazy afternoons spent with loved ones.


Ingredients:

- 1 cup diced bell pepper


- 1 teaspoon black pepper


- A handful of fresh parsley, chopped


- 2 cloves garlic, minced


- 1 teaspoon garlic powder


- 2 tablespoons capers, plus 2 tablespoons caper juice


- 1 lemon, juiced


- 1 small onion, diced


- 1 teaspoon dried oregano


- 1/2 teaspoon red pepper flakes


- Salt to taste


- 1 teaspoon sugar


- 1/4 cup vinegar


- 2 cups diced zucchini


Instructions:
1. Prepare the Salad: In a large bowl, combine the diced bell pepper, diced zucchini, and diced onion. Add a handful of chopped fresh parsley for that burst of green and freshness.
2. Mix the Dressing: In a separate cup, whisk together minced garlic, garlic powder, capers with caper juice, lemon juice, dried oregano, red pepper flakes, black pepper, salt, sugar, and vinegar. Adjust the ingredients to taste, balancing the tanginess and the heat to your preference.
3. Combine and Chill: Pour the zesty dressing over the salad mixture and gently toss until all the vegetables are evenly coated. Cover the bowl and let the salad sit in the refrigerator for a few hours. This allows the flavors to meld beautifully, enhancing the salad's vibrant taste.
4. Serve and Enjoy: Once chilled, give the salad a final toss before serving. It's the perfect appetizer to kick off any meal, offering a refreshing crunch and a nostalgic nod to summer days gone by.
A Nostalgic Family Memory

Growing up, my family would host a big summer barbecue every year, an event that was the highlight of my childhood. I remember my grandmother standing by the kitchen counter, her hands deftly chopping vegetables, her laughter mingling with the clinking of dishes. She had a way of infusing love into every dish she made, and our Simple Squash Salad was no exception.


As kids, my cousins and I would sneak into the kitchen, eager to snatch a taste while the salad marinated in the fridge. When it was finally time to eat, we'd gather around the table, our plates piled high with colorful, fresh flavors. The salad was always a hit, its tangy dressing perfectly complementing the sweetness of the bell peppers and the subtle crunch of zucchini.


These memories are etched into my heart, a reminder of simpler times when the world was as vibrant and full of promise as the salad before us.


Difficulty Rating: 3/10
Classification: Appetizer

---


Recreate this simple yet delicious recipe and bring a slice of those cherished summer memories to your table. Whether it's a family gathering or a quiet dinner, our Simple Squash Salad is sure to be a hit, inviting smiles and sparking nostalgia with every bite.

Read more about Appetizers

Read more about Main Dishes

Read more about Desserts

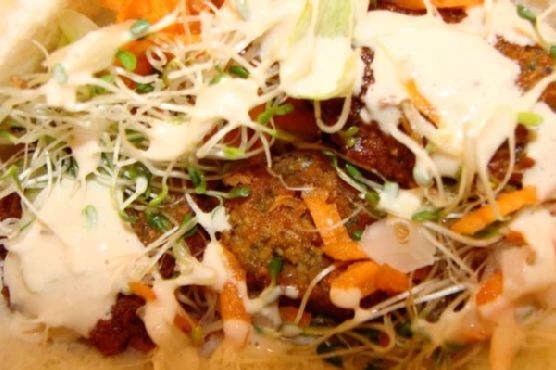
Falafels With Tahini Sauce | Made by Meaghan Moineau

Falafels With Tahini Sauce | Made by Meaghan Moineau

Title: “Crispy Falafels with Creamy Tahini Sauce: A Journey Back to Family Gatherings”
Description: Dive into the heartwarming world of homemade falafels, a cherished Middle Eastern delight, paired with a lusciously smooth tahini sauce. This recipe, brimming with vibrant flavors and texture, will transport you to a lively family gathering where each bite is a nostalgic reminder of shared laughter and stories. Easy to make and delightful to taste, this appetizer is a perfect way to bring loved ones together around the table.

Falafels with Tahini Sauce: A Taste of Home and Nostalgia

Introduction

The aroma of falafels sizzling in the kitchen always takes me back to my grandmother’s house. Her tiny kitchen, filled with the chatter of family members, was the center of our universe. Every family gathering was incomplete without her signature falafels, crispy on the outside and soft on the inside, paired with a creamy, tangy tahini sauce.

Ingredients

For the Falafels:

– 1 cup garbanzo beans, soaked overnight and drained

– 1 medium onion, finely chopped

– 2 cloves garlic, minced

– 1/4 cup fresh cilantro, chopped

– 1/4 cup fresh parsley, chopped

– 1 teaspoon ground cumin

– 1 teaspoon sea salt

– 1/2 teaspoon red dried pepper flakes

– 1 teaspoon baking powder

– Flour, as needed

For the Tahini Sauce:

– 1/2 cup tahini paste

– 1/4 cup water

– Juice of 2 lemons

– 1 clove garlic, minced

– 1/2 teaspoon sea salt

Instructions

Falafels:

1. Begin by soaking the garbanzo beans overnight. Drain and set aside.

2. In a food processor, combine the garbanzo beans, onion, garlic, cilantro, parsley, cumin, sea salt, and red pepper flakes. Process until the mixture is crumbly.

3. Transfer the mixture to a large bowl. Gradually add the flour, one tablespoon at a time, mixing well until the mixture can easily be formed into balls or patties.

4. Shape the mixture into balls or patties. Place them in the refrigerator to chill while preparing the tahini sauce.

Tahini Sauce:

1. In the food processor, combine the tahini paste, water, lemon juice, garlic, and sea salt.

2. Process until smooth. Adjust the consistency by adding more water if the sauce is too thick, or more lemon juice for extra tang.

A Nostalgic Family Memory

One summer evening, as the sun dipped below the horizon, casting a golden glow over our backyard, my grandmother and I were in the kitchen, preparing her famous falafels. Despite the heat of the day, the kitchen was cool, and the scent of fresh herbs filled the air. As we formed the falafel mixture into balls, she shared stories of her childhood, how her mother would make falafels as a treat for special occasions.

I watched in awe as she effortlessly flipped the falafels in the pan, each one perfectly golden brown. We gathered around the table, the adults with their stories and laughter, the children eager to devour the delicious spread. The falafels were always the highlight, their crispy exterior giving way to a burst of flavors inside. The tahini sauce, with its creamy texture and hint of garlic, was the perfect accompaniment.

That evening, with the sound of cicadas in the background and the warmth of family around, I realized that food is more than just sustenance—it’s a vessel for memories and love.

Difficulty Rating

Difficulty: 5/10

Classification

This dish is a versatile appetizer, perfect for starting a meal with its rich flavors and delightful textures.

Falafels with tahini sauce are more than just a dish; they are a celebration of family, tradition, and the stories that bind us. As you savor each bite, may it bring warmth to your heart and a smile to your face, reminiscent of cherished family gatherings.

Read more about Appetizers

Read more about Main Dishes

Read more about Desserts

Related update: Lemon and Strawberry Loaf

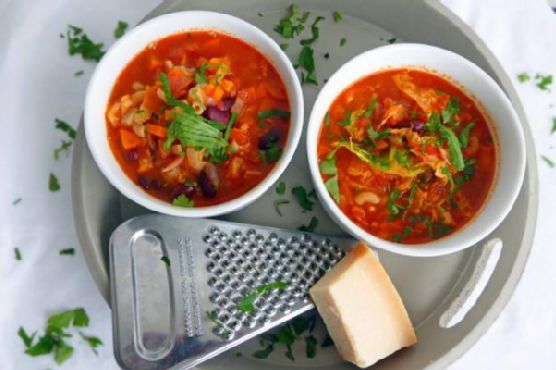
Minestrone Soup | Made by Meaghan Moineau

Minestrone Soup | Made by Meaghan Moineau

Title: "Hearty Minestrone Soup: A Family Classic to Warm Your Soul"
Description: Discover the comforting embrace of our Minestrone Soup recipe—a heartwarming blend of wholesome ingredients and cherished family memories. With its rich flavors and ease of preparation, this classic dish is perfect for any occasion. Join us as we take a delicious journey down memory lane, sharing the joy of cooking and savoring this timeless soup.

---


There’s something profoundly comforting about a simmering pot of soup on the stove, especially when it’s a recipe passed down through generations. Minestrone Soup, with its robust flavors and nourishing ingredients, has always been a staple in my family. It’s more than just a meal; it’s a delightful reminder of the times spent in my grandmother’s kitchen, surrounded by the laughter of loved ones and the aroma of fresh ingredients mingling together.


Ingredients:

- Smoked bacon, cut into strips


- 1 can of kidney beans


- 1 can of tomatoes


- 2 carrots, diced


- 2 celery stalks, chopped


- 1 tablespoon fresh thyme leaves


- 2 cloves garlic, minced


- 0.5 oz. macaroni


- 2 tablespoons olive oil


- 1 onion, finely chopped


- Parmesan cheese, to serve


- Black salt and pepper, to taste


- 1 cup shredded savoy cabbage


- 2 tablespoons tomato purée


- 2 fresh tomatoes, cut into eighths


- 4 cups vegetable stock


Instructions:
1. Begin with a Sizzle: Heat the olive oil in a very large pan with a close-fitting lid. Add the celery, bacon, onion, carrot, and garlic. Fry for about 5 to 7 minutes until the vegetables soften. Ensure the heat is moderate to avoid browning.
2. Infuse with Flavor: Stir in the tomato purée and thyme leaves. Allow them to cook for about 30 seconds until aromatic.
3. Build the Base: Pour in the vegetable stock, canned tomatoes, fresh tomatoes, and season with a little salt and pepper. Stir everything thoroughly, set to a gentle simmer, cover, and cook for about 25 minutes until the vegetables are al dente.
4. Perfect the Pasta: Add the macaroni and cook according to the package instructions, usually around 7 minutes.
5. Finish with Finesse: Incorporate the cabbage and kidney beans, cooking until the cabbage wilts, approximately 5 minutes. Taste, adjust seasoning with salt and pepper as needed.
6. Serve with a Sprinkle: Ladle the soup into bowls, topping each with a sprinkle of Parmesan cheese.
A Taste of Nostalgia:

As a child, Sunday afternoons at my grandmother's house were a cherished ritual. Her Minestrone Soup was the star of the table, a steaming pot filled with love and warmth. My siblings and I would crowd around the kitchen, eager to help chop vegetables or stir the pot. The aroma of garlic and thyme would fill the air, mingling with the sound of family chatter and laughter. Those moments taught me that food is more than sustenance; it’s a bridge to the past, a way to connect with our heritage and each other.


Difficulty: 4/10
Classification: Main Dish

This Minestrone Soup is an invitation to create new memories while honoring the old, a dish that brings both flavor and family together. Whether you're a seasoned cook or a kitchen novice, this recipe is a delightful endeavor, promising rich rewards for your taste buds and your heart.

Read more about Appetizers

Read more about Main Dishes

Read more about Desserts

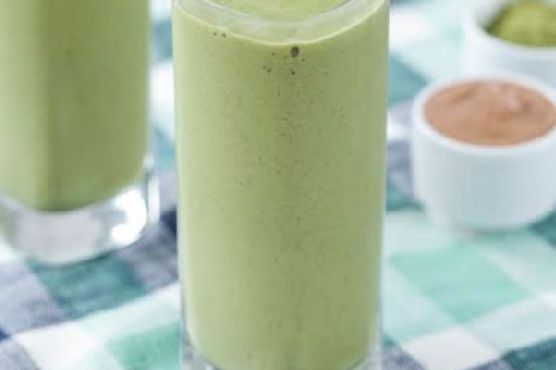
Powerhouse Almond Matcha Superfood Smoothie | Made by Meaghan Moineau

Powerhouse Almond Matcha Superfood Smoothie | Made by Meaghan Moineau

Title: Unleash Your Energy with the Powerhouse Almond Matcha Superfood Smoothie
Description: Dive into the world of wellness with our Powerhouse Almond Matcha Superfood Smoothie. This vibrant, nutrient-packed blend is a delicious way to kickstart your day. Perfect for breakfast or a midday boost, this smoothie combines the creamy richness of almond butter with the refreshing zing of matcha and tropical fruits. Join us as we explore this delightful recipe and the cherished family memory that inspired it.

In the hustle and bustle of modern life, finding the perfect balance of health and taste can often feel like an elusive quest. But what if I told you that the secret lies in a simple, yet extraordinary, blend of ingredients? Enter the Powerhouse Almond Matcha Superfood Smoothie—a concoction that not only fuels your body but also brings a sense of nostalgia with every sip.

Growing up, Sunday mornings were a special time in our house. My grandmother, a spirited woman with a penchant for healthy living, would whip up what she called her “magic potions.” These weren’t your ordinary breakfast smoothies; they were vibrant elixirs, brimming with color and flavor, designed to invigorate our bodies and minds for the week ahead.

One particular Sunday, I remember vividly. The kitchen was filled with the comforting aroma of vanilla, mingling with the earthy scent of matcha. My grandmother stood by the blender, her eyes twinkling with mischief as she added a spoonful of almond butter—her secret ingredient. “This,” she said with a wink, “is what gives it the power.”

As a child, I didn’t quite understand the concept of superfoods. But I did understand that this smoothie was something special. It was creamy yet refreshing, with a perfect balance of sweetness and a subtle hint of green tea. It felt like a treat, yet it was packed with wholesome goodness.

Now, as an adult, I’ve recreated this memory in my own kitchen. The Powerhouse Almond Matcha Superfood Smoothie has become a staple in my household, not just for its health benefits but for the warm reminder of those cherished Sunday mornings.

Ingredients:

– 2 tablespoons unsalted natural almond butter

– 1 cup unsweetened almond milk

– 1 frozen banana

– 1 tablespoon chia seeds

– 1 cup baby kale

– 1/2 cup frozen mango pieces

– 1 teaspoon green matcha tea powder

– 1/2 cup frozen pineapple

– 1/2 teaspoon vanilla extract

Instructions:

1. Combine all of the ingredients in a blender.

2. Blend on high until smooth.

3. Serve immediately and enjoy the burst of flavor and energy!

Difficulty Rating: 3/10
Classification: Appetizer

This smoothie is not just a drink; it’s a celebration of vibrant, wholesome ingredients that work harmoniously to energize your day. Whether you’re a seasoned health enthusiast or just starting your journey, the Powerhouse Almond Matcha Superfood Smoothie is a perfect way to embrace wellness with a touch of nostalgia. So go ahead, take a sip, and let the memories flow.

Read more about Appetizers

Read more about Main Dishes

Read more about Desserts

Also try: Banana Smoothie Boost

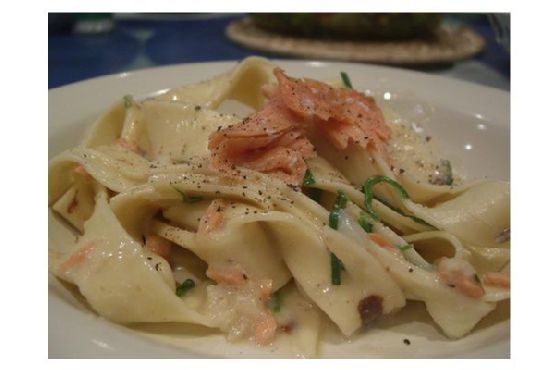
Pasta With Salmon Cream Sauce | Made by Meaghan Moineau

Pasta With Salmon Cream Sauce | Made by Meaghan Moineau

Title: Pasta with Salmon Cream Sauce: A Family Tradition on Every Plate
Description: Dive into the creamy goodness of Pasta with Salmon Cream Sauce—a dish that blends the richness of salmon with the comforting texture of pasta. Perfect for family dinners, this recipe not only pleases the palate but also brings cherished memories to the table. Discover the simple steps to recreate this hearty main dish and enjoy a nostalgic journey through a beloved family story.

---


Pasta with Salmon Cream Sauce: A Culinary Walk Down Memory Lane


There's something inherently comforting about pasta. It's versatile, filling, and when combined with the right ingredients, it can transform into a dish that evokes fond memories. The Pasta with Salmon Cream Sauce is one such recipe for my family—a dish that not only satiates our hunger but also binds us through shared stories and laughter.


The Ingredients of Love


To create this delightful main dish, you'll need the following ingredients: butter, flour, milk, onion, parmesan cheese, parsley, peas, penne, pepper, and, of course, red salmon. These components come together to form a sauce that clings lovingly to each piece of penne, creating a harmonious blend of flavors and textures.


Step-by-Step Guide


1. Cook the Pasta:

Begin by cooking the penne in a large pot of boiling water until it reaches that perfect al dente texture—tender yet firm—usually around 10 to 12 minutes. Drain and set aside.


2. Prepare the Sauce:

In a saucepan, melt the butter over medium heat. Add the chopped onion, cooking until tender and fragrant. Stir in the flour to create a roux, cooking just long enough to eliminate the raw flour taste. Slowly whisk in the milk, bringing the mixture to a simmer while stirring constantly.


3. Add the Flavors:

Introduce the peas, chunks of red salmon, and the juices from the salmon into the simmering sauce. Season with freshly ground pepper. Add chopped parsley and a generous helping of parmesan cheese. Stir until the cheese melts and the sauce thickens slightly.


4. Combine and Serve:

Pour the luscious salmon cream sauce over the cooked penne, gently mixing to ensure each piece is coated. Serve immediately for the best experience.


Microwave Method:

For a quicker version, cook pasta as instructed. In a microwave-safe bowl, microwave butter and onion on Medium-High for about a minute, or until the onion is tender. Stir in flour, gradually whisk in milk, and proceed with the remaining steps.


A Nostalgic Tale


This dish always takes me back to Sunday dinners at my grandmother’s house. I remember the aroma of onions sautéing in butter, mingling with the subtle scent of salmon wafting through the air. My grandmother, standing at the stove with her apron tied around her waist, would hum softly as she prepared the meal. She would often share stories of her youth, recounting how this dish was a staple in her own mother’s kitchen. As we gathered around the table, the Pasta with Salmon Cream Sauce became more than just a meal—it was a symbol of continuity and love, a way to connect with our roots and with each other.


Difficulty Rating: 4/10


This dish is straightforward and perfect for a cozy family dinner. It requires basic cooking skills, making it accessible to both novice and seasoned home cooks.


Category: Main Dish


Pasta with Salmon Cream Sauce is a main dish that stands out with its rich, comforting flavors. It’s ideal for a family meal or a cozy dinner party, offering both nourishment and nostalgia in every bite.


---


Embrace the warmth of this delightful dish and allow it to create new memories around your dining table. Whether you're cooking for family or friends, Pasta with Salmon Cream Sauce is sure to become a cherished staple in your culinary repertoire.

Read more about Appetizers

Read more about Main Dishes

Read more about Desserts

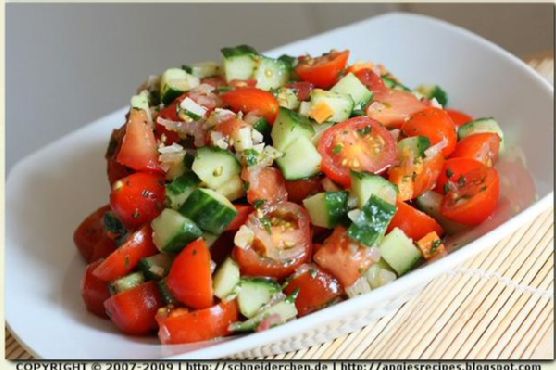
Tomato Cucumber Salad | Made by Meaghan Moineau

Tomato Cucumber Salad | Made by Meaghan Moineau

Title: The Timeless Charm of Tomato Cucumber Salad: A Refreshing Taste of Family Memories
Description: Dive into the world of simple culinary delights with our Tomato Cucumber Salad recipe. This refreshing appetizer combines fresh ingredients with a nostalgic tale, offering a taste of home and cherished family moments. Perfect for summer gatherings or a light snack, this dish is sure to become a staple in your recipe repertoire.

---


There's a certain magic in the simplicity of a well-crafted salad. The fresh crunch of cucumbers paired with the sweet burst of cherry tomatoes creates a melody of flavors that dance on the palate. For me, the Tomato Cucumber Salad is not just a recipe; it's a cherished family memory.


Ingredients:

- 1 pint cherry tomatoes


- 1 medium cucumber, diced into 1cm cubes


- 2 cloves garlic, sliced


- 2 tablespoons lemon juice


- 3 tablespoons olive oil


- Black salt and pepper to taste


- 1 small shallot, chopped


- A handful of fresh parsley, chopped


Instructions:

1. Begin by heating the olive oil in a skillet over medium heat. Add the chopped shallot and sliced garlic, stirring occasionally, until they turn lightly golden. The aroma will be reminiscent of family kitchens, where love and laughter filled the air.


2. Once golden, remove from heat and stir in the lemon juice. Season with black salt and pepper, adjusting to taste.


3. Meanwhile, cut the cherry tomatoes into halves and dice the cucumber. Place them into a large salad bowl, their vibrant colors a feast for the eyes.


4. Pour the warm dressing over the tomato and cucumber mixture, ensuring every piece is coated with the rich, tangy flavors.


5. Toss gently with the fresh chopped parsley, a touch of green that brings the dish to life.


6. Chill the salad for at least an hour before serving. This allows the flavors to meld, reminiscent of the days when patience was a virtue learned in the kitchen.


A Nostalgic Tale:

Every summer, my family would gather at my grandparents' house, a place where time seemed to slow down. The garden, a tapestry of colors and scents, was always abundant with fresh produce. My grandmother, with her gentle hands, would guide me through the art of making this simple salad. It was here, amidst shared stories and laughter, that I learned the true essence of cooking: love and togetherness.


As we sat around the old wooden table, the Tomato Cucumber Salad would inevitably be the centerpiece. Its crisp, refreshing flavors were the perfect antidote to the summer heat. With each bite, I was transported back to those cherished moments, a reminder of the unbreakable bonds of family.


Difficulty Rating: 3/10
Classification: Appetizer

This Tomato Cucumber Salad is a testament to the power of food to connect us with our past and the people we love. It's an easy-to-make appetizer, perfect for any occasion and guaranteed to bring a smile to your face. Enjoy this delightful dish and create new memories with your loved ones.

Read more about Appetizers

Read more about Main Dishes

Read more about Desserts

Flour-Less Peanut Butter Cookies | Made by Meaghan Moineau

Flour-Less Peanut Butter Cookies | Made by Meaghan Moineau

Title: Nostalgic Flour-Less Peanut Butter Cookies: A Taste of Simplicity
Description: Dive into the world of simple yet delectable desserts with our Flour-Less Peanut Butter Cookies. With just a handful of ingredients, these cookies evoke cherished memories of family gatherings and cozy kitchen moments. Perfect for a sweet treat, these cookies are easy to make and impossible to forget.

In the hustle and bustle of modern life, there’s something truly comforting about a recipe that requires only a few simple ingredients yet delivers a taste that transports you back to cherished family moments. Our Flour-Less Peanut Butter Cookies are more than just a dessert; they’re a delicious reminder of the magic that happens when family comes together in the kitchen.

Ingredients:

– 1 cup peanut butter

– 1/2 cup honey

– 1 large egg

– 1 teaspoon baking soda

– 1 teaspoon vanilla extract

Instructions:

1. Preheat your oven to 350°F (175°C).

2. In a large mixing bowl, combine peanut butter, honey, egg, baking soda, and vanilla extract. Stir well until the mixture is smooth and creamy.

3. Using a spoon, drop spoonfuls of the dough onto a lightly greased cookie sheet, spacing them about 2 inches apart.

4. Bake in the preheated oven for about 12 minutes. The cookies will appear soft to the touch, but they will firm up as they cool.

5. Carefully transfer the cookies to a rack to cool completely before indulging.

A Nostalgic Twist:

Every time I bake these peanut butter cookies, I’m instantly transported back to my grandmother’s cozy kitchen. The scent of cookies baking would fill the air, mingling with laughter and stories shared around the kitchen table. I remember being a child, standing on tiptoes to sneak a peek at the golden cookies through the oven door, eagerly awaiting the moment they would be cool enough to enjoy.

These cookies were a staple at our family gatherings, often appearing at birthdays, holidays, and spontaneous weekend visits. My grandmother, a woman of simple but profound wisdom, taught us that the best recipes don’t require complicated ingredients or fancy techniques. Instead, they rely on the love and care poured into each step—a philosophy that these Flour-Less Peanut Butter Cookies perfectly embody.

Difficulty Rating: 2/10
Classification: Dessert

With a difficulty rating of just 2 out of 10, this recipe is perfect for bakers of all skill levels. Whether you’re a seasoned chef or a novice in the kitchen, these cookies are a delightful way to create something sweet and satisfying without any fuss. Enjoy them as an afternoon snack, a delightful dessert, or an indulgent treat any time of the day.

In a world that often feels fast-paced and overwhelming, take a moment to slow down, gather your loved ones, and share these cookies. After all, it’s these simple, nostalgic recipes that remind us of the joy found in togetherness and the timeless pleasure of homemade treats.

Read more about Appetizers

Read more about Main Dishes

Read more about Desserts

Related update: Medenjaci - Croatian Honey Spice Cookies

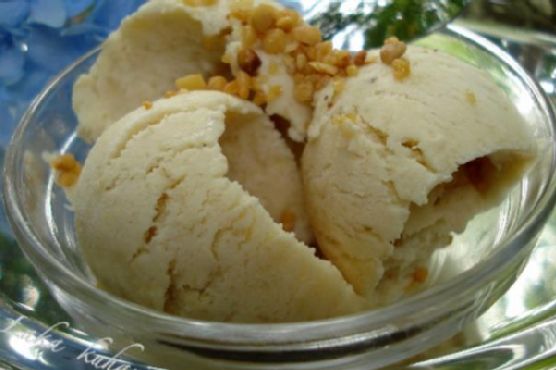
Banana in brown sugar ice cream | Made by Meaghan Moineau

Banana in brown sugar ice cream | Made by Meaghan Moineau

Title: Sweet Nostalgia: Crafting Banana in Brown Sugar Ice Cream
Description: Dive into a delicious journey of flavors with our Banana in Brown Sugar Ice Cream recipe. This dessert, infused with dark rum and vanilla, is a delightful blend of creamy textures and rich tastes. Join us as we share a cherished family memory linked to this delightful treat and guide you through creating this indulgence in your own kitchen.

---


There's something magical about the fusion of ripe bananas and the caramel notes of brown sugar. As the days grow warmer, I find myself reminiscing about summer evenings spent at my grandmother’s house, where the kitchen always smelled of sweet bananas and sugary delights. Her Banana in Brown Sugar Ice Cream was the highlight of those visits—a recipe that not only satisfied our sweet tooth but also wrapped us in the comfort of family tradition.


Ingredients:

- Bananas


- Dark rum


- Sour full-fat cream


- Lemon juice


- Light brown sugar


- Pinch of sea salt


- Vanilla extract


Instructions:

1. In a wide skillet or saucepan, heat the brown sugar with one-quarter of the sour cream, stirring until smooth and bubbly.


2. Add the bananas and salt, and continue to cook for 5 minutes, stirring occasionally, until the bananas are soft and completely cooked through.


3. Remove from heat and stir in the remaining sour cream, rum, and vanilla. If it tastes too sweet, add a few drops of fresh lemon juice.


4. Puree the mixture in a blender or food processor until completely smooth.


5. Chill thoroughly for 1 hour or overnight, then pour into the ice cream maker and proceed according to the manufacturer's instructions.


6. Before serving, take it out for 5-10 minutes to reach the right scooping temperature. For the perfect presentation, serve in chilled glass or porcelain bowls. Use a hot, dry ice-cream spoon for easy scooping.


A Family Memory:

Every summer, our family gathered in my grandmother's backyard, where laughter echoed through the air as the sun dipped below the horizon. My grandmother, with her apron dusted with flour and sugar, would bring out her signature banana ice cream. We watched in awe as she transformed simple ingredients into a creamy masterpiece. As children, we eagerly helped scoop the ice cream into bowls, each serving topped with a sprinkle of sea salt to enhance the flavors.


The first bite was always magical—the velvety texture, the subtle hint of rum, and the comforting sweetness of bananas melted into a perfect harmony. It wasn't just ice cream; it was a slice of happiness that brought us all together. Even now, miles away from that kitchen, every scoop of Banana in Brown Sugar Ice Cream brings me back to those cherished family gatherings.


Difficulty Rating: 4/10
Classification: Dessert

Creating this delightful dessert is a breeze, thanks to its straightforward preparation and the use of readily available ingredients. Whether you're an experienced cook or a novice in the kitchen, this recipe is sure to impress your family and friends with its rich, nostalgic flavors.

Read more about Appetizers

Read more about Main Dishes

Read more about Desserts

Refreshing Strawberry Limeade | Made by Meaghan Moineau

Refreshing Strawberry Limeade | Made by Meaghan Moineau

Title: Revive Summer Memories with Refreshing Strawberry Limeade
Description: Dive into nostalgia with our Refreshing Strawberry Limeade recipe, a delightful blend of sweet strawberries and tangy lime that is sure to awaken your senses. Perfect for summer gatherings or a quiet afternoon on the porch, this beverage is a trip down memory lane with every sip. Learn how to craft this easy yet elegant drink that’s sure to become a family favorite.

---


A Sip of Summer: Refreshing Strawberry Limeade Recipe

There's something magic about the simple joy of sipping a chilled, fruity drink on a hot summer day. For me, this Refreshing Strawberry Limeade is more than just a thirst-quencher; it's a cherished family tradition.


A Walk Down Memory Lane

Growing up, summer vacations meant long afternoons spent at my grandmother's house. Her backyard was a haven of vibrant flowers, towering oak trees, and laughter that echoed through the warm air. My cousins and I would run around until we were breathless before collapsing under the shade with cups of her famous strawberry limeade in hand. The sweet, tangy taste was the perfect antidote to the summer heat, and each sip seemed to cool the sun’s fiery rays.


My grandmother would prepare the drink early in the morning, allowing the flavors to meld together. Watching her work in the kitchen, I learned the art of balancing sweetness with tartness—a skill I've come to master over the years.


Ingredients:

- Fresh strawberries


- Sugar


- Lemon lime soda


- Seltzer


- Turbinado sugar


- Lime (juice)


- Thinly sliced limes


- Ice


Instructions:
1. Macerate the Berries: Begin by adding fresh strawberries and sugar to a bowl. Allow them to macerate for about 30 minutes. This process enhances the natural sweetness of the berries, creating a luscious base for your limeade.
2. Blend to Perfection: Once the strawberries have released their juices, transfer them to a food processor or blender. Pulse until smooth, creating a vibrant strawberry puree.
3. Mix the Magic: In a large pitcher, add ice until it's about one-third full. Pour in 2 parts seltzer to 1 part lemon lime soda. This combination provides the perfect fizzy foundation for your drink.
4. Combine Flavors: Stir in a few scoops of the strawberry puree and add the juice from 1 lime. Mix well, then taste. Adjust by adding more strawberry puree or lime juice as desired to suit your taste.
5. Garnish and Serve: For a touch of elegance, add thinly sliced limes to the pitcher. Rim each glass with turbinado sugar for added sweetness and garnish with a lime wedge.
Difficulty Rating: 3/10
Classification: Appetizer

This Refreshing Strawberry Limeade is more than just a drink; it's a celebration of family bonds and summer afternoons. Whether you're looking to relive old memories or create new ones, this delightful beverage is sure to enchant your taste buds and warm your heart. So, gather your loved ones, find a cozy spot in the shade, and enjoy a glass of nostalgia. Cheers to summer's sweetest flavors!

Read more about Appetizers

Read more about Main Dishes

Read more about Desserts

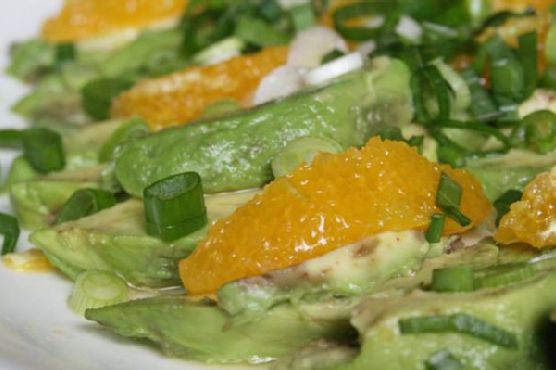
Avocado and Orange Salad With Orange-Ginger Dressing | Made by Meaghan Moineau

Avocado and Orange Salad With Orange-Ginger Dressing | Made by Meaghan Moineau

A Taste of Sunshine: Avocado and Orange Salad With Orange-Ginger Dressing


A Fresh and Vibrant Twist on Tradition


In the heart of summer, when the sun casts its golden rays and the air buzzes with the sounds of nature, there's nothing quite like a refreshing salad to bring a burst of flavor to your table. Our Avocado and Orange Salad with Orange-Ginger Dressing is a celebration of vibrant colors and zesty tastes—a dish that promises to delight your senses. This simple yet elegant appetizer is not only a feast for the eyes but also a symphony of flavors that dance on your palate. With ingredients like creamy avocados, juicy oranges, and a tangy ginger dressing, this salad is both nourishing and uplifting.


Ingredients


- 2 ripe avocados, sliced


- 3 juicy oranges, segmented (reserve the juice from the leftover)


- 2 green onions, finely chopped


- 1/4 cup of fresh orange juice


- 2 tablespoons lemon juice


- 1 teaspoon fresh ginger paste


- 1 tablespoon agave syrup


- 2 tablespoons olive oil


- Salt and pepper to taste


Instructions


1. Prepare the Salad Base: Arrange the avocado and orange slices, overlapping each other, on a platter. Squeeze the juice from the leftover orange over the arranged slices. This not only adds a layer of flavor but also prevents the avocados from browning.
2. Add a Touch of Crunch: Sprinkle the finely chopped green onions over the salad. Add a pinch of salt to taste.
3. Chill: Cover the platter with cling film and refrigerate until you’re ready to serve. Chilling enhances the flavors and refreshes the salad.
4. Make the Dressing: In a blender, combine the orange juice, lemon juice, fresh ginger paste, agave syrup, and olive oil. Blend until smooth. Season with salt and pepper to taste.
5. Serve: Just before serving, pour the orange-ginger dressing over the salad. Allow it to soak in the flavors for a few minutes, and then serve immediately.

A Nostalgic Twist


This salad takes me back to my grandmother's sunlit kitchen, where the scent of oranges and ginger would fill the air. Every summer, our family would gather at her place for an afternoon of laughter and stories. As kids, we’d run around her garden, the sun warming our skin, while the adults prepared a feast inside. This salad was always part of the spread—a tradition that brought us together, a dish that spoke of simplicity and love.


I remember sitting at the dining table, the coolness of the salad a perfect contrast to the warmth of the day, the flavors reminding me of those endless summers and the joy of family. It's more than just a dish; it's a memory, a piece of nostalgia that I cherish with every bite.


Difficulty and Classification


With its straightforward preparation and minimal cooking required, this Avocado and Orange Salad earns a 3 out of 10 on the difficulty scale. It's a perfect appetizer, ideal for those who wish to enjoy a sophisticated yet easy-to-prepare dish that captures the essence of summer.


---


Whether you're hosting a dinner party or simply enjoying a quiet meal at home, this Avocado and Orange Salad with Orange-Ginger Dressing is a delightful addition to any menu. Its fresh ingredients and vibrant flavors make it a standout appetizer that will leave your guests craving more. So, gather your loved ones, share stories, and let this salad be a part of your cherished memories.

Read more about Appetizers

Read more about Main Dishes

Read more about Desserts

15 Minute Healthy Dark Chocolate Truffles | Made by Meaghan Moineau

15 Minute Healthy Dark Chocolate Truffles | Made by Meaghan Moineau

Title: Indulge in Guilt-Free Pleasure: 15-Minute Healthy Dark Chocolate Truffles
Description: Discover the deliciously simple art of creating these 15-minute healthy dark chocolate truffles. Packed with natural sweetness and rich flavors, these truffles are the perfect guilt-free dessert that brings a touch of nostalgia to your table. Dive into our step-by-step guide and enjoy a delightful treat that’s sure to impress!

---


There’s something magical about the aroma of dark chocolate wafting through the kitchen. It reminds me of family gatherings during the holidays, where my grandmother would bring out a tray adorned with homemade treats. Among them, the little nuggets of joy she called “chocolate gems” were my absolute favorite. As a child, I was fascinated by the idea that something so decadent could be made with simple ingredients found in our pantry. Inspired by her, I’ve crafted a healthier version that retains all the indulgence without the guilt.


Ingredients:


- 1 cup dried dates


- 1/2 cup slivered almonds


- 1/2 cup pecans


- 1/4 cup cocoa powder


- 1 teaspoon vanilla extract


- 1 tablespoon agave nectar


- 1/4 teaspoon sea salt


- Water (for soaking dates)


- Optional: coconut flakes for rolling


Instructions:


1. Prep the Dates: Start by soaking the dates in hot water for about 5 minutes. The water should be comfortably hot but not scalding. This softens the dates, making them perfect for blending.
2. Create Nut Meal: In a food processor, pulse the slivered almonds until a coarse almond meal forms. Add the pecans and continue processing until they are ground into a coarse meal as well.
3. Blend Ingredients: Drain the dates and gently squeeze out excess water. Add these to the food processor along with cocoa powder, vanilla extract, agave nectar, and sea salt. Blend until a smooth, cohesive paste forms.
4. Form the Truffles: Use a tablespoon measure to scoop out a heaping portion of the mixture. Pack it tightly and gently slide the half-rounded ball out. Carefully shape it into a sphere with your hands, being mindful not to let it crumble.
5. Add Toppings: If desired, roll the truffles in your choice of toppings. Unsweetened coconut flakes add a lovely texture, while extra cocoa powder intensifies the chocolate flavor—though beware of its added bitterness.

This recipe is a delightful reminder of those warm family moments, echoing the simplicity and love found in every bite. Rated a 3 out of 10 in difficulty, these truffles are classified as a Dessert, perfect for satisfying your sweet tooth without veering off the path of health.


Whether you’re sharing them with loved ones or savoring them solo, these truffles invite you to indulge in a sweet nostalgia that’s both heartwarming and deliciously guilt-free. Enjoy every bite of this easy, delightful treat that can be whipped up anytime you need a little piece of happiness!

Read more about Appetizers

Read more about Main Dishes

Read more about Desserts

Almost Heaven Cake | Made by Meaghan Moineau

Almost Heaven Cake | Made by Meaghan Moineau

Title: Almost Heaven Cake: A Nostalgic Journey to Sweet Family Memories
Description: Dive into the heavenly layers of our Almost Heaven Cake, a delightful dessert that marries tropical flavors with creamy textures. Discover this easy-to-make, crowd-pleasing cake recipe that holds a special place in my family's heart, along with a cherished memory that makes it truly unforgettable.

---


Almost Heaven Cake Recipe: A Taste of Joyful Memories


Difficulty: 4/10
Category: Dessert

There’s something undeniably magical about a dessert that not only tantalizes your taste buds but also transports you back to cherished moments in time. The Almost Heaven Cake does just that, with its blend of citrusy goodness and creamy topping that evokes fond family memories. This cake is a beloved staple in our family gatherings, and today, I'm thrilled to share both the recipe and a nostalgic story that makes it truly special.


Ingredients:


- 1 box yellow cake mix


- 2 cans mandarin oranges (drained)


- 1 can crushed pineapple (undrained)


- 1 package vanilla pudding (4 serving size)


- 1/2 cup warm milk


- 1 cup cold milk


- 8 oz low-fat cream cheese


- 8 oz low-fat cool whip


Instructions:


1. Prepare the Cake:

- Follow the directions on the yellow cake mix package.


- As you mix the batter, gently fold in one can of drained mandarin oranges. The oranges will blend into small pieces, adding a burst of flavor and moisture to the cake.


- Pour the batter into a 9x13 inch prepared oblong cake pan.


2. Bake and Add Pineapple:

- Bake as directed on the cake mix box.


- Once out of the oven, while the cake is still warm, use a fork to poke holes across the entire surface.


- Evenly pour the undrained crushed pineapple over the hot cake, allowing the sweet juice to seep into the holes.


3. Cool and Prepare Cream Cheese Mixture:

- Allow the cake to cool completely.


- Mix the cream cheese with the vanilla pudding mix and 1/2 cup of warm milk until smooth.


- Gradually add the cold milk while mixing continuously until well-blended. For best results, use an electric mixer.


4. Chill and Assemble:

- Refrigerate the cream cheese mixture for about 1 hour, or until it firms up slightly.


- Spread the chilled mixture over the cooled cake.


- Top with a layer of low-fat cool whip.


5. Garnish and Refrigerate:

- Drain the second can of mandarin oranges and arrange the pieces atop the cool whip in a decorative pattern.


- Cover and refrigerate the cake for at least 1-2 hours before serving to allow the flavors to meld beautifully.


6. Serve and Store:

- Serve chilled and enjoy!


- Store any leftovers covered in the refrigerator.


A Sweet Family Memory


Every time I make Almost Heaven Cake, I'm whisked back to the vibrant summer of my childhood. It was during a family reunion at my grandparents' house, where the sun-drenched days were filled with laughter and the sweet aroma of blooming flowers. My grandmother, the matriarch of culinary prowess, introduced us to this delightful cake.


As the youngest, my job was to arrange the mandarin oranges on top. I remember the joy and pride I felt as my small hands meticulously placed each orange slice in neat rows, under the guidance of my grandmother's gentle smile. The cake was a hit, not just for its delectable taste but for the memories it created. It became a tradition, a symbol of the warmth and love shared within our family.


Today, making this cake is like flipping through the pages of a well-loved family album, each bite taking me back to those golden days. I hope this recipe brings as much joy and cherished memories to your family as it has to mine.


---


Whether you're looking to create new family traditions or simply indulge in a slice of paradise, the Almost Heaven Cake is a delightful choice. Enjoy this nostalgic dessert and perhaps, make some sweet memories of your own.

Read more about Appetizers

Read more about Main Dishes

Read more about Desserts

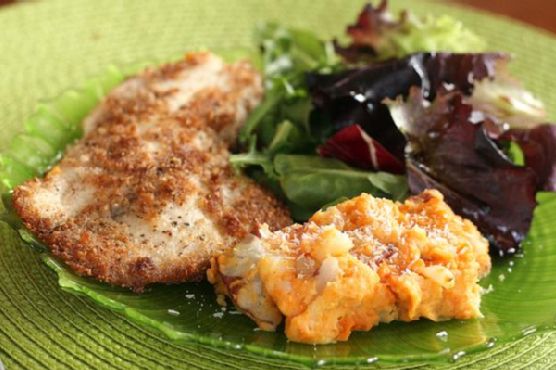
Coconut-Almond Crusted Tilapia | Made by Meaghan Moineau

Coconut-Almond Crusted Tilapia | Made by Meaghan Moineau

Title: Dive Into Tropical Flavors with Coconut-Almond Crusted Tilapia
Description: Discover the delightful fusion of tropical flavors in our Coconut-Almond Crusted Tilapia recipe. This dish, swimming in the freshness of lemon and the creaminess of coconut milk, is a perfect main course for any dinner table. With a nostalgia-inducing story, easy-to-follow instructions, and a difficulty rating of just 4 out of 10, this recipe ensures a deliciously memorable meal.

---


A Tropical Escape: Coconut-Almond Crusted Tilapia


When I was a child, summer vacations were a time of wonder and exploration. My family would pack up and head to a quaint beach house nestled on the coast. The sound of the waves crashing against the shore was a constant lullaby, and the scent of the ocean lingered in the air, mingling with the enticing aroma of freshly cooked meals.


One evening, as the sun dipped below the horizon, casting a golden glow over the sea, my mother decided to prepare her special Coconut-Almond Crusted Tilapia. This dish became the highlight of our meal, a beloved tradition that captured the essence of our beachside adventures.


Ingredients


- 4 white tilapia fillets


- 1 lemon


- 1/4 cup coconut milk


- 1/2 cup almond flour


- 1/4 cup unsweetened shredded coconut


- Salt and black pepper to taste


- 1/2 teaspoon ground ginger


- 1/2 teaspoon dried mint


- Oil for frying


Instructions


1. Prepare the Fish: Pat and dry the tilapia fillets thoroughly. Sprinkle both sides with a pinch or two of salt and black pepper. Squeeze the juice from half of the lemon over the fish and drizzle with coconut milk. Turn the fillets to ensure they are well-coated. Allow them to marinate at room temperature for 15 minutes.
2. Make the Breading: In a shallow bowl, combine the almond flour, shredded coconut, a pinch of salt and pepper, ground ginger, and dried mint. Mix well to create a flavorful breading mixture.
3. Cook the Tilapia: Cover the bottom of a large skillet with oil and bring to medium heat. Carefully lay the marinated fillets in the skillet. Cook each side until golden brown and the fish flakes easily with a fork, about 3 to 5 minutes per side for thin fillets, longer for thicker ones.
4. Drain and Cool: Transfer the cooked fillets to a stack of paper towels to drain and cool slightly.
5. Serve: Pair the Coconut-Almond Crusted Tilapia with a side of Tropical Sweets & Reds Mash, and enjoy the symphony of flavors.

Memories on a Plate


As we sat around the table, the sea breeze gently rustling the curtains, the first bite of the crispy, nutty crust and tender fish transported us. The subtle hints of ginger and mint danced across our palates, reminiscent of the vibrant, lively days spent by the ocean. This dish not only satisfied our hunger but also wove the tapestry of our family’s summer stories, shared and cherished over every meal.


Difficulty: 4/10


Classification: Main Dish


This Coconut-Almond Crusted Tilapia, with its tropical allure and comforting nostalgia, has become a family favorite, a delicious reminder of sun-kissed days and shared laughter. Try it out, and perhaps it will become a treasured part of your culinary adventures too.

Read more about Appetizers

Read more about Main Dishes

Read more about Desserts

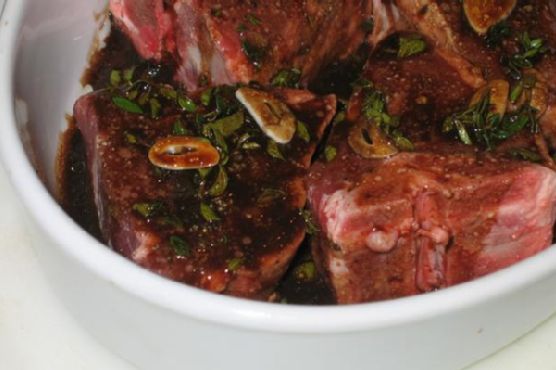
Balsamic Marinated Lamb Chops | Made by Meaghan Moineau

Balsamic Marinated Lamb Chops | Made by Meaghan Moineau

Title: Unleash the Flavors: Balsamic Marinated Lamb Chops for a Memorable Family Feast
Description: Discover the rich and savory world of Balsamic Marinated Lamb Chops—a dish that marries tender lamb with a bold marinade for an unforgettable dining experience. Perfect for a cozy family gathering, this recipe is easy to prepare yet delivers gourmet results. Rated as 5/10 in difficulty, this main dish is sure to capture the hearts and taste buds of your loved ones.

---


There's something magical about the aromatic sizzle of lamb chops on the grill, especially when they are infused with a balsamic vinegar marinade that's rich in flavor and steeped in nostalgia. Our Balsamic Marinated Lamb Chops recipe is a blend of savory sophistication and homely comfort—a perfect centerpiece for any family gathering.


Ingredients:

- Lamb loin chops


- Garlic


- Balsamic vinegar


- Dijon mustard


- Fresh oregano


- Red wine vinegar


- Olive oil


- Brown sugar


- Kosher salt


- Black pepper


Instructions:
1. Prepare the Marinade: In a mixing bowl, combine garlic, balsamic vinegar, Dijon mustard, fresh oregano, red wine vinegar, olive oil, and brown sugar. Mix well to create a harmonious blend of flavors.
2. Season the Lamb: Generously sprinkle kosher salt and black pepper over the lamb loin chops on both sides, setting the stage for a delightful taste experience.
3. Marinate the Lamb: Toss the seasoned lamb chops in the bowl with the prepared marinade, ensuring each chop is well-coated. Cover the bowl and refrigerate for at least 1 to 2 hours, turning occasionally to allow the flavors to penetrate the meat thoroughly.
4. Grill to Perfection: Preheat your BBQ to medium-high, utilizing indirect heat for even cooking. Grill the marinated lamb chops to a succulent medium-rare—approximately 7 minutes per side, depending on thickness. The result is a juicy and aromatic delight that promises to impress.
A Taste of Nostalgia:

This dish always takes me back to warm summer evenings spent in my grandparents' backyard. My grandfather, with his love for grilling, would carefully tend to the lamb chops, creating a feast that was both simple and grand. The balsamic marinade was his secret—an alchemy of flavors that transformed the meal into a cherished family tradition. As the sun set and the air filled with the aroma of grilling lamb, we would gather around the table, sharing stories and laughter, creating memories that last a lifetime.


Difficulty Rating: 5/10
Classification: Main Dish

Whether you're looking to recreate a cherished family memory or simply enjoy a delectable meal, these Balsamic Marinated Lamb Chops are sure to become a beloved staple in your home. Their rich flavors and tender texture make them a standout dish that's both easy to prepare and delightful to savor. So, fire up the grill and let the magic of this recipe bring your family together once more.

Read more about Appetizers

Read more about Main Dishes

Read more about Desserts

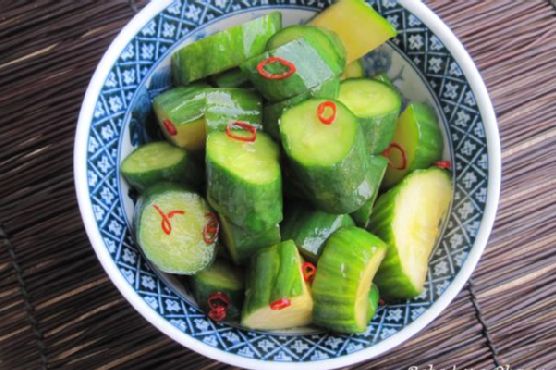
Kyuri Tsukemono | Made by Meaghan Moineau

Kyuri Tsukemono | Made by Meaghan Moineau

Title: Dive into Tradition: The Simplicity and Flavor of Kyuri Tsukemono
Description: Discover the art of Japanese pickling with Kyuri Tsukemono, a delightful cucumber dish that brings a touch of tradition and a burst of flavor to your table. Learn how to make this easy, yet captivating appetizer while delving into a nostalgic family story that highlights the magic of this simple recipe.

---


There's something almost magical about the simplicity of traditional recipes. They have a way of weaving themselves into our memories, becoming a comforting part of our lives. One such dish that has always held a special place in my heart is Kyuri Tsukemono, a Japanese cucumber pickle that's as easy to make as it is delicious to eat.


A Slice of Nostalgia

Growing up, I spent many summers at my grandmother's house in the countryside. Her garden was a lush paradise, overflowing with fresh vegetables, and cucumbers were always in abundance. I remember the sun casting a warm glow over her small kitchen as she taught me the art of making Kyuri Tsukemono. The process was simple, yet it felt like a sacred ritual passed down through generations.


"Remember," she'd say with a twinkle in her eye, "the secret is in the shaking." We would giggle as we shook the container, the rhythmic sound of cucumbers dancing around adding to the anticipation. It became our little tradition, a special bond sealed with the savory tang of soy sauce and the subtle kick of red chili peppers.


Ingredients:

- 3 to 4 Japanese cucumbers


- Soy sauce


- Rice vinegar


- Sesame oil


- Red dried chili peppers


Instructions:

1. Begin by rough chopping the cucumbers. The vibrant green of the cucumbers is a beautiful sight, promising freshness in every bite.


2. In a medium, securely sealable container, mix soy sauce, rice vinegar, and sesame oil. The combination of these ingredients creates a marinade that is both savory and aromatic, enhancing the natural flavor of the cucumbers.


3. Add the chopped cucumbers to the marinade. Close the container and give it a good shake. This step is not just functional; it's a nod to the cherished memories of my grandmother's kitchen.


4. Refrigerate for 1 to 2 hours, allowing the cucumbers to soak up the flavors. For an extra burst of flavor, shake the container periodically, or better yet, leave the cucumbers to marinate overnight. Note: the longer they stay in the marinade, the saltier they become. I've left them in the marinade for up to 3 days, and they were still delightfully crisp and flavorful.


5. Serve and enjoy! Kyuri Tsukemono makes for a refreshing appetizer that's perfect for any occasion.


Difficulty: 2/10
Classification: Appetizer

Every time I prepare Kyuri Tsukemono, I'm transported back to those cherished summer days. It's more than just a dish; it's a reminder of the love and joy shared in my grandmother's kitchen. As you embark on making your own batch of Kyuri Tsukemono, I hope you, too, create memories that will last a lifetime. Enjoy the simplicity and flavor of this traditional Japanese appetizer, and let it become a part of your culinary story.

Read more about Appetizers

Read more about Main Dishes

Read more about Desserts

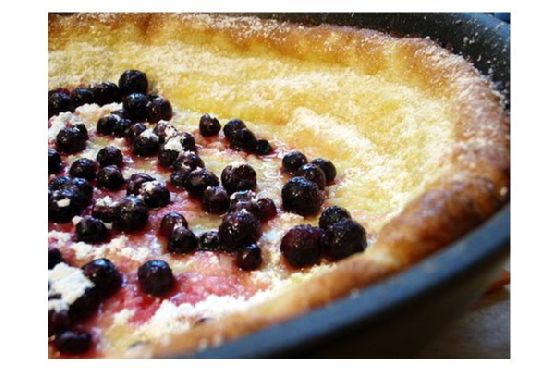
Dutch Baby | Made by Meaghan Moineau

Dutch Baby | Made by Meaghan Moineau

Title: The Magic of Dutch Baby: A Delightful Morning Ritual
Description: Discover the enchanting world of the Dutch Baby—a heavenly, puffed pancake that transforms breakfast into a cherished family tradition. Unveil the simplicity of its creation and indulge in a nostalgic journey that celebrates togetherness. Perfect for beginners, this dish is a delightful dessert that brings warmth to the table.

---


There's something magical about a Dutch Baby. Not only does it puff up like a glorious, golden crown, but it also carries with it a sense of nostalgia that warms the heart. For our family, the Dutch Baby is more than just a dish; it's a morning ritual that whispers of comfort and connection.


Ingredients:

- 3 large eggs


- ½ cup flour


- ½ cup milk


- 2 tablespoons unsalted butter


- 1-2 lemons


- Confectioner's sugar for dusting


Instructions:

1. Preheat your oven to a toasty 475 degrees F. This high heat is crucial for achieving that signature puff.


2. Cut the lemons in half crosswise—these will be your final flourish.


3. Place the unsalted butter in a heavy 10" oven-proof skillet and let it melt in the oven. The aroma of melting butter is just the beginning of this delightful journey.


4. While the butter melts, whisk together the eggs, flour, and milk in a bowl. Mix just until combined; overmixing isn't necessary.


5. Carefully remove the skillet from the oven once the butter has melted. Swirl the butter around to coat the sides of the skillet.


6. Pour the batter into the hot skillet and quickly return it to the oven.


7. Bake for 12 minutes or until your Dutch Baby has puffed up like a dream.


8. Once puffed and golden, remove it from the oven and transfer to a platter.


9. Squeeze the lemon halves over the Dutch Baby, letting the juice soak in. Dust generously with confectioner's sugar for that perfect finish.


10. Cut into serving-sized pieces and serve immediately.


Difficulty Rating: 3/10
Classification: Dessert

---


Growing up, Sundays were synonymous with family and food. My grandmother, with her apron tied loosely around her waist, would gather us in the kitchen to help with our favorite breakfast treat—the Dutch Baby. The anticipation was half the fun; we’d watch through the oven window as the batter rose, transforming into a golden, airy masterpiece.


As she pulled it from the oven, she’d tell us stories of her own childhood, of Sundays spent in her mother’s kitchen. The Dutch Baby was her mother's favorite too, and it became a thread that tied generations together. As the lemon juice mingled with the confectioner's sugar, we’d gather around the table, sharing stories, laughter, and the simple joy of being together.


The beauty of the Dutch Baby lies in its simplicity. It's a dish that invites you to slow down and savor the moment, to appreciate the warmth of family and the joy of shared meals. Whether you're a seasoned cook or a kitchen novice, this delightful dessert is an invitation to create your own family memories—one delicious puff at a time.

Read more about Appetizers

Read more about Main Dishes

Read more about Desserts

Nutella Stuffed French Toast | Made by Meaghan Moineau

Nutella Stuffed French Toast | Made by Meaghan Moineau

Title: Rediscovering Breakfast Bliss: Nutella Stuffed French Toast
Description: Dive into the comforting embrace of Nutella Stuffed French Toast, a decadent breakfast treat that marries nostalgia with indulgence. Perfect for leisurely weekend mornings, this dish will transport you back to simpler times with every bite.

---


Rediscovering Breakfast Bliss: Nutella Stuffed French Toast


There's something magical about the way certain dishes can transport us back in time. For me, Nutella Stuffed French Toast does just that. It’s a delicious journey to a sunlit kitchen, where the aroma of cinnamon and melted Nutella filled the air, and laughter echoed off the walls. This dish, with its gooey, chocolate-hazelnut center and flaky, golden-brown crust, is more than just food—it's a heartfelt memory served on a plate.


Ingredients:

- 2 eggs

- 1 cup of milk


- 2 tablespoons of sugar


- 1 teaspoon of cinnamon powder


- 4 slices of bread


- 1/2 cup of Nutella


- 2 tablespoons of butter


- Powdered sugar, for garnish


Instructions:


1. Prepare the Egg Mixture: In a deep, large bowl, whisk together the eggs, milk, sugar, and cinnamon powder. Stir it well using a fork until all ingredients are combined, then set aside.
2. Assemble the Sandwiches: Take two slices of bread and generously coat one side of each with Nutella. Press the Nutella-coated sides together to form a sandwich.
3. Soak the Sandwich: Immerse the Nutella-stuffed sandwich in the egg mixture. Use a knife to gently press down, ensuring the bread absorbs the mixture thoroughly. Let it sit for 3-5 minutes before flipping to coat the opposite side. Don’t forget to soak the edges!
4. Cook to Perfection: Preheat a pan over medium heat and melt the butter. Once sizzling, add the soaked sandwich and cook for about 5 minutes on each side. You're aiming for a golden-brown exterior—crispy yet not burnt.
5. Serve and Enjoy: Sprinkle a dusting of powdered sugar over the top and serve immediately. This rich, indulgent breakfast pairs perfectly with a strong cup of black coffee.
6. Repeat: Follow the same steps for the second sandwich to share the love (or indulge even more if you're feeling extra hungry).

A Nostalgic Bite


Every bite of Nutella Stuffed French Toast brings back memories of lazy Sunday mornings at my grandmother's house. I remember watching her expertly whisk the egg mixture, her hands moving with a practiced ease that only years of love-filled cooking could achieve. The kitchen was always warm and inviting, filled with the sweet, comforting aroma of cinnamon and sugar. As kids, my siblings and I would eagerly wait at the table, our excitement barely contained as we watched her flip the toast, each slice puffing up just right.


These mornings taught me that food is more than sustenance; it's a vessel for love and memories. Sharing this dish with my family now, I hope to pass on that same sense of comfort and joy.


Difficulty Rating: 4/10


While this recipe is relatively simple, the key is patience and attention to detail—perfect for a leisurely weekend breakfast. It’s classified as a Main Dish, ideal for a brunch centerpiece or a decadent breakfast treat.

---


Nutella Stuffed French Toast isn't just a meal—it's a delightful experience, rich with the flavors of nostalgia and warmth. As you savor each bite, consider the memories you're creating, and who knows? Perhaps one day, your own family will look back on these mornings with fondness, just as I do.

Read more about Appetizers

Read more about Main Dishes

Read more about Desserts

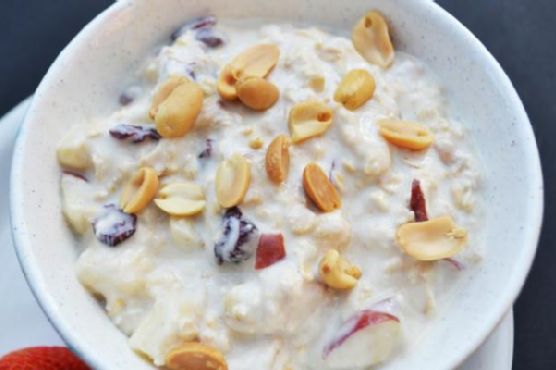
Chilled Swiss Oatmeal | Made by Meaghan Moineau

Chilled Swiss Oatmeal | Made by Meaghan Moineau

Title: A Nostalgic Dive into Chilled Swiss Oatmeal: A Perfect Start to Your Day
Description: Discover the delightful simplicity of Chilled Swiss Oatmeal, a nutritious breakfast option that's rich in flavor and memories. This easy-to-make dish combines the wholesome goodness of oatmeal with the refreshing taste of fresh fruits and the crunch of walnuts. Perfect for busy mornings or leisurely brunches, it's a dish that will have you reminiscing about cherished family moments with every bite.

---


A Wholesome Morning with Chilled Swiss Oatmeal

There's something truly special about waking up to the comforting taste of Chilled Swiss Oatmeal. This delightful breakfast dish, rich in flavors and textures, has been a beloved staple in my family for generations. Easy to prepare and perfect for those who adore a nutritious start to their day, it's a recipe that brings both health and happiness to the table.


The Ingredients of Joy

To create this masterpiece, you'll need old-fashioned oatmeal, low-fat plain vanilla yogurt, and milk. These form the creamy base of our dish. Fresh slices of apple and banana, along with dried cranberries, infuse the oatmeal with a burst of natural sweetness and tang. Finally, a generous sprinkle of walnuts adds the perfect finishing touch, providing a satisfying crunch and a dose of heart-healthy fats.


Instructions for a Perfect Swiss Oatmeal

1. In a small bowl, combine the oatmeal, yogurt, and milk. Stir until well mixed. For best results, let this mixture sit for a few minutes or, ideally, several hours in the refrigerator.


2. Once chilled, add the freshly chopped apple and banana to the mix, along with the dried cranberries. Stir until all ingredients are well combined.


3. Just before serving, top with a handful of walnuts for added crunch and flavor.


*Note:* For the ultimate taste experience, allow the oatmeal to sit overnight. Add the fresh fruits right before serving to ensure they remain crisp and vibrant.


A Sprinkle of Nostalgia

This dish always takes me back to cozy Sunday mornings at my grandmother's house. I remember waking up to the aroma of freshly brewed coffee and the sight of my grandmother bustling around the kitchen, preparing breakfast for the family. Her Chilled Swiss Oatmeal was the highlight of those mornings, served with love and a side of warm smiles.


The anticipation of digging into a bowl of this chilled delight was almost as enjoyable as the taste itself. As children, my siblings and I would gather around the table, eagerly awaiting our turn to add our favorite toppings. For me, it was always a little extra walnut crunch. These breakfasts were more than just meals; they were family bonding sessions filled with laughter, stories, and the occasional playful banter.


Difficulty Rating and Classification
Difficulty: 3/10
Classification: Appetizer

Chilled Swiss Oatmeal is not just a dish; it's a journey back to simpler times, a reminder of the love and warmth shared around the breakfast table. Whether you're making it for yourself or sharing it with loved ones, this recipe is sure to become a cherished part of your morning routine. So, go ahead and indulge in the nostalgic flavors of Chilled Swiss Oatmeal, and create new memories with every delicious spoonful.

Read more about Appetizers

Read more about Main Dishes

Read more about Desserts