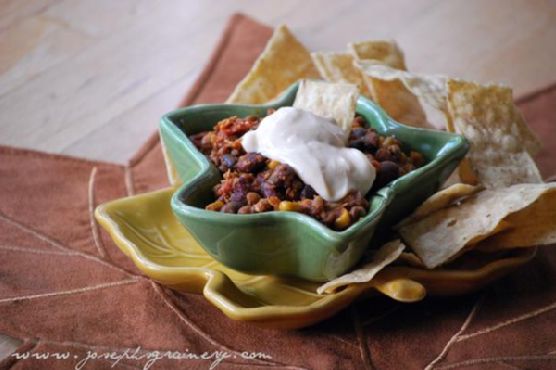
Chicken-Tortilla Chip Soup | Made by Meaghan Moineau

Chicken-Tortilla Chip Soup | Made by Meaghan Moineau

Title: Warm Your Soul with Chicken-Tortilla Chip Soup - A Bowl of Comfort and Memories
Description: Dive into the heartwarming world of Chicken-Tortilla Chip Soup, a delightful concoction that not only satisfies your taste buds but also stirs up cherished family memories. With a simple preparation process and rich flavors, this dish is perfect for both beginner and seasoned cooks alike. Discover the secret to this comforting main dish and the nostalgia it brings to the table.

---


As the leaves begin to change color and a crisp breeze fills the air, there's nothing quite like a warm bowl of soup to bring comfort to your soul. Our Chicken-Tortilla Chip Soup is more than just a meal; it's a heartfelt connection to cherished family moments, steeped in tradition and love.


Ingredients:

- Water


- Chicken breasts


- Bouillon cubes


- Diced carrots


- Diced cilantro


- Lawry's seasoned salt


Instructions:

1. In a large pot, combine the water, chicken breasts, bouillon cubes, diced carrots, diced cilantro, and Lawry's seasoned salt.


2. Bring the mixture to a boil, then reduce the heat to a simmer.


3. Allow the soup to cook for 30-40 minutes, letting the flavors meld together beautifully.


4. When ready to serve, garnish each bowl with crunchy corn chips, a generous sprinkle of Monterey Jack cheese, and slices of creamy avocado.


A Nostalgic Journey:

Every time I prepare this Chicken-Tortilla Chip Soup, I am transported back to my grandmother's cozy kitchen. She had a special way of turning simple ingredients into a meal that felt like a warm embrace. The aroma of simmering chicken and spices would fill the house, drawing everyone to the table with eager anticipation.


I remember one chilly autumn evening, the family gathered around the table, sharing laughter and stories, as the soup pot bubbled gently on the stove. My grandmother, with her infectious smile, would remind us that the secret ingredient to any great dish was a pinch of love. As we savored each spoonful of the hearty soup, topped with crunchy corn chips and gooey cheese, it was clear that her secret ingredient worked its magic.


These memories of togetherness and joy have become an integral part of my own kitchen. Now, I make this soup for my family, hoping to create the same kind of cherished moments that I was fortunate enough to experience.


Difficulty: 3/10

This recipe is straightforward and perfect for those just starting out in the kitchen or seasoned cooks looking for a quick, delicious meal.


Classification: Main Dish

Whether it’s a busy weeknight or a leisurely weekend meal, Chicken-Tortilla Chip Soup is a versatile main dish that never fails to delight. Gather your loved ones and create new memories with this comforting bowl of goodness. Enjoy!
Read more about Appetizers

Read more about Main Dishes

Read more about Desserts

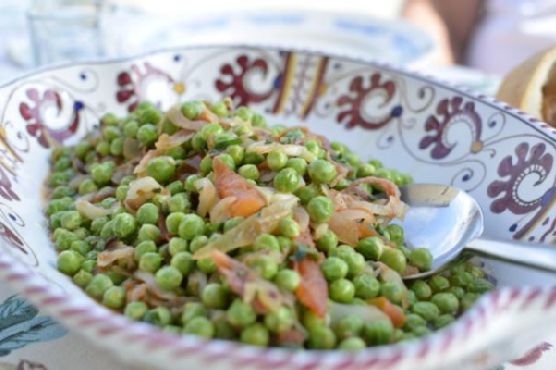
I Like My Peas with Pancetta | Made by Meaghan Moineau

I Like My Peas with Pancetta | Made by Meaghan Moineau

I Like My Peas with Pancetta: A Delightful Dance of Flavors and Memories


Description

Discover a timeless family classic with "I Like My Peas with Pancetta," where tender peas meet savory pancetta in a symphony of flavors. This dish, enriched with the freshness of cherry tomatoes and the aromatic embrace of garlic and onion, is not just a meal — it's a memory on a plate. Perfect for those nostalgic moments when food brings the family together, this appetizer is both simple and delightful, with a difficulty rating of 4 out of 10. Join us on a journey of taste and tradition, and learn how to create a dish that has been a staple in our family gatherings.

Ingredients

- 1 cup sweet fresh green peas

- 4 oz guanciale or pancetta, diced


- 1 medium onion, finely chopped


- 2 cloves garlic, minced


- 1 cup cherry tomatoes, halved


- 1 tablespoon red wine vinegar


- Fresh parsley, chopped


- Salt & pepper to taste


- Extra virgin olive oil


Instructions

1. Prepare the Peas: Bring a medium pot of water to a boil. Once boiling, add the peas and blanch for 2-3 minutes until they are half-cooked. Strain and reserve a spoonful of the pea-water.
2. Sauté the Pancetta: In a medium skillet over medium-low heat, slowly render down the diced pancetta for 4-5 minutes, ensuring it does not become crispy. If it begins to brown, remove the pan from the heat or lower the flame.
3. Aromatic Base: Add the minced garlic and chopped onion to the skillet. Sauté for 5-6 minutes until the onion is soft and translucent. For a vegetarian twist, simply omit the pancetta and sauté the onions and garlic in olive oil.
4. Enhance with Tomatoes: When the onions and garlic are nearly ready, add the cherry tomatoes to the skillet. Allow the flavors to meld together.
5. Combine and Cook: Toss the blanched peas into the skillet with the pancetta mixture. Add a spoonful of the reserved pea-water. Cook until the peas are tender yet still slightly firm to the bite. Adjust the seasoning with salt and pepper to your taste.
6. Finishing Touches: Just before serving, toss in the fresh parsley and drizzle with a generous amount of high-quality extra virgin olive oil.

A Family Memory

Growing up, "I Like My Peas with Pancetta" was more than just a dish; it was a cherished family tradition. Every summer, as the days grew longer and the sun kissed the earth with warmth, my grandmother and I would gather in her sunlit kitchen. She would hand me a basket of freshly picked peas from her garden, their sweetness a testament to her green thumb.

As we shelled peas together, she would recount stories of her childhood in the Italian countryside, where this humble dish was a staple at family gatherings. The aroma of pancetta sizzling on the stove and the vibrant colors of the fresh ingredients created a symphony that filled the kitchen with love and laughter.


Preparing this dish now transports me back to those carefree days, reminding me of the timeless bond between family and food. It's a reminder that, sometimes, the simplest ingredients create the most enduring memories.


Conclusion

"I Like My Peas with Pancetta" is an appetizer that brings together the richness of tradition and the simplicity of fresh ingredients. With its easy preparation and delightful flavors, it holds a special place at any family table. Whether you're enjoying it with loved ones or savoring it alone, this dish is a celebration of culinary heritage, perfect for any occasion.

Read more about Appetizers

Read more about Main Dishes

Read more about Desserts

One Bowl Jalapeno Cheddar Cornbread | Made by Meaghan Moineau

One Bowl Jalapeno Cheddar Cornbread | Made by Meaghan Moineau

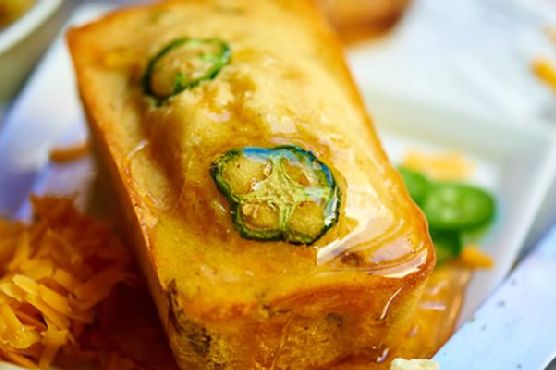
Title: Spicing Up Tradition: One Bowl Jalapeno Cheddar Cornbread
Description: Discover the heartwarming blend of flavors in our One Bowl Jalapeno Cheddar Cornbread. This easy-to-make recipe is a delightful twist on a classic, blending spicy jalapenos with creamy cheddar and the comforting texture of cornbread. Perfect as an appetizer or side dish, this cornbread has a special place in our family gatherings.

---


Recipe: One Bowl Jalapeno Cheddar Cornbread
Difficulty: 3/10
Category: Appetizer / Side Dish

---


A Nostalgic Bite of Family Tradition


Every family has that one dish that feels like home—a recipe that transports you back to warm kitchens and laughter-filled dining rooms. For our family, that dish has always been Jalapeno Cheddar Cornbread. I remember my grandmother, her apron dusted with flour, humming to herself as she prepared this dish in her cozy kitchen. The air was always filled with the rich aroma of melting butter and the sharpness of cheddar cheese.


As a child, I would watch her, fascinated by the way she effortlessly mixed the ingredients in a single bowl. Her secret, she’d say with a wink, was the love she poured into every stir. As the bread baked, we’d all gather around the table, eagerly waiting for that first warm bite. The spicy kick of jalapenos combined with the creamy cheddar and sweet cornmeal was a taste that defined our family gatherings.


Ingredients


- 1 stick unsalted butter, melted


- 1 cup white sugar


- 2 large eggs


- 1 cup buttermilk


- 1 teaspoon baking soda


- 1 cup cornmeal


- 1 cup all-purpose flour


- 1/2 teaspoon salt


- 1 cup shredded cheddar cheese


- 1/2 cup canned diced jalapenos


- 1 fresh jalapeno, thinly sliced (for topping)


Instructions


1. Melt the Butter: Start by melting a stick of unsalted butter in a microwave-safe bowl. Microwave in 30-second intervals until fully melted.
2. Mix the Wet Ingredients: Whisk in the white sugar until well combined, followed by the eggs, ensuring the mixture is smooth.
3. Combine Buttermilk and Baking Soda: In a separate bowl, mix the buttermilk with baking soda, then pour this into the butter mixture. Stir until everything is well incorporated.
4. Incorporate the Dry Ingredients: Add cornmeal, flour, and salt to the mixture. Stir in the shredded cheddar cheese and canned diced jalapenos until just combined—be careful not to overmix.
5. Prepare the Oven and Pan: Preheat your oven to 375 degrees F. Prepare a mini loaf pan or an 8x8 pan with cooking spray.
6. Bake: Spoon the batter into the prepared pan. Top the batter with thinly sliced fresh jalapenos for an extra kick. Bake for about 25 to 35 minutes, depending on your pan size. Keep an eye on the cornbread as it bakes, and remove once a toothpick inserted comes out clean.
7. Cool and Serve: Let the loaves cool in the pan for a few minutes before transferring them to a cooling rack. Serve warm and enjoy the nostalgic blend of flavors that will surely become a staple in your family traditions.

Conclusion


This One Bowl Jalapeno Cheddar Cornbread isn't just a recipe; it's a piece of our family's story—a story of love, warmth, and shared meals. Whether you're making it for a holiday gathering or a simple weeknight dinner, this cornbread promises to bring a smile to your face and warmth to your heart. Serve it as an appetizer or side dish, and watch it become a beloved part of your own family's memories.

Read more about Appetizers

Read more about Main Dishes

Read more about Desserts

Quick N’ Easy Basil Pesto | Made by Meaghan Moineau

Quick N' Easy Basil Pesto | Made by Meaghan Moineau

Title: "Embrace the Flavors of Tradition: Quick N' Easy Basil Pesto Recipe"
Description: Dive into the rich, aromatic world of basil pesto with our Quick N' Easy recipe that promises to transport you back to cherished family gatherings. Whether you're a culinary novice or a seasoned home chef, this flavorful dish is sure to add a touch of nostalgia to your kitchen.

---


Quick N' Easy Basil Pesto: A Taste of Family Tradition

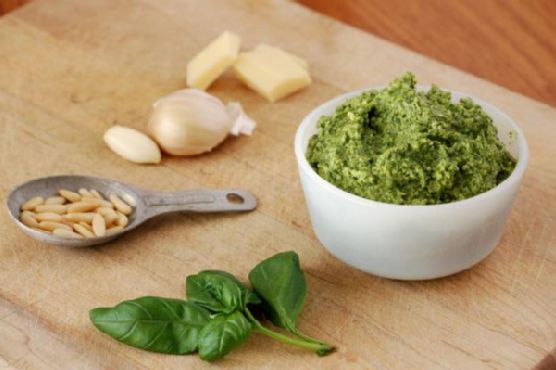
There's something undeniably comforting about the aroma of fresh basil mingling with the earthy tones of pine nuts and the pungent allure of garlic. For me, basil pesto isn't just a versatile condiment—it's a portal to sun-drenched summer afternoons spent in my grandmother's kitchen. It’s about the stories shared over the rhythmic hum of the food processor and the vibrant green concoction that would eventually grace our family table.


Ingredients:

- 2 cups fresh basil leaves


- 1/2 cup olive oil


- 1/3 cup pine nuts


- 2 cloves garlic


- 1/2 cup grated parmesan cheese


Instructions:

1. In a food processor, begin by adding a handful of fresh basil leaves, a drizzle of olive oil, a sprinkle of pine nuts, and a couple of garlic cloves.


2. Blend until the mixture starts to combine, then add the parmesan cheese.


3. Continue alternating the addition of ingredients, ensuring a smooth blend. If the pesto isn’t reaching the desired consistency, add more olive oil incrementally.


4. Use the pesto within 24 hours for optimal freshness, or freeze in plastic wrap-lined muffin cups for later use.


Difficulty Rating: 3/10
Classification: Appetizer
A Whiff of Nostalgia:

The first time I helped make basil pesto, I was perched on a stool, barely tall enough to see over the counter. My grandmother, with her gentle hands and warm smile, guided me through the process. She taught me the importance of patience and balance, of knowing just when to add more olive oil or sprinkle in a bit more cheese.


We would sit together, savoring the vibrant green pesto smeared over crusty bread, and she would tell me stories of her own childhood in the Italian countryside. Those afternoons were filled with laughter and learning, and while the pesto was delicious, it was the connection and love that made it truly special.


Today, whenever I make basil pesto, I’m reminded of those cherished moments. It’s amazing how a simple blend of ingredients can become a vessel for memories, transporting you to a different time and place.


Conclusion:

This Quick N' Easy Basil Pesto is more than just a recipe; it's an invitation to create your own memories. Perfect as an appetizer or to enhance your favorite dishes, it's a testament to the power of food in bringing people together. So, gather your loved ones, share stories, and enjoy the timeless flavors of basil pesto. Your taste buds—and your heart—will thank you.

Read more about Appetizers

Read more about Main Dishes

Read more about Desserts

Cheese and Leek Strata | Made by Meaghan Moineau

Cheese and Leek Strata | Made by Meaghan Moineau

Savory Nostalgia: The Comforting Layers of Cheese and Leek Strata


Description


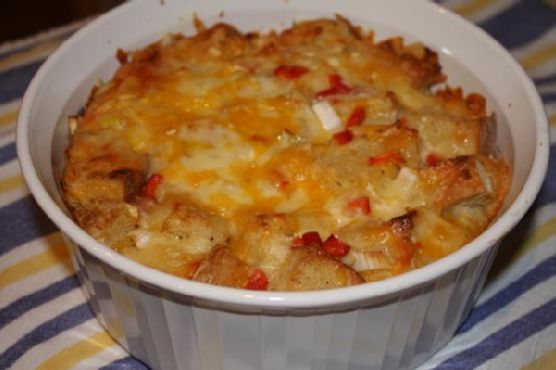
Dive into the delectable layers of our Cheese and Leek Strata, a dish that combines the humble charm of sourdough bread with the rich flavors of cheddar and Swiss cheese, all brought together by the subtle sweetness of leeks and the vibrant color of red bell peppers. This delightful recipe is perfect for a cozy brunch or a satisfying family dinner. With a hint of porter adding an unexpected depth, this strata promises to tantalize your taste buds and bring a touch of nostalgia to your dining table.


Ingredients


- 6 large eggs


- 2 cups milk


- 1/2 cup porter beer


- 1 garlic clove, minced


- Salt and pepper to taste


- 8 cups cubed sourdough bread


- 1 leek, cleaned and sliced


- 1 red bell pepper, diced


- 1 cup shredded cheddar cheese


- 1 cup shredded Swiss cheese


Instructions


1. Prepare the Oven: Preheat your oven to 350 degrees F (175 degrees C).
2. Mix the Egg Mixture: In a large bowl, combine eggs, milk, porter beer, minced garlic, salt, and pepper. Beat well until the mixture is thoroughly blended.
3. Layer the Ingredients:

- Place half of the bread cubes at the bottom of a greased 2.5-quart round baking dish.


- Sprinkle half of the sliced leeks and diced red bell pepper over the bread cubes.


- Top with half of the Swiss cheese and half of the cheddar cheese.


- Repeat the layers with the remaining ingredients, finishing with a generous layer of cheddar cheese on top.


4. Add the Egg Mixture: Pour the egg mixture evenly over the layered ingredients in the baking dish.
5. Refrigerate: Cover the dish tightly with foil or plastic wrap. Weigh the top of the strata down with a slightly smaller baking dish to compress the layers. Refrigerate for at least 2 hours, or ideally, overnight to allow the flavors to meld.
6. Bake: Remove the cover and bake the strata, uncovered, for 40 minutes or until the center is set and the top is golden brown.
7. Serve: Let it cool for a few minutes before serving warm.

A Slice of Memory


Every bite of this Cheese and Leek Strata takes me back to Sunday brunch at my grandmother's house. The kitchen would be filled with the aroma of baking bread and melting cheese, a scent that promised warmth and comfort. As children, my siblings and I would eagerly gather around the table, watching as my grandmother sliced into the perfectly golden crust, revealing the gooey layers within. It wasn't just a meal; it was a tradition, a time for family stories and laughter, all centered around this delicious dish. Even now, as I recreate this recipe in my own kitchen, I am reminded of those cherished Sundays and the love that went into every strata my grandmother made.


Difficulty


Rating: 4/10
Classification: Main Dish

This Cheese and Leek Strata is a straightforward yet rewarding dish that requires minimal preparation and rewards with maximum flavor. Ideal for feeding a crowd with ease or indulging in a weeknight treat, it's a dish that invites both novice and seasoned cooks to enjoy the art of layering flavors.

Read more about Appetizers

Read more about Main Dishes

Read more about Desserts

2 Minute Chocolate Yum | Made by Meaghan Moineau

2 Minute Chocolate Yum | Made by Meaghan Moineau

Title: "2-Minute Chocolate Yum: A Quick Dessert with a Nostalgic Twist"
Description: Discover the magic of crafting a delightful dessert in just two minutes with this easy-to-follow recipe. Perfect for satisfying your chocolate cravings, this 2-Minute Chocolate Yum is a simple yet decadent treat that will whisk you away to sweet family memories. With minimal ingredients and a microwave, indulge in a dessert that feels both nostalgic and indulgent, all while being incredibly quick and easy to prepare.

---


2-Minute Chocolate Yum: A Quick Dessert with a Nostalgic Twist

If there's one thing that can instantly warm the heart and soul, it's the aroma of chocolate wafting through the air. Growing up, chocolate desserts were a staple in our household, especially during those impromptu gatherings when friends and family would drop by unannounced. My mother had a knack for whipping up something quick and delightful, and the 2-Minute Chocolate Yum was her secret weapon.


Ingredients:

- 2 tablespoons cocoa powder


- 1 large egg


- 2 tablespoons flour


- 2 tablespoons milk


- 1 tablespoon oil


- A pinch of salt


- 2 tablespoons sugar


- ½ teaspoon vanilla extract


Instructions:

1. In a small mixing bowl, combine all the ingredients. Whip together until the mixture is smooth.


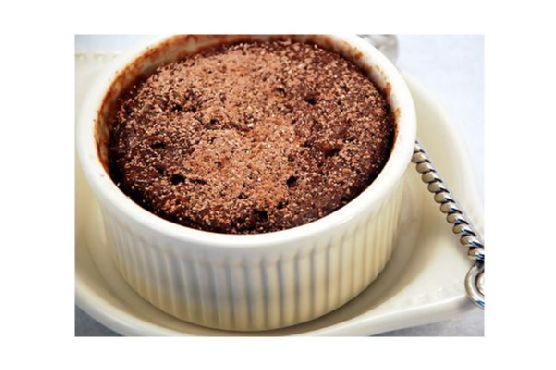
2. Pour the batter into two smaller 6-8 oz. ramekins, filling them a little over halfway.


3. Cook each ramekin one at a time in the microwave for 2 minutes, or until the cake is puffed up.


4. Serve immediately. Top with a scoop of ice cream or a dollop of whipped topping, or simply dust with a powdered sugar and cocoa powder mixture.


For a delightful twist, transform these into mini black forest cakes. Simply pour half of the batter into the ramekin, add a small spoonful of cherry pie filling, and top with the remaining batter before microwaving.


A Nostalgic Family Memory:

I remember one rainy afternoon when the house was filled with the chatter of cousins and the sound of raindrops tapping against the windows. My mother, ever the gracious host, decided to treat us all to her famous 2-Minute Chocolate Yum. As the aroma of chocolate filled the room, it transported me back to simpler times, where joy was found in the little things—like sharing a warm, gooey dessert with loved ones.


We gathered around the dining table, each of us with our own ramekin, topped with a generous scoop of vanilla ice cream. Laughter and stories flowed as freely as the rain outside, each bite of the warm, chocolatey goodness adding to the magic of the moment. It was in these moments that I realized the power of food to create cherished memories and bring people together.


Difficulty Rating: 2/10
Classification: Dessert

This 2-Minute Chocolate Yum is not only a quick and easy dessert to prepare, but it's also a delightful way to create lasting memories with family and friends. Whether you're a seasoned baker or a beginner in the kitchen, this recipe is sure to become a beloved go-to for any occasion. So go ahead, indulge in a little nostalgia, and share the love with this scrumptious chocolate treat.

Read more about Appetizers

Read more about Main Dishes

Read more about Desserts

Tuna Mexi Melts | Made by Meaghan Moineau

Tuna Mexi Melts | Made by Meaghan Moineau

Title: "Tuna Mexi Melts: A Flavorful Twist on a Family Classic"
Description: Discover the irresistible fusion of flavors in Tuna Mexi Melts, a delightful dish that combines zesty spices with creamy cheeses for a satisfying meal. This easy-to-make recipe is perfect for a cozy family gathering or a casual dinner party. Read on to learn how to prepare this mouthwatering dish and enjoy a nostalgic story that adds a personal touch to this family favorite.

---


Tuna Mexi Melts: A Flavorful Twist on a Family Classic


Introduction


There's something magical about the combination of savory tuna, spicy jalapeños, and melted cheese that transports me back to my childhood. Tuna Mexi Melts have always been a staple in my family, a dish that not only tantalizes the taste buds but also warms the heart. This recipe, bursting with Mexican-inspired flavors, is perfect for those seeking a comforting meal with a kick. Let's dive into the world of Tuna Mexi Melts and explore what makes them a cherished addition to any recipe collection.


Ingredients


To create this culinary delight, gather the following ingredients:

- Butter


- Chile powder


- Fresh cilantro


- Cumin


- French bread


- Garlic powder


- Green onions


- Jalapeño


- Lime juice


- Paprika


- Pepper jack cheese


- Picante sauce (your choice)


- Roma tomatoes


- Salt


- Shredded cheddar cheese


- Sour cream


- Tuna


Instructions


1. Prepare the Picante Sauce:

- Begin by adding all the ingredients for the picante sauce into your food processor.


- Blend until smooth, then season with salt to taste.


2. Prepare the Bread:

- Slice the French loaf into 1-inch slices.


- Brush each slice with melted butter.


- Sprinkle cumin, chile powder, and garlic powder over the buttered slices.


3. Mix the Melt Ingredients:

- In a bowl, combine all the ingredients for the melt, except for the pepper jack cheese.


- Mix thoroughly until everything is well incorporated.


4. Assemble the Melts:

- Spoon a generous amount of the tuna mixture onto each bread slice.


- Top each with a slice of pepper jack cheese.


5. Bake:

- Preheat the oven to 350°F (175°C).


- Place the assembled sandwiches on a baking sheet and bake for 10 to 15 minutes, or until the cheese is melted and bubbling.


A Nostalgic Family Memory


Every summer, my family would gather at my grandparents' house for a weekend of laughter, stories, and of course, delicious food. My grandmother, the heart of our family, had a knack for turning simple ingredients into unforgettable meals. Tuna Mexi Melts were her specialty, a dish she made with love and tradition. As kids, we would gather around the kitchen, eagerly watching her work her culinary magic. The aroma of spices and melting cheese filled the air, drawing us in like a comforting embrace. Each bite was a burst of flavor, a reminder of the warmth and joy that family gatherings bring. To this day, Tuna Mexi Melts remain a beloved recipe, a testament to the enduring power of food to connect us with cherished memories.


Difficulty & Classification


Difficulty: 4/10
Classification: Main Dish

Conclusion


Tuna Mexi Melts are more than just a meal; they are a flavorful journey into the heart of family traditions. With a smorgasbord of spices and creamy cheeses, this dish is sure to please your palate and evoke fond memories. Whether you're looking to recreate a family classic or introduce a new favorite, Tuna Mexi Melts are a delightful choice for any occasion. Enjoy the warmth and nostalgia this recipe brings, and share it with those you love.

Read more about Appetizers

Read more about Main Dishes

Read more about Desserts

Chicken Roll-Ups With Feta Cheese and Arugula | Made by Meaghan Moineau

Chicken Roll-Ups With Feta Cheese and Arugula | Made by Meaghan Moineau

Title: Savoring Simplicity: Chicken Roll-Ups with Feta Cheese and Arugula
Description: Discover an elegant yet simple recipe for Chicken Roll-Ups with Feta Cheese and Arugula. This delightful dish combines tender chicken, peppery arugula, and tangy feta for a meal that's both easy to prepare and sure to impress. Join me as I share a nostalgic family memory tied to this cherished recipe.

---


When it comes to creating memorable meals, simplicity often yields the most satisfying results. One such dish that embodies this philosophy is the Chicken Roll-Ups with Feta Cheese and Arugula. This recipe merges tender chicken breast cutlets with the vibrant flavors of fresh arugula and creamy feta cheese. It’s a dish that has become a family favorite, not just for its taste but also for the cherished memories it evokes.


I vividly recall one summer evening at my grandmother's house, where the aroma of olive oil and sizzling chicken wafted through the air. The kitchen was a flurry of activity as we prepared for our annual family gathering. My grandmother, always the culinary maestro, had a knack for creating dishes that were both simple and extraordinary. It was during these gatherings that she first introduced us to her signature Chicken Roll-Ups.


As a child, I was fascinated by the process. Watching her layer each chicken cutlet with baby arugula and crumble the feta cheese with expert precision was mesmerizing. She would then roll each piece tightly, securing it with a toothpick, a ritual that seemed almost ceremonial. The sizzle of the chicken as it hit the hot olive oil in the skillet was music to my ears—a prelude to the deliciousness that awaited.


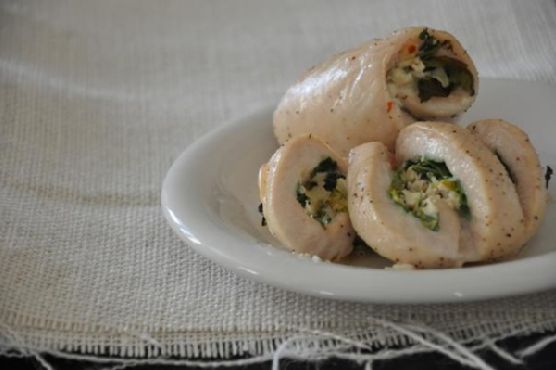
The magic continued as the skillet, brimming with these little bundles of joy, was transferred to the oven. The wait, albeit short, was always filled with anticipation and the comforting chatter of family. Once ready, the chicken was sliced crosswise, revealing a beautiful spiral of green and white against the golden-brown exterior. It was a sight to behold and a taste to cherish.


This dish, classified as a Main Dish with a difficulty rating of 4 out of 10, is perfect for any occasion, whether it’s a weeknight dinner or a special family gathering. Its preparation is straightforward, yet the flavors are anything but ordinary. The peppery arugula and tangy feta cheese complement the succulent chicken perfectly, while the olive oil lends a subtle richness that ties everything together.


As I prepare this dish today, I am reminded of those warm summer evenings and the joy of sharing good food with loved ones. It’s a recipe that not only delights the taste buds but also warms the heart with memories of family and home. So, roll up your sleeves and treat yourself and your family to this delightful dish—simple, flavorful, and steeped in love.


---


Ingredients:

- Chicken breast cutlets


- Coarse salt and ground pepper


- Baby arugula


- Feta cheese


- Olive oil


Instructions:

1. Preheat your oven to 375°F (190°C).


2. Season chicken breast cutlets with coarse salt and ground pepper.


3. Layer each cutlet with baby arugula and crumble feta cheese in the center.


4. Starting with the narrow end, roll up the chicken tightly and secure with a toothpick.


5. In a large nonstick ovenproof skillet, heat olive oil over medium-high heat and swirl to coat the bottom.


6. Cook the chicken, seam side down, until golden brown, about 1 to 2 minutes.


7. Turn the chicken over and transfer the skillet to the oven.


8. Cook until the chicken is opaque throughout, approximately 10 to 12 minutes.


9. Remove toothpicks and slice the chicken crosswise before serving, if desired.


This recipe is more than just a meal; it's a journey back to simpler times, where the kitchen was the heart of the home and every dish was a labor of love. Enjoy the flavors, and perhaps create a few new memories of your own.

Read more about Appetizers

Read more about Main Dishes

Read more about Desserts

Roasted Beet Hummus | Made by Meaghan Moineau

Roasted Beet Hummus | Made by Meaghan Moineau

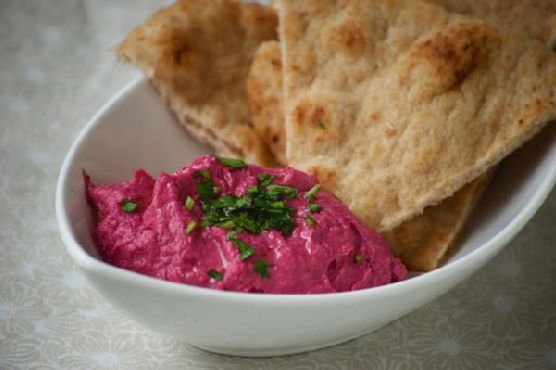
A Vibrant Twist on Tradition: Roasted Beet Hummus


A Taste of Home: The Story Behind the Dish


There are few dishes that capture the essence of nostalgia quite like hummus. For me, the aroma of roasted beets mingling with garlic and cumin instantly transports me back to my grandmother's cozy kitchen. Her home was always filled with the comforting scent of freshly baked bread, and her table was a testament to her love for vibrant, soul-warming foods. I remember her teaching me the art of making hummus, our hands stained pink from the beets, as we laughed and shared stories of our family's culinary roots. It was in her kitchen that I learned the magic of simplicity—how a handful of ingredients could come together to create something truly extraordinary.


A Splash of Color: Roasted Beet Hummus Recipe


Ingredients:

- 2 medium-sized red roasted beets

- 1 can of cooked chickpeas (about 1.5 cups)


- 2 cloves of garlic


- 1 teaspoon ground cumin


- Juice of 1 lemon


- 3 tablespoons olive oil (plus more as needed)


- Salt to taste


- 3 tablespoons tahini sesame seed paste


Instructions:

1. Prepare the Beets: If you haven't done so already, roast your beets until tender. Once cool, peel and chop them into manageable pieces.
2. Blend the Base: In a food processor or blender, add the roasted beets, garlic, ground cumin, lemon juice, salt, and tahini. Pulse until the mixture is well blended and smooth.
3. Incorporate Chickpeas: Add the cooked chickpeas and olive oil to the mixture. Pulse until the chickpeas are just incorporated, achieving a smooth texture. If the hummus is too thick, gradually add more olive oil until you reach your desired consistency.
4. Serve and Enjoy: Transfer your vibrant beet hummus to a serving bowl. This dish pairs perfectly with warm pita or flatbread, making it an enticing appetizer for any gathering.

Difficulty Rating: 3/10


Roasted Beet Hummus is a delightful appetizer that’s as easy to make as it is to enjoy. With a difficulty rating of just 3 out of 10, it's accessible to chefs of all skill levels, offering a quick and satisfying splash of color and flavor to your table.


A Dish to Remember


Every time I make this Roasted Beet Hummus, I'm reminded of those cherished times spent with my grandmother. The vibrant color and earthy flavors are a testament to the beauty of simplicity and the joy of sharing meals with loved ones. Whether you're introducing this dish to your family for the first time or incorporating it into your regular culinary repertoire, Roasted Beet Hummus is sure to become a beloved staple, creating new memories and stories to be passed down through generations.


Keywords: Roasted Beet Hummus, Easy Appetizer, Family Recipe, Nostalgic Cooking, Vibrant Flavors, Mediterranean Cuisine

Read more about Appetizers

Read more about Main Dishes

Read more about Desserts

Cherry Jello Poke Cake | Made by Meaghan Moineau

Cherry Jello Poke Cake | Made by Meaghan Moineau

Title: "Cherry Jello Poke Cake: A Sweet Slice of Nostalgia"
Description: Dive into the delightful world of Cherry Jello Poke Cake—a vibrant dessert that's as easy to make as it is to enjoy. This recipe combines the simplicity of a boxed cake mix with the playful flavors of cherry jello, all topped with a creamy layer of cool whip. Perfect for family gatherings or a nostalgic afternoon treat, this cake is sure to become a favorite in your home.

---


Cherry Jello Poke Cake: A Sweet Slice of Nostalgia


In the tapestry of family memories, there are certain dishes that stand out, evoking cherished moments and bringing smiles with every bite. For my family, that dish is the Cherry Jello Poke Cake. This delightful dessert, with its vibrant colors and refreshing taste, takes me back to lazy summer afternoons and bustling family reunions at my grandmother's house.


Ingredients:


- 1 box white cake mix


- 1 package cherry jello


- Cool Whip (enough to generously cover the cake)


Instructions:


1. Bake the Cake: Begin by preparing the boxed cake mix according to the directions on the package. Once baked, allow the cake to cool slightly.
2. Poke the Holes: Using the end of a wooden spoon or a similar tool, gently poke holes across the entire surface of the cake.
3. Prepare the Jello: Follow the instructions on the cherry jello package to prepare it. Immediately pour the liquid jello over the cake, ensuring it seeps into the holes. This will infuse the cake with a burst of cherry flavor.
4. Chill: Place the cake in the refrigerator for a few hours. For best results, let it sit overnight, allowing the flavors to meld beautifully.
5. Top with Cool Whip: Just before serving, spread a generous layer of cool whip over the top of the cake. This creamy topping balances the cake's zesty cherry undertones perfectly.

Nostalgic Family Memory:


As a child, summer meant one thing—family reunions at Grandma's house. Her backyard was a haven of laughter and playful chaos, with cousins running around, grown-ups sharing stories, and a long table laid out with potluck dishes. At the center of it all was Grandma's Cherry Jello Poke Cake.


I remember peering over the kitchen counter, eyes wide with anticipation, as Grandma skillfully poured the cherry jello over the cake. The vibrant red liquid absorbed into the cake, creating a mesmerizing mosaic of color. When it was finally time for dessert, the cool whip topping was like the creamy icing on a summer afternoon well spent.


That first bite was always magical—a perfect blend of moist cake, fruity jello, and velvety cool whip. Even now, each time I make this cake, I'm transported back to those carefree days, surrounded by family and love.


Difficulty Rating: 3/10


This Cherry Jello Poke Cake is delightfully simple to make, making it an ideal dessert for bakers of all skill levels. Its straightforward process and minimal ingredients ensure that anyone can recreate this family favorite with ease.


Classification: Dessert


Whether you're looking to create new memories or revisit old ones, the Cherry Jello Poke Cake is sure to be a hit at your next gathering. Its simplicity and taste make it a timeless classic, ready to be enjoyed by generations to come.

Read more about Appetizers

Read more about Main Dishes

Read more about Desserts

Sun Dried Tomato Stuffed Mushrooms | Made by Meaghan Moineau

Sun Dried Tomato Stuffed Mushrooms | Made by Meaghan Moineau

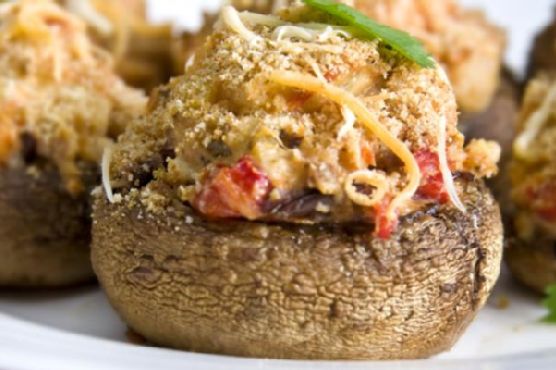
Savoring Nostalgia: Sun-Dried Tomato Stuffed Mushrooms


A Family Recipe That Transcends Generations


Introduction:

In the heart of every home, there’s a dish that sparks joy, evokes cherished memories, and unites family members around the dining table. For my family, that dish is Sun-Dried Tomato Stuffed Mushrooms. This delectable appetizer, with its rich blend of Mediterranean flavors, has been the centerpiece of our gatherings for as long as I can remember. Whether it's a festive holiday dinner or a casual Sunday brunch, these savory stuffed mushrooms never fail to bring a smile to our faces and warmth to our hearts.


Ingredients:

- White button mushrooms


- Bread crumbs


- Red diced roasted pepper


- Roasted garlic (from one bulb)


- Diced kalamata olives


- Diced onion


- Diced sun-dried tomatoes


- Olive oil


- Cream cheese


- Mozzarella


- Provolone


- Asiago


- Parmesan


- Romano


- Red pepper flakes


- Dried oregano


- Salt and pepper to taste


Instructions:

1. Preheat your oven to 350°F (175°C). Begin by cleaning the mushrooms and removing the stems. Lightly oil the mushroom caps and arrange them on a greased cookie sheet.


2. Finely dice the mushroom stems and set them aside. In a large bowl, combine cream cheese, mozzarella, provolone, asiago, parmesan, romano, half of the dried bread crumbs, red pepper flakes, and dried oregano. Stir until well combined. Season with salt and pepper to taste, then set aside.


3. Over medium heat, sauté the onions in olive oil until they become translucent. Add the diced mushroom stems and continue to sauté for one minute.


4. Stir in the roasted garlic, kalamata olives, roasted red peppers, and sun-dried tomatoes. Cook until the mixture is thoroughly heated.


5. Add the sautéed vegetables to the reserved cream cheese mixture and stir to combine.


6. Scoop one tablespoon of the mixture into each prepared mushroom cap. Sprinkle with the remaining bread crumbs and mozzarella cheese.


7. Bake in the oven for 20-25 minutes until the mushrooms are browned and the cheese is melted. Let them stand for 5 minutes before serving.


Difficulty Rating: 4/10
Classification: Appetizer
A Nostalgic Family Memory:

Every year, as the leaves turned golden and the air grew crisp, my grandmother would prepare her famous Sun-Dried Tomato Stuffed Mushrooms for our Thanksgiving feast. The kitchen would fill with the comforting aroma of garlic and roasted peppers, blending with the warm, creamy cheeses. As a child, I loved helping her mix the ingredients and stuff the mushroom caps, feeling as though I was contributing to our family tradition.


On one particular Thanksgiving, after the meal was devoured and the dishes were cleared, my grandmother shared a story of how she first discovered the recipe. She recounted her travels to the Mediterranean coast, where she fell in love with the vibrant flavors and simple yet exquisite ingredients that inspired her to create this dish. Listening to her tale, I realized that these mushrooms were more than just an appetizer; they were a symbol of her adventurous spirit and her love for family.


To this day, whenever I prepare Sun-Dried Tomato Stuffed Mushrooms, I'm reminded of my grandmother's laughter and the love she infused into every meal. These stuffed mushrooms continue to be a cherished part of our family gatherings, linking the past with the present and creating new memories for future generations to savor.

Read more about Appetizers

Read more about Main Dishes

Read more about Desserts

Avocado Toast With Caramelized Sweet Onion, Grape Tomatoes, Fresh Garden Chives and Chive Blossoms | Made by Meaghan Moineau

Avocado Toast With Caramelized Sweet Onion, Grape Tomatoes, Fresh Garden Chives and Chive Blossoms | Made by Meaghan Moineau

Title: A Nostalgic Bite: Avocado Toast With Caramelized Sweet Onion and Garden Fresh Toppings
Description: Discover the delightful simplicity of Avocado Toast with Caramelized Sweet Onion, Grape Tomatoes, and Fresh Garden Chives—a dish that brings together the perfect blend of flavors and evokes cherished memories. Easy to prepare and bursting with freshness, this recipe is a heartwarming addition to any meal.

---


A Nostalgic Bite: Avocado Toast With Caramelized Sweet Onion and Garden Fresh Toppings


Avocado toast has become a beloved staple in many households, celebrated for its versatility and vibrant flavors. Today, I want to share a version that holds a special place in my heart: Avocado Toast with Caramelized Sweet Onion, Grape Tomatoes, and Fresh Garden Chives. This dish not only tantalizes the taste buds but also carries with it a cherished family memory that makes every bite a nostalgic journey.


Ingredients:


- Olive oil


- 1 yellow sweet onion, thinly sliced


- 1 cup grape tomatoes, halved


- 1 ripe avocado


- 2 slices of quality bread


- A handful of fresh chives, finely chopped


- A few chive blossoms for garnish


- Salt and black ground pepper to taste


Instructions:


1. Caramelize the Onion and Tomatoes: In a skillet, heat a splash of olive oil over medium-high heat. Add the sliced sweet onions and halved grape tomatoes. Sauté for 5-8 minutes, stirring occasionally, until the onions are soft and golden, and the tomatoes are slightly blistered. Season with a pinch of salt and freshly ground black pepper. Set the mixture aside.
2. Prepare the Toast: While the onion and tomatoes are cooking, toast two slices of quality bread to your desired level of crispiness.
3. Assemble the Toast: Once toasted, spread the creamy avocado evenly onto each slice of toast. Sprinkle with a little salt and pepper for added flavor.
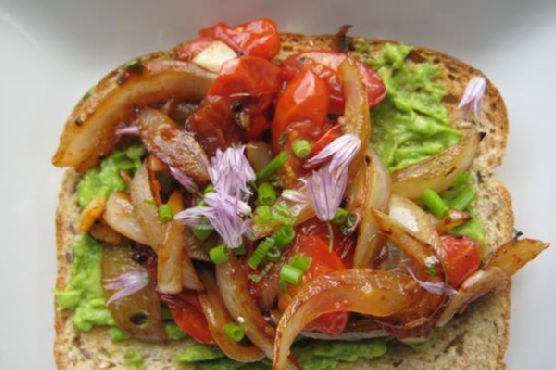
4. Top and Garnish: Generously pile the caramelized onion and tomato mixture onto the avocado toast. Finish with a sprinkle of fresh chives and a few delicate chive blossoms for a touch of elegance.

A Taste of Family Tradition


This recipe takes me back to idyllic summer afternoons spent at my grandmother's house. She had a sprawling garden filled with a variety of herbs and vegetables, and every meal seemed to incorporate something freshly picked. The sweet onions and juicy tomatoes were often plucked straight from her garden, their flavors intensified by the sun.


As a child, I loved helping her in the kitchen, watching as she transformed simple ingredients into meals that brought everyone together. Her avocado toast, always adorned with whatever fresh herbs she had on hand, was a favorite. The chive blossoms, with their mild onion flavor and vibrant purple hue, were the crowning touch that made her version truly special.


Each time I prepare this dish, I am reminded of those treasured moments spent in her warm, sunlit kitchen. It's a reminder of the joy found in simplicity and the bonds strengthened over shared meals.


Difficulty: 2/10


This Avocado Toast is remarkably easy to prepare, making it perfect for a quick breakfast, a light lunch, or an elegant appetizer. Its simplicity allows the fresh ingredients to shine, creating a delightful dish that is both nourishing and nostalgic.


---


Whether you're seeking a new way to enjoy avocado toast or longing to create memories that will last a lifetime, this recipe is sure to become a beloved tradition in your home. Enjoy the harmony of flavors and the love that goes into each delicious bite.

Read more about Appetizers

Read more about Main Dishes

Read more about Desserts

Mini Ham Omelets | Made by Meaghan Moineau

Mini Ham Omelets | Made by Meaghan Moineau

Title: "Mini Ham Omelets: A Heartfelt Recipe Packed with Flavor and Memories"
Description: Dive into the delightful world of Mini Ham Omelets, a simple yet flavorful dish that brings a sense of nostalgia and warmth. Perfect as an appetizer, this easy-to-make recipe is bursting with the vibrant flavors of cherry tomatoes, parmesan cheese, and prosciutto, all wrapped in a soft, eggy embrace. Join me as I share a cherished family memory tied to this beloved dish and guide you through creating your very own batch. Rated 3/10 in difficulty, this recipe is a breeze for cooks of all levels.

---


Mini Ham Omelets: A Heartfelt Recipe Packed with Flavor and Memories

Growing up, Sunday mornings were a sacred ritual in our household. The kitchen would awaken with the sizzle of pans and the harmonious chatter of family, all eagerly anticipating a hearty breakfast. Among the many dishes that graced our table, Mini Ham Omelets were a standout favorite. They were more than just a meal; they were a testament to the love and togetherness that Sundays embodied.


A Taste of Tradition

These Mini Ham Omelets are not just a treat for the taste buds; they are a journey back in time. My grandmother, the matriarch of our family, first introduced them to us. Her kitchen was her canvas, and every dish she created was a masterpiece. The smell of prosciutto crisping in the oven, the vibrant colors of fresh cherry tomatoes, and the creamy blend of eggs and parmesan were the defining notes of our Sunday symphony.


The Recipe
Ingredients:

- Cherry tomatoes


- Eggs


- Milk


- Onions


- Parmesan cheese


- Bell pepper


- Prosciutto


Instructions:

1. Begin by washing and chopping the spring onions. Set them aside.


2. In a mixing bowl, whisk the eggs together with the grated Parmesan cheese until well combined.


3. Add the chopped onions, milk, and a sprinkling of pepper to the egg mixture, stirring gently to incorporate.


4. Line six cavities of a silicone muffin mold with slices of prosciutto, creating a delicate, savory nest.


5. Fill each cavity with a couple of tablespoons of the egg mixture.


6. Place a washed and dried cherry tomato in the center of each mold.


7. Bake in a preheated oven at 180°C (356°F) for 12-15 minutes, until the omelets are set and the prosciutto is crisp.


A Nostalgic Twist

As these mini omelets baked, the aroma would fill the air, drawing everyone into the kitchen. We'd gather around the table, each bite a harmonious blend of flavors that told the story of our family. The tangy burst of cherry tomatoes complemented the savory richness of the prosciutto, while the parmesan cheese added a touch of elegance to the soft, fluffy eggs.


These omelets were more than a meal; they were a reminder of the simple joys of life and the importance of family. Every bite was filled with laughter, stories, and the warmth of shared memories.


Difficulty Rating: 3/10

Creating these Mini Ham Omelets is a delightful experience that cooks of all levels can enjoy. With a difficulty rating of just 3 out of 10, this recipe is perfect for anyone looking to recreate a piece of culinary nostalgia with ease.


Classification: Appetizer

Perfect as an appetizer, these Mini Ham Omelets are a versatile dish that can be served at brunch, as a starter for a dinner party, or as a delightful snack during family gatherings.


---


So, gather your ingredients, preheat your oven, and join me in creating these Mini Ham Omelets. Whether you're sharing them with family or enjoying a quiet morning alone, these little bites of nostalgia are sure to bring warmth and joy to your table.

Read more about Appetizers

Read more about Main Dishes

Read more about Desserts

Baked Cinnamon Apple Wedges | Made by Meaghan Moineau

Baked Cinnamon Apple Wedges | Made by Meaghan Moineau

Title: Warm Memories and Sweet Aromas: Baked Cinnamon Apple Wedges
Description: Unveil the heartwarming simplicity of Baked Cinnamon Apple Wedges, a dessert that marries the comforting flavors of fall with cherished family memories. Dive into this easy-to-make recipe that is sure to fill your home with the nostalgic aroma of cinnamon and apples.

---


As the crisp autumn air begins to wrap around us, there's nothing quite like the smell of cinnamon and apples wafting through the house. One bite of these Baked Cinnamon Apple Wedges, and you're instantly transported back to family gatherings where laughter was abundant, and the tables were laden with comfort food. This dessert is not just a treat for the taste buds, but a heartfelt journey back to simpler times.


A Nostalgic Family Memory:

I remember the first time I tasted these delightful apple wedges was at my grandmother's house. It was an annual tradition for the family to gather for Sunday dinners, and as the evening approached, the kitchen would start buzzing with activity. My grandmother had a knack for creating the most delicious desserts with the simplest of ingredients.


One fall evening, as the leaves painted the ground with hues of orange and gold, she decided to make Baked Cinnamon Apple Wedges. The apples, fresh from the orchard, were sliced with loving precision. I watched as she drizzled them with golden maple syrup and dusted them generously with cinnamon and nutmeg, her hands moving deftly, as if conducting an age-old symphony.


As the apples baked, the kitchen was enveloped in a warm, sweet aroma that drew the family together. We gathered around the table, eagerly awaiting the treat. Served warm, the apple wedges were a revelation—soft and tender, with a touch of spice that danced on the palate. It was a moment of pure joy and the perfect end to a cozy family meal.


The Recipe:

*Ingredients:*


- 1 apple


- 2 tablespoons of maple syrup


- 1 teaspoon of cinnamon


- 1/4 teaspoon of nutmeg


*Instructions:*


1. Preheat your oven to 180 degrees Celsius (approximately 350 degrees Fahrenheit).


2. Cut the apple into 10-12 wedges, ensuring they are evenly sized for consistent baking.


3. In a mixing bowl, combine the apple wedges with maple syrup, cinnamon, and nutmeg. Toss them gently to ensure each piece is well-coated.


4. Arrange the apple wedges in a single layer in a small baking dish or on a baking tray.


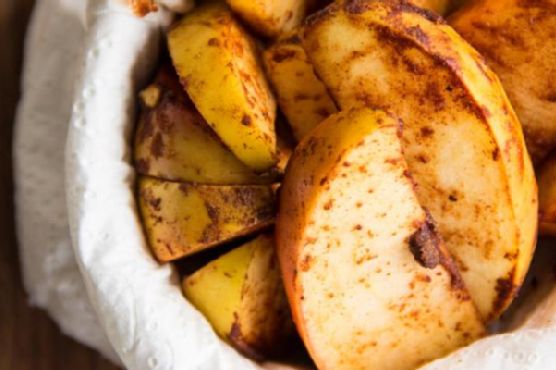
5. Bake in the preheated oven for about 10 minutes, or until the apples are golden brown and tender.


6. Serve the Baked Cinnamon Apple Wedges while they are warm, either on their own or with a scoop of vanilla ice cream for added indulgence.


Difficulty Rating: 2/10

This recipe is delightfully simple, making it accessible to both novice and experienced cooks.


Classification: Dessert

These Baked Cinnamon Apple Wedges are the perfect dessert for any occasion, embodying the flavors of fall and the warmth of family traditions. Whether you're hosting a large gathering or enjoying a quiet evening at home, this dish is sure to bring a touch of sweetness and nostalgia to your table. Enjoy the taste of cherished memories and the comforting embrace of fall flavors with every bite.

Read more about Appetizers

Read more about Main Dishes

Read more about Desserts

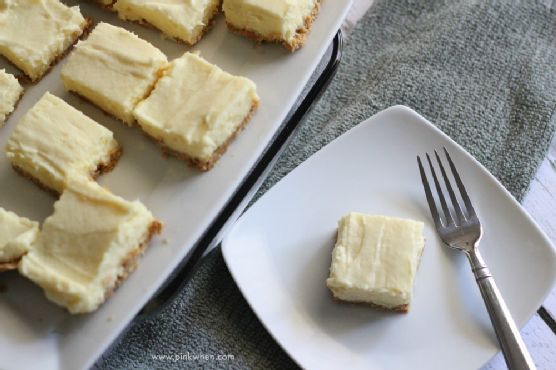
Creamy Lime Pie Square Bites | Made by Meaghan Moineau

Creamy Lime Pie Square Bites | Made by Meaghan Moineau

Creamy Lime Pie Square Bites: A Zesty Delight for Every Occasion


Description: Dive into the refreshing world of citrus with our Creamy Lime Pie Square Bites! Perfectly balanced between tangy and sweet, these bite-sized treats are bound to become your go-to dessert. Whether you're a seasoned baker or a beginner, this recipe is both simple and rewarding. Plus, it's packed with the nostalgic flavors of family gatherings and summer picnics. Let's create some new memories together!

---


Ingredients


- Crust:

- 1 cup all-purpose flour


- 1 cup graham cracker crumbs


- 1 tablespoon lime zest


- 1/4 cup sugar


- 1/2 cup unsalted butter, melted


- Filling:

- The rest of the ingredients as listed above


Instructions


1. Preheat and Prepare:

- Preheat your oven to 350°F (175°C).


- Line an 8x8 glass square dish with foil for easy removal later.


2. Make the Crust:

- In a medium bowl, whisk together all the crust ingredients until you achieve a grainy consistency.


- Firmly press the mixture into the prepared dish, ensuring the bottom and edges are evenly covered.


3. Bake the Crust:

- Place the dish in the oven and bake for 10-15 minutes, or until the crust is golden brown.


- Remove from the oven and allow it to cool for about an hour.


4. Prepare the Filling:

- Combine all filling ingredients in a medium bowl.


- Mix well for about 30 minutes, then reduce speed and mix on low for an additional 3 minutes.


5. Assemble and Bake:

- Pour the filling over the cooled crust, ensuring it reaches all edges.


- Bake in the oven for 5-10 minutes, until the filling is just set.


6. Cool and Chill:

- Place the dish on a cooling rack for 15 minutes.


- Transfer to the refrigerator for 45 minutes to set completely.


7. Serve:

- Carefully lift the foil to remove the pie from the dish.


- Cut into bite-sized squares and serve.


A Taste of Nostalgia


Growing up, every summer my family would gather at my grandmother's house for a weekend of fun, laughter, and of course, food. My grandmother had a sprawling garden filled with citrus trees, and the air was always infused with the fresh scent of limes and lemons. One of my fondest memories is helping her make these Lime Pie Square Bites. I would zest the limes, and she would tell me stories of her own childhood. Those moments in the kitchen taught me more than just cooking; they were lessons in love, patience, and the joy of sharing a meal with family.


Difficulty Rating: 3/10


Category: Dessert

---


Whether you're reliving cherished memories or creating new ones, these Creamy Lime Pie Square Bites are the perfect treat. They offer a delightful balance of creamy and zesty flavors that are sure to impress your guests. Don't forget, if you have lime essential oil on hand, it can add an extra punch of citrus to your dish. Just ensure you're using a high-quality, food-grade oil.


Explore More Lime-Infused Delights:


- Coconut Lime Spritzer


- Blackberry Lime Margaritas


- Strawberry Limeade


Note: Always ensure that any essential oils used in cooking are labeled as food-grade, as not all oils are safe for consumption.

Join our community of over 500,000 subscribers to receive more delicious recipes and exclusive content. Sign up today and start your culinary adventure with us!


---


Thank you for stopping by! If you try these Creamy Lime Pie Square Bites, leave a comment and let us know how they turned out. Happy baking!

Read more about Appetizers

Read more about Main Dishes

Read more about Desserts

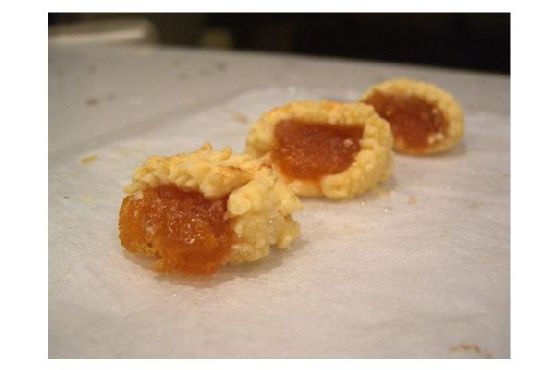
Jam Tarts | Made by Meaghan Moineau

Jam Tarts | Made by Meaghan Moineau

Title: Sweet Nostalgia: Crafting Timeless Jam Tarts


Description:

Dive into the heartwarming world of homemade Jam Tarts—a delicious dessert that not only tantalizes your taste buds but also weaves a tapestry of cherished family memories. Discover how these delightful treats can transform a simple day into a celebration of love and tradition.

---


The Heartfelt Journey of Jam Tarts


There's something profoundly comforting about the aroma of Jam Tarts wafting through the kitchen. This classic dessert, with its golden, flaky crust and sweet, luscious jam center, has been a staple in my family for generations. It's more than just a recipe; it's a story, a tradition, a piece of home.


Ingredients:

- 1 cup butter, melted- 4 oz cream cheese, softened

- 2 tbsp maple syrup


- 1 tbsp lemon juice


- 2 cups unbleached flour


- Your favorite jam (strawberry, raspberry, or apricot work wonderfully)


Instructions:

1. Begin by melting the butter in a saucepan over low heat.2. Once melted, blend in the cream cheese, maple syrup, and lemon juice until the mixture is smooth and well combined.

3. Gradually add the unbleached flour, stirring continuously until the dough is smooth and pliable.


4. Chill the dough overnight to ensure a firm texture.


5. Preheat your oven to 450°F (232°C).


6. Roll the chilled dough out to a 1/4-inch thickness on a lightly floured surface.


7. Using a 3-inch round cutter, cut out circles from the dough.


8. Make a small indentation in the center of each round and spoon a dollop of your chosen jam into it.


9. Place the prepared rounds on oiled cookie sheets.


10. Bake for 15 minutes or until the crusts are golden brown and slightly flaking.


11. If the crusts are not perfectly golden, return them to the oven for a few additional minutes.


12. Allow the tarts to cool slightly before serving.


Memories in Every Bite

I remember the first time I made Jam Tarts with my grandmother. It was a rainy Saturday afternoon, the kind of day that calls for baking. As she guided me through the process, her kitchen filled with laughter and the sweet scent of tradition. I was just a child, thrilled at the prospect of creating something so delicious from scratch.

As we pulled the tarts from the oven, their golden crusts gleaming with promise, my grandmother shared stories of how this recipe was a favorite during her childhood. She spoke of summer picnics and holiday gatherings where these tarts took center stage. Each bite was a reminder of simpler times and the love that binds us across generations.


A Dessert for All Occasions

Jam Tarts are a delightful dessert, perfect for any occasion—from family gatherings to casual afternoon tea. They are simple to make yet impressive enough to charm your guests. With a difficulty rating of 4 out of 10, these tarts are an excellent choice for both novice and experienced bakers alike.

In the end, Jam Tarts are more than just a dessert. They are a symbol of continuity and connection, a sweet reminder that the best recipes are those shared with love. Whether you are creating new memories or honoring old ones, these tarts are sure to bring joy to your table.


So, next time you find yourself yearning for a taste of nostalgia, roll up your sleeves, gather your ingredients, and let the magic of Jam Tarts fill your home—and your heart.

Read more about Appetizers

Read more about Main Dishes

Read more about Desserts

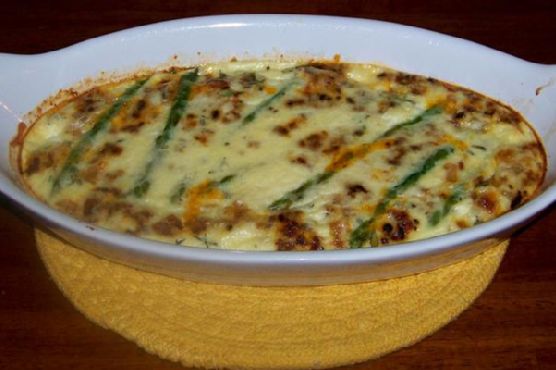
Baked Eggs With Asparagus and Sun Dried Tomatoes | Made by Meaghan Moineau

Baked Eggs With Asparagus and Sun Dried Tomatoes | Made by Meaghan Moineau

Title: "A Taste of Spring: Baked Eggs with Asparagus and Sun-Dried Tomatoes"
Description: Dive into the delightful world of baked eggs with this savory recipe featuring asparagus, sun-dried tomatoes, and parmesan cheese. Perfect as a brunch centerpiece or a light main dish, this recipe is a mouthwatering blend of flavors and textures. Join me as I share not only the step-by-step guide to creating this dish but also a cherished family memory tied to its deliciousness.

---


As the first hints of spring began to peek through the frost-covered windows of my grandmother's kitchen, a familiar and comforting aroma would often fill the air. It was the unmistakable scent of her signature baked eggs with asparagus and sun-dried tomatoes—a dish that has graced our family gatherings for generations.


This recipe, with its roots deeply embedded in our family tradition, is an ode to those early spring mornings spent around the breakfast table. The vibrant colors of the asparagus and sun-dried tomatoes mimic the awakening landscape outside, and the dish itself is a celebration of seasonal freshness.


Ingredients:

- 4 whole eggs


- 2 egg whites


- 1 cup steamed asparagus, cut into bite-sized pieces


- 1/4 cup sun-dried tomatoes, chopped


- 1 small onion, finely chopped


- 1 teaspoon dried thyme


- 1/2 cup canned quark


- 1/4 cup shredded parmesan cheese


- 1 cup fresh spinach


- Salt and pepper to taste


- Cooking spray


Instructions:
1. Preheat & Prepare: Preheat your oven to 375°F (190°C). Begin by steaming the asparagus until tender, about 3-4 minutes. Set aside.
2. Mix the Eggs: In a mixing bowl, whip together the whole eggs, egg whites, canned quark, thyme, and a pinch of salt and pepper. The quark adds a creamy texture that elevates the dish to new heights.
3. Sauté the Base: Heat a non-stick skillet over medium heat. Spray with cooking spray and add the chopped onion and sun-dried tomatoes. Sauté for about 4 minutes until the onions turn translucent and fragrant.
4. Assemble the Dish: Lightly spray a small baking dish with cooking spray. Layer the sautéed onion and tomato mixture at the bottom. Pour the egg mixture over them.
5. Top & Bake: Arrange the steamed asparagus and fresh spinach on top of the egg mixture. Sprinkle with shredded parmesan cheese for an added layer of richness. Bake in the preheated oven for 10-15 minutes, or until the eggs are set to your liking.
6. Serve & Enjoy: Once baked to perfection, remove from the oven and let it cool slightly before serving. This dish can be enjoyed warm or at room temperature, making it versatile for any mealtime.
Difficulty Rating: 4/10
Classification: Main Dish

As I prepare this dish today, I am reminded of those cherished mornings with my family. My grandmother would tell stories of how her mother taught her this recipe, using fresh ingredients from their garden. Each forkful is not just a bite of deliciousness but a trip down memory lane, reminding me of the warmth and love of family gatherings.


Whether you're looking to recreate a memory or start a new tradition of your own, this baked eggs recipe is a delightful way to welcome the joys of the spring season into your home. Enjoy every bite, and perhaps, create a new memory to pass down through the generations.

Read more about Appetizers

Read more about Main Dishes

Read more about Desserts

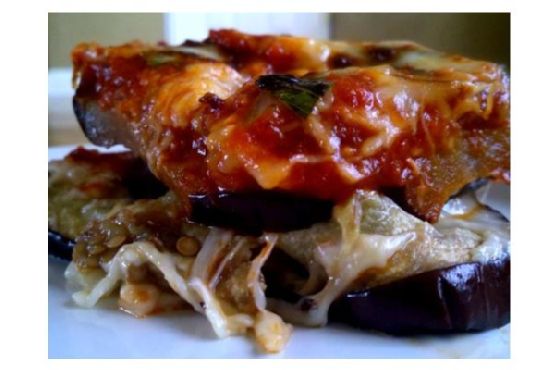
Easy Eggplant Parmesan | Made by Meaghan Moineau

Easy Eggplant Parmesan | Made by Meaghan Moineau

Savoring Simplicity: Easy Eggplant Parmesan for Cozy Family Dinners


Description

Delve into the flavors of Italy with our Easy Eggplant Parmesan recipe—a heartwarming dish that brings the taste of tradition to your table without the fuss. Discover how this delightful main dish, with a difficulty rating of just 4 out of 10, can transform any evening into a memorable culinary experience. Perfect for family gatherings or a comforting solo meal, this recipe is a nod to cherished family memories and the joy of home-cooked meals.

---


A Nostalgic Whiff of Eggplant Parmesan


There's something magical about the aroma of eggplant, cheese, and basil mingling in the oven. It takes me back to Sundays spent in my grandmother's rustic kitchen. As a child, I would eagerly await the moment when the rich scent of eggplant parmesan would signal that dinner was near. My grandmother, with her apron dusted in flour and a perpetual smile, would tell stories of her own childhood in Italy, where eggplants grew abundantly in her family's garden.


Her version of eggplant parmesan was always a labor of love, involving hours of preparation and an unspoken rule that every slice of eggplant be cooked to perfection. My siblings and I would gather around the kitchen table, helping with what little tasks we could manage, like tearing fresh basil leaves or grating cheese. It wasn't just about the food; it was about the laughter, the stories, and the warmth of being together.


This Easy Eggplant Parmesan recipe captures those cherished memories, delivering the same soulful flavors with a fraction of the effort. Whether you’re a seasoned chef or a kitchen novice, its simplicity ensures you can enjoy a taste of Italy right at home.


---


Ingredients


- Olive oil


- 1 onion, finely chopped


- 1 garlic clove, minced


- 2 cups pasta sauce


- 2 medium eggplants, sliced


- 2 cups Italian style cheese, shredded


- Fresh basil leaves, for garnish


---


Instructions


1. Prepare the Eggplant: Preheat your broiler and arrange the eggplant slices on a baking sheet. Brush each slice generously with olive oil. Place under the broiler until the eggplants become soft and tender. Once done, remove them from the oven and allow them to cool slightly.
2. Make the Sauce: In a small saucepan, gently heat the pasta sauce. Meanwhile, heat additional olive oil in a skillet over medium heat. Add the chopped onion and cook for about 5 minutes until translucent. Stir in the minced garlic and sauté for an additional minute. Combine the sautéed onion and garlic with the warm pasta sauce.
3. Assemble the Dish: In an 8 x 6 baking dish, create a layer of eggplant slices. Sprinkle a generous amount of Italian style cheese over the eggplant. Repeat these layers until all the eggplant is used, finishing with a final coating of sauce, fresh basil leaves, and the remaining cheese.
4. Bake: Preheat your oven to 375°F (190°C). Bake the assembled dish for approximately 40 minutes, until the cheese is golden and bubbly.
5. Optional Method: For a richer flavor, you can fry the eggplant slices in olive oil instead of broiling them. If you choose this method, be sure to let them drain on a paper towel to remove excess oil.

---


Enjoy this Easy Eggplant Parmesan as a main dish, either on its own or alongside a fresh salad or crusty bread. With its comforting flavors and simple preparation, it’s a dish that's sure to become a staple in your home, just as it has in ours.

Read more about Appetizers

Read more about Main Dishes

Read more about Desserts

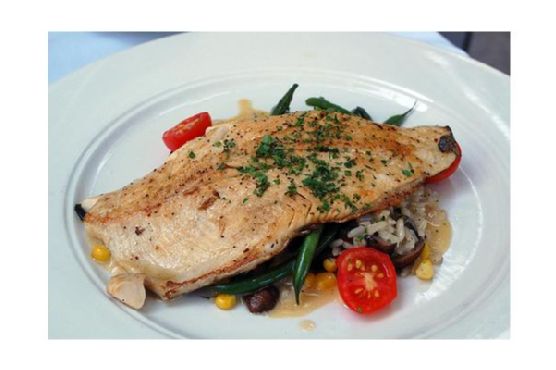
Mushroom Tarragon Fish | Made by Meaghan Moineau

Mushroom Tarragon Fish | Made by Meaghan Moineau

Savory Elegance: Mushroom Tarragon Fish Recipe


A Nostalgic Dance of Flavors


In the bustling kitchen of my childhood home, the aroma of fresh herbs and sizzling butter often mingled with laughter and stories from generations past. One dish that holds a special place in my heart is the Mushroom Tarragon Fish—a recipe that captures the essence of simplicity and elegance, yet is rich in flavor and family tradition.


A Family Tradition


I remember my grandmother, with her gentle hands and wise eyes, preparing this dish on special occasions. She would regale us with tales from her youth, where every ingredient had a story, and every meal was a celebration of life. The Mushroom Tarragon Fish was her secret weapon; a dish she claimed could win over the fiercest critic with its delicate balance of flavors.


As a child, I was often tasked with arranging the fish fillets in the baking pan, carefully overlapping the thinner ends as instructed. It was a small but significant role, making me feel part of the culinary magic that unfolded in our family kitchen.


Recipe: Mushroom Tarragon Fish


Ingredients:

- 4 to 6 lean white fish fillets


- 1 cup dry bread crumbs


- 1/4 cup butter, melted


- 1/2 cup green onions, chopped


- 1 cup mushrooms, sliced


- Salt, to taste


- Pepper, to taste


- 2 teaspoons Spice Islands tarragon


- 1/2 cup white wine


Instructions:
1. Preheat Oven: Start by preheating your oven to 400 degrees F.
2. Prepare Fish: Arrange the fish fillets at the bottom of a 13 x 9-inch baking pan. Overlap the thinner ends of the fish to prevent overcooking.
3. Season: Evenly sprinkle the white wine over the fish, followed by tarragon, salt, and pepper to your taste.
4. Add Toppings: Spread the mushrooms and green onions over the seasoned fish. Next, sprinkle with dry bread crumbs for a crunchy texture.
5. Drizzle with Butter: Drizzle melted butter over the top to enhance the flavors and ensure a golden crust.
6. Bake: Place in the oven and bake for 15 to 20 minutes or until the fish flakes easily when tested with a fork.
7. Serve and Enjoy: This dish serves as a delightful main course, perfect for 4 to 6 servings.

Culinary Memories


The beauty of the Mushroom Tarragon Fish lies in its simplicity—it's a quick and stylish entrée that effortlessly impresses. Each bite takes me back to those cherished moments in my grandmother's kitchen, where love was the main ingredient.


This dish is rated 3 out of 10 for difficulty, making it an accessible yet sophisticated choice for any aspiring home chef. Classified as a Main Dish, it pairs beautifully with a side of roasted vegetables or a fresh garden salad.

Conclusion


In a world that often rushes by, the Mushroom Tarragon Fish is a gentle reminder to savor the simple joys of life and the warmth of family traditions. Whether you're preparing it for a cozy dinner at home or a special gathering, this recipe promises to bring a touch of nostalgia and a whole lot of flavor to your table.

Read more about Appetizers

Read more about Main Dishes

Read more about Desserts

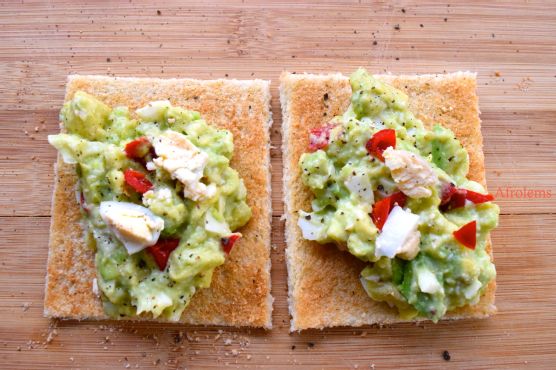
Avocado Egg Salad | Made by Meaghan Moineau

Avocado Egg Salad | Made by Meaghan Moineau

Title: Avocado Egg Salad: A Nostalgic Twist on a Classic Recipe
Description: Dive into the creamy, zesty world of Avocado Egg Salad, a delightful dish that combines wholesome ingredients with a touch of nostalgia. Perfect as an appetizer or a light main dish, this recipe is easy to prepare and bursting with flavor. Let's explore this culinary journey that’s not just about taste but also about cherished family memories.

---


When I think of Avocado Egg Salad, I am transported back to sunlit Sunday afternoons at my grandmother's house. The kitchen would be filled with laughter and the tantalizing aroma of freshly toasted whole wheat bread, a scent that promised comfort and warmth. Sundays were special, a day when our family would gather and share stories over meals that were simple yet profound in their ability to bring us all together.


One particular Sunday, when I was about ten years old, stands out vividly. It was the first time I was entrusted with helping make the Avocado Egg Salad, a dish my grandmother had perfected over the years. She believed in the magic of food, how it could evoke memories and strengthen bonds. As she handed me a ripe avocado, she shared stories of her childhood, of how avocados were a luxury during her time and how she would savor every bite.


The preparation began with boiling the eggs, a task I performed with great seriousness, knowing that these eggs would soon be transformed into something delicious. Once boiled, we immersed them in cold water to cool, a step that never failed to intrigue me with its simplicity and effectiveness.


Grandma's hands, though weathered with time, moved with grace and precision as she peeled the avocado and mashed it in a bowl, a task I eagerly took over. She taught me to squirt a bit of lemon over the mashed avocado, explaining that it not only enhanced the flavor but also kept the vibrant green color intact.


Together, we peeled and chopped the cooled eggs, mixing them gently with the avocado until they were well combined. The addition of black pepper, a crumbled seasoning cube, and a finely chopped scotch bonnet pepper added a kick that was both surprising and delightful. It was this unique blend of flavors that made the dish a family favorite.


As I toasted the whole wheat bread, Grandma showed me how to roll it out with a rolling pin, a trick she had learned from her mother. Cutting off the edges, we placed a generous serving of the avocado egg mixture on the bread, creating a simple yet elegant presentation.


These moments, filled with love and togetherness, are what make cooking such a treasured activity. The Avocado Egg Salad was more than just a meal; it was a symbol of our family's bond, a recipe passed down through generations, each with its own story to tell.


Difficulty Rating: 3/10
Classification: Appetizer/Main Dish

With its creamy texture and rich flavors, the Avocado Egg Salad is a dish that can easily transition from a light appetizer to a satisfying main course. It's a breeze to prepare, making it ideal for both novice cooks and seasoned chefs alike. Whether you're looking to recreate a cherished family memory or simply enjoy a nutritious and delicious meal, this recipe is sure to become a beloved staple in your kitchen.

Read more about Appetizers

Read more about Main Dishes

Read more about Desserts