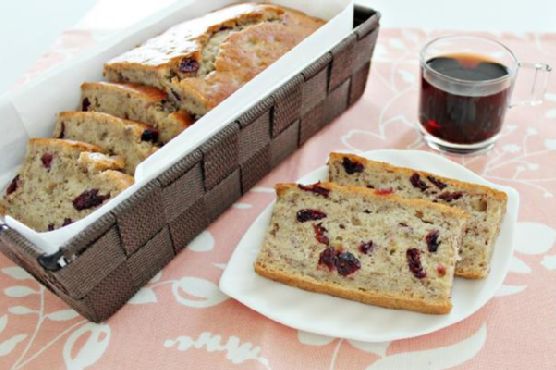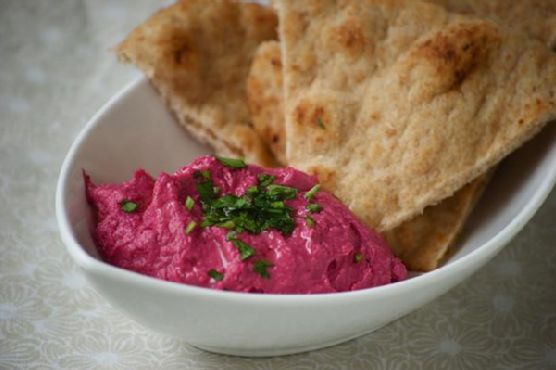
Roasted Beet Hummus | Made by Meaghan Moineau

Roasted Beet Hummus | Made by Meaghan Moineau

Title: A Vibrant Twist on Tradition: Roasted Beet Hummus
Description: Dive into the colorful world of Roasted Beet Hummus, a delightful fusion of earthy beets and creamy chickpeas. Discover a nostalgic family story that brings this dish to life, while learning how to create this flavorful appetizer in your own kitchen.

---


A Vibrant Twist on Tradition: Roasted Beet Hummus


In the heart of many family gatherings, food often takes center stage, binding loved ones together with its warmth and flavors. One dish that has become a beloved staple in my family is Roasted Beet Hummus. This vibrant, flavorful dip is more than just a treat for the taste buds—it's a journey down memory lane, rich with the colors and textures that make every get-together special.


A Family Memory: The Beetroot Legacy


Growing up, the sweet and earthy aroma of roasted beets often wafted through my grandmother's kitchen. She had an affinity for adding a pop of color to her dishes, and beets were her secret weapon. I remember sitting on a stool, watching her expertly peel and slice the beets, her hands stained a vivid magenta—a testament to her culinary expertise and love for vibrant, natural ingredients.


One summer, she decided to blend her love for traditional hummus with her beetroot obsession. The result was a stunning Roasted Beet Hummus that became an instant family favorite. I vividly recall the excitement and curiosity as she unveiled the bright pink dip, its color as bold as its flavor. We gathered around the table, dipping warm pita bread into the hummus, each bite a harmonious blend of earthy beets and creamy chickpeas, with a hint of lemon and garlic.


This dish quickly became a family tradition, gracing every gathering with its presence and reminding us of those joyful summer days. Even now, making Roasted Beet Hummus brings back memories of laughter, love, and the vibrant spirit of my grandmother.


The Recipe: Roasted Beet Hummus


Ingredients:

- 2 medium red roasted beets, peeled and chopped


- 1 can (15 oz) cooked chickpeas, drained and rinsed


- 2 cloves garlic, minced


- 1 teaspoon ground cumin


- Juice of 1 lemon


- 2 tablespoons tahini sesame seed paste


- 3 tablespoons olive oil (plus more for consistency)


- Salt to taste


Instructions:

1. In a food processor or blender, combine the roasted beets, garlic, cumin, lemon juice, tahini, and salt. Pulse until well blended.


2. Add the chickpeas and olive oil to the mixture. Pulse until just incorporated.


3. If the hummus is too thick, gradually add more olive oil, blending until you reach the desired consistency.


4. Serve with warm pita or flatbread, and enjoy a taste of tradition with a colorful twist.


Difficulty Rating: 3/10


This recipe is delightfully simple, making it accessible for even novice cooks while promising a delicious and visually stunning result. It's the perfect appetizer for any occasion, offering a unique twist on a classic favorite.


---


Roasted Beet Hummus is more than just a dish; it's a celebration of tradition, family, and the joy of sharing something beautiful and delicious with those you love. Whether you're creating new memories or reliving cherished ones, this vibrant hummus is sure to be a hit at your next gathering.

Read more about Appetizers

Read more about Main Dishes

Read more about Desserts

Tomato Stack Salad | Made by Meaghan Moineau

Tomato Stack Salad | Made by Meaghan Moineau

Title: "Tomato Stack Salad: A Taste of Summer Nostalgia"
Description: Dive into the freshness of summer with our Tomato Stack Salad, a delightful appetizer that brings together the vibrant flavors of ripe tomatoes, creamy goat cheese, and aromatic herbs. Rated an easy 3 out of 10 on the difficulty scale, this dish is perfect for beginners and seasoned cooks alike. Join us as we explore this simple yet elegant recipe, infused with the warmth of family memories.

---


Tomato Stack Salad: A Taste of Summer Nostalgia


As the sun casts its golden hue over the garden, the vibrant colors of ripe tomatoes become the centerpiece of summer meals. The Tomato Stack Salad, with its simple elegance, is more than just a dish; it's a cherished family tradition that brings back memories of warm gatherings and laughter-filled afternoons.


Ingredients:


- 4 ripe tomatoes


- 4 oz goat cheese


- A handful of fresh herbs (such as basil, parsley, or chives)


- Salt, to taste


- Balsamic vinegar, for drizzling


Instructions:


1. Prepare the Goat Cheese: Begin by mixing the fresh herbs into the goat cheese until well combined. The herbs add a burst of flavor, turning the cheese into a creamy, aromatic spread.
2. Slice the Tomatoes: Carefully slice each tomato into four thick rounds. Choose tomatoes that are firm yet ripe, ensuring they hold their shape when stacked.
3. Season the Tomatoes: Sprinkle each tomato slice lightly with salt to enhance its natural sweetness.
4. Assemble the Salad: Gently slather each tomato round with the herbed goat cheese. Stack the rounds to reassemble each tomato, creating a tower of alternating red and white layers.
5. Finish with Balsamic Vinegar: Drizzle the stacked tomatoes with balsamic vinegar, allowing it to cascade down the layers, adding a tangy contrast to the creamy cheese.

A Nostalgic Family Memory


This Tomato Stack Salad takes me back to my grandmother's kitchen, where the air was always filled with the aroma of fresh herbs. Every summer, my family would gather at her house, a quaint cottage surrounded by a lush garden. My siblings and I would help her pick the ripest tomatoes, our fingers stained with their juicy red hues.


Grandma had a way with simple ingredients, turning them into something magical. As she showed us how to mix the herbs into the goat cheese, her stories of summers past would unfold, each tale woven with laughter and a touch of nostalgia. The kitchen was our haven, a place where time slowed, and the outside world faded away.


The Tomato Stack Salad was always the highlight of our meal, a dish that captured the essence of summer in each bite. Even now, as I recreate this recipe, I can almost hear Grandma's voice, her laughter echoing through the years. This salad is more than just a recipe; it's a bridge to cherished memories and a testament to the power of family traditions.


Conclusion


The Tomato Stack Salad is a delightful appetizer that captures the essence of summer. With a difficulty rating of just 3 out of 10, it's an inviting dish for cooks of all levels. As you savor the flavors of fresh tomatoes, creamy goat cheese, and tangy balsamic vinegar, may you also find a connection to the warmth of family memories and the simple joys of sharing a meal together.


---


Embrace the simplicity and nostalgia of the Tomato Stack Salad, and let it become a cherished part of your summer gatherings.

Read more about Appetizers

Read more about Main Dishes

Read more about Desserts

Peanut Butter and Apple Oatmeal Breakfast Bars | Made by Meaghan Moineau

Peanut Butter and Apple Oatmeal Breakfast Bars | Made by Meaghan Moineau

Morning Bliss: Peanut Butter and Apple Oatmeal Breakfast Bars


A Delicious Morning Routine


There's something magical about the aroma of freshly baked oatmeal bars wafting through the house in the morning. Today, we will dive into a delightful recipe that will not only tantalize your taste buds but also fill your kitchen with the comforting scent of cinnamon and apples. Introducing our Peanut Butter and Apple Oatmeal Breakfast Bars—a perfect blend of wholesome ingredients and nostalgic flavors that are sure to make your mornings special.


Ingredients


- 2 cups Quaker oats


- 1/2 cup smooth peanut butter


- 1/4 cup butter


- 2 tablespoons vegetable oil


- 1/2 cup whole wheat flour


- 1/4 cup honey


- 1/3 cup brown sugar


- 1 teaspoon vanilla extract


- 1 teaspoon cinnamon


- 1 large apple, peeled and diced into small pieces


Instructions


1. Preparation: Preheat your oven to 350°F (175°C). Grease an 11x7 inch baking pan, or use an 8x8, 9x9, or 11x13 inch pan if necessary.
2. Mixing: Place the peanut butter and butter in a microwave-safe dish. Heat in the microwave for 30-45 seconds or until the butter is melted. Stir until smooth.
3. Combining Ingredients: In a large bowl, combine the oats, peanut butter mixture, vegetable oil, whole wheat flour, honey, brown sugar, vanilla extract, and cinnamon. Use an electric beater or KitchenAid mixer to blend the ingredients for approximately one minute.
4. Adding Apples: Carefully peel and dice the apple into small pieces, about the size of a pinky nail. Gently fold the diced apple into the oatmeal mixture.
5. Baking: Pour the mixture into the prepared pan and press down firmly with your fingers to ensure an even layer. Place the pan in the oven and bake for 25 minutes, or until the edges are golden brown. If using an 11x13 pan, check a bit earlier as the mixture will be thinner and cook faster.
6. Cooling and Serving: Let the bars cool for 10 minutes before slicing into strips. Allow the remaining bars to cool completely before storing them in a Tupperware container or wrapping them in foil.

A Nostalgic Family Memory


Growing up, Saturday mornings were a cherished family tradition in our household. The kitchen would come alive with the sound of laughter and the gentle clatter of mixing bowls. My mother, with her well-worn apron and a twinkle in her eye, would lead the culinary charge, and these Peanut Butter and Apple Oatmeal Breakfast Bars were always the star of the show.


I remember the excitement of peeling the apples with my little hands, the anticipation building as the sweet and nutty aroma filled the air. Once baked, the bars were a symphony of flavors—warm, comforting, and with just the right hint of cinnamon. After breakfast, our family would gather around the table, savoring each bite and sharing stories of the week gone by. These cherished moments are etched in my memory, a testament to the power of food in bringing people together.


Difficulty and Classification


- Difficulty: 3/10
- Classification: Main Dish

These Peanut Butter and Apple Oatmeal Breakfast Bars are not just a recipe; they are a gateway to creating beautiful memories with loved ones. Simple to make, yet profoundly satisfying, these bars are the perfect way to start your day with a touch of nostalgia and a whole lot of flavor. Enjoy baking, indulging, and making your mornings just a bit sweeter!

Read more about Appetizers

Read more about Main Dishes

Read more about Desserts

Rigatoni With Sweet Sausages In Creamy Tomato Sauce | Made by Meaghan Moineau

Rigatoni With Sweet Sausages In Creamy Tomato Sauce | Made by Meaghan Moineau

Title: "Nostalgic Comfort: Rigatoni with Sweet Sausages in Creamy Tomato Sauce"


Description: Dive into the heartwarming flavors of Italy with our Rigatoni with Sweet Sausages in Creamy Tomato Sauce. This recipe combines the savory essence of sweet sausages with the aromatic richness of fresh sage and leeks, all enveloped in a luscious, creamy tomato sauce. Join us as we share a cherished family memory that's bound to make this dish even more special. With a difficulty rating of 4/10, this main dish is perfect for a cozy family dinner or a nostalgic culinary journey.


---


Rigatoni with Sweet Sausages in Creamy Tomato Sauce: A Taste of Home


There's something undeniably comforting about a bowl of pasta, especially when it's infused with the rich flavors of sweet sausages and a creamy tomato sauce. This dish not only tantalizes the taste buds but also carries a legacy of family gatherings and nostalgic memories.


Ingredients You’ll Need:


- Sweet sausages


- 1 leek (cut in half lengthwise and rinsed thoroughly)


- Fresh sage


- 3 garlic cloves


- 1 onion


- Canned tomatoes


- Rigatoni pasta


- Milk


- Dried thyme


- Cayenne pepper


- Butter


- Extra virgin olive oil


- Sugar


- Salt & pepper


Cooking Instructions:


1. Prepare Your Ingredients: Begin by bringing a large pot of salted water to a boil. Chop the onion and garlic, setting them aside. Slice the leek in half lengthwise, rinse thoroughly, and chop. Chop the fresh sage and set it aside separately.
2. Cook the Sausages: To easily remove the casings, lightly slice each sausage lengthwise and peel them off with your fingers. In a large pan over medium-high heat, cook the sausages until they turn a beautiful golden brown, breaking them apart until they resemble ground meat. Remove the meat from the pan and set it aside in a bowl.
3. Sauté the Aromatics: Add 2 tablespoons of olive oil to the same pan and toss in the fresh sage. Cook for about a minute before adding the leeks and a pinch of cayenne pepper. Cook for an additional 2 to 3 minutes until the leeks soften. Return the sausage mixture to the pan, turn off the heat, and let the flavors meld.
4. Create the Sauce: In a separate pot, combine canned tomatoes, a splash of milk, and a sprinkle of dried thyme. Add a pinch of sugar to balance the acidity of the tomatoes. Season with salt and pepper to taste. Simmer the sauce for 10 minutes until it thickens.
5. Combine and Serve: Add the cooked rigatoni to the sausage and leek mixture, pouring the creamy tomato sauce over everything. Toss gently to combine and serve hot.

A Nostalgic Family Memory


Every time I prepare this dish, I'm transported back to my grandmother's cozy kitchen. The smell of sweet sausages sizzling in the pan and the sight of her expertly chopping leeks with the precision of years of practice. Sunday dinners were sacred in our family, with three generations gathered around the dining table, sharing stories and laughter. This rigatoni dish was always a staple, making an appearance at every family gathering. It was my grandmother's way of bringing us all together, each bite infused with love and tradition. Now, as I cook it for my family, I hope to pass on that same feeling of warmth and togetherness.


Difficulty Rating: 4/10


This main dish is perfect for home cooks looking to create something special without the stress of a complex recipe. The steps are simple and straightforward, ensuring a delightful meal that's sure to become a family favorite.


Conclusion


Rigatoni with Sweet Sausages in Creamy Tomato Sauce is more than just a meal; it's a connection to cherished memories and traditions. Whether you're cooking for your family or seeking comfort in a bowl, this dish promises to deliver warmth and satisfaction. Enjoy every bite and the stories that come with it.

Read more about Appetizers

Read more about Main Dishes

Read more about Desserts

Chicken Mulligatawny Soup | Made by Meaghan Moineau

Chicken Mulligatawny Soup | Made by Meaghan Moineau

A Hearty Hug in a Bowl: Chicken Mulligatawny Soup Recipe


A Taste of Tradition and Warmth


There's something magical about a bowl of soup that can transport you back in time, enveloping you in warmth and comfort. Chicken Mulligatawny Soup is one such dish, a delightful blend of flavors and textures that brings a touch of spice and a whole lot of love to your table. This recipe is not only a feast for the senses but also a cherished family tradition in many homes, including mine.


Description:

Discover the heartwarming flavors of Chicken Mulligatawny Soup, a rich and aromatic dish that combines tender chicken, crisp apples, and fragrant basmati rice with the exotic notes of curry and coconut. Perfect for chilly evenings or as a comforting meal any day of the week, this soup is sure to become a new favorite. With a preparation time of 45 minutes and a difficulty rating of 4 out of 10, it's a straightforward recipe that delivers complex flavors with minimal effort. Classified as a Main Dish, this soup is both satisfying and nourishing.


Ingredients:


- 2 tablespoons butter


- 1 onion, chopped


- 2 stalks celery, chopped


- 2 carrots, diced


- 2 apples, peeled and diced


- 1 tablespoon fresh ginger, grated


- 2 tablespoons flour


- 2 teaspoons curry powder


- 1/4 teaspoon cayenne pepper


- 6 cups chicken stock


- 1/2 cup basmati rice


- 2 skinless boneless chicken breasts, chopped


- 1 teaspoon salt


- 1 cup lite coconut milk


- Salt and pepper to taste


- Optional: Toasted almonds or cilantro for garnish


Instructions:


1. Sauté the Aromatics: Heat the butter in a large pot over medium heat. Add the onions, celery, carrots, apples, and ginger. Sauté for 5 minutes, stirring occasionally, until the vegetables are tender and fragrant.
2. Build the Base Flavor: Mix in the flour, curry powder, and cayenne pepper. Stir for another 3-5 minutes to allow the spices to bloom and the flour to cook off its raw taste.
3. Simmer the Soup: Add the chicken stock, basmati rice, chopped chicken, and 1 teaspoon of salt. Bring the mixture to a boil, then lower the heat to a simmer. Allow it to simmer for about 15 minutes, or until the rice is tender and the chicken is cooked through.
4. Finish with Creaminess: Stir in the lite coconut milk and season with additional salt and pepper to taste. Let the soup warm through, but do not boil.
5. Serve and Enjoy: Ladle the soup into bowls and garnish with toasted almonds or fresh cilantro for an added layer of texture and flavor.

A Family Memory: The Soup That Binds Us


I remember the first time my grandmother made Chicken Mulligatawny Soup for our family. It was a crisp autumn evening, the kind where the chill in the air makes you crave something warm and hearty. As soon as the kitchen filled with the aroma of sautéed onions and curry, we all gravitated toward the stove, eager to taste what was simmering in the pot.


Grandma would always tell us stories of her childhood in India, where this dish was a staple. She spoke of how her mother would make it on special occasions, filling the house with its captivating scent. As we sat around the dining table, bowls in hand, each spoonful was like a warm hug from her, a reminder of our roots and the love that binds our family together. That night, the kitchen wasn't just a place for cooking; it was a space for sharing stories, laughter, and creating memories that would last a lifetime.


Conclusion


Chicken Mulligatawny Soup is more than just a meal; it's a connection to heritage, a blend of cultures, and an expression of love. Whether you're making it for the first time or it's a family favorite, this soup promises to warm your heart as much as it does your body. Enjoy this culinary journey and savor the moments it creates around your table.

Read more about Appetizers

Read more about Main Dishes

Read more about Desserts

Drunken Turkey Chili | Made by Meaghan Moineau

Drunken Turkey Chili | Made by Meaghan Moineau

Title: Drunken Turkey Chili: A Hearty Bowl of Comfort and Memories
Description: Dive into a bowl of Drunken Turkey Chili, a savory and flavorful dish that combines lean turkey, fresh vegetables, and a splash of light beer for a unique twist. This main dish recipe is not only packed with taste but also comes with a heartwarming family story that makes it a cherished favorite.

---


As the leaves begin to turn and a crisp chill fills the air, there's nothing quite like cozying up with a steaming bowl of chili. While everyone has their go-to chili recipe, our family swears by a unique version that’s been passed down for generations: Drunken Turkey Chili.


Ingredients:

- 2 tablespoons extra virgin olive oil


- 1 large white onion, diced


- 1 red bell pepper, diced


- 3 cloves of garlic, minced


- 2 jalapeno peppers, seeded and minced


- 1 teaspoon smoked paprika


- 1 tablespoon chili powder


- 1 teaspoon ground cumin


- 1/2 teaspoon black pepper


- 1 teaspoon unsweetened cocoa powder


- 1 pound lean ground turkey meat


- 1 can (28 ounces) canned tomatoes, peeled


- 1 can (15 ounces) black beans, drained and rinsed


- 1 cup light beer


- 1 tablespoon low sodium soy sauce


- 1/4 cup fresh cilantro, chopped


Instructions:

1. Gently heat the oil in a large pot, ensuring it doesn’t smoke.


2. Add the onion, bell pepper, garlic, and jalapenos. Sauté over medium heat until the vegetables are soft, about 5 minutes.


3. Stir in the smoked paprika, chili powder, ground cumin, black pepper, and cocoa powder to coat the vegetables evenly.


4. Add the ground turkey, sautéing for 3-4 minutes until just cooked through, breaking it up with a spoon or spatula.


5. Drain the juice from the canned tomatoes into the pot, then finely chop the tomatoes and add them to the mix.


6. Stir in the black beans, light beer, and soy sauce.


7. Add the chopped cilantro and stir well. Cover and allow to simmer over low heat for 5 to 10 minutes.


8. Turn off the heat and let the chili rest for about 15 minutes before serving.


Optional Garnishes:

Top your chili with low-fat sour cream, grated cheese, avocado slices, or chopped green onions. I personally enjoy pairing it with crunchy tortilla chips.


A Family Memory:

Every fall, our family would gather at my grandmother's house for our annual autumn supper. The highlight was always her Drunken Turkey Chili. As a child, I remember the enticing aroma of spices and simmering turkey welcoming us as we walked through the door. Grandma would be stirring the pot with a wooden spoon, her apron dusted with flour from her morning baking.


One year, my cousin accidentally added too much beer to the pot. We nervously watched as Grandma tasted it, and to our surprise, she chuckled and said, "Well, it seems the turkey's having a party!" That version of the chili turned out to be a hit, and from then on, the "drunken" element became a beloved part of our tradition.


Difficulty Rating: 3/10
This dish is classified as a Main Dish and is perfect for those looking for a hearty yet simple meal to prepare. Its delightful flavors and ease of preparation make it an excellent choice for family gatherings or a cozy night at home.

So, the next time you’re in need of a comforting meal that warms both the stomach and the soul, give our Drunken Turkey Chili a try. It’s more than just a dish; it’s a bowl full of cherished memories.

Read more about Appetizers

Read more about Main Dishes

Read more about Desserts

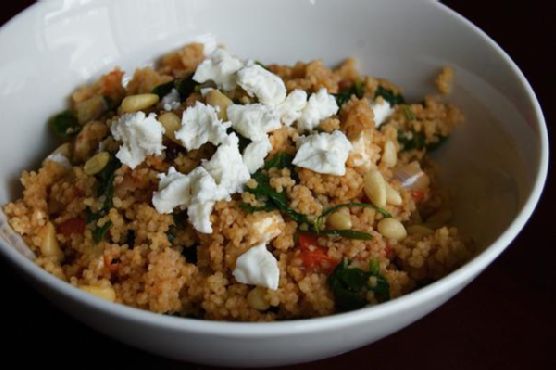
Spinach, Tomato & Onion Couscous | Made by Meaghan Moineau

Spinach, Tomato & Onion Couscous | Made by Meaghan Moineau

A Symphony of Flavors: Spinach, Tomato & Onion Couscous


A Hearty Main Dish That Brings the Family Together


Introduction


There’s something magical about a dish that brings people together, evoking cherished memories and creating new ones with every bite. Spinach, Tomato & Onion Couscous is one such dish—a delightful blend of fresh, wholesome ingredients that will have your taste buds dancing. This recipe is not only a feast for the senses but also a nostalgic trip down memory lane for me and my family.


Ingredients


- 1 cup whole-wheat couscous
- 1 ¼ cups water
- ½ teaspoon salt, divided
- 2 tablespoons olive oil
- 1 red onion, thinly sliced
- 2 tomatoes, diced
- 2 cups fresh spinach
- ¼ cup pine nuts
- ½ cup crumbled feta cheese
- Salt and pepper to taste

Instructions


1. Prepare the Couscous: In a small pan, bring the water and half of the salt to a boil. Once boiling, add the couscous, stir, and cover with a lid. Remove the pot from the heat and let it sit for 5 to 7 minutes while you prepare the vegetables.
2. Sauté the Vegetables: Heat a large pan over medium-high heat and add the olive oil. Once the oil is hot, add the onions and sauté until they begin to brown. Add the tomatoes and remaining salt, sautéing until they start to wilt, about 20 to 30 seconds. Add the spinach and sauté just until it wilts but remains bright green.
3. Mix It All Together: Stir the pine nuts into the vegetable mixture and remove the pan from the heat. Season with salt and pepper to taste. Pour the couscous into a large bowl, add the sautéed vegetables along with the crumbled feta, and toss everything together. Top with extra crumbled feta and enjoy while hot.

A Nostalgic Family Memory


Growing up, Sunday dinners were a sacred time in my family. No matter how busy the week had been, we all made it a point to gather around the dining table to share not just a meal, but our lives. My grandmother, the heart of our family, would often prepare her famous Spinach, Tomato & Onion Couscous. I remember the aroma of sautéed onions and fresh spinach wafting through the house, a scent that signaled warmth and togetherness.


As a child, I was fascinated by the way my grandmother would expertly toss the couscous with the vibrant vegetables, her hands moving gracefully as she added a sprinkle of feta cheese to finish the dish. It was her secret ingredient, she would say with a wink, and it never failed to elicit smiles from everyone at the table.


Those evenings were filled with laughter, stories, and the comforting knowledge that we were part of something bigger—a family bound by love and tradition. Today, whenever I prepare this couscous dish, I’m transported back to those cherished moments, and I hope it brings the same joy to your family as it has to mine.


Difficulty Rating


This recipe is rated 3 out of 10 for difficulty, making it accessible for cooks of all skill levels. It's a delightful main dish that's perfect for a family dinner or a cozy night in.

Conclusion


Spinach, Tomato & Onion Couscous is more than just a meal; it’s an experience, a connection to the past, and a celebration of the present. With its wholesome ingredients and simple preparation, it’s a dish that invites everyone to gather, share, and savor the taste of togetherness. So, why not try this recipe for your next family dinner and create some unforgettable memories of your own?

Read more about Appetizers

Read more about Main Dishes

Read more about Desserts

Creamy Chicken Orzo Soup | Made by Meaghan Moineau

Creamy Chicken Orzo Soup | Made by Meaghan Moineau

Title: "Nostalgic Comfort in a Bowl: Creamy Chicken Orzo Soup"
Description:

Warm your soul with the delightful embrace of Creamy Chicken Orzo Soup, a dish that promises not only to satisfy your hunger but also to evoke cherished memories of family gatherings. This heartwarming recipe is an ode to simplicity and flavor, combining tender vegetables, succulent chicken, and creamy orzo in a harmonious blend that is as comforting as a grandmother's hug. Ideal as a main dish, this soup is a perfect choice for those seeking a taste of nostalgia with a modern twist. Rated a 3 out of 10 for difficulty, it is accessible for home cooks of all skill levels.


---


Creamy Chicken Orzo Soup Recipe
Ingredients:

- Olive oil


- Celery


- Baby carrots


- Onion


- Kosher salt


- Freshly ground black pepper


- Canned Swanson Premium Chicken


- Canned Swanson Chicken Broth


- Poultry seasoning


- Orzo


- Cream of chicken condensed soup


Instructions:

1. In a large pot, heat a generous drizzle of olive oil over medium heat. Add chopped celery, baby carrots, and onion, and sauté for about 10 minutes until the vegetables are tender and fragrant.


2. Drain the canned chicken and add it to the pot, stirring gently to combine with the sautéed vegetables.


3. Season the mixture with kosher salt and freshly ground black pepper to taste. Stir to ensure even seasoning.


4. Increase the heat to medium-high and pour in the chicken broth along with two cans of warm water. Stir the mixture well and bring it to a gentle simmer.


5. Allow the soup to simmer for 15 minutes, then add the uncooked orzo and poultry seasoning. Stir to combine.


6. Continue to let the soup simmer for an additional 20 minutes, stirring occasionally to prevent the orzo from sticking to the bottom.


7. Finally, add the cream of chicken condensed soup. Stir until the broth transforms into a creamy delight. Serve hot and enjoy the comforting nostalgia in every spoonful.


---


A Taste of Nostalgia:

Every time I prepare this Creamy Chicken Orzo Soup, I am transported back to my grandmother's cozy kitchen, a place where love was the main ingredient in every dish. As a child, I would watch her from the corner of the room, mesmerized by her skillful movements as she chopped vegetables and stirred the pot with a wooden spoon worn smooth by years of use.


Sunday afternoons were special, a time when family gathered around the large wooden table, sharing stories and laughter while savoring bowls of this delicious soup. The aroma of simmering chicken broth and sautéed vegetables would fill the air, mingling with the sounds of clinking spoons and bubbling laughter. It was these simple moments, the warmth of family and the comfort of a meal shared, that made each Sunday unforgettable.


Now, I recreate this soup in my own kitchen, sharing it with my family, hoping to create similar memories for my children. Each spoonful is a reminder of those precious times, a bridge connecting the past with the present.


Difficulty Rating: 3/10
Classification: Main Dish

Whether you're seeking a comforting meal on a chilly day or longing for a taste of family nostalgia, this Creamy Chicken Orzo Soup is sure to deliver warmth and satisfaction. Enjoy each bite and let it remind you of cherished moments spent with loved ones.

Read more about Appetizers

Read more about Main Dishes

Read more about Desserts

10 Minute Brownies | Made by Meaghan Moineau

10 Minute Brownies | Made by Meaghan Moineau

Title: Whip Up Delight: 10-Minute Brownies That Bring Back Family Memories
Description: Discover the joy of baking with our quick and easy 10-Minute Brownies recipe! This delightful dessert combines rich, chocolaty goodness with a touch of nostalgia. Perfect for any sweet tooth, these brownies are a breeze to make and promise to become a family favorite. Follow our simple steps, and let this dessert bring a smile to your face and warmth to your heart.

---


When it comes to desserts that offer comfort and joy in every bite, brownies often top the list. Our 10-Minute Brownies are not just about convenience; they are about creating memories and savoring the sweet moments that life has to offer. With simple ingredients like semisweet chocolate chips, unsweetened applesauce, and finely-chopped walnuts, these brownies are both delicious and reminiscent of cherished family gatherings.


Ingredients You'll Need


- Baking Powder
- Canola Oil
- Finely-Chopped Walnuts
- Semisweet Chocolate Chips
- Sugar
- Unbleached Flour
- Unsweetened Applesauce
- Vanilla Extract

Instructions


1. Preheat your oven to 350 degrees F. Lightly oil a 6 x 9-inch baking pan and set it aside.


2. In a small saucepan over low heat, combine the canola oil and semisweet chocolate chips. Stir occasionally until the chocolate is melted. Remove from heat and set aside.


3. In a large bowl, add the unsweetened applesauce, sugar, and vanilla extract. Blend well.


4. Stir in the melted chocolate mixture. Whip and blend thoroughly.


5. Add the unbleached flour, baking powder, and finely-chopped walnuts. Mix just until combined.


6. Spoon the batter into the prepared baking pan.


7. Bake for 25 to 30 minutes, or until the top springs back when lightly touched. Be cautious not to overbake, as this will make the brownies dry.


8. Let the brownies cool completely before cutting them into squares. Store in a covered, airtight container in the refrigerator.


A Sweet Family Memory


As I watch the chocolate melt and blend with the rich aroma of vanilla, I am transported back to my grandmother's cozy kitchen. Every Sunday, our family would gather at her house, and the highlight of the day was always her famous brownies. I remember sitting on the counter, my legs swinging as I eagerly waited to lick the batter off the spoon. Grandma would wink at me and say, "The secret ingredient is love." These brownies were more than just a treat; they were the sweet thread that wove our family together, creating a tapestry of laughter and love.


Difficulty Rating: 3/10


Classification: Dessert


These 10-Minute Brownies are a testament to the magic that happens when simple, wholesome ingredients are combined with a sprinkle of nostalgia. Whether you're baking for a family gathering or simply treating yourself, this recipe promises to deliver rich, chocolaty goodness in every bite. So, don your apron, and let these brownies bring a touch of sweetness to your day!

Read more about Appetizers

Read more about Main Dishes

Read more about Desserts

White Chocolate Mocha Cookies | Made by Meaghan Moineau

White Chocolate Mocha Cookies | Made by Meaghan Moineau

Title: Savoring Sweet Memories: White Chocolate Mocha Cookies
Description: Dive into the world of flavor with our White Chocolate Mocha Cookies, a delightful blend of rich cocoa and espresso that takes you back to cherished family gatherings. Discover the story, the recipe, and the irresistible aroma that makes this dessert a timeless treat.

---


When the air turns crisp and the leaves start to blanket the ground in hues of gold and crimson, my heart often drifts back to the warmth of my grandmother's kitchen. It was a place where magic happened, where flour dusted the countertops like fresh snow, and the aroma of freshly baked cookies wrapped around you like a comforting blanket. Among the many recipes passed down through generations, one always stood out—the White Chocolate Mocha Cookies.


This cookie recipe is a family treasure, one that has been lovingly crafted and perfected over countless holiday seasons. The rich combination of cocoa and espresso powder evokes the comforting essence of a cozy café, while the sweet white chocolate chips offer a delightful contrast. Together, they create a symphony of flavors that sing of joy and nostalgia.


Ingredients:

- All-purpose flour


- Baking soda


- Cocoa powder


- Eggs


- Espresso powder


- Salt


- Semi-sweet chocolate chips


- Sugar


- Unsalted butter


- Vanilla extract


- White chocolate chips


Instructions:

1. Preheat your oven to 350°F (175°C). This is the perfect time to let your kitchen fill with the anticipation of what's to come.


2. In a large mixing bowl, cream together the unsalted butter and sugar until the mixture is light and fluffy—a task that, as a child, I watched my grandmother do with effortless grace.


3. Add in the eggs and vanilla extract, mixing until well combined. This was always my favorite part, watching the rich ingredients come together, much like our family did every Sunday afternoon.


4. Slowly incorporate the flour, cocoa powder, espresso powder, baking soda, and salt into the wet ingredients. Mix until just combined, being careful not to overwork the dough.


5. Gently fold in both the semi-sweet and white chocolate chips, ensuring each bite is packed with chocolatey goodness.


6. Roll the dough into balls, coating them with sugar if desired. Place them on a baking sheet lined with parchment paper or a Silpat mat. This step always reminded me of rolling snowballs in the yard with my siblings.


7. Bake in the preheated oven for 8-10 minutes. If your cookies are too rounded, press down lightly with the back of a measuring cup or the bottom of a glass immediately after removing them from the oven.


These cookies, with their perfect blend of chocolate and coffee, are a testament to those cherished moments spent in my grandmother's kitchen, where laughter was abundant, and love was the secret ingredient in every recipe.


Difficulty: 4/10
Classification: Dessert

Perfect for dessert, these White Chocolate Mocha Cookies are not just a treat for the taste buds but also a beautiful way to relive warm family memories. Whether you're baking them for a special occasion or just because, they promise to fill your home with the love and warmth of my grandmother's kitchen.

Read more about Appetizers

Read more about Main Dishes

Read more about Desserts

Creamy Polenta with Egg, Arrabiata & Bacon | Made by Meaghan Moineau

Creamy Polenta with Egg, Arrabiata & Bacon | Made by Meaghan Moineau

Title: Savor the Comfort: Creamy Polenta with Egg, Arrabiata & Bacon
Description: Dive into a world of creamy comfort with our Creamy Polenta with Egg, Arrabiata & Bacon recipe. This flavorful blend of polenta, rich cheeses, and crispy bacon, topped with a perfectly cooked egg, is sure to become a family favorite. With a touch of nostalgia and a hint of spice, this dish is as much about the memories it evokes as it is about its tantalizing taste. Easy to make yet packed with flavor, this main dish is perfect for a cozy weekend brunch or a hearty dinner.

---


When the winter chill wraps its icy fingers around our home, I find solace in the warmth of the kitchen, where hearty aromas mingle in the air. My mind drifts back to Sunday mornings with my grandmother, her hands deftly working over the stove, a ritual as comforting as the dish she prepared – a creamy polenta that was as much a cure for the cold as it was a feast for the soul. This Creamy Polenta with Egg, Arrabiata & Bacon recipe is a loving nod to those cherished memories.


Ingredients:

- Bacon


- Cream cheese


- Eggs


- Fresh parsley


- Goat cheese


- Olive oil


- Polenta


- Black salt & pepper


Instructions:
1. Preheat and Prepare: Preheat your oven to 425 degrees F. Prepare a medium saucepan by bringing 4 cups of water to a boil. Gradually whisk in the polenta, ensuring a smooth mix with no lumps. Allow it to simmer over medium-low heat for 30 minutes, stirring occasionally.
2. Incorporate the Cheeses: Once the polenta has reached a tender and thick consistency, stir in the goat cheese and cream cheese until fully melted and incorporated. Season with salt and pepper to taste.
3. Crisp the Bacon: Arrange the bacon on a parchment-lined baking sheet, placing it in the oven's middle rack. Roast for 15-18 minutes until golden and crisp. Once done, let the bacon rest on a paper towel-lined plate.
4. Heat the Arrabiata: Warm the marinara sauce in a small saucepan or microwave until simmering. Keep it warm for assembly.
5. Fry the Eggs: In a large non-stick skillet, heat 1 tablespoon of olive oil over medium heat. Add the eggs, cooking until the whites are opaque yet still runny on top. Cover with a lid, turning off the heat, allowing them to cook until the whites set while keeping the yolk runny.
6. Assemble the Bowls: Spoon generous portions of polenta into each bowl. Add a dollop of arrabiata, an egg, and two slices of crispy bacon. Garnish with freshly chopped parsley for a burst of color and freshness. Serve immediately, savoring each bite and the memories it rekindles.
A Nostalgic Family Memory:

The sight of this dish takes me back to my grandmother's kitchen, where the wooden table was always set for family. She would hum softly, a melody only she knew, as she prepared this dish with love. Her polenta, always perfectly creamy, served as the canvas for crispy bacon and eggs cooked just right. We would gather around, bowls in hand, sharing stories and laughter. It was more than a meal; it was a moment in time, a tradition passed through generations.


Difficulty Rating: 4/10
Classification: Main Dish

---


This Creamy Polenta with Egg, Arrabiata & Bacon is more than just a recipe; it's an experience, a reminder of the warmth and love that food can bring into our lives. Perfect for family gatherings or a quiet evening at home, it offers a taste of nostalgia with every bite. Enjoy the comfort and joy it brings, and perhaps create new memories of your own.

Read more about Appetizers

Read more about Main Dishes

Read more about Desserts

Bacon & Potato Soup, Gluten & Dairy Free | Made by Meaghan Moineau

Bacon & Potato Soup, Gluten & Dairy Free | Made by Meaghan Moineau

Title: A Bowl of Comfort: Bacon & Potato Soup, Gluten & Dairy Free
Description: Dive into the warmth and nostalgia of a family-favorite recipe, Bacon & Potato Soup. This hearty, gluten and dairy-free dish combines crispy bacon, tender potatoes, and savory cabbage in a rich broth that warms the soul. Join us as we explore the flavors and the cherished family memories that make this soup a beloved household staple.

---


As the leaves begin to turn and the air grows crisp, there's nothing quite like a comforting bowl of soup to chase away the chill. Our Bacon & Potato Soup, gluten and dairy-free, is the perfect remedy. With its rich aroma and hearty ingredients, it’s a dish that brings back fond memories of family gatherings around the dinner table.


Growing up, soup was more than just a meal; it was a tradition. Every autumn, as the first signs of fall appeared, my grandmother would pull out her well-worn stock pot and begin preparing her famous Bacon & Potato Soup. The smell of sizzling bacon mixed with the sweet aroma of onions would fill the kitchen, creating a welcoming atmosphere that drew everyone in.


Ingredients:

- 2 tablespoons olive oil


- 8 ounces lean bacon, chopped


- 1 large yellow onion, diced


- 3 garlic cloves, minced


- 6 cups chicken stock


- 4 large red baking potatoes, diced


- 2 cups shredded savoy cabbage


- 1 tablespoon Worcestershire sauce


- 1 tablespoon Dijon mustard


- Salt and pepper, to taste


- 1/4 cup flat-leaf parsley, chopped


- Lemon wedges and gluten-free garlic croutons, for garnish


Instructions:

1. In a large stock pot, heat the olive oil over medium-high heat. Add the chopped bacon and onions, cooking until the bacon is crisp and the onions are translucent.


2. Add the garlic and cook for one more minute, until fragrant.


3. Pour in the chicken stock, and add the diced potatoes, shredded cabbage, Worcestershire sauce, and Dijon mustard. Mix well, and season with salt and pepper.


4. Bring the soup to a boil, then reduce the heat and simmer for 30 minutes, or until the potatoes are tender but not falling apart.


5. Remove the pot from heat and allow it to cool for 5 minutes. Transfer 2 1/2 cups of the soup to a blender and pulse quickly to achieve a coarse puree.


6. Pour the blended portion back into the stock pot and return to heat. Cook, stirring often, for 5-10 minutes or until heated through.


7. Stir in the chopped parsley before serving.


8. Ladle the soup into serving bowls and garnish with a wedge of lemon and gluten-free garlic croutons.


A Taste of Nostalgia:

I remember one particular autumn evening when the wind howled outside, and the first flurries of snow danced in the air. My family gathered in the cozy warmth of the kitchen, where the soup simmered gently on the stove. We huddled around the table, bowls of steaming soup in hand, as my grandmother recounted stories of her own childhood. The rich flavors of bacon and potato mingled with the comforting memories of family, creating a moment that has stayed with me all these years.


This recipe is more than a meal; it's a connection to the past. Each spoonful brings back the laughter and love shared at that table, and I hope it brings the same warmth and joy to your home.


Difficulty: 4/10
Classification: Main Dish

Embrace the changing seasons with this delicious Bacon & Potato Soup. Whether you're creating new family traditions or simply savoring a cozy night in, this gluten and dairy-free recipe is sure to become a cherished favorite.

Read more about Appetizers

Read more about Main Dishes

Read more about Desserts

Cherry Lime Mojito | Made by Meaghan Moineau

Cherry Lime Mojito | Made by Meaghan Moineau

A Sip of Summer: The Cherry Lime Mojito


Description:

Escape to a tropical paradise with every sip of the Cherry Lime Mojito. This refreshing cocktail combines the tartness of lime, the sweetness of cherries, and the cooling freshness of mint to create a symphony of flavors that dance on your palate. Perfect for summer gatherings or a quiet evening on the porch, this mojito is a delightful escape in a glass. Rated at a 4 out of 10 for difficulty, this cocktail is as accessible as it is delicious. Pour yourself a glass and dive into a nostalgic tale of family memories tied to this drink.

---


Ingredients:

- Fresh cherries

- Mint leaves


- Lime


- Demerara sugar


- White rum


- Carbonated water


Instructions:

1. Muddle the Magic: In a tall glass, combine cherries, mint leaves, demerara sugar, and slices of lime. Gently muddle the ingredients to release their flavors.
2. Ice, Ice Baby: Add a few ice cubes to the glass, providing a chilled base for your drink.
3. Rum Away: Pour in a generous splash of white rum, letting it mingle with the muddled mixture.
4. Bubbly Finish: Top off the glass with carbonated water, giving your mojito a refreshing fizz. Stir gently and serve immediately.

Nostalgic Family Memory:


The Cherry Lime Mojito holds a special place in my heart, not just for its refreshing taste, but for the cherished family memories it evokes. Growing up, summer afternoons at my grandparents' house were a cherished tradition. Their sprawling backyard was a haven of lush greenery and vibrant flowers, a testament to my grandfather's green thumb.


Every summer, our family would gather for a weekend barbecue, a celebration of togetherness filled with laughter, games, and delicious food. As the adults chatted and the children played, my grandmother would prepare her signature Cherry Lime Mojitos. She believed that a good mojito was the secret ingredient to a perfect summer day.


I can still picture her in the kitchen, her hands deftly muddling cherries and mint, her face adorned with a warm smile. She'd let me help, guiding my eager hands as I pressed the ingredients together, releasing their aromatic symphony. Her garden provided the freshest mint, which she picked just moments before crafting each drink.


The first sip of that mojito was like stepping into a world where time slowed down, where the sun shone a little brighter, and laughter echoed a little longer. It was a drink that brought us together, a shared experience that transcended generations.


Even now, as I prepare my own Cherry Lime Mojito, I can't help but feel a wave of nostalgia wash over me. With each sip, I'm transported back to those sun-drenched afternoons, surrounded by family, love, and the simple joy of being together.


Difficulty: 4/10

Classification: Beverage

Whether you're crafting this mojito for a family gathering or a solo indulgence, it's a drink that promises to refresh and delight. Cheers to the memories it creates and the ones it brings back to life.

Read more about Appetizers

Read more about Main Dishes

Read more about Desserts

Easy Instant Pot Beef Tips and Rice | Made by Meaghan Moineau

Easy Instant Pot Beef Tips and Rice | Made by Meaghan Moineau

Title: "Savoring Memories: Easy Instant Pot Beef Tips and Rice"
Description: Discover a heartwarming recipe that brings family memories to life with every savory bite. This easy Instant Pot Beef Tips and Rice is a delightful main dish that's sure to become a beloved staple in your home.

---


When it comes to comfort food, nothing quite compares to the warmth and flavor of a dish that has been passed down through generations. Today, I am thrilled to share a recipe that not only tantalizes the taste buds but also evokes cherished family memories - Easy Instant Pot Beef Tips and Rice. This recipe is a delightful main dish with a difficulty rating of 3 out of 10, making it accessible for even the busiest of home cooks.


Ingredients


- 1.5 lbs sirloin beef tips


- 1 can of cream of mushroom soup


- 1 teaspoon garlic powder


- 2 tablespoons Dale's seasoning sauce


- 2 tablespoons olive oil


- 1 onion, chopped


- 1 cup water


Instructions


1. Sauteing the Beef: Set your Instant Pot to the sauté setting. Once warmed, add olive oil, beef tips, and chopped onion. Stir frequently and sauté for about 5 minutes, or until the meat begins to brown and the onions become translucent.
2. Mixing the Ingredients: Add the water, Dale's seasoning, cream of mushroom soup, and garlic powder to the pot. Stir to combine all the ingredients thoroughly.
3. Pressure Cooking: Secure the lid on the Instant Pot and set it to the Manual Setting on High Pressure for 25 minutes. It will take a few moments for the pot to come up to pressure.
4. Natural Release: Once the cooking time is complete, allow the pressure to naturally release for 20 minutes before removing the lid.
5. Serving Suggestions: Serve the beef tips over a bed of rice, or substitute with noodles or mashed potatoes. Pair with warm French bread to soak up the rich, savory gravy.

---


A Taste of Nostalgia


As the aroma of this dish fills the kitchen, I am transported back to my grandmother's cozy dining room, where family gatherings were frequent and laughter was abundant. Her version of beef tips and rice was a staple at Sunday dinners, where the entire family would gather around the table, eager to share stories from the week and enjoy each other's company.


I remember sitting at her table, my feet barely touching the ground, as she lovingly served each plate with a generous helping of beef tips and rice. The savory scent of the dish mingled with the warmth of the room, creating a comforting atmosphere that made everyone feel at home. It was during these moments that I learned the true value of family and the joy that comes from sharing a meal with loved ones.


Final Thoughts


This Easy Instant Pot Beef Tips and Rice recipe is not just a meal; it's a journey back to those cherished family moments. It's a dish that embodies love, warmth, and the joy of being surrounded by family. Whether you're looking to recreate a similar experience or simply seeking a delicious and comforting meal, this recipe is sure to deliver.


Give this recipe a try, and may it bring as much joy to your family as it has to mine. Don't forget to share your own stories and experiences in the comments below. Happy cooking!

Read more about Appetizers

Read more about Main Dishes

Read more about Desserts

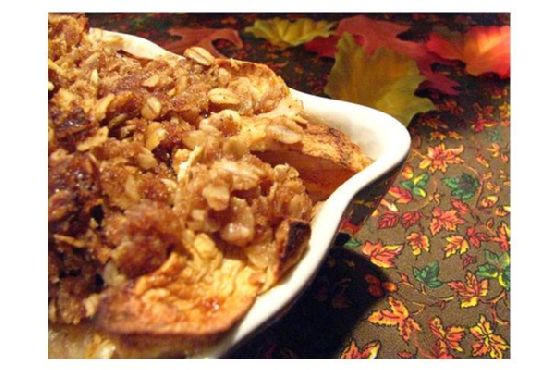
Apple Brown Betty | Made by Meaghan Moineau

Apple Brown Betty | Made by Meaghan Moineau

Title: "A Taste of Nostalgia: The Timeless Comfort of Apple Brown Betty"
Description: Dive into the heartwarming world of Apple Brown Betty, a classic dessert that has graced family tables for generations. With its simple yet flavorful ingredients, discover how this dish weaves together memories and tastes that are sure to delight both young and old. Rated 4/10 in difficulty, this dessert is perfect for any occasion that calls for a touch of sweetness and a sprinkle of nostalgia.

---


There’s something undeniably comforting about the aroma of apples and cinnamon wafting through the house, wrapping around you like a warm embrace on a chilly autumn evening. For many, including myself, this comforting aroma is synonymous with Apple Brown Betty, a dessert that has become a cherished family tradition.


The Magic of Apple Brown Betty


Apple Brown Betty is a dessert that celebrates simplicity while delivering robust flavors. The combination of diced apples, bread, and warm spices like cinnamon and nutmeg creates a delightful symphony of taste and texture. The addition of butter and a hint of lemon juice enhances the dish, while the golden-brown crust adds a satisfying crunch.


Ingredients:

- Diced apples


- Bread, cubed


- Butter


- Cinnamon


- Lemon juice


- Nutmeg


- White sugar


Instructions:

1. Preheat your oven to 375°F (190°C).


2. In a buttered 1-1/2 quart souffle dish, start with a layer of cubed bread.


3. Mix the diced apples with sugar, cinnamon, and nutmeg.


4. Cover the bread with a layer of the apple mixture.


5. Dot with butter and drizzle with a little lemon juice and rind.


6. Repeat the layering process, ending with a layer of bread cubes.


7. Cover and bake for 30 minutes.


8. Uncover and bake for an additional 30 minutes, until the apples are tender and the crust is golden brown.


A Journey Down Memory Lane


For me, Apple Brown Betty is more than just a dessert; it’s a portal to cherished memories. I recall the first time my grandmother and I made this delightful dish together. It was a crisp October afternoon, the kind when the leaves danced in the wind and painted the ground in hues of amber and gold. My grandmother, with her apron tied snugly around her waist, guided my small hands through the process of layering the bread and apples.


As the dish baked, we sat by the kitchen table, sipping hot cocoa and sharing stories. She spoke of her childhood, weaving tales of her own mother making the same dessert in a small country kitchen. The anticipation grew with every tick of the clock, and when the timer finally chimed, the kitchen was enveloped in an intoxicating scent that remains etched in my memory.


A Dessert for All Occasions


Rated at 4/10 in terms of difficulty, Apple Brown Betty is an ideal dessert for both novice and seasoned bakers. The straightforward preparation and familiar ingredients make it an accessible choice for any home cook. Whether it’s a cozy family dinner or a festive holiday gathering, this dessert is sure to be a beloved staple on your table.


The Apple Brown Betty is more than just a dish; it’s a treasured part of family history. With every bite, you’re not only savoring a delicious dessert but also indulging in a rich tapestry of memories and love. So why not gather your loved ones, roll up your sleeves, and create your own lasting memories with this timeless treat?

Read more about Appetizers

Read more about Main Dishes

Read more about Desserts

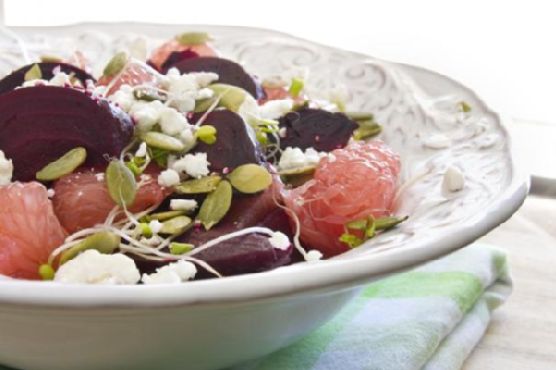
Citrus Beet Salad | Made by Meaghan Moineau

Citrus Beet Salad | Made by Meaghan Moineau

Title: A Taste of Sunshine: Creating a Nostalgic Citrus Beet Salad
Description: Dive into a world of vibrant flavors and cherished memories with our Citrus Beet Salad recipe. This delightful dish combines earthy beets, tangy grapefruit, and creamy goat cheese for an unforgettable culinary experience. Perfect as an appetizer or light main dish, this salad is sure to brighten any meal. Join us as we explore the simple joys of cooking and the heartfelt memories that come with it.

---


There's something magical about the fusion of colors and flavors that the Citrus Beet Salad brings to the table. With its earthy beets, tangy grapefruit, and creamy goat cheese, this dish is a symphony of tastes that dance on your palate. Rated 4 out of 10 in difficulty, it’s a perfect appetizer or light main dish that’s both visually stunning and incredibly delicious.


Ingredients:

- Beets


- Olive oil


- Balsamic vinegar


- Grapefruit


- Sprouts


- Pumpkin seeds


- Goat cheese


Instructions:

1. Begin by washing the beets thoroughly and patting them dry. Place them on a sheet of aluminum foil and drizzle generously with olive oil.


2. Fold the foil around the beets to create a sealed pouch, ensuring no steam will escape. Place this pouch on a cookie sheet and bake in the oven.


3. The cooking time will vary depending on the size of the beets. After 30 minutes, pierce them with a fork. If they remain firm, continue baking, checking every 15 minutes until they reach tenderness.


4. Once tender, remove the beets from the oven and allow them to cool until they can be handled safely. Use your hands to gently peel away the skins.


5. Slice the beets into bite-sized wedges and drizzle with balsamic vinegar for an added layer of flavor.


6. In a large bowl, create a base with fresh sprouts. Arrange the beet wedges and grapefruit segments on top.


7. Finish with a sprinkle of pumpkin seeds and crumbled goat cheese, then serve this vibrant salad immediately.


Nostalgic Memory:

Every time I prepare this Citrus Beet Salad, I am transported back to my grandmother's kitchen, filled with the aroma of roasting beets and the laughter of family gatherings. As a child, I remember sitting on a stool, watching her masterfully slice the grapefruit, her fingers sticky with its tangy juice. She would hand me a piece, and the burst of citrus was a delightful surprise every time.


Grandma believed that food was more than sustenance; it was a way to bring people together, to share stories, and to create lasting memories. Her beet salad, with its vibrant colors and contrasting flavors, was always the star of our summer picnics. We would gather around the table, the sun casting a golden hue over everything, and savor each bite as if it were a piece of sunshine itself.


Today, as I recreate this beloved dish, I am reminded of those carefree days and the warmth of family bonds. The Citrus Beet Salad is more than just a recipe; it’s a cherished heirloom, a link to the love and joy that filled my grandmother's kitchen.


---


This Citrus Beet Salad is not only a feast for the senses but also a joyful journey down memory lane. Whether you're recreating family traditions or starting new ones, this dish is sure to be a treasured part of your culinary repertoire.

Read more about Appetizers

Read more about Main Dishes

Read more about Desserts

Vegetarian Christmas wreath | Made by Meaghan Moineau

Vegetarian Christmas wreath | Made by Meaghan Moineau

Title: A Festive Centerpiece: Creating a Vegetarian Christmas Wreath
Description:

Embrace the spirit of the holiday season with this stunning Vegetarian Christmas Wreath. A delightful blend of fresh vegetables and cheese, this appetizer is not only a feast for the eyes but also a treat for the taste buds. Perfect for festive gatherings, this dish is sure to spark joy and create cherished memories with loved ones. Discover the recipe, reminisce with a nostalgic family story, and learn how to craft this beautiful and delicious centerpiece for your holiday table.


---


As the holiday season approaches, kitchens fill with the tantalizing aromas of festive cooking. One dish that stands out as both a visual and culinary delight is the Vegetarian Christmas Wreath. This vibrant appetizer combines the natural beauty of broccoli florets, cherry tomatoes, and cheese with the rich flavors of a creamy dip. It’s a recipe that not only pleases the palate but also becomes a conversation starter at any gathering.


Ingredients:


- Broccoli florets


- Cherry tomatoes


- Cheese


- Red bell pepper


- Cream cheese


- Mayonnaise


- Dried dill


- Dried garlic


- Olives


- Scallion


Instructions:


1. Prepare the Broccoli: Begin by washing and cutting the broccoli into florets. Fill a large pan with water, bring it to a boil, and add the broccoli. Have a bowl of ice-cold water ready. After two minutes of boiling, transfer the broccoli to the cold water to preserve its vibrant green color.
2. Prepare the Dip: While the broccoli cools, combine cream cheese, mayonnaise, dried dill, dried garlic, and chopped scallion to create a creamy dip. Chill in the refrigerator for at least three hours to let the flavors meld together.
3. Assemble the Wreath: On a large white plate, place a ramekin in the center for the dip. Arrange the cooled broccoli florets around it to form a wreath. Add cherry tomatoes for festive color and cut cheese into star shapes to sprinkle across the wreath. Finish by slicing red bell pepper into ribbon shapes and olives for added flair.

A Nostalgic Memory:


Every Christmas Eve, our family gathers in the cozy warmth of my grandmother's living room. As children, we would sit eagerly by the fireplace, waiting for our favorite holiday tradition—the unveiling of the Christmas Wreath. My grandmother, with her gentle hands and keen eye for detail, would transform simple ingredients into a masterpiece.


I remember the first time I helped her; I was entrusted with cutting the cheese into stars. Despite my clumsy attempts, she praised my efforts, making me feel like an artist contributing to her canvas. This tradition has become a cherished memory, as we all gather around the table, savoring each bite and reliving stories of past Christmases. The wreath symbolizes more than just a dish; it embodies the love and togetherness that defines our family.


Difficulty Rating: 4/10


Classification: Appetizer

With its vibrant colors and delightful flavors, the Vegetarian Christmas Wreath is a must-have addition to your holiday menu. Its ease of preparation and ability to bring people together make it a standout choice for any festive occasion. Gather your loved ones, share stories, and enjoy this beautiful, edible centerpiece that captures the essence of the season. Buon appetito!

Read more about Appetizers

Read more about Main Dishes

Read more about Desserts

Chinese Chicken Salad With Chipotle Dressing | Made by Meaghan Moineau

Chinese Chicken Salad With Chipotle Dressing | Made by Meaghan Moineau

Title: Savory Nostalgia: Chinese Chicken Salad with Chipotle Dressing


Description:

Dive into the fusion of flavors with our Chinese Chicken Salad with Chipotle Dressing. This delightful dish combines the rich, nutty essence of pea-mond dressing with the smoky heat of chipotle, creating a salad that tantalizes the taste buds. Perfect as a main dish, this easy-to-make recipe is a nostalgic journey to cherished family gatherings.

---


A Taste of Memories: Chinese Chicken Salad with Chipotle Dressing


There’s something magical about a dish that evokes memories of family gatherings and cherished times. Growing up, Sundays were sacred in our household — a time for family, laughter, and a delicious meal that brought us all together. One of those meals was the Chinese Chicken Salad with Chipotle Dressing, a dish that became a family favorite for its unique blend of flavors and textures.


The Ingredients


- Pea-mond Dressing: A blend of smooth peanut and almond butters for a rich, creamy texture.
- Rice Wine Vinegar: Adds a tangy kick that complements the nutty flavors.
- Fresh Ginger: Provides a zesty warmth that refreshes the palate.
- Adobo Chipotle Pepper Juice & Puree: Infuses the dressing with smoky, spicy notes that elevate the dish.
- Soy Sauce & Honey: Balances the heat with a sweet, salty depth.
- Sesame & Canola Oils: Create a silky consistency with a hint of nuttiness.
- Shredded Napa Cabbage & Romaine Lettuce: Offer a crisp, fresh base.
- Shredded Carrots & Snow Peas: Add vibrant color and crunch.
- Fresh Cilantro & Mint Leaves: Bring a burst of freshness.
- Green Onion & Roasted Peanuts: Lend a savory, crunchy finish.
- Shredded Rotisserie Chicken: The protein-packed heart of the salad.
- Chili Oil & Lime: For those who crave an extra zing.

Instructions


1. Dressing Magic: In a medium bowl, whisk together the rice wine vinegar, smooth peanut and almond butters, fresh ginger, adobo chipotle pepper puree, soy sauce, honey, sesame oil, and canola oil. Season with salt and pepper to taste. This dressing, with its blend of nutty richness and smoky chipotle heat, is the star of the show.
2. Assemble the Salad: In a large bowl, combine the shredded napa cabbage, romaine lettuce, carrots, snow peas, cilantro, green onion, and rotisserie chicken. Toss gently to mix.
3. Finish with Flair: Drizzle the chipotle dressing over the salad, tossing to coat evenly. Sprinkle with roasted peanuts and fresh mint leaves for an added layer of flavor. For an extra kick, add a dash of chili oil and a squeeze of fresh lime.

A Dish with Heart


This Chinese Chicken Salad is more than just a meal; it’s a walk down memory lane. I remember the first time my grandmother made this dish. Her kitchen was filled with the aroma of fresh ginger and the smoky scent of chipotle, a combination that felt like a warm hug. Each bite was a burst of flavor — the spice of the chipotle, the crunch of the cabbage, and the unexpected sweetness of honey. It was a culinary adventure that brought us closer, sitting around the table, sharing stories and laughter.


Difficulty Rating: 4/10


As a main dish, this recipe is rated as an easy 4 out of 10. It's perfect for those who are looking to whip up something impressive without too much hassle. Whether you’re a seasoned chef or a kitchen newbie, this salad is accessible to all.


Conclusion


The Chinese Chicken Salad with Chipotle Dressing is a testament to how food can transcend mere sustenance, becoming a vessel of nostalgia and a catalyst for connection. So gather your ingredients, invite your loved ones, and create new memories with this delightful dish. Enjoy the journey from your kitchen to the heart of your home.

Read more about Appetizers

Read more about Main Dishes

Read more about Desserts

Oreo Cake | Made by Meaghan Moineau

Oreo Cake | Made by Meaghan Moineau

Title: Indulge in Nostalgia: Easy Oreo Ice Cream Cake Recipe
Description: Dive into a delicious trip down memory lane with this Oreo Ice Cream Cake, a nostalgic dessert that is as simple as it is delightful. Perfect for family gatherings, this no-bake treat combines the irresistible flavors of Oreo cookies, creamy vanilla bean ice cream, and rich chocolate syrup. With a difficulty rating of just 3 out of 10, this dessert is a breeze to make and a joy to share.

---


A Journey Back in Time: The Sweet Story Behind Our Family's Oreo Cake Tradition

There’s something truly magical about desserts that evoke cherished memories, and for my family, the Oreo Ice Cream Cake does just that. Growing up, summers were a time of laughter, endless sunshine, and the delightful anticipation of family gatherings. Among the many highlights was Grandma’s famous Oreo Ice Cream Cake, a dessert that quickly became a beloved tradition.


I remember the first time I helped Grandma make this cake. The kitchen was filled with the comforting aroma of crushed Oreos and the soft hum of the ice cream maker in the background. As we crumbled the cookies, Grandma shared stories of how she first made this dessert for my mom’s birthday party. It was an instant hit, so much so that it became a staple at every family celebration thereafter.


The process was simple, yet it brought so much joy. Mixing the buttery cookie crumbs, spreading the creamy layers of vanilla bean ice cream, and seeing the smooth chocolate syrup drizzle over the cool whip was like painting a masterpiece. Grandma always let me have the honor of adding the final touch—the reserved cookie crumbles and a generous swirl of chocolate syrup on top.


As the cake set in the freezer, we’d gather in the sunlit living room, playing card games and chatting, the anticipation of dessert adding a sweet excitement to the air. When it was finally time to cut into the cake, the smiles and satisfied sighs around the table were worth every moment of preparation.


Today, I continue this tradition with my own children. The recipe is timeless, its simplicity making it a perfect choice for busy parents who still want to create special memories. Watching my kids’ eyes light up with the first taste brings me back to those sunny days in Grandma’s kitchen, reminding me of the simple pleasures of family and the joy of shared traditions.


Oreo Ice Cream Cake Recipe

*Ingredients:*


- Butter


- 1 can chocolate syrup


- Cool whip


- Oreo cookies


- 1 gallon vanilla bean ice cream


*Instructions:*


1. Crumble the Oreo cookies and save 1/3 for the topping.


2. Mix the butter with 2/3 of the cookie crumbs and press this mixture into the bottom of a long cake pan to create the base.


3. Layer half of the vanilla bean ice cream over the cookie base, followed by half of the chocolate syrup.


4. Spread a generous layer of cool whip over the top.


5. Sprinkle the remaining cookie crumbs and drizzle with the remaining chocolate syrup.


6. Freeze the cake overnight or for at least 12 hours to set properly.


Whether you're looking to relive your own family memories or create new ones, this Oreo Ice Cream Cake is sure to bring smiles and sweet nostalgia to your table. Enjoy the simplicity, savor the taste, and cherish the memories that come with every bite of this delightful dessert.

Read more about Appetizers

Read more about Main Dishes

Read more about Desserts

Banana, Cranberry and Apple Bread | Made by Meaghan Moineau

Banana, Cranberry and Apple Bread | Made by Meaghan Moineau

Title: "Wholesome Nostalgia: Banana, Cranberry, and Apple Bread Recipe"
Description: Discover the heartwarming flavors of our Banana, Cranberry, and Apple Bread. This delightful dessert combines the sweetness of ripe bananas, the tartness of green apples, and the chewy texture of dried cranberries. Perfect for family gatherings or a cozy afternoon treat, this bread will surely evoke cherished memories.

---


There's something magical about stepping into a kitchen filled with the comforting aroma of freshly baked bread, especially when that bread is our Banana, Cranberry, and Apple Bread. This delightful dessert is not just a treat for the taste buds; it's a nostalgic journey back to the warm embrace of family traditions.


A Slice of Family History

Growing up, Sunday afternoons were a sacred time in my family. It was a day reserved for rest, laughter, and the comforting rituals that brought us together. My grandmother, the matriarch of our family, had a knack for creating delicious recipes that seemed to weave magic into our lives. One of her most beloved creations was her Banana, Cranberry, and Apple Bread.


I remember sitting on a stool in her cozy kitchen, watching her deftly combine ingredients, sharing stories of her childhood as she worked. Her voice was a melodic blend of wisdom and warmth, and her stories often revolved around her own mother, who had passed down this very recipe. It was a legacy, a thread of love that connected generations.


Ingredients

- 235g skinless bananas, mashed


- 125g dried cranberries


- 200g plain flour


- 140g sugar


- 1 green apple, grated


- 2 eggs


- 100g vegetable oil


- 1/2 cup milk


- 1 tsp vanilla extract


- 1 tsp baking powder


- 1/2 tsp baking soda


- 1/4 tsp salt


Instructions

1. Preheat your oven to 350°F (170°C). Line and grease a loaf pan with cooking spray to ensure easy removal.


2. In a large mixing bowl, combine the flour, baking powder, baking soda, salt, and sugar. Mix well and set aside.


3. In another mixing bowl, whisk together the eggs, milk, vegetable oil, and vanilla extract. Add the grated apple and mashed bananas to this mixture and stir until well combined.


4. Gradually add the dry ingredients to the wet mixture, stirring gently until just combined. Be careful not to overmix.


5. Fold in the dried cranberries, ensuring they are evenly distributed throughout the batter.


6. Pour the batter into the prepared loaf pan, smoothing the top with a spatula.


7. Bake for approximately 70 minutes, or until a skewer inserted into the bread comes out clean.


8. Allow the bread to cool in the pan for 10 minutes before transferring to a wire rack to cool completely.


A Timeless Treat

Every bite of this bread is a tribute to my grandmother's legacy. The sweetness of the bananas, the tartness of the apples, and the chewy texture of the cranberries create a harmonious blend of flavors that never fails to transport me back to those cherished Sunday afternoons.


Difficulty Rating: 4/10

This recipe is simple enough for beginners, yet it carries the elegance of a dessert that can grace any family gathering.


Classification: Dessert

Whether you're looking to recreate fond memories or start new traditions, this Banana, Cranberry, and Apple Bread is sure to delight. Gather your loved ones, share stories, and savor the sweet nostalgia baked into every slice.

Read more about Appetizers

Read more about Main Dishes

Read more about Desserts