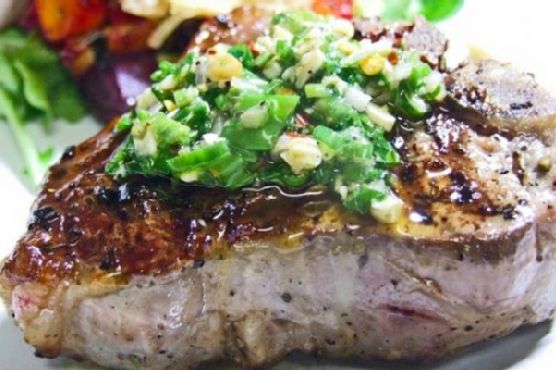
Pan Seared Lamb Loin With Chimichurri & Roasted Trio Squash Salad With Goat Cheese and Pinenuts | Made by Meaghan Moineau
Title: Savoring Tradition: Pan-Seared Lamb Loin with Chimichurri & Roasted Trio Squash SaladDescription: Discover the rich flavors and comforting nostalgia of our Pan-Seared Lamb Loin with Chimichurri paired with a Roasted Trio Squash Salad adorned with Goat Cheese and Pine Nuts. This main dish not only tantalizes your taste buds but also carries the warmth of cherished family memories. Experience a culinary journey that brings together the zest of fresh herbs and the heartwarming glow of the holiday table.
---
When it comes to family gatherings, few dishes evoke the warmth and comfort of home like a beautifully prepared lamb loin. As the holiday season approaches, I find myself reminiscing about the countless family dinners centered around this delightful dish. The aroma of fresh herbs mingling with the rich, savory lamb was a staple at our holiday table, a tradition passed down through generations.
Ingredients:
- Cilantro
- Extra virgin olive oil
- Flat leaf parsley
- Garlic clove
- Black ground pepper
- Kosher salt and pepper
- Lamb loin chops
- Lemon
- Mint
- Pine nuts
- Red pepper flakes
- Shallot
Instructions:
1. Preheat Your Oven: Start by preheating your oven to 400°F, setting the stage for a dish that’s sure to impress.
2. Prepare the Chimichurri: In a large bowl, combine cilantro, flat leaf parsley, minced garlic, lemon juice, mint, and a hint of red pepper flakes. Blend with extra virgin olive oil until you achieve a smooth consistency. Season to taste with kosher salt and freshly ground black pepper.
3. Sear the Lamb: Heat a large, heavy-bottomed pan with a splash of olive oil until it begins to smoke. Season each side of the lamb loin chops with salt and pepper. Sear them for about 2 minutes per side to lock in those delicious juices.
4. Oven Finish: Transfer the seared lamb to the preheated oven.
- For rare, roast for 2-3 minutes.
- For medium rare, extend to 6-8 minutes.
- For medium, let it cook for 9-11 minutes.
- For well done, aim for 12-14 minutes.
Remember, the lamb continues to cook after it's out of the oven, so adjust your times accordingly.
5. Roasted Trio Squash Salad: As the lamb cooks, prepare a medley of roasted squash. Toss sliced squash with olive oil, salt, and pepper, then roast until tender. Finish with a sprinkle of goat cheese and toasted pine nuts for a delightful crunch.
A Nostalgic Twist:
This dish always brings me back to a particular winter evening at my grandmother's house. The fireplace crackled, casting a warm glow across the dining room. I remember watching her skillfully sear the lamb, her hands moving with the confidence of years of practice. As we sat around the table, the laughter of my cousins filled the room, and the scent of chimichurri and roasted squash wrapped us in a cozy embrace. These moments, filled with love and laughter, are the essence of why I cherish this dish.
Difficulty: 6/10
Classification: Main Dish
---
Whether you’re creating new memories or savoring the nostalgia of family traditions, this Pan-Seared Lamb Loin with Chimichurri and Roasted Trio Squash Salad is sure to become a beloved part of your culinary repertoire. Indulge in the symphony of flavors and share a meal that speaks the universal language of love and togetherness.