
I was having one of those hectic weeks—work deadlines piling up, laundry mountain growing taller by the minute—and all I wanted was a moment of pure joy. Enter my savior: these Wild Blueberry Lemon Muffins. A burst of tart lemon and sweet summer blueberries wrapped up in a soft, buttery muffin. They’re the perfect blend of comforting and feel-good indulgence, but super easy to put together. The best part? They make your kitchen smell like heaven and taste even better! Whether you’re whipping them up for a weekend brunch or a quick weekday treat, these muffins are a little slice of bliss.
Jump to Recipe
What You’ll Need
You’re going to love how most of these ingredients are probably already sitting in your pantry or fridge. Here’s what you need:
- 2 1/2 cups all-purpose flour
- 2 1/2 teaspoons baking powder
- 1/2 teaspoon salt
- 1 cup granulated sugar
- 1/2 cup unsalted butter, softened
- 1 large egg
- 1/2 cup buttermilk
- 1 teaspoon vanilla extract
- 1 tablespoon fresh lemon juice
- 1 tablespoon lemon zest
- 1/8 cup sugar (for mashing with lemon zest)
- 1 can wild blueberries, drained
- 1/2 cup powdered sugar (for glaze)
How to Make Wild Blueberry Lemon Muffins
- Start by preheating your oven to 375°F (190°C). Line 16 muffin cups with paper liners to make cleanup a breeze.
- In a small bowl, mash 1/8 cup sugar with the lemon zest until the sugar is moistened and fragrant. This will amp up the lemony goodness.
- In a medium-sized bowl, whisk together the flour, baking powder, and salt. This dry mix is the backbone of your muffins.
- Using an electric mixer, cream the cup of sugar and butter together until light and fluffy, about 3 minutes. Add the egg, buttermilk, vanilla, and the fragrant lemon sugar, beating each in one at a time.
- Slowly incorporate the flour mixture into the wet ingredients. The batter should be smooth and inviting at this point.
- Gently fold in the wild blueberries with a large spatula. Try not to crush them—you’re aiming for bursts of berry goodness!
- Divide the batter equally into the prepared muffin tins, filling each about 3/4 full. This leaves room for them to rise beautifully.
- Bake in the preheated oven for about 35 minutes, or until a cake tester comes out clean and muffins are golden.
- Let the muffins cool for a few minutes in the pan before transferring them to a wire rack.
- While the muffins cool, whip up your glaze by combining the lemon juice, zest, and powdered sugar. Stir until smooth.
- Spoon about 1 tablespoon of glaze over each muffin, allowing it to drizzle down the sides for that enticing sweet-tangy finish.
Cook’s Notes
If you can, use wild blueberries—they have a more intense flavor and smaller size, making them perfect for muffins. Make sure to drain them well before adding to the batter to keep it from getting too wet. Store your muffins in an airtight container; they stay fresh on the counter for up to three days or can be frozen for up to a month. If you want to prepare ahead, mix the dry ingredients the night before to save time.
Make It Your Own
- Swap canned wild blueberries for fresh ones if they’re in season for a less sugary taste.
- Replace the lemon with orange zest and juice for a citrusy twist.
- Use almond extract instead of vanilla for a nutty undertone.
- Try adding a teaspoon of poppy seeds to the batter for an extra crunch.
If you try this, I’d love to hear how it turns out—drop a comment or tag me on social media! Happy baking, and may your week be as sweet as these muffins.
Related update: Wild Blueberry Lemon Muffins
Related update: Penne Arrabiata
Related update: Fast Tiramisu
Related update: Blueberry Almond Crescent Rolls

Imagine this: it’s a rainy Tuesday evening, and I’m staring into my pantry like it’s going to magically whip up dinner for me. You know those days when the fridge is playing hard to get and the clock is laughing in your face? Well, that’s when I turn to my trusty Hush Puppies recipe. These little golden nuggets save the day every time — they’re crispy, comforting, and the kind of simple that feels like a win even when everything else is chaos. Plus, they come together in a flash, which is exactly what you need when the hangry hits.
Jump to Recipe
What You’ll Need
There’s a good chance you’ve already got most of these on standby. That’s the beauty of this dish: minimal ingredients with maximum flavor payoff. Check out what you’ll need:
- 1 small onion, finely chopped
- 1 cup cornmeal
- 1/4 cup flour
- 1 tablespoon baking powder
- 1 teaspoon salt
- 1 egg
- 1/2 cup milk
- Oil for frying (vegetable or canola works best!)
How to Make Hush Puppies
- Start by grabbing a large mixing bowl and toss in your cornmeal, flour, baking powder, and salt. Give it a good stir until everything is well combined.
- In a separate medium bowl, crack in the egg and beat it with a fork until it’s all mixed up. Add in the chopped onion and milk, then stir until it’s nice and smooth.
- Pour the eggy onion mixture into the dry ingredients. Stir until it’s all combined into a thick, slightly lumpy batter. You’re aiming for a texture that holds its shape.
- Heat up about 2-3 inches of oil in your deep-fat fryer or a heavy skillet over medium-high heat. You want it to shimmer but not smoke — that’s your cue it’s hot enough.
- Once the oil is ready, drop heaping teaspoons of batter into the pan. They’ll plummet to the bottom but magically rise to the top as they cook. Fry about 5-6 at a time without overcrowding.
- Keep an eye out — after 1-2 minutes, the puppies should be a gorgeous golden brown. That’s when you’ll know they’re done. Use a slotted spoon to fish them out and let them drain on paper towels.
Cook’s Notes
Don’t overmix the batter; a few lumps are perfectly fine and keep the texture just right. The oil needs to be hot enough to ensure the hush puppies cook quickly and don’t soak up excess oil. If you’re making them ahead, you can fry them lightly and finish them off in a hot oven just before serving. They’re best enjoyed fresh but keep well in an airtight container for a day or two. Reheat them in the oven to maintain that crunch.
Make It Your Own
Here’s where you can get creative:
- Spice it up: Add a pinch of cayenne pepper or a chopped jalapeño for a kick.
- Cheesy twist: Stir in a handful of shredded cheddar cheese to the batter for some gooey goodness.
- Herbal accents: Mix in some chopped chives or parsley for a fresh pop of flavor.
- Sweet spin: Swap out the onion for corn kernels and add a teaspoon of sugar for a sweet-savory combo.
If you try this, I’d love to hear how it turns out — drop a comment or tag me! Remember, the best recipes are the ones you make your own. Enjoy your hush puppies and all the cozy vibes they bring.
Related update: Hush Puppies
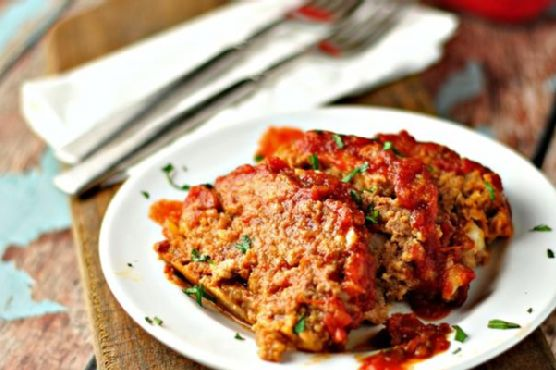
The other night I found myself staring at a package of ground beef and the clock ticking closer to dinner. You know that moment when you want something comforting but don’t want to commit to a culinary marathon? Well, meatloaf was calling my name. But not just any meatloaf—this was going to be the kind that gets the family excited, the kind that leaves everyone asking for seconds. It’s not just easy; it’s tasty, satisfying, and oh-so-worth it. A perfect blend of savory and a hint of sweet, this meatloaf turns the usual into the extraordinary.
Jump to Recipe
What You’ll Need
If you’re like me, chances are you already have most of this tucked away in your kitchen. Let’s make this as fuss-free as possible!
- 1 lb ground beef
- 1/2 lb bulk sausage
- 1/2 cup breadcrumbs
- 1 small diced onion
- 1 egg
- 1 teaspoon salt
- 1/2 teaspoon pepper
- 1 teaspoon cumin
- 1 teaspoon garlic powder
- 1 cup canned tomato sauce, divided
- 2 tablespoons cider vinegar
- 2 tablespoons brown sugar
- 2 tablespoons whole grain mustard
- 2 tablespoons Worcestershire sauce
- 1/4 cup water
How to Make Tasty Easy Meatloaf
- Preheat your oven to 350°F (175°C). This is the start of something wonderful.
- In a large bowl, mix together the ground beef, sausage, breadcrumbs, onion, egg, salt, pepper, cumin, garlic powder, and half of the tomato sauce. The trick is not to over-mix—keep it gentle to avoid a dense loaf.
- Shape your mixture into a loaf and place it in a shallow ovenproof pan. The sides should slope down gently, like a little hill of deliciousness.
- In a separate bowl, combine the remaining tomato sauce, cider vinegar, brown sugar, mustard, Worcestershire sauce, and water. Stir until the sugar is dissolved and the sauce is smooth.
- Pour this sauce over the meatloaf, letting it cascade down like a savory waterfall.
- Pop the pan into the oven and let it bake for about 1 hour. Every 20 minutes, spoon some of the sauce resting in the pan over the top of the loaf. This keeps it moist and full of flavor.
- Once baked through, the edges will look caramelized and the top glossy. Take it out of the oven and let it rest for 10 minutes. This pause lets the juices settle so each slice stays juicy.
Cook’s Notes
Making a meatloaf isn’t rocket science, but a few tips can make all the difference. First, don’t overwork the meat mixture; it’s tempting, but less is more for a tender loaf. If you like your meatloaf with a bit more of a kick, add a dash more Worcestershire sauce to the mix. Leftovers? Store them in an airtight container in the fridge for up to 3 days. They make wicked meatloaf sandwiches, trust me.
Make It Your Own
Here are some simple swaps to keep things interesting:
- Go Turkey: Substitute the ground beef and sausage with ground turkey for a lighter version.
- Spice It Up: Add a chopped jalapeño to the meat mixture if you like a bit of heat.
- Cheesy Delight: Mix in a cup of shredded cheddar cheese for an oozy surprise.
- Herby Twist: Toss in some chopped fresh herbs like parsley or thyme for an extra layer of flavor.
If you try this, I’d love to hear how it turns out—drop a comment or tag me in your meatloaf adventure! Happy cooking!
Related update: Tasty Easy Meatloaf
Related update: Moroccan Spiced Chicken Under A Brick
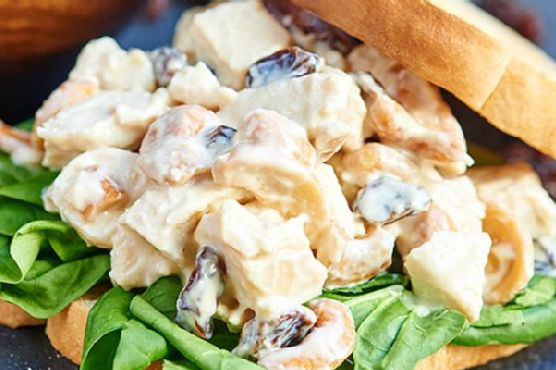
It was one of those whirlwind Wednesday evenings where everything seemed to be happening at once. My kitchen was a mess of grocery bags, half-empty coffee cups, and a laptop precariously perched on the edge of the counter streaming my latest binge-worthy show. Between juggling work calls and taming the chaos that had taken over my living space, I needed dinner to be quick, satisfying, and ideally nutritious enough to make me feel like I was winning at adulthood. Enter the Greek Yogurt Chicken Salad. It’s a reliable hero for those nights when you need something comforting yet refreshing, and it doesn’t hurt that the cleanup is a breeze! The creamy, tangy dressing paired with the tender chicken and the occasional sweet zing from the craisins is just what you need to hit reset.
Jump to Recipe
What You’ll Need
Just a heads up, this is the kind of recipe where you might already have most of the ingredients lounging around in your kitchen. It’s simple yet flavorful.
- 2-3 whole chicken breasts
- 4 cups chicken broth or water
- 1 cup plain Greek yogurt
- 1 tablespoon Dijon mustard
- 1 teaspoon garlic powder
- 1/2 cup craisins (or raisins)
- 1/2 cup roasted cashews
- Salt, to taste
- Pepper, to taste
How to Make Greek Yogurt Chicken Salad
- Start by bringing your chicken broth or water to a boil in a medium pot. Once it’s bubbling, add in your whole chicken breasts. Let them cook until there’s no pink left in the middle; this usually takes about 15-20 minutes depending on their size.
- While your chicken is having its spa treatment, whisk together the Greek yogurt, Dijon mustard, and garlic powder in a bowl. You’re aiming for a smooth, well-mixed sauce here. Add a dash of salt and pepper, adjusting to your taste.
- Stir in the craisins and cashews. If you love a bit more crunch, hold off on the cashews until just before serving. This way, they maintain their delightful crunch!
- Once the chicken is done, let it rest for about 5 minutes. Trust me, this little pause keeps all those flavorful juices locked in.
- Dice the chicken into bite-sized chunks and toss it into your prepared sauce. Give everything a good mix so each piece of chicken is generously coated.
- Serve your chicken salad chilled or at room temperature. It’s perfect in a sandwich, on a bed of greens, or just straight from the bowl.
Cook’s Notes
– Boiling the chicken in broth instead of water really takes the flavor up a notch, but if you’re in a pinch, water works just fine.
– This chicken salad keeps well in the fridge for about 3 days, making it a great make-ahead lunch option. Just store it in an airtight container to keep it fresh.
– If you’re planning to eat it over a few days, consider adding the cashews just before serving each time to maintain that satisfying crunch.
– Be mindful not to overcook the chicken, as it can become a bit rubbery. You want it tender and juicy!
Make It Your Own
- Swap the chicken for crispy tofu if you’re going for a vegetarian vibe. Just cube it and toss it in!
- Love a bit of heat? Add a pinch of cayenne pepper or some chopped jalapeños to the sauce.
- For an extra tangy twist, try tossing in some diced green apples. They add a delightful crunch and zing.
- Switch the craisins for chopped dried apricots for a different kind of sweetness if you’re feeling adventurous.
If you give this Greek Yogurt Chicken Salad a whirl, I’d love to hear how it turns out for you! Drop a comment below or tag me in your kitchen creations. Let’s keep those weeknight dinners delicious and stress-free!
Related update: Greek Yogurt Chicken Salad
Related update: Strawberry-Mango Quinoa Salad
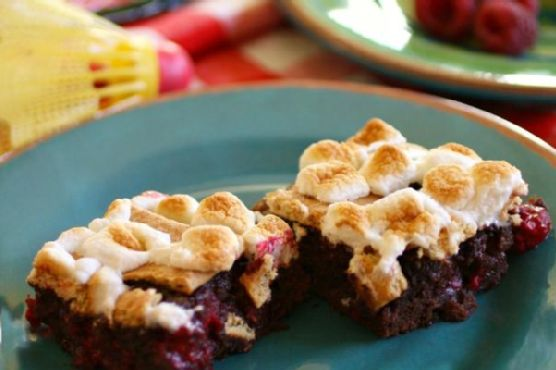
Picture this: it’s a Wednesday evening, and I’m knee-deep in that midweek slump, feeling like a bit of a sweet escape. The kind where comfort meets simplicity. I glanced at the calendar and saw it was nearing August 10th—National S’mores Day. Immediately, a light bulb moment struck! Why not combine the nostalgia of campfire s’mores with a fruity twist to lift my spirits? Enter: S’mores-n-berry Bars. They’re as indulgent as they sound, with a crispy graham cracker base, rich brownie layer, and gooey marshmallow topping that’s lightly kissed by the oven’s broiler for that perfect toasted finish. It’s the kind of treat that’s easy to whip up, yet impressive enough to satisfy any sweet tooth. Jump to Recipe
What You’ll Need
You probably have most of these ingredients lounging in your pantry already. Here’s what you’ll need:
- 1 box of cooked brownie mix
- 1 egg
- 1 cup graham cracker crumbs
- 2 whole graham crackers
- 1 cup mini marshmallows
- 1/2 cup fresh dried raspberries
- 1/4 cup sugar
- 1/2 cup unsalted butter, melted
- 1/4 cup vegetable oil
- 1/4 cup water
How to Make S’mores-n-berry Bars for National S’mores Day – August 10
- Preheat your oven to 325°F. Line an 8-inch-square baking pan with foil, making sure the foil hangs over the edges for easy removal later. Give it a spritz of nonstick cooking spray to make doubly sure nothing sticks.
- In a medium-sized bowl, combine the melted butter, graham cracker crumbs, and sugar until it resembles wet sand. Press this mixture evenly into the bottom of your prepared pan. Bake for about 20 minutes, or until it looks golden and smells like heaven. Set aside.
- Crank up your oven to 350°F. Meanwhile, grab another bowl and mix together the brownie mix, vegetable oil, water, and egg until smooth. Gently fold in the fresh dried raspberries. Pour this luscious batter over the cooled graham cracker crust.
- Bake the brownie layer for about 25 minutes, or until a toothpick inserted into the center comes out clean. This is your cue to remove it from the oven.
- Break up the two graham crackers into small pieces and scatter them artfully atop the brownie layer.
- Scatter the mini marshmallows over the graham crackers. Return the pan to the oven, this time setting it to broil. Watch carefully, as the marshmallows can quickly go from toasty to burnt in a flash! Once they’re golden and bubbly, pull the pan out.
- Allow the bars to cool completely in the pan. Lift them out using the overhanging foil and cut into squares. Enjoy the ooey-gooey goodness!
Cook’s Notes
These bars are as versatile as they are delicious. The graham cracker crust adds an incredible texture contrast to the fudgy brownie and gooey marshmallow topping. Here are a few tips to ensure they turn out perfect:
- If you prefer a denser brownie, add an extra egg to the brownie mixture.
- Store any leftovers in an airtight container at room temperature for up to 3 days. They’ll stay delicious, though the marshmallows might lose a bit of their chew.
- To make these ahead, you can prepare the graham cracker crust and brownie layer a day in advance. Add the graham crackers and marshmallows just before serving for the best texture.
Make It Your Own
- Nutty Twist: Swap out the raspberries for chopped toasted almonds or pecans for a crunchy surprise.
- Berry Medley: Use a mix of freeze-dried strawberries and blueberries instead of just raspberries for a more fruity experience.
- Chocolate Lovers: Add chocolate chips to the brownie mix for extra gooeyness. You can never have too much chocolate, right?
- Salted Caramel: Drizzle caramel sauce over the marshmallows before broiling. A sprinkle of sea salt can elevate these bars to gourmet status.
If you try this, I’d love to hear how it turns out — drop a comment or tag me! S’mores day or not, these bars are a crowd-pleaser every time.
Related update: S’mores-n-berry Bars for National S’mores Day – August 10
Related update: Cherry-Berry Pie With Agave Nectar All-Butter Crust

Picture this: a cozy Sunday afternoon, the type where time seems to slow down and a light drizzle taps rhythmically against your kitchen window. It’s the perfect setting for a baking adventure, and today’s mission is rugelach. This delightful pastry is more than just a treat; it’s a buttery, flaky, nutty explosion of flavor that’s surprisingly easy to pull off. Even if you’re juggling kids, pets, or a mountain of laundry, this recipe fits snugly into your schedule and promises to fill your home with warmth and the irresistible scent of cinnamon. Let’s dive in, shall we?
Jump to Recipe
What You’ll Need
The beauty of this rugelach recipe lies in its simplicity. Chances are, you have most of these ingredients lounging in your pantry or fridge already. Here’s what you’ll need:
- Salted butter – it gives the dough a rich flavor and perfect flakiness.
- Cream cheese – make sure to use a block, not the spreadable kind.
- Salt – just a pinch to balance the sweetness.
- Plain flour – for that tender, delicate texture.
- Egg yolks – they add richness and help bind the dough.
- Vanilla extract – a splash for warmth.
- Caster sugar – both in the dough and as a sweet coating at the end.
- Fruit preserves – I love orange marmalade, but feel free to experiment.
- Walnuts – adds crunch and a lovely nutty flavor.
- Ground cinnamon – because cinnamon and sugar are best friends.
How to Make Rugelach
- Start by leaving your butter and cream cheese out for a couple of hours. They should be soft and spreadable, which is key to working them into a smooth dough.
- Preheat your oven to 180°C (that’s about 356°F for my stateside friends).
- In a large mixing bowl, beat the softened butter and cream cheese together on medium speed until they’re light and fluffy. This should take about 2-3 minutes.
- Add in the egg yolks, vanilla extract, caster sugar, and a pinch of salt. Gradually mix in the flour until everything comes together into a smooth dough.
- While that’s mixing, chop up your walnuts into fine pieces and set them aside. They’ll add the perfect crunch to your rugelach.
- Once your dough is ready, dust your work surface with flour and knead the dough gently into a large block. If your dough feels a bit sticky, sprinkle on some more flour.
- Divide the dough into four equal pieces, keeping the ones you’re not currently using under a damp cloth so they stay moist.
- Roll one piece into a ball, then use a floured rolling pin to flatten it into a circle about 2 to 3mm thick.
- Cut the rolled dough into eight triangles. Like mini pizza slices, but so much better!
- Time to get fruity! Place a teaspoon of your fruit preserves at the wide end of each triangle, spreading it lightly.
- Sprinkle some chopped walnuts over the preserves, then tuck in the sides of the triangle slightly to keep everything tucked in as you roll.
- Roll each piece towards the pointed end, making sure the filling stays inside. Repeat for the other dough pieces.
- Place your rugelach on a baking tray lined with parchment paper.
- Mix caster sugar and ground cinnamon in a small bowl. Melt your butter and brush it over each rugelach, finishing with a generous sprinkle—or a roll—in the cinnamon-sugar.
- Bake for about 35 minutes, or until the rugelach are a deep golden brown and your kitchen smells heavenly.
- Let them cool on a rack before savoring or storing them away (if they last that long!).
Cook’s Notes
Rugelach is all about that flaky, tender dough, so make sure your butter and cream cheese are properly softened. Cold ingredients can lead to a dense pastry instead of the melt-in-your-mouth texture we’re after. If the dough gets too sticky, don’t be shy about adding a little more flour as you roll it out. These pastries store well—just pop them in an airtight container, and they’ll keep for a few days at room temperature or freeze beautifully for up to a month. A quick reheat in the oven or toaster oven revives their just-baked allure.
Make It Your Own
- Swap the orange marmalade for raspberry or apricot preserves for a different fruity twist.
- If you’re not into walnuts, try pecans or almonds for a different nutty bite.
- Add a sprinkle of chocolate chips to the filling for a decadent, chocolatey surprise.
- Feeling spicy? A pinch of cardamom in the sugar-cinnamon mix adds an exotic flair.
If you try this, I’d love to hear how it turns out—drop a comment or tag me on your socials! Cheers to cozy baking sessions and delicious rugelach adventures!
Related update: Rugelach
Related update: Tart Raspberry Sorbet with a Hint of Heat
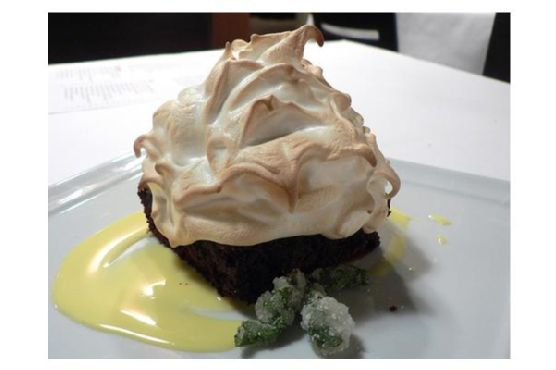
Picture this: It’s a Friday night, and you’ve had one of those weeks where everything felt like a never-ending to-do list. You’re craving something special, a little dramatic even, to kick off your weekend with flair. That’s when I remembered Baked Alaska. It’s one of those desserts that looks like a total showstopper but is actually super manageable to whip up. I love how it combines the coolness of ice cream, the soft texture of cake, and a toasty meringue that you can’t help but admire. It’s great because you can make it ahead of time, and it doesn’t require any fancy equipment. Seriously, if I can do it, anyone can. You just have to get over the idea that baking something on top of ice cream is somehow impossible — spoiler: it’s not, and it’s ridiculously fun. Jump to Recipe
What You’ll Need
Let’s be real: you’ve probably got most of this stuff on hand already, except maybe the ice cream. But hey, any excuse to grab a pint, right?
- A round cake (store-bought or homemade, your call!)
- Ice cream (about 1/2 gallon of your favorite flavor)
- Egg whites (from about 3 large eggs)
- Cream of tartar
- Powdered sugar
How to Make Baked Alaska
- Start by greasing a 7-inch bowl with a flavorless oil or unsalted butter. This bowl should be just big enough to snugly hold half a gallon of ice cream, but no wider than your cake round.
- Let your ice cream soften a bit so it’s workable. Then pack it tightly into the bowl. Pop it back into the freezer until it hardens — about an hour should do.
- For the meringue, beat your egg whites until they are foamy. Add a pinch of cream of tartar and keep whipping until you see stiff peaks. This is when the meringue holds its shape firmly.
- Gently fold in the powdered sugar, a bit at a time, to avoid deflating all that nice air you just whipped in.
- Once you’re ready to assemble, place your round cake on a plate that’s slightly larger than the cake itself.
- To unmold the ice cream, center it over the cake. If it’s being stubborn and won’t release from the bowl, run a bit of warm water over the outside of the bowl for a few seconds.
- Time to “frost” it! Cover the cake and ice cream completely with meringue, going wild with a spoon to create peaks and swirls. Don’t be shy — more is more with meringue.
- Bake your masterpiece in a preheated oven at 450°F for about 6-7 minutes, until those meringue peaks are beautifully golden brown.
- Pop it back in the freezer until you’re ready to serve. It’ll keep just fine for a day or two.
Cook’s Notes
A couple of quick tips to save your sanity: First, make sure your bowl is really cold to help the ice cream set faster. If you’re nervous about the meringue deflating, sift the powdered sugar first; it makes a surprising difference. And for those moments when the ice cream just won’t release, a quick dip in warm water works like magic!
Baked Alaska is a dream to make ahead. You can do all the components a day or two before and just assemble it the day of. Leftovers can be stored in the freezer, but they might lose a bit of their magic.
Make It Your Own
- Switch out the vanilla ice cream for something more adventurous like coffee or pistachio for a gourmet spin.
- Use a chocolate or lemon cake base instead of vanilla to complement or contrast your ice cream choice.
- Add a layer of jam between the cake and ice cream for a fruity surprise that cuts through the richness.
- Feeling nutty? Toss some toasted almonds or hazelnuts into the meringue for a crunchy texture.
If you try this, I’d love to hear how it turns out — drop a comment or tag me in your photos! Let’s see how your Baked Alaska stacks up. Happy baking, friends!
Related update: Baked Alaska
Related update: Rugelach

So, last Tuesday was one of those days where you open every cupboard and the fridge like five times, hoping for some magic to happen. You know what I mean, right? That weird limbo between wanting something sweet but not willing to spend hours in the kitchen. That’s when I remembered this white chocolate-cranberry ice cream recipe, and honestly, it’s a game-changer. We’re talking creamy, dreamy, with bursts of cranberry goodness — and it doesn’t demand a culinary degree. Perfect for when you need a sweet fix without the fuss. Jump to Recipe
What You’ll Need
The magic of this recipe? You probably have most of these tucked away already. Let’s check off the essentials:
- Double cream – The base for that silky smooth texture.
- Dried cranberries – For those tart little bursts.
- Egg yolks – Just the yolks, no cheating!
- Full fat milk – Because why compromise?
- Caster sugar – For sweetness, of course.
- Vanilla extract – A hint to bring it all together.
- White chocolate – The star of the show.
How to Make White Chocolate-Cranberry Ice Cream
- Start by heating the milk in a medium saucepan just until it begins to gently bubble. Don’t let it boil over — we’re not making hot chocolate here!
- Take it off the heat and set it aside for a moment. Let’s get those eggs going.
- In a separate bowl, whisk the egg yolks and sugar together. You’ll want to go at it for about 3 minutes until they turn pale yellow and fluffy. It’s like magic!
- Slowly pour that warm milk over the egg mixture, stirring as you go. Then, tip it all back into the saucepan.
- Simmer very lightly, stirring continuously. Watch for the custard to thicken or for it to coat the back of a wooden spoon. It should feel like a silky dream.
- Off the heat, stir in the chopped white chocolate. The residual heat will melt it beautifully. Trust the process.
- Once the mixture is cool, add in the vanilla extract. Pop it in the fridge to chill completely.
- When it’s nicely chilled, stir in the cream until everything is perfectly combined.
- Pour the mixture into your ice cream machine and churn until it’s lovely and frozen.
- In the last 5 minutes of churning, toss in those dried cranberries, letting the machine do the work of mixing them in.
- Transfer your creation into a plastic container and freeze for at least 3 hours before serving.
Cook’s Notes
Ah, the little things that make life easier (and tastier):
- If you don’t have an ice cream machine, you can still make this by freezing the mixture and stirring every 30 minutes until it sets. But, if we’re being honest, the machine really does make it creamier.
- Store this ice cream in an airtight container to keep it fresh. It’ll last about a week, but will probably disappear much sooner.
- Don’t rush the chilling process. The colder the mix before churning, the better the texture.
Make It Your Own
Feeling creative? Here’s how to switch things up:
- Swap dried cranberries with chopped dark chocolate for a double chocolate vibe.
- Try adding a pinch of sea salt when you stir in the vanilla for a salted white chocolate twist.
- Mix in some toasted almonds with the cranberries for a nutty crunch.
- Infuse the milk with a cinnamon stick while heating it for a spicy kick.
If you give this white chocolate-cranberry ice cream a whirl, I’d love to hear about it. Drop a comment or tag me in your posts — let’s share all this deliciousness together!
Related update: White chocolate-cranberry ice cream
Related update: Baked Alaska

It was one of those nights when the fridge seemed to mock me with its emptiness, only the defiant glow of the leftover polenta catching my eye. I had no grand plans for dinner, just a craving for something that felt like a hug on a plate without the fuss. Enter Polenta Pie with Italian Toppings — a recipe that marries the comforting, hearty texture of polenta with vibrant, savory toppings. It’s the perfect dish for those evenings when you need a little culinary adventure without a complicated list of steps or ingredients. Plus, it’s a great way to transform humble pantry staples into something that feels a bit fancy.
Jump to Recipe
What You’ll Need
It’s likely that you already have most of these ingredients lingering in your kitchen, making this dish both convenient and delicious. Here’s what you need to gather:
- Water
- Milk
- Olive oil
- Salt
- Yellow corn meal
- Diced pancetta
- Shallot
- Garlic
- Gorgonzola cheese or any blue cheese you love
- Baby spinach
- Sweet bright colored bell pepper
- Pignoli (pine nuts)
How to Make Polenta Pie With Italian Toppings
- Start by making the polenta. In a saucepan, bring water, milk, 1/4 cup of olive oil, and a pinch of salt to a boil. Immediately reduce the heat and gradually pour in the cornmeal while stirring to prevent lumps.
- Keep simmering the cornmeal, stirring very frequently for about 15 minutes. You’ll know it’s ready when it’s thick and holds its shape.
- Line a baking sheet with foil or parchment paper and drizzle it with olive oil. Spread the polenta evenly across the sheet to about 1/2-inch thick, shaping it into a circle like a pizza crust. Let it cool until it’s firm.
- Preheat your oven to 425°F. Once the polenta is set, sprinkle it with freshly ground pepper and bake for 30 minutes, until the edges are beautifully browned.
- While your crust is baking, prepare the toppings. Heat 1 tablespoon of olive oil in a skillet and sauté the diced pancetta, shallots, and garlic for about 7-8 minutes until they are golden and fragrant. Don’t overdo it — you want them just right, not crunchy.
- Remove the pancetta mixture to a bowl. In the same skillet, sauté the baby spinach until it’s wilted and a deep green, about 3 minutes. Remove and set aside.
- Add a touch more oil if needed and sauté the bell pepper slices until they’re slightly wilted, about 3-4 minutes.
- Now, let’s assemble the pie! Start by spreading the gorgonzola crumbs evenly over the baked polenta crust. Then layer the pancetta mix, followed by the spinach, bell peppers, and finally a sprinkle of pine nuts.
- Drizzle a few more drops of olive oil over the top and pop it back in the oven for 4-5 minutes just to warm everything through.
- Slice your polenta pie like a pizza or into neat squares. Serve it hot and enjoy the medley of flavors!
Cook’s Notes
This dish is a great candidate for prepping ahead. You can make the polenta crust a day in advance and store it in the fridge, well-wrapped. Just bring it to room temperature before proceeding with the baking step. If you’re lucky enough to have leftovers, they hold well in the fridge for 2-3 days. Simply reheat in the oven to enjoy a second time with a nice crisp. A common pitfall is undercooking the polenta, so keep an eye on that texture — thick but not cement-like is your sweet spot.
Make It Your Own
Here are a few fun twists to try:
- Swap the pancetta for crispy tofu to make it vegetarian-friendly.
- Try a mix of mushrooms instead of the bell pepper for an earthy depth.
- Use feta if you’re not a fan of blue cheese, it brings a nice tang.
- Replace the pine nuts with toasted almonds for an unexpected crunch.
If you try this Polenta Pie with Italian Toppings, I’d love to hear how it turns out! Drop a comment below or tag me in your creation pics. Let’s share the love for this deliciously comforting dish.
Related update: Polenta Pie With Italian Toppings
Related update: Chicken Porridge
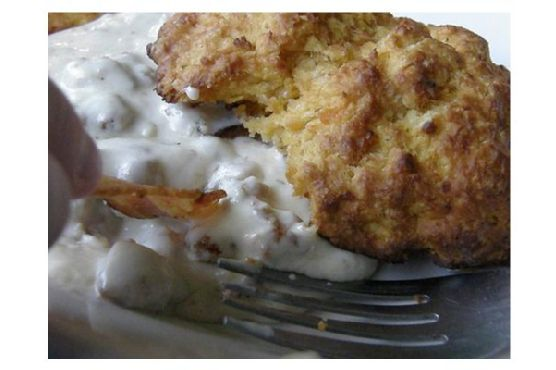
So, there I was on a lazy Sunday morning, craving something indulgent yet homey, and oh-so-satisfying. The kind of comfort food that just wraps you up in a warm hug — you know what I mean? That’s when I decided to whip up one of my go-to favorites: Breakfast Biscuits and Gravy. I mean, who can resist flaky biscuits smothered in rich, savory sausage gravy? Not me! They’re perfect for those mornings when you want to treat yourself without spending hours in the kitchen. Jump to Recipe
What You’ll Need
If you’ve got a well-stocked pantry, you’re already halfway there. This recipe relies on some everyday staples, along with a few flavor-boosting stars:
- Flour — unbleached for the best texture
- Baking powder
- Salt — regular and a pinch of black salt for depth
- Unsalted butter — because you can never have too much
- Plain yogurt
- Whole milk
- Fresh sage leaves
- Paprika
- Ground allspice
- Pork sausage
- Black pepper
How to Make Breakfast Biscuits and Gravy
- Preheat your oven to 425°F. Trust me, getting that oven nice and hot is crucial for achieving biscuit perfection.
- Line a baking sheet with parchment paper — no one likes a sticky mess.
- In a large bowl, sift together the flour, baking powder, and salt. This is where the magic starts.
- Grab your pastry blender or two knives and cut in the butter. You’re aiming for a texture ranging from cornmeal to pea-sized bits. A quick blitz in the food processor works if you’re feeling fancy.
- Using a fork, mix in the yogurt followed by the milk. The dough should be soft and slightly sticky, so don’t sweat it if it feels a bit wet.
- Turn the dough onto a lightly floured surface and knead briefly — just enough to hold everything together. Roll it out about 1 1/4 inches thick and cut into rounds.
- While your biscuits are getting golden in the oven, let’s tackle the sausage. Combine all the sausage ingredients in a large bowl, mixing them up with your hands. Don’t be shy!
- Form small patties and cook them in a skillet over medium-high heat until crisp and browned on the outside, cooked through inside. About 8 minutes per side should do it.
- As the sausage sizzles, inhale that aromatic blend of sage and spices. It’s a thing of beauty!
Cook’s Notes
Here’s the deal: biscuits are one of those things that get better with practice, so don’t stress if your first batch isn’t perfect. Keep the butter cold for the flakiest layers, and don’t overwork the dough. You can make the sausage mixture ahead of time and keep it in the fridge for up to a day — just form and fry when ready. Leftover biscuits? Pop them in an airtight container, and they’ll last a couple of days; they’re great reheated in the oven.
Make It Your Own
Switch things up and put your own spin on this classic dish with these ideas:
- Swap the pork sausage for turkey sausage if you’re leaning towards a lighter option.
- Add a pinch of red pepper flakes if you crave a bit of heat in your morning.
- For a vegetarian twist, use crispy tofu instead of sausage.
- Throw in some cheddar cheese into the biscuit dough for an extra layer of flavor.
If you try this, I’d love to hear how it turns out — drop a comment or tag me! Cooking is all about sharing the love, and I can’t wait to see your versions and hear your stories. Enjoy every bite! 🍽️
Related update: Breakfast Biscuits and Gravy
Related update: Easy Baked Parmesan Chicken
Related update: Loaded Veggie Omelet

The other day, I found myself in one of those classic kitchen dilemmas. It was a chilly autumn afternoon, I was craving something warm and spicy, and I swear, every recipe I came across called for ingredients I didn’t have on hand. Determined not to let my sweet tooth win, I started rummaging through my pantry, and that’s when it hit me: fat-free gingerbread cookies! Yes, you read that right. These cookies are just what you need when you crave that cozy, ginger-spiced goodness but want to keep things light. Trust me, these cookies are packed with bold flavors, and you might already have most of these ingredients at home. Plus, they’re soft, chewy, and perfect for an afternoon treat or a holiday gathering.
Jump to Recipe
What You’ll Need
Okay, so these cookies are awesome because aside from being fat-free, they use simple ingredients that pack a punch. Here’s what you’ll need:
- All-purpose flour
- Whole wheat flour
- Baking soda
- Salt
- Ground ginger
- Cinnamon
- Ground cloves
- Black pepper
- Fresh ground nutmeg
- Ground allspice
- Dark brown sugar
- Blackstrap molasses
- Apple sauce
- Vanilla extract
- Maple extract
- Chai concentrate
- Egg whites
- Candied ginger
- Granulated sugar
- Cinnamon (for rolling)
How to Make Fat Free Gingerbread Cookies
- Start by sifting together the all-purpose flour, whole wheat flour, baking soda, salt, and all your spices. You’ll know it’s ready when the spices smell like a warm hug.
- In a large mixing bowl, combine the dark brown sugar, blackstrap molasses, apple sauce, vanilla extract, maple extract, and chai concentrate. Use an electric mixer and beat it for about four minutes until everything’s smooth and luscious.
- Add the egg whites into your molasses mixture. Beat for another minute until the whites are completely mixed in.
- Slowly incorporate your sifted dry ingredients into the wet mixture. Beat until everything is fully combined, creating a rich, aromatic dough. Stir in the candied ginger bits for that extra zing.
- Cover the dough and let it chill in the fridge for at least an hour. I personally prefer letting it chill overnight for a deeper flavor.
- When you’re ready to bake, preheat your oven to 350°F (175°C). Line a baking sheet with parchment paper or lightly grease it.
- Mix the granulated sugar with a dash of cinnamon in a shallow bowl. Scoop a tablespoon of dough, coat it in the cinnamon sugar, and shape it into a ball.
- Place each dough ball on the prepared baking sheet, leaving about three inches of space between them. They will spread out as they bake.
- Bake the cookies for 10-12 minutes until they’re beautifully puffed and you start to smell that delightful gingerbread aroma.
- Once out of the oven, transfer the cookies to a wire rack to cool. Trust me, waiting for them to cool is the hardest part!
Cook’s Notes
Baking these cookies is pretty straightforward, but here are a few tips to ensure they turn out perfect every time. First, don’t skip the chilling step. It helps the flavors meld together and keeps the dough from spreading too much. If you’re planning ahead, you can make the dough and keep it in the fridge for up to two days. Just remember to let it sit at room temperature for a few minutes if it’s too hard to scoop. For leftovers, these cookies stay fresh for about a week if kept in an airtight container. You can also freeze them for longer storage—just thaw before serving.
Make It Your Own
These cookies are versatile, so feel free to experiment with these ideas:
- Swap the candied ginger for chocolate chips if you’re feeling a chocolate craving coming on.
- Use pumpkin pie spice instead of the individual spices for a quicker spice mix.
- Replace the chai concentrate with a strong brewed tea of your choice for a subtle flavor twist.
- If you want a little crunch, add some finely chopped nuts like pecans or walnuts.
If you try this, I’d love to hear how it turns out—drop a comment or tag me! Baking is all about experimenting and having fun, so don’t be afraid to make these cookies your own. Enjoy every spicy, soft bite!
Related update: Fat Free Gingerbread Cookies
Related update: Triple Citrus Cake

It was one of those chilly October afternoons where the air feels crisp and the leaves are doing that magical thing they do—turning into a vibrant sea of reds, oranges, and yellows. I was craving something cozy but with a twist, something that fit the season without being a pumpkin-flavored cliché. That’s when the idea for Cranberry-Orange Pistachio Chip Cookies came to me. These cookies are the perfect blend of tart cranberries and zesty orange, with the unexpected crunch of pistachios and creamy white chocolate morsels. They’re a little bit fancy, but still easy enough to whip up on a whim. I promise, once you try them, you’ll want to make them part of your regular cookie rotation.
Jump to Recipe
What You’ll Need
I bet you already have most of these ingredients lounging in your pantry, just waiting to be transformed into something wonderful.
- 2 1/4 cups all-purpose flour
- 1 teaspoon baking soda
- 1/2 teaspoon salt
- 1 cup (2 sticks) butter, softened
- 3/4 cup granulated sugar
- 3/4 cup packed brown sugar
- 1 teaspoon vanilla extract
- 2 large eggs
- 2 cups white nestlé® toll house® premier morsels
- 1 cup chopped pistachios
- 1 cup dried craisins
- 1/2 cup chopped candied orange peel
How to Make Cranberry-Orange Pistachio Chip Cookies
- Preheat your oven to 375°F (190°C). The anticipation starts now as the kitchen warms up and gets ready for some cookie magic.
- In a small bowl, whisk together the flour, baking soda, and salt. This is your dry mix—it’s the base that holds all the other goodies together.
- In a large bowl, beat the butter, granulated sugar, brown sugar, and vanilla extract until creamy. You want it smooth and luscious, like frosting but thicker.
- Add the eggs one at a time, beating well after each addition. The batter will start to look pale and fluffy.
- Gradually beat in the flour mixture. Go slow here; you don’t want a flour storm in your kitchen.
- Fold in those beautiful white morsels, pistachios, dried cranberries, and orange peel. This is where the magic happens—the cookies are getting their personality.
- Drop rounded tablespoonfuls of dough onto parchment-lined baking sheets. Space them out, they need room to spread their deliciousness.
- Bake for 9 to 11 minutes or until golden brown. You’ll know they’re ready by the dreamy aroma and the slight browning at the edges.
- Cool on the baking sheets for a couple of minutes before moving to wire racks. This is the hardest part—waiting for them to cool completely.
Cook’s Notes
These cookies are a bit of a showstopper, but they’re really straightforward. A few tips:
- Use the freshest pistachios you can find; their flavor really shines here.
- If you don’t have candied orange peel, you can make your own or use fresh zest in a pinch—just a little extra sugar will balance the tartness.
- These cookies are perfect for making ahead. You can freeze the dough balls, then bake as needed for a fresh cookie fix.
- Leftovers will stay delicious in an airtight container for about a week, but honestly, they’ll probably disappear way before then.
Make It Your Own
Want to tweak these cookies to better suit your taste buds or pantry stash? Here are some ideas:
- Swap the pistachios for almonds or walnuts if you prefer a different nutty note.
- Try semi-sweet chocolate chips instead of white morsels for a deeper chocolate experience.
- If dried craisins aren’t your thing, swap them out for dried cherries or even chopped dried apricots.
- Add a hit of spice with a teaspoon of ground cinnamon or cardamom for a warm, cozy vibe.
If you try this, I’d love to hear how it turns out—drop a comment or tag me! Happy baking, and may your kitchen be filled with the sweet scent of these glorious cookies.
Related update: Cranberry-Orange Pistachio Chip Cookies
Related update: Fat Free Gingerbread Cookies
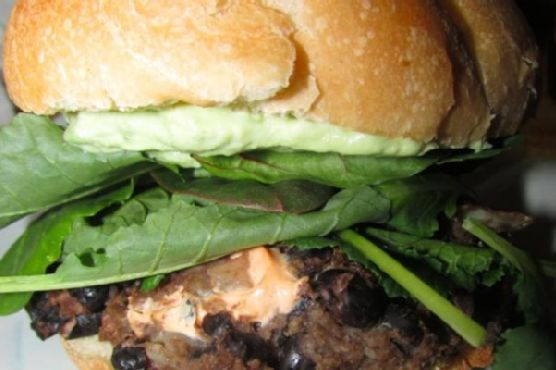
Last Tuesday was one of those days where time slipped through my fingers like sand, and suddenly it was dinnertime, and I had no plan. I stared into the fridge, hoping for inspiration to magically appear, and then my eyes landed on a can of black beans. Instantly, I knew it was time to whip up one of my lifesavers: Chipotle Cheese Stuffed Black Bean Burgers with Avocado Creme. These beauties are my go-to when I need something quick but still wanna impress myself (and anyone else lucky enough to be around). They're packed with flavor, and honestly, who can resist anything stuffed with cheese? Plus, they're vegetarian-friendly and can be made with stuff you're likely to have on hand. They're savory, slightly spicy, and the creamy avocado topping just brings it all home.
Jump to Recipe
What You'll Need
Chances are you already have most of this list tucked away in your pantry or fridge. Here's what you'll need to get these burgers sizzling:
- Canned black beans
- Yellow diced onion
- Diced mushrooms
- Egg
- Panko bread crumbs
- Cumin
- Chipotle chili powder
- Salt and pepper
- Wild olive oil
- Approx cream cheese spread
- Hamburger buns
- Cheese
- Spinach and tomato (optional)
- Avocado
- Sour cream
- Lime juice
- Sea salt
How to Make Chipotle Cheese Stuffed Black Bean Burgers with Avocado Creme
- Start by swirling a bit of olive oil in a skillet over medium heat. Toss in the diced mushrooms and onions. Sauté until they're softened and the aroma fills your kitchen, seasoning with a pinch of salt and pepper as you go.
- Drain the black beans and pour them into a medium bowl. Use a fork to mash them up; aim for a texture that's mostly smooth with some chunks left for interest.
- Mix in those sautéed mushrooms and onions, followed by the egg and bread crumbs. This is where it all starts coming together.
- Spice things up by adding cumin and a generous pinch of chipotle chili powder. Stir until everything is well combined, and take a moment to admire your handiwork.
- Now for the fun part: roll the mixture into burger patties. Whether you go for sliders or full-size is up to you. Create a little indent in the center of each and spoon in some cream cheese spread. Carefully mold the burger around the cheese, sealing it inside like a treasure.
- Heat a second swirl of olive oil in your skillet over medium heat. Cook the burgers two at a time, searing each side to a delicious golden brown, about 4 minutes on each side. If you're feeling cheesy, add sliced cheese on top now and cover the skillet to let it melt perfectly.
- While the burgers are sizzling, make your avocado creme. In a food processor or blender, combine avocado, sour cream, lime juice, and sea salt. Blend until smooth, tasting along the way to adjust the lime or sour cream to your liking.
- To serve, place each hot, cooked burger on an open toasted bun, top with optional spinach and tomato, and finish with a generous scoop of avocado creme before sandwiching it all with the top bun. Dig in while it's warm!
Cook's Notes
One of the best things about these burgers is how flexible they are. You can make the patties ahead of time and store them in the fridge for a day or two, or freeze them for up to a month. Just be sure to thaw completely before cooking. If you find your patties are falling apart, try adding a bit more bread crumbs to bind them better.
Leftovers, if you have any, are great for lunch the next day. Simply reheat in a skillet or microwave and enjoy them as they are, or get creative and crumble them into a salad or wrap.
Make It Your Own
- Swap the cream cheese for goat cheese for a tangier filling.
- For a vegan version, replace the egg with a flaxseed egg and use vegan cream cheese and cheese.
- If you’re not a fan of mushrooms, substitute them with finely chopped bell peppers.
- Add some chopped jalapeños to the mix for an extra spicy kick.
If you try this, I'd love to hear how it turns out — drop a comment or tag me! I always enjoy seeing the twists and tweaks you come up with. Happy cooking!

It was one of those early spring afternoons when the sun was just starting to peek through the clouds, promising warmer days ahead. I was rifling through my pantry, craving something sweet but not overly indulgent. You know, a little treat to go with my afternoon tea. That’s when I remembered this Easter Nest Sweet Cake recipe. It’s a delightful blend of flavors and textures — a soft cake topped with a tangy sour cream-royal icing and the crunch of pistachios. Perfect for those days when you want something that feels special but comes together without too much fuss. Plus, it makes for a show-stopping centerpiece at any Easter gathering or spring brunch.
Jump to Recipe
What You’ll Need
You might find that most of these ingredients are already in your kitchen, just waiting to be transformed into something magical. Here’s what you’ll want to gather:
- Unsalted butter – because decadent is the way to go.
- Brown sugar – for that rich, caramel-like sweetness.
- Eggs
- Flour
- Baking powder
- Sour cream – adds a moist and tangy kick to the cake.
- Icing sugar
- Lemon juice – brings brightness to the icing.
- Egg white
- Pistachios, unshelled – for a nutty crunch.
- Green food coloring – optional, but it gives the icing a festive touch.
How to Make Easter Nest Sweet Cake With Sour Cream-Royal Icing and Pistachios
- Preheat your oven to 190°C/375°F. Lightly grease a ring cake pan and set it aside. The anticipation starts here.
- In a medium bowl, use an electric mixer to beat the brown sugar, eggs, and unsalted butter until creamy — think smooth and dreamy. The sugar granules should almost disappear.
- Add the sour cream and flour to the mixture. Beat for a couple of minutes until everything is well combined. The batter should be thick and luscious.
- Pour the batter into your prepared cake pan, smoothing the top with a spatula. Bake for about 20 minutes. The cake should be golden brown and a skewer inserted in the center should come out clean.
- Let the cake cool in the pan for a few minutes, then transfer to a wire rack. The aroma is irresistible, but patience will pay off.
- For the icing, beat the egg white using a standard mixer until soft peaks form. Add lemon juice, icing sugar, and a drop of green food coloring if you’re feeling festive. Beat for a few more seconds until everything is just combined.
- Once the cake is cool, pour the royal icing generously over the top, letting it cascade down the sides. There’s something so satisfying about this step.
- Sprinkle with chopped pistachios, and get creative with your decorations. The crunch and subtle saltiness of the pistachios are a game-changer.
Cook’s Notes
Here’s the thing about this cake — it’s quite forgiving. If you find yourself without a ring pan, a regular cake pan or even a loaf pan will do in a pinch. Just keep an eye on the baking time. Store leftovers (if there are any!) in an airtight container at room temperature for up to three days. The icing may lose a little of its shine, but the flavor remains on point. If you’re planning ahead, bake the cake a day before and ice it on the day of serving for maximum freshness.
Make It Your Own
With a few tweaks, you can tailor this cake to suit different tastes or occasions:
- Swap the pistachios for toasted almonds for a different nutty flavor.
- If you’re not a fan of sour cream, try using Greek yogurt for a similar tanginess.
- Feeling adventurous? Add a tablespoon of shredded coconut to the batter for extra texture.
- For a citrus twist, incorporate the zest of one lemon into the cake batter.
If you try this, I’d love to hear how it turns out — drop a comment or tag me! And if you have any creative twists on this recipe, don’t keep it to yourself; I’m always on the lookout for new ideas. Happy baking!
Related update: Pumpkin Pecan Streusel Cake - gluten free, soy free, vegan

Thanksgiving at my place is never complete without a little bit of chaos and a lot of laughter. One year, I thought I’d try my hand at a new dessert after we had a bit of a mishap with the pumpkin pie (don’t ask!). In the spirit of whimsy and fun, I concocted these adorable little OREO Turkeys that not only saved the day but also became a family favorite. These treats are deceptively simple to make and a delightful project to get kids involved in. Plus, who can resist the combination of OREO cookies and chocolate? Trust me, once you try them, they’ll be a staple at every Thanksgiving feast. Jump to Recipe
What You’ll Need
This ingredient list is a breeze, and chances are you’re already stocked up on most of it, especially if you’ve got a sweet tooth like me!
- OREO cookies (3 cups, crushed)
- Cream cheese (softened)
- Sweet semi baking chocolate (melted)
- Candy corn
- Candy eyes
- Icing (as glue)
How to Make OREO Turkeys for Thanksgiving
- First up, grab a package of OREO cookies and crush them up finely. We’re talking almost powdery, so they mix well.
- Mix the crushed OREO cookies with softened cream cheese until you have a smooth, pliable dough. It should feel like a rich, chocolatey clay.
- Roll this mixture into one-inch balls. They should be small enough to handle easily but big enough to hold their own as a turkey body.
- Pop those balls into the freezer for a quick chill — about 10 minutes should do the trick. This helps them firm up for the chocolate dip.
- Dip each ball into the melted chocolate, making sure it’s completely coated, and place them on a cookie sheet lined with wax paper. The chocolate should be smooth and glossy.
- Refrigerate the chocolate-coated balls for 15 minutes to an hour. This gives them a nice, firm shell.
- Now the fun part: decorating! Stick 5 candy corn pieces into the back of each ball to create colorful tail feathers.
- Use icing as glue to attach candy eyes towards the front top of the ball. We want those eyes peering out cutely!
- For the finishing touch, take a candy corn and cut it into pieces. Use the white tip for a nose and stick it under the eyes, then use the orange pieces as feet. Your turkey should look absolutely adorable!
Cook’s Notes
If your cookie balls are too sticky to roll, try chilling the mixture for a bit longer. It should be firm yet pliable. Don’t worry if your OREO Turkeys aren’t perfect; their charm is in their handmade look! You can make these a day ahead and store them in the refrigerator to keep the chocolate nice and solid. Leftovers (if there are any) can be kept in an airtight container for up to a week.
Make It Your Own
- Swap the candy eyes with mini chocolate chips. They’re just as cute and give a different texture.
- Use white chocolate instead of semi-sweet for a sweeter, more vibrant look.
- Try using different flavored OREOs, like mint or peanut butter, for a twist on the classic flavor.
- Add a dash of cinnamon to the cream cheese mixture for a subtle, warm hint of spice.
If you try this recipe, I’d love to hear how it turns out — drop a comment or tag me on social media! Your feedback and creativity always make my day. Happy Thanksgiving, and may your kitchen be filled with delightful chaos!
Related update: How to Make OREO Turkeys for Thanksgiving

Picture this: it’s a Tuesday evening, and the only thing standing between me and a total kitchen meltdown is the comforting prospect of pulling together Grandma Inez’s Pineapple Pie. I was staring down a pantry that looked more like a post-tornado disaster zone than the well-stocked haven I imagined. But there it was, hidden among the cans of neglected beans and a jar of something unrecognizable — a lone can of pineapple. That’s when I remembered this pie, a dessert that feels like a tropical vacation and a cozy hug all rolled into one. It’s quick, it’s a little quirky, and it’s a whole lot of delicious. A pie so luscious and breezy, it practically makes the kitchen clean itself. Well, almost.
Jump to Recipe
What You’ll Need
If you’ve got a stocked baking cupboard, you’re probably halfway there. The beauty of this pie is that it doesn’t ask for much — just a bit of finesse and a lot of love.
- 1 pre-baked pie crust
- 1 can crushed pineapple (keep the juice!)
- 1 cup sugar (divided)
- 1/4 cup butter
- 3 tablespoons cornstarch
- 1 teaspoon vanilla
- 3 egg yolks
- 3 egg whites
- 1/4 teaspoon cream of tartar
- 1/4 teaspoon salt
- 1/2 cup water
How to Make Grandma Inez’s Pineapple Pie
- Start by creaming 3/4 cup of the sugar, butter, and egg yolks in a medium saucepan. Use a hand-held mixer to make it fluffy — a workout for your good arm, just until it’s pale and dreamy.
- Blend in the cornstarch and vanilla until smooth. It should look like a creamy potion, sweet and inviting.
- Add the water and that whole can of crushed pineapple, juice and all. Mix again, until everything feels like it’s come to a tropical accord.
- Transfer your saucepan to the stove and set it over medium heat. Stir constantly — think of it as a zen exercise — until the mix thickens. You’ll know it’s ready when it can coat the back of a spoon.
- Pour this luscious filling into your pre-baked pie crust, spreading it out like you’re tucking it into bed.
- Now, whip the egg whites until they’re foamy, like the top of a cappuccino. Gradually add the remaining 1/4 cup sugar, cream of tartar, and salt. Keep whipping until soft peaks form and the mixture is glossy like a magazine finish.
- Spread the meringue over the cooled pie. Use the back of a spoon to create little peaks, like waves on an ocean.
- Bake in a preheated 400°F oven for just a few minutes. Stay close! You want the meringue to be golden, not torched.
- Let it cool completely before slicing — if you can wait that long. Store in the fridge and sneak slices whenever you need a pick-me-up.
Cook’s Notes
A few tips to keep this pie from veering off course:
– Make sure your pie crust is completely cool before adding the filling — we want a crispy base, not a soggy one.
– Meringue can be a bit temperamental. Avoid making it on a humid day, or it might weep. No one likes a sad pie.
– The pie is best eaten within a day or two, but trust me, it rarely makes it that long. If you’ve got leftovers, keep them covered in the fridge. The meringue might lose its crispness, but it’ll still taste divine.
Make It Your Own
Here’s where you get to flex your creative muscles:
- Swap the pineapple for mango or passion fruit for a different tropical twist.
- Add a hint of ginger or nutmeg to the filling for a warm-spiced version.
- Use almond extract instead of vanilla for a nutty, nuanced flavor.
- Try topping with coconut flakes post-bake for an extra layer of texture and flavor.
If you try this, I’d love to hear how it turns out — drop a comment or tag me! Your kitchen is about to smell amazing, and I can’t wait for you to taste this slice of sunshine. Enjoy every bite!
Related update: Grandma Inez’s Pineapple Pie
Related update: How to Make OREO Turkeys for Thanksgiving

Last winter, I found myself staring down a half-eaten box of candy canes—a festive gift from my overly enthusiastic neighbor. I adore peppermint, but there’s only so much peppermint tea one can drink! Desperate to create something my friends and family would devour, it hit me: those candy canes needed a sweet partner. Enter my Candy Cane Chocolate Marshmallows. Perfect for a cozy evening in your favorite fuzzy socks, these treats are surprisingly easy to make and look infinitely more impressive than the effort they require. They’re the kind of thing you whip up to wow guests during holiday gatherings or to simply satisfy that post-dinner sweet tooth while binge-watching your favorite show. Trust me, they’re a hit! Jump to Recipe
What You’ll Need
This recipe is like a scavenger hunt in your pantry; chances are you already have most of the goodies tucked away. Here’s what you’ll need:
- Candy canes – the stars of the show!
- Dark chocolate – for that rich, bittersweet contrast.
- Marshmallows – go for the big, fluffy kind.
- Milk chocolate – adds a creamy sweetness to balance the dark chocolate.
How to Make Candy Cane Chocolate Marshmallows
- First, let’s get those candy canes ready. Grab a few and crush them using the bottom of a sturdy glass or a mallet. You want pieces small enough to stick but not so tiny that they turn to dust. Set them aside.
- Set up a double boiler by placing a heat-safe bowl over a pot of simmering water. Make sure the bottom of the bowl doesn’t touch the water. Add the dark and milk chocolate to the bowl, stirring occasionally until the mixture is smooth and glossy.
- Now for the fun part—dip each marshmallow into the melted chocolate, ensuring it’s nicely coated but not drowning. Let the excess drip off back into the bowl.
- Immediately roll the chocolate-dipped marshmallow into the crushed candy canes. The pieces should stick to the chocolate, creating a delightful crunchy coating.
- Place each finished marshmallow on a sheet of wax paper. They’ll need to chill in the fridge for at least an hour, or until the chocolate has fully hardened.
Cook’s Notes
These little delights are pretty forgiving, so don’t stress if things get a bit messy. Here are a few pointers to keep you on track:
- If you don’t have a double boiler, don’t sweat it. Use a microwave in short bursts to melt the chocolate, stirring in between.
- Store your marshmallows in an airtight container in a cool, dry place. They should last up to a week, but honestly, they’ll probably disappear much sooner!
- To make ahead, prepare them up to two days in advance. They’re the perfect treat to have waiting for last-minute guests or unexpected sweet cravings.
Make It Your Own
- Try using white chocolate for a sweeter, milder twist. It pairs beautifully with peppermint!
- For a nutty crunch, roll the chocolate-coated marshmallows in finely chopped hazelnuts instead of candy canes.
- If you’re feeling adventurous, add a pinch of cayenne pepper to the melted chocolate for a spicy kick.
- Not a fan of peppermint? Substitute with crushed graham crackers and sprinkle with a touch of cinnamon for a s’mores vibe.
If you try this, I’d love to hear how it turns out—drop a comment or tag me in your marshmallow masterpiece! Happy indulging, and may your winter be as sweet as these treats!
Related update: Candy Cane Chocolate Marshmallows
Related update: Grandma Inez’s Pineapple Pie
Related update: Tuna and Tofu Cold Dish
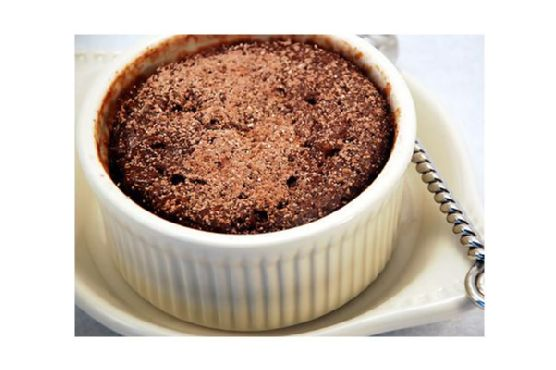
It was one of those evenings where you stare into your pantry hoping for a miracle, and it just magically happens! I had a sweet tooth that just wouldn’t quit, but the thought of baking a whole cake felt like running a marathon in heels. Ever been there? Enter: the 2 Minute Chocolate Yum. It’s that indulgent treat that saves you from dessert FOMO when you’re short on time and ingredients. Seriously, it’s like a chocolate hug in a mug. Imagine something that’s as easy as making a cup of coffee but infinitely more rewarding. Just a quick whip and zap, and you’ve got a dessert that feels like it took way more effort than it did. Also, if you’ve got a sudden guest or a cranky kid demanding sweets, this is your lifesaver.
Jump to Recipe
What You’ll Need
This recipe is a pantry hero; chances are, you’ve got most of these on hand. Here’s what you’ll need to whip up some chocolate magic:
- Cocoa powder
- Egg
- Flour
- Milk
- Oil
- Salt
- Sugar
- Vanilla
How to Make 2 Minute Chocolate Yum
- In a small mixing bowl, combine the cocoa powder, egg, flour, milk, oil, salt, sugar, and vanilla. Whip them together until the mixture is smooth and glossy, much like a velvety chocolate drizzle.
- Divide the batter evenly between two 6-8 oz. ramekins. Fill them a little over halfway full so they have room to puff up in the microwave.
- Microwave one ramekin at a time for about 2 minutes. You’ll know it’s done when the cake is puffed and looks like it’s ready to burst with chocolatey goodness.
- Serve immediately. Top with a scoop of ice cream, a dollop of whipped cream, or just a sprinkle of powdered sugar and cocoa for that minimalist vibe.
Cook’s Notes
Let’s keep it real: microwaves vary, so you might need to adjust the cooking time based on your machine’s mood swings. Start with 90 seconds if you’re unsure and then zap it in 10-second intervals until perfect. If you want to save some batter for later, it holds up well covered in the fridge for a day. Just give it a good stir before microwaving. Stuck with leftovers? Unlikely, but if that happens, you can refrigerate and reheat gently. The texture might change a bit, but it’ll still hit the spot.
Make It Your Own
- Black Forest Twist: Add a spoonful of cherry pie filling in the middle of the batter before cooking for a luscious surprise.
- Nutty Buddy: Stir in a tablespoon of peanut butter for a chocolate-peanut butter dream.
- Minty Fresh: A few drops of peppermint extract can turn this into a festive treat.
- Spice It Up: Add a pinch of cinnamon or chili powder for a surprising kick.
If you try this, I’d love to hear how it turns out! Drop a comment or tag me on social media with your chocolatey creations. Keep those sweet moments coming!
Related update: 2 Minute Chocolate Yum
Related update: Candy Cane Chocolate Marshmallows
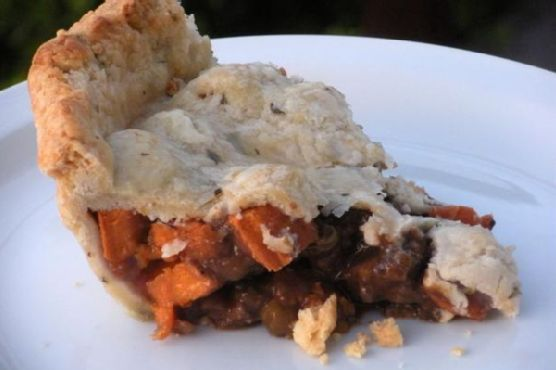
It was a Wednesday, smack in the middle of a busy week, when I found myself staring at a fridge full of mismatched leftovers and a craving for something hearty. A glimpse of sweet potatoes and a package of lamb sparked an idea — Lamb & Sweet Potato Pot Pie. It’s one of those meals that’s worth every step, filling the kitchen with cozy aromas and rewarding you with a golden, flaky crust. Plus, it’s a great way to transform humble ingredients into something that feels like a hug wrapped in pastry. If you’re in the mood for a little kitchen adventure with a comforting payoff, this recipe is just the ticket.
Jump to Recipe
What You’ll Need
Chances are you already have most of these ingredients in your pantry or fridge. Here’s what makes this pot pie special:
- Lamb
- Sweet potatoes
- Bay leaf
- Black pepper
- Butter
- Caraway seeds
- Celery stalks
- Cornstarch
- Demi glace
- Flour (used twice)
- Fresh rosemary
- Fresh thyme
- Garlic
- Ice water
- Kosher salt
- Lemon zest
- Milk
- Olive oil
- Orange zest
- Frozen peas
- Crust
- Red onion
- Red wine
- Shortening
- Sugar
- Water
How to Make Lamb & Sweet Potato Pot Pie
- Start with the crust. Combine the flour, sugar, fresh rosemary, fresh thyme, and salt in a large bowl. Add chilled butter and use a pastry blender to mix until it resembles coarse cornmeal.
- Integrate the shortening into your flour-butter mix until just combined. Gradually add ice water, mixing well after each tablespoon, until the dough begins to stick together.
- Divide the dough into two even balls, dust lightly with flour, and wrap in plastic. Let them chill in the fridge for at least an hour.
- For the lamb, toss it with salt, pepper, caraway seeds, garlic, and flour, and set aside for a bit.
- Swirl some olive oil in a deep, wide pan on medium heat. Add the lamb and cook it until just browned, then transfer to a plate.
- In the same pan, add a touch more oil if needed, and scrape up those flavorful drippings. Add the red onion and celery, cooking until they soften and turn translucent.
- Pour in the red wine and demi-glace, stirring well, then add the lamb back with the peas and bay leaf. Cover the pan, reduce to a simmer, and cook for about 15 minutes.
- Stir together water and cornstarch, pour into the lamb mixture, and mix well. Add in the sweet potatoes, cooking for another 5-7 minutes. Remove from heat and let cool completely. Remember to fish out that bay leaf!
- Roll the chilled dough on a floured surface for the bottom crust, place it in a 9-inch pie dish, and trim edges. Put it in the fridge to stay cool while you roll the top crust.
- Pour the cooled filling into the bottom crust. Top with the rolled-out dough for the top crust and trim the edges if necessary.
- Crimp the edges to seal, and chill the whole pie in the fridge. A quick chill in the freezer for about 2-4 minutes if the dough feels soft will also work wonders.
- Brush the top crust with milk just before baking. Bake in a preheated oven at 375 degrees for 45-50 minutes, until the crust is golden brown and fragrant.
Cook’s Notes
Always ensure your dough is well chilled to ensure a flaky crust. If it’s warm, it can become a soggy mess, so over-chilling is better than under-chilling. You can let the filling cool completely in the fridge before assembling to keep it manageable. This pot pie is a great candidate for make-ahead meals; assemble it in advance and bake it right before dinnertime. Leftovers stay tasty for up to 3 days when refrigerated.
Make It Your Own
- Swap the lamb for chicken thighs for a lighter but equally delicious version.
- Replace sweet potatoes with regular potatoes if that’s more your style.
- Use vegetable broth instead of demi-glace for a different depth of flavor.
- Add mushrooms to the filling for an earthier taste profile.
If you try this, I’d love to hear how it turns out — drop a comment or tag me on social media! It’s always a joy to see your spins on these recipes. Enjoy every flaky, savory bite!
Related update: Lamb & Sweet Potato Pot Pie
Related update: Swiss Chard Wraps

It was one of those afternoons when the sun was too hot, and all I could think of was something cool and creamy to beat the heat. The store-bought ice cream in my freezer just didn’t seem to cut it. I craved something more indulgent—a little scoop of homemade bliss I could savor slowly. That’s when I remembered this magic trick of a recipe for homemade coffee ice cream. It’s the kind of treat that sneaks in the backdoor of your afternoon and turns an ordinary day into something special. All you need is a few pantry staples and a bit of patience. Trust me, this coffee ice cream will make your taste buds dance and your kitchen smell like a cozy coffee shop. It’s the ultimate indulgence, perfect for a quick escape from the everyday grind or for impressing your dinner guests without breaking a sweat.
Jump to Recipe
What You’ll Need
The beauty of this recipe is its simplicity. Chances are, your kitchen already holds most of the magic beans for this spell. Here’s what you’ll need to whip up this silky delight:
- 2 cups of cream
- 1 cup of milk
- 3/4 cup of sugar
- 1 tablespoon of coffee granules
- 5 egg yolks
- 1 teaspoon of vanilla extract
How to Make Homemade Coffee Ice Cream
- In a medium, heavy saucepan, combine the cream, milk, sugar, and coffee granules. Heat gently over medium until it just begins to boil, filling your kitchen with a fragrant aroma. Remove from heat and let it sit while you move on to the eggs.
- In a medium bowl, beat the egg yolks until they’re smooth like sunshine. Slowly whisk in a cup of your hot coffee cream, taking care not to scramble the eggs.
- Add a dash of vanilla extract to this warm blend, because why not add a hint of sweetness to this love affair?
- Returning to your saucepan, gradually introduce the egg mixture by pouring it in a steady stream, stirring constantly. Cook over low heat until the mixture coats the back of a spoon, about 4-5 minutes. You’ll know it’s ready when it’s luxuriously thickened.
- Remove from heat and pour through a fine mesh strainer into a clean container. This step ensures your ice cream is as smooth as a jazz singer’s voice.
- Cover with plastic wrap, pressing it directly onto the surface to prevent a skin from forming. Chill in the fridge for at least 2 hours—perfect time to catch up on your favorite show!
- Once chilled, pour the mixture into an ice cream machine and churn according to the manufacturer’s instructions until it reaches a soft serve consistency.
- Transfer to a plastic container and freeze for a few hours to firm up. Before serving, let it sit out for 5-10 minutes to soften to the perfect scooping texture.
Cook’s Notes
This recipe is forgiving and rewards patience. Make sure you keep the temperature low when cooking with the egg yolks to avoid unpleasant curdling. Straining the mixture is not optional—it’s essential for that ultra-smooth texture. If you’re making this ahead of time, the mixture can be left to chill overnight in the fridge. Store your ready ice cream in an airtight container to keep it fresh; it should last about a week, but I doubt it will stick around that long!
Make It Your Own
- Want a more robust coffee flavor? Swap out regular coffee granules for an espresso version.
- For a luscious mocha twist, add a tablespoon of cocoa powder when combining the cream, milk, sugar, and coffee.
- Looking to impress with a boozy treat? Fold in a shot of coffee liqueur right before churning.
- Try using coconut milk instead of cow’s milk for a tropical vibe—it adds an unexpected twist and creaminess.
If you try this, I’d love to hear how it turns out—drop a comment or tag me! Whether you’re savoring this on a quiet afternoon or sharing it with friends, I hope it brings a little extra joy to your day.
Related update: Home made coffee ice cream
Related update: Home made coffee ice cream