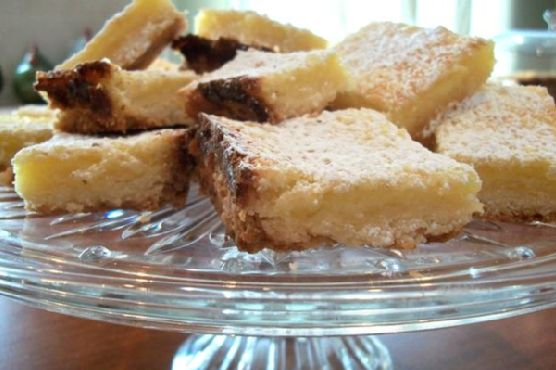
Luscious Lemon Bars | Made by Meaghan Moineau

Picture this: it’s a lazy Sunday afternoon, and I’m inevitably in the mood for something sweet and tangy that won’t monopolize my entire day. My eyes wander to the lemons on my counter, practically begging to be transformed into something divine. Enter: Luscious Lemon Bars. These bars hit the sweet spot between indulgent and refreshingly light—they’re the perfect antidote to a gray day or a midweek slump. Plus, with a buttery crust and a gooey lemony filling, it’s one of those recipes that’s way more impressive than the effort you put in. Intrigued yet? Let’s get those lemons going.

Jump to Recipe

What You’ll Need

The beauty of this recipe is that it relies on staple ingredients that are probably already lounging in your pantry. We’re talking about those trusty items you turn to when the craving strikes. Here’s what you’ll need:

  • 1 cup of flour
  • 1/2 cup of softened butter
  • 1/4 cup of white sugar
  • 2 large eggs
  • 1 cup of white sugar
  • 1/4 cup of flour
  • 1/2 teaspoon of baking powder
  • Juice of 2 lemons (about 1/3 cup)
  • Zest of 2 lemons
  • Powdered sugar for dusting

How to Make Luscious Lemon Bars

  1. First things first: PREHEAT your oven to 350°F. While it’s getting toasty, GREASE a 9×13-inch rectangular cake pan. This ensures your bars will pop out without a fuss later on.
  2. Next, COMBINE the crust ingredients—flour, butter, and white sugar—in a mixing bowl. Use your fingertips to press this crumbly heaven into the pan evenly. No need to overthink it; rustic is our aim here.
  3. Once smooth and even, BAKE the crust for about 20 minutes. You’re aiming for a pale golden brown, the kind of color that tells you it’s ready for the spotlight.
  4. While your crust is getting cozy in the oven, let’s talk FILLING. In a bowl, whisk together the remaining ingredients: eggs, sugar, flour, baking powder, lemon juice, and zest. Whisk it up until it’s smooth and well combined, a sunny yellow mixture that smells irresistible.
  5. When your crust is ready, REMOVE it from the oven and pour the lemon filling over the top. Return the pan to the oven and BAKE for an additional 23-25 minutes. Keep an eye on it; you want the top to be set but not too brown.
  6. Once baked, REMOVE the pan from the oven and allow the bars to cool on a wire rack for about 30 minutes. They need this time to firm up.
  7. To get those perfect squares, CUT the bars in half and use a large flexible spatula to lift each half out. This makes the final cutting much easier and less messy.
  8. Finally, DUST with a good amount of sifted powdered sugar. This isn’t just for looks—it adds a sweet layer that complements the tangy filling. And just like that, you’re DONE!

Cook’s Notes

Don’t rush the cooling process—these bars need it to set properly. If you’re in a hurry, pop them in the fridge after they’ve cooled on the rack a bit. They can be stored in an airtight container for up to a week, but honestly, they’re usually gone by day two. If you’re making them ahead of time, they freeze beautifully. Just wrap them tightly before dusting with sugar, and thaw in the fridge overnight when you’re ready to indulge.

Make It Your Own

Cooking is all about making a recipe fit your tastes. Here are a few ways to tweak these bars:

  • Swap out the lemon for lime for a zesty twist.
  • Mix in some raspberries to the filling for a fruity burst.
  • Use gluten-free flour for a GF-friendly treat.
  • Add a pinch of sea salt to the crust for a salty-sweet contrast.

If you try this, I’d love to hear how it turns out—drop a comment or tag me! Your feedback makes my day and I always enjoy seeing your delicious creations come to life. Happy baking!

Related update: Luscious Lemon Bars

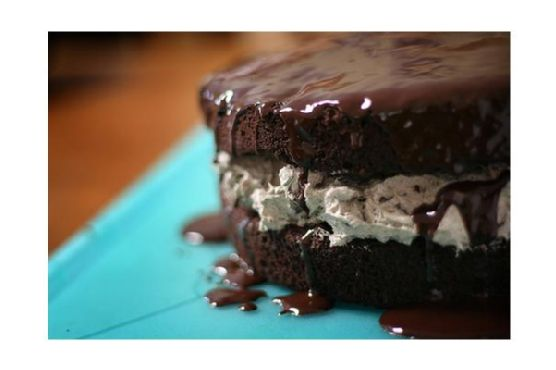
Related update: Oreo Cake

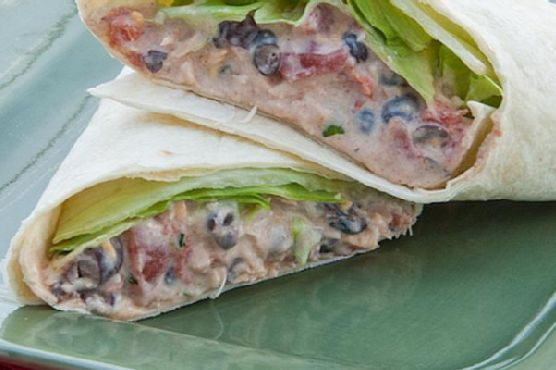
Chicken Enchilada Salad Wraps | Made by Meaghan Moineau

Picture this: It’s a Tuesday night, and you’re dead set on making dinner happen without a trip to the store. As I rummaged through my pantry, I found a can of Swanson Premium Chicken and thought, “Well, this could be interesting!” That’s how these Chicken Enchilada Salad Wraps came to life. They’re the kind of dish that feels like you’ve put way more effort into dinner than you really have. Perfect for when you want something comforting yet fresh and vibrant. These wraps are my go-to when I need a quick meal that doesn’t skimp on flavor. Trust me, they’re a keeper! Jump to Recipe

What You’ll Need

There’s a good chance you already have most of these ingredients hiding in your kitchen. It’s all about those pantry staples coming together to make magic.

  • Light cream cheese
  • Sour light cream
  • Chili powder
  • Cumin
  • Garlic
  • Canned Swanson Premium Chicken
  • Shredded cheddar cheese
  • Diced canned tomatoes
  • Diced green onions
  • Fresh cilantro
  • Lettuce
  • Burrito-sized tortillas

How to Make Chicken Enchilada Salad Wraps

  1. In a medium-sized bowl, blend together the light cream cheese, sour cream, chili powder, cumin, and garlic until smooth. You’ll want the mixture to be creamy with a little bit of a kick – smell those spices bloom!
  2. Gently fold in the shredded cheddar cheese, Swanson Premium Chicken, diced tomatoes, green onions, and fresh cilantro. Make sure everything is evenly mixed so you get a bit of everything in each bite.
  3. Divide the mixture evenly between the tortillas, making sure to spread it to the edges for maximum flavor coverage.
  4. Top each tortilla with a handful of lettuce. This adds a nice crunch and keeps things fresh and light.
  5. Roll up each tortilla burrito-style, tucking in the edges as you go to keep all the goodness inside.
  6. Slice in half if you’re feeling fancy and serve immediately. Enjoy the meld of textures and flavors, from cool and creamy to warm and savory.

Cook’s Notes

These wraps are pretty forgiving, so feel free to adjust the spices to your liking. If you’re a spice lover, a dash of cayenne wouldn’t hurt. They’re best enjoyed fresh but will keep in the fridge for a day or so. Just wrap them tightly in foil or plastic wrap to keep them from drying out.

  • If you’re making them ahead for a lunchbox, keep the lettuce separate until you’re ready to eat to avoid it getting soggy.
  • Got leftovers? They make a surprisingly good quesadilla filling. Just heat a pan and crisp them up until golden!

Make It Your Own

  • Swap the chicken for crispy tofu for a vegetarian twist that still packs in the protein.
  • Use spinach instead of lettuce for a slight nutritional boost and a different kind of crunch.
  • If you’re out of tortillas, this mix works wonderfully as a dip with some crispy tortilla chips.
  • Add some sliced avocado for an extra creamy dimension and a touch of healthy fat.

If you try this, I’d love to hear how it turns out — drop a comment or tag me! Your kitchen adventures always make my day.

Related update: Chicken Enchilada Salad Wraps

Related update: Hyderabadi baghara Baingan

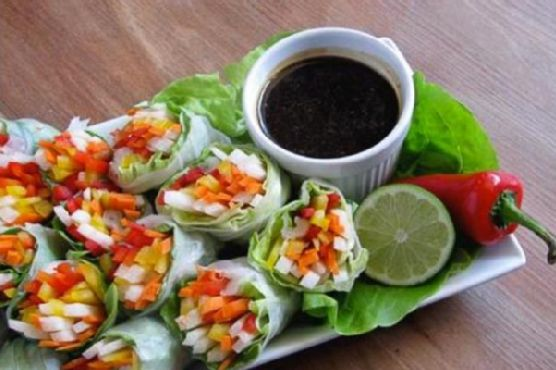
Vegetarian Spring Rolls With Garlic Lime Sauce | Made by Meaghan Moineau

It was one of those frantic weeknights when the thought of cooking anything complicated felt like a Herculean task. The kids were hungry, my partner was stuck in traffic, and the fridge looked like it had been raided by a group of snack-hungry gremlins. That’s when I spotted the package of rice paper hiding behind the milk. In a flash, I knew what to do. These Vegetarian Spring Rolls with Garlic Lime Sauce were going to be our savior. They’re colorful, crunchy, and somehow manage to make you look like a culinary genius with minimal effort. Perfect for a quick dinner fix or when you want to impress without breaking a sweat.

Jump to Recipe

What You’ll Need

The beauty of this recipe is its simplicity — chances are, you already have most of these ingredients lurking around.

  • Rice paper
  • Butter leaf lettuce
  • Carrots
  • Jicama
  • Red bell pepper
  • Yellow bell pepper
  • Thai basil
  • Ginger
  • Garlic
  • Lime
  • Hoisin sauce
  • Sriracha

How to Make Vegetarian Spring Rolls With Garlic Lime Sauce

  1. First, julienne the red and yellow bell peppers, carrots, jicama, and Thai basil. Aim for strips about 1/8 inch thick and 2 inches long, like colorful little matchsticks.
  2. Fill a round pie pan or shallow plate with warm water. Delicately dip one piece of rice paper in the water, ensuring both sides are soaked — but no need to drown them!
  3. Carefully lay the rice paper on a flat, flour towel cloth. Wait about ten seconds for it to soften — it should feel silky and pliable.
  4. Gently peel the rice paper off the cloth and place half a butter leaf lettuce on top. Discard the ribbing to keep things smooth and easy to roll.
  5. Add a delicate layer of each vegetable on top of the lettuce, finishing with a sprinkle of Thai Basil. It’s like art — have fun with it!
  6. To roll: start at one end, fold the edge toward the middle, and repeat with the parallel side. Give it a little 90-degree turn and roll it snugly, like wrapping up a little gift.
  7. Cut each roll diagonally and arrange them on a serving platter, so they look all fancy and inviting.
  8. For the Garlic Lime Hoisin Sauce, use a mortar and pestle to crush the garlic and ginger together until fragrant. The aroma should make you smile.
  9. Whisk in fresh lime juice and a modest splash of Sriracha for that zingy, spicy kick. Finally, add the hoisin sauce and whisk until combined. Taste and adjust as needed.

Cook’s Notes

Rolling these can be a bit of a learning curve, but once you get the hang of it, you’re golden. Rice paper can be temperamental, so if it tears, just keep going — a little imperfection never hurt anyone. If you want to prep these in advance, keep the veggies prepped in the fridge and roll them just before serving to keep everything fresh. Leftover rolls can be stored in an airtight container in the fridge for a day, but the rice paper will lose some of its magic over time. The sauce, however, can be made days ahead and will only get better as the flavors mingle.

Make It Your Own

  • Swap the jicama for cucumber for a refreshing twist.
  • Replace Thai basil with cilantro if that’s more your vibe.
  • For a protein boost, add slices of crispy tofu or tempeh.
  • Feeling nutty? Toss in some crushed peanuts for extra crunch.

If you try this, I’d love to hear how it turns out — drop a comment or tag me! Whether it’s a weeknight fix or a dinner party appetizer, these spring rolls are sure to brighten your table and your tastebuds. Enjoy!

Related update: Vegetarian Spring Rolls With Garlic Lime Sauce

Related update: Easy To Make Spring Rolls

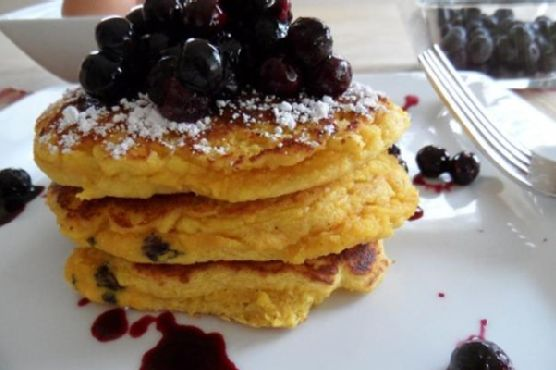
Coconut Flour Pancakes with Blueberry Honey Compote | Made by Meaghan Moineau

Picture this: It’s a dreary Wednesday morning, and my cravings for something sweet yet comforting are through the roof. I rummage through my pantry, and lo and behold, a bag of coconut flour winks at me from the back. My mind immediately darts to these heavenly Coconut Flour Pancakes with Blueberry Honey Compote. They’re a delightful balance of fluffy and fruity, perfect for when you need a little breakfast pick-me-up. Plus, they’re naturally gluten-free, so no need to worry about that! These pancakes are like a warm hug on a chilly day and are surprisingly easy to whip up. If you’re in the mood for a quick, fuss-free breakfast that’ll impress even the sleepiest of taste buds, you’ve got to try this.

Jump to Recipe

What You’ll Need

This ingredient list is straightforward and (almost) guaranteed to be stocked in your kitchen. The flavor comes from simple, wholesome ingredients and a touch of creativity.

  • Coconut flour – the star of the show, bringing that fluffy texture
  • Coconut milk – adds creaminess and enhances the coconut flavor
  • Eggs – for structure and richness
  • Honey
  • Olive oil
  • Baking powder
  • Salt
  • Frozen blueberries – juiciness and a pop of color
  • Agave nectar
  • Cinnamon

How to Make Coconut Flour Pancakes with Blueberry Honey Compote

  1. Start with the compote. In a small saucepan over low heat, add the frozen blueberries and agave nectar, then cover with a lid. If using fresh blueberries, throw in a tablespoon of water. After about 3 minutes, peek under the lid — once those juices start seeping out, add the cinnamon and stir it all up. Cover again and let it do its thing for another 10 to 15 minutes. You’ll know it’s ready when the juices become syrupy, and the berries are plump and hot. For a thicker syrup, mash the blueberries with a fork as they cook. Once perfect, remove from heat and keep covered to stay warm.
  2. While the compote simmers, prep the pancake batter. In a mixing bowl, combine all the wet ingredients and give them a good mix. Toss in the coconut flour, baking powder, and salt, then mix until smooth. The batter should be thick, so let it sit for about 5 minutes to thicken further.
  3. Heat a large skillet on medium-low and spread a little butter evenly over it. Spoon out about a third of the batter, shaping it into a pancake on the skillet. Coconut flour pancakes are a bit more stubborn, so you’ll need to shape them. If the edges of your pancakes start to spread too much, add a teaspoon of coconut flour to your batter.
  4. Repeat the last step for the remaining batter, ensuring each pancake has enough space to flip. Let them sit on the skillet for about 7 to 10 minutes. They’re ready to flip when the edges look set. Carefully slide a large spatula under each pancake and gently flip — be gentle as these beauties are fragile!
  5. Cook the pancakes for an additional 2 to 3 minutes on the other side. Once they’re golden and divine, remove them from the heat. Top the pancakes with your blueberry compote and a dusting of confectioners sugar. For an extra touch of sweetness, drizzle with agave nectar, honey, or pure maple syrup.

Cook’s Notes

Okay, let’s talk practicalities. Coconut flour is a bit finicky because it absorbs liquid like a sponge. So, if your batter is too runny, just add a teaspoon of coconut flour until you’re happy with the consistency. These pancakes can be made ahead of time — simply store them in an airtight container in the fridge for up to three days. Reheat in a skillet or microwave for a quick breakfast. Leftover compote? Drizzle it over yogurt or oatmeal for a sweet twist!

Make It Your Own

  • Berry Swap: No blueberries on hand? Swap them out for raspberries or blackberries for a different flavor profile.
  • Nutty Addition: Add a handful of chopped nuts into the batter for some crunch and extra protein.
  • Chocolate Dream: Toss in a few dark chocolate chips to the batter for an indulgent touch.
  • Spice It Up: Add a pinch of ground ginger or cardamom to the blueberry compote for a spicy kick.

If you try this, I’d love to hear how it turns out — drop a comment or tag me! These pancakes are a constant morning delight in my home, and I can’t wait for you to experience the joy they bring. Happy flipping!

Related update: Coconut Flour Pancakes with Blueberry Honey Compote

Related update: Simple Protein Pancakes

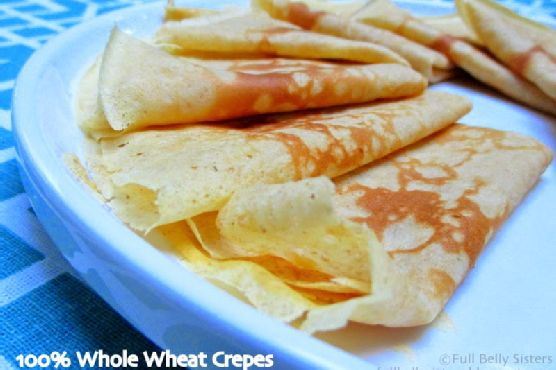
Simple Whole Wheat Crepes | Made by Meaghan Moineau

Picture this: it’s a lazy Saturday morning, and I’ve got the whole day stretched out ahead of me. No rush, no plans, just that perfect kind of weekend vibe that begs for a cozy breakfast. Enter: my Simple Whole Wheat Crepes. The first time I whipped these up, I was honestly just trying to avoid a trip to the grocery store. But now, they’ve become a staple. Quick to make, with a texture that’s both tender and slightly nutty, these crepes are fancy enough for brunch but easy enough for a weekday breakfast with the kiddos.

Jump to Recipe

What You’ll Need

These crepes come together with ingredients you probably already have lurking in your fridge and pantry. No need for a special trip to the store—unless you’re out of eggs, in which case, let’s talk.

  • 2 tablespoons butter, melted
  • 2 eggs
  • 1 tablespoon maple syrup
  • 1 ½ cups milk
  • ½ teaspoon sea salt
  • 1 cup white whole wheat flour

How to Make Simple Whole Wheat Crepes

  1. In your blender, combine the melted butter, eggs, maple syrup, milk, sea salt, and flour. Blend until the mixture is smooth and the batter is thin.
  2. Let the batter sit for at least 30 minutes. This is the perfect moment to sip your coffee slowly, or, if you’re me, lose yourself in a podcast.
  3. When ready to cook, heat your crêpe pan over medium heat. If you don’t have a crêpe pan, an electric crêpe maker works perfectly too. Either way, it’s all about that golden brown finish!
  4. Pour a small amount of batter onto the hot surface, swirling it around to evenly coat the pan. Cook until the edges start to lift and lightly brown, about 1 to 2 minutes.
  5. Flip the crêpe and cook for another 30 seconds to a minute until done to your liking. Repeat with the remaining batter, keeping finished crêpes warm in a low oven, if needed.

Cook’s Notes

Here’s a little secret: letting the batter rest is where the magic happens. This rest time allows the flour to fully hydrate and gives the gluten a chance to relax, resulting in the tenderest crepes. If you’re super organized or just love a breakfast shortcut, mix the batter the night before and let it hang out in the fridge. Just give it a quick stir before cooking. Store leftover crepes in an airtight container in the fridge for up to three days. You can also freeze them by placing wax paper between each crepe to prevent sticking, and pop them in a zip-top bag.

Make It Your Own

  • Sweet Twist: Add a teaspoon of vanilla extract and a sprinkle of cinnamon to the batter for a warm, cozy flavor.
  • Savory Spin: Omit the maple syrup and add chopped fresh herbs like chives or parsley to the batter.
  • Gluten-Free Option: Swap the white whole wheat flour for a gluten-free flour blend. Just make sure it’s one meant for baking!
  • Dairy-Free Delight: Use almond milk or another plant-based milk, and substitute the butter with coconut oil or a dairy-free butter substitute.

If you try this, I’d love to hear how it turns out—drop a comment or tag me! Let’s keep the breakfast magic alive, one crepe at a time. 🥞💛

Related update: Simple Whole Wheat Crepes

Related update: Coconut Flour Pancakes with Blueberry Honey Compote

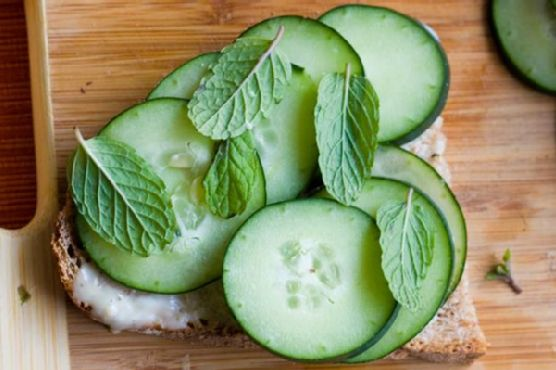
Cucumber Mint Tea Sandwiches | Made by Meaghan Moineau

It was one of those gloriously lazy Sunday afternoons when the sun was streaming through the kitchen window, painting everything in a warm, golden hue. I found myself craving something simple yet sophisticated to nibble on while sipping a freshly brewed pot of Earl Grey. That’s when the idea of Cucumber Mint Tea Sandwiches popped into my head. These little bites are like a garden party in your mouth — refreshing, slightly spicy, and with a hint of sweet earthiness. They’re perfect for when you want to impress your friends but also fit perfectly into a no-fuss, no-mess vibe. Trust me, once you try these, they’ll become your go-to for every casual gathering or solo indulgence.

Jump to Recipe

What You’ll Need

Honestly, you probably have most of these ingredients lounging in your pantry or fridge already. And if not, they’re super easy to find on your next grocery run.

  • Bread (your choice – think classy yet sturdy)
  • Cucumber (cool, crisp, and refreshing)
  • Wasabi Maple Spread (the secret zing)
  • Black pepper grinder (for that fresh, subtle heat)
  • Fresh mint leaves (fragrant and cooling)
  • Fresh dill (herbaceous and bright)
  • Vegenaise (creamy and delightful)
  • Maple syrup (just a touch of sweetness)
  • Wasabi powder (for that kick)

How to Make Cucumber Mint Tea Sandwiches

  1. Start by whipping together the wasabi maple spread. Combine vegenaise, a dash of maple syrup, and a sprinkle of wasabi powder until it’s smooth and slightly spicy.
  2. Thinly slice the cucumber. You can go for thick, crunchy slices if you’re feeling bold, or thin, silky ones for a more delicate bite. Either way, they should be refreshingly crisp.
  3. Gather your fresh mint leaves and dill. Rinse them under cold water and pat them dry with a clean kitchen towel. You want them to be fresh and vibrant.
  4. Spread a very thin layer of your wasabi maple spread on all the inside surfaces of the bread slices. It’s all about that flavor balance, not overpowering.
  5. Layer your cucumber slices neatly on top of the spread. Feel free to overlap them slightly. It’s like building a little cucumber brick wall.
  6. Add a layer of mint and dill. You can mix them up in each sandwich or go half mint, half dill if you like to keep your flavors organized.
  7. Grind some fresh black pepper over the top of the herbs and cucumbers. This will tie all the flavors together beautifully.
  8. Close each sandwich with another piece of bread and gently press down. Then, slice them into charming quarter cubes or triangles. Presentation is key!
  9. Plate the sandwiches, and if you’re feeling fancy, sprinkle a few edible flowers around for a pop of color and whimsy.

Cook’s Notes

These sandwiches are meant to be a fresh and light snack, so fresh ingredients are key. Make sure your cucumber is firm and your herbs are not wilting. Want to make them a few hours ahead? No problem! Just cover the platter with a slightly damp paper towel and wrap tightly with plastic wrap to keep everything moist and fresh. Leftovers (if you have any, which I doubt) can be stored in an airtight container in the fridge for up to a day — but they’re best fresh.

Make It Your Own

  • Swap out the bread for a whole grain or seed variety for extra texture and flavor.
  • Replace the wasabi maple spread with a spicy sun-dried tomato spread for a Mediterranean twist.
  • Add a layer of thinly sliced radishes for an extra peppery crunch.
  • Sprinkle a dash of red pepper flakes inside for those who love an extra spicy kick.

If you try this, I’d love to hear how it turns out — drop a comment or tag me in your tea-time creations! Happy sandwich making!

Related update: Cucumber Mint Tea Sandwiches

Related update: Vegetarian Spring Rolls With Garlic Lime Sauce

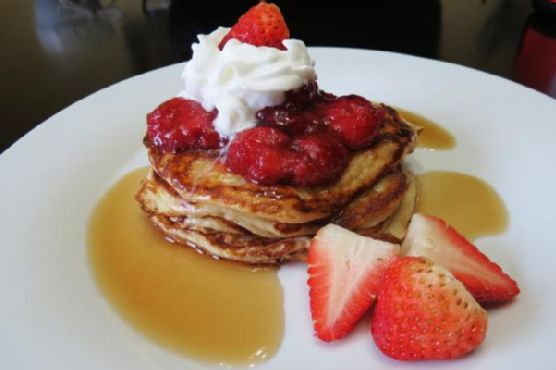
Strawberry Shortcake Pancakes | Made by Meaghan Moineau

It was one of those chaotic Tuesday mornings when everything seemed to be on fast forward. The email inbox was overflowing, the laundry was giving me side-eye, and breakfast needed to be something more inspiring than a bowl of cereal. Enter Strawberry Shortcake Pancakes. They’re like a breakfast dessert that feels a little indulgent but is grounded enough in wholesome ingredients to keep the weekday guilt at bay. These pancakes are the perfect blend of light and fluffy, with a burst of strawberry goodness that just screams “summer.” Whether you’re trying to impress your brunch guests or just need a pick-me-up to tackle the day, this dish has got you covered. Plus, it’s quick enough to throw together before that first Zoom call.

Jump to Recipe

What You’ll Need

You’d be surprised at how many of these ingredients are already sitting in your pantry, just waiting to be transformed into something fabulous.

  • Greek yogurt
  • Egg whites
  • Whole-wheat flour
  • Baking soda
  • Almond extract
  • Sugar
  • Salt
  • Dried freeze strawberries
  • Fresh strawberries
  • Sugar
  • Fat-free whip cream

How to Make Strawberry Shortcake Pancakes

  1. In a small bowl, mix together the Greek yogurt, egg whites, and a splash of almond extract. The aroma of the almond extract will make you want to dive right in, but resist—it’s worth the wait.
  2. In another bowl, whisk together the whole-wheat flour, baking soda, sugar, and salt. This mixture should feel light and airy, the foundation of pancake perfection.
  3. Combine the wet and dry ingredients, whisking until just mixed. You want a smooth batter, but don’t overdo it. Stir in the dried strawberries—these little gems will add an unexpected pop of flavor in every bite.
  4. In a small saucepan, cook the fresh strawberries with a teaspoon of sugar over medium heat. Stir occasionally until they’re thawed and juicy, about 5-7 minutes. The kitchen will start to smell like a strawberry field and you’ll feel like a domestic goddess.
  5. Meanwhile, heat a skillet over medium heat and lightly coat with cooking spray. Pour 1/4 cup of batter onto the skillet. Once you see bubbles forming on the surface, it’s time to flip—aim for about 1-2 minutes per side. Flatten the batter slightly with a spatula for even cooking.
  6. Top your stacks with that luscious strawberry sauce, a drizzle of maple syrup, and a generous dollop of fat-free whip cream. You’ve just created a masterpiece in about 20 minutes.

Cook’s Notes

Let’s get real: even a pro can end up with a few duds in the bunch. If your pancakes are sticking, lower the heat a notch. If you’re prepping for the week, these pancakes freeze like a dream. Just make sure they’re cool before you stack them between sheets of parchment paper and seal them up for the freezer. Need a quick breakfast fix later? Pop them in the toaster to reheat!

Make It Your Own

If you’re feeling adventurous, here are a few tweaks to personalize your pancakes:

  • Swap the almond extract with vanilla extract for a more classic flavor profile.
  • Make it tropical with dried mango instead of strawberries and top with coconut whip.
  • Add a handful of mini chocolate chips to the batter for a sweet surprise.
  • For a nutty twist, toss in some crushed almonds or walnuts for added crunch.

If you try this, I’d love to hear how it turns out—drop a comment or tag me in your pancake selfies! There’s nothing better than sharing a bit of kitchen magic. Enjoy!

Related update: Strawberry Shortcake Pancakes

Related update: Chicken with Grape Tomatoes and Mushrooms

Related update: Apple Pie Smoothie

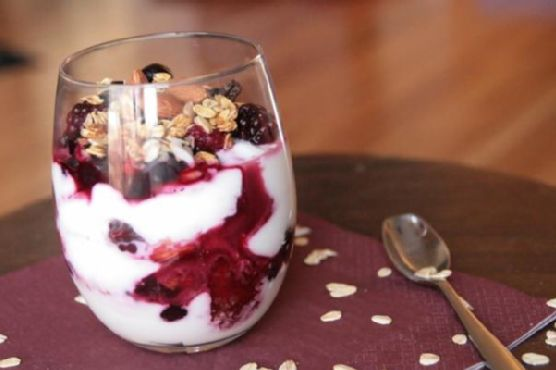
Mixed Berry Yogurt with Almonds | Made by Meaghan Moineau

It was one of those mornings where everything seemed to go wrong. I woke up late, the cat knocked over my coffee, and I realized we were out of milk. You know those days, right? But hey, sometimes the universe gives you lemons so you can find a creative and tasty solution. On this particular day, I discovered my savior: Mixed Berry Yogurt with Almonds. It’s the kind of dish that feels luxurious without much effort—perfect for those hectic mornings or even as a healthy dessert when you want something a bit more special. The best part? It’s quick, comforting, and feels like a little scoop of joy.

Jump to Recipe

What You’ll Need

You might already have most of these ingredients nestled in your pantry and freezer, which is a huge win in my book.

  • 1 cup frozen mixed berries
  • 1/2 cup whole oats
  • 1 cup plain Greek yogurt
  • 1/4 cup whole almonds

How to Make Mixed Berry Yogurt with Almonds

  1. Start by toasting the almonds in a dry skillet over medium heat. Shake the skillet occasionally until they turn golden and fragrant. This should take about 3-5 minutes. Keep an eye on them; they can go from perfect to burnt in no time!
  2. While the almonds are toasting, scoop the Greek yogurt into a bowl or glass cup. I love using a clear glass because it shows off the layers and makes me feel like an artist.
  3. Evenly sprinkle the oats over the yogurt. If you want them a bit softer, you can let them sit for a minute or two to soak up some of the yogurt’s moisture.
  4. Microwave the frozen berries for about 30 seconds to thaw them slightly, then layer them over the oats. The warmth from the berries will start to melt into the yogurt, creating a beautiful marbled effect.
  5. Finally, top it all off with those perfectly toasted almonds. The crunchiness will be a lovely contrast to the creamy yogurt and juicy berries.

Cook’s Notes

This dish is super flexible, so you can tweak it based on what you have. If you want to prepare it in advance, layer the yogurt and oats first and keep the berries and almonds separate until you’re ready to serve. Leftovers can be stored in an airtight container in the fridge for up to two days, but I recommend keeping the almonds separate to maintain their crunch.

Watch out for the almond toasting process—they toast quickly and can easily burn if you’re not paying attention. Trust me, I’ve been there. If you want to make it even quicker in the morning, toast the almonds the night before!

Make It Your Own

  • Swap the Greek yogurt for a creamier vanilla yogurt if you’re serving this as a dessert.
  • Layer in a drizzle of maple syrup over the yogurt for an extra touch of sweetness.
  • Try using walnuts or pecans if you’re out of almonds, toasting them just the same for that essential crunch.
  • If berries aren’t your thing, this works beautifully with sliced peaches, bananas, or even a medley of whatever fruits you have hanging out in your fridge.

If you try this, I’d love to hear how it turns out—drop a comment or tag me! There’s nothing quite like seeing your take on these tasty creations. Enjoy every spoonful!

Related update: Mixed Berry Yogurt with Almonds

Related update: Beet Greens and Poached Eggs

Baked Apple Pancake | Made by Meaghan Moineau

Ever have one of those mornings where you wake up and just know you need something a little extra special to kickstart the day? That was me last Sunday. As I gazed out my window at the crunchy, golden leaves piling up in my yard, it hit me—I needed something cozy and autumnal. You know, the kind of dish that feels like a hug. Enter: Baked Apple Pancake. It’s the ultimate lazy morning treat, perfect for when you want something indulgent but deceptively easy. Think of it as a fluffier, fruitier version of your favorite pancake, but baked to perfection in the oven. It’s the kind of recipe that makes you look like a kitchen pro, even if you just rolled out of bed.

Jump to Recipe

What You’ll Need

This ingredient list is blissfully simple, and chances are you already have most of it sitting in your pantry. Just a few fresh additions, and you’re ready to go!

  • 1 whole apple, sliced thin
  • 2 tablespoons butter
  • 1 tablespoon cinnamon
  • 2 whole eggs
  • 1/2 cup all-purpose flour
  • 1/2 cup milk
  • 1/4 cup nuts and raisins
  • 1/4 teaspoon salt
  • 1 tablespoon sugar

How to Make Baked Apple Pancake

  1. First things first, preheat your oven to a toasty 450°F. You want that oven nice and hot!
  2. Grab a skillet and melt 2 tablespoons of butter over medium heat. Add your apple slices to the pan and sauté until they’re tender and just starting to caramelize—think fragrant and golden.
  3. Sprinkle in the sugar, cinnamon, nuts, and raisins. Stir gently to coat the apples in this sweet and spicy goodness. Once everything is mixed, take it off the heat and set it aside.
  4. In a separate bowl, beat those eggs until they’re light and frothy. Slowly, because we’re not in a rush, add the flour and salt. Blend until smooth. Beat in the melted butter and milk until your batter is silky.
  5. Spray your skillet with a generous layer of Pam, then pour the apple filling you set aside back into the skillet. Top this with your batter, spreading it evenly.
  6. Pop it into the oven and bake for 15 minutes. You’ll want to watch as the edges start to rise and turn a delicious golden brown.
  7. Reduce the oven temperature to 350°F and let it bake for another five to ten minutes. The pancake should puff up slightly and set in the middle.
  8. Once baked, remove from the oven and let it cool for just a minute. Cut the pancake into four hearty pieces and serve with your favorite topping. Maple syrup, whipped cream, or even a dollop of yogurt would be heavenly!

Cook’s Notes

This recipe comes from a note marked “good!” by Barbara Michel, and I’ve made a couple of tweaks to honor her enthusiasm.

  • If you’re planning to make this ahead of time, you can sauté the apples and set them aside in the fridge. Just bring them back to room temperature before assembling the dish.
  • Leftovers (if there are any!) are delightful warmed up the next day. Just pop them in the microwave for a quick reheat.
  • Avoid overmixing the batter; it should be smooth, but overmixing can make it dense.

Make It Your Own

Here are a few fun tweaks to shake things up if you feel like experimenting.

  • Swap the apple for pear slices and add a touch of ginger for a spiced twist.
  • Substitute the nuts and raisins for dried cranberries and pecans for a seasonal flair.
  • If you’re feeling indulgent, drizzle the top with a caramel sauce right before serving.
  • For a citrus kick, add some orange zest to the batter.

If you try this, I’d love to hear how it turns out—drop a comment or tag me! Whether you stick to the classic or put your own spin on it, I hope this baked apple pancake brings a little extra warmth to your morning. Enjoy every bite!

Related update: Baked Apple Pancake

Related update: Mixed Berry Yogurt with Almonds

Lemon Scented Polenta Pancakes with Blueberry Thyme Syrup | Made by Meaghan Moineau

Picture this: it’s a lazy Sunday morning, and the sunlight is peeking through the kitchen window just enough to gently nudge me from my cozy corner on the couch. That’s when the craving hits—something vibrant and refreshing yet comforting to kickstart the day. Enter Lemon Scented Polenta Pancakes with Blueberry Thyme Syrup. This whimsical twist on the classic pancake is my answer to those mornings where you need a dish that feels special but isn’t a hassle to whip up. With the zing of lemon and the earthy sweetness of blueberry thyme syrup, this dish is an absolute keeper. It’s just fancy enough to impress anyone who stumbles into your kitchen but easy enough to make you wonder why you don’t do this every weekend.

Jump to Recipe

What You’ll Need

This recipe is one of those magical ones where you probably have most of the stuff lounging in your pantry, waiting to be turned into something fabulous. Here’s what you’ll need:

  • All-purpose flour
  • Baking powder
  • Fresh blueberries
  • Butter
  • Cornmeal
  • Egg
  • Fresh thyme
  • Honey
  • Lemon zest
  • Maple syrup
  • Milk
  • Salt
  • Vanilla extract
  • Water

How to Make Lemon Scented Polenta Pancakes with Blueberry Thyme Syrup

  1. Start by making the syrup. Combine the syrup ingredients: blueberries, maple syrup, and thyme sprigs in a small saucepan. Bring this mixture to a gentle boil. Once boiling, reduce the heat and let it simmer. The blueberries will soften and the thyme will infuse its earthy aroma. Remember to remove the thyme sprigs just before serving.
  2. For the pancakes, grab a medium saucepan and combine the cornmeal with cold water. Bring this to a boil, whisking constantly so it’s smooth and not lumpy. Reduce the heat and let it simmer until thickened, about 4 to 5 minutes. It should have the consistency of a thick porridge.
  3. In a small bowl, whisk together the milk, egg, honey, and a splash of vanilla extract. Add this to the thickened cornmeal, transforming it into a creamy polenta custard.
  4. In your largest mixing bowl, whisk together the all-purpose flour, baking powder, salt, and lemon zest. Make a well in the center of the dry ingredients and pour your polenta custard into the middle. Stir until everything is just combined; over-mixing is a no-go!
  5. Heat up a large griddle or non-stick pan and give it a good brush of butter. Ladle enough batter onto the griddle for 4-inch pancakes. If the batter seems too thick, a splash more milk will help it along.
  6. Cook the pancakes over moderate heat until bubbles form on the surface and the edges look a touch dry. This is your cue to flip them. Cook until the other side is beautifully golden and the pancakes have a little puff to them, about 2 minutes more.
  7. Transfer these golden beauties to warm plates and repeat with the remaining batter. Drench them in the warm blueberry syrup, and you’re set for a morning of deliciousness.

Cook’s Notes

Let’s talk about a few things to keep in mind as you embark on this pancake adventure. First, the syrup is the star—don’t skimp on the thyme unless you’re not a fan of its unique flavor! This syrup can be stored in an airtight container in the fridge for up to a week and reheated gently on the stove. As for the pancakes, if you’ve got leftovers (which is doubtful), they freeze well. Layer parchment paper between them and pop them in a zip-top bag for freezer storage. Defrost in the toaster on a low setting for a quick breakfast. Also, if you’re making these ahead of time, keep them warm in a low oven while you finish up the batch.

Make It Your Own

This recipe is wonderful as is, but who doesn’t love a little culinary improvisation? Here are a few ideas to make these pancakes truly yours:

  • Swap the blueberries for raspberries or blackberries if that’s what you have on hand or prefer.
  • Add a tablespoon of poppy seeds to the pancake batter for a delightful crunch that complements the lemon zest.
  • If you’re dairy-free, use almond milk and vegan butter without sacrificing any of the flavor.
  • For a nutty twist, replace half of the cornmeal with almond flour.

If you try this, I’d love to hear how it turns out—drop a comment or tag me! There’s nothing quite like seeing your creations and hearing how these pancakes brightened your day. Enjoy, my friends!

Related update: Lemon Scented Polenta Pancakes with Blueberry Thyme Syrup

Related update: Superbowl Chili

Related update: Baked Apple Pancake

Vanilla Coconut Snowball Cupcakes | Made by Meaghan Moineau

Last Tuesday, somewhere between the hustle of a long workday and the clamor of my kids’ animated dinner table debates, I felt that familiar urge to bake something comforting. It was the kind of chilly autumn evening that practically begs for a cozy, sweet treat — an edible hug, if you will. Enter these Vanilla Coconut Snowball Cupcakes. They’re the perfect blend of fluffy vanilla goodness and tropical coconut flair, transforming a regular weeknight into something a bit more special. The best part? They’re as easy as they are impressive, requiring only pantry staples and a little love. So, while I was elbow-deep in flour, and someone spilled milk all over the kitchen floor (of course), I realized these cupcakes were worth every bit of chaos. Jump to Recipe

What You’ll Need

Chances are, you’ve got most of these tucked away in your pantry or fridge already.

  • 1 1/2 cups **flour**
  • 1 1/2 teaspoons **baking powder**
  • 1/4 teaspoon **salt**
  • 1/2 cup **butter**, softened
  • 1 cup **sugar**
  • 1 teaspoon **vanilla extract**
  • 2 large **eggs**
  • 1/3 cup **regular milk**
  • 1/4 cup **sour cream**
  • 1 cup **unsweetened coconut flakes**
  • For the frosting:
    • 1/2 cup **butter**, softened
    • 1/4 cup **sour cream**
    • 1 teaspoon **vanilla**
    • 2-3 cups **confectioners’ sugar**
    • Additional **coconut flakes** for coating

How to Make Vanilla Coconut Snowball Cupcakes

  1. Preheat your oven to 350°F (175°C) and line a 12-cupcake pan with paper liners or grease it lightly if you’re all out of liners.
  2. In a small bowl, whisk together the flour, baking powder, and salt. Set this aside to get cozy with itself.
  3. In a large mixing bowl, beat the butter on medium-high speed until it’s creamy, about 2 minutes. This is where you’ll see magic starting to happen.
  4. Gradually add sugar to the butter, beating until the mix is light and fluffy — around 3 minutes. Don’t forget to scrape down the sides of the bowl midway.
  5. Beat in the vanilla extract, imagining the sweet fragrance wrapping around your senses.
  6. Add the eggs, one at a time, beating well between each addition. Your batter should now resemble a lovely, satiny mix.
  7. Alternately add the flour mixture and milk, starting and ending with the flour. Beat briefly after each addition just to combine.
  8. Stir in the sour cream and coconut, feeling the texture change as it all comes together.
  9. Fill the cupcake wells about 3/4 full. Pop them in the oven and let them bake for about 18 minutes or until a toothpick comes out clean.
  10. Transfer the pan to a wire rack for 5 minutes, then remove the cupcakes and let them cool completely on the rack.
  11. For the frosting, beat together the butter, sour cream, and vanilla until fluffy. Slowly add 2 cups of confectioners’ sugar, beating on low until combined. Increase speed and beat until light and fluffy, adding more sugar as needed.
  12. Fill a shallow bowl with coconut flakes. Frost each cooled cupcake and dip the tops into the coconut, pressing gently to adhere.

Cook’s Notes

Here are a few tidbits to keep in mind as you venture into cupcake bliss:

  • Room temperature ingredients are key for that perfect, smooth batter — so don’t skip this step.
  • The coconut flakes add a delightful texture and flavor, but if you’re not a fan, simply skip coating the tops. The cupcakes will still shine.
  • You can bake these a day ahead. Just keep them unfrosted and stored in an airtight container. Frost them before serving for that fresh, right-out-of-the-oven vibe.
  • Leftovers, if you have any, can be stored in the fridge for 3-4 days. Bring them to room temperature before indulging, as the flavors are best when not too cold.

Make It Your Own

  • **Nutty Twist:** Substitute the coconut flakes with toasted almonds or pecans for a delightful crunch.
  • **Chocolate Lovers’ Dream:** Swap out half the flour for cocoa powder, and add chocolate chips to the batter for a decadent treat.
  • **Lemon Coconut Delight:** Add the zest of one lemon to the batter and the frosting for a zingy, fresh take.
  • **Berry Bliss:** Gently fold in a handful of blueberries or raspberries into the batter for a burst of fruity goodness in every bite.

If you try these Vanilla Coconut Snowball Cupcakes, I’d love to hear how they turned out! Drop a comment below or tag me in your baking adventures. Happy baking, my friends! 🧁✨

Related update: Vanilla Coconut Snowball Cupcakes

Related update: Noodle Kugel with Pineapple-Gluten free, Dairy Free

How to make the World’s Greatest Lasagna Roll Ups | Made by Meaghan Moineau

It was one of those busy weeknights when I craved something comforting but didn’t have the time or energy for an elaborate meal. As I reached for a box of lasagna noodles, I had a lightbulb moment: Lasagna Roll Ups! They’re as indulgent and satisfying as regular lasagna but way more fun to assemble and serve. These little guys are perfect for when you want to impress with minimal fuss—plus, they make portion control a breeze. Trust me, once you try this recipe, you’ll never look at lasagna quite the same way again.

Jump to Recipe

What You’ll Need

Before you panic about a long list of ingredients, let me assure you: you probably have most of this stuff lurking in your kitchen. This dish is all about basics with a twist, relying on a few stars to shine.

  • Lean ground beef
  • Italian sausage
  • Extra virgin olive oil
  • Onion
  • Garlic
  • Italian seasoning
  • Dried basil
  • Canned tomato sauce
  • Fire roasted diced canned tomatoes
  • Canned tomato paste
  • Water
  • Black ground pepper
  • Fresh parsley
  • Ricotta cheese
  • Egg
  • Salt
  • Parmesan Reggiano
  • Mozzarella cheese
  • Lasagna noodles

How to Make the World’s Greatest Lasagna Roll Ups

  1. In a large saucepan over medium heat, start browning your ground beef and Italian sausage. The aroma will make your taste buds dance with anticipation.
  2. In a separate pan, heat 1 tablespoon of olive oil on medium heat. Add in the onion, garlic, Italian seasoning, and basil. Let them cook for about 6-8 minutes until the onion is translucent and your kitchen smells like an Italian bistro.
  3. Combine the onion and garlic mixture with the meat. Stir in the fire roasted diced tomatoes, canned tomato sauce, tomato paste, water, black pepper, and 2 tablespoons of fresh parsley. Allow this symphony of flavors to simmer uncovered for 1 hour, letting it thicken and become deliciously fragrant.
  4. Meanwhile, bring a large pot of water to boil and cook the lasagna noodles for 8-10 minutes. Drain and rinse them with cold water to stop the cooking process.
  5. Preheat your oven to 375°F (190°C). In a small mixing bowl, mix together the remaining parsley, ricotta cheese, egg, and 1/2 teaspoon salt until everything is beautifully combined.
  6. Pour a thin layer of meat sauce into the bottom of a 9 x 13 glass baking dish—this is your tasty foundation.
  7. To assemble the roll ups, lay a noodle flat and spread with the cheese mixture. Sprinkle a bit of Parmesan Reggiano over the top, then roll it up snugly like a delicious little sleeping bag.
  8. Arrange all your roll ups in the baking dish, and generously cover them with more of the meat sauce. Top each roll with a slice of mozzarella cheese, and then cover the dish with foil.
  9. Bake in the oven for 20 minutes. Remove the foil and bake for an additional 10 minutes, letting the cheese turn golden and bubbly.
  10. Take them out and allow them to cool for at least 10 minutes before serving. This will help them firm up and makes serving a breeze.

Cook’s Notes

A few things to keep in mind: Don’t rush the sauce. Letting it simmer gives the flavors time to deepen. If you’re in a hurry, you can prep the sauce the day before—it only gets better with time! Lasagna Roll Ups also freeze beautifully. Just assemble them without baking, wrap tightly, and freeze. To cook, thaw in the fridge overnight and bake as directed.

Make It Your Own

If you feel like experimenting, here are a few ways to mix things up:

  • Swap the ground beef for ground turkey or chicken for a lighter version.
  • Make it vegetarian by using mushrooms and zucchini instead of meat.
  • Add a kick by stirring some red pepper flakes into the cheese mixture.
  • Use whole wheat or gluten-free noodles for a different texture or dietary needs.

If you try this, I’d love to hear how it turns out—drop a comment or tag me! Whether it’s a weeknight dinner or a casual get-together, these roll ups are sure to win hearts and palates alike. Enjoy!

Related update: How to make the World’s Greatest Lasagna Roll Ups

Related update: Stuffed Pork Tenderloin with Marsala-Port Sauce

Mini Stuffed Mexican Bell Peppers | Made by Meaghan Moineau

Okay, imagine this: It’s a Wednesday night, and I’m standing in my kitchen, staring at a bunch of bell peppers I bought on impulse. You know the feeling, right? That moment of “What am I even going to do with these?” My brain whispers, “Stuff them!” But not just any stuffing — let’s infuse them with a fiesta of flavors. Enter these Mini Stuffed Mexican Bell Peppers. They’re a little spicy, a little tangy, and oh-so-satisfying. Perfect for those nights when you want something quick but super flavorful. Trust me, after you try this, you’ll wonder why you don’t have canned bell peppers permanently on your shopping list.

Jump to Recipe

What You’ll Need

Honestly, you’ve probably got most of this lounging around in your pantry. Here’s what you’ll need to create some magic:

  • Canned bell peppers
  • Lean ground turkey
  • Canned black beans
  • Chili powder
  • Chipotles in adobo
  • Fire roasted canned tomatoes
  • Garlic
  • Canned green chilies
  • Tsp ground coriander
  • Ground cumin
  • Paprika
  • Tomatillos
  • Yellow onion

How to Make Mini Stuffed Mexican Bell Peppers

  1. Preheat your oven to 400°F (200°C). Let’s get those veggies nice and roasted.
  2. Slice the tomatillos in half and the onion into 1/2-inch slices. Peel the garlic cloves.
  3. Spread the tomatillos, onions, and garlic on a baking sheet. Roast them in the oven until the tomatillos are tender and start to brown, about 20 minutes.
  4. While the veggies roast, get a large skillet and start cooking the ground turkey over medium heat. Break it up with a spatula until it’s no longer pink and just beginning to brown.
  5. Add the chili powder, ground coriander, ground cumin, and paprika to the turkey. Stir until everything is coated with those warm spices.
  6. Stir in the fire roasted tomatoes, black beans, chipotles in adobo, and green chilies. Let it simmer until the mixture thickens, about 5-7 minutes.
  7. By now, your kitchen should smell amazing. Once the veggies are done roasting, chop them up and mix them into the turkey concoction.
  8. Drain the canned bell peppers and arrange them on a baking tray, cut side up.
  9. Spoon the turkey and veggie mixture into each bell pepper evenly. Don’t be shy — pack them full!
  10. Pop the stuffed peppers into the oven for about 10 minutes. You’ll know they’re ready when the tops start to look a bit crispy.
  11. Let them cool slightly before digging in, but the anticipation is half the fun!

Cook’s Notes

Here’s a heads-up: Avoid overfilling the peppers, or they might collapse — they’re mini, after all! If you’re making this ahead, store the filling separately and stuff the peppers just before baking. Leftovers? Toss them in an airtight container; they’ll be good for about 3 days in the fridge. Reheat them gently, so you don’t lose any of that lovely texture.

Make It Your Own

  • Vegetarian Twist: Swap the turkey for crumbled firm tofu. Just make sure to press it well to get that nice crumbly texture.
  • Cheesy Version: Stir in some shredded Monterey Jack or sprinkle it on top before the final bake for a melty finish.
  • Spice It Up: Add some diced jalapeños or a dash of cayenne pepper if you’re craving extra heat.
  • Fresh Hit: Top with chopped cilantro or a squeeze of fresh lime juice right before serving for a zesty lift.

If you try this, I’d love to hear how it turns out — drop a comment or tag me! Cooking is all about sharing, and I can’t wait to see your takes on this spicy little number. Enjoy, my pepper-loving friends!

Related update: Mini Stuffed Mexican Bell Peppers

Related update: Bigoli with smoked salmon

Related update: How to make the World’s Greatest Lasagna Roll Ups

Related update: Cheesy Cauliflower

Homemade Animal Crackers | Made by Meaghan Moineau

It was one of those grey, lazy Sundays when the weather had no intention of letting you out of the house. My kids were bored, the couch had become a kingdom of pillows, and we were in desperate need of a fun kitchen project that would end with something delightful to snack on. That’s how we landed on making homemade animal crackers. It’s the perfect rainy-day activity that promises not just giggles and flour-covered noses but also a batch of wonderfully crunchy, subtly spiced crackers that beat anything from a box. Plus, they’re surprisingly simple to whip up with ingredients that are probably lounging in your pantry right now. Jump to Recipe

What You’ll Need

The beauty of these animal crackers is in their simplicity. Chances are you already have most of this hanging around in your kitchen. Here’s what you’ll need:

  • Butter – the base of flavor and texture
  • Brown sugar – for that slight caramel sweetness
  • Egg – to bind it all together
  • Vanilla – a warm aroma booster
  • Cinnamon – the spice that whispers “home”
  • Allspice – for a hint of mystery spice
  • Salt – because sweet needs balance
  • Baking powder – to lift them ever so slightly
  • Oats – for a bit of texture
  • Flour – the backbone of the dough
  • Cocoa powder – optional, but oh what it adds!

How to Make Homemade Animal Crackers

Ready to dive in? Let’s do this!

  1. In a mixing bowl, cream together the butter and brown sugar until the mixture is light and fluffy. You should see it lighten in color slightly.
  2. Add in the egg and vanilla, and mix until everything is well combined and smooth.
  3. Sprinkle in the cinnamon, allspice, and salt. The dough will start to smell like a cozy autumn afternoon.
  4. Mix in the baking powder, oats, and flour. If you’re going the chocolatey route, replace some of the flour with cocoa powder as you measure.
  5. Once everything is incorporated, form the dough into a ball. It will be a bit sticky, but that’s okay!
  6. Wrap it in plastic wrap and let that dough chill in the fridge for at least an hour, but overnight is perfectly fine too.
  7. When you’re ready, preheat your oven to 350°F. Pull the dough from the fridge, grab a hunk, and roll it out to a 1/4″ thickness. Think of it as your edible crafting clay.
  8. Use your favorite animal-shaped cookie cutters to stamp out shapes and place them on a cookie sheet lined with parchment paper. Give them a little breathing room—they need space to grow!
  9. Bake for 5-7 minutes. Keep an eye out—once they turn golden and fragrant, you’re in business.

Cook’s Notes

Here’s the deal: don’t skip the chilling. It makes the dough easier to handle and helps the flavors meld together nicely. If you’re planning ahead, this dough holds well in the fridge for about 24 hours. Once baked, keep the crackers in an airtight container. They should stay crunchy and delicious for about a week, if they last that long. Remember to roll the dough evenly, so all your crackers bake at the same rate. And if they get a little too golden, don’t worry, that just means more crunch.

Make It Your Own

Feel free to play around with the recipe. Here are some ideas:

  • Swap the cinnamon for nutmeg or ginger for a different kind of spice.
  • Add a handful of mini chocolate chips to the dough for a surprise treat.
  • Replace the oats with shredded coconut for a tropical twist.
  • Use almond extract instead of vanilla for a nuttier flavor.

If you try this, I’d love to hear how it turns out—drop a comment or tag me! These little guys are a joy to make and even more fun to eat, so I hope they bring a bit of joy to your table too. Happy baking!

Related update: Homemade Animal Crackers

Related update: Brownie Cake gluten free, dairy free

OREO Cookie Balls – Snowman | Made by Meaghan Moineau

Picture this: It’s a Saturday afternoon, and I’m in the kitchen with my son. We’re both craving something sweet but don’t want to spend hours baking. Suddenly, the idea hits me—OREO Cookie Balls! These aren’t just any cookie balls; we’re going to turn them into adorable snowmen. It feels like the perfect plan for a chilly day when you want something as comforting as a warm sweater but as easy as a quick snack. The best part? You probably already have most of the ingredients in your pantry. Trust me, these little bites are worth making. They’re quick and fun, especially if you have little helpers around.

Jump to Recipe

What You’ll Need

So here’s the deal: These ingredients are as simple as it gets. You might even have them stashed away already. Let’s dive in:

  • A full package of OREO Cookies
  • One block of cream cheese (softened to room temperature)
  • Baker’s chocolate (for melting)
  • Rolo chocolate candy
  • Black gel icing (for the eyes and buttons)
  • Orange gel icing (for the nose)
  • Additional supplies to decorate snowmen (think scarves made of licorice or hats from mini peanut butter cups)

How to Make OREO Cookie Balls – Snowman

Ready? Let’s make some magic happen!

  1. First, grab your package of OREO Cookies. Without removing the filling, crush them up in a large gallon-sized ziplock bag. You want fine crumbs, so give them a good whack!
  2. Pour your cookie crumbs into a large mixing bowl, and add in the softened cream cheese. Mix these together on medium speed until you have a smooth, dough-like consistency.
  3. Take a 1-inch cookie scoop (or just eyeball it) to portion out the mixture. Roll each scoop between your palms to form smooth, even balls.
  4. Place the cookie balls on a cookie sheet and pop them in the freezer for about 10 minutes. This helps them firm up a bit.
  5. While they’re chilling, melt your Baker’s chocolate according to the package instructions. You want it smooth and glossy, ready for dipping.
  6. Remove the cookie balls from the freezer and dip each one into the melted chocolate. Use a fork to lift them out, letting any excess chocolate drip off before placing them on a wax paper-lined cookie sheet.
  7. With a gentle touch, add the Rolo chocolate candy on top for the hat while the chocolate is still wet.
  8. Chill your snowmen in the refrigerator for about an hour until the chocolate shell is firm and set.
  9. Now, the fun part—decorate! Use the black gel icing for eyes and buttons, and the orange gel icing for the cute little carrot nose. Let your creativity shine with any additional decorations you like.

Cook’s Notes

Alright, let’s talk strategy. If the OREO dough feels too sticky, chill it in the fridge for a bit. It makes rolling much easier. Regarding the chocolate, avoid overheating it—give it slow, gentle warmth so it won’t seize. For storage, these snowmen can chill out in the fridge for up to a week or stay cozy in the freezer for about a month. Just make sure they’re in an airtight container to keep them fresh. If you’re planning to make these ahead of time, consider doing the base a day in advance to save on last-minute hustle.

Make It Your Own

Feel like changing things up? Here’s how you can shake up the snowman scene:

  • Swap the Baker’s chocolate with white chocolate for an even snowier look.
  • Use colored gel icing to create vibrant scarves or hats.
  • Add crushed peppermint candy to the cookie crumb mixture for a holiday twist.
  • Substitute the Rolo candy with a mini marshmallow for a softer hat look.

If you try this, I’d love to hear how it turns out—drop a comment or tag me! Let’s share some sweet little snowmen with the world. Happy decorating!

Related update: OREO Cookie Balls – Snowman

Related update: Chocoholic's Deep Dark Dream Chiffon Cake

The Blarney Burger | Made by Meaghan Moineau

Picture this: It’s a chilly Tuesday night, and I’m standing in front of my fridge, staring at the contents with that familiar, slightly desperate hope that inspiration will strike. As I pull out a pound of ground sirloin, I remember the half-full bottle of Irish whiskey on my shelf. That’s when it hits me — the Blarney Burger. A burger so delightfully infused with flavors, it feels like an Irish pub in your very own kitchen. It’s got a hint of whiskey, a punch of garlicky goodness, and the creamy tang of piccante Gorgonzola. It’s quick enough for a weeknight but fancy enough to make your Netflix binge feel like a special occasion. Ready to create some burger magic?

Jump to Recipe

What You’ll Need

So, most of this is probably hanging out in your kitchen already, waiting for its moment to shine. The secret weapons here are the whiskey and the Gorgonzola. They’re the dynamic duo that transforms this from a regular burger into the Blarney Burger.

  • 1 pound ground sirloin
  • 2 tablespoons Irish whiskey
  • 1 large egg
  • 1/2 cup sweet diced onion
  • 2 cloves fresh garlic, minced
  • 1/2 cup piccante Gorgonzola crumbles
  • Salt and pepper, to taste
  • 2 tablespoons butter
  • 1 cup shredded purple cabbage
  • 4 hamburger buns
  • 1 tablespoon Worcestershire sauce

How to Make The Blarney Burger

  1. First, let’s start with our Irish Mustard Sauce. In a small saucepan, combine 1 tablespoon cornstarch, 2 teaspoons sugar, 1 teaspoon dry mustard, 1/2 teaspoon salt, 1 cup water, 1 tablespoon butter, 1/4 cup vinegar, and 1 teaspoon horseradish. Whisk everything together over medium heat until it’s smooth and thick like pudding. Set aside.
  2. In a large bowl, mix the ground sirloin, Irish whiskey, egg, sweet diced onion, minced garlic, and a dash of salt and pepper. Use your hands — it’s messy but worth it — to combine everything until just mixed.
  3. Shape the meat mixture into 4 patties. Don’t pack them too tight; you want a tender burger.
  4. Heat a skillet or grill over medium-high heat. Cook the patties for 4-5 minutes per side. You’re looking for a deep brown crust, while the inside stays juicy.
  5. While the burgers are cooking, create a Gorgonzola butter-wash by melting the remaining Gorgonzola crumbles with 2 tablespoons of butter in the microwave. Whisk them until smooth.
  6. Brush the Gorgonzola butter-wash on the cut sides of the buns. Toast them on the upper or outer edges of the grill until they’re golden and slightly crispy. It’s all about that crunch!
  7. Assemble your burgers by placing a patty on each bun bottom, then topping with a heap of shredded purple cabbage and a generous drizzle of your Irish Mustard Sauce. Pop on the top bun, and you’re ready to dig in.

Cook’s Notes

A few quick tips to ensure your Blarney Burger is nothing short of legendary:

– Don’t overwork the meat when forming the patties. The looser they are, the juicier they’ll be.
– If you find the mixture too wet due to the whiskey, add a bit more diced onion to bind it.
– The Irish Mustard Sauce can be made ahead and stored in the fridge. Just warm it up slightly before serving.
– Leftover patties (if there are any!) can be stored in the fridge for up to two days. Reheat gently on the stove to keep them juicy.

Make It Your Own

Here are a few ideas to tailor the Blarney Burger to your taste buds:

  • Swap the ground sirloin for turkey if you’re feeling a lighter vibe. It’s surprisingly good with the Irish whiskey!
  • Trade the piccante Gorgonzola for sharp cheddar if you’re not a fan of blue cheese. You’ll still get a great tangy flavor.
  • For a spicier kick, add a tablespoon of crushed red pepper to the meat mixture.
  • Want to go vegetarian? Use crispy tofu slices marinated in a little Worcestershire and whiskey, then seared to golden perfection.

If you try this, I’d love to hear how it turns out — drop a comment or tag me! Your kitchen adventure could inspire my next one. 🍀

Related update: The Blarney Burger

Related update: Beef Braised In Red Wine

Caramelised Onion and Mushroom Quiche | Made by Meaghan Moineau

The other day, I found myself staring into the depths of my fridge, battling that familiar weeknight dilemma: what to make for dinner that feels both comforting and a little bit special. The answer came subtly as I caught sight of a lone pie shell resting on the bottom shelf. Voilà — Caramelised Onion and Mushroom Quiche! It’s the kind of dish that fills your kitchen with the most irresistible aroma, promising warmth and satisfaction in every bite. Plus, it’s a breeze to pull together with ingredients you probably already have lounging in your pantry and fridge. Let me tell you, this quiche is your new best friend for those hectic days when you crave something homemade but without the fuss.

Jump to Recipe

What You’ll Need

This ingredient list is delightfully straightforward, and chances are you already have most of these at home. Here’s what you’ll need to whip up this delicious quiche:

  • A pre-made nine-inch pie shell
  • 2 tablespoons of olive oil
  • 2 large white onions, thinly sliced
  • 2 cloves of garlic, minced
  • 1/2 teaspoon of dried chilli flakes
  • 8 ounces of mushrooms, sliced
  • 1 teaspoon of dried thyme
  • 3 eggs
  • 1 cup of half and half cream
  • 1 cup of grated havarti cheese
  • Salt and pepper, to taste

How to Make Caramelised Onion and Mushroom Quiche

  1. Preheat your oven to 400°F. Take your nine-inch pie shell and dock it with a fork to prevent it from puffing up. Slide it into the oven and let it bake for 10 to 15 minutes until it’s lightly golden.
  2. While the pie shell is crisping up, heat the olive oil in a large skillet over medium-high heat. Add the onions, garlic, and chilli flakes. Stir occasionally and let them cook until the onions are rich, brown, and caramelised, about 10 minutes.
  3. Next, toss the mushrooms into the skillet. Keep the heat on high and let the mushrooms caramelise as well, which should take around 5 minutes. The mushrooms will soak up all those lovely flavors. Once they’re ready, remove the skillet from the heat and stir in the thyme, salt, and pepper.
  4. In a large mixing bowl, beat the eggs together with the half and half cream. Stir in half of the grated havarti cheese. Combine this mixture with the onion-mushroom blend, mixing thoroughly until everything is well integrated.
  5. Place the pre-baked pie shell on a cookie tray — this is your shield against any unexpected spills. Pour the filling into the pie shell, spreading it evenly. Sprinkle the remaining cheese over the top.
  6. Reduce the oven temperature to 375°F. Bake the quiche until the filling is set — it will be firm to the touch and have a gorgeous golden hue. This should take about 25 to 30 minutes. Serve warm and get ready for those taste buds to rejoice!

Cook’s Notes

Cooking can sometimes be a bit unpredictable, so here are a few tips to ensure your quiche turns out perfect every time. First, make sure those onions are well caramelised; they should be a deep golden brown. This adds depth and sweetness to the quiche. Don’t rush the process — good things take time! Also, remember to taste your filling before adding it to the shell to adjust the seasoning. If you want to make this ahead, you can prepare the filling and bake the pie shell a day before; just assemble and bake right before serving. Leftovers (if any!) can be stored in the fridge and reheated gently in the oven.

Make It Your Own

This quiche is wonderfully versatile. Here’s how you can mix it up:

  • Swap the mushrooms for crispy tofu if you’re looking for a vegetarian protein boost.
  • Use Swiss cheese or even cheddar if you prefer a sharper flavor profile.
  • Throw in some baby spinach with the mushrooms for extra greens.
  • Substitute the dried thyme with fresh basil for a different herbal note.

If you try this, I’d love to hear how it turns out — drop a comment or tag me on social media! Cooking is all about experimenting and most importantly, enjoying every step of the way. Can’t wait to hear from you!

Related update: Caramelised Onion and Mushroom Quiche

Banana Pudding Cake | Made by Meaghan Moineau

Alright, picture this: It’s Wednesday evening, halfway through a week that feels like it’s been two weeks long, and you’re in dire need of something indulgent but not overly complicated. That’s the exact moment I found myself in last week when I decided to whip up a Banana Pudding Cake. This isn’t just any banana dessert; it’s got layers of moist cake, creamy custard, and a light-as-air whipped cream topping that makes it feel like a hug on a plate. Plus, it’s a great way to use up those slightly too-ripe bananas staring you down on the counter. The best part? You probably have most of the ingredients already lying around. Trust me, this is the dessert you deserve after adulting so hard all week. Jump to Recipe

What You’ll Need

This isn’t your typical mile-long ingredient list. Chances are you already have most of this.

  • Bananas
  • Vanilla wafers
  • Egg yolks
  • Eggs
  • Flour
  • Sugar
  • Baking powder
  • Cocoa powder
  • Milk
  • Salt
  • Pudding
  • Vanilla extract
  • Heavy whipping cream
  • Powdered sugar
  • Whipped cream

How to Make Banana Pudding Cake

  1. Preheat your oven to 350°F (175°C). In a large bowl, beat the egg yolks with sugar until the mixture gets that pale, creamy consistency, and set it aside.
  2. In the bowl of an electric mixer, whip the egg whites until they form stiff peaks that hold their shape like a dream.
  3. Gently add the baking powder, processed wafers, and cocoa to the egg yolk mixture. It gets a bit thick and fudgy here; you’re on the right track.
  4. Drop about 1/4 of the whipped egg whites into the larger bowl and fold lightly to get things started. Then fold in the remaining whites carefully until no streaks remain.
  5. Line a jellyroll sheet pan with parchment paper, ensuring it covers all sides, and spray the paper with non-stick floured baking spray.
  6. Spread the cake batter evenly over the paper, making sure it covers the entire pan, and bake it in your preheated oven for 15-20 minutes. The cake should feel springy to the touch.
  7. Let the cake cool completely on the sheet—this will take at least 30 minutes to an hour, so patience, my friend.
  8. Meanwhile, mix sugar, flour, and salt in the top of a double boiler. If you don’t have one, improvise with a saucepan over another with boiling water.
  9. Blend in the egg yolks and milk, then cook uncovered while stirring constantly for 10 to 12 minutes, or until the mixture thickens nicely. Remove from heat and stir in the vanilla extract.
  10. Once your cake is cooled, carefully lift the parchment paper, remove the cake from the pan, and place it on a flat surface. Starting from the short end, cut into three even pieces.
  11. Assemble your masterpiece by placing the first layer of cake on a serving platter. Spread half of the custard over the top, then cover with a third of the banana slices and a third of the crumbled wafers.
  12. Top with the next piece of cake and repeat, making sure to reserve a few bananas and crumbled cookies for later. Spread the final amount of custard onto the top layer of cake.
  13. Refrigerate the whole cake for at least 2 hours or until you’re ready to serve. This chill time is crucial for the flavors to really meld together.
  14. Just before serving, whip up the cream topping. Combine all ingredients in a large mixing bowl and beat until the cream thickens and becomes stiff.
  15. Spread the whipped cream over the cake and top with the reserved banana slices and wafers right before serving to keep everything fresh and delightful.

Cook’s Notes

This cake is best made ahead, allowing time for the flavors to develop in the fridge. Just keep the final toppings off until serving time to avoid any sad, brown bananas. Store leftovers in an airtight container in the fridge for up to 3 days, though the bananas might start to look a little tired by then. Don’t worry, the taste will still be on point!

  • If you’re in a hurry, ready-made pudding can be used in place of homemade custard, but honestly, the homemade is worth the little extra effort.
  • To avoid the dreaded banana browning, toss the slices in a bit of lemon juice before layering them in the cake.

Make It Your Own

  • Go chocolatey: Sprinkle some mini chocolate chips between the layers for a chocolate-banana twist.
  • Nutty buddy: Add a layer of crushed pecans or walnuts for a bit of crunch.
  • Berry bliss: Substitute half of the banana slices with fresh strawberries for a fruity variation.
  • Gluten-free: Use gluten-free vanilla wafers and your favorite gluten-free flour blend for the cake.

If you try this, I’d love to hear how it turns out—drop a comment or tag me! Happy baking, friends. Let’s make mid-week desserts a thing, because why not?

Related update: Banana Pudding Cake

Related update: Crispy Rhubarb Pockets

Valentine’s Day Potted Plant Ice-Cream Desserts | Made by Meaghan Moineau

It was a seemingly ordinary Tuesday evening, and I found myself staring at the contents of my freezer, feeling a bit uninspired. A pint of vanilla bean ice cream caught my eye, and suddenly, I was reminded of a cute dessert idea I’d seen earlier — those adorable potted plant ice cream treats. I mean, who wouldn’t want to dig their spoon into what looks like a tiny pot of dirt, only to find a luscious, creamy surprise underneath? Perfect for Valentine’s Day or just because, these desserts are delightfully simple to make and never fail to impress with their whimsical presentation. They come together quickly and are the kind of thing you can whip up on a whim, which, as a busy home cook, is exactly the kind of recipe I adore.

Jump to Recipe

What You’ll Need

Chances are you already have most of this hanging around, but the way these flavors and textures come together is just magical.

  • Vanilla bean ice-cream
  • Diced palm seeds
  • Mixed nuts
  • Blueberries
  • Oreo cookies
  • Parsley

How to Make Valentine’s Day Potted Plant Ice-Cream Desserts

  1. Start by separating the Oreo cookies; remove the cream filling and set it aside (or snack on it, no judgment here!). Pound the cookies until they transform into fine crumbs that resemble rich, dark soil.
  2. In a mixing bowl, combine the vanilla bean ice-cream with the diced palm seeds, mixed nuts, and a handful of blueberries. The idea is to get a balanced mix of creaminess, crunch, and bursts of fruity freshness.
  3. Divide this heavenly mixture into your serving cups. It doesn’t have to be perfect — a little messiness adds to the charm. Place these in the freezer for a good chill.
  4. Once your ice-cream cups are well-frozen, generously top each one with the Oreo cookie crumbs to create that authentic “soil” look.
  5. Just before serving, insert a sprig of parsley into each cup. Voilà! You’ve got yourself some delightful potted plant ice-cream desserts that are sure to wow anyone lucky enough to dig in.

Cook’s Notes

Making these desserts is almost as fun as eating them. Remember, the less perfect they look, the better — we’re aiming for a natural, earthy vibe. If you’re prepping ahead, keep the ice-cream mix in the freezer until just before serving, then add the cookie crumbs and parsley. Leftovers (if you have any!) can stay in the freezer for a few days, but be sure to add fresh parsley right before serving again to keep that vibrant green pop.

Make It Your Own

  • Swap the vanilla bean ice-cream for chocolate if you want that extra chocolatey punch — it’s a game-changer!
  • Try using mint leaves instead of parsley for a refreshing twist and a subtle hint of minty fragrance.
  • For a tropical vibe, substitute the blueberries with chunks of pineapple or mango.
  • If you’re nuts about nuts, add a sprinkle of crushed pistachios on top of the “soil” for extra crunch and color.

If you try this, I’d love to hear how it turns out — drop a comment or tag me in your potted plant creations! Trust me, these little delightful desserts will grow on you just as they have on me. Happy cooking!

Related update: Valentine’s Day Potted Plant Ice-Cream Desserts

Related update: Banana Pudding Cake

Chocolate Chip Peanut Butter Mallow Dessert Bars | Made by Meaghan Moineau

Last Tuesday, I found myself in need of a pick-me-up. It was one of those dreary afternoons when everything seemed to drag. The sky was grey, the email inbox was overflowing, and honestly, I just wanted something sweet and gooey to make it all better. That’s when I remembered these Chocolate Chip Peanut Butter Mallow Dessert Bars. Trust me, they’re the kind of treat that can turn any day around. Quick to whip up, using ingredients you likely already have kicking around your pantry, these bars are a perfect mix of chocolatey, peanut buttery magic with a delightful marshmallow surprise. They’re everything you didn’t know you needed.

Jump to Recipe

What You’ll Need

This is one of those recipes where a quick pantry dive will probably yield most of what you need. The combination of these ingredients is pure joy.

  • 1 package of chocolate chip cookie mix
  • 1 egg
  • 3 tablespoons of milk
  • 1/2 cup of butter, melted
  • 1/2 cup of peanut butter
  • 1 cup of marshmallows
  • Drizzle of chocolate syrup

How to Make Chocolate Chip Peanut Butter Mallow Dessert Bars

  1. Preheat your oven to 375°F (190°C). While it warms, grab a mixing bowl and stir together the chocolate chip cookie mix, egg, milk, and melted butter until smooth. It should be creamy and thick but pliable enough to spread.
  2. Grease an 8×8 baking pan well. Trust me, you’ll thank yourself later. Spread the cookie mixture evenly into the bottom of the pan. The more even, the better it’ll bake.
  3. Pop the pan into the oven for 15-20 minutes. You’ll know it’s ready when the edges are golden and the center looks set and slightly puffed. Your kitchen will smell like heaven by now.
  4. Take the pan out and immediately spread the peanut butter evenly over the hot cookie base. The warmth will help it glide smoothly.
  5. Top the peanut butter layer with marshmallows. Feel free to sneak a few into your mouth — I won’t tell.
  6. Return the pan to the oven for a few more minutes, just until the marshmallows start to melt and get a little golden on the tips.
  7. Remove from the oven and use a spatula to spread the marshmallows evenly over the peanut butter layer, creating a gooey, sticky blanket.
  8. Drizzle the chocolate syrup over the top. Let it cool to set completely before cutting into squares. This is the hardest part — waiting! But I promise it’s worth it.

Cook’s Notes

Keep an eye on the marshmallows when you pop the pan back in the oven. They can go from beautifully melted to burnt in a blink. If you’re making these ahead, let them cool completely before storing them in an airtight container at room temperature. They’ll keep for about 3-4 days, not that they’ll last that long! For leftovers, a quick zap in the microwave will bring back that gooey goodness.

Make It Your Own

  • Nut Swap: Substitute the peanut butter with almond or cashew butter for a different nutty twist.
  • S’mores Style: Add a layer of crushed graham crackers in between the peanut butter and marshmallows for a classic s’mores flavor.
  • Extra Chocolatey: Mix in a handful of chocolate chips into the cookie dough batter for extra bursts of chocolate with every bite.
  • Spice It Up: Stir a teaspoon of cinnamon into the cookie mix for a warm, spiced undertone.

If you try this, I’d love to hear how it turns out — drop a comment or tag me! There’s nothing like sharing a good recipe and seeing everyone’s delicious results. Happy baking, and may your days be as sweet as these bars!

Related update: Chocolate Chip Peanut Butter Mallow Dessert Bars

Related update: Valentine's Day Potted Plant Ice-Cream Desserts