Peach Crostata | Made by Meaghan Moineau

Peach Crostata | Made by Meaghan Moineau

The Perfect Summer Treat: Peach Crostata


A Delightful Blend of Nostalgia and Flavor


There's a certain magic in the air as summer approaches, bringing with it the sweet, juicy allure of ripe peaches. One of the best ways to capture this essence is through the creation of a Peach Crostata, a rustic dessert that not only satisfies the taste buds but also evokes cherished memories of family gatherings and sunlit afternoons.


Ingredients for a Simple Indulgence


- Recipe Pie Dough: The foundation of our crostata, offering a buttery and flaky base.
- Peaches: The star of the show, bursting with sweetness and a hint of tartness.
- Sugar: Adds a touch of sweetness to the fruit mixture.
- Flour: Helps thicken the fruit’s juices as they bake.
- Butter: A pat on top for a rich finish.
- Whole Egg: Used for brushing the pastry, giving it a golden sheen.
- Ice Cream: A perfect accompaniment, adding a creamy contrast to the warm crostata.

Steps to Create Your Peach Crostata


1. Preheat and Prepare: Start by preheating your oven to 375 degrees. Line a baking sheet with parchment paper to prevent sticking.
2. Assemble the Base: Place your uncooked pie dough onto the prepared baking sheet.
3. Mix the Filling: In a bowl, gently combine the peaches, sugar, and flour until the peaches are well-coated.
4. Fill the Dough: Pour the fruit mixture into the center of the pastry round, ensuring you leave about 2 1/2 inches around the edge for folding.
5. Fold and Brush: Carefully fold up the edges of the pastry dough over the filling to create a rustic rim, fanning the edges as you go. Brush the dough with the beaten egg to achieve that golden-brown finish.
6. Add Butter and Bake: Place a pat of butter on top of the fruit mixture. Bake in the preheated oven for 30 to 45 minutes until the crust is golden and the fruit is bubbling.
7. Cool and Serve: Once done, cool the crostata on a rack. Serve warm with a scoop of ice cream for an irresistible treat.

A Nostalgic Slice of Life


Every bite of Peach Crostata takes me back to my grandmother's kitchen on those lazy summer Sundays. The sweet aroma of peaches baking would waft through the house, drawing family members together like moths to a flame. My cousins and I would play in the backyard, our cheeks flushed with the sun's warmth, eagerly waiting for the crostata to cool just enough to eat. Grandma would serve it with a generous scoop of vanilla ice cream, its creamy texture melting over the warm pastry. It wasn't just a dessert; it was a centerpiece of family unity and laughter, a tradition I cherish and continue to this day.


Difficulty and Classification


Difficulty Rating: 3/10 – This dessert is delightfully simple, perfect for novice bakers and experienced chefs alike.
Classification: Dessert – A sweet conclusion to any meal, ideal for showcasing summer's bounty.

Incorporating the simplicity and nostalgia of a Peach Crostata into your summer festivities not only brings a delicious dessert to the table but also a piece of cherished family history. Enjoy the process, savor the moments, and indulge in this delightful summer treat.

Read more about Appetizers

Read more about Main Dishes

Read more about Desserts

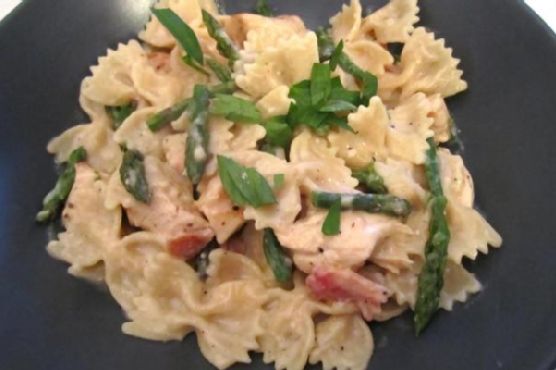
Farfalle with Peas, Ham and Cream | Made by Meaghan Moineau

Farfalle with Peas, Ham and Cream | Made by Meaghan Moineau

Title: "A Taste of Nostalgia: Farfalle with Peas, Ham, and Cream"
Description: Discover the comfort and joy of a classic Italian-inspired dish, Farfalle with Peas, Ham, and Cream. Perfectly blending simple ingredients with cherished memories, this easy-to-make main dish is sure to become a family favorite.

---


There's something enchantingly comforting about dishes that transport us back to cherished family gatherings. Farfalle with Peas, Ham, and Cream is one such recipe that not only delights the palate but also warms the soul. This dish, rich in both flavor and nostalgia, has been a staple at our family dinners, where laughter and love were always the main ingredients.


A Stroll Down Memory Lane

Growing up, Sunday dinners at my grandmother's house were a sacred ritual. The aroma of hearty dishes would greet us at the door, promising an afternoon of indulgence and togetherness. Among the myriad of recipes she crafted with love, Farfalle with Peas, Ham, and Cream stood out not just for its taste, but for the warmth it brought to our hearts.


I vividly recall the sight of my grandmother bustling around her cozy kitchen, her apron dusted with flour and her face glowing with the joy of cooking for her family. As the farfalle pasta danced in the boiling pot, she would hum a tune that was as comforting as the meal itself. The sizzle of butter in the skillet, the vibrant green of the peas, and the savory aroma of ham melded together to create a symphony of flavors that was simply irresistible.


After a day filled with conversation and laughter, we would gather around the dining table. Bowls of Farfalle with Peas, Ham, and Cream were passed around, each serving a testament to the love that went into its making. The creaminess of the sauce, the saltiness of the ham, and the subtle sweetness of the peas perfectly complemented the al dente farfalle, making every bite a delight.


The Recipe
This dish, with its Italian roots and heartwarming simplicity, is a breeze to prepare. Here's how you can recreate this beloved family treasure:
Ingredients:

- 2 tablespoons butter


- 1 cup diced ham


- 12 ounces farfalle pasta


- 1 cup canned heavy cream


- 1 cup parmesan cheese, grated


- 1 cup frozen peas


- Salt and pepper to taste


Instructions:

1. Cook the farfalle pasta according to the package directions until al dente. Drain and set aside.


2. In a skillet over medium heat, melt the butter. Add the diced ham and frozen peas, sautéing them together for about 5 minutes.


3. Pour in the heavy cream, season with salt and pepper, and let the mixture cook for 5 to 10 minutes, or until the cream begins to thicken slightly.


4. Remove the skillet from heat. Add the cooked pasta to the pan and gently stir to coat the farfalle with the creamy sauce.


5. Sprinkle the grated parmesan cheese over the pasta, stirring until the cheese melts and blends into the sauce.


6. Serve immediately, ensuring each plate is filled with love, warmth, and a sprinkle of nostalgia.


Difficulty Rating: 3/10
Classification: Main Dish

This recipe's simplicity is not just in its preparation but also in its ability to bring people together. It serves as a gentle reminder that the most cherished moments are often found in the simplest of meals, shared with those we love. So, gather your family and create new memories with this timeless dish that has been a cherished part of ours for generations. Enjoy!

Read more about Appetizers

Read more about Main Dishes

Read more about Desserts

Shortbread Lemon Cookies | Made by Meaghan Moineau

Shortbread Lemon Cookies | Made by Meaghan Moineau

Zesty Delights: Nostalgic Shortbread Lemon Cookies


A Journey of Taste: The Sweet and Tangy Embrace of Lemon Cookies


Imagine the vibrant zest of lemon mingling with the buttery goodness of shortbread, creating a perfect symphony of flavors that dance on your taste buds. Shortbread Lemon Cookies are not just a treat; they are a journey back to cherished family memories and sunny afternoons filled with laughter. With a difficulty rating of 4 out of 10, these delightful cookies are an easy yet impressive dessert to share with loved ones.


The Ingredients of Joy


To embark on this flavorful journey, gather these simple yet transformative ingredients:

- 1 cup butter, softened


- 2 eggs


- 1 tablespoon lemon zest


- 1 cup almond flour


- 1/2 cup caster sugar


- 1 1/2 cups all-purpose flour


- 2 tablespoons lemon juice


- Whole dried lemons, sliced


- Powdered sugar (optional)


A Recipe Steeped in Family Tradition


Growing up, the aroma of lemon cookies wafting through my grandmother’s kitchen signaled the start of summer. These cookies were more than just a treat; they were a symbol of our family’s love for gathering and sharing stories. I remember sitting on the porch, a plate of freshly baked cookies in my lap, as my grandmother recounted tales from her childhood.


The tradition was simple yet profound: each summer, we would make these cookies together, measuring ingredients and sharing laughter. The tangy aroma of lemon zest would fill the air as we shaped the dough into perfect rolls. These moments taught me the joy of baking and the importance of family bonds.


Crafting Your Own Memories: Instructions


1. Prepare the Base: Beat the softened butter with one egg until creamy. Gradually add the almond flour, caster sugar, all-purpose flour, and lemon juice, mixing on the lowest setting until a smooth dough forms.
2. Chill the Dough: Divide and shape the dough into two rolls, each about 2 inches in diameter. Wrap them in parchment paper and refrigerate for at least 3 hours to firm up the dough.
3. Ready the Oven: Preheat your oven to 350°F (175°C). While waiting, revel in the anticipation of the deliciousness to come.
4. Slice and Arrange: Once chilled, slice each log into cookies about 1/8 inch thick. Place them on a lightly greased baking sheet, leaving space for them to expand slightly.
5. Add a Golden Touch: Beat the second egg and gently brush the top of each cookie. Crown each with a slice of dried lemon and sprinkle with a touch of sugar.
6. Bake to Perfection: Bake in the preheated oven for 12-15 minutes. For a beautifully browned top, place the cookies under the broiler for the last 5 minutes. Allow them to cool on a wire rack.
7. Optional Elegance: Dust with powdered sugar for an added touch of elegance and a hint of sweetness.

A Sweet Conclusion


Shortbread Lemon Cookies are more than just a dessert; they are a gateway to cherished memories and the creation of new ones. Whether enjoyed on a warm summer day or as a treat during a cozy gathering, these cookies bring joy and connection to any occasion. So, gather your loved ones, embrace the nostalgia, and let the magic of lemon and shortbread transport you to a place of warmth and happiness.


Enjoy the journey, and happy baking!

Read more about Appetizers

Read more about Main Dishes

Read more about Desserts

Bahamian Goombay Smash Cocktail | Made by Meaghan Moineau

Bahamian Goombay Smash Cocktail | Made by Meaghan Moineau

Title: Sip the Tropics: Crafting the Perfect Bahamian Goombay Smash Cocktail
Description: Dive into the vibrant flavors of the Bahamian Goombay Smash Cocktail, a tropical delight that captures the essence of island life. With a blend of coconut rum, apricot brandy, and fresh juices, this cocktail promises to transport your senses to sun-soaked beaches. Join me as I share a nostalgic family memory tied to this refreshing drink, and learn how to create this masterpiece right at home. Difficulty: 3/10. Category: Appetizer.

---


When the sun dips low and paints the sky in hues of orange and pink, there's one drink that brings the spirit of the Bahamas to life: the Goombay Smash Cocktail. This tropical concoction, bursting with the rich flavors of coconut rum, apricot brandy, and fresh juices, is more than just a drink—it's an experience, a memory, a taste of paradise in a glass.


Ingredients


- Coconut Rum: Infuses the cocktail with a delightful tropical sweetness.
- Apricot Brandy: Adds a rich, fruity depth that balances the rum.
- Dark Rum: Provides a robust, molasses-like flavor.
- Pineapple Juice: Offers a vibrant, tangy sweetness.
- Orange Juice: Complements with a fresh, citrusy zing.
- Fresh Orange and Pineapple: For the perfect garnish.

Instructions


1. Begin by filling a small pitcher with ice, setting the stage for a chilled, refreshing drink.


2. Add both the coconut rum and dark rum, followed by the apricot brandy, creating a strong yet sweet foundation.


3. Pour in the pineapple juice, allowing its tang to dance with the rums.


4. Top off with orange juice, balancing the flavors with a citrusy brightness.


5. Stir gently, ensuring all ingredients meld together.


6. Garnish with slices of fresh orange and pineapple, enhancing both the visual and aromatic appeal.


A Nostalgic Family Memory


Every sip of the Goombay Smash takes me back to summers spent at my grandmother's quaint beach house on Eleuthera Island. It was a tradition for our family to gather every evening on the porch, the warm breeze carrying the scent of salt and hibiscus. My grandmother, with her infectious laughter and sun-kissed skin, would expertly mix a pitcher of Goombay Smash as we shared stories of our day.


This cocktail was more than just a drink; it was a symbol of togetherness and joy. As the sun set, painting the sky with a palette of tropical colors, we would raise our glasses, toasting to another unforgettable day in paradise. The Goombay Smash was our family's liquid sunshine, a reminder of the beautiful moments shared.


Difficulty and Classification


Creating the Bahamian Goombay Smash Cocktail is delightfully simple, with a difficulty rating of 3/10. Its ease of preparation makes it a perfect appetizer cocktail, setting a vibrant, tropical tone for any gathering.


---


In crafting the Goombay Smash, you're not just making a cocktail; you're capturing the essence of the Bahamas, inviting the spirit of the islands into your home. Whether you're reminiscing about family gatherings or creating new memories, this delightful drink is sure to become a cherished favorite, just as it has been for my family. So, shake off the day, embrace the island vibes, and enjoy your very own Bahamian escape, one sip at a time.

Read more about Appetizers

Read more about Main Dishes

Read more about Desserts

Warm Duck Salad With Roasted Beetroot | Made by Meaghan Moineau

Warm Duck Salad With Roasted Beetroot | Made by Meaghan Moineau

Title: Embrace the Seasons with a Warm Duck Salad and Roasted Beetroot Melody
Description: Discover the delightful fusion of rich flavors in our Warm Duck Salad with Roasted Beetroot. This comforting dish, with its blend of succulent duck breast, earthy beets, and vibrant citrus notes, is a true celebration of seasonal ingredients. Join us as we share not only a step-by-step guide to creating this culinary masterpiece but also a heartwarming family memory that makes this dish even more special.

---


Warm Duck Salad with Roasted Beetroot: A Taste of Tradition

As the leaves turn golden and the air grows crisp, there’s nothing like gathering around the table with family, sharing stories, and savoring the warmth of a lovingly prepared meal. One such dish that brings back the fondest memories in our family is the Warm Duck Salad with Roasted Beetroot. It’s a recipe that has been passed down through generations, always gracing our table during special fall gatherings.


Ingredients:

- Duck breast meat (skin left on)


- Baby beets


- Orange zest


- Honey


- Salt


- Arugula greens


- Pine nuts


- Canned mandarin orange segments


- Fresh mint


- Feta cheese


- Orange (juice)


- Extra virgin olive oil


- Balsamic vinegar


- Salt and pepper


Instructions:
1. Roast the Beets: Preheat your oven to 200°C (400°F). Clean the beets thoroughly, wrap them in aluminum foil, and roast for 30-40 minutes until tender.
2. Prepare Orange Zest: While the beets cook, peel an orange, ensuring you capture the zest without the bitter pith. Cut into fine strips and set aside.
3. Cook the Duck: Clean and dry the duck breasts, score the skin, and rub with salt. Place in a cold pan and cook on medium heat to render fat and brown the skin. Flip and cook until golden brown on both sides. Rest the duck under foil for half the cooking time.
4. Make the Vinaigrette: Squeeze the orange juice into a bowl, add olive oil, balsamic vinegar, and season with salt and pepper. Whisk well.
5. Prepare the Beets: Once cooled, peel and cut the beets into small pieces. Toss with vinaigrette and honey.
6. Assemble the Salad: Slice the duck thinly and layer with arugula, pine nuts, mandarin segments, mint, and feta cheese. Add beets and garnish with orange zest. Drizzle the remaining vinaigrette over the top.
A Nostalgic Family Memory:

Every autumn, my grandmother would gather the family for a weekend brunch, where this Warm Duck Salad was the star of the meal. I remember her bustling around the kitchen, sharing snippets of wisdom as she cooked. She taught me the art of perfecting duck breast and the importance of letting it rest, just as life sometimes requires us to pause and savor the moment.


This dish not only filled our bellies but also our hearts. We’d sit around the table, the vibrant colors of the salad matching the hues of the falling leaves, and share stories of our day. The scent of roasted beets mingling with citrusy notes of orange would fill the air, creating an atmosphere of warmth and love.


Difficulty: 6/10
Classification: Main Dish

This dish is more than just a meal; it’s a cherished family tradition, a tapestry of flavors woven with love and nostalgia. Whether you’re cooking for family or friends, this Warm Duck Salad with Roasted Beetroot is sure to create lasting memories and a sense of togetherness. Enjoy every bite and every moment.

Read more about Appetizers

Read more about Main Dishes

Read more about Desserts

Vanilla and Lime Flan By Esperanza Platas Alvarez (Planet Food Mexico) | Made by Meaghan Moineau

Vanilla and Lime Flan By Esperanza Platas Alvarez (Planet Food Mexico) | Made by Meaghan Moineau

Title: Sweet Memories: Crafting the Perfect Vanilla and Lime Flan
Description: Dive into the heart of traditional Mexican cuisine with our Vanilla and Lime Flan recipe. Authored by Esperanza Platas Alvarez from Planet Food Mexico, this dessert is more than just a treat—it's a nostalgic journey that blends the sweet essence of vanilla with the zesty freshness of lime. Discover a cherished family memory tied to this delightful dessert and learn how to create it yourself with our easy-to-follow guide.

---


Vanilla and Lime Flan: A Taste of Home

There's something magical about the way a recipe can transport you back in time, evoking memories of laughter-filled kitchens and the comforting aroma of a beloved dessert. For me, the Vanilla and Lime Flan is more than just a dish; it's a cherished family tradition passed down through generations.


Growing up, Sunday afternoons were always reserved for family gatherings. My grandmother, Esperanza, would lead the charge in our bustling kitchen, orchestrating a symphony of flavors with the ease of a maestro. Her Vanilla and Lime Flan was the centerpiece of these joyful occasions, a testament to her Mexican heritage and culinary prowess.


Ingredients:

- 1 cup sugar


- 1/4 cup water


- 1 can (14 oz) condensed milk


- 2 cups whole milk


- Zest of 2 limes


- 1 vanilla bean pod


- 4 large eggs


Instructions:
1. Preheat Your Oven: Set your oven to 360°F (182°C) to get it ready for the flan.
2. Craft the Caramel: In a medium saucepan, combine the sugar and water over medium heat. Stir gently for about 10 minutes until the mixture turns a golden caramel color. Remember, patience is key here—avoid burning the sugar. Once ready, pour the caramel into a cake pan, swirling it to coat the base evenly. Set aside to cool.
3. Infuse the Milk: In another saucepan, combine the condensed milk and whole milk. Add the zest of two limes for a citrusy kick. Split the vanilla pod lengthwise, scrape out the seeds, and add them to the milk mixture. Simmer gently for 15 minutes, allowing the flavors to meld beautifully.
4. Prepare the Custard: In a bowl, beat the eggs lightly. Gradually add a small amount of the warm milk mixture to the eggs, whisking continuously to temper them and prevent curdling. Once tempered, incorporate the rest of the milk mixture.
5. Assemble the Flan: Pour the custard mixture over the set caramel in the cake pan. Prepare a water bath by placing the cake pan inside a larger pan filled halfway with water. This will ensure even cooking.
6. Bake: Place the water bath in the oven and bake for 45 minutes to an hour. The flan should be firm yet slightly jiggly in the center.
7. Cool and Serve: Allow the flan to cool to room temperature before refrigerating overnight. Once chilled, gently invert the flan onto a serving plate and enjoy!
Family Nostalgia:

Every time I prepare this flan, I am reminded of my grandmother's wisdom and warmth. Her hands, worn but gentle, would guide mine as I learned the art of crafting this dessert. "Cooking is like love," she would say, "it requires patience and dedication." Each bite of the flan brings me back to those sunlit Sundays, surrounded by family, where love was as abundant as the flan itself.


Difficulty Rating: 6/10
Classification: Dessert

Creating Vanilla and Lime Flan is a labor of love, a delicate dance of flavors and techniques that culminates in a dessert that is both sophisticated and comforting. Whether you're reliving cherished family memories or creating new ones, this flan is sure to leave a lasting impression on your taste buds and your heart.

Read more about Appetizers

Read more about Main Dishes

Read more about Desserts

Turkey BLT with Creamy Dijon Mustard | Made by Meaghan Moineau

Turkey BLT with Creamy Dijon Mustard | Made by Meaghan Moineau

Title: Turkey BLT with Creamy Dijon Mustard: A Nostalgic Twist on a Classic
Description:

Dive into the savory layers of our Turkey BLT with Creamy Dijon Mustard—a modern take on a beloved classic. This recipe combines the tangy zest of Dijon mustard with the rich flavors of turkey bacon and Swiss cheese, all nestled between slices of fresh Italian bread. Easy to prepare yet delightfully satisfying, it's a dish that will transport you back to cherished family gatherings. Whether you're cooking for an intimate lunch or a casual get-together, this sandwich is sure to become a household favorite. Rated 3 out of 10 in difficulty, it's perfect for a quick Main Dish that doesn't sacrifice taste.


---


Turkey BLT with Creamy Dijon Mustard: A Recipe and a Memory

There’s something magical about the aroma of turkey bacon sizzling on the skillet. It takes me back to Sunday afternoons spent in my grandmother’s kitchen, where the air was always fragrant with the delightful smell of simple yet hearty meals. One of our favorites was the Turkey BLT, a sandwich that somehow managed to bring the family together in eager anticipation.


Ingredients:

- 1 tablespoon Dijon mustard


- 8 slices fresh Italian bread


- 1 tablespoon olive oil


- 4 romaine heart leaves


- 2 tablespoons salad dressing


- 4 slices Swiss cheese


- 2 ripe tomatoes, sliced


- 8 slices turkey bacon


- 1 Vidalia onion, thinly sliced


Instructions:
1. Prepare the Oven and Bacon: Preheat your oven to 350 degrees Fahrenheit. While the oven is warming, cook the turkey bacon in a skillet over medium heat until crispy. The sizzling sound and savory smell are bound to bring back memories of comfort and warmth.
2. Bread and Spread: Slice the Italian bread into 8 even slices. In a small bowl, mix the Dijon mustard and salad dressing to create a creamy spread. Generously coat one side of each bread slice with this mixture.
3. Assemble the Sandwich: On four of the slices, layer two pieces of Swiss cheese, two romaine leaves, two slices of tomato, one slice of Vidalia onion, and four slices of the crispy turkey bacon. Top each with another slice of bread, spread side down.
4. Toast to Perfection: Drizzle the top of each sandwich with olive oil. Arrange them on a baking sheet and bake in the preheated oven. Turn halfway through, allowing each side to toast and the cheese to melt, approximately 4-5 minutes per side. For a different texture, you can also use a panini maker or toast them in a skillet on the stove top.

As a child, I’d often watch my grandmother meticulously assemble these sandwiches, her hands moving deftly over the ingredients. The final touch was always her signature drizzle of olive oil, which imparted a golden crispness to the bread. Once the sandwiches were ready, we’d gather around the table, the warmth of the kitchen wrapping around us like a familiar blanket.


This Turkey BLT with Creamy Dijon Mustard is more than a meal; it’s a tradition, a reminder of simpler times when the most profound joy was found in the company of loved ones and the shared experience of a delicious, lovingly prepared meal.


Difficulty: 3/10
Classification: Main Dish

---


Recreate this timeless dish and perhaps, like me, you too will find comfort in its layers. Whether it's the tang of the mustard or the crispiness of the bacon, this sandwich is sure to evoke cherished memories while creating new ones around your table.

Read more about Appetizers

Read more about Main Dishes

Read more about Desserts

Vanilla Panna Cotta with Chocolate Ganache | Made by Meaghan Moineau

Vanilla Panna Cotta with Chocolate Ganache | Made by Meaghan Moineau

Title: A Sweet Symphony: Vanilla Panna Cotta with Chocolate Ganache
Description: Experience the perfect balance of creamy vanilla panna cotta and rich chocolate ganache with this elegant dessert recipe. A touch of nostalgia, a dash of sophistication, and a whole lot of flavor await you in this culinary journey.

---


When it comes to creating a dessert that is both elegant and comforting, few dishes can match the allure of Vanilla Panna Cotta with Chocolate Ganache. This classic Italian dessert, with its silky texture and harmonious flavors, is the perfect way to end a meal on a high note. In this blog post, I'll walk you through the process of making this delightful treat, while sharing a personal family memory that makes this dish even more special.


Ingredients:

- Gelatin

- Milk


- Vanilla bean


- Cream


- Sugar


- Chocolate bar


Instructions:


1. Prepare the Gelatin: Begin by filling a bowl with water and adding the gelatin. Let it soak until it becomes soft and pliable.
2. Heat the Milk: Pour the milk into a pan and bring it to just below simmering. It's crucial not to let it boil, as boiling can ruin the delicate texture of your panna cotta. Once the milk is heated, remove the pan from the heat.
3. Incorporate the Gelatin: Drain and squeeze out the gelatin, then add it to the warm milk, stirring until completely dissolved.
4. Flavor with Vanilla: In another pan, pour the cream and add sugar along with a split vanilla bean. Bring this mixture to a gentle boil over low heat, stirring constantly to infuse the cream with the vanilla's sweet aroma. Once it begins to boil, remove from heat and discard the vanilla bean.
5. Combine and Chill: Stir the milk mixture into the cream. Rinse your chosen ramekins or molds in ice-cold water, shaking out any excess, and fill them with the panna cotta mixture. Chill in the refrigerator for at least 3-4 hours, or until set.
6. Prepare the Chocolate Ganache: Using a double boiler, melt a chocolate bar until completely smooth. Gradually whisk in cream until you reach the desired consistency for your ganache.
7. Serve with Elegance: Once the panna cotta is set, gently turn it out onto a serving dish. Drizzle the luxurious chocolate ganache over the top just before serving.

A Slice of Nostalgia:


Every time I make this Vanilla Panna Cotta with Chocolate Ganache, I'm transported back to my grandmother's cozy kitchen. I recall a chilly winter evening when the family gathered around her rustic dining table, eagerly anticipating the dessert she'd promised. She was a maestro in the kitchen, turning simple ingredients into spectacular creations. That night, the panna cotta she served was a revelation—its creamy richness perfectly complemented by the decadent chocolate ganache. As we savored each bite, the room was filled with stories, laughter, and the warmth of family. It was one of those evenings that felt like a scene from a movie, and it's a memory I cherish every time I recreate this dish.


Difficulty Rating: 5/10


Classification: Dessert


This Vanilla Panna Cotta with Chocolate Ganache is a dessert that combines simplicity with sophistication. Whether you're hosting a dinner party or simply treating yourself, this recipe is sure to impress. So, gather your ingredients, embrace the nostalgia, and enjoy the sweet symphony of flavors in every bite.

Read more about Appetizers

Read more about Main Dishes

Read more about Desserts

Chinese Potstickers | Made by Meaghan Moineau

Chinese Potstickers | Made by Meaghan Moineau

Title: Unveiling the Art of Chinese Potstickers: A Delicious Journey from My Family's Kitchen
Description: Dive into the captivating world of Chinese Potstickers with our authentic recipe, bursting with flavors of lean ground pork, water chestnuts, and aromatic spices. This dish is a culinary bridge between past and present, enriched with a nostalgic family tale that warms the heart. Perfect as an appetizer, this recipe is rated 6/10 in difficulty, making it an exciting kitchen adventure for culinary enthusiasts.

---


A Culinary Bridge to My Heritage: Chinese Potstickers


Chinese Potstickers are more than just a delightful treat; they are a culinary emblem that brings my family together, echoing stories of laughter and tradition that span generations. This dish, known for its crisp, golden exterior and juicy, flavorful interior, embodies the essence of Chinese cuisine in every bite.


Ingredients


- 200g lean ground pork (or substitute with ground chicken)


- 1 teaspoon sea salt


- 1 teaspoon fine sugar


- 1/2 teaspoon ground black pepper


- 2 teaspoons light soy sauce


- 2 teaspoons sesame oil


- 1 tablespoon Shaoxing Huatiao wine


- 100g canned water chestnuts (or substitute with spinach or cabbage)


- 2-3 tablespoons finely chopped scallions


- Dumpling wrappers


- Plain flour (for dusting)


- 2-3 tablespoons vegetable oil


- 1/3 cup water


Instructions


1. Prepare the Filling: In a large mixing bowl, combine 200g of lean ground pork with sea salt, sugar, black pepper, light soy sauce, sesame oil, and Shaoxing Huatiao wine. Chop the water chestnuts into small pieces and add them to the mixture along with finely chopped scallions. Mix thoroughly.
2. Prepare the Wrappers: Thaw dumpling wrappers if frozen. Dust a dish and your working surface with flour. Carefully separate the dumpling wrappers and lay them out.
3. Assemble the Potstickers: Place 1.5 teaspoons of filling in the center of each wrapper. Lightly wet the rims with water, fold, and pleat as instructed, ensuring a tight seal. Arrange the prepared dumplings on a floured dish.
4. Cook the Potstickers: Heat vegetable oil in a frying pan. Place the potstickers flat-side down and fry until golden brown. Add water, cover the pan, and steam for 4-5 minutes. Remove the lid to let the base crisp up again.
5. Serve: Transfer to a plate and serve immediately with a vinegar dip made of balsamic or black Chinese vinegar and thinly sliced ginger. Enhance with soy sauce, chili oil, or sesame oil as desired.

A Family's Culinary Tale


As I prepare these delicious potstickers, I am transported back to my grandmother's kitchen—a warm haven filled with the intoxicating aroma of sizzling dumplings and her gentle laughter. Each pleat I form echoes the patient hands of my grandmother teaching me the art of dumpling-making, an experience woven with stories of her childhood in China. The kitchen was our storytelling stage, where tales of resilience and joy unfolded with every fold of dough.


These potstickers were the highlight of our family gatherings, a dish that symbolized unity and love. The crispy potstickers served with a tangy vinegar dip were not just an appetizer; they were a ceremonial opening to an evening filled with laughter and cherished memories.


Difficulty and Classification


Difficulty: 6/10
Classification: Appetizer

Whether you're a seasoned cook or a culinary novice, this recipe offers a delightful challenge that promises rewarding results. Share this dish with loved ones and create your own stories, adding to the rich tapestry of traditions that Chinese Potstickers bring to the table.

Read more about Appetizers

Read more about Main Dishes

Read more about Desserts

Cherry-Berry Pie With Agave Nectar All-Butter Crust | Made by Meaghan Moineau

Cherry-Berry Pie With Agave Nectar All-Butter Crust | Made by Meaghan Moineau

A Slice of Nostalgia: Cherry-Berry Pie with Agave Nectar All-Butter Crust


A Delicious Trip Down Memory Lane


Growing up, the aroma of freshly baked pie wafting through the kitchen was a staple of my childhood. My grandmother was the family’s unofficial pastry chef, and her pies were legendary at every family gathering. Among her repertoire, the Cherry-Berry Pie with Agave Nectar All-Butter Crust was a cherished favorite, not just for its delightful taste but for the cherished memories it created.


---


The Perfect Blend of Tradition and Taste


Difficulty: 7/10
Category: Dessert

The Cherry-Berry Pie is a symphony of flavors and textures, crafted with a meticulously prepared all-butter crust. The use of agave nectar instead of traditional sugar adds a modern twist to this classic dessert, making it both sweet and subtly complex. This pie is a testament to how wholesome ingredients can create a masterpiece that transcends generations.


Ingredients


- Agave nectar


- Sweet agave nectar


- Almond flour


- Frozen mixed berries


- Butter


- Frozen cherries


- Coconut flour


- Flour


- Lemon juice


- Orange extract (or substitute with Fiore di Sicilia flavoring)


- Tapioca flour


- Whole wheat pastry flour


Instructions


Make the Crust:

1. Pulse the dry ingredients 5-6 times in a food processor.


2. Add 2 sticks of very cold butter (frozen and cubed) and pulse until the mixture resembles very coarse meal.


3. Gradually add agave nectar and orange extract, one tablespoon at a time, until the dough just comes together.


4. Divide the dough into two parts, one larger than the other. Form into flat, round shapes.


5. Wrap each disk in plastic and refrigerate for at least 2 hours.


Prepare the Filling:

1. In a large bowl, combine all the filling ingredients and mix until well incorporated (the mixture will be very soupy).


Assemble the Pie:

1. Remove the dough from the fridge and let it warm enough to roll out.


2. Roll out the larger dough disk to fit your pie dish, patching as needed.


3. Wrap the pie dish in plastic and chill for 30 minutes.


4. Pour the filling into the crust. Wrap the pie in plastic and chill again.


5. Roll out the smaller dough disk and use cookie cutters to create decorative pieces for the top crust.


6. Decorate the top of the pie, ensuring to leave spaces for steam to escape.


7. Cover the edges with foil and bake at 325°F for 40 minutes. Remove foil and continue baking until the top is golden brown and the filling is bubbling.


Cool and Enjoy!

---


A Slice of History


Every time I bake this pie, I am transported back to my grandmother’s cozy kitchen. I remember the stories she'd tell as we mixed ingredients and the laughter that filled the room as we eagerly awaited the pie's arrival from the oven. My grandmother believed that the secret ingredient to a perfect pie was love, and this Cherry-Berry Pie is a testament to her culinary wisdom.


The pie not only serves as a delicious dessert but also as a reminder of the warmth and nostalgia of family gatherings. As the pie cools, I often find myself reminiscing about those cherished moments spent with loved ones, making every bite a delightful trip down memory lane.


Conclusion


The Cherry-Berry Pie with Agave Nectar All-Butter Crust is more than just a dessert; it’s an heirloom recipe that brings families together. Whether you’re a seasoned baker or a novice in the kitchen, this pie offers a rewarding challenge with its rich flavors and heartwarming memories. So why not gather your family and create your own cherished moments with this delightful dessert?

Read more about Appetizers

Read more about Main Dishes

Read more about Desserts

Jade Buddha Salmon Tartare | Made by Meaghan Moineau

Jade Buddha Salmon Tartare | Made by Meaghan Moineau

Title: A Taste of Serenity: Crafting the Perfect Jade Buddha Salmon Tartare
Description: Dive into the serene flavors of the Jade Buddha Salmon Tartare, a dish that blends the freshness of the sea with the vibrant zest of Asian herbs and spices. Discover a cherished family memory that makes this recipe not just a meal, but a journey through time.

---


There’s something inherently calming about the ritual of preparing a dish that has been passed down through generations. The Jade Buddha Salmon Tartare is one such recipe in my family, a tapestry of flavors woven together with love, history, and a touch of nostalgia.


Growing up, my grandmother’s kitchen was a place of wonder. A symphony of aromas would greet you at the door, promising both comfort and adventure. Among her many culinary masterpieces, the Jade Buddha Salmon Tartare held a special place. Its preparation was reserved for moments that called for celebration or reflection, occasions when the family would gather around the table, sharing stories and laughter.


The tartare’s ingredients are a harmonious blend of the ocean’s bounty and the garden’s freshest herbs. Diced salmon serves as the star, its soft, rich texture complemented by the sharpness of green onion and chives. Cilantro and Thai basil bring an unexpected depth, while the ginger adds a whisper of warmth. The dish is tied together with a kick of green habanero sauce, playing off the subtle heat of the chile, and seasoned to perfection with salt and pepper. A gentle coat of olive oil ensures a luxurious finish.


Ingredients:

- Diced salmon


- Green onion


- Chives


- Cilantro


- Thai basil


- Ginger


- Lime zest


- Lime juice


- Rice vinegar


- Green habanero sauce and chile


- Salt and pepper


- Olive oil to coat


Instructions:

1. Combine all ingredients except for the lime juice and rice vinegar in a mixing bowl.


2. Chill the mixture for 30 minutes to allow the flavors to meld.


3. Just before serving, add lime juice and rice vinegar, adjusting to taste.


4. Serve immediately for a refreshing, vibrant experience.


Difficulty: 5/10
Classification: Appetizer

The first time I attempted to recreate this dish on my own, I was a wide-eyed teenager eager to connect with my heritage. My grandmother stood beside me, her hands deftly guiding mine as we worked. “Cooking is about feeling, not just following,” she’d say, as she taught me to trust my instincts with seasoning and balance.


To this day, the act of preparing Jade Buddha Salmon Tartare transports me back to those cherished afternoons, fingers sticky with lime juice and the air buzzing with the vibrancy of fresh herbs. This dish is more than a recipe; it’s a bridge to the past, a reminder of the enduring legacy of family traditions.


Whether you’re serving this tartare as a sophisticated appetizer for a dinner party or enjoying it in a quiet moment of solitude, allow it to be more than just a meal. Let it be a meditation on flavor, memory, and the simple joys of cooking from the heart.

Read more about Appetizers

Read more about Main Dishes

Read more about Desserts

My Sister’s Soup: Creamy Curried Squash and Cauliflower Soup | Made by Meaghan Moineau

My Sister's Soup: Creamy Curried Squash and Cauliflower Soup | Made by Meaghan Moineau

Title: A Bowl of Memories: My Sister's Creamy Curried Squash and Cauliflower Soup
Description: Discover the heartwarming blend of flavors and nostalgia in my sister's Creamy Curried Squash and Cauliflower Soup. This delightful recipe, rated a 4 out of 10 in difficulty, is perfect as a comforting main dish for those chilly evenings. Dive into a family story that adds a dash of warmth to every spoonful.

---


Growing up, the kitchen was the heart of our home—a place where stories were shared, laughter echoed, and the aroma of delicious meals filled the air. Among the many recipes that emerged from that cozy space, my sister's Creamy Curried Squash and Cauliflower Soup holds a special place in my heart. It embodies not just the flavors of fall, but also the essence of cherished family moments.


A Nostalgic Tale:

I vividly remember the first time my sister crafted this soup. It was a crisp autumn evening, and the leaves had turned into shades of gold and crimson. We had just returned from a day of raking leaves and jumping into the piles with reckless abandon. Our cheeks were rosy from the chill, and our stomachs rumbled with hunger.


In the warmth of the kitchen, my sister, always the culinary adventurer, decided to experiment with the squash we'd picked up from the local farmer's market. I watched as she methodically sliced the butternut and delicata squash, her hands steady and sure. The scent of roasting squash soon mingled with the fragrance of sautéed onions and garlic, creating an inviting aroma that filled every corner of our home.


As the soup simmered, we gathered around the table, sharing stories and laughter. My sister ladled the rich, creamy soup into bowls, each serving topped with a dollop of sour cream that melted into a swirl of golden goodness. With the first spoonful, I was enveloped in warmth—both from the flavors of the soup and the love that went into making it.


The Recipe:
Ingredients:

- 1 butternut squash


- 1 delicata squash


- 1 head of cauliflower, chopped


- 4 cups vegetable stock


- 1 yellow onion, diced


- 2 cloves fresh garlic, minced


- 1 tablespoon curry powder


- 2 tablespoons butter


- Dashes of cayenne pepper


- Salt and pepper to taste


- Sour cream, for serving


Instructions:
1. Preheat your oven to 375°F (190°C). Slice the butternut and delicata squash lengthwise and place them face down in a casserole dish with about 1/4" of water at the bottom.
2. Bake for about 30 minutes or until the squash is tender. Allow them to cool slightly. Once cool enough to handle, scoop out the seeds and set them aside. Scoop the squash flesh into a bowl.
3. In a large stock pot, heat the butter over low-to-medium heat. Sauté the diced onions until they become translucent.

4. Add the minced garlic, curry powder, cayenne pepper, salt, and pepper to the onions, stirring to combine.


5. Add the squash and chopped cauliflower to the pot along with the vegetable stock. Simmer for about 20 minutes until the vegetables are tender.
6. Puree the mixture in batches in a blender until smooth. If the soup is too thick, add more stock a little at a time.
7. Serve the soup hot in bowls with a generous dollop of sour cream on top.

This dish, rated a 4 out of 10 in difficulty, primarily serves as a satisfying main dish. It's a recipe that invites everyone to gather, savor, and reminisce about the simple joys of life.


Every time I make this soup, it takes me back to that autumn evening, reminding me of the warmth of family and the delicious magic that happens when loved ones come together over food. Whether you're making it for the first time or the hundredth, may this soup bring a slice of nostalgia to your table.

Read more about Appetizers

Read more about Main Dishes

Read more about Desserts

Orange Chocolate Cake | Made by Meaghan Moineau

Orange Chocolate Cake | Made by Meaghan Moineau

Title: A Taste of Nostalgia: The Irresistible Orange Chocolate Cake
Description: Dive into the delightful world of our Orange Chocolate Cake, a symphony of citrus and chocolate that promises to enchant your taste buds. Follow our easy-to-understand recipe, infused with a sprinkle of family nostalgia, and create a dessert that’s sure to become a cherished favorite.

---


A Slice of Memory: Orange Chocolate Cake


When I think of family gatherings, the rich aroma of Orange Chocolate Cake is one of the first things that comes to mind. This delightful dessert has been a staple at our family reunions for as long as I can remember. The tradition started with my grandmother, who would bake this cake with love and a little help from her curious grandchildren. Every step of the process was a lesson in patience and precision, but mostly, it was about creating memories that would last a lifetime.


Ingredients:


- 1 tsp baking powder


- ½ tsp baking soda


- 1 cup butter, softened


- 3 large eggs


- 2 cups flour


- 1 cup sour plain natural yoghurt


- ¼ cup fresh orange juice


- 1 tbsp orange rind, finely grated


- ½ tsp salt


- 1 cup semi-sweet chocolate, melted


- 2 cups caster sugar


- 1 tsp vanilla extract


Instructions:


1. Preheat and Prep: Preheat your oven to 175°C (350°F). Grease a 9-inch bundt pan and dust with flour or use a non-stick spray to ensure an easy release.
2. Creaming the Butter: Beat butter until smooth. Gradually add in caster sugar, continuing to beat until the mixture is creamy and fluffy.
3. Incorporate Eggs: Add the eggs one at a time, mixing well after each addition. Stir in the freshly grated orange rind, orange juice, and vanilla extract, and blend at a low speed until well combined.
4. Alternate Mixing: Split the dry ingredients (flour, baking powder, baking soda, and salt) into four portions. Similarly, divide the sour yoghurt into three portions. Alternate adding the flour mixture and yoghurt to the batter, beginning and ending with the flour. Beat well after each addition to ensure a smooth consistency.
5. Chocolate Swirl: Take half of the batter and gently fold it into the melted semi-sweet chocolate. Be careful not to over mix.
6. Layer the Batter: Scoop plain and chocolate batters alternately into the prepared bundt pan. Give the pan a gentle shake to settle the batter evenly.
7. Bake to Perfection: Bake for 50-60 minutes or until a skewer inserted into the cake comes out clean. Let the cake cool in the pan for about 20 minutes before unmolding. Allow it to cool completely on a wire rack.

A Nostalgic Note:


As the cake bakes, the kitchen fills with the scent of chocolate and citrus. It’s a smell that transports me back to my grandmother's kitchen, where laughter and love were the main ingredients. I remember her saying, “The secret to a good cake is all in the details—and a little bit of heart.”


Difficulty: 6/10
Classification: Dessert

This Orange Chocolate Cake is more than just a dessert; it's a bridge to the past, a reminder of family ties and the sweet simplicity of sharing a homemade treat. Whether you're making it for a special occasion or just to enjoy with a cup of tea, this cake is sure to bring joy to your table and perhaps inspire a new tradition in your family.


So, go ahead, bake this cake, and create your own slice of nostalgia.

Read more about Appetizers

Read more about Main Dishes

Read more about Desserts

Candy Cane Chocolate Marshmallows | Made by Meaghan Moineau

Candy Cane Chocolate Marshmallows | Made by Meaghan Moineau

A Festive Treat: Candy Cane Chocolate Marshmallows


Description:

Dive into the festive spirit with our Candy Cane Chocolate Marshmallows, a delightful dessert that combines the rich flavors of dark and milk chocolate with the refreshing crunch of candy canes. Perfect for holiday gatherings or as a sweet indulgence to enjoy by the fire, these treats are sure to bring warmth and joy to your winter season.


The Ingredients:


- Candy canes


- Dark chocolate


- Marshmallows


- Milk chocolate


Step-by-Step Instructions:


1. Crush the Candy Canes: Begin by placing your candy canes in a sealed plastic bag. Use the bottom of a glass, a mallet, or whatever you have on hand to crush them into fine pieces. The key is to achieve a texture that will coat your marshmallows perfectly.
2. Melt the Chocolate: Set up a double boiler. If you don't have one, a heatproof bowl over a pot of simmering water will work just as well. Add both the dark and milk chocolate to the bowl, stirring occasionally until completely melted. Be careful to ensure the chocolate does not touch the water, as this can cause it to seize.
3. Dip and Coat: Take each marshmallow and dip it into the luscious melted chocolate, ensuring an even coat. Immediately roll the chocolate-covered marshmallow in the crushed candy canes, allowing them to adhere to the surface.
4. Set and Chill: Place the coated marshmallows on a sheet of wax paper and allow them to cool. For best results, chill them in the refrigerator for at least an hour or until the chocolate has fully hardened.
5. Store and Enjoy: Once set, store your Candy Cane Chocolate Marshmallows in an airtight container to keep them fresh. Enjoy them on their own or dunk them into a steaming mug of hot chocolate for an extra dose of holiday cheer.

A Nostalgic Family Memory


Every year as the holidays approached, my family would gather in the cozy kitchen of my grandmother's house. The air was always filled with the tantalizing aroma of chocolate and peppermint, a scent that to this day reminds me of cherished moments. One year, my grandmother decided to introduce a new recipe to our holiday traditions: Candy Cane Chocolate Marshmallows.


I remember being a young child, barely able to reach the countertop, eagerly watching as she crushed candy canes with the bottom of a sturdy glass. My siblings and I took turns rolling marshmallows in the melted chocolate, giggling as we inevitably ended up with sticky fingers. The highlight was always the first taste test, when we gathered around the fireplace, sipping hot chocolate and savoring our homemade creations.


Those Candy Cane Chocolate Marshmallows became more than just a treat; they were a symbol of family togetherness and the magic of the holiday season. To this day, making them brings back a wave of nostalgia, reminding me of those cherished moments spent with loved ones.


Difficulty Rating: 3/10


Classification: Dessert


This recipe is delightfully simple, making it a perfect activity to share with family and friends. With minimal ingredients and easy-to-follow steps, even novice bakers can enjoy the process of creating these festive treats. So gather your loved ones, roll up your sleeves, and enjoy the sweet journey of making Candy Cane Chocolate Marshmallows together. Happy holidays!

Read more about Appetizers

Read more about Main Dishes

Read more about Desserts

Creamy Mushroom Soup ~ with a “Kick” | Made by Meaghan Moineau

Creamy Mushroom Soup ~ with a “Kick” | Made by Meaghan Moineau

Title: Creamy Mushroom Soup with a Kick: A Hearty Bowl of Comfort
Description: Dive into the warmth and savory delight of Creamy Mushroom Soup with a Kick. This rich, flavorful dish combines earthy button mushrooms with zesty lime and a hint of spice, bringing a vibrant twist to a comforting classic. Perfect for chilly days or when you need a comforting meal, this soup is an easy-to-make culinary masterpiece that will leave your taste buds dancing.

---


As the leaves turn golden and the air fills with a crisp chill, there's no better time to indulge in a bowl of homemade soup. This Creamy Mushroom Soup with a Kick is a recipe that has been passed down through my family for generations, and it never fails to bring back fond memories of cozy family gatherings.


A Nostalgic Family Tradition

Growing up, autumn Sundays were always special in our household. My grandmother, known for her culinary prowess, would invite the entire family over for a hearty lunch. The house would be filled with the comforting aroma of sizzling bacon and sautéing onions, as she masterfully prepared her signature dish—Creamy Mushroom Soup with a Kick.


We would gather around the large, rustic dining table, eagerly awaiting the moment when Grandma would bring in her steaming pot of soup. Each bowl was garnished with crispy bacon bits, fresh cilantro, and a generous sprinkle of shredded cheddar cheese. The first spoonful was always a revelation—a rich, creamy base with the earthy depth of mushrooms, a subtle heat from the long pepper, and a surprising zest from the lime juice. It was a symphony of flavors that danced on our palates and warmed our souls.


Ingredients:

- 6 strips of bacon


- 2 cups of button mushrooms, sliced


- 1/4 cup of fresh cilantro, chopped


- 3 cloves of garlic, minced


- Juice of 1 lime


- 1 long pepper, chopped


- 2 cups of milk


- 2 tablespoons of olive oil


- 1 cup of potato buds


- 1 cup shredded cheddar cheese


- 1 sweet onion, diced


- 1 tablespoon of vegeta bouillon


- 6 cups of water


Instructions:
1. Sauté the Vegetables: Heat a large saucepot over medium heat and add a drizzle of olive oil. Add the garlic, long hot pepper, onion, and mushrooms to the pot. Sauté until the onion becomes translucent and the mushrooms are tender.
2. Prepare the Bacon: On a heated griddle, cook the bacon until it is nice and crispy. Once done, set it aside on a paper towel to drain excess oil.
3. Simmer the Soup Base: Add the tablespoon of vegeta bouillon and 6 cups of water to the pot. Bring to a simmer, then add the cup of potato buds, stirring occasionally. Allow the mixture to simmer on low heat.
4. Add Creaminess: Pour in the cups of milk and continue to simmer on low for a few more minutes. This will give the soup its creamy texture.
5. Finishing Touches: Just before serving, add the lime juice and stir well. Ladle the soup into bowls and top with crispy bacon bits, chopped cilantro, and shredded cheddar cheese.
Difficulty Rating: 4/10
Classification: Main Dish

This Creamy Mushroom Soup with a Kick is a delightful main dish that requires minimal effort but delivers maximum flavor. Its simplicity in preparation and rich, layered taste make it a perfect choice for any dinner table. Whether you’re enjoying it solo or sharing it with loved ones, this soup is sure to leave a lasting impression and create new, heartwarming memories.


So, the next chilly day, why not gather your family around the table and serve this nostalgic dish? Let its warmth and flavor transport you back to cherished moments, just as it does for me every time I take that first comforting spoonful.

Read more about Appetizers

Read more about Main Dishes

Read more about Desserts

Dutch Babies With Mulberry-Rhubarb Compote | Made by Meaghan Moineau

Dutch Babies With Mulberry-Rhubarb Compote | Made by Meaghan Moineau

Title: Delightful Nostalgia: Dutch Babies with Mulberry-Rhubarb Compote
Description: Dive into the comforting embrace of Dutch Babies, topped with a vibrant Mulberry-Rhubarb Compote. This recipe blends tradition and flavor, perfect for a special breakfast or a sweet family gathering. Join us as we explore the warmth of shared memories and the joy of creating something delicious together.

---


The Charm of Dutch Babies with Mulberry-Rhubarb Compote

There's something undeniably enchanting about a dish that stirs up fond memories, and Dutch Babies with Mulberry-Rhubarb Compote does just that. It's a recipe that not only brings together delightful flavors but also weaves in a tapestry of nostalgia, making every bite a journey back to simpler times.


Growing up, Sundays at my grandmother's house were a cherished ritual. The smell of freshly brewed coffee mingled with the sweet, tangy aroma of her mulberry trees, which lined the backyard. Our family would gather around the kitchen table, eagerly awaiting the magic that was about to unfold.


Ingredients:
- Compote:

- 2 cups rhubarb, diced


- 1 cup mulberries, chopped


- 1/4 cup orange juice


- 1/2 cup sugar


- 1/4 teaspoon salt


- 1 tablespoon cornstarch


- Fresh mint leaves, to taste


- Dutch Babies:

- 6 tablespoons butter, divided


- 3 large eggs


- 1/2 cup all-purpose flour


- 1/2 cup milk


- 2 tablespoons sugar


- 1/4 teaspoon salt


- 1 teaspoon vanilla sugar


Instructions:
For the Compote:

1. Pulse the rhubarb in a food processor 5-6 times until diced. Pulse the mulberries 3-4 times to chop.


2. In a saucepan, combine the rhubarb, mulberries, orange juice, sugar, salt, and cornstarch. Simmer over medium heat for 10-15 minutes, stirring occasionally, until the mixture thickens.


3. Remove from heat and stir in fresh mint leaves. This compote makes approximately 2 cups.


For the Dutch Babies:

1. Preheat your oven to 375°F (190°C).


2. In a blender, combine flour, sugar, salt, milk, and eggs. Blend for about 10 seconds until smooth.


3. Add 2 tablespoons of melted butter to the blender and blend again briefly.


4. Use the remaining 4 tablespoons of butter to thoroughly coat 24 muffin tins.


5. Pour the batter into the muffin tins, filling each about halfway.


6. Bake for 12-14 minutes until the edges are golden brown and the centers are puffed.


7. Remove immediately from the muffin tins and top with the mulberry-rhubarb compote.


This recipe serves 6+ and can also be prepared traditionally using two cast-iron skillets.


A Taste of Family and Tradition

Each Sunday morning, my grandmother would whip up her famous Dutch Babies, but it wasn't just about the food. It was the laughter echoing through the kitchen, the stories shared, and the simple act of being together. She would often say, "Food tastes better when it's shared with those you love." I couldn't agree more.


As a child, my favorite part was the moment the Dutch Babies emerged from the oven, their golden edges crisp and inviting. We would eagerly top them with spoonfuls of the tangy-sweet mulberry-rhubarb compote, a symphony of flavors that perfectly complemented the soft, eggy base.


Difficulty Rating: 4/10
This dish is relatively simple to prepare, making it an excellent choice for both novice and seasoned cooks. It's classified as a Dessert, though it can easily make a delightful breakfast or brunch centerpiece.
A Sweet Conclusion

Dutch Babies with Mulberry-Rhubarb Compote is more than a dish; it's a celebration of flavors and family traditions. As you savor each bite, may it bring you as much joy and warmth as it has brought to my family over the years. Whether shared with loved ones or enjoyed in solitude, this recipe is a beautiful reminder of the power of food to connect us to our past and create new memories for the future.

Read more about Appetizers

Read more about Main Dishes

Read more about Desserts

Raspberry Walnut Coffee Cake | Made by Meaghan Moineau

Raspberry Walnut Coffee Cake | Made by Meaghan Moineau

Title: A Slice of Nostalgia: Raspberry Walnut Coffee Cake Recipe
Description: Dive into a delightful blend of raspberries and walnuts with this easy-to-make coffee cake. Perfect for brunch or dessert, this recipe is not only delicious but also brings back cherished family memories.

---


A Slice of Nostalgia: Raspberry Walnut Coffee Cake Recipe

When the sun peeked through the kitchen window on lazy Sunday mornings, the air would soon be filled with the comforting aroma of baking. My grandmother, with her soft hands and warm smile, would guide me as we prepared her famous Raspberry Walnut Coffee Cake. This wasn’t just a dessert; it was a ritual, a cherished connection to family and tradition.


Ingredients:

- Almond milk


- 1 tablespoon ground flaxseed


- 1 teaspoon vanilla extract


- 1/2 cup maple syrup


- 2 tablespoons oil (vegetable or coconut)


- 1 teaspoon baking soda


- 1 teaspoon cinnamon


- 1/2 teaspoon salt


- 1 cup oat flour


- Raspberry jam


- 1/2 cup walnuts


- 1/4 cup turbinado sugar


- Rolled oats (optional for topping)


Instructions:

1. Preheat your oven to 375°F (190°C) and grease an 8x8-inch baking pan.


2. In a mixing bowl, combine all wet ingredients: almond milk, ground flaxseed, vanilla extract, maple syrup, and oil. Let this mixture stand while you prepare the walnuts.


3. Grind the walnuts in a food processor until they resemble a coarse meal.


4. In another bowl, whisk together the oat flour, baking soda, cinnamon, and salt. Add the ground walnuts to this mixture.


5. Pour half of the batter into the prepared pan. Using a spoon, dollop lines of raspberry jam across the batter. Use a knife to swirl the jam into the batter gently.


6. Pour the rest of the batter on top.


7. For the crumble topping, place walnuts in a bag and crush them into pea-sized crumbs. Combine with oat flour, cinnamon, turbinado sugar, and rolled oats if using. Mix in the oil until the mixture becomes crumbly.


8. Sprinkle the topping evenly over the batter.


9. Bake for 25 minutes, or until the top is browned and springs back slightly when touched. Serve warm.


A Sweet Memory

Every time I bake this cake, I am transported back to those mornings in my grandmother’s kitchen. The laughter, the stories, and the simple joy of creating something together are memories I hold dear. This Raspberry Walnut Coffee Cake is more than just a treat; it's a piece of my family’s heart, shared through generations.


Difficulty Rating: 4/10
Classification: Dessert

This delightful Raspberry Walnut Coffee Cake is a perfect blend of nostalgia and flavor. Whether you’re looking for a sweet start to your day or a comforting dessert to share with loved ones, this recipe promises to bring smiles and warm memories to your table.

Read more about Appetizers

Read more about Main Dishes

Read more about Desserts

Chicken Roll-Ups With Feta Cheese and Arugula | Made by Meaghan Moineau

Chicken Roll-Ups With Feta Cheese and Arugula | Made by Meaghan Moineau

Title: A Taste of Tradition: Chicken Roll-Ups with Feta Cheese and Arugula
Description: Dive into the delightful flavors and heartwarming memories with our Chicken Roll-Ups with Feta Cheese and Arugula. This simple yet elegant dish combines tender chicken, peppery arugula, and creamy feta, making it a perfect main dish for any occasion.

---


When it comes to family gatherings, the kitchen has always been the heart of our home. I have vivid memories of bustling around with my grandmother, the aroma of fresh ingredients wafting through the air as we prepared meals infused with love and tradition. One dish that holds a special place in my heart is the Chicken Roll-Ups with Feta Cheese and Arugula. This recipe, passed down through generations, is a testament to the simplicity and elegance of classic home cooking.


Ingredients:


- Chicken breast cutlets


- Coarse salt and ground pepper


- Baby arugula


- Feta cheese


- Olive oil


Instructions:


1. Prepare the Chicken:

Begin by seasoning the chicken breast cutlets with coarse salt and ground pepper. This simple seasoning allows the natural flavors of the chicken to shine through, creating a delicious base for our roll-ups.


2. Assemble the Roll-Ups:

Layer each cutlet with a generous handful of baby arugula. The arugula adds a peppery freshness that perfectly complements the creamy feta cheese. Crumble the feta in the center of each cutlet, ensuring every bite is filled with cheesy goodness.


3. Roll and Secure:

Starting with the narrow end, roll up the chicken tightly. Secure each roll-up with a toothpick to ensure they hold their shape during cooking.


4. Cook to Perfection:

Heat olive oil in a large nonstick ovenproof skillet over medium-high heat. Swirl the oil to coat the bottom of the pan evenly. Place the chicken roll-ups seam side down and cook until golden brown, about 1 to 2 minutes. Turn the chicken to ensure even cooking.


5. Bake Until Done:

Transfer the skillet to a preheated oven and cook until the chicken is opaque throughout, approximately 10 to 12 minutes. The result is tender, juicy chicken infused with the flavors of arugula and feta.


6. Serve and Enjoy:

Remove the toothpicks and slice the chicken crosswise for an elegant presentation, if desired. Serve warm and enjoy the delightful combination of flavors.


A Nostalgic Memory:


As a child, I remember eagerly helping my grandmother prepare this dish for Sunday dinners. Her kitchen was a sanctuary of warmth and laughter, where stories were shared and memories were made. She would tell tales of her own childhood, where her mother would prepare similar dishes using fresh ingredients from their backyard garden. As we rolled up each chicken cutlet, I felt connected to the past, knowing that I was part of a culinary tradition that spanned generations.


This recipe is more than just a dish; it’s a piece of our family history. The combination of juicy chicken, tangy feta, and peppery arugula brings back fond memories of those cherished family gatherings. Every bite is a reminder of the love and tradition that binds us together.


Difficulty Rating:


- Difficulty: 4/10
- Classification: Main Dish

Create your own family memories with this simple yet flavorful Chicken Roll-Ups with Feta Cheese and Arugula. Perfect for a cozy dinner or a special occasion, this dish is sure to become a beloved tradition in your home as well.

Read more about Appetizers

Read more about Main Dishes

Read more about Desserts

Chicken Lo Mein | Made by Meaghan Moineau

Chicken Lo Mein | Made by Meaghan Moineau

Title: "Savoring Memories: A Delicious Chicken Lo Mein Adventure"
Description: Dive into the delightful world of Chicken Lo Mein, a flavorful journey that combines tender chicken, vibrant vegetables, and a savory sauce. This recipe is a breeze to prepare, making it the perfect main dish for any occasion. Share in a nostalgic family memory as you recreate this beloved classic in your own kitchen.

---


There is something truly magical about the aroma of garlic and ginger sizzling in a skillet; it has the power to transport us back to cherished moments spent with family. For me, Chicken Lo Mein is more than just a dish—it's a culinary time machine, whisking me back to Sunday evenings at my grandmother's house. The kitchen was always bustling with activity, filled with laughter and the clatter of pots and pans, as we eagerly awaited the delicious meal to come.


Ingredients:

- 1 tablespoon peanut oil


- 2 cloves garlic, minced


- 1 tablespoon fresh ginger, minced


- 1 pound skinless, boneless chicken breast, cut into thin strips


- 1 large carrot, julienned


- 1 cup mushrooms, sliced


- 1 cup bok choy, chopped


- 1 cup bean sprouts


- 1/4 cup low sodium chicken broth


- 1/4 cup low sodium soy sauce


- 4 scallions, sliced


- 8 ounces cooked spaghetti


Instructions:

1. In a large nonstick skillet, heat the peanut oil over medium heat. Add the minced ginger and garlic, and let them cook for about 1 minute, releasing their fragrant aroma.


2. Increase the heat to medium-high and add the chicken strips and julienned carrot to the skillet. Stirring occasionally, cook until the chicken is lightly browned, approximately 2 minutes.


3. Introduce the mushrooms, bok choy, and bean sprouts to the mix. Pour in the chicken broth and soy sauce, stirring constantly. Cook until the carrot is tender-crisp, about 3 minutes.


4. Finally, stir in the cooked spaghetti and sliced scallions. Allow everything to heat through for about 1 minute, ensuring the noodles are well-coated in the savory sauce.


Nostalgic Memory:

Every time I make Chicken Lo Mein, I am reminded of my grandmother's kitchen—a place that was warm and welcoming, always buzzing with love and delicious food. One particular memory stands out: my grandmother teaching me how to julienne carrots, her hands guiding mine as we carefully sliced the vibrant orange vegetables. These lessons were not just about cooking; they were about patience, precision, and the simple joy of creating something with your own hands.


Back then, the kitchen was where stories were shared, and wisdom was passed down. Preparing meals together was a family affair, one that brought us closer and created a tapestry of memories that I cherish to this day. Chicken Lo Mein was often at the heart of these gatherings—a dish that embodies the love and care that went into every family meal.


Rate Difficulty: 4/10
Classification: Main Dish

This Chicken Lo Mein recipe is not only easy to prepare but also a delightful way to create new memories with your loved ones. Whether you're an experienced cook or a kitchen novice, this dish promises to deliver a burst of flavor and nostalgia, making it the perfect addition to any family meal. Enjoy the journey as you bring the tastes and stories of the past into your home.

Read more about Appetizers

Read more about Main Dishes

Read more about Desserts

Vanilla Bean Melting Moment Cookies With Caramel Filling | Made by Meaghan Moineau

Vanilla Bean Melting Moment Cookies With Caramel Filling | Made by Meaghan Moineau

Title: A Nostalgic Delight: Vanilla Bean Melting Moment Cookies with Caramel Filling
Description: Discover the irresistible charm of Vanilla Bean Melting Moment Cookies with Caramel Filling. This dessert, rich in flavor and steeped in family memories, is perfect for any occasion. With a difficulty rating of 5 out of 10, this delightful treat is accessible for bakers of all levels.

---


There's something truly magical about the aroma of freshly baked cookies wafting through the house, enveloping you in a warm, comforting embrace. Every time I bake these Vanilla Bean Melting Moment Cookies with Caramel Filling, I'm transported back to my grandmother's kitchen, where I first learned the art of baking.


A Walk Down Memory Lane


As a child, I spent countless weekends at my grandmother's house, eagerly awaiting the moment we'd don our aprons and transform simple ingredients into delectable treats. One particular recipe stands out in my memory: her beloved Vanilla Bean Melting Moment Cookies. These delicate cookies, paired with a luscious caramel filling, were always a highlight of our baking adventures.


I recall the gentle hum of the electric mixer as we creamed butter and powdered sugar, the sweet scent of vanilla bean paste filling the air. The joy of piping the dough onto baking sheets, watching the cookies rise and turn a perfect golden hue, was unmatched. Once cooled, the pièce de résistance was the silky caramel filling, a concoction of sweetened condensed milk, golden syrup, and butter, patiently stirred to perfection.


The Recipe


Ingredients


- 1 cup butter, softened


- 1/2 cup powdered sugar


- 1 teaspoon vanilla bean paste


- 1 1/2 cups all-purpose flour, sifted


- 1/2 cup cornstarch, sifted


- 1/2 cup canned sweetened condensed milk


- 1 tablespoon golden syrup


- 1/4 cup butter


Instructions


1. Prepare the Dough:

- Preheat your oven to 350 degrees Fahrenheit.


- In a large bowl, combine the butter, powdered sugar, and vanilla bean paste. Beat with an electric mixer until the mixture is light and fluffy.


- Gently fold in the sifted all-purpose flour and cornstarch until just combined.


2. Shape the Cookies:

- Transfer the dough to a piping bag fitted with a fluted tip.


- Pipe 1-inch rounds onto a baking sheet lined with parchment paper, ensuring enough space for the cookies to spread.


3. Bake:

- Bake in the preheated oven for 12-14 minutes or until the cookies achieve a lovely golden color.


- Allow the cookies to cool on the tray to maintain their delicate structure.


4. Create the Caramel Filling:

- In a saucepan, combine the sweetened condensed milk, golden syrup, and butter.


- Cook over very low heat, stirring continuously for 25-30 minutes, until the mixture is thick and pale golden.


5. Assemble:

- Once both cookies and caramel are cool, sandwich a generous spoonful of caramel filling between two cookies. Enjoy these nostalgic delights with a cup of tea or a glass of milk.


A Sweet Conclusion


These Vanilla Bean Melting Moment Cookies with Caramel Filling are more than just a dessert; they are a testament to the cherished moments spent with family in the heart of the home. With a difficulty rating of 5 out of 10, bakers of all skill levels can recreate these delightful cookies and perhaps start their own tradition of sweet memories.


Whether you're an experienced baker or a novice, I invite you to try this recipe. Create new memories with your loved ones, and let the warm scent of vanilla and caramel fill your home, just as it did mine so many years ago.

Read more about Appetizers

Read more about Main Dishes

Read more about Desserts