Easy Key Lime Pie | Made by Meaghan Moineau
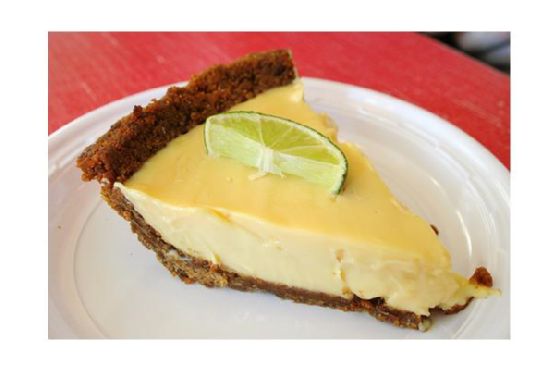
A Taste of Sunshine: Easy Key Lime Pie Recipe
Description
Dive into the zesty world of citrus delights with our Easy Key Lime Pie recipe. This classic dessert, infused with the tangy essence of lime and a rich, creamy filling, is perfect for any occasion. Whether you're looking to impress guests at a dinner party or enjoy a sweet treat on a lazy afternoon, this pie delivers a burst of flavor with every bite. Follow our step-by-step guide to create a pie that’s as delightful to make as it is to eat. Rated at a 3 out of 10 for difficulty, this dessert is accessible for all skill levels.
Ingredients
- 1/4 cup butter, melted
- 3 egg yolks
- 1 1/2 cups crushed graham crackers
- 1/2 cup lime juice
- 1/4 cup sugar
- 1 can (14 ounces) sweetened condensed milk
- 2 tablespoons water
- Whipped cream for topping
- Green food coloring (optional)
Instructions
Crust
1. Melt Butter: In a small bowl, melt the butter and stir in 1/4 cup of sugar.2. Mix: Add the crushed graham crackers and toss the mixture until well combined.
3. Press: Spread the mixture evenly into a 9-inch pie plate and press it firmly onto the bottom and sides to form the crust.
4. Chill: Chill the crust in the refrigerator for 1 hour or until firm. For a crispier crust, bake in a preheated 375°F oven for 4-5 minutes and let cool before filling.
Filling
1. Beat Yolks: In a medium bowl, beat the egg yolks with a whisk or fork until smooth.2. Combine Ingredients: Gradually whisk in the condensed milk, then add lime juice, water, and a few drops of green food coloring if desired. The mixture will thicken as you stir.
3. Fill Crust: Spoon the filling into the prepared crust, spreading it evenly.
Bake and Chill
1. Bake: Bake the pie in a preheated 350°F oven for 25 minutes.2. Cool: Allow the pie to cool at room temperature for 1 hour.
3. Chill: Transfer to the refrigerator and chill for 3-4 hours.
4. Serve: Top with whipped cream before serving.
A Slice of Nostalgia
Growing up, my grandmother's kitchen was always full of the warm, comforting smells of baked goods. Among her vast array of culinary creations, her Key Lime Pie was a family favorite. I remember one summer afternoon when the whole family gathered for a backyard barbecue. The sun was shining, laughter filled the air, and, as always, Grandma’s Key Lime Pie awaited us at the end of the meal.
I vividly recall the moment she cut into the pie, the creamy filling gently yielding to her knife, releasing that unmistakable, citrusy aroma. Each bite was a burst of sunshine, its tartness perfectly balanced by the sweetness of the condensed milk and the buttery graham cracker crust. For me, that pie will forever be intertwined with memories of lazy summer days, family gatherings, and the warmth of my grandmother's smile.
Difficulty Rating: 3/10
Classification: Dessert
Enjoy making this Easy Key Lime Pie, and may it bring a slice of sunshine to your table and create cherished memories with each and every bite.