
Picture this: it’s a Wednesday evening, the kind where you just want to curl up with something that feels like a bear hug — warm, comforting, and a little bit spicy. This One Bowl Jalapeno Cheddar Cornbread is the answer to that midweek craving. It’s one of those recipes that’s as satisfying to make as it is to eat, with just enough kick from the jalapenos to keep things interesting. Plus, did I mention you only need one bowl to whip this up? Less dishes, more deliciousness. Trust me, you’ll want to bookmark this for those cozy nights.
Jump to Recipe
What You’ll Need
The beauty of this recipe is that it uses pantry staples with a couple of standout stars. Chances are you already have most of this lying around:
- 1 stick unsalted butter
- 1 cup white sugar
- 2 eggs
- 1 cup buttermilk
- ½ teaspoon baking soda
- 1 cup cornmeal
- 1 cup flour
- ½ teaspoon salt
- 1 cup shredded cheddar cheese
- 1 can diced jalapenos
- 1 fresh jalapeno, thinly sliced
How to Make One Bowl Jalapeno Cheddar Cornbread
- Start by melting a stick of butter in a microwave-safe bowl. Use 30-second intervals to melt it completely without making a buttery mess.
- Whisk in the white sugar until it’s well integrated with the melted butter. The mixture should look smooth and glossy.
- Add in the eggs. You’ll want to whisk until the mixture turns a pale yellow and all the ingredients are happily married.
- In a small bowl, mix together the buttermilk and baking soda, then pour this into your buttery egg mixture. Stir until well combined.
- Now, add the cornmeal, flour, salt, shredded cheddar cheese, and diced jalapenos to the bowl. Mix gently until the batter is just combined. The mantra is ‘less is more’ here — overmixing is the enemy of tender cornbread.
- Preheat your oven to 375°F. While it’s warming up, prepare your pan with cooking spray. I usually opt for a mini loaf pan, but an 8×8 inch pan is a solid choice too.
- Spoon the batter into the prepared pan and artfully arrange the fresh jalapeno slices on top. They add a little flair and a preview of the heat inside.
- Bake for 25 to 35 minutes. Keep an eye out for edges turning golden and a skewer coming out clean. Remember, cooking time varies with pan size, so adjust as needed!
- Once baked, let the cornbread cool in the pan for a few minutes before transferring to a cooling rack. This step requires patience, but it’s worth it.
Cook’s Notes
Here are some notes to keep your cornbread game strong:
- For those who plan ahead, this cornbread can be made a day in advance and stored in an airtight container. Just reheat it gently in the oven or microwave before serving.
- If you accidentally overmix the batter, don’t panic! Just proceed and make a mental note for next time. It’ll still taste great, just a bit denser.
- Leftovers can be wrapped and stored in the fridge for about a week. They’re fantastic reheated with a little butter or honey.
Make It Your Own
Feeling adventurous? Try these variations:
- Spicy Honey Drizzle: Mix honey with a dash of cayenne pepper, and drizzle over warm cornbread for a sweet-spicy twist.
- Herb Infusion: Add a tablespoon of chopped fresh cilantro or chives to the batter for a burst of freshness.
- Cheese Swap: Try swapping cheddar for pepper jack if you want an extra kick.
- Vegetarian Twist: Add in a half cup of cooked corn kernels for a subtle textural change.
If you try this, I’d love to hear how it turns out — drop a comment or tag me! Happy baking and spicing things up in your kitchen!
Goes Well With
If you want to round out the meal, here’s what I’d pair it with over on meaghanmoineau.com:
Related update: One Bowl Jalapeno Cheddar Cornbread
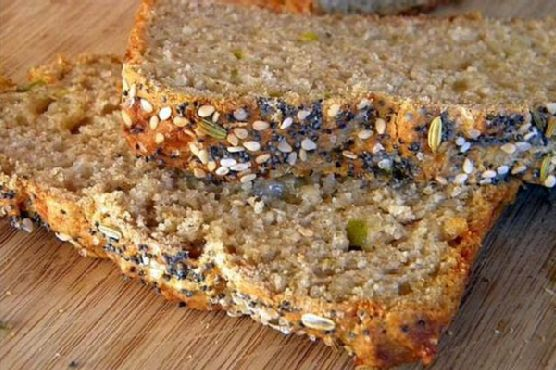
Last Tuesday, I found myself rummaging through the pantry with a fervor only a forgotten homework panic could match. It was one of those weeks: deadlines at work, the kids’ endless activities, and a weather forecast oscillating between sun and torrential rain. My mind craved something comforting yet simple—and homemade bread sounded like the answer to my prayers. Enter the Cheddar Chile Beer Bread. It’s the type of recipe that feels like a hug from the inside, yet simple enough to whip up in the middle of a busy week. The best part? It’s got a kick from the chiles and a tang from the beer that just elevates it from everyday bread to something a bit more special.
Jump to Recipe
What You’ll Need
This bread is a masterpiece of simplicity. Chances are you already have most of this in your pantry and fridge.
- 1 cup whole wheat flour
- 1 cup flour
- 1 teaspoon baking powder
- 1 teaspoon salt
- 1 teaspoon dry mustard
- 1 can of beer (choose your favorite lager or even an IPA for more flavor!)
- 1 cup shredded extra sharp cheddar cheese
- 1 can (4 oz) of green chiles, drained
- 1 tablespoon sesame seeds
- 1 tablespoon poppy seeds
- 1 tablespoon caraway seeds
- 1 teaspoon sea salt
How to Make Cheddar Chile Beer Bread
- Start by preheating your oven to 425 degrees. Trust me, this step is key to getting a nice initial rise on the bread.
- Grease a loaf pan. I love using a bit of butter for this, but cooking spray works just as well.
- In a large bowl, whisk together the whole wheat flour, flour, baking powder, salt, and dry mustard. The dry mustard adds a sneaky layer of flavor that makes things interesting.
- Add the green chiles, shredded cheddar, and beer to the dry ingredients. Stir until combined. The batter will be thick enough to try your patience, but hang in there—it’s worth it!
- Scrape the batter into your prepared loaf pan and spread it out evenly. It will look rustic and that’s perfect.
- Sprinkle the sesame seeds, poppy seeds, caraway seeds, and sea salt over the top. Gently press them into the batter using your fingers to ensure they stick.
- Now, reduce the oven temperature to 400 degrees and pop the loaf pan into the oven.
- Bake for 45 to 50 minutes. You’ll know it’s done when the top is golden and a toothpick comes out clean from the center.
- Cool on a wire rack for about 15 minutes, then turn out from the pan. Continue cooling, but feel free to sample right away. It’s irresistible!
Cook’s Notes
When it comes to making this bread, don’t second guess the beer choice. Whatever you love to drink is going to add that extra special something. Just remember, a stronger beer like an IPA will give a more pronounced flavor. Also, the batter is supposed to be thick—don’t panic! Once baked, the bread will be moist and delicious. If you’re planning on making this ahead, it’s best enjoyed within a day or two. Store it wrapped tightly in foil or in an airtight container to keep it fresh. And while it does freeze well, I recommend slicing it before freezing for easy access to toast on a whim.
Make It Your Own
- Spicy Kick: Swap the canned green chiles for diced jalapeños if you can handle the heat.
- Cheesy Affair: Experiment with different cheese blends. A mix of gouda and cheddar is a personal favorite.
- Herbaceous Twist: Stir in a tablespoon of dried herbs like rosemary or thyme for an aromatic lift.
- Nutty Crunch: Add a handful of chopped walnuts or pecans to the batter for an unexpected crunch.
If you try this, I’d love to hear how it turns out—drop a comment or tag me in your photos! This bread is a cozy companion to any meal or great just on its own.
Goes Well With
If you want to round out the meal, here’s what I’d pair it with over on meaghanmoineau.com:
Related update: Cheddar Chile Beer Bread
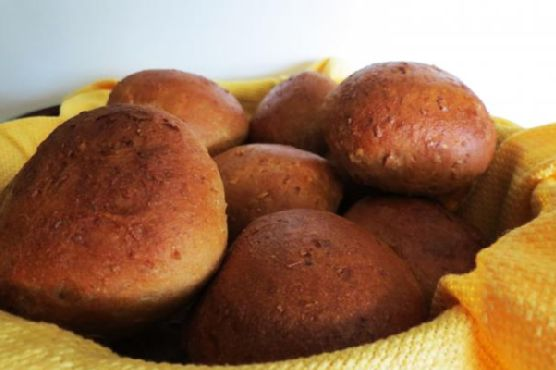
It was one of those Tuesday evenings when I realized I had promised fresh bread for dinner. The sun was setting, casting a warm, golden hue across my kitchen, and I could feel the cool breeze of autumn sneaking through the barely open window. That’s when it hit me — I needed something cozy yet impressive, but also forgiving enough to handle a bit of my mid-week chaos. Enter: these Whole Wheat Dinner Rolls. They’re not just any rolls; they’re the kind that make your kitchen smell like a bakery and your heart feel utterly content. I love how something so wholesome can come from ingredients I usually have stashed away in my pantry. Plus, they’re surprisingly easy to make, with a bit of patience and love.
Jump to Recipe
What You’ll Need
You’ll likely find most of these ingredients are staples in your kitchen, with a few stars that make these rolls stand out. Here’s what you’ll need:
- 1 cup water
- Cracked wheat (or Coaches Oats) – gives that lovely texture
- 1/3 cup warm water
- Dry active yeast – for that perfect rise
- Granulated sugar – just a touch for the yeast
- Butter – because everything is better with butter
- 1 teaspoon table salt
- Molasses – adds depth and color
- Honey – a natural sweetness
- 2 tablespoons wheat germ
- 1 cup milk
- 2 1/4 cups whole wheat flour
- 2 cups all-purpose flour
- Whole egg white – for that glossy finish
How to Make Whole Wheat Dinner Rolls
- In a small saucepan, bring 1 cup of water and the cracked wheat to a boil, then reduce the heat to medium-low and let it simmer for around 6 minutes. The kitchen will fill with a nutty aroma, and you’ll know it’s ready when the mixture has softened. Remove from the heat and allow it to cool to lukewarm.
- In a medium bowl, dissolve the yeast with the 1/3 cup of warm water and a tablespoon of sugar. Give it a quick stir and let it sit for about 10 minutes until it’s foamy and fragrant. It’ll be your sign that the yeast is happy and ready to work its magic.
- Add the cooled cracked wheat mixture to the yeast along with the butter, salt, molasses, honey, wheat germ, and milk in the bowl of an electric mixer. Use the paddle attachment to mix everything until just combined.
- Add 1 cup of the whole wheat flour and 2 cups of the all-purpose flour. Mix until the dough comes together. Switch to the dough hook attachment and gradually add the remaining whole wheat flour, about a quarter cup at a time, until the dough sticks less to the sides of the bowl.
- Let the mixer knead the dough on medium-low for about 8-10 minutes. The dough should be smooth and slightly tacky to the touch.
- Lightly oil a large bowl, place the dough inside, and cover it with a clean towel. Let it rise in a warm spot until it doubles in size — this could take anywhere from 1 to 2 hours, so be patient!
- Punch down the dough to release the air and divide it into 19 equally-sized pieces, about 2.5 ounces each. Shape them into balls and place them on a baking sheet lined with parchment paper. Cover with a towel and let them rise for another 45 minutes.
- While the rolls are rising, preheat your oven to 375°F. Place a dutch oven or oven-safe pot filled with water on the lowest shelf for added steam.
- Brush the risen rolls with an egg wash made by whisking the egg white with a bit of water. This will give them that irresistible sheen.
- Bake for 17-23 minutes until golden brown. The molasses will naturally darken the rolls, so don’t worry if they seem a little darker than expected. Once baked, let them cool on a wire rack.
Cook’s Notes
The key to these rolls is patience. Letting the dough rise properly will reward you with a tender crumb. If your kitchen is chilly, try placing the dough near a warm oven or in an off oven with the light on. For storage, keep them in an airtight container at room temperature for up to three days — if they last that long! To reheat, a quick zap in the microwave or a few minutes in a warm oven will bring them back to life. Freezing is an option too; just make sure they’re completely cooled before popping them in a freezer bag.
Make It Your Own
- Cheesy Rolls: Add a cup of your favorite shredded cheese to the dough for a gooey surprise in every bite.
- Herb-Infused: Mix in a tablespoon of dried rosemary or thyme into the dough for a fragrant herb twist.
- Seeded Top: Sprinkle sesame or poppy seeds on top of the rolls before baking for an added crunch.
- Sweet Cinnamon Swirl: Add a swirl of cinnamon sugar to the dough before shaping for a sweet counterpart to the savory meal.
If you try this recipe, I’d love to hear how it turns out for you — drop a comment or tag me in your photos! Whether they’re part of a holiday spread or a weeknight dinner, these rolls are sure to be a hit. Happy baking!
Goes Well With
If you want to round out the meal, here’s what I’d pair it with over on meaghanmoineau.com:
Related update: Whole Wheat Dinner Rolls
Related update: Cheddar Chile Beer Bread

Picture this: It’s a gloomy Wednesday evening, and the rain has been tapping on the windows since noon. I’m scouring the pantry for something interesting but comforting, and there it is—an unopened bag of dried fenugreek leaves. This is the perfect excuse to whip up a batch of warm, aromatic Fenugreek Roti. It’s one of those recipes that’s a total lifesaver when you want something homemade but don’t feel like spending hours in the kitchen. The subtle bitterness of the fenugreek combined with the spices makes this dish irresistibly flavorful and oh-so-satisfying. You’ll be hooked at the first bite, I promise.
Jump to Recipe
What You’ll Need
I bet you’ve got most of these goodies stashed away in your spice cabinet. Here’s what you’ll need:
- 1 cup whole wheat flour
- 1/2 cup chickpea flour
- 1/2 teaspoon baking soda
- 1 teaspoon sea salt
- 1/2 teaspoon chili powder
- 1/4 teaspoon cayenne
- 1/2 teaspoon ground cumin
- 1/2 teaspoon ground coriander
- 1 teaspoon ajwain seeds
- 1/4 teaspoon asafetida
- 1 cup dried fenugreek leaves
- 1/2 cup plain yogurt
- Ghee or oil for cooking
How to Make Fenugreek Roti
- Start by soaking the dried fenugreek leaves in some warm water for about 5 to 10 minutes. This will soften them up a bit. Once they’re ready, drain and give them a good squeeze to get rid of excess water.
- In a medium bowl, sift together the whole wheat flour, chickpea flour, and baking soda. This helps keep the batter smooth and lump-free.
- Stir in the sea salt, chili powder, cayenne, cumin, coriander, ajwain seeds, and asafetida. The aroma at this point is already promising!
- Add the soaked fenugreek leaves and plain yogurt to the dry ingredients. Mix everything up nicely.
- Gradually add about 1/4 cup of water to the mixture to form a semi-hard batter. Cover the bowl and let it sit at room temperature for an hour. The rest is crucial for the flavors to meld together.
- After the resting period, dust your hands with some flour and divide the dough into 10 to 12 small balls.
- Roll out each ball into a roughly 3-inch circle. It doesn’t have to be perfect—think rustic charm!
- Heat a non-stick pan over medium heat and brush it lightly with ghee or oil. When it’s hot, place a rolled-out roti on the pan.
- Cook for about 4 minutes or until the bottom is beautifully browned. You’ll start to see some bubbles forming on the surface.
- Sprinkle a little more oil or ghee, flip, and fry for another 2 to 3 minutes until both sides are nicely browned.
- Transfer the cooked roti to a plate and keep it warm in a 150°F oven. Repeat with the remaining dough.
Cook’s Notes
Don’t skip the rest time! It’s tempting to rush, but allowing the dough to rest lets the flavors deepen. You can keep leftovers wrapped in foil and stored in an airtight container in the fridge for up to 3 days. When reheating, a quick toss on a hot pan will bring them back to life. Avoid using too much flour when rolling out, or it might mess with the taste. If you’re making these ahead, par-cook them and finish them off just before serving for the freshest taste.
Make It Your Own
- Spice it up: Add a teaspoon of garam masala for an extra kick.
- Herby twist: Swap fenugreek for freshly chopped cilantro if you want a less bitter flavor.
- Gluten-free option: Use a gluten-free flour blend instead of whole wheat flour, and you’re good to go.
- Cheesy love: Add some grated paneer or cheddar to the dough for a cheesy delight!
If you try this, I’d love to hear how it turns out—drop a comment or tag me! Your kitchen adventures inspire me, and I hope this cozy dish becomes a new favorite in your home. Happy cooking!
Related update: Fenugreek Roti
Related update: Flemish Style Asparagus Side Dish
Related update: Whole Wheat Dinner Rolls
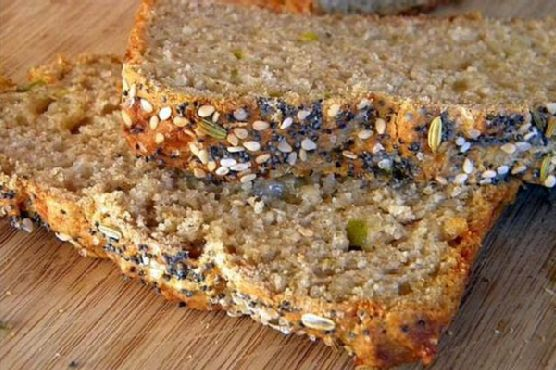
I remember last fall when I was caught in a total downpour on my way back from the farmers’ market. I dashed inside my apartment, dripping and shivering, with a bag full of local cheese and a can of green chiles I had impulsively picked up. My mind immediately went to a warm, comforting loaf of bread, something easy yet satisfying. Enter Cheddar Chile Beer Bread. This recipe is your best friend when you need something hearty but don’t want to fuss with yeast or kneading. It comes together in a flash, and that extra sharp cheddar paired with the zing from the chiles makes it feel special and cozy. Plus, it’s the kind of bread that fills your kitchen with the most *amazing* aroma, making it worth every second of waiting while it bakes.
Jump to Recipe
What You’ll Need
Chances are, most of these ingredients are lurking in your pantry right now, just waiting for their moment to shine. Here’s what you’ll need:
- 1 cup whole wheat flour
- 1 cup all-purpose flour
- 1 tablespoon baking powder
- 1 teaspoon salt
- 1/2 teaspoon dry mustard
- 1 can (12 oz) beer (use what you love to drink!)
- 1 cup white shredded extra sharp cheddar cheese
- 1 can (4 oz) canned green chiles, drained
- 1 tablespoon sesame seeds
- 1 tablespoon poppy seeds
- 1/2 teaspoon caraway seeds
- 1 teaspoon sea salt
How to Make Cheddar Chile Beer Bread
- Preheat your oven to 425 degrees. While it warms up, grease a loaf pan to make sure our bread doesn’t stick.
- In a large mixing bowl, whisk together the whole wheat flour, all-purpose flour, baking powder, salt, and dry mustard. This will be the backbone of your bread.
- Add the green chiles, shredded cheddar, and the beer to the dry mix. Stir until everything comes together. Expect a super thick batter that’s a good arm workout!
- Scrape the thick batter into your prepared loaf pan. Spread it out evenly so it bakes up nice and uniform.
- Now for the fun part: sprinkle the sesame seeds, poppy seeds, and caraway seeds over the top. Finish with a sprinkle of sea salt. Use your fingers to gently press these into the batter so they stick while baking.
- Lower your oven temperature to 400 degrees and pop the loaf in. Bake for 45-50 minutes, and let the aromas take over. It’s done when a toothpick inserted into the center comes out clean.
- Let the bread cool on a wire rack for about 15 minutes, then turn it out of the pan. Try to resist diving in right away, but I give you full permission to sample a slice while it’s still warm!
Cook’s Notes
A few little tips: using a beer you enjoy drinking will really make a difference as it flavors the bread. If the batter feels too thick, that’s totally normal. It might seem like you’ve done something wrong, but trust the process, it will work out. The seeds on top not only add flavor, but also a fun texture contrast to the soft, cheesy bread. This loaf is best the day it’s made, but if you have leftovers, toast them up the next morning with a bit of butter—it’s heavenly!
Make It Your Own
Here are a few ways to switch it up:
- Spicy Kick: Add a chopped jalapeño to the mix for some extra heat.
- Herby Twist: Toss in a tablespoon of dried herbs like rosemary or thyme with the dry ingredients.
- Cheese Swap: Use pepper jack or gouda instead of cheddar for a different cheesy flavor.
- Gluten-Free Version: Substitute the flours with a 1:1 gluten-free blend.
If you try this, I’d love to hear how it turns out—drop a comment or tag me in your photos! Sharing is caring, especially when it’s as delicious as this. Enjoy every bite, friends!
Related update: Cheddar Chile Beer Bread
Related update: Fenugreek Roti
Related update: Savory Cheese Dill Scones
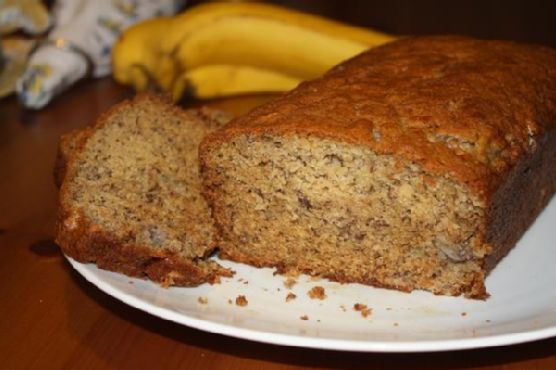
There’s something about the smell of banana bread baking that just instantly transports you to a place of comfort. It was a dreary Tuesday evening, and I was staring at a trio of overripe bananas languishing in my fruit bowl, a scene I suspect is familiar to many. These bananas had been begging to be transformed into something magical, and I knew just the recipe to do it. This traditional banana bread is like a warm hug in edible form—simple, reliable, and incredibly satisfying. Whether you’re trying to impress a last-minute guest or just want to make the most of those spotty bananas, this is the recipe you need. Plus, it’s almost guaranteed you have everything you need already in your pantry.
Jump to Recipe
What You’ll Need
Chances are you already have most of this sitting around your kitchen. We’re keeping it classic and straightforward, letting those bananas truly shine.
- Granulated sugar
- Unsalted butter, softened
- 2 large eggs
- 3 ripe bananas
- 2 tablespoons milk
- 1 teaspoon ground cinnamon
- 2 cups flour
- 1 teaspoon baking powder
- 1/2 teaspoon baking soda
- 1/2 teaspoon salt
How to Make Traditional Banana Bread
- Preheat your oven to 325 degrees F, and butter a 9x5x3-inch loaf pan. This is where your banana bread will take shape, so make sure it’s nicely coated to prevent sticking.
- Cream the sugar and butter in a large mixing bowl. You’re looking for a fluffy texture that feels as light as a cloud.
- Crack the eggs into the sugar mixture, one by one, beating well after each addition. This helps incorporate air, making your bread rise beautifully.
- In a small bowl, mash the bananas with a fork until they’re smooth but with a few small chunks remaining. Stir in the milk and cinnamon, giving your mixture that first hint of the aroma to come.
- In another medium-sized bowl, mix together the flour, baking powder, baking soda, and salt. It’s like setting the stage for a perfect bake.
- Fold the banana mixture into the butter mixture, stirring just until they’re happily combined.
- Add the dry ingredients to the banana mixture, stirring everything just until no flour pockets remain. Be careful not to overmix; we want tender, not tough.
- Pour the luscious batter into the prepared loaf pan. Level it out and pop it into the oven.
- Bake for about 1 hour, or until a toothpick inserted into the center comes out clean. The top should be golden and your kitchen will smell absolutely divine.
- Allow the bread to cool on a rack for at least 15 minutes before slicing. The waiting is hard, but worth it to avoid a crumbly mess when slicing.
Cook’s Notes
Banana bread is pretty forgiving, but a few pointers can make all the difference. Make sure your bananas are really ripe—almost too ripe to eat. They should be speckled brown and slightly mushy. This recipe works best with unsalted butter, but if all you have is salted, just reduce the salt a touch. If you’re baking ahead, this bread keeps well wrapped in foil or an airtight container for up to three days. You can also freeze slices individually for up to a month; just warm them in the oven before serving for that fresh-baked goodness.
Make It Your Own
Here are a few variations to consider if you’re feeling adventurous or just want to use up what you have:
- Swap the granulated sugar for brown sugar for a deeper, richer flavor.
- Fold in a handful of chocolate chips or chopped nuts right before baking for added texture and flavor.
- Add a teaspoon of vanilla extract when you add the eggs for a subtle twist that enhances the banana flavor.
- Replace the milk with Greek yogurt for a tangy touch and an extra moist crumb.
If you try this, I’d love to hear how it turns out—drop a comment or tag me! Whether you’re a seasoned baker or a newbie, this banana bread is sure to bring a bit of joy to your day. Happy baking!
Related update: Traditional Banana Bread
Related update: Coconut Macaroons With Chocolate Drizzle
Related update: Cheddar Chile Beer Bread
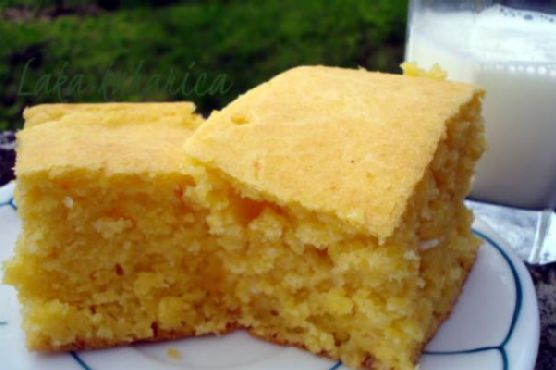
Last Tuesday, I found myself in one of those delightful culinary conundrums: a craving for something comforting yet uncomplicated, something that would warm the soul without demanding too much time or attention. The answer came to me as I stood in front of my pantry: Soft Croatian corn bread, or proja. This gem of a recipe is perfect for those moments when you want something special but don’t want to spend hours in the kitchen. It’s rich with the rustic flavors of corn and cheese, and the best part? You probably already have most of the ingredients on hand. Plus, it pairs wonderfully with soups and stews, making it a great choice for the changing seasons.
Jump to Recipe
What You’ll Need
In this recipe, the magic happens with just a few pantry staples and a couple of fresh items. Chances are, you already have most of this lying around:
- 1 cup all-purpose flour
- 1 teaspoon baking powder
- 1 cup corn grits
- 1 cup cornmeal
- 1 cup cottage cheese
- 3 large eggs
- 1 cup natural yogurt
- 1/4 cup olive oil
- 1 teaspoon salt
- 1 cup mineral water
How to Make Soft Croatian corn bread – proja
- Preheat your oven to 220°C (or about 430°F). Time to get that kitchen nice and toasty.
- In a large mixing bowl, crack in the eggs and sprinkle the salt. Whisk until the mixture becomes slightly frothy.
- Add the all-purpose flour, corn grits, cornmeal, and baking powder. Stir until everything is just combined.
- Pour in the olive oil and yogurt, mixing until you have a smooth batter that glistens with promise.
- Gradually add the mineral water, stirring consistently to achieve a thin, pourable batter. Don’t rush — let the batter tell you when it’s ready.
- Gently fold in the cottage cheese, ensuring it’s evenly distributed. The batter should be light and slightly lumpy.
- Lightly grease a baking pan with butter, then pour in the batter. Smooth the top with a spatula, giving it a little jiggle to settle.
- Bake in the preheated oven for about 30 minutes. You’ll know it’s done when the top is golden, and a toothpick inserted in the center comes out clean.
Cook’s Notes
Proja is forgiving, but here are a few tips to keep in mind. Make sure your batter is on the thinner side before baking; this ensures a tender crumb. If the top is browning too quickly in the oven, cover it with foil halfway through. Leftovers can be wrapped tightly and stored in the refrigerator for up to three days. To reheat, just pop a slice in the oven or toaster, and it comes back to life like magic.
Make It Your Own
Looking to add your own twist to this lovely loaf? Here are some fun variations:
- Swap the cottage cheese for feta for a tangier kick.
- Add a handful of chopped olives for a Mediterranean vibe.
- Mix in some sun-dried tomatoes for a pop of color and flavor.
- Replace the mineral water with beer for a richer, deeper flavor.
If you try this, I’d love to hear how it turns out — drop a comment or tag me! Your kitchen stories are always my favorite part. Happy baking, and remember: the best recipes are the ones that make you smile.
Related update: Soft Croatian corn bread – proja
Related update: Cavatappi pasta with salmon crab surimi

Okay, picture this: It’s a lazy Sunday morning, and the sun is peeking through the kitchen window, but you’re still in your pajamas and not quite ready to embrace the day. You crave something sweet but are not in the mood for a mess of bowls and measuring cups. Enter Blueberry Almond Crescent Rolls, the savior for those who want to feel fancy without the fuss. These little guys are like a bakery treat you can whip up faster than you can say “brunch,” and I promise, they’ll make your kitchen smell like a dream. Plus, they’re guaranteed to impress anyone lounging around in their PJs with you! 🍇🥐
Jump to Recipe
What You’ll Need
This is one of those recipes where you might peek into your pantry and realize you’ve got most of it already. Here’s the lineup:
- 1 can of regular crescent rolls
- 1/4 cup blueberry jam
- 4 ounces cream cheese, softened
- 1/2 cup confectioner’s sugar, divided
- 1/4 teaspoon almond extract, divided
- 1 tablespoon flour
- Pinch of sea salt
- 1 egg
- 1 tablespoon water
- 1 tablespoon milk
- 2 tablespoons turbinado sugar
How to Make Blueberry Almond Crescent Rolls
- Preheat your oven to 375 degrees F. Line a large baking sheet with parchment paper or a silicone baking mat. Trust me, it’s worth it for easy cleanup!
- In the bowl of your stand mixer with the paddle attachment—or just a handheld mixer if you’re like me and can’t be bothered—mix together the cream cheese, blueberry jam, 2 tablespoons of confectioner’s sugar, flour, sea salt, and 1/4 teaspoon of almond extract. Blend until smooth, which should take about 30 seconds.
- Spread your crescent roll wedges out on a clean work surface. You know the drill: take a generous tablespoon of that heavenly cream cheese mixture and plop it on the wide end of each wedge.
- Roll ’em up! Start from the wide end and roll until the narrow end is snug underneath. Nestle them onto your prepared baking sheet.
- Whisk the egg and water together to create an egg wash, then brush it over your crescent rolls. Don’t skip this step—it gives them that gorgeous golden glow.
- Sprinkle with turbinado sugar. This stuff is like edible glitter, trust me.
- Bake for 13-15 minutes, or until they’re puffed and golden. The anticipation will build as your kitchen fills with the scent of warm blueberries and almond.
- While they cool slightly on a wire rack, prepare the glaze. In a medium bowl, combine the remaining 1/2 cup of confectioner’s sugar, remaining 1/4 teaspoon of almond extract, and milk. Whisk until smooth. Taste and add a pinch of sea salt if it’s too sweet for your liking.
- Drizzle that silky glaze over your crescent rolls and serve immediately. Enjoy the blissful combo of flaky, sweet, and creamy!
Cook’s Notes
- Don’t overfill the crescent rolls. It may be tempting, but too much filling can cause a messy overflow.
- If you don’t have turbinado sugar, regular sugar works in a pinch, though it won’t have the same crunch.
- The rolls are best enjoyed fresh but can be stored in an airtight container at room temperature for up to two days.
- For make-ahead magic, prepare the cream cheese filling a day in advance and store it covered in the fridge. Let it come to room temp before using.
Make It Your Own
- Swap the blueberry jam for raspberry or strawberry if that’s more your jam (pun intended!).
- Add a dash of cinnamon to the cream cheese mixture for an extra layer of flavor.
- Use orange marmalade and replace the almond extract with vanilla for a citrusy twist.
- Feeling nutty? Add a sprinkle of chopped almonds inside or on top for added crunch.
If you try this, I’d love to hear how it turns out—drop a comment or tag me! Let’s make every breakfast feel like a special occasion, one crescent roll at a time. 🌟
Related update: Blueberry Almond Crescent Rolls
Related update: Neiman Marcus Oatmeal Chocolate Chip Cookies
Related update: Soft Croatian corn bread – proja
Related update: Avocado Nests
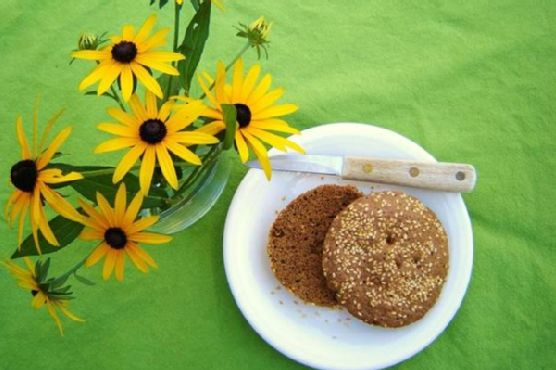
It was one of those days where I had absolutely nothing planned for dinner. You know the kind — when you open the fridge door for the third time hoping something magical will appear? Well, inspiration didn’t strike until I dug through my pantry and found a bag of sorghum flour tucked behind the lentils. It was like a lightbulb went off. I needed something quick and easy, and what’s better than a warm, freshly made bun that’s gluten-free and takes just five minutes? This recipe is not only a lifesaver for those rushed evenings but also a bit like magic in a mug. It’s comforting, satisfying, and, let’s be honest, it feels like a tiny victory to whip up bread in mere minutes.
Jump to Recipe
What You’ll Need
The beauty of these buns lies in their simplicity. Most of these ingredients are likely sitting in your pantry already, making this recipe a great go-to without a trip to the store. Here’s what you’ll gather:
- Almond meal
- Baking powder
- Cocoa powder
- Egg
- Ground flax seed
- Molasses
- Salt
- Sesame seeds
- Sorghum flour
How to Make 5 Minute Gluten Free Wonder Buns
- In a small bowl, crack open an egg and whisk it together with the molasses until well combined. You’ll smell the sweet earthy aroma of molasses starting to come through.
- In another small bowl, combine the sorghum flour, almond meal, ground flax seed, baking powder, and cocoa powder. Stir thoroughly, ensuring the mixture is even and free of clumps. The last thing you want is a surprise burst of bitter baking soda or unmixed cocoa powder.
- Pour the whisked eggs into the dry ingredient mixture and stir until the batter is smooth and glossy.
- Grab a 10 oz Pyrex custard cup, oil it lightly, and sprinkle sesame seeds on the bottom and sides. This not only prevents sticking but also adds a delightful nutty crunch to every bite.
- Pour the batter into the prepared cup, smoothing the top with a spoon. Sprinkle more sesame seeds on top for good measure.
- Pop the cup into the microwave and cook for 90 seconds. Watch as the batter rises and sets, emitting a warm and inviting aroma. Once done, let it cool for a moment before diving in.
Cook’s Notes
This recipe is pretty forgiving, but here are a few tips to keep in mind. Make sure your baking powder is fresh; otherwise, your buns won’t rise as much. If you don’t have a Pyrex custard cup, any microwave-safe mug should work, though cooking times may vary a bit. Feel free to experiment with the amount of molasses if you prefer a sweeter or less sweet bun. As for storage, these buns are best enjoyed fresh out of the microwave, but they can be stored in an airtight container for up to a day. Reheat them in the microwave for a few seconds to bring back that fresh-baked warmth.
Make It Your Own
These wonder buns are a blank canvas, ready for your culinary creativity. Here are a few ideas:
- Swap the cocoa powder for cinnamon to create a spiced bun that pairs beautifully with morning coffee.
- Add a tablespoon of grated cheese to the batter for a savory twist.
- Replace sesame seeds with sunflower seeds for a different crunch and flavor.
- For a sweeter treat, add a handful of chocolate chips before microwaving.
If you try this, I’d love to hear how it turns out — drop a comment or tag me! Whether you stick to the original recipe or put your spin on it, these wonder buns are sure to become a staple in your gluten-free recipe repertoire. Enjoy every bite!
Related update: 5 Minute Gluten Free Wonder Buns
Related update: Stuffed Pork Tenderloin with Marsala-Port Sauce
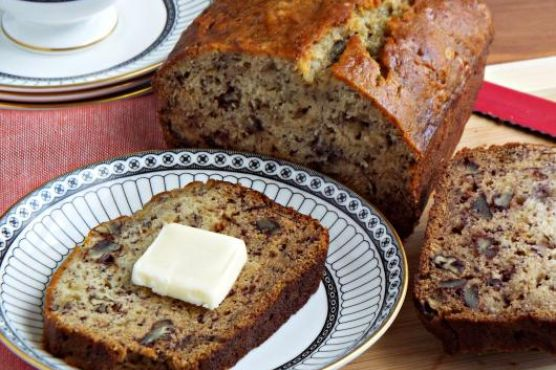
It was one of those drizzly Sundays when leaving the house was not an option, and the only thing that sounded remotely appealing was the smell of something baking in the oven. I found myself rifling through the pantry, hoping for inspiration, when I spotted a bunch of rather sad-looking bananas. You know the kind—brown, spotty, and begging to be transformed into something wonderful. That’s when it hit me: banana bread! It’s the kind of recipe that feels like a warm hug, and let’s be honest, who doesn’t need one of those every now and then? This banana bread is the perfect quick-fix comfort food—simple enough to whip up on a lazy afternoon but deliciously satisfying as if you spent hours perfecting the recipe. Jump to Recipe
What You’ll Need
Most of these ingredients are probably already lounging around in your kitchen, waiting for their moment to shine.
- 3 ripe bananas
- 1 cup granulated sugar
- 1/2 cup butter
- 1 egg
- 1 teaspoon vanilla extract
- 1 teaspoon baking soda
- Pinch of salt
- 1 1/2 cups all-purpose flour
- 1/2 cup chopped walnuts (optional, but highly recommended!)
How to Make Homemade Banana Bread
- Start by preheating your oven to 350°F (175°C). Trust me, nothing’s worse than a waiting oven when you’re ready to bake.
- In a large mixing bowl, beat together the butter, sugar, vanilla, and egg until the mixture is creamy and smooth. It should look like a pale-yellow fluffy cloud.
- Next, take your bananas. With a potato masher or a simple fork, mash them right into the bowl. It doesn’t have to be perfect; a few lumps are totally fine. Mix well until the bananas are fully incorporated into the creamy mixture.
- Time to bring in the flour, baking soda, and salt. Gently stir them into the wet ingredients. You don’t want to over-mix here; just enough to see no more streaks of flour.
- If you’re feeling nutty, toss in those tasty walnuts and give it another light stir.
- Grab your trusty loaf pan and give it a good spray with non-stick cooking spray. No one likes a sticky situation.
- Pour your banana-y mixture into the prepared loaf pan, smoothing the top with a spatula if needed.
- Place it in the oven and let it work its magic for 55-65 minutes. Your kitchen will soon smell like heaven. It’s ready when an inserted toothpick comes out clean.
Cook’s Notes
This banana bread is a dream to make, but here are a few tips to make sure yours is just as delightful:
- If your bananas aren’t ripe enough, place them in a 300°F oven for 15-20 minutes until they are brown and sweet.
- Store leftovers in an airtight container—it’ll stay fresh and moist for a few days, but I doubt it’ll last that long!
- For extra indulgence, try warming a slice and spreading a little butter on top. Heaven!
Make It Your Own
- Swap the walnuts for chocolate chips if you’re craving a chocolatey twist.
- Replace the granulated sugar with brown sugar for a deeper, caramel-like flavor.
- Throw in a handful of dried cranberries for a tart burst of flavor.
- Try a mix of nuts—pecans, almonds, or hazelnuts can add a delightful crunch.
If you give this banana bread a go, I’d love to hear how it turned out for you. Drop a comment or tag me in your tasty creations on social media! Let’s spread the banana bread love.
Related update: Homemade Banana Bread
Related update: Spare Ribs
Related update: White chocolate-cranberry ice cream
Related update: 5 Minute Gluten Free Wonder Buns
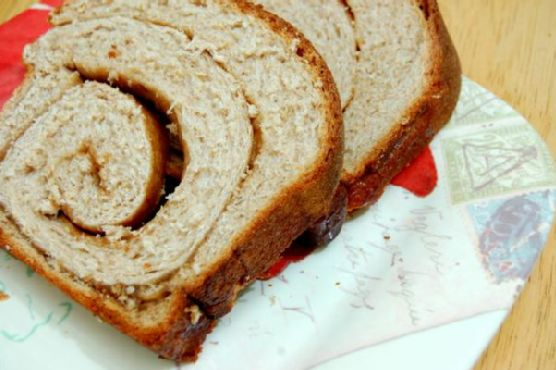
I was standing in my kitchen one chilly autumn evening, flat out of ideas and with only a few pantry staples at my disposal. You know those evenings, right? The ones where you want something homemade and comforting, but also quick enough that you’re not chained to the kitchen all night. That’s when it hit me—why not whip up a loaf of cinnamon swirl bread? This isn’t just any bread, folks; it’s got a heartwarming swirl of cinnamon goodness and a cozy, nutty flavor from whole wheat flour. Perfect for breakfast, dessert, or, let’s be honest, snacking directly from the cooling rack.
Jump to Recipe
What You’ll Need
I bet you already have most of these goodies tucked away in your kitchen. This recipe is all about pantry staples coming together in a magical way.
- 1 large egg
- 1 cup non-fat milk
- 1/4 cup warm water
- 2 tablespoons unsalted butter, softened
- 1/4 cup sugar
- 2 cups all-purpose flour
- 1 cup whole wheat flour
- 1 teaspoon salt
- 1/4 teaspoon nutmeg
- 1 teaspoon ground cinnamon
- 2 1/4 teaspoons dry yeast
- 1/4 cup brown sugar
How to Make Simply Amazing Cinnamon Swirl Wheat Bread
- Place the egg, non-fat milk, and warm water into the bread machine pan. These are your wet ingredients that will bind everything together.
- Add the softened butter, sugar, all-purpose flour, whole wheat flour, salt, nutmeg, cinnamon, and yeast to the pan. Imagine these as your bread’s backbone, each playing its part.
- Set your bread machine to the dough cycle. Let it do its magic while you kick back with your favorite book or start on a Netflix binge.
- When the cycle ends, remove the dough and roll it into a rectangle, about 10×12 inches. You’re going for “slightly wonky” rectangle, not architectural blueprint.
- Spread softened butter all over the surface of the dough, reaching the edges. This is where the decadence starts building.
- Sprinkle the surface with brown sugar and cinnamon, evenly covering the dough. This is your moment to be generous; it’s the heart of your cinnamon swirl.
- Roll the dough tightly, starting with the shorter side. Pinch the ends and fold them down to seal your tasty package.
- Place your dough seam-side down in a bread pan and cover. Let it rise in a warm, cozy spot for about an hour, or until it doubles in size. The dough should look slightly puffed and proud.
- Preheat your oven to 350°F (175°C). The anticipation is building!
- Once your dough has risen, pop the pan into the oven and bake for 35 minutes. The bread will turn a golden brown, filling your kitchen with the aroma of baked heaven.
- Remove from the oven and let it rest in the pan for at least 10 minutes. This is crucial for allowing the swirl to set and for not burning your eager fingers.
Cook’s Notes
One of the greatest joys of this recipe is its forgiving nature. You can store the bread in an airtight container for up to five days, although I suspect it won’t last that long. If you want to get ahead of your bread game, you can prepare the dough the day before. After rolling and placing it in the pan, cover it tightly with plastic wrap and let it hang out in your fridge overnight. Just bring it back to room temperature and allow it to rise before baking.
Make It Your Own
Want to put your own spin on this bread? Here are a few ideas:
- Swap the brown sugar for honey and add a sprinkle of cardamom for a floral twist.
- For a nutty crunch, add a handful of chopped walnuts or pecans to the cinnamon filling.
- Replace the butter with coconut oil for a subtle coconut flavor that pairs beautifully with cinnamon.
- Use a teaspoon of pumpkin spice instead of nutmeg and cinnamon for an autumnal vibe.
If you try this, I’d love to hear how it turns out — drop a comment or tag me! There’s nothing more fun than seeing your delicious creations ripple out into the world. Happy baking!
Related update: Simply Amazing Cinnamon Swirl Wheat Bread
Related update: Chocolate and Szechuan Peppercorn Brownies
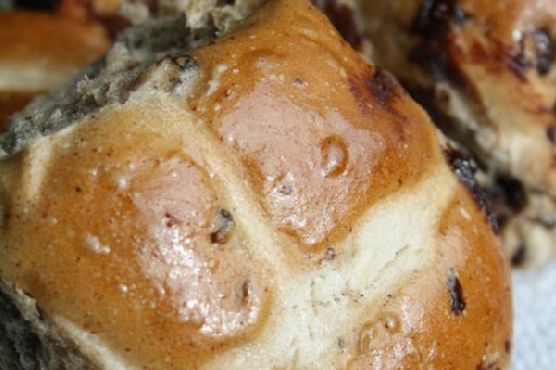
It was one of those unpredictable spring mornings where the sky couldn’t decide if it wanted to rain or shine. I found myself craving something that felt like a warm hug, something that would fill the house with the spicy sweet scent of comfort. Enter Hot Cross Buns. They’re perfect for those “in-between” days, bridging the gap between winter’s end and spring’s full bloom. What I adore about these buns is how deceptively simple they are to make; they sound fancy, but they’re actually pretty forgiving. You just mix, knead, roll, and bake. They’re like little pillows of happiness, complete with a sweet cross on top that’s practically begging to be photographed. Trust me, once you try them, these buns will become a regular request in your household.
Jump to Recipe
What You’ll Need
There’s a good chance you already have most of these ingredients lurking in your pantry. The combination of spices gives the buns their signature warmth, and the sour milk keeps them tender.
- Flour
- Sugar
- Baking powder
- Baking soda
- Salt
- Cinnamon
- Nutmeg
- Shortening
- Raisins
- Sour milk (or add a splash of vinegar or lemon juice to regular milk)
How to Make Hot Cross Buns
- Sift the flour once, then measure it out into a large bowl. Add the baking soda, baking powder, salt, sugar, and spices. Trust me, the double sifting might sound extra, but it makes the buns incredibly light.
- Cut in the shortening. You want to mix until the flour looks like coarse crumbs. This is your time to channel the patient, zen gardener within.
- Stir in the raisins. These little gems add pockets of sweetness in every bite.
- Add enough sour milk to create a stiff dough. You want it just moist enough to hold together without being sticky.
- Turn the dough onto a floured board and knead it slightly—just enough to bring it all together. Don’t overdo it!
- Roll the dough out to about 1/2 inch thickness. Use a 2-inch cutter to cut out your buns. It’s oddly satisfying, like cutting out cookies.
- Place the buns close together in a shallow pan. With a sharp knife, cut a cross into the top of each bun. This is where the magic happens.
- Brush the tops with a mixture of milk and sugar. This will give them a lovely gloss and help them brown beautifully.
- Bake in a hot oven at 475 degrees for 20 minutes. You’ll know they’re done when they’re golden and fragrant.
- Once out of the oven, brush them again with the milk and sugar solution. Fill the cross with plain frosting if desired. Serve them warm and watch them disappear.
Cook’s Notes
Here’s the scoop: these buns are best served warm, fresh out of the oven, but they do reheat well if you find yourself with leftovers (unlikely, but possible). Just pop them in the oven for a few minutes, wrapped in foil, to refresh them. You can make the dough ahead and keep it in the fridge overnight if you want to do the hard part in advance. Just be sure to let it come back to room temperature before rolling and cutting.
Make It Your Own
Feel free to play around with the recipe a bit. Here are some variations to consider:
- Swap raisins for dried cranberries for a tart twist.
- Add orange zest to the dough for a citrusy zing.
- Replace the frosting with a cream cheese glaze for a tangy finish.
- Throw in some chopped nuts if you’re in the mood for a bit of crunch.
If you try these Hot Cross Buns, I’d absolutely love to hear how they turn out for you! Drop a comment below or tag me on social media with your bun pics. Happy baking!
Related update: Hot Cross Buns
Related update: Xocai Oatmeal Dark Chocolate No-Bake Cookies
Related update: Simply Amazing Cinnamon Swirl Wheat Bread

Picture this: it’s a drizzly Tuesday evening, and you’ve just returned from a long day that felt like a relentless blur of meetings and errands. You’re craving something comforting and hearty, yet adventurous enough to pull you out of the weekday monotony. Enter Khachapuri — the pillowy, cheese-filled bread boat that hails from Georgia (the country, not the state). I’ve always found Khachapuri to be the perfect marriage of comfort and culinary curiosity, with its gooey center and golden, flaky crust. Making it is like giving yourself a cozy hug in bread form, and it’s surprisingly doable even when you’re running on fumes. Let’s dive into creating this cheesy delight that’s sure to warm your soul.
Jump to Recipe
What You’ll Need
What’s fantastic about this recipe is that you might already have most of these ingredients lounging in your pantry or fridge. Let’s get you prepped:
- Dry yeast
- Sugar
- Water
- Milk
- Butter
- Salt
- White Swiss cheese – 8 ounces
- Cheddar
- 2 eggs
- Muenster cheese
- Parsley
- White pepper
How to Make Khachapuri
- Dissolve the yeast and 1 teaspoon of sugar in 1/4 cup of warm water. Let it stand for 5-10 minutes until it becomes foamy and alive with little yeast bubbles.
- In a mixing bowl, combine the proofed yeast with milk, 2 tablespoons of sugar, butter, and salt. Gradually mix in enough flour to form a soft, slightly tacky dough.
- Transfer the dough to a greased bowl, turning it so it’s coated on all sides. Cover with a damp cloth and let it rise in a warm spot until it doubles in size — about an hour.
- While your dough is having its beauty rest, shred the cheeses and mix them with the eggs, parsley, and a pinch of white pepper. Pop this filling in the fridge to chill and mingle.
- Grease a 9-inch springform pan generously. Punch down the risen dough, shape it into a ball, and roll it out to a 20-inch circle.
- Gently fold the dough circle in half to lift it, then unfold it into the pan, allowing the edges to drape over. Pile the cheese filling into the dough-lined pan.
- Bring the draped edges of the dough up and over the filling, creating 8-12 evenly spaced pleats around the perimeter. Twist and pinch the ends together in the center to form a rustic knob.
- Cover the loaf with a buttered square of waxed paper and let it rise again until doubled in bulk.
- Preheat your oven to 375°F. Brush the top with a glaze made of 1 egg white mixed with 1 tablespoon of water, or simply use margarine.
- Bake for 40-50 minutes until the Khachapuri is deeply golden brown. Remove from the pan and place directly on the oven rack for an additional 5 minutes to crisp the bottom crust.
- Let it cool on a rack for about 45 minutes before slicing into wedges and basking in all the cheesy goodness.
Cook’s Notes
Here’s where the magic and little nuances come into play:
- Proofing patience: If your yeast doesn’t foam, give it another try with fresh yeast and slightly warmer water. It’s worth the wait to get that dough rising right!
- Cheese choices: Feel free to tailor the cheese mix to your liking. I find the combination of Swiss, Cheddar, and Muenster to be a dreamy balance between sharp and creamy.
- Leftovers: Khachapuri does great as leftovers. Wrap it tightly in foil and reheat it in the oven at 350°F for about 10-15 minutes to refresh that crispy crust.
- Make-ahead: You can prepare the dough and filling up to a day in advance — just keep them chilled and separate until you’re ready to assemble and bake.
Make It Your Own
- Herb It Up: Add fresh dill or cilantro to the filling for an herbal twist.
- Meaty Marvel: Toss in crispy bacon bits or diced ham for a protein-packed version.
- Spice Things Up: Mix in a pinch of red pepper flakes into the cheese for a touch of heat.
- Go Green: Layer in some sautéed spinach or kale for a veggie boost.
If you try this Khachapuri recipe, I’d love to hear all about your cheesy adventures! Drop me a comment or tag me on social media with your delicious creations. Let’s connect over this cozy, cheesy masterpiece!
Related update: Khachapuri
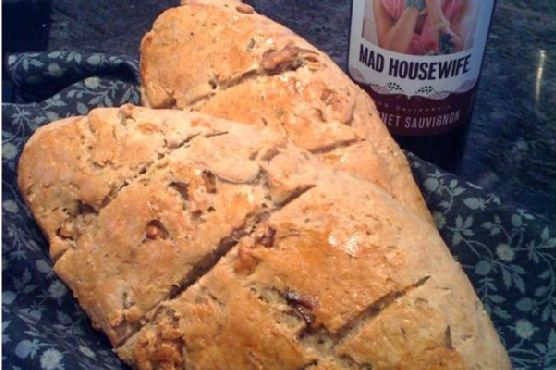
Picture this: It’s a chilly Saturday morning, the kind where the air feels sharp and the sky has that crisp blue tint that only autumn can deliver. The leaves have turned, and you’re wrapped up in your coziest sweater. A few weekends ago, I found myself in this exact scenario with a craving for something warm, hearty, and just a little bit special. Cue the Rosemary Walnut Bread! It’s the kind of bread that fills your kitchen with an aroma so enticing, you’ll want to bottle it as a candle. Plus, it’s a breeze to whip up, even if you’re still waking up from a glorious sleep-in. This recipe is a keeper for those who love a crusty loaf with the perfect hint of rosemary’s earthy magic and the crunch of walnuts.
Jump to Recipe
What You’ll Need
The beautiful thing about this Rosemary Walnut Bread is the simplicity of its ingredients — nothing fancy, yet it delivers big on flavor.
- Cream cheese
- Dry yeast
- Eggs
- Flour
- Honey
- Lemon zest
- Milk
- Olive oil
- Rosemary
- Salt
- Walnuts
How to Make Rosemary Walnut Bread
- Start by combining the cream cheese, milk, salt, and honey in a medium mixing bowl. Sprinkle the dry yeast over the mixture and give it a gentle stir. Let it stand for about 5 minutes, allowing the yeast to activate — you’ll notice a frothy layer on top.
- Slowly stir in two cups of flour. The dough will start to come together. Cover the bowl with plastic wrap and tuck it into a warm spot (85°F is ideal) for about 15 minutes. During this time, the dough gets a chance to rest and begin to rise.
- Add the remaining flour, chopped walnuts, lemon zest, and chopped rosemary into the bowl. Crack in two eggs, and mix everything until the dough feels sticky and cohesive.
- Transfer the dough onto a floured surface and knead for a full 10 minutes. Think of this as your morning workout. The dough should feel smooth and elastic by the time you’re done.
- Rub a bit of olive oil onto the top of your dough and place it in a lightly oiled bowl. Cover with a damp cloth and let it rise for an hour until it doubles in size.
- Once the dough has risen, return it to the floured surface. Divide and shape it into two leaf-like loaves. This is your chance to get creative with your shaping skills!
- Make three diagonal slashes about half an inch deep across each loaf. These slashes will help the bread expand beautifully while baking.
- Brush the tops with a beaten egg for that irresistible golden crust, then let the loaves rise again for 30 minutes.
- Bake in a preheated 375°F oven for 40 minutes, until the loaves are golden and sound hollow when tapped on the bottom.
- Let the bread stand for about 20 minutes before slicing — if you can resist!
Cook’s Notes
Here are a few little nuggets of wisdom to help you along the way. If your kitchen runs cold, you can place the dough near the oven or a warm stove to help with rising. And when you’re kneading, don’t be afraid to add a sprinkle of flour if the dough feels too sticky. For storage, wrap your bread tightly in foil or a bread bag to keep it fresh for up to three days. It also freezes beautifully — just slice it, wrap it well, and pop it in the freezer.
Make It Your Own
- Swap the walnuts for pecans if you fancy a different nutty flavor.
- If rosemary isn’t your jam, try using thyme or sage for a unique herb twist.
- Add a handful of dried cranberries for a sweet and tart combo that’s perfect for the holidays.
- Experiment with whole wheat flour for a heartier loaf — just adjust the liquid slightly as it tends to absorb more moisture.
If you try this, I’d love to hear how it turns out — drop a comment or tag me! Happy baking, and may your kitchen be filled with warmth and the comforting scent of home-baked bread.
Related update: Rosemary Walnut Bread
Related update: Khachapuri