
Picture this: It’s a chilly Wednesday evening, and I’ve got exactly 15 minutes before my friends show up for our weekly Wine & Whine night. The fridge is looking a bit sparse, but I spot some leftover brie from last weekend and a carton of raspberries that are starting to look a tad too ripe. As I rummage through my pantry, I stumble upon a forgotten stash of phyllo shells. A lightbulb moment strikes—why not whip up some White Chocolate Raspberry Brie Cups? They’re quick, ooze class with minimal effort, and the combination of creamy, tangy, and sweet is an absolute game-changer. Trust me, these little bites are what every Wednesday evening dreams of becoming.
Jump to Recipe
What You’ll Need
You might already have most of these on hand, which means fewer trips to the store—score!
- Brie – The creamy heart of our cups.
- Athens phyllo shells – Crunchy, flaky, ready-to-go lifesavers.
- Raspberries – Fresh and slightly tart.
- Raspberry preserves – For that extra berry punch.
- White chocolate – The sweet base to balance it all out.
How to Make White Chocolate Raspberry Brie Cups
- Preheat your oven to 350 degrees. This gives us just enough time to assemble everything.
- Line a baking sheet with parchment paper. This helps prevent any sticky messes and makes cleanup a breeze.
- Place 1 teaspoon of white chocolate in the bottom of each phyllo shell. The chocolate will melt into a sweet, gooey foundation.
- Top with chunks of brie. Go generous here—the brie should be the star of the show.
- Add about 1/2 teaspoon of raspberry preserves on top of the cheese. This layer should start to glisten.
- Bake for 8 minutes, or until the corners of the phyllo shells turn golden and the cheese is bubbling away.
- Carefully remove from the oven and top with a small dollop of extra raspberry jam. Trust me, it’s worth it.
- Place back in the oven for just 1 more minute to let the jam settle.
- Finally, crown each cup with a fresh raspberry. Serve them hot—the contrast of temperatures is divine.
Cook’s Notes
Don’t overstuff the shells; they need some space to breathe and bake properly. If you’re prepping for a party, you can assemble these up to a day in advance. Just cover and refrigerate them, then bake right before serving. These cups are best enjoyed fresh, but if you have leftovers (unlikely!), store them in an airtight container in the fridge. Pop them back in a warm oven for a few minutes to re-crisp.
Make It Your Own
- Swap the brie for camembert if you’re feeling adventurous—another creamy delight.
- Try a darker chocolate for a less sweet, more sophisticated bite.
- Substitute the raspberry preserves with apricot jam for a surprise twist.
- Add a thin slice of prosciutto under the brie for a savory kick.
If you try this, I’d love to hear how it turns out—drop a comment or tag me! Wine & Whine nights are my favorite, and I hope these cups make yours special too.
Related update: White Chocolate Raspberry Brie Cups

It was one of those Tuesday evenings where everything felt a little upside down. My oven was on the fritz, my dinner plans had gone awry, and yet, that familiar sweet craving hit me like clockwork. As I rummaged through my pantry, the thought of something warm and comforting felt like the perfect antidote to my topsy-turvy day. Enter, cinnamon sugar fried apples. Not only are these little guys a quick fix for any sweet tooth, but they also bring a cozy vibe that feels like a warm hug on a plate. And honestly, who doesn’t love a recipe that transforms humble ingredients into something downright delicious?
Jump to Recipe
What You’ll Need
This recipe is all about simplicity — chances are you’ve got most of this in your kitchen already. Here’s what you’ll need:
- All-purpose flour
- Apples (crisp varieties like Granny Smith or Honeycrisp work great!)
- Brown sugar
- Cinnamon
- Eggs
- Granulated sugar
- Lemon zest
- Milk
- Oil (for frying)
- Salt
- Unsalted butter
How to Make Cinnamon Sugar Fried Apples
- In a large bowl, whisk together the all-purpose flour, a pinch of salt, granulated sugar, milk, lightly beaten eggs, lemon zest, and melted unsalted butter until the batter is smooth to the touch. Cover the bowl with plastic wrap and let it rest for 30 minutes to ensure the flour fully hydrates and the flavors meld beautifully.
- While the batter is resting, core and slice your apples into 1 cm thick rings. Aim for even slices as this will help them cook uniformly. Set them aside and start heating the oil in your preferred frying vessel over medium heat.
- Once your batter has rested and your oil is shimmering and ready, dip each apple slice into the batter, allowing any excess to drip back into the bowl. Gently lay the slices into the hot oil.
- Fry the apple slices until they are golden and fragrant, about 2-3 minutes per side. You’ll know they’re ready when the edges turn a beautiful golden hue and your kitchen is filled with the nostalgic aroma of apples and cinnamon.
- As each batch finishes, transfer the fried apples to a plate lined with double-layered paper towels to drain any excess oil.
- In a small bowl, combine the brown sugar and cinnamon. Sprinkle this delightful cinnamon sugar mixture generously over the warm apple slices. Serve immediately for that perfect combination of crispy, sweet, and spiced.
Cook’s Notes
Here’s the thing: frying can be a bit of a mess, but it’s so worth it. Make sure your oil is hot enough before dipping in the apples; otherwise, they’ll soak up too much oil and get soggy. A small kitchen thermometer can be handy if you’re unsure. If you’re planning to make these ahead of time, I’d recommend just prepping the batter and slicing the apples. Frying is best done right before serving to maintain that delightful crispiness. If you do end up with leftovers, a quick reheat in the oven at 350°F should do the trick.
Make It Your Own
Want to put your own spin on these cinnamon sugar fried apples? Here are some fun ideas:
- Instead of apples, try using firm pears for a slightly different but equally delicious twist.
- For a nutty crunch, toss in some chopped pecans or walnuts after sprinkling the cinnamon sugar.
- Want a caramel vibe? Drizzle some homemade or store-bought caramel sauce over the fried apples for an extra indulgent treat.
- Looking for a boozy kick? Add a splash of spiced rum to the batter for a grown-up version.
If you try this recipe, I’d love to hear how it turns out — drop a comment or tag me in your delicious creations! Whatever you do, make sure to enjoy each crispy, sweet bite. Happy cooking! 🍏✨
Related update: Cinnamon Sugar Fried Apples
Related update: Roasted Red Pepper & Tomato Salsa
Related update: Bacon Brownie Cupcakes

On one of those bustling weekday evenings when time seems to slip away faster than you can say “dinner,” I found myself staring into the fridge, hoping for a miracle. What I really wanted was something fresh and light but also satisfying. That’s when I remembered these Easy To Make Spring Rolls. They’re perfect for those nights when you want something delicious and impressive-looking without the fuss. Plus, they have this uncanny ability to make you feel like you’ve got your life together. Not bad for a dish that’s ready in under 30 minutes!
Jump to Recipe
What You’ll Need
This recipe is the epitome of a grab-and-go grocery list. Most of these ingredients are probably already lounging in your kitchen. Here’s what you’ll need to whip up these fresh bites of joy:
- Rice paper wrappers
- Cooked shrimp, halved
- Boston lettuce leaves
- Fresh basil, mint, and coriander leaves
- Red bell pepper, sliced into thin strips
- Chili pepper, thinly sliced (optional for a kick)
- Garlic, minced
- Fresh lime juice
- Nuoc cham for dipping
- Fish sauce
- Rice vinegar
- Sugar
- Water
How to Make Easy To Make Spring Rolls
- First, get all your ingredients prepped and within arm’s reach. Trust me, this will save you a lot of scrambling later.
- Fill a large bowl with warm water. Dip a rice paper wrapper in the water just until it softens—this means a couple of swishes should do it. It might feel slightly stiff as you take it out, but don’t worry.
- Lay the softened wrapper flat on a clean surface. In the center, line up two shrimp halves. It’s like creating a little shrimp runway!
- Top the shrimp with a few leaves of basil, mint, and cilantro. Add a layer of Boston lettuce, and maybe some red bell pepper strips and a slice of chili if you’re feeling spicy.
- Fold the sides of the wrapper inward over the filling. Start rolling from the end with the lettuce, tucking in the filling as you go for a snug little spring roll.
- Repeat with the remaining wrappers and ingredients. Once you’ve got your little spring roll soldiers lined up, cut them in half for easy handling.
- Serve them at room temperature with some nuoc cham for dipping. Don’t skip the dipping sauce—it’s the secret weapon!
Cook’s Notes
Dealing with rice paper wrappers can be a bit like handling a delicate flower. Too much time in the water and they’ll become a soggy mess. Not enough and they’ll tear when you try to roll. My trick? A quick dip and a confident hand. They’ll soften up perfectly by the time you start rolling. These rolls are best enjoyed fresh, but you can prepare all the components ahead of time and roll them just before serving. If you have leftovers, wrap them tightly in plastic wrap to keep them from drying out.
Make It Your Own
Feel free to get creative with these spring rolls. Here are some variations to consider:
- Swap the shrimp for crispy tofu to make it vegetarian-friendly.
- Add in slivers of cooked pork or chicken for a meatier bite.
- Include julienned carrots for an extra crunch and pop of color.
- Spice things up by adding a dash of Sriracha to the dipping sauce.
If you try this, I’d love to hear how it turns out—drop a comment or tag me on social media! Whether you’re a spring roll pro or a first-timer, I hope these become a fun and tasty part of your meal rotation. Enjoy every bite!
Related update: Easy To Make Spring Rolls

It was one of those frantic weeknights when the thought of cooking anything complicated felt like a Herculean task. The kids were hungry, my partner was stuck in traffic, and the fridge looked like it had been raided by a group of snack-hungry gremlins. That’s when I spotted the package of rice paper hiding behind the milk. In a flash, I knew what to do. These Vegetarian Spring Rolls with Garlic Lime Sauce were going to be our savior. They’re colorful, crunchy, and somehow manage to make you look like a culinary genius with minimal effort. Perfect for a quick dinner fix or when you want to impress without breaking a sweat.
Jump to Recipe
What You’ll Need
The beauty of this recipe is its simplicity — chances are, you already have most of these ingredients lurking around.
- Rice paper
- Butter leaf lettuce
- Carrots
- Jicama
- Red bell pepper
- Yellow bell pepper
- Thai basil
- Ginger
- Garlic
- Lime
- Hoisin sauce
- Sriracha
How to Make Vegetarian Spring Rolls With Garlic Lime Sauce
- First, julienne the red and yellow bell peppers, carrots, jicama, and Thai basil. Aim for strips about 1/8 inch thick and 2 inches long, like colorful little matchsticks.
- Fill a round pie pan or shallow plate with warm water. Delicately dip one piece of rice paper in the water, ensuring both sides are soaked — but no need to drown them!
- Carefully lay the rice paper on a flat, flour towel cloth. Wait about ten seconds for it to soften — it should feel silky and pliable.
- Gently peel the rice paper off the cloth and place half a butter leaf lettuce on top. Discard the ribbing to keep things smooth and easy to roll.
- Add a delicate layer of each vegetable on top of the lettuce, finishing with a sprinkle of Thai Basil. It’s like art — have fun with it!
- To roll: start at one end, fold the edge toward the middle, and repeat with the parallel side. Give it a little 90-degree turn and roll it snugly, like wrapping up a little gift.
- Cut each roll diagonally and arrange them on a serving platter, so they look all fancy and inviting.
- For the Garlic Lime Hoisin Sauce, use a mortar and pestle to crush the garlic and ginger together until fragrant. The aroma should make you smile.
- Whisk in fresh lime juice and a modest splash of Sriracha for that zingy, spicy kick. Finally, add the hoisin sauce and whisk until combined. Taste and adjust as needed.
Cook’s Notes
Rolling these can be a bit of a learning curve, but once you get the hang of it, you’re golden. Rice paper can be temperamental, so if it tears, just keep going — a little imperfection never hurt anyone. If you want to prep these in advance, keep the veggies prepped in the fridge and roll them just before serving to keep everything fresh. Leftover rolls can be stored in an airtight container in the fridge for a day, but the rice paper will lose some of its magic over time. The sauce, however, can be made days ahead and will only get better as the flavors mingle.
Make It Your Own
- Swap the jicama for cucumber for a refreshing twist.
- Replace Thai basil with cilantro if that’s more your vibe.
- For a protein boost, add slices of crispy tofu or tempeh.
- Feeling nutty? Toss in some crushed peanuts for extra crunch.
If you try this, I’d love to hear how it turns out — drop a comment or tag me! Whether it’s a weeknight fix or a dinner party appetizer, these spring rolls are sure to brighten your table and your tastebuds. Enjoy!
Related update: Vegetarian Spring Rolls With Garlic Lime Sauce
Related update: Easy To Make Spring Rolls
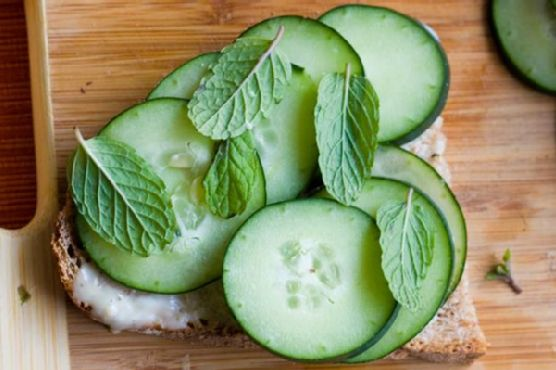
It was one of those gloriously lazy Sunday afternoons when the sun was streaming through the kitchen window, painting everything in a warm, golden hue. I found myself craving something simple yet sophisticated to nibble on while sipping a freshly brewed pot of Earl Grey. That’s when the idea of Cucumber Mint Tea Sandwiches popped into my head. These little bites are like a garden party in your mouth — refreshing, slightly spicy, and with a hint of sweet earthiness. They’re perfect for when you want to impress your friends but also fit perfectly into a no-fuss, no-mess vibe. Trust me, once you try these, they’ll become your go-to for every casual gathering or solo indulgence.
Jump to Recipe
What You’ll Need
Honestly, you probably have most of these ingredients lounging in your pantry or fridge already. And if not, they’re super easy to find on your next grocery run.
- Bread (your choice – think classy yet sturdy)
- Cucumber (cool, crisp, and refreshing)
- Wasabi Maple Spread (the secret zing)
- Black pepper grinder (for that fresh, subtle heat)
- Fresh mint leaves (fragrant and cooling)
- Fresh dill (herbaceous and bright)
- Vegenaise (creamy and delightful)
- Maple syrup (just a touch of sweetness)
- Wasabi powder (for that kick)
How to Make Cucumber Mint Tea Sandwiches
- Start by whipping together the wasabi maple spread. Combine vegenaise, a dash of maple syrup, and a sprinkle of wasabi powder until it’s smooth and slightly spicy.
- Thinly slice the cucumber. You can go for thick, crunchy slices if you’re feeling bold, or thin, silky ones for a more delicate bite. Either way, they should be refreshingly crisp.
- Gather your fresh mint leaves and dill. Rinse them under cold water and pat them dry with a clean kitchen towel. You want them to be fresh and vibrant.
- Spread a very thin layer of your wasabi maple spread on all the inside surfaces of the bread slices. It’s all about that flavor balance, not overpowering.
- Layer your cucumber slices neatly on top of the spread. Feel free to overlap them slightly. It’s like building a little cucumber brick wall.
- Add a layer of mint and dill. You can mix them up in each sandwich or go half mint, half dill if you like to keep your flavors organized.
- Grind some fresh black pepper over the top of the herbs and cucumbers. This will tie all the flavors together beautifully.
- Close each sandwich with another piece of bread and gently press down. Then, slice them into charming quarter cubes or triangles. Presentation is key!
- Plate the sandwiches, and if you’re feeling fancy, sprinkle a few edible flowers around for a pop of color and whimsy.
Cook’s Notes
These sandwiches are meant to be a fresh and light snack, so fresh ingredients are key. Make sure your cucumber is firm and your herbs are not wilting. Want to make them a few hours ahead? No problem! Just cover the platter with a slightly damp paper towel and wrap tightly with plastic wrap to keep everything moist and fresh. Leftovers (if you have any, which I doubt) can be stored in an airtight container in the fridge for up to a day — but they’re best fresh.
Make It Your Own
- Swap out the bread for a whole grain or seed variety for extra texture and flavor.
- Replace the wasabi maple spread with a spicy sun-dried tomato spread for a Mediterranean twist.
- Add a layer of thinly sliced radishes for an extra peppery crunch.
- Sprinkle a dash of red pepper flakes inside for those who love an extra spicy kick.
If you try this, I’d love to hear how it turns out — drop a comment or tag me in your tea-time creations! Happy sandwich making!
Related update: Cucumber Mint Tea Sandwiches
Related update: Vegetarian Spring Rolls With Garlic Lime Sauce

Last Tuesday, I found myself staring into the fridge at 7 PM, wondering what on earth I could whip up for a little evening gathering with friends. You know those days when you just need a recipe that’s not only impressive but also stress-free? That’s when I stumbled upon the forgotten block of *blue cheese* nestled next to a jar of *fig jam*. A brainwave hit me: Blue Cheese Tartlets with Fig Jam and Walnuts! These beauties are the perfect blend of savory and sweet, and trust me, they’re much easier to make than you’d think. Each bite is a little symphony of flavors and textures. Plus, they’re great for making ahead and pop in the oven the moment your guests ring the doorbell.
Jump to Recipe
What You’ll Need
The ingredient list for these tartlets is refreshingly simple. Chances are you already have most of these in your pantry:
- Blue cheese
- Butter
- Flour
- Fig jam
- Walnuts
- Orange zest
- (Optional) Fresh thyme leaves
How to Make Blue Cheese Tartlets With Fig Jam and Walnuts
- Preheat your oven to 350°F (175°C). Lightly grease the cups of your mini muffin pans unless they’re non-stick. No one wants a sticky situation!
- In a medium bowl, cream together the *blue cheese* and *butter*. The mixture should be smooth and creamy, with that unmistakable aroma of rich cheese.
- Add the flour to the bowl and use your hands to bring the dough together. It might take a little coaxing, but be patient — the dough will reward you with a tender crust.
- Divide the dough into 30 pieces and roll them into balls. If you prefer a more delicate shell, go for 36 pieces.
- Using lightly floured fingers, press each dough ball against the sides of the mini tart pan until the dough rises slightly above the rim. This ensures that lovely shell shape.
- Bake the shells for 15 minutes, until they are golden brown and smell like heaven. Let them cool in the pans for about 5 minutes, then transfer to a wire rack to finish cooling completely.
- Once cooled, spoon a dollop of *fig jam* into each tartlet shell. Top with a sprinkle of toasted *walnuts*, a touch of *orange zest*, and a few thyme leaves if you like.
Cook’s Notes
These tartlets are surprisingly versatile. You can prepare the tartlet shells ahead of time and store them in an airtight container. If you’re planning a party, they freeze beautifully — just bake frozen shells for 8 minutes at 325°F before filling them. Pro tip: when pressing the dough into the pan, keep a small bowl of flour nearby to dust your fingers and prevent sticking. And if you’re cooking for a big crowd, consider doubling the recipe because they disappear fast!
Make It Your Own
- Swap the blue cheese for *goat cheese* if you prefer something milder.
- Replace *fig jam* with a spicy *pepper jelly* for a kick.
- Use *pecans* or *hazelnuts* instead of walnuts for a different nutty flavor.
- Add a thin slice of prosciutto to each tartlet for a touch of saltiness.
If you try this, I’d love to hear how it turns out — drop a comment or tag me! These tartlets are really something special and I hope they bring a bit of joy to your kitchen and your taste buds. Enjoy every bite!
Related update: Blue Cheese Tartlets With Fig Jam and Walnuts
Related update: Cucumber Mint Tea Sandwiches

I remember the first time I tried to grill potato skins. It was a balmy summer evening, and my friends and I had decided on an impromptu barbecue to celebrate the end of a long workweek. We were short on the usual grilling staples, and I found myself rummaging through the pantry, just hoping to find anything that could be charred over an open flame. In a stroke of serendipitous genius—or desperation, depending on how you look at it—I stumbled upon a bag of baking potatoes. And so began my love affair with crispy, gooey, and utterly addictive grilled potato skins. They’re the perfect combination of crispy potato goodness and creamy, cheesy decadence, making them a crowd-pleaser that’s surprisingly easy to throw together. You won’t believe how fast these disappear once they hit the table.
Jump to Recipe
What You’ll Need
The beauty of this recipe is its simplicity. Chances are you already have most of these ingredients on hand.
- Baking potatoes
- Cooked bacon or finely-chopped ham
- Picante sauce
- Shredded cheddar cheese
- Sour cream
- Unsalted butter
How to Make Grilled Potato Skins
- First, preheat your oven to 375 degrees. Prick your baking potatoes all over with a fork to let them vent, then bake them for 50 to 60 minutes until they’re tender and can be easily pierced.
- Once the potatoes are cool enough to handle, cut each one in half lengthwise. Scoop out most of the insides, leaving a sturdy 1/4-inch shell. Save the scooped-out potato for mash or soup later!
- Melt some unsalted butter and brush the inside of each potato shell generously. This will help them get that delicious golden crispiness we’re after.
- Spoon about 2 teaspoons of picante sauce into each shell, spreading it around to coat the bottom. This adds a delightful zesty kick.
- Next, sprinkle a hearty amount of shredded cheddar cheese into each potato, followed by bits of your cooked bacon or ham. Really pack it in there—no one likes a stingy potato skin.
- Fire up your grill to medium heat. Place the potato skins directly over the coals, and let them grill uncovered for 10 to 12 minutes. You’ll know they’re ready when the skins are crisp and the cheese is bubbly and golden.
- If you’re feeling fancy, sprinkle with diced tomato and green onions right before serving. Finish with a generous dollop of sour cream on top.
Cook’s Notes
Grilled potato skins are pretty forgiving, but here are a few things to keep in mind:
- If you’re making these ahead of time, follow all the steps up to grilling and then store them in the fridge. When you’re ready to eat, pop them on the grill straight from the fridge. Just add a couple of extra minutes to the grill time.
- Leftovers can be stored in an airtight container in the fridge for up to three days. Reheat them in a 350-degree oven or a toaster oven until they’re heated through and crispy again.
- Make sure your grill is properly preheated before you start cooking. This ensures the skins get crispy rather than just drying out.
Make It Your Own
- Swap the bacon for crispy tofu to make it vegetarian-friendly.
- Use Monterey Jack or pepper jack cheese for a different flavor profile.
- Try adding black beans or corn for a southwestern twist.
- If you’re not a fan of picante sauce, substitute it with a mild salsa or even BBQ sauce for a smoky vibe.
If you try this, I’d love to hear how it turns out—drop a comment or tag me on social media! There’s nothing more satisfying than seeing your spin on these tasty potato skins. Enjoy every crispy, cheesy bite!
Related update: Grilled Potato Skins
Related update: Blue Cheese Tartlets With Fig Jam and Walnuts
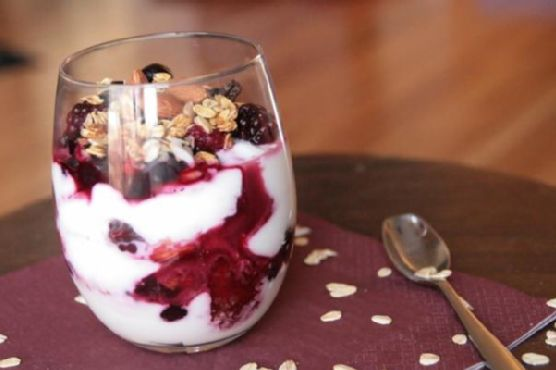
It was one of those mornings where everything seemed to go wrong. I woke up late, the cat knocked over my coffee, and I realized we were out of milk. You know those days, right? But hey, sometimes the universe gives you lemons so you can find a creative and tasty solution. On this particular day, I discovered my savior: Mixed Berry Yogurt with Almonds. It’s the kind of dish that feels luxurious without much effort—perfect for those hectic mornings or even as a healthy dessert when you want something a bit more special. The best part? It’s quick, comforting, and feels like a little scoop of joy.
Jump to Recipe
What You’ll Need
You might already have most of these ingredients nestled in your pantry and freezer, which is a huge win in my book.
- 1 cup frozen mixed berries
- 1/2 cup whole oats
- 1 cup plain Greek yogurt
- 1/4 cup whole almonds
How to Make Mixed Berry Yogurt with Almonds
- Start by toasting the almonds in a dry skillet over medium heat. Shake the skillet occasionally until they turn golden and fragrant. This should take about 3-5 minutes. Keep an eye on them; they can go from perfect to burnt in no time!
- While the almonds are toasting, scoop the Greek yogurt into a bowl or glass cup. I love using a clear glass because it shows off the layers and makes me feel like an artist.
- Evenly sprinkle the oats over the yogurt. If you want them a bit softer, you can let them sit for a minute or two to soak up some of the yogurt’s moisture.
- Microwave the frozen berries for about 30 seconds to thaw them slightly, then layer them over the oats. The warmth from the berries will start to melt into the yogurt, creating a beautiful marbled effect.
- Finally, top it all off with those perfectly toasted almonds. The crunchiness will be a lovely contrast to the creamy yogurt and juicy berries.
Cook’s Notes
This dish is super flexible, so you can tweak it based on what you have. If you want to prepare it in advance, layer the yogurt and oats first and keep the berries and almonds separate until you’re ready to serve. Leftovers can be stored in an airtight container in the fridge for up to two days, but I recommend keeping the almonds separate to maintain their crunch.
Watch out for the almond toasting process—they toast quickly and can easily burn if you’re not paying attention. Trust me, I’ve been there. If you want to make it even quicker in the morning, toast the almonds the night before!
Make It Your Own
- Swap the Greek yogurt for a creamier vanilla yogurt if you’re serving this as a dessert.
- Layer in a drizzle of maple syrup over the yogurt for an extra touch of sweetness.
- Try using walnuts or pecans if you’re out of almonds, toasting them just the same for that essential crunch.
- If berries aren’t your thing, this works beautifully with sliced peaches, bananas, or even a medley of whatever fruits you have hanging out in your fridge.
If you try this, I’d love to hear how it turns out—drop a comment or tag me! There’s nothing quite like seeing your take on these tasty creations. Enjoy every spoonful!
Related update: Mixed Berry Yogurt with Almonds
Related update: Beet Greens and Poached Eggs

It was one of those grey, lazy Sundays when the weather had no intention of letting you out of the house. My kids were bored, the couch had become a kingdom of pillows, and we were in desperate need of a fun kitchen project that would end with something delightful to snack on. That’s how we landed on making homemade animal crackers. It’s the perfect rainy-day activity that promises not just giggles and flour-covered noses but also a batch of wonderfully crunchy, subtly spiced crackers that beat anything from a box. Plus, they’re surprisingly simple to whip up with ingredients that are probably lounging in your pantry right now. Jump to Recipe
What You’ll Need
The beauty of these animal crackers is in their simplicity. Chances are you already have most of this hanging around in your kitchen. Here’s what you’ll need:
- Butter – the base of flavor and texture
- Brown sugar – for that slight caramel sweetness
- Egg – to bind it all together
- Vanilla – a warm aroma booster
- Cinnamon – the spice that whispers “home”
- Allspice – for a hint of mystery spice
- Salt – because sweet needs balance
- Baking powder – to lift them ever so slightly
- Oats – for a bit of texture
- Flour – the backbone of the dough
- Cocoa powder – optional, but oh what it adds!
How to Make Homemade Animal Crackers
Ready to dive in? Let’s do this!
- In a mixing bowl, cream together the butter and brown sugar until the mixture is light and fluffy. You should see it lighten in color slightly.
- Add in the egg and vanilla, and mix until everything is well combined and smooth.
- Sprinkle in the cinnamon, allspice, and salt. The dough will start to smell like a cozy autumn afternoon.
- Mix in the baking powder, oats, and flour. If you’re going the chocolatey route, replace some of the flour with cocoa powder as you measure.
- Once everything is incorporated, form the dough into a ball. It will be a bit sticky, but that’s okay!
- Wrap it in plastic wrap and let that dough chill in the fridge for at least an hour, but overnight is perfectly fine too.
- When you’re ready, preheat your oven to 350°F. Pull the dough from the fridge, grab a hunk, and roll it out to a 1/4″ thickness. Think of it as your edible crafting clay.
- Use your favorite animal-shaped cookie cutters to stamp out shapes and place them on a cookie sheet lined with parchment paper. Give them a little breathing room—they need space to grow!
- Bake for 5-7 minutes. Keep an eye out—once they turn golden and fragrant, you’re in business.
Cook’s Notes
Here’s the deal: don’t skip the chilling. It makes the dough easier to handle and helps the flavors meld together nicely. If you’re planning ahead, this dough holds well in the fridge for about 24 hours. Once baked, keep the crackers in an airtight container. They should stay crunchy and delicious for about a week, if they last that long. Remember to roll the dough evenly, so all your crackers bake at the same rate. And if they get a little too golden, don’t worry, that just means more crunch.
Make It Your Own
Feel free to play around with the recipe. Here are some ideas:
- Swap the cinnamon for nutmeg or ginger for a different kind of spice.
- Add a handful of mini chocolate chips to the dough for a surprise treat.
- Replace the oats with shredded coconut for a tropical twist.
- Use almond extract instead of vanilla for a nuttier flavor.
If you try this, I’d love to hear how it turns out—drop a comment or tag me! These little guys are a joy to make and even more fun to eat, so I hope they bring a bit of joy to your table too. Happy baking!
Related update: Homemade Animal Crackers
Related update: Brownie Cake gluten free, dairy free
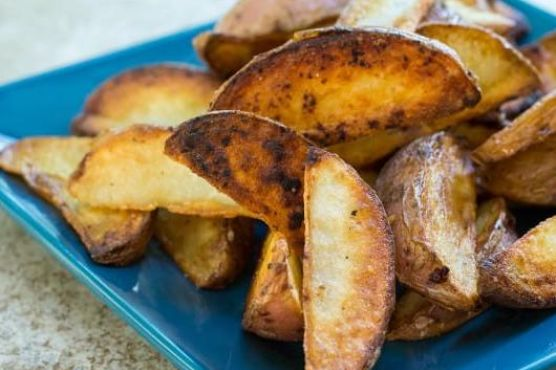
The other night, I was in one of those classic “stare into the fridge and hope something inspiring jumps out” moments. You know the ones — it’s midweek, the craving for takeout battles with my desire to not change out of my sweatpants. That’s when my eyes landed on a bag of red potatoes sitting unassumingly on the shelf. A lightbulb went off, and I remembered the simple joy of pan-fried potato wedges. They’re the perfect mix of indulgent and straightforward, and they come together faster than you’d expect. Crispy on the outside, soft on the inside, these are the kind of potatoes that make you feel like you’ve done something miraculous with very little effort. They’re comforting, and you always have the ingredients on hand. Plus, they make your kitchen smell like a dream.
Jump to Recipe
What You’ll Need
Not to brag, but chances are you already have most of this in your pantry or fridge, which makes this recipe a real lifesaver when you need something quick and satisfying.
- Red potatoes – The star of the show. Their texture is perfect for that crispy outside and soft inside.
- Seasoning salt – A bit of savory magic that levels up the flavor.
- Garlic powder – Adds a hint of earthy aroma.
- Onion powder – Because who can say no to a touch of oniony goodness?
- Black pepper – Just a pinch for a subtle heat.
- Canola oil – For frying to that perfect golden brown.
How to Make Pan Fried Potato Wedges
- Start by preheating your canola oil in a good-quality nonstick pan over medium heat. You want the oil to shimmer but not smoke — that’s when you know it’s ready.
- While the oil is heating, slice your red potatoes into wedges. Think thick enough to hold their shape, but thin enough to cook through.
- In a bowl, season those wedges with seasoning salt, garlic powder, onion powder, and black pepper. Toss them until they’re well-coated and you can smell the spices mixing together.
- Carefully place the potatoes in a single layer in the pan. This is key — crowding the pan will steam them instead of giving them that sought-after crispiness.
- Let them cook on one side without turning until they’re golden brown and crispy. You’ll know they’re ready to flip when they release easily from the pan.
- Flip the wedges and repeat on the other side. Your kitchen will smell amazing at this point, and your patience will be rewarded!
- Once both sides are perfectly crispy, remove the wedges from the pan and serve them hot. Trust me, they lose their magic if left to cool for too long.
Cook’s Notes
These potato wedges are pretty forgiving, but here are a few things to keep in mind. Make sure not to rush the cooking time; the key is to let them get really crispy on that first side before you flip them. If you don’t have red potatoes, Yukon Golds are a solid alternative. Store any leftovers in an airtight container in the fridge and reheat them in a hot oven to bring back some of their initial crispiness. But honestly, leftovers are rare because they tend to disappear the moment they hit the table.
Make It Your Own
Feeling adventurous? Here are some fun ideas to make these wedges uniquely yours:
- Spicy Kick: Mix some cayenne pepper in with the seasoning for a spicy version that’ll warm you up from the inside out.
- Herb Infusion: Sprinkle some dried rosemary or thyme over the wedges before frying for an aromatic twist.
- Cheesy Delight: After frying, toss the hot wedges with freshly grated Parmesan for an irresistible cheesy layer.
- Sweet & Savory: Swap garlic powder for cinnamon and add a sprinkle of sugar for a sweet and savory take.
If you give these pan-fried potato wedges a whirl, I’d love to hear how they turned out! Drop me a comment below or tag me in your crispy potato pics. Let’s make weeknight dinners a little more delicious together!
Related update: Pan Fried Potato Wedges
Related update: Homemade Animal Crackers

The craving hit me like a ton of bricks on a random Tuesday night. You know the type — the one where you’re suddenly transported to that cozy pub you used to frequent, with a plate of crispy shrimp and a cold drink in hand. However, instead of heading out, I was determined to recreate that same vibe right in my own kitchen. That’s how this Breaded Shrimp and Spicy Mayo Appetizer came to life. It’s the kind of dish that makes you feel like a rockstar chef without creating a mountain of dirty dishes. Trust me, it’s worth every minute you spend on it, especially when you bite into the perfectly crispy shrimp, complemented by the kick of spicy mayo. Whether you’re hosting a small gathering or just treating yourself, this recipe is a keeper.
Jump to Recipe
What You’ll Need
This recipe is delightfully straightforward, and I’m willing to bet you already have most of the ingredients lounging in your pantry. Here’s what you’ll need:
- All-purpose flour
- Bread crumbs
- Chili powder
- Egg
- Garlic powder
- Mayonnaise
- Onion powder
- Suya pepper (your secret weapon for flavor!)
- Salt
- Canned shrimp
- Sriracha sauce
How to Make Breaded Shrimp and Spicy Mayo Appetizer
- Start by peeling and deveining your shrimp. Leave the tail on if you’re feeling fancy — it makes for a great handle.
- Season the shrimp generously with suya pepper, and let them sit for a bit. The spice will do its magic while you prep the rest.
- In a small bowl, whisk the egg until it’s a smooth, sunny yellow, then set it aside for dunking duty.
- In another bowl, mix the all-purpose flour with onion powder, garlic powder, chili powder, and a pinch of salt. This is your flavor-packed coating.
- Take each shrimp and give it a loving coat in the seasoned flour. Dunk it in the egg mixture, making sure it’s fully covered, and finally, roll it in the breadcrumbs.
- Heat up your oil in a pan over medium heat. Once it’s shimmering, it’s time to fry. Place the shrimp in gently, cooking them until they’re golden brown on both sides, filling your kitchen with a mouth-watering aroma.
- For the spicy mayo, mix two tablespoons of mayonnaise with one tablespoon of sriracha sauce until you have a beautifully smooth and spicy dip.
- Serve your crispy shrimp hot, with a generous dollop of spicy mayo on the side. Enjoy the crunch and kick with every bite!
Cook’s Notes
Here are a few things I’ve learned along the way. First, don’t skimp on the seasoning — the suya pepper really elevates the shrimp. Also, make sure your oil is hot enough before you start frying; otherwise, you’ll end up with greasy shrimp instead of crispy perfection. If you’re making this ahead, fry the shrimp and keep them warm in the oven at a low temperature. They’ll stay crisp without drying out. Leftovers (if there are any!) can be stored in an airtight container in the fridge, but they’re best enjoyed fresh.
Make It Your Own
Here are some fun twists for when you’re feeling adventurous:
- Swap the shrimp for crispy tofu if you’re catering to vegetarian friends. The seasoning works well with tofu too!
- Try adding some lemon zest to the bread crumbs for a citrusy zing that pairs beautifully with the spicy mayo.
- If you love garlic, increase the garlic powder in the flour mix and add a dash of fresh minced garlic to the mayo for a garlic-lover’s dream.
- Add a sprinkle of parmesan cheese to the breadcrumbs for a cheesy twist on the classic breading.
If you try this, I’d love to hear how it turns out — drop a comment or tag me on social media! Whether you stick to the script or put your twist on it, I’m excited to see these shrimp bring joy to your table.
Related update: Breaded Shrimp and Spicy Mayo Appetizer

Picture this: It’s a Saturday afternoon, and I’m in the kitchen with my son. We’re both craving something sweet but don’t want to spend hours baking. Suddenly, the idea hits me—OREO Cookie Balls! These aren’t just any cookie balls; we’re going to turn them into adorable snowmen. It feels like the perfect plan for a chilly day when you want something as comforting as a warm sweater but as easy as a quick snack. The best part? You probably already have most of the ingredients in your pantry. Trust me, these little bites are worth making. They’re quick and fun, especially if you have little helpers around.
Jump to Recipe
What You’ll Need
So here’s the deal: These ingredients are as simple as it gets. You might even have them stashed away already. Let’s dive in:
- A full package of OREO Cookies
- One block of cream cheese (softened to room temperature)
- Baker’s chocolate (for melting)
- Rolo chocolate candy
- Black gel icing (for the eyes and buttons)
- Orange gel icing (for the nose)
- Additional supplies to decorate snowmen (think scarves made of licorice or hats from mini peanut butter cups)
How to Make OREO Cookie Balls – Snowman
Ready? Let’s make some magic happen!
- First, grab your package of OREO Cookies. Without removing the filling, crush them up in a large gallon-sized ziplock bag. You want fine crumbs, so give them a good whack!
- Pour your cookie crumbs into a large mixing bowl, and add in the softened cream cheese. Mix these together on medium speed until you have a smooth, dough-like consistency.
- Take a 1-inch cookie scoop (or just eyeball it) to portion out the mixture. Roll each scoop between your palms to form smooth, even balls.
- Place the cookie balls on a cookie sheet and pop them in the freezer for about 10 minutes. This helps them firm up a bit.
- While they’re chilling, melt your Baker’s chocolate according to the package instructions. You want it smooth and glossy, ready for dipping.
- Remove the cookie balls from the freezer and dip each one into the melted chocolate. Use a fork to lift them out, letting any excess chocolate drip off before placing them on a wax paper-lined cookie sheet.
- With a gentle touch, add the Rolo chocolate candy on top for the hat while the chocolate is still wet.
- Chill your snowmen in the refrigerator for about an hour until the chocolate shell is firm and set.
- Now, the fun part—decorate! Use the black gel icing for eyes and buttons, and the orange gel icing for the cute little carrot nose. Let your creativity shine with any additional decorations you like.
Cook’s Notes
Alright, let’s talk strategy. If the OREO dough feels too sticky, chill it in the fridge for a bit. It makes rolling much easier. Regarding the chocolate, avoid overheating it—give it slow, gentle warmth so it won’t seize. For storage, these snowmen can chill out in the fridge for up to a week or stay cozy in the freezer for about a month. Just make sure they’re in an airtight container to keep them fresh. If you’re planning to make these ahead of time, consider doing the base a day in advance to save on last-minute hustle.
Make It Your Own
Feel like changing things up? Here’s how you can shake up the snowman scene:
- Swap the Baker’s chocolate with white chocolate for an even snowier look.
- Use colored gel icing to create vibrant scarves or hats.
- Add crushed peppermint candy to the cookie crumb mixture for a holiday twist.
- Substitute the Rolo candy with a mini marshmallow for a softer hat look.
If you try this, I’d love to hear how it turns out—drop a comment or tag me! Let’s share some sweet little snowmen with the world. Happy decorating!
Related update: OREO Cookie Balls – Snowman
Related update: Chocoholic's Deep Dark Dream Chiffon Cake

Last Tuesday, I found myself staring into the fridge at 6 p.m. with a growling stomach and no dinner plans. You know the feeling, right? That weeknight scramble where you’re just trying to conjure up something quick yet satisfying. Lucky for me, an almost forgotten can of tuna and some leftover boiled eggs saved the day. Enter these deliciously simple Tuna Stuffed Hard-Boiled Eggs—a perfect blend of creamy and tangy, ready in a flash and impressive enough that you might actually look forward to making them again. Whether you’re crafting a light lunch or a snack for a spontaneous get-together, these little bites are exactly what you need.
Jump to Recipe
What You’ll Need
The beauty here is that you probably have all these ingredients lounging in your kitchen. It’s a simple yet delightful list that packs a punch.
- 6 hard-boiled eggs
- 1 can of tuna, drained
- 1/4 cup finely chopped onion
- 1/4 cup grated carrot
- 2 tablespoons chopped parsley
- 1 tablespoon fresh lemon juice
- 1/4 cup corn kernels for garnish
How to Make Tuna Stuffed Hard-Boiled Eggs
- Start by peeling those perfectly boiled eggs and slicing them in half lengthwise. Scoop the yolks into a bowl and place the whites on a plate.
- In the bowl with the yolks, add the drained tuna, chopped onion, grated carrot, parsley, and a squeeze of fresh lemon juice. Mash everything together with a fork until it’s well combined and creamy.
- Spoon or pipe the tuna mixture back into the egg whites, filling each hollow generously. You’ll want the filling to have a slightly mounded look.
- To finish, sprinkle the tops with corn kernels. They add a sweet pop and a dash of color—plus, who doesn’t love a little crunch?
Cook’s Notes
If you’re boiling the eggs specifically for this recipe, a 9-minute boil should give you that perfect firm yolk. To prevent overcooking them (nobody likes a green-tinged yolk!), immediately plunge them into an ice bath after boiling.
- For a smoother filling, try blending the mixture in a food processor. It’s not necessary, but it adds a touch of elegance.
- You can make the filling a day ahead—just store it in an airtight container in the fridge. Stuff the eggs just before serving for the freshest result.
- Leftovers can be stored in the fridge for up to 2 days, but honestly, they’re so good, you probably won’t have any!
Make It Your Own
- Swap the tuna for canned salmon or even shredded chicken for a different flavor profile.
- Love a bit of heat? Add a spoonful of sriracha or a pinch of cayenne pepper to the tuna mixture for a spicy kick.
- If you’re a fan of herbs, try swapping parsley for dill or basil for a fresh twist.
- For added creaminess, mix in a tablespoon of mayo or Greek yogurt with the tuna filling.
If you try this, I’d love to hear how it turns out—drop a comment or tag me! These eggs might just become your new go-to when you’re in a pinch. Happy cooking!
Related update: Tuna Stuffed Hard-Boiled Eggs
Related update: Warm Spinach Artichoke Dip
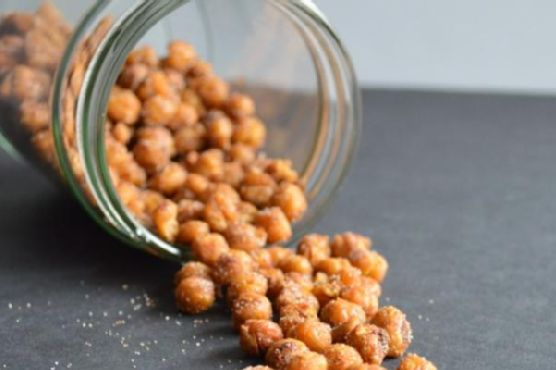
Picture this: It’s a breezy Sunday afternoon, my playlist is on shuffle, and I’m craving something snacky yet a little indulgent. I open the pantry, and there they are, my trusty canned chickpeas staring back at me like they know they’re about to be transformed. Last week, I had a major kitchen mishap with a new bread recipe that turned out more like a weapon than a loaf, so today I’m sticking to something foolproof and fabulous—Cinnamon & Sugar Roasted Chickpeas. These little morsels are not only super easy to whip up, but they also bring that sweet, crunchy magic that’s like a hug for your taste buds, without any of the guilt. Plus, they make my whole kitchen smell like a cinnamon wonderland, which is a win-win for everyone involved.
Jump to Recipe
What You’ll Need
What’s great about this recipe is that you likely already have most of these gems hanging around in your kitchen. We’re talking pantry staples with a sweet twist!
- 1 can of garbanzo beans (aka chickpeas)
- 1 tablespoon olive oil
- 1 tablespoon maple syrup
- 1 teaspoon cinnamon
- 1 tablespoon cane sugar
How to Make Cinnamon & Sugar Roasted Chickpeas
- First things first, preheat your oven to 425°F. Trust me, having it nice and hot is key for the perfect crunch.
- Line a baking sheet with parchment paper or a silicone mat. It makes cleanup super easy and keeps the chickpeas from sticking.
- Drain and rinse the chickpeas thoroughly. This is your chance to say goodbye to that canning liquid!
- Take two sheets of paper towels, lay one down, spread the chickpeas out, and use the other to gently pat them dry. You want them as dry as possible to achieve that crispy texture.
- While you’re drying, pick out any skins that have come loose. It’s not a big deal if you can’t get them all—just do your best!
- In a small bowl, mix the dried chickpeas with olive oil, maple syrup, and cinnamon until every little bean is well-coated and looking scrumptious.
- Spread the chickpeas on your prepared baking sheet in a single layer. Bake for 15 minutes, enjoy a dance break or clean up the kitchen.
- After 15 minutes, stir the chickpeas to ensure even baking. Return them to the oven, baking in 3-4 minute increments until they’re beautifully browned and dried to your liking. Remember, the longer they roast, the crunchier they’ll get, but keep an eye out to prevent burning.
- Once out of the oven, let them cool for a bit. Then, sprinkle the cane sugar over them while they’re still warm but not hot. Toss them gently to coat.
- Now, dig in and enjoy these delightful nuggets of crunchy sweetness!
Cook’s Notes
If you’re anything like me, you’ll want to store these in an airtight container if they last longer than a day (spoiler: they might not!). They generally stay fresh and crunchy for a couple of days, but after that, they tend to soften up. No worries though—they’re still tasty! For the impatient snackers, remember the necessity of drying the chickpeas; moisture is the enemy of crunch. Also, I wouldn’t recommend skipping the parchment paper unless you want a sticky mess on your hands.
Make It Your Own
- Feeling spicy? Add a pinch of cayenne pepper to the mix for a sweet and spicy combo that’ll keep you on your toes.
- Swap the maple syrup for honey if you’re after a deeper, richer sweetness.
- Use coconut oil instead of olive oil for a subtle tropical twist that pairs beautifully with the cinnamon.
- For a festive flair, sprinkle a bit of nutmeg or pumpkin pie spice into the mix. Hello, holiday vibes!
If you try this, I’d love to hear how it turns out—drop a comment or tag me in your snack-tastic creations! Your oven and chickpeas await, my friend. Snack on!
Related update: Cinnamon & Sugar Roasted Chickpeas
Related update: Tuna Stuffed Hard-Boiled Eggs
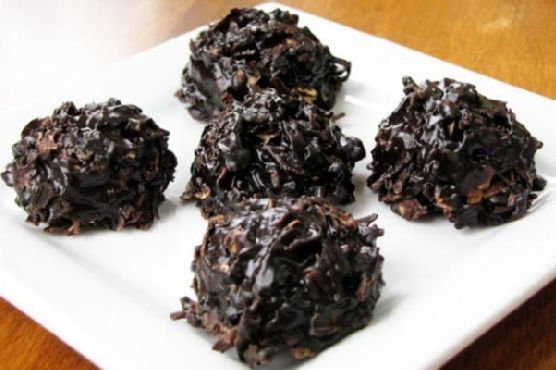
There I was, staring into my pantry on a rainy Wednesday afternoon, feeling the familiar pang of craving something sweet but not wanting to turn on the oven. You know those days when you just need a chocolate fix without all the fuss? That’s when I remembered these delightful little bites of joy: Xocai Oatmeal Dark Chocolate No-Bake Cookies. They’re the perfect balance of chocolatey goodness and wholesome oats, plus a breeze to whip up. What’s not to love about a recipe that feels like a treat but is secretly kind of healthy?
Jump to Recipe
What You’ll Need
This ingredient list is all about simplicity and, chances are, you already have most of these hanging out in your kitchen. Here’s what you’ll need:
- Butter substitute (for that creamy texture without the extra calories)
- Xocai healthy chocolate nugget (the star of the show with its rich, dark chocolate flavor)
- Oats (old-fashioned or quick oats both work perfectly)
- Peanut butter (for that nutty, irresistible taste)
- Soy milk
- Sugar substitute (to keep things sweet but light)
- Vanilla (a splash for that extra depth of flavor)
How to Make Xocai Oatmeal Dark Chocolate No-Bake Cookies
- In a medium saucepan, combine the butter substitute, Xocai chocolate nugget, oats, and peanut butter. Heat this mixture over medium heat, stirring gently to keep things smooth.
- Once everything is well-mixed and starting to melt together, increase the heat slightly and bring the mixture to a gentle boil. Keep stirring, and let it boil for five minutes. The mixture should become glossy and aromatic, like the best kind of hug in a pot.
- Remove the saucepan from the heat and stir in the soy milk, sugar substitute, and vanilla. This is where the mixture starts to transform into cookie magic.
- Finally, fold in the remaining Xocai chocolate nugget pieces. You want them to stay somewhat intact for that delightful chocolate burst in every bite.
- Spoon the mixture onto wax paper or foil, allowing the cookies to cool and harden. They’ll set as they cool, becoming perfectly chewy and rich.
Cook’s Notes
These cookies are incredibly forgiving, but here are a few tips to make them extra perfect:
- Make sure to stir constantly while boiling; this prevents the mixture from sticking to the pan or burning.
- If the cookies aren’t hardening, pop them in the fridge for a quicker set.
- Store the cookies in an airtight container at room temperature for up to a week, but I bet they won’t last that long!
Make It Your Own
- Swap the peanut butter for almond or cashew butter for a different nutty twist.
- Use almond milk instead of soy milk if that’s what you have on hand.
- Add a handful of shredded coconut to the mix for a tropical flair.
- Try adding a pinch of sea salt on top before they set for a sweet and salty combo.
If you try this, I’d love to hear how it turns out — drop a comment or tag me! There’s nothing better than sharing these little pieces of happiness with you all. Happy no-baking!
Related update: Xocai Oatmeal Dark Chocolate No-Bake Cookies
Related update: Cinnamon & Sugar Roasted Chickpeas
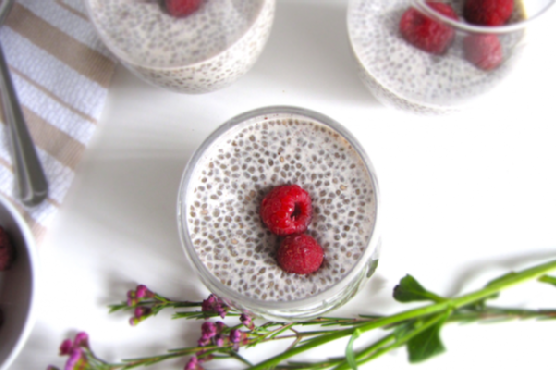
It was one of those hectic Tuesday nights when my brain was fried from work, and the fridge seemed like a barren wasteland. I needed something easy yet satisfying, and I really didn’t want to run to the store. Enter: chia seed pudding. This little gem is like a miracle in a bowl — crazy simple to whip up with stuff you probably have on hand, and it feels like a little treat when you need it most. Plus, it’s perfect if you’re like me and need a grab-and-go breakfast or a midnight snack that doesn’t involve cookies (well, not always). Trust me, once you try this, you’ll wonder how you managed without it.
Jump to Recipe
What You’ll Need
Chances are you already have most of these ingredients lounging in your pantry or fridge, just waiting to become something delicious.
- Black chia seeds
- Almond milk
- Raw agave syrup
- Vanilla extract
- Salt
- Fresh raspberries for garnish (or any berries you adore)
How to Make Chia Seed Pudding
- In a small bowl, mix together the black chia seeds and almond milk until the seeds are evenly dispersed and not clumpy.
- Add in a dash of salt, a splash of vanilla extract, and drizzle in the raw agave syrup to sweeten things up. Stir until everything is well combined and the syrup has dissolved.
- Cover the bowl and pop it in the fridge overnight or for at least 4 hours. You’ll know it’s ready when the mixture has thickened and resembles a pudding-like consistency.
- Before diving in, give it a good stir and top with fresh raspberries. The chill and sweetness from the berries are going to be a game-changer.
Cook’s Notes
Here’s a little secret: the longer the chia seeds soak, the creamier your pudding will be. They need time to absorb the liquid, so patience is key. If you find it too thick in the morning, just stir in a splash more almond milk to reach your desired consistency.
- Store any leftovers in an airtight container in the fridge, and they’ll keep for up to five days. Perfect if you want to meal prep!
- Don’t stress if you don’t have almond milk; any milk (or milk substitute) works fine. Each brings a slightly different vibe to the pudding.
- Be sure to stir well after it’s set. Chia seeds have a habit of clumping together, and a good stir smooths it all out.
Make It Your Own
- Swap out the almond milk for coconut milk for a tropical twist that pairs beautifully with mango chunks.
- Use maple syrup instead of agave if that’s what you have — it gives a warm, rich sweetness that’s divine.
- For a chocolatey version, stir in a tablespoon of cocoa powder with the seeds and milk.
- Add a sprinkle of cinnamon or nutmeg for a cozy, spiced-up flavor.
If you try this, I’d love to hear how it turns out — drop a comment or tag me! Your version might just inspire my next kitchen adventure.
Related update: Chia Seed Pudding
Related update: Fudgy chocolate cream cheese brownies with Baileys

One chilly autumn afternoon, I found myself digging through the fridge, searching for something — anything — that could transform into a warm, comforting snack. The day had that crisp edge that makes you want to cozy up with something fresh out of the oven. That’s when I spotted a lonely bunch of fresh chives and dill, remnants from last night’s dinner. An idea sparked, one that felt both adventurous and familiar: Chive and Dill Muffins. These little savory gems are the perfect answer to a craving for something cozy yet bright, offering a delightful mix of herbal freshness and subtle, buttery richness. And let’s be honest, they’re also a great way to justify eating a muffin at any time of day.
Jump to Recipe
What You’ll Need
Chances are you already have most of these ingredients lounging in your pantry, just waiting to become something delicious.
- 1 cup all-purpose flour
- 1/2 cup yellow cornmeal
- 2 tablespoons sugar
- 2 teaspoons baking powder
- 1 teaspoon salt
- 1/2 teaspoon baking soda
- 1/4 teaspoon cayenne pepper
- 1/4 cup fresh chives, chopped
- 1/4 cup fresh dill, chopped
- 1 cup plain yogurt
- 2 large eggs
- 1/2 cup (1 stick) unsalted butter, melted and slightly cooled
How to Make Chive and Dill Muffins
- Preheat your oven to 220°C (425°F). This high heat will give your muffins that beautiful rise and golden top.
- In a medium bowl, whisk together the flour, cornmeal, sugar, baking powder, salt, baking soda, and cayenne pepper. Once combined, gently stir in the chopped chives and dill, letting their fresh aroma fill your kitchen.
- In another medium bowl, whisk together the yogurt, eggs, and melted butter until smooth and creamy. The mixture should be a pale yellow, with small bubbles forming from the whisking.
- Add the yogurt mixture to the dry ingredients and stir just until blended. Be careful not to overmix; it’s okay if the batter is a bit lumpy. Those lumps will work themselves out during baking.
- Divide the batter among greased or silicone muffin cups, using about 1/3 cup batter for each. They should be about two-thirds full, giving them room to puff up beautifully.
- Bake in the preheated oven for 20 minutes, or until the muffins are puffed and golden. You’ll know they’re done when a toothpick inserted into the center comes out clean or with just a few crumbs attached.
- Let the muffins cool in their cups for a few minutes before removing. This brief wait allows them to set up perfectly. Serve warm for the best experience.
Cook’s Notes
Here’s where the magic happens — or at least where you avoid any potential hiccups. First, make sure your baking powder and soda are fresh; nothing’s worse than flat muffins. These muffins can be stored in an airtight container at room temperature for up to two days, but they’re best enjoyed fresh. If you want to make them ahead, you can freeze them for up to a month. Just thaw at room temperature and pop them in a warm oven for a few minutes to refresh their golden tops.
Make It Your Own
These muffins are already a little party of flavors, but if you’re feeling experimental, here are a few ideas:
- Swap the chives for green onions for a milder flavor with a slight crunch.
- Add 1/2 cup of grated cheddar cheese to the batter for an extra savory kick.
- Mix in some finely chopped sun-dried tomatoes for a slightly sweet, tangy twist.
- Replace the dill with fresh parsley and thyme for a different herbal profile.
If you try this, I’d love to hear how it turns out — drop a comment or tag me! Let’s swap stories about these delightful muffins and all their delicious variations.
Related update: Chive and dill muffins
Related update: Penne Arrabiata