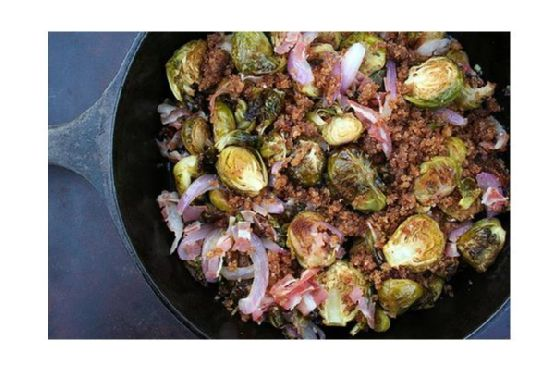
Roasted Brussels Sprouts With Red Onions and Pancetta | Made by Meaghan Moineau

It was one of those Thursday evenings when the world felt like it was spinning a bit faster than usual. I had finally wrangled the kids to bed, and there I was staring at a fridge that seemed emptier by the minute. But from somewhere in the depths of that fridge, a bag of Brussels sprouts peeked back at me. Paired with some pancetta I had tucked away (a gift from my last “I’m going to learn charcuterie” phase), I realized a deliciously satisfying dinner was just a roast away. These Roasted Brussels Sprouts with Red Onions and Pancetta are the perfect way to coax out the caramelized sweetness of Brussels sprouts, make your kitchen smell heavenly, and use up those random pantry ingredients. Honestly, it’s a little bit of magic in under an hour.

Jump to Recipe

What You’ll Need

This dish is as much about what’s not in it as what is. Simple, fresh ingredients that you probably have hiding in your kitchen already.

  • 1 lb of **Brussels sprouts**, halved
  • 3-5 cloves of **garlic**, pressed
  • 1/4 cup and 2 tablespoons of **olive oil**, divided
  • 1 slice of **bread**
  • 1/2 cup of **red onions**, sliced
  • 1/4 cup of **pancetta**, diced
  • Salt and pepper to taste

How to Make Roasted Brussels Sprouts With Red Onions and Pancetta

  1. Preheat your oven to 350°F (175°C). While it warms up, grab a large plastic zippered bag. Toss in the halved Brussels sprouts, 3 cloves of pressed garlic, and 2 tablespoons of olive oil. Give it a good shake until everything’s nicely coated.
  2. Spread the Brussels sprouts out in an ovenproof dish. Pop it in the oven and roast for about 40 minutes. They should come out tender with a golden brown hue and a heavenly aroma.
  3. Meanwhile, take a pan and heat up 1/4 cup of olive oil over medium heat. Once it’s warm, fry the slice of bread until it’s golden on both sides. Trust me, this will be our crispy topping magic in just a bit.
  4. Set that bread aside. In the still-warm pan, add the sliced red onions. Give them a quick sauté for about 3 minutes until they slightly soften but still have a bite. You’re aiming for them to be fragrant but not mushy.
  5. Toss in the diced pancetta with the onions and let them mingle for another minute. The pancetta should release its flavors but not get overly crispy.
  6. When the Brussels sprouts have roasted to perfection, add them to the pan. Heat everything together for about 3 minutes, stirring gently so the flavors blend without turning into a mushy mess.
  7. In a food processor, blitz the fried bread with 1-2 cloves of garlic until you have a coarse crumb. Sprinkle this over your Brussels sprouts and finish with a final drizzle of olive oil for good measure.

Cook’s Notes

Roasting Brussels sprouts is all about the timing. Make sure they’re cut evenly so they cook at the same rate. You want them tender but not mushy, with just enough caramelization to bring out their natural sweetness. This dish is fantastic fresh out of the oven, but if you have leftovers (and that’s a big if), they keep well in the fridge for about two days. Just reheat them gently so you don’t lose that delightful texture. And if you’re a planner, you can prep the Brussels sprouts and onions in advance—store them separately and combine everything just before serving for peak freshness.

Make It Your Own

  • Substitute the pancetta with **crispy tofu** for a vegetarian version that’s just as satisfying.
  • Swap the red onions for **shallots** if you want a milder, slightly sweeter flavor.
  • Add a handful of **parmesan cheese** just before serving for a cheesy twist.
  • Mix in some **dried cranberries** after roasting for a pop of sweetness that pairs wonderfully with the savory elements.

If you try this, I’d love to hear how it turns out—drop a comment or tag me! Nothing makes me happier than seeing your versions of these dishes come to life. Till next time, happy cooking!

Related update: Roasted Brussels Sprouts With Red Onions and Pancetta

Related update: Bacon Wrapped Filet Mignon

Philly Cheesesteak Grilled Wraps | Made by Meaghan Moineau

It was one of those early fall evenings when the chill starts to creep through the windows, and you find yourself craving something warm and comforting but don’t want to spend hours in the kitchen. The kind of night where you’re too lazy to do anything complicated but still want something that feels like a hug on a plate. That’s when I first made these Philly Cheesesteak Grilled Wraps. They’re a perfect blend of flavors with juicy steak, melty cheese, and a little kick of hot sauce, all rolled up into a crispy tortilla. They’re quick to assemble and hit all the right notes for a cozy meal. Plus, there’s something so satisfying about getting a little char on that wrap. Trust me, this recipe is going to be your new weeknight hero.

Jump to Recipe

What You’ll Need

I love how simple this ingredient list is. Chances are you already have most of this hanging out in your fridge or pantry:

  • Steaks – Choose your favorite cut; just slice it thin!
  • Vegetable oil – For those beautiful caramelized onions.
  • Onions – The backbone of flavor here!
  • Better Than Bouillon Beef Base – My little secret for that extra punch.
  • Portobello mushrooms – Meaty and delicious.
  • Bell peppers – Adds color and sweetness.
  • Mayonnaise – Trust me on this one, it’s the glue.
  • Hot sauce – For that essential kick.
  • Tortillas – The wrap that holds it all together.

How to Make Philly Cheesesteak Grilled Wraps

  1. In a frying pan over medium-low heat, add your onions and give them their time to shine. Let them caramelize slowly, stirring occasionally, until they transform into sweet, golden ribbons. This should take about 30 minutes.
  2. Once the onions are just right, stir in the Better Than Bouillon Beef Base with a tablespoon of water. This creates a faint gravy that coats everything beautifully.
  3. Next, introduce the mushrooms and bell peppers. Cook until they’ve softened and their flavors have melded, about 5 minutes. You’ll know they’re ready when the mushrooms are tender and the peppers are vibrant.
  4. Lay out a tortilla and spread a thin layer of mayonnaise over it. Add a few squirts of hot sauce for that necessary zing.
  5. Pile on the steak slices and the savory vegetable mix. Roll it up tightly, ensuring the ends are sealed so nothing escapes.
  6. Heat a griddle or large frying pan over medium heat and give it a light spray of cooking oil. Place your wraps seam side down, and press them with something heavy—think a smaller frying pan weighted down. Grill until the tortilla is toasty and golden.
  7. Flip the wraps and repeat the process on the other side. If you have a panini press or a George Foreman grill, these work wonders too.
  8. Once they’re grilled to perfection, pull them off and let them sit for a minute before slicing them in half. Enjoy watching happy faces around the table!

Cook’s Notes

Slow and steady wins the race with those onions. Rushing them will lose all that sweet, caramelized goodness. If you’re planning ahead, you can make the steak and veggie mix earlier in the day and just assemble and grill the wraps when you’re ready to eat. Leftovers? Pop them in the fridge and when you’re ready to reheat, a few minutes in a toaster oven will bring back that lovely crunch.

Make It Your Own

  • Swap the steak for crispy tofu to make it vegetarian-friendly. Just make sure to season the tofu well!
  • Try adding some provolone cheese or your favorite melty cheese for an extra layer of richness.
  • Incorporate some jalapeños if you want to amp up the heat—just slice them thinly and add them alongside the peppers.
  • Use whole wheat or spinach tortillas for a heartier, healthier twist.

If you try this, I’d love to hear how it turns out—drop a comment below or tag me on social media. Can’t wait to see your delicious creations!

Related update: Philly Cheesesteak Grilled Wraps

Escarole & Beans | Made by Meaghan Moineau

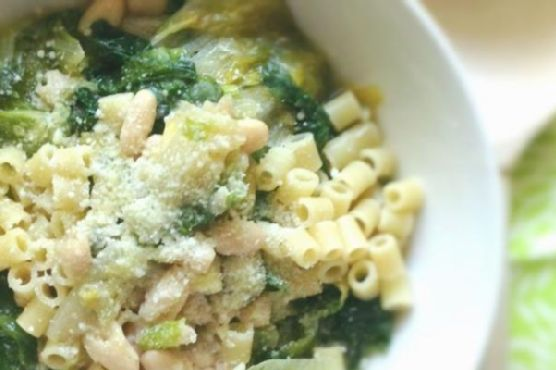
Picture this: it’s a dreary Tuesday evening, and the rain won’t let up. You’re standing in the kitchen, craving something warm and comforting but also something that won’t require an entire evening of chopping, stirring, and watching the pot. That’s when this Escarole & Beans recipe becomes your best friend. This dish is like a cozy blanket in a bowl—hearty, savory, and surprisingly simple to whip up. A few pantry staples, a quick simmer, and voila: you’re transported to a place where the rain feels less dreary and dinner feels a little more special. And trust me, the addition of escarole gives it just the right touch of freshness and bite.

Jump to Recipe

What You’ll Need

This dish thrives on simplicity, using ingredients you probably already have, with a couple of stars that elevate it from your typical pantry meal.

  • 8 oz of ditilini pasta
  • 3 diced garlic cloves
  • 3 tablespoons of olive oil
  • 1 can of cannellini beans, with its juice
  • 1 cup of vegetable broth
  • Salt & pepper to taste
  • 1 head of escarole, washed and chopped
  • 1 teaspoon of crushed red pepper flakes
  • Freshly grated parmesan cheese for garnish

How to Make Escarole & Beans

  1. Start by cooking the ditilini pasta according to the package directions. You want it al dente, so it holds up in the broth later.
  2. In a large pot, heat the olive oil over medium heat. Add the diced garlic and sauté just until it starts to turn golden and fragrant—don’t let it burn!
  3. Pour in the cannellini beans, juice and all. Add a sprinkle of salt, a crack of black pepper, and the crushed red pepper flakes. Stir it all together and let it heat through for a few minutes.
  4. Stir in the vegetable broth. Let the mixture simmer gently for about 10 minutes. You’ll notice the edges start to bubble, and it smells heavenly.
  5. Toss in the chopped escarole and cover the pot with a lid. You’re aiming to wilt the escarole, not stew it, so check every couple of minutes and give it a stir until it’s just wilted.
  6. Once the escarole is tender but still vibrant, turn off the heat. Taste and adjust the seasoning if needed—sometimes it just needs that little extra pinch of salt.
  7. To serve, spoon some pasta into each bowl and ladle the escarole and bean mixture over top. Don’t skimp on the broth—it’s the best part! Finish with a generous sprinkle of parmesan cheese.

Cook’s Notes

This dish is all about balance. The escarole should be wilted but not mushy, and the pasta al dente. If you’re making it ahead, you might want to store the pasta and the bean mixture separately, so the pasta doesn’t soak up all the broth and get soggy. Just combine them when you’re ready to eat.

  • If you’re not a fan of spicy, you can reduce or even omit the crushed red pepper flakes. It’s still delicious without the heat!
  • Leftovers can be stored in an airtight container in the fridge for up to three days. Reheat gently on the stove, adding a splash of water or broth if it’s too thick.

Make It Your Own

  • Swap out the escarole for kale or spinach if that’s what you have on hand or prefer. Both hold up beautifully in the broth.
  • If you’re looking for a heartier meal, add some Italian sausage to the pot when you sauté the garlic. Cook it through before proceeding with the recipe.
  • For a vegetarian twist with a protein kick, throw in some crispy tofu cubes just before serving.
  • Fancy a change from pasta? Try serving the beans and escarole over a slice of crusty, toasted sourdough bread for a rustic feel.

If you try this, I’d love to hear how it turns out—drop a comment or tag me! Cooking is all about sharing the love, after all. Bon appétit!

Related update: Escarole & Beans

Related update: Philly Cheesesteak Grilled Wraps

Hyderabadi baghara Baingan | Made by Meaghan Moineau

Picture this: it’s a bustling Tuesday evening and I’m standing in my kitchen, rifling through the pantry for dinner inspiration when I stumble upon a bunch of cute, little eggplants. A light bulb moment hits—Hyderabadi baghara Baingan! This dish is like a warm hug, perfect for when you’re craving something rich and tangy yet surprisingly easy to whip up. The eggplants soak up the spiced, nutty goodness, leaving you with a delicious meal that feels like it took hours, but really didn’t. Trust me, even on the busiest days, this is a dish that delivers on flavor with every bite.

Jump to Recipe

What You’ll Need

This isn’t one of those crazy ingredient lists that sends you to five different stores. Chances are you already have most of these at home.

  • 10-12 baby eggplants
  • 3-4 red Kashmiri chilies
  • Coconut
  • Coriander seeds
  • Cumin seeds
  • 8-10 curry leaves
  • Garlic
  • 1 piece of ginger
  • Tamarind, about a lime-sized ball
  • Oil
  • Onion
  • Salt
  • Nigella seeds
  • Sesame seeds
  • Turmeric
  • Jaggery
  • Peanuts
  • Cashews

How to Make Hyderabadi baghara Baingan

  1. First things first—wash those baby eggplants and pat them dry. You’re going to slit them lengthwise into fours, but keep the stems intact. This way, they hold together nicely in the dish.
  2. In a separate pan, heat a teaspoon of oil. Toss in the cumin seeds, peanuts, and cashews and fry them for a few seconds until fragrant.
  3. Add in the ginger, garlic, and chopped onion. Cook this down for about a minute until everything turns soft and golden.
  4. Sprinkle in the turmeric, coriander seeds, coconut, and Kashmiri red chilies. Keep frying till the mixture turns a lovely brown. Let this cool completely and then blend it into a fine paste with a little water.
  5. Now, in a thick-bottomed pan, heat some oil and fry the eggplants until they’re brown and tender. This is where they get all soft and lovely. Remove them and set aside.
  6. In the same oil, add the nigella seeds and let them crackle before stirring in those aromatic curry leaves. Fry for a few seconds to release their flavors.
  7. Add the ground paste you prepared, along with the tamarind pulp, salt, and jaggery. Mix it all up until it becomes a fragrant, bubbling sauce.
  8. Gently add the sautéed eggplants and about half a cup of water. Cover the pan and let everything simmer over low heat until the eggplants are cooked through and super soft.
  9. Serve this hot with rice or rotis, and savor each mouthful of that rich, tangy curry.

Cook’s Notes

Cooking Hyderabadi baghara Baingan is a breeze if you keep a few things in mind. First, ensure the eggplants are fresh and firm for the best taste. If you don’t have Kashmiri red chilies, substitute with any mild red chili for that vibrant color, but be mindful of the spice level. This dish is great the next day too as the flavors deepen overnight, so don’t hesitate to make it ahead of time. Store leftovers in an airtight container in the fridge for up to 3 days. Reheat gently, adding a splash of water if needed to loosen the sauce.

Make It Your Own

Looking to shake things up a bit? Here are a few ways to switch up this recipe:

  • Swap the eggplants for zucchini or baby bell peppers for a different twist.
  • For a nut-free version, omit the peanuts and cashews and add a tablespoon of almond butter to the paste for richness.
  • Dial up the heat by adding a green chili or two to the paste if you’re in the mood for something spicier.
  • For a heartier meal, toss in some boiled potatoes along with the eggplants.

If you try this, I’d love to hear how it turns out—drop a comment or tag me! Your feedback makes my day and helps fellow food lovers. Enjoy the cooking adventure!

Related update: Hyderabadi baghara Baingan

Related update: Lamb & Sweet Potato Pot Pie

Crawfish Cake Sliders | Made by Meaghan Moineau

It was one of those weeks where everything felt just a bit off. You know the kind — when you drop your phone in the sink, forget your keys, and somehow leave a trail of bread crumbs throughout the entire house. I needed some comfort food, but not the kind that takes hours to prepare. Enter: Crawfish Cake Sliders. These little gems are a weeknight savior — quick to whip up, yet bold and satisfying. Perfect for when you need a little culinary escape without the fuss. Plus, they pack that southern charm that makes you feel like you’re right at home, sitting by a bayou.

Jump to Recipe

What You’ll Need

Here’s the best part: you likely have most of these ingredients hanging out in your pantry. Just a few fresh items and you’re golden.

  • 1 teaspoon oil (plus more for frying)
  • 1 pound crawfish tails, chopped
  • 1 small red onion, finely chopped
  • 1 clove garlic, minced
  • 1 teaspoon Creole spice (or more to taste)
  • 1 large egg
  • 1/2 cup bread crumbs
  • 8 slider buns
  • Tartar sauce for serving

How to Make Crawfish Cake Sliders

  1. In a sauté pan, heat 1 teaspoon of oil over medium heat. Add the chopped red onion and cook until tender, about 2-3 minutes. The kitchen will start to smell amazing, like the beginning of a great meal.
  2. Once the onion is tender, remove the pan from the heat and add the minced garlic, chopped crawfish tails, and 1 teaspoon of Creole spice. Give it a quick toss to awaken those flavors.
  3. Transfer the mixture to a mixing bowl and let it cool for a bit. This is the perfect time to take a breather and maybe sip some iced tea.
  4. Once cooled, mix in the egg and just enough bread crumbs to bind everything together. You want the mixture to hold its shape, so feel free to adjust with more crumbs if needed. Season with salt, pepper, and more Creole spice if you’re feeling bold.
  5. Form the mixture into 8 equal patties and flatten them to about 3/4-inch thick. They should feel firm but not too dense.
  6. Heat more oil in the sauté pan over medium heat. Fry the patties on each side until they’re brown and crispy — about 3-4 minutes per side. You’ll know they’re ready when they smell irresistible.
  7. Serve these beauties on slider buns with a generous dollop of tartar sauce, and watch them disappear as quickly as you made them.

Cook’s Notes

A few things to keep in mind:

  • If your mixture feels too wet, sprinkle in more bread crumbs until it binds correctly.
  • Worried about the patties falling apart? Let them chill in the fridge for 15 minutes before frying. It makes them easier to handle.
  • These sliders can be made ahead of time. Just prepare the patties and store them in the fridge. Cook them when you’re ready to serve.
  • Leftovers can be stored in an airtight container in the fridge for up to two days. Reheat them in a skillet to bring back that lovely crispiness.

Make It Your Own

Want to put your spin on these sliders? Here are a few ideas:

  • Add some heat: Chop up a jalapeño and add it to the mix for a spicy kick.
  • Go green: Mix in some chopped fresh parsley or cilantro for a burst of freshness.
  • Cheesy delight: Add a slice of your favorite cheese on top of each patty just before they’re done frying.
  • Gluten-free option: Swap the bread crumbs for gluten-free crumbs and use gluten-free buns.

If you try this, I’d love to hear how it turns out — drop a comment or tag me in your delicious creations! Let’s make sure those off weeks are few and far between, my fellow food adventurers. Happy cooking!

Related update: Crawfish Cake Sliders

Related update: Easy Vegetable Fried Rice

Related update: Homemade Apple Almond Granola Bars

Vegetarian Mushroom Shepherd’s Pie | Made by Meaghan Moineau

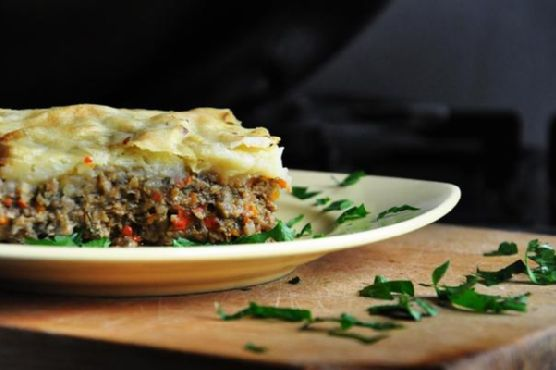
It was one of those crisp autumn evenings when the wind manages to sneak its way through every little crack in the window, and the leaves rustle just a bit too loudly. I was in my kitchen, fervently searching for something comforting yet uncomplicated enough to soothe the chill that had settled in my bones. And there it was—my answer in the form of a hearty, soul-warming Vegetarian Mushroom Shepherd’s Pie. It’s the kind of dish that’s a hug on a plate, warmly satisfying yet light enough that you won’t be falling asleep on the couch afterward. Trust me, this is a dish you’ll want to keep in your back pocket for those moments when you’re craving something cozy without all the fuss.

Jump to Recipe

What You’ll Need

It’s likely that you’ve got most of these ingredients chilling in your pantry or fridge right now. It’s a simple list, but when combined, the flavors really come alive.

  • Red skin potatoes
  • Soy granules
  • Mushrooms
  • Carrot
  • Red bell pepper
  • Diced onions
  • Dill
  • Parsley
  • Dry eggs (or your favorite egg substitute)
  • Sea salt
  • Ground pepper
  • Sweet paprika
  • Dry thyme
  • Unrefined sunflower oil

How to Make Vegetarian Mushroom Shepherd’s Pie

  1. Peel the red skin potatoes and place them into a large pot filled with water. Bring to a boil and let them bubble away until they’re tender and ready to be mashed.
  2. Once the potatoes are perfectly soft, drain and mash them. Let the mash cool while you get everything else ready—it should be smooth and slightly fluffy.
  3. Chop the mushrooms, carrot, and red bell pepper into manageable pieces, then add them into your food processor. Pulse until everything’s finely chopped and well mixed, creating a delightful, aromatic medley.
  4. In a large skillet, heat a splash of sunflower oil over medium heat until shimmering. Add the vegetable mixture, along with diced onions, chopped dill, parsley, soy granules, dry eggs, sea salt, ground pepper, sweet paprika, and dry thyme. Sauté for about 10 minutes until the mixture is fragrant, and the kitchen smells like comfort personified.
  5. Prepare a casserole dish by lining it with parchment paper. Divide the mashed potatoes into two portions, spreading the first half evenly as a base layer in the dish.
  6. Spoon the savory mushroom filling over the potato layer, ensuring it’s even and packed full of flavor.
  7. Spread the remaining mashed potatoes over the top of the filling, smoothing it out with a spatula like you’re icing a cake.
  8. Preheat your oven to 390°F (200°C). Slide your casserole into the oven and let it bake for 40 minutes until the top is golden and slightly crisp.
  9. Resist the urge to dive in immediately! Let it cool for at least half an hour to allow the flavors to settle and intensify.

Cook’s Notes

While this dish is pretty forgiving, a few tips can make it even better. If you’re tight on time, peel and chop the potatoes the night before and store them in water in the fridge. This way, they’ll be ready to go when you are. When mashing the potatoes, aim for smoothness, but a few lumps add a lovely rustic touch. Also, this pie is at its best when cooled slightly, so patience is key. Leftovers can be stored in an airtight container in the fridge for up to three days, and they reheat beautifully—just pop them back in the oven until they’re warmed through.

Make It Your Own

Feel free to tweak this recipe according to what’s in your fridge or what you’re craving:

  • Swap the soy granules with cooked lentils for a different texture and earthy flavor.
  • Use sweet potatoes instead of red skin potatoes for a sweeter topping that pairs beautifully with the savory filling.
  • Add a sprinkle of cheese on top for a golden, melty finish—vegan cheese works just as well!
  • Incorporate some corn or peas into the filling for an extra pop of color and sweetness.

If you try this, I’d love to hear how it turns out—drop a comment or tag me on social! I’m always excited to see your unique spins on this cozy classic.

Related update: Vegetarian Mushroom Shepherd’s Pie

Related update: Lamb In Red Mole Sauce

Related update: White Chocolate Raspberry Brie Cups

Apple Cheddar Turkey Burgers With Chipotle Yogurt Sauce | Made by Meaghan Moineau

Last Tuesday, after a long day at work and an unexpected downpour that left me semi-drenched on my way home, I found myself craving something warm and hearty but also a little adventurous. That’s when I remembered my go-to Apple Cheddar Turkey Burgers with Chipotle Yogurt Sauce. They’re a delicious twist on your classic burger — a little bit cozy, a little bit spicy, and deeply satisfying. Plus, they’re quick enough to whip up on a weeknight without losing any of that “special dinner” vibe. Perfect for when you need comfort food that feels like a treat. Trust me, your taste buds will thank you. Jump to Recipe

What You’ll Need

This recipe is a gem because most of these ingredients are pantry staples, with a few stars that elevate the whole dish. It’s likely you already have everything you’ll need.

  • 1 whole diced apple
  • 1 cup bread crumbs
  • 1 pound ground turkey
  • 1 tablespoon chipotle hot sauce
  • 1 small onion, finely chopped
  • 1/2 cup plain yogurt
  • Salt and pepper, to taste
  • 1 cup shredded sharp cheddar cheese
  • Diced garnish (optional, but recommended for extra crunch!)

How to Make Apple Cheddar Turkey Burgers With Chipotle Yogurt Sauce

  1. In a large bowl, mix together the diced apple, bread crumbs, ground turkey, chipotle hot sauce, chopped onion, salt, and pepper. Get in there with your hands — it’s the best way to ensure everything is evenly combined.
  2. Once everything is well mixed, shape the mixture into 4-6 patties, depending on your preferred size. You want them to be about 1 inch thick so they cook evenly.
  3. Preheat your grill or skillet over medium heat. Add the patties and cook for about 2 minutes on each side. You’ll know they’re done when the juices run clear, and the outside is golden brown and slightly crispy.
  4. While the burgers are cooking, stir together the plain yogurt and chipotle hot sauce in a small bowl. Adjust the heat level with more sauce if you like it spicier.
  5. Once the burgers are cooked, top each with a generous sprinkle of shredded cheddar cheese. Allow it to melt slightly before removing the patties from the grill or pan.
  6. Serve the burgers topped with a dollop of chipotle yogurt sauce and a sprinkle of your favorite diced garnish. Enjoy immediately while they’re warm and melty!

Cook’s Notes

These burgers are as versatile as they are tasty. If you find yourself with leftovers, they store well in the fridge for up to three days. Just reheat them in a pan over low heat to avoid drying out the turkey. To make these ahead, you can prepare the patties and sauce the night before and keep them refrigerated until you’re ready to cook.

  • Ensure your apple is diced finely to mix well with the turkey and keep the patties from falling apart.
  • Don’t rush the cooking. Medium heat is key to achieving that perfect golden crust while keeping the inside juicy.

Make It Your Own

  • Swap the turkey for beef if you’re feeling more traditional but still want that apple-cheddar flair.
  • Try using smoked gouda in place of cheddar for a deeper, smokier flavor.
  • For a vegetarian twist, use a black bean and quinoa mix instead of turkey. It pairs surprisingly well with the apple and cheddar!
  • If you’re not into chipotle, substitute with your favorite barbecue sauce for a different kind of smoky heat.

If you try this, I’d love to hear how it turns out — drop a comment or tag me! Your feedback means the world and inspires my next kitchen adventure. Happy cooking! 🍔

Related update: Apple Cheddar Turkey Burgers With Chipotle Yogurt Sauce

Related update: Baked Eggs and Bacon Cream In Spinach Fettuccine Nests

Tuna Noodle Casserole: Mommie Cooks | Made by Meaghan Moineau

One chilly evening last fall, I found myself rummaging through the pantry, desperate for something delicious but low-effort. Honestly, it had been one of those days where the last thing I wanted was a complicated dinner. That’s when I stumbled across a can of tuna and a pack of egg noodles — and like magic, the comforting idea of a Tuna Noodle Casserole bubbled to the surface. It’s the kind of dish that wraps you in a warm, cozy hug, yet is simple enough to pull together on a weeknight. With just a bit of chopping, stirring, and baking, the whole family can gather around a meal that feels like home. Trust me, this is a dinner worth diving into.

Jump to Recipe

What You’ll Need

The beauty of this recipe is that most of these ingredients are pantry staples. You might not even need a grocery run.

  • 1 cup bread crumbs
  • 5 tablespoons butter, divided
  • 1 can mushrooms, drained
  • 1 can peas, drained
  • 2 cans tuna in water, drained
  • 2 celery sticks, diced
  • 1 cup shredded cheese (cheddar works great!)
  • 1 cup chicken broth
  • 12 ounces cooked egg noodles
  • 1/4 cup flour
  • 3 cloves garlic, minced
  • 1 cup milk
  • 1 small onion, diced
  • 2 tablespoons chopped parsley
  • 1/4 cup pimientos, diced
  • Salt and pepper to taste
  • 1/4 cup sherry (optional, but adds depth)

How to Make Tuna Noodle Casserole: Mommie Cooks

  1. Melt 1 tablespoon of the butter in a skillet over medium heat. Toss in the garlic, onion, celery, mushrooms, and a pinch of salt and pepper. Cook for about 3 to 4 minutes until everything is soft and fragrant.
  2. Remove the veggies from the pan and turn the heat down to medium-low. Melt the remaining 4 tablespoons of butter in the skillet. Once melted, sprinkle in the flour and mix it up to create a roux.
  3. To the roux, slowly add in the milk, sherry, and chicken broth. Stir continuously and bring the mixture to a boil until it thickens, about 5 minutes.
  4. Reduce the heat to low and return the cooked veggies to the pan. Add in the tuna, peas, and pimientos. Give it a good stir to combine everything.
  5. Fold in the cooked egg noodles, ensuring they’re coated with the creamy goodness. Pour the mixture into an oven-safe dish.
  6. Top the casserole with bread crumbs and shredded cheese. Sprinkle with parsley for a pop of color.
  7. Bake in a preheated oven at 350°F for about 20 minutes, or until the cheese is bubbly and golden-brown.

Cook’s Notes

This casserole is pretty forgiving, so give yourself some grace if you’re not exact with measurements. Leftovers can be stored in the fridge for up to 3 days — just pop them in the microwave for a quick reheat. If you fancy making it ahead, prepare the casserole up to the baking step, then cover and refrigerate. When you’re ready to eat, bake it for an extra 10 minutes or so to ensure it’s heated through.

Watch out for overcooking the noodles initially; they’ll soften further as they bake, so aim for al dente. Also, if you’re not into sherry, simply leave it out or replace it with a bit more broth.

Make It Your Own

  • Swap the tuna for crispy tofu for a vegetarian spin.
  • Add a spicy kick with a teaspoon of red pepper flakes mixed into the sauce.
  • Trade the canned mushrooms for fresh ones, sautéing them with the onions and celery for an earthier flavor.
  • Use gluten-free noodles and flour to make this dish gluten-friendly.

If you try this recipe, I’d love to hear how it turns out for you! Drop a comment or tag me in your culinary adventures. Happy cooking, friends!

Related update: Tuna Noodle Casserole: Mommie Cooks

Related update: Apple Cheddar Turkey Burgers With Chipotle Yogurt Sauce

Related update: Crockpot "Refried" Beans

Instant Pot Chicken Thighs | Made by Meaghan Moineau

It was one of those chaotic weekday evenings where all I could think about was getting dinner on the table in less time than it would take for me to order takeout. I stood in my kitchen, slightly overwhelmed by the day’s hustle, when I felt that familiar craving for something warm and homey — something that felt like a hug on a plate. The answer? My trusty Instant Pot Chicken Thighs. This dish is perfect when you want something flavorful but don’t want to spend hours in the kitchen. With a few pantry staples and the magic of the Instant Pot, dinner would be ready in a flash. It’s the kind of meal that makes you feel accomplished and cozy all at once.

Jump to Recipe

What You’ll Need

This recipe is great because you probably have most of these ingredients already lounging in your pantry, like they’re waiting for their time to shine. Here’s what you’ll need:

  • Skinless boneless chicken thighs
  • Dried oregano
  • Dried thyme
  • Pepper
  • Garlic powder
  • Onion powder
  • White pepper
  • Olive oil

How to Make Instant Pot Chicken Thighs

  1. In a small bowl, mix together dried oregano, dried thyme, pepper, garlic powder, onion powder, and white pepper. This will be your flavor magic dust.
  2. Rub the chicken thighs generously with the seasoning mix. Imagine you’re giving them a spa treatment — they deserve it.
  3. Set your Instant Pot to Saute mode and let it get nice and warm for about a minute. When it’s ready, add the olive oil. The oil should shimmer — that’s your cue.
  4. Place the seasoned chicken thighs in the pot and cook them for 3-4 minutes on each side until they’re lightly browned. You want them to have that golden look, and your kitchen will start smelling heavenly.
  5. Transfer the chicken thighs to a plate. Now, turn off the Instant Pot and pour in 1 cup of water. Use a scraper to gently nudge all those tasty brown bits off the bottom of the pot — these are flavor bombs!
  6. Place the metal trivet into the pot, and then nestle the chicken thighs on top of it.
  7. Secure the lid on the Instant Pot, making sure the vent is closed. Set it to Manual Pressure on high for 8 minutes. This is where the Instant Pot works its magic.
  8. Once the timer is up, let the pressure release naturally for 10 minutes. Then, carefully release any remaining pressure. When the pin drops, it’s safe to open the lid and reveal your perfectly cooked chicken.
  9. Serve these juicy chicken thighs with your favorite sides, and enjoy the deliciousness!

Cook’s Notes

Here’s the scoop: don’t skip the browning step. It adds a depth of flavor that makes people wonder if you’ve been cooking all day. If you’re making this ahead of time, these chicken thighs reheat beautifully. Just pop them in the microwave or a warm oven for a few minutes. Store leftovers in an airtight container in the fridge for up to three days. If you happen to forget to release the pressure naturally, don’t worry too much; the chicken should still be juicy, but try to remember next time for the best texture.

Make It Your Own

There’s a world of possibilities to tweak this recipe to your liking:

  • Swap the chicken thighs for crispy tofu if you’re going for a vegetarian vibe. Just be mindful of cooking times.
  • Add a squeeze of lemon juice and zest to the seasoning mix for a bright, zesty kick.
  • Craving spice? Toss in some cayenne pepper with the seasoning for a fiery twist.
  • Throw in some baby potatoes or carrots on the trivet with the chicken for a complete one-pot meal.

If you try this, I’d love to hear how it turns out — drop a comment or tag me! This dish has saved my sanity more times than I can count, and I hope it becomes a staple in your kitchen too. Enjoy every bite!

Related update: Instant Pot Chicken Thighs

Related update: Tuna Noodle Casserole: Mommie Cooks

How Sweet It Is Sweet Potato Lasagne | Made by Meaghan Moineau

So there I was, staring at my pantry on a chilly Tuesday evening, fingers drumming impatiently on the counter. You know those nights when you crave something cheesy and delightful but also want to sneak in some veggies? Yeah, that was me. Enter: How Sweet It Is Sweet Potato Lasagne. This baby is the answer to those midweek blues — a marriage of hearty, comforting layers with a hint of spice and a whole lot of veggies. It’s one of those dishes that sounds fancy but is surprisingly straightforward. You get to play around with flavors a little, and honestly, who doesn’t like the idea of lasagne that feels a little healthier but still indulgent?

Jump to Recipe

What You’ll Need

So, here’s the kicker with this recipe: chances are you already have most of what you need right at home. A few staples, a couple of fresh picks, and voilà!

  • Sweet Potatoes – the star of the show, sliced into 1/4 inch pieces.
  • Baby Portabella Mushrooms – because mushrooms are the unsung heroes of any good veggie lasagne.
  • Dry curry powder – gives our dish a lovely kick.
  • Dried basil leaves – for that aromatic pop.
  • Eggplants – sliced just like the sweet potatoes, they add a lovely texture.
  • Frozen spinach – convenience meets nutrition.
  • Heavy cream – for when you want things creamy, not watery.
  • Monterey jack & cheddar cheese mix – because, cheese.
  • Jalapeños – optional, but a little spice never hurt anyone.
  • Marinara sauce – your favorite brand or homemade, up to you.
  • Salt & pepper – always necessary.
  • Vegetable cooking oil – canola or your oil of choice.

How to Make How Sweet It Is Sweet Potato Lasagne

  1. Start by slicing your sweet potatoes into 1/4 inch thick slices. Boil them until they’re just about tender but still a tad firm, around 10 minutes. You don’t want them too mushy.
  2. Mix together the dry curry powder and olive oil. Rub this aromatic mixture onto your semi-cooked sweet potatoes and let them marinate for at least 10 minutes, soaking in all that spicy goodness.
  3. Next, slice your eggplants just like the sweet potatoes. Rub them with a mix of olive oil, dried basil, and a pinch of salt and pepper. Let these beauties marinate for at least 15 minutes.
  4. Heat up some vegetable oil in a pan. Sauté your frozen spinach and baby portabella mushrooms for about 3-5 minutes, until fragrant and slightly softened.
  5. Add in the jalapeños (if you’re feeling adventurous) and season with salt and pepper. Turn the heat down and stir in some heavy cream and about half of your cheese mix until it’s creamy, but not runny.
  6. It’s time to assemble the masterpiece! In a baking dish, layer in this order: sweet potatoes, spinach/mushroom mix, eggplants, and a generous pour of marinara sauce. Repeat with sweet potatoes, spinach/mushroom mix, and eggplants.
  7. Sprinkle the remaining cheese mix on top like you’re raining down cheesy love.
  8. Bake at 350-375°F for about 35-45 minutes. You’ll know it’s ready when the cheese is bubbly and you can easily pierce through all the layers with a fork.
  9. Let it rest for a few minutes before serving to let everything meld together. Then, devour with passion!

Cook’s Notes

Let’s talk leftovers. This lasagne is a delight even the next day. Store it in an airtight container in the fridge for up to 3 days, and when you’re ready to reheat, just pop it in the oven at a low temperature until warm.

A word of caution: don’t overcook the sweet potatoes. We want them to hold their shape and add a bit of bite to the lasagne. If you’re prepping ahead, you can have your veggies sliced and marinated in advance, making assembly a breeze when you’re ready to bake.

Make It Your Own

This recipe is your canvas, so paint away:

  • Swap the eggplants for zucchini if you prefer a lighter bite.
  • Use crispy tofu instead of mushrooms for extra protein.
  • Add a layer of ricotta cheese for extra creaminess.
  • If curry isn’t your thing, try using smoked paprika for a different flavor profile.

So, if you give this sweet potato lasagne a spin, I’d love to hear how it turns out. Drop a comment or tag me! I’m always ready to chat about all things delicious. Enjoy every cheesy, veggie-packed bite! 🧡

Related update: How Sweet It Is Sweet Potato Lasagne

Mediterranean eggplants | Made by Meaghan Moineau

Picture this: It’s a Wednesday evening, and I’m staring at a couple of eggplants sitting forlornly in my fridge. They’re giving me that “use us before we wilt away” look. I had originally bought them with grand plans of making something elaborate, but let’s be real, life happened, and here we are. So, in the spirit of keeping things simple yet utterly delicious, I decided to whip up my go-to Mediterranean eggplants. This dish is like a warm hug—comforting yet bright, with the kind of flavors that make you feel like you’ve just dined at a cozy little seaside café. Plus, it’s a one-pan wonder that’ll save you from a pile of dish-nightmares.

Jump to Recipe

What You’ll Need

Chances are you already have most of this lying around, which is perfect because who wants to make a grocery run for a weeknight meal?

  • Eggplants – the stars of the show, make sure they’re fresh and firm.
  • Fresh sausage without the casing – it adds savoriness and richness.
  • Almonds – for that unexpected crunch.
  • Egg – to bring everything together.
  • Feta cheese – for that tangy creaminess we all love.
  • Mozzarella cheese – because melted cheese is life.
  • Pepper – freshly ground, of course.
  • Bread crumbs – gets all crispy and delightful on top.
  • Olive oil – don’t skimp on this, it’s the liquid gold that makes everything better.
  • Fresh dill – for a pop of freshness to finish.

How to Make Mediterranean Eggplants

  1. Start by washing the eggplants thoroughly. Cut off the stems and slice them in half lengthwise. You’ll want to scoop out the middle, leaving about a half-inch shell. It’s like carving a little canoe for all the tasty fillings.
  2. In a mixing bowl, combine the sausage meat, egg, feta cheese, mozzarella, almonds, and a few cracks of pepper. Use your hands to mix it all up until everything is just combined. It should smell irresistible already.
  3. With a spoon, generously stuff this mixture into your eggplant halves. Don’t worry about being too precise; rustic is charming, right?
  4. Sprinkle each stuffed eggplant with breadcrumbs, about a tablespoon each, then drizzle with olive oil. This will give your eggplants a delectable golden crust.
  5. Place them all on a baking sheet lined with parchment paper. Bake in a preheated oven at 230°C (that’s about 450°F) for 25 minutes. You’re looking for bubbling cheese, golden tops, and the edges of the eggplant to be slightly charred.
  6. Serve hot, sprinkled with fresh, chopped dill, or if you’ve got some chives or basil hanging out, they’ll work beautifully too.

Cook’s Notes

A couple of things to keep in mind: When scooping out the eggplant, don’t take too much flesh out, or else you’ll end up with a floppy mess. If you scoop out a bit of extra flesh, you can mix it into the sausage filling for zero waste. These eggplants are best eaten fresh out of the oven, but if you’ve got leftovers, store them in an airtight container in the fridge. They’ll keep for about 2-3 days, and you can reheat them in the oven or a skillet to keep that delightful crispiness intact.

Make It Your Own

  • Swap the sausage for crispy tofu if you’re going the vegetarian route. Just crumble and sauté it with some smoked paprika for extra flavor.
  • Switch out the almonds for walnuts if that’s what you have on hand. They add a lovely depth of flavor.
  • If you’re out of feta, try using goat cheese for a similarly tangy kick.
  • No dill? No worries! Parsley or cilantro can step in as a fresh finisher.

If you try this, I’d love to hear how it turns out — drop a comment or tag me! Happy cooking, and may your eggplants never languish in the fridge again. 🌿

Related update: Mediterranean eggplants

Related update: How Sweet It Is Sweet Potato Lasagne

Herb chicken with sweet potato mash and sautéed broccoli | Made by Meaghan Moineau

Last Tuesday, I found myself frantically rummaging through my pantry, desperately trying to pull a quick dinner together while my kids were on the brink of a full-blown meltdown. You know, one of those evenings when time feels like it’s slipping through your fingers, and everyone is hangry? That’s when I stumbled upon my trusty mixed herb pack and had a lightbulb moment: Herb chicken with sweet potato mash and sautéed broccoli. This dish turned out to be a lifesaver — it’s comforting enough to soothe any midweek chaos but feels just fancy enough to make you proud of your culinary skills. Plus, it’s a breeze to make, with most of the ingredients likely lounging around in your kitchen already.

Jump to Recipe

What You’ll Need

This ingredient list is refreshingly simple, and chances are you already have most of this on hand. Here’s what you’ll need to whip up this delicious meal:

  • Broccoli
  • Mixed pack of Maggi So Herbs
  • Olive oil
  • Diced russet potato
  • Black pepper and salt
  • Skinless boneless chicken breasts
  • Diced sweet potatoes
  • Unsalted butter

How to Make Herb Chicken with Sweet Potato Mash and Sautéed Broccoli

  1. Preheat your oven to 350°F (180°C) or 320°F (160°C) if you’re using a convection oven. Cook the chicken following the instructions on the herb pack — it’s as simple as it sounds, and your kitchen will soon smell divine.
  2. About 15 minutes before the chicken is done, bring a pot of water to a boil. Toss in the diced russet potatoes and let them cook for 5 minutes. Then add the sweet potatoes and continue boiling until both types of potatoes are tender.
  3. Drain the potatoes and roughly mash them. Add a generous dollop of butter, a pinch of salt, and a sprinkle of black pepper. Mash until everything is smooth and creamy — taste and adjust seasoning if needed.
  4. While the potatoes are doing their thing, heat a splash of olive oil in a pan over medium heat. Add the broccoli and sauté it quickly until it’s tender and vibrant green. Cover to keep it warm and steamy.
  5. Once the chicken is done, take it out of the oven and let it rest for a minute. Carefully cut open the cooking bag and gently tip the contents into a serving dish.
  6. Slice the chicken breasts into chunky pieces, doing your best to keep their original shape. This’ll make for a pretty presentation when served on top of the mash.
  7. To serve, generously pile the mash onto a plate, top it with sliced chicken and any delicious juices from the cooking bag, and add a side of that bright sautéed broccoli. Enjoy!

Cook’s Notes

Here’s the lowdown on making this dish smoothly. First off, when you’re mashing the potatoes, don’t be shy with the butter — it’s what makes the mash indulgently creamy. If you want to make this meal ahead, you can prep the mash and broccoli earlier in the day and just reheat them when you’re ready to serve. The chicken is best cooked fresh, but if you have leftovers, store them in an airtight container in the fridge for up to two days. Just note that reheated chicken can dry out, so add a splash of water or broth when warming it up.

Make It Your Own

This dish is versatile, so don’t hesitate to put your own spin on it! Here are a few ideas:

  • Swap the chicken for crispy tofu to make it vegetarian. Just coat the tofu in herbs before baking.
  • Add a handful of grated cheese to the mashed potatoes for an extra creamy, cheesy flavor.
  • Throw some sliced almonds or pine nuts into the broccoli for a bit of crunch and nuttiness.
  • Use a mix of sweet and smoked paprika in the potatoes for a smoky kick.

If you try this, I’d love to hear how it turns out — drop a comment or tag me on social media. Happy cooking, and may this recipe save your midweek dinner scramble just like it did mine!

Related update: Herb chicken with sweet potato mash and sautéed broccoli

Related update: Mediterranean eggplants

Instant Pot Chicken Tacos | Made by Meaghan Moineau

One rainy Tuesday evening, I found myself staring at a lonely lime on the counter, wondering how I could whip up something that felt fresh and exciting despite the weather gloom. My Instant Pot was calling, and I imagined the sizzle of tacos — not just any tacos, but ones that are easy enough for a weeknight yet flavorful enough to make you feel like a dinner hero. That’s how these Instant Pot Chicken Tacos came to life. They’re a symphony of flavors, with just the right tang from lime and a kick from taco seasoning, and the best part? They’re a breeze to make, even if you’re juggling a million things. Trust me, you’re going to want to bookmark this one for every taco Tuesday (or any day, really) when life gets a little hectic.

Jump to Recipe

What You’ll Need

The beauty of this recipe is its simplicity. Chances are, you already have most of these waiting in your pantry or fridge. Here’s what you’ll need to create this taco magic:

  • Chicken breasts — the star of the show, tender and juicy.
  • Black pepper
  • Taco seasoning — brings the fiesta to your taste buds.
  • Purple onion — for a subtle sharpness and a pop of color.
  • Canned salsa — your secret shortcut to layered flavor.
  • Lime juice — for that fresh zing at the end.

How to Make Instant Pot Chicken Tacos

With just a few steps, you’ll have these delightful tacos ready in no time:

  1. First, generously season both sides of the chicken breasts with black pepper and taco seasoning. Make sure they’re well-covered for maximum flavor.
  2. Place the seasoned chicken into the bottom of your Instant Pot. Let the anticipation build as you layer the flavors.
  3. Next, top the chicken with a handful of diced purple onion and a generous pour of canned salsa. It should look like a fiesta in a pot!
  4. Secure the Instant Pot lid into the lock position. Set it to the Poultry setting for 12 minutes. During this time, you can almost hear the flavors mingling and dancing inside.
  5. Once the timer beeps, don’t rush things. Allow the Instant Pot to naturally release pressure for 20 minutes. This is where the magic happens.
  6. Carefully remove the chicken from the pot and shred it with two forks. You’ll notice how effortlessly it falls apart.
  7. Sprinkle the shredded chicken with fresh lime juice. The tangy aroma will hit you, and you’ll know it’s taco time.
  8. Serve the chicken over a bed of rice or wrap it snugly in tortillas. Either way, you’re in for a treat!

Cook’s Notes

Here’s a little insider scoop to make the most out of this recipe:

– If you’re in a hurry, you can quick-release the pressure after cooking, but I find the patience pays off in flavor.
– Store any leftovers in an airtight container in the fridge for up to 3 days. They make for some mean taco bowls or quesadillas the next day.
– Shredding gets messy, but it’s worth it! Just make sure your forks are sturdy enough for the job.
– If you like your tacos with a bit of heat, feel free to throw in a pinch of cayenne with the taco seasoning.

Make It Your Own

Here are a few ideas to put your personal spin on these tacos:

  • Swap the chicken for crispy tofu for a vegetarian delight that’s just as satisfying.
  • Use a smoky chipotle salsa instead of regular salsa for an extra layer of depth.
  • Top with crumbled queso fresco or a dollop of sour cream for added creaminess.
  • Stir in some fresh corn kernels or sliced bell peppers before cooking for extra crunch and color.

If you try this, I’d love to hear how it turns out — drop a comment or tag me! Your kitchen adventures make my day. Enjoy those tacos, and remember, the best meals are the ones shared with laughter and a little bit of lime. 🌮

Related update: Instant Pot Chicken Tacos

Related update: Herb chicken with sweet potato mash and sautéed broccoli

Coconut and Whole Wheat Chicken Tenders | Made by Meaghan Moineau

Last Tuesday, I found myself staring into my pantry, half-hungry and half-hoping for inspiration to strike. The kids were asking for chicken nuggets, and I was craving something a little more grown-up but still easy to whip up on a weeknight. That’s when I remembered these Coconut and Whole Wheat Chicken Tenders. They’re like a tropical vacation for your taste buds and so much better than any fast-food version. Crispy on the outside, juicy on the inside, and with a hint of coconut that makes you feel like you’re doing something special. Plus, they’re baked, not fried, so you can feel a bit virtuous while indulging. Seriously, these are a must-try for anyone looking to jazz up their dinner routine without spending hours in the kitchen. Jump to Recipe

What You’ll Need

The beauty of this recipe is that it’s simple yet flavorful, and chances are you already have most of these ingredients at home.

  • Chicken tenders – the star of the show
  • Egg whites – to give that perfect coating
  • Unsweetened coconut – for that tropical flair
  • Whole wheat bread crumbs – for a hearty crunch

How to Make Coconut and Whole Wheat Chicken Tenders

  1. Preheat your oven to 350 degrees Fahrenheit. There’s nothing like a warm oven ready to welcome a new creation!
  2. Dip each chicken tender into a bowl filled with egg whites, ensuring it’s fully coated. The egg whites are the glue that will hold the crunchy magic together.
  3. In another bowl, mix the whole wheat bread crumbs with the unsweetened coconut until they’re evenly distributed. This is where the magic happens, friends!
  4. Roll the egg-coated chicken tenders in the breadcrumb-coconut mixture, pressing gently so it sticks. You’ll know it’s right when they’re wearing their new coat proudly.
  5. Place the tenders on a cookie sheet, making sure they’re not touching. Bake them for 20 minutes, or until the crust is golden and fragrant. Your kitchen will smell amazing!

Cook’s Notes

These chicken tenders are the perfect blend of easy and impressive. Here are a few tips to make sure they turn out perfect every time:

  • If you find yourself without whole wheat bread crumbs, regular breadcrumbs will do, though you’ll miss a bit of that nutty flavor.
  • Make sure your coconut is unsweetened, or you’ll end up with a surprisingly sweet dish that’s not quite what we’re going for here.
  • These tenders are best eaten fresh out of the oven, but you can reheat leftovers in a 350-degree oven for about 10 minutes.
  • Store leftovers in an airtight container in the fridge for up to 3 days. They’re great for a quick lunch the next day!

Make It Your Own

  • Swap the chicken for crispy tofu if you’re looking for a vegetarian option. The texture is amazing and soaks up the flavors beautifully.
  • Try adding a teaspoon of curry powder to the breadcrumb mixture for a spicy twist.
  • Use panko breadcrumbs instead of whole wheat for an extra crispy texture that crunches with every bite.
  • If you’re a garlic lover, add a teaspoon of garlic powder to the bread crumb mix for an additional layer of flavor.

If you try this, I’d love to hear how it turns out — drop a comment or tag me! Cooking is all about sharing the joy, after all. Enjoy your tropical escape from the comfort of your kitchen!

Related update: Coconut and Whole Wheat Chicken Tenders

Curried Cauliflower Gratin | Made by Meaghan Moineau

It was one of those chilly evenings when I found myself standing in front of the fridge, staring at a lonely head of cauliflower. It was one of those days when you crave something warm and cozy but can’t muster the energy for an elaborate meal. That’s when it hit me: Curried Cauliflower Gratin. It’s the perfect union of creamy, spicy, and crispy. This dish is like a comforting hug on a plate, yet it’s surprisingly easy to put together. Plus, it turns the humble cauliflower into something extraordinary, making it a weeknight favorite. Trust me, your taste buds will thank you later.

Jump to Recipe

What You’ll Need

You probably have most of these ingredients in your pantry already. The magic comes from how they all come together to elevate a simple vegetable.

  • Cauliflower – the star of the show!
  • Canned coconut milk
  • Peanut oil
  • Shallot
  • Fresh ginger
  • Garlic
  • Curry powder
  • Ground cumin
  • Ground cardamom
  • Ground nutmeg
  • Cinnamon
  • Flour
  • Kosher salt
  • Unsalted butter
  • Breadcrumbs
  • Cumin seeds
  • Fresh garnish: cilantro

How to Make Curried Cauliflower Gratin

  1. Preheat your oven to 400°F. Grease an 8×8-inch baking dish with a bit of butter and set it aside. This will help with easy cleanup later and ensure nothing sticks.
  2. Steam the whole cauliflower until it’s tender but still holds its shape, about 15 minutes. Once done, let it cool a bit and then slice horizontally into thick slabs.
  3. In a saucepan over medium heat, warm the peanut oil. Toss in the ginger, shallot, and garlic, and sauté them until they’re soft and aromatic, around 3 to 4 minutes. Your kitchen should start smelling amazing about now!
  4. Add in the dry spices: curry powder, cumin, cardamom, nutmeg, and cinnamon. Sauté these for another 3 minutes until the spices are fragrant and toasty.
  5. Sprinkle the flour over the spice mixture and stir it in, cooking for about 2 minutes. This forms the base of your sauce.
  6. Slowly whisk in the coconut milk and salt. Keep stirring until the mixture simmers and thickens, about 3 to 5 minutes. You’ll want it to be creamy but not too thick.
  7. Arrange a layer of cauliflower slices in your prepared baking dish. Pour about half of your curry cream over this layer. Repeat with remaining cauliflower and curry cream.
  8. In a small bowl, mix the breadcrumbs and cumin seeds. Sprinkle this over the top of the dish, then drizzle with melted butter for that crispy finish.
  9. Bake in the preheated oven for 25 to 30 minutes. You’ll know it’s done when the top is golden brown and the edges are bubbly.
  10. Once out of the oven, sprinkle with fresh cilantro for an extra pop of color and flavor. Serve warm and dig in!

Cook’s Notes

This dish is pretty forgiving, so feel free to adjust the spice levels to your liking. If you want a bit more heat, you could add a pinch of cayenne or chili flakes with the other spices. Leftovers can be stored in an airtight container in the fridge for up to three days. Reheat in the oven to bring back the crispiness rather than using the microwave, which can make it soggy. You can also make the curry cream a day ahead. Just keep it refrigerated and assemble the dish when you’re ready to bake.

Make It Your Own

  • Swap the cauliflower for broccoli if you want a different flavor profile or if that’s what you have on hand.
  • For a nut-free version, replace the peanut oil with olive oil.
  • If you’re not a fan of coconut milk, heavy cream can be used as a substitute, though it will change the flavor slightly.
  • Add a layer of sautéed mushrooms between the cauliflower slices for an earthy twist.

If you try this, I’d love to hear how it turns out — drop a comment or tag me! I’m always excited to see how you make these recipes your own. Happy cooking!

Related update: Curried Cauliflower Gratin

Bibimbab (Korean Rice w Vegetables & Beef) | Made by Meaghan Moineau

It was one of those evenings where the day had slipped away faster than expected. I glanced at the clock and realized it was nearly dinner time. My mind immediately went to Bibimbab, a dish that’s like a warm hug after a long day — comforting, flavorful, and surprisingly easy to throw together. Sure, it looks impressive with its vibrant array of veggies, tender beef, and that perfectly runny egg on top, but the secret is, it’s pretty forgiving. Accidentally overcooked your rice? No worries. Want to swap out the beef for something else? Go for it. It’s a dish that’s as flexible as your pantry, which makes it perfect for those impromptu weeknight dinners. Plus, the way the rich sesame oil blends with the spicy gochujang is just magic.

Jump to Recipe

What You’ll Need

Chances are you already have most of this in your kitchen. Here’s the rundown:

  • Carrots
  • Cooked white rice
  • Eggs
  • English cucumber
  • Garlic clove
  • Gochugaru (red pepper flakes)
  • Gochujang (red pepper paste)
  • Olive oil
  • Sesame oil
  • Sesame seeds
  • Soy sauce
  • Fresh spinach
  • Sandwich steaks (thinly sliced beef)

How to Make Bibimbab (Korean Rice w Vegetables & Beef)

  1. First, cook your rice according to the package directions. If you’re using leftover rice, even better — it’s one less thing to worry about.
  2. While the rice is cooking, slice your vegetables into matchstick pieces. This will help them cook quickly and evenly. Set them aside.
  3. In a large non-stick pan, bring 2 cups of water to a boil. Add the fresh spinach and cook, stirring constantly until it’s wilted. This should take about a minute. Drain the spinach, cool it off, and then squeeze it dry into a small ball. It’s amazing how much water spinach holds!
  4. Wipe out your skillet and heat 1 teaspoon of olive oil over medium-high heat. Add the carrots and cook until they’re soft, about 3 minutes. Toss in the garlic and cook until it’s fragrant, about another minute. Your kitchen should smell amazing by now.
  5. Next, add cucumber slices mixed with gochugaru for a little kick. Combine your spinach with soy sauce and set it aside until serving.
  6. Using the same pan (because who likes doing more dishes?), add the thinly sliced beef and cook until it’s browned and tender. This should only take a few minutes.
  7. Wipe the pan down with a napkin, then heat another teaspoon of olive oil over medium-high. Crack in the eggs and cook them until the whites are set, but the yolks are still deliciously runny — about 5 minutes should do the trick.
  8. Divide the cooked rice among four bowls. Top each bowl with the sautéed vegetables, beef, and that glorious egg. Drizzle with sesame oil, sprinkle with sesame seeds, and finish with a dollop of gochujang or a splash of Sriracha for an extra kick.

Cook’s Notes

Transforming a few simple ingredients into Bibimbab is like a little kitchen magic trick. Here are a few notes to keep in mind:

  • Don’t have all the ingredients? That’s okay! Bibimbab is super flexible. Use whatever veggies you have on hand.
  • Gochujang is crucial for authentic flavor, but if you’re in a pinch, Sriracha makes a decent stand-in.
  • This dish is best fresh, but you can store leftovers in the fridge for up to 2 days. Just know that the egg won’t be as lovely reheated.
  • To make it ahead, prep all the components except for the eggs. Assemble and fry the eggs just before serving.

Make It Your Own

Here are a few fun variations to consider:

  • Swap the beef for crispy tofu if you’re going for a vegetarian vibe.
  • Use quinoa or brown rice instead of white rice for a whole-grain alternative.
  • Add some kimchi for extra tang and spice.
  • Try using some zucchini instead of cucumber for a slightly different texture.

If you try this, I’d love to hear how it turns out — drop a comment or tag me! Whether you stick to the classic or put your own spin on it, Bibimbab is all about bringing joy to your table. Enjoy every bite!

Related update: Bibimbab (Korean Rice w Vegetables & Beef)

Related update: Coconut and Whole Wheat Chicken Tenders

Broccoli Rabe with Tomatoes, Anchovies & Spaghetti | Made by Meaghan Moineau

It was one of those whirlwind Tuesdays, you know, the kind where you look up and suddenly it’s 7 PM and you’re staring at your fridge like it’s a magic portal to dinner. The last thing I wanted was a complicated meal, but I was craving something a little more special than the usual weeknight pasta. That’s when I remembered this Broccoli Rabe with Tomatoes, Anchovies & Spaghetti recipe. It’s the perfect combination of quick, comforting, and just a touch fancy — like your favorite pair of jeans that still manage to make you feel dressed up. The best part? It comes together in no time, leaving you with a warm, savory bowl of goodness that feels like a little triumph over the chaos of the day.

Jump to Recipe

What You’ll Need

Before you make a mad dash to the grocery store, take a peek into your pantry. Chances are, you already have most of what you need. Here’s the simple lineup:

  • 1 bunch of broccoli rabe
  • 1 can of anchovies
  • 3 cloves of garlic
  • Juice of 1 lemon
  • 1/2 teaspoon red pepper flakes
  • 1/2 cup grated Romano cheese
  • 12 ounces of spaghetti
  • 1 cup cherry or grape tomatoes
  • Olive oil

How to Make Broccoli Rabe with Tomatoes, Anchovies & Spaghetti

Ready to transform these humble ingredients into something spectacular? Here’s how:

  1. Start by prepping the broccoli rabe. Trim about 1 inch off the stems and then give them a quick blanch in boiling water for 3-4 minutes. This will take out the bitterness and keep that lovely green color. Drain and set aside.
  2. In a large frying pan, heat a couple of drizzles of olive oil over medium heat. Toss in the garlic, red pepper flakes, and tomatoes. Sauté until the tomatoes are soft and the garlic is fragrant — think of it as the kitchen’s way of saying “hello, deliciousness!”
  3. Add the blanched broccoli rabe to the pan and continue to sauté for a few more minutes. This step gets all those flavors mingling.
  4. Now, for the umami punch: add the anchovies to the pan. They’ll melt into the dish, leaving behind a savory depth that’s pure magic.
  5. Meanwhile, cook your spaghetti in a large pot of salted boiling water. Before draining, scoop out about 1/2 cup of the pasta water and add it to the broccoli rabe mixture. This starchy water helps create a luscious sauce.
  6. Drain the spaghetti and get ready to plate. On a serving platter, drizzle a bit of olive oil and sprinkle some grated Romano cheese. Add the spaghetti, top with the broccoli rabe mix, then give it a final drizzle of olive oil, a squeeze of lemon juice, and a generous dusting of Romano cheese.

Cook’s Notes

A couple of things to keep in mind: If you’re new to cooking with anchovies, don’t be scared! They dissolve beautifully and add a savory backbone without a fishy taste. Make sure not to overcook the broccoli rabe initially; you want it vibrant, not mushy.

Got leftovers? Store them in an airtight container and they’ll keep well in the fridge for a couple of days. If you plan to make this ahead, keep the lemon juice out until serving to keep everything fresh and bright.

Make It Your Own

Feel free to play around with this recipe. Here are some ideas to get you started:

  • Swap the anchovies for crispy tofu to make it vegetarian-friendly.
  • Add a handful of toasted pine nuts for a bit of crunch and nuttiness.
  • Switch out the Romano cheese for Parmesan if that’s what you have on hand.
  • Try using kale instead of broccoli rabe for a slightly milder, less bitter green.

If you try this, I’d love to hear how it turns out — drop a comment or tag me! Cooking is all about making it work for you and having a little fun along the way. Enjoy your dinner, friend!

Related update: Broccoli Rabe with Tomatoes, Anchovies & Spaghetti

Related update: Bibimbab (Korean Rice w Vegetables & Beef)

Chorizo and egg bake | Made by Meaghan Moineau

Picture this: it’s one of those hectic Tuesday nights where you’ve got about 45 minutes to get something on the table before the whole evening devolves into chaos. The fridge is looking sparse, but you’ve got a pack of chorizo, some eggs, and a block of cheddar that’s been patiently waiting for its moment in the spotlight. That’s when this Chorizo and Egg Bake comes to the rescue. It’s one of those dishes that’s deceptively simple but packs a punch of flavor that’s sure to convince everyone you planned it all along. Plus, it’s all about that melty cheese and spicy kick that makes life feel just a bit more exciting.

Jump to Recipe

What You’ll Need

The beauty of this recipe is its simplicity—you’re likely to have almost everything you need ready to go!

  • 4 large eggs
  • 1 cup grated cheddar cheese
  • 200g smoked chorizo sausage, diced
  • 1 medium onion, finely chopped
  • 2 cloves garlic, minced
  • 1 can red and green chillies, drained
  • Salt and pepper to taste

How to Make Chorizo and Egg Bake

  1. Preheat your oven to 170°C. You’ll want it nice and warm to get that cheese melted just right.
  2. In a mixing bowl, crack the eggs and whisk them until the yolks and whites are fully combined. This is going to ensure a fluffy texture.
  3. Add the grated cheddar cheese, chopped onion, diced chorizo, minced garlic, and chopped chillies to the bowl. Give it all a good stir until everything’s evenly mixed. The aroma should already be enticing!
  4. Season generously with salt and pepper. Remember, the chorizo will add a bit of saltiness, so don’t go too wild.
  5. Lightly grease a baking dish to prevent sticking. Pour your eggy mixture into the dish, spreading it out evenly.
  6. Pop it into the oven and bake for about 20 minutes. You’ll know it’s ready when the edges start to bubble and turn a light golden brown.

Cook’s Notes

This dish is wonderfully forgiving, so feel free to tweak the ingredient amounts based on what you have. If you’re preparing it in advance, you can whisk together all the ingredients the night before and store them in the fridge. Just pour it into the baking dish and bake when you’re ready. Leftovers can be stored in an airtight container in the fridge for up to three days and are just as delicious when reheated—perfect for a quick lunch or a lazy breakfast.

Make It Your Own

  • Vegetarian Twist: Swap the chorizo for your favorite meat-free sausage or sautéed mushrooms.
  • Extra Veggies: Throw in some bell peppers or spinach for added color and nutrients.
  • Spicy Kick: Add a pinch of cayenne pepper or a few dashes of hot sauce to the egg mixture.
  • Different Cheese: Try swapping the cheddar with Monterey Jack or pepper jack for a different flavor profile.

If you give this recipe a whirl, I’d love to hear how it turns out for you! Drop a comment below or tag me on social media to share your delicious creations. Happy cooking!

Related update: Chorizo and egg bake

Related update: Broccoli Rabe with Tomatoes, Anchovies & Spaghetti

Cannellini Bean Side Dish With Fennel, Red Onion, and Saffron | Made by Meaghan Moineau

I found myself in the kitchen on one of those unexpectedly chilly evenings, the kind that sneaks up on you after a week of golden autumn days. As I rummaged through the pantry, I came across a can of cannellini beans tucked away behind the lentils – a forgotten gem in my usual dinner rotation. The scene was set: I had a craving for something warm and comforting, yet light enough not to tip into winter stews. A quick glance in the fridge revealed a bulb of fennel and a red onion that had been waiting patiently for their moment to shine. In no time, I whipped up this Cannellini Bean Side Dish with Fennel, Red Onion, and Saffron. It’s a dish that’s as fragrant as it is colorful, and blissfully easy to pull together. It’s perfect for a weeknight, yet elegant enough to grace a dinner party table.

Jump to Recipe

What You’ll Need

The magic of this dish is that it leans heavily on pantry staples, with just a few fresh ingredients to elevate the flavors. Chances are you already have most of this on hand!

  • Cannellini beans – cooked and ready to go
  • Extra virgin olive oil – for a rich, flavorful base
  • Fennel – adds a lovely anise flavor
  • Flat parsley – for a fresh, herby finish
  • Red onion – brings sweetness and color
  • Saffron threads – a pinch of luxury
  • Black salt and pepper – to season
  • Vegetable broth – to adjust consistency
  • Water – for soaking the saffron

How to Make Cannellini Bean Side Dish With Fennel, Red Onion, and Saffron

  1. Start by combining the saffron threads with a few tablespoons of boiling water in a small, heat-proof bowl or measuring cup. Let this steep for about 5 minutes. You’ll notice the water turning a lovely golden hue.
  2. In a large nonstick skillet, heat the extra virgin olive oil over medium heat. Toss in the fennel and red onion, and cook them, stirring occasionally, until they’re tender and the kitchen smells like heaven – about 5 minutes.
  3. Add the cannellini beans and the saffron water to the skillet. Stir everything together until the beans are coated with that gorgeous saffron color.
  4. Season to taste with black salt and freshly cracked pepper. If the mixture starts to look a bit dry, splash in some vegetable broth or the liquid from the beans until you achieve the consistency you like.
  5. Finish by sprinkling freshly chopped flat parsley or fennel fronds over the top. Serve immediately while it’s still gloriously warm.

Cook’s Notes

This dish is forgiving and flexible, which is part of its charm. If you don’t have saffron, don’t panic – just add a pinch of turmeric for a hint of color. Store any leftovers in an airtight container in the fridge for up to three days. To reheat, simply add a splash of broth or water to loosen everything back up. This dish is also perfect for making ahead; the flavors deepen as they sit, so it tastes even better the next day.

Make It Your Own

Here are a few ways to switch things up and make this dish your own:

  • Swap the cannellini beans for chickpeas or butter beans for a different texture.
  • Replace the fennel with celery if you prefer a milder flavor.
  • For a protein boost, add crispy tofu cubes or cooked shredded chicken towards the end of cooking.
  • Sprinkle some crumbled feta or goat cheese on top for a creamy finish.

If you try this, I’d love to hear how it turns out — drop a comment or tag me! There’s nothing better than seeing a little corner of my kitchen magic make its way into another home. Enjoy!

Related update: Cannellini Bean Side Dish With Fennel, Red Onion, and Saffron

Farfalle with Shrimps, Tomatoes Basil Sauce | Made by Meaghan Moineau

It was a Wednesday evening, and I’d just returned home after a long day that seemed to have no end in sight. You know the one — where you’re too exhausted to even scroll through your takeout apps. I peered into the fridge, hoping for a miracle, and voilà, the ingredients for Farfalle with Shrimps, Tomatoes Basil Sauce all but jumped out at me. It was like they were whispering, “We got you.” There’s something magical about pulling together a meal that feels indulgent and comforting but comes together in the blink of an eye. This dish is that kind of magic. Perfect for those nights when you want something special without the hassle.

Jump to Recipe

What You’ll Need

You might already have most of these ingredients lounging in your pantry or fridge, just waiting to become something delicious. Farfalle pasta is the star of the show, and everything else is there to make it shine even brighter.

  • 1 tablespoon of butter
  • 8 ounces of farfalle pasta
  • 1 cup of fresh tomatoes, chopped
  • 1/2 pound of fresh shrimp, peeled and deveined
  • 1/2 cup of fresh basil leaves
  • Salt and freshly ground black pepper, to taste

How to Make Farfalle with Shrimps, Tomatoes Basil Sauce

  1. Bring a large pot of salted water to a boil. Add the farfalle and cook until al dente, which should take about 10-12 minutes. You’ll know it’s ready when it’s firm to the bite yet tender.
  2. While the pasta cooks, melt the butter in a large frying pan over medium-high heat. Once the butter starts to bubble and gives off a nutty aroma, toss in the tomatoes.
  3. Sauté the tomatoes for about a minute, just until they start to soften and their juices mingle with the butter, creating a simple, vibrant sauce.
  4. Add the shrimp to the pan. Cook them until they turn a beautiful light pink and are cooked through, about 3-4 minutes. Sprinkle with salt and freshly ground black pepper to taste.
  5. Toss in the fresh basil leaves and give everything a gentle stir, letting the basil release its fragrant oils.
  6. Once your pasta is perfectly cooked, drain it and add it directly to the skillet with the shrimp and tomatoes. Toss everything together so the pasta is well-coated in the buttery tomato sauce.
  7. Serve immediately while it’s still hot, and watch as the room fills with the comforting aroma of basil and buttery goodness.

Cook’s Notes

This dish is forgiving, which is a blessing if you’re prone to distractions like I am. Keep an eye on the shrimp; they cook fast and go from perfect to rubbery in a blink. If you find your sauce getting too thick, a splash of the pasta cooking water will loosen it right up.

Leftovers can be stored in an airtight container in the refrigerator for up to two days. Reheat gently in a skillet over low heat, adding a little water to bring back the sauce’s creaminess.

Make It Your Own

  • Swap out the shrimp for crispy tofu if you’re in the mood for a vegetarian twist.
  • Add a handful of baby spinach along with the basil for a boost of greens.
  • If you love a bit of heat, a pinch of red pepper flakes will do wonders.
  • For a citrusy finish, add a squeeze of lemon juice just before serving.

If you try this, I’d love to hear how it turns out — drop a comment or tag me! Cooking is such a shared joy, and I can’t wait to hear your tales from the kitchen.

Related update: Farfalle with Shrimps, Tomatoes Basil Sauce

Related update: Cannellini Bean Side Dish With Fennel, Red Onion, and Saffron