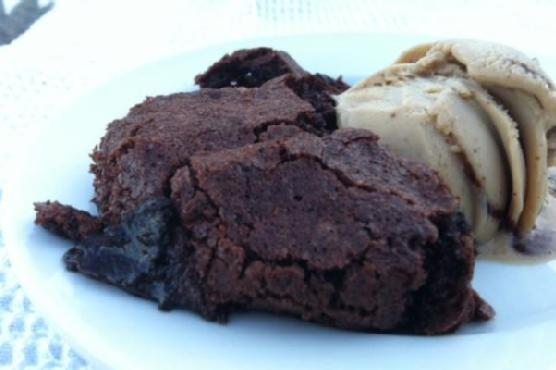
The other day, I found myself staring at a half-eaten bar of dark chocolate, a stray packet of espresso powder, and a whole lot of nothing for dessert. You know those moments when you just need something gooey and comforting but also want to keep it somewhat aligned with your food goals? Enter the Brownie Cake that’s both gluten-free and dairy-free yet decadently delicious. This isn’t just any dessert; it’s an easy weeknight indulgence that feels special enough for company but straightforward enough to whip up with pantry staples. The magic lies in its cake-like exterior giving way to a molten, pudding-like center. It’s the kind of dish that makes you feel like a kitchen wizard with minimal effort.
Jump to Recipe
What You’ll Need
This ingredient list is refreshingly simple, and chances are you already have most of these staples in your kitchen.
- Earth Balance Soy Free Spread (for that buttery richness without the dairy)
- Eggs (they give it that fluffy cake-like lift)
- Cane Sugar (because, duh, brownies need sweetness)
- Red Dark Chocolate (the star of the show)
- Vanilla Paste (adds a luxurious depth)
- Espresso Powder (just a touch for an extra kick)
- White Gluten Free Flour Blend (the base that keeps it light and gluten-free)
- Cocoa Powder (for that intense chocolate punch)
- Coconut Oil (keeps everything moist and lovely)
How to Make Brownie Cake gluten free, dairy free
- Preheat your oven to 325°F. Trust me, this temperature is key to getting that perfect texture.
- Lightly spread coconut oil in a 9x12x2 inch deep oval baking dish. This ensures nothing sticks and makes for easy serving later.
- Grab a bowl, sift together your flour and cocoa powder, and set aside. This little step ensures no lumps and a smooth batter.
- In the bowl of an electric mixer, beat the eggs and sugar on medium-high for about 5 minutes. You’re aiming for a consistency that’s thick, pale yellow, and reminiscent of cake batter.
- Once your egg and sugar mixture is ready, lower the speed to low and add the vanilla paste and espresso powder. It’ll smell heavenly.
- Slowly incorporate the flour and cocoa powder mixture. A handy tip: throw a dish towel over the mixer to avoid cocoa dust everywhere.
- Add in the Earth Balance Spread and mix for another 10 seconds. Just enough to combine.
- Pour the brownie mixture into your prepared dish. Smooth the top, but don’t obsess over it.
- Place this dish into a bigger roasting pan. Carefully fill the roasting pan with very hot tap water, reaching about halfway up the side of your brownie dish. This water bath technique gives it that unique texture.
- Bake for exactly 65 minutes. Patience is a virtue here. The cake will be set on the outside but fabulously gooey on the inside.
- Allow it to cool for 20 minutes before serving. Serve warm for the best experience.
Cook’s Notes
This Brownie Cake is a dreamy blend of textures, but a few tips will ensure it’s perfect every time. Make sure your eggs are at room temperature before starting; this helps them whip up better and combine more smoothly with the sugar. If you’re making this in advance, store it in the fridge and reheat gently in the oven before serving. It keeps well for about 3 days, not that it’ll last that long once your family gets a taste.
Make It Your Own
- Feeling nutty? Toss in a handful of chopped almonds or pecans for a delightful crunch.
- If dark chocolate isn’t your thing, swap it for semi-sweet or even white chocolate chips.
- Add a swirl of peanut butter into the batter before baking for a nutty flavor twist.
- Infuse the batter with a teaspoon of orange zest for a zesty chocolate-orange experience.
If you try this Brownie Cake, I’d love to hear how it turns out — drop a comment or tag me with your creations! Happy baking, friends!
Related update: Brownie Cake gluten free, dairy free
Related update: Vanilla Coconut Snowball Cupcakes
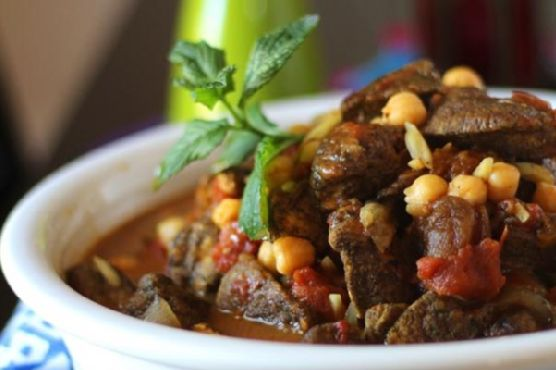
It was one of those nights where everything seemed to take forever. My hair was doing its own thing, there was a pile of laundry giving me the evil eye, and I had exactly zero patience left for the day. You know the feeling? That’s when Moroccan Chicken Tagine decided to swoop in and save my evening. With its warm spices and a touch of sweetness, it felt like a cozy hug in a bowl. This dish comes together quicker than you’d think, especially with the help of my trusty pressure cooker. I promise, it’s the kind of meal that makes you look forward to leftovers.
Jump to Recipe
What You’ll Need
Honestly, you’ve probably got most of this stuff hanging out in your pantry already, and that’s the beauty of it. Just a few special touches make this dish sing.
- Moroccan spice mixture
- Almond slivers
- Dried apricot halves
- Canned chickpeas
- Whole canned tomatoes
- Cilantro
- Extra virgin olive oil
- Fat-free chicken broth
- Flour
- Fresh ginger root
- Garlic clove
- Black salt and ground pepper
- Honey
- Onion
- Skinless boneless chicken breasts
How to Make Moroccan Chicken Tagine
- In a pie plate, mix together the flour and Moroccan spice mixture. Toss the chicken pieces in this mixture until they’re well coated.
- Heat some olive oil in your pressure cooker over medium-high heat. When it’s nice and hot, add the chicken pieces. Let them brown for about one minute per side, absorbing all that fragrant goodness.
- Take the chicken out and set it aside. Lower the heat to medium, then toss in the ginger and onions. Saute for about three minutes until the onions start looking semi-translucent and glossy.
- Add the garlic to the pot and cook for another minute. The aroma should fill your kitchen like a dream.
- Introduce the apricots, whole tomatoes, chicken broth, and the browned chicken back into the pot. Cover and bring it to low pressure over medium-high heat.
- Once you’ve reached pressure, cook for about eight minutes. Then, carefully release the pressure using the quick release method. Open the steam valve and be cautious!
- Stir in the chickpeas, almonds, and honey. Let everything warm through for a few minutes, allowing the almonds to soften slightly.
- Check the chicken for doneness and taste your tagine. This is your moment to adjust the salt and pepper to perfection. Serve it over fluffy couscous and sprinkle with fresh cilantro leaves for that extra pop of color and flavor.
Cook’s Notes
If you’re using a Dutch oven instead of a pressure cooker, follow steps 1-4 as described. Then bring the mixture to a boil, reduce to a simmer, and let it cook for 20-25 minutes, or until the apricots are tender. Continue with step 6.
- Feel free to prep some ingredients ahead. You can chop onions and garlic, or even coat the chicken earlier in the day.
- Leftovers are a dream. Store them in an airtight container in the fridge and savor them for up to three days. The flavors only deepen and become more delicious.
- Be adventurous with your spice mix. Play around with the ratios to suit your taste, just remember that a little goes a long way.
Make It Your Own
- Swap the chicken for crispy tofu: A perfect vegetarian option that still holds up to the hearty flavors.
- Try dried figs instead of apricots: They add a slightly different sweetness and pair wonderfully with the spices.
- Use quinoa instead of couscous: It offers a lovely, nutty texture and is gluten-free.
- Add some heat with chili flakes: If you like a bit of spice, a sprinkle of chili flakes will do the trick.
If you try this, I’d love to hear how it turns out — drop a comment or tag me on social media! Cooking is all about sharing and I’d be thrilled to know how this Moroccan Chicken Tagine fits into your week. Enjoy every bite!
Related update: Moroccan Chicken Tagine
Related update: Greek-Style Baked Fish: Fresh, Simple, and Delicious
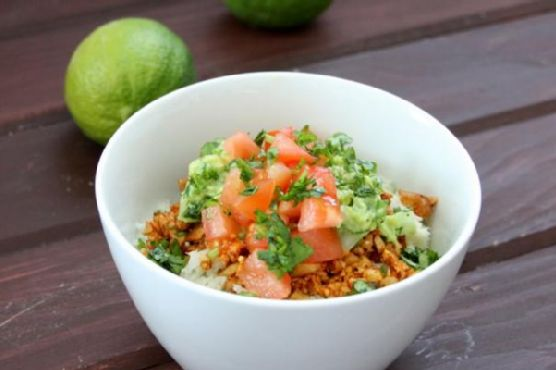
On a particularly hectic Tuesday evening, not too long ago, I found myself staring into the abyss of my pantry, wondering what on earth I could whip up for dinner. After a long day, the thought of a quick yet satisfying meal was all I needed to keep my spirits up. It was then that my eyes fell on a bag of walnuts tucked away in the corner, and inspiration struck. Enter: Vegan Taco Bowls with Cilantro Lime Cauliflower Rice. A burst of fresh flavors, a medley of textures, and the best part? It’s as comforting as it is healthy. This dish has become my go-to when I crave something hearty yet light, and the simplicity of it is just the cherry on top.
Jump to Recipe
What You’ll Need
What makes this dish a gem is that it’s likely you already have most of these ingredients at home. It’s about combining fresh goodness with a pinch of creativity.
- Avocado oil
- Cauliflower
- Red New Mexico chili powder
- Fresh cilantro
- Garlic powder
- Hass avocado
- Fresh jalapeño
- Fresh lime juice
- Onion
- Salt
- Tomato
- Walnuts
How to Make Vegan Taco Bowls with Cilantro Lime Cauliflower Rice
- Set the walnuts to soak in a bowl of water for 2-8 hours before you plan to prepare the taco meat. This will soften them up nicely for processing.
- Preheat your oven to 375°F and line a baking sheet with aluminum foil. This step will ensure easy clean-up later.
- Finely chop the cauliflower into rice-sized pieces, or give it a quick whirl in a food processor until you achieve the desired consistency. Toss with avocado oil and spread onto the baking sheet in an even layer.
- Bake the cauliflower for 18 minutes, giving it a stir halfway through to ensure it cooks evenly. You’ll know it’s done when it turns a lovely golden brown and smells slightly nutty.
- While the cauliflower rice is cooking, turn your attention to the guacamole and taco meat. Cut the avocado into large chunks and place them into a small bowl. Add the lime juice and mash until you reach a chunky puree or your preferred consistency.
- Stir in finely chopped cilantro, diced jalapeño, onion, and a pinch of garlic powder into the avocado mix. Set your guacamole aside — if you can resist a taste test, that is.
- Drain the soaked walnuts and place them into a small food processor. Pulse until they’ve reached a ground meat consistency; about 5-7 pulses should do the trick.
- Transfer the walnut mixture to a bowl and stir in the salt, cumin, garlic powder, and red chili powder. Set aside.
- Once the cauliflower is done, transfer it to a mixing bowl while still warm and toss with lime juice, cilantro, and a sprinkle of salt to taste.
- To assemble, layer 1 cup of your fragrant cauliflower rice into a bowl, add a hearty portion of taco nut meat, a generous dollop of guacamole, fresh tomatoes, and a sprinkling of fresh cilantro.
- Serve immediately with an additional slice of lime if desired. Enjoy the fresh, vibrant flavors dancing in your mouth!
Cook’s Notes
Here’s the deal: soaking the walnuts ahead of time is crucial for getting that perfect meaty texture. So, if you’re planning on making this, set a reminder or put a sticky note on your fridge. This dish is fabulous fresh, but it also makes for great leftovers. Store the components separately in airtight containers in the fridge — they’ll keep well for up to three days. Simply reassemble and enjoy when you’re ready for round two!
Make It Your Own
- Swap the walnuts with pecans for a sweeter, nuttier taco meat.
- Spice things up by adding a pinch of smoked paprika to the walnut mix for a deeper flavor.
- Make it extra creamy by adding a dollop of coconut yogurt on top of your assembled bowl.
- Include black beans for an extra protein punch and a heartier meal.
If you try this, I’d love to hear how it turns out — drop a comment or tag me on social media! Your kitchen adventures make this cooking journey all the more rewarding. Enjoy every delicious bite!
Related update: Vegan Taco bowls with Cilantro Lime Cauliflower Rice
Related update: Moroccan Chicken Tagine
It was one of those busy weeknights when I craved something comforting but didn’t have the time or energy for an elaborate meal. As I reached for a box of lasagna noodles, I had a lightbulb moment: Lasagna Roll Ups! They’re as indulgent and satisfying as regular lasagna but way more fun to assemble and serve. These little guys are perfect for when you want to impress with minimal fuss—plus, they make portion control a breeze. Trust me, once you try this recipe, you’ll never look at lasagna quite the same way again.
Jump to Recipe
What You’ll Need
Before you panic about a long list of ingredients, let me assure you: you probably have most of this stuff lurking in your kitchen. This dish is all about basics with a twist, relying on a few stars to shine.
- Lean ground beef
- Italian sausage
- Extra virgin olive oil
- Onion
- Garlic
- Italian seasoning
- Dried basil
- Canned tomato sauce
- Fire roasted diced canned tomatoes
- Canned tomato paste
- Water
- Black ground pepper
- Fresh parsley
- Ricotta cheese
- Egg
- Salt
- Parmesan Reggiano
- Mozzarella cheese
- Lasagna noodles
How to Make the World’s Greatest Lasagna Roll Ups
- In a large saucepan over medium heat, start browning your ground beef and Italian sausage. The aroma will make your taste buds dance with anticipation.
- In a separate pan, heat 1 tablespoon of olive oil on medium heat. Add in the onion, garlic, Italian seasoning, and basil. Let them cook for about 6-8 minutes until the onion is translucent and your kitchen smells like an Italian bistro.
- Combine the onion and garlic mixture with the meat. Stir in the fire roasted diced tomatoes, canned tomato sauce, tomato paste, water, black pepper, and 2 tablespoons of fresh parsley. Allow this symphony of flavors to simmer uncovered for 1 hour, letting it thicken and become deliciously fragrant.
- Meanwhile, bring a large pot of water to boil and cook the lasagna noodles for 8-10 minutes. Drain and rinse them with cold water to stop the cooking process.
- Preheat your oven to 375°F (190°C). In a small mixing bowl, mix together the remaining parsley, ricotta cheese, egg, and 1/2 teaspoon salt until everything is beautifully combined.
- Pour a thin layer of meat sauce into the bottom of a 9 x 13 glass baking dish—this is your tasty foundation.
- To assemble the roll ups, lay a noodle flat and spread with the cheese mixture. Sprinkle a bit of Parmesan Reggiano over the top, then roll it up snugly like a delicious little sleeping bag.
- Arrange all your roll ups in the baking dish, and generously cover them with more of the meat sauce. Top each roll with a slice of mozzarella cheese, and then cover the dish with foil.
- Bake in the oven for 20 minutes. Remove the foil and bake for an additional 10 minutes, letting the cheese turn golden and bubbly.
- Take them out and allow them to cool for at least 10 minutes before serving. This will help them firm up and makes serving a breeze.
Cook’s Notes
A few things to keep in mind: Don’t rush the sauce. Letting it simmer gives the flavors time to deepen. If you’re in a hurry, you can prep the sauce the day before—it only gets better with time! Lasagna Roll Ups also freeze beautifully. Just assemble them without baking, wrap tightly, and freeze. To cook, thaw in the fridge overnight and bake as directed.
Make It Your Own
If you feel like experimenting, here are a few ways to mix things up:
- Swap the ground beef for ground turkey or chicken for a lighter version.
- Make it vegetarian by using mushrooms and zucchini instead of meat.
- Add a kick by stirring some red pepper flakes into the cheese mixture.
- Use whole wheat or gluten-free noodles for a different texture or dietary needs.
If you try this, I’d love to hear how it turns out—drop a comment or tag me! Whether it’s a weeknight dinner or a casual get-together, these roll ups are sure to win hearts and palates alike. Enjoy!
Related update: How to make the World’s Greatest Lasagna Roll Ups
Related update: Stuffed Pork Tenderloin with Marsala-Port Sauce

It was one of those early spring evenings when the air is crisp enough to hint at winter’s end but not quite warm enough to ditch the cozy layers. I found myself staring into the fridge, hunting for something more exciting than a leftover salad or a reheated pizza slice. Then, inspiration struck — I had smoked salmon tucked away and a craving for something creamy yet light. Enter Bigoli with smoked salmon — a dish that feels fancy, but not in that “I’ve been cooking for hours” kind of way. It’s the kind of meal that impresses your taste buds without demanding too much attention, perfect for those nights when you want flavor without fuss.
Jump to Recipe
What You’ll Need
This recipe is a delightful mix of pantry staples and a few fresh ingredients. Chances are you already have most of this on hand, and trust me, the flavors come together in a way that feels oh-so-gourmet.
- Pine nuts – these bring a nutty richness that complements the salmon.
- Fresh bigoli pasta – if you can’t find it, a similar hearty pasta works.
- Olive oil
- Onion, chopped
- Garlic, minced
- Dry white wine – adds depth; nothing too sweet, please.
- Lemon juice
- Lemon zest – divided into 1 tablespoon + 1 tablespoon for that zesty zing.
- Cream – ensures everything is luscious and rich.
- Fresh chives, parsley, or dill, chopped
- Smoked salmon, cut into bite-sized pieces
- Black pepper
How to Make Bigoli with Smoked Salmon
- Toast the pine nuts in a dry skillet over medium heat. Keep them moving until they’re golden and fragrant, about 3-4 minutes. Set aside.
- Cook the bigoli pasta according to package instructions until al dente. Drain and drizzle with a little olive oil to prevent sticking.
- In a large pan, heat the olive oil over medium heat. Add the onion and sauté until it’s soft and translucent, about 5 minutes.
- Add the garlic and cook for another 30 seconds, just until fragrant.
- Pour in the dry white wine and let it simmer until reduced by half, about 2 minutes.
- Stir in the lemon juice and 1 tablespoon of lemon zest, followed by the cream. Let it gently simmer until slightly thickened, usually 3-4 minutes.
- Reduce the heat to low and add the smoked salmon and drained pasta to the pan, tossing everything to coat well in the creamy sauce.
- Toss in the chives and toasted pine nuts, stirring gently to combine.
- Finish with a generous sprinkle of black pepper and the remaining tablespoon of lemon zest. Serve immediately and savor the blend of textures and flavors.
Cook’s Notes
This dish is best enjoyed fresh, but if you have leftovers, store them in an airtight container in the fridge for up to two days. Reheat gently on the stove with a splash of cream or water to bring back its saucy glory. Avoid overcooking the salmon in the reheating process, as it can become tough. If you’re thinking ahead, you can prep the sauce components — the onion, garlic, and wine — a day in advance, making the final cooking a breeze.
Make It Your Own
- Switch up the protein by swapping the smoked salmon for crispy tofu or grilled chicken.
- If you’re out of bigoli pasta, any robust pasta like linguine or fettuccine will do the trick.
- For a dairy-free twist, substitute the cream with coconut cream and omit the parmesan.
- Introduce a veggie boost with a handful of fresh spinach or peas added in with the salmon.
If you try this, I’d love to hear how it turns out — drop a comment or tag me! It’s amazing how some simple ingredients can transform into something special. Enjoy every bite!
Related update: Bigoli with smoked salmon
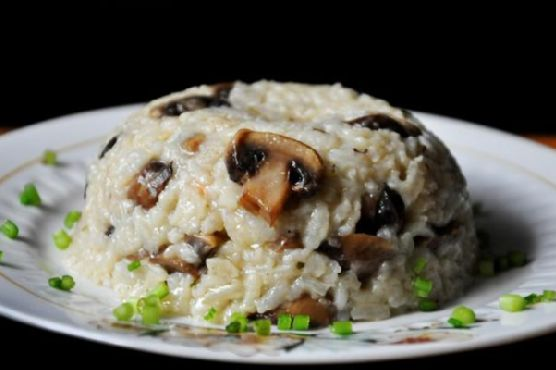
Last Tuesday, I found myself staring into the depths of my pantry, desperately seeking inspiration for dinner. It was one of those weeks where time slipped through my fingers, and suddenly, it was 6 PM, and my stomach was growling loud enough to scare the cat. That’s when I stumbled upon my trusty bag of brown rice and a can of mushrooms. With a bit of onion, a splash of oil, and a pinch of this and that, I transformed these humble staples into a warm, fragrant Brown Rice Mushroom Pilaf. It’s the kind of dish that feels cozy and effortless, yet tastes like you put in way more effort than you actually did. Perfect for those busy nights when you need something quick but also crave-worthy.
Jump to Recipe
What You’ll Need
This dish relies on a few simple ingredients, and chances are you already have most of them lurking in your kitchen.
- 1 tablespoon unrefined sunflower oil
- 1 medium onion, chopped
- 1 can (about 12 oz) of fresh mushrooms, drained and sliced
- 1 cup brown rice
- 2 cups water
- Sea salt to taste
- Ground pepper to taste
How to Make Brown Rice Mushroom Pilaf
- Start by heating the sunflower oil in a large saucepan over medium heat. You want the oil to be shimmering but not smoking.
- Add the chopped onion and sliced mushrooms. Sauté for about 5 minutes, stirring occasionally, until the onion is translucent and the mushrooms are golden and fragrant.
- Stir in the brown rice, ensuring every grain is coated with the oil and mingling with the onions and mushrooms.
- Pour in the water, then sprinkle with sea salt and ground pepper. Give it a gentle stir to combine.
- Bring the mixture to a boil. Once it’s bubbling, reduce the heat to low, cover the pan, and let it simmer for 30 minutes.
- After 30 minutes, remove the pan from the heat but keep it covered. Let it rest for about 10 minutes, allowing the rice to absorb any remaining liquid.
- Fluff the pilaf with a fork before serving. Taste and adjust the seasoning if needed.
Cook’s Notes
If you find that the rice hasn’t absorbed all the water after resting, simply return it to the heat for a few more minutes. This dish can be made ahead of time and stored in the fridge for up to four days. Just reheat it gently on the stove or in the microwave, adding a splash of water to prevent it from drying out. Avoid using high heat when reheating, as it might make the rice too tough.
Make It Your Own
- Swap the canned mushrooms for fresh ones, like cremini or shiitake, for a richer flavor.
- Stir in a handful of frozen peas during the last few minutes of cooking for a pop of color and sweetness.
- For a protein boost, add cooked shredded chicken or crispy tofu just before serving.
- Mix in some chopped fresh herbs like parsley or thyme to brighten the dish.
If you try this, I’d love to hear how it turns out — drop a comment or tag me! Cooking is all about experimenting and making a dish your own, so don’t be shy to tweak it to your taste. Enjoy every bite!
Related update: Brown Rice Mushroom Pilaf
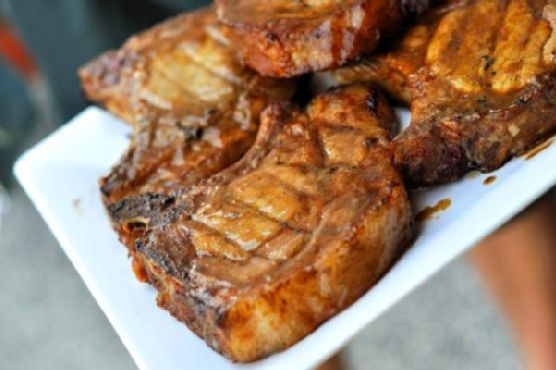
Picture this: it’s a busy Tuesday evening, and I’m racing against the clock to get dinner ready before my favorite show starts. My fridge is a chaotic jigsaw puzzle of assorted jars and half-emptied condiments. I’m craving something hearty but not the usual weekday fare that I’ve cycled through a million times. Enter the Sweet Mustard BBQ Pork Chops. They’re my go-to when I want something that feels special without the fuss of a complicated recipe. These pork chops are a harmony of sweet, tangy, and savory flavors that dance on your taste buds, all thanks to a marinade that takes about five minutes to throw together. Trust me, you’ll want these on your dinner rotation.
Jump to Recipe
What You’ll Need
If you’re like me, you might already have most of these ingredients hanging out in your pantry and fridge—the kind of staples that are real lifesavers.
- 4 bone-in pork chops
- Dijon mustard
- 3 cloves of garlic, minced
- Coarsely ground black pepper
- Honey
- Juice of one lemon
- Soy sauce
How to Make Sweet Mustard BBQ Pork Chops
- In a medium-sized bowl, whisk together the honey, Dijon mustard, lemon juice, soy sauce, and minced garlic until smooth. You want the honey to meld into the mix without a trace—it might take a minute or two.
- Place your pork chops in a large resealable plastic container or a trusty zip-top bag. Pour the marinade over them, making sure every inch of those chops gets some love.
- Seal the container or bag and pop it into the fridge. Let those flavors get cozy for at least 4 hours, but if you can swing it, overnight is where the magic happens. Give the container a shake or the bag a turn every now and then.
- When you’re ready to cook, fire up your grill to medium-high heat. Take the pork chops out of the fridge and let them come to room temp while you prep the grill.
- Sprinkle freshly cracked black pepper on both sides of the chops. The pepper adds a nice bit of heat to balance the sweetness.
- Grill the pork chops for about 5-7 minutes per side. You’re looking for a beautiful char and an internal temp of 145°F to 150°F. Feel free to brush on some leftover marinade as they cook, but if they start to burn, move them to a cooler spot on the grill.
- Once done, transfer the chops to a platter, cover them with foil, and let them rest for 5 minutes. This step is key—juices will redistribute, making every bite moist and tender.
- Serve these beauties with your favorite sides and watch them disappear.
Cook’s Notes
A couple of things I’ve picked up along the way: First, make sure to use bone-in pork chops. They’re less likely to dry out on the grill, and the bone adds some lovely flavor. Also, when you’re grilling, keep a little extra marinade handy for basting, but do it sparingly towards the end to avoid burning. If you’re new to grilling, a meat thermometer is your best friend—it takes the guesswork out of knowing when the meat is done.
For leftovers (if there are any!), store them in an airtight container in the fridge for up to three days. They’re fantastic cold in a salad or warmed up for a quick lunch.
Make It Your Own
I get it—sometimes you want to throw in a twist. Here are a few ideas to switch things up:
- Swap the pork for crispy tofu. Just press and cube the tofu, and marinate it the same way. Grill until it’s golden and crisp.
- Try adding a tablespoon of sriracha to the marinade for a sweet and spicy kick.
- If you’re out of lemon, lime juice works beautifully for a slightly different tang.
- Throw in some fresh rosemary or thyme into the marinade for an herbal note that complements the sweetness.
If you try this, I’d love to hear how it turns out—drop a comment or tag me! Whether you stick to the script or put your own spin on it, these pork chops are a winner. Enjoy the flavors and the simplicity, and happy cooking!
Related update: Sweet Mustard BBQ Pork Chops
Related update: Mini Stuffed Mexican Bell Peppers

Last Tuesday, in the middle of a chaotic week, I found myself staring at the fridge, desperate for something that felt like a hug in meal form. With a 7 PM deadline looming and my brain fried from Zoom meetings, I needed comfort food that wouldn’t take forever. Enter: Cheesy Pasta in a Pot. This dish is my go-to for those nights when I crave something hearty and fuss-free. It’s got layers of rich flavors wrapped in gooey cheese, and the best part is that I can make it with pantry staples I already have on hand. It’s the kind of meal that turns a hectic evening into a cozy, personal retreat. Trust me, one bite and you’ll feel like you’re wrapped in a warm blanket.
Jump to Recipe
What You’ll Need
You might find that you already have most of these ingredients waiting for you. It’s a pantry-friendly recipe, with the kind of ingredients that beg to be transformed into something special.
- 1 pound lean ground beef
- 1 medium onion, chopped
- 2 cloves garlic, minced
- 1 jar (24 ounces) spaghetti sauce
- 1 can (14.5 ounces) stewed tomatoes, undrained
- 1 can (4 ounces) sliced mushrooms, undrained
- 12 ounces shell pasta
- 4 slices provolone cheese
- 2 cups shredded mozzarella cheese
How to Make Cheesy Pasta in a Pot
- Preheat your oven to 350°F (175°C). This sets the stage for the magic to happen.
- In a large pan, heat a little oil over medium-high heat and add the ground beef. Cook, stirring often, until the meat is browned and crumbly. The kitchen should start to smell amazing as the beef sizzles away.
- Drain any excess fat from the pan, because nobody likes greasy pasta.
- Add the chopped onions and minced garlic to the pan. Stir them in and let everything cook until the onions are soft and fragrant.
- Pour in the jar of spaghetti sauce, stewed tomatoes, and the undrained mushrooms. Stir well to combine all these saucy elements. Let this simmer for about 20 minutes, stirring occasionally, until the onions are tender and everything is melded together beautifully.
- Meanwhile, cook the shell pasta according to the package directions. Once cooked, drain and rinse the pasta with cold water to stop the cooking process.
- In a deep casserole dish, layer half of the pasta. Top that with half of the meat sauce mixture.
- Cover this first layer with slices of provolone cheese. It’s like laying a cheesy blanket over the pasta.
- Repeat with the remaining pasta and meat sauce, finishing with an ample topping of mozzarella cheese.
- Cover the casserole with foil and bake in your preheated oven for 35-40 minutes. The anticipation should be building as the kitchen fills with mouth-watering aromas.
- Remove the cover and continue baking until the mozzarella is melted and just begins to brown, about 5 more minutes.
- Serve hot, and enjoy the cheesy, comforting goodness.
Cook’s Notes
Here are a few things I’ve learned along the way. First, don’t skimp on letting the sauce simmer — the flavors deepen beautifully during this time. If you’re prepping this dish ahead of time, assemble everything, cover it, and pop it into the fridge. When you’re ready to bake, just add a few extra minutes to the cooking time. Leftovers, if there are any, reheat nicely in the oven; just cover with foil to prevent the cheese from getting too brown.
Make It Your Own
Feel free to tweak this recipe to suit your taste buds or dietary needs:
- Swap the ground beef for ground turkey or chicken for a lighter version.
- Use whole wheat or gluten-free pasta if you’re looking for a healthier or allergy-friendly option.
- Add a handful of fresh spinach or kale to the sauce for an extra boost of greens.
- For a vegetarian version, replace the meat with a can of drained and rinsed chickpeas or black beans.
If you try this Cheesy Pasta in a Pot, I would love to hear how it turns out for you! Drop a comment below or tag me on social media with your cheesy creations. Enjoy every comforting bite!
Related update: Cheesy Pasta in a Pot
Related update: Brown Rice Mushroom Pilaf

Last Tuesday, I found myself staring at a bag of carrots in my fridge. There they were, looking slightly disheveled and in need of a purpose. It was one of those days when I craved something sweet yet healthy, something that didn’t scream “I’m trying too hard.” Enter my raw carrot cake. It’s a little slice of indulgence that’s as wholesome as it is easy to make. No oven, no fuss, just pure deliciousness. The magic of this recipe lies in the simplicity and the satisfying blend of warm spices mingling with the natural sweetness of fruits. Trust me; this cake is your ticket to dessert heaven on a weeknight hustle.
Jump to Recipe
What You’ll Need
Ah, the ingredient list that’s as generous as your pantry. Chances are, you already have most of these lying around.
- Carrots
- Raisins
- Dried apricots
- Mixed peel
- Date purée
- Almond flour
- Desiccated coconut
- Ginger powder
- Cinnamon powder
- Cloves
How to Make Raw Carrot Cake
- Start by pulsing the carrots, raisins, date purée, and spices in a blender. You want a rough blend, where the carrots still have some texture. The aroma of ginger and cinnamon will instantly hit you, setting the vibe just right.
- Next, drop in the chopped apricots and mixed peel. Pulse a couple of times until they are well incorporated but not fully obliterated — those little bursts of flavor are the hidden gems of this cake.
- Transfer the mixture into a large bowl. Add the almond flour and desiccated coconut, and mix well. You’ll notice the mixture coming together, thick and cohesive, almost begging to be molded.
- Press the mixture into a large cake pan. Ensure it’s even and smooth out the top with a spatula. Refrigerate uncovered until it sets, which should take about an hour.
- Once set, cut the cake into bite-sized squares. You have the option to frost them with whipped cream or roll them into balls and dust with desiccated coconut for an added flair.
Cook’s Notes
A few things to keep in mind while embarking on this carrot cake journey. The trickiest part is pulsing the mixture just right. You don’t want a puree; the goal is a chunky texture. As for storing, these delightful squares can be kept in the fridge for up to a week. If you’re planning ahead, you can make the mixture a day before and let it sit in the fridge, setting aside those frosting duties for the last minute. Just remember, if you opt for whipped cream, apply it just before serving to retain its fresh appeal.
Make It Your Own
This recipe is your canvas, and a few tweaks can lead to new masterpieces.
- Swap the raisins for dried cranberries to add a tart twist.
- Use walnut or pecan flour instead of almond flour for a different nutty flavor.
- For a tropical vibe, add some crushed pineapple (well-drained) into the mix.
- If you’re a fan of spice, add a pinch of nutmeg to the mixture for an extra kick.
If you try this, I’d love to hear how it turns out — drop a comment or tag me! I can’t wait to see your take on this raw carrot cake delight.
Related update: Raw Carrot Cake
Related update: Cheesy Pasta in a Pot
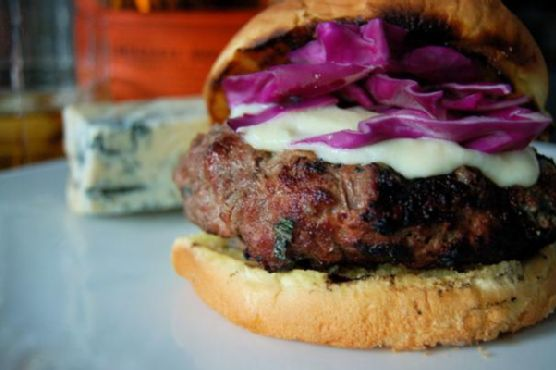
Picture this: It’s a chilly Tuesday night, and I’m standing in front of my fridge, staring at the contents with that familiar, slightly desperate hope that inspiration will strike. As I pull out a pound of ground sirloin, I remember the half-full bottle of Irish whiskey on my shelf. That’s when it hits me — the Blarney Burger. A burger so delightfully infused with flavors, it feels like an Irish pub in your very own kitchen. It’s got a hint of whiskey, a punch of garlicky goodness, and the creamy tang of piccante Gorgonzola. It’s quick enough for a weeknight but fancy enough to make your Netflix binge feel like a special occasion. Ready to create some burger magic?
Jump to Recipe
What You’ll Need
So, most of this is probably hanging out in your kitchen already, waiting for its moment to shine. The secret weapons here are the whiskey and the Gorgonzola. They’re the dynamic duo that transforms this from a regular burger into the Blarney Burger.
- 1 pound ground sirloin
- 2 tablespoons Irish whiskey
- 1 large egg
- 1/2 cup sweet diced onion
- 2 cloves fresh garlic, minced
- 1/2 cup piccante Gorgonzola crumbles
- Salt and pepper, to taste
- 2 tablespoons butter
- 1 cup shredded purple cabbage
- 4 hamburger buns
- 1 tablespoon Worcestershire sauce
How to Make The Blarney Burger
- First, let’s start with our Irish Mustard Sauce. In a small saucepan, combine 1 tablespoon cornstarch, 2 teaspoons sugar, 1 teaspoon dry mustard, 1/2 teaspoon salt, 1 cup water, 1 tablespoon butter, 1/4 cup vinegar, and 1 teaspoon horseradish. Whisk everything together over medium heat until it’s smooth and thick like pudding. Set aside.
- In a large bowl, mix the ground sirloin, Irish whiskey, egg, sweet diced onion, minced garlic, and a dash of salt and pepper. Use your hands — it’s messy but worth it — to combine everything until just mixed.
- Shape the meat mixture into 4 patties. Don’t pack them too tight; you want a tender burger.
- Heat a skillet or grill over medium-high heat. Cook the patties for 4-5 minutes per side. You’re looking for a deep brown crust, while the inside stays juicy.
- While the burgers are cooking, create a Gorgonzola butter-wash by melting the remaining Gorgonzola crumbles with 2 tablespoons of butter in the microwave. Whisk them until smooth.
- Brush the Gorgonzola butter-wash on the cut sides of the buns. Toast them on the upper or outer edges of the grill until they’re golden and slightly crispy. It’s all about that crunch!
- Assemble your burgers by placing a patty on each bun bottom, then topping with a heap of shredded purple cabbage and a generous drizzle of your Irish Mustard Sauce. Pop on the top bun, and you’re ready to dig in.
Cook’s Notes
A few quick tips to ensure your Blarney Burger is nothing short of legendary:
– Don’t overwork the meat when forming the patties. The looser they are, the juicier they’ll be.
– If you find the mixture too wet due to the whiskey, add a bit more diced onion to bind it.
– The Irish Mustard Sauce can be made ahead and stored in the fridge. Just warm it up slightly before serving.
– Leftover patties (if there are any!) can be stored in the fridge for up to two days. Reheat gently on the stove to keep them juicy.
Make It Your Own
Here are a few ideas to tailor the Blarney Burger to your taste buds:
- Swap the ground sirloin for turkey if you’re feeling a lighter vibe. It’s surprisingly good with the Irish whiskey!
- Trade the piccante Gorgonzola for sharp cheddar if you’re not a fan of blue cheese. You’ll still get a great tangy flavor.
- For a spicier kick, add a tablespoon of crushed red pepper to the meat mixture.
- Want to go vegetarian? Use crispy tofu slices marinated in a little Worcestershire and whiskey, then seared to golden perfection.
If you try this, I’d love to hear how it turns out — drop a comment or tag me! Your kitchen adventure could inspire my next one. 🍀
Related update: The Blarney Burger
Related update: Beef Braised In Red Wine
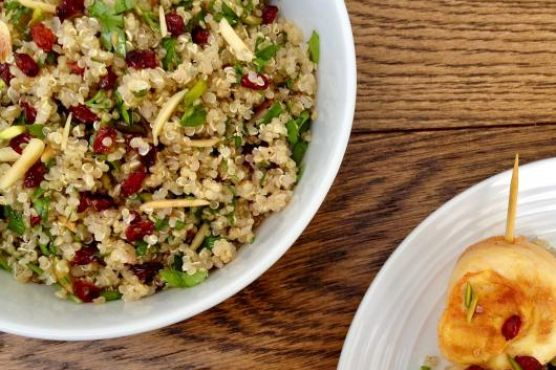
On a chilly Tuesday evening, I found myself rummaging through my pantry, desperate for something that felt like a hug in a bowl but wouldn’t keep me hostage in the kitchen. I wanted something earthy yet vibrant, complex but not fussy. That’s when a bag of quinoa caught my eye, nestled behind a family of lentils. With a little inspiration from the tangy barberries I’d recently discovered at the market and a stash of nuts that begged to be toasted to life, this Quinoa Salad with Barberries & Nuts was born. It’s the kind of dish that fills the kitchen with warm, toasty aromas and feels fancy enough to impress, but is simple enough to whip up on a weeknight.
Jump to Recipe
What You’ll Need
There’s a good chance you already have most of these ingredients hanging around, just waiting for a chance to shine. Here’s what you’ll gather:
- Quinoa – the blank canvas for all the flavor.
- Water – to cook the quinoa to fluffy perfection.
- Salt – always the unsung hero.
- Olive oil – for toasting and dressing.
- Barberries – those tangy pops of flavor.
- Slivered almonds – for that nutty crunch.
- Slivered pistachios – because why not double down on nuts?
- Coriander – a fresh, herby kick.
- Mint – because everything deserves a little minty brightness.
How to Make Quinoa Salad with Barberries & Nuts
- Start by rinsing the quinoa under cool running water using a sieve. This little bath removes any bitterness. Once rinsed, drain thoroughly.
- In a medium saucepan, pour boiling water over the quinoa. Add a generous pinch of salt, stir, and cook over medium-low heat. You’re looking for the quinoa to be tender yet retain a slight bite. Drain again in a sieve if needed.
- While the quinoa is doing its thing, turn your attention to the barberries. Pick them over, rinse them clean in a sieve, and let them dry a bit on some kitchen paper.
- In another saucepan, heat 1 tablespoon of olive oil over medium heat. Toss in the slivered almonds and toast them lightly. When they’re golden and fragrant, add the pistachios. Keep an eye on them; nuts can burn quickly!
- Add the rest of the olive oil and the rinsed barberries to the pan with the nuts. Cook briefly until the barberries are shiny and slightly puffed. Remove from heat.
- Save a tablespoon of the nut and barberry mixture for garnish later. Combine the remaining nut-barberry mixture with the cooked quinoa along with the chopped coriander and mint.
- Return the quinoa mixture to the pot. Cover with a lid and let it sit over low heat for about ten minutes until everything is well heated and steam is rising. The aroma will make it hard to wait!
- Fluff the quinoa with a fork, drizzle a little extra olive oil, give it a twist of black pepper if you’re feeling it, and then sprinkle over the reserved nut-barberry mix and herbs.
- Serve this beauty as a star on its own or let it play the perfect sidekick to any main dish.
Cook’s Notes
I won’t lie, this dish is forgiving. Quinoa can be prepped a day ahead and kept in the fridge, making this a great make-ahead option. If you end up with leftovers (lucky you!), it holds up well in the fridge for up to 3 days. Just give it a gentle reheat on the stove or enjoy it cold—it’s pretty versatile. Be mindful when toasting the nuts; they love to go from golden to charred in a heartbeat.
Make It Your Own
- Swap the barberries for dried cranberries if they’re more readily available. The sweetness will complement the nuts beautifully.
- Not a fan of pistachios? Use toasted hazelnuts instead for an equally delicious crunch.
- For a protein boost, toss in some shredded cooked chicken or crispy tofu cubes.
- If coriander and mint aren’t your jam, try parsley and basil for a different herby note.
If you try this, I’d love to hear how it turns out—drop a comment or tag me on social media! It’s always a joy to see your creations and hear your twists on the recipe. Enjoy the journey from pantry to plate!
Related update: Quinoa Salad with Barberries & Nuts
Related update: Garlic Lime Grilled Chicken Salad
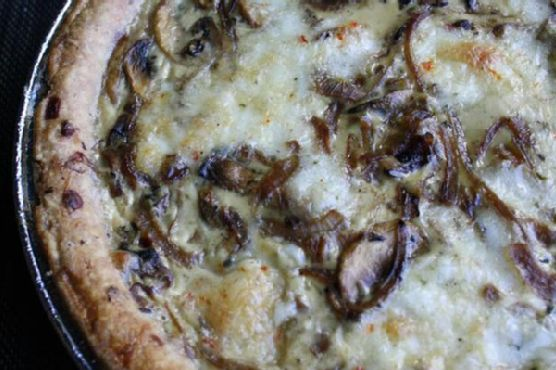
The other day, I found myself staring into the depths of my fridge, battling that familiar weeknight dilemma: what to make for dinner that feels both comforting and a little bit special. The answer came subtly as I caught sight of a lone pie shell resting on the bottom shelf. Voilà — Caramelised Onion and Mushroom Quiche! It’s the kind of dish that fills your kitchen with the most irresistible aroma, promising warmth and satisfaction in every bite. Plus, it’s a breeze to pull together with ingredients you probably already have lounging in your pantry and fridge. Let me tell you, this quiche is your new best friend for those hectic days when you crave something homemade but without the fuss.
Jump to Recipe
What You’ll Need
This ingredient list is delightfully straightforward, and chances are you already have most of these at home. Here’s what you’ll need to whip up this delicious quiche:
- A pre-made nine-inch pie shell
- 2 tablespoons of olive oil
- 2 large white onions, thinly sliced
- 2 cloves of garlic, minced
- 1/2 teaspoon of dried chilli flakes
- 8 ounces of mushrooms, sliced
- 1 teaspoon of dried thyme
- 3 eggs
- 1 cup of half and half cream
- 1 cup of grated havarti cheese
- Salt and pepper, to taste
How to Make Caramelised Onion and Mushroom Quiche
- Preheat your oven to 400°F. Take your nine-inch pie shell and dock it with a fork to prevent it from puffing up. Slide it into the oven and let it bake for 10 to 15 minutes until it’s lightly golden.
- While the pie shell is crisping up, heat the olive oil in a large skillet over medium-high heat. Add the onions, garlic, and chilli flakes. Stir occasionally and let them cook until the onions are rich, brown, and caramelised, about 10 minutes.
- Next, toss the mushrooms into the skillet. Keep the heat on high and let the mushrooms caramelise as well, which should take around 5 minutes. The mushrooms will soak up all those lovely flavors. Once they’re ready, remove the skillet from the heat and stir in the thyme, salt, and pepper.
- In a large mixing bowl, beat the eggs together with the half and half cream. Stir in half of the grated havarti cheese. Combine this mixture with the onion-mushroom blend, mixing thoroughly until everything is well integrated.
- Place the pre-baked pie shell on a cookie tray — this is your shield against any unexpected spills. Pour the filling into the pie shell, spreading it evenly. Sprinkle the remaining cheese over the top.
- Reduce the oven temperature to 375°F. Bake the quiche until the filling is set — it will be firm to the touch and have a gorgeous golden hue. This should take about 25 to 30 minutes. Serve warm and get ready for those taste buds to rejoice!
Cook’s Notes
Cooking can sometimes be a bit unpredictable, so here are a few tips to ensure your quiche turns out perfect every time. First, make sure those onions are well caramelised; they should be a deep golden brown. This adds depth and sweetness to the quiche. Don’t rush the process — good things take time! Also, remember to taste your filling before adding it to the shell to adjust the seasoning. If you want to make this ahead, you can prepare the filling and bake the pie shell a day before; just assemble and bake right before serving. Leftovers (if any!) can be stored in the fridge and reheated gently in the oven.
Make It Your Own
This quiche is wonderfully versatile. Here’s how you can mix it up:
- Swap the mushrooms for crispy tofu if you’re looking for a vegetarian protein boost.
- Use Swiss cheese or even cheddar if you prefer a sharper flavor profile.
- Throw in some baby spinach with the mushrooms for extra greens.
- Substitute the dried thyme with fresh basil for a different herbal note.
If you try this, I’d love to hear how it turns out — drop a comment or tag me on social media! Cooking is all about experimenting and most importantly, enjoying every step of the way. Can’t wait to hear from you!
Related update: Caramelised Onion and Mushroom Quiche
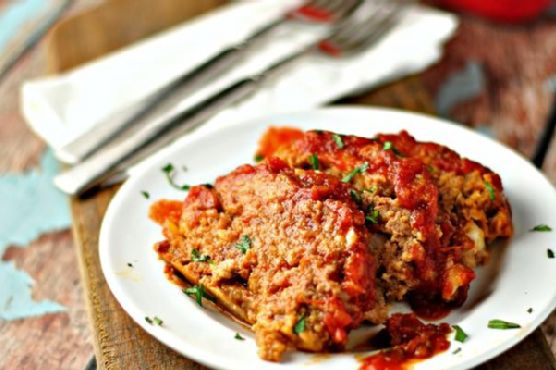
Picture this: it’s a chilly Wednesday evening, the kind when the sun sets way too early, and you’re standing in the kitchen with a hungry family waiting in the wings. You need something comforting, something that smells like home. Enter my Tasty Easy Meatloaf. It’s the perfect solution for those mid-week blues when time and patience are in short supply. This isn’t just any meatloaf—it’s juicy, flavorful, and topped with a tangy-sweet glaze that’ll make you wonder why you ever made it any other way. Plus, it’s a straightforward, one-bowl wonder that even the busiest of us can tackle. Trust me, this is the kind of comforting dish that makes life just a little bit easier. Jump to Recipe
What You’ll Need
This ingredient list is delightfully simple and, with any luck, your pantry already holds the key players.
- Ground beef
- Bulk sausage
- Breadcrumbs
- Diced onion
- Egg
- Salt
- Pepper
- Cumin
- Garlic powder
- Canned tomato sauce
- Cider vinegar
- Brown sugar
- Whole grain mustard
- Water
- Worcestershire sauce
How to Make Tasty Easy Meatloaf
- Preheat your oven to 350°F. You want it warm and welcoming, just like this meatloaf will be.
- In a large bowl, combine the ground beef, bulk sausage, breadcrumbs, diced onion, egg, salt, pepper, cumin, and garlic powder. Use your fingers to mix until just combined—overmixing can make the meatloaf tough.
- Gently shape the mixture into a loaf and place it in a shallow, ovenproof pan. It’s like shaping a sandcastle but more delicious.
- In a small bowl, stir together the remaining canned tomato sauce, cider vinegar, brown sugar, whole grain mustard, water, and Worcestershire sauce. This is your glaze, sweet and tangy perfection.
- Pour the glaze over the meatloaf. Make sure it gets nice and cozy with your loaf.
- Bake in the oven for about an hour, until the meatloaf is cooked through and the house smells inviting. Every 20 minutes, lovingly spoon some of the glaze back over the top to keep it juicy and flavorful.
- Remove from the oven and let it rest for 10 minutes. This step is crucial for sealing in the juices.
Cook’s Notes
This meatloaf is a forgiving dish, but here are a few tips to ensure success:
- Make sure not to overwork the meat mixture; it should just hold together.
- The glaze is your best friend—baste frequently for extra flavor.
- Leftovers make fantastic sandwiches, so don’t be shy about doubling the recipe.
- Store leftovers in the fridge for up to 3 days, or freeze for up to a month for a quick meal later.
Make It Your Own
- Swap the ground beef for ground turkey for a lighter version.
- Add chopped bell peppers to the meat mixture for a bit of sweetness and color.
- For a spicy kick, mix in some diced jalapeños with the onions.
- Vegetarian? Replace the meat with a mix of lentils and mushrooms for a hearty substitute.
If you try this, I’d love to hear how it turns out—drop a comment or tag me! Your kitchen adventures are my favorite kind of stories. Bon appétit!
Related update: Tasty Easy Meatloaf
Related update: Hard-Boiled Egg Gratin In A Bechamel Sauce
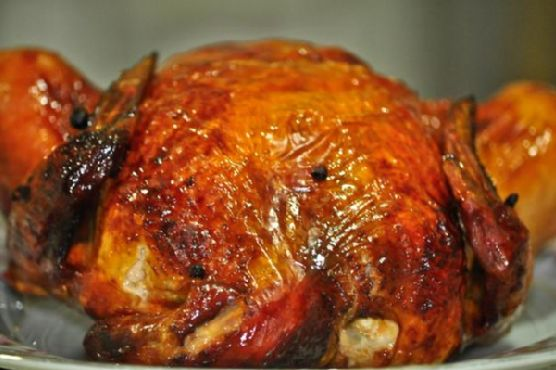
The other night, I found myself staring into my pantry, that familiar feeling of “what on earth can I make for dinner?” creeping in. It was one of those long days where you’re just too exhausted to whip up anything too complicated. That’s when I remembered Turbo Chicken. It’s the perfect mix of comforting and impressive, with just the right amount of effort to make you feel like a kitchen hero without breaking a sweat. The best part? The crispy skin and juicy meat are practically a hug on a plate. So, let’s dive in together!
Jump to Recipe
What You’ll Need
The beauty of this dish lies in its simplicity. Chances are you already have most of these on hand, so no need for a last-minute grocery run. Here’s what you’ll gather:
- Whole chicken
- Soy sauce
- Salt
- Calamansi (or lemon/lime if you can’t find it)
- Baking flour dissolved in water
- Gravy from the turbo broiler drippings
- Bell pepper
How to Make Turbo Chicken
- Start by giving that chicken a loving rubdown with soy sauce, salt, and calamansi. Don’t be shy—massage it inside and out as if you’re making it the most relaxed chicken ever.
- Let the chicken marinate for about 10-20 minutes on each side. This is the perfect time to set up your turbo broiler and perhaps sip on a glass of something refreshing.
- Place a small baking pan at the bottom of the turbo broiler to catch all those wonderful drippings. Trust me, you’ll want this later for the gravy magic.
- Set the chicken in the turbo broiler, crank up the heat to 250 degrees, and let it work its magic for 30 minutes.
- After 30 minutes, turn the chicken over. Give it another 10 minutes to achieve the crispiest golden brown skin you’ve ever seen.
- While the chicken finishes up, grab those drippings and pour them into a small pan over low heat. Stir in the flour dissolved in water until silky smooth, then add salt, pepper, and a splash of calamansi to taste.
- Once your chicken is done and rested, carve it up and drizzle it with that beautiful gravy. Voilà! Dinner is served.
Cook’s Notes
Let me just say, the turbo broiler can be your best friend in the kitchen if you let it. It cooks everything evenly and gives you that crispy skin we all crave. Just be sure to watch your chicken closely after flipping it—those last 10 minutes can make all the difference between perfect and a tad too crispy.
Got leftovers? Lucky you! Store them in an airtight container in the fridge, and they’ll keep beautifully for up to three days. Reheat gently to keep all those juices locked in.
Make It Your Own
Feel like getting creative? Here are a few fun twists:
- Swap the chicken for some crispy tofu for a vegetarian-friendly version. Just adjust the cooking time accordingly.
- Add a hint of heat by including some chili flakes in your marinade.
- Throw in some garlic cloves inside the chicken cavity for an aromatic twist.
- Mix in a tablespoon of honey with your soy sauce marinade for a sweet and savory combo.
If you try this, I’d love to hear how it turns out — drop a comment or tag me! Can’t wait to see how you make Turbo Chicken your own. Happy cooking, friends! 🐔
Related update: Turbo Chicken
Related update: Tasty Easy Meatloaf

It was one of those evenings where the day just didn’t stop. You know the kind—I spent too long in traffic, the grocery store was packed, and let’s not even talk about the email avalanche. As I finally stepped into the kitchen, I was craving something that’s both comforting and invigorating. I remembered a recipe tucked away for a rainy day, one that combines creamy coconut with warming spices and fresh fish—Linefish Simmered In A Spiced Coconut Gravy. It’s the kind of dish that feels like a warm hug but also has a playful kick to it. The real beauty? Once you’ve got everything prepped, it practically cooks on its own, allowing you to sip a glass of your favorite white wine as the magic happens.
Jump to Recipe
What You’ll Need
I promise, most of these ingredients are pantry staples, lurking in the back of your cupboard just waiting for their time to shine. And those that aren’t, well, they’re totally worth the trip.
- Garlic
- Fresh thumb-sized piece of ginger
- Red chilli powder
- Turmeric
- Salt
- Tamarind pulp
- Vegetable oil
- Brown mustard seeds
- Fenugreek seeds
- Whole cloves
- White whole cardamom pods
- Thumb-length quill of cinnamon
- Onions
- Coconut milk
- Powdered cumin
- Black freshly milled pepper
- Fresh cilantro
- White fresh firm-fleshed fish fillets
- White fresh kilograms (assuming this means the right quantity for your crowd!)
How to Make Linefish Simmered In A Spiced Coconut Gravy
- Start by cutting the fish into large, hearty chunks. Toss them into a bowl, sneaking in half of that aromatic garlic and ginger while you’re at it. Sprinkle generously with chilli powder, turmeric, and a bit of salt. Give it all a good mix and let it chill in the fridge for a cool 30 minutes.
- While your fish is taking a breather, soften that tamarind pulp in a cup of warm water. It’s like giving it a little spa treatment for 20 minutes.
- Heat the vegetable oil in a large saucepan over a high flame. As soon as it’s shimmering, in go the mustard seeds, fenugreek, cloves, cardamom, and cinnamon. Let them sizzle and pop — this is when your kitchen starts to smell divine.
- Add the onions along with the reserved ginger and garlic to the party. Fry them briskly for about 10 minutes until they’re golden brown and fragrant.
- Mash the softened tamarind pulp into its soaking water with your fingers. Strain this tangy liquid over the onions and discard the leftover pulp.
- Pour in the creamy coconut milk and sprinkle the cumin powder. Give it a good stir and let it simmer for about 15 minutes, letting the flavors meld into a fragrant gravy.
- Gently tip the marinated fish cubes into the sauce. Stir them in with care and let them simmer until just cooked, about 7 minutes. You’re aiming for tender, not tough!
- Finish with a flourish of fresh cilantro sprinkled on top. Serve your creation hot with a side of Basmati rice, and enjoy the bliss that follows.
Cook’s Notes
Here’s the deal: fresh ingredients are non-negotiable here. They make all the difference. Also, when cooking the spices, keep an ear out for the mustard seeds popping. It’s their way of telling you they’re ready. This dish is best enjoyed fresh, but if you need to make it ahead, do the prep steps and store the marinated fish and sauce separately in the fridge. Just combine and simmer when you’re ready to serve. Leftovers? They’re even better the next day, as the flavors deepen. Just keep them in an airtight container in the fridge for up to two days.
Make It Your Own
- Not a fan of fish? Swap it out for crispy tofu chunks for a vegetarian twist. Just adjust the marinating time to let those flavors soak in.
- If you’re feeling adventurous, substitute the white fish with shrimp. Just be mindful; shrimp cooks a lot faster, so adjust the simmering time accordingly.
- Add a handful of baby spinach at the end for a pop of color and nutrients. It wilts beautifully into the sauce.
- For a richer texture, throw in a handful of cashew nuts while simmering the sauce. They’ll soften up and add a lovely creaminess.
If you try this, I’d love to hear how it turns out—drop a comment or tag me! Whether it’s your first taste or a comforting regular, this dish is a keeper. Enjoy every spoonful!
Related update: Linefish Simmered In A Spiced Coconut Gravy
Related update: Turbo Chicken

It was one of those evenings where the idea of putting together a lavish meal seemed both daunting and completely out of the question. You know the kind, right? Where you’re caught between wanting something special for dinner because it’s been a long week and yet, you really don’t want to spend ages in the kitchen. That’s when Valentine’s Chicken Marsala came to the rescue. It’s the kind of dish that hits that perfect sweet spot: impressive enough that it feels like a treat, yet simple enough that you’re not sweating it out at the stove. Plus, there’s something truly comforting about the aroma of Marsala wine and garlic wafting through the house. Trust me, this is worth making whenever you need a bit of mid-week magic.
Jump to Recipe
What You’ll Need
I love that this recipe doesn’t require a trip to a specialty store. Chances are you already have most of these goodies lounging in your pantry or fridge. Here’s what you’ll need:
- Fresh mushrooms
- Skinless boneless chicken breast
- Garlic
- Butter
- Olive oil
- Seasoned breadcrumbs or coating mix
- Marsala wine
- Heavy cream
- Cooked pasta (optional, but recommended for soaking up that wonderful sauce!)
How to Make Valentine’s Chicken Marsala
- Start by prepping your ingredients. Slice the mushrooms nice and thin — they’ll shrink down and soak up all the flavors. For the chicken, place the breast between two sheets of wax paper and give it a good pounding with a mallet until it’s about 1/4 inch thick. This helps it cook evenly.
- Next, dredge the chicken breast in seasoned breadcrumbs. Make sure it’s well-coated for that satisfying crunch.
- Now, heat up a heavy stainless or cast iron pan. Trust me, this isn’t the time for non-stick. Add butter and olive oil, letting the butter melt until it’s bubbly and fragrant.
- Place the chicken breast in the pan and let it brown on both sides. You’re looking for that beautiful golden color that screams “delicious.” Once browned, remove it from the pan and set aside.
- In the same pan, add a touch more olive oil if needed and toss in the sliced mushrooms and minced garlic. Sauté until the mushrooms are tender and the garlic is giving off an intoxicating aroma.
- Time to deglaze! Pour in the Marsala wine, using a wooden spoon to scrape up all the yummy bits stuck to the pan. This is where a lot of the flavor magic happens.
- Return the browned chicken breast to the pan. Bring the mixture to a boil, then reduce to a gentle simmer. Cover and let it do its thing for about 30 minutes, allowing the chicken to soak up all those amazing flavors.
- After simmering, remove the chicken from the pan again. Increase the heat slightly and add the heavy cream. Let the sauce reduce by about half — it should be rich, creamy, and oh-so-delicious.
- Serve the chicken and sauce over cooked pasta, or keep it low-carb and enjoy as is. Either way, it’s heavenly.
Cook’s Notes
Cooking can sometimes feel like a dance, and it’s all about timing and adjustments. If your sauce looks too thin after adding the cream, give it a bit more time to reduce. On the flip side, if it’s too thick, a splash of chicken stock or even a bit more wine can help. Store any leftovers in an airtight container in the fridge for up to three days. Reheat gently on the stove with a splash of water or stock to loosen the sauce. And yes, it’s just as tasty the next day.
Make It Your Own
You can totally switch things up with this recipe. Here are some ideas to get those creative juices flowing:
- Swap the chicken for crispy tofu if you’re aiming for a vegetarian twist. Just make sure to press the tofu well before dredging it in breadcrumbs.
- Try using portobello mushrooms for a meatier texture that complements the chicken beautifully.
- If Marsala wine isn’t your thing, a dry white wine can work wonders as well, giving the dish a slightly different but equally delicious profile.
- For a gluten-free version, use gluten-free breadcrumbs or even almond flour to coat the chicken.
If you try this, I’d love to hear how it turns out — drop a comment or tag me! Whether it’s a quiet dinner for two or a treat-yourself kind of night, this dish is sure to bring a touch of joy to your table. Enjoy the delicious journey!
Related update: Valentine’s Chicken Marsala
Related update: Oxtail Ragout
Related update: Linefish Simmered In A Spiced Coconut Gravy
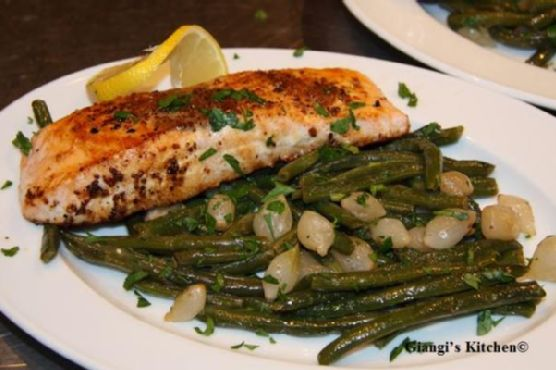
Picture this: it’s a Wednesday evening, halfway through the week, and my energy is fading faster than the daylight. The fridge is a bit barren, just the usual suspects left to fend for themselves. That’s when I remember this quick and comforting recipe that feels like a mini victory every time: Green Beans with Pearl Onions and Salmon. This dish is a total lifesaver — it’s elegant enough to make me feel like a culinary genius yet simple enough for my tired brain to handle. Plus, the mix of green beans and pearl onions gives me that cozy, satisfying vibe I crave without having to spend hours in the kitchen.
Jump to Recipe
What You’ll Need
Before we dive in, let me just say that this ingredient list is as friendly as it gets — you might not even need a grocery run! Here’s what you’ll gather:
- Frozen green beans
- Frozen pearl onions
- Olive oil
- Unsalted butter
- Chicken stock
- Brown sugar
- Salt and pepper
- Skinless salmon steaks
How to Make Green Beans with Pearl Onions and Salmon
- Start by grabbing a large pot and filling it with some water. Toss in those trusty frozen green beans and pearl onions, cover it up, and let them cook over medium heat until they’re tender — you’ll know they’re ready when they give a little bit under a fork. Drain away the water and set them aside for their moment to shine.
- Now, heat up a large skillet with one tablespoon of butter and the olive oil over medium-high heat. When the butter is melted and the oil is shimmering, add the green beans and pearl onions. Sauté for about a minute until they start to sizzle and get that lovely sheen.
- Add the chicken stock to the party and let it cook for another minute until it’s all evaporated. This step brings out a deeper flavor in the veggies.
- Lower the heat to low and stir in another tablespoon of butter with the brown sugar. Mix gently until the veggies are slightly caramelized with a sweet glaze. Remove from the heat and keep them warm and cozy.
- Without washing the skillet (we love saving dishes!), return it to medium-high heat and melt a teaspoon of butter right in the center. Place the salmon steaks over the melted butter, season them generously with salt and pepper, and let them cook for 3-5 minutes. You’re looking for a golden crust that’s the envy of all salmon.
- Flip each salmon steak and cook for another 3 minutes until they’re cooked through but still tender. You know it’s ready when it flakes easily with a fork.
- To serve, lay the green beans and pearl onions on plates, then lovingly place a salmon steak on top. Voila! Dinner is served.
Cook’s Notes
Here’s a little secret: this dish is all about timing and listening to those sweet sizzles. Make sure to keep an eye on the salmon to avoid overcooking — you want that crispy outside and tender inside. As for the green beans and onions, the key is not to rush the caramelization. Let them take their time to get that nice color.
If you’re thinking ahead, you can totally make the green beans and onions a day in advance and store them in an airtight container in the fridge. Just reheat them gently before serving. Leftovers? Sure thing! They’re a dream for lunch the next day or even a fancy brunch with a poached egg on top.
Make It Your Own
This dish is a canvas for creativity! Here are some ideas to mix things up:
- Swap the salmon for crispy tofu if you’re going for a plant-based option. Just pan-fry the tofu until golden on both sides.
- Use maple syrup instead of brown sugar for a different kind of sweetness that pairs beautifully with the veggies.
- Add a handful of toasted almonds or pine nuts for some crunch and extra flavor.
- Try a splash of balsamic vinegar at the end for a tangy twist that brightens up the dish.
If you try this, I’d love to hear how it turns out — drop a comment or tag me on social media! Your kitchen adventures are the best part of sharing recipes. Enjoy every bite!
Related update: Green Beans with Pearl Onions and Salmon
Related update: Valentine's Chicken Marsala
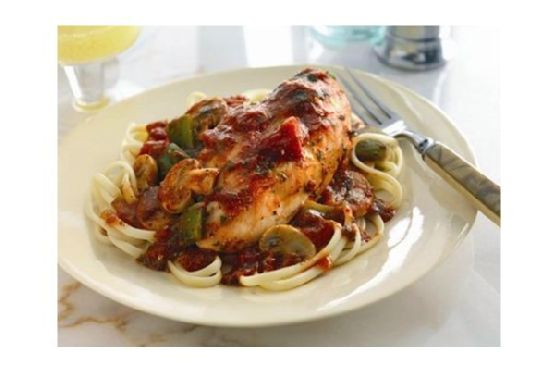
On a Tuesday evening, not too long ago, I found myself staring into the fridge, contemplating yet another night of uninspired dinner options. It was one of those weeks where everything felt like it was on fast-forward, and the idea of cooking anything complicated sent me straight to visions of takeout menus. But then, I spotted those lonely boneless chicken breasts tucked away in the fridge and suddenly remembered a recipe that’s delightfully simple yet tastes like you’ve been at it for hours — Grilled Chicken Hunter Style. The beauty of this dish lies in its comforting flavors, reminiscent of a cozy Italian bistro, but with the ease suited for a hectic weeknight. Trust me, this is comfort food that’s as flavorful as it is straightforward to whip up.
Jump to Recipe
What You’ll Need
If your pantry is anything like mine, you probably have most of these ingredients already. This recipe is all about using what you’ve got and letting a few key ingredients really shine.
- Boneless chicken breasts
- Extra virgin olive oil
- Green bell pepper
- Mamma Lombardi’s marinara sauce
- Mushrooms
- Red bell pepper
- Romano cheese
- Black salt and pepper
How to Make Grilled Chicken Hunter Style
- First, let’s get those chicken breasts soaking up some flavor. Coat them well in 1 ounce of extra virgin olive oil and set them aside. This will keep them juicy and give them a lovely sear on the grill.
- Next, grab a 2-quart sauce pot and heat up 2 ounces of extra virgin olive oil over medium heat. Toss in the green bell pepper, red bell pepper, and mushrooms. Cook these until they begin to brown slightly, releasing a sweet aroma that fills the kitchen.
- Once the veggies are just right, add in the Mamma Lombardi’s marinara sauce. Sprinkle in some salt and freshly ground black pepper to taste. Let it all simmer together for about 12 minutes, stirring occasionally. The sauce should become rich and aromatic.
- While the sauce is simmering, fire up your grill. Grill the chicken breasts until they’re thoroughly cooked through and juicy, with those beautiful charred grill marks — about 6-8 minutes per side depending on thickness.
- To finish, arrange the grilled chicken on a serving tray. Ladle that beautiful, fragrant sauce generously over the top and sprinkle with grated Romano cheese. Serve it hot and enjoy!
Cook’s Notes
Here’s the thing about this dish: it’s forgiving. Forgot the mushrooms? No problem. Only have yellow bell peppers? They’ll work too. The essence of this meal is in the grill-marked chicken and that savory sauce. For leftovers, store the chicken and sauce separately in airtight containers in the fridge for up to 3 days. Reheat gently on the stove with a splash of water or broth if the sauce has thickened. This dish can also be prepped ahead; just make the sauce a day early and grill the chicken fresh.
Make It Your Own
- For a vegetarian twist, swap the chicken for crispy tofu. Just press and grill it the same way, soaking it in the olive oil first.
- Add a kick by stirring in some red pepper flakes or a dash of hot sauce to the marinara.
- Experiment with cheese! Replace Romano with Parmesan or even a sharp cheddar for a different flavor profile.
- Mix in some sautéed onions with the peppers and mushrooms for extra sweetness and depth.
If you try this, I’d love to hear how it turns out — drop a comment or tag me! Whether it’s a busy Tuesday or a lazy Sunday, this Grilled Chicken Hunter Style might just become your new go-to. Enjoy every delicious bite!
Related update: Grilled Chicken Hunter Style
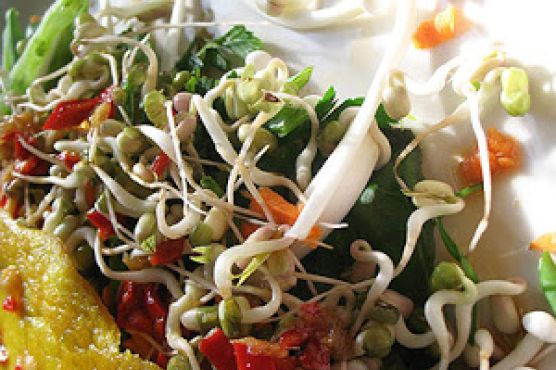
One Thursday evening, I found myself staring at my pantry, hoping for culinary inspiration to jump out at me. You know how it goes — those nights when you’re craving something more exciting than a sandwich but don’t want to spend hours in the kitchen. That’s when my memory flashed back to a street food adventure in Vietnam. I remembered devouring these crispy, savory pancakes called Bánh Xèo, filled with fresh veggies and a fragrant dipping sauce that tingled the senses. It was the perfect balance of crispy, soft, and tangy. So, I decided to recreate that magic. This recipe is both comforting and impressive without demanding too much of your time. Perfect for when you want to feel like you’ve traveled the world from your kitchen!
Jump to Recipe
What You’ll Need
Ever had one of those moments when you think you have nothing to cook, but then realize you actually have the makings of a feast? This is one of those recipes. Chances are you already have most of this in your kitchen, and the rest are worth adding to your pantry!
- Brown rice flour – the backbone for a gluten-free batter.
- Coconut milk – for that creamy texture and subtle sweetness.
- Tamari sauce – adds depth to the dipping sauce.
- Egg – helps bind the batter.
- Sea salt
- Turmeric – for color and a hint of earthiness.
- Cayenne – just a pinch for a touch of heat.
- Green fresh chili – adds freshness and zing.
- Carrot, daikon radish, and snow peas – for the filling, adding crunch and nutrition.
- Mung bean sprouts – because they make everything better.
- Fresh basil, mint, and parsley leaves – an aromatic, herbal trio.
- Trimmed enoki mushrooms – delicate and perfect for texture.
- Garlic and fresh ginger – because no good dish is complete without them.
- Red fresh chilies – for a spicy kick in the sauce.
- Lime juice – lifts everything with its citrusy zest.
- Rice vinegar – for a tang in the sauce.
- Sesame oil – for richness in the sauce.
How to Make Vietnamese Pancakes with Vegetables, Herbs and a Fragrant Dipping Sauce (Bánh Xèo)
- Start by making the pancake batter: In a mixing bowl, whisk together the rice flour, egg, sea salt, turmeric, cayenne, and green chili. Gradually add the coconut milk, whisking as you go. Aim for a smooth, pourable consistency. If it’s too thick, a splash of water does wonders. Cover the bowl and set it aside to rest.
- Now, onto the sauce: Combine the tamari sauce, lime juice, rice vinegar, minced garlic, grated ginger, chopped red chilies, and a drizzle of sesame oil. Whisk until all the flavors meld together and set aside. This fragrant sauce will take your pancakes to another level.
- For the filling, mix the julienned carrot, daikon radish, thinly sliced green onions, chopped green chilies, and sliced snow peas in a bowl. In another bowl, gather the chopped fresh herbs and have the mung bean sprouts and enoki mushrooms ready to go.
- Time to cook the pancakes! Heat a teaspoon of sesame oil in a non-stick skillet over medium heat. Once hot, pour in about 1/2 cup of batter. Use the bottom of the ladle to spread it into a 6 to 8-inch circle. Cook for 6 to 8 minutes, waiting for small bubbles to pop and the edges to turn crispy and golden brown. Flip and cook the other side for another couple of minutes. Repeat with the remaining batter, keeping the cooked pancakes warm in a 150°F oven.
- To serve, layer a portion of the vegetable mixture and herbs on one half of the pancake. Drizzle with some sauce, fold the pancake over, and give it another light drizzle of sauce. Voilà, your culinary journey to Vietnam is served!
Cook’s Notes
Don’t rush the pancake batter; a little rest allows the flour to hydrate fully, giving you that perfect texture. When cooking the pancakes, medium heat is your best friend. Too high, and you’ll burn them before they’re cooked through. If making ahead, the batter can rest in the fridge for a few hours, just give it a gentle stir before using. Leftover pancakes are a treat; reheat them in a hot pan to regain the crispiness. The sauce and filling can be prepped in advance, making your cooking process even smoother.
Make It Your Own
- Swap the enoki mushrooms for shiitake if you like a meatier texture.
- Use crispy tofu instead of, or alongside, the veggies for a protein-packed version.
- For a spicier kick, add an extra green chili or some Sriracha to the batter.
- Play with the herbs: cilantro lovers, feel free to add it into the mix!
If you try this, I’d love to hear how it turns out — drop a comment or tag me! Making Bánh Xèo is like taking a mini vacation right from your kitchen. Enjoy every crispy, savory bite.
Related update: Vietnamese Pancakes with Vegetables, Herbs and a Fragrant Dipping Sauce (Bánh Xèo)
Related update: Grilled Chicken Hunter Style

It was one of those evenings where the fridge seemed to be giving me the silent treatment—half-empty, a bunch of odds and ends staring back at me. I was craving something warm and comforting, but not the usual suspects. Enter: Japanese Chicken Donburi. It’s the kind of dish that feels luxurious but is secretly a weeknight warrior, ready in under 30 minutes. Plus, it’s a one-pan wonder, which means less time scrubbing pots and more time enjoying a cozy meal. The mix of tender chicken, silky eggs, and a touch of soy sauce can turn any ordinary evening into a mini celebration. Spoiler: It’s about to become your new dinner staple.
Jump to Recipe
What You’ll Need
Here’s the kicker—chances are, you’ll find most of these ingredients in your kitchen already. This recipe is all about bringing simple items together for a meal that’s anything but ordinary.
- 2 tablespoons salad oil
- 1 small onion, chopped
- 1 tablespoon fresh ginger, minced
- 2 cups **fat-skimmed chicken broth**
- 2 tablespoons **soy sauce**
- 1 tablespoon sugar
- 1 pound **boned, skinned chicken breast**, cut into bite-size pieces
- 4 cups baby spinach leaves
- 4 large eggs
- 2 cups **cooked rice**
- 1 **diced roma tomato**
How to Make Japanese Chicken Donburi
- In a deep 10-inch or 12-inch frying pan over high heat, stir the salad oil, onion, and ginger until the onion is lightly browned and fragrant, about 2 minutes.
- Add the chicken broth, soy sauce, and sugar to the pan. Stir until the sugar dissolves.
- Gently introduce the chicken pieces to the pan. Bring the mixture to a boil, ensuring the chicken is cooked through yet tender.
- Add the baby spinach on top, cover the pan, and cook until wilted, about 1 minute.
- While waiting, beat the eggs in a small bowl until blended.
- Reduce the heat to low. Evenly distribute the mixture in the pan and pour in the eggs. Use a spatula to nudge the vegetables and chicken slightly so the egg can seep through the sauce.
- Cover and cook until the eggs are softly set, about 2 to 2 1/2 minutes.
- Spoon the cooked rice into bowls, creating a cozy bed.
- Top each bowl with the egg-spinach mixture, making sure to include some of that savory sauce.
- For a fresh finish, sprinkle the diced roma tomato over each serving.
Cook’s Notes
This dish is a dance of flavors and textures, and it’s pretty forgiving. If you like your eggs a little firmer, let them cook just a bit longer under the lid. And if you’re making this ahead, store the components separately; the rice, chicken, and egg mixture will keep well in the fridge for up to two days. When you’re ready to enjoy, just heat them up and assemble. A quick note: If your chicken pieces are on the thicker side, make sure they’re cooked through by cutting into the largest piece to check.
Make It Your Own
Consider these variations to fit your mood or what you have on hand:
- Swap the **chicken** for crispy tofu to keep it vegetarian but still satisfying.
- Use **quinoa** instead of rice for a protein-packed twist.
- For a spicier kick, mix a bit of **sriracha** into the broth before adding the chicken.
- Replace **baby spinach** with bok choy for a more traditional touch.
If you try this, I’d love to hear how it turns out — drop a comment or tag me! Cooking is about creativity and connection, and I’m excited to see how Japanese Chicken Donburi finds a spot at your table. 🍚🥢
Related update: Japanese Chicken Donburi
Related update: Vietnamese Pancakes with Vegetables, Herbs and a Fragrant Dipping Sauce (Bánh Xèo)
Related update: Oxtail Ragout