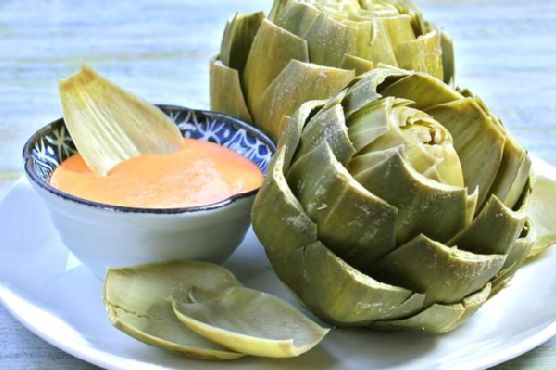
Steamed Artichokes With Roasted Red Pepper Aioli | Made by Meaghan Moineau

Steamed Artichokes With Roasted Red Pepper Aioli | Made by Meaghan Moineau

### Title: Nostalgic Flavors: Steamed Artichokes with Roasted Red Pepper Aioli


#### Description:


Dive into a culinary journey with our Steamed Artichokes with Roasted Red Pepper Aioli recipe. This delightful dish, rated 6/10 in difficulty, serves as a perfect appetizer for any gathering. Infused with rich flavors and a touch of nostalgia, it's a must-try for those who want to impress their guests while reminiscing about cherished family moments.


---


#### A Taste of Memories: Steamed Artichokes with Roasted Red Pepper Aioli


The clatter of pots and pans, the gentle hum of conversation, and the irresistible aroma of steaming artichokes mingling with the tangy scent of roasted red pepper aioli—it all transports me back to those cherished family gatherings at my grandmother's house. Her kitchen was a place of warmth and laughter, where recipes were passed down through generations and every dish told a story.


This Steamed Artichokes with Roasted Red Pepper Aioli is more than just an appetizer; it's a gateway to nostalgia, a dish that brings back the vibrant energy of my childhood. I vividly remember sitting around the large oak dining table, eagerly waiting for the artichokes to finish steaming. My grandmother would carefully trim and prepare them, her hands skillfully working their magic. We, the little ones, were tasked with setting the table and sneaking tastes of the aioli, much to her feigned dismay.


#### Ingredients:


- Artichokes


- Egg yolks


- Garlic clove


- Cayenne pepper


- Lemon juice


- Oil


- Red roasted pepper


- Salt


#### Instructions:


1. **Prepare the Aioli**: Place the egg yolks, garlic, cayenne pepper, and a pinch of salt in a food processor. Puree until smooth. Add the roasted red pepper and puree again until the mixture is fully smooth. While the processor is running, gradually pour in the oil, allowing the mixture to emulsify to your desired consistency. Taste and adjust with more salt if needed. Cover and refrigerate until ready to serve.


2. **Steam the Artichokes**: Fill a large pot with about 2 inches of water and place a steaming basket over it. Cover and bring to a boil. Trim the artichoke stems and remove about 1 inch from the top of the artichoke flower. Discard any damaged leaves at the base. Using kitchen shears, trim the pointed tips of the outer leaves. Squeeze lemon juice over the cut edges to prevent browning. Sprinkle with salt and place the artichokes in the steaming basket. Cover and steam for 30-40 minutes, or until a center leaf pulls out easily.


3. **Serve**: Arrange the steamed artichokes on a platter, with the roasted red pepper aioli on the side for dipping. For an added touch, serve alongside fingerling potatoes, which also pair beautifully with the aioli.


#### A Culinary Journey


As I savor this dish today, I am reminded of those joyful family meals, a time when life seemed simpler and every meal was a celebration. The earthy taste of the artichokes combined with the creamy, spicy aioli evokes memories of laughter and togetherness. This recipe not only delights the senses but also acts as a tribute to family traditions and the timeless art of home cooking.


#### Difficulty: 6/10


#### Classification: Appetizer


Whether you're introducing this dish at a family gathering or simply recreating a beloved memory, Steamed Artichokes with Roasted Red Pepper Aioli is sure to leave a lasting impression. Enjoy the flavors, relish the memories, and, most importantly, share the joy with those you love.
Read more about Appetizers

Read more about Main Dishes

Read more about Desserts

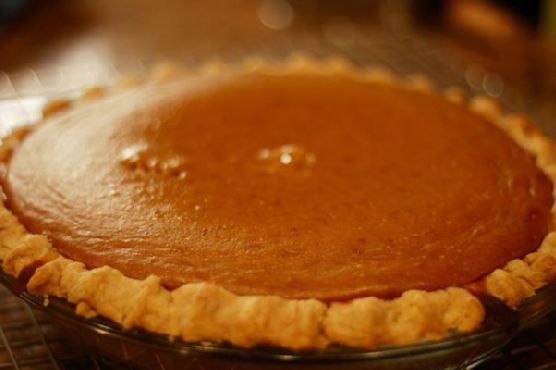
Classic Pumpkin Pie | Made by Meaghan Moineau

Classic Pumpkin Pie | Made by Meaghan Moineau

Title: "A Slice of Nostalgia: The Timeless Allure of Classic Pumpkin Pie"


Description: Dive into the comforting embrace of fall with a Classic Pumpkin Pie recipe that not only tantalizes your taste buds but also warms your heart with a sprinkle of nostalgia.


---


As the crisp autumn air begins to weave its way through the trees, painting the landscape with hues of amber and gold, there's one classic dessert that captures the essence of the season like no other: Classic Pumpkin Pie. This timeless recipe combines the rich flavors of canned pumpkin, the warm spices of cinnamon, ginger, and nutmeg, and the creamy sweetness of condensed milk, all nestled within a tender, flaky pie crust. It's more than just a dessert; it's a culinary tradition that brings family and friends together around the table, year after year.


### Ingredients:


- 1 can of pumpkin


- 2 large eggs


- 1 teaspoon ground cinnamon


- 1/2 teaspoon ground ginger


- 1/4 teaspoon ground nutmeg


- 1/2 teaspoon salt


- 1 can sweetened condensed milk


- 1 unbaked pie crust


- Whipped cream for garnish


### Instructions:


1. **Preheat the Oven**: Begin by preheating your oven to 425 degrees F. This initial high temperature helps set the crust, ensuring it remains crisp and flaky.


2. **Mix the Filling**: In a medium bowl, whisk together the canned pumpkin, sweetened condensed milk, eggs, ground cinnamon, ginger, nutmeg, and salt. Stir until the mixture is smooth and well combined.


3. **Assemble the Pie**: Pour the pumpkin mixture into the unbaked pie crust, spreading it evenly with a spatula.


4. **Bake**: Place the pie in the oven and bake for 15 minutes. Then, reduce the oven temperature to 350 degrees F and continue baking for an additional 35 to 40 minutes. The pie is done when a knife inserted 1 inch from the crust comes out clean.


5. **Cool and Serve**: Allow the pie to cool completely before serving. Garnish with a generous dollop of whipped cream for the perfect finishing touch.


### Difficulty Rating: 4/10


### Classification: Dessert


**A Nostalgic Family Memory:**


Every Thanksgiving, as the fragrant aroma of pumpkin pie wafted through the house, it signaled the beginning of the holiday season for our family. I vividly remember my grandmother standing in her cozy kitchen, wearing her favorite apron, which was always dusted with a faint layer of flour. She would hum softly to herself as she whisked the pumpkin filling, a melody that echoed the warmth and love she poured into every dish she made.


Gathered around the dining table, with the pie taking center stage, we would share stories of the past and dreams for the future, laughter punctuating our conversations. As dessert was served, my grandmother would always insist on adding an extra swirl of whipped cream to each slice, a gesture that made every piece feel special.


This Classic Pumpkin Pie recipe is not just a dessert; it's a cherished tradition, a slice of nostalgia that connects us to our roots and reminds us of the simple joys of life. Whether you're a seasoned baker or a novice in the kitchen, this recipe offers a delightful journey back to those heartwarming moments that define the spirit of family gatherings.


As you take your first bite, may it transport you to a place of warmth, love, and cherished memories. Happy baking!

Read more about Appetizers

Read more about Main Dishes

Read more about Desserts

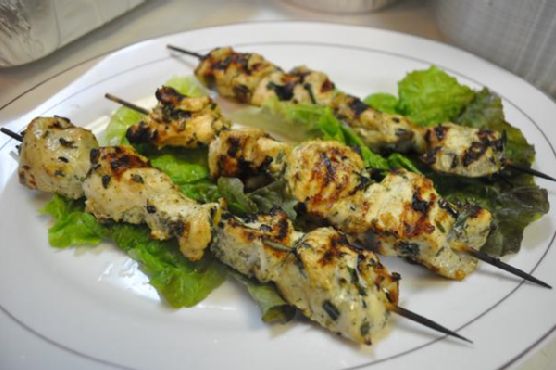
Moroccan Lemon Shish Kebabs | Made by Meaghan Moineau

Moroccan Lemon Shish Kebabs | Made by Meaghan Moineau

**Title: Savoring Tradition: Moroccan Lemon Shish Kebabs**


**Description:** Dive into the world of Moroccan cuisine with our delightful Moroccan Lemon Shish Kebabs. Discover the vibrant flavors of lemon, herbs, and spices wrapped around juicy chicken skewers. Experience the joy of creating a dish that's not just a meal, but a cherished family tradition.


---


**A Taste of Morocco: Moroccan Lemon Shish Kebabs Recipe**


When it comes to culinary experiences that transport you to another world, Moroccan cuisine never disappoints. Bursting with vibrant flavors and aromatic spices, one dish that stands out is the delectable Moroccan Lemon Shish Kebabs. These tantalizing skewers are not just a feast for the senses but also a cherished family tradition that brings nostalgic memories to life.


**Ingredients:**


- Lean chicken breast fillets, trimmed of fat and cut into 1" cubes


- Moroccan lemon marinade


- Fresh parsley


- Fresh rosemary leaves


- Fresh thyme leaves


- Garlic


- Black peppercorns


- Lemon juice


- Olive oil


**Instructions:**


1. **Prepare the Marinade:** In a large bowl, combine fresh parsley, rosemary leaves, thyme leaves, garlic, black peppercorns, lemon juice, and olive oil. Mix well to create the aromatic Moroccan lemon marinade.


2. **Marinate the Chicken:** Add the cubed chicken breast fillets to the marinade, ensuring each piece is well-coated. Cover the bowl with plastic wrap and let it marinate for at least half an hour. For deeper flavor, consider leaving it in the fridge for a few hours.


3. **Prepare the Skewers:** If using bamboo skewers, soak them in a tray of water to prevent burning during grilling.


4. **Thread the Chicken:** Thread about four pieces of marinated chicken onto each skewer.


5. **Cook the Kebabs:** Grill the shish kebabs over charcoal or on a skillet until the chicken is thoroughly cooked and slightly charred, releasing the irresistible aroma of lemon and herbs.


6. **Serve with a Side:** Once cooked, serve immediately on a bed of rice, Mediterranean couscous, or with warm pita bread.


**Difficulty:** 4/10


**Classification:** Main Dish


**A Nostalgic Family Memory:**


As a child, the aroma of Moroccan Lemon Shish Kebabs sizzling on the grill was a surefire sign that summer had arrived. My family would gather in the backyard, the air filled with laughter and stories shared across generations. My grandfather, a master of the grill, would always recount tales of his own childhood in Morocco, where these kebabs were a staple at family gatherings.


The preparation was a family affair. My mother would meticulously trim the chicken, while my father mixed the marinade, his hands a blur as he combined the fresh herbs and spices. I would watch in awe, occasionally sneaking a taste of the tangy marinade, my fingers sticky with lemon juice and olive oil.


As the sun began to set, the kebabs would be placed on the grill. The smoke rising from the coals seemed to carry with it the essence of Morocco. The first bite was always magical – the tender chicken bursting with flavors that danced on the tongue.


Even now, making these Moroccan Lemon Shish Kebabs feels like stepping back in time, each skewer a bridge to those cherished family moments. It's more than just a recipe; it's a reminder of the joy and love that food can bring to our lives.


Incorporating this dish into your recipe repertoire not only promises a delightful culinary experience but also invites the warmth and nostalgia of family traditions into your home. So, fire up the grill, gather your loved ones, and let the magic of Moroccan Lemon Shish Kebabs create new memories for generations to come.

Read more about Appetizers

Read more about Main Dishes

Read more about Desserts

Best Potato Cheese Soup in a bread bowl | Made by Meaghan Moineau

Best Potato Cheese Soup in a bread bowl | Made by Meaghan Moineau

**Title: "Cozy Comfort: Indulge in the Best Potato Cheese Soup in a Bread Bowl"**


**Description:**


Dive into a bowl of warmth and nostalgia with our Best Potato Cheese Soup in a Bread Bowl. This creamy, cheesy delight promises to be the star of your dinner table, offering a perfect blend of flavors that feels like a warm hug on a chilly day. With easy-to-follow instructions and a touch of family history, this recipe is a heartfelt journey into the world of comfort food.


---


**The Best Potato Cheese Soup in a Bread Bowl: A Family Tradition**


When the leaves begin to change and the autumn air turns crisp, there's one dish that instantly transports me back to my grandmother’s cozy kitchen—the creamy, savory delight of Potato Cheese Soup. Nestled in a warm bread bowl, this soup was more than just a meal; it was a family tradition, a cherished memory, and a symbol of togetherness.


**Ingredients:**


- 2 tablespoons olive oil


- 1 sweet onion, diced


- 2 cloves garlic, minced


- 4 cups chicken stock


- 2 cups water


- 1 teaspoon salt


- 4 red potatoes, diced


- 2 carrots, diced


- 1 cup whole milk


- 1 cup heavy cream


- 2 tablespoons butter


- 1 block Velveeta cheese, cubed


- 1 cup shredded sharp cheddar cheese


- Salt and pepper to taste


- Garnishes: bacon crumbles, chives, sour cream, additional shredded cheese


**Instructions:**


1. **Prep and Sauté:**


In a large heavy stock pot, heat 2 tablespoons of olive oil over medium heat. Add diced onions and cook until translucent, about 2-3 minutes. Stir in minced garlic and cook for another minute, letting the flavors meld.


2. **Build the Base:**


Pour in the chicken stock, water, and 1 teaspoon of salt. Add diced red potatoes and carrots, bringing the mixture to a boil. Cook until the potatoes are fork-tender.


3. **Blend for Creaminess:**


Turn off the burner and let the soup cool slightly. Remove about half of the potatoes with a slotted spoon and blend them in a food processor until smooth. Return the potato paste to the pot.


4. **Add Creaminess and Cheesy Goodness:**


Place the stock pot back on medium heat. Stir in whole milk, heavy cream, butter, and Velveeta cheese. Heat gently until the butter and Velveeta are melted; be careful not to let it boil. Stir frequently with a wooden spoon, scraping the bottom to prevent sticking.


5. **Cheesy Finish:**


Gradually add the shredded sharp cheddar, one handful at a time, stirring until melted. Sprinkle in some Parmesan cheese for extra depth. Season with additional salt and pepper to taste.


6. **Serve and Savor:**


Ladle the soup into a bread bowl or your favorite mug. Top with bacon crumbles, chives, a dollop of sour cream, and extra shredded cheese for the ultimate comfort experience.


**A Nostalgic Note:**


I remember sitting at my grandmother's kitchen table, the warm aroma of simmering soup filling the air. She would often tell us stories of her childhood, her voice a gentle melody against the backdrop of bubbling pots. Each spoonful of soup was like a page from her storybook, rich with history and love. Now, every time I make this soup, those cherished memories come alive, and I feel her warmth surrounding me.


**Rate Difficulty:** 5/10


**Classification:** Main Dish


Whether it's a family gathering or a quiet evening at home, this Potato Cheese Soup in a Bread Bowl is more than just a meal—it's a memory in the making. So, gather your loved ones, share stories, and enjoy the comforting embrace of a dish that's been passed down through generations.

Read more about Appetizers

Read more about Main Dishes

Read more about Desserts

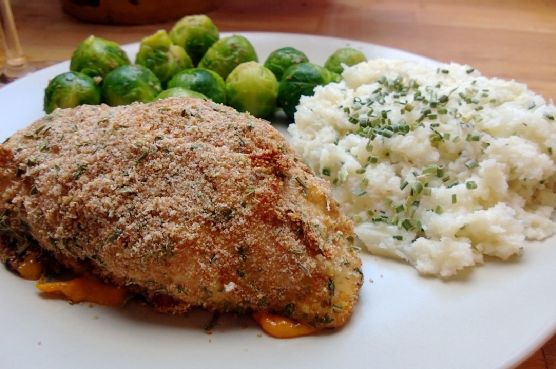
Herb and Cheddar Cordon Bleu | Made by Meaghan Moineau

Herb and Cheddar Cordon Bleu | Made by Meaghan Moineau

### Title: Savoring Memories: Herb and Cheddar Cordon Bleu


**Description:** Dive into a flavorful family favorite with our Herb and Cheddar Cordon Bleu recipe. This delightful dish combines the richness of cheddar cheese with savory herbs and tender chicken, wrapped in a nostalgic story that will warm your heart as much as your palate. Perfect for a cozy meal, this main dish is sure to impress both in taste and presentation.


---


When the aroma of baking chicken mingles with the fragrant notes of rosemary, marjoram, and parsley, it never fails to transport me back to countless Sunday dinners at my grandmother's home. Our Herb and Cheddar Cordon Bleu was more than just a meal; it was a family tradition that brought us together, filling our hearts with warmth and our bellies with satisfaction.


**Ingredients:**


- 4 chicken breasts


- 4 slices of deli ham


- 4 slices of cheddar cheese


- 1 cup breadcrumbs


- 1 tablespoon dried marjoram


- 1 tablespoon dried parsley


- 1 tablespoon dried rosemary


- 1 egg


- 1/2 cup flour


- Salt and pepper to taste


**Instructions:**


1. **Preheat the Oven:** Start by preheating your oven to 350 degrees F (about 176 degrees C). This ensures an even cooking temperature for the perfect bake.


2. **Prepare the Chicken:** Place each chicken breast between two slices of wax paper. Using a rolling pin or meat mallet, gently pound until they are about a quarter of an inch thick.


3. **Assemble the Rolls:** On each flattened chicken breast, place a slice of ham and a slice of cheddar cheese. Roll the chicken as tightly as you can, securing with toothpicks or small skewers if necessary.


4. **Set Up Your Stations:** Beat an egg in a shallow baking dish. Prepare two more stations: one with flour and another with a mix of breadcrumbs, dried marjoram, parsley, and rosemary.


5. **Coat the Chicken:** First, coat the chicken rolls in flour, then dip them into the egg mixture. Finally, press them into the breadcrumb and herb mixture until thoroughly covered.


6. **Bake to Perfection:** Place the rolls in an oiled or buttered baking dish. Bake for about 30 minutes until golden brown and cooked through.


---


**A Walk Down Memory Lane:**


Every bite of this Herb and Cheddar Cordon Bleu is a nostalgic journey to those Sunday afternoons at Grandma's. I remember sitting at the kitchen table, watching her deft hands roll the chicken with precision, her stories flowing as freely as her laughter. It was in these moments that I learned cooking was more than just following a recipe; it was about creating an experience, a legacy of love passed down through generations.


**Difficulty Rating: 6/10**


This dish requires a bit of finesse with the rolling and coating, but is otherwise straightforward and ideal for anyone looking to hone their culinary skills.


**Classification:** Main Dish


---


Incorporate Herb and Cheddar Cordon Bleu into your meal rotation for a dish that encapsulates both flavor and familial love. Whether you're creating new memories or indulging in old ones, this recipe promises to be a cherished addition to your dining experience.

Read more about Appetizers

Read more about Main Dishes

Read more about Desserts

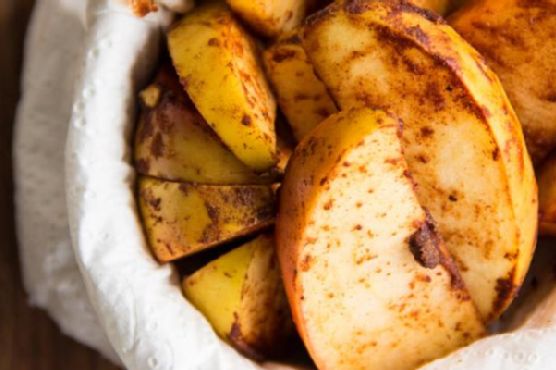
Baked Cinnamon Apple Wedges | Made by Meaghan Moineau

Baked Cinnamon Apple Wedges | Made by Meaghan Moineau

**Title: A Warm Hug in Every Bite: Baked Cinnamon Apple Wedges**


**Description:** Dive into the nostalgic flavors of fall with our Baked Cinnamon Apple Wedges. This simple yet flavorful dessert is perfect for cozy gatherings or a comforting treat at home. With just four ingredients, this easy-to-make dish brings back cherished family memories while delighting your taste buds.


---


As autumn leaves begin to fall and a crisp breeze fills the air, my thoughts often drift back to cozy family gatherings. One of my fondest memories is of my grandmother bustling around her warm kitchen, the welcoming scent of cinnamon and nutmeg weaving through the house like a comforting embrace. She had a knack for turning the simplest ingredients into something magical, and her Baked Cinnamon Apple Wedges were no exception.


Every autumn, she would gather the freshest apples from the local orchard, their skins glistening in shades of red and green. I remember sitting at the kitchen table, my feet barely touching the floor, as she meticulously cut each apple into perfect wedges. She would then drizzle them with rich maple syrup, sprinkle them with aromatic cinnamon and nutmeg, and slide them into the oven. The anticipation was almost too much to bear, as the sweet and spicy aroma filled the room, wrapping us in its warmth.


Just ten minutes later, the apples emerged from the oven, golden brown and tender, ready to be savored. Each bite was like a warm hug, the flavors perfectly balanced and reminiscent of everything wonderful about the season. We would gather around the table, sharing stories and laughter, the simple act of enjoying these baked apple wedges creating memories that would last a lifetime.


Now, as I prepare this dish for my own family, I am reminded not only of my grandmother's love but also of the joy found in sharing these timeless recipes. The Baked Cinnamon Apple Wedges are more than just a dessert; they are a connection to the past, a celebration of the present, and a tradition I hope to pass on.


**Recipe: Baked Cinnamon Apple Wedges**


**Ingredients:**


- 1 apple


- 1 tablespoon maple syrup


- 1 teaspoon ground cinnamon


- 1/4 teaspoon ground nutmeg


**Instructions:**


1. Preheat your oven to 180 degrees Celsius (356 degrees Fahrenheit).


2. Cut the apple into approximately 10-12 wedges.


3. In a bowl, mix the apple wedges with maple syrup, cinnamon, and nutmeg until evenly coated.


4. Arrange the apple wedges in a single layer in a small baking dish or on a baking tray.


5. Bake in the preheated oven for 10 minutes, or until the apples are golden brown and cooked through.


6. Serve warm and enjoy the comforting flavors.


**Difficulty Rating:** 2/10


**Classification:** Dessert


Whether you're looking to recreate cherished family memories or simply indulge in a deliciously easy dessert, these Baked Cinnamon Apple Wedges are sure to delight. With their enticing aroma and comforting taste, they capture the essence of fall in every bite. So gather your loved ones, share a story or two, and enjoy this warm hug from the oven.

Read more about Appetizers

Read more about Main Dishes

Read more about Desserts

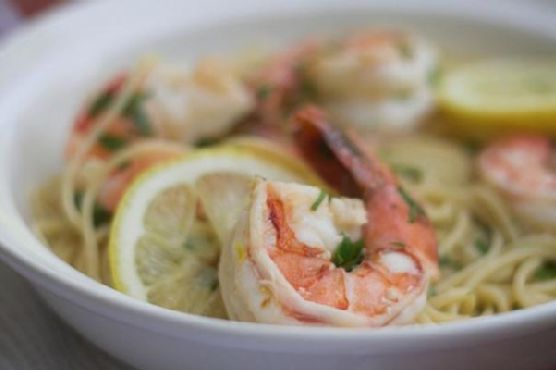
Easy Shrimp Scampi | Made by Meaghan Moineau

Easy Shrimp Scampi | Made by Meaghan Moineau

**Title: A Taste of Home: Easy Shrimp Scampi for the Soul**


**Description:** Dive into the heartwarming flavors of Easy Shrimp Scampi, a quick and delightful main dish that combines the rich taste of garlic, butter, and white wine with succulent shrimp. Perfect for a family dinner or a solo indulgence, this recipe is a nostalgic journey back to cherished family gatherings. Discover the simplicity and joy of cooking this classic dish, rated just 3 out of 10 in difficulty—ideal for both seasoned cooks and beginners alike.


---


There's something magical about the aroma of garlic sizzling in butter and olive oil, a fragrance that transports me back to my grandmother's cozy kitchen. Every Sunday, our family would gather around her wooden dining table, eagerly awaiting the feast she had prepared. Among her culinary masterpieces, her Shrimp Scampi was a standout—simple yet bursting with flavor.


**Ingredients:**


- 2 tablespoons butter


- 2 tablespoons olive oil


- 4 cloves garlic, minced


- 1/2 cup white wine


- 2 tablespoons lemon juice


- 1 pound shrimp, peeled and deveined


- 1/4 cup fresh parsley, chopped


- Salt and pepper to taste


**Instructions:**


1. In a large skillet, melt the butter and olive oil over medium heat. The kitchen fills with the comforting scent, reminiscent of those cherished Sunday gatherings.


2. Add the minced garlic and sauté for about 30 seconds, just until it begins to release its aromatic goodness.


3. Stir in the white wine and lemon juice, letting it simmer for a minute. This step always reminded me of my grandmother's gentle touch as she cooked, her love infusing every dish.


4. Add the shrimp, fresh parsley, salt, and pepper. Cooking over high heat, stir constantly for 2-3 minutes until the shrimp turn pink and are cooked through.


5. Serve immediately over a bed of pasta or rice, just like we did back then, when every bite was accompanied by laughter and stories from our week.


As I recreate this dish today, I remember a particular Sunday during a chilly autumn. The leaves were turning, painting the landscape in shades of gold and crimson. We were all gathered in my grandmother's warm kitchen, the windows fogged up from the heat of the stove. I watched as she moved gracefully, her hands a blur of practiced motions, creating magic with simple ingredients. Her Shrimp Scampi was always the highlight, a dish that brought us together and made us feel at home.


**Difficulty:** 3/10


**Classification:** Main Dish


With every bite of this Easy Shrimp Scampi, I'm reminded of those beautiful moments—an ode to simpler times, where food and family were the heart of our home. May this recipe bring a touch of that warmth and nostalgia to your table, too. Enjoy!

Read more about Appetizers

Read more about Main Dishes

Read more about Desserts

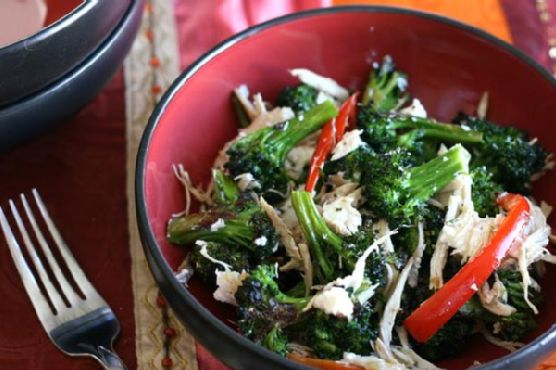
Chicken and Roasted Broccoli Salad With Goat Cheese | Made by Meaghan Moineau

Chicken and Roasted Broccoli Salad With Goat Cheese | Made by Meaghan Moineau

# Nostalgic Flavors: Chicken and Roasted Broccoli Salad with Goat Cheese


## A Taste of Home: Family Gatherings and Culinary Memories


Growing up, my family had a tradition of gathering every Sunday for a hearty meal. The kitchen would be filled with laughter, the clatter of pots and pans, and the mouthwatering aroma of delicious dishes. One of the standout recipes that often graced our table was the Chicken and Roasted Broccoli Salad with Goat Cheese. This dish, with its perfect blend of savory chicken, tangy goat cheese, and roasted broccoli, is not just a meal—it's a cherished memory.


### Ingredients:


- 1 head of broccoli, chopped into florets


- 2 garlic cloves, minced


- 4 oz goat cheese, crumbled


- Juice from 1 lemon


- 3 tbsp olive oil


- 1 tsp dried oregano


- 1/2 tsp freshly ground pepper


- 1 red bell pepper, sliced


- A pinch of red pepper flakes


- Salt, to taste


- 2 cups cooked shredded chicken


- 1 tsp sugar


### Instructions:


1. **Preheat the Oven:** Begin by heating your oven to a scorching 500 degrees Fahrenheit. Place a sturdy baking sheet on the lowest rack. This high heat is essential for achieving perfectly roasted broccoli.


2. **Prepare the Broccoli:** In a large bowl, toss the broccoli florets with minced garlic, olive oil, salt, pepper, and a dash of red pepper flakes. For an added touch of sweetness, sprinkle in the sugar.


3. **Roast the Broccoli:** Spread the broccoli mixture evenly on the preheated baking sheet. Roast in the oven for about 15-20 minutes, or until the broccoli is tender and has a slight char.


4. **Assemble the Salad:** In a large serving bowl, combine the roasted broccoli, shredded chicken, and red bell pepper slices. Drizzle with lemon juice and sprinkle with dried oregano.


5. **Add the Goat Cheese:** Finish the salad by crumbling goat cheese over the top. Its creamy texture and tangy flavor will elevate the dish.


6. **Serve:** Toss everything gently to combine, ensuring an even distribution of ingredients. Serve warm or at room temperature.


### A Family Memory:


I vividly remember one particular Sunday when my grandmother decided to add her unique twist to this classic dish. With her usual flair, she infused the salad with extra lemon juice and a touch of oregano, creating a symphony of flavors that lingered on our taste buds. That afternoon, we gathered around the table, reminiscing about old times and sharing stories that spanned generations. The Chicken and Roasted Broccoli Salad with Goat Cheese became more than just a meal—it was a symbol of love, tradition, and the bonds that tie us together.


### Difficulty Rating: 4/10


This dish is straightforward and perfect for cooks of all levels. The simple steps and readily available ingredients make it an ideal choice for a relaxing Sunday dinner.


### Classification: Main Dish


With its hearty combination of protein, vegetables, and cheese, this salad serves as a satisfying main dish. It’s perfect for a family meal or a casual dinner with friends.


---


Whether you're recreating family memories or crafting new ones, the Chicken and Roasted Broccoli Salad with Goat Cheese is a delightful dish that will warm your heart and satisfy your palate. Enjoy the nostalgia and flavors that come with each bite!

Read more about Appetizers

Read more about Main Dishes

Read more about Desserts

Creamy Lime Pie Square Bites | Made by Meaghan Moineau

Creamy Lime Pie Square Bites | Made by Meaghan Moineau

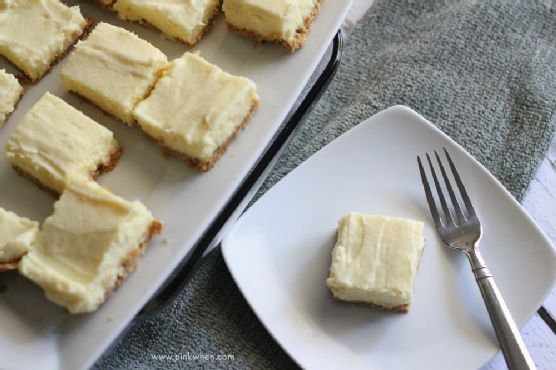
**Title: A Zesty Twist on Tradition: Creamy Lime Pie Square Bites**


**Description:** Dive into a world of tangy sweetness with our Creamy Lime Pie Square Bites. Perfect for dessert lovers, these luscious bites are a modern twist on a family classic. Discover the perfect blend of graham cracker crust and creamy lime filling, and indulge in a nostalgic journey that will tantalize your taste buds and warm your heart.


---


### A Nostalgic Bite of Lime Heaven


Growing up, my family had a tradition of gathering every Sunday afternoon at my grandmother's house for a potluck feast. Each member would bring their signature dish, but the highlight was always my grandmother's famous key lime pie. The tartness of the lime combined with the sweetness of the creamy filling was a taste that lingered in our memories long after the last bite was savored.


Fast forward to today, and I've taken her beloved recipe and transformed it into Creamy Lime Pie Square Bites—a delightful, bite-sized version that pays homage to those cherished family gatherings. These squares are perfect for sharing, just like the memories of those sunny Sundays in Grandma's kitchen.


### Ingredients:


- All-purpose flour


- Graham cracker crumbs


- Lime zest


- Sugar


- Unsalted butter


### Instructions:


1. **Preheat and Prepare:** Begin by preheating your oven to 350°F (175°C). Cover an 8x8 glass square dish with foil, ensuring the foil extends beyond the edges for easy removal later.


2. **Crust Creation:** In a medium bowl, whisk together all-purpose flour, graham cracker crumbs, lime zest, and sugar until they reach a grainy consistency. Melt unsalted butter and incorporate it into the mixture.


3. **Press and Bake:** Using a spoon or your fingers, press the graham crust mixture firmly into the prepared dish, making sure all edges and the bottom are well covered. Place in the oven and bake for 10-15 minutes until the crust is golden brown. Set aside to cool for about an hour.


4. **Filling the Flavor:** For the filling, combine all your ingredients in a medium bowl. Mix well for about 30 minutes, ensuring a smooth, creamy texture, then continue mixing on low speed for an additional 3 minutes.


5. **Assemble and Bake Again:** Pour the filling into the graham cracker crust, smoothing out the top and ensuring the edges are filled. Bake in the oven for another 5-10 minutes before removing the dish to a cooling rack for 15 minutes.


6. **Chill and Serve:** Finally, transfer the dish to the refrigerator for about 45 minutes to set. Once chilled, carefully lift the foil to remove the dessert from the dish. Slice into bite-sized squares and serve.


### A Tangy Twist on Tradition


These Creamy Lime Pie Square Bites are more than just a dessert. They're a testament to the power of family traditions and the joy of sharing a lovingly prepared meal. Whether you're a seasoned baker or a novice in the kitchen, these squares are a breeze to make and sure to impress.


**Difficulty:** 4/10


**Category:** Dessert


### Explore More Lime-Infused Delights


If you're as captivated by lime's zesty charm as we are, explore these delightful recipes:


- Coconut Lime Spritzer


- Blackberry Lime Margaritas


- Strawberry Limeade


- Cherry Lime Chia Energy Bars


- Strawberry Margarita Cheesecake


### A Note on Essential Oils


While adding a drop of high-quality lime essential oil can enhance the flavor, it's crucial to ensure the oil is edible. Look for therapeutic-grade oils with a Supplement Facts box. Always prioritize purity and safety in your culinary adventures.


Join our community of over 500,000 subscribers at Pink When and get exclusive recipes and tips delivered straight to your inbox. Sign up now and receive our FREE Simple Fit Dinners Ebook. Don’t miss out on the culinary fun!

Read more about Appetizers

Read more about Main Dishes

Read more about Desserts

Rotisserie Chicken and Bean Tostadas | Made by Meaghan Moineau

Rotisserie Chicken and Bean Tostadas | Made by Meaghan Moineau

**Title: Savoring Nostalgia: Rotisserie Chicken and Bean Tostadas for a Heartwarming Family Feast**


**Description: Discover the delightful fusion of flavors in our Rotisserie Chicken and Bean Tostadas recipe. This easy-to-follow dish, rated a 3 out of 10 in difficulty, is perfect as a savory main dish. Uncover a cherished family tale that adds a sprinkle of nostalgia to each bite, and gather your loved ones around for a feast brimming with warmth and joy.**


---


As the oven preheats to a cozy 350 degrees, my kitchen fills with the comforting aroma of anticipation. Today, we're diving into a dish that has become synonymous with family gatherings and heartfelt laughter—Rotisserie Chicken and Bean Tostadas. This recipe, a delightful blend of simplicity and flavor, is not just about creating a meal but reliving cherished memories with every bite.


**A Taste of Tradition**


Growing up, Saturday afternoons were reserved for a ritual my family held dear. My abuela would gather us around her kitchen table, a place where stories were shared and bonds were strengthened. Among her repertoire of culinary creations, her rotisserie chicken and bean tostadas were legendary. The process was simple, yet it carried a weight of tradition that made each gathering special.


**The Recipe**


To recreate this nostalgic dish, start by placing corn tortillas on a cookie sheet, sliding them into the oven for 16-17 minutes until their edges brown and curl. The smell of warming tortillas always transports me back to those afternoons, the kitchen filled with laughter and stories.


Once the tortillas have cooled at room temperature, the assembly of the tostadas begins. Spread 1-2 tablespoons of canned refried beans on each tortilla, a creamy foundation that anchors the flavors. Top it with a generous handful of shredded rotisserie chicken, its savory aroma mingling with the memories of my abuela's kitchen.


A vibrant sprinkle of shredded iceberg lettuce and diced tomato adds a fresh crunch, reminiscent of the garden my grandfather tended with care. A dollop of guacamole, creamy and rich, is followed by a drizzle of lime juice, its citrusy tang brightening the dish.


The final touches are a sprinkle of cotija cheese, its salty crumble echoing the laughter shared over meals, and a drizzle of salsa. Garnish with jalapeños for a hint of heat, a nod to the spice that my family has always loved.


**A Meal to Share**


These tostadas, served open-faced on a platter, tell a story of family and tradition. They remind me of the joy of gathering around the table, sharing not just food but a piece of our heritage. As a main dish, this recipe is a testament to the power of food to connect us, to bring us closer to those we love.


**A Nostalgic Culinary Adventure**


As you savor these Rotisserie Chicken and Bean Tostadas, may your kitchen be filled with the same warmth and joy that mine was on those cherished Saturdays. This dish, a humble 3 out of 10 in difficulty, holds within it the power to create new memories while honoring the old. Gather your loved ones, share stories, and let the flavors of this dish carry you on a nostalgic culinary adventure.


**Keywords:** Rotisserie Chicken Tostadas, Easy Tostada Recipe, Family Meal, Nostalgic Dish, Mexican Cuisine, Main Dish, Simple Tostadas, Authentic Flavor, Family Tradition, Comfort Food.


---


Whether you're recreating family memories or crafting new ones, these Rotisserie Chicken and Bean Tostadas are sure to become a beloved staple in your home. Enjoy the flavors, cherish the moments, and let the tradition continue.

Read more about Appetizers

Read more about Main Dishes

Read more about Desserts

Delicious Rhubarb Custard Pie | Made by Meaghan Moineau

Delicious Rhubarb Custard Pie | Made by Meaghan Moineau

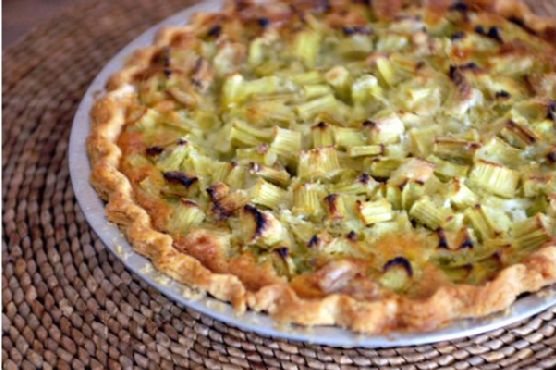
**Title: A Slice of Nostalgia: Crafting the Perfect Rhubarb Custard Pie**


**Description:** Dive into the world of baking with a timeless recipe that blends tradition and taste. Our Delicious Rhubarb Custard Pie combines tangy rhubarb with a creamy custard filling, all nestled in a perfectly baked crust. This dessert not only tantalizes your taste buds but also offers a slice of cherished family memories. Rated 5/10 in difficulty, this dessert is perfect for both novice and seasoned bakers alike.


---


### The Delightful Dance of Rhubarb and Custard


There's something magical about the combination of tangy rhubarb and creamy custard, a pairing that perfectly encapsulates both balance and indulgence. This Delicious Rhubarb Custard Pie is a testament to that harmony. With a hint of nutmeg and the buttery goodness enveloping each bite, it’s a dessert that promises satisfaction and nostalgia.


#### Ingredients:


- Butter


- Eggs


- Flour


- Nutmeg


- Prebaked pie crust


- Raw rhubarb


- Salt


#### Instructions:


1. **Prepare the Filling:** In a large bowl, combine flour, nutmeg, salt, and raw rhubarb. This mixture will become the heart of your pie, infusing every bite with a delightful tartness.


2. **Assemble the Pie:** Pour the rhubarb mixture into a pre-baked pie crust, ensuring it's evenly distributed.


3. **Add the Custard:** Beat the eggs and pour them over the rhubarb mixture, letting the custard seep through the vibrant reds and greens of the rhubarb.


4. **Drizzle with Butter:** Melt the butter and drizzle it over the top of the pie. This final touch ensures a rich, velvety texture.


5. **Baking:** Preheat your oven to 400°F (220°C). Place the pie in the center rack and bake for 50 minutes. To prevent the crust edges from over-browning, tent them with aluminum foil.


#### A Slice of Family Memory


Every time I bake this pie, I’m whisked back to my grandmother’s quaint kitchen. The aroma of rhubarb custard pie wafting through her house was a signal that something special was about to happen. It was a Sunday tradition, a staple at our family gatherings. We’d gather around the table, the pie still warm from the oven, and share stories of the week gone by.


My grandmother, with her kind eyes and gentle smile, always insisted on using fresh rhubarb from her garden. She said it was the secret ingredient, though I suspect it was her love that made each pie so memorable. As kids, my siblings and I would sneak into the garden, plucking rhubarb stalks, pretending to be little chefs. Those moments are etched in my heart, a testament to the power of food in bringing families together.


#### Dessert Rating: 5/10


This recipe, while not overly complicated, requires careful attention to detail to achieve the perfect balance of flavors. It's an intermediate-level dessert, ideal for those ready to expand their baking repertoire.


---


Embrace the tradition, savor the flavors, and let this Delicious Rhubarb Custard Pie become a cherished part of your family gatherings. As you bake, remember the stories that have brought this recipe to life, and perhaps, create new ones of your own.

Read more about Appetizers

Read more about Main Dishes

Read more about Desserts

Turkey-Spinach Burgers With Sweet Soy-Ginger Sauce | Made by Meaghan Moineau

Turkey-Spinach Burgers With Sweet Soy-Ginger Sauce | Made by Meaghan Moineau

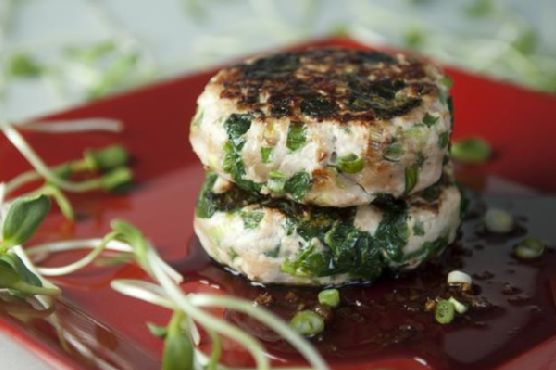
# Turkey-Spinach Burgers With Sweet Soy-Ginger Sauce: A Fusion of Flavors and Family Memories


## Description


Discover the culinary magic of Turkey-Spinach Burgers with Sweet Soy-Ginger Sauce. This delightful fusion dish combines the wholesome goodness of ground turkey and fresh spinach with a tantalizing Asian-inspired sauce. Perfect as a main dish, these burgers are not just a treat for the taste buds but also a stroll down memory lane, wrapped in a nostalgic family story.


## A Taste of Nostalgia


Cooking has always been a family affair in my household. Every Sunday, my mom and I would gather in the kitchen, aprons tied and ready for adventure. One particular Sunday, we stumbled upon a recipe that would become a staple in our family: Turkey-Spinach Burgers with Sweet Soy-Ginger Sauce.


The aroma of soy sauce and fresh ginger simmering on the stove would fill the kitchen, mingling with the laughter and stories we shared. My mom would recount tales of her childhood, and in those moments, I felt connected to generations past. The sizzling sound of turkey patties on the skillet was the soundtrack to our conversations, and the vibrant green of the spinach reminded us of the garden my grandmother used to tend with love and care.


Every bite of those burgers was a bite of history, flavored with love and memories. It's a recipe that transcends taste; it’s a testament to family bonds and culinary heritage.


## Recipe: Turkey-Spinach Burgers With Sweet Soy-Ginger Sauce


### Ingredients


- Fresh baby spinach


- Black pepper


- Canola oil


- Dark brown sugar


- Fresh ginger


- Ground turkey


- Mirin


- Salt


- Scallions


- Sesame oil


- Soy sauce


### Instructions


1. **Prepare the Sauce**: In a small saucepan, combine soy sauce, mirin, dark brown sugar, and fresh ginger. Bring to a boil over medium-high heat, whisking to dissolve the sugar. Reduce until slightly syrupy, about 3 minutes. Adjust the heat if necessary to prevent boil-over. Remove from heat and allow to cool completely. (Sauce may be prepared up to 2 days in advance and refrigerated in a covered container.)


2. **Prepare the Spinach**: Bring a large pot of water to a boil. Cook the spinach for 1 minute. Drain and transfer to a cold water bath to stop the cooking process. Drain again and dry thoroughly between layers of paper towels. (Spinach may be prepared up to 2 days in advance and refrigerated in a covered container.)


3. **Make the Patties**: In a large bowl, combine ground turkey, scallions, sesame oil, reserved spinach, and 1 tablespoon of the reserved sauce. Season with salt and black pepper and blend well without overworking the mixture. Form the turkey-spinach mixture into 4 patties, about 3 inches across and 1 inch thick.


4. **Cook the Burgers**: Heat canola oil in a large nonstick skillet over medium-high heat. When hot, add the patties and cook for about 5 minutes per side, until nicely browned and cooked through. Lower heat if necessary to prevent burning.


5. **Serve**: Serve the burgers with some of the sauce spooned over. Garnish with sliced scallions if desired.


### Difficulty Rating


Rated 5 out of 10 for difficulty, this dish is approachable for home cooks and offers a rewarding culinary experience.


### Classification


Main Dish


## Conclusion


These Turkey-Spinach Burgers with Sweet Soy-Ginger Sauce are more than just a meal; they are a bridge between past and present, a recipe that brings families together. Whether you're a seasoned chef or a kitchen novice, this dish invites you to create your own memories, one delicious bite at a time. Enjoy the fusion of flavors and the warmth of family tradition in every burger.

Read more about Appetizers

Read more about Main Dishes

Read more about Desserts

Chewy Gingersnaps | Made by Meaghan Moineau

Chewy Gingersnaps | Made by Meaghan Moineau

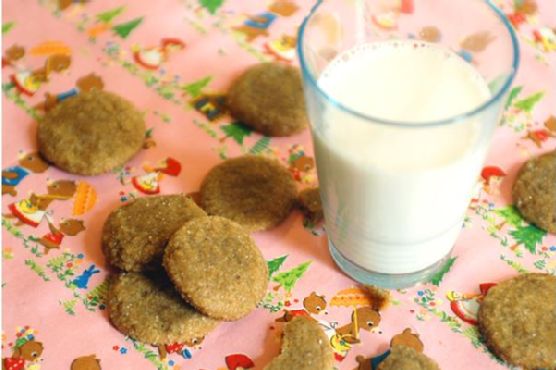
**Title: "Chewy Gingersnaps: A Heartwarming Holiday Tradition"**


**Description:** Dive into the cozy nostalgia of the holiday season with these irresistibly chewy gingersnaps. Infused with the warm spices of ginger and cinnamon, this classic dessert offers a delightful balance of sweet and spicy flavors. Ideal for family gatherings or a quiet night by the fire, these cookies are sure to become a cherished part of your seasonal traditions. With a difficulty rating of 4 out of 10, they're accessible for bakers of all skill levels.


---


As the crisp air of fall deepens into the chill of winter, my kitchen becomes a haven of warmth and spice. The scent of gingersnaps baking in the oven is more than just a delightful aroma; it’s a passport to cherished family memories. These chewy gingersnaps, with their perfect blend of ginger, cinnamon, and molasses, have been a staple at our holiday gatherings for as long as I can remember.


Growing up, the holidays meant a bustling kitchen, filled with the laughter of family and the clatter of pots and pans. My grandmother would always take the lead, orchestrating the preparation of a feast while simultaneously baking batch after batch of her famous gingersnaps. These cookies were more than just a treat; they were a tradition, a symbol of the season, and a testament to the love that bound our family together.


The process of making gingersnaps was a family affair. My siblings and I would gather around the kitchen counter, eager to help in any way we could. Our roles were simple yet crucial: stirring the flour, baking soda, salt, and spices in one bowl while watching my grandmother cream the butter, oil, and sugars in another. The anticipation built as she beat in the eggs, one at a time, followed by the rich, dark molasses that gave the cookies their distinctive flavor.


Once the dough was mixed, it was time for our favorite part: shaping the dough into small balls and rolling them in a generous coating of sugar. As we placed them onto parchment-lined baking trays, my grandmother would remind us that the secret to their perfect chewiness was to bake them for precisely eight minutes. They would still seem a bit underdone when first taken out, but that was exactly how they were supposed to be.


The first bite of a freshly baked gingersnap was always magical. The outside was crisp with a sugar coating, while the inside was soft, chewy, and bursting with flavor. These cookies were often enjoyed with a cup of hot cocoa or mulled cider, completing the cozy holiday experience.


Today, I carry on the tradition with my own family, baking these chewy gingersnaps each year as the holidays approach. Each batch is a tribute to my grandmother and the loving memories she created. I hope that as you try this recipe, it brings warmth, joy, and a touch of nostalgia to your home as well.


**Difficulty: 4/10**


**Classification: Dessert**


**Ingredients:**


- 2 teaspoons baking soda


- 1 cup brown sugar


- 1 cup (2 sticks) butter, softened


- 2 teaspoons ground cinnamon


- 2 large eggs


- 2 cups all-purpose flour


- 2 teaspoons ground ginger


- 1/2 teaspoon kosher salt


- 1/4 cup molasses


- 1/4 cup vegetable oil


- 1/4 teaspoon ground white pepper


- 1/2 cup white sugar (plus extra for rolling)


**Instructions:**


1. Preheat oven to 325°F (160°C).


2. In a large bowl, stir together the flour, baking soda, salt, ginger, cinnamon, and white pepper.


3. In another bowl, cream the butter, oil, brown sugar, and white sugar together until light and fluffy.


4. Beat in the eggs, one at a time, until fully incorporated.


5. Stir in the molasses.


6. Gradually add the dry ingredients to the wet ingredients, stirring until well combined.


7. Shape the dough into small balls and roll them in additional white sugar.


8. Place the dough balls on a baking tray lined with parchment paper.


9. Bake for 8 minutes. The cookies will appear slightly underdone when removed from the oven.


10. Allow to cool on the baking tray for a few minutes before transferring to a wire rack to cool completely.


Enjoy these delightful chewy gingersnaps, and may they fill your home with warmth and joy this holiday season!

Read more about Appetizers

Read more about Main Dishes

Read more about Desserts

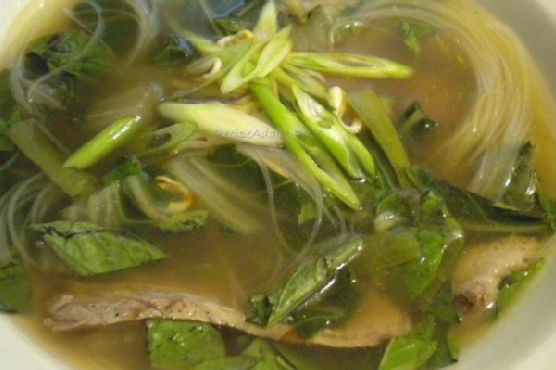
Vietnamese Beef-Noodle Soup With Asian Greens, Okay Vietnamese/japanese | Made by Meaghan Moineau

Vietnamese Beef-Noodle Soup With Asian Greens, Okay Vietnamese/japanese | Made by Meaghan Moineau

**Title: Savory Whispers of Home: Vietnamese Beef-Noodle Soup with Asian Greens**


**Description:** Dive into the aromatic embrace of Vietnamese Beef-Noodle Soup with Asian Greens, a dish that marries the rich flavors of Vietnam and Japan. This culinary journey not only tantalizes the taste buds but also weaves a tapestry of familial memories, evoking the warmth and love of home. Perfect as a hearty main dish, this recipe is rated 6 out of 10 on the difficulty scale, making it an accessible yet satisfying challenge for any home cook.


---


### A Taste of Tradition: Vietnamese Beef-Noodle Soup with Asian Greens


The gentle simmering of spices, the vibrant green of baby bok choy, and the fragrant dance of fresh herbs—these are not just ingredients to a dish but the whispers of a memory, a nostalgic journey back to my grandmother’s kitchen. Vietnamese Beef-Noodle Soup with Asian Greens, a recipe that seamlessly combines Vietnamese and Japanese culinary traditions, is more than just a meal; it’s a cherished family heirloom.


#### Ingredients


- 2 baby bok choy leaves


- 1 tablespoon brown sugar


- 3 cardamom pods


- 2 tablespoons fish sauce


- 1/4 cup fresh basil leaves


- 1/4 cup fresh bean sprouts


- 1 tablespoon grated fresh ginger


- 1/4 cup fresh mint leaves


- 3 garlic cloves, minced


- 6 cups fat-free less-sodium beef broth


- Lime wedges for serving


- 2 tablespoons less-sodium soy sauce


- 2 tablespoons light miso


- 8 oz wide rice stick noodles


- 1 teaspoon sesame oil


- 1 pound sirloin steak, partially frozen, sliced thin


- 1 cup trimmed snow peas


- 2 star anise pods


- 1 fresh Thai chile, thinly sliced


- 2 cups water


- 1 yellow onion, thinly sliced


#### Instructions


1. **Prepare the Beef and Noodles:**


- Freeze the beef for 10 minutes to make slicing easier. Cut across the grain into 1/8-inch-thick slices.


- Cook noodles according to package directions. Drain, rinse with cold water, and set aside.


2. **Create the Broth:**


- In a large saucepan, combine onion, ginger, garlic, cardamom, and star anise. Cook over medium-high heat for 5 minutes, stirring frequently to release the aromas.


- Add beef broth and 2 cups water (or dashi) to the saucepan. Bring it to a boil, then strain the mixture through a fine sieve into a bowl, discarding the solids.


3. **Flavor the Broth:**


- Return the strained broth to the pan. Stir in soy sauce, sugar, fish sauce, and sesame oil. Bring it to a boil once more.


- Add bok choy and snow peas, simmering for 4 minutes until the peas are crisp-tender and the bok choy is wilted. Stir in the miso at the last minute for a touch of umami.


4. **Assemble the Bowls:**


- Arrange 1/2 cup of noodles into each of 4 large bowls.


- Evenly divide the raw beef and chile slices among the bowls.


5. **Serve:**


- Ladle about 1 2/3 cups of hot soup over each serving. The broth will gently cook the beef to perfection.


- Top each bowl with 1/4 cup of bean sprouts, 1 tablespoon of basil, and 1 tablespoon of mint.


- Serve with lime wedges for a zesty finish.


#### A Family Memory


I remember the first time I watched my grandmother prepare this dish. It was a rainy afternoon, the kind that invites you to gather around a warm hearth. The kitchen was alive with the sound of sizzling and the aromatic symphony of spices. As a child, I was fascinated by the meticulous way she sliced the beef, her hands steady and sure, her eyes twinkling with a blend of concentration and joy. The final touch was always the fresh herbs, a nod to our Vietnamese roots, and the lime wedges, a hint of my grandfather’s Japanese influence.


Sharing this soup was more than sharing a meal; it was sharing our heritage, our stories, and our love. Every spoonful was a step back in time, a reminder of the simple yet profound comfort of family.


Whether you’re a seasoned cook or a culinary novice, this Vietnamese Beef-Noodle Soup with Asian Greens offers a deliciously fulfilling challenge. Rated 6 out of 10 in difficulty, it’s the perfect main dish to bring warmth to your table and a slice of nostalgia to your heart.

Read more about Appetizers

Read more about Main Dishes

Read more about Desserts

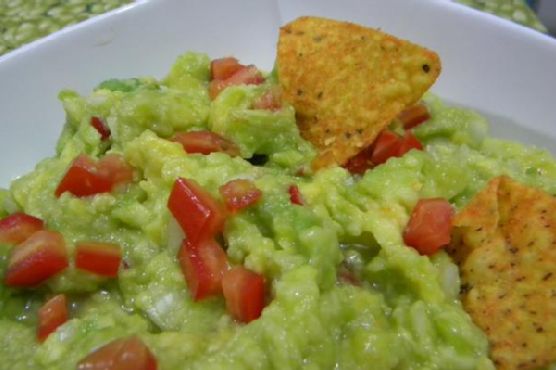
Guacamole | Made by Meaghan Moineau

Guacamole | Made by Meaghan Moineau

**Title: A Taste of Tradition: Crafting the Perfect Guacamole**


**Description: Dive into the rich, flavorful world of homemade guacamole, a dish that not only tantalizes the taste buds but also evokes cherished family memories. Discover the simple yet exquisite recipe that has been a staple at our family gatherings and learn how to make it yourself.**


---


### A Taste of Tradition: Crafting the Perfect Guacamole


Guacamole is more than just a dish; it's a celebration of flavors that brings people together. Its creamy texture and vibrant taste have the power to transform any meal, making it an essential appetizer in many households. Today, I want to share not only a delightful guacamole recipe but also a heartwarming story of how this dish became a beloved tradition in my family.


#### Ingredients:


- 3 Haas avocados


- 1 small onion, finely chopped


- 1 jalapeño pepper, seeded and minced


- 2 tablespoons fresh cilantro, chopped


- 1 teaspoon salt


- 1/2 teaspoon black pepper


- 1 tablespoon fresh lime juice


- 1 tablespoon fresh basil, chopped


- 1 tablespoon fresh oregano, chopped


#### Instructions:


1. **Prepare the Avocados**: Begin by cutting the avocados in half lengthwise. Carefully drive a chef's knife into the large pit and twist to remove it. Scoop the avocado flesh from the skin into a mixing bowl.


2. **Mash and Mix**: Using a fork, gently mash the avocado to your desired consistency. Add in the finely chopped onion, minced jalapeño pepper, fresh cilantro, basil, and oregano. Mix well to incorporate all the ingredients.


3. **Season to Perfection**: Season the mixture with salt, black pepper, and fresh lime juice. Stir to combine, ensuring every bite is packed with flavor.


4. **Serve or Store**: Serve your guacamole immediately for the freshest taste. If you're not planning to enjoy it right away, press a plastic film wrap directly onto the surface of the guacamole to prevent browning, and store it in the refrigerator.


#### A Nostalgic Family Memory


Every summer, my family would gather at my grandparents' house for a weekend of laughter, storytelling, and, of course, food. The centerpiece of these gatherings was always my grandfather's famous guacamole. He had learned the recipe from his mother, who had brought it from her hometown in Mexico.


I remember as a child, standing on a stool beside him as he prepared the guacamole, eagerly waiting to be handed the fork to mash the avocados. He would tell stories of his childhood in the bustling markets of Guadalajara, where he first learned to select the perfect avocados. The kitchen would fill with the fresh aroma of cilantro and lime, a scent that still transports me back to those warm summer afternoons.


Guacamole was more than just an appetizer; it was a symbol of our family's heritage and love, a dish that connected us to our roots and to each other. Even now, as I prepare this recipe, I feel a sense of nostalgia and a deep appreciation for the family traditions that shape our lives.


#### Difficulty: 3/10


#### Classification: Appetizer


In conclusion, this guacamole recipe is not only simple and delicious but also a reminder of the power of food to evoke memories and bring people together. Whether you're hosting a family gathering or simply want a taste of tradition, this dish promises to delight your taste buds and warm your heart. Enjoy!

Read more about Appetizers

Read more about Main Dishes

Read more about Desserts

Divine Christmas Candy Cane Cookies | Made by Meaghan Moineau

Divine Christmas Candy Cane Cookies | Made by Meaghan Moineau

**Title: Celebrate the Holidays with Divine Christmas Candy Cane Cookies**


**Description:** Embrace the holiday spirit with our delightful Candy Cane Cookies, a heavenly treat that combines the minty freshness of peppermint with the sweetness of a buttery cookie. Perfect for sharing, these cookies will bring joy to every festive gathering. Follow our detailed guide to create these charming confections and discover the heartwarming family story behind this treasured recipe.


---


**A Sweet Holiday Tradition: Divine Christmas Candy Cane Cookies**


As the holiday season approaches, the aroma of freshly baked cookies fills the air, evoking cherished memories of family gatherings and festive celebrations. One such nostalgic treat that has become a staple in our household is the delightful Candy Cane Cookie. With its vibrant colors and refreshing peppermint flavor, this cookie is not just a dessert, but a symbol of holiday joy and togetherness.


**Recipe Overview**


**Ingredients:**


- 2 cups all-purpose flour


- 1 egg yolk


- Red food coloring


- 1 teaspoon peppermint extract


- 1/2 cup powdered sugar


- 1 cup unsalted butter, softened


- 1 teaspoon vanilla extract


**Instructions:**


1. **Creaming the Butter**: Begin by creaming the unsalted butter until it achieves a smooth, fluffy texture. Gradually add the powdered sugar, continuing to beat until the mixture is light and airy.


2. **Mixing the Wet Ingredients**: Incorporate the egg yolk, vanilla extract, and peppermint extract into the butter and sugar mixture, stirring until well combined.


3. **Incorporating the Dry Ingredients**: Add the all-purpose flour in two additions. First, add half of the flour, stirring until fully incorporated, then add the remaining flour. Mix until you attain a firm, smooth dough.


4. **Coloring the Dough**: Divide the dough into two equal portions. Add a few drops of red food coloring to one half, kneading until the color is evenly distributed.


5. **Chilling the Dough**: Wrap both dough balls in plastic wrap and refrigerate for about 30 minutes, allowing the dough to firm up.


6. **Shaping the Cookies**: Preheat your oven to 180°C (356°F). On a lightly floured surface, take a walnut-sized piece of red dough and a walnut-sized piece of white dough. Roll each into a 10-12 cm long rope. Place the ropes side by side and gently twist them together, pressing slightly to form a spiral. Shape by bending one end into a hook, creating the iconic candy cane shape.


7. **Baking**: Line the cookies on baking paper about 2 cm apart. Bake for approximately 10 minutes or until the edges start to brown. Once baked, let the cookies cool completely on a wire rack.


**A Cherished Family Memory**


Every Christmas, my grandmother would gather the family in her cozy kitchen, the heart of her home. With flour dusting the countertops and laughter echoing off the walls, we would embark on our annual cookie-baking adventure. The Candy Cane Cookies were always my favorite part. My siblings and I would compete to see who could create the most perfect twist, our hands sticky with dough and faces smeared with flour. As the cookies baked, the kitchen would be filled with the sweet scent of peppermint, wrapping us in a warm, festive embrace. To this day, the taste of these cookies transports me back to those precious moments, a reminder of the simple joys and loving bonds that define the holiday season.


**Difficulty Level: 5/10**


**Classification: Dessert**


Whether you’re continuing a family tradition or starting a new one, these Candy Cane Cookies are sure to bring a smile to everyone’s face. With their delightful appearance and delicious taste, they’re the perfect addition to your holiday dessert table. Happy baking, and may your holidays be filled with warmth and cheer!

Read more about Appetizers

Read more about Main Dishes

Read more about Desserts

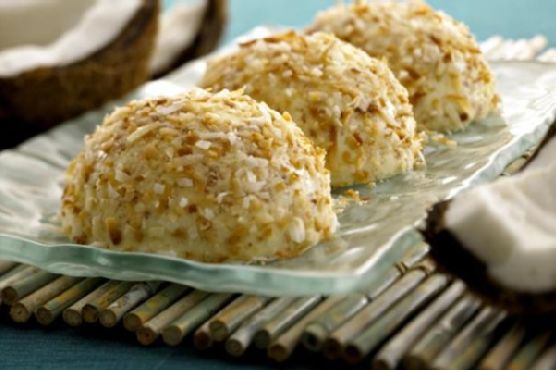
Crème Fraiche Coconut Bavarians | Made by Meaghan Moineau

Crème Fraiche Coconut Bavarians | Made by Meaghan Moineau

**Title: Indulge in Nostalgia with Crème Fraiche Coconut Bavarians: A Dessert That Transcends Time**


**Description: Dive into the rich, creamy world of Crème Fraiche Coconut Bavarians—a dessert that perfectly blends tradition and modern culinary artistry. Infused with the tropical allure of coconut and the luxurious texture of crème fraiche, this dessert is not just a treat for the palate but also a journey down memory lane. Discover how this delectable creation became a cherished family tradition and learn how to create it yourself with our step-by-step guide.**


**Crème Fraiche Coconut Bavarians: A Sweet Taste of Memory**


The gentle hum of our family kitchen was always punctuated by the rhythmic clattering of dishes and the soft laughter of loved ones. Among the many desserts that graced our dining table, one stood out for its sumptuous texture and evocative flavor—Crème Fraiche Coconut Bavarians. It wasn't just a dessert; it was the embodiment of family gatherings, a sweet testament to our shared history.


**Ingredients:**


- 1 packet gelatin


- 1 can coconut milk, divided


- 1 can sweetened condensed milk


- 1/2 cup sugar


- 4 egg yolks


- 1 cup Alouette Cuisine Crème Fraiche


- 1/2 cup shredded coconut


**Instructions:**


1. **Bloom the Gelatin:** In a small bowl, combine the gelatin with 4 tablespoons of coconut milk. Let it sit to bloom while you prepare the rest of the ingredients.


2. **Simmer the Milks:** In a medium saucepan, bring the sweetened condensed milk and remaining coconut milk to a gentle simmer over medium-high heat. Stir occasionally to ensure it doesn't stick to the bottom.


3. **Temper the Egg Yolks:** Meanwhile, whisk together the sugar and egg yolks in a separate bowl until well combined. Slowly add a small amount of the heated milk mixture to the egg yolks, whisking continuously to temper them without cooking the eggs.


4. **Combine and Thicken:** Gradually pour the tempered egg yolk mixture back into the saucepan. Stir constantly and heat until the mixture thickens enough to coat the back of a spoon, about 5 to 7 minutes. Remove from heat and stir in the bloomed gelatin until fully dissolved.


5. **Chill and Whip:** Transfer the mixture to a bowl and refrigerate until it begins to gel. While waiting, whip the Alouette Cuisine Crème Fraiche in a separate bowl until soft peaks form.


6. **Fold and Mold:** Once the gelatin mixture has slightly set, gently fold it together with the whipped crème fraiche. Pour the combined mixture into your chosen molds immediately.


7. **Refrigerate Overnight:** Allow the Bavarians to set in the refrigerator overnight.


8. **Serve with Nostalgia:** Unmold the Bavarians just before serving and generously sprinkle with shredded coconut. Enjoy the dessert that has become a beloved part of our family's culinary heritage.


**A Nostalgic Family Memory**


I remember the first time my grandmother made Crème Fraiche Coconut Bavarians. The kitchen was filled with the enticing aroma of coconut, a scent that still evokes memories of those bustling family gatherings. As children, we watched in awe as she carefully folded the whipped crème fraiche into the gelling mixture, her hands moving with the grace of years of practice. Each bite was a reminder of her warmth and the love she poured into every dish. Even today, making this dessert feels like a sweet conversation with her, a way to keep her spirit alive in our hearts and taste buds.


**Difficulty Rating:** 6/10


**Classification:** Dessert


Creating Crème Fraiche Coconut Bavarians is not just about following a recipe—it's about connecting with the past, savoring the present, and crafting memories for the future. Whether you're a seasoned chef or a culinary novice, this dessert promises a rewarding experience that goes beyond taste. So, gather your ingredients, embrace the process, and indulge in a dessert that truly transcends time.

Read more about Appetizers

Read more about Main Dishes

Read more about Desserts

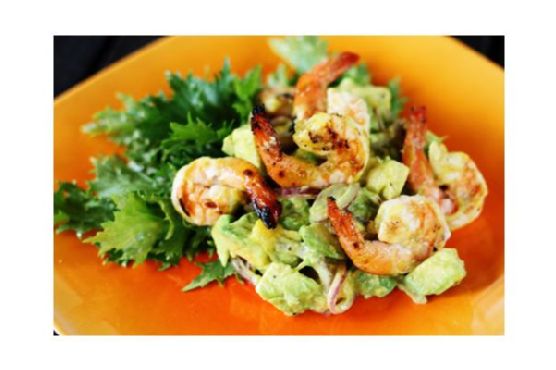
Avocado-Mango Salad With Grilled Shrimp | Made by Meaghan Moineau

Avocado-Mango Salad With Grilled Shrimp | Made by Meaghan Moineau

**Title: A Taste of Summer: Avocado-Mango Salad with Grilled Shrimp**


**Description: Dive into the flavors of summer with our Avocado-Mango Salad with Grilled Shrimp. This dish, a symphony of fresh ingredients and vibrant tastes, is perfect for family gatherings or a simple weeknight dinner. Rated a 6/10 in difficulty, this main dish is sure to impress without overwhelming your culinary skills.**


---


**A Taste of Summer: Avocado-Mango Salad with Grilled Shrimp**


There’s something inherently nostalgic about summer meals. The smell of a grill heating up, the sound of laughter and chatter in the background, and the vibrant flavors of fresh produce all remind me of family gatherings at my grandmother's house. Today, I want to share a recipe that encapsulates those cherished memories: Avocado-Mango Salad with Grilled Shrimp. This dish not only brings a burst of flavor but also transports me back to those carefree days of summer.


**Ingredients:**


- 1 lb shrimp, peeled and deveined


- 2 ripe Hass avocados, diced


- 1 cup diced mango


- Lime wedges for garnish


- 2 tbsp red wine vinegar


- 2 tbsp fresh lime juice


- 1 tsp fresh ginger, grated


- 1 tsp sugar


- 1 tbsp Dijon mustard


- 1/4 cup canola oil


- 1/4 cup cilantro, chopped


- 1 tsp lime zest


- 1 diced habanero chile (optional for heat)


- 1/2 cup red onion, thinly sliced


- Salt and black pepper to taste


**Instructions:**


1. **Preheat the Grill:** Start by preheating your gas grill to high heat. This ensures that the shrimp will cook quickly and evenly, achieving that perfect charred flavor.


2. **Prepare the Dressing:** In a small bowl, combine the red wine vinegar, fresh lime juice, grated ginger, sugar, Dijon mustard, and canola oil. Whisk until the ingredients are well blended. Season with salt and black pepper to taste. Set aside.


3. **Grill the Shrimp:** Season the shrimp with a pinch of salt and black pepper. Place them on the grill and cook for about 2-3 minutes on each side, until they turn pink and opaque. Remove from the grill and set aside.


4. **Assemble the Salad:** In a large bowl, combine the diced avocados, mango, red onion, lime zest, and cilantro. If you're feeling adventurous and enjoy a bit of heat, add the diced habanero chile. Drizzle the prepared dressing over the salad and toss gently to coat.


5. **Serve:** Arrange the grilled shrimp atop the salad, and garnish with lime wedges. This dish can be served warm or at room temperature, making it a versatile option for any occasion.


**A Family Memory:**


This dish always takes me back to the annual summer barbecues at my grandmother's house. I remember the excitement of helping her in the kitchen, carefully dicing the avocados and mangos while listening to her stories of summers past. The aroma of grilled shrimp would waft through the air as family members gathered around the picnic table, sharing laughter and love. It was during one of these gatherings that I first tasted the combination of creamy avocado with sweet mango and succulent shrimp—a flavor match made in heaven that has since become a family favorite.


**Final Thoughts:**


Our Avocado-Mango Salad with Grilled Shrimp is more than just a meal; it's an experience. It's a reminder of the joy that comes from sharing delicious food with loved ones. Whether you're creating new memories or reminiscing about old ones, this dish is sure to bring sunshine to your table.


**Difficulty Rating: 6/10**


**Classification: Main Dish**


So fire up the grill and gather your loved ones. It's time to create some delicious memories!

Read more about Appetizers

Read more about Main Dishes

Read more about Desserts

Brown Rice Mushroom Pilaf | Made by Meaghan Moineau

Brown Rice Mushroom Pilaf | Made by Meaghan Moineau

**Title: A Hearty Bowl of Comfort: Brown Rice Mushroom Pilaf**


**Description:** Discover the heartwarming delight of Brown Rice Mushroom Pilaf, a dish that brings back cherished family memories. Perfect as a main dish, this simple yet flavorful recipe is a wholesome addition to your menu. Join me as I share a nostalgic journey and a recipe that scores a 4 out of 10 on the difficulty scale, yet offers a 10 in satisfaction.


---


When the cool winds of autumn arrive, they carry with them a cascade of memories from a time when family gatherings were frequent and hearty meals filled the air with irresistible aromas. One such dish that has been a staple in my family for generations is the Brown Rice Mushroom Pilaf. With its earthy flavors and comforting warmth, it never fails to evoke a sense of home.


**The Nostalgic Story:**


I remember the first time I helped my grandmother make this pilaf. It was a chilly Saturday afternoon, and we were preparing for a large family dinner. The aroma of onions sizzling in sunflower oil filled the kitchen, mingling with the earthy scent of mushrooms. My grandmother, with her kind eyes and gentle hands, guided me through the process, teaching me how to patiently sauté the onions and mushrooms until they reached that perfect golden hue.


As the brown rice was added to the pan, she imparted her wisdom, "The secret, my dear, is to let each grain soak up the flavors. It’s like life; we must take in all the goodness around us." With her guidance, I learned the art of stirring the rice just enough to coat it in the oil without overdoing it, allowing each grain to absorb the rich flavors of the dish.


Once the water was added, we waited, sharing stories and laughter, letting the pilaf simmer, filling the air with its inviting aroma. The lid was placed on the saucepan, and we let it rest, just like she taught me, ensuring every drop of liquid was absorbed, leaving the rice tender and flavorful.


This dish, simple in its ingredients yet profound in its ability to bring people together, became a symbol of our family’s love and togetherness. To this day, whenever I prepare Brown Rice Mushroom Pilaf, it’s as if my grandmother is right there with me, smiling and reminding me of the importance of savoring life’s simple pleasures.


**Recipe for Brown Rice Mushroom Pilaf:**


**Ingredients:**


- 1 onion, chopped


- 1 cup brown rice


- 1 can (or equal amount) fresh mushrooms, sliced


- 2 tablespoons unrefined sunflower oil


- 2 cups water


- Sea salt, to taste


- Ground pepper, to taste


**Instructions:**


1. Heat the sunflower oil in a large saucepan over medium heat.


2. Add the chopped onion and sliced mushrooms, sautéing them for about 5 minutes until the onion becomes translucent and the mushrooms soften.


3. Stir in the brown rice, ensuring each grain is well-coated with the oil and flavors from the onion and mushrooms.


4. Pour in the water and bring the mixture to a boil.


5. Reduce the heat to a simmer, covering the saucepan. Let it cook for approximately 30 minutes.


6. Remove from heat, keeping the lid on, and let the pilaf rest until all the liquid is absorbed into the rice.


7. Season with sea salt and ground pepper to taste, then fluff with a fork before serving.


**Difficulty Rating:** 4/10


**Classification:** Main Dish


This Brown Rice Mushroom Pilaf is more than just a meal; it’s a journey into the past, a reminder of the warmth and love of family traditions. It’s perfect for a cozy dinner, offering a delightful blend of flavors that speak to the heart and soul. Whether you’re recreating cherished memories or making new ones, this dish is sure to become a beloved favorite in your home.

Read more about Appetizers

Read more about Main Dishes

Read more about Desserts

Captain America Shield Cookies | Made by Meaghan Moineau

Captain America Shield Cookies | Made by Meaghan Moineau

# Shielding Sweetness: Captain America Shield Cookies


**Description:** Unleash your inner superhero with these delightful and iconic Captain America Shield Cookies. Perfect for comic book fans and dessert lovers alike, these cookies not only capture the essence of a beloved superhero but also serve as a nostalgic treat that brings families together. With layers of vibrant fondant and a creamy buttercream finish, these cookies are bound to be the star of your next gathering.


---


## A Sweet Nostalgia: A Family Memory


Growing up, superhero movies were a staple in our household. Every summer, my siblings and I would gather around the TV, popcorn in hand, eagerly watching the latest superhero saga unfold. Captain America, with his unwavering sense of justice and iconic shield, was always a favorite. It wasn't just his strength or bravery that captivated us; it was the idea of protection and unity that resonated deeply.


One rainy afternoon, with no new comics to dive into, my mom came up with a brilliant idea to keep us entertained - baking Captain America Shield Cookies. As the aroma of freshly baked sugar cookies wafted through the air, our kitchen transformed into a workshop of creativity and laughter. My siblings and I took turns dipping the cookies in red candy melts, giggling as we tried to perfect the fondant stars.


The joy of creating these cookies was matched only by the delight of sharing them with family and friends. Each bite was a reminder of those cherished days, where superhero adventures and family bonds were seamlessly intertwined.


## Recipe


### Ingredients:


- Red candy melts


- Coconut oil


- Circular cookie cutters (various sizes)


- Star cookie cutter


- Cornstarch


- Blue cake fondant


- White cake fondant


- Pre-made sugar cookies


- Vanilla buttercream


### Instructions:


1. Line a baking sheet with wax paper.


2. Microwave the candy melts and coconut oil in 30-second intervals until completely melted, mixing thoroughly.


3. Using a fork, dip each sugar cookie into the melted candy and set it carefully on the lined baking sheet.


4. Allow to set in the refrigerator for about one hour.


5. Dust a clean working surface with cornstarch and roll out your fondant.


6. Cut your white fondant with the largest cookie cutter, then using the 1.5-inch cookie cutter, cut a hole in the middle.


7. Using the smallest circular cookie cutter, cut out blue fondant circles.


8. Cut star shapes from the white fondant and use buttercream to glue them onto your blue fondant circles.


9. Once the coated cookies are set, remove them from the fridge and start assembling. Using buttercream as the glue, place your large white circle, then the blue one (with the star).


10. Enjoy your superhero creation!


### Difficulty Rating:


**4/10** - This recipe is beginner-friendly and perfect for a fun family activity.


### Classification:


**Dessert**


---


Whether you're celebrating a superhero-themed party or simply indulging your sweet tooth, these Captain America Shield Cookies are more than just a treat. They're a delicious way to bring a slice of nostalgia and the spirit of heroism into your home. Assemble your team, don your aprons, and let the baking adventure begin!

Read more about Appetizers

Read more about Main Dishes

Read more about Desserts