
On a chilly Tuesday morning last week, I found myself staring into my pantry, desperate for something other than my go-to toast routine. You know those mornings when you crave a little adventure but also need to keep it quick and wholesome? Enter my Healthy Southwestern Oatmeal. It’s like a warm hug with a zesty kick, perfect for waking up those taste buds and starting your day on a high note. You get the heartiness of oats, the warmth of chili powder, and the creamy goodness of cheese—all in one bowl. Plus, it’s a breeze to make. No fancy footwork in the kitchen, just straightforward comfort with a little flair.
Jump to Recipe
What You’ll Need
If your kitchen is anything like mine, you’re already halfway there with these ingredients! Simple, everyday staples with a couple of stars.
- 1 1/2 cups water
- 1 cup old fashioned oats
- 2 egg whites
- 1/4 cup reduced fat cheddar cheese
- 1/2 teaspoon chili powder
- 2 green white scallions, sliced
- Salt, to taste
How to Make Healthy Southwestern Oatmeal
- Start by bringing 1 1/2 cups of water to a rolling boil in a medium saucepan. Feel the steam rising and imagine the coziness awaiting you.
- Add the old fashioned oats to the water, giving them a gentle stir. Reduce the heat to a simmer and let them cook for about 10 minutes. You’ll know they’re ready when the mixture starts to look more like oats and less like water.
- Toss in the sliced scallions and chili powder. Cook together until the excess liquid has evaporated and the aroma of chili fills your kitchen, hinting at the southwestern flair.
- Pour in the egg whites, stirring constantly. Watch as they transform from clear to opaque, weaving themselves into the oats like magic.
- Spoon your creation into a serving bowl, sprinkle with salt and the reduced fat cheddar cheese. The cheese will melt slightly, adding a touch of creaminess and comfort.
Cook’s Notes
This dish is all about balance, so don’t be shy to adjust the chili powder for your spice preference. I find it best to enjoy this oatmeal fresh, but if you have leftovers, store them in an airtight container in the fridge for up to two days. When reheating, add a splash of water or milk to help bring it back to life. And if you find yourself in a rush in the morning, prep your scallions the night before to save some precious minutes.
Make It Your Own
- Swap the reduced fat cheddar for a little goat cheese for a tangy twist.
- For a protein boost, add black beans alongside the scallions.
- Try topping with a dollop of Greek yogurt for added creaminess and a bit of cool contrast.
- If you’re a meat lover, some crumbled turkey sausage would make a hearty addition.
If you try this, I’d love to hear how it turns out—drop a comment or tag me! Whether you stick to the recipe or tweak it to your liking, I hope this bowl brings a little extra joy to your morning routine.
Goes Well With
If you want to round out the meal, here’s what I’d pair it with over on meaghanmoineau.com:
Related update: Healthy Southwestern Oatmeal
Related update: Cheddar Polenta with Sun-dried Tomatoes & Shrimp
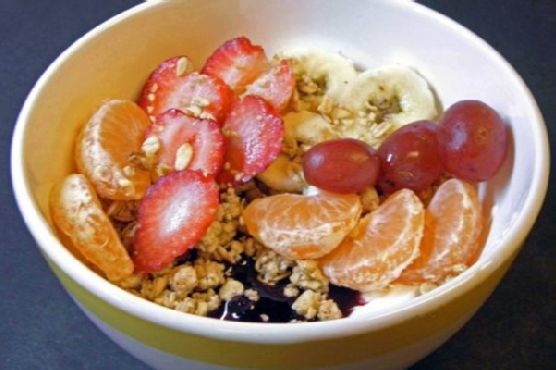
It was a rainy Tuesday afternoon, the kind where the clouds hang low and the air smells like earth. I found myself staring into my pantry, craving something that was both comforting and vibrant. My eyes landed on a jar of maple syrup, and I instantly knew what I needed: a warm batch of homemade granola with a medley of fresh fruit. This isn’t your average breakfast; it’s a hug in a bowl, the perfect blend of sweet and nutty with a touch of tang from dried cranberries. Just knowing that I could whip this up in about an hour, with ingredients I already had, made it even more appealing. By the time the granola was baking, the house smelled like a cozy blend of maple and toasted oats, and I couldn’t wait to dive in.
Jump to Recipe
What You’ll Need
The beauty of this recipe is in its simplicity. Chances are, you already have most of these at home, just waiting to be transformed into something magical:
- Dark brown sugar
- Cashew pieces
- Dried cranberries
- Dried raisins
- Fresh fruit (your choice!)
- Maple syrup
- Vegetable oil; peanut oil preferred
- Rolled oats
- Salt
- Slivered almonds
How to Make Homemade Organic Maple Granola with Fresh Fruit
- Preheat your oven to a cozy 250°F. This low temperature ensures each oat flake toasts evenly without burning.
- In a large mixing bowl, unite the rolled oats, cashew pieces, slivered almonds, a pinch of salt, and a smattering of dark brown sugar. Give it a gentle mix, letting your fingers enjoy the textures.
- Pour in the luscious maple syrup and your choice of vegetable oil. Stir everything thoroughly until every oat and nut is slicked with sweetness.
- Spread the mixture thinly and evenly on two baking tins with sides about an inch high. The secret to perfect granola is even spreading!
- Slide the tins into the oven and let them toast away for 45 to 60 minutes. Every 15 minutes, give them a careful stir and swap the tins’ positions. Your kitchen will soon smell like heaven.
- You’ll know it’s done when the granola has turned a lovely tan color and offers a gentle crunch. Remove the trays and let the granola cool completely.
- Once cooled, toss in the dried cranberries and raisins. Store your masterpiece in sealed plastic bags where it will stay delicious for up to two weeks, unrefrigerated.
- Serve with your favorite fresh fruits. I love a good mix of berries and sliced bananas for a refreshing twist.
Cook’s Notes
Granola is surprisingly forgiving, but here are a few pointers to make sure yours turns out just right:
- Make sure your oats are evenly coated with the sugar, syrup, and oil mixture for ultimate flavor distribution.
- Stirring every 15 minutes might sound like a chore, but it’s essential for that perfect golden tan and even texture.
- If you like chunkier granola, press the mixture down slightly when spreading it on the tins before baking.
- This granola makes a great make-ahead breakfast or snack. Just store it in a cool, dry place, and it’s ready whenever you are!
Make It Your Own
- Swap the cashew pieces for pecans or walnuts if you want an extra buttery crunch.
- Feeling spicy? Add a teaspoon of cinnamon or nutmeg to the oat mixture for a warm, autumnal vibe.
- Experiment with the dried fruits — dried apricots or mangoes add a lovely sweetness.
- Not a fan of maple? Try honey or agave syrup for a different but equally delightful flavor.
If you try this recipe, I’d love to hear how it turns out — drop a comment or tag me in your breakfast photos! I promise, your mornings are about to get a whole lot cozier.
Goes Well With
If you want to round out the meal, here’s what I’d pair it with over on meaghanmoineau.com:
Related update: Home made organic maple granola with fresh fruit
Related update: Healthy Southwestern Oatmeal

The other morning, as the autumn leaves whispered secrets through the slight breeze outside my window, I found myself in a breakfast conundrum. You know, the kind of morning where you crave something different but comforting, something that feels like a warm hug yet won’t leave you feeling weighed down. Enter: Oatmeal Pancakes. These beauties are both wholesome and satisfying, perfect for those busy weekdays when you still want to start your day with intention. They’ve quickly become my go-to because they’re not just heart-healthy; they’re heartwarming. Plus, they’re surprisingly simple to whip up. Seriously, you might already have everything you need in your kitchen!
Jump to Recipe
What You’ll Need
I love that these pancakes come together with just a handful of ingredients, most of which are probably chilling in your pantry or fridge right now.
- Irish oats
- Fat-free milk
- Whole wheat multi-purpose flour
- Baking powder
- Egg whites
- Agave (or sugar, if that’s your jam)
- Blueberries
- 100% maple syrup, for serving
How to Make Oatmeal Pancake (Yummy & Heart Healthy)
- Start by soaking your irish oats in the fat-free milk for a good 3-4 hours, or even better, let them get cozy overnight in the fridge. This is where the magic begins, softening up those oats for the perfect pancake texture.
- When you’re ready to get cooking, add the egg whites, whole wheat flour, baking powder, and agave to your oat and milk mixture. Blend everything together in a food processor or coffee grinder until you’ve got a smooth batter.
- Heat up a non-stick pan over medium heat. No need for any greasing here—these pancakes are low-maintenance!
- Pour 5 to 7 spoonfuls of your batter onto the heated pan. You’ll know it’s time to flip when the edges start to bubble and the bottom is a dreamy golden color.
- Flip and let the other side cook for another minute or two until puffed up and beautifully golden.
- Serve them warm, drizzled with 100% pure maple syrup, and maybe a handful of fresh blueberries if you’ve got them. Dig in and enjoy the cozy vibes!
Cook’s Notes
These pancakes are pretty forgiving, which I love. If you’re not a fan of soaking oats overnight, a few hours will do the trick, but the longer soak really gives the best texture. Once cooked, they’ll keep in the fridge for a couple of days. Just pop them in the microwave or toaster to reheat. Oh, and if you’re making these ahead, you can freeze them! Just layer parchment paper between each pancake and seal them in a freezer bag. Easy peasy.
Make It Your Own
- Boost the protein by swapping half of the egg whites for a scoop of your favorite protein powder.
- Not a fan of agave? Use honey or a tablespoon of brown sugar for a deeper sweetness.
- For a nutty twist, throw in a handful of chopped nuts like almonds or walnuts to the batter.
- Make it a berry bonanza by adding raspberries or strawberries instead of blueberries.
If you try this, I’d love to hear how it turns out — drop a comment or tag me! Enjoy your breakfast adventure and let these pancakes be your morning muse.
Related update: Oatmeal Pancake (Yummy & Heart Healthy)
Related update: Spicy Black-Eyed Pea Curry with Swiss Chard and Roasted Eggplant
Related update: Home made organic maple granola with fresh fruit

Picture this: It’s a chilly Tuesday morning, and I’m standing in my kitchen, bleary-eyed, clutching my favorite oversized mug of coffee. I need something hearty, something that’ll stick with me through the morning without sending me into a food coma by 10 a.m. Enter my go-to breakfast hero: Healthy Southwestern Oatmeal. It’s that perfect mix of comfort and sustenance — warm, savory oats with a kick of spice and cheesy goodness. Plus, it’s packed with protein from egg whites to keep me powered up. A total week-morning win, ready in no time, and bonus: you probably have most of the ingredients lurking in your pantry and fridge. Let’s dive into this simple yet satisfying breakfast wonder.
Jump to Recipe
What You’ll Need
This recipe is all about elevating simple pantry staples. Chances are you already have most of these on hand, which is great because who wants to run to the store before breakfast?
- 1 1/2 cups water
- 1 cup old fashioned oats
- 2-3 egg whites
- 1/4 cup reduced fat cheddar cheese, shredded
- 1/4 teaspoon chili powder (adjust to taste)
- 1-2 green white scallions, sliced
- Salt, to taste
How to Make Healthy Southwestern Oatmeal
- Start by bringing 1 1/2 cups of water to a boil in a medium saucepan. This is your base, so let that water get nice and bubbly before moving on.
- Add in the oats and reduce the heat to a gentle simmer. Let them cook for about 10 minutes. You’ll know they’re ready when the mixture is more oats than water, and it starts to thicken up. Stir occasionally to keep them from sticking.
- Once the oats are thick, toss in the scallions and chili powder. Give it a good stir, and let it all cook together until any remaining liquid is gone, and the aroma of chilies fills your kitchen.
- Now, the fun part: adding the egg whites. Pour them in slowly while stirring constantly. You’ll want to keep stirring until the whites are opaque and fully incorporated into the oats. It should take just a couple of minutes.
- Transfer the oatmeal to your favorite serving bowl, sprinkle with salt to taste, and top with the cheddar cheese. Let it melt over the top, and you’ve got yourself a delicious, energizing breakfast!
Cook’s Notes
Let’s talk about some tips and tricks to make this Southwestern Oatmeal fit right into your morning routine. First off, if you’re tight on time, you can prep the dry ingredients the night before. In the morning, just boil the water and you’re halfway there. Leftovers (if there are any!) can be stored in the fridge for up to two days. Just reheat them gently on the stove or in the microwave, and maybe splash a bit of water or milk to loosen them up. Be careful not to overdo the chili powder unless you’re really into spice — a little goes a long way!
Make It Your Own
You’re the boss of your breakfast bowl! Here are a few ideas to tweak it to your taste:
- Cheesy Upgrade: Swap the reduced-fat cheddar for a sharp aged cheddar or even some pepper jack for extra zing.
- Go Green: Add a handful of spinach or kale in with the scallions for an extra veggie boost.
- Protein Boost: Top with a sliced boiled egg if you’re looking for more protein power.
- Spice It Up: Add a dash of hot sauce or some chopped jalapeños if you want to kick up the heat.
If you try this, I’d love to hear how it turns out! Drop a comment or tag me on social media with your delicious creations. Happy breakfasting! 🥄
Related update: Healthy Southwestern Oatmeal
Related update: Blackened Cajun Chicken
Related update: Oatmeal Pancake (Yummy & Heart Healthy)

Last Tuesday, I found myself staring at the fridge at 7 a.m., coffee in hand, trying to muster some inspiration for breakfast before the day spiraled into chaos. There they were: a half-empty bag of potato tots, some bell peppers, and a few eggs that desperately needed a purpose. In that moment of breakfast indecision, Easy Weekday Breakfast Muffins were born. These muffins are the perfect balance of savory, cheesy goodness, and they’re surprisingly simple to whip up. Plus, they can be made ahead, making those rushed weekdays just a tad more bearable. Trust me, once you try these, weekday mornings will feel like a breeze.
Jump to Recipe
What You’ll Need
Most of these ingredients are probably lounging in your kitchen already, just waiting to become something delicious.
- Bell pepper, chopped
- Eggs – 6 of them, whisked
- Milk – just a splash
- Small onion, chopped
- Potato tots – because who doesn’t love them?
- Salt and pepper, to taste
- Shredded cheese – the more, the merrier
- Turkey – diced or shredded
How to Make Easy Weekday Breakfast Muffins
- Preheat your oven to 350°F (180°C). This gives you time to prep everything while it heats up.
- In a medium-sized bowl, whisk together the eggs and a splash of milk until they’re well combined and a lovely shade of pale yellow.
- Fold in the chopped bell pepper and onion. Season this mixture with a good pinch of salt and a couple of cracks of pepper.
- Stir in a generous handful of shredded cheese. This will add that irresistible gooeyness and flavor.
- Lightly grease a muffin tin or line it with muffin cups, then fill each cup halfway with the egg mixture.
- Drop a few pieces of turkey into each cup. It’s like a little protein surprise!
- Place a single potato tot in the center of each cup, pressing it lightly into the egg mixture.
- Sprinkle a bit more shredded cheese on top of each muffin for that golden, bubbly top.
- Pop the muffin tin into the oven for about 20 minutes, or until the muffins are set and the tops are gloriously golden.
- Let them cool for a few minutes before serving or storing for later.
Cook’s Notes
If you’re short on time in the morning, these muffins can be made the night before and stored in the fridge. Just reheat them in the microwave for about 20-30 seconds, and they’ll taste like you just pulled them out of the oven.
- When whisking the eggs, ensure they’re completely blended to avoid any streaks of egg whites in your muffins.
- These muffins keep well in the fridge for up to 3 days. For longer storage, freeze them and thaw overnight in the fridge before reheating.
- Be careful not to overfill the muffin cups. They’ll expand as they cook, and you don’t want egg mixture overflowing in your oven!
Make It Your Own
- Swap the turkey for crispy tofu for a vegetarian version that’s just as satisfying.
- Try adding cooked bacon bits to each muffin for an extra savory kick.
- Use different cheeses like sharp cheddar or feta for a flavor twist.
- If you’re feeling a bit adventurous, sprinkle some chopped jalapeños into the mix for a spicy morning pick-me-up.
If you try this, I’d love to hear how it turns out — drop a comment or tag me! Breakfast doesn’t have to be a hassle; let’s make it delicious and fun together.
Related update: Easy Weekday Breakfast Muffins
Related update: Chimichurri Skirt Steak with Grilled Asparagus
Related update: Healthy Southwestern Oatmeal
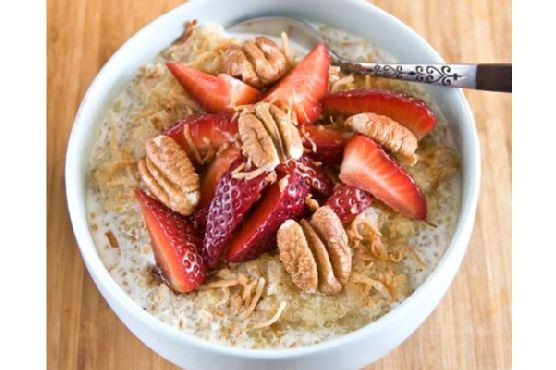
Okay, so picture this: it’s a dreary Tuesday morning, and I’m dragging myself into the kitchen with one eye barely open, the other desperately seeking caffeine. The thought of another bland bowl of oatmeal is honestly more than I can handle. Enter: Tropical Breakfast Quinoa. This dish has become my sunshine in a bowl — it’s like a mini-vacation for your taste buds, without the hassle of airport security. It’s quick to whip up, comforting in all the right ways, and just fancy enough that you feel like you’ve got your life together (at least until lunch). Whether you’re rushing off to work or settling down for a lazy Sunday brunch, this vibrant breakfast will transport you to a sunny beach with every bite. No passport required!
Jump to Recipe
What You’ll Need
This recipe is basically a tropical party for your pantry. Chances are you already have most of this hanging around.
- 2 cups of cooked quinoa
- 1 cup of light coconut milk
- 1/2 cup of crushed pineapple (canned or fresh)
- 1/2 teaspoon of cinnamon
- 2 tablespoons of maple syrup
- 1/4 cup of toasted coconut
- 1/4 cup of chopped pecans
- 1/2 cup of sliced strawberries
- A drizzle of balsamic vinegar (trust me, it works!)
How to Make Tropical Breakfast Quinoa
- Start by grabbing a medium-sized pot and tossing in your cooked quinoa, coconut milk, crushed pineapple, cinnamon, and maple syrup. Give it a good stir until everything is well combined and all the flavors are mingling like guests at a really great party.
- Turn up the heat until the mixture reaches a gentle boil. Then, reduce the heat to a simmer. Let it cook for about 5 minutes, stirring occasionally. You’ll know it’s ready when your kitchen smells like a tropical paradise and the mixture has thickened just a bit.
- Once your quinoa is ready, grab a bowl and spoon in a generous serving of the warm, tropical mixture.
- Top it off with a sprinkle of toasted coconut and chopped pecans for some crunch. Add a handful of sliced strawberries for freshness, and finish with a surprising drizzle of balsamic vinegar. The vinegar might sound weird, but it ties everything together with a subtle tang that just works.
Cook’s Notes
Here’s the deal with this recipe: it’s super forgiving. Don’t stress if your pineapple is fresh or canned; either works. The key is just to make sure your quinoa is cooked ahead of time. If you’re not a morning person, like me, make the quinoa the night before and save yourself some hassle. Leftovers can be stored in the fridge and reheated gently on the stove with a splash more coconut milk. Just remember, the strawberries and balsamic drizzle are best added fresh, right before serving to keep things vibrant and pretty.
Make It Your Own
- Nut Swap: If pecans aren’t your jam, try almonds or walnuts for a different crunch.
- Fruit Fiesta: Swap out the strawberries for mango or kiwi for an even more tropical twist.
- Sweet Tooth: Add a dollop of Greek yogurt or a scoop of vanilla ice cream (yes, for breakfast) if you’re feeling indulgent.
- Spice It Up: Add a pinch of nutmeg or cardamom for a bit of extra warmth and depth.
If you try this, I’d love to hear how it turns out — drop a comment or tag me in your breakfast masterpiece! Catch you in the kitchen. 😊
Related update: Tropical Breakfast Quinoa
Related update: Neoguri (Spicy Seafood Ramen)
Related update: Cheese and Leek Strata
Related update: Easy Weekday Breakfast Muffins

Picture this: It’s a lazy Sunday morning, and I’m still in my pajamas with zero plans to change that anytime soon. The weather outside is just right, and there’s a soft playlist humming in the background. Suddenly, a craving hits—something sweet, something warm, something that will make the house smell like a dream. Doughnuts! But not just any doughnuts. These are the kind of doughnuts that make you feel like you’ve conquered a small kingdom right from your kitchen. They’re golden, fluffy, and just the right amount of sweet without veering into dessert territory. Best part? These homemade wonders come together without any fancy equipment or ingredients you don’t already have. So, if you’re ready to make your kitchen smell like a bakery and indulge in some deliciously fluffy doughnuts, let’s get started!
Jump to Recipe
What You’ll Need
Who doesn’t love it when a recipe calls for things you likely already have on hand? We’re talking pantry staples here, folks.
- 2 cups of flour
- 1/4 cup of honey
- 1/4 cup of powdered milk
- 1 teaspoon of salt
- 1 cup of warm water
- 2 1/4 teaspoons of yeast
How to Make Doughnuts
- Start by mixing the warm water with the yeast and honey in a bowl. Whisk it all together and let it sit for about 15 minutes, or until the mixture becomes foamy. This is your yeast proving it’s ready to party!
- In a separate bowl, combine the flour, salt, and powdered milk. Pour the bubbly yeast mixture into this bowl.
- Knead the dough until it feels elastic and not sticky. This is your chance to work out any stress—think of it as dough therapy. Cover the bowl and let the dough rise until it doubles in size, which usually takes 1-2 hours. Patience is key here!
- Once your dough has risen to the occasion, roll it out on a lightly floured surface, but don’t make it too thin—you want them fluffy, not flat. Cut the dough into circles. If you have a doughnut cutter, great! If not, improvise with a small bowl or the mouth of a plastic bottle for the center hole.
- Let these cut-out beauties rise for another 45 minutes. You’re in the home stretch now!
- Heat up your oil to fry the doughnuts until they’re a delicious golden brown on both sides. This is where the magic happens, and your kitchen starts smelling irresistible.
- For a Vanilla Glaze, whisk 1 cup of powdered sugar with 30ml of milk and a teaspoon of vanilla. Drizzle over your doughnuts and add sprinkles if you’re feeling fancy.
- For a Chocolate Glaze, simply drizzle some chocolate sauce over the doughnuts and top with sprinkles. Voilà!
Cook’s Notes
When you’re knee-deep in doughnut making, a few insider tips go a long way. First, make sure your water is warm, not hot, to keep that yeast alive and thriving. If the dough feels too sticky, dust your hands with a bit of flour rather than adding more to the dough itself, which can make the doughnuts tough. These doughnuts are best eaten fresh, but if you have leftovers (lucky you!), store them in an airtight container. Just pop them in the microwave for a few seconds to bring them back to life.
Make It Your Own
The best part about doughnuts? They’re a blank canvas waiting for your creative touch.
- Spiced Doughnuts: Add a teaspoon of cinnamon and a pinch of nutmeg to the flour mixture for a cozy twist.
- Lemon Zest: Mix in a tablespoon of fresh lemon zest to the dough for a zesty kick.
- Coconut Glaze: Use coconut milk instead of regular milk in the glaze and sprinkle shredded coconut on top.
- Maple-Bacon: Drizzle with a maple glaze and top with crispy bacon bits for a sweet and savory delight.
If you try this recipe, I’d love to hear how it turns out—drop a comment or tag me in your doughnut adventures! Trust me, once you start making these at home, you’ll be finding excuses to whip them up just about every weekend. Enjoy the sweet smell of success!
Related update: Doughnuts
Related update: Tropical Breakfast Quinoa
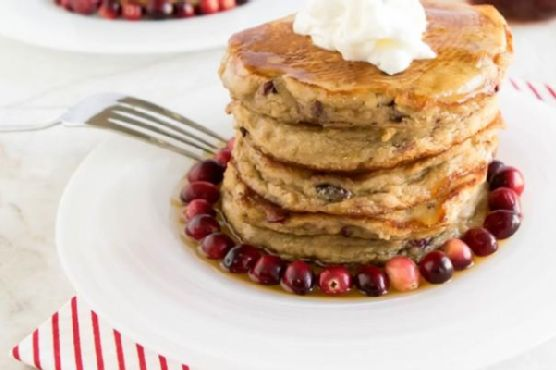
Picture this: It’s a drizzly Saturday morning, and all you want is a breakfast that feels like a cozy hug. Well, these Caramelized Cranberries Coconut Pancakes are exactly that. They’re the perfect blend of sweet, tart, and fluffy, with a tropical twist that feels like a mini-vacation on your plate. I first whipped these up when I was rummaging through my pantry during a random craving for something sweet yet substantial. They came together almost effortlessly, and I realized they were the kind of pancakes that could impress without stress. Whether you’re feeding a crowd or just treating yourself, these bring a little sunshine to your morning, no matter the weather outside. Trust me, you don’t want to miss out on these.
Jump to Recipe
What You’ll Need
The beauty of this ingredient list is that it’s straightforward and likely already in your kitchen. Plus, we’re using a mix of whole wheat and coconut flour for that extra oomph.
- 1 cup fresh cranberries
- 1/4 cup brown sugar
- 1 tsp vanilla extract
- 1 cup coconut flour
- 1 cup whole wheat flour
- 2 tsp baking powder
- 1/2 tsp salt
- 2 large eggs
- 1 1/2 cups coconut milk
How to Make Caramelized Cranberries Coconut Pancakes
- Start by heating a nonstick saucepan over medium flame. Toss in the cranberries, brown sugar, and vanilla extract. Stir it up, cover, and let it cook for about 4-5 minutes until the cranberries are soft and juicy. Give them a good mash with your spoon. The aroma will be irresistible.
- Once done, take it off the flame and let it cool for a few minutes. This gives you time to gather the rest without burning your taste buds later.
- In a mixing bowl, combine all the dry ingredients: coconut flour, whole wheat flour, baking powder, and salt. Give them a good whisk so there are no clumps.
- In another bowl, beat the eggs and mix in the coconut milk. Now, add the cooled cranberry mixture to this and beat thoroughly. This will be your magic mixture.
- Pour the wet ingredients into the dry ones and mix just until combined. Let it stand for about 2 minutes, so everything gets cozy.
- Meanwhile, heat up your griddle or fry pan over medium flame and grease it with a cooking spray or oil of your choice. Let the sizzle tell you it’s ready.
- Pour a spoonful of the batter into the pan and shape it round. Let it cook for about 2 minutes or until you see those bubbles on the surface and the edges turning golden. Flip it over like a pro and cook the other side for another 2 minutes.
- Repeat with the remaining batter. Finish with a drizzle of your favorite sweetener and a dollop of cream if you’re feeling indulgent. Serve warm and dive in!
Cook’s Notes
Here’s the thing with pancakes: patience is your best friend. Don’t rush the process, and you’ll be rewarded with perfectly golden and fluffy bites. If you find your batter too thick (coconut flour can be tricky), feel free to add a splash more of coconut milk. Leftovers? They’re rare, but if you happen to have any, they store well in the fridge for a couple of days. Just pop them in the toaster or microwave to reheat.
Make It Your Own
- Nutty Twist: Add a handful of chopped walnuts or pecans to the batter for some crunch.
- Berry Swap: If cranberries aren’t your thing, try using blueberries instead for a sweeter pop.
- Dairy-Free Option: Use almond milk instead of coconut milk for a different nutty flavor.
- Spice It Up: Add a pinch of cinnamon or nutmeg to the dry ingredients for some warmth.
If you try this, I’d love to hear how it turns out. Drop a comment or tag me in your pancake adventures! Your kitchen is about to smell amazing.
Related update: Caramelized cranberries coconut pancakes
Related update: Doughnuts
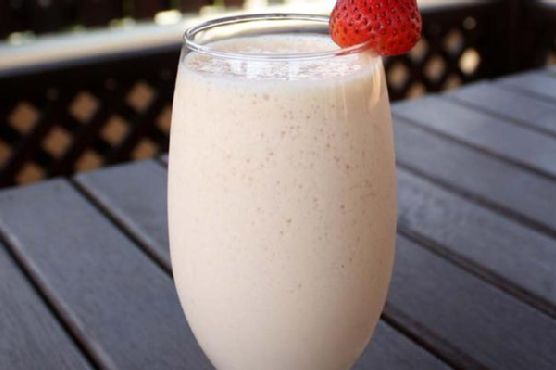
Imagine it’s one of those mornings where you’ve hit snooze one too many times, and now you’re racing through your kitchen in a flurry of panic. Your brain is still in bed but your body is desperately trying to catch up with the clock. It’s on these mornings that my Protein Strawberry Smoothie saves the day. It’s a quick, delicious way to fuel up, with a creamy texture that feels indulgent but is packed with goodness. And let’s be real, anything that helps you avoid a hangry rage before your first meeting is worth its weight in gold. Plus, it’s got that perfect balance of sweet strawberries and the smooth richness of almond milk, making it a versatile favorite you’ll find yourself coming back to again and again.
Jump to Recipe
What You’ll Need
This ingredient list is short and sweet, with a few pantry staples you probably already have on hand. Here’s what you’ll need:
- 1 cup of almond milk
- 1 banana
- 1/2 cup of fat-free Greek yogurt
- 1 tablespoon of honey
- 1 cup of ice
- 1 cup of fresh strawberries
How to Make Protein Strawberry Smoothie
- Toss your strawberries, banana, and Greek yogurt into the blender. The fruit should be fresh and ripe, which will give you that vibrant flavor burst.
- Pour in the almond milk, which adds a nutty base that balances the sweetness from the fruit.
- Add the honey. You’ll want just enough for a hint of sweetness without overpowering the strawberries.
- Throw in the ice. This will give your smoothie that chilly, refreshing feel that’s perfect for a morning pick-me-up.
- Blend everything on high until it’s smooth and creamy. You’ll know it’s ready when you see a beautifully pink, frothy mixture without any lumps.
Cook’s Notes
Don’t get too caught up in exact measurements here. This smoothie is pretty forgiving, so feel free to adjust based on what you have. If your bananas are smaller, use two. If your strawberries are extra-large, maybe go a bit shy on the cup measurement. Also, I recommend using fresh strawberries, but if you only have frozen, that’s totally fine—just skip the ice so it doesn’t turn into a frozen block! If you’ve got a busy morning ahead, you can prep the fruit the night before and store it in the fridge, then just throw it all in the blender when you’re ready. Leftovers can be stored in the fridge for a day, but be sure to give it a good stir before drinking.
Make It Your Own
- Swap the almond milk for coconut milk for a tropical twist.
- Add a tablespoon of your favorite nut butter for some extra protein and a richer flavor.
- If you’re not a fan of honey, replace it with a splash of maple syrup or agave nectar.
- For a green boost, toss in a handful of spinach. It won’t change the taste much but will kick up the nutrition!
If you try this, I’d love to hear how it turns out — drop a comment or tag me in your smoothie pics! Nothing makes my day more than seeing someone enjoy a recipe that’s made their morning just a bit brighter. Enjoy, and here’s to more deliciously lazy mornings!
Related update: Protein Strawberry Smoothie
Related update: Caramelized cranberries coconut pancakes
Related update: Green Tea Fruit Medley Smoothie
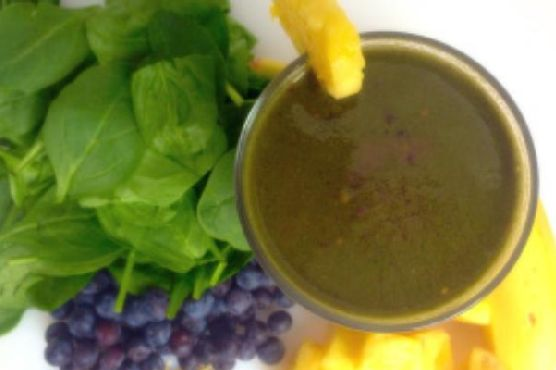
Okay, picture this: It’s a Wednesday morning, you hit snooze one too many times, and now you’re rushing around trying to make it out the door on time. You want something quick, healthy, and delicious to kick-start your day. That’s exactly how I stumbled upon this Tropical Banana Green Smoothie. I was in dire need of something refreshing and energizing, yet easy enough to throw together in less than five minutes. This smoothie checks all those boxes and more. It’s like a mini tropical vacation in a glass, and while it sounds fancy, it’s really just a few simple ingredients blended into creamy perfection. Trust me, one sip of this and you’ll forget all about your hectic morning. Jump to Recipe
What You’ll Need
This smoothie is all about using what you have on hand and embracing the refreshing flavors of the tropics. Chances are you already have most of this in your kitchen.
- 1 ripe banana
- 1 cup pineapple, fresh or frozen
- 1 cup coconut water
- 1/2 cup blueberries, fresh or frozen
- 1 scoop protein powder (vanilla works great!)
- 1 handful mixed spinach
How to Make TROPICAL BANANA GREEN SMOOTHIE
- Peel and slice the banana. If you’re using frozen pineapple, you can skip this step for now. If fresh, chop it into chunks. This will add to the creaminess.
- In a blender, add the banana slices and pineapple chunks. Pour in the coconut water. This will be the base of your smoothie, giving it that tropical flair.
- Throw in the blueberries and the scoop of protein powder. The blueberries add a pop of color and a hint of sweetness that complements the tropical vibes.
- Top it off with a generous handful of mixed spinach. Don’t worry; the taste is so mild, you won’t even notice it’s there (your body will, though!).
- Blend on high until the mixture is smooth and creamy. You’ll know it’s ready when there are no more visible chunks and the blend is a beautiful, vibrant green.
- Pour into your favorite glass, pop in a fun straw, and savor your mini-vacation in a cup.
Cook’s Notes
This smoothie is incredibly forgiving, so feel free to adjust the ingredient quantities to suit your taste. If you prefer a thicker smoothie, use frozen fruit or add a couple of ice cubes before blending. For those with a sweet tooth, a splash of honey or agave nectar can take it to another level.
It’s best enjoyed fresh, but if you’re in a time crunch, you can make it the night before. Just give it a quick stir or shake in the morning. As for leftovers, store in an airtight container in the fridge for up to one day; beyond that, it tends to lose its vibrancy and freshness.
Make It Your Own
- Swap the coconut water with almond milk for a creamier texture and a nutty undertone.
- Add a tablespoon of chia seeds before blending for an extra boost of fiber and omega-3s.
- Replace the spinach with kale for a more robust green flavor.
- For a tropical twist, throw in a few mint leaves during blending.
If you try this, I’d love to hear how it turns out — drop a comment or tag me! Let’s turn those chaotic mornings into something a bit more delightful, one smoothie at a time!
Related update: TROPICAL BANANA GREEN SMOOTHIE
Related update: Protein Strawberry Smoothie
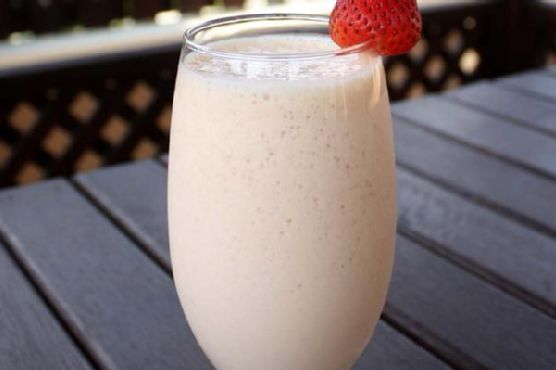
It was one of those mornings where I woke up, looked in the fridge, and realized I was running late for everything. My mind was a blur, but my stomach was loud and clear: it needed something quick, filling, and delicious. Enter the Protein Strawberry Smoothie. It’s like a breakfast hug in a glass, bursting with fruity freshness and a protein punch to keep you going. Plus, it comes together in minutes — perfect for the days when your to-do list is longer than your patience.
Jump to Recipe
What You’ll Need
I bet you already have most of these ingredients in your kitchen, which means you’re just minutes away from sipping on this creamy delight. Here’s what you’ll need:
- 1 cup almond milk
- 1 banana
- 1/2 cup fat-free Greek yogurt
- 1 tablespoon honey
- 1 cup ice
- 1 cup fresh strawberries
How to Make Protein Strawberry Smoothie
- Start by grabbing your blender and pouring in the almond milk. This will be the liquid base that helps everything blend smoothly.
- Peel the banana and break it into chunks, tossing them into the blender. Bananas add natural sweetness and a creamy texture.
- Add the fat-free Greek yogurt next. This is where the protein magic happens, making your smoothie satisfying and rich.
- Drizzle in the honey. Adjust the sweetness to your taste, but remember, the strawberries will add their own sweetness too.
- Throw in the ice to make it nice and frosty. No one likes a warm smoothie!
- Top it all off with the fresh strawberries. They bring a bright, berry flavor that’s completely irresistible.
- Blend on high until everything is smooth and the color is a lovely pink. It should only take about a minute. Taste and adjust if needed — maybe a bit more honey or a splash of almond milk if it’s too thick.
- Pour into your favorite glass and enjoy immediately. It’s best when fresh and frothy!
Cook’s Notes
So, a few quick things to make sure your smoothie game is on point. If your smoothie ends up too thick, just add a bit more almond milk to loosen it up. Too thin? A few more ice cubes will do the trick. I love using fresh strawberries when they’re in season, but frozen will work in a pinch and will make your smoothie even thicker — just reduce the ice a bit. As for storing it, well, this smoothie is really best made fresh. If you do have leftovers, pop them in the fridge for a few hours, but know they might separate a bit (just give it a good shake or stir before drinking).
Make It Your Own
Here are a few fun ways to switch things up:
- Swap the almond milk for coconut milk for a tropical twist.
- Replace the banana with a ripe avocado for a lower-sugar, extra creamy version.
- Add a tablespoon of chia seeds before blending for an extra boost of fiber and omega-3s.
- Throw in a handful of spinach to sneak in some greens — you won’t even taste it!
If you try this, I’d love to hear how it turns out — drop a comment or tag me! Whether you’re sipping this on a bustling morning or a lazy afternoon, I hope it adds a bit of joy to your day. Cheers to easy, tasty nutrition!
Related update: Protein Strawberry Smoothie
Related update: TROPICAL BANANA GREEN SMOOTHIE
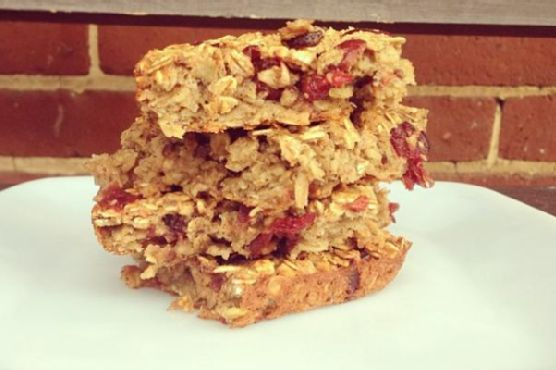
It was one of those chilly mornings where you can feel the crisp air sneaking through the cracks of your window, coaxing you to stay under the covers just a little longer. But I was determined to start my day with something as cozy as my fluffy duvet, so I headed to the kitchen and decided to whip up my favorite baked oatmeal with dried cranberries. This dish is a lifesaver on mornings like this because it warms you up from the inside out, and it’s the kind of comfort food that feels indulgent but is actually packed with goodness. Plus, it’s the perfect dish to make ahead for the week. I promise, once you try this, you’ll look forward to getting out of bed just for breakfast!
Jump to Recipe
What You’ll Need
I love this recipe because it uses a lot of pantry staples, so you’re likely to have everything you need on hand. Plus, the dried cranberries add that tart sweetness that makes every bite exciting.
- 2 cups dry oats
- 1 teaspoon baking powder
- 1/2 teaspoon cinnamon
- 1/4 teaspoon salt
- 1/4 cup flaxseeds
- 2 cups unsweetened almond milk
- 2 bananas, mashed
- 2 eggs
- 1 teaspoon vanilla extract
- 1/2 cup dried cranberries
How to Make Baked Oatmeal with Dried Cranberries
- Preheat your oven to 350°F (175°C). The warmth will soon fill your kitchen, hinting at the deliciousness to come.
- In a large bowl, mix the dry ingredients: oats, baking powder, cinnamon, salt, and flaxseeds. Stir until everything is well combined — you want the flaxseeds to be evenly distributed like little gems throughout the mixture.
- In a separate bowl, whisk together the liquid ingredients: almond milk, mashed bananas, eggs, and vanilla extract. Whisk until the mix is smooth and the bananas are well incorporated, giving off that lovely, sweet aroma.
- Pour the liquid mixture into the bowl of dry ingredients. Mix well until the oats are thoroughly soaked and the liquid is evenly distributed. It’ll look like a big, soupy mess, but don’t worry, it will transform in the oven!
- Spray a baking pan with non-stick spray. The size of the pan will determine the thickness of your oatmeal bars, so choose according to your preference. I like using a smaller pan to get thicker, chewier bars.
- Pour the oatmeal mixture into the prepared pan, spreading it out evenly. Sprinkle the dried cranberries on top, letting them fall where they may, like little jewels peeking out.
- Bake in the preheated oven for about 45 minutes. Your kitchen will be filled with the warm, inviting scent of cinnamon and baked bananas. The top should be slightly golden and the center set.
- Once done, let it cool for a few minutes before slicing. This is the hardest part, but trust me, it’s worth the wait!
- Enjoy a slice warm, perhaps with a drizzle of maple syrup or a dollop of yogurt. It’s the breakfast that feels like a hug!
Cook’s Notes
Baked oatmeal is incredibly forgiving, but here are a few tips to ensure success. If you prefer a sweeter dish, add a bit of honey or maple syrup to the wet ingredients. You can store leftovers in the fridge for up to a week, making it perfect for meal prep. Just reheat a slice in the microwave or enjoy it cold — both ways are delicious. If you find your oatmeal drying out in the fridge, a splash of almond milk during reheating will do the trick.
Make It Your Own
Here’s where you can let your creativity shine! Try these variations to keep things exciting:
- Swap the dried cranberries for chopped nuts like almonds or walnuts for a bit of crunch.
- If you’re a chocolate lover, sprinkle in some dark chocolate chips for a decadent twist.
- Trade the almond milk for coconut milk for a tropical flair.
- Mix in some fresh berries like blueberries or raspberries before baking for a burst of freshness in every bite.
If you try this, I’d love to hear how it turns out — drop a comment or tag me! I’m always excited to see how you make these recipes your own. Enjoy every cozy, delicious bite!
Related update: Baked Oatmeal with Dried Cranberries
Related update: Broccoli Rabe and Breaded Veal Scallopini
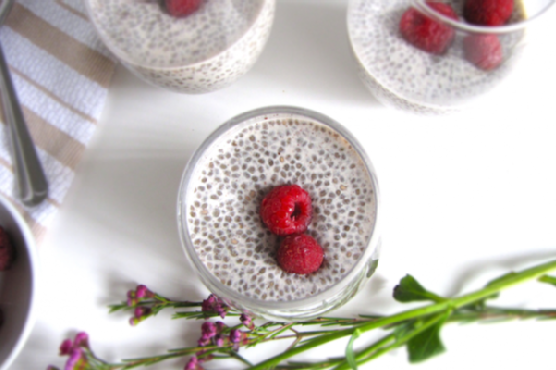
So there I was, rummaging through my pantry on a Sunday night, searching for something—anything—that could pass as a make-ahead breakfast for the hectic week ahead. You know how it is, right? That moment when you realize you’ve spent a little too much time on the couch binge-watching your favorite series and now the thought of meal-prepping feels like climbing Everest. Enter: chia seed pudding. Honestly, it’s like a little miracle in a bowl. Quick to put together, almost zero cleanup, and it somehow feels like a treat even though it’s packed with all the good stuff. And did I mention it requires zero effort in the morning? Just grab and go. Trust me, once you try this, you’ll wonder how you ever lived without it.
Jump to Recipe
What You’ll Need
This chia seed pudding is all about simplicity, and chances are you already have most of these in your kitchen.
- 2 tablespoons black chia seeds
- 1 cup almond milk
- 1 tablespoon raw agave syrup
- 1/4 teaspoon vanilla extract
- Pinch of salt
- Garnish: raspberries or your favorite berries
How to Make Chia Seed Pudding
- Start by grabbing a small bowl or a mason jar—whatever works for you. Pour in the almond milk, then add the chia seeds, giving them a gentle stir to ensure they begin to soak up the liquid.
- Add the raw agave syrup to the mix. Stirring slowly, add the vanilla extract and a pinch of salt. The salt might seem odd, but trust me, it balances the sweetness perfectly.
- Keep stirring until everything’s combined and the chia seeds are evenly distributed. Cover the bowl or jar, and place it in the fridge overnight. This is when the magic happens—let the chia seeds work their gelling wonder.
- In the morning, check the consistency. If it’s too thick for your liking, stir in a bit more almond milk. Top with fresh raspberries or any berries you fancy, and voilà—breakfast is served!
Cook’s Notes
Here’s the deal: chia seeds can be a little finicky when it comes to absorbing liquid. If you find your pudding too runny, just add a bit more chia seed, stir, and let it sit for another hour. For those of us who love a thicker consistency, you might try reducing the almond milk slightly. And if mornings are as hectic for you as they are for me, make a couple of these at once—they keep well in the fridge for up to four days.
Make It Your Own
- Coconut Dream: Swap almond milk for coconut milk and top with shredded coconut and pineapple chunks.
- Chocolate Indulgence: Mix in a tablespoon of cocoa powder and finish with dark chocolate shavings on top.
- Nutty Flavor: Replace almond milk with cashew milk and add a handful of chopped nuts on top.
- Berry Bonanza: Go wild with mixed berries for a burst of color and flavor.
If you try this, I’d love to hear how it turns out—drop a comment or tag me! Can’t wait to see your delicious creations and don’t forget to enjoy every spoonful. Happy breakfast prepping!
Related update: Chia Seed Pudding
Related update: Dried Fruit and Ginger Scones
Related update: Baked Oatmeal with Dried Cranberries

It was one of those lazy Sunday mornings when I found myself staring into the abyss of my fridge, hoping for some culinary inspiration to jump out and bite me. The chill of early spring was still hanging in the air, and I was craving something that felt both cozy and a bit indulgent. That’s when I noticed I had a couple of avocados sitting on the counter, at that perfect stage of ripeness where they practically beg to be eaten. A quick scan of the fridge and pantry revealed the usual suspects: eggs, bacon, and a trusty bag of frozen hash browns. And just like that, the idea for Avocado Nests was born. This dish is incredibly satisfying, combining the creamy richness of avocados with the savory crunch of bacon and hash browns. It’s a little bit of everything you love about brunch, with a fun twist.
Jump to Recipe
What You’ll Need
So, here’s the deal: you’re likely just a few steps away from a deliciously satisfying meal, because most of these ingredients are staples you probably have on hand.
- Avocados — perfectly ripe, because isn’t that always the goal?
- Hardboiled Eggs — get these ready before you start.
- Frozen Hash Browns — because who has time to grate potatoes on a Sunday morning?
- Bacon — smoky, crispy, and just the right touch of indulgence.
- Mayonnaise — or cream cheese if you’re feeling fancy.
- Salt and pepper — the dynamic duo of seasoning.
How to Make Avocado Nests
- First, cook your frozen hash browns according to the package directions. You want them golden and crispy but not too dark. The smell of them browning should fill your kitchen with that warm, inviting aroma.
- While those are cooking, cut your bacon into thin strips. You can either bake them in the oven or fry them up in a pan until they reach your desired crispiness. A little sizzle and a waft of that smoky scent, and you know they’re ready.
- Next up, time to make some deviled eggs. Pop out those egg yolks and mix them with a spoonful of mayonnaise or cream cheese until smooth. Season with a sprinkle of salt and pepper before scooping the mixture back into the egg white halves.
- Take your avocados and carefully cut them in half. Remove the seed and peel them gently. You’re aiming for a seamless, intact avocado half here.
- Layer the cooked hash browns onto a serving plate and sprinkle with the crispy bacon pieces. This is your flavorful nest bed, inviting those avocados to rest.
- Finally, nestle a deviled egg half into the seed cavity of each avocado half. Place the filled avocados onto the bed of hash browns and bacon. Voilà, your Avocado Nests are ready to enjoy!
Cook’s Notes
Okay, real talk: the key to nailing this dish is timing. Get those hash browns and bacon going first so you can focus on prepping the other ingredients. If you’re planning to make this ahead of time, keep the elements separate until you’re ready to serve — nobody likes soggy hash browns. Leftovers can be stored in an airtight container in the fridge for a day or two, and they make for a surprisingly good next-day lunch. Just reheat the hash browns and bacon separately for the best texture.
Make It Your Own
Here are a few fun twists to make these Avocado Nests even more personal:
- Swap the bacon for crispy tofu if you’re aiming for a vegetarian version. Just season it well!
- Mix in a bit of hot sauce or Sriracha into the egg yolk mixture for a spicy kick.
- Use sweet potato hash browns instead for a slightly sweeter, more complex flavor profile.
- Jump out of the brunch box and add a sprinkle of feta or blue cheese crumbles for an extra punch of flavor.
If you try this, I’d love to hear how it turns out — drop a comment or tag me on social media! There’s nothing better than sharing a little homemade magic. Enjoy your cozy brunch adventure!
Related update: Avocado Nests
Related update: Chia Seed Pudding
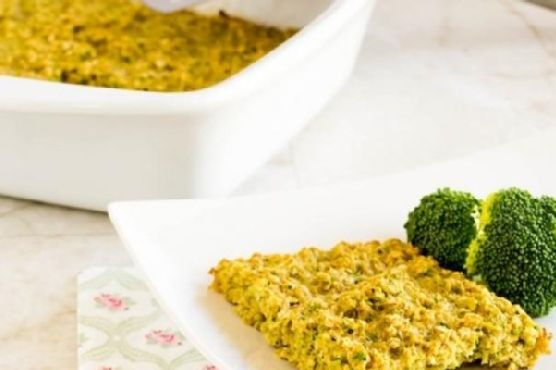
It was one of those mornings when I wanted something warm and filling but couldn’t face another bowl of cereal. I peeked into the fridge and found a half-used bag of broccoli and a carton of eggs. Inspiration struck, and soon my kitchen was filled with the comforting smell of baking oats and the savory tang of broccoli. This Broccoli Oatmeal Breakfast Casserole is exactly what you need when you want something nutritious and satisfying without spending your entire morning in the kitchen. Plus, it’s surprisingly easy to make, so you can enjoy a leisurely breakfast even on a busy day.
Jump to Recipe
What You’ll Need
This recipe is beautifully simple and calls for ingredients you likely have sitting in your pantry. You know I love a recipe where a quick rummage through the cupboard delivers everything you need.
- Broccoli florets
- Dry oats
- Eggs
- Low-fat milk
- Olive oil
- Baking powder
- Salt
- Cayenne pepper
How to Make Broccoli Oatmeal Breakfast Casserole
- Start by preheating your oven to 350°F (175°C). While it warms up, grab your trusty 8-inch square baking dish and give it a light misting of cooking spray to prevent sticking.
- Chop the broccoli florets roughly and blitz them in a food processor until they resemble coarse crumbs. The earthy smell of fresh broccoli will fill the air.
- In a large mixing bowl, combine the ground broccoli, dry oats, a pinch of baking powder, a sprinkle of salt, and a dash of cayenne pepper. Give it a good mix — this is the foundation of your casserole.
- In a separate bowl, whisk together the eggs, low-fat milk, and a generous tablespoon of olive oil. The mixture should be smooth and slightly frothy.
- Pour the wet ingredients into the bowl of dry ingredients. Stir everything together until the oats are fully coated and the broccoli is evenly distributed.
- Spoon the mixture into your prepared baking dish, smoothing the top with a spatula. Slide it into the oven and bake for 25-30 minutes, or until the edges are golden and a fork inserted into the center comes out clean.
- Let it cool slightly before cutting into your desired size and serving it warm. The casserole will be firm yet tender, with a delicious crust formed by the oats.
Cook’s Notes
This casserole is forgiving, so don’t stress if you’re missing an ingredient. If you’re prepping in advance, you can assemble the night before and bake it fresh in the morning—just cover and store in the fridge. Leftovers? Refrigerate them, and they’ll keep for up to three days. Reheat portions in the microwave or the oven. Watch out for over-baking; once it’s golden and a fork comes out clean, it’s ready. The texture should be moist but not soggy.
Make It Your Own
- Cheese Lover’s Twist: Add a handful of grated cheddar or parmesan to the dry ingredients for a cheesy kick.
- Protein Boost: Toss in some cooked, crumbled sausage or crispy bacon bits to the batter for extra protein.
- Veggie Variety: Swap half the broccoli for finely chopped spinach or kale for an extra green boost.
- Spice It Up: Substitute cayenne pepper with smoked paprika or add a pinch of chili flakes for a different heat profile.
If you try this Broccoli Oatmeal Breakfast Casserole, I’d love to hear how it turns out for you. Drop a comment below or tag me in your breakfast creations! Here’s to starting the day with something nutritious and delicious. 🥦✨
Related update: Broccoli Oatmeal Breakfast Casserole
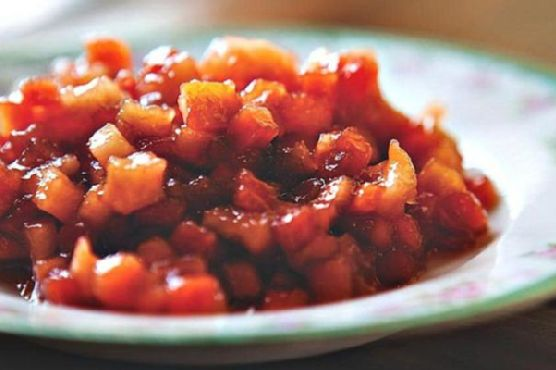
I was standing in my kitchen one chilly October morning, staring at a basket of apples and pears I’d picked up from the farmer’s market the day before. You know those mornings when the air is crisp, and everything feels just a little bit cozier? That’s when it hit me: a warm, spiced fruit compote that could double as a breakfast topping or a dessert treat was exactly what I needed. This Fall Fruit Compote is the kind of recipe that fills your kitchen with the scent of cinnamon and makes you feel like you’re swaddled in a warm blanket. It’s quick to whip up, requires only a few staple ingredients, and the result is pure comfort.
Jump to Recipe
What You’ll Need
The beauty of this recipe is its simplicity — you probably have most of these items on hand already. Here’s what you’ll need to get that cozy feeling wafting through your kitchen:
- 2 tablespoons butter
- 2 cups diced honeycrisp apples
- 2 cups diced pears
- 1/2 cup dried cherries
- 1/4 cup apple cider vinegar
- 1/2 cup apple juice, plus more as needed
- 1/3 cup brown sugar
- 1 cinnamon stick
How to Make Fall Fruit Compote
- Melt the butter in a medium saucepan over high heat. As it melts, breathe in that nutty aroma — that’s your first sign of deliciousness to come.
- Add the diced honeycrisp apples, diced pears, dried cherries, apple cider vinegar, apple juice, brown sugar, and the cinnamon stick. Your kitchen will start smelling like a fall wonderland. Stir everything well.
- Cook for about 5 minutes, letting the fruit soften slightly and the flavors mingle together. You want the liquid to begin bubbling up around the edges.
- Lower the heat to medium and continue to cook for a few more minutes. Keep stirring occasionally until the fruit is tender and the liquid has mostly evaporated. If it seems like the fruit might stick, add a little more apple juice to keep everything cozy and moist.
Cook’s Notes
Let’s talk about a few things that can make or break your compote. First, the type of apple matters — honeycrisps are perfect here for their sweet-tart flavor and firm texture. If you don’t have dried cherries, dried cranberries can step in as a worthy substitute. Remember, the compote will thicken as it cools, so don’t fret if it seems a bit saucy when you take it off the heat. If you’re planning ahead, you can make this compote up to a week in advance and just store it in an airtight container in the fridge. When you’re ready to serve, a gentle reheat on the stove will do the trick. And hey, it’s not just for potato latkes; try it over pancakes, waffles, or even vanilla ice cream!
Make It Your Own
Here are some fun ways to tweak this compote and make it yours:
- Swap the dried cherries for golden raisins for a different layer of sweetness.
- Substitute the apple cider vinegar with balsamic vinegar for a deeper, richer flavor profile.
- Add a splash of bourbon or rum just before serving for a boozy warmth.
- Throw in a handful of chopped walnuts or pecans for a bit of crunch and nutty warmth.
If you try this, I’d love to hear how it turns out — drop a comment or tag me! Your kitchen is about to smell amazing, and I can’t wait for you to experience it. Enjoy every warm, sweet, and spicy bite!
Related update: Fall Fruit Compote
Related update: Broccoli Oatmeal Breakfast Casserole
Related update: Easy Homemade Apple Fritters
Related update: Béarnaise Sauce
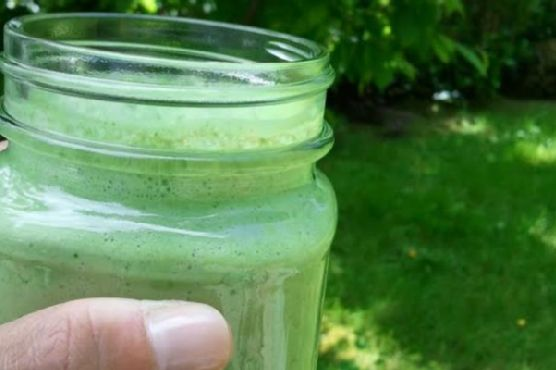
It was one of those mornings where hitting the snooze button was more tempting than ever. The kind of morning where a little pick-me-up is not just a want but a necessity. As I shuffled into the kitchen, I thought about something quick, healthy, and invigorating. Enter the Skinny Green Monster Smoothie. It’s like a jolt of energy in a glass, and it comes together in minutes. Trust me, this smoothie is both a morning lifesaver and a delightful way to sneak in those greens without sacrificing flavor. Just one sip, and you’ll be hooked—it’s the kind of recipe that keeps you coming back, not just for the taste, but for how it makes you feel: ready to tackle anything the day throws at you.
Jump to Recipe
What You’ll Need
I’ve gathered a list of ingredients that are both simple and likely already in your kitchen, so you can whip this up without a special trip to the grocery store. Here’s what you need:
- Frozen banana – it makes the smoothie creamy and naturally sweet.
- Baby spinach – don’t worry, you won’t even taste it!
- Peanut butter – adds a delicious richness and nutty flavor.
- Unsweetened vanilla almond milk – keeps it light and dairy-free.
- Fat-free plain Greek yogurt – for that extra creaminess and a protein boost.
How to Make Skinny Green Monster Smoothie
- Start by placing the frozen banana in your blender. It’s best to break it into chunks so it blends smoothly.
- Add a generous handful of baby spinach. Don’t worry—it’ll blend in seamlessly, giving you all the green goodness without overpowering the taste.
- Spoon in the peanut butter. This is where the magic happens as it brings richness and a subtle sweetness to the mix.
- Pour in the unsweetened vanilla almond milk. This will help everything blend together and give the smoothie a lovely vanilla hint.
- Add the fat-free plain Greek yogurt for an extra creamy texture. This also ups the protein quotient, making the smoothie more filling.
- Blend everything on high until it’s completely smooth and creamy. You should see a beautiful green hue and a velvety texture. If needed, scrape down the sides and blend again.
- Taste and adjust if necessary. Need it a bit sweeter? Add a touch more banana or a splash of honey. Too thick? A little more almond milk will do the trick.
Cook’s Notes
There’s not much that can go wrong with this smoothie, but here are a few pointers to keep it perfect every time. If your blender is having trouble with the frozen banana, let it thaw for a few minutes before blending. This smoothie is best enjoyed fresh, but you can refrigerate leftovers for up to a day. Just give it a good shake or stir before drinking. If you prefer it colder, throw in a few ice cubes before blending, but keep in mind this might dilute the flavors slightly.
Make It Your Own
There are plenty of ways to tweak this smoothie to suit your taste:
- Swap the peanut butter for almond or cashew butter if you’re feeling adventurous.
- Use coconut milk instead of almond milk for a tropical twist.
- Add a scoop of your favorite protein powder to make it a post-workout powerhouse.
- For a berry boost, toss in a handful of frozen blueberries or strawberries.
If you try this, I’d love to hear how it turns out—drop a comment or tag me! Whether you’re rushing out the door or lounging with a good book, this smoothie is a perfect companion. Enjoy and embrace your inner green monster! 🥤💚
Related update: Skinny Green Monster Smoothie
Related update: Easy Cheesy Pizza Casserole
Related update: Banana Milo Milkshake
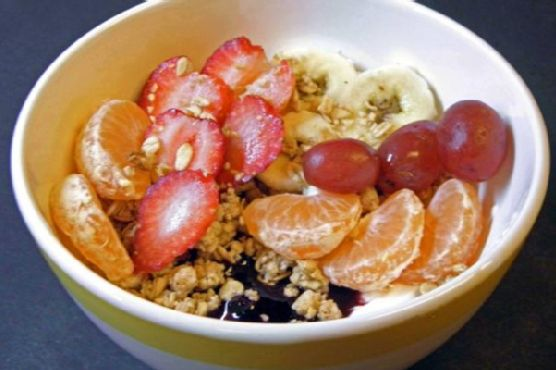
One chilly Sunday morning, I found myself staring at a nearly empty pantry, craving something cozy and sweet without stepping out into the biting cold. That was the day my homemade organic maple granola was born, and let me tell you, it was like a warm hug in a bowl. There’s just something magical about the way the house smells when this granola is baking—sweet, nutty, and comforting. The best part? It’s ridiculously easy to make. You’ll end up with hearty, golden clusters that are perfect to pair with fresh, juicy fruit. Now, this recipe is a staple in my home, perfect for those days when you want something wholesome and satisfying, without a lot of fuss.
Jump to Recipe
What You’ll Need
The beauty of this granola lies in its simplicity and versatility. You might already have most of these ingredients lurking in your kitchen!
- Rolled oats
- Dark brown sugar
- Maple syrup
- Vegetable oil; peanut oil is preferred
- Salt
- Cashew pieces
- Slivered almonds
- Dried cranberries
- Dried raisins
- Fresh fruit (to serve)
How to Make Home made organic maple granola with fresh fruit
- Preheat your oven to 250°F. This low temperature ensures the granola dries out rather than burns, for that perfect crunch.
- In a large bowl, combine the rolled oats, cashew pieces, slivered almonds, salt, and dark brown sugar. Give it a good stir to distribute the sugar evenly.
- Pour in the maple syrup and vegetable oil. Mix everything until the oats and nuts are well coated. You should be able to smell the sweetness already!
- Spread the mixture thinly and evenly onto two baking sheets with sides about an inch high. Trust me, the thin layer is key for even baking.
- Bake for 45 to 60 minutes, stirring carefully every 15 minutes. Don’t forget to swap the positions of the trays each time you stir them. This little dance ensures even browning.
- You’ll know it’s done when the granola looks tan—not dark—and feels slightly crisp to the touch. It will harden more as it cools.
- Remove the trays from the oven and let the granola cool completely. Once cooled, mix in the dried cranberries and raisins.
- Store your granola in sealed plastic bags or containers. It’ll stay fresh for up to two weeks, unrefrigerated.
- Serve your granola with a handful of fresh fruit. Enjoy every crunchy, sweet bite!
Cook’s Notes
This granola is super forgiving, but here are a few tips to keep it foolproof. Remember to stir it gently to keep those lovely clusters intact. If you don’t have peanut oil, any neutral oil like canola will work in a pinch, but peanut oil does add a subtle, nutty flavor that’s just divine. Make sure to let it cool completely before storing, as any trapped heat can make it soggy. If you somehow don’t finish this in two weeks (but let’s be real, you will), just pop it in an airtight container in the freezer for longer storage.
Make It Your Own
Here are some fun tweaks to make this granola truly yours:
- Swap the cashews and almonds for your favorite nuts like walnuts or pecans for a different flavor profile.
- Add a teaspoon of cinnamon or a pinch of nutmeg to the oat mixture for a warm spice kick.
- Try using honey instead of maple syrup for a different kind of sweetness.
- Sprinkle some coconut flakes into the mix before baking for a tropical twist.
If you try this, I’d love to hear how it turns out — drop a comment or tag me! Happy granola-making, friends!
Related update: Home made organic maple granola with fresh fruit

Picture this: it’s a lazy Sunday morning, and the sun’s just lazily peeking through your kitchen window. I was in my coziest pajamas, craving something warm and sweet that didn’t involve leaving the house. Enter these Jumbo Blueberry Muffins. They’re like a giant hug in muffin form—a bit of a show-off with their size, but oh so easy to whip up. With a crunchy lemon-sugar topping and bursting with blueberries, they’re the hero of any breakfast spread or spontaneous brunch. Plus, they’re quick enough to make on a weekday morning when you’re feeling a bit extra. Ready to bake? Let’s dive in.
Jump to Recipe
What You’ll Need
You probably have most of this stuff lounging in your pantry. Here’s what you’ll need:
- 2 cups all-purpose flour
- 2 teaspoons baking powder
- 1/2 teaspoon salt
- 1/3 cup granulated sugar + 1 cup separate
- 2 large eggs
- 1/4 cup unsalted butter, melted
- 1/4 cup vegetable oil
- 1 cup buttermilk
- 1 teaspoon vanilla extract
- Zest of one fresh lemon
- 1 1/2 cups fresh blueberries
How to Make Jumbo Blueberry Muffins
- Preheat your oven to 425°F (220°C). Give a 6-cup large-sized muffin tin a light spritz of cooking spray, and set it aside.
- In a small bowl, combine the lemon zest and 1/3 cup of sugar. Use a fork to mix them thoroughly, creating a fragrant lemon-sugar mixture.
- Grab a large bowl and whisk together the flour, baking powder, and salt. Try to distribute everything evenly—it’ll make for a fluffier muffin.
- In another medium bowl, whisk the remaining 1 cup of sugar with the eggs. Go at it for about 45 seconds until the mixture is thick and homogeneous.
- Slowly pour in the melted butter and oil, then whisk in the buttermilk and vanilla extract. The mixture should be smooth and creamy.
- Add the liquid ingredients and the blueberries to the dry ingredients. Gently fold everything together until just combined. Resist the urge to over-mix!
- Fill the muffin tins with the batter, right up to the top. Sprinkle the tops generously with the lemon-sugar mixture for a crunchy finish.
- Bake the muffins at 425°F for 5 minutes. Then, lower the heat to 375°F and bake for another 25 minutes. Remember to rotate the pan halfway through to ensure even baking.
- The muffins are done when a toothpick inserted near the center comes out with just a few crumbs attached. Let them cool in the pan for about 5 minutes before transferring them to a wire rack to cool completely.
Cook’s Notes
Here’s the scoop: the key to these muffins is not over-mixing the batter. Too much mixing leads to tough muffins, and nobody wants that. These muffins are best enjoyed fresh, but if you’re making them ahead, they stay good in an airtight container at room temperature for up to three days. You can also freeze them! Just wrap them tightly in plastic wrap and pop them in a freezer bag. They’ll last for about three months, and all you have to do is let them thaw at room temp or give them a quick zap in the microwave.
Make It Your Own
Feel like experimenting? Here are a few variations:
- Mixed Berry Muffins: Swap half of the blueberries with raspberries or chopped strawberries.
- Nutty Twist: Add a handful of chopped walnuts or almonds to the batter for some crunch.
- Citrus Punch: Substitute the lemon zest with orange zest for a different citrusy flavor.
- Chocolate Indulgence: Replace some of the blueberries with chocolate chips for a sweet surprise.
So, are you ready to go jumbo? If you try this, I’d love to hear how it turns out—drop a comment or tag me! Let’s make your kitchen smell like a bakery, one muffin at a time. Happy baking! 💙
Related update: Jumbo Blueberry Muffins
Related update: Wild Blueberry Lemon Muffins
Related update: Home made organic maple granola with fresh fruit
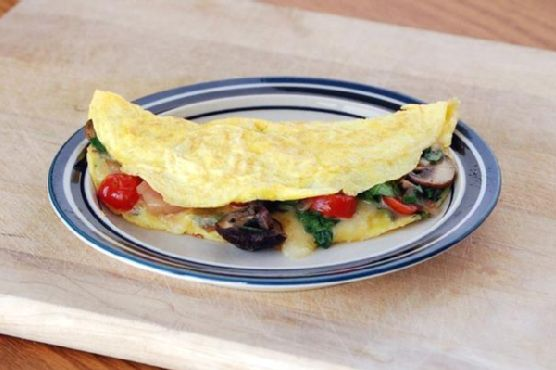
I was deep in the throes of a Tuesday night quandary—hungry but not wanting to commit to a full-on kitchen escapade. You know those nights, right? The ones where takeout seems like the easy choice, but your inner voice whispers (or maybe shouts), “Use the groceries you bought!” It was on one such evening that I whipped up this Loaded Veggie Omelet. It’s the kind of recipe that feels like a mini victory; quick to make yet hearty enough to satisfy. Perfect for when you want something impressive without the fuss. Plus, who wants a mountain of dishes? Not me.
Jump to Recipe
What You’ll Need
This isn’t one of those recipes where you’ll be chasing obscure ingredients. Chances are you already have most of this:
- Shallot
- Garlic
- Mushrooms
- Cherry tomatoes
- Fresh basil
- Fresh spinach
- Eggs whisked
- White cheese
- Drizzle of olive oil
How to Make Loaded Veggie Omelet
- Start by preheating your oven to warm or 170 degrees. This will keep your first omelet cozy while you prepare the second one. Trust me, it’s worth it.
- Heat a small sauté pan over medium. Drizzle it with just enough olive oil to give your veggies a glistening hug.
- Add the shallot and garlic first. Sauté them until they’re golden and fragrant—your kitchen should smell amazing by now.
- Toss in the mushrooms and let them soften. They’ll release their juices, which is exactly what we want.
- Now, add the cherry tomatoes and fresh spinach. Give everything a good stir and then remove the pan from the heat. The spinach should just start to wilt.
- In a small omelet or sauté pan, pour in a layer of your whisked eggs. As the egg begins to set, gently run a spatula around the edges. This keeps it from sticking and makes folding easier.
- When the egg is almost fully cooked—think slightly runny on top—layer half of the basil, cheese, and your sautéed veggie mix onto one side of the egg.
- Gently fold the other side of the egg over the filling. Use your spatula to help if needed. Slide the omelet onto a small oven-safe plate and keep it warm in the oven.
- Repeat the process for the second omelet, then serve both while they’re still warm.
Cook’s Notes
Cooking omelets is more of an art than a science, and a few tips can make all the difference.
- If you’re not a fan of runny eggs, let them cook a bit longer before adding the filling. The key is to keep it soft enough to fold.
- Store leftovers in an airtight container in the fridge. They make a delightful breakfast next day, just reheat in a pan to revive some freshness.
- Use a non-stick pan to make your life easier, especially if you’re new to making omelets. It’s all about the slide!
- If you want to make these ahead, prepare the veggie mix and store it separately. When you’re ready to eat, whip up those eggs and you’re set.
Make It Your Own
Here’s where you get to play chef. These variations keep things exciting:
- Swap the mushrooms for crispy tofu for an extra protein punch.
- If you’re a cheese enthusiast, try using feta instead of white cheese for a tangy twist.
- Give it a spicy kick by adding a dash of red pepper flakes or a few jalapeño slices.
- Not a fan of spinach? Substitute with arugula for a peppery note.
I hope this Loaded Veggie Omelet becomes your go-to for those nights when you need a quick, satisfying meal. If you try this, I’d love to hear how it turns out — drop a comment or tag me! Here’s to cozy, tasty evenings in.
Related update: Loaded Veggie Omelet
Related update: Jumbo Blueberry Muffins