
Okay, imagine this: It’s a Wednesday night, and I’m standing in my kitchen, staring at a bunch of bell peppers I bought on impulse. You know the feeling, right? That moment of “What am I even going to do with these?” My brain whispers, “Stuff them!” But not just any stuffing — let’s infuse them with a fiesta of flavors. Enter these Mini Stuffed Mexican Bell Peppers. They’re a little spicy, a little tangy, and oh-so-satisfying. Perfect for those nights when you want something quick but super flavorful. Trust me, after you try this, you’ll wonder why you don’t have canned bell peppers permanently on your shopping list.
Jump to Recipe
What You’ll Need
Honestly, you’ve probably got most of this lounging around in your pantry. Here’s what you’ll need to create some magic:
- Canned bell peppers
- Lean ground turkey
- Canned black beans
- Chili powder
- Chipotles in adobo
- Fire roasted canned tomatoes
- Garlic
- Canned green chilies
- Tsp ground coriander
- Ground cumin
- Paprika
- Tomatillos
- Yellow onion
How to Make Mini Stuffed Mexican Bell Peppers
- Preheat your oven to 400°F (200°C). Let’s get those veggies nice and roasted.
- Slice the tomatillos in half and the onion into 1/2-inch slices. Peel the garlic cloves.
- Spread the tomatillos, onions, and garlic on a baking sheet. Roast them in the oven until the tomatillos are tender and start to brown, about 20 minutes.
- While the veggies roast, get a large skillet and start cooking the ground turkey over medium heat. Break it up with a spatula until it’s no longer pink and just beginning to brown.
- Add the chili powder, ground coriander, ground cumin, and paprika to the turkey. Stir until everything is coated with those warm spices.
- Stir in the fire roasted tomatoes, black beans, chipotles in adobo, and green chilies. Let it simmer until the mixture thickens, about 5-7 minutes.
- By now, your kitchen should smell amazing. Once the veggies are done roasting, chop them up and mix them into the turkey concoction.
- Drain the canned bell peppers and arrange them on a baking tray, cut side up.
- Spoon the turkey and veggie mixture into each bell pepper evenly. Don’t be shy — pack them full!
- Pop the stuffed peppers into the oven for about 10 minutes. You’ll know they’re ready when the tops start to look a bit crispy.
- Let them cool slightly before digging in, but the anticipation is half the fun!
Cook’s Notes
Here’s a heads-up: Avoid overfilling the peppers, or they might collapse — they’re mini, after all! If you’re making this ahead, store the filling separately and stuff the peppers just before baking. Leftovers? Toss them in an airtight container; they’ll be good for about 3 days in the fridge. Reheat them gently, so you don’t lose any of that lovely texture.
Make It Your Own
- Vegetarian Twist: Swap the turkey for crumbled firm tofu. Just make sure to press it well to get that nice crumbly texture.
- Cheesy Version: Stir in some shredded Monterey Jack or sprinkle it on top before the final bake for a melty finish.
- Spice It Up: Add some diced jalapeños or a dash of cayenne pepper if you’re craving extra heat.
- Fresh Hit: Top with chopped cilantro or a squeeze of fresh lime juice right before serving for a zesty lift.
If you try this, I’d love to hear how it turns out — drop a comment or tag me! Cooking is all about sharing, and I can’t wait to see your takes on this spicy little number. Enjoy, my pepper-loving friends!
Related update: Mini Stuffed Mexican Bell Peppers
Related update: Bigoli with smoked salmon
Related update: How to make the World’s Greatest Lasagna Roll Ups
Related update: Cheesy Cauliflower

Picture this: it’s a busy Tuesday evening, and I’m racing against the clock to get dinner ready before my favorite show starts. My fridge is a chaotic jigsaw puzzle of assorted jars and half-emptied condiments. I’m craving something hearty but not the usual weekday fare that I’ve cycled through a million times. Enter the Sweet Mustard BBQ Pork Chops. They’re my go-to when I want something that feels special without the fuss of a complicated recipe. These pork chops are a harmony of sweet, tangy, and savory flavors that dance on your taste buds, all thanks to a marinade that takes about five minutes to throw together. Trust me, you’ll want these on your dinner rotation.
Jump to Recipe
What You’ll Need
If you’re like me, you might already have most of these ingredients hanging out in your pantry and fridge—the kind of staples that are real lifesavers.
- 4 bone-in pork chops
- Dijon mustard
- 3 cloves of garlic, minced
- Coarsely ground black pepper
- Honey
- Juice of one lemon
- Soy sauce
How to Make Sweet Mustard BBQ Pork Chops
- In a medium-sized bowl, whisk together the honey, Dijon mustard, lemon juice, soy sauce, and minced garlic until smooth. You want the honey to meld into the mix without a trace—it might take a minute or two.
- Place your pork chops in a large resealable plastic container or a trusty zip-top bag. Pour the marinade over them, making sure every inch of those chops gets some love.
- Seal the container or bag and pop it into the fridge. Let those flavors get cozy for at least 4 hours, but if you can swing it, overnight is where the magic happens. Give the container a shake or the bag a turn every now and then.
- When you’re ready to cook, fire up your grill to medium-high heat. Take the pork chops out of the fridge and let them come to room temp while you prep the grill.
- Sprinkle freshly cracked black pepper on both sides of the chops. The pepper adds a nice bit of heat to balance the sweetness.
- Grill the pork chops for about 5-7 minutes per side. You’re looking for a beautiful char and an internal temp of 145°F to 150°F. Feel free to brush on some leftover marinade as they cook, but if they start to burn, move them to a cooler spot on the grill.
- Once done, transfer the chops to a platter, cover them with foil, and let them rest for 5 minutes. This step is key—juices will redistribute, making every bite moist and tender.
- Serve these beauties with your favorite sides and watch them disappear.
Cook’s Notes
A couple of things I’ve picked up along the way: First, make sure to use bone-in pork chops. They’re less likely to dry out on the grill, and the bone adds some lovely flavor. Also, when you’re grilling, keep a little extra marinade handy for basting, but do it sparingly towards the end to avoid burning. If you’re new to grilling, a meat thermometer is your best friend—it takes the guesswork out of knowing when the meat is done.
For leftovers (if there are any!), store them in an airtight container in the fridge for up to three days. They’re fantastic cold in a salad or warmed up for a quick lunch.
Make It Your Own
I get it—sometimes you want to throw in a twist. Here are a few ideas to switch things up:
- Swap the pork for crispy tofu. Just press and cube the tofu, and marinate it the same way. Grill until it’s golden and crisp.
- Try adding a tablespoon of sriracha to the marinade for a sweet and spicy kick.
- If you’re out of lemon, lime juice works beautifully for a slightly different tang.
- Throw in some fresh rosemary or thyme into the marinade for an herbal note that complements the sweetness.
If you try this, I’d love to hear how it turns out—drop a comment or tag me! Whether you stick to the script or put your own spin on it, these pork chops are a winner. Enjoy the flavors and the simplicity, and happy cooking!
Related update: Sweet Mustard BBQ Pork Chops
Related update: Mini Stuffed Mexican Bell Peppers

It was one of those weeks where everything seemed to be going at double speed. You know the kind? Work was hectic, my inbox was overflowing, and the kids had back-to-back soccer practices. By Friday, I was craving something bold, comforting, and just a little indulgent. Enter: Guinness and Brats. This dish is the kind of recipe that makes you feel like a weekend warrior even on a Tuesday night. It’s smoky, savory, and hearty enough to make you forget the chaos of the week. Plus, there’s something incredibly satisfying about cooking with beer, especially when it’s a robust Guinness Stout. So, let’s dive into this dish that turns a few humble ingredients into a weeknight hero.
Jump to Recipe
What You’ll Need
It’s a short and sweet list of ingredients, with a touch of the unexpected. Chances are you already have most of this, or at least something close enough to swap in:
- Bratwurst – the star of the show, so choose your favorite kind!
- Guinness Stout – the magic ingredient that marries everything together.
- Onions – go for sweet or yellow, quartered for those lovely caramelized edges.
- Hotdog buns – soft or crusty, whatever you prefer for wrapping up all that goodness.
How to Make Guinness and Brats
- Preheat your grill to about 400°F. You want it nice and hot to do justice to these brats.
- In a large cast iron skillet, nestle your bratwurst links and scatter the quartered onions around them. Pour an entire bottle of Guinness Stout over the top. The aroma as it sizzles is just divine.
- Place the skillet directly on the grill and close the lid. Let the magic happen as the Guinness starts to bubble and the flavors meld together.
- Every 5-10 minutes, open the lid and give everything a good toss. The onions should be getting golden, and the brats will be plumping up beautifully.
- After about 45 minutes to an hour, everything should be perfectly cooked. The brats should be juicy and the onions caramelized in that lovely stout reduction.
- Take a brat and some of those luscious onions, and tuck them into a hotdog bun. Serve immediately, and enjoy the praises you’ll undoubtedly receive.
Cook’s Notes
Cooking on the grill adds a wonderful smoky depth you just can’t fake, but if the weather is uncooperative, you can make this on the stovetop or in the oven. Just keep in mind that stovetop cooking may require more frequent stirring to prevent sticking. Leftovers (if there are any!) can be stored in an airtight container in the fridge for up to 3 days. They reheat beautifully, and you can even slice the brats and onions to toss with pasta for a quick lunch.
Make It Your Own
- Swap the bratwurst for spicy Italian sausage if you crave a kick.
- Use a different stout or dark beer if you’re not a fan of Guinness — just make sure it’s something full-bodied.
- Try adding bell peppers to the mix for a bit of sweetness and color.
- For a lighter option, serve the brats and onions over a bed of greens instead of in a bun.
If you try this, I’d love to hear how it turns out — drop a comment or tag me! There’s something so rewarding about sharing a meal that feels like a mini celebration. Enjoy!
Related update: Guinness and Brats
Related update: Pan Fried Potato Wedges
Related update: Sweet Mustard BBQ Pork Chops

It was one of those evenings where autumn seemed to have secretly slipped into the neighborhood overnight. The air felt crisp, and the leaves were giving their best dance moves, swirling to the ground with every gust of wind. I found myself craving something warm and reassuring, a cozy bowl of soup that would wrap around me like my favorite blanket. That’s when I remembered this Roasted Garlic & Butternut Parmesan Soup — a velvety concoction that feels fancy enough for any dinner party but is as easy as pie to whip up on a weekday. Not to mention, the house smells absolutely divine with the heady scent of roasted garlic and caramelized squash wafting from the kitchen. It’s like giving your taste buds a great big hug.
Jump to Recipe
What You’ll Need
Funny thing about this soup is its simplicity; you probably have most of these ingredients lounging in your kitchen already. Let’s get to it:
- Butternut squash – the star of our show
- Sweet onion – for that subtle, sweet depth
- An entire head of garlic – because nobody ever said no to roasted garlic
- Olive oil – a generous drizzle makes everything better
- Sea salt – enhances all the flavors
- Chicken stock – or vegetable for a vegetarian twist
- Shredded romano cheese – for that salty, nutty finish
- Whole milk – adds creaminess without overpowering
How to Make Roasted Garlic & Butternut Parmesan Soup
- Preheat your oven to 400°F (200°C). This is the perfect time to pour yourself a glass of wine, if you’re into that!
- In a large roasting pan, toss together the butternut squash and onion slices. Drizzle them generously with olive oil and a good sprinkle of sea salt. Trust me, the caramelization is what makes it magical.
- Take about 12 inches of parchment paper and place the whole head of garlic right in the center. Drizzle it with olive oil and sea salt, then wrap it tightly. Pop this little package in foil for a cozy wrap — think of it as a garlic spa treatment.
- Place the garlic package beside your roasting pan in the oven. Bake for about 45 minutes, or until the squash is tender and garlic is mushy. The aroma will be your timer.
- Once roasted to perfection, add the squash and onion (and all those lovely pan juices!) to a glass blender. Pour in chicken stock until you reach the desired consistency, and blend until smooth.
- Squeeze the mushy garlic from its skin directly into the blender, along with all the olive oil from its package. Blend again until everything is luxuriously smooth.
- Pour the mixture into a large saucepan. Stir in the shredded romano cheese and whole milk. Heat gently to a simmer — don’t rush this step; it’s where flavors meld.
- Let it simmer for about 10 minutes, allowing the flavors to deepen. Serve it up with an extra drizzle of olive oil and a sprinkle of romano cheese. Voilà, dinner is served!
Cook’s Notes
So here’s the thing — make sure your butternut squash is cubed evenly. It’ll roast better that way, and we want each piece to soak up that olive oil magic. You can prep the squash and onion the night before if you’re tight on time. As for storage, this soup keeps beautifully in the fridge for up to 3 days and freezes like a charm. Just be sure to reheat gently, stirring often to maintain that creamy texture. Oh, and if you don’t have a glass blender, a good immersion blender will do the trick just fine.
Make It Your Own
This soup is pretty versatile; here are a few fun twists:
- Swap the chicken stock for vegetable stock to keep it vegetarian but still flavorful.
- Replace romano cheese with aged cheddar for a sharper tang.
- For a vegan version, substitute milk with coconut milk and the cheese with nutritional yeast.
- Add a pinch of nutmeg or cinnamon for a warm, spicy note that complements the squash.
If you try this, I’d love to hear how it turns out — drop a comment or tag me! Happy cooking, and may your kitchen be filled with laughter and delicious aromas.
Related update: Roasted Garlic & Butternut Parmesan Soup
Related update: Vegetarian Bean and Pumpkin Chili

Picture this: It’s a chilly Wednesday evening, and I’ve had one of those days where I needed something more than just food—I needed comfort on a plate. In moments like these, I often find myself reaching for my trusty Dutch oven and a bottle of red wine to whip up my favorite Beef Braised In Red Wine. This dish is my go-to because it hits all the right notes: it’s rich, savory, and cozy, but doesn’t require babysitting on the stove. Plus, it fills the house with the kind of aroma that makes you feel wrapped in a warm hug. Trust me, this is the kind of dish that can turn any mundane weeknight into something special.
Jump to Recipe
What You’ll Need
What I love about this recipe is how unfussy it is. Chances are you already have most of these ingredients lounging in your pantry or fridge. Let’s gather up all the deliciousness:
- Olive oil
- Bacon, chopped
- Boneless beef chuck roast
- Salt
- Pepper
- 1 large onion, chopped
- 2 carrots, peeled and chopped
- 2 celery stalks, chopped
- 4 garlic cloves, minced
- 1 tablespoon tomato paste
- 2 cups dry red full-bodied wine
- 2 cups water
- 1 teaspoon fresh thyme leaves
- 1 teaspoon fresh rosemary, chopped
How to Make Beef Braised In Red Wine
- Place the oven rack in the middle position and preheat your oven to 325°F. This will give us that perfect low and slow heat we need for tender meat.
- In a large Dutch oven, heat a splash of olive oil until it’s shimmering but not smoking. This is where the magic begins!
- While the oil heats, pat your beef chuck roast dry with a paper towel, then season generously with salt and pepper. You want a nice crust when you sear it.
- Brown the beef on both sides for about 10 minutes total. Get it nice and golden—this is where flavor builds. If the pan gets too hot and things start to scorch, turn down the heat a bit.
- Remove the beef and let it rest on a plate, letting all those yummy juices hang out. We’ll need them later.
- In the same pot, toss in the bacon. Sauté until it’s browned and crisp. The smell will make you want to dive right in, but hold tight!
- Add the onion, carrots, and celery to the bacon and cook until they’re softened and golden brown. Think of this as the cozy base of your dish.
- Stir in the garlic, thyme, and rosemary, sautéing for just a minute until fragrant. Then add the tomato paste, cooking for another minute to caramelize those flavors.
- Pour in the wine and bring it to a boil. Let it bubble away until reduced by half, concentrating all that deliciousness.
- Add the water and bring everything to a simmer. This is the luxurious bath your beef will cook in.
- Return the beef and any accumulated juices to the pot, nestling it in with all the flavors. Cover with a lid and transfer to the oven.
- Let it cook in the oven for 2 1/2 to 3 hours, or until the meat is fall-apart tender. Your patience will be rewarded!
- Once done, remove the beef and slice it across the grain. Serve it atop fluffy mashed potatoes or creamy grits, spooning that gorgeous sauce over the top.
Cook’s Notes
Here’s the thing: you don’t have to be a culinary master to nail this dish. The key is in the low and slow cooking. If you rush it, the meat might not be as tender, so patience is your friend here. Also, feel free to experiment with the type of wine you use, but stick to something you enjoy drinking for the best results.
- Leftovers will keep beautifully in the fridge for up to 3 days. Just warm them gently on the stove or in the microwave.
- This is a great make-ahead dish. The flavors only get better after a day or two in the fridge.
Make It Your Own
- Go Mediterranean by swapping out the rosemary and thyme for oregano and adding a handful of olives when you add the wine.
- For a mushroom lover’s twist, add a cup of sliced mushrooms along with the veggies.
- Substitute the beef with lamb for a different depth of flavor—just as delicious and maybe even more luxurious!
- Skip the bacon for a leaner version and use a tablespoon of butter with the olive oil for browning.
If you try this, I’d love to hear how it turns out—drop a comment or tag me! It’s always a joy to see your creations and hear about any delicious twists you might have added. Happy cooking, friends!
Related update: Beef Braised In Red Wine
Related update: Guinness and Brats
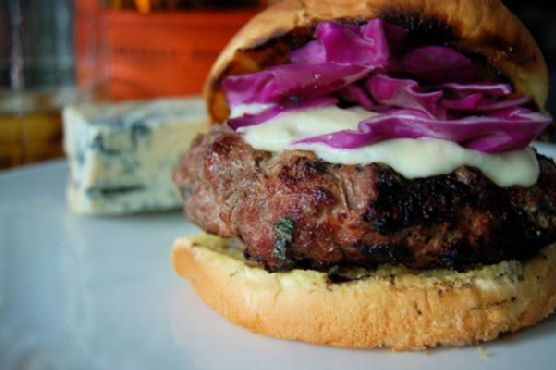
Picture this: It’s a chilly Tuesday night, and I’m standing in front of my fridge, staring at the contents with that familiar, slightly desperate hope that inspiration will strike. As I pull out a pound of ground sirloin, I remember the half-full bottle of Irish whiskey on my shelf. That’s when it hits me — the Blarney Burger. A burger so delightfully infused with flavors, it feels like an Irish pub in your very own kitchen. It’s got a hint of whiskey, a punch of garlicky goodness, and the creamy tang of piccante Gorgonzola. It’s quick enough for a weeknight but fancy enough to make your Netflix binge feel like a special occasion. Ready to create some burger magic?
Jump to Recipe
What You’ll Need
So, most of this is probably hanging out in your kitchen already, waiting for its moment to shine. The secret weapons here are the whiskey and the Gorgonzola. They’re the dynamic duo that transforms this from a regular burger into the Blarney Burger.
- 1 pound ground sirloin
- 2 tablespoons Irish whiskey
- 1 large egg
- 1/2 cup sweet diced onion
- 2 cloves fresh garlic, minced
- 1/2 cup piccante Gorgonzola crumbles
- Salt and pepper, to taste
- 2 tablespoons butter
- 1 cup shredded purple cabbage
- 4 hamburger buns
- 1 tablespoon Worcestershire sauce
How to Make The Blarney Burger
- First, let’s start with our Irish Mustard Sauce. In a small saucepan, combine 1 tablespoon cornstarch, 2 teaspoons sugar, 1 teaspoon dry mustard, 1/2 teaspoon salt, 1 cup water, 1 tablespoon butter, 1/4 cup vinegar, and 1 teaspoon horseradish. Whisk everything together over medium heat until it’s smooth and thick like pudding. Set aside.
- In a large bowl, mix the ground sirloin, Irish whiskey, egg, sweet diced onion, minced garlic, and a dash of salt and pepper. Use your hands — it’s messy but worth it — to combine everything until just mixed.
- Shape the meat mixture into 4 patties. Don’t pack them too tight; you want a tender burger.
- Heat a skillet or grill over medium-high heat. Cook the patties for 4-5 minutes per side. You’re looking for a deep brown crust, while the inside stays juicy.
- While the burgers are cooking, create a Gorgonzola butter-wash by melting the remaining Gorgonzola crumbles with 2 tablespoons of butter in the microwave. Whisk them until smooth.
- Brush the Gorgonzola butter-wash on the cut sides of the buns. Toast them on the upper or outer edges of the grill until they’re golden and slightly crispy. It’s all about that crunch!
- Assemble your burgers by placing a patty on each bun bottom, then topping with a heap of shredded purple cabbage and a generous drizzle of your Irish Mustard Sauce. Pop on the top bun, and you’re ready to dig in.
Cook’s Notes
A few quick tips to ensure your Blarney Burger is nothing short of legendary:
– Don’t overwork the meat when forming the patties. The looser they are, the juicier they’ll be.
– If you find the mixture too wet due to the whiskey, add a bit more diced onion to bind it.
– The Irish Mustard Sauce can be made ahead and stored in the fridge. Just warm it up slightly before serving.
– Leftover patties (if there are any!) can be stored in the fridge for up to two days. Reheat gently on the stove to keep them juicy.
Make It Your Own
Here are a few ideas to tailor the Blarney Burger to your taste buds:
- Swap the ground sirloin for turkey if you’re feeling a lighter vibe. It’s surprisingly good with the Irish whiskey!
- Trade the piccante Gorgonzola for sharp cheddar if you’re not a fan of blue cheese. You’ll still get a great tangy flavor.
- For a spicier kick, add a tablespoon of crushed red pepper to the meat mixture.
- Want to go vegetarian? Use crispy tofu slices marinated in a little Worcestershire and whiskey, then seared to golden perfection.
If you try this, I’d love to hear how it turns out — drop a comment or tag me! Your kitchen adventure could inspire my next one. 🍀
Related update: The Blarney Burger
Related update: Beef Braised In Red Wine
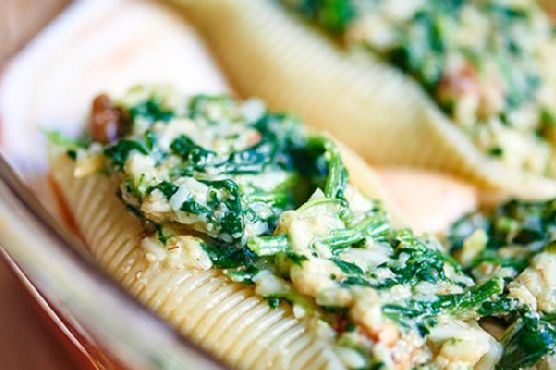
Picture this: it’s a chilly Tuesday evening, and you’re staring into the depths of your fridge, hoping for dinner inspiration to leap out at you. That’s when you remember those jumbo pasta shells you bought on impulse, sitting in the pantry like a promise of comfort. Enter the magic of Cheesy Spinach Stuffed Shells — a dish that ticks all the boxes when you want something warm, cheesy, and convincingly fancy without the fuss. This recipe is the kind of thing you can whip up with stuff you’ve probably already got lying around. It’s got the creamy, melty goodness of cheese, the nutritious punch of spinach, and the satisfying bite of perfectly cooked pasta — all drenched in a dreamy layer of sauce. Whether you’re feeding the family or impressing a date, these stuffed shells are your ticket to a happy, full belly.
Jump to Recipe
What You’ll Need
The beauty of this recipe is in its simplicity — we’re talking ingredients you likely have on hand, with a few star players you can grab on your next grocery run. Here’s what you’ll need:
- Jumbo shells
- Cooked frozen spinach
- Wheat germ
- Shredded parmesan cheese
- Chopped pecans
- Shredded Mexican cheese blend
- Diced green onions
- Salt and dried basil
- Eggs
- Water
- Alfredo sauce
- Spaghetti sauce
How to Make Cheesy Spinach Stuffed Shells
Ready for the good stuff? Let’s dive in!
- Start by bringing a large pot of salted water to a boil. Add in the jumbo shells and cook them for about 9 minutes — they should be al dente, as they’ll finish cooking in the oven. Drain them and let them sit face down on a paper towel to get rid of excess water.
- While those shells are having their moment, pop your frozen spinach in the microwave, following the box instructions, but skip adding water. Once cooked, squeeze out as much water as you can.
- In a large mixing bowl, combine the cooked spinach with wheat germ, parmesan cheese, Mexican cheese blend, chopped pecans, and finely diced green onions. Toss in some salt, a dash of pepper, and about a teaspoon of dried basil — feel free to adjust this to taste, and if you’re adventurous, a pinch of nutmeg could be interesting!
- Crack in two eggs and add a splash of water to the mixture. Stir until everything is well combined — the eggs should be incorporated smoothly into the mix.
- Stuff each shell generously with the spinach mixture. You’ll have enough filling for about 16 to 20 shells.
- Preheat your oven to 350 degrees. Grab an 8×8 or a 9×11 inch baking dish and give it a good spray with cooking spray.
- Spread a thin layer of Alfredo sauce on the bottom of the dish, followed by a layer of spaghetti sauce. This double-sauce base is what dreams are made of!
- Arrange the stuffed shells over the sauce base, then drape them with the remaining sauce. Make sure each shell gets some sauce love!
- Bake in the preheated oven for 30-35 minutes, or until the sauces are bubbly and make your kitchen smell like a cozy Italian bistro.
Cook’s Notes
Here’s the scoop: this dish is forgiving, so don’t stress if your shells aren’t perfectly stuffed or your sauce layers are a bit uneven. If you’re making it ahead, you can assemble everything, cover, and stash it in the fridge for a day or two. When you’re ready, just pop it in the oven and extend the baking time by about 10-15 minutes. Leftovers? Lucky you! They reheat beautifully in the microwave or oven. Just sprinkle a splash of water if you’re microwaving to keep things nice and saucy.
Make It Your Own
Here’s where you can get creative:
- Go nut-free: If pecans aren’t your thing, swap them out for sunflower seeds for that crunch.
- Protein punch: Mix in some cooked chicken sausage into the filling for a meatier bite.
- Gluten-free option: Use gluten-free pasta shells and ensure your sauces are gluten-free too.
- Spicier spin: Add a pinch of chili flakes into the filling or use a spicy Mexican cheese blend.
If you try this, I’d love to hear how it turns out — drop a comment or tag me! Cooking should be fun and delicious, so play with it and make it yours. Happy cooking, friend!
Related update: Cheesy Spinach Stuffed Shells
Related update: Mango Fried Rice
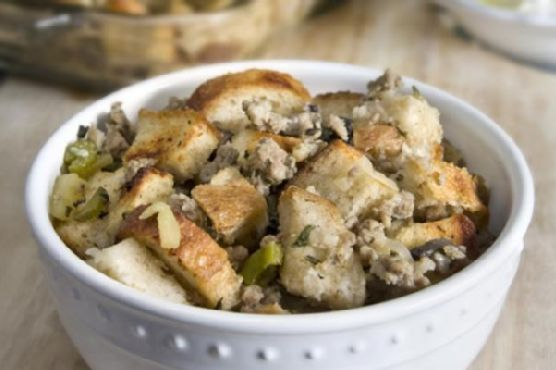
I found myself in a bit of a culinary pickle last Wednesday. You know those days when you’re just craving something hearty and flavorful, but the thought of spending hours in the kitchen makes you want to order takeout instead? Well, I was there — staring at my pantry with determination to whip up something that screams fall comfort but doesn’t require half my day. Enter the Sourdough Stuffing with Sage Sausage and Apples. This dish checks all the boxes: rich flavors from the sausage, a hint of sweetness from the apples, and earthy herbs that make your kitchen smell like an autumn hug. It’s surprisingly simple to make and perfect for a cozy weeknight dinner or an impressive side for a festive gathering.
Jump to Recipe
What You’ll Need
This dish is all about layers of flavor with ingredients you might already have around. The key players? Let’s just say **sourdough bread** and **sage sausage** are ready to steal the show.
- 1 pound of **sage sausage**
- 3 tablespoons of **butter**, divided
- 2 shallots, finely chopped
- 2 cloves of garlic, minced
- 3 stalks of celery, diced
- 1 **apple**, diced
- 6 ounces of **portobello mushrooms**, diced
- 1 teaspoon of **fresh thyme**
- 1 tablespoon of **fresh sage**, chopped
- 1/2 cup of **dry white wine**
- 1 loaf of whole wheat sourdough bread, diced
- 2 cups of **chicken broth**
- Salt and pepper, to taste
How to Make Sourdough Stuffing with Sage Sausage and Apples
- In a large skillet over medium heat, cook the sausage until it’s no longer pink, breaking it up with a spoon as it cooks; this should take about 10 minutes. Once cooked, drain the fat and set the sausage aside.
- In the same skillet, melt 1 tablespoon of butter. Add the shallots, garlic, celery, apple, and mushrooms. Sauté until the veggies are tender and the mixture is fragrant, about 8 minutes. Sprinkle with thyme and sage, stirring to combine.
- Pour the wine over the vegetable mix, using a wooden spoon to scrape up any browned bits from the bottom of the pan. Let it simmer for about 2 minutes, allowing the alcohol to evaporate.
- In a large bowl, combine the cooked sausage with the vegetable mixture. Add the diced sourdough bread and 2 tablespoons of butter. Pour the chicken broth over everything, stirring well so the bread absorbs the broth evenly. You’ll want the bread to be moist but not overly soggy.
- Transfer the stuffing into a 9×13 inch casserole dish, spreading it out evenly. Cover with foil and bake in a preheated oven at 350°F (175°C) for 20 minutes.
- Remove the foil, dot the top of the stuffing with the remaining tablespoon of butter, and return to the oven. Bake uncovered for an additional 10 minutes, or until the top is golden and slightly crispy. Serve immediately for maximum coziness.
Cook’s Notes
Here’s the thing with stuffing — it’s forgiving. Just remember, dry bread is your friend, as it’ll soak up all those delicious juices. If your bread isn’t dry enough, you can pop it in the oven at a low temperature to dry it out before starting.
Leftovers? Absolutely! Store them in an airtight container in the fridge for up to three days. You can reheat in the oven or microwave, but add a splash of broth to avoid drying it out. This stuffing can also be made a day ahead; just assemble it as directed, cover, and keep it in the fridge. Pop it in the oven when you’re ready to serve.
Make It Your Own
- Vegetarian Twist: Swap out the sausage for a plant-based alternative or use crispy cubes of tofu for a veggie-friendly option.
- Gluten-Free Version: Use your favorite gluten-free bread instead of sourdough. The texture will be slightly different, but it’ll still taste amazing.
- Nuts About Nuts: Add a handful of chopped walnuts or pecans for a bit of crunch and extra flavor depth.
- Cheese Please: Sprinkle some grated Parmesan or Gruyère over the top just before the final bake for a cheesy crust.
If you try this, I’d love to hear how it turns out — drop a comment or tag me! Whether you’re serving it up for a holiday spread or just wanting to turn a regular dinner into something special, this stuffing is bound to become a favorite. Enjoy every bite!
Related update: Sourdough Stuffing with Sage Sausage and Apples
Related update: Cheesy Spinach Stuffed Shells
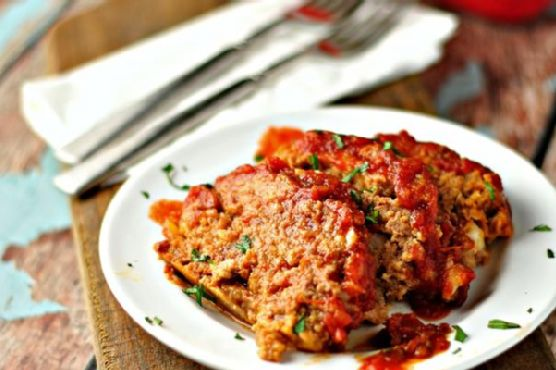
Picture this: it’s a chilly Wednesday evening, the kind when the sun sets way too early, and you’re standing in the kitchen with a hungry family waiting in the wings. You need something comforting, something that smells like home. Enter my Tasty Easy Meatloaf. It’s the perfect solution for those mid-week blues when time and patience are in short supply. This isn’t just any meatloaf—it’s juicy, flavorful, and topped with a tangy-sweet glaze that’ll make you wonder why you ever made it any other way. Plus, it’s a straightforward, one-bowl wonder that even the busiest of us can tackle. Trust me, this is the kind of comforting dish that makes life just a little bit easier. Jump to Recipe
What You’ll Need
This ingredient list is delightfully simple and, with any luck, your pantry already holds the key players.
- Ground beef
- Bulk sausage
- Breadcrumbs
- Diced onion
- Egg
- Salt
- Pepper
- Cumin
- Garlic powder
- Canned tomato sauce
- Cider vinegar
- Brown sugar
- Whole grain mustard
- Water
- Worcestershire sauce
How to Make Tasty Easy Meatloaf
- Preheat your oven to 350°F. You want it warm and welcoming, just like this meatloaf will be.
- In a large bowl, combine the ground beef, bulk sausage, breadcrumbs, diced onion, egg, salt, pepper, cumin, and garlic powder. Use your fingers to mix until just combined—overmixing can make the meatloaf tough.
- Gently shape the mixture into a loaf and place it in a shallow, ovenproof pan. It’s like shaping a sandcastle but more delicious.
- In a small bowl, stir together the remaining canned tomato sauce, cider vinegar, brown sugar, whole grain mustard, water, and Worcestershire sauce. This is your glaze, sweet and tangy perfection.
- Pour the glaze over the meatloaf. Make sure it gets nice and cozy with your loaf.
- Bake in the oven for about an hour, until the meatloaf is cooked through and the house smells inviting. Every 20 minutes, lovingly spoon some of the glaze back over the top to keep it juicy and flavorful.
- Remove from the oven and let it rest for 10 minutes. This step is crucial for sealing in the juices.
Cook’s Notes
This meatloaf is a forgiving dish, but here are a few tips to ensure success:
- Make sure not to overwork the meat mixture; it should just hold together.
- The glaze is your best friend—baste frequently for extra flavor.
- Leftovers make fantastic sandwiches, so don’t be shy about doubling the recipe.
- Store leftovers in the fridge for up to 3 days, or freeze for up to a month for a quick meal later.
Make It Your Own
- Swap the ground beef for ground turkey for a lighter version.
- Add chopped bell peppers to the meat mixture for a bit of sweetness and color.
- For a spicy kick, mix in some diced jalapeños with the onions.
- Vegetarian? Replace the meat with a mix of lentils and mushrooms for a hearty substitute.
If you try this, I’d love to hear how it turns out—drop a comment or tag me! Your kitchen adventures are my favorite kind of stories. Bon appétit!
Related update: Tasty Easy Meatloaf
Related update: Hard-Boiled Egg Gratin In A Bechamel Sauce

The other night, I found myself staring into my pantry, that familiar feeling of “what on earth can I make for dinner?” creeping in. It was one of those long days where you’re just too exhausted to whip up anything too complicated. That’s when I remembered Turbo Chicken. It’s the perfect mix of comforting and impressive, with just the right amount of effort to make you feel like a kitchen hero without breaking a sweat. The best part? The crispy skin and juicy meat are practically a hug on a plate. So, let’s dive in together!
Jump to Recipe
What You’ll Need
The beauty of this dish lies in its simplicity. Chances are you already have most of these on hand, so no need for a last-minute grocery run. Here’s what you’ll gather:
- Whole chicken
- Soy sauce
- Salt
- Calamansi (or lemon/lime if you can’t find it)
- Baking flour dissolved in water
- Gravy from the turbo broiler drippings
- Bell pepper
How to Make Turbo Chicken
- Start by giving that chicken a loving rubdown with soy sauce, salt, and calamansi. Don’t be shy—massage it inside and out as if you’re making it the most relaxed chicken ever.
- Let the chicken marinate for about 10-20 minutes on each side. This is the perfect time to set up your turbo broiler and perhaps sip on a glass of something refreshing.
- Place a small baking pan at the bottom of the turbo broiler to catch all those wonderful drippings. Trust me, you’ll want this later for the gravy magic.
- Set the chicken in the turbo broiler, crank up the heat to 250 degrees, and let it work its magic for 30 minutes.
- After 30 minutes, turn the chicken over. Give it another 10 minutes to achieve the crispiest golden brown skin you’ve ever seen.
- While the chicken finishes up, grab those drippings and pour them into a small pan over low heat. Stir in the flour dissolved in water until silky smooth, then add salt, pepper, and a splash of calamansi to taste.
- Once your chicken is done and rested, carve it up and drizzle it with that beautiful gravy. Voilà! Dinner is served.
Cook’s Notes
Let me just say, the turbo broiler can be your best friend in the kitchen if you let it. It cooks everything evenly and gives you that crispy skin we all crave. Just be sure to watch your chicken closely after flipping it—those last 10 minutes can make all the difference between perfect and a tad too crispy.
Got leftovers? Lucky you! Store them in an airtight container in the fridge, and they’ll keep beautifully for up to three days. Reheat gently to keep all those juices locked in.
Make It Your Own
Feel like getting creative? Here are a few fun twists:
- Swap the chicken for some crispy tofu for a vegetarian-friendly version. Just adjust the cooking time accordingly.
- Add a hint of heat by including some chili flakes in your marinade.
- Throw in some garlic cloves inside the chicken cavity for an aromatic twist.
- Mix in a tablespoon of honey with your soy sauce marinade for a sweet and savory combo.
If you try this, I’d love to hear how it turns out — drop a comment or tag me! Can’t wait to see how you make Turbo Chicken your own. Happy cooking, friends! 🐔
Related update: Turbo Chicken
Related update: Tasty Easy Meatloaf

It was one of those evenings where the day just didn’t stop. You know the kind—I spent too long in traffic, the grocery store was packed, and let’s not even talk about the email avalanche. As I finally stepped into the kitchen, I was craving something that’s both comforting and invigorating. I remembered a recipe tucked away for a rainy day, one that combines creamy coconut with warming spices and fresh fish—Linefish Simmered In A Spiced Coconut Gravy. It’s the kind of dish that feels like a warm hug but also has a playful kick to it. The real beauty? Once you’ve got everything prepped, it practically cooks on its own, allowing you to sip a glass of your favorite white wine as the magic happens.
Jump to Recipe
What You’ll Need
I promise, most of these ingredients are pantry staples, lurking in the back of your cupboard just waiting for their time to shine. And those that aren’t, well, they’re totally worth the trip.
- Garlic
- Fresh thumb-sized piece of ginger
- Red chilli powder
- Turmeric
- Salt
- Tamarind pulp
- Vegetable oil
- Brown mustard seeds
- Fenugreek seeds
- Whole cloves
- White whole cardamom pods
- Thumb-length quill of cinnamon
- Onions
- Coconut milk
- Powdered cumin
- Black freshly milled pepper
- Fresh cilantro
- White fresh firm-fleshed fish fillets
- White fresh kilograms (assuming this means the right quantity for your crowd!)
How to Make Linefish Simmered In A Spiced Coconut Gravy
- Start by cutting the fish into large, hearty chunks. Toss them into a bowl, sneaking in half of that aromatic garlic and ginger while you’re at it. Sprinkle generously with chilli powder, turmeric, and a bit of salt. Give it all a good mix and let it chill in the fridge for a cool 30 minutes.
- While your fish is taking a breather, soften that tamarind pulp in a cup of warm water. It’s like giving it a little spa treatment for 20 minutes.
- Heat the vegetable oil in a large saucepan over a high flame. As soon as it’s shimmering, in go the mustard seeds, fenugreek, cloves, cardamom, and cinnamon. Let them sizzle and pop — this is when your kitchen starts to smell divine.
- Add the onions along with the reserved ginger and garlic to the party. Fry them briskly for about 10 minutes until they’re golden brown and fragrant.
- Mash the softened tamarind pulp into its soaking water with your fingers. Strain this tangy liquid over the onions and discard the leftover pulp.
- Pour in the creamy coconut milk and sprinkle the cumin powder. Give it a good stir and let it simmer for about 15 minutes, letting the flavors meld into a fragrant gravy.
- Gently tip the marinated fish cubes into the sauce. Stir them in with care and let them simmer until just cooked, about 7 minutes. You’re aiming for tender, not tough!
- Finish with a flourish of fresh cilantro sprinkled on top. Serve your creation hot with a side of Basmati rice, and enjoy the bliss that follows.
Cook’s Notes
Here’s the deal: fresh ingredients are non-negotiable here. They make all the difference. Also, when cooking the spices, keep an ear out for the mustard seeds popping. It’s their way of telling you they’re ready. This dish is best enjoyed fresh, but if you need to make it ahead, do the prep steps and store the marinated fish and sauce separately in the fridge. Just combine and simmer when you’re ready to serve. Leftovers? They’re even better the next day, as the flavors deepen. Just keep them in an airtight container in the fridge for up to two days.
Make It Your Own
- Not a fan of fish? Swap it out for crispy tofu chunks for a vegetarian twist. Just adjust the marinating time to let those flavors soak in.
- If you’re feeling adventurous, substitute the white fish with shrimp. Just be mindful; shrimp cooks a lot faster, so adjust the simmering time accordingly.
- Add a handful of baby spinach at the end for a pop of color and nutrients. It wilts beautifully into the sauce.
- For a richer texture, throw in a handful of cashew nuts while simmering the sauce. They’ll soften up and add a lovely creaminess.
If you try this, I’d love to hear how it turns out—drop a comment or tag me! Whether it’s your first taste or a comforting regular, this dish is a keeper. Enjoy every spoonful!
Related update: Linefish Simmered In A Spiced Coconut Gravy
Related update: Turbo Chicken
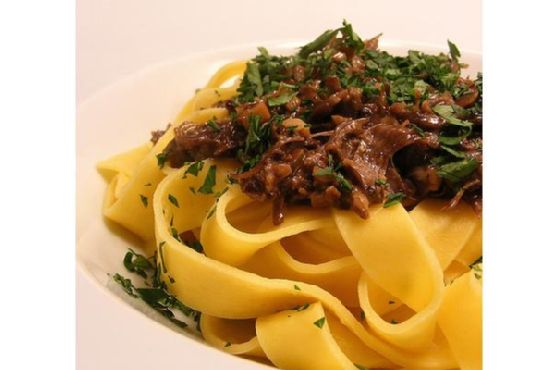
I’ve got to tell you about this time when I found myself staring into the abyss of my pantry, a little uninspired and a lot hungry. It was one of those dreary afternoons where the rain just wouldn’t let up, and all I craved was something rich and comforting to fill the house with warmth — and let’s be honest, something that would have me coming back for seconds. That’s when I remembered the oxtails tucked away in the freezer, just waiting for their moment. A few hours later, my kitchen was filled with the deep, savory aroma of Oxtail Ragout simmering away, and let me tell you, it was glorious. This recipe is the kind of comfort food that hugs you from the inside out, and while it might sound fancy, it’s pretty straightforward and oh-so-worth it.
Jump to Recipe
What You’ll Need
This ingredient list is a pantry’s best friend. You’re likely to have most of this stuff already, and the flavors all come together to create something magical.
- Oxtails
- Flour
- Salt
- Pepper
- Paprika
- Hot fat (like vegetable oil or lard)
- Onion, chopped
- Garlic, minced
- Bell pepper, diced
- Whole allspice
- Whole bay leaf
- Tomato juice
- Water
- Lemon juice
How to Make Oxtail Ragout
- In a small bowl, mix together 1 teaspoon of salt, some freshly cracked pepper, paprika, and enough flour to lightly coat the oxtails. Roll the oxtails in this seasoned flour mixture until they are fully covered.
- Heat some hot fat in a heavy-bottomed pot over medium-high heat. Add the floured oxtails and brown them thoroughly on all sides. You’re looking for a deep, golden crust that’s almost irresistible.
- Once browned, toss in the chopped onion, minced garlic, and diced bell pepper. Stir everything around until the onions are translucent and the garlic is fragrant but not burned.
- Add in the whole allspice and bay leaf, followed by the tomato juice and enough water to cover the oxtails. Give everything a good stir to combine.
- Bring the pot to a gentle simmer, then cover it up and let it do its thing for about 3 hours. You’re aiming for the kind of tenderness where the meat practically falls off the bone.
- Once the oxtails are melt-in-your-mouth tender, fish out the allspice and bay leaf. Stir in a splash of lemon juice to brighten the flavors, and you’re done!
Cook’s Notes
I’ve learned a few things the hard way, so here are some tips to keep in mind. Be patient with the browning process; it’s where a lot of the flavor develops. Don’t rush it! If you want to make this ahead, the ragout tastes even better the next day once the flavors have had a chance to deepen. Just store it in the fridge and reheat gently. Leftovers can be kept in an airtight container for up to 3 days, or frozen if you want to hoard this goodness for a rainy day.
Make It Your Own
Here are a few variations to keep things interesting or to cater to different tastes:
- Swap the tomato juice for red wine if you’re looking for a richer, more robust flavor.
- Add diced carrots and celery for a bit more veggie goodness and texture.
- Try using smoked paprika for a deeper, smokier flavor profile.
- If you’re feeling adventurous, throw in a dash of hot sauce for a little heat.
If you try this, I’d love to hear how it turns out — drop a comment or tag me on social media. Your kitchen adventures are half the fun for me!
Related update: Oxtail Ragout

It was one of those evenings where the idea of putting together a lavish meal seemed both daunting and completely out of the question. You know the kind, right? Where you’re caught between wanting something special for dinner because it’s been a long week and yet, you really don’t want to spend ages in the kitchen. That’s when Valentine’s Chicken Marsala came to the rescue. It’s the kind of dish that hits that perfect sweet spot: impressive enough that it feels like a treat, yet simple enough that you’re not sweating it out at the stove. Plus, there’s something truly comforting about the aroma of Marsala wine and garlic wafting through the house. Trust me, this is worth making whenever you need a bit of mid-week magic.
Jump to Recipe
What You’ll Need
I love that this recipe doesn’t require a trip to a specialty store. Chances are you already have most of these goodies lounging in your pantry or fridge. Here’s what you’ll need:
- Fresh mushrooms
- Skinless boneless chicken breast
- Garlic
- Butter
- Olive oil
- Seasoned breadcrumbs or coating mix
- Marsala wine
- Heavy cream
- Cooked pasta (optional, but recommended for soaking up that wonderful sauce!)
How to Make Valentine’s Chicken Marsala
- Start by prepping your ingredients. Slice the mushrooms nice and thin — they’ll shrink down and soak up all the flavors. For the chicken, place the breast between two sheets of wax paper and give it a good pounding with a mallet until it’s about 1/4 inch thick. This helps it cook evenly.
- Next, dredge the chicken breast in seasoned breadcrumbs. Make sure it’s well-coated for that satisfying crunch.
- Now, heat up a heavy stainless or cast iron pan. Trust me, this isn’t the time for non-stick. Add butter and olive oil, letting the butter melt until it’s bubbly and fragrant.
- Place the chicken breast in the pan and let it brown on both sides. You’re looking for that beautiful golden color that screams “delicious.” Once browned, remove it from the pan and set aside.
- In the same pan, add a touch more olive oil if needed and toss in the sliced mushrooms and minced garlic. Sauté until the mushrooms are tender and the garlic is giving off an intoxicating aroma.
- Time to deglaze! Pour in the Marsala wine, using a wooden spoon to scrape up all the yummy bits stuck to the pan. This is where a lot of the flavor magic happens.
- Return the browned chicken breast to the pan. Bring the mixture to a boil, then reduce to a gentle simmer. Cover and let it do its thing for about 30 minutes, allowing the chicken to soak up all those amazing flavors.
- After simmering, remove the chicken from the pan again. Increase the heat slightly and add the heavy cream. Let the sauce reduce by about half — it should be rich, creamy, and oh-so-delicious.
- Serve the chicken and sauce over cooked pasta, or keep it low-carb and enjoy as is. Either way, it’s heavenly.
Cook’s Notes
Cooking can sometimes feel like a dance, and it’s all about timing and adjustments. If your sauce looks too thin after adding the cream, give it a bit more time to reduce. On the flip side, if it’s too thick, a splash of chicken stock or even a bit more wine can help. Store any leftovers in an airtight container in the fridge for up to three days. Reheat gently on the stove with a splash of water or stock to loosen the sauce. And yes, it’s just as tasty the next day.
Make It Your Own
You can totally switch things up with this recipe. Here are some ideas to get those creative juices flowing:
- Swap the chicken for crispy tofu if you’re aiming for a vegetarian twist. Just make sure to press the tofu well before dredging it in breadcrumbs.
- Try using portobello mushrooms for a meatier texture that complements the chicken beautifully.
- If Marsala wine isn’t your thing, a dry white wine can work wonders as well, giving the dish a slightly different but equally delicious profile.
- For a gluten-free version, use gluten-free breadcrumbs or even almond flour to coat the chicken.
If you try this, I’d love to hear how it turns out — drop a comment or tag me! Whether it’s a quiet dinner for two or a treat-yourself kind of night, this dish is sure to bring a touch of joy to your table. Enjoy the delicious journey!
Related update: Valentine’s Chicken Marsala
Related update: Oxtail Ragout
Related update: Linefish Simmered In A Spiced Coconut Gravy

Picture this: it’s a Wednesday evening, halfway through the week, and my energy is fading faster than the daylight. The fridge is a bit barren, just the usual suspects left to fend for themselves. That’s when I remember this quick and comforting recipe that feels like a mini victory every time: Green Beans with Pearl Onions and Salmon. This dish is a total lifesaver — it’s elegant enough to make me feel like a culinary genius yet simple enough for my tired brain to handle. Plus, the mix of green beans and pearl onions gives me that cozy, satisfying vibe I crave without having to spend hours in the kitchen.
Jump to Recipe
What You’ll Need
Before we dive in, let me just say that this ingredient list is as friendly as it gets — you might not even need a grocery run! Here’s what you’ll gather:
- Frozen green beans
- Frozen pearl onions
- Olive oil
- Unsalted butter
- Chicken stock
- Brown sugar
- Salt and pepper
- Skinless salmon steaks
How to Make Green Beans with Pearl Onions and Salmon
- Start by grabbing a large pot and filling it with some water. Toss in those trusty frozen green beans and pearl onions, cover it up, and let them cook over medium heat until they’re tender — you’ll know they’re ready when they give a little bit under a fork. Drain away the water and set them aside for their moment to shine.
- Now, heat up a large skillet with one tablespoon of butter and the olive oil over medium-high heat. When the butter is melted and the oil is shimmering, add the green beans and pearl onions. Sauté for about a minute until they start to sizzle and get that lovely sheen.
- Add the chicken stock to the party and let it cook for another minute until it’s all evaporated. This step brings out a deeper flavor in the veggies.
- Lower the heat to low and stir in another tablespoon of butter with the brown sugar. Mix gently until the veggies are slightly caramelized with a sweet glaze. Remove from the heat and keep them warm and cozy.
- Without washing the skillet (we love saving dishes!), return it to medium-high heat and melt a teaspoon of butter right in the center. Place the salmon steaks over the melted butter, season them generously with salt and pepper, and let them cook for 3-5 minutes. You’re looking for a golden crust that’s the envy of all salmon.
- Flip each salmon steak and cook for another 3 minutes until they’re cooked through but still tender. You know it’s ready when it flakes easily with a fork.
- To serve, lay the green beans and pearl onions on plates, then lovingly place a salmon steak on top. Voila! Dinner is served.
Cook’s Notes
Here’s a little secret: this dish is all about timing and listening to those sweet sizzles. Make sure to keep an eye on the salmon to avoid overcooking — you want that crispy outside and tender inside. As for the green beans and onions, the key is not to rush the caramelization. Let them take their time to get that nice color.
If you’re thinking ahead, you can totally make the green beans and onions a day in advance and store them in an airtight container in the fridge. Just reheat them gently before serving. Leftovers? Sure thing! They’re a dream for lunch the next day or even a fancy brunch with a poached egg on top.
Make It Your Own
This dish is a canvas for creativity! Here are some ideas to mix things up:
- Swap the salmon for crispy tofu if you’re going for a plant-based option. Just pan-fry the tofu until golden on both sides.
- Use maple syrup instead of brown sugar for a different kind of sweetness that pairs beautifully with the veggies.
- Add a handful of toasted almonds or pine nuts for some crunch and extra flavor.
- Try a splash of balsamic vinegar at the end for a tangy twist that brightens up the dish.
If you try this, I’d love to hear how it turns out — drop a comment or tag me on social media! Your kitchen adventures are the best part of sharing recipes. Enjoy every bite!
Related update: Green Beans with Pearl Onions and Salmon
Related update: Valentine's Chicken Marsala
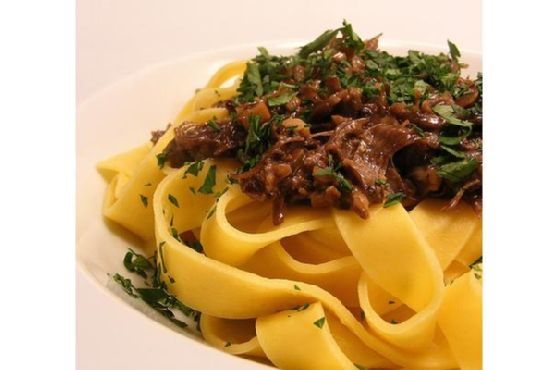
It was one of those chilly, rainy afternoons when the sky couldn’t quite decide if it wanted to drizzle or pour, and I found myself leaning into the kind of comfort cooking that warms you from the inside out. I’d been craving something rich and flavorful, the kind of dish that makes your whole home smell like a cozy hug. Enter: Oxtail Ragout. Trust me, this recipe is a keeper. It’s the kind of meal that feels like a culinary project, but it’s actually more about letting the ingredients do their thing while you kick back. You get meltingly tender meat and a sauce that’s so good you’ll want to sop it up with a hunk of crusty bread. Plus, the prep is minimal, so it’s perfect for those days when you want something special without spending the whole day in the kitchen.
Jump to Recipe
What You’ll Need
One of the best parts? You might already have most of these goodies hanging out in your pantry or fridge. Here’s what you’ll need to gather:
- Oxtails
- Flour
- 1 teaspoon of salt
- Pepper
- Paprika
- Hot fat (like vegetable oil or lard)
- 1 large onion, chopped
- 2 cloves of garlic, minced
- 1 bell pepper, chopped
- Tomato juice
- 1 whole bay leaf
- 1 whole allspice berry
- Water
- Lemon juice
How to Make Oxtail Ragout
- In a shallow dish, combine 1 teaspoon of salt, a few grinds of pepper, paprika, and some flour. This seasoned flour is where the magic starts, giving the oxtails a flavorful crust.
- Roll the oxtails in the seasoned flour until they’re well coated. Shake off any excess so you get a nice, even crust.
- Heat some hot fat in a large pot over medium-high heat. Brown the oxtails thoroughly on all sides. You want them deeply caramelized — think golden and fragrant.
- Once browned, add the chopped onion, minced garlic, and bell pepper to the pot. Stir them around, scraping up any delicious bits stuck to the bottom, until they start to soften and smell amazing.
- Pour in enough tomato juice to cover the oxtails, then add the whole bay leaf and allspice. Top it off with a splash of water to ensure everything is nicely submerged.
- Bring the mixture to a gentle simmer, then cover the pot. Let it do its thing for about 3 hours, checking occasionally to ensure it stays at a low simmer.
- When the meat is fall-off-the-bone tender, remove the bay leaf and allspice berry. Stir in a splash of lemon juice to brighten the flavors, adjusting seasoning to taste.
Cook’s Notes
This dish is pretty forgiving, but here are a few tips to make things even smoother:
- Don’t rush the browning process. It’s where a lot of the flavor comes from, so take your time.
- If you don’t have tomato juice, you can use crushed tomatoes or even a bit of tomato paste mixed with water.
- This ragout tastes even better the next day, so feel free to make it ahead. It stores well in the fridge for up to 3 days.
- If you’re wondering about leftovers, they freeze beautifully for up to 3 months. Just reheat gently on the stove.
Make It Your Own
- Swap the oxtails for short ribs if you’re in the mood for something different but equally delicious.
- Add a handful of chopped carrots or celery for extra veg power and a bit of sweetness.
- If you like a bit of heat, throw in a pinch of red pepper flakes with the garlic and onions.
- For a smoky twist, use smoked paprika instead of regular paprika.
If you try this, I’d love to hear how it turns out — drop a comment or tag me! Nothing makes my day like seeing your creations. Enjoy every rich, saucy bite!
Related update: Oxtail Ragout
Related update: Green Beans with Pearl Onions and Salmon

It was one of those evenings where the fridge seemed to be giving me the silent treatment—half-empty, a bunch of odds and ends staring back at me. I was craving something warm and comforting, but not the usual suspects. Enter: Japanese Chicken Donburi. It’s the kind of dish that feels luxurious but is secretly a weeknight warrior, ready in under 30 minutes. Plus, it’s a one-pan wonder, which means less time scrubbing pots and more time enjoying a cozy meal. The mix of tender chicken, silky eggs, and a touch of soy sauce can turn any ordinary evening into a mini celebration. Spoiler: It’s about to become your new dinner staple.
Jump to Recipe
What You’ll Need
Here’s the kicker—chances are, you’ll find most of these ingredients in your kitchen already. This recipe is all about bringing simple items together for a meal that’s anything but ordinary.
- 2 tablespoons salad oil
- 1 small onion, chopped
- 1 tablespoon fresh ginger, minced
- 2 cups **fat-skimmed chicken broth**
- 2 tablespoons **soy sauce**
- 1 tablespoon sugar
- 1 pound **boned, skinned chicken breast**, cut into bite-size pieces
- 4 cups baby spinach leaves
- 4 large eggs
- 2 cups **cooked rice**
- 1 **diced roma tomato**
How to Make Japanese Chicken Donburi
- In a deep 10-inch or 12-inch frying pan over high heat, stir the salad oil, onion, and ginger until the onion is lightly browned and fragrant, about 2 minutes.
- Add the chicken broth, soy sauce, and sugar to the pan. Stir until the sugar dissolves.
- Gently introduce the chicken pieces to the pan. Bring the mixture to a boil, ensuring the chicken is cooked through yet tender.
- Add the baby spinach on top, cover the pan, and cook until wilted, about 1 minute.
- While waiting, beat the eggs in a small bowl until blended.
- Reduce the heat to low. Evenly distribute the mixture in the pan and pour in the eggs. Use a spatula to nudge the vegetables and chicken slightly so the egg can seep through the sauce.
- Cover and cook until the eggs are softly set, about 2 to 2 1/2 minutes.
- Spoon the cooked rice into bowls, creating a cozy bed.
- Top each bowl with the egg-spinach mixture, making sure to include some of that savory sauce.
- For a fresh finish, sprinkle the diced roma tomato over each serving.
Cook’s Notes
This dish is a dance of flavors and textures, and it’s pretty forgiving. If you like your eggs a little firmer, let them cook just a bit longer under the lid. And if you’re making this ahead, store the components separately; the rice, chicken, and egg mixture will keep well in the fridge for up to two days. When you’re ready to enjoy, just heat them up and assemble. A quick note: If your chicken pieces are on the thicker side, make sure they’re cooked through by cutting into the largest piece to check.
Make It Your Own
Consider these variations to fit your mood or what you have on hand:
- Swap the **chicken** for crispy tofu to keep it vegetarian but still satisfying.
- Use **quinoa** instead of rice for a protein-packed twist.
- For a spicier kick, mix a bit of **sriracha** into the broth before adding the chicken.
- Replace **baby spinach** with bok choy for a more traditional touch.
If you try this, I’d love to hear how it turns out — drop a comment or tag me! Cooking is about creativity and connection, and I’m excited to see how Japanese Chicken Donburi finds a spot at your table. 🍚🥢
Related update: Japanese Chicken Donburi
Related update: Vietnamese Pancakes with Vegetables, Herbs and a Fragrant Dipping Sauce (Bánh Xèo)
Related update: Oxtail Ragout

It was one of those Wednesday evenings when the fridge was looking particularly uninspiring, and the clock was ticking towards dinner time. My mind was juggling between making something quick, comforting, and, above all, something that wouldn’t require a trip to the store. That’s when I decided to whip up some Lebanese Kibbeh. With its flavorful layers and aromatic spices, it’s like a warm hug on a plate — quick to assemble but impressive enough to make you feel like a culinary genius. Plus, the way the kitchen smells when the Kibbeh is baking — it’s like a magical invitation for everyone to gather around the table.
Jump to Recipe
What You’ll Need
This recipe is all about transforming simple pantry staples into something extraordinary. Chances are you already have most of these ingredients in your kitchen:
- Bulgur wheat
- Lean lamb or veal
- Onion
- Butter
- Salt & fresh ground pepper
- Sprig of mint
- Oil
- Pine nuts
- Ground allspice
- Greek yogurt
- Garlic
- Fresh mint for garnish
How to Make Lebanese Kibbeh
- Preheat your oven to 375°F. This way, it’ll be all set to go once your Kibbeh is assembled.
- Rinse the bulgur wheat in a sieve, giving it a good shake to remove excess moisture. You want it just damp enough to blend easily.
- In a large bowl, mix the lean lamb, onion, and a generous seasoning of salt and pepper. Roll up your sleeves and knead until you get a thick, cohesive paste.
- Add the rinsed bulgur wheat into this meaty mix and blend until it’s all one happy family.
- For the filling, warm up the oil in a frying pan over medium heat. Toss in the onion and cook until golden — your kitchen should start smelling amazing right about now.
- Add the lamb (or veal) to the pan, stirring occasionally until the meat is evenly browned. Mix in the pine nuts, allspice, and another hit of salt and pepper.
- Oil up a large baking dish and spread half of the lamb and bulgur mix over the bottom, pressing it down to form an even layer.
- Spoon the flavorful filling over this layer, then top it with the remaining lamb and bulgur mix. Press down firmly using the back of a spoon for a neat finish.
- Pour melted butter over the top. Trust me, this is the magic touch that will make the top irresistibly crispy and golden.
- Slide the dish into the oven and let it bake for 40-45 minutes, until the top is beautifully browned.
- While the Kibbeh bakes, whip up a quick yogurt dip by blending Greek yogurt with crushed garlic. Spoon it into a bowl and finish with a sprinkle of chopped mint.
- Once your Kibbeh is done, let it rest for a few minutes before cutting into squares or rectangles. Serve it up with the yogurt dip and garnish with fresh mint.
Cook’s Notes
Making Kibbeh is quite forgiving if you keep a few things in mind. First, if your bulgur wheat seems too wet, squeeze it out well; excess moisture can make the layers soggy. When layering in the baking dish, press down firmly to avoid any air pockets. If you’re making this ahead, you can easily assemble the dish a few hours earlier, refrigerate it, and pop it in the oven when you’re ready. Leftovers are delightful for lunch the next day — simply reheat in a low oven until warm.
Make It Your Own
- Switch up the protein: Try using ground beef or turkey for a different twist on the classic.
- Nutty variation: Substitute the pine nuts with chopped walnuts for a different crunch.
- Spice it up: Add a pinch of cayenne pepper to the filling if you like a bit of heat.
- Herbaceous twist: Mix in some chopped parsley or cilantro into the bulgur mix for extra freshness.
If you try this, I’d love to hear how it turns out — drop a comment or tag me on social media! Cooking is all about sharing the love, after all. Let me know what variations you come up with. Happy cooking!
Related update: Lebanese Kibbeh
Related update: Japanese Chicken Donburi
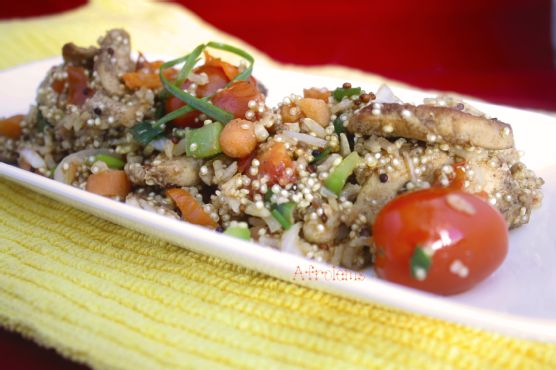
It was one of those Tuesday evenings when the fridge was looking pretty sparse, and my energy levels were even lower. You know the kind — a long day at work, the sun setting a bit too early, and a craving for something warm and satisfying but not a culinary marathon. That’s when my Stir Fried Quinoa, Brown Rice, and Chicken Breast came to the rescue. It’s a dish that seems fancy enough to impress anyone joining you at the table, but quick and easy enough that you won’t dread making it even after the most exhausting day. Plus, those spicy and savory flavors always hit the spot!
Jump to Recipe
What You’ll Need
This recipe is all about simplicity without sacrificing flavor. Chances are, you might already have most of these ingredients lying around, waiting to be transformed into something magical.
- Suya spice
- Quinoa and brown rice mix
- Butter
- Carrots
- Whole cherry tomatoes
- Chicken breast
- Garlic
- Seasoning cubes
- Green bell pepper
- Roma tomato
- Scotch bonnet pepper
- Spring onion
- Vegetable oil
- Water
How to Make Stir Fried Quinoa, Brown Rice and Chicken Breast
- Start by seasoning the chicken breast with the seasoning cubes and suya spice. Ideally, let it marinate for 2 hours, but if hunger strikes hard, go ahead and use it right away.
- In a pot, bring 1 cup of water to a boil. Add the quinoa and brown rice mix along with a teaspoon of oil. Cook until the grains are soft, approximately 5-7 minutes. Once cooked, transfer to a bowl and set aside.
- Melt the butter in a pan over medium heat, then add the marinated chicken breast. Pan fry, turning constantly, until it’s golden brown and fragrant on both sides. If the pan gets too dry, add 2 tablespoons of water to keep things juicy. Cover the pan and let the chicken cook through.
- While the chicken is cooking, chop up your veggies: carrots, green bell pepper, scotch bonnet pepper, spring onion, and the roma tomato.
- Once the chicken is nearly done, stir in the chopped vegetables. Let them cook until they’re vibrant and just tender, releasing a melody of aromas.
- Finally, fold in the cooked quinoa and brown rice mix. Stir everything together, ensuring that every grain is coated in flavor. Serve hot and enjoy the delicious medley!
Cook’s Notes
Cooking isn’t just about following steps; it’s about feeling the process. Here are a few tips to make this dish even better:
- If you’re short on time, skip the marination, but if you can spare those 2 hours, it makes the chicken extra flavorful.
- Leftover potential? Oh yes! Store in an airtight container and it’ll be good for up to 3 days in the fridge. Just reheat gently on the stove or in the microwave.
- If you’re new to using suya spice, start with a smaller amount and adjust to your heat preference.
- Don’t stress if you don’t have scotch bonnet peppers. They add a nice kick, but you can tone it down or swap with a milder pepper.
Make It Your Own
Cooking is all about personal touches. Here are some fun variations:
- Swap the chicken for crispy tofu for a vegetarian twist.
- Add a handful of spinach with the veggies for a burst of green goodness.
- Use coconut oil instead of butter for a slight tropical vibe.
- Mix in a spoonful of peanut butter with the suya spice for a creamy, nutty flavor.
If you try this, I’d love to hear how it turns out — drop a comment or tag me! Enjoy every bite of this simple yet satisfying dish, and remember, the best recipes are the ones that work for you. Happy cooking!
Related update: Stir Fried Quinoa, Brown Rice and Chicken Breast
Related update: Lebanese Kibbeh
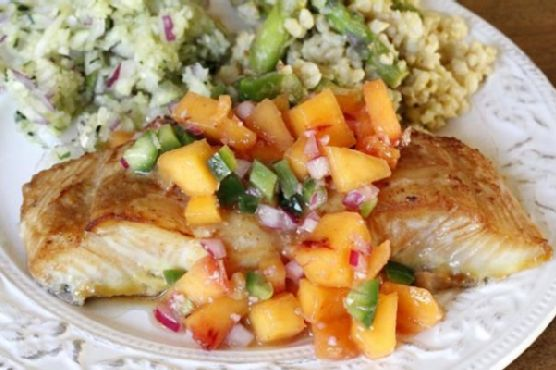
Picture this: it’s a Wednesday evening, my fridge looks like a ghost town except for a couple of halibut fillets staring back at me, and I’m craving something a bit more exciting than the usual mid-week fare. I’m also avoiding another last-minute dash to the store because, you know, life. So, I decided to bring some brightness and zing to the table with a Soy Ginger Glazed Halibut, topped with a Ginger Peach Relish that’s basically summer in a spoon. This recipe is the answer to impressing your taste buds without needing a culinary degree—or a packed pantry. Easy yet striking, this dish is the perfect combo of sweet, spicy, and savory. Trust me, you’ll want to keep this one in your recipe stash.
Jump to Recipe
What You’ll Need
Chances are, you already have most of what you need for this dish in your kitchen, especially if you’re a fan of Asian-inspired flavors. Here’s what to gather:
- Halibut fillets – the star of the show, make sure they’re nice and fresh
- Fresh ginger – adds that spicy zing we all love
- Soy sauce – for that umami depth
- White wine – adds a touch of elegance and acidity
- Olive oil – a smooth base for our marinade
- Peach – sweet and juicy, perfect for the relish
- Red onion – brings in a sharp, savory note
- Jalapeno – for a kick of heat
- Apple cider vinegar – a tangy counterbalance
- Lime – freshens everything up
How to Make Soy Ginger Glazed Halibut with Ginger Peach Relish
- Peel and roughly chop a piece of fresh ginger. You’re looking for that sharp, spicy aroma to fill your kitchen. Place all marinade ingredients—soy sauce, white wine, olive oil, and 1 tablespoon of chopped ginger—in a blender and blend until smooth. This ensures the ginger infuses its flavor beautifully.
- In a zip-lock bag or bowl with a secure cover, add the halibut fillets and pour in the marinade. Massage the bag gently to ensure the fillets are fully coated. Let them soak up all that goodness for at least 20 minutes, though a few hours would make them sing.
- Preheat your oven to broil. Once heated, place the fish in a casserole dish along with all the marinade. Set the dish on one of the top racks and bake for about 10-12 minutes. You’re aiming for a nice brown glaze on top and perfectly cooked-through fish.
- For the relish, chop up the peach, red onion, and jalapeno. Combine them in a bowl with apple cider vinegar, the juice of half a lime, and 1 tablespoon of ginger. Stir and refrigerate. The longer it sits, the more the flavors meld into a vibrant accompaniment.
Cook’s Notes
Let’s get practical for a second. First off, if you forget to marinate the fish ahead of time, don’t panic—it’ll still be delicious after just 20 minutes. However, if you can plan ahead, the flavors really deepen with a longer soak. When broiling, keep an eye on the fish to avoid burning, especially if your oven runs hot. As for the relish, it’s a make-ahead’s best friend. If you want, prepare it in the morning or even the night before. The flavors only get better with time, and it keeps beautifully in the fridge for a couple of days.
Make It Your Own
Feeling adventurous? Here are a few swaps that keep the spirit of the dish alive but shake things up a bit:
- Swap the halibut for salmon if you’re feeling more like a buttery fish vibe.
- If peaches are out of season, try using mango for the relish—a tropical twist that pairs beautifully with the heat of the jalapeno.
- Not a fan of heat? Leave out the jalapeno or swap it for a milder pepper like a poblano.
- For a gluten-free version, use tamari in place of soy sauce.
If you try this, I’d love to hear how it turns out—drop a comment or tag me! Seeing your creations is the best part of sharing these recipes. Bon appétit!
Related update: Soy Ginger Glazed Halibut with Ginger Peach Relish
Related update: Stir Fried Quinoa, Brown Rice and Chicken Breast

Last Tuesday, I found myself staring at an array of mismatched jars and half-opened cans in my pantry, curiously wondering, “What can I whip up for dinner that’s both comforting and easy?” The answer came in the form of this delightful Curry-Braised Chicken. It’s one of those glorious dishes where the simplicity of ingredients belies its depth of flavor. I’m all about recipes that make you look like a kitchen wizard without breaking a sweat, and this one’s a total weeknight win. The chicken turns out tender and juicy, and the creamy coconut curry sauce is pure magic over a bed of fluffy basmati rice. It’s the kind of dinner that makes you want to sit down, take a deep breath, and savor every bite. Plus, your home will smell incredible.
Jump to Recipe
What You’ll Need
This recipe is a pleasant surprise because chances are you already have most of these ingredients chilling in your kitchen.
- Skinless boneless chicken breasts – these soak up the curry flavors like a dream.
- Vegetable oil – just enough to get the party started in your Dutch oven.
- Salt – essential for seasoning the chicken.
- Yellow, red, or green curry paste – your choice here will define the dish’s character.
- Canned unsweetened coconut milk – the creamy backbone of our sauce.
- Fish sauce – brings a subtle umami depth.
- Brown sugar – a pinch of sweetness to balance the spice.
- Fresh lime juice – adds freshness and zing at the end.
- Basmati rice – perfect to soak up all that curry goodness.
- Bell pepper – optional, but adds a pop of color and texture.
How to Make Curry-Braised Chicken
- Preheat your oven to 325 degrees Fahrenheit. This ensures the magic happens slowly, making everything tender.
- Cut your chicken breasts in half. Season them with salt and a dash of pepper, massaging it in like you’re giving the chicken a spa day.
- Heat some vegetable oil over medium-high heat in a trusty Dutch oven. You want it hot enough that the chicken sizzles on contact.
- Brown the chicken on both sides for 1-2 minutes per side. You’re not cooking it through here; just giving it a lovely golden crust. Work in batches if needed.
- Remove the chicken and add your chosen curry paste to the same pot. Use a wooden spoon to break it up, getting the paste to meld beautifully with the leftover oil.
- Once the curry paste is fragrant and slightly darker, pour in the coconut milk. Stir with your spoon to scrape up any golden bits stuck to the bottom of the pot.
- Add the fish sauce and brown sugar, stirring until everything’s a harmonious blend.
- Return the chicken to the pot, snuggling it into the sauce. Cover with a lid and place the Dutch oven in the preheated oven.
- Bake for 45-55 minutes or until the chicken is cooked through and no longer pink. The sauce should be bubbling enticingly around the edges.
- Right before serving, stir in the fresh lime juice. Trust me, this is the zingy magic touch.
- Serve the curry-braised chicken over steaming basmati rice and, if using, sprinkle with sliced bell peppers for a crisp contrast.
Cook’s Notes
A few things I’ve learned along the way: don’t rush the browning step. That lovely golden crust adds layers of flavor. If you plan on making this ahead, you can pop it into the fridge after step 8 and finish baking when you’re ready to eat. Leftovers taste even better the next day, as the flavors have more time to mingle. Reheat gently on the stove, and add a splash of water if the sauce has thickened too much.
Make It Your Own
Looking to switch things up? Here are a few ideas:
- Swap the chicken for crispy tofu for a vegetarian version. Just brown the tofu pieces before adding them to the curry.
- Use shrimp instead of chicken. Adjust the cooking time – shrimp cooks much faster!
- Throw in some diced sweet potatoes along with the chicken. They’ll soak up the curry flavor wonderfully.
- Add a handful of spinach or kale at the end for a dose of greens.
If you try this, I’d love to hear how it turns out — drop a comment or tag me! Cooking is all about sharing, so let’s swap stories and tips. Happy cooking, friends!
Related update: Curry-Braised Chicken
Related update: Soy Ginger Glazed Halibut with Ginger Peach Relish