
One rainy Tuesday evening, I found myself staring at a lonely lime on the counter, wondering how I could whip up something that felt fresh and exciting despite the weather gloom. My Instant Pot was calling, and I imagined the sizzle of tacos — not just any tacos, but ones that are easy enough for a weeknight yet flavorful enough to make you feel like a dinner hero. That’s how these Instant Pot Chicken Tacos came to life. They’re a symphony of flavors, with just the right tang from lime and a kick from taco seasoning, and the best part? They’re a breeze to make, even if you’re juggling a million things. Trust me, you’re going to want to bookmark this one for every taco Tuesday (or any day, really) when life gets a little hectic.
Jump to Recipe
What You’ll Need
The beauty of this recipe is its simplicity. Chances are, you already have most of these waiting in your pantry or fridge. Here’s what you’ll need to create this taco magic:
- Chicken breasts — the star of the show, tender and juicy.
- Black pepper
- Taco seasoning — brings the fiesta to your taste buds.
- Purple onion — for a subtle sharpness and a pop of color.
- Canned salsa — your secret shortcut to layered flavor.
- Lime juice — for that fresh zing at the end.
How to Make Instant Pot Chicken Tacos
With just a few steps, you’ll have these delightful tacos ready in no time:
- First, generously season both sides of the chicken breasts with black pepper and taco seasoning. Make sure they’re well-covered for maximum flavor.
- Place the seasoned chicken into the bottom of your Instant Pot. Let the anticipation build as you layer the flavors.
- Next, top the chicken with a handful of diced purple onion and a generous pour of canned salsa. It should look like a fiesta in a pot!
- Secure the Instant Pot lid into the lock position. Set it to the Poultry setting for 12 minutes. During this time, you can almost hear the flavors mingling and dancing inside.
- Once the timer beeps, don’t rush things. Allow the Instant Pot to naturally release pressure for 20 minutes. This is where the magic happens.
- Carefully remove the chicken from the pot and shred it with two forks. You’ll notice how effortlessly it falls apart.
- Sprinkle the shredded chicken with fresh lime juice. The tangy aroma will hit you, and you’ll know it’s taco time.
- Serve the chicken over a bed of rice or wrap it snugly in tortillas. Either way, you’re in for a treat!
Cook’s Notes
Here’s a little insider scoop to make the most out of this recipe:
– If you’re in a hurry, you can quick-release the pressure after cooking, but I find the patience pays off in flavor.
– Store any leftovers in an airtight container in the fridge for up to 3 days. They make for some mean taco bowls or quesadillas the next day.
– Shredding gets messy, but it’s worth it! Just make sure your forks are sturdy enough for the job.
– If you like your tacos with a bit of heat, feel free to throw in a pinch of cayenne with the taco seasoning.
Make It Your Own
Here are a few ideas to put your personal spin on these tacos:
- Swap the chicken for crispy tofu for a vegetarian delight that’s just as satisfying.
- Use a smoky chipotle salsa instead of regular salsa for an extra layer of depth.
- Top with crumbled queso fresco or a dollop of sour cream for added creaminess.
- Stir in some fresh corn kernels or sliced bell peppers before cooking for extra crunch and color.
If you try this, I’d love to hear how it turns out — drop a comment or tag me! Your kitchen adventures make my day. Enjoy those tacos, and remember, the best meals are the ones shared with laughter and a little bit of lime. 🌮
Related update: Instant Pot Chicken Tacos
Related update: Herb chicken with sweet potato mash and sautéed broccoli
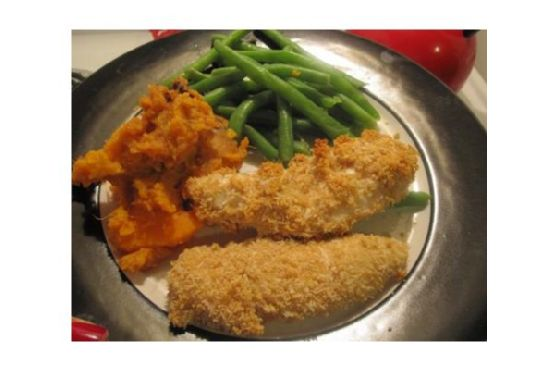
Last Tuesday, I found myself staring into my pantry, half-hungry and half-hoping for inspiration to strike. The kids were asking for chicken nuggets, and I was craving something a little more grown-up but still easy to whip up on a weeknight. That’s when I remembered these Coconut and Whole Wheat Chicken Tenders. They’re like a tropical vacation for your taste buds and so much better than any fast-food version. Crispy on the outside, juicy on the inside, and with a hint of coconut that makes you feel like you’re doing something special. Plus, they’re baked, not fried, so you can feel a bit virtuous while indulging. Seriously, these are a must-try for anyone looking to jazz up their dinner routine without spending hours in the kitchen. Jump to Recipe
What You’ll Need
The beauty of this recipe is that it’s simple yet flavorful, and chances are you already have most of these ingredients at home.
- Chicken tenders – the star of the show
- Egg whites – to give that perfect coating
- Unsweetened coconut – for that tropical flair
- Whole wheat bread crumbs – for a hearty crunch
How to Make Coconut and Whole Wheat Chicken Tenders
- Preheat your oven to 350 degrees Fahrenheit. There’s nothing like a warm oven ready to welcome a new creation!
- Dip each chicken tender into a bowl filled with egg whites, ensuring it’s fully coated. The egg whites are the glue that will hold the crunchy magic together.
- In another bowl, mix the whole wheat bread crumbs with the unsweetened coconut until they’re evenly distributed. This is where the magic happens, friends!
- Roll the egg-coated chicken tenders in the breadcrumb-coconut mixture, pressing gently so it sticks. You’ll know it’s right when they’re wearing their new coat proudly.
- Place the tenders on a cookie sheet, making sure they’re not touching. Bake them for 20 minutes, or until the crust is golden and fragrant. Your kitchen will smell amazing!
Cook’s Notes
These chicken tenders are the perfect blend of easy and impressive. Here are a few tips to make sure they turn out perfect every time:
- If you find yourself without whole wheat bread crumbs, regular breadcrumbs will do, though you’ll miss a bit of that nutty flavor.
- Make sure your coconut is unsweetened, or you’ll end up with a surprisingly sweet dish that’s not quite what we’re going for here.
- These tenders are best eaten fresh out of the oven, but you can reheat leftovers in a 350-degree oven for about 10 minutes.
- Store leftovers in an airtight container in the fridge for up to 3 days. They’re great for a quick lunch the next day!
Make It Your Own
- Swap the chicken for crispy tofu if you’re looking for a vegetarian option. The texture is amazing and soaks up the flavors beautifully.
- Try adding a teaspoon of curry powder to the breadcrumb mixture for a spicy twist.
- Use panko breadcrumbs instead of whole wheat for an extra crispy texture that crunches with every bite.
- If you’re a garlic lover, add a teaspoon of garlic powder to the bread crumb mix for an additional layer of flavor.
If you try this, I’d love to hear how it turns out — drop a comment or tag me! Cooking is all about sharing the joy, after all. Enjoy your tropical escape from the comfort of your kitchen!
Related update: Coconut and Whole Wheat Chicken Tenders
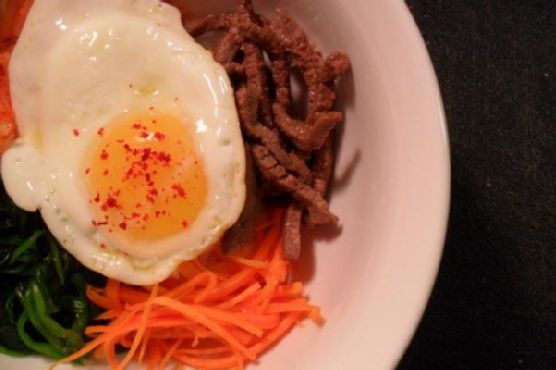
It was one of those evenings where the day had slipped away faster than expected. I glanced at the clock and realized it was nearly dinner time. My mind immediately went to Bibimbab, a dish that’s like a warm hug after a long day — comforting, flavorful, and surprisingly easy to throw together. Sure, it looks impressive with its vibrant array of veggies, tender beef, and that perfectly runny egg on top, but the secret is, it’s pretty forgiving. Accidentally overcooked your rice? No worries. Want to swap out the beef for something else? Go for it. It’s a dish that’s as flexible as your pantry, which makes it perfect for those impromptu weeknight dinners. Plus, the way the rich sesame oil blends with the spicy gochujang is just magic.
Jump to Recipe
What You’ll Need
Chances are you already have most of this in your kitchen. Here’s the rundown:
- Carrots
- Cooked white rice
- Eggs
- English cucumber
- Garlic clove
- Gochugaru (red pepper flakes)
- Gochujang (red pepper paste)
- Olive oil
- Sesame oil
- Sesame seeds
- Soy sauce
- Fresh spinach
- Sandwich steaks (thinly sliced beef)
How to Make Bibimbab (Korean Rice w Vegetables & Beef)
- First, cook your rice according to the package directions. If you’re using leftover rice, even better — it’s one less thing to worry about.
- While the rice is cooking, slice your vegetables into matchstick pieces. This will help them cook quickly and evenly. Set them aside.
- In a large non-stick pan, bring 2 cups of water to a boil. Add the fresh spinach and cook, stirring constantly until it’s wilted. This should take about a minute. Drain the spinach, cool it off, and then squeeze it dry into a small ball. It’s amazing how much water spinach holds!
- Wipe out your skillet and heat 1 teaspoon of olive oil over medium-high heat. Add the carrots and cook until they’re soft, about 3 minutes. Toss in the garlic and cook until it’s fragrant, about another minute. Your kitchen should smell amazing by now.
- Next, add cucumber slices mixed with gochugaru for a little kick. Combine your spinach with soy sauce and set it aside until serving.
- Using the same pan (because who likes doing more dishes?), add the thinly sliced beef and cook until it’s browned and tender. This should only take a few minutes.
- Wipe the pan down with a napkin, then heat another teaspoon of olive oil over medium-high. Crack in the eggs and cook them until the whites are set, but the yolks are still deliciously runny — about 5 minutes should do the trick.
- Divide the cooked rice among four bowls. Top each bowl with the sautéed vegetables, beef, and that glorious egg. Drizzle with sesame oil, sprinkle with sesame seeds, and finish with a dollop of gochujang or a splash of Sriracha for an extra kick.
Cook’s Notes
Transforming a few simple ingredients into Bibimbab is like a little kitchen magic trick. Here are a few notes to keep in mind:
- Don’t have all the ingredients? That’s okay! Bibimbab is super flexible. Use whatever veggies you have on hand.
- Gochujang is crucial for authentic flavor, but if you’re in a pinch, Sriracha makes a decent stand-in.
- This dish is best fresh, but you can store leftovers in the fridge for up to 2 days. Just know that the egg won’t be as lovely reheated.
- To make it ahead, prep all the components except for the eggs. Assemble and fry the eggs just before serving.
Make It Your Own
Here are a few fun variations to consider:
- Swap the beef for crispy tofu if you’re going for a vegetarian vibe.
- Use quinoa or brown rice instead of white rice for a whole-grain alternative.
- Add some kimchi for extra tang and spice.
- Try using some zucchini instead of cucumber for a slightly different texture.
If you try this, I’d love to hear how it turns out — drop a comment or tag me! Whether you stick to the classic or put your own spin on it, Bibimbab is all about bringing joy to your table. Enjoy every bite!
Related update: Bibimbab (Korean Rice w Vegetables & Beef)
Related update: Coconut and Whole Wheat Chicken Tenders

It was one of those whirlwind Tuesdays, you know, the kind where you look up and suddenly it’s 7 PM and you’re staring at your fridge like it’s a magic portal to dinner. The last thing I wanted was a complicated meal, but I was craving something a little more special than the usual weeknight pasta. That’s when I remembered this Broccoli Rabe with Tomatoes, Anchovies & Spaghetti recipe. It’s the perfect combination of quick, comforting, and just a touch fancy — like your favorite pair of jeans that still manage to make you feel dressed up. The best part? It comes together in no time, leaving you with a warm, savory bowl of goodness that feels like a little triumph over the chaos of the day.
Jump to Recipe
What You’ll Need
Before you make a mad dash to the grocery store, take a peek into your pantry. Chances are, you already have most of what you need. Here’s the simple lineup:
- 1 bunch of broccoli rabe
- 1 can of anchovies
- 3 cloves of garlic
- Juice of 1 lemon
- 1/2 teaspoon red pepper flakes
- 1/2 cup grated Romano cheese
- 12 ounces of spaghetti
- 1 cup cherry or grape tomatoes
- Olive oil
How to Make Broccoli Rabe with Tomatoes, Anchovies & Spaghetti
Ready to transform these humble ingredients into something spectacular? Here’s how:
- Start by prepping the broccoli rabe. Trim about 1 inch off the stems and then give them a quick blanch in boiling water for 3-4 minutes. This will take out the bitterness and keep that lovely green color. Drain and set aside.
- In a large frying pan, heat a couple of drizzles of olive oil over medium heat. Toss in the garlic, red pepper flakes, and tomatoes. Sauté until the tomatoes are soft and the garlic is fragrant — think of it as the kitchen’s way of saying “hello, deliciousness!”
- Add the blanched broccoli rabe to the pan and continue to sauté for a few more minutes. This step gets all those flavors mingling.
- Now, for the umami punch: add the anchovies to the pan. They’ll melt into the dish, leaving behind a savory depth that’s pure magic.
- Meanwhile, cook your spaghetti in a large pot of salted boiling water. Before draining, scoop out about 1/2 cup of the pasta water and add it to the broccoli rabe mixture. This starchy water helps create a luscious sauce.
- Drain the spaghetti and get ready to plate. On a serving platter, drizzle a bit of olive oil and sprinkle some grated Romano cheese. Add the spaghetti, top with the broccoli rabe mix, then give it a final drizzle of olive oil, a squeeze of lemon juice, and a generous dusting of Romano cheese.
Cook’s Notes
A couple of things to keep in mind: If you’re new to cooking with anchovies, don’t be scared! They dissolve beautifully and add a savory backbone without a fishy taste. Make sure not to overcook the broccoli rabe initially; you want it vibrant, not mushy.
Got leftovers? Store them in an airtight container and they’ll keep well in the fridge for a couple of days. If you plan to make this ahead, keep the lemon juice out until serving to keep everything fresh and bright.
Make It Your Own
Feel free to play around with this recipe. Here are some ideas to get you started:
- Swap the anchovies for crispy tofu to make it vegetarian-friendly.
- Add a handful of toasted pine nuts for a bit of crunch and nuttiness.
- Switch out the Romano cheese for Parmesan if that’s what you have on hand.
- Try using kale instead of broccoli rabe for a slightly milder, less bitter green.
If you try this, I’d love to hear how it turns out — drop a comment or tag me! Cooking is all about making it work for you and having a little fun along the way. Enjoy your dinner, friend!
Related update: Broccoli Rabe with Tomatoes, Anchovies & Spaghetti
Related update: Bibimbab (Korean Rice w Vegetables & Beef)

Picture this: it’s one of those hectic Tuesday nights where you’ve got about 45 minutes to get something on the table before the whole evening devolves into chaos. The fridge is looking sparse, but you’ve got a pack of chorizo, some eggs, and a block of cheddar that’s been patiently waiting for its moment in the spotlight. That’s when this Chorizo and Egg Bake comes to the rescue. It’s one of those dishes that’s deceptively simple but packs a punch of flavor that’s sure to convince everyone you planned it all along. Plus, it’s all about that melty cheese and spicy kick that makes life feel just a bit more exciting.
Jump to Recipe
What You’ll Need
The beauty of this recipe is its simplicity—you’re likely to have almost everything you need ready to go!
- 4 large eggs
- 1 cup grated cheddar cheese
- 200g smoked chorizo sausage, diced
- 1 medium onion, finely chopped
- 2 cloves garlic, minced
- 1 can red and green chillies, drained
- Salt and pepper to taste
How to Make Chorizo and Egg Bake
- Preheat your oven to 170°C. You’ll want it nice and warm to get that cheese melted just right.
- In a mixing bowl, crack the eggs and whisk them until the yolks and whites are fully combined. This is going to ensure a fluffy texture.
- Add the grated cheddar cheese, chopped onion, diced chorizo, minced garlic, and chopped chillies to the bowl. Give it all a good stir until everything’s evenly mixed. The aroma should already be enticing!
- Season generously with salt and pepper. Remember, the chorizo will add a bit of saltiness, so don’t go too wild.
- Lightly grease a baking dish to prevent sticking. Pour your eggy mixture into the dish, spreading it out evenly.
- Pop it into the oven and bake for about 20 minutes. You’ll know it’s ready when the edges start to bubble and turn a light golden brown.
Cook’s Notes
This dish is wonderfully forgiving, so feel free to tweak the ingredient amounts based on what you have. If you’re preparing it in advance, you can whisk together all the ingredients the night before and store them in the fridge. Just pour it into the baking dish and bake when you’re ready. Leftovers can be stored in an airtight container in the fridge for up to three days and are just as delicious when reheated—perfect for a quick lunch or a lazy breakfast.
Make It Your Own
- Vegetarian Twist: Swap the chorizo for your favorite meat-free sausage or sautéed mushrooms.
- Extra Veggies: Throw in some bell peppers or spinach for added color and nutrients.
- Spicy Kick: Add a pinch of cayenne pepper or a few dashes of hot sauce to the egg mixture.
- Different Cheese: Try swapping the cheddar with Monterey Jack or pepper jack for a different flavor profile.
If you give this recipe a whirl, I’d love to hear how it turns out for you! Drop a comment below or tag me on social media to share your delicious creations. Happy cooking!
Related update: Chorizo and egg bake
Related update: Broccoli Rabe with Tomatoes, Anchovies & Spaghetti

It was one of those rainy afternoons when the only thing that could rival the soothing sound of raindrops was the comfort of a warm, spicy dish. I found myself staring at a bunch of baby eggplants in my kitchen, and that’s when the craving hit me—Hyderabadi baghara Baingan. It’s the kind of dish that feels like a warm hug, rich in flavor yet deceptively simple to make. This recipe is a lifesaver on days when you want to impress without spending hours in the kitchen. The combination of spices and the texture of the eggplants creates a symphony of flavors that dance around your taste buds. Trust me, this is one recipe you’ll find yourself going back to, rain or shine. Jump to Recipe
What You’ll Need
The ingredient list is delightfully short and sweet. Chances are you already have most of this in your pantry, which means fewer trips to the grocery store.
- Baby eggplants – 10-12
- Red Kashmiri chilies – 3-4
- Coconut
- Coriander seeds
- Cumin seeds
- Curry leaves – 8-10
- Garlic
- Ginger – 1 piece
- Tamarind – a lime-sized ball
- Oil
- Onion
- Salt
- Nigella seeds
- Sesame seeds
- Turmeric
- Jaggery
- Peanuts
- Cashew nuts
How to Make Hyderabadi baghara Baingan
- First, wash the baby eggplants and pat them dry. Carefully slit each one lengthwise into four sections, ensuring the stems are still intact. This gives the dish its signature look where the eggplants remain joined at the stem.
- In a pan, heat a teaspoon of oil and toss in the cumin seeds, peanuts, and cashew nuts. Sauté for a few seconds until you can smell their toasty aroma.
- Add in the ginger, garlic, and chopped onion. Sauté for about a minute until the onion becomes translucent and the mixture is fragrant.
- Now, add the turmeric, coriander seeds, coconut, and red Kashmiri chilies. Fry this mixture until it turns a rich brown color. Your kitchen will smell absolutely divine!
- Allow this aromatic mixture to cool completely before blending it into a fine paste, adding just a little water to get the right consistency. Set the paste aside.
- Heat some oil in a thick-bottomed pan. Fry the eggplants until they are brown and tender. Remove them carefully and set aside.
- In the same oil, add the nigella seeds and let them crackle. Toss in the curry leaves and fry briefly for a few seconds.
- Stir in the prepared ground paste, tamarind pulp, salt, and jaggery. Mix everything well before adding the fried eggplants back to the pan.
- Add half a cup of water, cover, and let it cook over low heat until the eggplants are thoroughly cooked and soft. This should take a few minutes.
- Serve this delectable curry hot, paired perfectly with either rice or rotis.
Cook’s Notes
This dish is all about balancing flavors. The tanginess from the tamarind and the sweetness from the jaggery complement the spicy, nutty base perfectly. Be sure not to rush the roasting of the spices and nuts; it’s this step that builds the foundation of the dish’s flavor. If you’re preparing it ahead of time, the curry can be stored in the refrigerator for up to three days. Simply reheat it gently on the stove before serving. And the best part? The flavors intensify overnight, making for even tastier leftovers!
Make It Your Own
- For a nuttier flavor, swap peanuts for almonds. Just make sure to toast them lightly for that extra crunch.
- Not a fan of eggplants? Use zucchini as an alternative, though they cook faster, so keep an eye on them.
- Add a handful of raisins for an unexpected pop of sweetness that complements the spices beautifully.
- If you want to up the spice level, include some green chilies along with the red ones for a fiery kick.
If you try this, I’d love to hear how it turns out — drop a comment or tag me! Nothing makes me happier than seeing different takes on my favorite recipes. Enjoy cooking and savor every bite!
Related update: Hyderabadi baghara Baingan
Related update: Chorizo and egg bake
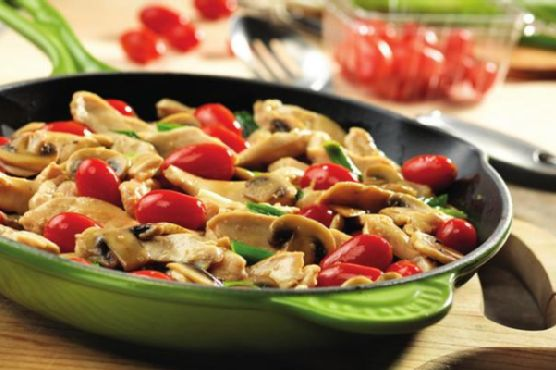
It was one of those evenings where the fridge seemed determined to sabotage my dinner plans. A random mix of odds and ends stared back at me — a handful of grape tomatoes about to bid farewell, a shy pack of mushrooms, and the ever-reliable chicken breast. I was craving something that felt like comfort but didn’t require a culinary degree. And just like that, this Chicken with Grape Tomatoes and Mushrooms came to life. It’s simple, a bit rustic, and oh, the flavors! You can whip it up in about 30 minutes, and it’s perfect for those nights when you want something special but don’t want to break a sweat.
Jump to Recipe
What You’ll Need
This dish is all about fresh simplicity. You might already have most of these beauties in your kitchen:
- 2 tablespoons olive oil
- 4 skinless boneless chicken breast halves
- 2 cups fresh mushrooms, sliced
- 2 cloves garlic, minced
- 1 cup grape tomatoes, halved
- 2 green onions, sliced
- 1 packet flavor concentrated chicken broth
- 1/4 cup water
How to Make Chicken with Grape Tomatoes and Mushrooms
- Start by heating 1 tablespoon of the olive oil in a 12-inch skillet over medium-high heat. Once the oil shimmers, add the chicken and let it sizzle until well browned, turning occasionally to get an even golden crust. This should take about 5-7 minutes. Remove the chicken and set it aside.
- In the same skillet, pour in the remaining tablespoon of oil. Toss in the mushrooms and let them cook, stirring occasionally, until they’re tender and releasing their juices, about 5 minutes.
- Reduce the heat to medium and add the garlic, grape tomatoes, and green onions to the skillet. Stir everything together for about a minute until the garlic is fragrant and the tomatoes start to soften slightly.
- Nestle the browned chicken back into the skillet. Pour in the flavor boost and water, stirring gently to combine all the flavors. Let everything simmer together for another 5-7 minutes, or until the chicken is cooked through and no longer pink in the middle.
Cook’s Notes
When cooking chicken, keep an eye on the heat. If it’s too high, the chicken can dry out and the vegetables might scorch. If you’re not a fan of mushrooms, swap them out for zucchini or bell peppers. This dish can be made ahead of time and stored in the fridge for up to 3 days in a sealed container. To reheat, simply warm it in a skillet over low heat until heated through. Avoid using the microwave if you can — it tends to make the chicken rubbery.
Make It Your Own
- Swap the chicken for crispy tofu for a vegetarian version. Just be sure to press the tofu to remove excess moisture.
- Add a splash of white wine when you add the garlic for a richer flavor profile. Let it cook off slightly before proceeding to the next step.
- If you love a bit of heat, throw in a pinch of red pepper flakes along with the garlic and tomatoes.
- For a creamier sauce, stir in a tablespoon of heavy cream right at the end.
If you try this, I’d love to hear how it turns out — drop a comment or tag me! I’m always curious to see how you make it your own. Happy cooking!
Related update: Chicken with Grape Tomatoes and Mushrooms
Related update: Farfalle with Shrimps, Tomatoes Basil Sauce
Related update: Chicken Enchilada Salad Wraps

I was in the middle of a chilly Tuesday evening, the kind where you’re just craving something warm and hearty, and I found myself staring at a package of venison stew meat in my fridge. You know those days, right? The ones where you want comfort food without all the fuss? That was me. I didn’t want to wait forever for flavors to meld, and I certainly wasn’t in the mood for a culinary marathon. Enter this venison stew — it’s that perfect blend of savory goodness, with tender chunks of venison and veggies that practically hug you from the inside. It’s simple enough to throw together on a weeknight, but tastes like it’s been simmering all day.
Jump to Recipe
What You’ll Need
I love how this recipe doesn’t require a grocery cart full of fancy ingredients. Chances are, you’ve already got most of these at home, especially if you’re a fan of hearty stews!
- Venison stew meat
- 4 stalks celery
- 1 can mushrooms
- 1 green bell pepper
- 1 cup flour plus 3 tbsp
- 2 tablespoons beef bouillon
- Water
- Potatoes
- Onion
- Baby carrots
How to Make Venison Stew
- Begin by cutting all your veggies and the venison into 1-inch pieces. Grab a bowl and dredge the venison in a mix of flour, salt, and pepper until it’s nicely coated.
- Heat a splash of vegetable oil in a large pot over medium-high heat. Add the venison and let it brown on all sides. You’re looking for a nice, golden crust here — that’s flavor!
- Once browned, add the beef bouillon and enough water to cover the meat. Bring it to a boil, then reduce the heat and let it simmer for about 2 hours. This is where the magic happens, and the meat gets tender.
- After 2 hours, toss in all the veggies: carrots, celery, mushrooms, potatoes, and bell pepper. Let everything simmer together for another 30 minutes, until the veggies are nice and tender.
- Mix 3 tablespoons of flour with 1 cup of cold water. Stir it into the stew to thicken. Give it a few minutes, and you’ll see it transform into a rich, heartwarming dish.
Cook’s Notes
Okay, here’s the thing — patience really is a virtue with this stew. Letting the venison simmer for a full two hours ensures it’s melt-in-your-mouth tender. If you’re in a pinch, you can reduce the simmering time, but it won’t be as tender. As for storage, this stew actually tastes even better the next day. Just keep it in an airtight container in the fridge, and it’ll last for about 3 days. You can also freeze it for up to 3 months. Just make sure to let it cool completely before freezing.
Make It Your Own
- Swap the venison for beef if that’s what you have on hand — just as delicious!
- For a veggie twist, replace the meat with chickpeas and add extra mushrooms for a hearty vegetarian version.
- Add a splash of red wine while simmering for an extra depth of flavor.
- Throw in some parsnips or turnips if you’re in the mood for an earthy undertone.
If you try this, I’d love to hear how it turns out — drop a comment or tag me! It’s one of those dishes that just feels like a warm hug, and I hope it brings you as much comfort as it does me. Happy cooking!
Related update: Venison Stew
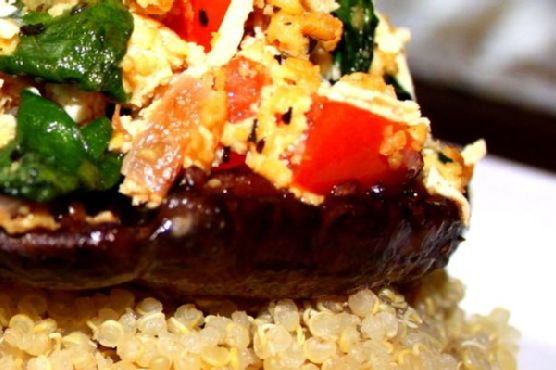
Picture this: It’s a Tuesday evening, and I’m staring into my fridge, hunting for inspiration. It’s been a chaotic day with back-to-back meetings and a toddler who thinks naptime is optional. I need something quick, something comforting. My eyes land on a pack of portobello mushrooms and a forgotten block of tofu in the freezer. A lightbulb moment! Vegan Stuffed Portobello Mushrooms over Quinoa. It’s not only going to save dinner but also my sanity. This dish is a godsend on nights like these. It’s hearty, packed with flavor, and gives me that little victory dance moment because it feels way fancier than the effort it demands.
Jump to Recipe
What You’ll Need
This recipe is a pantry hero — chances are, you already have most of this on hand.
- Cooked quinoa
- Large portobello mushrooms
- Frozen tofu
- Diced tomato
- Fresh spinach
- Red diced onion
- Garlic
- Dried oregano
- Dried basil
- Nutritional yeast
- Lemon juice
- Daiya vegan mozzarella “cheese”
- Olive oil
- Balsamic vinaigrette
- Salt and pepper
How to Make Vegan Stuffed Portobello Mushroom over Quinoa
- Start off by cooking your quinoa according to package instructions and set it aside. This will be your bed of deliciousness.
- Thaw the tofu, then drain and squeeze out all that excess water. You want it as dry as possible to soak up all the flavors.
- Gently brush off any dirt from the portobello mushrooms and remove the stems. Set them aside for stuffing.
- Whip up a quick marinade for the mushrooms: mix together 3 tablespoons of olive oil, 3 tablespoons of balsamic vinaigrette, and season it with salt and pepper. Taste as you go — you want a balance of tangy and salty.
- In a pan, heat 3 tablespoons of olive oil over medium heat. Add diced onions, minced garlic, a pinch of dried oregano, and basil. Cook until the onions are soft and fragrant.
- Now, crumble the tofu with your hands directly into the pan. Stir it around, letting it cook on medium heat for about 15 to 20 minutes. This step fills your kitchen with a mouthwatering aroma.
- Add nutritional yeast, fresh spinach, diced tomato, and a splash of lemon juice to the tofu. Stir everything together, cooking for just another minute, then set aside.
- Dip each mushroom cap into the marinade, ensuring it’s nicely coated, and place them top side down on a baking pan.
- Stuff each mushroom with the tofu and veggie mixture. This is where the magic happens — don’t be shy, pack them full!
- Top it all off with a generous sprinkle of vegan mozzarella cheese. Because why not?
- Preheat your oven to 370 degrees Fahrenheit. Once it’s ready, bake the stuffed mushrooms for 15 to 20 minutes, until the cheese is melty and bubbly.
- Serve your glorious stuffed mushrooms over a fluffy bed of quinoa and take a moment to admire your creation.
Cook’s Notes
Here are a few nuggets of wisdom to keep this dish a breeze. The marinade is key — don’t skimp on it; it infuses the mushrooms with so much flavor. Cooking the tofu until it’s golden and crispy is another must-do for an added texture contrast. If you’re planning ahead, you can stuff the mushrooms in advance, then bake them right before serving. Leftovers keep well for a couple of days in the fridge, and they reheat beautifully in the oven.
Make It Your Own
Here are some fun swaps and additions to keep things interesting:
- Swap the frozen tofu for crispy baked chickpeas for a different texture.
- Add a sprinkle of pine nuts on top before baking for a nutty crunch.
- Use zucchini ribbons instead of spinach if you’re in the mood for something a bit different.
- For a spicy kick, mix some sriracha or your favorite hot sauce into the tofu mixture.
If you try this, I’d love to hear how it turns out — drop a comment or tag me! Cooking for you is like sharing a piece of my heart, and I hope you feel that love in every bite.
Related update: Venison Stew
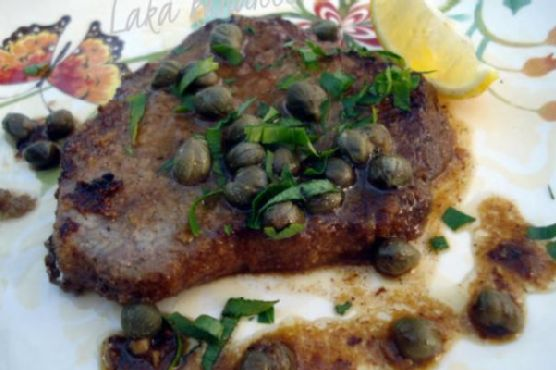
I kid you not, last Tuesday, I found myself staring blankly into my fridge, halfway between a “what’s for dinner?” crisis and the daily grind of life. You know those days, right? Everything feels like it’s at a standstill, but you need something comforting and quick to lift your spirits. Enter my trusty Steak with Lemon and Capers. It’s one of those recipes you stumble upon in desperation, fall in love with, and then never forget. The bright, tangy kick from the lemon and capers mixed with the savory goodness of a perfectly cooked steak—trust me, it’s the midweek hero we all need.
Jump to Recipe
What You’ll Need
The beauty of this dish is in its simplicity. Chances are you already have most of this in your kitchen. Here’s what you need to gather:
- Beef steak
- Butter
- Capers
- Dry white wine
- Flour
- Garlic
- Ground black pepper
- Lemon juice
- Lemon wedges
- Olive oil
- Parsley
- Salt
How to Make Steak with Lemon and Capers
- Start by giving your steaks a light pounding with a meat mallet. We’re not trying to flatten them into oblivion, just enough to tenderize.
- In a shallow dish, mix together flour, a pinch of salt, and black pepper. Dip each steak into this mixture, ensuring both sides are nicely coated.
- Heat a generous tablespoon of butter and a splash of olive oil in a skillet over medium heat. Once the mixture is hot and slightly shimmering, sauté the steaks for about 4 minutes on each side. You’re looking for a nice golden crust.
- Remove the steaks and set them aside. They’ll finish cooking in a bit, so no stress if they’re still a tad pink.
- In the same pan, toss in the minced garlic. Let it sizzle in the fragrant fat for about a minute, stirring to avoid burning.
- Pour in the dry white wine and lemon juice. Stir and let simmer for 5 minutes, letting the liquid reduce slightly and concentrate those flavors.
- Stir in the capers, letting them mingle with the sauce. The smell at this point should be divine.
- Return the steaks to the pan. Cover and let them simmer over low heat for another 4 minutes, until they’re cooked to your liking.
Cook’s Notes
Let’s talk practical here. If your steaks are on the thicker side, you might need an extra minute or two per side when searing. Don’t panic if your garlic burns a little; it happens to the best of us, and it won’t ruin the dish. For storage, keep leftovers in an airtight container in the fridge for up to 2 days. Reheat gently on the stove to avoid toughening the steak. Prepping ahead? You can coat the steaks with flour and seasoning and keep them in the fridge until you’re ready to cook.
Make It Your Own
Here are a few ideas to jazz up your steak with lemon and capers:
- Swap the beef steak for crispy tofu slabs for a vegetarian twist.
- Use lime juice instead of lemon for a sharper zing.
- Add a pinch of red pepper flakes to the sauce for a hint of heat.
- Try adding a handful of cherry tomatoes to the sauce for extra freshness and color.
If you try this, I’d love to hear how it turns out — drop a comment or tag me! Whether it’s a simple weeknight dinner or an impromptu dinner party dish, it never disappoints. Happy cooking!
Related update: Steak with lemon and capers
Related update: Vegetarian Ratatouille
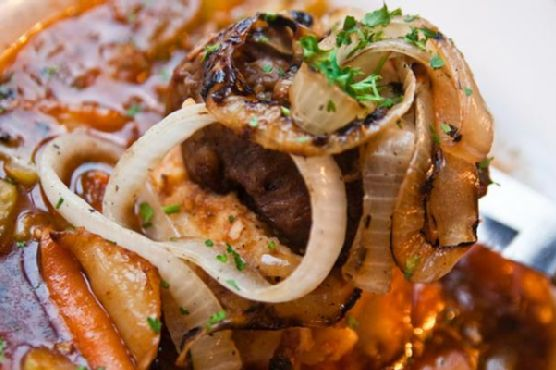
So it was one of those Thursday afternoons. You know the kind — when the clock seems to tick extraordinarily slowly, and the chilly breeze outside just makes you crave something deeply satisfying. I found myself staring at a pack of beef short ribs in the fridge, remembering a long-ago failed attempt at a backyard barbecue. But this day was different. I had a plan that didn’t involve open flames but rather the comforting embrace of a dutch oven. These Amazing Braised Beef Short Ribs are perfect for when you want to impress without the stress. They practically cook themselves once they’re in the oven, and trust me, the aroma will fill your home with anticipation.
Jump to Recipe
What You’ll Need
You might already have most of these tucked in your pantry, but a quick trip to grab a few fresh items will make this dish sing.
- 4 strips of bacon
- 3 tablespoons olive oil
- 2 pounds of beef short ribs
- sea salt and fresh ground pepper
- 8 ounces of white button mushrooms, sliced
- 1 cup of yellow diced onions
- 1 cup of diced carrot
- 3 cloves of garlic, minced
- 2 cups of Cabernet Sauvignon wine
- 2 cups of beef stock
- 2 tablespoons of tomato paste
- 1 tablespoon of beef base
- 2 teaspoons of fresh dried thyme
- 2 bay leaves
How to Make Amazing Braised Beef Short Ribs
- Preheat your oven to 300°F. Grab your largest heavy-bottomed pot—I swear by my trusty Le Creuset for this.
- Over medium heat, cook the bacon until crisp, then let it drain on paper towels. You’re gonna crumble this into the sauce later, but for now, keep the bacon fat in the pot.
- Pat the short ribs dry with paper towels. This is crucial for that perfect caramelization. Trim a bit of the excess fat, but don’t go overboard—flavor, remember?
- Season the short ribs liberally with sea salt and fresh ground pepper. Brown them in the pot over medium-high heat in olive oil and bacon fat, making sure to give them space. You might need to do this in batches.
- Once browned, remove the ribs and set them aside in a large bowl. Pour out the used fat, keeping those flavorful bits stuck to the bottom intact.
- Lower the heat to medium, add fresh olive oil, and sauté the mushrooms until crisp and golden, about 7-10 minutes.
- Throw in the onions and carrots, cooking until soft, about 5-7 minutes. Add the garlic and cook for just a minute more.
- Crank up the heat to high and deglaze the pot with the Cabernet Sauvignon. Stir vigorously, scraping up the browned bits. Bring to a boil.
- Add beef stock, tomato paste, beef base, thyme, bay leaves, sea salt, and pepper. Let it boil while stirring for about 3 minutes.
- Snuggle the browned short ribs back into the pot, ensure they’re covered in liquid, and bring it back to a boil for 2 more minutes.
- Put the lid on the pot and transfer it to the oven. Let it cook undisturbed for 3 hours—don’t peek!
- When time’s up, carefully remove the pot from the oven and brace yourself for a steam facial as you take the lid off.
- Gently move the short ribs to a bowl—they’ll be meltingly tender. Skim the fat off the sauce that’s gathered at the top.
- Remove the bay leaves and thyme stems. Bring the pot back to medium-high heat and reduce the sauce by a third, concentrating the flavors.
- Crumble the bacon into the sauce, stirring well. Return the short ribs to the pot, ensuring they’re well-coated in the sauce. Serve immediately over mashed potatoes or polenta. Absolute heaven!
Cook’s Notes
– Bacon lovers, rejoice! The bacon fat really amps up the richness, but if you’re looking for a lighter version, you can skim more of it off before deglazing.
– This dish is even better the next day, so consider making it ahead and letting the flavors meld overnight in the fridge. Just reheat gently on the stovetop.
– If your sauce turns out too salty, don’t worry—add a touch more beef stock or water during the reduction phase to balance it out.
– Leftovers can be stored in an airtight container in the fridge for up to three days. They’re pretty dreamy in a sandwich or tossed with pasta!
Make It Your Own
- Substitute the short ribs with boneless chicken thighs. They’ll cook faster—about 1.5 to 2 hours should do it.
- Swap the carrots for parsnips or sweet potatoes for a different kind of sweetness.
- Use a different red wine like Merlot if Cabernet isn’t your jam.
- Add a handful of chopped fresh herbs like parsley or basil at the end for a fresh, bright twist.
If you try this, I’d love to hear how it turns out—drop a comment or tag me! There’s something so fulfilling about sharing good food, and I hope this becomes one of your go-to comfort dishes. Enjoy every delicious bite!
Related update: Amazing Braised Beef Short Ribs
Related update: Steak with lemon and capers

It was one of those wild Mondays where nothing seemed to go as planned—spilled coffee, missing socks, you name it. By the time dinner rolled around, I needed something comforting and quick. Enter my Cheddar Polenta with Bacon Wrapped Asparagus. This dish is like a warm hug in a bowl, yet impressive enough to make you feel like a kitchen wizard. It’s the perfect combo of creamy, cheesy polenta topped with crispy bacon and tender asparagus. Trust me, this is comfort food that doesn’t demand hours in the kitchen.
Jump to Recipe
What You’ll Need
If you’re like me, you probably have a lot of this stuff already hanging out in your kitchen. Here’s what you’ll need to pull together this weeknight savior:
- 6 spears of asparagus
- 2 slices of raw bacon
- 2 cups chicken broth
- 1 cup coarse corn grits
- 1 cup extra sharp cheddar cheese, shredded
- 1 bell pepper (optional, for extra crunch)
- Salt and pepper, to taste
How to Make Cheddar Polenta With Bacon Wrapped Asparagus
- Preheat your oven to 400°F (200°C). This is when your kitchen will start smelling promising!
- Take the asparagus spears and wrap them in bacon. I like to use two slices for the full crispy effect. Place these beauties on a small baking sheet.
- Spritz the asparagus bundle lightly with nonstick cooking spray. This helps the salt and pepper stick and adds a hint of flavor.
- Roast for 15-20 minutes. Keep an eye out: the bacon should be crispy and the asparagus fork-tender, with some golden edges peeking through.
- While the asparagus is roasting, bring your chicken broth to a boil in a small saucepan. The bubbling will be music to your ears.
- Once boiling, stir in the polenta. Lower the heat and let it cook slowly for about 5 minutes, stirring occasionally. You’ll know it’s ready when it has thickened and looks like a cozy blanket.
- Stir in the cheddar cheese and a dash of salt and pepper. The cheese should melt into the polenta, creating a creamy, golden mixture.
- To assemble, scoop the polenta into a dish and gently place the bacon wrapped asparagus on top. Serve warm and enjoy every bite!
Cook’s Notes
Alright, let’s get real for a second. Polenta can sometimes turn out lumpy if you rush it. Stir it slowly and give it the attention it deserves. This dish is best enjoyed fresh, but if you have leftovers, store the polenta and asparagus separately in airtight containers in the fridge for up to two days. Reheat the polenta with a splash of water or broth to bring it back to its creamy glory.
Make It Your Own
Feel free to get creative with this recipe! Here are a few ideas to switch things up:
- Swap the bacon for prosciutto if you’re feeling fancy or have it on hand.
- For a vegetarian twist, ditch the bacon and roast the asparagus with a sprinkle of smoked paprika and olive oil.
- Try using Parmesan instead of cheddar for a sharp, nutty flavor.
- Add some heat with a sprinkle of crushed red pepper flakes over the polenta just before serving.
If you give this recipe a try, I’d love to hear how it turns out—drop a comment or tag me on social media! Your kitchen stories make my day. Happy cooking!
Related update: Cheddar Polenta With Bacon Wrapped Asparagus
Related update: Amazing Braised Beef Short Ribs
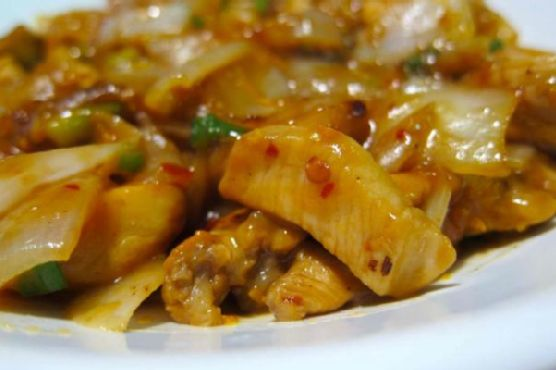
It was one of those evenings where the craving for takeout hits hard, but the thought of delivery fees makes you cringe. I remember standing in my kitchen, staring at a lonely chicken breast and a couple of oranges, thinking, “Could I… maybe… make orange chicken from scratch?” Spoiler: I did, and it was magic. It turns out, whipping up a healthier version of this takeout classic is not only doable but downright satisfying. The best part? It’s a whirlwind of citrusy freshness, subtle heat, and a sweet tangy glaze that hugs every bite of tender chicken.
Jump to Recipe
What You’ll Need
So, what’s the secret sauce (pun intended) to this homemade wonder? A lot of it is probably already chillin’ in your pantry or fridge. Here’s what you’ll need:
- Chicken breast – the star; make sure it’s fresh and juicy.
- Vegetable oil
- Orange juice – squeezed or store-bought, but fresh is fab.
- Rice vinegar
- Rice wine
- Soy sauce – it’s gotta be the good stuff.
- Chili sauce
- Garlic – because what is even life without garlic?
- Brown sugar
- Orange zest – that’s where the zing comes from!
- Green onions
- Water
- Corn starch
- Salt and pepper
- White rice – fluffy and perfect for soaking up all that goodness.
How to Make Healthy Orange Chicken
- First, cut the chicken breast into bite-sized cubes. This is where the magic begins.
- In a mixing bowl, combine the chicken with orange juice, rice vinegar, rice wine, chili sauce, brown sugar, and minced garlic. Mix it up and let those flavors marinate.
- Cover the bowl with plastic wrap, pressing it down so the marinade really gets to know the chicken. Pop it in the fridge for about an hour.
- While the chicken is getting cozy in the marinade, chop up your veggies. Cut the onion into square pieces and separate the white and green parts of the green onions. Don’t forget to zest that orange!
- Heat vegetable oil in a sauté pan over high heat. Toss in the marinated chicken and sauté for about a minute. Toss it around and give it another minute until it’s golden and caramelized.
- Transfer the chicken to a dish and, in the same sizzling pan, add the chopped onion. Sauté until they’re soft and aromatic.
- Add the chicken back into the pan along with the white parts of the green onion and your glorious orange zest. Let them mingle for about 30 seconds.
- Pour in the marinade liquid and let it simmer. This is where things get saucy!
- Add the remaining green onion and let the sauce thicken to your liking. A little patience here goes a long way.
- Once the sauce has reached your preferred consistency, season with salt and pepper. Serve it over a bed of fluffy white rice, and voilà, your orange chicken masterpiece is ready!
Cook’s Notes
– Make sure not to skip the marinating process. It’s what gives the chicken all that flavor you love.
– If you’re short on time, you can marinate for less, but an hour is ideal.
– Store leftovers in an airtight container. They’ll keep in the fridge for up to three days, and honestly, the flavors get even better!
– To reheat, just pop it in a pan over medium heat. Add a splash of water if the sauce gets too thick.
Make It Your Own
- Swap the chicken for crispy tofu to keep it vegetarian. Just prep the tofu the same way!
- Add some bell pepper slices or broccoli florets for extra crunch and color.
- Switch up the sauce with a few dashes of sesame oil for a nutty twist.
- Fancy a bit more heat? A sprinkle of crushed red pepper or a drizzle of sriracha should do the trick!
If you try this, I’d love to hear how it turns out — drop a comment or tag me! And remember, cooking is all about experimenting, so don’t be afraid to put your own spin on it. Happy cooking! 🍊🍗
Related update: Healthy Orange Chicken
Related update: Cheddar Polenta With Bacon Wrapped Asparagus
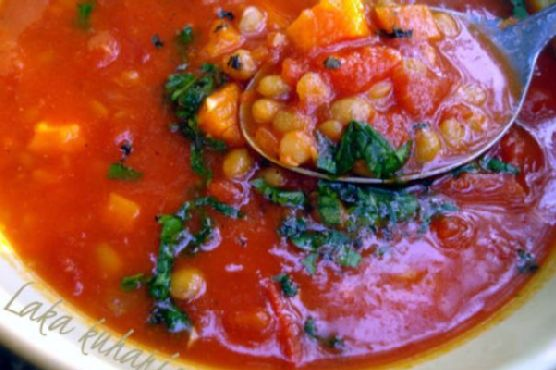
It was one of those blustering autumn afternoons where the wind insisted on swirling the golden leaves into a frenzy just outside my kitchen window. I found myself craving something warm and cozy — the kind of comfort that wraps around you like a favorite sweater. My pantry was my savior, holding a treasure trove of humble ingredients that quickly turned into a hearty Tomato and Lentil Soup. This dish is my weeknight hero; it’s simple, comforting, and comes together faster than the kids can finish their homework. Plus, the aroma of simmering garlic and onions is enough to gather everyone around the kitchen, eagerly waiting for their bowls.
Jump to Recipe
What You’ll Need
This recipe is a celebration of pantry staples. Chances are, you already have most of these tucked away in your kitchen:
- 2 tablespoons of olive oil
- 1 large onion, chopped
- 2 cloves of garlic, minced
- 2 carrots, diced
- 1 can (14 oz) canned tomatoes
- 1 bay leaf
- 4 cups of water
- 1 cup of lentils
- Salt to taste
- Fresh parsley, chopped
How to Make Tomato and Lentil Soup
- Start by heating the olive oil in a large pot over medium heat. Toss in the chopped onion and garlic, letting them sizzle and fill your kitchen with their tantalizing smell. Sauté for about 5 minutes, stirring occasionally, until the onions are soft and translucent.
- Add the diced carrots to the mix. Continue to sauté for another 2 minutes. You’ll know it’s time to move on when the carrots start to soften and their edges look a bit golden.
- Pour in the canned tomatoes and add the bay leaf. Give everything a good stir, then add the water. Crank up the heat and bring it all to a rolling boil.
- Once boiling, stir in the lentils. Sprinkle in some salt, keeping in mind you can adjust later if needed. Lower the heat to a simmer and let the soup cook for 5 minutes, just until the lentils are tender but still holding their shape.
- Before serving, remove the bay leaf and give the soup a taste. Adjust the salt if necessary, and sprinkle generously with chopped parsley for a fresh, vibrant finish.
Cook’s Notes
Let’s talk about some soup wisdom I’ve gathered along the way. First off, don’t rush the onion and garlic sautéing — it lays the groundwork for all the flavors to come alive. If you have leftover soup, it stores beautifully in the fridge for up to 3 days. Reheat it gently on the stove or in the microwave, adding a splash more water if it’s too thick for your liking. You can even make it a day ahead to allow the flavors to meld more deeply.
Make It Your Own
Let’s shake things up a bit! Here are a few ideas to customize your soup:
- Swap the lentils for chickpeas for a creamier texture.
- If you like a bit of heat, add a pinch of red pepper flakes when sautéing the onions.
- For a richer flavor, use vegetable broth instead of water.
- Boost the earthiness by adding a handful of chopped spinach or kale in the last couple of minutes of cooking.
If you try this Tomato and Lentil Soup, I’d love to hear how it turns out — drop a comment or tag me! There’s something so satisfying about turning simple ingredients into something that feels like a warm hug in a bowl. Enjoy every spoonful!
Related update: Tomato and lentil soup
Related update: Kale and Chickpea Soup with Lemon
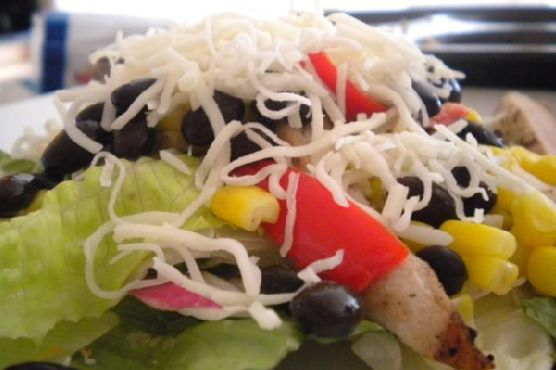
Picture this: It’s midweek, and you’re staring into the abyss of your fridge, seeking inspiration for dinner. We’ve all been there, and that’s precisely how this Garlic Lime Grilled Chicken Salad came to life in my kitchen. It’s that perfect holistic mix of tangy, zesty, and fresh that turns a mundane weeknight into a mini feast. The best part? It’s simple yet impressive enough to make you feel like a culinary genius without breaking a sweat. It’s brightened by the citrusy marinade and packed with vibrant, savory flavors that are sure to elevate your salad game. Plus, it’s a great excuse to fire up the grill! So, if you’re looking for a vibrant, flavor-packed dinner that’s also healthy, this one’s for you. Jump to Recipe
What You’ll Need
Chances are you already have most of these in your pantry or fridge, making this dish delightfully low-fuss. Here’s the lineup:
- Chicken breast
- Limes
- Garlic
- Olive oil
- Cooked refrigerated black beans
- Black pepper
- Cilantro
- Cumin
- Frozen corn
- Kosher salt
- Shredded Mexican cheese
- Onions
- Orange
- Oregano
- Red peppers
- Romaine lettuce
- Vinegar
How to Make Garlic Lime Grilled Chicken Salad
- In a small bowl, mix 1/4 cup of fresh orange juice and 1/4 cup of fresh lime juice with olive oil, a sprinkle of cumin, a dash of oregano, a generous pinch of kosher salt, and minced garlic. Trust me, the aroma is divine!
- Pour half of this citrusy concoction over the chicken breasts, ensuring they get a good soak. Save the rest of the marinade for later. Let those flavors mingle for at least an hour—two if you have the time.
- Prepare your grill and heat it up to a sizzling 425°F. Once hot, sear the marinated chicken on both sides, about 12 minutes, or until you see those lovely grill marks.
- Lower the heat to 350°F and let the chicken cook through for another 7-10 minutes. You’re aiming for juicy, not dry!
- Slice up the red peppers into thin strips and give them a quick grill for about 2-3 minutes, so they’re tender but still have a bit of crunch.
- Warm up the frozen corn—nothing fancy here, just make sure it’s warm to the touch.
- Transform the leftover marinade into a vinaigrette by whisking in 1-2 tablespoons of vinegar. This will be your salad’s secret weapon.
- Start your salad assembly: Start with a bed of fresh romaine lettuce, layer on the grilled chicken, sprinkle with black beans, grilled red peppers, cheese, and a drizzle of your vinaigrette. Voilà!
Cook’s Notes
Here’s the scoop: Marinating is key. The longer you let the chicken hang out in that zingy bath, the better. If you’re in a hurry, even 30 minutes can work. Don’t rush the grill time; those grill marks are where the magic happens, giving that smoky, irresistible taste.
Store any extras in separate containers, if possible, to avoid soggy lettuce—nobody likes a wilted salad! This dish holds up beautifully in the fridge for up to three days, so it’s perfect for meal prep, too.
Make It Your Own
- Swap the chicken for crispy tofu to make it vegetarian-friendly. Just press and marinate the tofu the same way you would the chicken.
- Add some diced avocado for creamy goodness that pairs perfectly with the citrusy zing.
- Not a fan of romaine? Spinach or arugula would be fantastic substitutes, bringing their unique flavors to the table.
- Craving extra crunch? Toss in a handful of tortilla strips or crushed tortilla chips right before serving.
If you try this, I’d love to hear how it turns out—drop a comment or tag me! Whether it’s a weeknight or a weekend grill-out, this salad is a surefire way to brighten up your dinner table. Enjoy!
Related update: Garlic Lime Grilled Chicken Salad
Related update: Swiss Chard Wraps
Related update: Traditional Panzanella
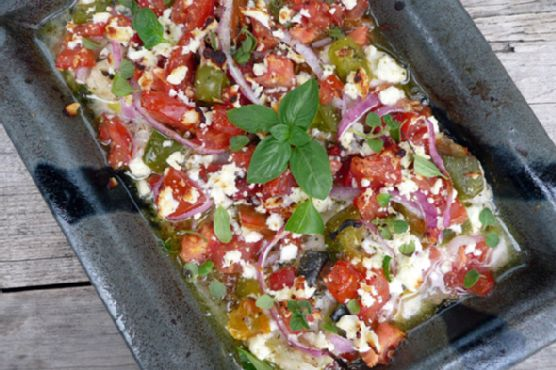
Picture this: It’s midweek, I’ve worked the whole day, and the fridge is looking thin. I peek inside to find some fish fillets, a lonely bell pepper, and a crumbling block of feta cheese. The usual dinner panic begins to set in, but then I remember this Greek-Style Baked Fish recipe. It’s my go-to for those days when I want something fresh and flavorful without the fuss. The beauty of this dish is that it’s both light and deeply satisfying, perfect for when you want a bit of sunshine on your plate, no matter the season. Plus, it comes together faster than you can say “Saganaki!”.
Jump to Recipe
What You’ll Need
This recipe shines with its simplicity and the ingredients you probably already have on hand. Here’s what you’ll need:
- Fish fillets – Choose your favorite white fish.
- Red onion – Adds a sweet crunch.
- Bell pepper – The more colorful, the better.
- Feta cheese – Crumbly and tangy goodness.
- Tomato – Juicy and adds a touch of acidity.
- White wine – For that hint of sophistication.
- Olive oil – The Greek staple.
- Dried basil and oregano
- Salt & pepper
- Cooked rice – To serve alongside.
How to Make Greek-Style Baked Fish: Fresh, Simple, and Delicious
- Preheat your oven to 450 degrees F. You want it hot so the fish cooks quickly and stays tender.
- Grab an oven-proof baking dish that will snugly fit your fish fillets without them overlapping. Give it a light spray with cooking spray to prevent sticking.
- Lay the fish fillets in the dish in a single layer. Season them generously with salt and pepper, because who likes bland fish?
- Top the fish with slices of red onion and bell pepper. The colors should already start to cheer you up.
- Sprinkle dried basil and oregano over the top, followed by diced tomato and crumbled feta cheese. The feta will melt slightly and get creamy in the oven.
- Drizzle the white wine and olive oil over everything. This is the magic moment that brings it all together.
- Finish with a grind of fresh pepper, just before putting it in the oven.
- Bake uncovered for about 12 – 15 minutes. You’ll know it’s done when the fish flakes easily with a fork and the kitchen smells heavenly.
- Once out of the oven, squeeze some lemon wedges over the fish, and if you have fresh basil or oregano, now’s the time to sprinkle them on. Serve immediately with hot cooked rice.
Cook’s Notes
A few things to keep in mind: First, if your fish fillets are particularly thick, you might need a minute or two more in the oven. But keep a watchful eye, overcooked fish is a tragedy! As for leftovers, they’re rare, but if you do have any, this dish microwaves well. Just be gentle, so the fish doesn’t dry out.
If you’re planning ahead, you can chop the vegetables and crumble the feta in advance. Just keep them in the fridge until you’re ready to assemble. This makes an already quick recipe even speedier.
Make It Your Own
This dish is wonderfully versatile. Here are a few ideas to make it your own:
- Switch the fish fillets for chicken breast. Just adjust the cooking time until the chicken is cooked through.
- Try tofu instead of fish for a vegetarian twist. Use firm tofu and bake until it’s golden.
- Throw in some kalamata olives for an extra punch of Mediterranean flavor.
- Use quinoa instead of rice to up your protein and fiber game.
If you try this, I’d love to hear how it turns out — drop a comment or tag me in your photos. Here’s to less dinner panic and more delicious moments!
Related update: Greek-Style Baked Fish: Fresh, Simple, and Delicious
Related update: Stir Fried Cabbage and Tomatoes
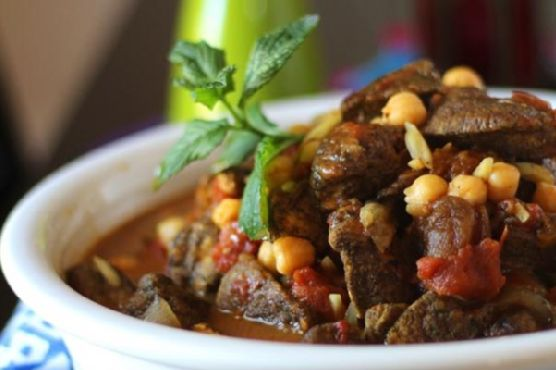
It was one of those nights where everything seemed to take forever. My hair was doing its own thing, there was a pile of laundry giving me the evil eye, and I had exactly zero patience left for the day. You know the feeling? That’s when Moroccan Chicken Tagine decided to swoop in and save my evening. With its warm spices and a touch of sweetness, it felt like a cozy hug in a bowl. This dish comes together quicker than you’d think, especially with the help of my trusty pressure cooker. I promise, it’s the kind of meal that makes you look forward to leftovers.
Jump to Recipe
What You’ll Need
Honestly, you’ve probably got most of this stuff hanging out in your pantry already, and that’s the beauty of it. Just a few special touches make this dish sing.
- Moroccan spice mixture
- Almond slivers
- Dried apricot halves
- Canned chickpeas
- Whole canned tomatoes
- Cilantro
- Extra virgin olive oil
- Fat-free chicken broth
- Flour
- Fresh ginger root
- Garlic clove
- Black salt and ground pepper
- Honey
- Onion
- Skinless boneless chicken breasts
How to Make Moroccan Chicken Tagine
- In a pie plate, mix together the flour and Moroccan spice mixture. Toss the chicken pieces in this mixture until they’re well coated.
- Heat some olive oil in your pressure cooker over medium-high heat. When it’s nice and hot, add the chicken pieces. Let them brown for about one minute per side, absorbing all that fragrant goodness.
- Take the chicken out and set it aside. Lower the heat to medium, then toss in the ginger and onions. Saute for about three minutes until the onions start looking semi-translucent and glossy.
- Add the garlic to the pot and cook for another minute. The aroma should fill your kitchen like a dream.
- Introduce the apricots, whole tomatoes, chicken broth, and the browned chicken back into the pot. Cover and bring it to low pressure over medium-high heat.
- Once you’ve reached pressure, cook for about eight minutes. Then, carefully release the pressure using the quick release method. Open the steam valve and be cautious!
- Stir in the chickpeas, almonds, and honey. Let everything warm through for a few minutes, allowing the almonds to soften slightly.
- Check the chicken for doneness and taste your tagine. This is your moment to adjust the salt and pepper to perfection. Serve it over fluffy couscous and sprinkle with fresh cilantro leaves for that extra pop of color and flavor.
Cook’s Notes
If you’re using a Dutch oven instead of a pressure cooker, follow steps 1-4 as described. Then bring the mixture to a boil, reduce to a simmer, and let it cook for 20-25 minutes, or until the apricots are tender. Continue with step 6.
- Feel free to prep some ingredients ahead. You can chop onions and garlic, or even coat the chicken earlier in the day.
- Leftovers are a dream. Store them in an airtight container in the fridge and savor them for up to three days. The flavors only deepen and become more delicious.
- Be adventurous with your spice mix. Play around with the ratios to suit your taste, just remember that a little goes a long way.
Make It Your Own
- Swap the chicken for crispy tofu: A perfect vegetarian option that still holds up to the hearty flavors.
- Try dried figs instead of apricots: They add a slightly different sweetness and pair wonderfully with the spices.
- Use quinoa instead of couscous: It offers a lovely, nutty texture and is gluten-free.
- Add some heat with chili flakes: If you like a bit of spice, a sprinkle of chili flakes will do the trick.
If you try this, I’d love to hear how it turns out — drop a comment or tag me on social media! Cooking is all about sharing and I’d be thrilled to know how this Moroccan Chicken Tagine fits into your week. Enjoy every bite!
Related update: Moroccan Chicken Tagine
Related update: Greek-Style Baked Fish: Fresh, Simple, and Delicious
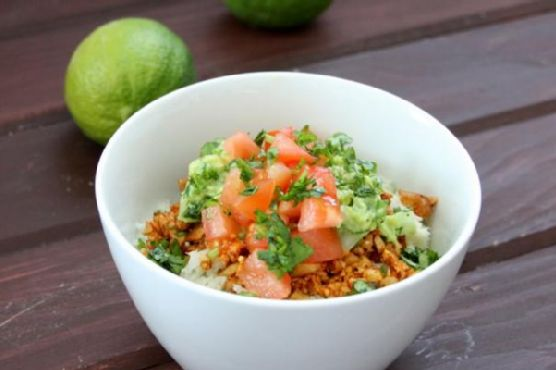
On a particularly hectic Tuesday evening, not too long ago, I found myself staring into the abyss of my pantry, wondering what on earth I could whip up for dinner. After a long day, the thought of a quick yet satisfying meal was all I needed to keep my spirits up. It was then that my eyes fell on a bag of walnuts tucked away in the corner, and inspiration struck. Enter: Vegan Taco Bowls with Cilantro Lime Cauliflower Rice. A burst of fresh flavors, a medley of textures, and the best part? It’s as comforting as it is healthy. This dish has become my go-to when I crave something hearty yet light, and the simplicity of it is just the cherry on top.
Jump to Recipe
What You’ll Need
What makes this dish a gem is that it’s likely you already have most of these ingredients at home. It’s about combining fresh goodness with a pinch of creativity.
- Avocado oil
- Cauliflower
- Red New Mexico chili powder
- Fresh cilantro
- Garlic powder
- Hass avocado
- Fresh jalapeño
- Fresh lime juice
- Onion
- Salt
- Tomato
- Walnuts
How to Make Vegan Taco Bowls with Cilantro Lime Cauliflower Rice
- Set the walnuts to soak in a bowl of water for 2-8 hours before you plan to prepare the taco meat. This will soften them up nicely for processing.
- Preheat your oven to 375°F and line a baking sheet with aluminum foil. This step will ensure easy clean-up later.
- Finely chop the cauliflower into rice-sized pieces, or give it a quick whirl in a food processor until you achieve the desired consistency. Toss with avocado oil and spread onto the baking sheet in an even layer.
- Bake the cauliflower for 18 minutes, giving it a stir halfway through to ensure it cooks evenly. You’ll know it’s done when it turns a lovely golden brown and smells slightly nutty.
- While the cauliflower rice is cooking, turn your attention to the guacamole and taco meat. Cut the avocado into large chunks and place them into a small bowl. Add the lime juice and mash until you reach a chunky puree or your preferred consistency.
- Stir in finely chopped cilantro, diced jalapeño, onion, and a pinch of garlic powder into the avocado mix. Set your guacamole aside — if you can resist a taste test, that is.
- Drain the soaked walnuts and place them into a small food processor. Pulse until they’ve reached a ground meat consistency; about 5-7 pulses should do the trick.
- Transfer the walnut mixture to a bowl and stir in the salt, cumin, garlic powder, and red chili powder. Set aside.
- Once the cauliflower is done, transfer it to a mixing bowl while still warm and toss with lime juice, cilantro, and a sprinkle of salt to taste.
- To assemble, layer 1 cup of your fragrant cauliflower rice into a bowl, add a hearty portion of taco nut meat, a generous dollop of guacamole, fresh tomatoes, and a sprinkling of fresh cilantro.
- Serve immediately with an additional slice of lime if desired. Enjoy the fresh, vibrant flavors dancing in your mouth!
Cook’s Notes
Here’s the deal: soaking the walnuts ahead of time is crucial for getting that perfect meaty texture. So, if you’re planning on making this, set a reminder or put a sticky note on your fridge. This dish is fabulous fresh, but it also makes for great leftovers. Store the components separately in airtight containers in the fridge — they’ll keep well for up to three days. Simply reassemble and enjoy when you’re ready for round two!
Make It Your Own
- Swap the walnuts with pecans for a sweeter, nuttier taco meat.
- Spice things up by adding a pinch of smoked paprika to the walnut mix for a deeper flavor.
- Make it extra creamy by adding a dollop of coconut yogurt on top of your assembled bowl.
- Include black beans for an extra protein punch and a heartier meal.
If you try this, I’d love to hear how it turns out — drop a comment or tag me on social media! Your kitchen adventures make this cooking journey all the more rewarding. Enjoy every delicious bite!
Related update: Vegan Taco bowls with Cilantro Lime Cauliflower Rice
Related update: Moroccan Chicken Tagine
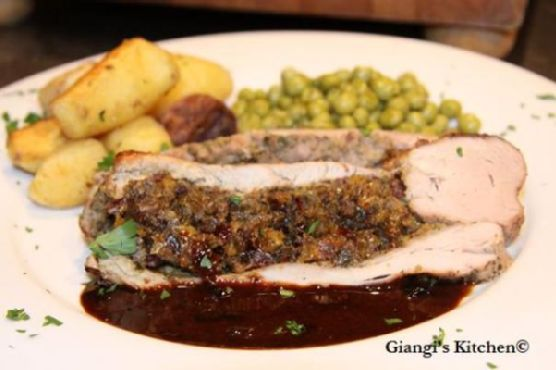
Picture this: It’s a chilly Tuesday evening, and I’m staring at the contents of my fridge, wondering what in the world to make for dinner. My eyes land on a pork tenderloin, and I remember that bottle of Marsala that’s been collecting dust on the shelf. Suddenly, the idea of a Stuffed Pork Tenderloin with Marsala-Port Sauce sounds like the perfect blend of comforting yet impressive. It’s the kind of dish that feels a bit fancy but is deceptively easy to whip up. As the aroma of Marsala and sautéed onions fills the kitchen, I can’t help but feel a little proud of the culinary magic happening right at my stove.
Jump to Recipe
What You’ll Need
The beauty of this dish is in its simplicity and the likelihood that you already have most of these ingredients tucked away in your pantry or fridge. We’re talking about a few surprises that elevate the dish, like dried fruits and Marsala wine.
- 1 pork tenderloin
- 1 shallot, finely diced
- 1 small yellow onion, diced
- 8 oz mushrooms, chopped
- 1/4 cup dried apricots
- 1/4 cup raisins
- 1/4 cup dried cranberries
- 1/4 cup flat-leaf parsley, chopped
- 1/2 cup Marsala wine
- 1/2 cup Port wine
- 2 tablespoons butter
- 1/4 cup heavy cream
- 2 tablespoons olive oil
- Salt and pepper to taste
How to Make Stuffed Pork Tenderloin with Marsala-Port Sauce
- Preheat your oven to 450°F (230°C). The key to a crispy outside and juicy inside is starting with a hot oven.
- In a large skillet over medium heat, warm up 1 tablespoon of olive oil. Toss in the diced onions, shallots, and mushrooms. Cook these until the onions turn translucent, and your kitchen smells like heaven.
- Remove the skillet from heat. In a small food processor, combine the cooked onion mixture, dried apricots, raisins, cranberries, and parsley. Pulse until everything is minced and well combined. This mixture will be your delectable stuffing.
- Take the pork tenderloin and cut it in half crosswise. Butterfly each section carefully, ensuring not to cut all the way through. Season both sides generously with salt and pepper.
- Spread the stuffing over one side of each butterflied pork piece. Lay the other half of the meat on top and secure the edges with toothpicks. Don’t be shy with the salt and pepper here — it’s the secret to bringing out all those flavors.
- In the same skillet you used earlier, heat another teaspoon of olive oil. Sear the pork tenderloin on each side for about 3-5 minutes. You’re looking for a lovely golden crust.
- Transfer the pork to the oven and let it roast for 20 to 30 minutes, until there’s no pink and the juices run clear. Internal temperature should hit 145°F (63°C).
- Once done, remove the pork from the oven, place it on a dish, and tent it with aluminum foil to rest while you make the sauce.
- Pour off any fat from the skillet. Add the Marsala and Port wines, scraping up any browned bits with a spatula as you bring it to a boil. Let this bubble away until reduced to about 1/2 cup.
- Remove from heat and swirl in the butter and cream. You’ll know it’s perfect when the butter is completely melted and the sauce is just thick enough to coat the back of a spoon.
- Remove the toothpicks, slice the pork tenderloin into rounds, and drizzle with that luscious sauce. Serve immediately and prepare to wow your taste buds.
Cook’s Notes
When stuffing the tenderloin, ensure the filling is well minced so it stays snugly inside as it cooks. If you don’t have a small food processor, chopping everything by hand works too — just takes a little more elbow grease. I recommend letting the meat rest for at least 5 minutes before slicing; this keeps it juicy. In terms of leftovers, this dish keeps well in the fridge for up to 3 days. Reheat gently with a splash of water or stock to keep it moist.
Make It Your Own
- Try swapping the pork for a boneless chicken breast. Just pound it to an even thickness and proceed with stuffing and cooking as directed.
- For a vegetarian twist, replace the pork with large portobello mushrooms. Use the same stuffing and bake them until tender, about 15 minutes.
- Substitute the Marsala for sherry or white wine if you prefer a different flavor profile.
- Add a sprinkle of crushed pistachios or walnuts to the stuffing for a delightful crunch.
If you try this, I’d love to hear how it turns out — drop a comment or tag me on social media! Your kitchen adventures make my day. Happy cooking!
Related update: Stuffed Pork Tenderloin with Marsala-Port Sauce
Related update: Vegan Taco bowls with Cilantro Lime Cauliflower Rice
It was one of those busy weeknights when I craved something comforting but didn’t have the time or energy for an elaborate meal. As I reached for a box of lasagna noodles, I had a lightbulb moment: Lasagna Roll Ups! They’re as indulgent and satisfying as regular lasagna but way more fun to assemble and serve. These little guys are perfect for when you want to impress with minimal fuss—plus, they make portion control a breeze. Trust me, once you try this recipe, you’ll never look at lasagna quite the same way again.
Jump to Recipe
What You’ll Need
Before you panic about a long list of ingredients, let me assure you: you probably have most of this stuff lurking in your kitchen. This dish is all about basics with a twist, relying on a few stars to shine.
- Lean ground beef
- Italian sausage
- Extra virgin olive oil
- Onion
- Garlic
- Italian seasoning
- Dried basil
- Canned tomato sauce
- Fire roasted diced canned tomatoes
- Canned tomato paste
- Water
- Black ground pepper
- Fresh parsley
- Ricotta cheese
- Egg
- Salt
- Parmesan Reggiano
- Mozzarella cheese
- Lasagna noodles
How to Make the World’s Greatest Lasagna Roll Ups
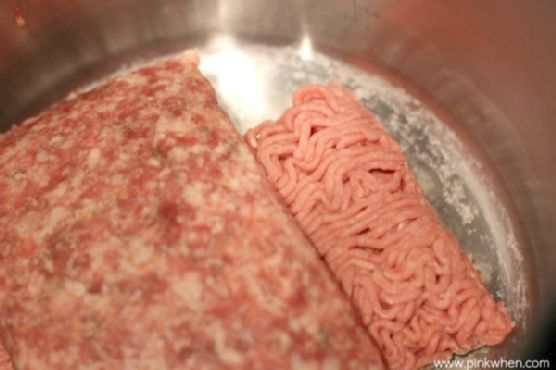
- In a large saucepan over medium heat, start browning your ground beef and Italian sausage. The aroma will make your taste buds dance with anticipation.
- In a separate pan, heat 1 tablespoon of olive oil on medium heat. Add in the onion, garlic, Italian seasoning, and basil. Let them cook for about 6-8 minutes until the onion is translucent and your kitchen smells like an Italian bistro.
- Combine the onion and garlic mixture with the meat. Stir in the fire roasted diced tomatoes, canned tomato sauce, tomato paste, water, black pepper, and 2 tablespoons of fresh parsley. Allow this symphony of flavors to simmer uncovered for 1 hour, letting it thicken and become deliciously fragrant.
- Meanwhile, bring a large pot of water to boil and cook the lasagna noodles for 8-10 minutes. Drain and rinse them with cold water to stop the cooking process.
- Preheat your oven to 375°F (190°C). In a small mixing bowl, mix together the remaining parsley, ricotta cheese, egg, and 1/2 teaspoon salt until everything is beautifully combined.
- Pour a thin layer of meat sauce into the bottom of a 9 x 13 glass baking dish—this is your tasty foundation.
- To assemble the roll ups, lay a noodle flat and spread with the cheese mixture. Sprinkle a bit of Parmesan Reggiano over the top, then roll it up snugly like a delicious little sleeping bag.
- Arrange all your roll ups in the baking dish, and generously cover them with more of the meat sauce. Top each roll with a slice of mozzarella cheese, and then cover the dish with foil.
- Bake in the oven for 20 minutes. Remove the foil and bake for an additional 10 minutes, letting the cheese turn golden and bubbly.
- Take them out and allow them to cool for at least 10 minutes before serving. This will help them firm up and makes serving a breeze.
Cook’s Notes
A few things to keep in mind: Don’t rush the sauce. Letting it simmer gives the flavors time to deepen. If you’re in a hurry, you can prep the sauce the day before—it only gets better with time! Lasagna Roll Ups also freeze beautifully. Just assemble them without baking, wrap tightly, and freeze. To cook, thaw in the fridge overnight and bake as directed.
Make It Your Own
If you feel like experimenting, here are a few ways to mix things up:
- Swap the ground beef for ground turkey or chicken for a lighter version.
- Make it vegetarian by using mushrooms and zucchini instead of meat.
- Add a kick by stirring some red pepper flakes into the cheese mixture.
- Use whole wheat or gluten-free noodles for a different texture or dietary needs.
If you try this, I’d love to hear how it turns out—drop a comment or tag me! Whether it’s a weeknight dinner or a casual get-together, these roll ups are sure to win hearts and palates alike. Enjoy!
Related update: How to make the World’s Greatest Lasagna Roll Ups
Related update: Stuffed Pork Tenderloin with Marsala-Port Sauce