My Sister’s Soup: Creamy Curried Squash and Cauliflower Soup | Made by Meaghan Moineau

My Sister's Soup: Creamy Curried Squash and Cauliflower Soup | Made by Meaghan Moineau

Title: A Bowl of Comfort: My Sister's Creamy Curried Squash and Cauliflower Soup
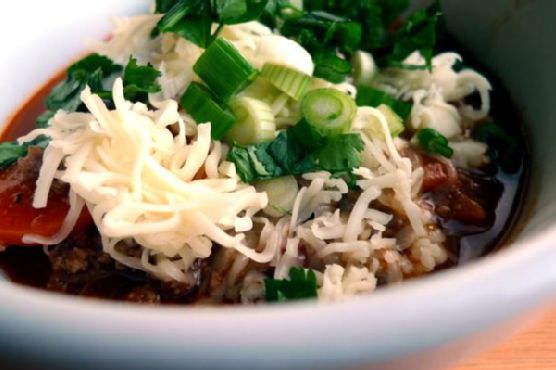
Description: Dive into the warmth of fall with a bowl of Creamy Curried Squash and Cauliflower Soup, inspired by cherished family memories. This flavorful, soul-soothing dish combines the comforting sweetness of butternut and delicata squash with the aromatic spices of curry and cayenne. Perfect as a main dish for cozy evenings, this recipe is not only delicious but also carries the warmth of family traditions.

---


As the leaves begin to turn and the air carries a crisp bite, there's nothing quite like a steaming bowl of soup to wrap your hands around. In our family, the arrival of autumn is synonymous with my sister's Creamy Curried Squash and Cauliflower Soup—a recipe that has evolved into a cherished culinary tradition over the years.


The Heartwarming Story Behind the Soup

When I think of this soup, I'm instantly transported back to a particular fall evening in my childhood. The smell of roasted squash and curry would waft through the house, mingling with the sound of crackling logs in the fireplace. My sister, always the culinary artist, would orchestrate the making of this soup with a grace that was both comforting and inspiring.


Our parents would gather around the kitchen table, sharing stories from their own childhoods, as we watched the magic unfold. The kitchen was our stage, and the soup, our family heirloom, lovingly passed down with each ladle. It wasn’t just about the flavors; it was about the laughter shared and the love that simmered alongside the ingredients.


The Recipe: My Sister's Creamy Curried Squash and Cauliflower Soup
Ingredients:

- Butternut squash


- Delicata squash


- Cauliflower


- Vegetable stock


- Yellow diced onion


- Fresh garlic


- Curry powder


- Butter


- Dashes of cayenne pepper


- Salt and pepper


Instructions:

1. Preheat your oven to 375°F (190°C). Slice the squash lengthwise and place them face down in a casserole dish with about 1/4 inch of water at the bottom.


2. Bake for about 30 minutes or until the squash is tender. Allow it to cool a bit, then scoop out the seeds and the flesh, setting it aside in a bowl.


3. In a large stock pot, heat the butter and sauté the onions over low-to-medium heat until they turn translucent.


4. Add the garlic, curry powder, cayenne pepper, salt, and pepper to the onions, stirring well.


5. Add the squash flesh and cauliflower into the pot along with the vegetable stock. Let the mixture simmer for about 20 minutes.


6. Puree the squash and cauliflower, along with the liquid, in batches using a blender. If the mixture seems too thick, gradually add more stock until you achieve your desired consistency.


7. Transfer the soup to bowls and serve with a dollop of sour cream for extra creaminess.


Difficulty: 5/10
Classification: Main Dish

This soup is more than just a meal; it is a reminder of the power of family traditions and the joy of sharing simple moments. As you prepare and enjoy this dish, may it bring warmth to your home and fill your kitchen with memories, just as it has done in ours.

Read more about Appetizers

Read more about Main Dishes

Read more about Desserts

Spinach Cheese Tortellini | Made by Meaghan Moineau

Spinach Cheese Tortellini | Made by Meaghan Moineau

Title: Spinach Cheese Tortellini: A Nostalgic Family Feast
Description: Dive into the heartwarming world of homemade comfort food with our Spinach Cheese Tortellini recipe. Packed with rich flavors and a touch of nostalgia, this delightful dish brings together the creamy goodness of cheese tortellini and the fresh vibrancy of spinach in a tomato-infused sauce. Perfect for family gatherings or a cozy night in, this recipe is sure to become a cherished favorite.

---


Spinach Cheese Tortellini: A Nostalgic Family Feast


When I think of family gatherings around our dining table, the comforting aroma of Spinach Cheese Tortellini always springs to mind. It is a dish that has woven itself into the fabric of our family memories, a delicious centerpiece that brings us together time and time again.


Ingredients:


- 1 tablespoon butter
- 1 can of tomatoes (with juice)
- 1 package fresh dried cheese tortellini
- 1 teaspoon cumin
- 1 teaspoon dried basil
- 1 tablespoon flour
- 2 cloves garlic, minced
- 1 teaspoon garlic powder
- 1/2 cup heavy cream
- 1 cup milk
- 2 tablespoons olive oil
- 1 diced onion
- 1 teaspoon onion powder
- 1 teaspoon oregano
- 1/2 cup fresh parmesan cheese, grated
- 1 tablespoon raw sugar
- 1/2 teaspoon red pepper flakes
- Salt and pepper to taste
- 2 cups fresh spinach
- 1 teaspoon thyme

Instructions:


1. Prepare Tortellini: Follow the package instructions to cook the tortellini. Set aside.
2. Sauté Aromatics: In a large stainless steel pan, heat olive oil and butter over medium heat. Add diced onions and cook until soft and translucent, about 3-4 minutes. Stir in minced garlic and cook for an additional minute.
3. Create Tomato Base: Pour in the canned tomatoes, including their juice, and season with salt, pepper, garlic powder, onion powder, red pepper flakes, thyme, oregano, cumin, dried basil, and raw sugar. Simmer for 5 minutes, allowing the flavors to meld.
4. Add Spinach: Introduce the spinach leaves to the pan, cover with a lid, and let them wilt. Stir occasionally and add water 1/4 cup at a time if the mixture becomes too dry.
5. Prepare Cream Sauce: In a small bowl, whisk together flour, milk, and cream until smooth. Pour this mixture into the pan with the tomato and spinach. Stir in the parmesan cheese, combining everything thoroughly.
6. Combine & Serve: Using a slotted spoon, transfer the cooked tortellini into the pan. Gently mix everything with a wooden spoon to prevent tearing the pasta. Heat until everything is warmed through. Serve immediately, garnished with extra parmesan cheese and fresh basil.

A Family Memory


Growing up, I remember my grandmother bustling around the kitchen, her apron dusted with flour and the kitchen alive with the scents of garlic and herbs. Spinach Cheese Tortellini was her signature dish, one that she would prepare for every special occasion. I vividly recall sitting on the countertop, eagerly watching her every move, hoping to absorb her culinary magic.


The clinking of her wooden spoon against the stainless steel pan was a comforting symphony, and the sight of fresh spinach wilting into the bubbling tomato sauce was nothing short of mesmerizing. When it was finally time to eat, the whole family would gather around, laughter and stories flowing as freely as the wine.


This dish, with its rich, creamy texture and vibrant flavors, was more than just a meal; it was a vessel for love and connection, a reminder of the simple joys of family and home.


Difficulty: 5/10


Classification: Main Dish


Whether you're cooking for a crowd or simply indulging in a bit of culinary nostalgia, this Spinach Cheese Tortellini offers a taste of home, wrapped in warmth and memories. Enjoy!

Read more about Appetizers

Read more about Main Dishes

Read more about Desserts

Sweet Potato Casserole with Pecan Crumble Topping | Made by Meaghan Moineau

Sweet Potato Casserole with Pecan Crumble Topping | Made by Meaghan Moineau

A Taste of Tradition: Sweet Potato Casserole with Pecan Crumble Topping


A Nostalgic Family Favorite


Description

Indulge in the heartwarming flavors of fall with our Sweet Potato Casserole with Pecan Crumble Topping. This delightful dessert captures the essence of cozy family gatherings, blending tender sweet potatoes with a crunchy pecan topping. Perfect for holiday feasts or Sunday dinners, this recipe is both a culinary treat and a cherished family tradition.

Difficulty: 5/10

Classification: Dessert


---


Ingredients:


- 3 cups sweet potatoes, peeled and chopped


- 1 large egg, beaten


- 1/2 cup sugar


- 1/3 cup evaporated milk


- Zest and juice of 1 orange


- 3 tablespoons butter, melted


- 1 teaspoon vanilla extract


- 1/2 cup brown sugar


- 1/3 cup all-purpose flour


- 2 tablespoons butter, for topping


- 1 cup pecan pieces


- Optional: Pecan halves for decoration


---


Instructions:


1. Preheat the Oven: Begin by preheating your oven to 350°F (175°C).
2. Cook the Sweet Potatoes: Place the chopped sweet potatoes in a large pot. Fill with water until just covered. Bring to a boil, then reduce the heat and gently boil until the potatoes are fork-tender, about 15 minutes.
3. Prepare the Sweet Potato Mixture: In a large bowl, combine the beaten egg, sugar, evaporated milk, orange zest, melted butter, and vanilla extract.
4. Mash the Sweet Potatoes: Drain the cooked sweet potatoes and add them to the bowl. Use a wooden spoon or a mixer on low speed to break up the potatoes. Add the freshly squeezed orange juice (about 1/4 cup) and mix until smooth.
5. Assemble the Casserole: Transfer the sweet potato mixture into a greased 9 x 5 loaf pan.
6. Make the Pecan Crumble Topping: In a separate bowl, mix the brown sugar and flour. Cut in the 2 tablespoons of butter until the mixture resembles coarse crumbs. Stir in the pecan pieces.
7. Top the Casserole: Evenly cover the sweet potato mixture with the pecan crumble topping. Decorate with pecan halves if desired.
8. Bake: Place the casserole in the oven and bake for 25 minutes, or until the topping is golden brown and crispy.

---


Family Memory


Every Thanksgiving, our family gathers in the cozy warmth of Grandma's kitchen, where the comforting aroma of sweet potatoes and pecans fills the air. This Sweet Potato Casserole with Pecan Crumble Topping has been a staple at our holiday table for generations.


I fondly remember sitting on a stool beside Grandma as she prepared the dish, her hands skillfully mixing the ingredients while sharing stories of her childhood Thanksgivings. She would let me sprinkle the pecan pieces over the top, a task I took on with great pride. As the casserole baked, we would share laughs and memories, the anticipation growing with each passing minute.


When the casserole finally emerged from the oven, its golden topping glistening, the family would gather round, eager for the first taste. Each bite was a reminder of the love and tradition that had been passed down through the years.


This dish is more than just a recipe; it's a connection to our past and a way to create new memories with every gathering.


---


Embrace the flavors of tradition and create your own family memories with this Sweet Potato Casserole with Pecan Crumble Topping. Whether served at a festive holiday meal or a simple family dinner, this dish is sure to become a beloved classic in your home.

Read more about Appetizers

Read more about Main Dishes

Read more about Desserts

Spare Ribs | Made by Meaghan Moineau

Spare Ribs | Made by Meaghan Moineau

Title: Unraveling the Secret of Perfect Spare Ribs: A Journey of Flavor and Family Memories


Description: Dive into the world of exquisite flavors with our Spare Ribs recipe, a culinary delight that promises to tantalize your taste buds. Accompanied by a heartwarming family story, this dish is not just a meal; it’s a journey through cherished memories, perfect for any gathering. Prepare to create a masterpiece that’s easy to make yet rich in flavor.

---


Unraveling the Secret of Perfect Spare Ribs: A Journey of Flavor and Family Memories


There’s something undeniably special about cooking a dish that has been passed down through generations. The smoky aroma, the sticky glaze, and the tender bite of perfectly cooked spare ribs can transport you to a different time and place. Today, I’m excited to share not just a recipe but a piece of my family history, woven into every bite of these delectable spare ribs.


Ingredients:

- 2 tablespoons of oil

- 3 tablespoons of clear honey


- 2-inch piece of fresh ginger root, grated


- 4 tablespoons of dark soy sauce


- 3 tablespoons of hoisin sauce


- 1 teaspoon of five-spice powder


- 3 garlic cloves, minced


- 2 pounds of spare ribs


Instructions:

1. Preparation: Preheat your oven to 400 degrees Fahrenheit. While the oven heats, combine the oil, honey, ginger, soy sauce, hoisin sauce, five-spice powder, and minced garlic in a jug. Mix well to create a flavorful marinade.
2. Marinating the Ribs: Place the spare ribs in a large dish and pour the marinade over them. Ensure the ribs are well-coated, then cover and refrigerate. For the best results, let the ribs marinate overnight, allowing the flavors to fully penetrate the meat.
3. Cooking the Ribs: Remove the ribs from the marinade and place them on a rack in a roasting pan. Cook in the preheated oven for about 45 minutes, turning them halfway through to achieve an even cook and a beautifully caramelized exterior.
4. Serving: Once cooked, allow the ribs to cool slightly. They can be served warm, but they’re equally delightful when enjoyed cold, making them a versatile dish suitable for any occasion.

A Nostalgic Family Memory

The scent of these spare ribs always takes me back to summers at my grandparents' house. Each year, the family would gather for a reunion, a tradition that brought relatives from near and far to share stories, laughter, and, of course, delicious food. My grandmother was the orchestrator of these gatherings, and her spare ribs were the star of the spread.

I remember being just tall enough to peer over the kitchen counter, watching her expertly mix the marinade. The kitchen would be filled with the rich aroma of ginger and garlic mingling with the sweet and savory notes of soy and hoisin. As the ribs marinated, we'd sit at the kitchen table, shelling peas and sharing stories of yesteryears.


When the ribs finally emerged from the oven, beautifully caramelized and glistening, they were more than just a meal—they were a celebration of family and tradition. Even now, as I prepare this recipe in my own kitchen, I feel a connection to those joyful days, the flavors acting as a bridge to cherished memories.


Difficulty Rating: 3/10

Classification: Main Dish

Crafting these spare ribs is a straightforward process, yet the flavors achieved are nothing short of extraordinary. Whether you’re a seasoned cook or a beginner eager to impress, this recipe is your ticket to creating a dish that’s sure to become a favorite at your family’s table. Enjoy the journey of flavors and the stories that come with each bite.

Read more about Appetizers

Read more about Main Dishes

Read more about Desserts

Valentine Hearts | Made by Meaghan Moineau

Valentine Hearts | Made by Meaghan Moineau

Title: Sweet Memories and Heartfelt Treats: Crafting Valentine Hearts
Description: Unleash your culinary creativity this Valentine's Day with our delectable Valentine Hearts recipe. This dessert combines the flakiness of puff pastry, the richness of crème fraiche, and the sweetness of fresh strawberries and chocolate. Easy to make and perfect for creating lasting memories with loved ones.

---


Valentine’s Day has always been a cherished occasion in my family. As a child, I fondly remember the kitchen transforming into a haven of sweet aromas and joyful laughter. My grandmother would lead the charge, her hands deftly working with ingredients that would soon become the most delicious treats. Among her repertoire, the Valentine Hearts stood out, not just for their taste, but for the love they symbolized.


Ingredients for a Touch of Love:

- Puff pastry


- 1 egg (for glazing)


- Castor sugar


- Canned crème fraiche


- Fresh strawberries


- Plain chocolate


Instructions: A Journey to Delight
1. Preheat and Prepare: Begin by preheating your oven to 220 degrees C (425 F). This temperature ensures that your pastry puffs up beautifully, achieving that coveted golden-brown hue.
2. Puff Pastry Perfection: Thaw the pastry sheet as instructed on the package. Unroll it gently and, using a medium-sized heart-shaped cookie cutter, carve out around eight hearts. These little shapes are the canvas for your culinary masterpiece.
3. Glaze and Sugar: Prick each heart lightly with a fork to prevent them from puffing unevenly. Brush the tops with beaten egg, then sprinkle a modest amount of castor sugar. This step infuses a hint of sweetness and a glossy finish.
4. Bake to Golden Glory: Arrange the hearts on a greased baking sheet, giving them space to expand. Bake for about 10 minutes, watching as they rise and turn a warm, golden brown. Once done, let them cool completely.
5. Strawberry Splendor: While the pastry cools, slice the fresh strawberries. Using a sharp knife, carefully split each heart horizontally, creating a top and bottom layer.
6. Assemble with Love: Sandwich the hearts with a generous layer of crème fraiche and the sliced strawberries. The combination of creamy and fruity creates a delightful contrast.
7. Chocolate Drizzle and Final Touch: Melt the plain chocolate and drizzle it over the assembled hearts. Finish with a dusting of castor sugar for an elegant touch.
A Family Legacy of Love

Every year, as we prepared these Valentine Hearts, my grandmother would share stories of their origins. She spoke of a time when she and my grandfather first made them together, a symbol of their budding romance. The process of creating these treats became a tradition passed down through generations, each heart a testament to love’s enduring nature.


The sounds of laughter and the sight of flour-dusted hands remain etched in my memory. Sharing these sweet treats with family not only satisfied our taste buds but also nurtured our hearts, bringing us closer with every bite.


Difficulty Rating: 4/10

Creating Valentine Hearts is a simple yet rewarding experience, perfect for novice bakers aiming to impress. The process is straightforward, with each step offering a delightful sense of accomplishment.


Classification: Dessert

This recipe is a quintessential dessert, ideal for concluding a romantic meal or offering as a sweet gesture to those you cherish.


---


As you embark on this culinary journey, remember that Valentine Hearts are more than just a dessert. They are an opportunity to create new memories, to share love, and to indulge in the simple joys of life. Whether you're crafting them for a special someone or enjoying them with family, these hearts are sure to bring warmth and sweetness to your day.

Read more about Appetizers

Read more about Main Dishes

Read more about Desserts

Cocoa Protein Pancakes | Made by Meaghan Moineau

Cocoa Protein Pancakes | Made by Meaghan Moineau

Title: Rediscovering Joy: How Cocoa Protein Pancakes Became a Family Tradition
Description: Dive into the heartwarming story of how a simple, protein-packed pancake recipe became a cherished family tradition. Learn how to make these delicious Cocoa Protein Pancakes that are not only healthy but also incredibly easy to whip up. Perfect for breakfast or brunch, this dish will surely become a staple in your household.

---


In the hustle and bustle of modern life, it's easy to forget the simple pleasures that bring families together. For me, the nostalgic aroma of Cocoa Protein Pancakes sizzling on a Sunday morning brings back fond memories of my childhood. Growing up, weekends were a special time in our household—a chance to slow down and savor the moments with one another.


I remember waking up to the comforting sound of my mother humming softly in the kitchen, the smell of cocoa wafting through the air. She would let me join her, standing on a little stool so I could reach the counter. My job was to measure the rolled oats and pour them into the blender. As the oats transformed into a fine powder, I would watch in awe, anticipating the delicious breakfast we were about to create.


Ingredients:

- 1 cup rolled oats


- 2 tablespoons cocoa powder


- 1 cup cottage cheese (or quark if you can find it)


- 2 eggs


- Maple syrup, for serving


Instructions:

1. Begin by blending the rolled oats in a blender or food processor until they become a fine powder.


2. Mix in the cocoa powder, creating a rich, chocolatey blend.


3. Combine the ground oats and cocoa powder with the cottage cheese and eggs in the blender, until a thick batter forms.


4. Heat a greased skillet over medium heat. Pour about a quarter cup of the batter into the skillet, using the back of a spoon to shape it into a round pancake.


5. Cook until the sides of the pancake are firm and begin to brown, then flip to cook the other side.


6. Serve warm with a generous drizzle of maple syrup.


These Cocoa Protein Pancakes are not just a meal—they're a bridge to the past, a symbol of family unity, and a nourishing start to the day. The combination of cocoa and oats not only provides a delightful flavor but also packs a punch of protein, making it a wholesome choice for any breakfast table.


Nostalgic Memories:

As we sat down to enjoy our pancakes, my family would gather around the table, sharing stories and laughter. Each bite was a taste of happiness, a reminder that the simplest dishes often hold the most sentimental value. Even now, as I prepare these pancakes for my own family, I feel a sense of continuity, passing on the tradition and the love that comes with it.


Difficulty: 3/10
Classification: Main Dish

Cocoa Protein Pancakes are a delightful blend of flavors and memories, proving that food is not just sustenance but a way to connect with our past and present. Whether you're making them for the first time or the hundredth, these pancakes are sure to bring warmth and nostalgia to your kitchen. Enjoy the journey and the joy that comes with rediscovering this family favorite.

Read more about Appetizers

Read more about Main Dishes

Read more about Desserts

Italian Beef Braciole | Made by Meaghan Moineau

Italian Beef Braciole | Made by Meaghan Moineau

Savor the Flavors of Italy: How to Make Authentic Italian Beef Braciole


Description


Dive into the heart of Italian cuisine with our authentic Beef Braciole recipe. This savory dish, filled with rich flavors from prosciutto, salami, and Romano cheese, is perfect for a cozy family dinner or a special gathering. Join us as we explore not just the culinary steps but also the heartwarming family memories that make this dish unforgettable.


---


Introduction


The aroma of Italian Beef Braciole simmering in marinara sauce is enough to transport anyone straight to the sun-drenched kitchens of Italy. This classic Italian dish, known for its robust flavors and tender meat, holds a special place in my family's culinary traditions. Every time I prepare this dish, I am reminded of Sunday afternoons spent in my grandmother's kitchen, surrounded by laughter, love, and the irresistible scent of homemade cooking.


Ingredients


- Round Steak: The foundation of our dish, pounded thin to absorb all those delicious flavors.
- Prosciutto & Genoa Salami: Adds a layer of rich, savory taste.
- Fresh Bread Crumbs: For texture and to soak up juices.
- Italian Fresh Parsley: A hint of freshness.
- Romano Cheese: For a sharp and creamy finish.
- Olive Oil: To sear and enrich the beef.
- Garlic: Infuses the sauce with robust flavor.
- Cooked Marinara Sauce: The perfect base for simmering.
- Red Wine: Enhances the depth of the sauce.

Instructions


1. Prepare the Beef: Place the round steak between two sheets of plastic wrap. Using a meat tenderizer, gently pound it to about ½ inch thick, being careful to avoid tearing. Any tears can be patched with prosciutto or salami.
2. Layer the Fillings: Arrange the prosciutto and salami over the beef, ensuring any thin spots are covered. Sprinkle fresh bread crumbs evenly, leaving an inch border. Add a layer of Romano cheese and drizzle with 2 tablespoons of olive oil.
3. Roll and Tie: Fold the edges and roll the beef tightly. Secure with kitchen twine. Rub the roll with the remaining olive oil.
4. Sear the Roll: In a non-stick skillet over medium-high heat, sear the roll on all sides until browned.
5. Simmer in Sauce: In a Dutch oven, warm the marinara sauce with garlic and red wine. Add the browned braciole and bring to a gentle simmer. Cover and braise over low heat for about 3 hours or until tender.
6. Serve and Enjoy: Allow the braciole to cool slightly, then remove the string. Slice and serve with pasta or gnocchi, topped with sauce and Parmesan cheese.

Family Memory


The first time I made Italian Beef Braciole, I was 12 years old, standing on a stool next to my grandmother. I remember her gentle guidance, showing me how to roll the beef just right, and the stories she shared about her childhood in Italy. The kitchen was filled with the warmth of family, a pot of simmering sauce, and the sound of my grandmother's laughter. This dish, rich in tradition and flavor, is more than just a meal; it's a connection to my roots and a reminder of the love that binds us.


Difficulty: 7/10


This dish requires some skill in handling and rolling the meat, as well as patience in allowing the flavors to meld together during the long braising process.


Classification: Main Dish


Italian Beef Braciole is a hearty and satisfying main course, perfect for family dinners and special occasions.


---


Conclusion


Crafting Italian Beef Braciole is a rewarding culinary journey that combines rich flavors with cherished memories. It's a celebration of tradition, bringing the warmth and love of Italy into your home. Whether you're making it for the first time or revisiting a beloved family recipe, this dish is sure to become a favorite. Enjoy the process, savor the flavors, and create lasting memories with each tender bite.

Read more about Appetizers

Read more about Main Dishes

Read more about Desserts

Chipotle Cheese Stuffed Black Bean Burgers with Avocado Creme | Made by Meaghan Moineau

Chipotle Cheese Stuffed Black Bean Burgers with Avocado Creme | Made by Meaghan Moineau

Title: Savor the Spice: Chipotle Cheese Stuffed Black Bean Burgers with Avocado Crème


Description:

Dive into a world of zesty flavors and creamy textures with our Chipotle Cheese Stuffed Black Bean Burgers with Avocado Crème. This satisfying vegetarian dish combines the earthiness of black beans, the smoky heat of chipotle, and the lusciousness of cream cheese. Topped with a refreshing avocado crème, these burgers promise a taste adventure in every bite.

The Recipe: A Culinary Adventure


Ingredients:

- 1 can black beans, drained

- 1 small yellow onion, diced


- 1 cup diced mushrooms


- 1 egg


- 1/2 cup panko bread crumbs


- 1 tsp cumin


- 1 tsp chipotle chili powder


- Salt and pepper to taste


- Olive oil


- 1/4 cup cream cheese spread


- Hamburger buns


- Sliced cheese (optional)


- Fresh spinach and tomato slices


Avocado Crème:

- 1 ripe avocado


- 1/2 cup sour cream


- 1 tbsp lime juice


- Sea salt to taste


Instructions:

1. Prepare the Veggies: Heat a swirl of olive oil in a skillet over medium heat. Add the diced onions and mushrooms. Sauté until softened, seasoning with salt and pepper. Remove from heat and set aside.
2. Create the Burger Mix: In a medium bowl, mash the drained black beans with a fork. Stir in the sautéed onions and mushrooms, followed by the egg and panko bread crumbs. Mix in the cumin and chipotle chili powder until well combined.
3. Form the Patties: Divide the mixture into equal portions, shaping them into patties. Make a small indent in the center of each patty and add a spoonful of cream cheese spread. Carefully mold the patty around the cream cheese, ensuring it's sealed.
4. Cook the Patties: Heat a skillet over medium heat with a swirl of olive oil. Cook the patties in batches, about 4 minutes per side, until browned and cooked through. If desired, add sliced cheese on top during the last minute of cooking and cover the skillet to melt the cheese.
5. Prepare the Avocado Crème: In a food processor or blender, combine the avocado, sour cream, lime juice, and sea salt. Blend until smooth and creamy. Adjust seasoning to taste.
6. Assemble the Burgers: Place each hot cooked burger on an open toasted bun. Top with fresh spinach and tomato slices, and a generous scoop of avocado crème. Finish with the top bun and serve immediately.

A Nostalgic Family Memory:


Growing up, summer barbecues were more than just meals; they were family reunions where laughter filled the air and stories were shared over the grill's sizzling symphony. My grandmother, with her knack for inventive cooking, introduced these chipotle cheese-stuffed black bean burgers as a vegetarian twist to our traditional meat-heavy lineup. I remember her explaining how she discovered the idea while experimenting with her garden's harvest. The smoky aroma mingled with the scent of fresh-cut grass, as she deftly assembled each burger with love and precision. The addition of her special avocado crème was a revelation, a creamy, tangy topping that brought everything together. These burgers became a family favorite, a reminder of those warm summer days spent in the backyard, creating memories that would last a lifetime.


Difficulty Rating:

5/10 - Perfect for a home cook looking to impress without the stress.

Classification:

Main Dish

This recipe is not just a meal; it's an experience—a homage to flavors that bring people together and create lasting memories. Enjoy the adventure of cooking and savor every bite!

Read more about Appetizers

Read more about Main Dishes

Read more about Desserts

Stuffed zucchini with rice and mushroom | Made by Meaghan Moineau

Stuffed zucchini with rice and mushroom | Made by Meaghan Moineau

Title: Reliving Family Moments with Stuffed Zucchini Delight
Description: Discover the heartwarming story behind our Stuffed Zucchini with Rice and Mushroom recipe. This flavorful main dish combines fresh ingredients and cherished memories, offering a delightful culinary experience that resonates with every bite.

---


In the hustle and bustle of modern life, there’s nothing quite like a dish that transports you back to simpler times. Our Stuffed Zucchini with Rice and Mushroom is more than a recipe; it's a gateway to cherished family memories and the warmth of shared meals. This main dish, with a difficulty rating of 6 out of 10, beautifully marries the earthy flavors of mushrooms and fresh zucchini with the comforting notes of cheese and rice.


A Taste of Nostalgia


Growing up, my grandmother’s kitchen was the heart of our family. It was a place where stories were shared, and laughter echoed over the simmering pots. Every Sunday, the air would fill with the irresistible aroma of her signature stuffed zucchini. As a child, I would eagerly watch her deftly prepare the ingredients, mesmerized by her skill and love for cooking.


The ritual began with her selecting the freshest zucchinis from her garden, a task she deemed sacred. Her hands, though aged, moved with the grace of experience as she hollowed out the zucchinis, creating the perfect vessels for the savory filling. This was no ordinary dish; it was a celebration of flavors, a symphony of textures brought together by the rich tomato sauce that lovingly embraced each stuffed zucchini.


The Ingredients of a Memory


- Fresh Zucchinis: The canvas of our dish, bringing a fresh, garden-fresh taste.
- Rice: The heart of the stuffing, providing a comforting, starchy bite.
- Mushrooms: Offering an earthy depth that complements the zucchinis beautifully.
- Cheese: Melting into the filling, adding a creamy richness.
- Flour & Oil: Essential for binding and creating a light, crispy texture.
- Garlic & Red Onion: Aromatic essentials that infuse the dish with flavor.
- Bell Pepper: A colorful addition that adds a sweet, vibrant crunch.
- Salt & Tomato Sauce: The finishing touches, enhancing and enveloping each stuffed zucchini in a tangy embrace.

Bringing the Dish to Life


Although the full instructions can be found at myzucchinirecipes.com, the essence of this dish lies in its simplicity and the love with which it's made. As you prepare this recipe, let yourself be guided by the aromas and flavors, creating not just a meal, but a memory.


The Legacy Continues


Today, when I prepare Stuffed Zucchini with Rice and Mushroom, I feel my grandmother's presence in every step. It’s not just the taste that brings her back; it’s the act of creating, of sharing, and of remembering where we come from. This dish is more than a family favorite; it’s a legacy passed down through generations, a testament to the enduring power of food to connect us with those we love.


So, gather your ingredients, and embark on this culinary journey. As you savor each bite of this delicious main dish, may you feel the warmth of family and the echoes of laughter from kitchens past.

Read more about Appetizers

Read more about Main Dishes

Read more about Desserts

Chocolatey Overnight Oats with Strawberries | Made by Meaghan Moineau

Chocolatey Overnight Oats with Strawberries | Made by Meaghan Moineau

A Sweet Start to Your Day: Chocolatey Overnight Oats with Strawberries


Description: Discover the perfect blend of indulgence and nutrition with our Chocolatey Overnight Oats with Strawberries. This delightful recipe combines the rich flavors of cocoa and the natural sweetness of strawberries, creating a breakfast that feels like a treat yet fuels your day. Easy to prepare and full of wholesome ingredients, this dish will be a favorite for the entire family.

---


A Nostalgic Twist on Breakfast: Family Memories in a Jar


Growing up, breakfast was always a special time in our household. It was the one moment when the kitchen buzzed with the sound of clinking spoons and laughter, and the aroma of freshly prepared meals wafted through the air. Among the many beloved dishes, my grandmother's overnight oats held a special place in our hearts.


Every Sunday evening, my grandmother would gather my siblings and me around the kitchen table. We’d watch in awe as she expertly mixed the ingredients, her hands moving with the grace and precision that only years of practice could perfect. She would regale us with stories of her childhood, tales of summer mornings spent picking strawberries at the local farm. Those strawberries, juicy and red, were the crowning glory of our breakfast oats.


My grandmother always insisted on using cocoa powder, explaining that the chocolatey richness reminded her of the sweet treats her mother used to make on special occasions. As we layered the oats and strawberries into jars, she would remind us that food was more than just sustenance; it was a way to cherish memories and create new ones.


Fast forward to today, and I find myself recreating this cherished recipe for my own family. Each bite transports me back to those warm kitchen gatherings, filled with love, laughter, and the comforting taste of chocolate and strawberries. This dish is not just a breakfast—it's a tradition passed down through generations, a testament to the enduring bond of family.


---


Chocolatey Overnight Oats with Strawberries Recipe


Ingredients:

- 1 cup oatmeal

- 1 ½ cups almond milk


- 2 tablespoons chia seeds


- 2 tablespoons cocoa powder


- ¼ cup non-fat Greek yogurt


- 1-2 tablespoons agave nectar (to taste)


- Fresh strawberries, sliced


Instructions:

1. In a mixing bowl, combine oatmeal, almond milk, chia seeds, cocoa powder, non-fat Greek yogurt, and agave nectar. Stir until well mixed.

2. In a jar or airtight container, spoon a layer of the oatmeal mixture.


3. Add a layer of sliced strawberries on top.


4. Repeat with another layer of oatmeal and strawberries.


5. Finish with a final layer of the oatmeal mixture.


6. Seal the container and refrigerate overnight.


7. In the morning, enjoy your delicious, ready-to-eat breakfast!


Difficulty Rating: 2/10


Classification: Dessert


---


This delightful recipe is not only easy to make but also a beautiful way to start your day with a touch of nostalgia. Whether you are reliving cherished family memories or creating new ones, these Chocolatey Overnight Oats with Strawberries are sure to become a beloved staple in your home. Enjoy the perfect blend of flavors and the heartwarming reminder that the best meals are those shared with loved ones.

Read more about Appetizers

Read more about Main Dishes

Read more about Desserts

Classic French Onion Soup | Made by Meaghan Moineau

Classic French Onion Soup | Made by Meaghan Moineau

Title: Savoring Tradition: The Art of Crafting Classic French Onion Soup
Description: Uncover the rich, aromatic layers of Classic French Onion Soup, a comforting embrace of caramelized onions and melted gruyere cheese. Join us as we delve into a nostalgic family tradition, sharing heartwarming memories and a step-by-step guide to mastering this quintessential French delicacy. Perfect as a comforting appetizer, this dish is sure to bring a touch of elegance and warmth to your table.

---


The Aroma of Memories: Crafting Classic French Onion Soup

There’s something uniquely comforting about the rich, savory aroma of Classic French Onion Soup simmering on the stove. For many, it conjures memories of cozy family gatherings and heartwarming conversations. In our family, this dish is more than just a meal; it’s a cherished tradition passed down through generations, each spoonful steeped in love and nostalgia.


I vividly remember my grandmother’s kitchen, the air thick with the scent of caramelized onions and the subtle tang of sherry. She would spend hours perfecting her French Onion Soup, her dedication evident in every meticulous stir of the pot. The kitchen, bathed in a golden glow, became a sanctuary where stories were shared, laughter echoed, and bonds were strengthened.


Ingredients:

- Salted butter


- 4 large yellow onions, thinly sliced


- 2 tablespoons flour


- 1/2 cup sherry


- 6 cups beef broth


- 4 sprigs fresh thyme


- 2 sprigs fresh parsley


- 1 bay leaf


- Salt and pepper to taste


- 1 French crusty baguette, sliced


- 1 cup shredded gruyere cheese


Instructions:
1. Begin with the Onions: Preheat your oven to 400°F (200°C). In a large Dutch oven, melt the butter over medium heat. Add the sliced onions and sprinkle with flour. Reduce the heat to medium-low, allowing the onions to cook slowly for about 45 minutes. Stir occasionally, ensuring they become tender and golden in color. If they begin to cook too quickly, lower the heat further.
2. De-glaze and Simmer: Once the onions reach the desired caramelization, de-glaze the pan with sherry, scraping up any flavorful bits from the bottom. Pour in the beef broth and bring the mixture to a boil over medium heat.
3. Infuse with Flavor: Add the fresh thyme, parsley, bay leaf, salt, and pepper, adjusting to taste. Reduce the heat and let the soup simmer gently for 15 minutes, allowing the flavors to meld beautifully.
4. Prepare the Bread: While the soup simmers, prepare the bread. Spray a cookie sheet with cooking spray. Butter the baguette slices and bake them in the preheated oven for 5-10 minutes until they are very dry and slightly toasted. Set aside.
5. Assemble and Serve: Remove the herb stalks and bay leaf from the soup. Ladle portions into four oven-safe ramekins. Top each with a slice of crusty French bread and a generous sprinkle of shredded gruyere cheese. Place the ramekins on a cookie sheet and bake uncovered at 400°F for 5-10 minutes until the cheese is bubbling. For a perfect finish, broil for one minute to achieve a beautifully browned top. Serve warm and savor the memories infused in each bite.
A Family Tradition

Each time I prepare this dish, I’m transported back to those cherished moments in my grandmother’s kitchen. The soup, with its rich flavors and comforting warmth, serves as a culinary bridge between past and present, connecting our family across generations. It’s more than just a meal; it’s a celebration of tradition, love, and the simple joys of sharing good food with loved ones.


Difficulty Rating: 6/10
Classification: Appetizer

Embark on this flavorful journey and experience the joy of crafting Classic French Onion Soup, a dish that promises to warm your heart and soul, just as it has ours for many years.

Read more about Appetizers

Read more about Main Dishes

Read more about Desserts

Sex in a glass | Made by Meaghan Moineau

Sex in a glass | Made by Meaghan Moineau

Title: Indulge in Nostalgia with "Sex in a Glass": A Decadent Dessert Delight
Description:

Dive into a world of creamy indulgence with "Sex in a Glass," a dessert that's not just rich in flavor but rich in memories. This delightful concoction brings together the smoothness of dulce de leche ice cream, the boldness of espresso, and the sweetness of caramel for a sensory experience that is as unforgettable as the family moments it evokes. Discover how to craft this simple yet sophisticated sweet and relive the warmth of cherished family gatherings.


---


A Nostalgic Sip: Reliving Family Memories with "Sex in a Glass"

The clinking of glasses, the gentle hum of conversation, and the scent of espresso wafting through the air—all these elements bring me back to those cherished Sunday afternoons at my grandmother's house. It was a time when family gathered around the long dining table, a mosaic of mismatched chairs pulled together from different rooms, creating a circle of love and laughter.


After a hearty meal, my grandmother would disappear into the kitchen, only to return with her signature dessert: "Sex in a Glass." It was a tradition, a sweet ending to every family gathering, and for us, it was more than just a dessert. It was a celebration in a glass, a ritual that marked the culmination of a day spent with loved ones.


As she meticulously poured caramel dessert topping into each glass, the anticipation grew. Next came the cream, swirling in a gentle dance with the caramel, creating a canvas for the star ingredient—dulce de leche ice cream. The rich, creamy texture was the perfect counterpoint to the bold espresso, which she would brew fresh, allowing it to cool just enough before adding it to the mix. The final touch was a sprinkle of sugar, a nod to the sweetness of life itself.


This dessert, "Sex in a Glass," was more than just a treat. It was a bridge to the past, a reminder of simpler times when the world seemed to pause, if only for a moment, to savor the richness of family and flavor.


The Recipe: A Simple Yet Sophisticated Dessert
Ingredients:

- Caramel dessert topping


- Cream


- Dulce de leche ice cream


- Espresso


- Sugar


- Water


Instructions:

1. Begin by making a strong espresso. Bring water to a boil and pour it over the espresso grounds. Allow it to steep and set aside to cool.


2. Once the espresso has cooled, add the melted dulce de leche ice cream, blending the flavors into a harmonious mix.


3. In a glass, drizzle caramel dessert topping.


4. Pour in the cream, followed by the espresso and ice cream mixture.


5. Stir gently and top with a sprinkle of sugar.


6. Serve immediately and enjoy the luxurious blend of flavors.


Difficulty Level: 3/10
Classification: Dessert

Whether you're looking to recreate a beloved family tradition or simply searching for a new dessert to savor, "Sex in a Glass" is a delightful choice. Its simplicity belies the depth of flavor it offers, making it the perfect dessert to share with those you hold dear. So, gather your loved ones, raise your glasses, and toast to the sweet moments that linger long after the last sip.

Read more about Appetizers

Read more about Main Dishes

Read more about Desserts

Spinach & Ham Quiche | Made by Meaghan Moineau

Spinach & Ham Quiche | Made by Meaghan Moineau

Title: A Taste of Home: Crafting the Perfect Spinach & Ham Quiche
Description: Discover the delightful Spinach & Ham Quiche recipe that brings warmth and nostalgia to your kitchen. With a blend of tender spinach, savory ham, and rich cheddar cheese encased in a golden crust, this dish is perfect for any occasion. Easy to prepare yet bursting with flavor, it's a family favorite that will leave everyone asking for seconds.

---


A Taste of Home: Crafting the Perfect Spinach & Ham Quiche

There's something undeniably comforting about a warm, savory quiche fresh out of the oven. For me, the Spinach & Ham Quiche is more than just a dish; it's a cherished family memory that brings a sense of nostalgia every time I prepare it.


Growing up, weekends at my grandmother's house were always filled with the tantalizing aromas of her kitchen creations. One of my fondest memories is waking up to the smell of her Spinach & Ham Quiche baking in the oven. It was a dish that brought the whole family together around the table, sharing stories and laughter.


Ingredients:

- 2 tablespoons butter


- 1 cup shredded cheddar cheese


- 4 large eggs


- 1 cup shredded picnic ham


- 2 tablespoons ice water


- 1 cup milk


- 1/4 teaspoon white pepper


- 1 1/2 cups plain flour


- 1/2 teaspoon salt


- 2 shallots, finely chopped


- 1 cup shredded spinach


- 1/2 cup whipping cream


Instructions:

1. Preheat your oven to 180°C (356°F).


2. In a skillet, melt the butter and add a little oil. Fry the shallots until they are fragrant and golden brown.


3. Add the shredded ham to the skillet and fry for a few minutes, then add the spinach and continue to fry until the spinach is cooked through. Set aside.


4. In a measuring cup, combine the whipping cream and milk. If you prefer, you can use all 160ml of milk and omit the cream.


5. Lightly beat the eggs and add them to the milk mixture along with a pinch of salt. Mix well.


6. Spread the cooked ham and spinach mixture evenly over the bottom of a prepared tart pan. Sprinkle with shredded cheddar cheese and a dash of white pepper.


7. Gently pour the egg and milk mixture over the ham, spinach, and cheese.


8. Bake in the preheated oven for 40 minutes or until the quiche is set and golden brown on top.


9. Serve hot or warm, and enjoy a slice of nostalgia.


As I prepare this quiche today, I can't help but think of my grandmother's laughter echoing through the kitchen. Her love and warmth infused every bite, making each meal a treasured memory.


Difficulty: 4/10
Classification: Main Dish

This Spinach & Ham Quiche is a delightful main dish that's easy to prepare, making it perfect for both novice and experienced cooks. The combination of flavors and textures, along with the memories it invokes, ensures that it will remain a family favorite for generations to come. Whether you're serving it for brunch or a light dinner, this quiche is sure to bring a little taste of home to your table.

Read more about Appetizers

Read more about Main Dishes

Read more about Desserts

Cauliflower and Broccoli Gratin With Camembert Cheese | Made by Meaghan Moineau

Cauliflower and Broccoli Gratin With Camembert Cheese | Made by Meaghan Moineau

Title: A Taste of Home: Cauliflower and Broccoli Gratin with Camembert Cheese
Description: Dive into the comforting embrace of a classic family favorite, Cauliflower and Broccoli Gratin with Camembert Cheese. This delectable dish combines creamy Camembert with wholesome veggies, crowned with a golden breadcrumb crust. Embark on a culinary journey that blends nostalgia with modern flavors, perfect for a cozy dinner or as a star side dish.

---


There's something inherently comforting about a warm, cheesy gratin. For me, this Cauliflower and Broccoli Gratin with Camembert Cheese isn't just a dish—it's a cherished memory, lovingly resurrected from my childhood. Growing up, my grandmother had a way of turning simple ingredients into something magical, and this gratin was her pièce de résistance.


Ingredients:

- 1 head of cauliflower, cut into florets


- 1 head of broccoli, cut into florets


- 3 tablespoons of butter


- 2 tablespoons of flour


- 2 cups of milk


- 200g Camembert cheese, cut into cubes (plus extra for topping)


- Salt and pepper to taste


- 1 cup of breadcrumbs


Instructions:
1. Preheat Your Oven: Set your oven to 180°C (350°F) to get it ready for your delicious creation.
2. Parboil the Vegetables: In a large pot, parboil the cauliflower and broccoli for about 10-15 minutes, just until tender. Drain and set aside.
3. Prepare the Cheese Sauce: In a medium saucepan, melt the butter over medium heat. Stir in the flour to form a smooth paste. Gradually add milk, stirring constantly until thickened. Add the cubed Camembert and stir until melted and smooth. Season with salt and pepper to your liking.
4. Combine and Assemble: Gently combine the cheese sauce with the parboiled vegetables. Transfer the mixture to a baking dish and top with extra Camembert cubes and breadcrumbs for that perfect crust.
5. Bake to Perfection: Place the dish in the oven and bake for 20 minutes or until the top is golden brown.
A Family Memory

Every Sunday, our family gathered at my grandmother's house for dinner. The air was filled with laughter, stories, and the mouth-watering aroma of her legendary gratin. I remember sitting at the kitchen table, watching her skillfully layer the dish with love and attention. Her secret was the Camembert cheese, which she insisted added an extra layer of creamy, tangy richness that no other cheese could match.


As a child, helping her sprinkle the breadcrumbs was my self-appointed task. I took immense pride in ensuring every inch was evenly covered. When the gratin emerged from the oven, bubbly and golden, it was the centerpiece of our meal—served with stories from the past week and dreams for the future.


Difficulty Rating: 4/10
Classification: Main Dish

This Cauliflower and Broccoli Gratin with Camembert Cheese is more than just a recipe; it's a family heirloom, passed down with love and cherished memories. Whether you're recreating a piece of your past or crafting new traditions, this dish promises warmth, comfort, and a touch of elegance to any meal. Enjoy the journey of flavors, and may it bring you the same joy it has brought my family for generations.

Read more about Appetizers

Read more about Main Dishes

Read more about Desserts

Penne Pasta with Broccoli and Cheese | Made by Meaghan Moineau

Penne Pasta with Broccoli and Cheese | Made by Meaghan Moineau

Title: A Taste of Comfort: Penne Pasta with Broccoli and Cheese
Description: Dive into the comforting flavors of our Penne Pasta with Broccoli and Cheese. This delightful main dish combines the wholesome goodness of broccoli with the creamy richness of Parmesan cheese, all brought together with perfectly cooked penne pasta. Read on to discover a nostalgic family story connected to this delightful dish and learn how to easily recreate this beloved recipe at home.

---


There's something inherently comforting about a bowl of pasta, and my family's recipe for Penne Pasta with Broccoli and Cheese is no exception. This dish has been a staple in our home for as long as I can remember, serving as a warm embrace on chilly evenings or a quick weeknight meal that never fails to satisfy.


A Nostalgic Family Memory:

Growing up, Sunday dinners were a cherished tradition in our household. My grandmother, with her gentle hands and warm smile, would often prepare her signature Penne Pasta with Broccoli and Cheese. The aroma of garlic sautéing in the kitchen would fill the house, drawing us all together in eager anticipation.


One particular Sunday stands out in my memory. It was a blustery autumn evening, and the wind howled outside as leaves danced across the yard. Inside, the kitchen was a haven of warmth and coziness. I remember sitting at the table, eagerly watching my grandmother as she expertly stirred the bubbling skillet of broccoli and broth. She'd let me sprinkle the Parmesan cheese over the pasta, a task I took on with great pride, knowing it was the final touch to this much-loved dish.


As we gathered around the table, each spoonful of that creamy, cheesy pasta was like a hug from the inside. The simple ingredients, brought together with love and care, created a meal that was more than just sustenance; it was a connection to family, tradition, and home.


The Recipe:
Ingredients:

- 12 oz penne pasta


- 4 cups water


- 1 cup low sodium chicken broth


- 2 cups frozen broccoli florets


- 1 teaspoon dried basil leaves


- 1/2 teaspoon ground pepper


- 2 cloves garlic, minced


- 1/2 cup grated Parmesan cheese


Instructions:

1. In a large pot, bring the water to a boil. Add the penne pasta and cook until done, about 6 minutes. Drain and set aside.


2. Meanwhile, in a large skillet over medium heat, combine the chicken broth, basil, black pepper, garlic, and frozen broccoli florets. Bring to a boil.


3. Reduce the heat to low, cover, and cook until the broccoli is tender-crisp, about 5 minutes.


4. Add the cooked pasta to the broccoli mixture, tossing to coat evenly.


5. Sprinkle in the Parmesan cheese, stirring until the cheese is melted and everything is well combined.


6. Serve immediately and enjoy the comforting goodness of this dish.


With just a handful of ingredients and simple steps, this recipe is easy to prepare, making it perfect for busy weeknights or a cozy family dinner.


Nutritional Information (per serving):

- Calories: 235


- Fat: 2g


- Cholesterol: 5mg


- Sodium: 138mg


- Carbohydrates: 40.3g


- Fiber: 8.5g


- Sugar: 3.3g


- Protein: 12g


Difficulty Rating: 3/10 - This recipe is straightforward and beginner-friendly.
Classification: Main Dish

Whether it's a memory of a beloved family tradition or simply a new addition to your weekly meal rotation, Penne Pasta with Broccoli and Cheese is sure to become a favorite in your home. Enjoy the comforting taste of nostalgia and the joy of sharing a meal with loved ones.

Read more about Appetizers

Read more about Main Dishes

Read more about Desserts

Peanut Butter And Chocolate Oatmeal | Made by Meaghan Moineau

Peanut Butter And Chocolate Oatmeal | Made by Meaghan Moineau

Title: A Sweet Nostalgia: The Comfort of Peanut Butter and Chocolate Oatmeal
Description: Dive into the delightful blend of peanut butter and chocolate with this simple yet satisfying oatmeal recipe. Perfect for breakfast or a comforting dessert, this quick dish is a trip down memory lane with every bite.

---


In the hustle and bustle of modern life, finding moments of comfort and nostalgia can be a precious gift. The smell of toasting oats, the rich aroma of cocoa, and the creamy allure of peanut butter can instantly transport you back to simpler times. Today, I want to share a recipe that not only warms your belly but also your heart: Peanut Butter and Chocolate Oatmeal. This dish is more than just a meal; it's a memory, a whisper of the past, wrapped in the cozy embrace of familiar flavors.


Ingredients:

- 1/2 cup cooking oats


- 1 tablespoon unsweetened cocoa powder


- 1 tablespoon agave syrup


- 1 tablespoon crunchy peanut butter


- 1 cup non-fat milk


Instructions:

1. Combine all the ingredients in a small bowl or mug.


2. Microwave for 1 minute.


3. Stir well and enjoy!


4. For an extra crunch, garnish with crushed peanuts or almonds.


*Rate of Difficulty: 2/10*


*Classification: Dessert*


This recipe is as easy as it is comforting, making it perfect for those mornings when you need a quick yet indulgent breakfast, or for those quiet evenings when you're craving a sweet dessert. The ease of preparation, a mere two out of ten on the difficulty scale, means it’s accessible to everyone, whether you’re a seasoned chef or a kitchen novice.


A Nostalgic Tale:

Every time I make this dish, I am transported back to my grandmother's cozy kitchen. As a child, her home was a haven of warmth and love, and the smell of oats and cocoa simmering on the stove was a familiar melody. On chilly winter mornings, she would prepare a pot of oatmeal, the kitchen windows fogging up from the steam. I remember sitting at her small, round table, legs swinging, waiting eagerly for my bowl of comfort.


My grandmother had a knack for turning simple ingredients into something magical, and her secret was always a generous dollop of peanut butter. She’d swirl it into the steaming oats, the creamy texture melding perfectly with the rich cocoa. Sometimes, she’d sprinkle crushed nuts on top, adding a delightful crunch that made every spoonful a new adventure.


This Peanut Butter and Chocolate Oatmeal recipe is my homage to those cherished mornings, a gentle reminder that sometimes the simplest dishes carry the most profound memories. Whether you're sharing it with family or enjoying a quiet moment alone, I hope this dish brings you the same warmth and joy it has always brought me.


Conclusion:

In a world full of complexities, it's the simple pleasures that often bring the most happiness. This Peanut Butter and Chocolate Oatmeal is not just a recipe; it's a passport to treasured memories, a taste of home, and an embrace from the past. Whether you're starting your day or winding down, indulge in this delightful dessert and savor the nostalgia it brings.

Read more about Appetizers

Read more about Main Dishes

Read more about Desserts

Pumpkin gnocchi with basil and Parmesan | Made by Meaghan Moineau

Pumpkin gnocchi with basil and Parmesan | Made by Meaghan Moineau

Title: Embrace Autumn with Homemade Pumpkin Gnocchi: A Nostalgic Family Recipe
Description: Dive into the cozy flavors of fall with our delightful Pumpkin Gnocchi with Basil and Parmesan. This recipe, a cherished family favorite, combines the earthy sweetness of pumpkin with aromatic basil and the rich saltiness of Grana Padano cheese. Follow along for step-by-step instructions, a heartwarming family story, and a taste of autumn in every bite.

---


As the golden leaves of autumn blanket the ground, there's nothing quite like the comforting embrace of a warm, homemade dish to fill the home with joy. One of my fondest memories of this season involves gathering around the kitchen table with my family, hands dusted with flour, as we crafted our beloved Pumpkin Gnocchi with Basil and Parmesan.


This dish is more than just a meal; it's a celebration of togetherness and tradition, passed down through generations. I remember chilly afternoons in my grandmother's kitchen, the scent of pumpkin and fresh basil dancing in the air as we worked side by side. Her stories of childhood autumns spent on the family farm always added a sprinkle of nostalgia to our culinary endeavors.


Ingredients:

- 1 medium-sized pumpkin


- 2 whole eggs


- Sea salt, to taste


- Freshly ground black pepper, to taste


- A handful of fresh basil leaves, chopped


- 2 cups wheat flour (plus extra for dusting)


- 1/2 cup corn flour


- Olive oil, for sautéeing


- 1 cup Grana Padano cheese, grated


- Additional fresh basil leaves, for garnish


Instructions:

1. Begin by separating the meat from the pumpkin and chopping it into a smooth puree. In a large mixing bowl, combine the pumpkin puree with the eggs, stirring until well mixed.


2. Season the mixture with sea salt, black pepper, and freshly chopped basil. Gradually incorporate the wheat and corn flours, kneading until a soft dough forms. Depending on the moisture of your pumpkin, you may need to adjust the flour quantity.


3. Once your dough is ready, divide it into equal rolls, approximately 3 cm thick and 20 cm long. Cut each roll into 2 cm pieces, forming the gnocchi.


4. Bring a large pot of salted water to a boil. Cook the gnocchi in batches; they are done when they float to the surface. Use a slotted spoon to remove them.


5. For a finishing touch, heat olive oil in a pan and gently sauté the cooked gnocchi until they develop a light golden crust.


6. Serve your gnocchi hot, generously sprinkled with Grana Padano cheese and garnished with fresh basil leaves.


Difficulty Rating: 6/10
Classification: Main Dish

Every bite of this Pumpkin Gnocchi is a journey back to those family afternoons, where laughter echoed and the world outside seemed to pause. The combination of creamy pumpkin, fragrant basil, and savory cheese is a testament to the magic that happens when tradition meets culinary creativity. Whether you're making it for a special occasion or a cozy weeknight dinner, this dish is sure to bring warmth and joy to your table.


As you embark on your own gnocchi-making adventure, I hope it becomes a cherished part of your family's autumn traditions, just as it has been for mine. Happy cooking!

Read more about Appetizers

Read more about Main Dishes

Read more about Desserts

Farfalle with Peas, Ham and Cream | Made by Meaghan Moineau

Farfalle with Peas, Ham and Cream | Made by Meaghan Moineau

Title: A Taste of Nostalgia: Farfalle with Peas, Ham, and Cream
Description: Dive into the comforting embrace of a classic pasta dish, Farfalle with Peas, Ham, and Cream. This rich and creamy delight not only tantalizes your taste buds but also evokes precious family memories. Whether you're a seasoned chef or a kitchen novice, this main dish is a breeze to whip up, with a difficulty rating of just 3 out of 10. Join me as I share a cherished family recipe that brings warmth and love to every bite.

---


A Taste of Nostalgia: Farfalle with Peas, Ham, and Cream

There's something truly special about a dish that transports you back to simpler times, where every bite is infused with love and nostalgia. For me, Farfalle with Peas, Ham, and Cream is much more than just a meal; it is a cherished memory served on a plate.


Ingredients:

- Butter


- Diced ham


- Farfalle pasta


- Canned heavy cream


- Parmesan cheese


- Frozen peas


- Salt and pepper


Instructions:

1. Begin by cooking the farfalle pasta according to the package directions. While the pasta boils, take a moment to reminisce about family gatherings and the tantalizing aromas that filled the kitchen.


2. In a skillet, melt butter over medium heat. Add the frozen peas and diced ham, sautéing for about 5 minutes. As the peas and ham sizzle, they release a fragrant aroma that fills the kitchen, reminiscent of those comforting Sunday dinners at grandma's house.


3. Pour in the canned heavy cream, adding a generous pinch of salt and pepper. Allow the mixture to cook over medium heat for 5 to 10 minutes, stirring occasionally, until the cream thickens slightly. This creamy concoction is the heart of the dish, wrapping each farfalle bow in a velvety hug.


4. Once the pasta is cooked and drained, return it to the pot. Pour the creamy sauce over the pasta, stirring well to ensure every bowtie is coated in the luscious mixture.


5. Finally, sprinkle in the Parmesan cheese, letting it melt into the sauce, adding a touch of savory richness.


Serve this delightful dish nice and hot, and watch as it brings smiles to the faces of your loved ones.
A Family Memory:

Growing up, Sundays at my grandparents' house were a beloved tradition. The kitchen was always bustling, with pots and pans clattering and the aroma of home-cooked meals enveloping every corner. My grandmother, an expert in creating simple yet delicious dishes, would often prepare Farfalle with Peas, Ham, and Cream. I remember sitting around the table with my family, eagerly awaiting dinner as grandma shared stories of her childhood. This dish was always the star of the show, its creamy richness a comforting embrace that brought us all together.


Difficulty Rating: 3/10
Classification: Main Dish

In just a few simple steps, you can recreate this heartwarming family recipe in your own kitchen. Perfect for any occasion, Farfalle with Peas, Ham, and Cream is a dish that promises to delight your palate and warm your heart, just as it has done for my family for generations. Enjoy this culinary journey down memory lane, and may it bring as much joy to your table as it has to mine.

Read more about Appetizers

Read more about Main Dishes

Read more about Desserts

Banana Pudding Cake | Made by Meaghan Moineau

Banana Pudding Cake | Made by Meaghan Moineau

Banana Pudding Cake: A Nostalgic Dessert Delight


Description: Dive into the creamy and rich layers of Banana Pudding Cake, a dessert that perfectly marries the flavors of ripe bananas, velvety custard, and luscious whipped cream. This recipe is a delightful journey that not only satisfies your sweet tooth but also brings back cherished family memories.

---


A Slice of Nostalgia: The Banana Pudding Cake Story


There's something uniquely comforting about desserts that carry a sense of nostalgia. For me, the Banana Pudding Cake isn't just a treat; it's a time machine that takes me back to my grandmother's cozy kitchen. I remember the warm summer afternoons spent there, the windows open, letting in a gentle breeze mixed with the sweet aroma of bananas and vanilla.


Every family gathering was incomplete without this cake. My grandmother had a magical way of making everyone feel welcome, and her Banana Pudding Cake was the star of every reunion. As a child, I would watch her with wide eyes as she carefully layered the cake, custard, and bananas with the precision of an artist. She'd always let me sprinkle the crumbled vanilla wafers—a task I took on with great pride.


One memorable summer, my little brother decided to be my grandmother's "official helper." His enthusiasm was infectious, and he took his role very seriously, even if it meant sneaking a few banana slices into his mouth when he thought no one was looking. We laughed, chatted, and enjoyed the simple joy of creating something delicious together.


The cake wasn't just a dessert; it was a symbol of love, laughter, and family unity. Even now, whenever I make this Banana Pudding Cake, I feel a connection to those joyful days, making it a perfect recipe to share at gatherings or to simply enjoy a taste of the past.


---


Ingredients


- 1 ½ teaspoons baking powder


- 3 ripe bananas, sliced


- 2 tablespoons cocoa powder


- 4 egg yolks


- 6 eggs (4 separated, 2 whole)


- 1 cup all-purpose flour


- 1 cup heavy whipping cream


- 2 cups milk


- 1 ½ cups powdered sugar


- ¼ teaspoon salt


- 1 package vanilla pudding mix


- 1 ½ cups sugar


- 2 teaspoons vanilla extract


- 1 box vanilla wafers, crumbled


- Whipped cream (for topping)


---


Instructions


1. Prepare the Cake Batter

- In a large bowl, beat egg yolks with sugar and set aside.


- In the bowl of an electric mixer, whip egg whites until stiff. Add baking powder, processed wafers, and cocoa to the egg yolk mixture.


- Drop about 1/4 of the egg whites into the larger bowl and fold lightly. Fold in the remaining whites carefully.


- Line a jellyroll sheet pan with parchment paper covering all sides and spray with non-stick floured baking spray. Spread cake batter onto paper, covering the entire pan.


- Bake in a preheated oven at 350°F (175°C) for 15-20 minutes. Let cake cool completely on the sheet (at least 30 minutes to an hour).


2. Make the Custard

- As the cake cools, mix sugar, flour, and salt in the top of a double boiler. Blend in egg yolks and milk.


- Cook, uncovered, over boiling water, stirring constantly for 10 to 12 minutes or until thickened. Remove from heat and stir in vanilla.


3. Assemble the Cake

- Once the cake is cooled, carefully lift the parchment paper, remove from the pan, and place on a flat surface. Cut into three even pieces starting from the short end.


- Place the first layer of cake on a serving platter. Spread half of the custard over the top, then cover with one third of the banana slices. Sprinkle with one third of the crumbled wafers.


- Top with the next piece of cake and repeat, reserving a few bananas and crumbled cookies.


- Spread the final amount of custard onto the top layer of cake, and refrigerate the whole cake for at least 2 hours or until ready to serve.


4. Make the Whipped Cream Topping

- Just before serving, make the whipped cream topping. Combine all ingredients together in a large mixing bowl until cream thickens and becomes stiff.


- Spread whipped cream on the cake and top with remaining banana and wafers.


*Pro Tip:* To keep the bananas fresh and prevent browning, sprinkle them with a bit of lemon juice and store in an airtight container until ready to use.


---


Difficulty: 6/10
Category: Dessert

Whether you're looking to create new memories or relive old ones, this Banana Pudding Cake is sure to become a beloved addition to your dessert repertoire. Enjoy every slice with the warmth of family and the sweetness of nostalgia.

Read more about Appetizers

Read more about Main Dishes

Read more about Desserts

Chicken Lo Mein | Made by Meaghan Moineau

Chicken Lo Mein | Made by Meaghan Moineau

Title: Savoring Memories: Crafting the Perfect Chicken Lo Mein


Description:

Explore the delightful simplicity of Chicken Lo Mein, a family-favorite dish that blends savory flavors with cherished memories. This easy-to-follow recipe will transport you back to warm family dinners and create new culinary traditions. Discover the joy of making this main dish with a dash of nostalgia.

---


Chicken Lo Mein Recipe: A Culinary Journey Down Memory Lane

There's something magical about the aroma of Chicken Lo Mein wafting through the kitchen. It takes me back to bustling family gatherings and the comforting clatter of chopsticks against porcelain bowls. This dish, a staple in our household, was always a symbol of togetherness and joy.


Difficulty Rating: 3/10
Category: Main Dish

Ingredients:


- 2 tablespoons peanut oil


- 2 cloves garlic, minced


- 1 tablespoon fresh ginger, grated


- 1 pound skinless, boneless chicken breast, thinly sliced


- 1 cup carrot, julienned


- 1 cup bok choy, chopped


- 1 cup mushrooms, sliced


- 1 cup bean sprouts


- 4 scallions, sliced


- 1/2 cup low sodium chicken broth


- 3 tablespoons low sodium soy sauce


- 8 ounces cooked spaghetti


Instructions:


1. Heat the Peanut Oil: In a large nonstick skillet, heat the peanut oil over medium heat. Add the minced garlic and grated ginger, cooking for about 1 minute until fragrant.
2. Cook the Chicken and Carrots: Increase the heat to medium-high. Add the sliced chicken breast and julienned carrot to the skillet. Cook, stirring occasionally, until the chicken is lightly browned, about 2 minutes.
3. Incorporate Vegetables: Add bok choy, mushrooms, bean sprouts, and scallions to the skillet. Stir constantly, cooking until the carrot is tender-crisp, approximately 3 minutes.
4. Add Noodles and Sauce: Stir in the cooked spaghetti, low sodium chicken broth, and soy sauce. Cook everything together until the noodles are heated through, about 1 minute.
5. Serve and Enjoy: Serve hot, garnished with additional scallions if desired, and enjoy a meal that feels like a warm hug from the past.

---


A Nostalgic Family Memory


Every time I prepare Chicken Lo Mein, I'm transported back to my grandmother's kitchen. Her culinary skills were unmatched, and the kitchen was her domain—a place where love was the secret ingredient in every dish. I remember standing on a stool beside her, barely tall enough to see over the counter, watching in awe as she effortlessly brought ingredients to life.


The sizzle of chicken hitting the hot skillet, the vibrant colors of fresh vegetables, and the rhythmic clinking of her wooden spoon were the soundtrack of my childhood. Each bite of her Chicken Lo Mein was a medley of flavors that mirrored the harmony in our family. The dish was more than sustenance; it was a testament to the joy of sharing and the bonds that food can forge.


As I cook this dish today, I feel her presence, guiding my hands and reminding me that meals are more than just fuel—they're a way to connect with loved ones, past and present. Chicken Lo Mein isn't just a recipe; it's a cherished family tradition, a dish that continues to bring us together, one delicious bite at a time.


In creating this dish, I invite you to form your own memories, to gather with those you love, and to celebrate the timeless ritual of sharing a meal together. Enjoy every moment, every flavor, and every memory made.

Read more about Appetizers

Read more about Main Dishes

Read more about Desserts