Creamy Polenta with Egg, Arrabiata & Bacon | Made by Meaghan Moineau

Creamy Polenta with Egg, Arrabiata & Bacon | Made by Meaghan Moineau

Title: Savor the Comfort: Creamy Polenta with Egg, Arrabiata & Bacon
Description: Dive into a world of creamy comfort with our Creamy Polenta with Egg, Arrabiata & Bacon recipe. This flavorful blend of polenta, rich cheeses, and crispy bacon, topped with a perfectly cooked egg, is sure to become a family favorite. With a touch of nostalgia and a hint of spice, this dish is as much about the memories it evokes as it is about its tantalizing taste. Easy to make yet packed with flavor, this main dish is perfect for a cozy weekend brunch or a hearty dinner.

---


When the winter chill wraps its icy fingers around our home, I find solace in the warmth of the kitchen, where hearty aromas mingle in the air. My mind drifts back to Sunday mornings with my grandmother, her hands deftly working over the stove, a ritual as comforting as the dish she prepared – a creamy polenta that was as much a cure for the cold as it was a feast for the soul. This Creamy Polenta with Egg, Arrabiata & Bacon recipe is a loving nod to those cherished memories.


Ingredients:

- Bacon


- Cream cheese


- Eggs


- Fresh parsley


- Goat cheese


- Olive oil


- Polenta


- Black salt & pepper


Instructions:
1. Preheat and Prepare: Preheat your oven to 425 degrees F. Prepare a medium saucepan by bringing 4 cups of water to a boil. Gradually whisk in the polenta, ensuring a smooth mix with no lumps. Allow it to simmer over medium-low heat for 30 minutes, stirring occasionally.
2. Incorporate the Cheeses: Once the polenta has reached a tender and thick consistency, stir in the goat cheese and cream cheese until fully melted and incorporated. Season with salt and pepper to taste.
3. Crisp the Bacon: Arrange the bacon on a parchment-lined baking sheet, placing it in the oven's middle rack. Roast for 15-18 minutes until golden and crisp. Once done, let the bacon rest on a paper towel-lined plate.
4. Heat the Arrabiata: Warm the marinara sauce in a small saucepan or microwave until simmering. Keep it warm for assembly.
5. Fry the Eggs: In a large non-stick skillet, heat 1 tablespoon of olive oil over medium heat. Add the eggs, cooking until the whites are opaque yet still runny on top. Cover with a lid, turning off the heat, allowing them to cook until the whites set while keeping the yolk runny.
6. Assemble the Bowls: Spoon generous portions of polenta into each bowl. Add a dollop of arrabiata, an egg, and two slices of crispy bacon. Garnish with freshly chopped parsley for a burst of color and freshness. Serve immediately, savoring each bite and the memories it rekindles.
A Nostalgic Family Memory:

The sight of this dish takes me back to my grandmother's kitchen, where the wooden table was always set for family. She would hum softly, a melody only she knew, as she prepared this dish with love. Her polenta, always perfectly creamy, served as the canvas for crispy bacon and eggs cooked just right. We would gather around, bowls in hand, sharing stories and laughter. It was more than a meal; it was a moment in time, a tradition passed through generations.


Difficulty Rating: 4/10
Classification: Main Dish

---


This Creamy Polenta with Egg, Arrabiata & Bacon is more than just a recipe; it's an experience, a reminder of the warmth and love that food can bring into our lives. Perfect for family gatherings or a quiet evening at home, it offers a taste of nostalgia with every bite. Enjoy the comfort and joy it brings, and perhaps create new memories of your own.

Read more about Appetizers

Read more about Main Dishes

Read more about Desserts

Bacon & Potato Soup, Gluten & Dairy Free | Made by Meaghan Moineau

Bacon & Potato Soup, Gluten & Dairy Free | Made by Meaghan Moineau

Title: A Bowl of Comfort: Bacon & Potato Soup, Gluten & Dairy Free
Description: Dive into the warmth and nostalgia of a family-favorite recipe, Bacon & Potato Soup. This hearty, gluten and dairy-free dish combines crispy bacon, tender potatoes, and savory cabbage in a rich broth that warms the soul. Join us as we explore the flavors and the cherished family memories that make this soup a beloved household staple.

---


As the leaves begin to turn and the air grows crisp, there's nothing quite like a comforting bowl of soup to chase away the chill. Our Bacon & Potato Soup, gluten and dairy-free, is the perfect remedy. With its rich aroma and hearty ingredients, it’s a dish that brings back fond memories of family gatherings around the dinner table.


Growing up, soup was more than just a meal; it was a tradition. Every autumn, as the first signs of fall appeared, my grandmother would pull out her well-worn stock pot and begin preparing her famous Bacon & Potato Soup. The smell of sizzling bacon mixed with the sweet aroma of onions would fill the kitchen, creating a welcoming atmosphere that drew everyone in.


Ingredients:

- 2 tablespoons olive oil


- 8 ounces lean bacon, chopped


- 1 large yellow onion, diced


- 3 garlic cloves, minced


- 6 cups chicken stock


- 4 large red baking potatoes, diced


- 2 cups shredded savoy cabbage


- 1 tablespoon Worcestershire sauce


- 1 tablespoon Dijon mustard


- Salt and pepper, to taste


- 1/4 cup flat-leaf parsley, chopped


- Lemon wedges and gluten-free garlic croutons, for garnish


Instructions:

1. In a large stock pot, heat the olive oil over medium-high heat. Add the chopped bacon and onions, cooking until the bacon is crisp and the onions are translucent.


2. Add the garlic and cook for one more minute, until fragrant.


3. Pour in the chicken stock, and add the diced potatoes, shredded cabbage, Worcestershire sauce, and Dijon mustard. Mix well, and season with salt and pepper.


4. Bring the soup to a boil, then reduce the heat and simmer for 30 minutes, or until the potatoes are tender but not falling apart.


5. Remove the pot from heat and allow it to cool for 5 minutes. Transfer 2 1/2 cups of the soup to a blender and pulse quickly to achieve a coarse puree.


6. Pour the blended portion back into the stock pot and return to heat. Cook, stirring often, for 5-10 minutes or until heated through.


7. Stir in the chopped parsley before serving.


8. Ladle the soup into serving bowls and garnish with a wedge of lemon and gluten-free garlic croutons.


A Taste of Nostalgia:

I remember one particular autumn evening when the wind howled outside, and the first flurries of snow danced in the air. My family gathered in the cozy warmth of the kitchen, where the soup simmered gently on the stove. We huddled around the table, bowls of steaming soup in hand, as my grandmother recounted stories of her own childhood. The rich flavors of bacon and potato mingled with the comforting memories of family, creating a moment that has stayed with me all these years.


This recipe is more than a meal; it's a connection to the past. Each spoonful brings back the laughter and love shared at that table, and I hope it brings the same warmth and joy to your home.


Difficulty: 4/10
Classification: Main Dish

Embrace the changing seasons with this delicious Bacon & Potato Soup. Whether you're creating new family traditions or simply savoring a cozy night in, this gluten and dairy-free recipe is sure to become a cherished favorite.

Read more about Appetizers

Read more about Main Dishes

Read more about Desserts

Cherry Lime Mojito | Made by Meaghan Moineau

Cherry Lime Mojito | Made by Meaghan Moineau

A Sip of Summer: The Cherry Lime Mojito


Description:

Escape to a tropical paradise with every sip of the Cherry Lime Mojito. This refreshing cocktail combines the tartness of lime, the sweetness of cherries, and the cooling freshness of mint to create a symphony of flavors that dance on your palate. Perfect for summer gatherings or a quiet evening on the porch, this mojito is a delightful escape in a glass. Rated at a 4 out of 10 for difficulty, this cocktail is as accessible as it is delicious. Pour yourself a glass and dive into a nostalgic tale of family memories tied to this drink.

---


Ingredients:

- Fresh cherries

- Mint leaves


- Lime


- Demerara sugar


- White rum


- Carbonated water


Instructions:

1. Muddle the Magic: In a tall glass, combine cherries, mint leaves, demerara sugar, and slices of lime. Gently muddle the ingredients to release their flavors.
2. Ice, Ice Baby: Add a few ice cubes to the glass, providing a chilled base for your drink.
3. Rum Away: Pour in a generous splash of white rum, letting it mingle with the muddled mixture.
4. Bubbly Finish: Top off the glass with carbonated water, giving your mojito a refreshing fizz. Stir gently and serve immediately.

Nostalgic Family Memory:


The Cherry Lime Mojito holds a special place in my heart, not just for its refreshing taste, but for the cherished family memories it evokes. Growing up, summer afternoons at my grandparents' house were a cherished tradition. Their sprawling backyard was a haven of lush greenery and vibrant flowers, a testament to my grandfather's green thumb.


Every summer, our family would gather for a weekend barbecue, a celebration of togetherness filled with laughter, games, and delicious food. As the adults chatted and the children played, my grandmother would prepare her signature Cherry Lime Mojitos. She believed that a good mojito was the secret ingredient to a perfect summer day.


I can still picture her in the kitchen, her hands deftly muddling cherries and mint, her face adorned with a warm smile. She'd let me help, guiding my eager hands as I pressed the ingredients together, releasing their aromatic symphony. Her garden provided the freshest mint, which she picked just moments before crafting each drink.


The first sip of that mojito was like stepping into a world where time slowed down, where the sun shone a little brighter, and laughter echoed a little longer. It was a drink that brought us together, a shared experience that transcended generations.


Even now, as I prepare my own Cherry Lime Mojito, I can't help but feel a wave of nostalgia wash over me. With each sip, I'm transported back to those sun-drenched afternoons, surrounded by family, love, and the simple joy of being together.


Difficulty: 4/10

Classification: Beverage

Whether you're crafting this mojito for a family gathering or a solo indulgence, it's a drink that promises to refresh and delight. Cheers to the memories it creates and the ones it brings back to life.

Read more about Appetizers

Read more about Main Dishes

Read more about Desserts

Creamy Mushroom Soup ~ with a “Kick” | Made by Meaghan Moineau

Creamy Mushroom Soup ~ with a “Kick” | Made by Meaghan Moineau

Title: A Hearty Embrace: Creamy Mushroom Soup with a Kick
Description: Dive into a bowl of comfort and nostalgia with our Creamy Mushroom Soup with a Kick. This flavorful blend combines the earthy richness of mushrooms with a spicy twist from long pepper, topped with crispy bacon and zesty lime. Perfect as a cozy main dish, this soup will warm your heart and soul, bringing back cherished family memories.

---


When the leaves turn golden and the air starts to carry a crisp whisper of winter, my mind inevitably drifts back to my grandmother's kitchen. It was the heart of her home—a place where laughter mingled with the aroma of simmering soups and the promise of a hearty meal. Among her many culinary treasures, one dish stands out: her Creamy Mushroom Soup with a Kick.


A Nostalgic Tale:

Growing up, Sunday afternoons meant gathering at Grandma's for a family feast. As the youngest, I was often tasked with keeping a watchful eye on the soup pot—a role I embraced with enthusiasm. The kitchen would come alive with the sizzling of bacon on the griddle, filling the room with its irresistible aroma. Grandma would hand me a wooden spoon and let me stir the pot as button mushrooms, sweet onions, and garlic danced in a drizzle of olive oil.


The excitement in her voice was palpable when she would add a sprinkle of long pepper—her secret ingredient. "This," she would say with a wink, "is the kick that keeps everyone coming back for more." I watched as she stirred in the vegeta bouillon and cups of water, the flavors mingling into a savory symphony. The potato buds were next, lending their creamy texture to the bubbling mixture.


As we waited for the soup to simmer, Grandma and I would sit at the old wooden table, where she shared stories of her childhood, tales woven with warmth and wisdom. When it was time to add the milk, I knew we were nearing the end of our culinary journey. A squeeze of lime juice added that final touch of zest, brightening the flavors.


Finally, the soup was ladled into bowls, crowned with crispy bacon bits, a handful of shredded cheddar cheese, and a sprinkle of fresh cilantro. With each spoonful, I was enveloped in a tapestry of flavors and memories, a comforting reminder of those cherished Sundays spent in Grandma's kitchen.


Instructions:

1. Heat a large saucepot with a drizzle of olive oil.


2. Sauté garlic, long hot pepper, onion, and mushrooms until the onion is translucent.


3. Prepare bacon on a heated griddle until crispy, then set aside.


4. Add one tablespoon of bouillon and six cups of water to the pot, simmer.


5. Stir in one cup of potato buds, continuing to simmer on low.


6. Gradually add two cups of milk, simmering on low for a few minutes.


7. When ready to serve, stir in lime juice.


8. Top with bacon bits, cilantro, and cheddar cheese before serving.


Difficulty Rating: 5/10
Classification: Main Dish
Conclusion:

This Creamy Mushroom Soup with a Kick is more than just a recipe—it's a vessel for memories, a celebration of family, and a testament to the power of food to bring people together. Whether you're recreating a cherished family tradition or starting a new one, this hearty soup is sure to become a beloved staple in your culinary repertoire. Warm your heart and soul with this flavorful embrace, and relish the nostalgia with every spoonful.

Read more about Appetizers

Read more about Main Dishes

Read more about Desserts

Easy Instant Pot Beef Tips and Rice | Made by Meaghan Moineau

Easy Instant Pot Beef Tips and Rice | Made by Meaghan Moineau

Title: "Savoring Memories: Easy Instant Pot Beef Tips and Rice"
Description: Discover a heartwarming recipe that brings family memories to life with every savory bite. This easy Instant Pot Beef Tips and Rice is a delightful main dish that's sure to become a beloved staple in your home.

---


When it comes to comfort food, nothing quite compares to the warmth and flavor of a dish that has been passed down through generations. Today, I am thrilled to share a recipe that not only tantalizes the taste buds but also evokes cherished family memories - Easy Instant Pot Beef Tips and Rice. This recipe is a delightful main dish with a difficulty rating of 3 out of 10, making it accessible for even the busiest of home cooks.


Ingredients


- 1.5 lbs sirloin beef tips


- 1 can of cream of mushroom soup


- 1 teaspoon garlic powder


- 2 tablespoons Dale's seasoning sauce


- 2 tablespoons olive oil


- 1 onion, chopped


- 1 cup water


Instructions


1. Sauteing the Beef: Set your Instant Pot to the sauté setting. Once warmed, add olive oil, beef tips, and chopped onion. Stir frequently and sauté for about 5 minutes, or until the meat begins to brown and the onions become translucent.
2. Mixing the Ingredients: Add the water, Dale's seasoning, cream of mushroom soup, and garlic powder to the pot. Stir to combine all the ingredients thoroughly.
3. Pressure Cooking: Secure the lid on the Instant Pot and set it to the Manual Setting on High Pressure for 25 minutes. It will take a few moments for the pot to come up to pressure.
4. Natural Release: Once the cooking time is complete, allow the pressure to naturally release for 20 minutes before removing the lid.
5. Serving Suggestions: Serve the beef tips over a bed of rice, or substitute with noodles or mashed potatoes. Pair with warm French bread to soak up the rich, savory gravy.

---


A Taste of Nostalgia


As the aroma of this dish fills the kitchen, I am transported back to my grandmother's cozy dining room, where family gatherings were frequent and laughter was abundant. Her version of beef tips and rice was a staple at Sunday dinners, where the entire family would gather around the table, eager to share stories from the week and enjoy each other's company.


I remember sitting at her table, my feet barely touching the ground, as she lovingly served each plate with a generous helping of beef tips and rice. The savory scent of the dish mingled with the warmth of the room, creating a comforting atmosphere that made everyone feel at home. It was during these moments that I learned the true value of family and the joy that comes from sharing a meal with loved ones.


Final Thoughts


This Easy Instant Pot Beef Tips and Rice recipe is not just a meal; it's a journey back to those cherished family moments. It's a dish that embodies love, warmth, and the joy of being surrounded by family. Whether you're looking to recreate a similar experience or simply seeking a delicious and comforting meal, this recipe is sure to deliver.


Give this recipe a try, and may it bring as much joy to your family as it has to mine. Don't forget to share your own stories and experiences in the comments below. Happy cooking!

Read more about Appetizers

Read more about Main Dishes

Read more about Desserts

Apple Brown Betty | Made by Meaghan Moineau

Apple Brown Betty | Made by Meaghan Moineau

Title: "A Taste of Nostalgia: The Timeless Comfort of Apple Brown Betty"
Description: Dive into the heartwarming world of Apple Brown Betty, a classic dessert that has graced family tables for generations. With its simple yet flavorful ingredients, discover how this dish weaves together memories and tastes that are sure to delight both young and old. Rated 4/10 in difficulty, this dessert is perfect for any occasion that calls for a touch of sweetness and a sprinkle of nostalgia.

---


There’s something undeniably comforting about the aroma of apples and cinnamon wafting through the house, wrapping around you like a warm embrace on a chilly autumn evening. For many, including myself, this comforting aroma is synonymous with Apple Brown Betty, a dessert that has become a cherished family tradition.


The Magic of Apple Brown Betty


Apple Brown Betty is a dessert that celebrates simplicity while delivering robust flavors. The combination of diced apples, bread, and warm spices like cinnamon and nutmeg creates a delightful symphony of taste and texture. The addition of butter and a hint of lemon juice enhances the dish, while the golden-brown crust adds a satisfying crunch.


Ingredients:

- Diced apples


- Bread, cubed


- Butter


- Cinnamon


- Lemon juice


- Nutmeg


- White sugar


Instructions:

1. Preheat your oven to 375°F (190°C).


2. In a buttered 1-1/2 quart souffle dish, start with a layer of cubed bread.


3. Mix the diced apples with sugar, cinnamon, and nutmeg.


4. Cover the bread with a layer of the apple mixture.


5. Dot with butter and drizzle with a little lemon juice and rind.


6. Repeat the layering process, ending with a layer of bread cubes.


7. Cover and bake for 30 minutes.


8. Uncover and bake for an additional 30 minutes, until the apples are tender and the crust is golden brown.


A Journey Down Memory Lane


For me, Apple Brown Betty is more than just a dessert; it’s a portal to cherished memories. I recall the first time my grandmother and I made this delightful dish together. It was a crisp October afternoon, the kind when the leaves danced in the wind and painted the ground in hues of amber and gold. My grandmother, with her apron tied snugly around her waist, guided my small hands through the process of layering the bread and apples.


As the dish baked, we sat by the kitchen table, sipping hot cocoa and sharing stories. She spoke of her childhood, weaving tales of her own mother making the same dessert in a small country kitchen. The anticipation grew with every tick of the clock, and when the timer finally chimed, the kitchen was enveloped in an intoxicating scent that remains etched in my memory.


A Dessert for All Occasions


Rated at 4/10 in terms of difficulty, Apple Brown Betty is an ideal dessert for both novice and seasoned bakers. The straightforward preparation and familiar ingredients make it an accessible choice for any home cook. Whether it’s a cozy family dinner or a festive holiday gathering, this dessert is sure to be a beloved staple on your table.


The Apple Brown Betty is more than just a dish; it’s a treasured part of family history. With every bite, you’re not only savoring a delicious dessert but also indulging in a rich tapestry of memories and love. So why not gather your loved ones, roll up your sleeves, and create your own lasting memories with this timeless treat?

Read more about Appetizers

Read more about Main Dishes

Read more about Desserts

Citrus Beet Salad | Made by Meaghan Moineau

Citrus Beet Salad | Made by Meaghan Moineau

Title: A Taste of Sunshine: Creating a Nostalgic Citrus Beet Salad
Description: Dive into a world of vibrant flavors and cherished memories with our Citrus Beet Salad recipe. This delightful dish combines earthy beets, tangy grapefruit, and creamy goat cheese for an unforgettable culinary experience. Perfect as an appetizer or light main dish, this salad is sure to brighten any meal. Join us as we explore the simple joys of cooking and the heartfelt memories that come with it.

---


There's something magical about the fusion of colors and flavors that the Citrus Beet Salad brings to the table. With its earthy beets, tangy grapefruit, and creamy goat cheese, this dish is a symphony of tastes that dance on your palate. Rated 4 out of 10 in difficulty, it’s a perfect appetizer or light main dish that’s both visually stunning and incredibly delicious.


Ingredients:

- Beets


- Olive oil


- Balsamic vinegar


- Grapefruit


- Sprouts


- Pumpkin seeds


- Goat cheese


Instructions:

1. Begin by washing the beets thoroughly and patting them dry. Place them on a sheet of aluminum foil and drizzle generously with olive oil.


2. Fold the foil around the beets to create a sealed pouch, ensuring no steam will escape. Place this pouch on a cookie sheet and bake in the oven.


3. The cooking time will vary depending on the size of the beets. After 30 minutes, pierce them with a fork. If they remain firm, continue baking, checking every 15 minutes until they reach tenderness.


4. Once tender, remove the beets from the oven and allow them to cool until they can be handled safely. Use your hands to gently peel away the skins.


5. Slice the beets into bite-sized wedges and drizzle with balsamic vinegar for an added layer of flavor.


6. In a large bowl, create a base with fresh sprouts. Arrange the beet wedges and grapefruit segments on top.


7. Finish with a sprinkle of pumpkin seeds and crumbled goat cheese, then serve this vibrant salad immediately.


Nostalgic Memory:

Every time I prepare this Citrus Beet Salad, I am transported back to my grandmother's kitchen, filled with the aroma of roasting beets and the laughter of family gatherings. As a child, I remember sitting on a stool, watching her masterfully slice the grapefruit, her fingers sticky with its tangy juice. She would hand me a piece, and the burst of citrus was a delightful surprise every time.


Grandma believed that food was more than sustenance; it was a way to bring people together, to share stories, and to create lasting memories. Her beet salad, with its vibrant colors and contrasting flavors, was always the star of our summer picnics. We would gather around the table, the sun casting a golden hue over everything, and savor each bite as if it were a piece of sunshine itself.


Today, as I recreate this beloved dish, I am reminded of those carefree days and the warmth of family bonds. The Citrus Beet Salad is more than just a recipe; it’s a cherished heirloom, a link to the love and joy that filled my grandmother's kitchen.


---


This Citrus Beet Salad is not only a feast for the senses but also a joyful journey down memory lane. Whether you're recreating family traditions or starting new ones, this dish is sure to be a treasured part of your culinary repertoire.

Read more about Appetizers

Read more about Main Dishes

Read more about Desserts

Vegetarian Christmas wreath | Made by Meaghan Moineau

Vegetarian Christmas wreath | Made by Meaghan Moineau

Title: A Festive Centerpiece: Creating a Vegetarian Christmas Wreath
Description:

Embrace the spirit of the holiday season with this stunning Vegetarian Christmas Wreath. A delightful blend of fresh vegetables and cheese, this appetizer is not only a feast for the eyes but also a treat for the taste buds. Perfect for festive gatherings, this dish is sure to spark joy and create cherished memories with loved ones. Discover the recipe, reminisce with a nostalgic family story, and learn how to craft this beautiful and delicious centerpiece for your holiday table.


---


As the holiday season approaches, kitchens fill with the tantalizing aromas of festive cooking. One dish that stands out as both a visual and culinary delight is the Vegetarian Christmas Wreath. This vibrant appetizer combines the natural beauty of broccoli florets, cherry tomatoes, and cheese with the rich flavors of a creamy dip. It’s a recipe that not only pleases the palate but also becomes a conversation starter at any gathering.


Ingredients:


- Broccoli florets


- Cherry tomatoes


- Cheese


- Red bell pepper


- Cream cheese


- Mayonnaise


- Dried dill


- Dried garlic


- Olives


- Scallion


Instructions:


1. Prepare the Broccoli: Begin by washing and cutting the broccoli into florets. Fill a large pan with water, bring it to a boil, and add the broccoli. Have a bowl of ice-cold water ready. After two minutes of boiling, transfer the broccoli to the cold water to preserve its vibrant green color.
2. Prepare the Dip: While the broccoli cools, combine cream cheese, mayonnaise, dried dill, dried garlic, and chopped scallion to create a creamy dip. Chill in the refrigerator for at least three hours to let the flavors meld together.
3. Assemble the Wreath: On a large white plate, place a ramekin in the center for the dip. Arrange the cooled broccoli florets around it to form a wreath. Add cherry tomatoes for festive color and cut cheese into star shapes to sprinkle across the wreath. Finish by slicing red bell pepper into ribbon shapes and olives for added flair.

A Nostalgic Memory:


Every Christmas Eve, our family gathers in the cozy warmth of my grandmother's living room. As children, we would sit eagerly by the fireplace, waiting for our favorite holiday tradition—the unveiling of the Christmas Wreath. My grandmother, with her gentle hands and keen eye for detail, would transform simple ingredients into a masterpiece.


I remember the first time I helped her; I was entrusted with cutting the cheese into stars. Despite my clumsy attempts, she praised my efforts, making me feel like an artist contributing to her canvas. This tradition has become a cherished memory, as we all gather around the table, savoring each bite and reliving stories of past Christmases. The wreath symbolizes more than just a dish; it embodies the love and togetherness that defines our family.


Difficulty Rating: 4/10


Classification: Appetizer

With its vibrant colors and delightful flavors, the Vegetarian Christmas Wreath is a must-have addition to your holiday menu. Its ease of preparation and ability to bring people together make it a standout choice for any festive occasion. Gather your loved ones, share stories, and enjoy this beautiful, edible centerpiece that captures the essence of the season. Buon appetito!

Read more about Appetizers

Read more about Main Dishes

Read more about Desserts

Cauliflower Chickpea Stew | Made by Meaghan Moineau

Cauliflower Chickpea Stew | Made by Meaghan Moineau

Title: Wholesome Comfort: Cauliflower Chickpea Stew to Warm Your Soul
Description: Discover the heartwarming flavors of our Cauliflower Chickpea Stew, a nourishing blend of spices and vegetables that transports you to cozy family dinners. With a difficulty rating of 6/10, this hearty main dish is perfect for both novice and seasoned cooks alike. Dive into a recipe steeped in nostalgia and unforgettable family memories.

---


A Nostalgic Family Dinner: Cauliflower Chickpea Stew

There's something magical about the aroma of spices wafting through the kitchen, reminiscent of cherished family gatherings around the dinner table. One such dish that never fails to evoke warm memories for me is the Cauliflower Chickpea Stew. This hearty and flavorful stew was a staple in my childhood home, especially during the cooler months when the air was crisp, and the evenings were spent wrapped in the warmth of family.


Ingredients for a Cozy Night In:

- Olive oil


- Brown rice


- Twice the amount of water as rice


- Garlic cloves


- Turmeric


- Salt & pepper


- Onion


- Canned tomatoes


- Tomato puree


- Fresh ginger


- Fresh chili


- Cinnamon


- Garam masala


- Paprika


- Sweet potatoes


- Lemon (juice)


- Cauliflower


- Canned chickpeas


Instructions:
1. Infuse the Aroma: Begin by heating a generous splash of olive oil in a large saucepan over high heat. Crush the garlic cloves and fry them with turmeric, salt, and pepper for about a minute. This aromatic base sets the stage for the comforting flavors to come.
2. Toasty Grains: Add the brown rice to the pan, allowing it to fry for 4-5 minutes. The rice should start to toast, absorbing the fragrant spices and oil.
3. Simmering Serenity: Pour in the water, bringing it to a boil before reducing the heat to low-medium. Cover and let it simmer for 30 minutes, allowing the rice to soak up the flavors and reach perfect tenderness.
4. Building Layers of Flavor: While the rice simmers, in a separate pot, sauté diced onion until translucent. Add canned tomatoes, tomato puree, freshly grated ginger, chopped chili, cinnamon, garam masala, and paprika. Let these ingredients meld together, creating a rich and inviting sauce.
5. Hearty Additions: Stir in cubed sweet potatoes, cauliflower florets, and canned chickpeas. Allow these to cook in the sauce until the vegetables are tender and the flavors have melded beautifully.
6. Finishing Touches: Just before serving, squeeze fresh lemon juice over the stew, brightening the dish with a zesty finish.
A Dish Steeped in Memory

As a child, I remember this stew being a centerpiece at family dinners. My mother would prepare it with such care, filling the house with its aromatic allure. It was more than just a meal; it was a symbol of togetherness, a dish that brought everyone to the table, sharing stories and laughter.


Difficulty Rating: 6/10

This Cauliflower Chickpea Stew is a delightful main dish that's accessible to both new and seasoned cooks, offering a rewarding culinary experience that captures the essence of home-cooked comfort.


Whether you're seeking a nourishing meal for a cozy night in or a dish to share with loved ones, this stew is a testament to the power of food to connect and comfort. Embrace the warmth and nostalgia it brings, and create your own cherished memories around the table.

Read more about Appetizers

Read more about Main Dishes

Read more about Desserts

Pasta With Chicken and Broccoli | Made by Meaghan Moineau

Pasta With Chicken and Broccoli | Made by Meaghan Moineau

Savoring Memories: Pasta with Chicken and Broccoli Delight


A Hearty Dish That Brings Families Together


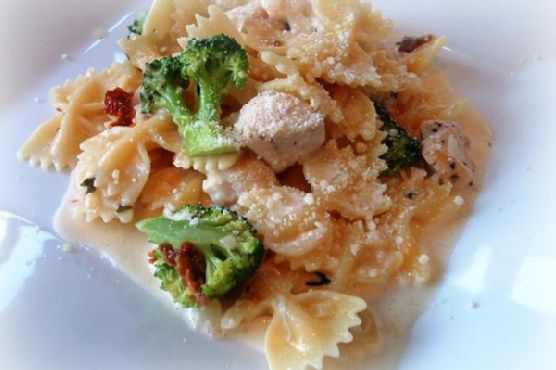
In the hustle and bustle of daily life, it's the comforting aroma of a home-cooked meal that often brings families together. One such dish that has stood the test of time in my family is the classic "Pasta with Chicken and Broccoli." This delightful main dish, with its perfect blend of flavors and textures, is not only a feast for the taste buds but also a heartwarming reminder of cherished family gatherings.


A Nostalgic Whiff of the Past


Growing up, Sunday afternoons were a sacred time in our household. It was the day my grandmother would don her favorite apron, one that seemed as old as time itself, and transform her kitchen into a culinary playground. The centerpiece of her Sunday magic? Her signature Pasta with Chicken and Broccoli.


I remember the sizzling sound of garlic hitting the olive oil, the air soon filled with a tantalizing aroma that beckoned everyone to the kitchen. My cousins and I would sit around the table, our chatter and laughter punctuated by the rhythmic clinking of utensils as my grandmother lovingly prepared the meal. Her secret, she would whisper to us, was a sprinkle of dried basil leaves and a dash of white wine, which transformed the dish from ordinary to extraordinary.


When the meal was finally served, it was more than just food on our plates; it was a slice of our family history. Each bite was a symphony of flavors - the tender chicken, the crisp yet tender broccoli, and the perfectly al dente lasagna noodles, all brought together by a delicate sauce of chicken broth and a hint of red pepper flakes. The crowning glory was a generous sprinkle of freshly grated Parmesan cheese, which melted into the dish, adding a creamy richness that was simply irresistible.


Crafting Your Own Culinary Memory


Creating this dish is a culinary adventure that's worth every minute spent in the kitchen. Here's how you can bring a piece of my family tradition into your home.


Ingredients:

- Olive oil


- Boneless chicken breasts


- Red pepper flakes


- Cooked lasagna noodles


- Garlic cloves


- Broccoli florets


- Dried basil leaves


- White wine


- Chicken broth


- Parmesan cheese


Instructions:

1. In a large skillet, heat olive oil over medium heat. Add garlic and sauté for about one minute, stirring constantly to avoid burning.


2. Add the boneless chicken breasts, cooking them until they're perfectly well-done.


3. Introduce the broccoli florets to the skillet, cooking until they're crisp yet tender.


4. Season the mixture with dried basil leaves and red pepper flakes. Add salt and pepper to taste.


5. Pour in the white wine and chicken broth, allowing the flavors to meld together for about 5 minutes.


6. Add the cooked and drained lasagna noodles to the skillet, tossing to combine all ingredients. Let it heat for an additional 1 to 2 minutes.


7. Serve immediately, topping with freshly grated Parmesan cheese if desired.


Difficulty: 4/10


Creating this dish is a delightful culinary endeavor that is moderately easy, making it perfect for both novice and experienced cooks alike. As a main dish, it promises to be the highlight of any family dinner, offering a taste of nostalgia with every bite.


Conclusion


In the end, Pasta with Chicken and Broccoli is more than just a meal; it's a connection to the past, a reason to gather, and a way to create new memories. Whether you're sharing it with family or friends, this dish is sure to become a beloved tradition in your own home. So, roll up your sleeves, gather your ingredients, and let the magic of this classic recipe bring warmth and joy to your table.

Read more about Appetizers

Read more about Main Dishes

Read more about Desserts

Cyndee’s Neiman Marcus Cake | Made by Meaghan Moineau

Cyndee's Neiman Marcus Cake | Made by Meaghan Moineau

Title: "Baking Memories: Crafting Cyndee's Neiman Marcus Cake in the Heart of the Family Kitchen"
Description: Discover the timeless joy of baking with Cyndee's Neiman Marcus Cake. This cherished family dessert, rich with flavors of lemon and vanilla, is the perfect blend of nostalgia and culinary delight. Join us as we delve into a heartfelt family story and guide you through this beloved recipe, rated at a moderate difficulty level of 6 out of 10.

---


There's something magical about the aroma of a cake baking in the oven. It has the power to transport you back in time, to a place where laughter echoes and cherished memories are etched in the heart. For our family, Cyndee's Neiman Marcus Cake holds such a place. This delightful dessert, bursting with the comforting flavors of lemon and vanilla, has become a symbol of love and togetherness in our home.


Ingredients:

- Baking soda


- Butter


- Cornstarch


- Cream cheese


- Eggs


- Flour


- Kosher salt


- Lemon zest


- Sour cream


- Sugar


- Vanilla extract


Instructions:
1. Preheat & Prep: Begin by preheating your oven to 350°F (175°C). Grease a 9 by 13-inch baking pan to ensure your cake releases smoothly once baked.
2. Cream & Blend: In the bowl of an electric mixer fitted with a paddle attachment, cream the butter and sugar on medium-high speed until light and fluffy, approximately 5 minutes. This step is crucial for creating that perfect cake texture.
3. Incorporate Wet Ingredients: On medium speed, add the eggs one at a time, followed by the sour cream, vanilla extract, and lemon zest. Be sure to scrape down the bowl as needed to ensure a well-combined mixture.
4. Combine Dry Ingredients: Sift together the flour, cornstarch, salt, and baking soda. With the mixer on low speed, gradually add this dry mixture to the butter mixture. Stir just until smooth, and finish mixing by hand to ensure everything is well incorporated.
5. Bake & Cool: Pour the batter evenly into the prepared baking pan. Mix the ingredients for the topping (cream cheese, sugar, perhaps a sprinkle of extra zest), and spread evenly on top of the batter. Bake for about 30-35 minutes. Once done, let the cake cool before removing it from the pan.
Nostalgic Family Memory:

Every family gathering was incomplete without Cyndee's Neiman Marcus Cake. I remember one particular summer afternoon when my grandmother, Cyndee, orchestrated a baking session with all her grandchildren. The kitchen was a whirlwind of activity, filled with giggles and flour-dusted faces. As the cake baked, she regaled us with stories of her childhood, weaving a tapestry of family history that seemed as rich and layered as the cake itself.


When the timer finally chimed, signaling the cake's completion, we gathered around the oven, anticipation palpable in the air. With a loving hand, Grandma sliced into the golden crust, revealing its soft, aromatic interior. That first bite was more than just a taste; it was a moment of pure joy, a connection to generations past and the promise of new memories to come.


Difficulty Rating: 6/10
Classification: Dessert

Cyndee's Neiman Marcus Cake is more than just a dessert; it's a journey through time, a delicious reminder of the power of food to bring people together. Whether you're recreating family memories or starting new traditions, this cake is sure to delight and impress. So gather your loved ones, roll up your sleeves, and experience the joy of baking this beloved family favorite.

Read more about Appetizers

Read more about Main Dishes

Read more about Desserts

Chinese Chicken Salad With Chipotle Dressing | Made by Meaghan Moineau

Chinese Chicken Salad With Chipotle Dressing | Made by Meaghan Moineau

Title: Savory Nostalgia: Chinese Chicken Salad with Chipotle Dressing


Description:

Dive into the fusion of flavors with our Chinese Chicken Salad with Chipotle Dressing. This delightful dish combines the rich, nutty essence of pea-mond dressing with the smoky heat of chipotle, creating a salad that tantalizes the taste buds. Perfect as a main dish, this easy-to-make recipe is a nostalgic journey to cherished family gatherings.

---


A Taste of Memories: Chinese Chicken Salad with Chipotle Dressing


There’s something magical about a dish that evokes memories of family gatherings and cherished times. Growing up, Sundays were sacred in our household — a time for family, laughter, and a delicious meal that brought us all together. One of those meals was the Chinese Chicken Salad with Chipotle Dressing, a dish that became a family favorite for its unique blend of flavors and textures.


The Ingredients


- Pea-mond Dressing: A blend of smooth peanut and almond butters for a rich, creamy texture.
- Rice Wine Vinegar: Adds a tangy kick that complements the nutty flavors.
- Fresh Ginger: Provides a zesty warmth that refreshes the palate.
- Adobo Chipotle Pepper Juice & Puree: Infuses the dressing with smoky, spicy notes that elevate the dish.
- Soy Sauce & Honey: Balances the heat with a sweet, salty depth.
- Sesame & Canola Oils: Create a silky consistency with a hint of nuttiness.
- Shredded Napa Cabbage & Romaine Lettuce: Offer a crisp, fresh base.
- Shredded Carrots & Snow Peas: Add vibrant color and crunch.
- Fresh Cilantro & Mint Leaves: Bring a burst of freshness.
- Green Onion & Roasted Peanuts: Lend a savory, crunchy finish.
- Shredded Rotisserie Chicken: The protein-packed heart of the salad.
- Chili Oil & Lime: For those who crave an extra zing.

Instructions


1. Dressing Magic: In a medium bowl, whisk together the rice wine vinegar, smooth peanut and almond butters, fresh ginger, adobo chipotle pepper puree, soy sauce, honey, sesame oil, and canola oil. Season with salt and pepper to taste. This dressing, with its blend of nutty richness and smoky chipotle heat, is the star of the show.
2. Assemble the Salad: In a large bowl, combine the shredded napa cabbage, romaine lettuce, carrots, snow peas, cilantro, green onion, and rotisserie chicken. Toss gently to mix.
3. Finish with Flair: Drizzle the chipotle dressing over the salad, tossing to coat evenly. Sprinkle with roasted peanuts and fresh mint leaves for an added layer of flavor. For an extra kick, add a dash of chili oil and a squeeze of fresh lime.

A Dish with Heart


This Chinese Chicken Salad is more than just a meal; it’s a walk down memory lane. I remember the first time my grandmother made this dish. Her kitchen was filled with the aroma of fresh ginger and the smoky scent of chipotle, a combination that felt like a warm hug. Each bite was a burst of flavor — the spice of the chipotle, the crunch of the cabbage, and the unexpected sweetness of honey. It was a culinary adventure that brought us closer, sitting around the table, sharing stories and laughter.


Difficulty Rating: 4/10


As a main dish, this recipe is rated as an easy 4 out of 10. It's perfect for those who are looking to whip up something impressive without too much hassle. Whether you’re a seasoned chef or a kitchen newbie, this salad is accessible to all.


Conclusion


The Chinese Chicken Salad with Chipotle Dressing is a testament to how food can transcend mere sustenance, becoming a vessel of nostalgia and a catalyst for connection. So gather your ingredients, invite your loved ones, and create new memories with this delightful dish. Enjoy the journey from your kitchen to the heart of your home.

Read more about Appetizers

Read more about Main Dishes

Read more about Desserts

Authentic Bolognese Sauce | Made by Meaghan Moineau

Authentic Bolognese Sauce | Made by Meaghan Moineau

Title: Unveiling Tradition: Crafting Authentic Bolognese Sauce
Description: Dive into the heart of Italian culinary tradition with our Authentic Bolognese Sauce recipe. This rich, savory delight brings together a symphony of flavors that will transport you straight to the sun-drenched hills of Bologna. Perfect for a comforting main dish, this recipe is steeped in family memories and culinary heritage. Discover the secret to creating a sauce that captures the essence of Italy in every bite.

---


A Taste of Italy: Crafting the Perfect Bolognese Sauce


When it comes to Italian cuisine, few dishes evoke the warmth and comfort of home quite like a traditional Bolognese sauce. This beloved staple has been a cherished part of my family’s culinary repertoire for generations, with each spoonful bringing back fond memories of bustling kitchens and lively family gatherings.


Ingredients:


- 1 carrot, finely chopped


- 1 celery stalk, finely chopped


- 1 cup dry white wine


- 2 garlic cloves, minced


- 1 pound regular ground beef


- 2 tablespoons olive oil


- 1 diced onion


- 3 ounces pancetta, diced


- Salt and pepper to taste


- 2 tablespoons tomato paste


- 1 cup whole milk


Instructions:


1. Prepare the Base: In a large skillet, heat the olive oil over medium heat. Add the diced pancetta, onion, carrot, celery, and minced garlic. Cook until the vegetables are soft and aromatic, about 10-15 minutes.
2. Cook the Meat: Increase the heat slightly and add the ground beef to the skillet. Cook until the beef is browned and no longer pink, breaking it apart with a wooden spoon.
3. Combine Flavors: Stir in the dry white wine, allowing it to simmer until mostly evaporated. Follow with the whole milk and tomato paste, stirring well to combine.
4. Season and Simmer: Season the sauce with salt and pepper to taste. Reduce the heat to low and let the sauce simmer uncovered for about 1 hour, or until most of the liquid is absorbed and the flavors have melded together beautifully.
5. Serve: Pair this luscious Bolognese sauce with your favorite pasta, and garnish with freshly grated Parmesan cheese for an authentic Italian experience.

A Nostalgic Journey:


Every time I prepare this Bolognese sauce, I am transported back to my grandmother's cozy kitchen. The scent of onions and garlic sizzling in olive oil always takes me to those Sunday afternoons, where the entire family would gather around the table, eagerly anticipating the meal to come. My grandmother, with her flour-dusted apron and warm smile, would share stories of her childhood in Italy as she stirred the sauce, infusing it with love and tradition.


These moments were more than just meals—they were a celebration of our heritage, a connection to our roots. Today, as I pass this recipe down to my own children, I hope they too will carry forward the sense of belonging and joy that comes with every delicious bite.


---


Difficulty: 5/10
Classification: Main Dish

This Authentic Bolognese Sauce is not just a meal; it's an experience—a journey through time and taste that brings family and friends together. Whether you’re an experienced cook or a culinary newcomer, this recipe promises to delight and inspire, creating memories as rich and flavorful as the sauce itself. Buon Appetito!

Read more about Appetizers

Read more about Main Dishes

Read more about Desserts

Oreo Cake | Made by Meaghan Moineau

Oreo Cake | Made by Meaghan Moineau

Title: Indulge in Nostalgia: Easy Oreo Ice Cream Cake Recipe
Description: Dive into a delicious trip down memory lane with this Oreo Ice Cream Cake, a nostalgic dessert that is as simple as it is delightful. Perfect for family gatherings, this no-bake treat combines the irresistible flavors of Oreo cookies, creamy vanilla bean ice cream, and rich chocolate syrup. With a difficulty rating of just 3 out of 10, this dessert is a breeze to make and a joy to share.

---


A Journey Back in Time: The Sweet Story Behind Our Family's Oreo Cake Tradition

There’s something truly magical about desserts that evoke cherished memories, and for my family, the Oreo Ice Cream Cake does just that. Growing up, summers were a time of laughter, endless sunshine, and the delightful anticipation of family gatherings. Among the many highlights was Grandma’s famous Oreo Ice Cream Cake, a dessert that quickly became a beloved tradition.


I remember the first time I helped Grandma make this cake. The kitchen was filled with the comforting aroma of crushed Oreos and the soft hum of the ice cream maker in the background. As we crumbled the cookies, Grandma shared stories of how she first made this dessert for my mom’s birthday party. It was an instant hit, so much so that it became a staple at every family celebration thereafter.


The process was simple, yet it brought so much joy. Mixing the buttery cookie crumbs, spreading the creamy layers of vanilla bean ice cream, and seeing the smooth chocolate syrup drizzle over the cool whip was like painting a masterpiece. Grandma always let me have the honor of adding the final touch—the reserved cookie crumbles and a generous swirl of chocolate syrup on top.


As the cake set in the freezer, we’d gather in the sunlit living room, playing card games and chatting, the anticipation of dessert adding a sweet excitement to the air. When it was finally time to cut into the cake, the smiles and satisfied sighs around the table were worth every moment of preparation.


Today, I continue this tradition with my own children. The recipe is timeless, its simplicity making it a perfect choice for busy parents who still want to create special memories. Watching my kids’ eyes light up with the first taste brings me back to those sunny days in Grandma’s kitchen, reminding me of the simple pleasures of family and the joy of shared traditions.


Oreo Ice Cream Cake Recipe

*Ingredients:*


- Butter


- 1 can chocolate syrup


- Cool whip


- Oreo cookies


- 1 gallon vanilla bean ice cream


*Instructions:*


1. Crumble the Oreo cookies and save 1/3 for the topping.


2. Mix the butter with 2/3 of the cookie crumbs and press this mixture into the bottom of a long cake pan to create the base.


3. Layer half of the vanilla bean ice cream over the cookie base, followed by half of the chocolate syrup.


4. Spread a generous layer of cool whip over the top.


5. Sprinkle the remaining cookie crumbs and drizzle with the remaining chocolate syrup.


6. Freeze the cake overnight or for at least 12 hours to set properly.


Whether you're looking to relive your own family memories or create new ones, this Oreo Ice Cream Cake is sure to bring smiles and sweet nostalgia to your table. Enjoy the simplicity, savor the taste, and cherish the memories that come with every bite of this delightful dessert.

Read more about Appetizers

Read more about Main Dishes

Read more about Desserts

Banana, Cranberry and Apple Bread | Made by Meaghan Moineau

Banana, Cranberry and Apple Bread | Made by Meaghan Moineau

Title: "Wholesome Nostalgia: Banana, Cranberry, and Apple Bread Recipe"
Description: Discover the heartwarming flavors of our Banana, Cranberry, and Apple Bread. This delightful dessert combines the sweetness of ripe bananas, the tartness of green apples, and the chewy texture of dried cranberries. Perfect for family gatherings or a cozy afternoon treat, this bread will surely evoke cherished memories.

---


There's something magical about stepping into a kitchen filled with the comforting aroma of freshly baked bread, especially when that bread is our Banana, Cranberry, and Apple Bread. This delightful dessert is not just a treat for the taste buds; it's a nostalgic journey back to the warm embrace of family traditions.


A Slice of Family History

Growing up, Sunday afternoons were a sacred time in my family. It was a day reserved for rest, laughter, and the comforting rituals that brought us together. My grandmother, the matriarch of our family, had a knack for creating delicious recipes that seemed to weave magic into our lives. One of her most beloved creations was her Banana, Cranberry, and Apple Bread.


I remember sitting on a stool in her cozy kitchen, watching her deftly combine ingredients, sharing stories of her childhood as she worked. Her voice was a melodic blend of wisdom and warmth, and her stories often revolved around her own mother, who had passed down this very recipe. It was a legacy, a thread of love that connected generations.


Ingredients

- 235g skinless bananas, mashed


- 125g dried cranberries


- 200g plain flour


- 140g sugar


- 1 green apple, grated


- 2 eggs


- 100g vegetable oil


- 1/2 cup milk


- 1 tsp vanilla extract


- 1 tsp baking powder


- 1/2 tsp baking soda


- 1/4 tsp salt


Instructions

1. Preheat your oven to 350°F (170°C). Line and grease a loaf pan with cooking spray to ensure easy removal.


2. In a large mixing bowl, combine the flour, baking powder, baking soda, salt, and sugar. Mix well and set aside.


3. In another mixing bowl, whisk together the eggs, milk, vegetable oil, and vanilla extract. Add the grated apple and mashed bananas to this mixture and stir until well combined.


4. Gradually add the dry ingredients to the wet mixture, stirring gently until just combined. Be careful not to overmix.


5. Fold in the dried cranberries, ensuring they are evenly distributed throughout the batter.


6. Pour the batter into the prepared loaf pan, smoothing the top with a spatula.


7. Bake for approximately 70 minutes, or until a skewer inserted into the bread comes out clean.


8. Allow the bread to cool in the pan for 10 minutes before transferring to a wire rack to cool completely.


A Timeless Treat

Every bite of this bread is a tribute to my grandmother's legacy. The sweetness of the bananas, the tartness of the apples, and the chewy texture of the cranberries create a harmonious blend of flavors that never fails to transport me back to those cherished Sunday afternoons.


Difficulty Rating: 4/10

This recipe is simple enough for beginners, yet it carries the elegance of a dessert that can grace any family gathering.


Classification: Dessert

Whether you're looking to recreate fond memories or start new traditions, this Banana, Cranberry, and Apple Bread is sure to delight. Gather your loved ones, share stories, and savor the sweet nostalgia baked into every slice.

Read more about Appetizers

Read more about Main Dishes

Read more about Desserts

Balsamic Marinated Lamb Chops | Made by Meaghan Moineau

Balsamic Marinated Lamb Chops | Made by Meaghan Moineau

Title: Unveiling the Charm of Balsamic Marinated Lamb Chops: A Culinary Journey Back in Time
Description: Dive into a flavorful culinary experience with our Balsamic Marinated Lamb Chops recipe. This main dish isn't just a meal; it's a nostalgic trip back to family gatherings and cherished memories. Perfectly seasoned and grilled to perfection, these lamb chops are sure to impress. Prepare to tantalize your taste buds with the aromatic blend of garlic, balsamic vinegar, and fresh herbs. Difficulty: 6/10

---


A Nostalgic Culinary Journey: Balsamic Marinated Lamb Chops

There's something truly magical about the aroma of Balsamic Marinated Lamb Chops sizzling on the grill. It transports me back to those idyllic family gatherings, where laughter mingled with the tantalizing scents of herbs and spices. The recipe I'm about to share isn't just a method for cooking lamb chops; it's a cherished family tradition, lovingly passed down through generations.


Ingredients:

- Lamb loin chops


- 4 cloves of garlic, minced


- 1/2 cup balsamic vinegar


- 2 tablespoons Dijon mustard


- 1 teaspoon fresh oregano


- 1 tablespoon red wine vinegar


- 1/4 cup olive oil


- 2 tablespoons brown sugar


- Kosher salt


- Black pepper


Instructions:
1. Prepare the Marinade: In a mixing bowl, whisk together the garlic, balsamic vinegar, Dijon mustard, oregano, red wine vinegar, olive oil, and brown sugar. This aromatic concoction will serve as the perfect marinade for your lamb chops.
2. Season the Lamb: On a separate plate, generously sprinkle the lamb loin chops with kosher salt and black pepper on both sides. This initial seasoning ensures that the meat is flavorful from the first bite to the last.
3. Marinate the Lamb: Place the seasoned lamb chops into the bowl with the marinade. Toss them gently to ensure each chop is well-coated. Cover the bowl with plastic wrap and refrigerate for at least 1 to 2 hours, turning the chops occasionally to allow the flavors to meld beautifully.
4. Fire Up the Grill: Get your BBQ ready! You'll want medium-high, indirect heat to ensure the lamb chops cook evenly and achieve that perfect medium-rare finish.
5. Grill to Perfection: Place the marinated lamb chops on the grill. Cook each side for approximately 5 to 7 minutes, depending on the thickness of the chops. You're aiming for a luscious medium-rare, where the exterior has a lovely char, and the interior remains juicy and tender.
A Family Memory:

Every time I prepare these lamb chops, I'm reminded of my grandmother's backyard, her garden blooming with the fresh herbs we would use in the marinade. As a child, I was often tasked with picking the freshest oregano leaves, while my siblings helped set up the grill. The air would be filled with the rich scent of balsamic vinegar and garlic, mingling with the laughter and stories shared around the family table. These gatherings weren't just about the food; they were about creating memories and cherishing the time spent with loved ones.


Final Thoughts:

Making Balsamic Marinated Lamb Chops is more than just preparing a meal; it's a celebration of family, tradition, and the timeless joy of sharing good food. With a difficulty rating of 6/10, this dish is approachable for most home cooks and serves as an impressive main dish for any occasion. Whether you're recreating a family memory or starting a new tradition, these lamb chops are sure to become a beloved favorite.

Read more about Appetizers

Read more about Main Dishes

Read more about Desserts

Coconut Guava Ice cream | Made by Meaghan Moineau

Coconut Guava Ice cream | Made by Meaghan Moineau

Title: Tropical Bliss: Crafting Coconut Guava Ice Cream with a Nostalgic Twist


Description:

Dive into the world of tropical flavors with our Coconut Guava Ice Cream recipe. This dessert, rich with the creamy goodness of coconut milk and the exotic sweetness of guava, will transport you to sun-kissed beaches and family gatherings. Easy to make yet bursting with flavor, it's the perfect ending to any meal.

---


Introduction

There's something undeniably enchanting about tropical flavors. They have the power to whisk you away, if only for a moment, to sun-drenched beaches and swaying palm trees. Coconut Guava Ice Cream is one such treat that not only captivates the taste buds but also carries a story of familial warmth and nostalgia.

A Nostalgic Tale

I remember my grandmother's kitchen, a place where the air was always perfumed with the scent of fresh fruit and homemade treats. One summer, during a family reunion, she introduced us to her version of Coconut Guava Ice Cream. It was a revelation—a creamy, fruity concoction that had everyone clamoring for more. The kitchen buzzed with laughter and chatter as we all took turns churning the ice cream by hand, a labor of love that brought us closer together. Those days spent with family around the table, sharing stories and scoops of this delightful ice cream, remain some of my fondest memories.

Recipe: Coconut Guava Ice Cream


Ingredients:

- 1 can of coconut milk

- 1/2 cup of condensed milk


- 2 ripe guavas, peeled and de-seeded


- 1/2 cup of blueberries


- 1/4 cup of crushed peanuts


Instructions:

1. Prepare the Coconut Milk: Place the can of coconut milk in the freezer and allow it to solidify. This typically takes 4-6 hours, depending on your freezer's temperature.
2. Separate the Coconut Milk: Once frozen, open the can completely. The milk and coconut water will have separated, with the coconut water appearing clearer. Use a sharp knife to cut through the frozen block, separating the milk from the water.
3. Blend the Ingredients: Place the frozen coconut milk in a blender. Add the condensed milk and chopped, de-seeded guavas. Blend for 3-5 minutes, pausing at intervals to ensure a smooth consistency.
4. Mix in Blueberries: Pour the blended mixture into a bowl, stir in the blueberries, and ensure they are evenly distributed.
5. Freeze and Serve: Transfer the mixture to a freezer-safe container. Allow it to freeze for 3-6 hours until firm. Serve garnished with crushed peanuts for added texture and flavor.

Conclusion

Creating Coconut Guava Ice Cream is more than just making a dessert; it's a journey into the tropical paradise of flavors and memories. With each spoonful, you're not only savoring the rich blend of coconut and guava but also a slice of cherished family moments.

Difficulty: 4/10


Classification: Dessert


This Coconut Guava Ice Cream is a breeze to make, offering a delightful escape to tropical indulgence with minimal effort. Whether you're crafting it for a special occasion or simply treating yourself, this ice cream is sure to become a staple in your culinary repertoire.

Read more about Appetizers

Read more about Main Dishes

Read more about Desserts

Blackberry Peach Betty | Made by Meaghan Moineau

Blackberry Peach Betty | Made by Meaghan Moineau

Title: Nostalgia in Every Bite: The Comforting Delight of Blackberry Peach Betty
Description: Dive into the heartwarming world of Blackberry Peach Betty, a dessert that not only tantalizes the taste buds but also brings cherished family memories to life. This easy-to-make slow cooker recipe combines the sweet and tangy flavors of peaches and blackberries with the comforting crunch of graham cracker crumbs. Perfect for any gathering, this dessert will transport you back to simpler times with each delicious bite.

---


When I think of desserts that evoke a sense of warmth and nostalgia, Blackberry Peach Betty instantly comes to mind. This delightful dish, with its harmonious blend of juicy peaches and tart blackberries, is more than just a sweet treat—it's a thread that ties my family together through shared memories and cherished moments.


Ingredients You'll Need:

- 1 can of peach pie filling


- 2 cups of frozen blackberries


- 1 tablespoon of butter, melted


- 1 cup of graham cracker crumbs


- 1 teaspoon of ground cinnamon


- ¼ cup of sugar


Instructions:

1. Begin by spraying your slow cooker with cooking spray to prevent sticking, then set it aside.


2. In a medium-sized bowl, mix together the peach pie filling, frozen blackberries, sugar, and ground cinnamon. This will be the fragrant fruit base of your Betty.


3. Pour half of the fruit mixture into the bottom of the slow cooker, and top with half of the graham cracker crumbs and a drizzle of melted butter. Repeat with the remaining fruit, crumbs, and butter to create layers of flavor and texture.


4. Cover the slow cooker and let it work its magic on low for 3-4 hours. The slow, gentle heat will meld the ingredients into a warm, bubbling dessert.


5. Once done, serve it hot over a scoop of French vanilla ice cream. The contrast of the warm Betty and the cold ice cream is simply irresistible.


A Trip Down Memory Lane:

Growing up, my family gatherings were often centered around the kitchen, where the aroma of various dishes would fill the air. One summer evening, my grandmother introduced us to Blackberry Peach Betty. I remember her explaining how, during her own childhood, this dessert was her mother's way of making the most of the season's bounty. It quickly became a staple at our family reunions, with my grandmother sharing stories of her youth as we savored each spoonful. The warmth of the dessert mirrored the warmth of our family bonds, creating a tradition that I now share with my own children.


Difficulty: 3/10
Classification: Dessert

Blackberry Peach Betty is a testament to the beauty of simple ingredients coming together to create something extraordinary. It's a dessert that doesn't demand much from the cook, yet offers so much in return. Whether you're making it for a special occasion or just to indulge in a bit of nostalgia, this dish never fails to deliver both comfort and joy.

Read more about Appetizers

Read more about Main Dishes

Read more about Desserts

Spicy Indian-Style Hummus | Made by Meaghan Moineau

Spicy Indian-Style Hummus | Made by Meaghan Moineau

Title: Spicy Indian-Style Hummus: A Flavorful Fusion of Tradition and Taste
Description: Dive into the vibrant world of Indian-inspired cuisine with our Spicy Indian-Style Hummus. This unique take on a classic dip combines traditional hummus ingredients with the robust flavors of Indian spices, creating a dish that's both familiar and exotic. Perfect as an appetizer, this easy-to-make recipe brings a touch of nostalgia to your table, reminiscent of cherished family gatherings. Rated 4 out of 10 on the difficulty scale, this dish promises to be a delightful addition to your culinary repertoire.

---


Spicy Indian-Style Hummus: A Family Favorite with a Twist

There's something inherently comforting about recipes that remind us of home. For me, hummus has always been one of those dishes. Growing up, our kitchen was a melting pot of flavors, with my Indian heritage blending seamlessly with my love for international cuisine. This Spicy Indian-Style Hummus is a testament to that fusion, a dish that brings together the best of both worlds.


Ingredients:

- 1 cup dried chickpeas


- 1 pinch asafetida


- 1/2 teaspoon cayenne


- 2 tablespoons fresh chives, chopped


- 1 tablespoon fresh ginger, minced


- 2 tablespoons fresh parsley, chopped


- 2 cloves garlic, minced


- 1 teaspoon ground coriander


- 1 teaspoon ground cumin


- 1/2 teaspoon black fresh ground pepper


- Juice of 1 lemon


- 1/4 cup olive oil (plus more if needed)


- 1-2 red and green fresh chilies, chopped


- 1 teaspoon sea salt


- 1/4 cup tahini


- 1/2 teaspoon turmeric


Instructions:
1. Prep the Chickpeas: Begin by rinsing the chickpeas thoroughly. Soak them for 8 hours or overnight in several inches of water, adding a bit of yogurt whey or lemon juice to aid in softening them.
2. Cook the Chickpeas: Drain and rinse the soaked chickpeas, then transfer them to a large saucepan. Cover them with fresh water, bring to a boil, and then reduce the heat to medium-low. Cover and simmer for 1 to 1 1/2 hours, or until the beans are buttery soft. Drain them completely.
3. Blend the Ingredients: In a food processor, combine the cooked chickpeas with asafetida, cayenne, chives, ginger, parsley, garlic, coriander, cumin, black pepper, lemon juice, olive oil, chilies, sea salt, tahini, and turmeric. Process until you achieve a thick, smooth paste. For a thinner consistency, add more olive oil or a bit of water.
4. Serve: This recipe makes approximately 3 cups of hummus. Serve it as a delicious appetizer with fresh vegetables, pita bread, or crackers.
Family Memory:

Every summer, our family would gather at my grandparents' house for a weekend filled with laughter, stories, and, of course, food. My grandmother, with her eclectic mix of recipes, would always surprise us with something new. One year, she introduced us to her Spicy Indian-Style Hummus. I remember her bustling around the kitchen, explaining how the spices she used reminded her of her childhood in India. As we sat around the table, dipping warm, crusty bread into the hummus, I realized that food was more than just sustenance. It was a bridge connecting us to our past, a way to share and preserve cherished memories.


Difficulty Rating: 4/10
Classification: Appetizer

This Spicy Indian-Style Hummus is not just a dish; it's a journey through flavors and time, weaving together the threads of tradition and personal history. Whether you're hosting a gathering or simply looking to spice up your snack game, this hummus is sure to be a hit. Enjoy!

Read more about Appetizers

Read more about Main Dishes

Read more about Desserts

Cheesy Spinach Stuffed Shells | Made by Meaghan Moineau

Cheesy Spinach Stuffed Shells | Made by Meaghan Moineau

Title: A Comforting Classic: Cheesy Spinach Stuffed Shells That Warm the Heart
Description: Dive into the delightful fusion of flavors with our Cheesy Spinach Stuffed Shells recipe. This heartwarming dish, enriched with the goodness of spinach, a mix of cheeses, and crunchy pecans, is perfect for family gatherings or a cozy night in. Discover how this simple yet satisfying main dish became a cherished family tradition, and get ready to create lasting memories with each bite.

---


When I think of comfort food that brings my family together, the first dish that comes to mind is Cheesy Spinach Stuffed Shells. This delightful recipe has been a staple at our family dinners for as long as I can remember. It's not just the blend of rich flavors and wholesome ingredients that make it special; it's the memories we create every time we gather around the table to savor it.


Ingredients:

- Jumbo shells


- Cooked frozen spinach


- Wheat germ


- Shredded Parmesan cheese


- Pecans


- Shredded Mexican cheese


- Diced green onions


- Salt


- Dried basil


- Eggs


- Water


- Alfredo sauce


- Spaghetti sauce


Instructions:

1. Begin by pre-boiling your jumbo shells in a large pot of salted boiling water for about 9 minutes. They will finish cooking in the oven later. Once boiled, drain them face down on a paper towel to remove any excess water.


2. While the shells are cooking, prepare your filling. Cook the frozen spinach in the microwave until it's no longer frozen, following the directions on the package but without adding water.


3. In a large bowl, combine the cooked spinach, wheat germ, Parmesan cheese, shredded Mexican cheese, chopped pecans, and finely diced green onions. Mix until well combined.


4. Season the mixture with salt, a touch of pepper, and dried basil to taste. I usually add about a teaspoon of dried basil, but feel free to adjust according to your preference. For a unique twist, consider adding a pinch of nutmeg.


5. Once the mixture is seasoned to your liking, stir in two eggs and a bit of water, mixing until the eggs are fully incorporated.


6. Stuff the spinach mixture into each of the shells. You should have enough filling for about 16 - 20 shells. Set these aside.


7. Grease an 8 x 8-inch baking pan with cooking spray. Spread half a jar of Alfredo sauce on the bottom, followed by an even layer of spaghetti sauce.


8. Arrange the stuffed shells in the pan, then top them with the remaining sauce.


9. Bake in a preheated 350°F oven, uncovered, for about 30 - 35 minutes or until the sauce is bubbly.


10. Serve hot, and enjoy the tastes of home.


Nostalgic Family Memory:

Every year, as the leaves turned golden and the air grew crisp, my family gathered at my grandma's house for our annual autumn feast. The main highlight was always her Cheesy Spinach Stuffed Shells. I remember watching her in the kitchen, expertly stuffing each shell with a smile, her hands moving with the grace of practiced love. As the shells baked, the house filled with a comforting aroma that promised warmth and togetherness. Those dinners weren't just about the food; they were about coming together, sharing stories, laughter, and love—a tradition I continue with my own family today.


Difficulty Rating: 5/10
Classification: Main Dish

This Cheesy Spinach Stuffed Shells recipe is not only a delicious main course but also a vessel for cherished memories. It's simple enough for a weeknight dinner and special enough for a festive gathering. Give it a try, and perhaps it will become a beloved tradition in your family, too.

Read more about Appetizers

Read more about Main Dishes

Read more about Desserts