Peanut Butter Sriracha Cookies | Made by Meaghan Moineau

Peanut Butter Sriracha Cookies | Made by Meaghan Moineau

Spice Up Your Sweet Tooth: Peanut Butter Sriracha Cookies


A Nostalgic Twist on a Family Favorite


When it comes to baking, few things evoke nostalgia like the comforting aroma of cookies wafting through the house. Growing up, cookies were a staple in our household, each batch a different adventure, each bite a fond memory. Among the myriad of recipes my family experimented with, one always stood out for its unique blend of flavors: Peanut Butter Sriracha Cookies. As unconventional as it sounds, this daring combination became a beloved treat, sparking laughter and curiosity every time we shared them with friends and family.


The Story Behind the Spice


My earliest memory of these cookies dates back to a rainy Sunday afternoon. My mom, ever the culinary adventurer, decided to put a twist on the traditional peanut butter cookie recipe by adding a hint of sriracha. The result was nothing short of magical—a perfect blend of sweet, salty, and spicy, topped with a classic Hershey's chocolate kiss. I remember the initial skepticism turning into surprise and delight as we all took our first bites. The cookies became a family staple, often requested at gatherings and cherished as a symbol of our family's love for creativity and adventure in the kitchen.


The Recipe: A Perfect Blend of Sweet and Heat


Ingredients:

- 1 cup unsalted butter, softened


- 1 cup crunchy peanut butter


- 1 cup sugar


- 1 cup brown sugar


- 1 tablespoon sriracha


- 2 large eggs


- 1 teaspoon vanilla extract


- 2 1/2 cups all-purpose flour


- 1 teaspoon baking powder


- 1/2 teaspoon salt


- 1 teaspoon baking soda


- Granulated sugar for rolling


- Hershey's chocolate kisses for topping


Instructions:

1. In a large mixing bowl, cream together the unsalted butter, crunchy peanut butter, sugar, and brown sugar until smooth and fluffy.


2. Gradually add in the sriracha, eggs, and vanilla extract. Beat the mixture until everything is well combined.


3. In a separate bowl, whisk together the flour, baking powder, baking soda, and salt.


4. Slowly incorporate the dry ingredients into the peanut butter mixture, stirring until fully combined.


5. Chill the dough in the refrigerator for 1 hour.


6. Preheat your oven to 375 degrees Fahrenheit.


7. Roll the dough into approximately 1-inch balls, or use a medium-sized cookie scoop for uniformity.


8. Dip the top of each dough ball into granulated sugar, then place them onto a cookie sheet.


9. Flatten each ball with a fork, creating a criss-cross pattern.


10. Bake for 8-10 minutes, ensuring not to over-bake them. The cookies should just begin to brown.


11. Once out of the oven, immediately press a Hershey's chocolate kiss into the center of each cookie.


12. Allow the cookies to cool on wire racks before indulging.


The Verdict


Difficulty Rating: 4/10
Classification: Dessert

These Peanut Butter Sriracha Cookies are more than just a dessert; they're a conversation starter. Easy enough for a novice baker yet intriguing enough for a seasoned one, they offer a delightful surprise with every bite. Whether you're looking to impress at a potluck or just craving something different, these cookies promise a unique experience that's sure to leave a lasting impression on anyone who tries them. So, why not spice up your sweet tooth and create some new, heartwarming memories along the way?

Read more about Appetizers

Read more about Main Dishes

Read more about Desserts

Baked Scallops With Parma Ham | Made by Meaghan Moineau

Baked Scallops With Parma Ham | Made by Meaghan Moineau

Title: Savoring Memories: Baked Scallops with Parma Ham
Description: Dive into a delectable culinary journey with our Baked Scallops with Parma Ham recipe. This exquisite appetizer, blending the rich flavors of tender scallops and savory Parma ham, will transport your taste buds to the coastal kitchens of Italy. Easy to prepare and perfect for any occasion, this dish is a delightful starter that promises to enchant your guests. Discover the nostalgia behind this family favorite and bring a touch of elegance to your dining table.

---


Baked Scallops with Parma Ham: A Taste of Nostalgia


There’s something magical about the aroma of freshly baked scallops mingling with the earthy scent of Parma ham and garlic. It instantly transports me back to my grandmother's cozy kitchen, where every dish was infused with love and tradition. This Baked Scallops with Parma Ham recipe is more than just a delightful appetizer; it’s a cherished family memory that I’m thrilled to share with you.


Ingredients:

- Fresh big scallops

- Parma ham


- 1 garlic clove


- Dried breadcrumbs


- Fresh parsley


- Olive oil


- Bell pepper (optional for garnish)


Instructions:

1. Preheat the Oven: Begin by preheating your oven to 410°F (210°C / T 7). This ensures a perfect, even bake for your scallops.
2. Prepare the Topping: In a food processor, combine the dried breadcrumbs, Parma ham, garlic, parsley, and 1 teaspoon of olive oil. Blitz until you achieve a coarse, crumbly mixture. This topping will add a delightful crunch and flavor to your scallops.
3. Grease the Oven Rack: Fold a piece of kitchen paper and pour 1 teaspoon of olive oil onto it. Use this to grease an oven rack, preventing the scallops from sticking and ensuring an easy cleanup.
4. Assemble the Dish: Place the fresh scallops on the greased rack. Generously top each scallop with the Parma ham mixture, ensuring an even distribution.
5. Bake to Perfection: Drizzle a dash of olive oil over the scallops and slide the rack into the preheated oven. Let them bake for approximately 8 minutes, or until the tops are golden brown and the scallops are cooked through.
6. Serve and Enjoy: For an elegant presentation, serve the scallops as a starter with a few leaves of lamb's lettuce or rocket. A sprinkle of finely chopped bell pepper adds a vibrant touch and a hint of sweetness, perfectly complementing the savory flavors.

A Family Tradition


Every time I prepare this dish, I’m reminded of a particular summer evening at my grandmother's seaside cottage. The salty breeze from the ocean mingled with the mouthwatering scent of baking scallops, creating an atmosphere of warmth and togetherness. My grandmother, with her gentle hands and warm smile, guided me through the steps as we prepared this family favorite together. Sharing stories and laughter made the experience unforgettable, and now, every bite of these baked scallops brings back those cherished memories.


Difficulty Rating: 3/10


This recipe is wonderfully straightforward, making it accessible even for novice cooks. With minimal preparation and a quick bake time, it’s the perfect choice for those looking to impress without the stress.


Classification: Appetizer


Baked Scallops with Parma Ham is an elegant appetizer that sets the tone for a gourmet dining experience. Its rich flavors and sophisticated presentation make it an ideal start to any meal.


---


Embrace the flavors and memories with this Baked Scallops with Parma Ham recipe. Whether you’re cooking for a special occasion or simply indulging in a bit of culinary nostalgia, this dish promises to delight and inspire. Enjoy the taste of tradition with every bite!

Read more about Appetizers

Read more about Main Dishes

Read more about Desserts

Beef Teriyaki Stir Fry | Made by Meaghan Moineau

Beef Teriyaki Stir Fry | Made by Meaghan Moineau

Title: Savoring Memories with Beef Teriyaki Stir Fry: A Nostalgic Family Delight
Description: Dive into the flavors of our Beef Teriyaki Stir Fry—a savory blend of tender beef, vibrant vegetables, and a delectable sauce. This main dish not only tantalizes your taste buds but also brings back cherished memories of family gatherings. Rated a 6/10 on the difficulty scale, this recipe is perfect for both seasoned cooks and culinary novices looking to create a delicious and heartwarming meal.

---


Beef Teriyaki Stir Fry: A Flavorful Journey Through Time

The aroma of soy sauce mingling with ginger and garlic, the sizzle of beef in a hot pan, and the vibrant colors of fresh vegetables—these are the sensations that transport me back to my grandmother's kitchen. It was a place where magic happened, where every meal was a celebration of flavors and family. Today, I want to share a recipe that encapsulates those cherished moments: Beef Teriyaki Stir Fry.


Ingredients:

- 1 lb flank steak, thinly sliced


- 2 cups broccoli florets


- 1 red bell pepper, sliced


- 1 cup mushrooms, sliced


- 2 scallions, sliced


- 2 tablespoons soy sauce


- 1 tablespoon brown sugar


- 1 tablespoon dark sesame oil


- 2 cloves garlic, minced


- 1 inch fresh ginger, grated


- 2 tablespoons vegetable oil


- 1 tablespoon cornstarch


- 2 teaspoons cold water


- Sesame seeds for garnish


Instructions:
1. Marinate the Flavors: In a small bowl, whisk together soy sauce, brown sugar, sesame oil, garlic, and ginger. Add the sliced flank steak to the mixture, ensuring each piece is well-coated. Cover and refrigerate for at least 30 minutes, allowing the flavors to meld.
2. Sizzle and Sauté: Heat vegetable oil in a large frying pan over medium heat. Add the marinated beef, cooking for 3-4 minutes to brown it on all sides. Remove the beef from the pan and set it aside.
3. Vegetable Medley: In the same pan, add broccoli, red bell pepper, and mushrooms. Sauté for about 5 minutes, or until the vegetables begin to soften.
4. Saucy Symphony: Stir in the teriyaki sauce and bring the mixture to a simmer. Return the beef to the pan, including any flavorful drippings. Cook for another 5 minutes, stirring occasionally to ensure even flavor distribution.
5. Thickening Touch: In a small bowl, dissolve cornstarch in 2 teaspoons of cold water. Stir this mixture into the pan, allowing the sauce to thicken over 2 minutes. Toss the beef and vegetables to coat them evenly in the rich teriyaki sauce.
6. Serve and Enjoy: Sprinkle with sesame seeds and sliced scallions before serving. Pair it with steamed rice or noodles for a complete meal.
A Nostalgic Family Memory:

Every Sunday afternoon, my family would gather at my grandmother's house. The kitchen was always a hub of activity, filled with laughter, stories, and the enticing scent of her Beef Teriyaki Stir Fry. I remember standing on a stool, watching her expertly whisk the sauce, her hands moving with the grace of years of practice. The sizzling beef and vibrant vegetables were a feast for the senses, and as we sat around the table, each bite was a reminder of the love and care she infused into every dish.


These meals were more than just food; they were a celebration of our heritage and the bonds that held us together. Even now, whenever I make this dish, I'm reminded of those precious Sundays, and I feel a sense of gratitude for the culinary legacy she passed down to us.


Difficulty Rating: 6/10
Dish Classification: Main Dish
Conclusion:

Beef Teriyaki Stir Fry is more than just a recipe; it's an opportunity to recreate memories and share them with loved ones. Whether you're cooking for family or friends, this dish is sure to bring a sense of warmth and nostalgia to your table. Enjoy the symphony of flavors and the stories woven into each bite, and perhaps, create a few new memories of your own.

Read more about Appetizers

Read more about Main Dishes

Read more about Desserts

Drunken Turkey Chili | Made by Meaghan Moineau

Drunken Turkey Chili | Made by Meaghan Moineau

Title: Unveiling the Flavors of Fall: Drunken Turkey Chili Recipe
Description: Dive into the comforting warmth of Drunken Turkey Chili, a dish that not only fills your home with irresistible aromas but also brings back cherished memories of family gatherings. This hearty main dish, with a difficulty rating of 6 out of 10, is perfect for cozy evenings. Packed with lean turkey, vibrant veggies, and the subtle kick of light beer, this chili will quickly become a household favorite.

---


As the leaves begin to turn and the air takes on a crisp bite, there's nothing quite like a steaming bowl of chili to bring comfort and warmth to your home. Our Drunken Turkey Chili is the perfect companion for those cozy autumn nights, blending the rich flavors of lean turkey, fresh vegetables, and a hint of light beer to create a dish that's as nourishing as it is flavorful.


Ingredients:

- 2 tablespoons extra virgin olive oil


- 1 large white onion, diced


- 1 red bell pepper, chopped


- 3 cloves garlic, minced


- 2 jalapeno peppers, seeded and chopped


- 1 teaspoon smoked paprika


- 1 tablespoon chili powder


- 1 teaspoon ground cumin


- ½ teaspoon black pepper


- 1 tablespoon unsweetened cocoa powder


- 1 pound lean ground turkey meat


- 1 can (28 ounces) peeled tomatoes


- 1 can (15 ounces) black beans, drained and rinsed


- 1 cup light beer


- 2 tablespoons low sodium soy sauce


- Fresh cilantro, chopped


Instructions:

1. In a large pot, gently heat the extra virgin olive oil over medium heat. Ensure the oil doesn’t smoke.


2. Add the diced onion, chopped red bell pepper, minced garlic, and jalapenos. Sauté for about 5 minutes, until the vegetables are soft and fragrant.


3. Stir in the smoked paprika, chili powder, ground cumin, black pepper, and unsweetened cocoa powder, coating the vegetables thoroughly.


4. Add the ground turkey, sautéing for 3 to 4 minutes until it's just cooked through. Break up the turkey with your spoon or spatula as it cooks.


5. Drain the juice from the canned tomatoes into the pot, then finely chop the tomatoes and add them in. Stir well.


6. Introduce the black beans, light beer, and low sodium soy sauce to the mixture. Stir to combine all ingredients.


7. Add the chopped fresh cilantro and stir again to incorporate.


8. Cover the pot and allow the chili to simmer over low heat for 5 to 10 minutes.


9. Turn off the heat and let the chili rest for about 15 minutes before serving.


Optional Garnishes: Top with low-fat sour cream, grated cheese, avocado slices, or chopped green onions. Serve with tortilla chips for added crunch and flavor.
Nostalgic Family Memory:

Every year, as the first chill of autumn settled in, my family would gather in the kitchen to prepare our beloved Drunken Turkey Chili. The kitchen, filled with the symphony of chopping, sizzling, and stirring, became the heart of our home. I remember my grandmother, stirring the pot with a knowing smile, regaling us with stories of her childhood. Her tales, much like the chili, were rich and full of flavor.


The light beer added a playful twist to the recipe, a nod to the jovial spirit of our family gatherings. As the chili simmered, we'd huddle around the pot, tasting and tweaking, each family member adding their own special touch. Once ready, we'd ladle generous portions into bowls, topping them with our favorite garnishes, and gather around the table.


Today, each spoonful transports me back to those cherished moments, surrounded by laughter, love, and the delicious aroma of our family’s Drunken Turkey Chili. It's more than just a meal; it's a tradition that warms both the heart and soul.


---


This fall, embrace the season and create your own family memories with this delightful Drunken Turkey Chili. It's a dish that promises not only to satisfy your taste buds but also to bring a nostalgic warmth to your home.

Read more about Appetizers

Read more about Main Dishes

Read more about Desserts

Bibimbab (Korean Rice w Vegetables & Beef) | Made by Meaghan Moineau

Bibimbab (Korean Rice w Vegetables & Beef) | Made by Meaghan Moineau

Title: Discover the Heartwarming Flavors of Bibimbab: A Korean Classic
Description: Dive into the rich flavors and vibrant colors of Bibimbab, a beloved Korean dish that brings together a medley of fresh vegetables, savory beef, and perfectly cooked rice. Join us as we explore this deliciously customizable meal, perfect for any palate, and share a nostalgic family memory that highlights its place in our hearts.

---


Bibimbab: A Journey Through Flavor and Memory


Bibimbab, a staple in Korean cuisine, is more than just a dish. It's a tapestry of flavors and textures that unite to create a harmonious and satisfying meal. With its roots steeped in tradition and adaptability to suit any lifestyle, Bibimbab is a culinary delight that welcomes everyone to the table.


Ingredients:

- Carrots, julienned

- Cooked white rice


- Eggs


- English cucumber, sliced


- Garlic clove


- Red sprinkle gochugaru (red pepper flakes)


- Red gochujang (red pepper paste)


- Olive oil


- Sesame oil


- Sesame seeds


- Soy sauce


- Fresh spinach


- Sandwich steaks, thinly sliced


Instructions:


1. Prepare the Rice: Cook rice according to package directions and set aside.
2. Prep the Vegetables: Cut the carrots and cucumber into matchstick pieces. Set aside for sautéing.
3. Cook the Spinach: In a large non-stick pan, bring 2 cups of water to a boil. Add spinach and cook until wilted, stirring constantly. Drain and squeeze the spinach dry into a ball.
4. Sauté the Carrots and Garlic: Wipe out the skillet and heat 1 tsp of olive oil over medium-high heat. Add carrots and cook until soft, about 3 minutes. Add garlic and cook until fragrant, about 1 minute. Mix cucumber slices with gochugaru and set aside.
5. Prepare the Spinach Mixture: Combine the spinach with soy sauce and set aside until serving.
6. Cook the Beef: Add thinly sliced beef to the non-stick pan and heat until browned. Wipe down the pan with a napkin.
7. Fry the Eggs: Heat 1 tsp of olive oil in the non-stick pan over medium-high heat. Add eggs and cook until the whites are set, and the yolks remain runny, about 5 minutes.
8. Assemble the Bibimbab: Divide the cooked rice among four bowls. Top with sautéed vegetables, beef, and eggs. Drizzle with sesame oil and sprinkle with sesame seeds. Finish with a dollop of gochujang or Sriracha sauce for a spicy kick.

A Taste of Nostalgia


Growing up, Bibimbab was more than just a meal; it was a family ritual that brought us together on Sunday afternoons. I vividly recall the comforting aroma of sesame oil and the vibrant colors of the vegetables laid out on the kitchen counter. My grandmother, with her gentle hands, would guide us in chopping the vegetables, teaching us the importance of each ingredient and its place in the dish.


As we gathered around the table, each person was given the freedom to craft their perfect bowl, adding a personal touch to the traditional recipe. It was in these moments that I learned the true essence of Bibimbab—its ability to adapt to each individual's taste while still maintaining its core identity. Even today, every bite takes me back to those cherished family gatherings, filled with laughter and stories, binding us together through the simple joy of sharing a meal.


Difficulty Rating: 4/10


Classification: Main Dish


Bibimbab is a dish that invites creativity and personalization, making it a delightful experience for both novice and experienced cooks alike. Its versatility accommodates vegetarians, dieters, health-conscious eaters, and meat-lovers, ensuring that everyone can partake in its deliciousness. So, gather your ingredients, embrace the process, and enjoy the journey of creating your own Bibimbab masterpiece!

Read more about Appetizers

Read more about Main Dishes

Read more about Desserts

Roasted Beet Hummus | Made by Meaghan Moineau

Roasted Beet Hummus | Made by Meaghan Moineau

Title: A Vibrant Twist on Tradition: Roasted Beet Hummus
Description: Dive into the colorful world of Roasted Beet Hummus, a delightful fusion of earthy beets and creamy chickpeas. Discover a nostalgic family story that brings this dish to life, while learning how to create this flavorful appetizer in your own kitchen.

---


A Vibrant Twist on Tradition: Roasted Beet Hummus


In the heart of many family gatherings, food often takes center stage, binding loved ones together with its warmth and flavors. One dish that has become a beloved staple in my family is Roasted Beet Hummus. This vibrant, flavorful dip is more than just a treat for the taste buds—it's a journey down memory lane, rich with the colors and textures that make every get-together special.


A Family Memory: The Beetroot Legacy


Growing up, the sweet and earthy aroma of roasted beets often wafted through my grandmother's kitchen. She had an affinity for adding a pop of color to her dishes, and beets were her secret weapon. I remember sitting on a stool, watching her expertly peel and slice the beets, her hands stained a vivid magenta—a testament to her culinary expertise and love for vibrant, natural ingredients.


One summer, she decided to blend her love for traditional hummus with her beetroot obsession. The result was a stunning Roasted Beet Hummus that became an instant family favorite. I vividly recall the excitement and curiosity as she unveiled the bright pink dip, its color as bold as its flavor. We gathered around the table, dipping warm pita bread into the hummus, each bite a harmonious blend of earthy beets and creamy chickpeas, with a hint of lemon and garlic.


This dish quickly became a family tradition, gracing every gathering with its presence and reminding us of those joyful summer days. Even now, making Roasted Beet Hummus brings back memories of laughter, love, and the vibrant spirit of my grandmother.


The Recipe: Roasted Beet Hummus


Ingredients:

- 2 medium red roasted beets, peeled and chopped


- 1 can (15 oz) cooked chickpeas, drained and rinsed


- 2 cloves garlic, minced


- 1 teaspoon ground cumin


- Juice of 1 lemon


- 2 tablespoons tahini sesame seed paste


- 3 tablespoons olive oil (plus more for consistency)


- Salt to taste


Instructions:

1. In a food processor or blender, combine the roasted beets, garlic, cumin, lemon juice, tahini, and salt. Pulse until well blended.


2. Add the chickpeas and olive oil to the mixture. Pulse until just incorporated.


3. If the hummus is too thick, gradually add more olive oil, blending until you reach the desired consistency.


4. Serve with warm pita or flatbread, and enjoy a taste of tradition with a colorful twist.


Difficulty Rating: 3/10


This recipe is delightfully simple, making it accessible for even novice cooks while promising a delicious and visually stunning result. It's the perfect appetizer for any occasion, offering a unique twist on a classic favorite.


---


Roasted Beet Hummus is more than just a dish; it's a celebration of tradition, family, and the joy of sharing something beautiful and delicious with those you love. Whether you're creating new memories or reliving cherished ones, this vibrant hummus is sure to be a hit at your next gathering.

Read more about Appetizers

Read more about Main Dishes

Read more about Desserts

Tomato Stack Salad | Made by Meaghan Moineau

Tomato Stack Salad | Made by Meaghan Moineau

Title: "Tomato Stack Salad: A Taste of Summer Nostalgia"
Description: Dive into the freshness of summer with our Tomato Stack Salad, a delightful appetizer that brings together the vibrant flavors of ripe tomatoes, creamy goat cheese, and aromatic herbs. Rated an easy 3 out of 10 on the difficulty scale, this dish is perfect for beginners and seasoned cooks alike. Join us as we explore this simple yet elegant recipe, infused with the warmth of family memories.

---


Tomato Stack Salad: A Taste of Summer Nostalgia


As the sun casts its golden hue over the garden, the vibrant colors of ripe tomatoes become the centerpiece of summer meals. The Tomato Stack Salad, with its simple elegance, is more than just a dish; it's a cherished family tradition that brings back memories of warm gatherings and laughter-filled afternoons.


Ingredients:


- 4 ripe tomatoes


- 4 oz goat cheese


- A handful of fresh herbs (such as basil, parsley, or chives)


- Salt, to taste


- Balsamic vinegar, for drizzling


Instructions:


1. Prepare the Goat Cheese: Begin by mixing the fresh herbs into the goat cheese until well combined. The herbs add a burst of flavor, turning the cheese into a creamy, aromatic spread.
2. Slice the Tomatoes: Carefully slice each tomato into four thick rounds. Choose tomatoes that are firm yet ripe, ensuring they hold their shape when stacked.
3. Season the Tomatoes: Sprinkle each tomato slice lightly with salt to enhance its natural sweetness.
4. Assemble the Salad: Gently slather each tomato round with the herbed goat cheese. Stack the rounds to reassemble each tomato, creating a tower of alternating red and white layers.
5. Finish with Balsamic Vinegar: Drizzle the stacked tomatoes with balsamic vinegar, allowing it to cascade down the layers, adding a tangy contrast to the creamy cheese.

A Nostalgic Family Memory


This Tomato Stack Salad takes me back to my grandmother's kitchen, where the air was always filled with the aroma of fresh herbs. Every summer, my family would gather at her house, a quaint cottage surrounded by a lush garden. My siblings and I would help her pick the ripest tomatoes, our fingers stained with their juicy red hues.


Grandma had a way with simple ingredients, turning them into something magical. As she showed us how to mix the herbs into the goat cheese, her stories of summers past would unfold, each tale woven with laughter and a touch of nostalgia. The kitchen was our haven, a place where time slowed, and the outside world faded away.


The Tomato Stack Salad was always the highlight of our meal, a dish that captured the essence of summer in each bite. Even now, as I recreate this recipe, I can almost hear Grandma's voice, her laughter echoing through the years. This salad is more than just a recipe; it's a bridge to cherished memories and a testament to the power of family traditions.


Conclusion


The Tomato Stack Salad is a delightful appetizer that captures the essence of summer. With a difficulty rating of just 3 out of 10, it's an inviting dish for cooks of all levels. As you savor the flavors of fresh tomatoes, creamy goat cheese, and tangy balsamic vinegar, may you also find a connection to the warmth of family memories and the simple joys of sharing a meal together.


---


Embrace the simplicity and nostalgia of the Tomato Stack Salad, and let it become a cherished part of your summer gatherings.

Read more about Appetizers

Read more about Main Dishes

Read more about Desserts

Peanut Butter and Apple Oatmeal Breakfast Bars | Made by Meaghan Moineau

Peanut Butter and Apple Oatmeal Breakfast Bars | Made by Meaghan Moineau

Morning Bliss: Peanut Butter and Apple Oatmeal Breakfast Bars


A Delicious Morning Routine


There's something magical about the aroma of freshly baked oatmeal bars wafting through the house in the morning. Today, we will dive into a delightful recipe that will not only tantalize your taste buds but also fill your kitchen with the comforting scent of cinnamon and apples. Introducing our Peanut Butter and Apple Oatmeal Breakfast Bars—a perfect blend of wholesome ingredients and nostalgic flavors that are sure to make your mornings special.


Ingredients


- 2 cups Quaker oats


- 1/2 cup smooth peanut butter


- 1/4 cup butter


- 2 tablespoons vegetable oil


- 1/2 cup whole wheat flour


- 1/4 cup honey


- 1/3 cup brown sugar


- 1 teaspoon vanilla extract


- 1 teaspoon cinnamon


- 1 large apple, peeled and diced into small pieces


Instructions


1. Preparation: Preheat your oven to 350°F (175°C). Grease an 11x7 inch baking pan, or use an 8x8, 9x9, or 11x13 inch pan if necessary.
2. Mixing: Place the peanut butter and butter in a microwave-safe dish. Heat in the microwave for 30-45 seconds or until the butter is melted. Stir until smooth.
3. Combining Ingredients: In a large bowl, combine the oats, peanut butter mixture, vegetable oil, whole wheat flour, honey, brown sugar, vanilla extract, and cinnamon. Use an electric beater or KitchenAid mixer to blend the ingredients for approximately one minute.
4. Adding Apples: Carefully peel and dice the apple into small pieces, about the size of a pinky nail. Gently fold the diced apple into the oatmeal mixture.
5. Baking: Pour the mixture into the prepared pan and press down firmly with your fingers to ensure an even layer. Place the pan in the oven and bake for 25 minutes, or until the edges are golden brown. If using an 11x13 pan, check a bit earlier as the mixture will be thinner and cook faster.
6. Cooling and Serving: Let the bars cool for 10 minutes before slicing into strips. Allow the remaining bars to cool completely before storing them in a Tupperware container or wrapping them in foil.

A Nostalgic Family Memory


Growing up, Saturday mornings were a cherished family tradition in our household. The kitchen would come alive with the sound of laughter and the gentle clatter of mixing bowls. My mother, with her well-worn apron and a twinkle in her eye, would lead the culinary charge, and these Peanut Butter and Apple Oatmeal Breakfast Bars were always the star of the show.


I remember the excitement of peeling the apples with my little hands, the anticipation building as the sweet and nutty aroma filled the air. Once baked, the bars were a symphony of flavors—warm, comforting, and with just the right hint of cinnamon. After breakfast, our family would gather around the table, savoring each bite and sharing stories of the week gone by. These cherished moments are etched in my memory, a testament to the power of food in bringing people together.


Difficulty and Classification


- Difficulty: 3/10
- Classification: Main Dish

These Peanut Butter and Apple Oatmeal Breakfast Bars are not just a recipe; they are a gateway to creating beautiful memories with loved ones. Simple to make, yet profoundly satisfying, these bars are the perfect way to start your day with a touch of nostalgia and a whole lot of flavor. Enjoy baking, indulging, and making your mornings just a bit sweeter!

Read more about Appetizers

Read more about Main Dishes

Read more about Desserts

Rigatoni With Sweet Sausages In Creamy Tomato Sauce | Made by Meaghan Moineau

Rigatoni With Sweet Sausages In Creamy Tomato Sauce | Made by Meaghan Moineau

Title: "Nostalgic Comfort: Rigatoni with Sweet Sausages in Creamy Tomato Sauce"


Description: Dive into the heartwarming flavors of Italy with our Rigatoni with Sweet Sausages in Creamy Tomato Sauce. This recipe combines the savory essence of sweet sausages with the aromatic richness of fresh sage and leeks, all enveloped in a luscious, creamy tomato sauce. Join us as we share a cherished family memory that's bound to make this dish even more special. With a difficulty rating of 4/10, this main dish is perfect for a cozy family dinner or a nostalgic culinary journey.


---


Rigatoni with Sweet Sausages in Creamy Tomato Sauce: A Taste of Home


There's something undeniably comforting about a bowl of pasta, especially when it's infused with the rich flavors of sweet sausages and a creamy tomato sauce. This dish not only tantalizes the taste buds but also carries a legacy of family gatherings and nostalgic memories.


Ingredients You’ll Need:


- Sweet sausages


- 1 leek (cut in half lengthwise and rinsed thoroughly)


- Fresh sage


- 3 garlic cloves


- 1 onion


- Canned tomatoes


- Rigatoni pasta


- Milk


- Dried thyme


- Cayenne pepper


- Butter


- Extra virgin olive oil


- Sugar


- Salt & pepper


Cooking Instructions:


1. Prepare Your Ingredients: Begin by bringing a large pot of salted water to a boil. Chop the onion and garlic, setting them aside. Slice the leek in half lengthwise, rinse thoroughly, and chop. Chop the fresh sage and set it aside separately.
2. Cook the Sausages: To easily remove the casings, lightly slice each sausage lengthwise and peel them off with your fingers. In a large pan over medium-high heat, cook the sausages until they turn a beautiful golden brown, breaking them apart until they resemble ground meat. Remove the meat from the pan and set it aside in a bowl.
3. Sauté the Aromatics: Add 2 tablespoons of olive oil to the same pan and toss in the fresh sage. Cook for about a minute before adding the leeks and a pinch of cayenne pepper. Cook for an additional 2 to 3 minutes until the leeks soften. Return the sausage mixture to the pan, turn off the heat, and let the flavors meld.
4. Create the Sauce: In a separate pot, combine canned tomatoes, a splash of milk, and a sprinkle of dried thyme. Add a pinch of sugar to balance the acidity of the tomatoes. Season with salt and pepper to taste. Simmer the sauce for 10 minutes until it thickens.
5. Combine and Serve: Add the cooked rigatoni to the sausage and leek mixture, pouring the creamy tomato sauce over everything. Toss gently to combine and serve hot.

A Nostalgic Family Memory


Every time I prepare this dish, I'm transported back to my grandmother's cozy kitchen. The smell of sweet sausages sizzling in the pan and the sight of her expertly chopping leeks with the precision of years of practice. Sunday dinners were sacred in our family, with three generations gathered around the dining table, sharing stories and laughter. This rigatoni dish was always a staple, making an appearance at every family gathering. It was my grandmother's way of bringing us all together, each bite infused with love and tradition. Now, as I cook it for my family, I hope to pass on that same feeling of warmth and togetherness.


Difficulty Rating: 4/10


This main dish is perfect for home cooks looking to create something special without the stress of a complex recipe. The steps are simple and straightforward, ensuring a delightful meal that's sure to become a family favorite.


Conclusion


Rigatoni with Sweet Sausages in Creamy Tomato Sauce is more than just a meal; it's a connection to cherished memories and traditions. Whether you're cooking for your family or seeking comfort in a bowl, this dish promises to deliver warmth and satisfaction. Enjoy every bite and the stories that come with it.

Read more about Appetizers

Read more about Main Dishes

Read more about Desserts

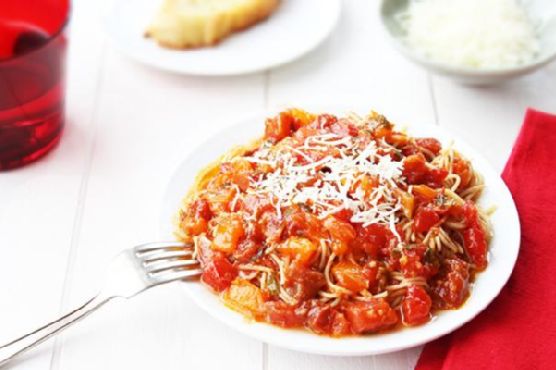
Peppery Absorption-Cooked Red-Wine Capellini | Made by Meaghan Moineau

Peppery Absorption-Cooked Red-Wine Capellini | Made by Meaghan Moineau

A Taste of Memories: Peppery Absorption-Cooked Red-Wine Capellini


Description

Indulge in the flavors of tradition with our Peppery Absorption-Cooked Red-Wine Capellini, a dish that combines the elegance of angel hair pasta with the robust notes of Spanish red wine and fresh herbs. Perfect as a main dish, this recipe not only tantalizes the taste buds but also evokes cherished family memories. With a difficulty rating of 6/10, this dish is both a culinary adventure and a nostalgic journey.

---


Ingredients


- Angel hair pasta: A delicate base that absorbs rich flavors.
- Olive oil: For a Mediterranean touch.
- White onion and garlic cloves: Aromatic essentials that form the backbone of flavor.
- Kosher salt: To enhance the natural taste of ingredients.
- Diced zucchini and trimmed asparagus: Fresh vegetables that add texture and nutrition.
- Cherry tomatoes: Juicy bursts of sweetness.
- Smoked paprika, black pepper, cayenne pepper: For that peppery kick.
- Fresh oregano and rosemary leaves: Fragrant herbs that elevate the dish.
- Spanish red wine and water: A bold liquid for absorption cooking.
- Fresh flat parsley leaves: A vibrant garnish to finish.

---


Instructions


1. Preheat and Toast: Preheat your oven to 375°F. Break the capellini into 3-inch lengths and spread them on a baking sheet. Toast in the oven, tossing occasionally, until golden brown, about 12 minutes.
2. Sauté Aromatics: In a large pot, heat olive oil over medium heat. Add the onion, garlic, and a pinch of salt. Cook until the onion and garlic are soft and aromatic, approximately 5 minutes.
3. Brown the Zucchini: Increase heat to medium-high. Add zucchini with another pinch of salt, and sauté until well browned, about 5 minutes.
4. Layer and Flavor: Place the toasted noodles atop the zucchini mixture. Layer asparagus and 1 cup of cherry tomatoes over the pasta. Sprinkle smoked paprika, black pepper, cayenne pepper, oregano, and rosemary.
5. Cook with Wine: Pour the red wine and ½ cup of water over the mixture. Toss gently with tongs. Cover the pot, reduce heat to medium, and cook for 8-12 minutes, tossing every 3 minutes. Add more wine or water if needed until noodles are cooked to your liking.
6. Final Touches: Adjust seasoning if necessary. Transfer to serving bowls. Garnish with remaining cherry tomatoes, parsley, and an extra grind of black pepper. Serve immediately.

---


Family Memory: A Dish from the Heart


The aroma of garlic sizzling in olive oil instantly transports me back to my grandmother’s kitchen. Every Sunday, the family would gather around her worn wooden table, eager to savor her latest creation. Among all her dishes, the Peppery Absorption-Cooked Red-Wine Capellini was a perennial favorite.


I remember the laughter and stories shared as we toasted the pasta, a simple task that somehow became an event in itself. My grandmother would let me sprinkle the smoked paprika, declaring that a “dash of love” was the secret ingredient. The dish was more than just a meal; it was a tapestry of flavors woven with love, laughter, and the warmth of family.


This recipe is my homage to those cherished Sundays. It’s a reminder that food is not just sustenance but a bridge to our past, connecting generations through taste and tradition.


---


Conclusion


The Peppery Absorption-Cooked Red-Wine Capellini is more than a dish; it’s a culinary experience infused with the flavors of memory and love. As you savor each bite, may it evoke the warmth of family gatherings and the joy of shared stories. Whether you’re crafting it for a special occasion or a simple dinner, this dish promises to bring a touch of nostalgia and a burst of flavor to your table. Enjoy this main dish with a 6/10 difficulty rating, and let it become a part of your family tradition.

Read more about Appetizers

Read more about Main Dishes

Read more about Desserts

Chicken Mulligatawny Soup | Made by Meaghan Moineau

Chicken Mulligatawny Soup | Made by Meaghan Moineau

A Hearty Hug in a Bowl: Chicken Mulligatawny Soup Recipe


A Taste of Tradition and Warmth


There's something magical about a bowl of soup that can transport you back in time, enveloping you in warmth and comfort. Chicken Mulligatawny Soup is one such dish, a delightful blend of flavors and textures that brings a touch of spice and a whole lot of love to your table. This recipe is not only a feast for the senses but also a cherished family tradition in many homes, including mine.


Description:

Discover the heartwarming flavors of Chicken Mulligatawny Soup, a rich and aromatic dish that combines tender chicken, crisp apples, and fragrant basmati rice with the exotic notes of curry and coconut. Perfect for chilly evenings or as a comforting meal any day of the week, this soup is sure to become a new favorite. With a preparation time of 45 minutes and a difficulty rating of 4 out of 10, it's a straightforward recipe that delivers complex flavors with minimal effort. Classified as a Main Dish, this soup is both satisfying and nourishing.


Ingredients:


- 2 tablespoons butter


- 1 onion, chopped


- 2 stalks celery, chopped


- 2 carrots, diced


- 2 apples, peeled and diced


- 1 tablespoon fresh ginger, grated


- 2 tablespoons flour


- 2 teaspoons curry powder


- 1/4 teaspoon cayenne pepper


- 6 cups chicken stock


- 1/2 cup basmati rice


- 2 skinless boneless chicken breasts, chopped


- 1 teaspoon salt


- 1 cup lite coconut milk


- Salt and pepper to taste


- Optional: Toasted almonds or cilantro for garnish


Instructions:


1. Sauté the Aromatics: Heat the butter in a large pot over medium heat. Add the onions, celery, carrots, apples, and ginger. Sauté for 5 minutes, stirring occasionally, until the vegetables are tender and fragrant.
2. Build the Base Flavor: Mix in the flour, curry powder, and cayenne pepper. Stir for another 3-5 minutes to allow the spices to bloom and the flour to cook off its raw taste.
3. Simmer the Soup: Add the chicken stock, basmati rice, chopped chicken, and 1 teaspoon of salt. Bring the mixture to a boil, then lower the heat to a simmer. Allow it to simmer for about 15 minutes, or until the rice is tender and the chicken is cooked through.
4. Finish with Creaminess: Stir in the lite coconut milk and season with additional salt and pepper to taste. Let the soup warm through, but do not boil.
5. Serve and Enjoy: Ladle the soup into bowls and garnish with toasted almonds or fresh cilantro for an added layer of texture and flavor.

A Family Memory: The Soup That Binds Us


I remember the first time my grandmother made Chicken Mulligatawny Soup for our family. It was a crisp autumn evening, the kind where the chill in the air makes you crave something warm and hearty. As soon as the kitchen filled with the aroma of sautéed onions and curry, we all gravitated toward the stove, eager to taste what was simmering in the pot.


Grandma would always tell us stories of her childhood in India, where this dish was a staple. She spoke of how her mother would make it on special occasions, filling the house with its captivating scent. As we sat around the dining table, bowls in hand, each spoonful was like a warm hug from her, a reminder of our roots and the love that binds our family together. That night, the kitchen wasn't just a place for cooking; it was a space for sharing stories, laughter, and creating memories that would last a lifetime.


Conclusion


Chicken Mulligatawny Soup is more than just a meal; it's a connection to heritage, a blend of cultures, and an expression of love. Whether you're making it for the first time or it's a family favorite, this soup promises to warm your heart as much as it does your body. Enjoy this culinary journey and savor the moments it creates around your table.

Read more about Appetizers

Read more about Main Dishes

Read more about Desserts

My Drunken Fish Fillet | Made by Meaghan Moineau

My Drunken Fish Fillet | Made by Meaghan Moineau

Title: "My Drunken Fish Fillet: A Nostalgic Dive into Flavor"


Description:

Uncover the secrets of My Drunken Fish Fillet, an irresistible dish that combines the perfect blend of textures and flavors. Journey with me through a cherished family memory, as we explore this recipe that promises a delightful culinary experience. Rated as a 6 out of 10 in difficulty, this main dish is a must-try for any adventurous cook looking to impress their guests.

---


My Drunken Fish Fillet: A Nostalgic Dive into Flavor


In the heart of my family's kitchen, amidst the clatter of pots and pans, lies a recipe passed down through generations—My Drunken Fish Fillet. This dish is more than just a meal; it's a gateway to cherished memories and flavors that linger long after the last bite.


Ingredients:

- Fresh fish fillets

- Salt (to fillet the fish)


- White ground pepper (to fillet the fish)


- A splash of rice wine


- 1 cup of beer


- 2 white eggs (separate the yolks from the whites)


- 1 cup all-purpose flour (plus a little more for dredging)


- ½ tsp salt


- Oil (for frying)


Instructions:

1. Batter Preparation:

- In a mixing bowl, combine the beer, egg yolk, flour, and ½ tsp of salt. Beat well until the mixture becomes thick and smooth. Refrigerate for one hour to allow the flavors to meld and the batter to thicken.


2. Fish Preparation:

- Sprinkle salt and white ground pepper over the fish fillets. Pat them gently to ensure they're well-coated.


- Splash the rice wine over the fillets and let them marinate for 15 to 20 minutes. This step infuses the fish with a subtle yet distinct aroma.


3. Batter Enhancement:

- Before cooking, whip the egg whites until they form soft, foamy peaks. Gently fold the egg whites into the chilled batter, mixing carefully to maintain a light and airy texture.


4. Frying:

- Dip the marinated fish fillets into the drunken batter, ensuring each piece is well-coated.


- Heat oil in a pan over medium heat. Fry the fillets, three pieces at a time, until they are golden brown and crispy.


5. Serving Suggestion:

- For a complementary dip, mix Yamasa soy sauce with wasabi from a tube and a dash of lemon juice. This tangy, spicy dip perfectly balances the richness of the fish.


A Family Memory:


Every summer, as the golden hues of dusk settled over our lakeside cabin, my grandmother would gather the family for a special feast. Her version of the Drunken Fish Fillet was the star of the show, accompanied by laughter and stories that echoed through the years. The kitchen would fill with the aroma of sizzling fish, mingling with the cool evening breeze.


I remember the first time she entrusted me with the task of preparing the batter. After a few flour-dusted attempts, I finally achieved the right consistency. "Patience," she said, "is the secret ingredient." As we cooked together, she shared tales of her own childhood, of fishing trips with her father, and the first time she learned to make this dish.


This recipe is a tribute to those precious moments, capturing the essence of family, tradition, and the joy of cooking together.


Difficulty Rating: 6/10

Classification: Main Dish


Whether you're looking to recreate a nostalgic family memory or simply indulge in a delightful culinary adventure, My Drunken Fish Fillet promises an experience that is as heartwarming as it is delicious. So gather your loved ones, roll up your sleeves, and let the magic of this dish bring you closer together.

Read more about Appetizers

Read more about Main Dishes

Read more about Desserts

Honeyed Bacon” Baklava | Made by Meaghan Moineau

Honeyed Bacon" Baklava | Made by Meaghan Moineau

Title: Honeyed Bacon Baklava: A Sweet and Savory Fusion of Tradition and Innovation
Description:

Dive into the delightful layers of Honeyed Bacon Baklava—a modern twist on a timeless classic. This recipe blends the richness of walnuts, the sweetness of honey, and the savory goodness of bacon, all wrapped in delicate phyllo pastry. Perfect as a dessert, this dish is sure to impress both traditionalists and adventurous foodies alike. Discover the story behind this unique creation and learn how to make it at home with our detailed guide.


---


Honeyed Bacon Baklava: A Family Tradition with a Twist

There's something magical about the aroma of baklava baking in the oven, its sweet, nutty fragrance filling the kitchen and wafting through the house. For as long as I can remember, baklava has been a staple at our family gatherings. My grandmother would spend hours preparing her signature dessert, layering phyllo dough with precision and love. The final touch was always her secret syrup, drizzled generously over the golden-baked layers.


One autumn afternoon, inspired by both nostalgia and curiosity, I decided to give our beloved baklava a modern twist. The idea of adding bacon—a family favorite—seemed both daring and delicious. I knew it was a risk, but the combination of savory and sweet was too tempting to resist.


Ingredients:

- 2 cups walnuts


- 1/2 cup sugar


- 1 teaspoon ground cinnamon


- 1 package frozen phyllo dough, thawed


- 1 cup butter, melted


- 1 cup honey


- 8 slices of bacon, fried to a crispy stage


Instructions:
1. Prepare the Filling:

In a large bowl of a food processor, add walnuts, crispy bacon, sugar, and cinnamon. Pulse until the mixture is finely chopped and well combined. Set aside.


2. Layer the Phyllo:

Preheat your oven to 300°F (150°C). Cut the phyllo dough into 13" by 9" rectangles. In a greased 13" by 9" baking dish, place one sheet of phyllo and brush it with melted butter. Repeat this process to make five more layers of phyllo, brushing each layer with butter.


3. Assemble the Baklava:

Sprinkle one cup of the walnut-bacon mixture over the phyllo layers. Repeat the layering process three more times, making a total of four layers. Top with the remaining phyllo sheets, brushing each with butter.


4. Cut and Bake:

With a sharp knife, cut just halfway through the layers in a triangle or diamond pattern. Bake in the preheated oven for 1 hour and 25 minutes, or until the top is golden brown.


5. Add the Honey:

In a small saucepan over medium-low heat, warm the honey until it's hot but not boiling. Evenly spoon the hot honey over the hot baklava, ensuring it seeps into the cuts. Allow the baklava to cool in the dish on a wire rack for at least one hour. Cover with foil and let it stand at room temperature until serving.


6. Serve:

To serve, finish cutting through the layers with a sharp knife to form triangles or diamonds.


A Family Memory:

As I served this Honeyed Bacon Baklava at our next family gathering, I was met with curious looks and raised eyebrows. My grandmother, the matriarch of our family traditions, took the first bite. Her eyes widened with surprise, and then a smile broke across her face. "You've done it," she said, her voice full of warmth. "You've taken something old and made it new." The baklava was a hit, a perfect blend of nostalgia and innovation that brought us all together in laughter and shared delight.


Difficulty Rating: 8/10
Classification: Dessert

This Honeyed Bacon Baklava is a delightful challenge for those looking to expand their culinary repertoire. Its blend of flavors and textures will impress at any gathering, offering a unique twist on a beloved classic. Whether you're a seasoned baker or a curious cook, this recipe invites you to explore the delicious intersection of tradition and creativity.

Read more about Appetizers

Read more about Main Dishes

Read more about Desserts

Drunken Turkey Chili | Made by Meaghan Moineau

Drunken Turkey Chili | Made by Meaghan Moineau

Title: Drunken Turkey Chili: A Hearty Bowl of Comfort and Memories
Description: Dive into a bowl of Drunken Turkey Chili, a savory and flavorful dish that combines lean turkey, fresh vegetables, and a splash of light beer for a unique twist. This main dish recipe is not only packed with taste but also comes with a heartwarming family story that makes it a cherished favorite.

---


As the leaves begin to turn and a crisp chill fills the air, there's nothing quite like cozying up with a steaming bowl of chili. While everyone has their go-to chili recipe, our family swears by a unique version that’s been passed down for generations: Drunken Turkey Chili.


Ingredients:

- 2 tablespoons extra virgin olive oil


- 1 large white onion, diced


- 1 red bell pepper, diced


- 3 cloves of garlic, minced


- 2 jalapeno peppers, seeded and minced


- 1 teaspoon smoked paprika


- 1 tablespoon chili powder


- 1 teaspoon ground cumin


- 1/2 teaspoon black pepper


- 1 teaspoon unsweetened cocoa powder


- 1 pound lean ground turkey meat


- 1 can (28 ounces) canned tomatoes, peeled


- 1 can (15 ounces) black beans, drained and rinsed


- 1 cup light beer


- 1 tablespoon low sodium soy sauce


- 1/4 cup fresh cilantro, chopped


Instructions:

1. Gently heat the oil in a large pot, ensuring it doesn’t smoke.


2. Add the onion, bell pepper, garlic, and jalapenos. Sauté over medium heat until the vegetables are soft, about 5 minutes.


3. Stir in the smoked paprika, chili powder, ground cumin, black pepper, and cocoa powder to coat the vegetables evenly.


4. Add the ground turkey, sautéing for 3-4 minutes until just cooked through, breaking it up with a spoon or spatula.


5. Drain the juice from the canned tomatoes into the pot, then finely chop the tomatoes and add them to the mix.


6. Stir in the black beans, light beer, and soy sauce.


7. Add the chopped cilantro and stir well. Cover and allow to simmer over low heat for 5 to 10 minutes.


8. Turn off the heat and let the chili rest for about 15 minutes before serving.


Optional Garnishes:

Top your chili with low-fat sour cream, grated cheese, avocado slices, or chopped green onions. I personally enjoy pairing it with crunchy tortilla chips.


A Family Memory:

Every fall, our family would gather at my grandmother's house for our annual autumn supper. The highlight was always her Drunken Turkey Chili. As a child, I remember the enticing aroma of spices and simmering turkey welcoming us as we walked through the door. Grandma would be stirring the pot with a wooden spoon, her apron dusted with flour from her morning baking.


One year, my cousin accidentally added too much beer to the pot. We nervously watched as Grandma tasted it, and to our surprise, she chuckled and said, "Well, it seems the turkey's having a party!" That version of the chili turned out to be a hit, and from then on, the "drunken" element became a beloved part of our tradition.


Difficulty Rating: 3/10
This dish is classified as a Main Dish and is perfect for those looking for a hearty yet simple meal to prepare. Its delightful flavors and ease of preparation make it an excellent choice for family gatherings or a cozy night at home.

So, the next time you’re in need of a comforting meal that warms both the stomach and the soul, give our Drunken Turkey Chili a try. It’s more than just a dish; it’s a bowl full of cherished memories.

Read more about Appetizers

Read more about Main Dishes

Read more about Desserts

Spinach, Tomato & Onion Couscous | Made by Meaghan Moineau

Spinach, Tomato & Onion Couscous | Made by Meaghan Moineau

A Symphony of Flavors: Spinach, Tomato & Onion Couscous


A Hearty Main Dish That Brings the Family Together


Introduction


There’s something magical about a dish that brings people together, evoking cherished memories and creating new ones with every bite. Spinach, Tomato & Onion Couscous is one such dish—a delightful blend of fresh, wholesome ingredients that will have your taste buds dancing. This recipe is not only a feast for the senses but also a nostalgic trip down memory lane for me and my family.


Ingredients


- 1 cup whole-wheat couscous
- 1 ¼ cups water
- ½ teaspoon salt, divided
- 2 tablespoons olive oil
- 1 red onion, thinly sliced
- 2 tomatoes, diced
- 2 cups fresh spinach
- ¼ cup pine nuts
- ½ cup crumbled feta cheese
- Salt and pepper to taste

Instructions


1. Prepare the Couscous: In a small pan, bring the water and half of the salt to a boil. Once boiling, add the couscous, stir, and cover with a lid. Remove the pot from the heat and let it sit for 5 to 7 minutes while you prepare the vegetables.
2. Sauté the Vegetables: Heat a large pan over medium-high heat and add the olive oil. Once the oil is hot, add the onions and sauté until they begin to brown. Add the tomatoes and remaining salt, sautéing until they start to wilt, about 20 to 30 seconds. Add the spinach and sauté just until it wilts but remains bright green.
3. Mix It All Together: Stir the pine nuts into the vegetable mixture and remove the pan from the heat. Season with salt and pepper to taste. Pour the couscous into a large bowl, add the sautéed vegetables along with the crumbled feta, and toss everything together. Top with extra crumbled feta and enjoy while hot.

A Nostalgic Family Memory


Growing up, Sunday dinners were a sacred time in my family. No matter how busy the week had been, we all made it a point to gather around the dining table to share not just a meal, but our lives. My grandmother, the heart of our family, would often prepare her famous Spinach, Tomato & Onion Couscous. I remember the aroma of sautéed onions and fresh spinach wafting through the house, a scent that signaled warmth and togetherness.


As a child, I was fascinated by the way my grandmother would expertly toss the couscous with the vibrant vegetables, her hands moving gracefully as she added a sprinkle of feta cheese to finish the dish. It was her secret ingredient, she would say with a wink, and it never failed to elicit smiles from everyone at the table.


Those evenings were filled with laughter, stories, and the comforting knowledge that we were part of something bigger—a family bound by love and tradition. Today, whenever I prepare this couscous dish, I’m transported back to those cherished moments, and I hope it brings the same joy to your family as it has to mine.


Difficulty Rating


This recipe is rated 3 out of 10 for difficulty, making it accessible for cooks of all skill levels. It's a delightful main dish that's perfect for a family dinner or a cozy night in.

Conclusion


Spinach, Tomato & Onion Couscous is more than just a meal; it’s an experience, a connection to the past, and a celebration of the present. With its wholesome ingredients and simple preparation, it’s a dish that invites everyone to gather, share, and savor the taste of togetherness. So, why not try this recipe for your next family dinner and create some unforgettable memories of your own?

Read more about Appetizers

Read more about Main Dishes

Read more about Desserts

Chimichurri Skirt Steak with Grilled Asparagus | Made by Meaghan Moineau

Chimichurri Skirt Steak with Grilled Asparagus | Made by Meaghan Moineau

Title: "A Taste of Tradition: Chimichurri Skirt Steak with Grilled Asparagus"
Description: Dive into a culinary journey with our Chimichurri Skirt Steak and Grilled Asparagus recipe. This main dish combines vibrant flavors with a touch of nostalgia, perfect for gatherings and family dinners. Discover the simplicity and elegance of Argentinian-inspired cooking with a personal story that ties it all together.

---


A Taste of Tradition: Chimichurri Skirt Steak with Grilled Asparagus

There's something remarkably comforting about revisiting cherished family recipes. Each dish is a tapestry of flavors intertwined with memories, weaving a story that transcends generations. Today, we delve into the vibrant world of Chimichurri Skirt Steak with Grilled Asparagus—a dish that has not only graced our table but has also become a symbol of togetherness in our family.


A Family Heritage on a Plate

Growing up, Sundays were synonymous with family gatherings at my grandparents' house. The aroma of grilled meats and fresh herbs would fill the air, mingling with the sounds of laughter and storytelling. My grandfather, an avid cook, would always prepare his signature chimichurri sauce—a recipe passed down from his Argentinean grandmother. I remember standing on tiptoe, barely tall enough to peek over the kitchen counter, as he meticulously blended fresh parsley, oregano, and mint leaves, adding just the right amount of garlic and red wine vinegar.


As the adults chatted and caught up on the week's happenings, my cousins and I would run around the garden, waiting for the moment when the grill was finally ready. The sizzle of skirt steaks hitting the hot grill is a sound I can still hear vividly. Paired with the perfectly grilled green and white asparagus, this dish was a staple at our family gatherings, bringing everyone together around the table.


The Recipe: A Symphony of Flavors

Here's how you can recreate this beloved dish, infusing your own gatherings with a touch of tradition and flavor.


Ingredients:

- Green and white asparagus


- 1-2 teaspoons chili pepper flakes


- 1 cup flat-leaf parsley


- 1/2 cup fresh mint leaves


- 3 to 5 garlic cloves


- Kosher salt


- 2 tablespoons lemon juice


- 1 cup olive oil


- 1/2 cup fresh oregano leaves


- Black freshly cracked pepper


- 1/4 cup red wine vinegar


- 1 shallot, diced


- 2-3 skirt steaks


Instructions:
1. Chimichurri Sauce: Place all chimichurri sauce ingredients except for the olive oil in a food processor and pulse until well chopped. While the processor is running, slowly pour in the olive oil until the mixture is blended. Reserve half of the sauce to serve with the meal.
2. Marinate the Steaks: Season the skirt steaks with salt and pepper on both sides. Spoon the remaining chimichurri sauce over the steaks and let them marinate for 30 minutes up to overnight.
3. Prepare the Grill: Preheat your grill to a temperature between 350 to 400°F.
4. Grill the Asparagus: In a plastic resealable bag, combine asparagus, olive oil, garlic, salt, and pepper. Shake to coat and place in a grill basket. Grill asparagus over direct heat, gently tossing for even cooking. Baste with the garlic and olive oil mixture for about 10 minutes.
5. Grill the Steaks: Grill the skirt steaks to your desired temperature, approximately 5 to 8 minutes per side. Once cooked, remove them from the grill and let them rest for 10 minutes before slicing into long strips.
6. Serve: Spoon the reserved chimichurri sauce over the sliced steak and serve with grilled asparagus on the side.
Difficulty: 5/10

As we gather around the table, this dish continues to be a testament to our family's love for food and togetherness. The vibrant flavors of the chimichurri sauce, paired with the smoky goodness of grilled asparagus and tender skirt steak, create a culinary experience that is as joyful as the memories it evokes.


Whether you're creating new traditions or revisiting old ones, may this Chimichurri Skirt Steak with Grilled Asparagus bring a touch of nostalgia and connection to your next meal. Enjoy!

Read more about Appetizers

Read more about Main Dishes

Read more about Desserts

Creamy Chicken Orzo Soup | Made by Meaghan Moineau

Creamy Chicken Orzo Soup | Made by Meaghan Moineau

Title: "Nostalgic Comfort in a Bowl: Creamy Chicken Orzo Soup"
Description:

Warm your soul with the delightful embrace of Creamy Chicken Orzo Soup, a dish that promises not only to satisfy your hunger but also to evoke cherished memories of family gatherings. This heartwarming recipe is an ode to simplicity and flavor, combining tender vegetables, succulent chicken, and creamy orzo in a harmonious blend that is as comforting as a grandmother's hug. Ideal as a main dish, this soup is a perfect choice for those seeking a taste of nostalgia with a modern twist. Rated a 3 out of 10 for difficulty, it is accessible for home cooks of all skill levels.


---


Creamy Chicken Orzo Soup Recipe
Ingredients:

- Olive oil


- Celery


- Baby carrots


- Onion


- Kosher salt


- Freshly ground black pepper


- Canned Swanson Premium Chicken


- Canned Swanson Chicken Broth


- Poultry seasoning


- Orzo


- Cream of chicken condensed soup


Instructions:

1. In a large pot, heat a generous drizzle of olive oil over medium heat. Add chopped celery, baby carrots, and onion, and sauté for about 10 minutes until the vegetables are tender and fragrant.


2. Drain the canned chicken and add it to the pot, stirring gently to combine with the sautéed vegetables.


3. Season the mixture with kosher salt and freshly ground black pepper to taste. Stir to ensure even seasoning.


4. Increase the heat to medium-high and pour in the chicken broth along with two cans of warm water. Stir the mixture well and bring it to a gentle simmer.


5. Allow the soup to simmer for 15 minutes, then add the uncooked orzo and poultry seasoning. Stir to combine.


6. Continue to let the soup simmer for an additional 20 minutes, stirring occasionally to prevent the orzo from sticking to the bottom.


7. Finally, add the cream of chicken condensed soup. Stir until the broth transforms into a creamy delight. Serve hot and enjoy the comforting nostalgia in every spoonful.


---


A Taste of Nostalgia:

Every time I prepare this Creamy Chicken Orzo Soup, I am transported back to my grandmother's cozy kitchen, a place where love was the main ingredient in every dish. As a child, I would watch her from the corner of the room, mesmerized by her skillful movements as she chopped vegetables and stirred the pot with a wooden spoon worn smooth by years of use.


Sunday afternoons were special, a time when family gathered around the large wooden table, sharing stories and laughter while savoring bowls of this delicious soup. The aroma of simmering chicken broth and sautéed vegetables would fill the air, mingling with the sounds of clinking spoons and bubbling laughter. It was these simple moments, the warmth of family and the comfort of a meal shared, that made each Sunday unforgettable.


Now, I recreate this soup in my own kitchen, sharing it with my family, hoping to create similar memories for my children. Each spoonful is a reminder of those precious times, a bridge connecting the past with the present.


Difficulty Rating: 3/10
Classification: Main Dish

Whether you're seeking a comforting meal on a chilly day or longing for a taste of family nostalgia, this Creamy Chicken Orzo Soup is sure to deliver warmth and satisfaction. Enjoy each bite and let it remind you of cherished moments spent with loved ones.

Read more about Appetizers

Read more about Main Dishes

Read more about Desserts

10 Minute Brownies | Made by Meaghan Moineau

10 Minute Brownies | Made by Meaghan Moineau

Title: Whip Up Delight: 10-Minute Brownies That Bring Back Family Memories
Description: Discover the joy of baking with our quick and easy 10-Minute Brownies recipe! This delightful dessert combines rich, chocolaty goodness with a touch of nostalgia. Perfect for any sweet tooth, these brownies are a breeze to make and promise to become a family favorite. Follow our simple steps, and let this dessert bring a smile to your face and warmth to your heart.

---


When it comes to desserts that offer comfort and joy in every bite, brownies often top the list. Our 10-Minute Brownies are not just about convenience; they are about creating memories and savoring the sweet moments that life has to offer. With simple ingredients like semisweet chocolate chips, unsweetened applesauce, and finely-chopped walnuts, these brownies are both delicious and reminiscent of cherished family gatherings.


Ingredients You'll Need


- Baking Powder
- Canola Oil
- Finely-Chopped Walnuts
- Semisweet Chocolate Chips
- Sugar
- Unbleached Flour
- Unsweetened Applesauce
- Vanilla Extract

Instructions


1. Preheat your oven to 350 degrees F. Lightly oil a 6 x 9-inch baking pan and set it aside.


2. In a small saucepan over low heat, combine the canola oil and semisweet chocolate chips. Stir occasionally until the chocolate is melted. Remove from heat and set aside.


3. In a large bowl, add the unsweetened applesauce, sugar, and vanilla extract. Blend well.


4. Stir in the melted chocolate mixture. Whip and blend thoroughly.


5. Add the unbleached flour, baking powder, and finely-chopped walnuts. Mix just until combined.


6. Spoon the batter into the prepared baking pan.


7. Bake for 25 to 30 minutes, or until the top springs back when lightly touched. Be cautious not to overbake, as this will make the brownies dry.


8. Let the brownies cool completely before cutting them into squares. Store in a covered, airtight container in the refrigerator.


A Sweet Family Memory


As I watch the chocolate melt and blend with the rich aroma of vanilla, I am transported back to my grandmother's cozy kitchen. Every Sunday, our family would gather at her house, and the highlight of the day was always her famous brownies. I remember sitting on the counter, my legs swinging as I eagerly waited to lick the batter off the spoon. Grandma would wink at me and say, "The secret ingredient is love." These brownies were more than just a treat; they were the sweet thread that wove our family together, creating a tapestry of laughter and love.


Difficulty Rating: 3/10


Classification: Dessert


These 10-Minute Brownies are a testament to the magic that happens when simple, wholesome ingredients are combined with a sprinkle of nostalgia. Whether you're baking for a family gathering or simply treating yourself, this recipe promises to deliver rich, chocolaty goodness in every bite. So, don your apron, and let these brownies bring a touch of sweetness to your day!

Read more about Appetizers

Read more about Main Dishes

Read more about Desserts

White Chocolate Mocha Cookies | Made by Meaghan Moineau

White Chocolate Mocha Cookies | Made by Meaghan Moineau

Title: Savoring Sweet Memories: White Chocolate Mocha Cookies
Description: Dive into the world of flavor with our White Chocolate Mocha Cookies, a delightful blend of rich cocoa and espresso that takes you back to cherished family gatherings. Discover the story, the recipe, and the irresistible aroma that makes this dessert a timeless treat.

---


When the air turns crisp and the leaves start to blanket the ground in hues of gold and crimson, my heart often drifts back to the warmth of my grandmother's kitchen. It was a place where magic happened, where flour dusted the countertops like fresh snow, and the aroma of freshly baked cookies wrapped around you like a comforting blanket. Among the many recipes passed down through generations, one always stood out—the White Chocolate Mocha Cookies.


This cookie recipe is a family treasure, one that has been lovingly crafted and perfected over countless holiday seasons. The rich combination of cocoa and espresso powder evokes the comforting essence of a cozy café, while the sweet white chocolate chips offer a delightful contrast. Together, they create a symphony of flavors that sing of joy and nostalgia.


Ingredients:

- All-purpose flour


- Baking soda


- Cocoa powder


- Eggs


- Espresso powder


- Salt


- Semi-sweet chocolate chips


- Sugar


- Unsalted butter


- Vanilla extract


- White chocolate chips


Instructions:

1. Preheat your oven to 350°F (175°C). This is the perfect time to let your kitchen fill with the anticipation of what's to come.


2. In a large mixing bowl, cream together the unsalted butter and sugar until the mixture is light and fluffy—a task that, as a child, I watched my grandmother do with effortless grace.


3. Add in the eggs and vanilla extract, mixing until well combined. This was always my favorite part, watching the rich ingredients come together, much like our family did every Sunday afternoon.


4. Slowly incorporate the flour, cocoa powder, espresso powder, baking soda, and salt into the wet ingredients. Mix until just combined, being careful not to overwork the dough.


5. Gently fold in both the semi-sweet and white chocolate chips, ensuring each bite is packed with chocolatey goodness.


6. Roll the dough into balls, coating them with sugar if desired. Place them on a baking sheet lined with parchment paper or a Silpat mat. This step always reminded me of rolling snowballs in the yard with my siblings.


7. Bake in the preheated oven for 8-10 minutes. If your cookies are too rounded, press down lightly with the back of a measuring cup or the bottom of a glass immediately after removing them from the oven.


These cookies, with their perfect blend of chocolate and coffee, are a testament to those cherished moments spent in my grandmother's kitchen, where laughter was abundant, and love was the secret ingredient in every recipe.


Difficulty: 4/10
Classification: Dessert

Perfect for dessert, these White Chocolate Mocha Cookies are not just a treat for the taste buds but also a beautiful way to relive warm family memories. Whether you're baking them for a special occasion or just because, they promise to fill your home with the love and warmth of my grandmother's kitchen.

Read more about Appetizers

Read more about Main Dishes

Read more about Desserts

Butter-Bread | Made by Meaghan Moineau

Butter-Bread | Made by Meaghan Moineau

Butter-Bread Bliss: A Nostalgic Journey Through Flavor and Family


Description

Uncover the secrets behind a delightfully soft and fragrant butter-bread that promises to transport you back to cherished family moments. This recipe combines the rustic charm of homemade bread with the creamy richness of butter, all while being deceptively easy to make. Whether you're a seasoned baker or a curious beginner, this guide will walk you through every step, ensuring a perfect loaf every time. Rated 6/10 in difficulty, this main dish is perfect for any occasion that calls for a touch of warmth and nostalgia.

---


Ingredients

- 500g white strong bread flour

- 150g butter, softened


- 15g fresh yeast


- 1 tbsp liquid malt extract


- 10g salt


- 20ml sunflower oil


- 300ml water, room temperature


For the Starter Dough (prepare a night before)

- 100g white strong bread flour

- 5g fresh yeast


- 150ml water


---


Instructions


Preparation: The Night Before

1. Starter Dough: In a mixing bowl, combine the white strong bread flour, fresh yeast, and water. Mix until smooth. Cover the bowl and place it in the fridge overnight.

Baking Day: Morning Rituals

2. Room Temperature Preparation: Remove the starter dough and butter from the fridge an hour before you begin baking, allowing them to reach room temperature.
3. Yeast Mixture: In a small bowl, mix the yeast, liquid malt extract, and water until smooth and lump-free.
4. Combine Ingredients: In a large mixing bowl, add the white strong bread flour, salt, and softened butter. Pour in the yeast mixture and stir until combined.
5. Incorporate Starter Dough: Add the starter dough to the bowl and knead the mixture for 10 minutes. For best results, use a food processor with a dough hook attachment—knead on a slow speed for 5 minutes, then increase to a fast speed for another 5 minutes.
6. First Rise: Turn the dough onto a floured surface, dust generously with flour, cover, and let it sit for 30 minutes. Every 10 minutes, punch the dough down, stretch it, fold the edges over, and turn it.

Shaping and Final Rise

7. Prepare the Tin: Grease a loaf tin with sunflower oil. Shake off any excess flour from the dough, form it into a loaf shape, and place it in the tin.
8. Score and Rise: Cover the loaf and allow it to rise for another 30 minutes. After 10 minutes, use a sharp knife to score a 2 cm line down the center.

Baking

9. Preheat and Steam: Preheat your oven to 230°C. Place the loaf on the middle shelf, and using a spray bottle, mist around the bread to create steam.
10. Bake: Bake for 45 minutes. After 15 minutes, spray the bread again with water and reduce the temperature to 200°C.
11. Cool: Check for doneness with a skewer—it should come out clean. Allow the bread to cool completely on a wire rack before slicing.

---


A Taste of Memory


As the aroma of freshly baked butter-bread fills your kitchen, I'm reminded of my grandmother's cozy kitchen during crisp autumn afternoons. Every Sunday, she'd gather us around her wooden table, the centerpiece being her famous butter-bread. It was more than just a meal; it was a bond, a tradition passed down through generations. The soft, buttery texture and golden crust were the perfect companions to her stories of family adventures and heartfelt laughter. Baking this bread brings me back to those warm, love-filled days, proving that the best recipes are those that nourish both body and soul.


---


Difficulty Rating

6/10 - This recipe is moderately challenging, requiring some kneading skills and patience for the dough to rise. Perfect for an adventurous baker looking to create something truly special.

Classification

Main Dish - Ideal for sharing at family gatherings or as a comforting solo treat, this butter-bread is more than just a side; it's a centerpiece of flavor and tradition.

Read more about Appetizers

Read more about Main Dishes

Read more about Desserts