Picture this: It’s a Tuesday evening, and I’m staring into my fridge, hunting for inspiration. It’s been a chaotic day with back-to-back meetings and a toddler who thinks naptime is optional. I need something quick, something comforting. My eyes land on a pack of portobello mushrooms and a forgotten block of tofu in the freezer. A lightbulb moment! Vegan Stuffed Portobello Mushrooms over Quinoa. It’s not only going to save dinner but also my sanity. This dish is a godsend on nights like these. It’s hearty, packed with flavor, and gives me that little victory dance moment because it feels way fancier than the effort it demands.
What You’ll Need
This recipe is a pantry hero — chances are, you already have most of this on hand.
- Cooked quinoa
- Large portobello mushrooms
- Frozen tofu
- Diced tomato
- Fresh spinach
- Red diced onion
- Garlic
- Dried oregano
- Dried basil
- Nutritional yeast
- Lemon juice
- Daiya vegan mozzarella “cheese”
- Olive oil
- Balsamic vinaigrette
- Salt and pepper
How to Make Vegan Stuffed Portobello Mushroom over Quinoa
- Start off by cooking your quinoa according to package instructions and set it aside. This will be your bed of deliciousness.
- Thaw the tofu, then drain and squeeze out all that excess water. You want it as dry as possible to soak up all the flavors.
- Gently brush off any dirt from the portobello mushrooms and remove the stems. Set them aside for stuffing.
- Whip up a quick marinade for the mushrooms: mix together 3 tablespoons of olive oil, 3 tablespoons of balsamic vinaigrette, and season it with salt and pepper. Taste as you go — you want a balance of tangy and salty.
- In a pan, heat 3 tablespoons of olive oil over medium heat. Add diced onions, minced garlic, a pinch of dried oregano, and basil. Cook until the onions are soft and fragrant.
- Now, crumble the tofu with your hands directly into the pan. Stir it around, letting it cook on medium heat for about 15 to 20 minutes. This step fills your kitchen with a mouthwatering aroma.
- Add nutritional yeast, fresh spinach, diced tomato, and a splash of lemon juice to the tofu. Stir everything together, cooking for just another minute, then set aside.
- Dip each mushroom cap into the marinade, ensuring it’s nicely coated, and place them top side down on a baking pan.
- Stuff each mushroom with the tofu and veggie mixture. This is where the magic happens — don’t be shy, pack them full!
- Top it all off with a generous sprinkle of vegan mozzarella cheese. Because why not?
- Preheat your oven to 370 degrees Fahrenheit. Once it’s ready, bake the stuffed mushrooms for 15 to 20 minutes, until the cheese is melty and bubbly.
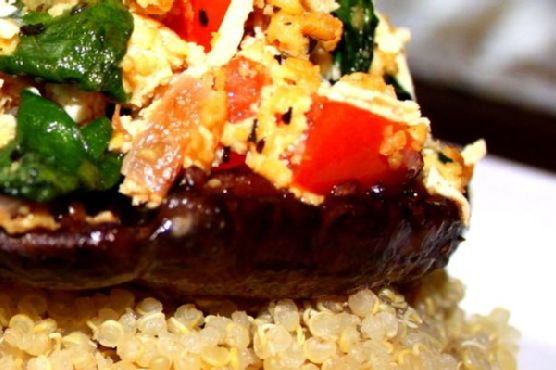
- Serve your glorious stuffed mushrooms over a fluffy bed of quinoa and take a moment to admire your creation.
Cook’s Notes
Here are a few nuggets of wisdom to keep this dish a breeze. The marinade is key — don’t skimp on it; it infuses the mushrooms with so much flavor. Cooking the tofu until it’s golden and crispy is another must-do for an added texture contrast. If you’re planning ahead, you can stuff the mushrooms in advance, then bake them right before serving. Leftovers keep well for a couple of days in the fridge, and they reheat beautifully in the oven.
Make It Your Own
Here are some fun swaps and additions to keep things interesting:
- Swap the frozen tofu for crispy baked chickpeas for a different texture.
- Add a sprinkle of pine nuts on top before baking for a nutty crunch.
- Use zucchini ribbons instead of spinach if you’re in the mood for something a bit different.
- For a spicy kick, mix some sriracha or your favorite hot sauce into the tofu mixture.
If you try this, I’d love to hear how it turns out — drop a comment or tag me! Cooking for you is like sharing a piece of my heart, and I hope you feel that love in every bite.
Related update: Venison Stew