
It was one of those evenings when you open the fridge and just sigh, you know what I mean? It had been a long day, and I wanted something delicious but low-key. There it was, a can of shrimp I had almost forgotten about. That’s when inspiration hit—breaded shrimp with a spicy mayo dip! It’s the kind of dish that feels like a cheat: super quick to make, but everyone will think you’re some kind of kitchen wizard. Perfect for when friends drop by unannounced or when you’re just craving something crispy and spicy. Trust me, this Breaded Shrimp and Spicy Mayo Appetizer is about to become your new go-to.
Jump to Recipe
What You’ll Need
You probably have most of these ingredients hanging out in your pantry already, and if not, they’re easy enough to grab at any grocery store. Here’s what you’ll need:
- All-purpose flour
- Bread crumbs
- Chili powder
- Egg
- Garlic powder
- Mayonnaise
- Onion powder
- Suya pepper
- Salt
- Canned shrimps
- Sriracha sauce
How to Make Breaded Shrimp and Spicy Mayo Appetizer
- Start by peeling and deveining your shrimp. You can leave the tails on for a bit of extra crunch and a nicer presentation if you like.
- Season the shrimp with suya pepper and set them aside to let the flavors sink in.
- Whisk the egg in a small bowl and set it aside as your dipping station.
- In another bowl, combine your all-purpose flour with onion powder, garlic powder, salt, and chili powder.
- Take each seasoned shrimp and dredge it in the seasoned flour, making sure it’s well-coated. The spices should cling to every curve.
- Dunk the floured shrimp into the egg mixture, ensuring they’re nice and gooey.
- Coat them in the bread crumbs; press gently so the crumbs stick fully.
- Heat up a pan with oil for frying until it’s hot but not smoking. Fry the shrimp until golden brown on both sides, about 2-3 minutes per side.
- For the spicy mayo, mix 2 tablespoons of mayonnaise with 1 tablespoon of sriracha sauce until well combined. It should be a lovely salmon pink color.
- Serve your crispy shrimp with the spicy mayo on the side for dipping. Enjoy the crunchy, spicy goodness!
Cook’s Notes
You want to make sure your oil is hot enough before you start frying; otherwise, your shrimp will absorb too much oil and become soggy. If you’re making this for a crowd, you can fry the shrimp earlier and keep them warm in a low oven. Leftovers can be stored in an airtight container in the fridge and reheated in the oven to keep them crispy. I wouldn’t recommend microwaving them—no one likes limp shrimp!
Make It Your Own
- Swap the shrimp for crispy tofu if you’re catering to vegetarians. Just make sure to press the tofu well before seasoning.
- If you love extra heat, add more sriracha or even a dash of hot sauce to the spicy mayo.
- Try using panko instead of regular bread crumbs for an extra-crunchy texture.
- If you’re out of suya pepper, a mix of cayenne and paprika can add that smoky heat.
If you try this, I’d love to hear how it turns out—drop a comment or tag me! I’m always excited to see how you guys make these recipes your own. Happy cooking!
Related update: Breaded Shrimp and Spicy Mayo Appetizer
Related update: Hush Puppies

Picture this: it’s a lazy Sunday morning, and the sun’s just lazily peeking through your kitchen window. I was in my coziest pajamas, craving something warm and sweet that didn’t involve leaving the house. Enter these Jumbo Blueberry Muffins. They’re like a giant hug in muffin form—a bit of a show-off with their size, but oh so easy to whip up. With a crunchy lemon-sugar topping and bursting with blueberries, they’re the hero of any breakfast spread or spontaneous brunch. Plus, they’re quick enough to make on a weekday morning when you’re feeling a bit extra. Ready to bake? Let’s dive in.
Jump to Recipe
What You’ll Need
You probably have most of this stuff lounging in your pantry. Here’s what you’ll need:
- 2 cups all-purpose flour
- 2 teaspoons baking powder
- 1/2 teaspoon salt
- 1/3 cup granulated sugar + 1 cup separate
- 2 large eggs
- 1/4 cup unsalted butter, melted
- 1/4 cup vegetable oil
- 1 cup buttermilk
- 1 teaspoon vanilla extract
- Zest of one fresh lemon
- 1 1/2 cups fresh blueberries
How to Make Jumbo Blueberry Muffins
- Preheat your oven to 425°F (220°C). Give a 6-cup large-sized muffin tin a light spritz of cooking spray, and set it aside.
- In a small bowl, combine the lemon zest and 1/3 cup of sugar. Use a fork to mix them thoroughly, creating a fragrant lemon-sugar mixture.
- Grab a large bowl and whisk together the flour, baking powder, and salt. Try to distribute everything evenly—it’ll make for a fluffier muffin.
- In another medium bowl, whisk the remaining 1 cup of sugar with the eggs. Go at it for about 45 seconds until the mixture is thick and homogeneous.
- Slowly pour in the melted butter and oil, then whisk in the buttermilk and vanilla extract. The mixture should be smooth and creamy.
- Add the liquid ingredients and the blueberries to the dry ingredients. Gently fold everything together until just combined. Resist the urge to over-mix!
- Fill the muffin tins with the batter, right up to the top. Sprinkle the tops generously with the lemon-sugar mixture for a crunchy finish.
- Bake the muffins at 425°F for 5 minutes. Then, lower the heat to 375°F and bake for another 25 minutes. Remember to rotate the pan halfway through to ensure even baking.
- The muffins are done when a toothpick inserted near the center comes out with just a few crumbs attached. Let them cool in the pan for about 5 minutes before transferring them to a wire rack to cool completely.
Cook’s Notes
Here’s the scoop: the key to these muffins is not over-mixing the batter. Too much mixing leads to tough muffins, and nobody wants that. These muffins are best enjoyed fresh, but if you’re making them ahead, they stay good in an airtight container at room temperature for up to three days. You can also freeze them! Just wrap them tightly in plastic wrap and pop them in a freezer bag. They’ll last for about three months, and all you have to do is let them thaw at room temp or give them a quick zap in the microwave.
Make It Your Own
Feel like experimenting? Here are a few variations:
- Mixed Berry Muffins: Swap half of the blueberries with raspberries or chopped strawberries.
- Nutty Twist: Add a handful of chopped walnuts or almonds to the batter for some crunch.
- Citrus Punch: Substitute the lemon zest with orange zest for a different citrusy flavor.
- Chocolate Indulgence: Replace some of the blueberries with chocolate chips for a sweet surprise.
So, are you ready to go jumbo? If you try this, I’d love to hear how it turns out—drop a comment or tag me! Let’s make your kitchen smell like a bakery, one muffin at a time. Happy baking! 💙
Related update: Jumbo Blueberry Muffins
Related update: Wild Blueberry Lemon Muffins
Related update: Home made organic maple granola with fresh fruit
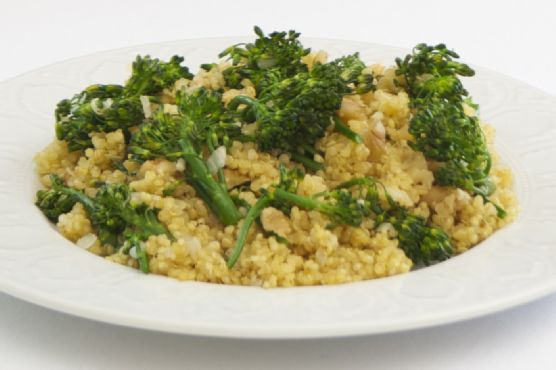
It was one of those evenings when the clouds rolled in, and the rain tapped softly against the windows, turning my kitchen into a cozy haven. I was craving something warm and hearty, something that didn’t require a grocery run in the drizzle. Enter Broccolini Quinoa Pilaf—a dish that’s both comforting and surprisingly simple. What I love about this dish is how effortlessly it balances health and flavor. The nutty quinoa paired with tender broccolini and crunchy walnuts is just the kind of meal that warms both your heart and your belly. Plus, it’s almost a one-pan wonder, which means fewer dishes—always a win in my book.
Jump to Recipe
What You’ll Need
This ingredient list is delightfully short, and chances are you already have most of this in your pantry.
- Broccolini, trimmed
- 1 garlic clove, minced
- 2 tablespoons olive oil
- 1 small onion, diced
- 1 cup quinoa, rinsed
- 2 cups vegetable broth
- 1/4 cup walnuts, chopped
- Salt and pepper to taste
How to Make Broccolini Quinoa Pilaf
- In a large pan with a lid, heat the olive oil over medium-high heat. Once shimmering, add the diced onions and cook for about a minute. You’ll notice the onions start to sizzle and soften.
- Add the minced garlic and continue to cook, stirring occasionally, until the onions become translucent and the garlic is wonderfully fragrant—this should take about 2-3 minutes.
- Pour in the quinoa and stir to coat it with the oil, garlic, and onion mixture. Let it toast for a minute to bring out its nutty flavor.
- Slowly add the vegetable broth, stirring as you pour. Increase the heat to bring it all to a boil.
- Once boiling, cover the pan and reduce the heat to low. Let the quinoa simmer for about 15 minutes.
- In the last 2-3 minutes of cooking, gently lay the broccolini on top of the quinoa. Don’t stir! Just cover it back up and let the steam work its magic.
- After 15 minutes, uncover the pan and toss the broccolini and quinoa together. The broccolini should be bright green and tender-crisp.
- Season with salt and pepper to your liking. Finish by sprinkling the chopped walnuts over the top for a delightful crunch.
- Serve hot and enjoy the medley of flavors and textures.
Cook’s Notes
A few tips to help you along: Make sure to rinse your quinoa under cold water before cooking to remove any bitterness. This dish is pretty forgiving, so feel free to let the onions cook a bit longer for a richer flavor. If you’re making this ahead, keep the broccolini separate until you’re about to serve, then warm everything up and integrate it at the end to keep the veggies vibrant. Leftovers? Store them in an airtight container in the fridge for up to 3 days, though I doubt they’ll last that long!
Make It Your Own
Here are some tweaks to keep things exciting:
- Swap the broccolini for asparagus tips if you’re in a pinch. They cook similarly and add a nice touch.
- For a protein boost, stir in some chickpeas when you add the vegetable broth. They’ll soak up the flavors beautifully.
- If you’re a cheese lover, a sprinkle of feta or parmesan over the top before serving can add a deliciously creamy element.
- For a nut-free version, use toasted pumpkin seeds for an equally satisfying crunch.
If you give this Broccolini Quinoa Pilaf a try, I’d love to hear how it turns out! Drop a comment below or tag me in your photos. Happy cooking, friends!
Related update: Broccolini Quinoa Pilaf
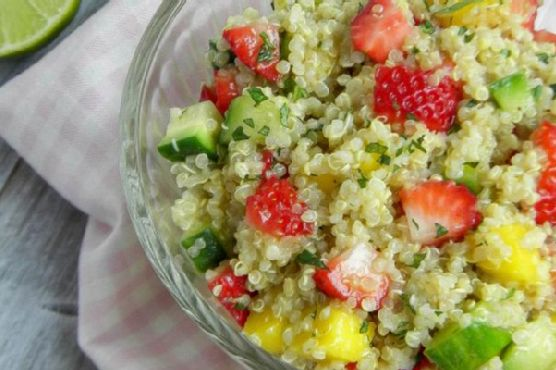
The first time I made this Strawberry-Mango Quinoa Salad, it was one of those chaotic weeknights where I just wanted something fresh and easy. You know the kind—work had run late, the fridge was a bit empty, and the idea of ordering takeout was so tempting. But then I remembered the sweet mangoes I had picked up on a whim, and the lonely strawberries sitting in the fridge. That’s when the idea hit me—what if I threw together a salad that was not only refreshing but also filled with vibrant, zesty flavors? This salad is the kind of dish that makes you feel like you’ve got it all together, even when life is a little messy. Plus, it’s super quick to whip up.
Jump to Recipe
What You’ll Need
This salad’s beauty lies in its simplicity and the burst of flavors from super fresh ingredients. Chances are you already have most of these in your kitchen:
- Quinoa – Nutty and satisfying, the base of our salad.
- Water
- Salt
- Fresh strawberries – Sweet, juicy, and perfect for adding a pop of color.
- Ripe mango – For that tropical twist.
- Cucumber – Crunchy and refreshing.
- Fresh mint – Bright and aromatic.
- Lime juice and zest – To give that zesty zing.
- Honey – For a touch of sweetness.
- Canned sour plain cream – Adds a creamy tang.
- Olive oil – Smooth and rich, tying it all together.
- Bell pepper – For some extra crunch and color.
How to Make Strawberry-Mango Quinoa Salad
- In a medium saucepan, combine the quinoa, water, and a pinch of salt. Bring it to a boil over medium-high heat. Once it starts bubbling, lower the heat and let it simmer. Cover the pan and let it cook for about 15 minutes, until the liquid is just absorbed. You’ll know it’s done when you see those little quinoa tails unfurling.
- Spread the cooked quinoa out on a baking sheet. Let it cool for about 20 minutes. It should be warm to the touch but not steaming hot—perfect for absorbing all the dressing goodness later.
- While the quinoa is cooling, grab a large bowl. Whisk together the lime juice, lime zest, honey, sour cream, and olive oil. The mixture should be smooth and slightly thick, with a lovely citrusy aroma.
- Add the cooled quinoa to the bowl. Then toss in the strawberries, mango, cucumber, and mint. Toss everything well to make sure each bite is balanced.
- Season with a pinch of salt and a grind of pepper to taste. Give it one last gentle toss, and you’re ready to serve immediately.
Cook’s Notes
This salad is as forgiving as they come. If your quinoa isn’t quite cool when you mix it with the dressing, don’t sweat it—just let it sit a little longer before adding the other ingredients. Also, always taste as you go; if your mangoes are particularly sweet, you might want to dial back a bit on the honey. Leftovers can be stored in an airtight container in the fridge for up to two days. But let’s be real, it rarely lasts that long!
Make It Your Own
Here’s where you can get playful with it:
- Swap the mango for juicy pineapple if that’s what’s on hand or in season.
- For a bit of nuttiness, toss in a handful of toasted almonds or cashews.
- Add a spicy kick by mixing in some finely chopped jalapeños or a dash of chili flakes.
- If you’re a cheese lover, crumble some feta or goat cheese on top before serving.
If you try this, I’d love to hear how it turns out—drop a comment or tag me! Whether you stick to the original or put your own twist on it, this salad is sure to bring a bit of sunshine to your table. Enjoy!
Related update: Strawberry-Mango Quinoa Salad
Related update: Carrot and Cabbage Salad With Coriander+cumin Dry Rub

Picture this: it’s a chilly Wednesday evening, and I’m staring into the abyss of my refrigerator, silently hoping for a miracle. You know, one of those magical moments when dinner just materializes without much effort. Alas, the fridge reveals only lonely carrots, wilting celery, and a half-used onion. But hey, sometimes the best meals start with a scavenger hunt, right? That’s when I remembered this gem of a recipe: One Soup, Two Ways. It’s like having your cake and eating it too, but with soup! You get the hearty, rustic charm of chunky vegetables or the silky smoothness of cream of vegetables—all from the same pot. It’s quick, comforting, and perfect for those nights when you’re in dire need of warmth and coziness, without a lot of fuss.
Jump to Recipe
What You’ll Need
You’re in luck! This recipe mostly calls for pantry staples, so you might not even need to make a grocery run. Here’s what you’ll need:
- Olive oil
- Garlic, minced
- Onion, chopped
- Carrots, sliced
- Celery, sliced
- Salt
- Canned tomato puree
- Canned corn
- Chicken broth
- Canned beans
- Dried herbs like thyme
- Whole cooking cream (for the creamy version)
- Turmeric
How to Make One Soup, Two Ways: Chunky Vegetables and Cream Of Vegetables
- Heat the olive oil over medium-low heat in a soup pot, big enough to hold all the goodness. The aroma of sizzling garlic and onions will greet you first—just the start of this flavorful journey.
- Add the garlic, onions, carrots, and celery. Give them a gentle stir, sprinkle the salt, and cover the pot. Let them sweat for about 10 minutes, until everything softens and the kitchen smells like a hug.
- Stir in the tomato puree and corn. Allow this medley to cook for a few minutes, until the puree deepens in color, promising robust flavor.
- Pour in the chicken broth, crank the heat to maximum, and bring it all to a boil. This is where the soup starts to take shape, bubbling with potential.
- Introduce the beans into the pot and season with your choice of dried herbs. Thyme is a personal favorite; it adds a gentle earthiness.
- For the chunky version, let this simmer for another 10-15 minutes until everything is heated through.
- If you’re feeling like a creamy delight, blend the soup in batches after the simmering. Stir in the whole cooking cream and a pinch of turmeric for a golden hue and a hint of warmth.
Cook’s Notes
I totally get it; sometimes soup can be a little intimidating, but don’t stress. The key here is to let those veggies sweat properly at the beginning—it builds the foundation of flavor. If you’re making the creamy version, remember not to fill your blender too full, or you might end up with a soup explosion (learned that the hard way). Store leftovers in an airtight container in the fridge for up to three days. Reheat gently on the stove, adding a splash of broth if it thickens too much.
Make It Your Own
Here are a few ideas to give this soup your own twist:
- Swap the beans for chickpeas for a nuttier flavor and a bit more texture.
- Use vegetable broth instead of chicken broth for a vegetarian-friendly version.
- Add cooked shredded chicken for a protein boost and to make it extra hearty.
- Try coconut milk instead of cream for a dairy-free, subtly tropical twist.
If you try this, I’d love to hear how it turns out—drop a comment or tag me! Soup’s on, friends. Enjoy every spoonful. 🍲
Related update: One Soup, Two Ways: Chunky Vegetables and Cream Of Vegetables
Related update: Curry and Sage Roast Chicken
Related update: Moosewood Lentil Soup

I was deep in the throes of a Tuesday night quandary—hungry but not wanting to commit to a full-on kitchen escapade. You know those nights, right? The ones where takeout seems like the easy choice, but your inner voice whispers (or maybe shouts), “Use the groceries you bought!” It was on one such evening that I whipped up this Loaded Veggie Omelet. It’s the kind of recipe that feels like a mini victory; quick to make yet hearty enough to satisfy. Perfect for when you want something impressive without the fuss. Plus, who wants a mountain of dishes? Not me.
Jump to Recipe
What You’ll Need
This isn’t one of those recipes where you’ll be chasing obscure ingredients. Chances are you already have most of this:
- Shallot
- Garlic
- Mushrooms
- Cherry tomatoes
- Fresh basil
- Fresh spinach
- Eggs whisked
- White cheese
- Drizzle of olive oil
How to Make Loaded Veggie Omelet
- Start by preheating your oven to warm or 170 degrees. This will keep your first omelet cozy while you prepare the second one. Trust me, it’s worth it.
- Heat a small sauté pan over medium. Drizzle it with just enough olive oil to give your veggies a glistening hug.
- Add the shallot and garlic first. Sauté them until they’re golden and fragrant—your kitchen should smell amazing by now.
- Toss in the mushrooms and let them soften. They’ll release their juices, which is exactly what we want.
- Now, add the cherry tomatoes and fresh spinach. Give everything a good stir and then remove the pan from the heat. The spinach should just start to wilt.
- In a small omelet or sauté pan, pour in a layer of your whisked eggs. As the egg begins to set, gently run a spatula around the edges. This keeps it from sticking and makes folding easier.
- When the egg is almost fully cooked—think slightly runny on top—layer half of the basil, cheese, and your sautéed veggie mix onto one side of the egg.
- Gently fold the other side of the egg over the filling. Use your spatula to help if needed. Slide the omelet onto a small oven-safe plate and keep it warm in the oven.
- Repeat the process for the second omelet, then serve both while they’re still warm.
Cook’s Notes
Cooking omelets is more of an art than a science, and a few tips can make all the difference.
- If you’re not a fan of runny eggs, let them cook a bit longer before adding the filling. The key is to keep it soft enough to fold.
- Store leftovers in an airtight container in the fridge. They make a delightful breakfast next day, just reheat in a pan to revive some freshness.
- Use a non-stick pan to make your life easier, especially if you’re new to making omelets. It’s all about the slide!
- If you want to make these ahead, prepare the veggie mix and store it separately. When you’re ready to eat, whip up those eggs and you’re set.
Make It Your Own
Here’s where you get to play chef. These variations keep things exciting:
- Swap the mushrooms for crispy tofu for an extra protein punch.
- If you’re a cheese enthusiast, try using feta instead of white cheese for a tangy twist.
- Give it a spicy kick by adding a dash of red pepper flakes or a few jalapeño slices.
- Not a fan of spinach? Substitute with arugula for a peppery note.
I hope this Loaded Veggie Omelet becomes your go-to for those nights when you need a quick, satisfying meal. If you try this, I’d love to hear how it turns out — drop a comment or tag me! Here’s to cozy, tasty evenings in.
Related update: Loaded Veggie Omelet
Related update: Jumbo Blueberry Muffins

It was one of those whirlwind Wednesday evenings where everything seemed to be happening at once. My kitchen was a mess of grocery bags, half-empty coffee cups, and a laptop precariously perched on the edge of the counter streaming my latest binge-worthy show. Between juggling work calls and taming the chaos that had taken over my living space, I needed dinner to be quick, satisfying, and ideally nutritious enough to make me feel like I was winning at adulthood. Enter the Greek Yogurt Chicken Salad. It’s a reliable hero for those nights when you need something comforting yet refreshing, and it doesn’t hurt that the cleanup is a breeze! The creamy, tangy dressing paired with the tender chicken and the occasional sweet zing from the craisins is just what you need to hit reset.
Jump to Recipe
What You’ll Need
Just a heads up, this is the kind of recipe where you might already have most of the ingredients lounging around in your kitchen. It’s simple yet flavorful.
- 2-3 whole chicken breasts
- 4 cups chicken broth or water
- 1 cup plain Greek yogurt
- 1 tablespoon Dijon mustard
- 1 teaspoon garlic powder
- 1/2 cup craisins (or raisins)
- 1/2 cup roasted cashews
- Salt, to taste
- Pepper, to taste
How to Make Greek Yogurt Chicken Salad
- Start by bringing your chicken broth or water to a boil in a medium pot. Once it’s bubbling, add in your whole chicken breasts. Let them cook until there’s no pink left in the middle; this usually takes about 15-20 minutes depending on their size.
- While your chicken is having its spa treatment, whisk together the Greek yogurt, Dijon mustard, and garlic powder in a bowl. You’re aiming for a smooth, well-mixed sauce here. Add a dash of salt and pepper, adjusting to your taste.
- Stir in the craisins and cashews. If you love a bit more crunch, hold off on the cashews until just before serving. This way, they maintain their delightful crunch!
- Once the chicken is done, let it rest for about 5 minutes. Trust me, this little pause keeps all those flavorful juices locked in.
- Dice the chicken into bite-sized chunks and toss it into your prepared sauce. Give everything a good mix so each piece of chicken is generously coated.
- Serve your chicken salad chilled or at room temperature. It’s perfect in a sandwich, on a bed of greens, or just straight from the bowl.
Cook’s Notes
– Boiling the chicken in broth instead of water really takes the flavor up a notch, but if you’re in a pinch, water works just fine.
– This chicken salad keeps well in the fridge for about 3 days, making it a great make-ahead lunch option. Just store it in an airtight container to keep it fresh.
– If you’re planning to eat it over a few days, consider adding the cashews just before serving each time to maintain that satisfying crunch.
– Be mindful not to overcook the chicken, as it can become a bit rubbery. You want it tender and juicy!
Make It Your Own
- Swap the chicken for crispy tofu if you’re going for a vegetarian vibe. Just cube it and toss it in!
- Love a bit of heat? Add a pinch of cayenne pepper or some chopped jalapeños to the sauce.
- For an extra tangy twist, try tossing in some diced green apples. They add a delightful crunch and zing.
- Switch the craisins for chopped dried apricots for a different kind of sweetness if you’re feeling adventurous.
If you give this Greek Yogurt Chicken Salad a whirl, I’d love to hear how it turns out for you! Drop a comment below or tag me in your kitchen creations. Let’s keep those weeknight dinners delicious and stress-free!
Related update: Greek Yogurt Chicken Salad
Related update: Strawberry-Mango Quinoa Salad

Picture this: it’s a Wednesday evening, and I’m knee-deep in that midweek slump, feeling like a bit of a sweet escape. The kind where comfort meets simplicity. I glanced at the calendar and saw it was nearing August 10th—National S’mores Day. Immediately, a light bulb moment struck! Why not combine the nostalgia of campfire s’mores with a fruity twist to lift my spirits? Enter: S’mores-n-berry Bars. They’re as indulgent as they sound, with a crispy graham cracker base, rich brownie layer, and gooey marshmallow topping that’s lightly kissed by the oven’s broiler for that perfect toasted finish. It’s the kind of treat that’s easy to whip up, yet impressive enough to satisfy any sweet tooth. Jump to Recipe
What You’ll Need
You probably have most of these ingredients lounging in your pantry already. Here’s what you’ll need:
- 1 box of cooked brownie mix
- 1 egg
- 1 cup graham cracker crumbs
- 2 whole graham crackers
- 1 cup mini marshmallows
- 1/2 cup fresh dried raspberries
- 1/4 cup sugar
- 1/2 cup unsalted butter, melted
- 1/4 cup vegetable oil
- 1/4 cup water
How to Make S’mores-n-berry Bars for National S’mores Day – August 10
- Preheat your oven to 325°F. Line an 8-inch-square baking pan with foil, making sure the foil hangs over the edges for easy removal later. Give it a spritz of nonstick cooking spray to make doubly sure nothing sticks.
- In a medium-sized bowl, combine the melted butter, graham cracker crumbs, and sugar until it resembles wet sand. Press this mixture evenly into the bottom of your prepared pan. Bake for about 20 minutes, or until it looks golden and smells like heaven. Set aside.
- Crank up your oven to 350°F. Meanwhile, grab another bowl and mix together the brownie mix, vegetable oil, water, and egg until smooth. Gently fold in the fresh dried raspberries. Pour this luscious batter over the cooled graham cracker crust.
- Bake the brownie layer for about 25 minutes, or until a toothpick inserted into the center comes out clean. This is your cue to remove it from the oven.
- Break up the two graham crackers into small pieces and scatter them artfully atop the brownie layer.
- Scatter the mini marshmallows over the graham crackers. Return the pan to the oven, this time setting it to broil. Watch carefully, as the marshmallows can quickly go from toasty to burnt in a flash! Once they’re golden and bubbly, pull the pan out.
- Allow the bars to cool completely in the pan. Lift them out using the overhanging foil and cut into squares. Enjoy the ooey-gooey goodness!
Cook’s Notes
These bars are as versatile as they are delicious. The graham cracker crust adds an incredible texture contrast to the fudgy brownie and gooey marshmallow topping. Here are a few tips to ensure they turn out perfect:
- If you prefer a denser brownie, add an extra egg to the brownie mixture.
- Store any leftovers in an airtight container at room temperature for up to 3 days. They’ll stay delicious, though the marshmallows might lose a bit of their chew.
- To make these ahead, you can prepare the graham cracker crust and brownie layer a day in advance. Add the graham crackers and marshmallows just before serving for the best texture.
Make It Your Own
- Nutty Twist: Swap out the raspberries for chopped toasted almonds or pecans for a crunchy surprise.
- Berry Medley: Use a mix of freeze-dried strawberries and blueberries instead of just raspberries for a more fruity experience.
- Chocolate Lovers: Add chocolate chips to the brownie mix for extra gooeyness. You can never have too much chocolate, right?
- Salted Caramel: Drizzle caramel sauce over the marshmallows before broiling. A sprinkle of sea salt can elevate these bars to gourmet status.
If you try this, I’d love to hear how it turns out — drop a comment or tag me! S’mores day or not, these bars are a crowd-pleaser every time.
Related update: S’mores-n-berry Bars for National S’mores Day – August 10
Related update: Cherry-Berry Pie With Agave Nectar All-Butter Crust

Picture this: it’s a sweltering summer afternoon, and you’re yearning for something refreshing yet a little out of the ordinary. You’ve already got one foot in the kitchen, rifling through the freezer, when you stumble upon a forgotten stash of frozen raspberries. Suddenly, inspiration hits you like a cool breeze. Why not whip up a sorbet that’s as tart as your mood and just a tad mischievous, with a spicy kick to keep things interesting? This Tart Raspberry Sorbet with a Hint of Heat is exactly what you need. It’s the kind of recipe that doesn’t just cool you down but also gives your taste buds a little wake-up call. Plus, it’s ridiculously easy to make—perfect for those moments when you want to impress but can’t be bothered with a culinary masterpiece.
Jump to Recipe
What You’ll Need
You might already have most of these tucked away in your pantry and freezer, which makes this sorbet a breeze to throw together on a whim.
- Frozen raspberries – The star of the show, bringing their tart and vibrant flavor.
- Raspberry jam – For an extra burst of raspberry goodness and a bit of sweetness.
- White grape juice – To lend a subtle sweetness and some liquid gold.
- Cardamom powder – Adds an exotic warmth that pairs beautifully with the raspberries.
- Green chili – Just a little, for that unexpected kick.
- Lime juice – To enhance the tartness and add a citrusy zing.
How to Make Tart Raspberry Sorbet with a Hint of Heat
- In your food processor, combine the frozen raspberries, raspberry jam, and white grape juice. Add a pinch of cardamom powder, a small piece of green chili, and a generous squeeze of lime juice.
- Process the mixture until it’s smooth and vibrant. Listen for the change in sound as the chunks of raspberry become a luscious puree.
- Push the mixture through a fine strainer to remove most of the seeds. This part might seem tedious, but trust me, your teeth will thank you later.
- Transfer the silky mixture to a container, cover, and pop it in the freezer. Every couple of hours, check on it and give it a good stir. This keeps the texture smooth and prevents large ice crystals from forming.
- As the sorbet nears the end of its freezing journey, consider shaping it into enticing balls using an ice cream scoop or a large spoon. It’s not just about looks—it helps the sorbet melt evenly when served.
- Once frozen, let your sorbet thaw for a few minutes before serving. This little pause is crucial, especially if your freezer tends to be overzealous.
Cook’s Notes
Let’s talk about some nuances that can take this sorbet from good to unforgettable. First off, if you’re worried about the heat, start by adding just a sliver of green chili. You can always add more, but you can’t take it out. As for storage, this sorbet keeps well in the freezer for up to two weeks, though it’s best enjoyed within the first few days when the flavors are at their peak.
If you’re planning ahead, make the sorbet the day before you want to serve it. This allows it to firm up perfectly. If you end up with leftovers (unlikely, but it happens), let them soften a bit before diving back in.
Make It Your Own
This sorbet is a canvas for your creativity. Here are a few ideas to make it uniquely yours:
- Swap the raspberries for frozen strawberries for a sweeter, less tart version.
- If you’re a mint fan, add a handful of fresh mint leaves to the food processor for a refreshing twist.
- Looking for an adult-only version? Replace the white grape juice with a splash of Prosecco or a sweet white wine.
- For a nutty contrast, sprinkle a handful of toasted pistachios over your sorbet before serving.
If you try this, I’d love to hear how it turns out—drop a comment or tag me! Your adventures in sorbet-land might just inspire someone else to give it a whirl. Enjoy your chill time!
Related update: Tart Raspberry Sorbet with a Hint of Heat
Related update: S’mores-n-berry Bars for National S’mores Day – August 10
Related update: Pumpkin gnocchi with basil and Parmesan

Picture this: a cozy Sunday afternoon, the type where time seems to slow down and a light drizzle taps rhythmically against your kitchen window. It’s the perfect setting for a baking adventure, and today’s mission is rugelach. This delightful pastry is more than just a treat; it’s a buttery, flaky, nutty explosion of flavor that’s surprisingly easy to pull off. Even if you’re juggling kids, pets, or a mountain of laundry, this recipe fits snugly into your schedule and promises to fill your home with warmth and the irresistible scent of cinnamon. Let’s dive in, shall we?
Jump to Recipe
What You’ll Need
The beauty of this rugelach recipe lies in its simplicity. Chances are, you have most of these ingredients lounging in your pantry or fridge already. Here’s what you’ll need:
- Salted butter – it gives the dough a rich flavor and perfect flakiness.
- Cream cheese – make sure to use a block, not the spreadable kind.
- Salt – just a pinch to balance the sweetness.
- Plain flour – for that tender, delicate texture.
- Egg yolks – they add richness and help bind the dough.
- Vanilla extract – a splash for warmth.
- Caster sugar – both in the dough and as a sweet coating at the end.
- Fruit preserves – I love orange marmalade, but feel free to experiment.
- Walnuts – adds crunch and a lovely nutty flavor.
- Ground cinnamon – because cinnamon and sugar are best friends.
How to Make Rugelach
- Start by leaving your butter and cream cheese out for a couple of hours. They should be soft and spreadable, which is key to working them into a smooth dough.
- Preheat your oven to 180°C (that’s about 356°F for my stateside friends).
- In a large mixing bowl, beat the softened butter and cream cheese together on medium speed until they’re light and fluffy. This should take about 2-3 minutes.
- Add in the egg yolks, vanilla extract, caster sugar, and a pinch of salt. Gradually mix in the flour until everything comes together into a smooth dough.
- While that’s mixing, chop up your walnuts into fine pieces and set them aside. They’ll add the perfect crunch to your rugelach.
- Once your dough is ready, dust your work surface with flour and knead the dough gently into a large block. If your dough feels a bit sticky, sprinkle on some more flour.
- Divide the dough into four equal pieces, keeping the ones you’re not currently using under a damp cloth so they stay moist.
- Roll one piece into a ball, then use a floured rolling pin to flatten it into a circle about 2 to 3mm thick.
- Cut the rolled dough into eight triangles. Like mini pizza slices, but so much better!
- Time to get fruity! Place a teaspoon of your fruit preserves at the wide end of each triangle, spreading it lightly.
- Sprinkle some chopped walnuts over the preserves, then tuck in the sides of the triangle slightly to keep everything tucked in as you roll.
- Roll each piece towards the pointed end, making sure the filling stays inside. Repeat for the other dough pieces.
- Place your rugelach on a baking tray lined with parchment paper.
- Mix caster sugar and ground cinnamon in a small bowl. Melt your butter and brush it over each rugelach, finishing with a generous sprinkle—or a roll—in the cinnamon-sugar.
- Bake for about 35 minutes, or until the rugelach are a deep golden brown and your kitchen smells heavenly.
- Let them cool on a rack before savoring or storing them away (if they last that long!).
Cook’s Notes
Rugelach is all about that flaky, tender dough, so make sure your butter and cream cheese are properly softened. Cold ingredients can lead to a dense pastry instead of the melt-in-your-mouth texture we’re after. If the dough gets too sticky, don’t be shy about adding a little more flour as you roll it out. These pastries store well—just pop them in an airtight container, and they’ll keep for a few days at room temperature or freeze beautifully for up to a month. A quick reheat in the oven or toaster oven revives their just-baked allure.
Make It Your Own
- Swap the orange marmalade for raspberry or apricot preserves for a different fruity twist.
- If you’re not into walnuts, try pecans or almonds for a different nutty bite.
- Add a sprinkle of chocolate chips to the filling for a decadent, chocolatey surprise.
- Feeling spicy? A pinch of cardamom in the sugar-cinnamon mix adds an exotic flair.
If you try this, I’d love to hear how it turns out—drop a comment or tag me on your socials! Cheers to cozy baking sessions and delicious rugelach adventures!
Related update: Rugelach
Related update: Tart Raspberry Sorbet with a Hint of Heat

Picture this: it’s a lazy Sunday afternoon, and I’m in my kitchen staring down a couple of eggplants that have been lounging in my crisper drawer for a bit too long. It’s one of those days where I desperately want something crispy and satisfying, but without the guilt that comes with a giant bowl of fries. Enter: Eggplant Fries with Tzatziki Sauce. These little guys are a revelation—they’re crunchy, flavorful, and come with a cool, tangy dipping sauce that just hits the spot. The best part? They’re baked, not fried, so you get all the crunch with none of the extra oil. They’re also perfect for when you’re hosting friends and need an appetizer that’s impressively delicious yet deceptively simple to make. Seriously, your friends will be raving about these.
Jump to Recipe
What You’ll Need
What’s great about this recipe is that it’s likely you already have most of these ingredients lounging in your pantry. The secret is in the mix of spices and the creamy yogurt that coats the eggplant before it bakes to crispy perfection. Here’s the crew you’ll need:
- Eggplants – the star of the show!
- Italian seasoning mix – for that herby kick.
- Bread crumbs – to give our fries that crispy crunch.
- Low fat plain yogurt – adds creaminess and tang.
- Egg – helps bind everything together.
How to Make Eggplant Fries with Tzatziki Sauce
- Preheat your oven to 450°F. This is key for achieving that glorious crunchy exterior on the fries. Trust me, a hot oven is your best friend here.
- Mix together a pinch of salt, garlic powder, Italian seasonings, and a dash of paprika in a bowl. This mixture will become your flavor-packed coating.
- In another bowl, whisk together the yogurt and egg until you have a smooth mixture. This will act as the glue to hold those delicious breadcrumbs.
- Slice your eggplants into strips—think classic fry shape. Dunk each strip into the yogurt and egg mix, allowing any excess to drip off.
- Roll the coated eggplant strips in the breadcrumb mix, making sure each piece is covered well. This is what’s going to give you that irresistible crunch.
- Place the breaded eggplant strips onto a parchment-lined or greased baking pan, making sure they have some breathing room. You want them to bake, not steam.
- Pop them into the oven and bake for about 10-15 minutes, rotating once halfway through. They’re done when they’re slightly brown and smell absolutely divine.
Cook’s Notes
- Don’t overcrowd your baking sheet. The eggplant needs space to crisp up, so if you’re making a big batch, use two sheets or bake in batches.
- If you find your eggplant fries aren’t browning as much as you’d like, you can pop them under the broiler for a minute or two—just keep a close eye to prevent burning.
- These fries are best enjoyed fresh out of the oven, but if you have leftovers, they can be stored in an airtight container in the fridge for up to two days. To reheat, just pop them back into the oven at 400°F for a few minutes.
Make It Your Own
- Want to go gluten-free? Swap out the bread crumbs for a gluten-free variety, or try crushed cornflakes for an extra crunch.
- For a spicy twist, add a teaspoon of cayenne pepper to the breadcrumb mix. It’ll give your fries a nice kick.
- If you’re out of Italian seasoning, get creative with what you have on hand—oregano, thyme, or even a hint of rosemary can work wonders.
- No yogurt? No problem. Buttermilk or a splash of milk with a squeeze of lemon can substitute in a pinch.
If you try this, I’d love to hear how it turns out—drop a comment or tag me! Your kitchen adventures always make my day. Happy cooking, friends!
Related update: Eggplant Fries with Tzatziki Sauce
Related update: Breaded Shrimp and Spicy Mayo Appetizer

Picture this: It’s a chilly Tuesday evening, and the last thing you want to do is spend hours in the kitchen after a long day. But you’re craving something warm and fulfilling, something that feels like a hug in a bowl. Enter my Beans With Smoked Pork Hock — a dish I stumbled upon during a desperate weeknight scramble when all I had were pantry basics and a lonely smoked pork hock languishing in the freezer. This recipe is the hero of cozy weeknight dinners, rich with smoky depth and packed full of comforting flavors. The beauty of it lies in its simplicity; it’s the kind of meal that lets you put in minimal effort yet rewards you with a nourishing, soul-warming bowl of happiness.
Jump to Recipe
What You’ll Need
It’s likely you’ve got most of these hanging around your kitchen already. This shopping list is delightfully short and sweet, focusing on a few key ingredients that pack a punch.
- Smoked pork hock
- 1 onion
- 2 garlic cloves
- 1 bay leaf
- 2 cups dried beans, soaked overnight
- 1 vegetable cube
- 2 carrots
- Celery root
- Salt and pepper to taste
- A nice loaf of black bread
How to Make Beans With Smoked Pork Hock
- Start by soaking your beans the night before. Trust me, you’ll thank yourself tomorrow when the beans are perfectly plump and ready to soak up all that deliciousness.
- Rinse the smoked pork hock under cold water and remove the skin. This is where the magic begins — the smokiness of the pork hock will infuse everything with flavor.
- In a large pan, combine the onion, pork hock, beans, bay leaf, and garlic. Your kitchen should start smelling like the warm-up to a grand meal.
- Pour enough water to cover the beans and meat, then crumble in the vegetable cube. Bring everything to a gentle simmer.
- Let it all cook for a good 60 minutes on low heat, with the lid on. This is when you can kick back and relax, maybe with a glass of wine in hand.
- Fifteen minutes before the end, chop the carrots and celery root in a blender or roughly by hand if you like it chunkier. Add them to the pot and give everything a good stir.
- Once the beans are tender and the flavors have melded, fish out the pork hock. Tear it into smaller, bite-sized pieces — perfect for mingling with the beans.
- Don’t forget to remove the bay leaf. This little soldier has done its job.
- Season with salt and pepper to your liking. Serve the beans with those deliciously shredded pieces of pork and a hearty slice of black bread.
Cook’s Notes
Let’s chat about some practical tips. First, if you forget to soak the beans overnight (we’ve all been there), a quick soak method works too: boil them for 1-2 minutes, then let them sit off the heat for an hour. For storage, leftovers can be kept in the fridge for up to three days and they freeze beautifully. Just be sure to store the beans and meat separately for best results. When reheating, add a splash of water to loosen things up.
Make It Your Own
Here’s where you can play around and make this recipe truly yours:
- Swap the smoked pork hock for a smoked turkey leg if you’re feeling adventurous or simply want to switch up the protein.
- Try using kidney or black beans instead of your regular go-to beans for a different texture and color.
- Add a pinch of red pepper flakes for a bit of warmth and spice if you like a little kick.
- If you’re feeling extra, throw in some diced potatoes along with the carrots and celery for added heartiness.
If you give this recipe a whirl, I’d love to hear how it turns out for you! Drop a comment below or tag me in your culinary creations. Happy cooking, friends!
Related update: Beans With Smoked Pork Hock

It was one of those weeknights when I opened the fridge and stared blankly, hoping dinner would magically appear. With only a few clams left from last weekend and some trusty linguine, I decided it was time to whip up my favorite Linguine with Clams in Garlic White Wine Sauce. It’s one of those dishes that sounds fancy—and tastes even fancier—but it’s surprisingly forgiving and quick to prepare, perfect for a midweek pick-me-up. By the time the pasta was perfectly al dente, my kitchen smelled like a cozy little Italian trattoria. My secret weapon? Loads of garlic and a splash of wine that turns simple ingredients into something special.
Jump to Recipe
What You’ll Need
I bet you have most of these ingredients hanging around already, and if not, they’re worth stocking up on for moments like this.
- 5 cloves of garlic
- 3 1/2 dozen little neck clams
- 1 cup dry white wine
- Pinch of red pepper flakes
- 1 pound linguine
- 4 tablespoons unsalted butter
- 1/4 cup fresh Italian parsley
- 1/4 cup fresh oregano leaves
- Parmigiano-Reggiano (optional)
- Kosher salt
How to Make Linguine and Clams In Garlic White Wine Sauce
- Coat a large sauté pan with olive oil and toss in 5 garlic cloves with a pinch of red pepper flakes. Crank the heat to medium-high until the garlic is golden brown and fragrant; this is when your kitchen begins to smell divine. If you’re like me and adore garlic, flip the cloves for extra flavor. Once golden, remove and discard them.
- Add the clams to the pan, pour in the white wine, and cover. Allow it to come to a boil over medium heat. Let it simmer until the clams open up, around 10 minutes. Use a slotted spoon to fish out the clams, reserving the cooking liquid.
- Boil a large pot of water for your linguine. Normally, I’d salt the water generously, but this time I skipped it because the clam juice added enough salty goodness.
- Mince the remaining garlic cloves. In the same sauté pan, drizzle more olive oil, add the minced garlic and another pinch of red pepper flakes. Cook until the garlic is just releasing its aroma, careful not to brown it.
- Add the raw clams and reserved clam juice back to the pan, checking the liquid for any sand or grit. A paper towel-lined sieve could help here to avoid any unwanted crunchiness in your dish.
- Cover and let the clams cook while you drop your linguine into the boiling water, aiming for very al dente—about a minute less than the box suggests.
- Once the clams have opened, set aside those in their shells to keep warm. Add butter and the clams removed from their shells back to the pan. Bring the liquid to a boil, then toss in the cooked pasta and fresh herbs.
- Cook everything together until the sauce coats the linguine. Kill the heat, then stir in grated Parmigiano-Reggiano if you’re using. Serve up the pasta, topping each dish with the clams in their shells and a sprinkle of fresh herbs.
Cook’s Notes
A few pearls of wisdom from my kitchen to yours: make sure to buy shellfish sold in mesh bags to avoid dead shellfish—plastic suffocates them. If you’re planning in advance, all the components can be prepped a few hours ahead, but cook them right before serving for optimal freshness. Leftovers, if you have any, can be refrigerated for up to two days. Just know that reheating clams can make them chewy, so enjoy it fresh if possible.
Make It Your Own
Switch it up with a few fun variations:
- Substitute the clams for crispy tofu for a plant-based twist.
- Use whole wheat or gluten-free pasta to suit dietary needs.
- Swap the white wine for vegetable broth if you’re steering clear of alcohol.
- Add a handful of cherry tomatoes for a pop of color and sweetness.
If you try this, I’d love to hear how it turns out—drop a comment or tag me! Cooking is all about sharing, so let’s keep this delicious conversation going.
Related update: Beans With Smoked Pork Hock
Related update: Greek Yogurt Chicken Salad

So, last Tuesday was one of those days where you open every cupboard and the fridge like five times, hoping for some magic to happen. You know what I mean, right? That weird limbo between wanting something sweet but not willing to spend hours in the kitchen. That’s when I remembered this white chocolate-cranberry ice cream recipe, and honestly, it’s a game-changer. We’re talking creamy, dreamy, with bursts of cranberry goodness — and it doesn’t demand a culinary degree. Perfect for when you need a sweet fix without the fuss. Jump to Recipe
What You’ll Need
The magic of this recipe? You probably have most of these tucked away already. Let’s check off the essentials:
- Double cream – The base for that silky smooth texture.
- Dried cranberries – For those tart little bursts.
- Egg yolks – Just the yolks, no cheating!
- Full fat milk – Because why compromise?
- Caster sugar – For sweetness, of course.
- Vanilla extract – A hint to bring it all together.
- White chocolate – The star of the show.
How to Make White Chocolate-Cranberry Ice Cream
- Start by heating the milk in a medium saucepan just until it begins to gently bubble. Don’t let it boil over — we’re not making hot chocolate here!
- Take it off the heat and set it aside for a moment. Let’s get those eggs going.
- In a separate bowl, whisk the egg yolks and sugar together. You’ll want to go at it for about 3 minutes until they turn pale yellow and fluffy. It’s like magic!
- Slowly pour that warm milk over the egg mixture, stirring as you go. Then, tip it all back into the saucepan.
- Simmer very lightly, stirring continuously. Watch for the custard to thicken or for it to coat the back of a wooden spoon. It should feel like a silky dream.
- Off the heat, stir in the chopped white chocolate. The residual heat will melt it beautifully. Trust the process.
- Once the mixture is cool, add in the vanilla extract. Pop it in the fridge to chill completely.
- When it’s nicely chilled, stir in the cream until everything is perfectly combined.
- Pour the mixture into your ice cream machine and churn until it’s lovely and frozen.
- In the last 5 minutes of churning, toss in those dried cranberries, letting the machine do the work of mixing them in.
- Transfer your creation into a plastic container and freeze for at least 3 hours before serving.
Cook’s Notes
Ah, the little things that make life easier (and tastier):
- If you don’t have an ice cream machine, you can still make this by freezing the mixture and stirring every 30 minutes until it sets. But, if we’re being honest, the machine really does make it creamier.
- Store this ice cream in an airtight container to keep it fresh. It’ll last about a week, but will probably disappear much sooner.
- Don’t rush the chilling process. The colder the mix before churning, the better the texture.
Make It Your Own
Feeling creative? Here’s how to switch things up:
- Swap dried cranberries with chopped dark chocolate for a double chocolate vibe.
- Try adding a pinch of sea salt when you stir in the vanilla for a salted white chocolate twist.
- Mix in some toasted almonds with the cranberries for a nutty crunch.
- Infuse the milk with a cinnamon stick while heating it for a spicy kick.
If you give this white chocolate-cranberry ice cream a whirl, I’d love to hear about it. Drop a comment or tag me in your posts — let’s share all this deliciousness together!
Related update: White chocolate-cranberry ice cream
Related update: Baked Alaska

It was one of those rainy Tuesday evenings where all you want is something warm and nourishing that hugs you from the inside out. I was staring into my pantry, contemplating the array of tins and boxes, when I stumbled upon a forgotten bag of rice. That was the moment Chicken Porridge became my saving grace. It’s a dish that’s comforting, easy to put together, and just sophisticated enough to impress with its humble roots. You’ll love how straightforward this recipe is, and honestly, it uses things you probably already have lying around – except maybe the fresh ginger, but trust me, it’s worth a trip to the store.
Jump to Recipe
What You’ll Need
You’re going to love how this one simple dish can use up the odds and ends in your kitchen. Let’s raid the pantry and the fridge:
- 1 cup of rice (any kind you have will do, but jasmine is my favorite)
- 2 cups of chicken stock (homemade if you have it; the boxed kind works too!)
- 1 large chicken breast
- 1 medium carrot, diced
- 1 tablespoon of julienne young ginger
- 1 teaspoon of white ground pepper
- 2 tablespoons of chopped parsley
- 2 shallots, thinly sliced
- 1 spring onion, diced
- 2 tablespoons of vegetable oil
- Salt to taste
How to Make Chicken Porridge
- Start by deep-frying the sliced shallots in the vegetable oil until they turn a gorgeous golden brown. The aroma will be irresistible! Drain them on a paper towel and set them aside. Save that shallot-infused oil; it’s liquid gold.
- Wash the rice under cold water until the water runs clear. This helps keep the porridge from becoming too sticky.
- Mix the washed rice with a tablespoon or two of the reserved shallot oil. This gives it an extra layer of flavor that is just divine.
- In a large pot, combine the rice, chicken stock, chicken breast, and diced carrots. Bring everything to a gentle boil over medium heat.
- Once boiling, reduce the heat to low. Let it simmer for around an hour, stirring occasionally. You’ll know it’s ready when the rice breaks down and the porridge thickens to a silky consistency.
- Remove the chicken breast, shred it using two forks, and return the shredded meat to the pot. This ensures every bite has a bit of chicken goodness.
- Warm everything through, then season with salt and white ground pepper. Taste as you go; you might prefer it a bit pepperier.
- Serve the porridge hot, garnished with diced spring onion, chopped parsley, julienne young ginger, and the crispy fried shallots. A few drops of that shallot oil on top, and you have a bowl of bliss.
Cook’s Notes
Don’t rush the simmering process; the longer it simmers, the creamier it gets. If you find your porridge too thick, just stir in a bit more chicken stock or water. This porridge keeps well in the fridge for a couple of days. When reheating, add a splash of water to bring it back to life. The crispy shallots are best fresh, but if you need to, you can store them in an airtight container for a day or two; they may just lose a bit of their crunch.
Make It Your Own
- Swap the chicken for crispy tofu, and you’ve got a vegetarian version that’s just as comforting.
- Use beef stock and thinly sliced beef for a heartier alternative.
- Add a dash of soy sauce or fish sauce for an umami boost.
- Throw in a handful of spinach or kale right before serving for some extra greens.
If you try this, I’d love to hear how it turns out — drop a comment or tag me! Eating your way through a rainy day has never been more delightful. Enjoy every spoonful!
Related update: Chicken Porridge
Related update: Classic French Onion Soup
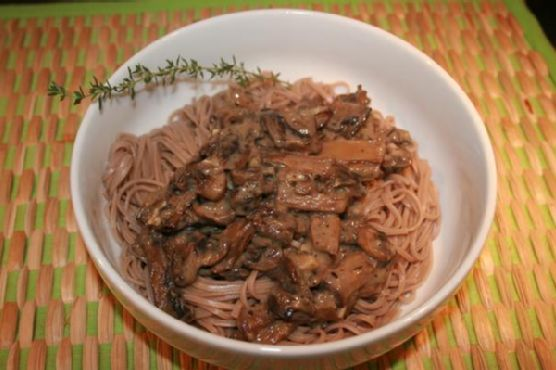
Last Tuesday, I found myself staring into the abyss of my fridge after what felt like the longest day ever. You know the kind — the kind where your brain feels like mush and you just want something cozy and satisfying. That’s when I concocted this dreamy dish: Creamy Mushrooms Over Soba Noodles. It’s a lifesaver for those nights when you crave comfort without the fuss. This recipe is incredibly creamy, perfectly garlicky, and has just the right amount of freshness from the lemon and thyme. Plus, it’s all vegan! Trust me, this is one you’ll want to keep in your back pocket for any occasion.
Jump to Recipe
What You’ll Need
I bet you already have most of these on hand. It’s all about those mushrooms and the creamy sauce that makes this dish sing.
- Earth Balance buttery spread – 2 tablespoons, divided
- Cremini and white mushrooms – a mix, sliced
- Garlic – 3 cloves, minced
- All-purpose flour – 1 tablespoon
- Unsweetened soy milk – 1 cup
- White wine – 1/4 cup (optional, but highly recommended!)
- Fresh thyme – a few sprigs plus more for garnish
- Lemon juice – from half a lemon
- Salt and pepper – to taste
- Soba noodles – 8 ounces
How to Make Creamy Mushrooms Over Soba Noodles (Vegan)
- Start by melting 1 tablespoon of the Earth Balance in a large sauté pan over medium heat. Toss in the mushrooms and garlic, stirring occasionally until the mushrooms are dark, reduced, and oh-so-fragrant. This should take about 5-7 minutes.
- Set those lovely mushrooms aside. In the same pan, melt the remaining tablespoon of Earth Balance. Sprinkle in the flour and stir continuously for about a minute to form a roux. It should smell slightly nutty and golden.
- Slowly pour in the soy milk, whisking as you go to avoid any lumps. Keep stirring until the mixture is smooth and has thickened into a luscious sauce.
- Return the mushrooms to the pan, and add the lemon juice, thyme, salt, and pepper. Pour in the white wine and let the sauce simmer until it’s reduced and has reached a consistency that coats the back of a spoon.
- Meanwhile, cook your soba noodles according to the package instructions. Drain and divide them among your bowls.
- Ladle the creamy mushroom sauce over the noodles, garnish with extra thyme if you’re feeling fancy, and dig in!
Cook’s Notes
Here’s the deal: this dish is forgiving, so don’t stress too much. If you accidentally add too much soy milk, just let it reduce a bit longer. It might be tempting to skip the white wine, but it really adds depth to the sauce. If you’re cooking for one, the leftovers are a blessing — the flavors meld beautifully overnight. Just store them in an airtight container in the fridge, and reheat gently on the stove or microwave with a splash of soy milk to loosen the sauce.
Make It Your Own
- Swap the soba noodles for zucchini noodles if you’re keeping it low-carb.
- Add a handful of spinach or arugula when you add the mushrooms back to the sauce for extra greens.
- If you’re out of white wine, a splash of vegetable broth can add that needed umami punch.
- For a nutty twist, sprinkle toasted sesame seeds over the finished dish.
If you try this, I’d love to hear how it turns out — drop a comment or tag me! Happy cooking, and remember that sometimes the best dishes come from those moments of pure inspiration in front of an open fridge. Enjoy!
Related update: Creamy Mushrooms Over Soba Noodles (Vegan)
Related update: Polenta Pie With Italian Toppings
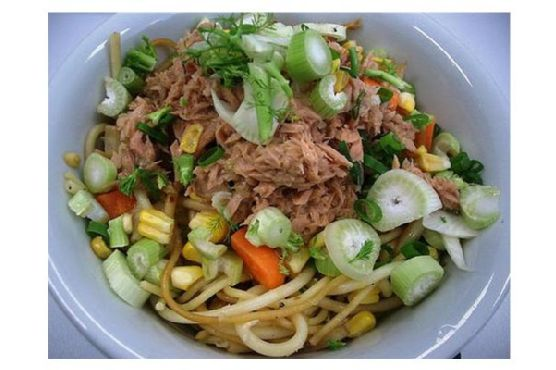
I was standing in my kitchen one Tuesday night, craving something hearty yet low-key — you know, that sweet spot between weeknight ease and weekend indulgence. I scoured my pantry for inspiration and stumbled upon a can of tuna. That’s when it hit me: Pasta With Tuna. This dish is like a warm hug on a plate, combining the creamy comfort of a sauce with the lightness of seafood. It’s quick, it’s satisfying, and yes, it’s got a little kick, thanks to that dash of hot pepper sauce. Perfect when you need to whip up something scrumptious without a ton of fuss.
Jump to Recipe
What You’ll Need
The beauty of this dish is in its simplicity. Chances are you already have most of these lying around in your kitchen:
- Olive oil
- 1 onion, chopped
- Flour
- Non-fat milk
- 1 can water-packed tuna, drained and shredded into chunks
- 1 cup frozen peas
- A bunch of fresh parsley, chopped
- 2-3 green onions, sliced
- 1 cup parmesan cheese, grated
- A dash of pepper sauce
- 1 pound of tubular pasta of your choice
How to Make Pasta With Tuna
- Start by cooking your pasta in a large pot of boiling water until it’s perfectly al dente. You want it to have a nice bite — not too soft.
- Once done, drain the pasta and return it to the warm pot. This keeps it cozy while you work on the sauce.
- Grab a saucepan and heat up a drizzle of olive oil over medium heat. Toss in the chopped onion and sauté until it’s transparent, releasing its sweet aroma.
- Sprinkle in the flour and give it a good stir. Cook for just a few seconds to take off that raw edge.
- Whisk in the non-fat milk, stirring constantly. You’ll see it start to thicken into a creamy base — that’s the magic happening!
- Add in the frozen peas, and let them mingle with the sauce for a couple of minutes until they’re vibrant and heated through.
- Introduce the tuna, breaking it into chunks as you go, followed by the parsley, green onions, and a generous amount of parmesan. Don’t forget that dash of pepper sauce for some zing!
- Pour this delightful sauce over the pasta and stir gently to mix everything together. You want each piece of pasta to be lovingly coated.
- Serve it up immediately, preferably with extra parmesan on top — because why not?
Cook’s Notes
Let’s get real — this dish is pretty forgiving. Don’t sweat the small stuff. If your onions are more golden than transparent, it’s all good. The key is stirring the sauce constantly; it keeps it smooth and prevents lumps. Make it ahead by prepping the sauce and storing it separately from the pasta. When you’re ready to eat, simply reheat them together on the stove. Leftovers? They keep well for up to two days in the fridge. Just note that the pasta will continue to absorb the sauce, so it may be less saucy but still deliciously flavorful.
Make It Your Own
Feeling adventurous? Here are some fab twists to try:
- Swap the tuna for crispy tofu chunks for a vegetarian spin.
- Add a squeeze of lemon juice for a citrusy pop that brightens the flavor.
- Replace the parmesan with feta cheese for a tangy twist.
- Throw in a handful of cherry tomatoes for a burst of sweetness and color.
If you give this pasta dish a try, I’d love to know how it turns out for you! Drop a comment below or tag me on social media with your culinary creations. Bon appétit!
Related update: Pasta With Tuna
Related update: Creamy Mushrooms Over Soba Noodles (Vegan)

It was one of those soggy Tuesday evenings, you know? The kind where the rain seems endless, and all you want is something warm and comforting. I was rummaging through the pantry, and there it was — a pack of spare ribs that I’d forgotten about. The thought of sticky, tender ribs with a glossy finish gave me just the kind of culinary pep talk I needed. This recipe is one of those gems that feels like a treat but is surprisingly easy to put together. It’s perfect for when you want to impress without spending hours in the kitchen. Spoiler: the magic is all in the marinade.
Jump to Recipe
What You’ll Need
Picture this: a short list of ingredients that packs a punch. Chances are you already have most of this in your kitchen:
- Oil
- Clear honey
- Fresh ginger root
- Dark soy sauce
- Hoisin sauce
- Five-spice powder
- Garlic cloves
- Spare ribs
How to Make Spare Ribs
- Preheat your oven to a toasty 400 degrees. This is your way to crispy, caramelized goodness!
- In a trusty mixing jug, combine the oil, clear honey, freshly grated ginger root, dark soy sauce, hoisin sauce, five-spice powder, and minced garlic cloves. It’s like a flavor bomb waiting to happen.
- Pour this rich, sticky marinade over the spare ribs. For best results, let them soak up all those flavors overnight. But if you’re short on time, a couple of hours will do the trick.
- Arrange the marinated ribs on a rack in a roasting pan. This allows the heat to circulate, giving you that perfect crispy edge.
- Cook them in your preheated oven for around 45 minutes. Halfway through, turn those ribs over so they cook evenly and develop a perfect crust.
- Let them cool down a bit, and serve them when they’re just warm or cold if you prefer. Either way, they’re delicious!
Cook’s Notes
The secret to these ribs lies in the marinade time — the longer, the better. If you’ve got the patience, overnight marinating is where the magic truly happens. As for leftovers, which are rare because they tend to disappear fast, you can store them in the fridge for up to three days. Just reheat them in the oven to bring back that lovely glaze. A common pitfall is skipping the turning step — don’t! It ensures that all sides are equally tantalizingly sticky.
Make It Your Own
These ribs are like a blank canvas — here are some ways to mix things up:
- Swap the spare ribs for chicken wings for a finger-licking appetizer.
- Add a splash of sriracha to the marinade for some heat that’ll warm you from the inside out.
- Replace hoisin sauce with a tablespoon of barbecue sauce for a smoky twist.
- Try adding a tablespoon of orange juice to the marinade for a sweet citrusy note.
If you try this, I’d love to hear how it turns out — drop a comment or tag me! This dish is one of those treasures that makes cooking at home feel both indulgent and gratifying. Enjoy every sticky bite!
Related update: Spare Ribs
Related update: Pasta With Tuna

It was one of those drizzly Sundays when leaving the house was not an option, and the only thing that sounded remotely appealing was the smell of something baking in the oven. I found myself rifling through the pantry, hoping for inspiration, when I spotted a bunch of rather sad-looking bananas. You know the kind—brown, spotty, and begging to be transformed into something wonderful. That’s when it hit me: banana bread! It’s the kind of recipe that feels like a warm hug, and let’s be honest, who doesn’t need one of those every now and then? This banana bread is the perfect quick-fix comfort food—simple enough to whip up on a lazy afternoon but deliciously satisfying as if you spent hours perfecting the recipe. Jump to Recipe
What You’ll Need
Most of these ingredients are probably already lounging around in your kitchen, waiting for their moment to shine.
- 3 ripe bananas
- 1 cup granulated sugar
- 1/2 cup butter
- 1 egg
- 1 teaspoon vanilla extract
- 1 teaspoon baking soda
- Pinch of salt
- 1 1/2 cups all-purpose flour
- 1/2 cup chopped walnuts (optional, but highly recommended!)
How to Make Homemade Banana Bread
- Start by preheating your oven to 350°F (175°C). Trust me, nothing’s worse than a waiting oven when you’re ready to bake.
- In a large mixing bowl, beat together the butter, sugar, vanilla, and egg until the mixture is creamy and smooth. It should look like a pale-yellow fluffy cloud.
- Next, take your bananas. With a potato masher or a simple fork, mash them right into the bowl. It doesn’t have to be perfect; a few lumps are totally fine. Mix well until the bananas are fully incorporated into the creamy mixture.
- Time to bring in the flour, baking soda, and salt. Gently stir them into the wet ingredients. You don’t want to over-mix here; just enough to see no more streaks of flour.
- If you’re feeling nutty, toss in those tasty walnuts and give it another light stir.
- Grab your trusty loaf pan and give it a good spray with non-stick cooking spray. No one likes a sticky situation.
- Pour your banana-y mixture into the prepared loaf pan, smoothing the top with a spatula if needed.
- Place it in the oven and let it work its magic for 55-65 minutes. Your kitchen will soon smell like heaven. It’s ready when an inserted toothpick comes out clean.
Cook’s Notes
This banana bread is a dream to make, but here are a few tips to make sure yours is just as delightful:
- If your bananas aren’t ripe enough, place them in a 300°F oven for 15-20 minutes until they are brown and sweet.
- Store leftovers in an airtight container—it’ll stay fresh and moist for a few days, but I doubt it’ll last that long!
- For extra indulgence, try warming a slice and spreading a little butter on top. Heaven!
Make It Your Own
- Swap the walnuts for chocolate chips if you’re craving a chocolatey twist.
- Replace the granulated sugar with brown sugar for a deeper, caramel-like flavor.
- Throw in a handful of dried cranberries for a tart burst of flavor.
- Try a mix of nuts—pecans, almonds, or hazelnuts can add a delightful crunch.
If you give this banana bread a go, I’d love to hear how it turned out for you. Drop a comment or tag me in your tasty creations on social media! Let’s spread the banana bread love.
Related update: Homemade Banana Bread
Related update: Spare Ribs
Related update: White chocolate-cranberry ice cream
Related update: 5 Minute Gluten Free Wonder Buns

So there I was, standing in my kitchen on a chilly Wednesday evening, staring at the contents of my fridge like they might magically assemble themselves into dinner. It had been one of those days, you know? The kind where you just want something cozy and comforting, but it needs to come together fast because you’re already running low on energy. That’s when I spotted the potatoes and cheese, and it hit me—Potato Cheese Soup! But not just any soup; this one is going to be served in a bread bowl. Trust me, by the time you ladle this velvety magic into its warm carb cradle, you’ll feel like you just wrapped yourself in a fluffy blanket of culinary bliss. It’s rich, creamy, and feels like a hug in a bowl. Perfect for when life needs a pause button. And yes, it’s secretly pretty easy to make! Jump to Recipe
What You’ll Need
This ingredient list is a lifesaver because chances are, you already have most of these lurking in your pantry or fridge.
- 2 tablespoons of olive oil
- 1 sweet diced onion
- 2 cloves of garlic, minced
- 4 cups of chicken stock
- 2 cups of water
- 1 teaspoon of salt
- 5 medium red potatoes, diced
- 2 carrots, peeled and sliced
- 1 cup of whole milk
- 1/2 cup of heavy cream
- 2 tablespoons of butter
- 8 oz block of Velveeta cheese, cubed
- 2 cups of shredded sharp cheddar cheese
- Salt and pepper to taste
- Optional garnishes: bacon crumbles, chives, sour cream, shredded Parmesan cheese
How to Make Best Potato Cheese Soup in a Bread Bowl
- In a large heavy stock pot, heat 2 tablespoons of olive oil over medium heat. When the oil shimmers, toss in the chopped onions. Cook until they’re translucent and their sweetness wafts through the kitchen, about 2-3 minutes.
- Add the minced garlic and let it dance around in the pot for another minute until it’s fragrant but not brown.
- Pour in the chicken stock, water, and a teaspoon of salt. Stir to combine and then add in the diced potatoes and sliced carrots.
- Bring the pot to a boil. Let it work its magic until the potatoes are fork-tender, like a hot knife through butter.
- Turn off the burner and let things cool a bit. Scoop out about half of the potatoes into a food processor or blender. Blitz them until you have a smooth paste, then return them to the pot. This thickens the soup beautifully.
- Place the pot back on medium heat. Add the whole milk, heavy cream, butter, and Velveeta cheese. Stir gently until the butter and Velveeta have melted into a luscious pool. Make sure not to boil; adjust the heat to low as needed.
- Start adding the shredded sharp cheddar cheese, a handful at a time, stirring lovingly after each addition. Finish with a sprinkle of Parmesan cheese.
- Taste and adjust seasoning with salt and pepper. Remember, the cheeses are salty, so go slow and taste as you go.
- Spoon the soup into bread bowls, regular bowls, or even a mug if you’re feeling rebellious. Top with bacon crumbles, chives, a dollop of sour cream, and a sprinkle of extra cheese for good measure.
Cook’s Notes
This soup is your forgiving friend in the kitchen. If you find that it’s too thick, just splash in a bit more milk or chicken stock. It’ll hang out in the fridge for about 3 days, but I doubt it’ll last that long. When reheating, do so gently over low heat to avoid separating that creamy goodness.
If you’re planning ahead, make the soup without the cream and cheeses, cool it, and store in the fridge. When you’re ready to eat, reheat and then add the dairy components for freshest flavor.
Make It Your Own
- Swap the Velveeta for a more natural cheese like Gruyère or Fontina for a different creamy texture.
- Add crispy bacon directly into the soup for a smoky flavor boost that’s irresistible.
- Go vegetarian by using vegetable stock instead of chicken stock. It’s still super flavorful!
- Spice it up with a dash of cayenne pepper or a splash of hot sauce for those who like a bit of heat.
If you try this, I’d love to hear how it turns out—drop a comment or tag me! Your kitchen adventures make my day. Here’s to warm bowls and full hearts!
Related update: Best Potato Cheese Soup in a bread bowl