Brown sugar & Spice Sugar cookie frogs | Made by Meaghan Moineau

Brown sugar & Spice Sugar cookie frogs | Made by Meaghan Moineau

Title: Sweet Memories in Every Bite: Brown Sugar & Spice Sugar Cookie Frogs
Description: Dive into the enchanting world of baking with our Brown Sugar & Spice Sugar Cookie Frogs. These delightful treats are more than just cookies; they’re a nostalgic journey back to cherished family gatherings. With a perfect blend of warm spices and a touch of sweetness, these cookies promise to bring warmth and joy to your kitchen. Whether you're a seasoned baker or a beginner, this recipe is sure to captivate your taste buds and your heart.

---


Brown Sugar & Spice Sugar Cookie Frogs: A Recipe Steeped in Family Tradition


Ingredients:


- Unbleached flour


- Baking powder


- Cinnamon


- Ginger


- Nutmeg


- Allspice


- Granulated sugar


- Light brown sugar


- Butter


- Egg


- Vanilla extract


Instructions:


1. Prepare Your Dry Ingredients: Begin by whisking together the flour, baking powder, cinnamon, ginger, nutmeg, and allspice. Set this aromatic mixture aside, letting the spices mingle and infuse their warmth.
2. Creaming Magic: In a separate bowl, cream the granulated sugar and light brown sugar with the butter until light and fluffy. The blend of sugars gives the cookies their distinct, rich flavor.
3. Incorporate Wet Ingredients: Add the egg and vanilla extract to the creamed mixture, mixing until well-blended. The vanilla adds a hint of sweet aroma that perfectly complements the spices.
4. Combine and Conquer: Gradually incorporate the flour mixture into the wet ingredients. Beat just until combined, ensuring to scrape down the bowl, especially the bottom. The dough will be thick; don't hesitate to knead in any stray bits of flour by hand.
5. Shaping Your Frogs: Roll the dough on a floured surface and cut into whimsical frog shapes. Place these playful figures on parchment-lined baking sheets, ready to hop into the oven.
6. Baking to Perfection: Bake in a preheated oven for 9-12 minutes, adjusting the time depending on the size of your cookie cutter. Let them sit on the sheet for a few minutes before transferring them to a cooling rack.

---


A Sweet Nostalgia: The Memory Behind the Recipe


Every time I bake these Brown Sugar & Spice Sugar Cookie Frogs, I am transported back to my grandmother's cozy kitchen. As a child, I’d watch in awe as she effortlessly transformed simple ingredients into magical treats. The aroma of spices wafting through the air was always the first sign that something special was underway.


Grandma had a particular fondness for frogs, often saying they brought good luck. She’d let me help cut out the frog shapes, my small hands struggling to keep the dough intact. We’d laugh at the misshapen ones, claiming they had extra character. Those afternoons filled with laughter and love are some of my most cherished memories.


These cookies were a staple at every family gathering, each bite a reminder of the warmth and joy that surrounded us. Even now, as I bake them for my own family, I feel a connection to those happy days, hoping to create similar memories for my little ones.


---


Difficulty: 3/10


Classification: Dessert


---


Whether you’re creating new memories or reliving old ones, these Brown Sugar & Spice Sugar Cookie Frogs are sure to bring smiles and sweetness to your home. Enjoy the process, savor the flavors, and let the nostalgia wash over you. Happy baking!

Read more about Appetizers

Read more about Main Dishes

Read more about Desserts

Whole Wheat Chocolate Chip Cookies | Made by Meaghan Moineau

Whole Wheat Chocolate Chip Cookies | Made by Meaghan Moineau

Title: Nostalgic Whispers of Warmth: Whole Wheat Chocolate Chip Cookies
Description: Discover the heartwarming joy of baking Whole Wheat Chocolate Chip Cookies with this delightful recipe that marries the rich flavors of dark brown and coconut sugars with the wholesome goodness of whole-wheat flour. These cookies are the epitome of comfort, perfect for a cozy afternoon treat or sharing with loved ones. Alongside the recipe, enjoy a nostalgic tale of family memories that brings a touch of warmth to every bite.

---


Whole Wheat Chocolate Chip Cookies Recipe
Difficulty: 4/10
Category: Dessert
Ingredients:

- 1 teaspoon baking powder


- 1 teaspoon baking soda


- 2 cups chocolate chips


- 1 cup coconut sugar


- 1 cup dark brown sugar


- 2 large eggs


- 1 teaspoon kosher salt


- 1 cup unsalted butter, softened


- 2 teaspoons vanilla extract


- 2 1/2 cups whole-wheat flour


Instructions:
1. Preparation: Begin by placing two racks in the upper and lower thirds of your oven and preheat it to 350°F. Line two baking sheets with parchment paper for easy cleanup.
2. Mix Dry Ingredients: Sift together the baking powder, baking soda, kosher salt, and whole-wheat flour into a large bowl. Pour back any remaining bits into the bowl to ensure no ingredient is left behind.
3. Cream Butter and Sugars: In a standing mixer fitted with a paddle attachment, combine the softened butter, coconut sugar, and dark brown sugar. Beat on low speed until the mixture is smooth and creamy, approximately 2 minutes. Scrape down the sides of the bowl with a spatula.
4. Add Eggs and Vanilla: Incorporate the eggs one at a time, mixing thoroughly after each addition. Stir in the vanilla extract until fully combined.
5. Combine Ingredients: Gradually add the dry ingredient mixture to the wet ingredients. Mix on low speed until just combined, about 30 seconds. Ensure all the flour is incorporated by scraping down the sides and bottom of the bowl.
6. Add Chocolate Chips: Pour in the chocolate chips and mix on low speed until evenly distributed throughout the dough.
7. Shape Cookies: Use a spatula to transfer the dough onto a work surface. Use your hands to fully incorporate all ingredients. Scoop mounds of dough, about 3 tablespoons each, onto the prepared baking sheets, allowing 3 inches of space between each cookie.
8. Bake: Bake the cookies for 16 to 20 minutes, rotating the sheets halfway through for even baking. The cookies should be a beautiful golden brown.
9. Cool and Enjoy: Transfer the cookies, still on the parchment, to a countertop to cool. For an extra touch, sprinkle a pinch of sea salt on top while they are still warm.

These cookies are best enjoyed warm from the oven, but they also freeze well for later indulgence. Simply warm in the microwave for 20-30 seconds to relive the freshly baked experience.


---


A Nostalgic Tale:

Growing up, Saturday afternoons were a sacred time in our family. My grandmother would gather us in her cozy kitchen, the air already fragrant with the anticipation of baking. Her secret to the best chocolate chip cookies was a pinch of love and the patience to let us kids measure out the ingredients with our clumsy hands. As we sifted flour and sneaked chocolate chips when she wasn't looking, stories of her childhood would fill the room, intertwining with our laughter.


These Whole Wheat Chocolate Chip Cookies hold a special place in my heart, as they remind me of those cherished afternoons. The wholesome earthiness of whole-wheat flour combined with the sweetness of chocolate chips is more than just a recipe; it’s a bridge to a simpler time when the world was as warm and inviting as a freshly baked cookie. Every bite takes me back to that kitchen, surrounded by family, where love was the main ingredient in every recipe.


Whether you are creating new memories or revisiting old ones, these cookies are sure to bring a sprinkle of nostalgia and a dollop of comfort to your day.

Read more about Appetizers

Read more about Main Dishes

Read more about Desserts

Homemade Apple Almond Granola Bars | Made by Meaghan Moineau

Homemade Apple Almond Granola Bars | Made by Meaghan Moineau

Title: Crunchy Nostalgia: Homemade Apple Almond Granola Bars
Description: Dive into the comforting embrace of Homemade Apple Almond Granola Bars, a delightful concoction of wholesome ingredients that bring back the warmth of family gatherings. Easy to make and irresistibly tasty, these bars are perfect for breakfast on-the-go or a guilt-free snack.

---


Homemade Apple Almond Granola Bars: A Family Tradition


Growing up, my family always had a knack for turning simple moments into cherished memories. Among these, Saturday mornings were special. The smell of freshly baked goods wafting through the house was our gentle wake-up call, drawing us out of our slumber and into the kitchen where the magic happened.


One of the most beloved recipes that graced our kitchen was the Homemade Apple Almond Granola Bars. These bars were more than just a treat; they were a symbol of togetherness and the perfect embodiment of autumn afternoons spent with family. The combination of rolled oats, sweet honey, and the crunch of almonds brought a comforting warmth that only a homemade recipe could provide.


Ingredients:


- 2 cups rolled oats


- 1/4 cup ground flax seed


- 1/4 cup oat bran


- 1/4 cup wheat bran


- 1/2 teaspoon salt


- 1 teaspoon baking powder


- 1 teaspoon ground cinnamon


- 1/4 cup sugar substitute


- 1/4 cup unsweetened coconut


- 1/2 cup non-fat milk


- 1/4 cup sweet honey


- 1 egg


- 1 teaspoon vanilla extract


- 1 apple, peeled and diced


- 1/2 cup almonds, chopped


Instructions:


1. Preheat your oven to 350°F (175°C) and spray a 9x13 pan with non-stick cooking spray.
2. Combine in a large bowl the oats, flax seed, oat bran, wheat bran, salt, baking powder, cinnamon, sugar substitute, and coconut. Mix until well combined.
3. Add the milk, honey, egg, and vanilla extract to the dry ingredients. Stir until everything is well incorporated.
4. Fold in the diced apple and chopped almonds, ensuring they are evenly distributed throughout the mixture.
5. Press the mixture firmly into the prepared pan, spreading it out evenly.
6. Bake for 15-20 minutes, or until the edges start to brown lightly.
7. Cool for 10 minutes before cutting into bars. Allow to cool completely before serving or storing.

These granola bars are a perfect example of how food can connect us to our roots and to each other. As we savored these bars, my siblings and I would reminisce about the little things that made our weekend mornings special—like the sound of crunching leaves outside or the laughter that filled the room as we enjoyed our breakfast together.


Difficulty: 3/10 - Easy


Classification: Dessert / Snack


Whether you're yearning for a quick snack or a healthy dessert option, these Homemade Apple Almond Granola Bars are sure to satisfy. They're not just a treat; they're a piece of nostalgia, a way to bring a little bit of my family's warmth into your own home.


So, gather your ingredients and invite your loved ones to the kitchen. Create new memories while indulging in the delightful flavors of this cherished family recipe. Enjoy the simple pleasure of homemade goodness, and perhaps, start a new tradition of your own.

Read more about Appetizers

Read more about Main Dishes

Read more about Desserts

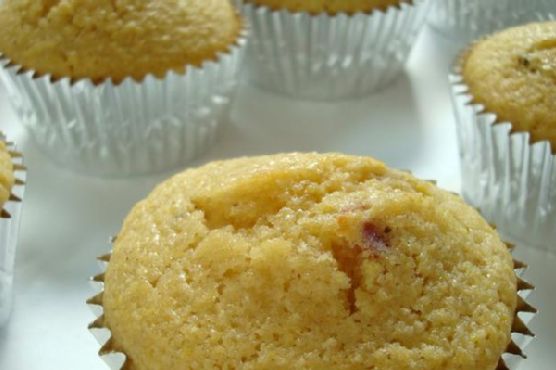
Maple-Bacon Corn Muffins | Made by Meaghan Moineau

Maple-Bacon Corn Muffins | Made by Meaghan Moineau

Maple-Bacon Corn Muffins: A Sweet and Savory Delight


Description: Craving a unique twist on a classic comfort food? Our Maple-Bacon Corn Muffins combine the sweet allure of maple syrup with the smoky richness of bacon, creating a mouthwatering balance that captures the essence of home. Perfect as an appetizer or a brunch centerpiece, these muffins are sure to delight your taste buds and warm your heart.

---


A Nostalgic Journey: Family Memories of Maple-Bacon Corn Muffins


Growing up, Saturday mornings in our household were always special. The aroma of freshly brewed coffee would waft through the air, mingling with the irresistible scent of bacon sizzling on the stove. My siblings and I knew that it was time for our beloved family tradition—Maple-Bacon Corn Muffins. This dish holds a cherished place in our hearts, a recipe passed down from my grandmother who had a knack for combining flavors in the most delightful ways.


I remember the excitement of gathering in the kitchen, each of us assigned a task. My brother was in charge of chopping the bacon, my sister whisked the eggs and milk, and I was responsible for stirring the dry ingredients—a job I took very seriously. As we worked, stories flowed as freely as the maple syrup we eagerly poured into the mixture.


Once the muffins were in the oven, the anticipation was palpable. We'd peek through the oven window, watching the muffins rise and turn a perfect golden brown. When the timer chimed, we could hardly wait to liberate the muffins from their tin prisons. Served warm, the first bite was always the best—crispy bacon mingling with the soft, sweet cornmeal, underlined by the deep, rich flavor of maple.


Those mornings were a ritual, a time when our family came together, sharing not just food, but laughter, love, and stories. Even now, as I prepare this dish in my own kitchen, those memories flood back, adding an extra layer of warmth to each batch.


Today, I am thrilled to share this recipe with you, in hopes that it will bring a touch of nostalgia and a whole lot of flavor to your kitchen.


---


Ingredients


- Bacon


- Baking powder


- Butter (melted)


- Eggs


- Flour


- Maple syrup


- Milk


- Salt


- Sugar


- Yellow cornmeal


Instructions


1. Preheat your oven to 400°F.


2. Heat a skillet over medium-high heat. Chop the bacon and cook until slightly crispy. Remove with a slotted spoon and set the skillet aside.


3. In a large bowl, combine all dry ingredients: flour, cornmeal, baking powder, sugar, and salt.


4. Whisk in the milk and eggs until well combined.


5. Stir in the melted butter, maple syrup, and a cup of reserved bacon grease.


6. Add the bacon pieces back into the mixture and stir until evenly distributed.


7. Line a 12-cup muffin tin with muffin liners. Evenly divide the mixture among the liners.


8. Bake for 15 minutes until the muffins are golden brown.


9. Remove from the muffin tin and serve warm. Enjoy!


---


Difficulty: 4/10
Classification: Appetizer

These Maple-Bacon Corn Muffins are more than just a dish; they are a portal to cherished memories and a celebration of comforting flavors. Whether you're sharing them with family or enjoying a quiet morning alone, they promise to bring joy and warmth to any occasion.

Read more about Appetizers

Read more about Main Dishes

Read more about Desserts

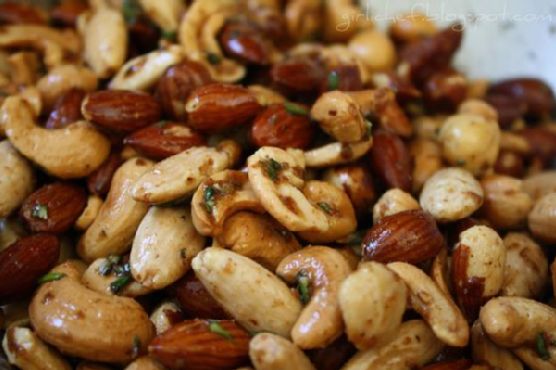
Sweet and Spicy Nuts | Made by Meaghan Moineau

Sweet and Spicy Nuts | Made by Meaghan Moineau

Title: Sweet and Spicy Nuts: A Family Tradition with a Fiery Twist
Description: Discover the delightful balance of sweet and spicy flavors in this easy-to-make Sweet and Spicy Nuts recipe. Perfect as an appetizer or a snack, this dish is sure to add a kick to your family gatherings. Reminisce with me as I share a cherished family memory tied to these delectable nuts. Difficulty: 3/10.

---


When I think of Sweet and Spicy Nuts, my mind drifts back to those delightful family gatherings at my grandmother's house. Tucked away in her cozy kitchen, the air was always filled with the comforting aroma of buttery spices, a scent that wrapped around us like a warm hug.


The recipe I'm about to share has become a staple in our family—a perfect blend of sweet and spicy that echoes the warmth of those cherished memories. It's a dish that brings smiles and a bit of nostalgia, as it reminds us of those lively conversations and laughter shared over a bowl of these flavorful nuts.


Sweet and Spicy Nuts Recipe
Ingredients:

- 2 tablespoons butter


- 1/2 teaspoon cayenne pepper


- 1/2 teaspoon ground cinnamon


- 1/2 teaspoon ground cumin


- 1/4 cup light brown sugar


- 2 cups mixed nuts (such as walnuts)


- 1 teaspoon salt


- 1 tablespoon water


Instructions:
1. Mix the Spices: In a small bowl, combine the ground cumin, cayenne pepper, ground cinnamon, and salt. Set aside for later use.
2. Toast the Nuts: Heat a dry skillet over medium heat. Add the mixed nuts and cook, stirring frequently, until they begin to toast, about 4 minutes. Transfer the nuts to a small bowl and set aside.
3. Create the Glaze: In the same hot skillet, add the butter, light brown sugar, water, and the spice mixture. Cook, stirring, until a smooth glaze forms, about 1 minute.
4. Coat the Nuts: Return the toasted nuts to the skillet. Toss them in the glaze, ensuring they are well-coated. Cook for an additional 1 to 2 minutes, or until the nuts are glazed and golden brown.
5. Cool and Store: Remove the skillet from the heat and transfer the glazed nuts to a baking sheet lined with aluminum foil. Use a fork to separate them. Allow the nuts to cool until the sugar hardens, about 10 minutes. Store in an airtight container.
A Nostalgic Note:

The tradition of making Sweet and Spicy Nuts started with my grandmother. She had a knack for turning simple ingredients into something magical. As kids, we would gather around her, eyes wide with anticipation, as she tossed the nuts in the sizzling glaze. The aroma was irresistible, and we eagerly waited for them to cool, often sneaking a few warm morsels when she wasn't looking.


These nuts have now become a symbol of our family's togetherness, a dish that travels with us through generations. Whether it's a holiday party or a casual Sunday afternoon, a bowl of Sweet and Spicy Nuts always makes its way to the table, sparking conversations and creating new memories.


Difficulty: 3/10
Category: Appetizer

---


Next time you're looking for a delightful appetizer to impress your guests or just a snack to enjoy on a cozy afternoon, give these Sweet and Spicy Nuts a try. They are sure to add a fiery twist to your gatherings and maybe even inspire a family tradition of your own.

Read more about Appetizers

Read more about Main Dishes

Read more about Desserts

Pink Grapefruit Slaw | Made by Meaghan Moineau

Pink Grapefruit Slaw | Made by Meaghan Moineau

Title: Refreshing Memories: The Joy of Pink Grapefruit Slaw
Description: Discover the vibrant flavors of Pink Grapefruit Slaw, a delightful mix of tangy and sweet that will transport you back to cherished family gatherings. This easy-to-make appetizer is perfect for adding a splash of color and nostalgia to your dining table.

---


A Nostalgic Journey with Pink Grapefruit Slaw

There’s something undeniably soothing about the familiar aroma of a dish that takes you back to simpler times—like the Pink Grapefruit Slaw my grandmother used to make during those long, sun-drenched summer afternoons. As a child, I remember eagerly watching her in the kitchen, marveling at how effortlessly she combined ingredients to create something magical.


The recipe was always a highlight at our family picnics, a beacon of freshness amidst the array of hearty dishes. My grandmother had a knack for infusing love into her cooking, and her Pink Grapefruit Slaw was no exception. The tangy sweetness of the grapefruit paired with the crunch of fresh cabbage and the subtle bite of red onion created a symphony of flavors that danced on our taste buds.


As the adults chatted and the children played, I would sneak into the kitchen to watch her skillfully zest the grapefruit, her hands moving with practiced precision. She would smile at me, her eyes twinkling with a secret only we shared—the joy of creating something beautiful together.


Recipe: Pink Grapefruit Slaw
Ingredients:

- Black pepper


- 1 pink grapefruit


- 2 cups green shredded cabbage


- 2 tablespoons light mayonnaise


- 1 small red onion, thinly sliced


- Salt


- 1-2 teaspoons sugar (to taste)


Instructions:

1. In a small bowl or measuring cup, combine 2 tablespoons of light mayonnaise, 3 tablespoons of fresh grapefruit juice (from just a segment or two), 1-2 teaspoons of sugar, 1 teaspoon of grapefruit zest, salt, and black pepper. Whisk the mixture until it's well blended.


2. In a large bowl, combine 2 cups of shredded green cabbage, the remaining sections of the pink grapefruit, and the thinly sliced red onion.


3. Pour the dressing over the cabbage mixture and toss everything together until it’s well coated.


4. Garnish with parsley if desired, and serve immediately to enjoy the flavors at their peak freshness.


Difficulty: 3/10
Classification: Appetizer

This Pink Grapefruit Slaw is a testament to the beauty of simple, fresh ingredients coming together to create a dish that’s both delicious and nostalgic. Whether you’re preparing it for a family gathering or a solo lunch, this slaw is sure to evoke fond memories and perhaps inspire new traditions for years to come.

Read more about Appetizers

Read more about Main Dishes

Read more about Desserts

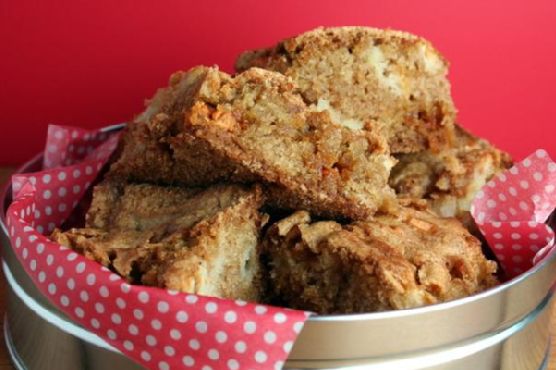
Apple Pie Bars | Made by Meaghan Moineau

Apple Pie Bars | Made by Meaghan Moineau

Title: Apple Pie Bars: A Nostalgic Twist on a Timeless Classic
Description: Dive into the heartwarming world of Apple Pie Bars, where the comforting flavors of spiced apples meet the delightful crunch of butterscotch chips. Perfect as a dessert, this recipe is not just about satisfying your sweet tooth; it's about reliving cherished family memories. Rated 5/10 in difficulty, this recipe is accessible to both novice and experienced bakers alike.

---


There's something inherently magical about the scent of cinnamon and nutmeg wafting through the air. It’s a spell that pulls you back to simpler times, to a kitchen filled with laughter and the gentle hum of an electric mixer. For me, this enchanting aroma is synonymous with Apple Pie Bars—a recipe that has been passed down through generations in our family.


Ingredients:

- McIntosh apples


- Baking powder


- Baking soda


- Butterscotch chips


- Eggs


- Flour


- Ground cinnamon


- Ground nutmeg


- Salt


- Sugar


- Vegetable oil


Instructions:

1. Preheat your oven to a cozy 350 degrees F. Prepare a 9 by 13-inch baking dish by giving it a generous coat of cooking spray.


2. In the bowl of an electric mixer, combine the oil, eggs, and sugar until they form a harmonious blend.


3. In a separate bowl, sift together the flour, baking powder, salt, baking soda, ground cinnamon, and ground nutmeg. Gradually add this dry mixture to the oil mixture, allowing the mixer to work its magic until everything is thoroughly combined. Be prepared for a thick, luscious batter.


4. Switch to a sturdy spoon and lovingly fold in the apple pieces. Transfer this mixture into your prepared baking dish, smoothing it out to create an even layer.


5. Gently sprinkle the butterscotch chips over the top, pressing them lightly into the batter.


6. Bake in the preheated oven for 45 minutes to an hour, until golden brown and just beginning to pull away from the edges of the pan.


7. Allow the bars to cool thoroughly before cutting them into delightful squares.


A Walk Down Memory Lane

I remember the first time I helped my grandmother make these Apple Pie Bars. I was barely tall enough to see over the kitchen counter, standing on a little wooden stool she had pulled out just for me. The kitchen was alive with activity, a symphony of clinking bowls and the whirring of our old mixer.


Every autumn, as the leaves turned to shades of amber and gold, my family would gather at my grandmother's house for our annual apple-picking adventure. We would come back with baskets brimming with McIntosh apples, their sweet-tart flavor perfectly suited for baking. My grandmother, the matriarch of our family, would lead the charge in transforming these apples into her famous Apple Pie Bars.


I recall the warmth of the kitchen, the stories shared across generations. My grandmother would tell tales of her own childhood, of how these bars were a staple at every family gathering. Each bite was a bridge to the past, a connection to family members who had long since passed, yet whose spirits lingered in every crumb.


Difficulty: 5/10
Classification: Dessert

Creating these Apple Pie Bars is more than just baking; it’s about creating memories. So, gather your loved ones, don an apron, and let the nostalgic aroma of apples and spices fill your home. These bars are a testament to the enduring power of family traditions and the simple joys of baking together.

Read more about Appetizers

Read more about Main Dishes

Read more about Desserts

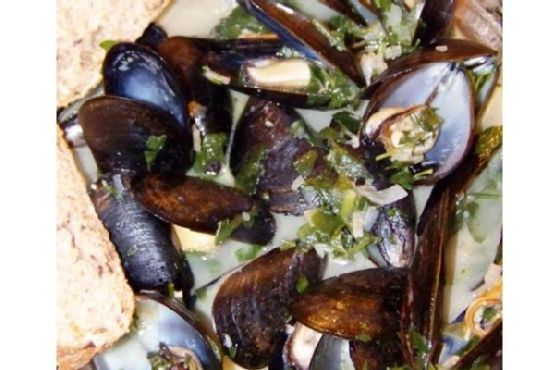
Classic French Mussels | Made by Meaghan Moineau

Classic French Mussels | Made by Meaghan Moineau

Title: Unveiling the Elegance of Classic French Mussels: A Taste of Nostalgia
Description: Dive into the heart of French culinary tradition with our Classic French Mussels recipe. Perfectly blending delicate flavors and cultural richness, this dish offers a taste of nostalgia, transporting you to cherished family gatherings. With simple ingredients like dry white wine, fresh parsley, and garlic, this mussel recipe is a delightful appetizer rated 4 out of 10 in difficulty. Relish the harmony of taste and memory as you savor each bite.

---


There’s something inherently comforting about the ritual of preparing a beloved family dish. For me, Classic French Mussels brings back vivid memories of summer evenings spent at my grandmother’s quaint seaside cottage in Brittany, France. The air was always filled with the briny scent of the ocean, mingling with the aroma of garlic and shallots sizzling in olive oil—a sensory symphony that signaled the beginning of a cherished meal.


Ingredients:

- 2 lbs mussels


- 2 tablespoons olive oil


- 2 shallots, finely chopped


- 4 garlic cloves, minced


- 1 cup dry white wine


- 1/2 cup low-fat buttermilk


- 2 tablespoons unsalted light butter


- 1/4 cup fresh parsley, chopped


- Kosher salt to taste


Instructions:
1. Prepare the Mussels: Begin by scrubbing the mussels under cold water with a stiff brush. Discard any mussels that remain open or have broken shells. Soak them in cool, clean water for at least an hour to allow them to expel any sand.
2. Remove the Beards: Locate the small fibrous "beard" on each mussel and pull it out toward the hinge of the shell to avoid injuring the mussel.
3. Cook the Aromatics: In a large pot, heat the olive oil over medium-high heat. Add the shallots and garlic, cooking until soft and fragrant, approximately 5 minutes.
4. Combine Ingredients: Add the mussels to the pot, followed by the wine, buttermilk, butter, and parsley. Season generously with kosher salt. Stir well to combine all ingredients.
5. Steam the Mussels: Cover the pot and allow the mussels to cook for 10 to 15 minutes, or until they have opened and are cooked through.
6. Serve: Divide the mussels and the flavorful juices between two bowls. Serve immediately with crusty whole-grain bread to soak up the delectable sauce.

This dish, a testament to the simplicity and elegance of French cuisine, is the perfect appetizer for any occasion. It’s rated a 4 out of 10 in difficulty, making it accessible even for those new to cooking mussels.


As I watch the mussels gently open in the pot, I’m reminded of those magical evenings in Brittany, where laughter echoed around the dinner table, and the warmth of family togetherness was as nourishing as the meal itself. Today, I carry on this tradition, serving Classic French Mussels to my own family, creating new memories while honoring the old.


Savor the rich flavors and let this dish transport you to a place of warmth, love, and tradition. Bon appétit!

Read more about Appetizers

Read more about Main Dishes

Read more about Desserts

Big Batch Smoothie Bowl | Made by Meaghan Moineau

Big Batch Smoothie Bowl | Made by Meaghan Moineau

Title: Nourishing Nostalgia: The Big Batch Smoothie Bowl That Revives Family Memories
Description:

Step into a world where wholesome ingredients meet cherished family moments. Our Big Batch Smoothie Bowl is more than just a breakfast treat—it's a blend of flavors and memories, perfect for those who crave both nutrition and nostalgia.


---


The Big Batch Smoothie Bowl: A Wholesome Family Tradition

There's something magical about the clinking of spoons and the chatter of family gathered around the kitchen table. For me, the Big Batch Smoothie Bowl isn't just a delightful dish; it's a cherished family tradition that brings back vivid memories of sunlit mornings and joyous laughter.


Ingredients:

- Whey protein


- Frozen strawberries


- Frozen blueberries


- Bananas


- Pomegranate seeds


- Walnuts


- Pumpkin seeds


- Flaxseed


- Granola


Instructions:

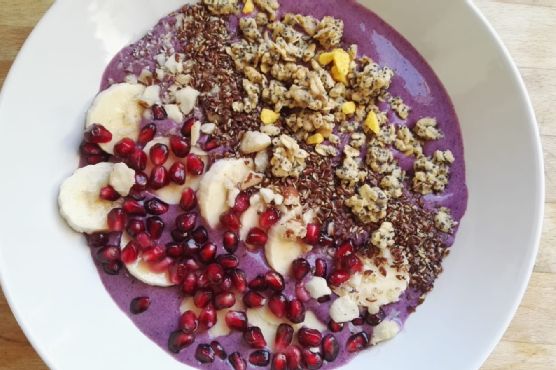
1. Begin by blending the frozen strawberries and blueberries with creamy kefir and a scoop of whey protein. This step is best done ahead of time, allowing the mixture to rest until it reaches the perfect temperature—not too icy, just refreshingly cool.


2. Once your blend is ready, portion out each serving into inviting bowls. Top them with slices of ripe bananas, a generous sprinkle of pomegranate seeds, crunchy granola, and a dusting of ground walnuts and flaxseed. For an added burst of flavor and texture, scatter a few pumpkin seeds on top.


3. Gather your loved ones and savor each spoonful, enjoying not just the taste, but the moments shared together.


A Walk Down Memory Lane:

This smoothie bowl brings me back to summer mornings at my grandparents' house. I remember waking up to the aroma of ripe fruits and the soft hum of the blender. My grandmother would call us to the kitchen, her eyes twinkling with warmth and love.


As we sat around the table, each bowl was a masterpiece—vibrant colors of berries, the crunch of granola, and the subtle nuttiness of flaxseed. It wasn't just breakfast; it was a celebration of togetherness. My grandfather would share stories of his childhood, and we'd listen, captivated by tales of a simpler time.


Even now, as I prepare this dish for my own family, it's as if I'm honoring those memories, carrying forward a tradition that nourishes both body and soul. The Big Batch Smoothie Bowl is a testament to the power of food to connect generations, creating bonds that transcend time.


Difficulty Rating: 3/10

This recipe is as easy as it is delightful, with minimal preparation and maximum enjoyment.


Classification: Main Dish

While often enjoyed as a breakfast treat, the hearty ingredients make this smoothie bowl a satisfying main dish, perfect for starting the day on a healthy and happy note.


---


Embrace the blend of flavors and family memories with our Big Batch Smoothie Bowl. A dish that's as nourishing as it is nostalgic, allowing you to savor both the taste and the tradition, one spoonful at a time.

Read more about Appetizers

Read more about Main Dishes

Read more about Desserts

Corn Avocado Salsa | Made by Meaghan Moineau

Corn Avocado Salsa | Made by Meaghan Moineau

Title: A Taste of Summer: Corn Avocado Salsa with a Nostalgic Twist
Description: Dive into a vibrant blend of flavors with our Corn Avocado Salsa recipe. This appetizer is not only a feast for the senses but also a trip down memory lane, filled with family gatherings and summer nostalgia.

---


As the summer sun casts its golden glow over lush gardens and bustling farmers' markets, there's one dish that never fails to capture the essence of the season for me: Corn Avocado Salsa. This vibrant, flavorful appetizer is more than just a recipe; it's a cherished family tradition that brings back fond memories of sun-drenched days and laughter-filled evenings.


Ingredients:

- 1 ripe avocado


- 1 tablespoon balsamic vinegar


- 1 teaspoon cumin


- 1 can of frozen corn, drained


- 1 clove garlic, finely chopped


- 1 red bell pepper, finely chopped


- Olive oil spray


Instructions:

1. Preheat your oven to 375 degrees Fahrenheit.


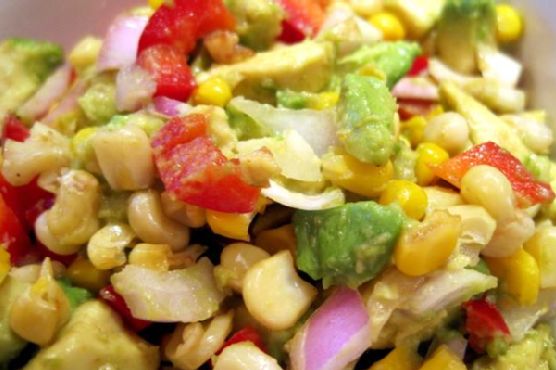
2. Spread the drained corn evenly on a baking sheet and lightly spray with olive oil.


3. Roast the corn in the oven for about 8-10 minutes, ensuring it doesn't brown too much or burn. Once done, remove from heat and allow it to cool.


4. In a large bowl, combine the finely chopped red pepper and garlic.


5. Peel, coarsely chop the avocado, and add it to the bowl along with the cooled corn.


6. Sprinkle in the cumin and drizzle the balsamic vinegar over the mixture, blending well to ensure all ingredients are evenly coated.


Difficulty Rating: 3/10
Classification: Appetizer

---


The true magic of Corn Avocado Salsa lies not only in its exquisite taste but also in the memories it evokes. Every time I prepare this dish, I'm transported back to my grandmother's kitchen, where the aroma of roasting corn mingled with the laughter of cousins gathered around the table. Grandma always insisted on using the freshest ingredients, and her secret was roasting the corn just to the right point where it retained its sweetness without losing its crispness.


Our family would often gather in the backyard, surrounded by towering sunflowers and the melodious chirping of crickets. Grandma would bring out a large bowl of her famous salsa, and we'd snack on it with tortilla chips, savoring each bite as the sun dipped below the horizon. It was during these moments that I learned the importance of good food and even better company.


Today, I continue this tradition with my own family, and with every bite of Corn Avocado Salsa, I'm reminded of those warm, joyful gatherings. This recipe is more than just a culinary delight; it's an invitation to pause, savor, and create lasting memories with loved ones. So, as you prepare this dish, I hope it brings as much warmth and happiness to your table as it has to mine.


Whether you're hosting a summer barbecue or simply looking to indulge in a refreshing appetizer, Corn Avocado Salsa is sure to impress. Enjoy the blend of creamy avocado, sweet roasted corn, and the subtle kick of cumin, and let it transport you to your own cherished memories.

Read more about Appetizers

Read more about Main Dishes

Read more about Desserts

Penne with Goat Cheese and Basil | Made by Meaghan Moineau

Penne with Goat Cheese and Basil | Made by Meaghan Moineau

Title: A Taste of Home: Penne with Goat Cheese and Basil
Description: Dive into the delightful simplicity of Penne with Goat Cheese and Basil, a dish that promises to bring comfort and nostalgia to your dining table. This easy yet flavorful main dish is perfect for any occasion, whether you're a seasoned cook or a kitchen novice.

---


There's something magical about the aroma of fresh basil mingling with the creamy tang of goat cheese. It takes me back to warm summer evenings at my grandmother's house, where the air was always filled with laughter and the scent of herbs from her garden. This dish, Penne with Goat Cheese and Basil, is not only a nod to those cherished moments but also a testament to the power of simple ingredients to create something truly special.


Ingredients:

- Penne pasta


- Fresh basil leaves


- Goat cheese


- Olive oil


- Salt and pepper


Instructions:

1. Begin by cooking the penne pasta according to the package directions. The key is to achieve that perfect al dente texture, where each piece offers a slight bite yet is tender enough to soak up the flavors.


2. While the pasta cooks, take a generous bunch of basil leaves and arrange them in a neat stack. Roll them up tightly like a cigar and cut crosswise to create beautiful, fragrant ribbons using the classic chiffonade technique.


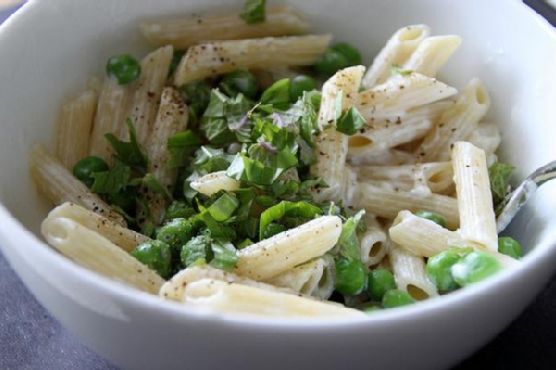
3. Once the pasta is cooked and drained, toss it with a drizzle of olive oil and crumbled goat cheese. Allow it to cool for a few minutes, letting the cheese melt slightly and coat the pasta in a creamy embrace.


4. Finally, add your basil chiffonade, a pinch of salt, and freshly cracked pepper. Toss everything together gently, ensuring each piece of penne is enveloped in the harmonious blend of flavors.


5. Serve immediately and savor each bite, perhaps with a glass of chilled white wine or a summery iced tea.


A Nostalgic Note:

This dish always takes me back to those family gatherings at grandma's. I remember the way she would wander through her garden, snipping fresh basil with a pair of well-used scissors, smiling as she handed me the fragrant leaves. We'd cook together, her guiding hands showing me the chiffonade technique, her voice blending with the sounds of the bustling kitchen. The simple act of preparing and sharing a meal was her way of teaching us about love and togetherness.


Difficulty Rating: 3/10
Classification: Main Dish

Whether you're looking to impress guests with minimal effort or simply want to treat yourself to a comforting meal, Penne with Goat Cheese and Basil is the perfect choice. Its simplicity is its strength, allowing the fresh, vibrant ingredients to shine. Give it a try, and perhaps you'll create a new memory of your own to cherish.

Read more about Appetizers

Read more about Main Dishes

Read more about Desserts

Roasted Strawberry Coconut Milk Ice Cream | Made by Meaghan Moineau

Roasted Strawberry Coconut Milk Ice Cream | Made by Meaghan Moineau

Title: Indulge in Nostalgia with Roasted Strawberry Coconut Milk Ice Cream
Description: Dive into a scoop of creamy nostalgia with our Roasted Strawberry Coconut Milk Ice Cream. This delightful dessert combines the lusciousness of coconut milk with the warm spice of cardamom and the sweet, tangy burst of roasted strawberries. Easy to make and even easier to enjoy, this ice cream is a perfect treat for any occasion.

---


Roasted Strawberry Coconut Milk Ice Cream


Difficulty: 4/10
Classification: Dessert

Ingredients:


- 1/2 cup raw cane sugar


- 2 cans full-fat coconut milk


- 1 teaspoon ground cardamom


- 1 pound strawberries


- 1 vanilla bean


Instructions:


1. Prepare the Coconut Milk Mixture: In a saucepan over medium heat, combine the coconut milk, 1/2 cup of raw cane sugar, and ground cardamom. Using a small knife, slice the vanilla bean lengthwise and scrape the seeds into the coconut milk mixture. Add the vanilla bean pod as well for extra flavor.
2. Roast the Strawberries: Preheat your oven to 375°F (190°C). Hull and slice the strawberries, then spread them out on a baking sheet lined with parchment paper. Sprinkle a tablespoon of raw cane sugar over the strawberries, and roast in the oven for about 20-25 minutes, or until the strawberries are soft and slightly caramelized.
3. Combine and Chill: Once the coconut milk mixture is warmed and the aroma is inviting, remove the vanilla bean pod. Allow the mixture to cool to room temperature. Once the strawberries have roasted, allow them to cool as well. Blend the roasted strawberries until smooth, then mix them into the coconut milk mixture. Chill the combined mixture in the refrigerator for at least 4 hours or overnight for best results.
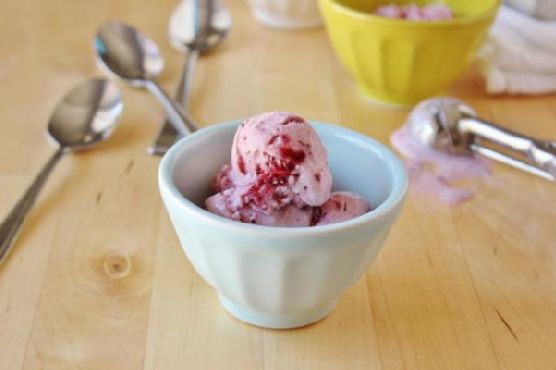
4. Churn and Freeze: Pour the chilled mixture into an ice cream maker and churn according to the manufacturer's instructions. Once churned to a soft-serve consistency, transfer the ice cream to a lidded container and freeze for at least 2 hours, or until firm.
5. Serve and Enjoy: Scoop the ice cream into bowls or cones and enjoy the creamy, fruity flavors that bring back cherished memories.

---


A Sweet Memory


Growing up, summers at Grandma's house were synonymous with the delightful aroma of fresh strawberries roasting in the kitchen. Her kitchen was a haven of culinary wonders, but nothing could rival the excitement of homemade ice cream day. Grandma's secret ingredient was always a pinch of cardamom, which she claimed was a little bit of magic passed down from her mother.


The sweet, spicy aroma of cardamom wafting through the air was a signal that something extraordinary was happening. We'd gather around, eager to watch as she blended the roasted strawberries into the creamy coconut milk mixture, her hands deftly working the ice cream maker.


Those moments, spent with family, laughing and sharing stories while waiting for the ice cream to set, were the essence of summer. Each spoonful of ice cream was a taste of nostalgia, a reminder of the warmth and love that filled those sun-drenched days.


Now, as I recreate this recipe for my own family, I hope to pass on not just the flavors, but the cherished memories that come with it. This Roasted Strawberry Coconut Milk Ice Cream is more than just a dessert—it's a celebration of love, tradition, and the simple joys of life.


---


Indulge in this delightful dessert and let the flavors transport you to a place of warmth and nostalgia. Perfect for summer gatherings or a cozy evening treat, this ice cream is a delicious way to create new memories while honoring the old.

Read more about Appetizers

Read more about Main Dishes

Read more about Desserts

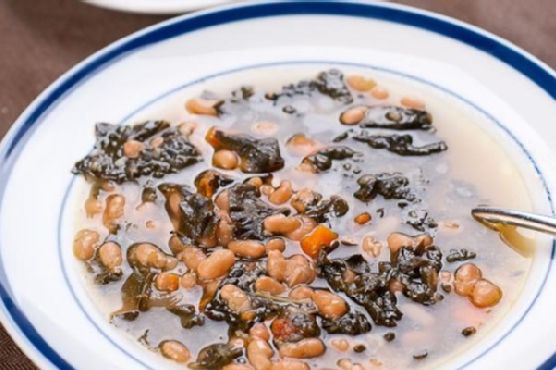
Herbivoracious’ White Bean and Kale Soup | Made by Meaghan Moineau

Herbivoracious' White Bean and Kale Soup | Made by Meaghan Moineau

Savoring Simplicity: Herbivoracious' White Bean and Kale Soup Recipe


A Comforting Bowl of Nostalgia and Nutrition


In the hustle and bustle of modern life, it's often the simplest things that bring the most comfort. Herbivoracious' White Bean and Kale Soup is one of those treasured recipes that seamlessly blends heartiness with wholesomeness. Whether you're a seasoned chef or a culinary novice, this soup is your gateway to a world of flavors that marries nutrition with nostalgia.


Ingredients


- 2 tablespoons olive oil
- 1 medium onion, diced
- 3 cloves garlic, whole
- 2 carrots, diced
- 1 teaspoon kosher salt
- 2 bay leaves
- 1 tablespoon fresh rosemary leaves
- Choice of Parmesan rind, dried porcini, or broth powder
- 1 cup dried white navy beans
- 6 cups water
- 1 bunch dinosaur kale, chopped
- Juice of 1 lemon
- Extra-virgin olive oil for drizzling

Instructions


Pressure Cooker Method


1. Sauté the Vegetables: In the pressure cooker, heat olive oil over medium-high heat. Sauté the onion, garlic, carrot, and salt until the onion is translucent, about 4 minutes.
2. Add Aromatics and Beans: Stir in the bay leaves, rosemary, and your choice of Parmesan rind, dried porcini, or broth powder. Add the dried beans and water.
3. Pressure Cook: Seal the pressure cooker and bring to high pressure. Cook for 40 minutes, then allow the pressure to release naturally.
4. Finalize the Soup: Open the lid, remove the bay leaves and Parmesan rind. Add the kale and lemon juice, and simmer for 10 minutes until the kale is tender. Adjust seasoning to taste.
5. Serve: Garnish with a generous drizzle of extra-virgin olive oil before serving.

Stovetop Method


1. Prepare the Beans: Soak beans overnight in ample water. Drain and place them in a large saucepan with enough water to cover by 2 inches. Bring to a boil, then reduce heat and simmer until tender, about 1 ½ to 2 hours. Drain, reserving the broth.
2. Sauté the Vegetables: In a large saucepan, heat olive oil over medium-high heat. Sauté the onion, garlic, carrot, and salt until the onion is translucent, about 4 minutes.
3. Simmer the Soup Base: Add 4 cups of the reserved bean broth, bay leaves, rosemary, and your choice of Parmesan rind, dried porcini, or broth powder. Simmer for 30 minutes.
4. Complete the Soup: Remove bay leaves and Parmesan rind. Add the cooked beans, kale, and lemon juice, simmering for 10 minutes until the kale is tender.
5. Serve: Adjust seasoning and serve with a drizzle of extra-virgin olive oil.

A Nostalgic Taste of Home


Growing up, Sundays were a time for family gatherings, where stories were shared and laughter echoed through the house. My grandmother often made a version of this White Bean and Kale Soup, filling the kitchen with its irresistible aroma. I remember sitting at her worn wooden table, watching the steam rise from my bowl as she recounted tales from her childhood. This soup, with its rustic charm and hearty flavors, became a symbol of family love and togetherness. Even today, every spoonful takes me back to those cherished moments, reminding me of the warmth and comfort of home.


Difficulty Rating: 4/10


Herbivoracious' White Bean and Kale Soup is a delightful main dish that's simple to prepare, making it accessible to cooks of all skill levels. With a bit of patience and love, this recipe transforms basic ingredients into a nourishing meal that feeds both body and soul.


Embrace the culinary journey of creating this comforting dish, and allow it to become a staple in your family's collection of wholesome recipes. Whether you're gathering around the table with loved ones or seeking solitude with a good book, this soup is a testament to the power of simplicity and the joy of homemade goodness.

Read more about Appetizers

Read more about Main Dishes

Read more about Desserts

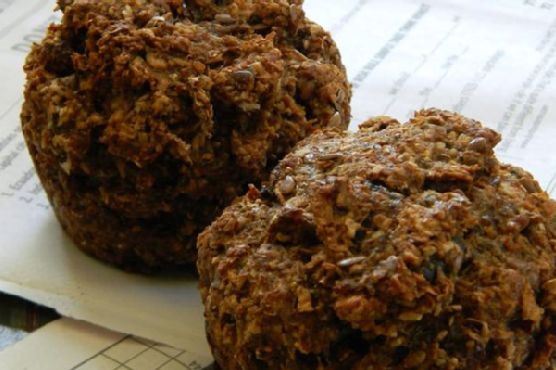
Moist Vegan Spelt Bran Muffins | Made by Meaghan Moineau

Moist Vegan Spelt Bran Muffins | Made by Meaghan Moineau

Unwrapping Memories: Moist Vegan Spelt Bran Muffins


Description


Delve into the heartwarming world of homemade goodness with our Moist Vegan Spelt Bran Muffins. Perfect for breakfast or a wholesome snack, these muffins are a delightful blend of healthy ingredients and nostalgic memories, making them a must-try for any baking enthusiast. With a difficulty rating of 4 out of 10, this dessert is approachable for both novice and experienced bakers alike.


---


A Taste of Yesteryears: Family Mornings with Spelt Bran Muffins


There’s a certain magic that envelops the kitchen when baking. The warm aroma of nutmeg and cinnamon swirling through the air, the sound of mixing bowls clattering, and the sight of ingredients coming together to create something special. For me, this enchanting scene is forever tied to memories of Sunday mornings spent with my grandmother.


Every Sunday, my family would gather at her cozy home, nestled in a quaint corner of our town. While the adults caught up over mugs of steaming coffee, we kids hovered around the kitchen, eagerly watching Grandma prepare her famous spelt bran muffins. She never used a written recipe, relying instead on her well-practiced hands and heart full of love to guide her.


Grandma’s secret was always in the preparation. She would whisk together ground flaxseed and hot water, letting it sit for those crucial ten minutes to achieve that perfect binding texture. As the flax transformed, she would regale us with stories from her own childhood, tales of her mother baking similar treats in a wood-fired oven.


The ingredients she used were simple yet wholesome, reflecting her philosophy of nourishing both body and soul. Wheat bran, spelt flakes, and whole spelt flour formed the foundation, while psyllium fibre husks and chia seeds added a modern twist. She would lovingly fold in plump raisins and chopped prunes, their sweetness a perfect counterbalance to the earthy spelt.


As the muffins baked, we’d gather around the oven, waiting with anticipation. The timer's ring signaled not just perfectly done muffins, but also the continuation of a cherished family tradition. Biting into those warm, moist muffins, with their delicate balance of spices and subtle sweetness, never failed to transport me back to those cherished mornings.


Now, as I prepare these muffins in my own kitchen, I feel a connection to those past generations. It’s a reminder that while ingredients and techniques might evolve, the love and warmth infused in family recipes remain timeless.


---


Recipe: Moist Vegan Spelt Bran Muffins


Ingredients


- 2 tablespoons ground flaxseed


- 6 tablespoons hot water


- 1 cup wheat bran


- 1 cup spelt bran


- 1 cup spelt flakes


- 1 cup whole spelt flour


- 2 tablespoons psyllium fibre husks


- 1 teaspoon stevia extract powder


- 2 tablespoons whole flaxseeds


- 2 tablespoons chia seeds


- 2 teaspoons baking soda


- 1 teaspoon sea salt


- 1 teaspoon nutmeg


- 2 teaspoons cinnamon


- 1 cup demerara sugar


- ½ cup agave nectar


- 1 cup applesauce


- 4 tablespoons Ener-G egg replacer (prepared as per package instructions)


- 1 ½ cups vegan milk (almond, soy, or oat)


- ½ cup canola oil


- 1 cup raisins (soaked and drained)


- 1 cup chopped prunes


Instructions


1. Preheat your oven to 400°F (200°C). Prepare 24 muffin cups by lining them with paper liners or greasing them well.


2. In a small bowl, whisk together the ground flaxseed and hot water. Allow the mixture to stand for 10 minutes, creating a flax "egg."


3. In a medium bowl, combine the wheat bran, spelt bran, spelt flakes, whole spelt flour, psyllium fibre husks, stevia extract, whole flaxseeds, chia seeds, baking soda, sea salt, nutmeg, and cinnamon. Whisk until well blended.


4. In a large mixing bowl, beat together the demerara sugar, agave nectar, applesauce, prepared Ener-G egg replacer, flax mixture, vegan milk, and canola oil until smooth and well incorporated.


5. Gradually add the dry ingredients to the wet ingredients, stirring just until combined. Fold in the raisins (along with their reserved liquid) and chopped prunes.


6. Spoon the batter into the prepared muffin cups, filling each about 2/3 full.


7. Bake in the preheated oven for 15-17 minutes, or until a toothpick inserted into the center of a muffin comes out clean.


8. Allow the muffins to cool in the pan for a few minutes before transferring them to a wire rack to cool completely.


---


These Moist Vegan Spelt Bran Muffins are not merely a recipe; they are a bridge to cherished memories and a testament to the enduring power of family traditions. Whether enjoyed fresh from the oven or packed for a midday snack, these muffins promise a taste of nostalgia and the comforting embrace of home.

Read more about Appetizers

Read more about Main Dishes

Read more about Desserts

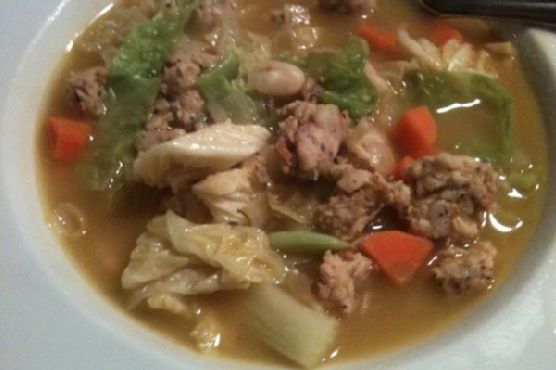
Chicken Sausage, White Bean and Cabbage Soup | Made by Meaghan Moineau

Chicken Sausage, White Bean and Cabbage Soup | Made by Meaghan Moineau

Title: A Hearty Hug in a Bowl: Chicken Sausage, White Bean, and Cabbage Soup
Description: Discover the comforting flavors of our Chicken Sausage, White Bean, and Cabbage Soup—a perfect blend of savory and wholesome ingredients. This easy-to-make, one-pot wonder is ideal for chilly nights and family gatherings. With a touch of nostalgia and warmth in every spoonful, this recipe is a must-try for anyone seeking a delicious and nourishing meal.

---


As the leaves turn golden and the air gets crisp, there’s nothing quite like a steaming bowl of soup to bring warmth and comfort to your soul. Our Chicken Sausage, White Bean, and Cabbage Soup is more than just a dish—it's a heartfelt embrace, a reminder of cozy family dinners, and a delicious way to celebrate the flavors of the season.


Ingredients


- Olive oil


- 1 white onion, chopped


- 2 diced carrots


- Salt and black pepper to taste


- 3 cloves garlic, minced


- 1/2 teaspoon crushed red pepper flakes


- 1 pound Italian mild chicken sausage


- 6 cups low sodium vegetable stock


- 2 cans white beans, drained and rinsed


- 1 small green cabbage, thinly sliced


Instructions


1. Start with Sautéing: In a large pot, heat olive oil over medium heat. Add chopped onions and sauté until tender, about 8 minutes.
2. Add Vegetables: Toss in diced carrots and continue cooking for another 5 minutes. Season with salt, pepper, garlic, and red pepper flakes; cook for another minute.
3. Cook the Sausage: Remove the sausage from its casing and break it into small chunks in the pot. Toss with vegetables to brown the meat, cooking for another 8-10 minutes.
4. Simmer the Soup: Pour in the vegetable stock, enough to cover all ingredients, and bring to a gentle simmer.
5. Incorporate Beans and Cabbage: Add the white beans and cabbage, stirring to combine. Simmer, covered, until the cabbage is wilted but not mushy, about 10 minutes. Taste and adjust seasoning with more salt or pepper if needed.

A Nostalgic Note


This soup takes me back to my grandmother's kitchen, where I spent countless chilly afternoons enveloped in the warmth of her loving care. The aroma of sautéed onions and garlic would drift through the house, a sign that something truly special was being prepared. As a child, I loved watching her add each ingredient with precision and care, taking the time to let the flavors meld into something magical. Her secret ingredient wasn't in the spice rack but rather in the love and joy she infused into every meal. Each bite was a reminder of her nurturing spirit and the cherished family memories we created around her table.


Difficulty and Classification


Difficulty: 3/10 - This soup is straightforward and perfect for beginners and seasoned cooks alike, offering a hassle-free cooking experience.
Classification: Main Dish - Packed with protein and hearty vegetables, this soup is a fulfilling main dish that holds its own as a complete and satisfying meal.

Whether you're looking to recreate a piece of nostalgia or simply enjoy a flavorful and hearty meal, this Chicken Sausage, White Bean, and Cabbage Soup is sure to become a beloved favorite in your home. Gather your loved ones and savor the simple joys of cooking and sharing a meal together.

Read more about Appetizers

Read more about Main Dishes

Read more about Desserts

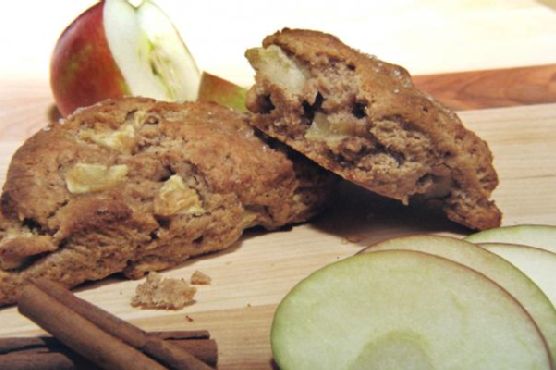
Apple Pie Honey Wheat Scones | Made by Meaghan Moineau

Apple Pie Honey Wheat Scones | Made by Meaghan Moineau

Title: "Warm Memories & Sweet Aromas: Crafting Apple Pie Honey Wheat Scones"


Description:

Dive into the heartwarming world of Apple Pie Honey Wheat Scones, a delightful dessert that combines rustic charm and nostalgic flavors. Explore the easy-to-follow recipe, enriched with a family memory that makes these scones more than just a treat—they're a cherished tradition. Rated for its simplicity and soul, this dish is perfect for any baking enthusiast looking to create something truly special.

---


A Whiff of Nostalgia: Apple Pie Honey Wheat Scones


There's something inherently comforting about the aroma of apple pie mingling with the cozy warmth of freshly baked scones. For me, these Apple Pie Honey Wheat Scones are more than just a dessert; they are a portal back to cherished family gatherings, where love was the main ingredient and laughter was the background music.


The Essence of Home


Growing up, autumn was a magical time in our household. The trees donned their vibrant golden hues, and the air was crisp with the promise of impending festivities. My grandmother, the heart of our family, would gather us in her spacious, sunlit kitchen to create culinary wonders. Among her specialties were these delightful Apple Pie Honey Wheat Scones.


With her apron tied snugly around her, she would expertly blend whole wheat flour and all-purpose flour, setting the stage for what was to come. The warm, spicy aroma of cinnamon and freshly grated ginger would fill the air, a prelude to the sweet symphony of flavors about to unfold.


The Recipe


Here's how you can recreate this beloved family recipe:
Ingredients:

- Whole wheat flour


- All-purpose flour plus 1 rounded tablespoon


- Dark brown sugar


- Cinnamon


- Baking powder


- Salt


- Fresh ginger


- Unsalted butter


- Heavy cream


- Egg


- Honey


- Vanilla extract


- Brandy


- Diced apple


- Turbinado sugar


Instructions:

1. Preheat your oven to 400°F (200°C) and line a baking sheet with parchment paper.


2. In a large mixing bowl, whisk together the first seven ingredients.


3. Add fresh ginger and butter. Work everything together with your fingers until the mixture resembles coarse crumbles. Keep the butter cool and in pieces.


4. Mix in the cream, egg, honey, vanilla, and brandy, kneading until the dough comes together.


5. Incorporate the diced apples, pressing them into the dough until evenly distributed.


6. On a floured surface, flatten the dough into a one-inch-thick disc. Cut into eight equal sections.


7. Place the scones on the baking sheet and sprinkle with turbinado sugar.


8. Bake for 15-18 minutes or until golden brown.


9. Melt butter and drizzle over a warm scone for an extra touch of indulgence.


10. Transfer the remaining scones to a wire rack to cool. Store in a sealed container or freeze for up to 3-4 months.


A Legacy of Love


Every bite of these scones transports us back to those treasured moments in my grandmother's kitchen, where the hustle and bustle of daily life paused, allowing us to savor the simple joys of togetherness. These scones are rated a 4 out of 10 for difficulty, making them accessible even to novice bakers, yet rewarding enough for seasoned pros.


As a dessert, Apple Pie Honey Wheat Scones are a delightful way to end any meal, offering a perfect balance of sweetness and spice. Whether enjoyed with a cup of tea or shared with loved ones around the table, they are more than just a treat—they are a slice of family history, lovingly baked into each scrumptious morsel.


So go ahead, gather your ingredients, and create your own warm memories with this timeless recipe. As my grandmother used to say, "A kitchen full of laughter and love is the recipe for happiness."


---


Nostalgia, warmth, and a touch of sweetness—these scones are sure to become a staple in your own family traditions. Enjoy baking and savor every moment, just as we did in those golden autumn days.

Read more about Appetizers

Read more about Main Dishes

Read more about Desserts

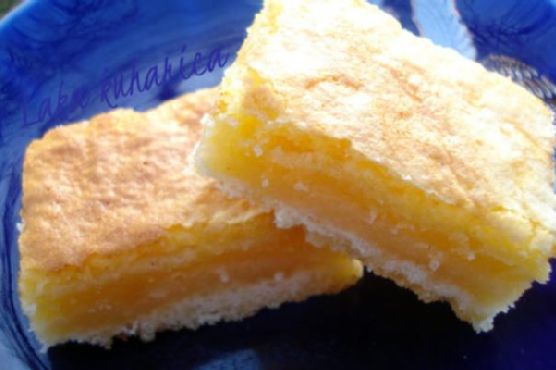
Lemon square bars | Made by Meaghan Moineau

Lemon square bars | Made by Meaghan Moineau

Title: Zesty Lemon Square Bars: A Nostalgic Dessert to Brighten Your Day
Description: Dive into the refreshing world of lemon square bars, a classic dessert that's both delightful and timeless. This blog post will guide you through crafting these tangy treats with ease, while sharing a heartwarming family memory that makes them even more special. Rated a 4 out of 10 for difficulty, these lemon bars are perfect for dessert lovers seeking a simple yet satisfying bake.

---


Zesty Lemon Square Bars: A Nostalgic Dessert to Brighten Your Day

If there's one dessert that has the magical ability to transport me back to my childhood, it's lemon square bars. The tangy zest of lemon combined with a buttery crust and a sweet, chewy topping was a staple in my grandmother's kitchen, and each bite was like a time capsule filled with love and laughter. Today, I'm sharing not just a recipe, but a piece of my family's history that I hope will bring joy to your home as well.


Ingredients You'll Need:

- 2 cups all-purpose flour


- ½ cup confectioners' sugar


- 1 cup unsalted butter, melted


- 1 teaspoon vanilla essence


- 2 cups granulated sugar


- 4 large eggs


- 1 teaspoon baking powder


- ½ cup fresh lemon juice


- 2 tablespoons grated lemon rind


- A pinch of nostalgia (optional, but highly recommended!)


Instructions:
1. Craft the Crust:

Begin by preheating your oven to 170°C (340°F). In a medium-sized bowl, combine 2 cups of flour with the confectioners' sugar. Blend in the melted butter and vanilla essence, stirring until the mixture forms a soft dough. Press this dough evenly into the bottom of a greased 9x13 inch pan. Bake for 15 minutes or until the crust is golden and firm to the touch.


2. Prepare the Filling:

While the crust bakes, whip up the lemony filling. In a large bowl, beat the eggs until they are light and frothy. In a separate bowl, mix together the granulated sugar, baking powder, and ½ cup of flour, ensuring there are no lumps. Gradually stir this sugar mixture into the beaten eggs. Add the lemon juice and lemon rind, mixing until well combined.


3. Assemble and Bake:

Pour the lemon mixture over the pre-baked crust, spreading it evenly. Return the pan to the oven and bake for an additional 30 minutes, or until the lemon topping is set and slightly golden. Allow the bars to cool completely before slicing them into perfectly tangy squares.


A Slice of Family Memory:

Every summer, my family would gather at my grandmother's house for our annual reunion. The highlight was always her legendary lemon square bars, which she would bake in abundance to satisfy our eager appetites. We would sit on her porch, the scent of fresh lemons wafting through the air, as we shared stories and laughter. Those sun-drenched afternoons, filled with the sound of cicadas and the taste of these sweet treats, are memories I cherish deeply. Each bite now reminds me of those precious moments and the warmth of family.


Difficulty Rating: 4/10
Classification: Dessert

These lemon square bars are a testament that sometimes the simplest recipes bring the most joy. With their vibrant citrus flavor and buttery goodness, they are sure to become a beloved addition to your dessert repertoire. Whether you're hosting a family gathering or simply craving a sweet treat, these bars promise a burst of sunshine in every bite. Enjoy baking, and may your kitchen be filled with the same happiness and warmth that my grandmother's once was.

Read more about Appetizers

Read more about Main Dishes

Read more about Desserts

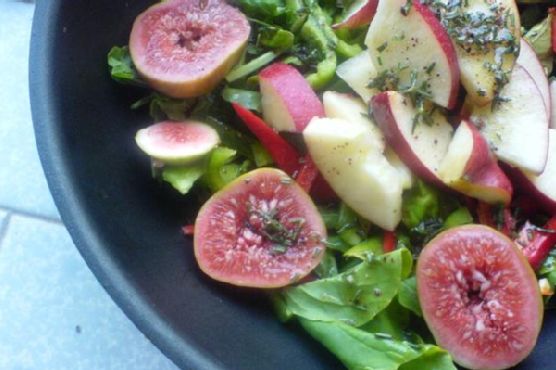
Fig, Apple, and Arugula Salad | Made by Meaghan Moineau

Fig, Apple, and Arugula Salad | Made by Meaghan Moineau

Title: A Taste of Nostalgia: Fig, Apple, and Arugula Salad
Description: Dive into the nostalgic flavors of a Fig, Apple, and Arugula Salad, a dish that combines the natural sweetness of figs and apples with the peppery bite of arugula. This recipe is not just a treat for the taste buds but also a journey down memory lane, bringing back cherished family moments. Discover how the blend of simple ingredients can create a symphony of flavors in your mouth. Perfect as an appetizer, this salad rates a 3 out of 10 in difficulty, making it accessible to chefs of all levels.

---


Growing up, Sunday afternoons at my grandmother's house were a cherished family tradition. The kitchen was always abuzz with the sounds of laughter, clinking pots, and the aromatic promise of delicious meals. One of my favorite dishes from those days was a simple yet unforgettable Fig, Apple, and Arugula Salad. It was a dish that my grandmother always prepared with a twinkle in her eye, knowing it was a family favorite.


The magic of this salad lies in its harmonious balance of flavors. The peppery bite of arugula, also known as roquette lettuce, forms the base of the dish, offering a fresh and slightly bitter contrast to the sweetness of ripe figs and crisp apples. My grandmother always insisted on using the juiciest apples and perfectly ripe figs, ensuring each bite was a burst of natural sweetness.


To add a touch of vibrant color and a hint of spice, she would include slices of red and green peppers, their crunch adding another layer of texture to the salad. The dressing was a simple yet elegant concoction of olive oil, maple syrup, fresh rosemary, and a pinch of sumac powder. This combination brought a delightful zesty tang, enhancing the flavors without overpowering the natural taste of the fruits and vegetables.


The process was straightforward: chop the fruits and vegetables into bite-sized morsels and combine them in a large bowl. The dressing, a masterpiece of simplicity, was reserved until the very moment we were ready to eat, ensuring the salad remained crisp and fresh.


As I recreate this dish today, the memories come flooding back—sitting around the table, sharing stories, and relishing the taste of a salad that was much more than just a dish; it was a symbol of family, love, and tradition.


This Fig, Apple, and Arugula Salad is classified as an appetizer, perfect for whetting the appetite before a main course. With a difficulty rating of just 3 out of 10, it's an easy and delightful way to bring a touch of nostalgia to your table. Whether you're preparing it for a family gathering or a quiet dinner at home, this salad is sure to be a hit, just as it was in my grandmother's kitchen so many years ago.


For those interested in seeing the dish in all its vibrant glory, you can find a photo of the salad [here](http://rawgirlinmumbai.blogspot.com/2011/01/fig-apple-and-roquette-salad.html). Enjoy crafting this beautiful and flavorful dish that is as much a feast for the eyes as it is for the palate.

Read more about Appetizers

Read more about Main Dishes

Read more about Desserts

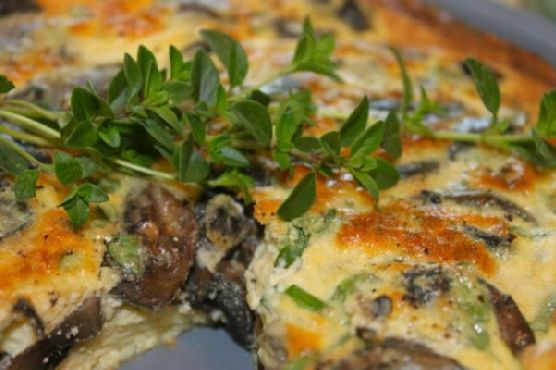
Frittata with Mushrooms, Thyme, and Parmigiano Cheese | Made by Meaghan Moineau

Frittata with Mushrooms, Thyme, and Parmigiano Cheese | Made by Meaghan Moineau

Title: Savoring Sunday Mornings: Frittata with Mushrooms, Thyme, and Parmigiano Cheese
Description: Discover the comforting flavors of a classic frittata with mushrooms, thyme, and Parmigiano cheese. This delicious and easy-to-make dish is perfect for breakfast, brunch, or a light dinner. Immerse yourself in a nostalgic family memory that adds a personal touch to this tasty recipe. Rated 4 out of 10 in difficulty, this main dish will surely become a family favorite.

---


Frittata with Mushrooms, Thyme, and Parmigiano Cheese

Sunday mornings have always had a special place in my heart. Growing up, they were synonymous with family gatherings around the kitchen table, the warmth of the sun streaming through the windows, and the irresistible aroma of a frittata cooking in the oven. This recipe for Frittata with Mushrooms, Thyme, and Parmigiano Cheese brings back those cherished memories and is a delightful way to start any day.


Ingredients:

- 3 eggs


- 2 egg replacements


- 1 cup trimmed fresh mushrooms


- 1 tablespoon fresh thyme leaves


- 2 green onions, sliced


- Freshly ground black pepper


- 1/2 cup canned whole half and half


- 1/2 cup freshly grated Parmigiano cheese


- Salt to taste


- Cooking spray or butter for the pan


Instructions:

1. Preheat your oven to 350 degrees Fahrenheit. Later, you'll switch it to "Broil."


2. Heat an 8-inch ovenproof skillet over medium-high heat and coat it with cooking spray or butter.


3. Add the mushrooms and green onions to the pan; sauté for about 12 minutes or until the mushrooms are nicely browned.


4. In a medium bowl, combine the eggs and egg replacement with the half and half, Parmesan cheese, thyme, salt, and pepper. Whisk everything together until thoroughly mixed.


5. Pour the egg and cheese mixture into the same pan with the sautéed mushrooms and green onions.


6. Cover the pan and cook over medium heat for about 6 minutes, or until the mixture is just a little liquid-y/runny on top.


7. Transfer the pan to the oven and bake at 350 degrees for another 5-10 minutes, until the frittata is completely set.


8. Change the oven setting to "Broil." Place the pan on the lowest rack and broil for about 2 minutes, or until the top is a golden brown color.


I remember sitting at the kitchen table, watching my grandmother skillfully prepare this dish. She would tell us stories of her childhood, her voice weaving tales of family traditions and the importance of sharing meals together. The frittata, infused with the earthy flavors of mushrooms and thyme, was always a highlight of our Sunday brunches, bringing everyone together and creating lasting memories.


Difficulty: 4/10
Classification: Main Dish

This frittata recipe, with its rich flavors and simple preparation, is a testament to the power of food to connect us to our past and to each other. Whether you’re sharing it with family or enjoying it on your own, it's sure to become a beloved staple in your culinary repertoire. So, gather your loved ones and savor the experience of making and enjoying this delightful dish.

Read more about Appetizers

Read more about Main Dishes

Read more about Desserts

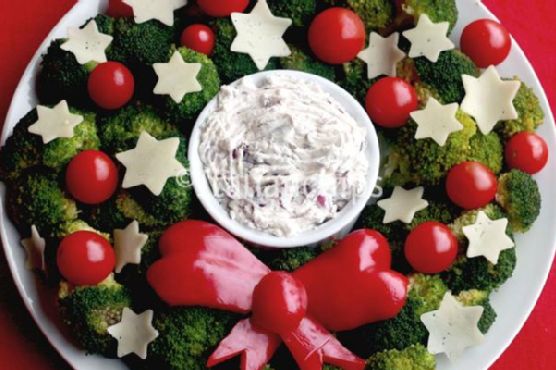
Vegetarian Christmas wreath | Made by Meaghan Moineau

Vegetarian Christmas wreath | Made by Meaghan Moineau

Title: A Festive Delight: Crafting a Vegetarian Christmas Wreath
Description: Embrace the holiday spirit with this delightful Vegetarian Christmas Wreath, a vibrant and healthy appetizer that elevates your festive table. Packed with fresh broccoli, juicy cherry tomatoes, and creamy cheese, this dish isn't just a feast for the eyes; it's a nostalgic journey back to cherished family gatherings. Discover the secrets to creating this culinary masterpiece and bring a touch of warmth and color to your Christmas celebrations.

---


As the holiday season approaches, many of us find ourselves reminiscing about the cherished memories and traditions that make this time of year so special. For me, one dish that encapsulates the joy of Christmas is the Vegetarian Christmas Wreath. Not only is it a visual masterpiece, but its fresh and savory flavors bring back memories of family gatherings filled with laughter and warmth.


A Nostalgic Journey

Every Christmas, my family would gather in my grandmother’s cozy kitchen, the heart of our home during the festive season. My grandmother, a culinary wizard in her own right, introduced us to the Vegetarian Christmas Wreath when I was a child. The dish became an instant favorite, not just for its vibrant colors and enticing flavors, but for the way it brought us all together. I recall the bustling kitchen, the aroma of fresh vegetables, and the joyous chatter as we eagerly awaited the unveiling of our family’s festive wreath.


Creating the Wreath:

To recreate this delightful appetizer, you'll need a handful of simple yet flavorful ingredients: fresh broccoli florets, juicy cherry tomatoes, creamy cheese, a crisp red bell pepper, tangy cream cheese, mayonnaise, dried dill, dried garlic, savory olives, and a fresh scallion for garnish.


1. Blanching the Broccoli: Start by washing the broccoli and cutting the florets into bite-sized pieces. Fill a large pan with water and bring it to a boil. Once boiling, add the broccoli florets. While they're cooking, prepare a bowl filled with ice water. After two minutes of boiling, swiftly transfer the broccoli to the ice water to preserve its vibrant green color.
2. Preparing the Dip: As the broccoli cools, combine the cream cheese, mayonnaise, dried dill, and dried garlic to create a creamy dip. Let it chill in the fridge for at least three hours to allow the flavors to meld beautifully.
3. Assembling the Wreath: On a large white plate, place a ramekin at the center for the dip. Arrange the broccoli florets around the ramekin to form the wreath, adding cherry tomatoes for bursts of color. Use star-shaped cookie cutters to slice the cheese into festive shapes, and strategically place them on the wreath. Finally, cut the red bell pepper into strips to craft a decorative ribbon, completing your edible masterpiece.
Buon Appetito!

Serving this dish is not merely about enjoying a delicious appetizer; it's about creating an experience that brings loved ones together, evoking fond memories and starting new traditions. Whether you're hosting a grand feast or a cozy family dinner, the Vegetarian Christmas Wreath is sure to impress and delight.


Difficulty Rating: 5/10
Classification: Appetizer

This dish requires a bit of preparation but is straightforward enough for cooks of all abilities. Its simplicity is part of its charm, allowing you to enjoy the creative process without stress.


As you gather with family and friends this holiday season, consider adding the Vegetarian Christmas Wreath to your menu. It's a dish that symbolizes togetherness, joy, and the spirit of Christmas, reminding us that the best ingredients in any recipe are love and laughter.

Read more about Appetizers

Read more about Main Dishes

Read more about Desserts