Creamy Tomato Soup | Made by Meaghan Moineau

Creamy Tomato Soup | Made by Meaghan Moineau

Warm Memories in a Bowl: Creamy Tomato Soup Recipe


Description:

Indulge in the comforting embrace of our Creamy Tomato Soup, a soul-warming recipe that marries the richness of tomatoes with a creamy smoothness, creating a symphony of flavors that dance on your taste buds. This delightful dish is perfect for cozy evenings and family gatherings, where stories and laughter are shared over steaming bowls of soup. This Appetizer, rated a 4 out of 10 for difficulty, is sure to become a staple in your culinary repertoire.

---


Ingredients:

- 1 tablespoon olive oil

- 1 diced onion


- 1 teaspoon fresh dried basil


- 1 teaspoon fresh dried thyme


- Salt to taste


- Black pepper to taste


- 2 cans diced tomatoes


- 2 tablespoons tomato paste


- 1/4 cup all-purpose flour


- 3 cups chicken broth, divided


- 1 tablespoon Splenda


- 1 cup evaporated milk


---


Instructions:

1. Sauté the Aromatics: In a large saucepan, heat the olive oil over medium heat. Add the diced onion, basil, thyme, salt, and black pepper. Cook, stirring occasionally, until the onion is tender and golden.
2. Simmer the Tomatoes: Add the diced tomatoes and tomato paste to the saucepan. Stir well and let the mixture simmer for about 10 minutes, allowing the flavors to meld together.
3. Thicken the Base: In a small bowl, whisk together the flour and 1/4 cup of chicken broth until smooth. Stir this mixture into the tomato mixture, ensuring it is well blended.
4. Create the Soup: Add the remaining chicken broth to the saucepan. Let the soup simmer for 30 minutes, stirring frequently to prevent sticking.
5. Blend to Perfection: Use an immersion blender to puree the soup until smooth.
6. Finish with Creaminess: Stir in the Splenda and evaporated milk. Heat through before serving.

---


A Nostalgic Family Memory:


Growing up, our family kitchen was the heart of our home, a place where the aroma of delicious meals would draw us together. I vividly recall a chilly autumn evening when my grandmother decided to make her famous Creamy Tomato Soup. The air outside was crisp, and the leaves painted the ground in hues of gold and red. Inside, the kitchen was warm with the smell of onions sautéing in olive oil, a scent that always signaled something special was brewing.


As we gathered around the table, bowls steaming with the rich, creamy soup, my grandmother regaled us with stories of her childhood. She spoke of simpler times, of a little kitchen in her hometown where tomato soup was a cherished tradition. With each spoonful, we were not just savoring a meal but also connecting with our roots and the love that spanned generations.


Even now, whenever I prepare this Creamy Tomato Soup, I am transported back to that evening, to the laughter and warmth of family. This recipe is more than just a dish; it's a vessel of memories, a reminder of the love that binds us all together.


---


Bring a taste of nostalgia and warmth to your table with this Creamy Tomato Soup. Perfect for nourishing both body and soul, it's a dish that invites you to create new memories while cherishing the old.
Read more about Appetizers

Read more about Main Dishes

Read more about Desserts

Instant Pot Chicken Tacos | Made by Meaghan Moineau

Instant Pot Chicken Tacos | Made by Meaghan Moineau

Instant Pot Chicken Tacos: A Quick, Flavorful Feast for the Whole Family


Description


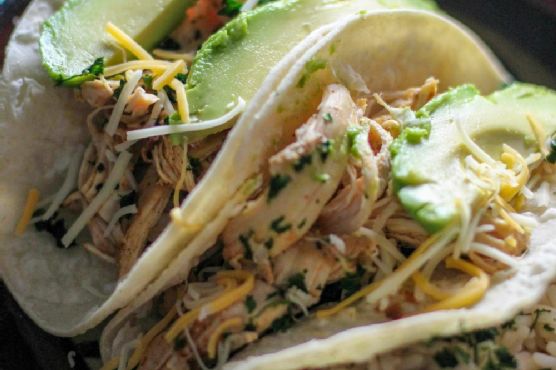
Discover the magic of Instant Pot Chicken Tacos, a delicious and easy meal that brings families together. With simple ingredients like chicken breasts, purple onion, and canned salsa, this dish transforms into a mouthwatering main course that's sure to please. Perfect for busy weeknights or a casual dinner party, these tacos capture the essence of home-cooked comfort food in a fraction of the time. Dive into this recipe and enjoy a taste of nostalgia with every bite.


A Nostalgic Family Memory


Growing up, Taco Tuesdays were a cherished tradition in our household. As the sun dipped below the horizon, casting a warm glow over our kitchen, my siblings and I would gather around the table, eagerly awaiting the sizzling sounds and tantalizing aromas that filled the air. Mom would always make her signature chicken tacos, a recipe passed down from her grandmother. The kitchen buzzed with laughter and stories as we chopped fresh onions and seasoned the chicken with care.


One particular Tuesday stands out in my memory. It was a chilly autumn evening, and the first hint of winter's bite was in the air. Mom had recently received an Instant Pot as a gift, and she was eager to try it out with our beloved taco recipe. We were skeptical at first—could this new gadget really recreate the flavors we held so dear?


As the Instant Pot worked its magic, we shared stories of past family adventures and dreamed of future ones. The smell of seasoned chicken and salsa wafted through the room, and our mouths watered in anticipation. When the timer finally beeped, signaling the end of the cooking process, we gathered around as Mom carefully lifted the lid.


The result was nothing short of spectacular. The chicken was tender and infused with the rich flavors of taco seasoning and salsa. As we bit into our tacos, the familiar taste of lime juice and savory chicken transported us back to a simpler time. That evening, we realized that while the method had changed, the heart of our family tradition remained unchanged.


Recipe


Ingredients


- 2 chicken breasts


- Black pepper


- 1 tablespoon taco seasoning


- 1 purple onion, sliced


- 1 cup canned salsa


- 2 tablespoons lime juice


Instructions


1. Season both sides of the chicken breasts with black pepper and taco seasoning.


2. Place the seasoned chicken into the bottom of the Instant Pot.


3. Top the chicken with sliced purple onion and canned salsa.


4. Secure the Instant Pot lid into the lock position.


5. Select the Poultry setting and set the timer for 12 minutes.


6. Once cooking is complete, allow the Instant Pot to naturally release pressure for 20 minutes.


7. Carefully remove the chicken from the Instant Pot and shred it using two forks.


8. Sprinkle the shredded chicken with lime juice for added zest.


9. Serve over rice or with warm tortillas for a delightful taco experience.


Difficulty Rating


This recipe is rated a 3 out of 10 for difficulty, making it an ideal choice for cooks of all skill levels. Its simplicity and efficiency make it a fantastic option for those new to using an Instant Pot or anyone looking for a quick, satisfying meal.


Classification


Instant Pot Chicken Tacos are classified as a Main Dish, perfect for family dinners or entertaining guests with minimal fuss.


---


Embrace the ease and flavor of Instant Pot Chicken Tacos, and create new family memories with this delightful dish. Whether you're a seasoned cook or just starting out, this recipe is sure to become a beloved staple in your culinary repertoire.

Read more about Appetizers

Read more about Main Dishes

Read more about Desserts

Shrimp and Lemongrass Soup | Made by Meaghan Moineau

Shrimp and Lemongrass Soup | Made by Meaghan Moineau

Title: A Taste of Home: Crafting the Perfect Shrimp and Lemongrass Soup
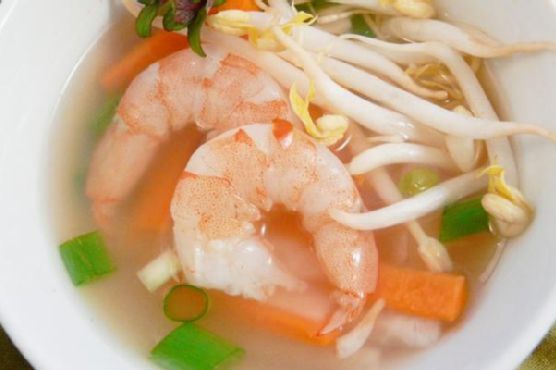
Description: Dive into a bowl of nostalgia with our Shrimp and Lemongrass Soup, a fragrant and flavorful dish that brings family memories to life. Learn how to make this delightful appetizer that combines the freshness of lemongrass with succulent shrimp, all in a soothing broth that’s sure to warm your soul.

---


There’s something inherently comforting about a bowl of soup that’s been simmered to perfection. For me, Shrimp and Lemongrass Soup is more than just a delicious appetizer; it’s a cherished family tradition that transports me back to my childhood kitchen, where the aromatic scent of lemongrass and the sound of gentle simmering were constants in our home.


Growing up, weekends meant family gatherings filled with laughter and the clinking of spoons against bowls. My grandmother, a culinary genius in her own right, would often whip up her signature Shrimp and Lemongrass Soup. The kitchen was her domain, and I vividly remember watching her expertly slice the lemongrass, her face a picture of concentration and love.


The process of crafting this soup is a labor of love, yet surprisingly simple. Here’s how you can recreate this heartwarming dish:

Ingredients:


- Raw shrimp (shells reserved)


- Lemongrass stems


- Scallion


- Bean sprouts


- Lime juice


- Carrot


- Daikon


- Chicken stock


- Fresh mint for garnish


Instructions:


1. Start by cutting off the white part of the lemongrass stems, saving the tops for later use. Slice the white part into inch-long pieces and gently flatten them with a knife to release their full flavor.


2. In a large stockpot, bring chicken stock to a boil. Add the flattened lemongrass stems and reserved shrimp shells, allowing them to simmer for 2 minutes. This step infuses the stock with a rich, aromatic base.


3. After simmering, set the stock aside to allow the flavors to meld. Strain the stock to remove the lemongrass and shrimp shells, then return the clear, aromatic liquid to the stockpot.


4. Slice the remaining lemongrass stem and finely chop it. Add this to the stock along with the raw shrimp, allowing it to simmer for 3-4 minutes until the shrimp turn a beautiful pink hue.


5. Stir in the lime juice, scallions, bean sprouts, sliced carrots, and daikon. Mix well, ensuring each ingredient is lovingly coated in the flavorful broth. Season to taste with salt and pepper.


6. Serve the soup hot, garnished with fresh mint leaves for an added burst of freshness.


A Trip Down Memory Lane


As a child, I would sit at the kitchen table, eagerly awaiting my bowl of soup. The first sip was always magical—a harmonious blend of tangy lime, aromatic lemongrass, and the subtle sweetness of shrimp. It was a dish that brought our family together, each spoonful a reminder of love and tradition.


This Shrimp and Lemongrass Soup is rated a 4 out of 10 on the difficulty scale, making it an approachable recipe for both novice and seasoned cooks. As an appetizer, it pairs beautifully with a variety of main courses, yet stands confidently on its own as a star dish at any dinner table.


So, gather your ingredients, put on your apron, and invite a little nostalgia into your kitchen. This Shrimp and Lemongrass Soup isn’t just about flavor—it’s about creating memories and sharing a piece of my family’s heritage with yours. Bon appétit!

Read more about Appetizers

Read more about Main Dishes

Read more about Desserts

Cabbage and sausages in beer | Made by Meaghan Moineau

Cabbage and sausages in beer | Made by Meaghan Moineau

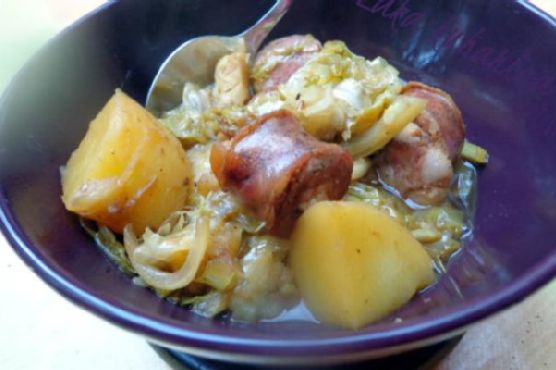
Title: A Heartwarming Bowl: Cabbage and Sausages in Beer
Description: Dive into a comfort food classic with our Cabbage and Sausages in Beer recipe. This simple yet flavorful main dish combines savory smoked sausages with the earthy goodness of cabbage and the subtle sweetness of beer. Perfect for a cozy family dinner, this dish will fill your kitchen with mouthwatering aromas and your heart with nostalgia.

---


There are certain dishes that transport us back in time, evoking memories that are as rich and comforting as the flavors themselves. Our Cabbage and Sausages in Beer recipe is one such culinary time machine, whisking me back to countless family gatherings in my grandmother's warm, bustling kitchen.


A Stroll Down Memory Lane


Growing up, Sunday dinners at Grandma's house were a cherished ritual. The savory aroma of smoked sausages simmering in beer would greet us at the door, mingling with the laughter of cousins and the comforting hum of adult conversation. The centerpiece of our family feast was always a heaping bowl of cabbage and sausages, tender and steaming, served with a side of thick, crusty bread.


Grandma had a knack for turning simple ingredients into something magical. She would melt a generous pat of butter in her well-loved pot, adding diced onions that would sizzle and turn golden, filling the room with a sweet, caramelized scent. A sprinkle of sugar and salt would follow, her wooden spoon working its way around the pan with the precision of years of practice.


Next came the beer—a splash of golden liquid that bubbled and hissed as it hit the pan, its malty aroma inviting everyone to gather around. The sausages were nestled in among the cabbage and potatoes, their smoky essence infusing the entire dish. The pot, brimming with promise, would simmer gently, allowing the flavors to meld into a comforting symphony.


Creating Your Own Memories


To recreate this dish, start by melting butter in a large pan over medium-low heat. Add the onions, a pinch of sugar, and a dash of salt. Stir frequently, watching as the onions transform into a golden hue, about 5-8 minutes. Pour in the beer, scraping up any flavorful bits clinging to the bottom of the pan.


Introduce the smoked sausages, green cabbage, and potatoes into this aromatic mix. Let the dish simmer, covered, for 20 minutes or until the vegetables are tender and full of flavor. Serve the sausages and veggies in big bowls, ensuring each serving is accompanied by plenty of the rich cooking liquid. A sprinkle of freshly cracked pepper adds the final touch.


A Dish for Every Occasion


This recipe, with its simple ingredients and deep, satisfying flavors, makes for a perfect main dish. It's a 3 out of 10 on the difficulty scale, making it accessible for cooks of all skill levels. Whether you're looking to create new family traditions or simply need a hearty meal for a chilly evening, this Cabbage and Sausages in Beer will not disappoint.


As you savor each bite, let the comforting flavors remind you of the warmth of family and the simple joys of a meal shared with loved ones. Here's to creating your own cherished memories around the dining table. Enjoy!

Read more about Appetizers

Read more about Main Dishes

Read more about Desserts

Spiked Watermelon lemonade | Made by Meaghan Moineau

Spiked Watermelon lemonade | Made by Meaghan Moineau

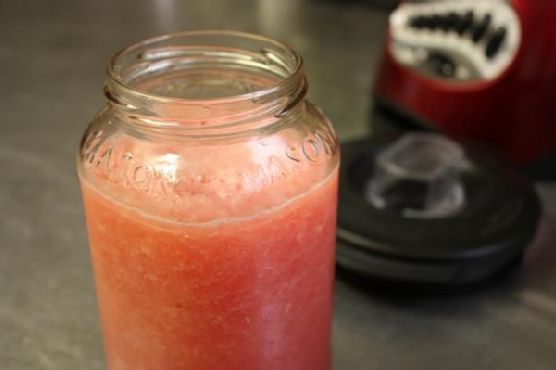
Title: A Refreshing Twist on Tradition: Spiked Watermelon Lemonade
Description: Dive into the nostalgic flavors of summer with our Spiked Watermelon Lemonade. This refreshing cocktail combines the sweetness of ripe watermelon, the zing of fresh lemon juice, and the aromatic touch of mint-infused simple syrup, all topped off with a splash of gin. Perfect for backyard gatherings or a quiet evening on the porch, this drink is a modern twist on a family favorite.

---


A Refreshing Twist on Tradition: Spiked Watermelon Lemonade

As the summer sun blazes down, there's nothing quite like the joy of gathering with family and friends, sharing stories, laughter, and, of course, delicious food and drinks. One of my fondest memories of these summer get-togethers is the creation of a family-favorite drink that has been lovingly passed down through generations: the classic lemonade. But as with any tradition, there comes a time for a refreshing twist that rejuvenates and delights the senses.


Nostalgia in Every Sip

The story begins in the backyard of my grandparents' house, a place where the line between childhood adventures and culinary experiments blurred seamlessly. My grandmother had a knack for turning simple ingredients into something magical, and her lemonade was no exception. I remember her bustling about the kitchen, her apron dusted with sugar, as she squeezed lemons with a precision only years of practice could perfect. The air would be filled with the citrusy aroma, blending beautifully with the fresh scent of mint from her garden.


It was during one of these sun-drenched afternoons that my uncle, with his playful spirit and penchant for innovation, decided to add a grown-up touch to the beloved lemonade. With a mischievous grin, he reached for a plump watermelon and a bottle of gin. The result was nothing short of spectacular—a drink that was as much about creation as it was about celebration.


Crafting the Perfect Spiked Watermelon Lemonade
For those eager to recreate this refreshing cocktail, here's a simple guide that captures the essence of those cherished family moments:
Ingredients:

- 1 cup of sugar


- 2 cups of water (divided)


- Fresh mint leaves


- Freshly squeezed lemon juice


- Cubed watermelon


- Gin


Instructions:

1. Begin by making a mint-infused simple syrup. In a small saucepan, combine the sugar and 1 cup of water. Add a handful of mint leaves, and cook over medium heat, stirring until the sugar dissolves completely. Once dissolved, remove from heat, cover, and let the mixture sit for at least an hour to infuse.


2. Meanwhile, in a blender, combine the freshly squeezed lemon juice with cubed watermelon. Blend until smooth.


3. Strain the mint simple syrup and add it to the watermelon mixture, 1/4 cup at a time, until the desired sweetness is achieved (about a cup).


4. Pour the mixture into a large pitcher. Add 1 cup of cold water and 1 cup of gin. Fill the pitcher with the watermelon mixture and stir to combine.


5. Serve over ice, garnished with a sprig of mint or a slice of lemon, and savor the taste of summer.


A Delightful Challenge

Rated at a 4 out of 10 on the difficulty scale, this Spiked Watermelon Lemonade is a breeze to prepare, ensuring more time spent enjoying the company of loved ones. While it straddles the line between a delightful appetizer and a refreshing dessert, it’s ultimately a drink that complements any occasion.


In the end, this Spiked Watermelon Lemonade is more than just a cocktail; it's a sip of nostalgia, a reminder of the simple joys of summer and the power of family traditions, reinvented with a twist. Raise your glass to cherished memories and the creation of new ones, as you enjoy this refreshing treat under the warm embrace of the sun. Cheers!

Read more about Appetizers

Read more about Main Dishes

Read more about Desserts

Thick, Fudgy, One Bowl Brownies | Made by Meaghan Moineau

Thick, Fudgy, One Bowl Brownies | Made by Meaghan Moineau

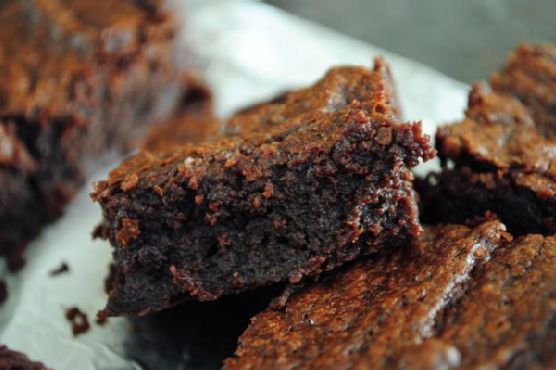
Title: A Journey Back in Time with Thick, Fudgy, One Bowl Brownies
Description: Dive into the comforting embrace of these Thick, Fudgy, One Bowl Brownies, a timeless dessert that promises both simplicity and indulgence. With a rich blend of semi-sweet and unsweetened chocolate, these brownies are as delightful to make as they are to eat. Join me as I share a cherished family memory that makes this recipe truly special.

---


There's something undeniably magical about the aroma of chocolate wafting through the house. It's the kind of scent that transports you back in time, evoking a swirl of cherished memories. For me, that memory is Saturday afternoons in my grandmother's kitchen, where the world seemed to slow down as we baked her famous brownies.


A Sweet Family Tradition

Growing up, weekends were synonymous with family gatherings, and no gathering was complete without Grandma's brownies. Her secret? A recipe that was as straightforward as it was delicious. Thick, fudgy, and requiring just one bowl, these brownies are a testament to the idea that simplicity is often the key to perfection.


As a child, I would perch on a stool, eyes wide with anticipation, watching Grandma melt chocolate in a large, heatproof bowl set over simmering water. The semi-sweet and unsweetened chocolate, combined with unsalted butter, would slowly transform into a smooth, glossy mixture. This was my favorite part—the moment when the kitchen filled with the rich, intoxicating scent of chocolate.


Once cooled, Grandma would let me stir in the cocoa powder, eggs, sugar, vanilla, and salt. Her gentle guidance made the process feel like a grand adventure. The final step was my sacred duty—carefully adding the flour and ensuring it was just combined. Grandma always said that overmixing was the enemy of a perfect brownie.


The Magic of Baking

After spreading the batter into a foil-lined baking pan, we'd slide it into the oven. Those 35 to 40 minutes felt like an eternity to a chocolate-loving child. But the wait was worth it. The brownies emerged slightly puffed, with a toothpick inserted into the center revealing the perfect balance between gooey and set.


Though the recipe suggested cooling them to room temperature, patience was never my strong suit. Five minutes was usually all I could manage before cutting into them. To this day, the first bite of those warm, fudgy brownies takes me back to those precious afternoons.


A Dessert to Cherish

Rated a 3 out of 10 for difficulty, this dessert is not only easy to make but also a delightful way to create lasting memories with loved ones. Whether you're a seasoned baker or a novice, these Thick, Fudgy, One Bowl Brownies are a must-try.


So, gather your ingredients—semi-sweet chocolate, unsweetened chocolate, unsalted butter, cocoa powder, eggs, vanilla extract, table salt, and flour—and embark on a nostalgic baking journey. This simple, yet indulgent treat is perfect for any occasion, but most importantly, it's a reminder that the best recipes are those that bring people together.


Conclusion

In a world that often feels hurried and complex, these brownies offer a moment of pause, a chance to savor the simple joys of life. Whether you're sharing them with family, indulging alone, or gifting them to a friend, these thick, fudgy brownies are sure to warm hearts and create sweet memories.

Read more about Appetizers

Read more about Main Dishes

Read more about Desserts

Easy Gluten Free Vegetarian Pasta Salad | Made by Meaghan Moineau

Easy Gluten Free Vegetarian Pasta Salad | Made by Meaghan Moineau

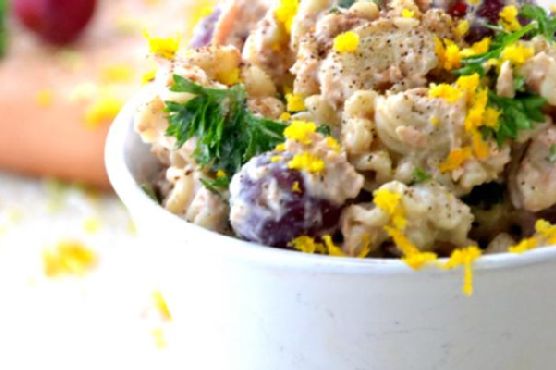
Title: A Taste of Summer: Easy Gluten-Free Vegetarian Pasta Salad
Description: Discover the fresh and vibrant flavors of our Easy Gluten-Free Vegetarian Pasta Salad. This delightful dish combines the zesty tang of oranges with the sweetness of fresh grapes, creating a refreshing and healthy meal perfect for any occasion. Join us as we explore the simplicity of this recipe and share a cherished family memory that makes this salad truly special.

---


A Taste of Summer: Easy Gluten-Free Vegetarian Pasta Salad

There’s something nostalgically comforting about a good pasta salad, especially when it’s easy to prepare and packed with flavor. Our Easy Gluten-Free Vegetarian Pasta Salad is a celebration of simple, wholesome ingredients that come together in perfect harmony. With gluten-free pasta as its base, this dish is perfect for those with dietary restrictions without compromising on taste.


Ingredients:

- Gluten-free pasta


- Plain Greek yogurt


- Orange zest


- Fresh orange juice


- Olive oil


- Fresh grapes


- Fresh cilantro


- Sea salt


- Black pepper


Instructions:

1. Cook the gluten-free pasta according to package directions. Drain and set aside to cool for 10 minutes.


2. In a large bowl, combine all ingredients; gently toss to combine.


3. Transfer pasta salad to four serving bowls.


4. Serve chilled.


Difficulty Rating: 3/10
Classification: Main Dish

---


A Nostalgic Family Memory

Every summer, my family would gather at my grandmother’s house for a weekend of laughter, games, and of course, delicious food. The backyard was always buzzing with the playful sounds of cousins chasing each other, while the adults lounged under the shade of the old oak tree, sharing stories and reminiscing about days gone by.


Among the array of dishes that adorned the picnic table, my grandmother’s pasta salad was always a standout. Her secret? A splash of fresh orange juice and a sprinkle of orange zest, which she believed added a bit of sunshine to each bite.


This recipe is my tribute to those cherished summer afternoons. As I prepare the salad, I’m reminded of the joy and warmth that filled those days, the citrusy aroma of oranges mingling with the fresh scent of cilantro, and the sweet taste of grapes bursting with flavor.


Each bite of this salad takes me back to those sunlit afternoons, with the gentle rustle of leaves in the breeze and the comforting presence of family by my side. It’s a reminder that the simplest dishes, made with love and shared with those we hold dear, often become the most memorable.


Whether you’re hosting a summer gathering or simply craving a light and refreshing meal, this Easy Gluten-Free Vegetarian Pasta Salad is sure to delight. It’s a dish that not only satisfies the palate but also nourishes the soul with its simplicity and the memories it evokes.


Enjoy this delightful salad chilled, and let each bite transport you to a place of warmth, joy, and togetherness.

Read more about Appetizers

Read more about Main Dishes

Read more about Desserts

Grilled Ham and Cheese French Toast For A Quick Weeknight Dinner | Made by Meaghan Moineau

Grilled Ham and Cheese French Toast For A Quick Weeknight Dinner | Made by Meaghan Moineau

Title: Quick and Delicious: Grilled Ham and Cheese French Toast for a Weeknight Treat
Description: Discover the comfort of a Grilled Ham and Cheese French Toast that’s perfect for those busy weeknights. Made with wholesome ingredients like low-fat Jarlsberg cheese, lean turkey ham, and hearty wheat bread, this dish combines the savory satisfaction of a classic sandwich with the sweet nostalgia of French toast. Easy to prepare and packed with flavor, this meal is sure to become a family favorite.

---


A Taste of Childhood: Grilled Ham and Cheese French Toast


There’s something inherently comforting about a grilled cheese sandwich. The golden, crispy bread and gooey, melted cheese transport many of us back to simpler times. This Grilled Ham and Cheese French Toast elevates that classic comfort, combining it with the delightful flavors of French toast for a meal that’s both nostalgic and novel.


Ingredients:


- Buttermilk: Adds a tangy richness to the French toast coating.
- Egg Whites: Helps bind the ingredients and provides a light texture.
- Dijon Mustard: Infuses the bread with a subtle kick.
- Wheat Bread: Offers a wholesome base for the sandwich.
- Low Fat Jarlsberg Cheese: Melts beautifully and imparts a nutty flavor.
- Lean Turkey Ham: A healthier alternative to traditional ham.
- Dill Pickles: Adds a crunchy, tangy contrast.
- Low Fat Light Smart Balance Heart Right: Ensures a buttery crust without the extra calories.

Instructions:


1. Preheat the Oven: Set it to 350 degrees to keep the sandwiches warm.
2. Prepare the Coating: In a shallow bowl, whisk together buttermilk and egg whites, then set aside.
3. Assemble the Sandwiches: Spread mustard on each slice of bread. Top half with cheese, ham, and pickles, then complete with remaining slices.
4. Cook the Sandwiches: Melt reduced-fat butter in a nonstick pan over medium heat. Dip sandwiches in the buttermilk mixture, ensuring they’re lightly coated. Cook covered for 3-5 minutes, flip and press, then cook uncovered for another 2-3 minutes until golden.
5. Keep Warm: Place cooked sandwiches on a baking sheet in the oven while repeating with the remaining sandwiches.
6. Serve: Slice each sandwich in half and enjoy with a fork and knife.

A Slice of Family Memory


Growing up, my family had a tradition of spending Friday nights together, sharing stories over a comforting meal. My grandmother, a culinary enthusiast, often surprised us with creative twists on classic dishes. One memorable evening, she introduced us to her version of Grilled Ham and Cheese French Toast. As we gathered around the table, the air filled with the aroma of melting cheese and sizzling butter, we knew we were in for a treat.


This dish, with its crispy edges and soft, cheesy center, quickly became a family favorite. Every bite was a delightful blend of flavors and textures, reminiscent of lazy Sunday mornings and bustling family gatherings. Even today, preparing this meal brings back those cherished memories, turning any weeknight dinner into a warm family occasion.


Difficulty Rating: 3/10


This Grilled Ham and Cheese French Toast is simple to prepare, making it a perfect choice for a quick and satisfying weeknight dinner. With minimal ingredients and straightforward instructions, even a novice cook can master this dish. Enjoy the fusion of flavors and the joy of creating a meal that’s both nostalgic and delicious.


Classification: Main Dish

---


Embrace the nostalgia and savor every bite of this Grilled Ham and Cheese French Toast. It’s more than just a meal; it’s a journey back to the warmth of family gatherings and the joy of sharing good food with loved ones.

Read more about Appetizers

Read more about Main Dishes

Read more about Desserts

Quick and Easy Southwestern Corn Chowder | Made by Meaghan Moineau

Quick and Easy Southwestern Corn Chowder | Made by Meaghan Moineau

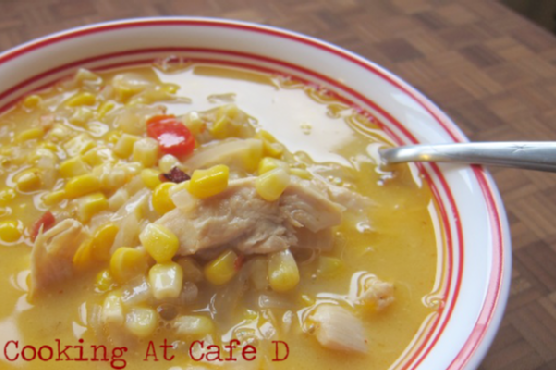
Title: A Hearty Bowl of Comfort: Quick and Easy Southwestern Corn Chowder
Description: Dive into the warmth of Southwestern flavors with this Quick and Easy Corn Chowder. Perfect for busy weeknights, this delightful dish combines vibrant vegetables, tender chicken, and creamy cheese for a soul-satisfying experience. Join me as I share my personal family memories tied to this comforting meal.

---


As the leaves begin to turn and the air becomes crisp, there's nothing quite like a warm, hearty soup to bring comfort to both the body and soul. Our Quick and Easy Southwestern Corn Chowder is not just a dish; it's a bowl of memories, nostalgia, and love. This flavorful chowder combines the earthy sweetness of fresh corn with the gentle heat of chili flakes, making it a perfect companion for cozy evenings.


Nostalgic Family Memory:

Growing up, my family always gathered around the kitchen on Sunday evenings to prepare meals together. It was a sacred ritual, a time to connect after our busy weeks. My grandmother, with her worn-out apron and gentle smile, was the maestro of our kitchen symphony. She had an uncanny ability to turn simple ingredients into something magical, and her Southwestern Corn Chowder was no exception.


I fondly remember the aroma of onions and peppers gently sweating in the Dutch oven, filling the house with an inviting warmth. As a child, my job was to carefully measure the corn kernels, making sure not to spill any on our kitchen floor—a task I took very seriously. The heart of our chowder was always the fresh corn, harvested from our backyard garden, adding a touch of sweetness that only nature can provide.


As my grandmother stirred the pot, she would share stories of her childhood, tales of her family's own kitchen gatherings in the Southwest. Each spoonful of chowder was a journey back to those stories, a connection to our roots and a reminder of the love that bound us together. Now, every time I make this dish, I feel her presence in the kitchen, guiding me, just as she did all those years ago.


Recipe Details:
Ingredients:

- 2 tablespoons butter


- 1 cup cheddar cheese (optional)


- 1 teaspoon chili flakes


- 4 cups yellow fresh corn kernels


- 1 green bell pepper, diced


- 1 cup half and half


- 1 red bell pepper, diced


- Salt and pepper to taste


- 2 cups cooked shredded chicken


- 1 cup sweet onions, diced


- 4 cups vegetable stock


Instructions:

1. In a Dutch oven, melt the butter over medium heat. Add the diced sweet onions and bell peppers, along with a pinch of salt. Sweat the vegetables until the onions become translucent and fragrant.


2. Sprinkle in the chili flakes, allowing them to release their warmth into the mix.


3. Pour in the vegetable stock, followed by the fresh corn kernels and shredded chicken. Stir to combine and bring the mixture to a gentle simmer. Cover and let it simmer for about 10 minutes, allowing the flavors to meld.


4. Once the chowder has simmered, reduce the heat and stir in the half and half. If desired, add the cheddar cheese, stirring until melted and incorporated.


5. Season with salt and pepper to taste, adjusting to your preference.


6. Serve hot, garnished with additional cheese or fresh herbs if desired.


Difficulty Rating: 3/10
Classification: Main Dish

This Southwestern Corn Chowder is more than just a meal; it’s a tradition, a family heirloom passed down through generations, warming hearts and homes with its rich flavors and cherished memories. Enjoy this dish with your loved ones and create your own stories to share around the dinner table.


---


Let us know how this recipe turned out for you and share your own kitchen memories in the comments below!

Read more about Appetizers

Read more about Main Dishes

Read more about Desserts

Chicken Piccata with Artichokes | Made by Meaghan Moineau

Chicken Piccata with Artichokes | Made by Meaghan Moineau

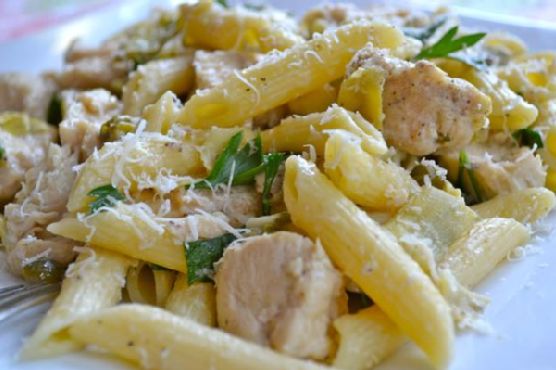
Title: Discover the Magic of Chicken Piccata with Artichokes: A Nostalgic Family Favorite
Description: Dive into the heartwarming flavors of Chicken Piccata with Artichokes, a delightful main dish that brings family memories to life. With the perfect blend of savory and tangy notes, this recipe is a culinary journey you won’t want to miss. Rated 4 out of 10 for difficulty, it's approachable for home cooks of all levels.

---


The Magic of Chicken Piccata with Artichokes: A Family Tradition

There’s something about the aroma of a lovingly prepared meal that transports us back to cherished moments shared around the family table. For me, Chicken Piccata with Artichokes is more than just a dish—it's a portal to Sunday dinners at my grandmother’s house.


Every Sunday, my grandmother would don her favorite apron and set to work in her cozy kitchen, filling the air with the mouthwatering scent of sautéing chicken and fresh herbs. The heart of our gatherings, her signature Chicken Piccata with Artichokes, was a dish that brought smiles to everyone’s faces, transcending the ordinary and creating a feast of flavors and memories.


This recipe, with its combination of tender boneless chicken breasts and the unique tang of artichokes and capers, is a tribute to my grandmother’s culinary wisdom. It’s a dish that’s as much about the experience of making it as it is about the enjoyment of eating it.


Ingredients:

- 4 boneless chicken breasts


- Salt and pepper to taste


- 1/2 cup flour for dredging


- 3 tablespoons extra virgin olive oil


- 1/2 cup reduced sodium chicken broth


- 1/4 cup freshly squeezed lemon juice


- 1/4 cup capers, drained


- 1 can artichoke hearts, drained and halved


- 1/4 cup chopped flat leaf parsley


- 1/2 cup freshly grated parmesan cheese


- 1 lb cooked penne rigate


Instructions:

1. In a large bowl, combine the chicken with a generous pinch of salt and pepper. Lightly dredge the chicken in flour, shaking off excess.


2. Heat the extra virgin olive oil in a large skillet over medium heat. Add the chicken breasts, cooking until browned and the juices run clear, approximately 12 minutes.


3. Stir in the chicken broth, lemon juice, capers, and artichokes, allowing the mixture to cook for about 3 minutes. The combination of these ingredients creates a tantalizing sauce that perfectly complements the chicken.


4. Reduce the heat to a simmer for an additional 3 minutes, letting the flavors meld together.


5. Stir in the cooked penne rigate until fully combined, absorbing the delicious sauce.


6. Add the chopped parsley, infusing the dish with freshness, and transfer to a serving bowl. Finish with a generous sprinkle of parmesan cheese for a savory touch.


A Culinary Journey

Each bite of this Chicken Piccata with Artichokes is a step back in time, recalling laughter-filled evenings and the comfort of family bonds. As a main dish, it’s perfect for gathering loved ones and creating new memories, just as my grandmother did every Sunday.


With a difficulty rating of 4 out of 10, this recipe is accessible for novice cooks, yet sophisticated enough to impress seasoned chefs. Its versatility makes it a staple for any home cook’s repertoire—a dish that truly embodies the warmth of home cooking and the joy of shared meals.


So next time you’re looking to evoke a sense of nostalgia while satisfying your culinary cravings, try this Chicken Piccata with Artichokes. It’s more than just a meal; it’s a celebration of family, flavor, and the timeless tradition of gathering around the table.

Read more about Appetizers

Read more about Main Dishes

Read more about Desserts

5-Minute Rocky Road Fudge | Made by Meaghan Moineau

5-Minute Rocky Road Fudge | Made by Meaghan Moineau

Title: The Sweet Simplicity of 5-Minute Rocky Road Fudge
Description: Discover the joy of creating a delightful dessert in just five minutes with our 5-Minute Rocky Road Fudge recipe. This easy-to-make treat combines rich chocolate, fluffy marshmallows, and crunchy walnuts for a nostalgic flavor that brings back fond family memories. Perfect for any occasion, this fudge is a sweet reminder of the simple pleasures in life.

---


A Journey Down Memory Lane: The Sweet Simplicity of 5-Minute Rocky Road Fudge


There’s something magical about the combination of chocolate, marshmallows, and nuts. For me, it’s a taste that instantly transports me back to the cozy warmth of my grandmother's kitchen. Her 5-Minute Rocky Road Fudge was more than just a dessert; it was a symbol of love and the centerpiece of many cherished family gatherings.


Ingredients:


- 2 cups semi-sweet chocolate chips


- 1 can (14 ounces) sweetened condensed milk


- 1 teaspoon vanilla extract


- 1/4 teaspoon salt


- 2 cups mini-marshmallows


- 1 cup chopped walnuts


Instructions:


1. Prepare Your Pan: Line a 13x9-inch pan with foil and lightly spray it with cooking spray. This step ensures your fudge releases effortlessly, preserving each perfect square.
2. Melt the Chocolate: In a large, microwave-safe bowl, combine the semi-sweet chocolate chips and sweetened condensed milk. Microwave for about 40 seconds, stirring until the chips are just melted. If necessary, continue microwaving in 15-second increments, being careful not to overcook.
3. Add Flavor: Stir in the vanilla extract and salt, infusing the melted chocolate with a hint of warmth and depth.
4. Fold in the Fun: Gently fold in the mini-marshmallows and walnuts, ensuring they are evenly distributed throughout the chocolate mixture.
5. Set the Fudge: Quickly spread and press the fudge into the prepared pan. Refrigerate until set and completely cooled.
6. Serve and Enjoy: Once cooled, cut into squares and serve. Watch as smiles spread across faces with each delightful bite.

A Taste of Nostalgia:


I remember the first time I made this fudge with my grandmother. The kitchen was filled with laughter as we melted chocolate and sneaked marshmallows when we thought no one was looking. The smell of chocolate mixed with vanilla wafted through the air, wrapping us in a comforting embrace. Each piece of fudge was a testament to our shared moments, a delicious reminder of afternoons spent together, filled with stories and love.


This fudge was always the star at family gatherings, disappearing almost as quickly as it was made. It was the perfect treat to share, a bite-sized piece of happiness that brought everyone together. Even now, as I make this fudge with my own children, I’m reminded of those precious times, and I hope to pass on the tradition to the next generation.


Difficulty Rating: 2/10


This recipe is incredibly simple, making it the perfect dessert for both novice and experienced cooks. With minimal ingredients and just a microwave needed, it’s an easy yet impressive addition to any occasion.


Classification: Dessert

Indulge in the sweet simplicity of 5-Minute Rocky Road Fudge. Whether you're creating new memories or reliving old ones, this delightful dessert is sure to bring joy to your table.

Read more about Appetizers

Read more about Main Dishes

Read more about Desserts

Glazed pork chops | Made by Meaghan Moineau

Glazed pork chops | Made by Meaghan Moineau

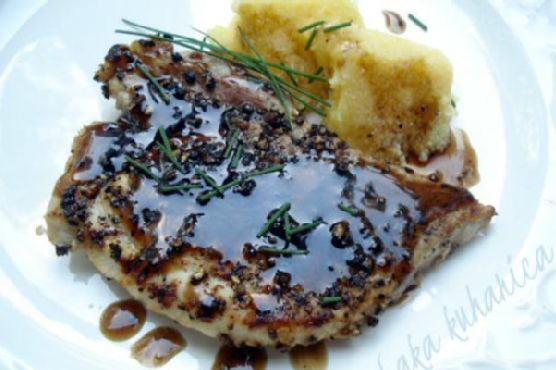
Title: A Taste of Home: Glazed Pork Chops with a Nostalgic Twist
Description: Dive into a culinary journey with our Glazed Pork Chops recipe, perfectly balanced with honey, soy sauce, and balsamic vinegar. This main dish not only promises a delightful dining experience but also brings back cherished family memories. Discover how to transform simple ingredients into a meal that speaks to the heart and soul. Rated a 5/10 on the difficulty scale, this dish is accessible yet impressive, perfect for any home cook eager to bring a touch of nostalgia to the dinner table.

---


Glazed Pork Chops: A Recipe Steeped in Family Tradition


In the heart of every family kitchen, there exists a dish that holds the power to transport us back to simpler times. For my family, that dish is Glazed Pork Chops. The aroma of sizzling pork, mingling with the sweet and tangy glaze, evokes memories of Sunday dinners at my grandmother's house where laughter and love were the main courses.


Growing up, Sundays were sacred. The whole family would gather around Grandma’s large oak dining table, eager to share stories and enjoy the feast she had lovingly prepared. Among all the delightful dishes, it was her Glazed Pork Chops that stole the show. Tender, juicy, and perfectly seasoned, they were the highlight of our meals.


As I recreate this dish today, I am reminded of my grandmother's kitchen, a place filled with warmth and the comforting hum of conversations. The secret to her unforgettable pork chops lay not only in the ingredients but in the love she infused into each step of the process.


Ingredients:


- Lean boneless pork chops


- Black pepper


- 2 tablespoons butter


- 2 garlic cloves, minced


- 1/4 cup honey


- 2 tablespoons soy sauce


- 1 tablespoon balsamic vinegar


- 1 tablespoon cornstarch


- Fresh green onions, chopped


Instructions:


1. Prepare the Pork Chops: Start by pressing one side of each pork chop into cracked black pepper. This step is crucial for infusing the meat with a peppery kick that complements the sweet glaze.
2. Cook the Pork Chops: Heat a nonstick grill skillet until hot. Add the pork chops, pepper side down, and cook for about 4 minutes or until browned. Reduce the heat to medium, flip the pork chops, and continue cooking for 6-8 minutes. Once done, remove the skillet from the heat, cover the pork chops, and set aside.
3. Prepare the Glaze: In a separate bowl, mix honey, soy sauce, balsamic vinegar, and cornstarch until smooth. Add a pinch of black pepper and stir well.
4. Make the Sauce: Melt butter in a small pan over medium heat. Add minced garlic and cook for 30 seconds, stirring constantly to prevent burning. Stir in the honey mixture, bring to a boil, and cook for 1 minute, stirring continuously until the sauce thickens.
5. Serve: Spoon the luscious glaze over the pork chops and sprinkle with fresh green onions. For a complete meal, serve alongside creamy polenta and a fresh green salad.

A Dish for Every Occasion


Rated 5/10 on the difficulty scale, this main dish is perfect for both novice cooks and seasoned chefs looking to add a nostalgic twist to their repertoire. The balance of flavors, from the robust pepper to the sweet and tangy glaze, creates a symphony of taste that leaves a lasting impression.


As I prepare this dish today, I am enveloped in a sense of nostalgia, remembering the joy and unity that this meal brought to my family. I hope that, in sharing this recipe, you too can create new memories while honoring the old. Embrace the simplicity, savor the flavors, and let each bite transport you to a place where love, laughter, and delicious food reign supreme.

Read more about Appetizers

Read more about Main Dishes

Read more about Desserts

Quick and Easy Scallop Pasta | Made by Meaghan Moineau

Quick and Easy Scallop Pasta | Made by Meaghan Moineau

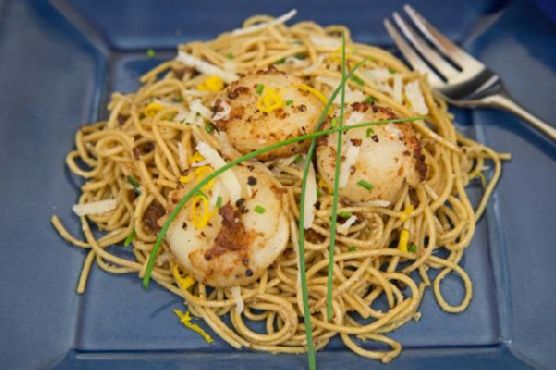
Title: Savor the Sea: Quick and Easy Scallop Pasta Recipe
Description: Dive into the delicious simplicity of our Quick and Easy Scallop Pasta, where succulent scallops meet the aromatic allure of garlic and white wine, all wrapped up in the comforting embrace of Japanese ramen noodles. Perfect for a weeknight dinner or an elegant weekend meal, this dish is a seafood lover's dream. With a difficulty rating of just 4 out of 10, even novice cooks can bring this Main Dish to life in their own kitchens. Join us on this culinary adventure and discover a recipe that’s not just about food, but also family, nostalgia, and the joy of shared meals.

---


A Taste of the Past: Family Memories with Scallop Pasta

Growing up, Sundays were always special in our household. They were the days when the entire family gathered around the dining table, sharing laughter and stories, and of course, savoring a delicious meal. My grandmother, an extraordinary cook, would often prepare a seafood feast, and scallop pasta was always a crowd favorite. As a child, I remember the anticipation that built as the rich aroma of garlic and butter wafted through the house, signaling that dinner was almost ready.


I learned the art of cooking scallops from watching her. She would expertly pat them dry, sprinkle a touch of salt and pepper, and sear them to perfection, creating a delectable golden crust. Her secret was the splash of sauvignon blanc that deglazed the pan, infusing the dish with a depth of flavor that was nothing short of magical.


As we sat around the table, the clinking of forks and contented sighs filled the air. The pasta, twirled expertly around our forks, was coated in a luscious sauce that brought together the briny scallops, nutty parmesan, and the subtle bite of fresh chives. Each bite was a harmonious blend of flavors, a testament to my grandmother's culinary skills and her love for her family.


Creating Your Own Scallop Pasta Experience
Ingredients:

- Dry scallops


- Dry Japanese ramen noodles


- Garlic


- Sesame oil


- Sauvignon blanc white wine


- Unsalted butter


- Parmesan cheese


- Round chives


- Lemon zest


- Fresh sea salt


Instructions:

1. Begin by patting the room temperature scallops dry with a paper towel. Season both sides with fresh sea salt, pepper, and granulated garlic.


2. Boil the ramen noodles for four minutes, then drain, rinse, and shake them dry. Set aside until needed.


3. Heat sesame oil in a 12-inch non-stick sauté pan over medium-high heat. Once hot, add the scallops, cooking them for three minutes on one side until they develop a golden-brown crust. Carefully flip and cook for another three minutes. Remove the scallops and keep them warm in a low-temperature oven.


4. Reduce the pan heat to medium and add minced garlic, cooking for about 1 to 1½ minutes until fragrant.


5. Carefully pour in the sauvignon blanc white wine, deglazing the pan by stirring up the browned bits from the scallops. Add the butter, stirring until it melts and combines with the wine to create a rich pan sauce.


6. Return the pasta to the pan, along with chopped chives and grated parmesan cheese. Mix thoroughly to combine all the flavors.


Serving Suggestion:

Finish your dish with a sprinkle of lemon zest for a fresh, zesty kick. Serve immediately, garnished with additional chives and a light dusting of parmesan cheese for a touch of elegance.


---


Whether you're creating new memories with loved ones or enjoying a quiet dinner for one, this Quick and Easy Scallop Pasta will bring a touch of nostalgia and joy to your table. Bon appétit!

Read more about Appetizers

Read more about Main Dishes

Read more about Desserts

Curry-Braised Chicken | Made by Meaghan Moineau

Curry-Braised Chicken | Made by Meaghan Moineau

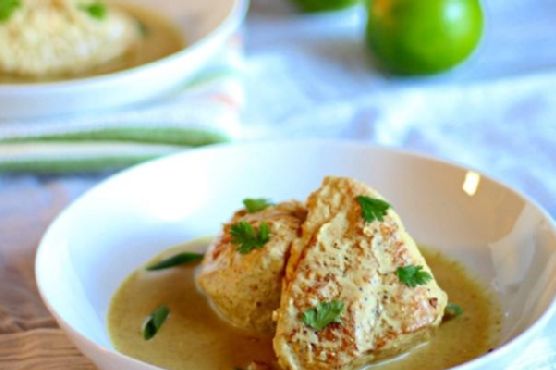
Title: Curry-Braised Chicken: A Comforting Culinary Journey
Description: Dive into the fragrant world of Curry-Braised Chicken, a dish that marries rich flavors with tender textures. Perfect for cozy family dinners or special gatherings, this curry-infused delight will transport you to a warm kitchen filled with laughter and nostalgia. Discover the recipe, memories, and more as we explore this delectable main dish.

---


Curry-Braised Chicken: A Comforting Culinary Journey


There’s something comforting about a dish that fills the home with an aroma so inviting, it feels like a warm hug. Curry-Braised Chicken is one such dish, a symphony of flavors that dances across your palate and evokes memories of family gatherings and heartfelt conversations. Let's dive into this comforting recipe and relive the cherished memories it brings.


Ingredients


- Basmati Rice
- 2 tablespoons Brown Sugar
- 2 tablespoons Fish Sauce
- 2 tablespoons Fresh Lime Juice
- 1 Bell Pepper, sliced
- Salt, to taste
- 4 Skinless Boneless Chicken Breasts, halved
- 1 can (13.5 oz) Unsweetened Coconut Milk
- 2 tablespoons Vegetable Oil
- 3 tablespoons Yellow, Red, or Green Curry Paste

Instructions


1. Preheat the Oven: Start by preheating your oven to 325 degrees Fahrenheit.
2. Prepare the Chicken: Slice the chicken breasts in half for even cooking. Dust them with salt and pepper.
3. Brown the Chicken: Heat the vegetable oil over medium-high heat in a Dutch oven. Brown the chicken for 1-2 minutes on each side in batches. Set aside once done.
4. Create the Curry Base: Add the curry paste to the same Dutch oven. Use a wooden spoon to break up any large pieces and incorporate the paste into the hot oil.
5. Add Coconut Milk: Pour in the coconut milk, using the wooden spoon to release any browned bits of chicken from the bottom of the pot.
6. Flavor it Up: Stir in the fish sauce and brown sugar, ensuring everything is well combined.
7. Bake: Cover the Dutch oven and place it in the oven. Bake for 45-55 minutes, or until the chicken is fully cooked and no longer pink.
8. Final Touch: Just before serving, stir in the fresh lime juice to lend a zesty finish.
9. Serve: Plate the Curry-Braised Chicken with cooked basmati rice and bell pepper slices for a complete meal.

A Nostalgic Memory


Every time I prepare this dish, I am whisked back to a lively kitchen bustling with family members during the holiday season. My grandmother, with her warm smile and gentle guidance, would orchestrate our culinary endeavors. As the curry simmered, stories of our heritage were shared, bridging generations. This dish, with its rich aroma and tantalizing flavors, became a symbol of unity and warmth — a reminder that food is not just sustenance, but a vessel for love, laughter, and legacy.


Difficulty: 4/10


While the steps are straightforward, the key lies in patience and allowing the flavors to meld together harmoniously in the oven. This main dish is approachable for cooks of all levels, making it a perfect choice for a comforting family meal.


---


Curry-Braised Chicken is more than just a recipe; it's a journey through flavors and family history. Whether you're new to the kitchen or an experienced cook, this dish promises a delightful experience that warms both the heart and soul. Enjoy this culinary adventure and create your own memories to treasure for years to come.

Read more about Appetizers

Read more about Main Dishes

Read more about Desserts

Tortellini In Brodo | Made by Meaghan Moineau

Tortellini In Brodo | Made by Meaghan Moineau

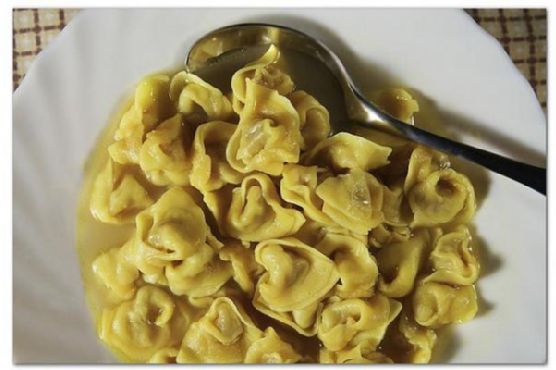
Title: A Taste of Tradition: Reliving Family Memories with Tortellini In Brodo
Description: Dive into the comforting world of Tortellini In Brodo, a classic Italian dish that combines simplicity with rich flavors. This heartwarming recipe not only serves as a perfect main dish but also unlocks cherished family memories. Join me as I share the recipe, a personal story, and tips to recreate this delightful meal at home.

---


Tortellini In Brodo: A Soupy Embrace of Tradition


There's something magical about the aroma of simmering chicken stock and the tender pockets of tortellini floating within. For me, Tortellini In Brodo is more than just a meal; it's a fragrant journey back to my grandmother's kitchen in the heart of winter. As the snowflakes danced outside, we gathered around the dining table, eagerly anticipating the soul-warming bowls that awaited us.


Ingredients You'll Need:

- Chicken stock

- Fresh lemon juice


- Lemon zest


- Parmigiano-Reggiano


- Salt and pepper


- Frozen tortellini


Instructions to Warm the Heart:

1. Begin by heating your chicken stock to a gentle boil. The rich aroma will soon fill your kitchen, much like it did in my grandmother's.

2. Add the frozen tortellini. As they cook, they absorb the savory essence of the broth, transforming into delightful morsels of comfort.


3. Once cooked, ladle the steaming soup into bowls. The warmth seems to wrap around you like a cozy blanket.


4. Squeeze fresh lemon juice into each bowl, stirring gently to incorporate the tangy brightness.


5. Grate a generous amount of Parmigiano-Reggiano on top, allowing the cheese to melt ever so slightly into the broth.


6. Finish with a sprinkle of lemon zest, freshly ground salt, and pepper for that perfect balance of flavors.


7. Serve immediately, and watch as smiles light up around the table.


A Nostalgic Family Memory:


Every spoonful of Tortellini In Brodo transports me back to those cherished winter evenings with my family. My grandmother, a beacon of warmth and love, would often share stories of her childhood in Italy as we savored each bite. Her stories were as rich as the broth itself, weaving tales of her youthful adventures and the traditional Italian recipes passed down through generations. This dish was more than sustenance; it was a connection to our heritage, a reminder of where we came from, and a testament to the love that binds us.


As I prepare this dish today, I find joy in the continuity of tradition, knowing that I am creating new memories while honoring the old. It's a simple recipe, yet its impact is profound, reminding us that the essence of family is captured in the meals we share.


Recipe Difficulty: 3/10


Classification: Main Dish


Whether you're a seasoned cook or a kitchen novice, Tortellini In Brodo is a delightful recipe that promises to bring warmth and joy to your home. Embrace the simplicity, savor the flavors, and as you do, may you create your own treasured memories with those you love.

Read more about Appetizers

Read more about Main Dishes

Read more about Desserts

Lemon square bars | Made by Meaghan Moineau

Lemon square bars | Made by Meaghan Moineau

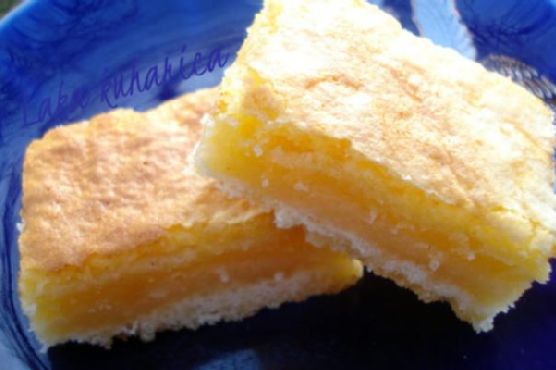
Title: Nostalgic Lemon Square Bars: A Zesty Slice of Family Memories
Description: Dive into the world of tangy decadence with our Lemon Square Bars recipe. This delightful dessert, rated a 4 out of 10 on the difficulty scale, blends the perfect balance of tart and sweet with a touch of nostalgia that will warm your heart and tantalize your taste buds. Whether you're a seasoned baker or a novice in the kitchen, these bars promise to deliver joy with every bite.

---


As the golden rays of summer began to wane and the crisp embrace of autumn gently took over, my family had a beloved tradition of gathering in the kitchen to bake Lemon Square Bars. The scent of freshly zested lemon rind and the warmth of the oven filled the air, transforming our home into a haven of shared stories and laughter.


Ingredients:

- 2 cups flour


- 1/2 cup confectioners' sugar


- 1 cup unsalted butter, melted


- 1 teaspoon vanilla essence


- 4 eggs


- 2 cups sugar


- 1 teaspoon baking powder


- 1/4 cup flour


- 2/3 cup lemon juice


- Lemon rind from 2 lemons


Instructions:
1. Prepare the Base:

In a medium bowl, stir together 2 cups of flour and 1/2 cup of confectioners' sugar. Blend in the melted butter and vanilla essence. With the palm of your hand, press the soft dough into the bottom of a greased 9x13 inch pan. Bake in a preheated oven at 170°C (338°F) for 15 minutes, or until golden brown.


2. Create the Filling:

While the crust bakes, beat the eggs in a large bowl until light and frothy. In a separate bowl, combine 2 cups of sugar, baking powder, and 1/4 cup of flour to ensure there are no lumps. Gradually stir the sugar mixture into the eggs. Add the lemon juice and freshly grated lemon rind, mixing until well combined.


3. Bake to Perfection:

Pour the lemon mixture over the prepared crust and return to the oven. Bake for an additional 30 minutes or until the bars are set. Allow to cool completely before cutting into squares.


A Slice of Nostalgia:

Every year, as the first leaves began to fall, my grandmother would pull out her treasured, slightly worn recipe card. It was a ritual that marked the transition of seasons—a time when family gathered around the kitchen table, each member assigned a task, from zesting lemons to stirring the batter.


I vividly remember my grandmother's stories, shared as we worked side by side. She spoke of her childhood summers spent in her grandmother's garden, where lemon trees stood tall, their branches heavy with fruit. Those stories, full of warmth and love, were as much an ingredient in our Lemon Square Bars as the lemons themselves.


These bars were more than just a dessert; they were a bridge between generations, a connection to our past, and a sweet promise of future gatherings. Each bite brought with it a flood of cherished memories, a reminder of the enduring power of family traditions.


Conclusion:

These Lemon Square Bars, with their tangy sweetness and buttery crust, are a testament to the joy of baking with loved ones. As you savor each bite, may you find your own slice of nostalgia, a moment of connection, and a delightful escape into the warmth of family memories. Whether you enjoy them as a dessert for a special occasion or a simple treat on a Sunday afternoon, these bars are sure to become a beloved staple in your culinary repertoire.

Read more about Appetizers

Read more about Main Dishes

Read more about Desserts

Nachos Grande | Made by Meaghan Moineau

Nachos Grande | Made by Meaghan Moineau

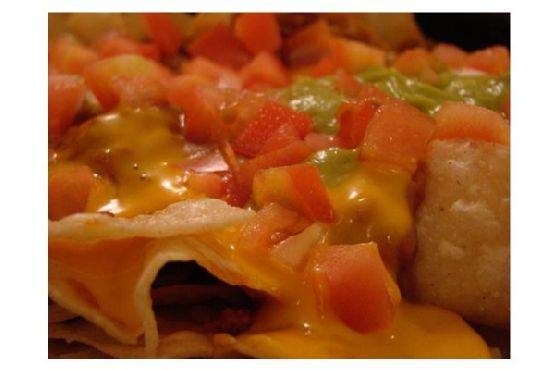
Title: Nachos Grande: A Flavorful Journey to Family Gatherings


Description:

Explore the vibrant, tantalizing flavors of Nachos Grande—a dish that not only brings a delightful burst of taste to your table but also serves as a nostalgic trip down memory lane. Perfect for gatherings, this crowd-pleaser is a sure way to impress your guests with its rich, spicy notes and mouth-watering cheese melt. Discover a beloved family recipe that's both heartwarming and satisfying.

---


Recipe: Nachos Grande


Ingredients:

- 1 can of tomatoes

- 1 cup of cheddar cheese, shredded


- 1 tablespoon chili powder


- 2 tablespoons corn oil


- 2 garlic cloves, minced


- 1 green bell pepper, chopped


- 1 green fresh chili, diced


- 1 teaspoon ground cumin


- 1 onion, chopped


- 1 teaspoon paprika, plus extra for garnish


- 1 can of refried beans


- 1 bag of tortilla chips


- 1/2 cup of water


Instructions:

1. Sauté the Veggies: Heat corn oil in a skillet over medium heat. Add chopped onion, green bell pepper, and minced garlic. Sauté gently, stirring occasionally for about 5 minutes, until the vegetables are softened but not browned.
2. Cook the Sauce: Add canned tomatoes and fresh green chili to the skillet. Continue to cook over medium heat for another 5 minutes, allowing most of the liquid to evaporate.
3. Spice it Up: Stir in chili powder and paprika, cooking for an additional 3 minutes to let the spices bloom.
4. Prepare the Beans: Add the refried beans, breaking them up with a fork. Pour in the water and cook, stirring occasionally, for 8-10 minutes until the mixture thickens.
5. Assemble and Bake: Spoon the bean mixture into the center of a baking dish. Arrange tortilla chips around the edge and sprinkle with ground cumin. Generously distribute the shredded cheddar cheese over the beans and chips.
6. Final Touch: Bake at 400°F (200°C) for 15-20 minutes, or until the cheese is irresistibly melted. Garnish with a lattice pattern of paprika for a splash of color and serve immediately.

---


A Nostalgic Family Memory:


Nachos Grande has always been more than just a dish in our family; it’s a cherished tradition. Every summer during our annual family reunion, the kitchen would come alive with the vibrant aroma of spices and sizzling vegetables. My grandmother, the heart of our family, would orchestrate this culinary symphony, inviting us to join her in the kitchen.


We would gather around the table in anticipation, as the tantalizing scent of melting cheddar wafted through the air. The Nachos Grande would emerge from the oven, cheese bubbling and edges crisp, a masterpiece of flavors waiting to be devoured. As we dug in, laughter and stories filled the room, and each bite seemed to carry a piece of our shared history. To this day, the taste of Nachos Grande brings me back to those joyful gatherings, a delicious reminder of the love and connection that binds us.


---


Difficulty Rating: 4/10

Classification: Appetizer


Creating Nachos Grande is both a simple and rewarding experience, making it an excellent choice for those looking to whip up a quick yet impressive appetizer. Its vibrant flavors and ease of preparation make it a staple for any get-together, ensuring your guests enjoy a meal that's as memorable as it is delicious.

Read more about Appetizers

Read more about Main Dishes

Read more about Desserts

Tropical Breakfast Quinoa | Made by Meaghan Moineau

Tropical Breakfast Quinoa | Made by Meaghan Moineau

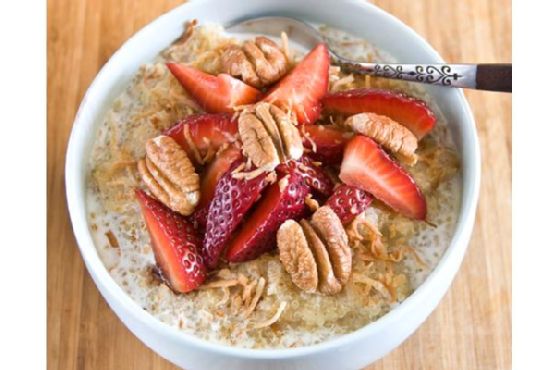
Title: A Taste of Paradise: Tropical Breakfast Quinoa
Description: Dive into a bowl of sunshine with our Tropical Breakfast Quinoa, a delightful blend of creamy coconut, sweet pineapple, and warm cinnamon. This breakfast bowl is not only a nutritious start to your day but also a heartwarming journey back to cherished family memories. Easy to prepare and bursting with flavor, this dish is sure to become a staple in your morning routine.

---


When I was a child, Saturday mornings were the highlight of my week. My family would gather in the kitchen, the heart of our home, for a breakfast that was as much about togetherness as it was about the food. My mother, a lover of all things tropical, would often whip up a version of this Tropical Breakfast Quinoa. The aroma of coconut milk warming on the stove would fill the air, mingling with the sweet scent of pineapple and cinnamon. It was a smell that promised comfort and joy.


I remember standing on a stool, my tiny hands eagerly helping to stir the pot, watching as the ingredients melded together into a creamy, fragrant mixture. My mother would tell stories of her childhood trips to the beach, where fresh fruit was always in abundance. She’d talk about how the taste of pineapple and coconut reminded her of those sunny days, and how she wanted to bring a piece of that paradise to our table.


As the quinoa cooked, we’d prepare the toppings – toasting coconut flakes until golden, chopping pecans, and slicing strawberries. The pièce de résistance was always a subtle drizzle of balsamic vinegar, a surprising twist that added a depth of flavor to the dish. Each family member had a role, and the kitchen buzzed with laughter and chatter, turning a simple breakfast into a tapestry of shared moments.


This Tropical Breakfast Quinoa is more than just a meal; it’s a reminder of those carefree mornings, filled with love and laughter. It’s a recipe that carries the warmth of family tradition, while also infusing your mornings with the vibrant flavors of the tropics.


Instructions:

1. In a medium-sized pot, combine the cooked quinoa, light coconut milk, crushed pineapple, cinnamon, and maple syrup. Stir to blend all ingredients well.


2. Bring the mixture to a gentle boil, then reduce the heat and let it simmer. Cook for 5 minutes, stirring occasionally to ensure nothing sticks to the bottom.


3. Once cooked, spoon the quinoa mixture into bowls.


4. Top each serving with a handful of toasted coconut, chopped pecans, and sliced strawberries.


5. Finish with a light drizzle of balsamic vinegar for an unexpected yet delightful contrast.


Difficulty: 3/10
Classification: Main Dish

This recipe is a testament to the idea that the simplest of dishes can carry the most profound memories. So, gather your loved ones, and share a moment of paradise with this Tropical Breakfast Quinoa. Whether you're creating new traditions or reliving old ones, may this dish bring warmth and joy to your table.

Read more about Appetizers

Read more about Main Dishes

Read more about Desserts

Kahlua Tiramisu | Made by Meaghan Moineau

Kahlua Tiramisu | Made by Meaghan Moineau

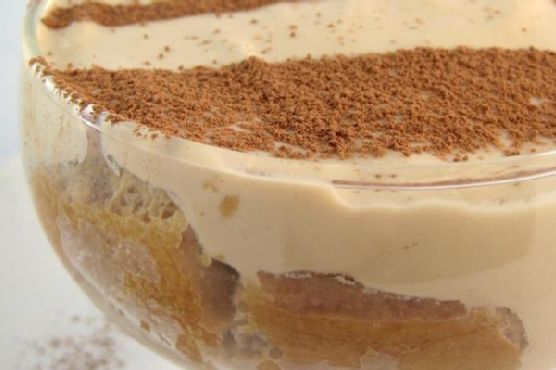
A Taste of Nostalgia: Kahlua Tiramisu


Indulge in the Rich Flavors of a Classic Dessert with a Twist


Kahlua Tiramisu is more than just a dessert; it's a journey through time, a blend of rich, creamy flavors that evokes cherished family memories. This delightful Italian classic, infused with a hint of Kahlúa, is perfect for any occasion. Whether you're hosting a dinner party or simply craving a sweet treat, this dessert is sure to impress.


Ingredients


- Mascarpone cheese


- Vanilla extract


- Kahlúa


- Espresso


- Whipping cream


- Icing sugar


- Ladyfingers (adjust quantity to fit your dish)


- Cocoa powder


Instructions


1. In a medium mixing bowl, combine the mascarpone, vanilla extract, Kahlúa, and slightly less than half of the espresso. Blend until smoothly mixed.


2. In another bowl, beat the whipping cream with the icing sugar until smooth. Gently fold in the mascarpone mixture.


3. Pour the remaining espresso into a large, deep plate. Quickly dip the ladyfingers, flipping sides, one by one, and arrange enough to form a single layer in an 11x7 casserole dish.


4. Evenly spread half of the mascarpone mixture over the ladyfingers.


5. Repeat with another layer of dipped ladyfingers and the remaining mascarpone mixture.


6. Refrigerate for a few hours or overnight to set.


7. Before serving, fill a small sieve with cocoa powder and lightly dust the top. For an extra touch of elegance, grate some bittersweet chocolate or create chocolate curls and scatter them over the top.


A Nostalgic Family Memory


The first time I tasted Kahlua Tiramisu, I was transported back to my grandmother's cozy kitchen, surrounded by the warmth of family gatherings. She had a knack for turning simple ingredients into culinary masterpieces, and her tiramisu was the star of many festive tables. The aroma of freshly brewed espresso mingling with the sweet, creamy layers always signaled a special occasion.


Every Thanksgiving, as we gathered around the table, my grandmother would bring out her treasured tiramisu, her eyes twinkling with pride. It was more than just dessert; it was a symbol of love and tradition, a recipe passed down through generations. Each bite was a reminder of the laughter and stories shared, the bonds strengthened over time. Even now, as I prepare this dish for my own family, I feel her presence, guiding me with every step.


Difficulty Rating: 4/10


Kahlua Tiramisu is surprisingly easy to make, yet it delivers a sophisticated and indulgent flavor profile. With a little patience and preparation, you'll have a dessert that's both impressive and deeply satisfying.


Classification: Dessert


Perfect as a decadent finale to any meal, this Kahlua Tiramisu is a timeless dessert that blends tradition with a modern twist. Enjoy a slice of nostalgia and create new memories with your loved ones around the table.

Read more about Appetizers

Read more about Main Dishes

Read more about Desserts

Ferrero Raffaello Coconut Candy Balls | Made by Meaghan Moineau

Ferrero Raffaello Coconut Candy Balls | Made by Meaghan Moineau

Title: "Sweet Nostalgia: Crafting Ferrero Raffaello Coconut Candy Balls"
Description: Dive into the world of sweet indulgence with our Ferrero Raffaello Coconut Candy Balls. This delightful dessert is a harmony of graham cracker crumbs and hazelnuts, enveloped in a blanket of coconut flakes. Perfect for family gatherings or a solo treat, these candy balls evoke cherished memories while tantalizing your taste buds. Join us as we share a heartfelt family story and guide you through this easy, yet rewarding recipe.

---


A Taste of Home: Ferrero Raffaello Coconut Candy Balls

There's a certain magic that food holds – the ability to transport us back in time, to rekindle memories we hold dear. For me, the creation of Ferrero Raffaello Coconut Candy Balls is a journey back to my grandmother's kitchen, a place where love was the secret ingredient in every recipe.


The Ingredients of Memory
To recreate this nostalgic treat, you'll need:

- 1 cup graham cracker crumbs


- 1 cup unsweetened shredded coconut flakes


- 1/2 cup finely chopped hazelnuts


- 1/2 cup powdered sugar


- 1/4 cup milk


- 1/4 cup melted butter


- Extra shredded coconut flakes for rolling


The simplicity of these ingredients belies the depth of flavor they produce. It's a reminder that sometimes, the most unassuming elements can create the most extraordinary experiences.


Crafting the Delight

In my grandmother's kitchen, the process of making these coconut candy balls was a family affair. We would gather around the large wooden table, the heart of the home, ready to create something special.


1. Combine the Basics: In a large mixing bowl, thoroughly blend the graham cracker crumbs, coconut flakes, chopped hazelnuts, and powdered sugar. The aroma of the hazelnuts would fill the room, creating a warm and inviting atmosphere.
2. Add Liquid Gold: Stir in the milk and melted butter, mixing until everything is well combined. This step always felt like a little piece of alchemy, transforming dry ingredients into a cohesive, tempting dough.
3. Chill and Shape: Cover the bowl and let it chill for an hour. This waiting period was always filled with anticipation, as my siblings and I would sneak peeks into the refrigerator, eager for the next step.
4. Roll and Coat: Once chilled, shape small bits of dough into balls and roll them in the extra coconut flakes. The tactile process of forming each ball was a therapeutic ritual, one that brought laughter and bonding.
5. Refrigerate and Savor: Place the candy balls in the refrigerator for at least two hours before serving. This final step was a test of patience, but it was always worth the wait. The cool, creamy texture paired with the crunch of hazelnuts and the sweetness of coconut was a reward like no other.
A Sweet Conclusion

Rated as a 3 out of 10 in difficulty, this dessert is perfect for beginners and seasoned cooks alike. It's more than just a treat; it's a gateway to cherished memories and an opportunity to create new ones. Whether you're presenting them as a dessert at a family gathering or indulging solo, these Ferrero Raffaello Coconut Candy Balls are a testament to the joys of simple pleasures and shared moments.


So, gather your loved ones, and let the tradition of creating and savoring these delightful coconut candy balls begin anew in your home. I promise, they'll bring as much joy to your heart as they do to your taste buds.

Read more about Appetizers

Read more about Main Dishes

Read more about Desserts