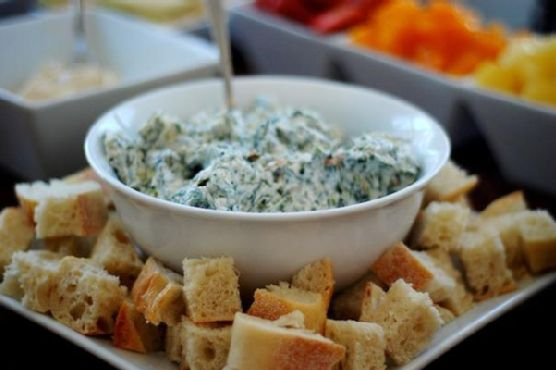
Thai Savory Brown Fried Rice | Made by Meaghan Moineau

Thai Savory Brown Fried Rice

Intro

There’s something incredibly comforting about the aroma of fried rice sizzling on the stove, filling the kitchen with its enticing fragrance. This Thai Savory Brown Fried Rice recipe takes me back to my childhood summers spent in my grandmother’s bustling kitchen. She would whip up the most delicious meals seemingly without effort, and her fried rice was always the highlight of our family gatherings. Today, I am thrilled to share my version of this beloved dish, which brings together the warmth of those cherished memories and the vibrant flavors of Thailand in one delightful bowl.

Why You’ll Love It

This Thai Savory Brown Fried Rice is a deliciously wholesome and satisfying dish that you’ll fall in love with for several reasons:

  • Flavorful: The combination of garlic, red chili peppers, and fresh lime juice creates a symphony of tastes that dance on your palate.
  • Nutritious: Packed with wholesome ingredients like brown rice, fresh vegetables, and cashews, this dish is as nourishing as it is tasty.
  • Quick and Easy: Once the rice is ready, the rest of the meal comes together in a flash, making it perfect for busy weeknights.
  • Customizable: Easily adapt this recipe to suit your dietary preferences or whatever ingredients you have on hand.

Ingredients

  • 2 tablespoons extra virgin olive oil, divided
  • 3 cloves garlic, minced
  • 2 red fresh chili peppers, sliced
  • 1/2 cup raw cashew nuts
  • 1/4 cup dry unsweetened shredded coconut, toasted
  • 1 teaspoon stevia powder
  • 2 tablespoons Bragg Liquid Aminos
  • 1 tablespoon apple cider vinegar
  • 1 flax egg (1 tablespoon ground flaxseed mixed with 3 tablespoons water)
  • 1 cup fresh green beans, trimmed and cut into 1-inch pieces
  • 2 cups shredded regular bok choy
  • 3 cups cooked brown rice
  • Lime wedges, for serving

Instructions

  1. Prepare the Perfect Brown Rice: In a medium saucepan, heat 1 teaspoon of olive oil over medium heat. Add 1 cup of uncooked brown rice and stir until lightly browned. Place 2 basil leaves on top of the rice and add 2 cups of filtered water all at once. Cover with a lid and bring to a boil. Reduce heat to a simmer and cook until all the water has evaporated, about 40 minutes. Remove from heat and let it sit covered for 5 minutes, then fluff with a fork.
  2. While the rice is cooking, heat the remaining olive oil in a wok or large frying pan over medium heat. Add the minced garlic and cook until lightly golden, being careful not to burn it.
  3. Add the sliced red chili peppers, cashew nuts, and toasted coconut to the pan, stirring to combine.
  4. In a small bowl, mix together the stevia powder, Bragg Liquid Aminos, and apple cider vinegar. Pour this mixture into the pan and cook for 1 minute over medium heat.
  5. Push the stir-fry to one side of the pan and add the flax egg on the opposite end. Cook and stir the flax egg for about a minute, then incorporate it into the stir-fry mixture.
  6. Add the green beans, bok choy, and cooked brown rice to the stir-fry. Cook and stir on medium for another minute, until the bok choy is wilted but the green beans remain slightly crunchy.
  7. Spoon the fried rice into a serving dish and serve with lime wedges on the side for squeezing over the rice before eating.

Tips

  • Toast the Coconut: Toasting the coconut enhances its flavor and adds a delightful crunch to the dish. Simply spread it in a dry pan and heat over medium heat, stirring frequently until golden brown.
  • Prep Ahead: Cook the brown rice ahead of time and store it in the refrigerator. Cold rice works best for fried rice recipes as it doesn’t clump together.
  • Adjust Spice Level: If you prefer a milder dish, reduce the amount of chili peppers or remove the seeds before slicing.

Variations & Substitutions

This recipe is incredibly versatile, and you can easily adapt it to suit your taste or dietary needs:

  • Protein Options: Add tofu, shrimp, or chicken for additional protein.
  • Vegetable Swaps: Substitute or add other vegetables such as bell peppers, carrots, or snap peas.
  • Soy Sauce Alternative: If you don’t have Bragg Liquid Aminos, tamari or soy sauce will work just as well.

Storage

Leftover Thai Savory Brown Fried Rice can be stored in an airtight container in the refrigerator for up to 3 days. Reheat gently in a pan over medium heat, adding a splash of water or broth to help rehydrate the rice. Avoid microwaving as it can make the rice rubbery.

FAQ

Can I use white rice instead of brown rice?

Yes, you can substitute white rice for brown rice in this recipe. Keep in mind that white rice cooks faster, so adjust the cooking time accordingly.

Is there a substitute for flax egg?

If you’re not vegan, you can use a regular egg instead of a flax egg. Simply scramble it in the pan before adding it to the stir-fry.

Can I make this dish ahead of time?

Yes, you can prepare the rice and chop the vegetables ahead of time to streamline the cooking process. However, for the best texture and flavor, it’s recommended to stir-fry the ingredients just before serving.

Nutrition

This Thai Savory Brown Fried Rice is a wholesome and balanced meal. It’s rich in fiber from the brown rice and vegetables, healthy fats from the olive oil and cashews, and offers a moderate amount of protein. However, nutritional values can vary based on serving size and any variations you make to the recipe.

Conclusion

Thai Savory Brown Fried Rice is more than just a meal; it’s a culinary journey that brings together vibrant flavors and cherished memories. Whether you’re cooking for family, friends, or just treating yourself, this dish is sure to impress with its delightful taste and nourishing ingredients. I hope this recipe becomes a beloved staple in your home, just as it has in mine. Enjoy!

Related update: Thai Savory Brown Fried Rice

Related update: Madras Beef Curry

Italian Tomato and Mozzarella Caprese | Made by Meaghan Moineau

Italian Tomato and Mozzarella Caprese

Intro

There’s something truly magical about the simplicity of Italian cuisine. The first time I tasted a Caprese salad was during a family trip to the Amalfi Coast. We were dining al fresco at a quaint little restaurant with views of the sparkling Mediterranean Sea. The sun was setting, casting a golden hue over everything, and the air was rich with the scent of fresh basil and ripe tomatoes. Every bite of that Caprese was an explosion of freshness and flavor, and I’ve been in love with this dish ever since.

Why You’ll Love It

The Italian Tomato and Mozzarella Caprese is a celebration of fresh, high-quality ingredients. It’s a dish that requires minimal preparation but delivers maximum flavor. This easy-to-make salad is perfect for any occasion, whether you’re hosting a summer barbecue, looking for a quick appetizer, or simply craving a taste of Italy. The combination of juicy vine-ripened tomatoes, creamy mozzarella, and fragrant basil, all drizzled with balsamic vinegar and olive oil, is nothing short of divine.

Ingredients

  • Fluid balsamic vinegar
  • Black pepper
  • Fresh basil leaves
  • Kosher salt
  • Olive oil
  • Dry sprinkle of oregano leaves
  • Fresh whole-milk mozzarella
  • Vine-ripened tomatoes

Instructions

  1. On a large platter, arrange sliced tomatoes and drizzle with balsamic vinegar.
  2. Place one basil leaf on top of each tomato slice.
  3. Slice mozzarella and place on top of basil leaves.
  4. Sprinkle oregano, salt, and black pepper on cheese and drizzle with the olive oil.

This recipe yields 4 servings.

Tips

To make the most of your Caprese salad, ensure that your ingredients are as fresh as possible. Look for bright red, firm tomatoes and fresh mozzarella that is soft and slightly springy to the touch. Use high-quality olive oil and balsamic vinegar to enhance the flavors. Remember, the key to a perfect Caprese is balance, so adjust the seasoning to your taste.

Variations & Substitutions

While the classic Caprese is delightful on its own, there are several ways you can mix things up:

  • Avocado: Add slices of ripe avocado for a creamy twist.
  • Pesto: Drizzle a little pesto over the top for an extra burst of basil flavor.
  • Prosciutto: For a heartier salad, add thin slices of prosciutto.
  • Buffalo Mozzarella: Substitute traditional mozzarella with buffalo mozzarella for a richer taste.

Storage

Caprese salad is best enjoyed fresh. However, if you have leftovers, store them in an airtight container in the refrigerator for up to 24 hours. Note that the tomatoes may release some juice, which can affect the texture of the salad. It’s a dish that shines in its freshness, so try to prepare only as much as you plan to eat.

FAQ

Can I make Caprese salad ahead of time?

While it’s best to assemble the salad just before serving, you can prepare the individual components a few hours ahead. Slice the tomatoes and mozzarella and store them separately in the refrigerator. Assemble the salad when you’re ready to serve.

What can I serve with Caprese salad?

Caprese salad is wonderfully versatile and can be served alongside grilled meats, pasta dishes, or crusty bread. It’s also a great addition to a charcuterie board.

Is Caprese salad healthy?

Yes, Caprese salad is a healthy choice. It’s packed with nutrients from the tomatoes and basil, and the mozzarella provides protein and calcium. Just be mindful of the olive oil and cheese if you’re watching your calorie intake.

Nutrition

Each serving of Caprese salad contains approximately:

  • Calories: 250
  • Protein: 12g
  • Fat: 20g
  • Carbohydrates: 8g
  • Fiber: 2g
  • Sugar: 6g

Conclusion

The Italian Tomato and Mozzarella Caprese is more than just a salad; it’s a tribute to the beauty of simple, fresh ingredients. Whether you’re reminiscing about a past Italian getaway or just looking to bring a taste of Italy to your table, this Caprese salad is sure to delight your taste buds. Enjoy each layer, each flavor, and let it transport you to a sun-drenched terrace overlooking the Mediterranean. Buon appetito!

Related update: Italian Tomato and Mozzarella Caprese

Related update: Arame Edamame Cucumber Salad

Related update: Agedashi Tofu

Fresh Peach With Goat Cheese Side Salad | Made by Meaghan Moineau

Fresh Peach With Goat Cheese Side Salad

Intro

There’s something uniquely magical about the late summer months when peaches are at their peak. I remember as a child, eagerly visiting the local farmer’s market with my grandmother, who knew every vendor by name. The sweet fragrance of ripe peaches would envelop us as we wandered past the stands, sampling slices offered with a smile. Those warm afternoons spent in her sun-dappled kitchen inspired this Fresh Peach With Goat Cheese Side Salad recipe, which captures the essence of those cherished moments. This salad is a celebration of simplicity, where fresh ingredients shine in perfect harmony.

Why You’ll Love It

This Fresh Peach With Goat Cheese Side Salad is a delightful blend of sweet, tangy, and savory flavors that will captivate your taste buds. It’s a breeze to prepare, making it an ideal choice for busy weeknights or as a refreshing addition to your weekend brunch spread. The combination of juicy peaches, creamy goat cheese, and fragrant basil leaves drizzled with honey is both elegant and comforting. Whether you’re a seasoned chef or a kitchen newbie, this recipe is sure to impress with its vibrant colors and irresistible flavors.

Ingredients

  • 2 ripe peaches, sliced
  • 2 tablespoons honey
  • A pinch of salt
  • 1/4 cup fresh basil leaves, torn
  • 1/3 cup crumbled goat cheese

Instructions

  1. Place the sliced peaches in a medium-sized bowl.
  2. Drizzle the honey over the peaches and gently toss to coat them evenly.
  3. Sprinkle a pinch of salt over the honey-coated peaches.
  4. Gently fold in the torn basil leaves and crumbled goat cheese, mixing until well combined.
  5. Transfer the salad to a serving dish and enjoy immediately or chill for a few minutes to allow the flavors to meld.

Tips

For the best results, choose peaches that are ripe but still firm enough to hold their shape when sliced. If your peaches are very juicy, you might want to reduce the amount of honey to prevent the salad from becoming too sweet. Fresh basil adds a wonderful aroma, but you can also experiment with mint leaves for a refreshing twist. Remember, the quality of the ingredients is key—opt for a high-quality goat cheese to enhance the salad’s creamy texture.

Variations & Substitutions

This salad is wonderfully versatile, allowing you to tailor it to your taste preferences or dietary needs. If you’re not a fan of goat cheese, feta cheese makes an excellent substitute with its crumbly texture and tangy flavor. You can also swap out honey for agave syrup for a vegan-friendly option. For a heartier version, consider adding a handful of arugula or mixed greens to transform this side dish into a light main course. Feel free to add a sprinkle of toasted nuts, such as almonds or walnuts, for an added crunch.

Storage

While this salad is best enjoyed fresh, you can prepare it a few hours in advance if needed. Store it in an airtight container in the refrigerator for up to 24 hours. If you’re planning to make it ahead, consider adding the goat cheese just before serving to maintain its creamy texture. Be mindful that the peaches will release their juices over time, which may affect the salad’s consistency.

FAQ

Can I use canned peaches for this salad?

While fresh peaches are recommended for their flavor and texture, you can use canned peaches in a pinch. Be sure to drain them thoroughly and adjust the honey accordingly, as canned peaches are often packed in syrup.

Can I prepare this salad in advance for a party?

Yes, you can prepare the ingredients a few hours in advance and store them separately. Simply combine the peaches, honey, basil, and goat cheese just before serving to ensure the salad remains fresh and vibrant.

What can I serve with this salad?

This Fresh Peach With Goat Cheese Side Salad pairs beautifully with grilled chicken or fish, providing a delightful contrast of flavors. It’s also an excellent complement to a charcuterie board or as a refreshing side dish for a summer barbecue.

Nutrition

This salad is a nutritious option, featuring the natural sweetness of peaches, the protein-rich creaminess of goat cheese, and the antioxidant properties of fresh basil. Each serving is approximately 250 calories, making it a light yet satisfying addition to any meal. The honey provides a natural energy boost, while the peaches offer vitamins A and C, contributing to a balanced diet.

Conclusion

This Fresh Peach With Goat Cheese Side Salad is a testament to the beauty of simplicity, allowing each ingredient to shine through with every bite. It’s a dish that evokes nostalgia, celebrates the bounty of the season, and brings people together around the table. Whether you’re serving it to family, friends, or simply enjoying it yourself, this salad is sure to become a beloved favorite in your culinary repertoire. So, gather your ingredients, savor the process, and indulge in this delightful taste of summer.

Related update: Fresh Peach With Goat Cheese Side Salad

Related update: Arame Edamame Cucumber Salad

Mashed Sweet Potatoes | Made by Meaghan Moineau

Mashed Sweet Potatoes

Intro

There’s something uniquely comforting about a warm dish of mashed sweet potatoes. This recipe takes me back to my grandmother’s kitchen, where the sweet aroma of spices filled the air during the holiday season. As a child, I would watch her expertly blend the ingredients with her wooden spoon, creating a side dish that was both simple and divine. Today, I’m excited to share this family favorite with you, adding a modern twist that enhances the classic flavors without losing its nostalgic essence.

Why You’ll Love It

This mashed sweet potato recipe is a delightful blend of sweet and spicy, creamy and smooth. It’s packed with flavor thanks to a unique blend of spices, including cinnamon, cardamom, and a hint of cayenne pepper that gives it just the right amount of kick. The addition of maple syrup and orange zest elevates the natural sweetness of the potatoes, making it a perfect side dish for any occasion. Whether you’re serving it at a festive gathering or a simple weeknight dinner, these mashed sweet potatoes are sure to become a staple in your recipe collection.

Ingredients

  • 4 large sweet potatoes, peeled and cubed
  • 2 tablespoons brown sugar
  • 3 tablespoons butter
  • 1/2 teaspoon ground cardamom
  • 1/4 teaspoon cayenne pepper
  • 1 teaspoon ground cinnamon
  • 1/4 cup cream
  • 1 teaspoon kosher salt
  • 2 tablespoons maple syrup
  • 1 tablespoon orange zest
  • 1 teaspoon vanilla extract

Instructions

  1. Place the peeled and cubed sweet potatoes in a large pot of boiling water. Cook until they are tender, about 20 minutes. Drain and return them to the pot.
  2. Mash the sweet potatoes until they are well broken up. If you prefer a smoother consistency, you can use an electric mixer.
  3. In a small bowl, mix together the cinnamon, cayenne pepper, cardamom, orange zest, and brown sugar. Set aside.
  4. Add the butter, cream, vanilla extract, and maple syrup to the mashed sweet potatoes. Mix well until fully combined.
  5. Incorporate the cinnamon sugar mixture into the sweet potatoes, stirring until smooth and well blended.
  6. Season with kosher salt to taste. Serve warm and enjoy!

Tips

For the best texture, make sure your sweet potatoes are cooked until they are very tender. This will make mashing much easier and result in a creamier consistency. When mashing, avoid overworking the potatoes as this can make them gummy. If you’re using an electric mixer, use it on a low setting.

Variations & Substitutions

If you’re looking to make this dish vegan, simply swap out the butter and cream for your favorite plant-based alternatives. Coconut cream and vegan butter work particularly well. For a different flavor profile, try adding a splash of bourbon or a handful of toasted pecans for extra crunch.

Storage

Store any leftover mashed sweet potatoes in an airtight container in the refrigerator for up to four days. Reheat them gently on the stovetop or in the microwave, adding a splash of cream or milk to restore their creamy consistency. These mashed sweet potatoes also freeze well for up to two months; just make sure to thaw them overnight in the refrigerator before reheating.

FAQ

Can I make mashed sweet potatoes ahead of time?

Yes, this dish can be prepared a day in advance. Simply follow the instructions and store the mashed sweet potatoes in the refrigerator. Reheat them on the stove or in the oven before serving, adding a little extra cream or milk to maintain their texture.

What can I serve with mashed sweet potatoes?

Mashed sweet potatoes are a versatile side dish that pairs well with a variety of main courses. They’re perfect alongside roasted turkey, glazed ham, or grilled chicken. For a vegetarian option, consider serving them with a hearty lentil stew or a fresh salad.

Nutrition

This recipe is not only delicious but also provides a good dose of vitamins and minerals. Sweet potatoes are rich in vitamin A, vitamin C, and potassium, making them a nutritious addition to your meal. Each serving of this dish contains approximately 200 calories, 8 grams of fat, and 30 grams of carbohydrates.

Conclusion

These mashed sweet potatoes are not just a side dish; they’re a tradition, a comfort food, and a crowd-pleaser. With their rich flavor and creamy texture, they are sure to become a beloved part of your culinary repertoire. Whether you’re preparing them for a special holiday meal or a cozy family dinner, they promise warmth and satisfaction in every bite. I hope you enjoy this recipe as much as my family has over the years!

Related update: Mashed Sweet Potatoes

Curry Leaves Potato Chips | Made by Meaghan Moineau

Curry Leaves Potato Chips

Intro

There’s something magical about the aroma of freshly fried snacks wafting through the house, a nostalgic scent that takes me back to my grandmother’s kitchen. I recall afternoons spent by her side, watching her deft hands transform humble ingredients into delightful treats. Among her many specialties, one stood out – her irresistible Curry Leaves Potato Chips. This recipe, a cherished family heirloom, combines the earthy goodness of potatoes with the aromatic punch of curry leaves, creating a snack that’s both comforting and exciting. Today, I’m excited to share this beloved recipe with you, hoping it brings the same warmth and joy to your home as it does to mine.

Why You’ll Love It

These Curry Leaves Potato Chips are a perfect blend of simplicity and flavor. They come together with minimal ingredients and effort, yet deliver a taste that’s anything but ordinary. The crispy, golden potatoes are seasoned to perfection with a hint of heat from the chili powder, while the fried curry leaves add an aromatic twist that elevates this snack to gourmet status. Whether you’re looking for a quick bite during movie night or a unique appetizer for a gathering, these chips are sure to impress both you and your guests.

Ingredients

  • Potatoes, peeled
  • Plain chili powder
  • Curry leaves
  • Salt
  • Oil for frying

Instructions

  1. Start by wiping or patting the peeled potatoes dry with a clean kitchen towel. This is crucial to ensure that the chips turn out crispy.
  2. Slice the potatoes thinly and evenly for consistent cooking. A mandoline slicer can be particularly useful here.
  3. In a large mixing bowl, toss the potato slices with a dash of chili powder and salt, making sure each slice is well-coated.
  4. Heat oil in a deep pan or fryer over medium heat. To check if the oil is ready, drop a small piece of potato into it; it should sizzle immediately.
  5. Fry the potato slices in batches, ensuring they are not overcrowded, which helps them cook evenly and become crunchy.
  6. Once the chips are golden and crispy, remove them with a slotted spoon and place them on a paper towel-lined plate to drain excess oil.
  7. In the same oil, carefully fry the curry leaves until they are crispy. This should only take a few seconds.
  8. Scoop out the fried curry leaves and generously sprinkle them over the potato chips.
  9. Gently crush the curry leaves over the chips and toss everything together to distribute the flavors evenly.

Tips

For the best results, ensure that the potato slices are as dry as possible before frying. This prevents the oil from splattering and helps achieve that coveted crunch. Adjust the amount of chili powder to suit your heat preference, and feel free to experiment with additional spices like garlic powder or paprika for a personalized touch.

Variations & Substitutions

If you’re looking to switch things up, consider using sweet potatoes instead of regular potatoes for a naturally sweeter chip that pairs beautifully with the savory curry leaves. Alternatively, you can substitute the curry leaves with rosemary or thyme for a different herbaceous note. For those avoiding fried foods, try baking the potato slices in the oven at 400°F (200°C) until crispy, though the texture will differ slightly from the fried version.

Storage

Store any leftover chips in an airtight container at room temperature. They should remain crispy for up to three days. If they begin to lose their crunch, a quick reheat in the oven at 350°F (175°C) can help restore their original texture.

FAQ

Can I use a different type of potato for this recipe?

Yes, you can. While russet potatoes are ideal for their starch content, which contributes to crispiness, you can experiment with other varieties like Yukon gold or red potatoes. Keep in mind that the texture and flavor may vary slightly.

How can I make this recipe healthier?

To make a healthier version, consider air-frying or baking the potato slices instead of deep-frying. You can also reduce the amount of salt and chili powder used, or substitute them with low-sodium and less spicy alternatives.

Nutrition

The nutritional value of these chips will depend on the amount of oil absorbed during frying, but generally, they are a source of carbohydrates from the potatoes, with added vitamins and minerals from the curry leaves. If you’re mindful of your oil intake, consider opting for a heart-healthy oil like olive or avocado oil.

Conclusion

Curry Leaves Potato Chips are more than just a snack; they’re a culinary journey that brings together flavors and memories from the past. As you savor each crispy bite, I hope you feel the same sense of nostalgia and joy that this recipe has brought to my family for generations. So, gather your loved ones, share the chips, and create new memories around this delightful and aromatic treat. Happy cooking!

Related update: Curry Leaves Potato Chips

Related update: Mashed Sweet Potatoes

Green Monster Ice Pops | Made by Meaghan Moineau

Green Monster Ice Pops: A Refreshing Summer Treat

Intro

There’s something magical about the first taste of an ice pop on a sweltering summer day. Growing up, my siblings and I would race to the ice cream truck, clutching our allowance tightly. Yet, there was a special kind of joy in making our own frozen treats at home. We’d gather in the kitchen, blending various fruits and juices, eager to see what delicious concoction we’d create. Today, I bring you a healthier twist on those childhood favorites with my Green Monster Ice Pops. Packed with nutritious ingredients, they’re as delightful as they are refreshing.

Why You’ll Love It

These Green Monster Ice Pops are not only a delicious way to cool down but also a sneaky way to pack in some greens. With the creaminess of avocado and the natural sweetness of mango and banana, these ice pops are a hit with both kids and adults alike. Whether you’re looking for a post-workout snack or a guilt-free dessert, these ice pops are sure to satisfy. Plus, they’re a fantastic way to use up any ripe fruit you have on hand!

Ingredients

  • Unsweetened almond milk
  • 1 ripe avocado, peeled and pitted
  • 1 cup baby spinach
  • 1 banana
  • 1 tablespoon honey
  • 1 cup fresh mango, diced

Instructions

  1. Place all ingredients into a blender and mix well until smooth and creamy.
  2. Taste the smoothie. If you find that it is not sweet enough, add 1 to 2 tablespoons of maple syrup or honey and blend again.
  3. Pour the smoothie mixture into the ice pop molds.
  4. Insert a wooden popsicle stick into each mold, leaving about a quarter of the stick above the mold.
  5. Place the molds into the freezer for 2-3 hours to let them freeze completely before serving.

Tips

For the creamiest texture, make sure your avocado is perfectly ripe. You can also soak your wooden sticks in water for about 10 minutes before inserting them into the molds to prevent them from floating up. If you’re in a hurry, refrigerate the smoothie mix for an hour before pouring it into the molds to reduce the freezing time.

Variations & Substitutions

Feel free to customize these ice pops to suit your taste! You can substitute the almond milk with coconut milk for a tropical twist. If avocados aren’t your thing, a half cup of Greek yogurt can provide similar creaminess. For an extra nutrient boost, toss in a tablespoon of chia seeds or flaxseeds.

Storage

Once frozen, you can remove the ice pops from the molds and store them in a resealable plastic bag or airtight container in the freezer. They’ll last for up to two weeks, though they’re so delicious they might not last that long!

FAQ

Can I use frozen spinach instead of fresh?

Yes, you can use frozen spinach. Just be sure to thaw and drain it thoroughly before blending to avoid excess water in your mixture.

What if I don’t have ice pop molds?

No worries! You can use small paper cups as an alternative. Simply cover them with foil and insert the popsicle stick through the foil. Once frozen, peel away the paper cup to enjoy your ice pop.

Nutrition

These ice pops are not only refreshing but also packed with nutrients. The avocado provides healthy fats, while spinach adds a dose of iron and fiber. Each pop contains approximately 120 calories, 5g of fat, 20g of carbohydrates, and 2g of protein, making them a balanced treat.

Conclusion

Green Monster Ice Pops are more than just a summer treat; they’re a delightful way to indulge in nostalgia while still honoring a healthy lifestyle. Whether you’re enjoying them by the poolside or serving them at a backyard barbecue, these pops are sure to be a hit. Gather your ingredients, blend away, and relish the vibrant flavors of summer with every bite!

Related update: Green Monster Ice Pops

Related update: Dump Cake

Farfalle with fresh tomatoes, basil and mozzarella | Made by Meaghan Moineau

Farfalle with Fresh Tomatoes, Basil, and Mozzarella

Intro

Farfalle with fresh tomatoes, basil, and mozzarella is a delightful dish that brings the vibrant flavors of summer to your table, no matter the season. I remember the first time I tasted this dish; it was during a family trip to the sun-drenched coast of Italy. We stumbled upon a quaint restaurant nestled in a village overlooking the azure waters. The aroma of fresh basil and juicy tomatoes wafted through the air as we sat down to eat. To this day, every bite takes me back to that sunlit afternoon, surrounded by laughter and the gentle sea breeze.

Why You’ll Love It

This dish is the epitome of simplicity and taste. Not only is it quick and easy to prepare, but it also bursts with freshness and flavor. The combination of al dente farfalle pasta with the creamy mozzarella and the aromatic basil creates a symphony of tastes that is both comforting and invigorating. It’s perfect for a weeknight dinner or an elegant lunch gathering. Plus, it’s vegetarian-friendly and can be easily adapted to suit various dietary needs.

Ingredients

  • Farfalle pasta (preferably Barilla)
  • Fresh basil leaves
  • Diced mozzarella
  • Olive oil
  • Salt and pepper
  • Tomatoes
  • Unsalted butter

Instructions

  1. Boil a large pot of salted water and cook the pasta according to the package directions.
  2. When the pasta is done, drain it, place it back in the cooking pan, and add the butter.
  3. In a large skillet, sauté the tomatoes with the olive oil for 5 minutes.
  4. Remove the skillet from the heat and add the basil.
  5. In a large bowl, combine the pasta and the sautéed tomatoes, mixing well.
  6. Add the mozzarella and give it a final light folding.
  7. Serve immediately and enjoy!

Tips

For the best results, use the freshest ingredients you can find. Fresh basil and ripe tomatoes will make a significant difference in the flavor of the dish. Also, remember to cook the pasta al dente for that perfect texture. If you love a bit of spice, consider adding a pinch of red pepper flakes to the olive oil when sautéing the tomatoes.

Variations & Substitutions

Feel free to experiment with this recipe by adding your favorite ingredients. You can substitute the farfalle with any pasta shape you have on hand, like penne or fusilli. For a heartier meal, consider adding grilled chicken or shrimp. If you’re looking to cut down on dairy, swap the mozzarella with a vegan cheese alternative. You can also add more vegetables, such as roasted red peppers or zucchini, to boost the nutritional value and add more color to the dish.

Storage

If you have leftovers, store them in an airtight container in the refrigerator for up to 3 days. To reheat, gently warm the pasta on the stove with a splash of olive oil or in the microwave. Note that the texture of mozzarella may change slightly after refrigeration, but the dish will still be delicious.

FAQ

Can I use other types of pasta for this recipe?

Absolutely! While farfalle is recommended for its delightful texture, you can use any pasta you prefer or have on hand. Penne, fusilli, or even spaghetti would work just as well.

Is it okay to use dried basil instead of fresh?

While fresh basil offers the best flavor and aroma, you can use dried basil in a pinch. Just remember that dried herbs are more concentrated, so use about a third of the amount compared to fresh.

Nutrition

This dish is not only tasty but also nutritious. It’s a good source of carbohydrates from the pasta, healthy fats from the olive oil, and protein from the mozzarella. Additionally, the tomatoes and basil provide vitamins and antioxidants. One serving of this dish (based on four servings total) contains approximately 400 calories, 20 grams of fat, 30 grams of carbohydrates, and 15 grams of protein. Please note that these values may vary based on specific ingredient brands and serving sizes.

Conclusion

Farfalle with fresh tomatoes, basil, and mozzarella is a timeless recipe that brings together simple ingredients to create an extraordinary meal. It’s a dish that’s easy enough for novice cooks yet sophisticated enough to impress your guests. Whether you’re reminiscing about a past vacation or simply wanting to enjoy a taste of Italy at home, this dish is sure to become a staple in your culinary repertoire. Enjoy the vibrant flavors and the delightful memories each bite brings.

Related update: Farfalle with fresh tomatoes, basil and mozzarella

Related update: Glazed pork chops

Mixed Berry Yogurt with Almonds | Made by Meaghan Moineau

Mixed Berry Yogurt with Almonds

Intro

There’s something undeniably comforting about a morning routine, and for me, it often involves a peaceful moment by the window, a favorite book in hand, and a bowl of my beloved Mixed Berry Yogurt with Almonds. This recipe takes me back to my childhood summers spent at my grandmother’s house, where the mornings were filled with the sweet aroma of berries picked fresh from her garden. Today, I’ve found a way to capture that nostalgia in a simple, yet satisfying, dish that is perfect for breakfast or a healthy snack.

Why You’ll Love It

This Mixed Berry Yogurt with Almonds is more than just a treat for the taste buds; it’s a symphony of textures and flavors that delight the senses. You’ll love the way the creamy yogurt pairs with the juicy berries, while the crunch of whole almonds and whole oats adds a satisfying bite. It’s a nutrient-rich meal, packed with antioxidants, protein, and healthy fats, to keep you fueled and satisfied.

Ingredients

  • 1 cup frozen mixed berries
  • 1/2 cup whole oats
  • 1 cup plain Greek yogurt
  • 1/4 cup whole almonds

Instructions

  1. Begin by toasting the whole almonds in a skillet over medium heat until they are golden brown and aromatic, about 5 minutes. Set aside to cool.
  2. In a large glass cup or bowl, start layering the ingredients. First, place a layer of Greek yogurt at the bottom.
  3. Add a layer of whole oats over the yogurt for that hearty texture.
  4. Scatter a portion of the frozen mixed berries over the oats. The berries will slightly thaw and release their juices, making the dish deliciously sweet and colorful.
  5. Repeat the layers until all ingredients are used, finishing with a generous layer of Greek yogurt on top.
  6. Top with the toasted almonds just before serving to maintain their crunch.

Tips

To enhance the flavor of this dish, consider adding a pinch of cinnamon or a drizzle of honey between the layers. For the best texture, use thick Greek yogurt, which will hold up nicely against the juicy berries. If you prefer a softer crunch, you can soak the oats in a bit of milk or yogurt overnight.

Variations & Substitutions

This breakfast lends itself to endless variations. If you’re in the mood for something more decadent, especially if serving this as a dessert, use a creamier vanilla yogurt. You can also drizzle a bit of maple syrup on top of the yogurt for added sweetness. Any kind of nut will do, and toasting them will bring out their maximum crunch and flavor. If you don’t have berries on hand, this works well with just about any fruit. Try sliced bananas, peaches, or even a tropical mix with mango and pineapple for a summery twist.

Storage

This dish is best enjoyed fresh, but you can prepare it in advance. Store the yogurt, oats, and berries layered in an airtight container in the refrigerator for up to 3 days. Add the toasted almonds just before serving to maintain their crunch and prevent them from becoming soggy.

FAQ

Can I use fresh berries instead of frozen?

Absolutely! Fresh berries are a wonderful substitute and can add a lovely burst of flavor and freshness to your dish. Just be sure to rinse them thoroughly before use.

What can I use instead of Greek yogurt?

If Greek yogurt isn’t your preference, you can use regular yogurt, dairy-free yogurt, or even cottage cheese for a different texture. Just keep in mind that the consistency and taste will vary slightly depending on your choice.

Nutrition

This dish is not only delicious but also packed with health benefits. The mixed berries provide a rich source of antioxidants, the Greek yogurt offers a high protein content, and the almonds and oats add healthy fats and fiber, making it a well-rounded meal to start your day.

Conclusion

Mixed Berry Yogurt with Almonds is a delightful way to savor the simple pleasures of a well-balanced meal. Whether you enjoy it as a quick breakfast, a refreshing snack, or a light dessert, it’s a versatile recipe you’ll return to time and again. As you dig into your bowl, I hope you’re reminded of your own cherished memories, just as I am of those sunlit mornings at my grandmother’s table. Enjoy every spoonful!

Related update: Mixed Berry Yogurt with Almonds

Easy Thanksgiving Entertaining | Made by Meaghan Moineau

Easy Thanksgiving Entertaining

Intro

Thanksgiving has always been a time for family, friends, and unforgettable meals. As a child, I remember the warmth of the kitchen, the smell of spices, and the sound of laughter that filled our home. My grandmother would always have a special treat ready for us kids—a homemade pumpkin spice ice cream that was both comforting and delicious. Now that I host Thanksgiving, I’ve adapted her recipe to make it even easier, so I can spend more time with my loved ones and less time in the kitchen. This Easy Thanksgiving Entertaining recipe brings together the flavors of the season with minimal fuss, making it the perfect addition to your holiday table.

Why You’ll Love It

This ice cream recipe is a delightful twist on traditional Thanksgiving desserts. Here are a few reasons why you’ll fall in love with it:

  • Simple Ingredients: With just a handful of ingredients, you can create a dessert that’s both luxurious and comforting.
  • Quick Preparation: Spend less time cooking and more time enjoying with family and friends.
  • Seasonal Flavors: The combination of pumpkin spice and creamy goodness captures the essence of fall.
  • Kid-Friendly: This treat is a hit with kids and adults alike, making it perfect for gatherings.

Ingredients

  • 2 cups heavy cream
  • 1 cup whole milk
  • 1/2 cup sugar
  • 1 teaspoon vanilla extract
  • Pinch of salt
  • 1 cup crushed pumpkin spice cookies

Instructions

  1. In a large mixing bowl, whisk together the heavy cream, whole milk, sugar, vanilla extract, and salt until the sugar has completely dissolved.
  2. Gently fold in the crushed pumpkin spice cookies, ensuring they are evenly distributed throughout the mixture.
  3. Pour the mixture into an ice cream machine and freeze according to the manufacturer’s instructions.
  4. Once the ice cream reaches a soft-serve consistency, transfer it to an airtight container and freeze until firm, about 2-4 hours.
  5. When ready to serve, scoop into bowls and garnish with an additional pumpkin spice cookie for an extra touch of festivity and crunch.

Tips

For the best results, make sure your ice cream mixture is well chilled before adding it to the ice cream machine. This will help it freeze faster and achieve a creamier texture. If you don’t have an ice cream machine, you can pour the mixture into a shallow dish, freeze it, and stir every 30 minutes until it reaches the desired consistency.

Variations & Substitutions

If you’re looking to switch things up, consider these delicious variations:

  • Spiced Apple Cider: Replace the pumpkin spice cookies with crushed gingersnap cookies and add a teaspoon of cinnamon.
  • Chocolate Pumpkin: Stir in 1/2 cup of mini chocolate chips for a chocolatey twist.
  • Dairy-Free Option: Substitute coconut milk for heavy cream and almond milk for whole milk to make it dairy-free.

Storage

Store any leftover ice cream in an airtight container in the freezer for up to two weeks. To prevent ice crystals from forming, press a piece of plastic wrap directly onto the surface of the ice cream before sealing the container.

FAQ

Can I make this ice cream without an ice cream machine?

Yes, you can! Simply pour the mixture into a shallow dish and freeze, stirring every 30 minutes to break up ice crystals until it reaches the desired consistency.

How can I make this recipe more festive?

Consider adding a tablespoon of your favorite liqueur, such as bourbon or rum, for an adult version. You can also top the ice cream with caramel sauce or whipped cream for an extra indulgent treat.

Is there a way to make this ice cream less sweet?

Feel free to reduce the sugar to 1/4 cup if you prefer a less sweet dessert. The cookies will still provide plenty of flavor and sweetness.

Nutrition

While this ice cream is a treat, it can be enjoyed in moderation as part of a balanced diet. A single serving (1/2 cup) contains approximately:

  • Calories: 250
  • Fat: 18g
  • Carbohydrates: 22g
  • Protein: 3g

Conclusion

This Easy Thanksgiving Entertaining dessert is more than just ice cream—it’s a memory in the making. Perfect for sharing with loved ones, it’s a sweet reminder of the warmth and togetherness that the holiday season brings. Whether you’re serving it to a crowd or enjoying a quiet evening in, this ice cream is sure to become a cherished part of your Thanksgiving tradition. So go ahead, scoop up some joy, and savor the flavors of the season!

Related update: Easy Thanksgiving Entertaining

Related update: Cacao-Pecan Shortbread Cookies

Thai Cucumber Salad (By Roz) | Made by Meaghan Moineau

Thai Cucumber Salad (By Roz)

Intro

Welcome to my kitchen! Today, I’m sharing a delightful recipe that has been a staple in my family for generations: Thai Cucumber Salad. This dish is a vibrant medley of flavors and textures that will transport your taste buds straight to the bustling streets of Bangkok. I still remember the first time I tasted this salad at a family reunion—it was love at first bite. The refreshing crunch of cucumbers, the zing of lime, and the subtle heat from the peppers made it an unforgettable experience. I’m thrilled to bring this taste of Thailand into your home. Let’s dive in!

Why You’ll Love It

Thai Cucumber Salad is the perfect combination of sweet, spicy, and tangy. It’s incredibly refreshing and makes for a fantastic side dish or a light main course. You’ll love how simple it is to prepare, yet how complex and satisfying the flavors are. This salad is also highly customizable, allowing you to adjust the spice level and ingredients to your liking. Whether you’re a seasoned cook or a kitchen newbie, this recipe is sure to impress.

Ingredients

  • Cilantro
  • Canned cucumbers
  • Jalapeno pepper
  • Lime juice
  • Lime zest
  • Red white onions
  • Red pepper flakes
  • Rice wine vinegar
  • Dry unsalted chopped roasted peanuts
  • Salt
  • Coconut oil
  • Sesame oil
  • Soy sauce
  • Sugar
  • Thai garlic chili pepper sauce
  • White pepper

Instructions

  1. Blend all the dressing ingredients together: lime juice, lime zest, rice wine vinegar, coconut oil, sesame oil, soy sauce, sugar, Thai garlic chili pepper sauce, and white pepper. Adjust the ingredients to suit your taste.
  2. In a large bowl, mix in all of the chopped vegetables, herbs, and peanuts, if desired: canned cucumbers, cilantro, jalapeno pepper, red white onions, and dry unsalted chopped roasted peanuts.
  3. Add more of any of the flavors that you prefer, which is the true Thai way. Taste and adjust seasoning as needed.
  4. Garnish each plate with cilantro leaves and sliced limes for an added burst of freshness.
  5. Serve with a platter of add-ins: lime slices, red pepper flakes, chopped cilantro, chopped peanuts, Thai sweet chili sauce, sugar, salt, etc., for your guests to customize their plates.

Tips

To ensure your Thai Cucumber Salad is as delicious as possible, here are a few tips:

  • Use fresh lime juice for the best flavor. Bottled lime juice can be a bit too acidic.
  • Canned cucumbers can be substituted with fresh ones for an added crunch.
  • If you prefer less heat, remove the seeds from the jalapeno pepper before chopping.
  • Let the salad sit for at least 30 minutes before serving to allow the flavors to meld together.

Variations & Substitutions

This Thai Cucumber Salad is highly versatile. Here are some variations and substitutions you might consider:

  • Protein Boost: Add grilled chicken or shrimp for a more filling meal.
  • Vegetarian Option: Swap out the fish sauce for a vegetarian soy sauce or tamari.
  • Nut Allergy: Leave out the peanuts or substitute with toasted sunflower seeds.
  • Extra Veggies: Feel free to add additional vegetables such as bell peppers or carrots for more color and texture.

Storage

This salad is best enjoyed fresh, but you can store any leftovers in an airtight container in the refrigerator for up to two days. Keep in mind that the cucumbers may lose some of their crunch over time. If making in advance, consider storing the dressing separately and mixing just before serving.

FAQ

Can I make this salad ahead of time?

Yes, you can prepare the dressing and chop the vegetables a few hours in advance. However, for the best texture, it is recommended to combine the ingredients and add the dressing just before serving.

How can I adjust the spice level?

To adjust the spice level, start by adding a small amount of jalapeno and red pepper flakes, then taste and add more if desired. You can also serve additional red pepper flakes on the side for those who prefer a spicier salad.

What can I serve with Thai Cucumber Salad?

This salad pairs beautifully with grilled meats like chicken, pork, or beef. It also makes a refreshing side to accompany curries or as part of a larger Thai-inspired meal.

Nutrition

While the exact nutritional content will depend on the specific quantities and brands of ingredients used, Thai Cucumber Salad is generally low in calories and rich in vitamins A and C. It’s a great source of hydration and antioxidants, making it both a healthy and delicious choice.

Conclusion

There you have it—a simple yet irresistibly tasty Thai Cucumber Salad that brings a burst of flavor with every bite. Whether you’re making it for a family gathering or a quiet dinner at home, this dish is sure to please. I hope this recipe brings as much joy to your table as it has to mine. Happy cooking, and enjoy your culinary journey to Thailand!

Related update: Thai Cucumber Salad (By Roz)

Related update: Avocado Chicken Salad

Spicy Black-Eyed Pea Curry with Swiss Chard and Roasted Eggplant | Made by Meaghan Moineau

Spicy Black-Eyed Pea Curry with Swiss Chard and Roasted Eggplant

Intro

There’s a certain magic that happens in the kitchen when the aroma of spices fills the air, reminiscent of home-cooked meals that warm the heart and soul. I remember the first time I encountered black-eyed peas in a dish. It was at a family gathering during the holidays, where each dish had its own story and tradition. My grandmother, with her gentle hands and warm smile, would serve a spicy black-eyed pea curry that quickly became the centerpiece of our gatherings. Her secret? A generous helping of roasted eggplant and leafy greens that made the dish as hearty as it was flavorful. Inspired by those cherished moments, I’ve recreated this Spicy Black-Eyed Pea Curry with Swiss Chard and Roasted Eggplant, a dish that’s both comforting and nourishing, perfect for sharing with loved ones.

Why You’ll Love It

This curry is a delightful fusion of flavors and textures. The creamy black-eyed peas intertwine with the smoky, tender roasted eggplant, while the Swiss chard adds a burst of color and nutrition. The medley of spices, including curry powder, garam masala, and cumin, creates a rich, aromatic base that elevates the humble ingredients into a memorable meal. Whether you’re a seasoned cook or a beginner looking to explore new flavors, this recipe is both accessible and rewarding. It’s a versatile dish that can be enjoyed on its own or paired with rice or bread for a complete meal.

Ingredients

  • 1 cup cooked dried black-eyed peas
  • 1 tablespoon curry powder
  • 1 teaspoon garam masala
  • 1 eggplant, preferably Italian globe
  • 1 teaspoon ground coriander
  • 1 teaspoon ground cumin
  • 1/2 teaspoon ground mustard powder
  • Juice of 1 lemon
  • 2 tablespoons olive oil
  • 2-3 red or green chilies, finely chopped
  • Sea salt to taste
  • 2 shallots, finely chopped
  • 2 cups Swiss chard, trimmed and chopped
  • 1 large tomato, chopped
  • 1/2 cup water, plus more as needed

Instructions

  1. Rinse the black-eyed peas and soak them in several inches of water for 6 hours or overnight. Drain and rinse again. Transfer to a large saucepan, cover with fresh water, and bring to a boil. Reduce heat to medium-low, cover, and simmer for 40 to 60 minutes until the peas are tender but not falling apart. Drain and set aside.
  2. To prepare the eggplant, cut off the stem and bottom edge, then halve it lengthwise. Score the flesh into a diagonal pattern, being careful not to cut through the skin. Sprinkle with salt and let it sit for 40 minutes. Rinse and squeeze out excess water.
  3. Brush the eggplant with olive oil and place it in a roasting pan. Bake in a preheated 400°F oven until the flesh appears collapsed and wrinkly, about 30-40 minutes. Remove from heat, let cool for 10 minutes, then scoop out the flesh. If too watery, drain using a strainer. Set aside.
  4. In the same saucepan used for the black-eyed peas, heat the olive oil over medium heat. Add shallots and chilies, sautéing for 2-3 minutes.
  5. Add curry powder, garam masala, ground coriander, cumin, and mustard powder. Stir for another minute until fragrant.
  6. Add the chopped tomato and cook for a few more minutes. Then, add the roasted eggplant and cooked black-eyed peas, stirring frequently.
  7. Pour a few tablespoons of water into the pan. Gradually add Swiss chard, allowing it to wilt before adding more. Add more water as necessary to maintain desired consistency.
  8. Stir in the lemon juice and salt to taste. Remove from heat, cover, and let the curry sit for a few minutes before serving.

Tips

For best results, ensure the black-eyed peas are cooked perfectly tender but not mushy. The eggplant’s roasting time may vary depending on its size; keep an eye on it to achieve the desired texture. Adjust the level of spice by adding more or fewer chilies, based on your heat preference.

Variations & Substitutions

Feel free to experiment with different greens such as spinach or kale if Swiss chard is unavailable. For an added protein boost, consider tossing in some cooked chickpeas. If you prefer a milder curry, use less curry powder and add a dollop of coconut milk for creaminess.

Storage

Store any leftovers in an airtight container in the refrigerator for up to 3 days. This curry also freezes well; simply thaw and reheat on the stove over low heat, adding a splash of water if needed to reach the desired consistency.

FAQ

Can I use canned black-eyed peas for this recipe?

Yes, you can use canned black-eyed peas if you’re short on time. Just be sure to rinse and drain them thoroughly before adding them to the dish.

What other vegetables can I add to this curry?

Feel free to add other vegetables such as bell peppers, zucchini, or carrots. Just be sure to adjust the cooking time accordingly so that all the vegetables are tender.

Is this recipe vegan?

Yes, this Spicy Black-Eyed Pea Curry with Swiss Chard and Roasted Eggplant is entirely vegan, making it a delicious choice for those following a plant-based diet.

Nutrition

This curry is a nutritious powerhouse, rich in fiber, vitamins, and minerals. Black-eyed peas are an excellent source of protein and iron, while Swiss chard provides vitamins A, C, and K. Eggplant adds antioxidants and dietary fiber, making this dish both wholesome and satisfying.

Conclusion

Embark on a culinary adventure with this Spicy Black-Eyed Pea Curry with Swiss Chard and Roasted Eggplant. It’s a dish that brings warmth to the table and joy to those who share it. Whether you’re reminiscing about childhood memories or creating new ones, this curry is sure to become a beloved staple in your kitchen. Enjoy the rich tapestry of flavors and the simplicity of ingredients that come together in this heartwarming meal. Happy cooking!

Related update: Spicy Black-Eyed Pea Curry with Swiss Chard and Roasted Eggplant

Related update: Pork Menudo

Pear Salad With Walnuts and Blue Cheese | Made by Meaghan Moineau

Pear Salad With Walnuts and Blue Cheese

Intro

There’s something inherently magical about the crispness of autumn, the way the air turns cooler, and the leaves transform into a symphony of warm hues. As a child, this season always meant family gatherings where we would indulge in hearty meals that celebrated the bounty of the harvest. One dish that has always stood out in my memory is my grandmother’s pear salad. It was a delightful mix of sweet and savory, with juicy pears, crunchy walnuts, and the bold flavor of blue cheese. This salad was more than just food; it was a celebration of the season’s best offerings, a dish that brought everyone together, and left you feeling warm and content. Today, I’m thrilled to share this beloved recipe with you, hoping it brings the same warmth to your table as it has to ours.

Why You’ll Love It

This pear salad with walnuts and blue cheese is a perfect blend of flavors and textures. Here’s why you’ll fall in love with it:

  • Balance of Flavors: The sweetness of pears complements the tangy blue cheese, while the walnuts add a savory crunch.
  • Healthy and Nourishing: Packed with vitamins, antioxidants, and healthy fats, this salad is as nutritious as it is delicious.
  • Quick and Easy: With minimal prep time, this salad is perfect for a quick meal or a stunning appetizer.
  • Visually Stunning: The vibrant colors of the salad leaves, pears, and cheese make this dish as beautiful as it is tasty.

Ingredients

  • 4 ripe pears
  • 1 cup crumbled blue cheese
  • 1/4 cup finely chopped chives
  • 6 cups mixed salad leaves (such as curly endive)
  • 2 tablespoons lemon juice
  • 3 tablespoons safflower oil
  • 1 tablespoon walnut oil
  • 1 cup walnuts, toasted and roughly chopped

Instructions

  1. Prepare the pears by cutting the base so they stand straight. This not only makes for an appealing presentation but also ensures the pear remains stable in the bowl.
  2. Arrange one pear and a generous handful of mixed salad leaves in individual serving bowls.
  3. Add a scattering of chopped celery to each bowl for added crunch.
  4. In a separate bowl, whisk together the lemon juice, safflower oil, and walnut oil to create the dressing. Drizzle the dressing over each salad.
  5. Finish by sprinkling the crumbled blue cheese and toasted walnuts evenly over each salad.
  6. Serve immediately and enjoy the delightful flavors of autumn.

Tips

For the best experience, ensure your pears are ripe but still firm to the touch. This will give you the perfect balance of sweetness and crunch. Toasting the walnuts enhances their flavor, so don’t skip this step! If you prefer a milder cheese, consider using gorgonzola instead of blue cheese.

Variations & Substitutions

  • Cheese: Swap blue cheese for feta or goat cheese for a different flavor profile.
  • Nuts: Pecans or almonds can be used as alternatives to walnuts for some variety.
  • Extra Add-ins: Add dried cranberries or pomegranate seeds for a touch of sweetness and color.
  • Dressing: A honey-mustard vinaigrette can be a delightful alternative to the walnut oil dressing.

Storage

This salad is best enjoyed fresh. However, if you need to prepare it in advance, keep the dressing separate and add it just before serving to prevent the salad leaves from wilting. Store any leftovers in an airtight container in the refrigerator for up to a day.

FAQ

Can I use canned pears instead of fresh ones?

While fresh pears offer the best texture and flavor, you can use canned pears in a pinch. Just ensure they are well-drained and not overly sweetened.

What can I use if I’m allergic to nuts?

If you have a nut allergy, try substituting the walnuts with sunflower seeds or pumpkin seeds for an added crunch without the risk.

How can I make this salad vegan?

To make this salad vegan, simply omit the cheese or use a vegan cheese alternative. Ensure the dressing is also free from animal products, perhaps using a balsamic vinaigrette instead.

Nutrition

Each serving of this pear salad is approximately 250 calories, with 18 grams of healthy fats, 5 grams of protein, and 20 grams of carbohydrates. It is a good source of fiber, vitamin C, and antioxidants, making it a nutritious choice for any meal.

Conclusion

This pear salad with walnuts and blue cheese is a tribute to the flavors of fall, a dish that is as nourishing as it is delectable. Whether you’re serving it as a starter at a dinner party or enjoying it as a light lunch, it’s sure to impress with its complex flavors and beautiful presentation. I hope this recipe becomes a staple in your home, just as it has in mine, creating new memories and bringing joy to your dining table.

Related update: Pear Salad With Walnuts and Blue Cheese

Related update: Japanese Gyoza Pot Stickers

Related update: Thai Cucumber Salad (By Roz)

Wild Blueberry Lemon Muffins | Made by Meaghan Moineau

Wild Blueberry Lemon Muffins

Intro

There’s something inexplicably comforting about the aroma of freshly baked muffins wafting through the house. It takes me back to Sunday mornings in my grandmother’s cozy kitchen, where the sun would gently stream through the lace curtains, casting delicate patterns on the worn wooden table. Those mornings were filled with the chatter of family and the irresistible scent of golden-brown muffins cooling on the counter. Today, I’m thrilled to share a recipe that captures that warmth and nostalgia: Wild Blueberry Lemon Muffins. These muffins combine the tartness of lemons with the sweet burst of wild blueberries, creating a delightful treat that’s perfect for breakfast, brunch, or any moment in between.

Why You’ll Love It

These Wild Blueberry Lemon Muffins are the embodiment of simple pleasures. Each bite offers a perfect balance of sweetness and tartness, with the wild blueberries providing juicy pops of flavor. The muffins are moist, tender, and crowned with a tangy lemon glaze that elevates them from ordinary to extraordinary. Whether you’re hosting a brunch or looking for a delightful weekday breakfast, these muffins are sure to impress. Plus, they’re incredibly easy to make, requiring just a few staple ingredients and minimal effort.

Ingredients

  • 2 cups all-purpose flour
  • 2 teaspoons baking powder
  • 1/4 teaspoon salt
  • 1/2 cup unsalted butter, softened
  • 1 cup granulated sugar, plus 1/8 cup for lemon zest
  • 1 large egg
  • 1 cup buttermilk
  • 1 teaspoon vanilla extract
  • 1 tablespoon fresh lemon juice
  • 1 tablespoon lemon zest
  • 1 cup canned wild blueberries, drained
  • 1 cup powdered sugar

Instructions

  1. Preheat your oven to 375°F (190°C). Line 16 muffin cups with paper liners.
  2. Mash 1/8 cup of sugar with the lemon zest in a small bowl until the sugar is moistened and fragrant.
  3. In a medium-sized bowl, whisk together the flour, baking powder, and salt. Set aside.
  4. Using an electric mixer, beat 1 cup of sugar and the softened butter together in a large bowl until light and fluffy.
  5. Add the egg to the butter mixture, beating well after each addition.
  6. Mix in the buttermilk, vanilla extract, and lemon sugar gradually, ensuring each ingredient is fully incorporated.
  7. Slowly add the flour mixture to the wet ingredients, mixing until the batter is smooth and free of lumps.
  8. Fold in the wild blueberries gently with a large spatula, being careful not to crush them.
  9. Divide the batter equally among the prepared muffin tins, filling each about 3/4 full.
  10. Bake for about 35 minutes, or until a cake tester inserted into the center of a muffin comes out clean.
  11. Allow the muffins to cool in the pan for a few minutes before transferring them to a wire rack.
  12. Prepare the lemon glaze by combining the lemon juice, remaining lemon zest, and powdered sugar in a small bowl.
  13. Spoon about 1 tablespoon of glaze over each muffin, letting it drip down the sides.

Tips

For the best muffins, ensure your butter is at room temperature before you start. This allows it to incorporate more air, resulting in fluffier muffins. Also, when folding in the blueberries, do so gently to avoid breaking them and turning your batter purple. Finally, don’t skip the glaze—it’s what ties everything together with a delightful zing!

Variations & Substitutions

If you can’t find canned wild blueberries, fresh or frozen ones will work just as well. Just make sure to pat them dry if using frozen to avoid excess moisture. For a dairy-free version, substitute the buttermilk with almond milk mixed with a splash of lemon juice. You can also try adding a handful of chopped nuts, like almonds or walnuts, for some extra texture.

Storage

These muffins are best enjoyed fresh, but they can be stored in an airtight container at room temperature for up to three days. If you want to keep them longer, they freeze beautifully. Just wrap each muffin individually in plastic wrap and place them in a resealable plastic bag. They can be frozen for up to two months. To enjoy, simply thaw at room temperature or warm them in the oven for a few minutes.

FAQ

Can I use regular blueberries instead of wild blueberries?

Absolutely! Regular blueberries can be used as a substitute if wild blueberries aren’t available. Keep in mind that wild blueberries tend to be smaller and more intensely flavored, so you might notice a slight difference in taste and texture with regular blueberries.

How can I make my muffins rise higher?

To achieve higher rising muffins, make sure your baking powder is fresh. Additionally, starting with a higher oven temperature for the first 5 minutes of baking can create a burst of steam, which helps the muffins rise. Then, reduce the temperature to the specified 375°F for the remainder of the baking time.

Can I make these muffins gluten-free?

Yes, you can make these muffins gluten-free by using a gluten-free all-purpose flour blend. Ensure the blend contains xanthan gum or a similar binding agent, which helps mimic the texture of traditional flour.

Nutrition

Each muffin is approximately 210 calories, with 8g of fat, 32g of carbohydrates, and 2g of protein. The nutritional content can vary slightly based on ingredient brands and portion sizes.

Conclusion

These Wild Blueberry Lemon Muffins are more than just a treat; they’re a little piece of nostalgia wrapped in a paper liner. With their sunny lemon flavor and sweet blueberries, they’re sure to brighten any day. Whether you enjoy them with a cup of tea or as a grab-and-go breakfast, these muffins are a delightful reminder of the simple joys in life. I hope this recipe brings as much joy to your kitchen as it has to mine. Happy baking!

Related update: Wild Blueberry Lemon Muffins

Guacamole | Made by Meaghan Moineau

The Best Homemade Guacamole

Intro

There’s nothing quite like the taste of fresh guacamole. I remember the first time I tried it at a family gathering when I was a child. The creamy texture combined with a hint of spice and citrusy notes was unlike anything I’d tasted before. My uncle, who had just returned from a trip to Mexico, made a batch for us, and since then, guacamole has been a staple at all our family gatherings. Today, I’ll share with you my take on this classic recipe, inspired by that nostalgic experience.

Why You’ll Love It

This guacamole recipe is perfect for any occasion. Whether you’re hosting a party, enjoying a quiet night in, or looking for a healthy snack, this guacamole will be your go-to. The creamy texture of the avocados paired with the freshness of herbs like cilantro, basil, and oregano creates a perfect balance of flavors. Plus, it’s quick and easy to make!

Ingredients

  • 3 ripe Haas avocados
  • 1/4 cup finely chopped onion
  • 1 jalapeño pepper, seeded and minced
  • 2 tablespoons fresh cilantro, chopped
  • 1/2 teaspoon salt
  • 1/4 teaspoon black pepper
  • 2 tablespoons fresh lime juice
  • 1 tablespoon fresh basil, chopped
  • 1 tablespoon fresh oregano, chopped

Instructions

  1. Cut the avocados in half lengthwise. Remove the pit by driving a chef’s knife into it and twisting gently to loosen.
  2. Scoop the avocado flesh out of the skin and into a mixing bowl.
  3. Using a fork, mash the avocado to your desired consistency.
  4. Add the chopped onion, jalapeño, cilantro, basil, and oregano to the mashed avocado.
  5. Mix until all the ingredients are well incorporated.
  6. Season the guacamole with salt, black pepper, and lime juice to taste.
  7. Serve immediately or chill for a more pronounced flavor.
  8. If not serving immediately, store in the refrigerator with plastic film wrap pressed onto the surface of the guacamole to prevent browning.

Tips

When choosing avocados, look for ones that are slightly soft to the touch but not mushy. A ripe avocado will yield gently to pressure. To prevent the guacamole from turning brown, ensure the plastic wrap is touching the entire surface of the guacamole. This minimizes air contact, which causes oxidation.

Variations & Substitutions

Feel free to customize your guacamole. For a spicier kick, leave the seeds in the jalapeño or add a dash of cayenne pepper. If you’re not a fan of cilantro, you can omit it or replace it with parsley. For a twist, try adding diced tomatoes or roasted corn for extra texture and flavor.

Storage

Store leftover guacamole in an airtight container in the refrigerator. Press a piece of plastic wrap directly onto the surface before sealing to keep it fresh for up to two days. Remember, the sooner you enjoy it, the better it tastes!

FAQ

Can I make guacamole in advance?

Yes, you can prepare guacamole a few hours in advance. Just make sure to store it with plastic wrap pressed against the surface to prevent browning. The lime juice also helps preserve its vibrant color.

What can I serve with guacamole?

Guacamole is incredibly versatile. Serve it with tortilla chips, as a topping for tacos, or alongside grilled chicken or fish. It’s also a great addition to sandwiches and burgers for an extra burst of flavor.

Nutrition

Avocados are packed with healthy fats, fiber, and essential nutrients. This guacamole recipe is not only delicious but also offers a good source of vitamins C, E, K, and B-6, as well as potassium and folate. Enjoy it as a healthy snack or as part of a balanced meal.

Conclusion

Whether you’re a long-time fan of guacamole or trying it for the first time, this recipe is sure to become a favorite. Its simplicity and freshness make it a standout dish that’s perfect for any occasion. So gather your ingredients and enjoy a taste of this classic, nostalgic treat. Remember, the best dishes are those shared with family and friends. Happy guacamole making!

Related update: Guacamole

Coconut Israeli Couscous Studded With Pomegranate | Made by Meaghan Moineau

Coconut Israeli Couscous Studded With Pomegranate

Intro

Growing up, I remember the sweet scent of cinnamon and coconut wafting through our kitchen during family gatherings. These were the times when my grandmother would prepare her famous coconut couscous, a dish so comforting and aromatic that it became a family tradition. It wasn’t just a meal; it was a vessel of memories, filled with laughter and warmth. Today’s recipe, Coconut Israeli Couscous Studded with Pomegranate, is a tribute to those cherished moments. It’s a dish that combines the creamy texture of coconut milk with the delightful surprise of pomegranate seeds, creating a symphony of flavors that will dance on your palate.

Why You’ll Love It

This recipe is a beautiful fusion of flavors and textures. The soft, chewy Israeli couscous absorbs the rich, creamy coconut milk, while the pomegranate seeds add a burst of freshness and color. The subtle hint of cardamom and cinnamon brings warmth and depth, making this dish a perfect addition to any meal. Whether you’re looking for a unique side dish or a comforting main course, you’ll fall in love with this coconut couscous.

Ingredients

  • 1 cup milk
  • 1 can (13.5 oz) unsweetened coconut milk
  • 3 green cardamom pods
  • 1/2 teaspoon ground cinnamon
  • 2 tablespoons sugar
  • 1 cup Israeli couscous
  • Seeds from half a pomegranate

Instructions

  1. Smash the cardamom pods open with the flat side of your knife, just like you would with a garlic clove.
  2. In a saucepan, combine the milk, coconut milk, and cardamom. Place over low heat and bring to just below a boil, stirring occasionally. It should become slightly foamy.
  3. Strain out the cardamom pods since the shells are not so pleasant to eat.
  4. Add the Israeli couscous to the saucepan and simmer on low for 10-12 minutes, until all the liquid is absorbed. The couscous should be tender but still have some chew to it.
  5. Stir in the ground cinnamon, sugar, and pomegranate seeds. Mix well to combine.

Tips

For best results, use fresh pomegranate seeds. They add a delightful crunch and freshness to the dish. If you find the couscous is absorbing the liquid too quickly, feel free to add a bit more milk to ensure it cooks evenly. Always taste and adjust the sweetness to your preference.

Variations & Substitutions

If you don’t have pomegranate seeds on hand, or if you’re not a fan, you can easily substitute them with raisins or dried cranberries. Both options will add a lovely sweetness and chewy texture. For a nutty twist, sprinkle some toasted almonds or pistachios on top before serving.

Storage

Store any leftover couscous in an airtight container in the refrigerator for up to 3 days. To reheat, simply add a splash of milk to the couscous and heat it gently on the stovetop, stirring occasionally.

FAQ

Can I use regular couscous instead of Israeli couscous?

Yes, you can use regular couscous, but be aware that the cooking time will be shorter, and the texture will be different. Israeli couscous is larger and chewier, which makes it an excellent choice for this creamy dish.

Is there a substitute for coconut milk?

If you’re not a fan of coconut milk or have an allergy, you can use almond milk or cashew milk as an alternative. Keep in mind, though, that the coconut flavor is integral to the dish’s profile, so the result will be slightly different.

How can I make this dish vegan?

To make this recipe vegan, replace the regular milk with a plant-based milk of your choice, such as almond or oat milk. The rest of the ingredients are already plant-based, making this a simple adjustment.

Nutrition

While I don’t have an exact nutritional breakdown for this dish, it’s worth noting that coconut milk adds healthy fats, and pomegranate seeds are rich in antioxidants. This dish offers a good balance of carbohydrates, fats, and a touch of sweetness.

Conclusion

Coconut Israeli Couscous Studded with Pomegranate is more than just a meal; it’s an experience. Each bite is a trip down memory lane, bringing warmth and joy to your table. Easy to prepare yet rich in flavor, this dish is perfect for both special occasions and simple family dinners. Enjoy the comforting taste and let it create new memories for you and your loved ones. Happy cooking!

Related update: Coconut Israeli Couscous Studded With Pomegranate

Related update: Osso Buco

Tomato Cutlets | Made by Meaghan Moineau

Tomato Cutlets: A Savory Delight

Intro

Growing up, summers were synonymous with the sweet aroma of fresh tomatoes ripening on the vine in my grandmother’s garden. I vividly recall the warmth of the sun on my face as I plucked those vibrant, juicy beefsteak tomatoes, their fragrance wafting through the air, promising a delectable treat. One of my cherished memories is watching my grandmother transform these garden-fresh tomatoes into golden, crispy cutlets. Today, I am excited to share this cherished family recipe with you, bringing a taste of those sun-drenched summer days into your kitchen.

Why You’ll Love It

This Tomato Cutlets recipe is a delightful fusion of crispy textures and savory flavors, perfect for a light lunch or an elegant appetizer. Whether you’re a seasoned cook or a kitchen novice, you’ll appreciate the simplicity and versatility of this dish. The combination of fresh ingredients and easy preparation makes it a go-to recipe for any occasion. Plus, it’s a great way to enjoy the seasonal bounty of tomatoes and eggplants.

Ingredients

  • 2 baby eggplants, halved
  • 2 large beefsteak tomatoes, sliced
  • 1 cup Italian bread crumbs
  • 2 eggs, beaten
  • Juice of 1 lemon
  • 2 tablespoons olive oil
  • 2 tablespoons Italian fresh parsley, chopped
  • Salt and pepper to taste
  • 1/4 cup fresh Romano cheese, grated

Instructions

  1. Prepare your ingredients by slicing the beefsteak tomatoes and beating the eggs in a shallow bowl. Place the Italian bread crumbs in another shallow dish.
  2. Dip each tomato slice into the egg wash and then coat it with the bread crumbs. Repeat this process if you have extra egg wash and bread crumbs for a thicker crust.
  3. Heat a large frying pan over medium heat and add the olive oil. Once the oil is hot, carefully place the prepared tomato slices in the pan.
  4. Cook the tomato slices for about 3-4 minutes on each side, or until they achieve a nice golden color. Gently flip them halfway through cooking.
  5. After removing the tomato slices from the pan, add the halved baby eggplants. Sprinkle them with salt and pepper to taste.
  6. Sauté the eggplants on one side until they are golden, about 3-4 minutes, then turn and sauté the other side.
  7. Plate the tomato cutlets and eggplants, and finish with a garnish of chopped parsley, a squeeze of lemon juice, and a generous sprinkle of grated Romano cheese.

Tips

For the best results, use ripe, firm beefsteak tomatoes. The firmer the fruit, the better it will hold up during cooking. Additionally, ensure the oil is hot before frying to achieve that perfect golden crust. If you find the cutlets are browning too quickly, adjust the heat to medium-low to ensure even cooking.

Variations & Substitutions

If you prefer a gluten-free version, substitute the Italian bread crumbs with gluten-free bread crumbs. For a vegan twist, replace the eggs with a plant-based egg substitute or a mixture of water and flour to help the bread crumbs adhere to the tomatoes. You can also experiment with spices in the bread crumbs, such as garlic powder or paprika, for an extra kick of flavor.

Storage

These Tomato Cutlets are best enjoyed fresh to maintain their crispy texture. However, if you have leftovers, store them in an airtight container in the refrigerator for up to 2 days. Reheat them in a preheated oven at 350°F (175°C) for about 10 minutes to regain some of their crispiness.

FAQ

Can I use other types of tomatoes for this recipe?

Yes, you can use other types of tomatoes, such as Roma or heirloom. However, beefsteak tomatoes are preferred for their size and firm texture, which hold up well during frying.

What can I serve with Tomato Cutlets?

Tomato Cutlets pair beautifully with a fresh green salad or a side of pasta. They also make a great topping for a sandwich or a burger for a unique twist.

Can I prepare the cutlets in advance?

You can prepare the tomatoes and eggplants ahead of time and store them separately in the refrigerator. When you’re ready to serve, simply fry them up fresh for the best texture and flavor.

Nutrition

While specific nutritional values will vary based on portion sizes and exact brands used, these Tomato Cutlets are generally a good source of Vitamin C from the tomatoes and healthy fats from the olive oil. Using fresh ingredients ensures a wholesome and delicious dish without unnecessary additives.

Conclusion

There’s something magical about turning simple, fresh ingredients into a dish that delights the senses. These Tomato Cutlets not only bring a taste of summer to your table but also provide a comforting, nostalgic culinary experience. Whether you’re preparing them for family, friends, or simply treating yourself, this recipe is sure to become a beloved staple in your kitchen. Enjoy the warm, crispy goodness and the nostalgic flavors of this timeless dish.

Related update: Tomato Cutlets

Related update: Square Deviled Eggs

Banana Blueberry Pancakes | Made by Meaghan Moineau

Banana Blueberry Pancakes

Intro

There’s something incredibly comforting about the aroma of pancakes sizzling on a Sunday morning. Growing up, weekends were a special time in our household, and my mom’s banana blueberry pancakes were a tradition that never failed to bring the family together. As a child, I would eagerly help mash the bananas, my little hands sticky with sweet fruit, while my mom expertly flipped each pancake to golden perfection. Those mornings, filled with laughter and the sweet scent of pancakes, remain some of my fondest memories. I’m thrilled to share this beloved recipe with you, hoping it will create equally delicious memories in your home.

Why You’ll Love It

These banana blueberry pancakes are a delightful blend of natural sweetness and fruity goodness, offering a wholesome start to your day. The combination of ripe bananas and juicy blueberries creates a flavor explosion with every bite, while coconut flour adds a subtle nuttiness and a gluten-free twist. Whether you’re looking for a hearty breakfast or a comforting brunch option, these pancakes are sure to please. Plus, they are easy to make, requiring simple ingredients and minimal preparation time, making them perfect for both busy mornings and leisurely weekend brunches.

Ingredients

  • 4 whole eggs
  • 1 cup water
  • 2 tablespoons liquid coconut oil
  • ½ cup coconut flour
  • 1 teaspoon cream of tartar
  • 1 teaspoon ground cinnamon
  • 2 ripe bananas, mashed
  • 1 cup frozen blueberries

Instructions

  1. Beat the eggs for 1 minute in a medium-sized bowl until they are light and frothy.
  2. Add the water, coconut oil, and coconut flour to the eggs. Whisk together until the mixture is smooth and well combined.
  3. Allow the batter to sit for 5 minutes to let the coconut flour absorb the liquid and expand.
  4. Stir in the cream of tartar, ground cinnamon, and mashed bananas. Whisk until the batter is smooth.
  5. Gently fold in the frozen blueberries using a spatula, ensuring they are evenly distributed throughout the batter.
  6. Heat a little oil, butter, or a combination of both in a skillet over medium to low heat.
  7. Ladle about 1/2 cup of batter for each pancake onto the skillet, spreading it out to form a circle.
  8. Cook the pancakes for about 5 minutes on one side, or until bubbles form on the surface and the edges are set.
  9. Carefully flip the pancakes and cook the other side until golden brown and cooked through.
  10. Repeat the process with the remaining batter to make approximately 8 pancakes.
  11. Serve the pancakes warm, drizzled with maple syrup, and enjoy!

Tips

For the perfect pancakes, make sure your skillet is well-heated before you start cooking. This ensures a nice, even browning. If the batter seems too thick after resting, you can add a little more water, a tablespoon at a time, until you reach your desired consistency. Be gentle when folding in the blueberries to avoid breaking them and turning your batter blue!

Variations & Substitutions

If you’re looking to switch things up, consider adding a handful of chopped nuts, such as walnuts or pecans, for added crunch. You can also substitute the coconut flour with almond flour if you prefer, though the texture might be slightly different. For a vegan version, replace the eggs with a flaxseed egg substitute and use a plant-based oil.

Storage

These pancakes store well in the refrigerator for up to 3 days. Simply place them in an airtight container. To reheat, warm them in a skillet over low heat or in the microwave. You can also freeze the pancakes for up to 2 months. Separate each pancake with parchment paper and store them in a freezer-safe container or bag.

FAQ

Can I use fresh blueberries instead of frozen?

Absolutely! Fresh blueberries work just as well in this recipe. Just be sure to rinse and dry them thoroughly before folding them into the batter.

What can I use if I don’t have cream of tartar?

If you don’t have cream of tartar on hand, you can substitute it with 1 1/2 teaspoons of baking powder. This will help the pancakes rise and achieve a fluffy texture.

Are these pancakes gluten-free?

Yes, these banana blueberry pancakes are gluten-free, thanks to the use of coconut flour. Just ensure that all your ingredients, including baking powder, are certified gluten-free if you have a severe allergy or sensitivity.

Nutrition

Each pancake is packed with nutrients and flavor. While the exact nutrition will vary based on the ingredients and portion sizes, these pancakes are a good source of protein from the eggs, healthy fats from the coconut oil, and fiber from the coconut flour and blueberries. Plus, they’re naturally sweetened with bananas, making them a healthier choice for breakfast.

Conclusion

Banana blueberry pancakes are more than just a meal; they’re a hug on a plate, a reminder of cozy mornings and cherished family traditions. Whether you’re making them for a special occasion or just to brighten up a weekday morning, these pancakes are sure to be a hit. I hope this recipe brings as much joy to your kitchen as it does to mine. Happy cooking!

Related update: Banana Blueberry Pancakes

Paneer jalfrezi | Made by Meaghan Moineau

Paneer Jalfrezi: A Flavorful Journey to Spice and Comfort

Intro

Paneer Jalfrezi is more than just a dish; it’s a vibrant tapestry of flavors that brings together the essence of Indian cooking. This dish takes me back to my childhood, where Sunday lunch was a family affair, and the aroma of spices would fill the house. My grandmother would stand at the stove, her hands moving expertly, creating magic in the form of Paneer Jalfrezi. It was the first “grown-up” dish I learned to cook, and every time I make it, I’m transported back to those cozy afternoons filled with laughter and love.

Why You’ll Love It

Paneer Jalfrezi is a delightful combination of fresh vegetables and soft paneer, enveloped in a symphony of spices. Here’s why this dish will win you over:

  • Quick and Easy: Ready in under 30 minutes, it’s perfect for a weeknight dinner.
  • Customizable Heat: Adjust the level of spiciness according to your preference.
  • Vegetarian Delight: A protein-rich meal that satisfies both vegetarians and non-vegetarians alike.
  • Rich in Flavor: The dish boasts a perfect balance of tangy, sweet, and spicy notes.

Ingredients

  • 200g paneer, cubed
  • 2 tbsp oil, divided
  • 1 tsp cumin seeds
  • 3 medium tomatoes, 2 roughly chopped and 1 cut into strips
  • 1 large onion, half roughly chopped and half sliced
  • 1 red bell pepper, sliced
  • 1 green bell pepper, sliced
  • 1/2 tsp turmeric powder
  • 1 tsp chilli powder
  • 2-3 green chillies, chopped
  • 2-3 Kashmiri red dried chillies
  • 1 inch ginger, finely sliced
  • 1 tsp garam masala
  • 1/2 tsp sugar
  • 1 tsp vinegar
  • Fresh coriander leaves for garnish
  • Salt to taste

Instructions

  1. Roughly chop half an onion and 2 tomatoes.
  2. Heat 1 tbsp oil in a non-stick pan. Add the onions and fry until lightly brown.
  3. Add the tomatoes and cook for 2-3 minutes until soft. Remove from heat, let cool, and blend into a puree.
  4. In the same pan, heat 1 tbsp oil on medium heat. Add cumin seeds and let them sputter.
  5. Add the Kashmiri red chillies and sliced ginger, frying for 30-45 seconds.
  6. Add turmeric powder, sliced onions, bell peppers, chilli powder, salt, and two-thirds of the chopped green chillies. Fry for 3-4 minutes.
  7. Add the paneer cubes and cook on low heat for 5 minutes.
  8. Add the tomato puree, garam masala, and sugar. Simmer for 2 minutes.
  9. Stir in the tomato strips and toss well.
  10. Finish with vinegar and garnish with remaining green chillies and fresh coriander.

Tips

Here are some tips to ensure your Paneer Jalfrezi turns out perfect every time:

  • Use fresh, firm paneer for the best texture.
  • If you prefer a creamier texture, add a splash of cream before serving.
  • For a smokier flavor, lightly char the bell peppers before adding them to the dish.

Variations & Substitutions

Feel free to experiment with this Paneer Jalfrezi recipe:

  • Vegan Option: Substitute paneer with firm tofu for a vegan version.
  • Extra Veggies: Add mushrooms or zucchini for added nutrition and texture.
  • Spice Level: Adjust the number of chillies to increase or decrease the heat.

Storage

Store any leftovers in an airtight container in the refrigerator for up to 3 days. Reheat gently on the stove or in the microwave, adding a splash of water to maintain moisture.

FAQ

Can I make Paneer Jalfrezi ahead of time?

Yes, you can prepare the dish a day in advance. The flavors deepen overnight, making it even more delicious the next day. Just be sure to store it properly in the refrigerator.

What can I serve with Paneer Jalfrezi?

Paneer Jalfrezi pairs beautifully with naan, roti, or steamed basmati rice. A side of yogurt or raita helps balance the heat of the dish.

Is Paneer Jalfrezi spicy?

It can be spicy due to the chillies, but you can easily adjust the spice level to your liking by adding more or fewer chillies.

Nutrition

This dish is a good source of protein, thanks to the paneer, and is rich in vitamins from the fresh vegetables. It’s a wholesome and satisfying meal that fits well into a balanced diet. For those watching their calorie intake, use less oil or opt for low-fat paneer.

Conclusion

Paneer Jalfrezi is a dish that celebrates the vibrant flavors of Indian cuisine. It’s a comforting meal that brings warmth to the table and joy to the heart. Whether you’re a seasoned cook or a beginner, this recipe is a delightful journey into the world of spices and flavors. I hope it becomes as cherished in your home as it is in mine. Enjoy every bite of your delicious creation!

Related update: Paneer jalfrezi

Related update: Mediterranean eggplants

Root Vegetable Rosemary Gratin | Made by Meaghan Moineau

Root Vegetable Rosemary Gratin

Intro

As the crisp chill of autumn settles in, there’s nothing quite like the comfort of a warm, bubbling gratin fresh out of the oven. I fondly remember Sunday afternoons spent in my grandmother’s kitchen, the air filled with the earthy aroma of root vegetables and herbs. She would tell stories of how her own mother taught her the art of crafting the perfect gratin. Today, I’m excited to share this recipe for Root Vegetable Rosemary Gratin, a dish that combines the rustic flavors of red potatoes, sweet potatoes, carrots, and turnips with a fragrant hint of rosemary. This dish is perfect for cozy family dinners or as a stunning side dish for your holiday table.

Why You’ll Love It

This Root Vegetable Rosemary Gratin is a celebration of the season’s best produce. The combination of red potatoes, sweet potatoes, carrots, and turnips creates a symphony of flavors and textures, while the rosemary adds a touch of aromatic elegance. The creamy, cheesy layers are enveloped in a flaky pie crust, making each bite a delight. If you’re looking for a dish that’s both comforting and impressive, this gratin is sure to become a favorite.

Ingredients

  • 2 refrigerated piecrusts
  • 2 tablespoons fresh rosemary, chopped
  • 1 teaspoon ground black pepper
  • 2 cups shredded Gruyère cheese
  • 2 red potatoes, peeled and thinly sliced
  • 2 sweet potatoes, peeled and thinly sliced
  • 2 carrots, peeled and thinly sliced
  • 2 turnips, peeled and thinly sliced
  • 1 teaspoon kosher salt
  • 1 cup heavy cream
  • 1 garlic clove, minced

Instructions

  1. Preheat your oven to 450°F (232°C).
  2. On a lightly floured surface, unroll the piecrusts. Sprinkle with rosemary, pepper, and 1/2 cup of Gruyère cheese over one piecrust. Top with the remaining piecrust and roll into a 13-inch circle.
  3. Press the piecrust on the bottom and up the sides of a 9-inch springform pan. Fold the edges under and chill in the refrigerator.
  4. Meanwhile, peel and thinly slice the red potatoes, sweet potatoes, carrots, and turnips.
  5. Layer one-third each of the red potatoes, sweet potatoes, carrots, turnips, and salt in the prepared crust. Sprinkle with 1/2 cup of cheese.
  6. Repeat the layers twice, pressing them down slightly to fit. This will be a tight fit, but it ensures that every layer cooks evenly.
  7. In a microwave-safe cup, microwave the cream and garlic at high for 45 seconds. Pour the warm mixture over the layered potatoes in the pan.
  8. Sprinkle with the remaining 1 cup of cheese.
  9. Cover the pan with heavy-duty aluminum foil and place it on a baking sheet to catch any drips.
  10. Bake for 1 hour. Remove the foil and continue baking for an additional 25 minutes, or until the potatoes are tender and the crust is a deep, golden brown.
  11. Let the gratin stand for 10 to 15 minutes. Carefully transfer it to a serving plate and remove the sides of the pan. If desired, use a long knife or narrow spatula to slide the gratin off the bottom of the pan.

Tips

To ensure your gratin is perfectly cooked, use a mandoline slicer for even, thin slices of vegetables. This will help them cook evenly and thoroughly. Also, be sure to pack the layers tightly in the pan to prevent air pockets, which can cause uneven cooking.

Variations & Substitutions

If you prefer a different cheese, feel free to substitute Gruyère with aged cheddar or fontina. For a vegan version, replace the heavy cream with coconut milk and use a vegan cheese substitute. You can also experiment with different herbs, such as thyme or sage, to add a unique flavor twist.

Storage

Your Root Vegetable Rosemary Gratin can be stored in the refrigerator for up to 3 days. Make sure it’s covered tightly with plastic wrap or stored in an airtight container. To reheat, place in a 350°F (175°C) oven until warmed through, about 20 minutes.

FAQ

Can I make this gratin in advance?

Yes, you can prepare the gratin a day in advance. Follow all the steps up to baking, then cover and store it in the refrigerator. When you’re ready to bake, let it sit at room temperature for about 30 minutes before placing it in the oven.

What can I serve with this gratin?

This gratin pairs beautifully with roasted meats such as chicken, beef, or pork. It’s also delightful alongside a fresh green salad or steamed green beans for a lighter accompaniment.

Nutrition

This gratin is a rich and indulgent dish, perfect for special occasions. Each serving contains approximately 350 calories, 20g of fat, 30g of carbohydrates, and 12g of protein. Keep in mind, these values can vary based on the exact ingredients and portion sizes you use.

Conclusion

Root Vegetable Rosemary Gratin is a dish that brings warmth and nostalgia to the table. It’s a testament to the beauty of simple ingredients coming together to create something truly special. Whether you’re crafting a comforting dinner for your family or impressing guests with a holiday spread, this gratin is sure to be a hit. I hope it brings as much joy to your home as it has to mine. Enjoy!

Related update: Root Vegetable Rosemary Gratin

Fall Fruit Compote | Made by Meaghan Moineau

Fall Fruit Compote

Intro

There’s something magical about fall—the crisp air, the vibrant colors, and the comforting aroma of spices and fruits mingling together. Growing up, fall was always my favorite season. I remember sitting in my grandmother’s cozy kitchen, the windows fogging up as she cooked her famous fruit compote. The sweet and tangy smell would waft through the house, inviting everyone to gather around the table. Her secret? A touch of apple cider vinegar that added just the right amount of zing. Now, I carry on her tradition with my own version of this delightful Fall Fruit Compote, and I can’t wait to share it with you!

Why You’ll Love It

This Fall Fruit Compote is a hug in a bowl. Whether you’re serving it up as a side dish, a topping for potato latkes, or simply enjoying it on its own, this recipe is sure to warm your heart and soul. Here’s why you’ll absolutely love it:

  • Easy to Make: With just a few simple steps, you can have this delicious compote ready in no time.
  • Versatile: Serve it warm or cold, with breakfast or dessert—it complements any meal!
  • Full of Fall Flavors: The combination of apples, pears, and cinnamon captures the essence of autumn in every bite.
  • Customizable: Easily adjust the sweetness or tweak the spices to suit your taste.

Ingredients

  • 1 tablespoon butter
  • 2 cups diced honeycrisp apples
  • 1 cup diced pears
  • 1/2 cup dried cherries
  • 1 tablespoon apple cider vinegar
  • 1 cup apple juice, plus more as needed
  • 1/4 cup brown sugar
  • 1 cinnamon stick

Instructions

  1. Melt the butter in a medium saucepan over high heat.
  2. Add the diced apples, pears, cherries, vinegar, apple juice, brown sugar, and cinnamon stick.
  3. Cook for 5 minutes, stirring occasionally.
  4. Lower the heat to medium and cook for a few minutes more, until the fruit is tender and the liquid has boiled away.
  5. If necessary, add a bit more apple juice to keep the fruit from scorching.
  6. Remove the cinnamon stick and serve warm, ideally with potato latkes or your favorite dish.

Tips

Here are a few tips to ensure your compote turns out perfectly:

  • Choose the Right Apples: Honeycrisp apples are ideal for this recipe as they hold their shape well and add a natural sweetness.
  • Monitor the Liquid: Keep an eye on the liquid level to prevent the fruit from burning. Add more apple juice as needed.
  • Adjust Sweetness: Feel free to add more or less brown sugar based on your preference.

Variations & Substitutions

One of the best things about this compote is its adaptability. Here are some variations and substitutions you might consider:

  • Fruit Variations: Swap out the pears for peaches or add cranberries for a tart twist.
  • Sugar Alternatives: Use maple syrup or honey instead of brown sugar for a different sweetness profile.
  • Spice It Up: Add a pinch of nutmeg or cloves for extra warmth.

Storage

This delicious compote can be stored in an airtight container in the refrigerator for up to a week. Reheat gently on the stove or in the microwave before serving. You can also freeze it for up to three months—just thaw and warm it before enjoying.

FAQ

Can I use fresh cherries instead of dried?

Yes, fresh cherries can be used, though they will add more moisture to the compote. You might need to reduce the amount of apple juice slightly to compensate.

Is there a way to make this recipe vegan?

Absolutely! Simply substitute the butter with a plant-based alternative, such as coconut oil or vegan butter, and you’re good to go.

Can I make this compote in advance?

Definitely! This compote tastes even better the next day, as the flavors have more time to meld together. Just store it in the fridge and reheat when you’re ready to serve.

Nutrition

This Fall Fruit Compote is not only delicious but also packed with nutrients. Apples and pears are high in fiber and vitamin C, while cherries add antioxidants. While it does include sugar, you can easily adjust the amount to fit your dietary needs.

Conclusion

There you have it—a warm, comforting dish that captures the essence of fall in every bite. Whether you’re gathering with family or simply indulging in a cozy night at home, this Fall Fruit Compote is sure to be a hit. I hope it brings as much joy to your table as it does to mine. Happy cooking!

Related update: Fall Fruit Compote

Related update: Zabaglione with Roasted Plums