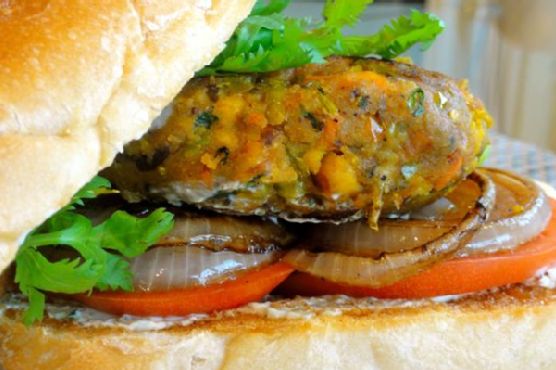
Scotch Eggs | Made by Meaghan Moineau

Scotch Eggs | Made by Meaghan Moineau

**Title: Nostalgia on a Plate: Crafting the Perfect Scotch Eggs**


**Description**: Dive into a delicious journey with our Scotch Eggs recipe, a delightful combination of savory sausage and perfectly boiled eggs, encased in a crunchy breadcrumb shell. This classic dish not only serves as a scrumptious appetizer but also carries with it the warmth of cherished family memories.


---


### A Timeless Classic: Scotch Eggs


Scotch Eggs have always been a beloved treat in my family, often gracing our tables at gatherings and special occasions. This simple yet flavorful dish combines the hearty richness of sausage with the delicate texture of hard-boiled eggs, all encased in a golden breadcrumb crust. Whether you're enjoying them as an appetizer or as a main dish, Scotch Eggs are sure to steal the show.


#### Ingredients


- Bulk sausage


- Corn meal


- 9 eggs (8 hard-boiled, 1 beaten)


- Breadcrumbs


#### Instructions


1. **Prepare the Sausage**: Begin by dividing the bulk sausage into 8 equal portions. On a lightly crumb-sprinkled surface, pat each portion out to about 1/8 inch thickness.


2. **Wrap the Eggs**: Take one hard-boiled egg and wrap it completely with a portion of sausage, pressing the edges together to seal. Repeat this process with the remaining sausage and hard-boiled eggs.


3. **Coat the Eggs**: Dip each sausage-wrapped egg in the beaten egg, ensuring it's fully coated, then roll it in breadcrumbs until evenly covered.


4. **Cook to Perfection**: You have two cooking options:


- **Deep Fry**: For a crispy finish, deep fry the eggs until they turn a golden brown.


- **Bake**: Alternatively, place the eggs on a baking sheet and bake in a preheated 375°F oven for 20 minutes, or until lightly browned.


#### Difficulty Rating


This recipe is straightforward and perfect for home cooks of all levels, earning a difficulty rating of 3 out of 10. It's a delightful appetizer that can easily be transformed into a main dish by serving alongside a crisp salad or roasted vegetables.


### A Taste of Home: My Family's Scotch Egg Tradition


Every time I prepare Scotch Eggs, I'm transported back to my grandmother's cozy kitchen. The aroma of sizzling sausage and the gentle hum of the oven evoke memories of family gatherings filled with warmth and laughter. My grandmother, with her apron neatly tied, would expertly wrap each egg in sausage, her hands moving with practiced ease.


One particular memory stands out vividly. It was a chilly autumn afternoon, and our family was gathered for a harvest celebration. The kitchen was bustling with activity, and the air was rich with the scent of spices and roasting meats. As my cousins and I sat around the table, eagerly awaiting the feast, my grandmother emerged from the kitchen, a platter of freshly baked Scotch Eggs in hand. Their golden hue and enticing aroma captured everyone's attention, and as we took that first bite, the flavors melded together, creating a moment of pure culinary bliss.


That day, the Scotch Eggs were more than just a dish; they were a symbol of family unity and love. Even now, as I recreate this cherished recipe, I'm reminded of those precious moments spent with loved ones, making each bite a nostalgic journey back to those joyful celebrations.


### Conclusion


Scotch Eggs are more than just a delightful blend of textures and flavors; they are a gateway to cherished memories and familial bonds. Whether you're preparing them for a festive gathering or a simple family meal, this recipe is sure to bring a touch of nostalgia and warmth to your table. So, gather your ingredients, and let the magic of Scotch Eggs transform your dining experience into a memorable family tradition.

Read more about Appetizers

Read more about Main Dishes

Read more about Desserts

Roasted Beet Hummus | Made by Meaghan Moineau

Roasted Beet Hummus | Made by Meaghan Moineau

**Title: Rediscovering Tradition with a Modern Twist: Roasted Beet Hummus**


**Description:** Dive into the vibrant world of roasted beet hummus, a delightful twist on the classic Middle Eastern dish. Perfect as an appetizer, this recipe combines the earthy sweetness of roasted beets with the creamy richness of tahini and chickpeas. Inspired by fond family memories, this dish is not just about flavors but also about creating new traditions around the dining table.


---


**Rediscovering Tradition with a Modern Twist: Roasted Beet Hummus**


There's something magical about the vibrant hue of roasted beet hummus. It beckons you to the table, not just with its bright, alluring color but with the promise of flavors that are both familiar and refreshingly new. This recipe, an appetizer that rates a 4 out of 10 on the difficulty scale, is a testament to how food can bridge past and present, creating a tapestry of memories and new experiences.


**Ingredients:**


- Red roasted beets


- Cooked chickpeas


- Garlic


- Ground cumin


- Lemon juice


- Olive oil


- Salt


- Tahini sesame seed paste


**Instructions:**


1. Begin by placing all ingredients except for the chickpeas and olive oil in a food processor or blender. Pulse until well blended.


2. Add the chickpeas and olive oil and pulse until just incorporated.


3. If needed, add more olive oil to help blend the chickpeas into a paste or to adjust the hummus to your desired consistency.


4. Serve with warm pita or flatbread for a delicious appetizer.


As I prepare this dish, I'm transported back to my grandmother's kitchen—a place filled with warmth, laughter, and the irresistible aroma of freshly baked bread. Every Sunday, our family would gather around her large oak table, sharing stories and savoring her culinary creations. Grandma had a knack for taking traditional recipes and infusing them with her own unique flair, much like this roasted beet hummus.


The beets, often harvested from her own garden, were roasted to perfection, their earthy sweetness a perfect complement to the creamy chickpeas. She'd regale us with tales from her childhood, stories that seemed to come alive with every bite we took. Her hands, though weathered with age, moved with practiced ease as she blended ingredients, creating a hummus that was not just food, but a memory in the making.


Today, as I share this recipe with you, it's more than just a delightful appetizer; it's a piece of my heritage, passed down through generations. The roasted beet hummus is a reminder of simpler times, of family gatherings filled with love and laughter, and of the timeless tradition of sharing a meal with those we hold dear.
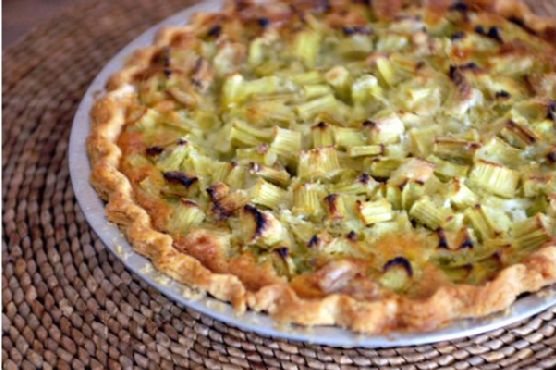

Whether you're looking to recreate a beloved family memory or simply seeking a new addition to your culinary repertoire, this roasted beet hummus offers a burst of flavor that promises to delight and inspire. So, gather your loved ones, serve up this beautiful dish, and create your own stories to cherish for years to come.

Read more about Appetizers

Read more about Main Dishes

Read more about Desserts

Stir Fried Quinoa, Brown Rice and Chicken Breast | Made by Meaghan Moineau

Stir Fried Quinoa, Brown Rice and Chicken Breast | Made by Meaghan Moineau

# A Taste of Home: Stir Fried Quinoa, Brown Rice, and Chicken Breast


## Bringing Back Memories with Every Bite


There's something magical about the aroma of a well-cooked dish wafting through your kitchen. It has the power to transport you back to cherished moments with loved ones, where laughter was abundant, and time seemed to stand still. Today, I invite you to embark on a culinary journey with a delightful recipe that encapsulates the essence of family, tradition, and the joy of sharing a meal together: Stir Fried Quinoa, Brown Rice, and Chicken Breast.


### A Family Tradition


Growing up, Sundays were a special day in our household. After returning from church, my family would gather in the kitchen, each of us playing a role in preparing the day's feast. My father, with his infectious enthusiasm, would take charge of marinating the chicken, infusing it with a generous sprinkle of suya spice and seasoning cubes. As a child, the vibrant colors of the spices and the tantalizing aroma never failed to captivate my senses.


My mother, the orchestrator of our culinary symphony, would oversee the boiling of the quinoa and brown rice mix—a task I eagerly volunteered for, feeling important as I watched the grains dance in the pot. It was during these moments that I learned the value of patience, as the grains slowly softened and absorbed the rich flavors.


### The Recipe


#### Ingredients:


- Suya spice


- 1 cup quinoa and brown rice mix


- 2 tablespoons butter


- 2 medium carrots, sliced


- 1 cup whole cherry tomatoes


- 2 chicken breasts


- 3 cloves garlic, minced


- 2 seasoning cubes


- 1 green bell pepper, chopped


- 1 roma tomato, chopped


- 1 scotch bonnet pepper, finely chopped


- 2 spring onions, sliced


- 1 teaspoon vegetable oil


- 1 cup water


#### Instructions:


1. **Marinate the Chicken**: In a bowl, season the chicken breasts with seasoning cubes and suya spice. Allow to marinate for 2 hours, or use immediately if pressed for time.


2. **Prepare the Quinoa and Rice**: In a pot of boiling water (1 cup), add the quinoa and brown rice mix along with a teaspoon of vegetable oil. Allow to boil until soft, about 5-7 minutes. Pour into a bowl and set aside.


3. **Cook the Chicken**: In a pan, melt the butter over medium heat and pan fry the chicken breasts, flipping constantly to brown on both sides. Reduce the heat, cover the pan, and allow the chicken to cook thoroughly. If the pan becomes dry, add 2 tablespoons of water.


4. **Combine and Serve**: Stir in the chopped vegetables—carrots, cherry tomatoes, green bell pepper, roma tomato, scotch bonnet pepper, and spring onions—into the pan with the frying chicken. Finally, add the quinoa and brown rice mix. Serve hot!


### Nostalgia on a Plate


As we sat around the dining table, savoring the medley of flavors, stories from the past would surface—of my grandparents' tales of resilience, of my parents' adventurous youth, and of my own childhood escapades. This dish, a delightful amalgamation of textures and tastes, became more than just a meal; it was a bridge connecting generations, a testament to our shared history.


### Difficulty Level


This recipe is rated a 5 out of 10 in terms of difficulty. It strikes a perfect balance between simplicity and the exciting challenge of combining diverse flavors and textures. Classified as a Main Dish, it's hearty, nutritious, and destined to become a staple in your family meals.


### Conclusion


If you're looking to recreate a little magic in your kitchen and perhaps spark a walk down memory lane, this Stir Fried Quinoa, Brown Rice, and Chicken Breast recipe is your ticket. It embodies the warmth of home, the love of family, and the beauty of tradition. Enjoy the journey, one delicious bite at a time.

Read more about Appetizers

Read more about Main Dishes

Read more about Desserts

DAIRY-FREE COCOA CUPCAKES WITH PEANUT BUTTER FILLING, MARSHMALLOW FROSTING | Made by Meaghan Moineau

DAIRY-FREE COCOA CUPCAKES WITH PEANUT BUTTER FILLING, MARSHMALLOW FROSTING | Made by Meaghan Moineau

**Title: Nostalgic Delights: Dairy-Free Cocoa Cupcakes with Peanut Butter Filling and Marshmallow Frosting**


**Description:**


Indulge in these deliciously rich Dairy-Free Cocoa Cupcakes infused with a creamy peanut butter filling and topped with a fluffy marshmallow frosting. Perfectly moist and irresistibly decadent, these cupcakes are a delightful treat for any occasion. Dive into a nostalgic story that ties this delightful dessert to cherished family memories. Easy to make and sure to please, this recipe is a must-try for dessert lovers everywhere.


---


**Nostalgic Delights: Dairy-Free Cocoa Cupcakes with Peanut Butter Filling and Marshmallow Frosting**


There's something magical about the aroma of freshly baked cupcakes wafting through the house. It takes me back to lazy Sunday afternoons spent in the cozy kitchen of my grandmother's home. The warmth of the oven, the gentle hum of chatter, and the sweet anticipation of tasting a new creation are memories that forever hold a special place in my heart.


**A Whisk of Nostalgia**


My grandmother, a woman of simple pleasures, always believed in the power of food to bring people together. Every Sunday, she'd whip up a batch of her famous cupcakes. These were no ordinary cupcakes; they were a labor of love, a blend of flavors that danced in harmony. Her secret? A perfect marriage of bittersweet chocolate and creamy peanut butter, crowned with a cloud-like marshmallow frosting.


As a child, I would perch on a stool, eyes wide with wonder, as she deftly mixed ingredients. "The key is to let the batter remain a bit lumpy," she'd say with a wink, "that's where the magic happens." To this day, the smell of cocoa and the taste of peanut butter bring back those cherished moments, filled with laughter and love.


**Dairy-Free Cocoa Cupcakes with Peanut Butter Filling and Marshmallow Frosting**


**Ingredients:**


- 1 cup unbleached flour


- 1/2 cup Dutch cocoa powder


- 1 tsp baking powder


- 1/2 tsp baking soda


- 1/4 tsp salt


- 1 large egg


- 1/3 cup canola oil


- 1/2 cup granulated sugar


- 1/4 cup light brown sugar


- 1 tsp chocolate flavor


- 1 tsp vanilla extract


- 1/2 cup freshly brewed coffee, cooled


- 1/2 cup soy milk


**Peanut Butter Filling:**


- 1/3 cup Jif Natural Creamy Peanut Butter


- 2 tbsp maple syrup


**Marshmallow Frosting:**


- 2 egg whites


- 1/2 cup granulated sugar


- 1/4 tsp cream of tartar


- 1/4 cup light corn syrup


- 1/4 cup water


- 1 tsp vanilla extract


- 1/4 cup confectioner's sugar


**Topping:**


- 1/4 cup honey-roasted peanuts, coarsely chopped


**Instructions:**


1. **Prepare the Cupcakes:**


Preheat your oven to 350°F (175°C). Line a 12-cup muffin tin with paper liners. In a large bowl, whisk together cocoa powder, flour, baking powder, baking soda, and salt.


2. **Mix Wet Ingredients:**


In a medium bowl, whisk the egg, canola oil, granulated sugar, light brown sugar, chocolate flavor, vanilla extract, coffee, and soy milk.


3. **Combine and Fill:**


Stir the wet ingredients into the dry ingredients using a spoon or spatula. Remember, the batter will be somewhat lumpy—do not overmix. Using an ice cream scoop (about 1/4 cup), fill the paper liners.


4. **Bake:**


Bake in the preheated oven for 18-20 minutes, or until a toothpick inserted into the center comes out clean. Let the cupcakes cool completely before filling and frosting.


5. **Prepare the Peanut Butter Filling:**


In a small bowl, mix together the peanut butter and maple syrup until smooth. Once cupcakes are cooled, use a small knife to cut a cone-shaped piece out of the center of each cupcake. Fill the hole with the peanut butter mixture.


6. **Make the Marshmallow Frosting:**


In a medium heatproof bowl, combine egg whites, granulated sugar, cream of tartar, corn syrup, and water. Place over a pot of simmering water, whisking constantly until the mixture is warm and the sugar has dissolved. Remove from heat and beat with an electric mixer on high speed until stiff peaks form. Add vanilla extract and confectioner's sugar, beating until smooth.


7. **Frost and Garnish:**


Pipe or spread the marshmallow frosting over each cupcake. Sprinkle with chopped honey-roasted peanuts for a crunchy finish.


**Difficulty Rating:** 6/10


**Classification:** Dessert


These Dairy-Free Cocoa Cupcakes with Peanut Butter Filling and Marshmallow Frosting are more than just a dessert. They are a testament to the power of food to evoke memories and create new ones. Whether you’re making them for a special occasion or just because, they are sure to bring a smile to your face and a sweet warmth to your heart.

Read more about Appetizers

Read more about Main Dishes

Read more about Desserts

Vegan Pumpkin Bundt Cake | Made by Meaghan Moineau

Vegan Pumpkin Bundt Cake | Made by Meaghan Moineau

**Title: Autumn Nostalgia: A Vegan Pumpkin Bundt Cake to Warm Your Heart**


**Description: Experience the flavors of fall with our Vegan Pumpkin Bundt Cake, a delightful dessert that captures the essence of autumn. With the earthy sweetness of pumpkin and the warming spices of cinnamon, cloves, and nutmeg, this cake is perfect for cozy gatherings or a quiet evening at home. Discover a family story that makes this dessert even more special.**


---


As the leaves begin to turn and the air grows crisp, there’s one recipe that always brings back the warmth of family gatherings and the comfort of home: Vegan Pumpkin Bundt Cake. This delightful dessert, with its rich blend of spices and the subtle sweetness of date sugar, is more than just a treat; it’s a cherished tradition.


I remember the first time my grandmother made this cake. It was a blustery October afternoon, and the scent of cinnamon and nutmeg wafted through the house as we gathered in the kitchen. My grandmother, with her apron dusted in flour, showed me how to carefully fold the pumpkin mixture into the dry ingredients, a technique she insisted was crucial to achieving the perfect texture.


The kitchen was filled with laughter and the sound of pecans being chopped, the occasional burst of storytelling punctuating the rhythm of our work. As the cake baked, Grandma shared tales of her childhood, of autumns spent in the countryside, where the harvest was celebrated with feasts that brought the community together. Her stories were as comforting as the cake itself, weaving a tapestry of family history that made every bite even more meaningful.


Creating this cake is a journey in itself, with each ingredient playing a vital role. The apple cider vinegar adds a subtle tang, while the maple syrup and date sugar provide a depth of sweetness that complements the spices perfectly. The golden raisins and toasted pecans add texture and bursts of flavor, making each slice a delightful surprise.


Here's how you can bring this slice of nostalgia into your own kitchen:


### Ingredients:


- 1 tablespoon apple cider vinegar


- 2 teaspoons baking powder


- 1 teaspoon baking soda


- 2 cups barley flour


- 1/2 cup canola oil


- 1 cup date sugar


- 1/2 cup golden raisins


- 1 teaspoon ground allspice


- 2 teaspoons ground cinnamon


- 1/2 teaspoon ground cloves


- 1 teaspoon ground ginger


- 1/4 cup maple syrup


- 1/2 teaspoon nutmeg


- 1 cup pecans


- 1 cup pumpkin puree


- 1/2 teaspoon salt


- 1 cup soymilk


- 1 teaspoon vanilla extract


### Instructions:


1. Preheat your oven to 350 degrees Fahrenheit. Oil a bundt pan and dust it lightly with flour.


2. Spread pecans on a baking sheet and toast for 10 minutes. Let them cool completely, then chop roughly.


3. Cover raisins with boiling water and soak for 25 minutes. Drain and set aside.


4. In a bowl, whisk together pumpkin puree, canola oil, maple syrup, soymilk, apple cider vinegar, and vanilla extract.


5. In a large bowl, mix date sugar, barley flour, baking soda, baking powder, ground spices, and salt with a clean whisk.


6. Using a rubber spatula, gently fold the pumpkin mixture into the dry ingredients. When the dry ingredients are halfway incorporated, add the raisins and chopped pecans.


7. Continue folding just until the mixture comes together; be careful not to overmix.


8. Pour the batter into the prepared bundt pan and smooth the top with a rubber spatula.


9. Bake for 45 minutes, rotating the cake from front to back after 20 minutes, or until a toothpick inserted into the center comes out clean.


10. Cool the cake in the pan for 15 minutes, then invert it onto a wire rack to continue cooling.


11. Transfer to a plate and dust with powdered sugar. Serve warm or at room temperature.


### Difficulty: 6/10


### Classification: Dessert


Whether served warm with a cup of herbal tea or enjoyed at room temperature, this Vegan Pumpkin Bundt Cake is a testament to the timeless joy of baking. It's not just about the delicious flavors but also about the memories and connections that come with it. So, gather your loved ones, share a slice of this cake, and create your own stories to pass down through the generations.

Read more about Appetizers

Read more about Main Dishes

Read more about Desserts

Coconut Guava Ice cream | Made by Meaghan Moineau

Coconut Guava Ice cream | Made by Meaghan Moineau

**Title: Tropical Nostalgia: The Magic of Coconut Guava Ice Cream**


**Description:**


Dive into a tropical paradise with our Coconut Guava Ice Cream recipe, a delightful blend of creamy coconut milk and exotic guava, enhanced by the burst of blueberries and the crunch of peanuts. This dessert is not only a treat for your taste buds but also a gateway to cherished family memories. With a difficulty rating of 4/10, this dessert is perfect for both novice and seasoned cooks looking to create a taste of the tropics at home.


---


**Nostalgic Journey to the Tropics**


Growing up, my summers were marked by the tropical delights of my grandmother's kitchen. Among her culinary treasures was a special dessert—Coconut Guava Ice Cream. Every summer, as the sun blazed down and school was out, my siblings and I would eagerly await the moment when she would declare it was time to make her famous ice cream.


The process was nothing short of magical. I remember the anticipation as we placed a can of coconut milk in the freezer, watching the clock tick by as we waited for the transformation to begin. My grandmother would often tell us stories of her own childhood in the Caribbean, where guavas grew in abundance and coconuts were a staple. She spoke of her mother making a similar dessert, using the freshest ingredients available, and how she would gather around with her siblings, much like we were doing, to enjoy the frozen treat.


Once the coconut milk had solidified, the real excitement began. My grandmother would skillfully separate the rich coconut cream from the water, a task that seemed like a culinary magic trick to my young eyes. The blender whirred into action, and the sweet aroma of guava filled the air, mingling with the creamy coconut and sugary condensed milk—a scent that still transports me back to those sun-drenched days.


As the mixture was poured into a bowl, we added a generous handful of blueberries, their vibrant color standing out against the creamy concoction. We each took turns stirring, our small hands eager to contribute to the creation of our beloved dessert. Once satisfied, we would pop the bowl into the freezer and wait, our patience tested by the promise of what was to come.


Hours later, the ice cream was ready, and we gathered around the table, our spoons in hand and smiles on our faces. The first bite was always the best—a perfect balance of creamy coconut, tangy guava, and the unexpected pop of blueberries. Topped with a sprinkle of crushed peanuts, it was a symphony of flavors and textures that epitomized summer.


Today, as I make Coconut Guava Ice Cream for my own family, I can't help but feel a wave of nostalgia. This simple dessert, with its rich history and vibrant flavors, is more than just a recipe—it's a connection to my past and a tradition I am thrilled to pass on to the next generation.


**Recipe Difficulty: 4/10**


**Category: Dessert**


**Ingredients:**


- 1 can of coconut milk


- 1/2 cup of condensed milk


- 2 ripe guavas, chopped and de-seeded


- 1 cup of blueberries


- 1/4 cup of crushed peanuts


**Instructions:**


1. Place the can of coconut milk in the freezer and allow it to solidify. This could take 4-6 hours depending on the temperature of your freezer.


2. Remove the can of coconut milk and open it completely. The milk and coconut water would have separated.


3. With a very sharp knife, cut through the frozen coconut milk to separate the milk from the coconut water.


4. Place the frozen coconut milk part in a blender.


5. Pour in your condensed milk and chopped, de-seeded guavas. Blend for about 3-5 minutes at intervals until smooth.


6. Pour the mixture into a bowl, add the blueberries, stir gently, and place in the freezer.


7. Allow your coconut ice cream to freeze for about 3-6 hours.


8. Serve garnished with crushed peanuts.


Enjoy your journey to the tropics with each creamy, fruity spoonful, and perhaps create some new family memories along the way!

Read more about Appetizers

Read more about Main Dishes

Read more about Desserts

Rugelach | Made by Meaghan Moineau

Rugelach | Made by Meaghan Moineau

# Rugelach: A Sweet Taste of Tradition and Togetherness


## Description


Indulge in the delightful world of Rugelach, a classic pastry that brings warmth and nostalgia to any gathering. With a buttery, flaky dough filled with sweet fruit preserves and crunchy walnuts, these bite-sized treats are perfect for any occasion. This blog post not only walks you through the step-by-step process of making these delectable pastries but also shares a cherished family memory that makes Rugelach more than just a dessert—it's a slice of tradition. Whether you're a seasoned baker or a novice in the kitchen, this recipe is sure to become a family favorite.


---


### Ingredients


- 1 cup salted butter, softened


- 1 block of cream cheese, softened


- A pinch of salt


- 2.5 cups plain flour


- 2 large egg yolks


- 1 teaspoon vanilla extract


- 1/2 cup caster sugar (for dough)


- 1/2 cup fruit preserves (e.g., orange marmalade)


- 1/2 cup walnuts, finely chopped


- 50g butter, melted (for brushing)


- 1/4 cup caster sugar (for topping)


- 1 teaspoon ground cinnamon (for topping)


### Instructions


1. **Preparation**: Leave the butter and cream cheese in a warm place for a couple of hours to soften.


2. **Preheat Oven**: Set your oven to 180°C (350°F).


3. **Mix Dough**: In a large mixing bowl, beat the softened butter and cream cheese until light and fluffy. Add egg yolks, vanilla extract, 1/2 cup of caster sugar, salt, and plain flour. Mix until the dough comes together.


4. **Prepare Walnuts**: Finely chop the walnuts and set aside.


5. **Roll Dough**: Divide the dough into 4 equal pieces. Roll one piece into a thin circle and cut into 8 triangles.


6. **Fill and Roll**: Spread fruit preserves on each triangle, sprinkle with walnuts, and roll each piece into a crescent shape.


7. **Cinnamon-Sugar Coating**: Mix 1/4 cup caster sugar and cinnamon. Brush rugelachs with melted butter and coat with the cinnamon-sugar mixture.


8. **Bake**: Place rugelachs on a baking tray and bake for 35 minutes or until golden brown.


9. **Cool and Serve**: Allow to cool before storing or serving.


### A Taste of Nostalgia


Every holiday season, my grandmother would gather the family around her cozy kitchen to make Rugelach. The aroma of cinnamon and melting butter would fill the room, creating an atmosphere of warmth and love. As a child, I remember eagerly waiting for the moment when she would let me sprinkle the cinnamon sugar over the freshly rolled pastries, a simple task that felt monumental in my small hands. These moments of togetherness, laughter, and shared stories are etched in my memory, making Rugelach not just a dessert, but a symbol of family unity and joy.


### Difficulty Rating: 6/10


Rugelach is a moderately challenging recipe, perfect for those with some baking experience. The key is to ensure the dough is well-mixed and not overworked, allowing for a tender, flaky pastry.


### Classification: Dessert


With its sweet filling and delightful crunch, Rugelach is a perfect dessert to end any meal on a high note. Serve with a cup of tea or coffee for a truly satisfying treat.


---


Whether you’re baking for a special occasion or simply indulging in the joy of homemade pastries, Rugelach is a timeless classic that promises to delight. Embrace the tradition, share the love, and enjoy every sweet bite.

Read more about Appetizers

Read more about Main Dishes

Read more about Desserts

Salmon In Banana Leaf | Made by Meaghan Moineau

Salmon In Banana Leaf | Made by Meaghan Moineau

# Discover the Exquisite Flavors of Salmon in Banana Leaf


## A Culinary Journey Wrapped in Tradition


In the world of gastronomy, few experiences can match the delicate balance of flavors and textures found in a perfectly cooked dish. Today, we're diving into the vibrant and aromatic world of **Salmon in Banana Leaf**. This recipe not only tantalizes the taste buds but also evokes cherished memories of family gatherings and culinary adventures.


### Ingredients that Tell a Story


- Banana leaves


- Cinnamon


- Fennel seed


- Fish sauce


- Garlic


- Ginger


- Peach preserves


- Red chiles


- Rice


- Rice wine vinegar


- Salmon steaks


- Scallions


- Sesame oil


- Soy sauce


- Star anise


- Tahini


- Vegetable oil


### A Nostalgic Culinary Memory


Growing up, our family kitchen was always bustling with activity and delightful aromas. One of my fondest memories is watching my grandmother prepare Salmon in Banana Leaf for our annual summer reunion. As the youngest, I was given the important task of gathering fresh banana leaves from the garden—a task I took on with great pride.


As the salmon marinated, my grandmother would weave stories of her childhood, sharing tales of her own family's gatherings filled with laughter and the clinking of chopsticks. The process of wrapping the salmon in banana leaves, a skill she passed down through generations, felt like a rite of passage. The anticipation built as the fragrant parcels were steamed to perfection, creating an unforgettable sensory experience.


### Step-by-Step Instructions


1. **Marinate the Salmon:** Begin by mixing the marinade ingredients (cinnamon, fennel seed, fish sauce, garlic, ginger, peach preserves, red chiles, rice wine vinegar, soy sauce, sesame oil, star anise, and tahini) in a large bag or container. Add the salmon steaks and refrigerate for at least 30 minutes, or up to 2 hours for maximum flavor infusion.


2. **Prepare the Scented Rice Powder:** While the salmon is marinating, combine rice, fennel seed, and star anise in a spice grinder. Pulse until coarsely ground, leaving some larger crumbles for texture.


3. **Wrap the Salmon:** Remove salmon from the marinade, discarding the excess. Coat each piece with the scented rice powder. Lay banana leaves flat, placing one salmon fillet in the center of each. Fold the leaves over the salmon, creating a neatly wrapped package.


4. **Steam the Salmon:** Place the banana leaf packages in a steamer basket over boiling water. Steam for 10-13 minutes until the salmon is cooked through.


5. **Serve and Enjoy:** Carefully make a slit in the banana leaves to reveal the succulent salmon inside. Serve alongside Chinese noodles, corn, and the remaining marinade as a dipping sauce.


### A Dish with Depth


**Difficulty:** 6/10


**Classification:** Main Dish


Crafting Salmon in Banana Leaf is a culinary adventure that brings together a symphony of flavors and textures. The aromatic blend of spices and the subtle sweetness of peach preserves create a dish that is both exotic and comforting. It's a recipe that transforms a simple meal into an experience, one that is perfect for impressing guests or simply enjoying a quiet evening at home.


### The Legacy of Flavor


As you savor each bite of this delightful dish, take a moment to reflect on the memories that food can evoke. Whether it's a family tradition or a new culinary endeavor, Salmon in Banana Leaf promises to be a recipe that you'll return to time and time again. So gather your ingredients, embrace the process, and let the flavors transport you to a place of nostalgia and joy.

Read more about Appetizers

Read more about Main Dishes

Read more about Desserts

Apple Persimmon Sauce | Made by Meaghan Moineau

Apple Persimmon Sauce | Made by Meaghan Moineau

**Title: A Taste of Autumn: Apple Persimmon Sauce for Cozy Gatherings**


**Description:** Dive into the comforting flavors of fall with our delightful Apple Persimmon Sauce. This easy-to-make recipe combines the rich sweetness of persimmons with the crisp, bright flavor of apples, creating a perfect accompaniment to your autumnal meals. Whether served as a dessert topping or a festive side dish, this sauce is sure to evoke warm memories of family gatherings. Join us as we explore the simple steps to creating this nostalgic treat and share a cherished family story that makes this dish truly special.


---


As the cool breeze of autumn begins to weave through the trees, there's nothing quite like the comforting aroma of simmering spices wafting through the kitchen. The scent of cinnamon and nutmeg mingling with sweet apples and ripe persimmons instantly transports me back to my grandmother's cozy kitchen. It was a place where every family member would eventually wander, drawn by the irresistible allure of her signature Apple Persimmon Sauce.


**The Recipe: Apple Persimmon Sauce**


**Ingredients:**


- 3 ripe persimmons, peeled and chopped


- 3 medium apples, peeled, cored, and chopped


- 1 teaspoon ground cinnamon


- 1/2 teaspoon nutmeg


- 1/2 cup water


- 1/4 cup dark brown sugar


- 2 tablespoons fresh lemon juice


**Instructions:**


1. **Combine Ingredients:** In a medium pot, combine the chopped persimmons, apples, cinnamon, nutmeg, water, dark brown sugar, and fresh lemon juice.


2. **Bring to a Boil:** Over medium-high heat, bring the mixture to a boil, stirring occasionally to ensure the sugar dissolves evenly.


3. **Simmer:** Once boiling, cover the pot and reduce the heat to medium-low. Allow the sauce to simmer for 25-30 minutes, stirring occasionally, until the fruit is soft and the flavors have melded beautifully.


4. **Mash:** Remove the pot from the heat and mash the mixture with a potato masher until it reaches your desired consistency. I always loved mine a bit chunky, reminding me of the rustic texture my grandmother favored.


5. **Store:** Transfer the sauce to an airtight container. It will keep in the fridge for up to two weeks or can be frozen for up to a year, preserving the essence of autumn for whenever you need a taste.


**A Nostalgic Family Memory**


Growing up, autumn was a magical time for our family. We would gather at my grandmother's home every Sunday afternoon for a hearty meal that always ended with her famous Apple Persimmon Sauce. I remember sitting at the kitchen table, watching her expertly peel and chop the fruits, her hands moving with a rhythm honed by years of practice. She would tell us stories of her own childhood, of apple-picking adventures and family traditions, as the sauce simmered gently on the stove.


One particular memory stands out: a chilly October day when the first snowflakes of the season danced through the air. As we sat around the table, wrapped in the warmth of family and the comforting aroma of the sauce, my grandmother shared tales of winters past. Her stories, much like her sauce, were a blend of sweet and spicy, warming us from the inside out.


**Difficulty Rating: 2/10**


This recipe is delightfully simple to make, with minimal preparation and cooking skills required. It’s a perfect project for a cozy afternoon at home, suitable even for beginner cooks.


**Classification: Dessert**


While this sauce pairs beautifully with roasted meats and can be served as a side dish, its sweet and spiced flavor profile makes it an ideal companion for desserts. Try it as a topping for vanilla ice cream, pancakes, or even as a filling for pies and pastries.


With every spoonful of this Apple Persimmon Sauce, you're not just tasting a delightful combination of autumn flavors; you're savoring a piece of family history, a nostalgic reminder of the love and warmth shared around the kitchen table. Whether you're creating new memories or reminiscing about old ones, this simple yet flavorful sauce is sure to become a cherished part of your seasonal gatherings.

Read more about Appetizers

Read more about Main Dishes

Read more about Desserts

Baked Tofu Cheesecake | Made by Meaghan Moineau

Baked Tofu Cheesecake | Made by Meaghan Moineau

**Title: A Nostalgic Twist: Baked Tofu Cheesecake Recipe for the Soul**


**Description:** Dive into the luscious world of Baked Tofu Cheesecake, a delightful fusion of creamy textures and subtle sweetness. This recipe not only caters to dessert lovers but also carries a heartwarming family memory that brings the essence of togetherness to your kitchen. Rated as a 6 out of 10 on the difficulty scale, this dessert is a perfect blend of tradition and innovation, creating a flavorful experience you'll want to share with loved ones.


---


**A Nostalgic Twist: Baked Tofu Cheesecake Recipe for the Soul**


There’s something inherently magical about recipes that are passed down through generations. They carry more than just flavors; they embody memories, stories, and a sense of belonging. For me, the Baked Tofu Cheesecake is more than just a dessert—it's a cherished link to family gatherings and laughter-filled evenings.
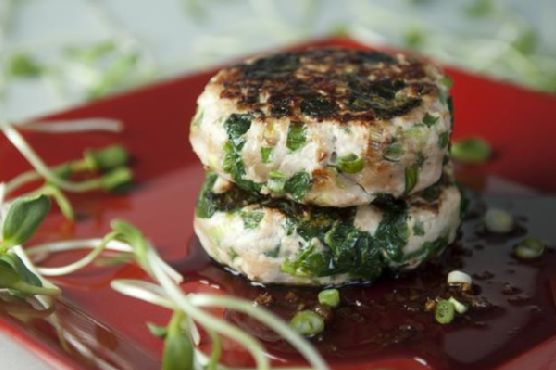

**Ingredients:**


- 250g cream cheese


- 3 egg whites


- 3 egg yolks


- 2 tablespoons lemon juice


- 150ml unsweetened soya milk


- 50g plain flour


- 300g silken tofu


- 150g caster sugar


- 1 teaspoon vanilla extract


**Instructions:**


1. **Preheat and Prepare:** Preheat your oven to 170°C (338°F). Line a 9-inch cake tin with parchment paper and wrap the exterior with heavy-duty aluminum foil. This ensures no water seeps into the cheesecake during the baking process.


2. **Blend Ingredients:** In a food processor, blend the cream cheese, egg yolks, lemon juice, soya milk, plain flour, silken tofu, and vanilla extract until smooth. Transfer this mixture into a large mixing bowl.


3. **Create Soft Meringue:** In a separate bowl, beat the egg whites with the caster sugar until semi-firm peaks form, creating a soft meringue.


4. **Combine Mixtures:** Using a whisk, gently mix one-third of the soft meringue with the blended mixture. Then, using a spatula, fold in the remaining meringue gently to maintain the airiness.


5. **Bake:** Pour the mixture into the prepared cake tin. Steam bake on the lower rack of the oven for about 50 minutes.


6. **Golden Finish:** Move the cheesecake to the upper rack and switch the oven to grill, allowing it to develop a golden top for about 30 seconds to one minute.


7. **Cool and Serve:** Allow the cheesecake to cool at room temperature. It's best enjoyed chilled, so refrigerate before serving.


**A Sweet Family Memory**


The first time I encountered this cheesecake was during one of our extended family reunions at my grandmother's house. The air was filled with the scent of blooming gardenias and the sound of children playing in the backyard. As the adults gathered in the kitchen, my grandmother brought out her trusty, albeit slightly worn, recipe book. Among the many stained pages, she found the handwritten recipe for the Baked Tofu Cheesecake.


I remember sitting on the countertop, my feet dangling, as she patiently explained each step to me and my cousins. The kitchen buzzed with excitement as we took turns blending, whisking, and folding the ingredients. It was a beautiful mess of laughter, flour-dusted aprons, and sticky fingers.


When the cheesecake finally emerged from the oven, it was a masterpiece with its golden top glistening invitingly. We all gathered around the table, each bite a testament to family love and shared moments. To this day, every slice of Baked Tofu Cheesecake transports me back to that warm kitchen, surrounded by the people I cherish most.


**Difficulty:** 6/10


**Classification:** Dessert


This Baked Tofu Cheesecake isn’t just a treat for the taste buds; it's a gateway to nostalgia, perfect for creating new memories while honoring the old. Share it with your family and add your own stories to this delicious tradition.

Read more about Appetizers

Read more about Main Dishes

Read more about Desserts

Seared Scallops With Wilted Greens | Made by Meaghan Moineau

Seared Scallops With Wilted Greens | Made by Meaghan Moineau

# A Taste of the Sea: Seared Scallops with Wilted Greens


## A Culinary Journey Through Time and Taste


Step into the kitchen and embrace the art of crafting a dish that combines the delicate flavors of the sea with robust, earthy greens. Our Seared Scallops with Wilted Greens are more than just a meal; they are a culinary experience that will transport you to a place where family memories and exquisite tastes blend seamlessly.


### The Ingredients of Nostalgia


- **Butter** - 2 tablespoons


- **Garlic** - 2 cloves, minced


- **Bunches of Kale** - 2, stems sliced thin, leaves in larger strips


- **Olive Oil** - 2 tablespoons


- **Red Wine Vinegar** - 1 tablespoon


- **Salt and Pepper** - to taste


- **Sea Scallops** - 12 large


- **Shallots** - 2, finely chopped


- **Soy Sauce** - 2 tablespoons


- **Thick-Cut Bacon** - 4 slices, cut into pieces


### A Recipe Etched in Memory


Growing up, our family gatherings were incomplete without a seafood dish that paid homage to our coastal roots. The aroma of sizzling bacon and the sight of scallops perfectly seared to a golden brown would fill the air, drawing everyone to the kitchen. My grandmother, the keeper of our family recipes, would orchestrate the meal with unmatched grace, her hands moving deftly as she coaxed flavors from simple ingredients.


The highlight was always the moment when she added the scallops to the hot iron skillet, a symphony of sizzle and steam ensued, captivating our senses and stirring a sense of nostalgia in all of us. As the butter melted and enveloped each scallop, she would regale us with stories of her childhood by the sea, where this dish first became a beloved family staple.


### Crafting the Dish


1. **Prepare the Kale**: Begin by slicing the kale stems into thin pieces and the leaves into larger strips. This step ensures both texture and flavor in every bite.


2. **Cook the Bacon and Shallots**: In a large, deep pan, heat to medium-high and add the bacon pieces. Cook for 3-4 minutes until they start to crisp. Add the chopped shallots and cook for another 3 minutes until soft.


3. **Add Garlic and Kale Stems**: Toss in the minced garlic and the sliced kale stems. Cook for 4-5 minutes, allowing the flavors to meld.


4. **Wilt the Kale Leaves**: Add the kale leaves, tossing them over the heat until wilted. Stir in the soy sauce and red wine vinegar, then season with salt and pepper to taste. Keep this kale mixture warm as you prepare the scallops.


5. **Sear the Scallops**: Heat an iron skillet to high. Pat the scallops dry thoroughly and season with salt and pepper. Add the olive oil to the pan and swirl it around. As soon as it begins to smoke, quickly place the scallops in the skillet. Sear for 1-2 minutes on each side.


6. **Finish with Butter**: Flip the scallops and add the butter to the pan. Baste the scallops with the melted butter for another 1-2 minutes, enhancing their flavor and ensuring a perfect sear.


7. **Serve**: Plate the warm wilted greens and place the seared scallops on top, allowing the flavors to mingle and create a dish that is both sophisticated and heartwarming.


### A Family Favorite: Difficulty and Classification


Rated at a 7 out of 10 in difficulty, this dish requires attention to detail and timing but rewards with a satisfying blend of flavors and textures. Classified as a **Main Dish**, Seared Scallops with Wilted Greens is perfect for a special occasion or a nostalgic family dinner.


Join us in the kitchen and let this recipe become part of your family’s culinary tradition, creating memories that will last a lifetime.

Read more about Appetizers

Read more about Main Dishes

Read more about Desserts

Easy Chicken with White Wine Sauce | Made by Meaghan Moineau

Easy Chicken with White Wine Sauce | Made by Meaghan Moineau

**Title: Savory Memories: Easy Chicken with White Wine Sauce**


**Description:**


Dive into the delicious simplicity of our Easy Chicken with White Wine Sauce, a dish that combines rich flavors with effortless preparation. This main dish captures the essence of home-cooked comfort, with a nostalgic story to warm your heart. Rated a 4 out of 10 in difficulty, it's perfect for both novice cooks and seasoned chefs looking for a quick yet satisfying meal.


---


### A Taste of Home: Easy Chicken with White Wine Sauce


When I was a child, Sunday dinners were a sacred ritual in our household. After a bustling week of school, work, and various activities, Sunday was our day of togetherness. My mother, with her adept culinary skills, would transform our modest kitchen into a haven of inviting aromas and comforting flavors. One dish that always graced our table was her Chicken with White Wine Sauce.


This dish was more than just a meal; it was a centerpiece for laughter, stories, and shared moments. I remember watching her as she heated olive oil in a skillet, her movements graceful and practiced. The sizzle of the chicken as it browned was music to our ears, signaling the start of our family feast.


### Ingredients:


- 2 skinless, boneless chicken breast halves


- 2 tablespoons olive oil


- 1 shallot, finely chopped


- 1 teaspoon fresh thyme leaves


- 1/2 cup dry white wine


- 1/4 cup flavor-concentrated chicken broth


### Instructions:


1. **Prepare the Chicken:** Heat the olive oil in a 10-inch skillet over medium heat. Gently place the chicken breasts in the skillet and brown them for about 10 minutes, ensuring they are golden on both sides. Once cooked, remove the chicken from the skillet and set aside.


2. **Create the Sauce:** Add the chopped shallot and fresh thyme leaves to the skillet. Cook and stir for 30 seconds, allowing the shallot to soften and release its sweet aroma.


3. **Add the Wine:** Pour in the dry white wine, letting it simmer for about 2 minutes until the liquid reduces by half. This step intensifies the flavors, creating a perfect balance of acidity and richness.


4. **Incorporate the Broth:** Stir in the flavor-concentrated chicken broth, combining it with the wine mixture for a robust sauce.


5. **Finish the Dish:** Return the chicken to the skillet, spooning the sauce over it. Let it cook for another 5 minutes, ensuring the chicken is cooked through and tender.


### A Nostalgic Note:


As the fragrant aroma of thyme and wine filled our home, we all gathered in anticipation. My siblings and I would set the table with care, knowing that soon we would be enveloped in the warmth of our family's love and the delectable taste of this cherished dish. Even now, making this Easy Chicken with White Wine Sauce brings back a flood of memories, each bite a reminder of those special Sunday dinners.


### Conclusion:


Our Easy Chicken with White Wine Sauce is more than just a recipe; it's an invitation to create your own family memories. With its straightforward preparation and savory flavor, it's an ideal main dish for any occasion. Whether you're looking to recreate a sense of nostalgia or craft new moments, this dish is sure to become a beloved staple in your culinary repertoire.


So, gather your loved ones around the table, and let this delightful chicken dish be the start of your own treasured memories.

Read more about Appetizers

Read more about Main Dishes

Read more about Desserts

Rice Pudding | Made by Meaghan Moineau

Rice Pudding | Made by Meaghan Moineau

**Title: Nostalgia in a Bowl: The Comfort of Homemade Rice Pudding**


**Description:**


Indulge in the creamy, comforting embrace of homemade rice pudding—a classic dessert that effortlessly bridges the gap between past and present. This easy-to-follow recipe, rated at a 3 out of 10 on the difficulty scale, will not only satisfy your sweet tooth but also transport you back to the warm, nostalgic kitchens of yesteryear. Join me as I share a cherished family memory tied to this beloved dessert. Perfect for any occasion, this rice pudding is sure to become a staple in your dessert repertoire.


---


**A Journey Through Time: Reliving Childhood Memories with Rice Pudding**


There’s something magical about the aroma of vanilla and cinnamon wafting through the kitchen. It transports me back to my grandmother’s cozy home, where love was served by the spoonful. Rice pudding was not just a dessert; it was a ritual, a comforting constant amidst the whirlwind of childhood adventures.


Every Sunday afternoon, my family would gather around the kitchen table, eager to savor the sweet, creamy delight that was my grandmother’s signature rice pudding. She would always let me help, handing me a wooden spoon too big for my small hands and guiding me through the simple yet meticulous process.


“Patience is the secret ingredient,” she’d say, her eyes twinkling with the wisdom of countless desserts perfected over the years. As the rice simmered, she’d share stories from her own childhood, tales of family gatherings and festive occasions where rice pudding was the star of the dessert table.


Now, as an adult, I find myself recreating that same comforting dish in my own kitchen, savoring each spoonful and each memory that accompanies it. This recipe, with its creamy texture and delicate balance of flavors, is a testament to those cherished moments of family and tradition.


**The Recipe: A Step-by-Step Guide to Creamy Perfection**


**Ingredients:**


- 1 1/2 cups water


- 3/4 cup medium or short grain rice


- 1/4 teaspoon salt


- 2 cups whole milk, divided


- 1/3 cup sugar


- 1 large egg, beaten


- 1 tablespoon butter


- 1 teaspoon vanilla extract


- A pinch of cinnamon or nutmeg


**Instructions:**


1. **Prepare the Rice:**


In a medium saucepan, bring 1 1/2 cups of water to a boil. Add the rice and salt, stirring gently. Cover, reduce the heat, and let it simmer until the water is absorbed, approximately 15 minutes.


2. **Create the Creamy Base:**


In another saucepan, combine 1 1/2 cups of milk, sugar, and the cooked rice. Cook over medium heat, stirring constantly until the mixture becomes thick and creamy, about 15 to 20 minutes.


3. **Enrich with Egg and Milk:**


In a small bowl, mix the remaining 1/2 cup of milk with the beaten egg. Slowly add this mixture to the rice, stirring constantly. Continue cooking for 2 more minutes.


4. **Finishing Touches:**


Remove the saucepan from heat and stir in the butter and vanilla extract. Season with a pinch of cinnamon or nutmeg to enhance the flavors.


5. **Serve and Enjoy:**


Serve the rice pudding warm, and indulge in the sweet nostalgia that accompanies each bite.


**Conclusion:**


Rice pudding, with its simple ingredients and heartwarming memories, is more than just a dessert; it’s a bridge to the past, a reminder of the people and moments that shape us. Whether you’re creating new traditions or honoring old ones, this timeless dessert will always find a place at the table. So gather your loved ones, embrace the comforting aroma, and savor the joy of homemade rice pudding.

Read more about Appetizers

Read more about Main Dishes

Read more about Desserts

Spanakopita Cups | Made by Meaghan Moineau

Spanakopita Cups | Made by Meaghan Moineau

**Title: Spanakopita Cups: A Bite-Sized Greek Delight**


**Description:** Dive into the delightful world of Greek cuisine with our Spanakopita Cups! These bite-sized treasures bring together the rich flavors of spinach, feta, and dill enclosed in a crispy phyllo shell. Ideal as an appetizer, they are perfect for any gathering. Let the aroma of nostalgia and family warmth fill your kitchen as you recreate this cherished recipe.


---


Spanakopita Cups are not just a recipe; they are a journey. Imagine the scent of olive oil warming over a gentle flame, the sizzle of scallions dancing in the pan, and the vibrant green of spinach blending with the creamy tang of feta. These elements come together to create a harmonious symphony of flavors, all nestled in a perfectly crisp phyllo cup.


### Ingredients:


- 2 tablespoons olive oil


- 4 green white scallions, finely chopped


- 1 package frozen spinach, thawed and squeezed dry


- 2 tablespoons fresh dill, chopped


- 2 large eggs, beaten


- 1 cup crumbled feta cheese


- 1 teaspoon kosher salt


- 1/2 teaspoon black pepper


- 1 package frozen phyllo dough, thawed


- 1/2 cup unsalted butter, melted


- 1/4 cup dry plain breadcrumbs


### Instructions:


1. **Preheat the Oven:** Set your oven to 400°F (200°C) and let it warm up as you prepare the ingredients.


2. **Prepare the Filling:** Heat olive oil in a pan over medium heat. Add the chopped scallions and sauté for about 5 minutes until fragrant and tender. In a large bowl, combine the cooked scallions, squeezed spinach, dill, eggs, and feta cheese. Season with kosher salt and black pepper. Mix well to ensure all ingredients are evenly distributed.


3. **Prepare the Phyllo Dough:** Keep the phyllo dough sheets covered with a damp kitchen towel to prevent them from drying out. Unfold one sheet and brush with melted butter. Sprinkle lightly with breadcrumbs. Layer a second sheet on top, brush with butter, and sprinkle with breadcrumbs. Repeat this process until you have four sheets stacked.


4. **Form the Cups:** Using a round cutter, cut circles from the layered phyllo dough. These circles should fit perfectly into the molds of a mini muffin pan. Gently press each circle into the pan to form a cup.


5. **Fill and Bake:** Spoon the spinach and feta mixture into each phyllo cup. Continue until all the mixture is used. Bake in the preheated oven for 17 minutes, or until the phyllo is golden brown and crispy.


6. **Serve and Enjoy:** Allow the Spanakopita Cups to cool slightly before serving. Enjoy these cups as a delightful appetizer, or share them at your next family gathering.


### A Family Memory


Every time I make Spanakopita Cups, I am transported back to my grandmother's cozy kitchen, a place filled with laughter and the comforting aroma of home-cooked meals. During family gatherings, my grandmother would set out trays of her famous spanakopita. The sound of crispy phyllo breaking was a signal that the feast had begun. I remember sitting on the kitchen counter, my legs swinging as I watched her work her magic, her hands deftly layering phyllo, never rushing, always smiling. It was in those moments that I learned that cooking is an expression of love, a tradition I carry on with my own family today.


### Difficulty Rating: 5/10


**Classification:** Appetizer


Spanakopita Cups are a testament to the beauty of simplicity. With a few ingredients and some care, you can create an appetizer that not only pleases the palate but also serves as a bridge to cherished memories and traditions. Whether you're serving them at a party or enjoying them as a snack, their rich flavors and satisfying crunch are sure to leave a lasting impression.

Read more about Appetizers

Read more about Main Dishes

Read more about Desserts

Lemon Chickpea & Tomato Stew | Made by Meaghan Moineau

Lemon Chickpea & Tomato Stew | Made by Meaghan Moineau

**Title: A Hearty Bowl of Nostalgia: Lemon Chickpea & Tomato Stew**


**Description:** Dive into the comforting flavors of our Lemon Chickpea & Tomato Stew, a dish that brings together the warmth of family memories and the zest of fresh ingredients. Perfectly seasoned and simmered to perfection, this stew is not only a nourishing main dish but also a delightful journey down memory lane. With a difficulty rating of 4 out of 10, it's an accessible recipe that promises rich, vibrant flavors with every spoonful.


---


**Lemon Chickpea & Tomato Stew: A Recipe Steeped in Family Tradition**


There's something inherently comforting about a simmering pot of stew. The aroma fills the kitchen, wrapping itself around you like a warm embrace. For me, this Lemon Chickpea & Tomato Stew does just that, conjuring memories of Sunday afternoons spent in my grandmother's kitchen, a place where the magic of food and family came to life.


**Ingredients:**


- 2 tablespoons olive oil


- 1 shallot, finely chopped


- 3 garlic cloves, minced


- 1 jalapeño chili, seeded and finely chopped


- 1 teaspoon dried oregano


- 2 bay leaves, broken


- 1/2 teaspoon crushed red pepper


- Salt and pepper to taste


- 2 cans of chickpeas, drained and rinsed


- 4 cups chicken broth


- Zest of 1 fresh lemon


- Juice of 1 fresh lemon


- 1 cup dried oven tomatoes


- 2 cups fresh spinach, loosely packed


**Instructions:**


1. **Sauté the Aromatics:** In a large saucepan, heat the olive oil over medium heat. Add the shallot and garlic, cooking until soft and aromatic, about 5 minutes. This step always reminds me of how my grandmother would patiently stir, telling stories of her childhood.


2. **Infuse with Spice:** Stir in the chickpeas, jalapeño, oregano, bay leaves, and crushed red pepper. Season generously with salt and pepper. Continue to cook, stirring frequently, until the herbs release their fragrance and the chickpeas start to brown, about 5-7 minutes. Be cautious, as those adventurous chickpeas might jump out — a quirk my siblings and I used to find hilarious.


3. **Build the Stew:** Pour in the chicken broth, lemon zest, and lemon juice. Bring the stew to a gentle boil, then reduce the heat and let it simmer until the broth is reduced by half, about 20 minutes. This was the time my grandmother would share her wisdom, the gentle bubbling of the stew a soothing backdrop.


4. **Final Touches:** Stir in the dried oven tomatoes, additional garlic if desired, and fresh spinach. Allow the stew to simmer for another 5 minutes. Discard the bay leaves before serving.


5. **Serve and Enjoy:** Season the stew with additional salt and pepper to taste. Serve hot with warm, crusty bread to soak up the flavorful juices.


**Difficulty Rating: 4/10**


**Classification: Main Dish**


As an adult, recreating this recipe has become a cherished ritual, a way to connect with those cherished family moments. It's not just about the delicious result — though that's certainly a perk — but about the process, the stories, and the love stirred into every pot. Whether you're sharing this meal with loved ones or enjoying it as a solo indulgence, may it bring warmth and a touch of nostalgia to your table.

Read more about Appetizers

Read more about Main Dishes

Read more about Desserts

Kolaches | Made by Meaghan Moineau

Kolaches | Made by Meaghan Moineau

### Title: "A Taste of Tradition: Crafting Perfect Kolaches for Every Family Gathering"


#### Description: Discover the heartwarming tradition of making kolaches, a cherished family recipe passed down through generations. With a blend of soft dough and sweet filling, this delightful treat is sure to bring joy to any gathering. Dive into our step-by-step guide and explore a nostalgic story that makes this dish a family favorite.
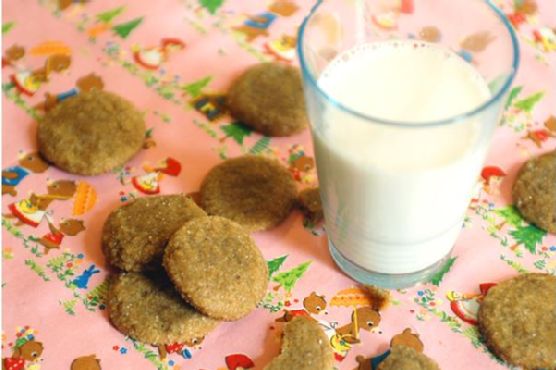

---


The aroma of freshly baked kolaches wafts through the house, and suddenly, I am transported back to my grandmother’s cozy kitchen. Every family gathering was incomplete without a batch of her famous kolaches, perfectly golden and filled with sweet poppy-seed goodness. As a child, I remember eagerly watching her skilled hands work the dough, transforming simple ingredients into a delightful masterpiece.


### Ingredients:


- 1 tablespoon sugar (for yeast)


- 1 package yeast


- 1 cup warm water


- 1 cup milk


- 1/2 cup shortening


- 1 teaspoon salt


- 3 egg yolks


- 1/2 cup sugar (for dough)


- 4 cups flour


- Canned poppy-seed filling


- 1/2 cup sugar (for Popsika)


- 1/4 cup flour (for Popsika)


- 1 teaspoon cinnamon


- 2 tablespoons melted butter


### Instructions:


1. **Activate the Yeast**: Begin by sprinkling 1 tablespoon of sugar over the yeast in a small bowl. Dissolve the mixture in lukewarm water and set aside to activate.


2. **Prepare the Milk Mixture**: In a small saucepan, heat the milk and dissolve the shortening. Allow it to cool to lukewarm before adding the salt, egg yolks, and sugar. Stir well to combine.


3. **Combine Mixtures**: Pour the milk mixture into the yeast mixture, creating a harmonious blend.


4. **Form the Dough**: Gradually add flour to the liquid mixture, working the dough by hand or with a mixer until it becomes glossy and slightly sticky.


5. **First Rise**: Cover the dough and place it in a warm, draft-free location, allowing it to rise until it doubles in size, approximately 45 minutes to an hour.


6. **Shape the Kolaches**: Once risen, punch down the dough and knead it lightly. Divide into egg-sized portions and form into balls. Arrange them on well-oiled baking pans about an inch apart and butter the tops.


7. **Second Rise**: Let the dough balls rise for about 15 minutes, then make indentations in each for the filling.


8. **Add Filling**: Fill each indentation with a large teaspoon of canned poppy-seed filling.


9. **Prepare the Popsika Topping**: In a small bowl, mix 1/2 cup sugar, 1/4 cup flour, and 1 teaspoon cinnamon. Add 2 tablespoons of melted butter and combine until the mixture resembles crumbs. Sprinkle the Popsika over the filled kolaches.


10. **Final Rise and Bake**: Allow the kolaches to rise again, doubling in size, for about 45 minutes to one hour. Preheat the oven to 375°F, then bake the kolaches until they turn golden brown.


11. **Cool and Enjoy**: Remove from the oven, cool slightly, then transfer the kolaches to wire racks to cool completely.


### A Nostalgic Family Memory


One winter evening, as snowflakes danced outside, my family gathered in the warmth of my grandmother’s kitchen. The laughter of my cousins filled the air as we eagerly awaited the kolaches. My grandmother shared stories of her childhood, lovingly kneading the dough while recounting tales of her own mother teaching her the same recipe. Each bite of the kolaches carried the taste of heritage and the bond of family, a tradition we continue to cherish.


### Difficulty Rating: 6/10


### Classification: Dessert


Kolaches, with their soft, buttery dough and sweet filling, are more than a dessert; they are a symbol of love and tradition, perfect for any family gathering. Whether you’re revisiting cherished memories or creating new ones, this recipe is sure to bring a touch of warmth and nostalgia to your home.

Read more about Appetizers

Read more about Main Dishes

Read more about Desserts

Tex-Mex Burger | Made by Meaghan Moineau

Tex-Mex Burger | Made by Meaghan Moineau

# Savoring the Southwest: Crafting the Perfect Tex-Mex Burger


## A Nostalgic Culinary Journey


Growing up in the heart of Texas, my family and I would often gather in the backyard on warm summer evenings, the air buzzing with laughter and the smell of something delicious wafting from the grill. It was on these golden evenings that my mother introduced us to the Tex-Mex Burger—a dish that would become a family favorite and a symbol of our shared love for bold flavors and simple pleasures.


I remember the first time she made it. The sun was setting, casting an amber glow across our backyard. My siblings and I watched in awe as she skillfully mixed ground beef with salsa and a medley of spices. It was like watching a magician at work. When she handed each of us a burger, the first bite was transformative. The crispy exterior of the patty gave way to a juicy, flavorful core, perfectly balanced by the creamy avocado and the kick of pepper jack cheese.


## Crafting Your Own Tex-Mex Burger


### Ingredients:


- Ground beef


- Salsa


- Avocado


- Pepper jack cheese


- Hamburger buns


- Red onion


- Chili powder


- Cumin


- Paprika


- Cilantro


- Salt


- Pepper


### Instructions:


1. **Preheat the Broiler:** Begin by preheating your broiler. This will ensure a delightful crust on your patties.


2. **Prepare the Frying Pan:** Heat a large frying pan over medium-high heat. We want it hot enough to sear the burgers to perfection.


3. **Make the Patties:** In a large mixing bowl, combine the ground beef with salsa, chili powder, cumin, paprika, salt, and pepper. Mix until the ingredients are evenly distributed.


4. **Form the Patties:** Shape the mixture into patties, pressing slightly in the center for even cooking.


5. **Cook the Patties:** Place the patties in the hot frying pan. Cook each side for approximately 4-5 minutes, ensuring a nice crust forms.


6. **Melt the Cheese:** In the last minute of cooking, place a slice of pepper jack cheese on each patty. Allow it to melt beautifully over the patty.


7. **Assemble the Burger:** Toast the hamburger buns lightly, then layer each with a slice of avocado, a juicy patty, and a few slices of red onion. Garnish with fresh cilantro.


## A Flavorful Main Dish


The Tex-Mex Burger is more than just a meal; it’s a tribute to the culinary melding of robust Texan and vibrant Mexican flavors. With its harmonious blend of spices and fresh ingredients, it promises a taste of the Southwest in every bite.


### Difficulty Rating: 4/10


This dish is surprisingly easy to prepare, making it perfect for both novice cooks and seasoned chefs looking to spice up their culinary repertoire. As a Main Dish, it’s ideal for family dinners, backyard barbecues, or any occasion that calls for a hearty, flavorful meal.


## A Family Tradition


Even now, whenever we gather as a family, someone inevitably suggests we make those unforgettable Tex-Mex Burgers. They’ve become a beloved tradition, a culinary heirloom passed down through flavors and memories. As you embark on crafting your own Tex-Mex Burger, may you find the same joy and connection that this dish has brought to my family for generations. Happy cooking!

Read more about Appetizers

Read more about Main Dishes

Read more about Desserts

Pancakes | Made by Meaghan Moineau

Pancakes | Made by Meaghan Moineau

**Title: Fluffy Pancakes and Family Memories: A Nostalgic Breakfast Delight**


**Description: Rediscover the joy of homemade pancakes with our simple, yet delicious recipe. Dive into a heartwarming family story that brings this breakfast classic to life. Perfect for a weekend morning, these pancakes are bound to become a cherished tradition in your home.**


---


There is something inherently magical about waking up to the smell of pancakes sizzling on a Sunday morning. The aroma wafts through the house, gently coaxing everyone out of bed with the promise of a warm, delicious breakfast. Pancakes are more than just a meal; they are a canvas for family memories, a dish that unites generations at the breakfast table.


**Ingredients:**


- 1 egg


- 1 cup milk


- 2 tablespoons melted margarine


- 1 cup flour


- 2 teaspoons baking powder


- 1/2 teaspoon salt


- 1 tablespoon sugar


**Instructions:**


1. Begin by beating the egg in a bowl until it becomes fluffy, a step that sets the foundation for light and airy pancakes.


2. Add the milk and melted margarine to the beaten egg, mixing thoroughly to combine the wet ingredients.


3. In a separate bowl, whisk together the flour, baking powder, salt, and sugar.


4. Gradually add the dry ingredients to the wet mixture, stirring until well combined and smooth.


5. Heat a heavy griddle or frying pan, greased lightly with butter on a paper towel. The pan is ready when a drop of water breaks into smaller dancing balls on the surface.


6. Pour approximately 1/4 cup of batter into the pan, using the back of a spoon to spread it out gently.


7. Cook until bubbles appear on the surface and begin to pop, then flip and cook the other side until golden brown.


**Difficulty: 3/10**


**Classification: Main Dish**


---


Growing up, Sunday mornings were always special in our household. My siblings and I would gather around the kitchen table, eagerly awaiting the pancakes my grandmother would make with love. The kitchen was her domain, and she orchestrated it with the precision of a maestro conducting a symphony. Her pancakes were legendary, not just for their perfect golden hue and airy texture but for the stories she shared as she flipped each one.


One story that stayed with me was about the time she first learned to make pancakes from her mother. During the Great Depression, resources were scarce, and creativity was key to making meals stretch. My great-grandmother would swap out butter for margarine and use what little sugar they had sparingly. Despite the challenges, she always found a way to make breakfast feel like a feast. Grandma would tell us how her mother's pancakes were a symbol of hope and resilience, a reminder that even in hard times, simple joys could be found around the breakfast table.


As I prepare these pancakes for my family today, I find myself channeling the spirit of those Sunday mornings. The kitchen is filled with laughter and chatter, the same way it was when I was a child. Each bite of pancake is a tribute to the generations before us, a testament to the power of tradition and the comfort of home-cooked meals.


These pancakes, with their humble ingredients and straightforward preparation, are a reminder that sometimes the simplest dishes leave the most lasting impressions. Whether you're making them for the first time or the hundredth, may they bring warmth and happiness to your morning, just as they have for my family.


So, gather your loved ones, warm up the griddle, and create your own pancake memories. After all, every great family story deserves a delicious beginning.

Read more about Appetizers

Read more about Main Dishes

Read more about Desserts

Grilled Ham and Cheese French Toast For A Quick Weeknight Dinner | Made by Meaghan Moineau

Grilled Ham and Cheese French Toast For A Quick Weeknight Dinner | Made by Meaghan Moineau

# Grilled Ham and Cheese French Toast: A Quick and Delicious Weeknight Dinner Delight


## Description


Discover the recipe for Grilled Ham and Cheese French Toast, a delightful twist on a classic sandwich that's perfect for a quick weeknight dinner. With layers of lean turkey ham, low-fat Jarlsberg cheese, and a tangy kick from dill pickles, all enveloped in a crisp, golden French toast crust, this dish is sure to be a family favorite. Follow our step-by-step guide to create this mouthwatering meal that combines the comfort of French toast with the savory satisfaction of a grilled cheese sandwich. Easy to make and full of flavor, this recipe is rated 4 out of 10 in difficulty and is classified as a Main Dish.


## Ingredients


- Buttermilk


- Egg whites


- Dijon mustard


- Wheat bread


- Low-fat Jarlsberg cheese


- Lean turkey ham


- Dill pickles


- Low-fat light Smart Balance Heart Right spread


## Instructions


1. **Preheat and Prepare:** Preheat your oven to 350 degrees Fahrenheit. In a shallow bowl or pie plate, whisk together the buttermilk and egg whites. Set aside.


2. **Assemble the Sandwiches:** Spread Dijon mustard on one side of each slice of wheat bread. On 4 slices, place a slice of low-fat Jarlsberg cheese. Arrange lean turkey ham over the cheese. Add 3-4 thin slices of dill pickle to each sandwich. Top with the remaining slices of bread, mustard side down.


3. **Cook the Sandwiches:** Melt 1 tablespoon of reduced-fat butter in a large nonstick pan over medium heat. Dip 2 sandwiches into the buttermilk mixture, ensuring both sides are coated but not soaked. Allow excess to drip back into the dish. Add the sandwiches to the pan, cover, and cook for 3-5 minutes.


4. **Finish Cooking:** Uncover, flip the sandwiches, press down with a spatula, cover again, and cook for an additional 2-3 minutes until golden brown and the cheese is melted. Remove the sandwiches, place them on a baking sheet, and keep warm in the oven.


5. **Repeat and Serve:** Repeat the cooking process with the remaining sandwiches. Once all are cooked, slice each sandwich in half and serve with a fork and knife.


## A Taste of Nostalgia


Growing up, Sunday evenings were always a special time in our household. After a busy weekend, my family would gather around the kitchen table, eager for the comforting aroma of a home-cooked meal. My mother often made her famous Grilled Ham and Cheese French Toast, and it quickly became a family tradition. We would watch her expertly whip up the buttermilk and egg mixture, spreading mustard with a flourish and layering the ham and cheese with precision. The sound of the sandwiches sizzling in the pan was our cue to gather around, forks in hand, ready to dig in. Those evenings were filled with laughter, shared stories, and the simple joy of a delicious meal. Creating this dish now brings back those cherished memories, and I hope it becomes a beloved tradition for your family too.


## Difficulty and Classification


This Grilled Ham and Cheese French Toast is rated a 4 out of 10 in difficulty, making it an easy-to-follow recipe even for novice cooks. It is classified as a Main Dish, perfect for a satisfying and quick weeknight meal. Enjoy the delightful blend of flavors and the nostalgic comfort it brings to your dinner table.

Read more about Appetizers

Read more about Main Dishes

Read more about Desserts

Broccolini Quinoa Pilaf | Made by Meaghan Moineau

Broccolini Quinoa Pilaf | Made by Meaghan Moineau

**Title: "Savor the Simplicity: Nostalgic Broccolini Quinoa Pilaf"**


**Description: Discover the delightful harmony of broccolini and quinoa in a wholesome pilaf that evokes cherished family memories. This nutritious dish is a perfect blend of flavors and textures, ideal as a main dish for any meal.**


---


There's something uniquely satisfying about a dish that not only fills your belly but also warms your heart with memories. Our Broccolini Quinoa Pilaf is one such creation, a delightful main dish that effortlessly combines the earthy notes of quinoa with the bright, slightly bitter touch of broccolini. This recipe not only tantalizes your taste buds but also nurtures your soul with its comfort and simplicity.


### Ingredients:


- 1 bunch of broccolini, trimmed


- 1 garlic clove, minced


- 2 tablespoons olive oil


- 1 medium onion, finely chopped


- 1 cup quinoa


- 2 cups vegetable broth


- ½ cup walnuts, toasted and roughly chopped


- Salt and pepper to taste


### Instructions:


1. In a large pan with a lid, heat olive oil over medium-high heat. Add onions and cook for 1 minute.


2. Add garlic and cook until onions are translucent and garlic is fragrant.


3. Stir in quinoa, ensuring it’s well mixed with the onions and garlic.


4. Gradually pour in the vegetable broth, bringing the mixture to a boil.


5. Cover the pan and reduce the heat to low. Let it simmer for 15 minutes.


6. In the last 2-3 minutes of cooking, place the broccolini on top of the quinoa without stirring, then cover again.


7. After cooking, uncover and gently toss the broccolini with the quinoa.


8. Season with salt and pepper to taste, sprinkle with toasted walnuts, and serve hot.


### A Nostalgic Family Memory:


Growing up, Sunday lunches were a time-honored tradition in our family. My grandmother, the matriarch of our culinary experiences, would often prepare her signature Broccolini Quinoa Pilaf. The aroma of sautéed onions and garlic would waft through the house, signaling the beginning of a meal that brought us all together.


This dish was more than just a meal; it was a vessel of stories and laughter shared around the dining table. As a child, I remember being tasked with the important job of trimming the broccolini, standing on tiptoes to reach the counter. My grandmother would watch over me with a gentle smile, recounting tales of her childhood and how she learned to cook from her own mother.


The simplicity of the pilaf, adorned with the crunch of walnuts, was a testament to the beauty of uncomplicated cooking. Each bite was a reminder of those precious family moments, where food was love and laughter was abundant.


### Difficulty Rating: 3/10


This Broccolini Quinoa Pilaf is not only a testament to uncomplicated cooking but also a delightful main dish that anyone can master with ease. Perfect for a nutritious meal, it brings a touch of nostalgia to your table, making it a cherished addition to any family gathering.

Read more about Appetizers

Read more about Main Dishes

Read more about Desserts