Penne Arrabiata | Made by Meaghan Moineau

It was a Tuesday night, and I found myself staring at the pantry, looking for some inspiration. The day had been long, and the thought of spending hours cooking was just not happening. I needed something quick, with a punch of flavor that would kick away the day’s stress. That’s when I remembered my go-to comfort dish: Penne Arrabiata. This dish is a lifesaver, seriously. It’s one of those recipes that seems almost too easy given how delicious it turns out — a spicy, garlicky tomato sauce that clings lovingly to every piece of penne. Plus, there’s something about the warmth of the spices that feels like a cozy hug after a hectic day. So, if you’re in the same boat and need a little quick comfort, I’ve got you.

Jump to Recipe

What You’ll Need

You probably have most of these ingredients just waiting in your pantry, making this dish all the more inviting. Here’s what’s essential:

  • Canned whole tomatoes – I personally love Pomi tomatoes.
  • Pasta – A packet of penne.
  • Fresh parsley, minced.
  • Garlic – About 5 cloves, freshly minced.
  • Olive oil – 3 tablespoons will do the trick.
  • Dried red peppers – For that spicy kick.
  • Fresh basil – For serving.

How to Make Penne Arrabiata

  1. Start by bringing a large pot of salted water to a boil. This is where your penne will cook, so make sure the water is well-seasoned.
  2. While the water is heating up, grab a large skillet and heat about 3 tablespoons of olive oil over medium heat. Toss in about a teaspoon of dried red pepper flakes, letting them infuse the oil until they’re slightly aromatic but not smoking. Trust your nose here!
  3. Next, add your freshly minced garlic — all five cloves of it. The garlic will start to turn golden and fragrant in no time.
  4. Soon after, sprinkle in a couple of tablespoons of minced fresh parsley, stirring it into the mix. The fragrance should be pretty irresistible by now.
  5. Chop and add the canned whole tomatoes. Stir them in, and then cover the skillet. Let the sauce cook until it’s heated through, the flavors coming together beautifully.
  6. Meanwhile, cook the penne in your boiling water, allowing it to reach that perfect al dente texture — tender with a hint of bite.
  7. Drain the pasta and add it straight into your simmering sauce. Stir thoroughly, so every piece is coated with that spicy, garlicky goodness.
  8. Just before serving, toss in some coarsely chopped fresh basil and a little more parsley. This fresh, herby finish makes all the difference.
  9. Serve immediately, preferably with a good chunk of crusty bread to mop up any sauce left on your plate.

Cook’s Notes

Here’s the deal: the key to a great Penne Arrabiata is balance. Let your senses guide you — the sauce should be spicy but not overwhelmingly so. Feel free to adjust the amount of red pepper flakes depending on your spice tolerance. If you’re making this ahead, you can prep the sauce and store it in the fridge for up to 3 days. Just reheat and toss with freshly cooked pasta when you’re ready to eat. As for leftovers, they keep well in the fridge for about 2 days; just be sure to store the pasta and sauce together in an airtight container.

Make It Your Own

This dish is super adaptable, which is another reason to love it. Here are some fun ways to switch things up:

  • Swap the penne for spaghetti for a different texture experience.
  • If you’re into protein, add some grilled chicken slices or crispy tofu on top.
  • For a veggie boost, toss in some sautéed mushrooms or spinach just before serving.
  • Feeling cheesy? A sprinkle of parmesan or a dollop of ricotta can take this dish to new heights.

If you give this Penne Arrabiata a whirl, I’d love to hear about how it turns out! Drop a comment below or tag me in your spicy pasta creations — let’s share the love for this simple, satisfying meal. Enjoy!

Related update: Penne Arrabiata

Rosemary Walnut Bread | Made by Meaghan Moineau

Picture this: It’s a chilly Saturday morning, the kind where the air feels sharp and the sky has that crisp blue tint that only autumn can deliver. The leaves have turned, and you’re wrapped up in your coziest sweater. A few weekends ago, I found myself in this exact scenario with a craving for something warm, hearty, and just a little bit special. Cue the Rosemary Walnut Bread! It’s the kind of bread that fills your kitchen with an aroma so enticing, you’ll want to bottle it as a candle. Plus, it’s a breeze to whip up, even if you’re still waking up from a glorious sleep-in. This recipe is a keeper for those who love a crusty loaf with the perfect hint of rosemary’s earthy magic and the crunch of walnuts.

Jump to Recipe

What You’ll Need

The beautiful thing about this Rosemary Walnut Bread is the simplicity of its ingredients — nothing fancy, yet it delivers big on flavor.

  • Cream cheese
  • Dry yeast
  • Eggs
  • Flour
  • Honey
  • Lemon zest
  • Milk
  • Olive oil
  • Rosemary
  • Salt
  • Walnuts

How to Make Rosemary Walnut Bread

  1. Start by combining the cream cheese, milk, salt, and honey in a medium mixing bowl. Sprinkle the dry yeast over the mixture and give it a gentle stir. Let it stand for about 5 minutes, allowing the yeast to activate — you’ll notice a frothy layer on top.
  2. Slowly stir in two cups of flour. The dough will start to come together. Cover the bowl with plastic wrap and tuck it into a warm spot (85°F is ideal) for about 15 minutes. During this time, the dough gets a chance to rest and begin to rise.
  3. Add the remaining flour, chopped walnuts, lemon zest, and chopped rosemary into the bowl. Crack in two eggs, and mix everything until the dough feels sticky and cohesive.
  4. Transfer the dough onto a floured surface and knead for a full 10 minutes. Think of this as your morning workout. The dough should feel smooth and elastic by the time you’re done.
  5. Rub a bit of olive oil onto the top of your dough and place it in a lightly oiled bowl. Cover with a damp cloth and let it rise for an hour until it doubles in size.
  6. Once the dough has risen, return it to the floured surface. Divide and shape it into two leaf-like loaves. This is your chance to get creative with your shaping skills!
  7. Make three diagonal slashes about half an inch deep across each loaf. These slashes will help the bread expand beautifully while baking.
  8. Brush the tops with a beaten egg for that irresistible golden crust, then let the loaves rise again for 30 minutes.
  9. Bake in a preheated 375°F oven for 40 minutes, until the loaves are golden and sound hollow when tapped on the bottom.
  10. Let the bread stand for about 20 minutes before slicing — if you can resist!

Cook’s Notes

Here are a few little nuggets of wisdom to help you along the way. If your kitchen runs cold, you can place the dough near the oven or a warm stove to help with rising. And when you’re kneading, don’t be afraid to add a sprinkle of flour if the dough feels too sticky. For storage, wrap your bread tightly in foil or a bread bag to keep it fresh for up to three days. It also freezes beautifully — just slice it, wrap it well, and pop it in the freezer.

Make It Your Own

  • Swap the walnuts for pecans if you fancy a different nutty flavor.
  • If rosemary isn’t your jam, try using thyme or sage for a unique herb twist.
  • Add a handful of dried cranberries for a sweet and tart combo that’s perfect for the holidays.
  • Experiment with whole wheat flour for a heartier loaf — just adjust the liquid slightly as it tends to absorb more moisture.

If you try this, I’d love to hear how it turns out — drop a comment or tag me! Happy baking, and may your kitchen be filled with warmth and the comforting scent of home-baked bread.

Related update: Rosemary Walnut Bread

Related update: Khachapuri

Chive and dill muffins | Made by Meaghan Moineau

One chilly autumn afternoon, I found myself digging through the fridge, searching for something — anything — that could transform into a warm, comforting snack. The day had that crisp edge that makes you want to cozy up with something fresh out of the oven. That’s when I spotted a lonely bunch of fresh chives and dill, remnants from last night’s dinner. An idea sparked, one that felt both adventurous and familiar: Chive and Dill Muffins. These little savory gems are the perfect answer to a craving for something cozy yet bright, offering a delightful mix of herbal freshness and subtle, buttery richness. And let’s be honest, they’re also a great way to justify eating a muffin at any time of day.

Jump to Recipe

What You’ll Need

Chances are you already have most of these ingredients lounging in your pantry, just waiting to become something delicious.

  • 1 cup all-purpose flour
  • 1/2 cup yellow cornmeal
  • 2 tablespoons sugar
  • 2 teaspoons baking powder
  • 1 teaspoon salt
  • 1/2 teaspoon baking soda
  • 1/4 teaspoon cayenne pepper
  • 1/4 cup fresh chives, chopped
  • 1/4 cup fresh dill, chopped
  • 1 cup plain yogurt
  • 2 large eggs
  • 1/2 cup (1 stick) unsalted butter, melted and slightly cooled

How to Make Chive and Dill Muffins

  1. Preheat your oven to 220°C (425°F). This high heat will give your muffins that beautiful rise and golden top.
  2. In a medium bowl, whisk together the flour, cornmeal, sugar, baking powder, salt, baking soda, and cayenne pepper. Once combined, gently stir in the chopped chives and dill, letting their fresh aroma fill your kitchen.
  3. In another medium bowl, whisk together the yogurt, eggs, and melted butter until smooth and creamy. The mixture should be a pale yellow, with small bubbles forming from the whisking.
  4. Add the yogurt mixture to the dry ingredients and stir just until blended. Be careful not to overmix; it’s okay if the batter is a bit lumpy. Those lumps will work themselves out during baking.
  5. Divide the batter among greased or silicone muffin cups, using about 1/3 cup batter for each. They should be about two-thirds full, giving them room to puff up beautifully.
  6. Bake in the preheated oven for 20 minutes, or until the muffins are puffed and golden. You’ll know they’re done when a toothpick inserted into the center comes out clean or with just a few crumbs attached.
  7. Let the muffins cool in their cups for a few minutes before removing. This brief wait allows them to set up perfectly. Serve warm for the best experience.

Cook’s Notes

Here’s where the magic happens — or at least where you avoid any potential hiccups. First, make sure your baking powder and soda are fresh; nothing’s worse than flat muffins. These muffins can be stored in an airtight container at room temperature for up to two days, but they’re best enjoyed fresh. If you want to make them ahead, you can freeze them for up to a month. Just thaw at room temperature and pop them in a warm oven for a few minutes to refresh their golden tops.

Make It Your Own

These muffins are already a little party of flavors, but if you’re feeling experimental, here are a few ideas:

  • Swap the chives for green onions for a milder flavor with a slight crunch.
  • Add 1/2 cup of grated cheddar cheese to the batter for an extra savory kick.
  • Mix in some finely chopped sun-dried tomatoes for a slightly sweet, tangy twist.
  • Replace the dill with fresh parsley and thyme for a different herbal profile.

If you try this, I’d love to hear how it turns out — drop a comment or tag me! Let’s swap stories about these delightful muffins and all their delicious variations.

Related update: Chive and dill muffins

Related update: Penne Arrabiata

Eggplant Parmesan | Made by Meaghan Moineau

Last Tuesday, I found myself staring at a lone eggplant sitting forlornly in my fridge. It had been a long day, and I needed something comforting and satisfying. Eggplant Parmesan popped into my head, and I couldn’t shake the craving. There’s something about the gooey cheese, the tangy tomato sauce, and the crispy eggplant layers that makes everything right in the world. Plus, it’s one of those dishes that tastes like it took hours, but really it’s pretty straightforward. I promise, even if you’re working with a fridge that’s almost as empty as mine was, you can make this happen.

Jump to Recipe

What You’ll Need

A lot of these ingredients are pantry staples or things you probably have around. This recipe is all about turning humble ingredients into something magic.

  • Eggplant – the star of the show, obviously.
  • Eggs – for dipping and making a perfect crispy crust.
  • Dried bread crumbs – because who’s got the time to make fresh ones?
  • Olive oil – my go-to for sautéing.
  • Parmesan cheese – gotta get that sharp, nutty flavor.
  • Mozzarella cheese – for maximum cheese pull satisfaction.
  • Canned tomato sauce – keeping it easy and simple.
  • Garlic – because duh, it’s garlic.
  • Yellow onions – they bring that sweet, savory base note.
  • Oregano – dried is fine, fresh if you’ve got it.

How to Make Eggplant Parmesan

  1. Preheat your oven to 350 degrees. Trust me, this is the perfect temp.
  2. Slice your eggplant into 1/4 inch thick rounds. Sprinkle with salt and let them sit for 30 minutes. It’s all about drawing out that extra moisture.
  3. In a saucepan, sauté the onions and garlic in a tablespoon of oil until they’re soft and fragrant. Then add in your canned tomato sauce and a good sprinkle of oregano. Simmer until it thickens slightly. The smell will have you dreaming of Italy.
  4. Set up a dipping station with beaten eggs in one bowl and bread crumbs in another. Dip each eggplant slice in the eggs, then coat them in crumbs. You want them perfectly covered.
  5. Heat some olive oil in a pan over medium heat. Sauté the eggplant slices until they’re golden brown on both sides. The kitchen will smell like heaven.
  6. In a 2-quart casserole dish, start with a layer of eggplant slices. Sprinkle with Parmesan, some more oregano, and a bit of mozzarella. Cover with tomato sauce. Repeat layers until you’ve used everything up, finishing with a good layer of mozzarella. It’s a cheesy masterpiece.
  7. Bake in your preheated oven until the sauce bubbles and the cheese is melted and browned, about 30 minutes. You’ll know it’s ready when the edges are sizzling with cheesy goodness.

Cook’s Notes

Keep an eye on your eggplant slices while sautéing. Too much oil, and they’ll be soggy instead of crispy. If you’re making this ahead, you can assemble the entire dish, cover it, and pop it in the fridge. When you’re ready to bake, just add a few extra minutes to the cooking time. Leftovers (if you have any!) keep well in the fridge for a couple of days. Just reheat in the oven to keep that crispiness.

Make It Your Own

  • Swap the mozzarella for smoked provolone for a deeper flavor.
  • Use gluten-free bread crumbs if you’re skipping gluten.
  • Try adding a layer of spinach or mushrooms between the eggplant for extra veggies.
  • Fancy a twist? Drizzle with a bit of balsamic glaze just before serving.

If you try this, I’d love to hear how it turns out — drop a comment or tag me! There’s nothing quite like sharing good food stories. Happy cooking!

Related update: Eggplant Parmesan

Related update: Classic Boeuf Bourguignon

Lemon Curd Cheesecake | Made by Meaghan Moineau

Lemon Curd Cheesecake

Intro

There’s something incredibly nostalgic about a creamy cheesecake, reminiscent of family gatherings and festive celebrations. I remember the first time I tried a lemon curd cheesecake at my grandmother’s house. It was a sunny afternoon, and the tangy sweetness of the lemon curd perfectly balanced the rich, creamy cheesecake. Since then, it has become a staple in my dessert repertoire, evoking memories of laughter and love shared around the dining table. Today, I’m excited to share my version of this beloved dessert, hoping it brings as much joy to your table as it has to mine.

Why You’ll Love It

This Lemon Curd Cheesecake is a delightful blend of flavors and textures that will captivate your taste buds. The buttery biscuit crust provides a perfect base for the rich and creamy filling, while the lemon curd adds a refreshing tangy sweetness. It’s an elegant yet approachable dessert, perfect for any occasion, from casual family dinners to sophisticated gatherings. Plus, it’s a no-bake recipe, making it a breeze to prepare.

Ingredients

  • 1 cup digestive biscuits crumbs
  • 1/4 cup unsalted butter, melted
  • 2 cups cream cheese, softened
  • 3/4 cup sugar
  • 2 tablespoons lemon zest
  • 1/2 cup lemon juice
  • 1 cup lemon curd
  • 1 packet gelatin
  • 1/4 cup cold water
  • 1 cup whipping cream
  • Additional whipped cream for decoration

Instructions

  1. Mix the digestive biscuit crumbs and melted butter in a bowl until well combined. Press the mixture into the bottom of a loose-bottom springform pan to form the crust. Refrigerate to set.
  2. To make the lemon curd: In the top of a double boiler over gently simmering water, combine all lemon curd ingredients (lemon juice, sugar, eggs, and butter). Cook while stirring constantly until thickened and coats the back of a spoon. Remove from heat and allow to cool completely.
  3. For the filling: Sprinkle gelatin over cold water in a small bowl to let it bloom. Place the bowl over simmering water, stirring until the gelatin dissolves. Set aside to cool slightly.
  4. In a large bowl, beat the cream cheese with an electric mixer on medium-high until smooth and creamy. Gradually add sugar, followed by lemon zest, lemon juice, and all but 1/2 cup of the lemon curd.
  5. Whip the whipping cream until thickened and set aside.
  6. Stir the dissolved gelatin into the cream cheese mixture, mixing well to combine. Gently fold in the whipped cream using a spatula.
  7. Pour the filling over the chilled crust and smooth the top. Refrigerate the cheesecake for at least 3 hours or until fully set.
  8. Before serving, spread the reserved lemon curd over the top of the cheesecake and decorate the edges with whipped cream.
  9. Use a hot knife to slice the cheesecake and serve. Enjoy!

Tips

For the best results, ensure your cream cheese is at room temperature before mixing to achieve a smooth filling. When decorating, a piping bag can help create beautiful whipped cream patterns along the edge. To avoid cracking, make sure the gelatin is completely dissolved and cooled before adding it to the cream cheese mixture.

Variations & Substitutions

If you prefer a different base, substitute the digestive biscuits with graham crackers or shortbread. For a gluten-free version, use gluten-free biscuits. You can also experiment with different citrus flavors by replacing lemon juice and zest with lime or orange.

Storage

Store your Lemon Curd Cheesecake in the refrigerator, covered with plastic wrap or in an airtight container, for up to 5 days. For longer storage, freeze the cheesecake without the lemon curd topping, wrapped tightly in plastic wrap and foil, for up to a month. Thaw in the refrigerator before serving and add the lemon curd topping fresh for best results.

FAQ

Can I make this cheesecake ahead of time?

Yes, this cheesecake is perfect for making ahead. Prepare it a day in advance, allowing enough time for it to set in the fridge. Add the lemon curd topping just before serving for the freshest taste.

Is there a substitute for gelatin?

If you prefer not to use gelatin, you can substitute it with agar-agar for a vegetarian option. Follow the package instructions for conversion, as agar-agar sets differently than gelatin.

Nutrition

This Lemon Curd Cheesecake is rich and indulgent, making it a treat best enjoyed in moderation. It provides a good source of calcium from the cream cheese but is high in sugar and fat. Adjust portion sizes to fit your dietary needs.

Conclusion

This Lemon Curd Cheesecake is more than just a dessert; it’s a journey back to cherished memories and a testament to the timeless appeal of classic flavors. Whether you’re an experienced baker or a novice in the kitchen, this recipe is sure to impress and delight. Gather your loved ones, serve up a slice, and watch their faces light up with each tangy, creamy bite. Enjoy this delightful creation and create new memories around your table.

Related update: Lemon Curd Cheesecake

Hard-Boiled Egg Gratin In A Bechamel Sauce | Made by Meaghan Moineau

Hard-Boiled Egg Gratin In A Bechamel Sauce

Intro

There’s a certain comfort that comes from indulging in a dish that reminds you of home, warmth, and simpler times. For me, Hard-Boiled Egg Gratin in a Bechamel Sauce is that dish. I remember my grandmother preparing it on Sunday mornings, the aroma of melting butter and sizzling onions filling the kitchen, while I eagerly waited at the table. This dish, with its velvety sauce and golden-brown cheesy top, is more than just a meal; it’s a hug on a plate, a nostalgic nod to family gatherings and cherished memories.

Why You’ll Love It

There are countless reasons why this recipe will become a staple in your home:

  • Comforting and Satisfying: Each bite offers a delightful combination of creamy, cheesy, and savory flavors.
  • Simple Ingredients: You likely already have most of the ingredients in your kitchen.
  • Versatile: Perfect for breakfast, brunch, or even a light dinner.
  • Impressive Yet Easy: It looks and tastes gourmet but is easy enough for novice cooks.

Ingredients

  • Butter
  • Eggs
  • Flour
  • Gruyère cheese
  • Milk
  • Nutmeg
  • Onion
  • White salt
  • Pepper

Instructions

  1. Hard-boil the eggs: Bring a saucepan of salted water to the boil. Add the eggs, reduce the heat and simmer for 10 minutes. Put the eggs into cold water until just cool enough to handle, then shell. A trick for shelling hard-boiled eggs is to roll them with the palm of your hand on a hard surface to break up the shell and then peel them under a slow stream of running water. Reserve the eggs in a bowl of warm water.
  2. Melt the butter in a saucepan or small frying pan over low heat. Add the onion and cook, stirring frequently, until tender but not colored.
  3. Prepare the béchamel sauce: Melt the butter in a medium heavy-bottomed saucepan over low heat. Add the flour and whisk for about 2 minutes; do not allow it to color. Whisk in the milk and bring to the boil, whisking constantly to avoid lumps. Season with the nutmeg and salt and pepper to taste. Reduce the heat and simmer for 10 minutes, whisking constantly and scraping the bottom and sides of the pan to prevent the sauce from sticking. Stir in the cooked onions and cook for 5 minutes.
  4. Heat the grill. Slice the eggs 1 cm (0.4 inch) thick. Spread a thin layer of the béchamel sauce over the bottom of the gratin dish. Layer the egg slices over the béchamel sauce and coat with the remaining sauce. Sprinkle with grated cheese, then grill, turning the dish if necessary to color evenly, until the top is golden brown. Serve immediately.

Tips

  • For perfectly cooked eggs, start with room-temperature eggs, which helps in even boiling.
  • Use freshly grated Gruyère cheese for the best melt and flavor.
  • If your béchamel sauce becomes too thick, whisk in a little more milk to reach your desired consistency.

Variations & Substitutions

This dish is wonderfully versatile. Here are some variations and substitutions to consider:

  • Cheese: Substitute Gruyère with Swiss or Emmental cheese for a different flavor profile.
  • Vegetarian Additions: Add sautéed mushrooms or spinach for extra nutrients and flavor.
  • Spices: Try adding a pinch of cayenne pepper or paprika for a subtle kick.

Storage

If you have leftovers (which might be unlikely!), store them in an airtight container in the refrigerator for up to 2 days. Reheat gently in the microwave or oven before serving. Keep in mind that the texture may change slightly upon reheating.

FAQ

Can I prepare this dish in advance?

Yes, you can prepare the béchamel sauce and boil the eggs a day ahead. Store them separately in the fridge. Assemble the gratin just before grilling for best results.

What can I serve with this gratin?

This dish pairs beautifully with a simple green salad or crusty bread to soak up the creamy sauce. It’s also delightful alongside roasted vegetables.

Can I make this recipe gluten-free?

Absolutely! Simply substitute the flour in the béchamel sauce with a gluten-free all-purpose flour blend. Ensure that the other ingredients are certified gluten-free.

Nutrition

This dish is rich and indulgent, offering protein from the eggs and essential nutrients from the cheese and milk. While it’s not a low-calorie meal, it’s perfect for an occasional treat or special breakfast.

Conclusion

Our Hard-Boiled Egg Gratin in a Bechamel Sauce is more than just a recipe; it’s a celebration of comfort and nostalgia. Whether you’re looking to impress guests with a simple yet elegant dish or just craving something warm and satisfying, this gratin is sure to please. Relish the creamy layers and savor the golden topping, knowing you’re indulging in a dish that has stood the test of time. Happy cooking!

Related update: Hard-Boiled Egg Gratin In A Bechamel Sauce

Carrot Cake Pancakes | Made by Meaghan Moineau

Carrot Cake Pancakes

Intro

There’s something undeniably comforting about the smell of pancakes sizzling on a Sunday morning. It takes me back to my childhood when my family would gather around the kitchen table, eagerly awaiting the breakfast treat that my grandmother would whip up with love. Her secret was always in the ingredients she chose, and one of my favorite variations was her Carrot Cake Pancakes. This recipe combines the classic flavors of carrot cake with the fluffy goodness of pancakes, making it a delightful morning indulgence.

Why You’ll Love It

Carrot Cake Pancakes are the perfect balance of sweet and savory, providing a delicious start to your day. They’re not only flavorful but also packed with nutrients from the carrots, making them a healthier option compared to traditional pancakes. Whether you’re looking to impress brunch guests or simply want to treat yourself, these pancakes are versatile, easy to make, and sure to become a household favorite.

Ingredients

  • 3-4 medium carrots, peeled and grated
  • 1 cup white whole wheat flour
  • 2 teaspoons baking powder
  • 1/2 teaspoon salt
  • 1 teaspoon cinnamon
  • 1/2 teaspoon ground nutmeg
  • 1/4 teaspoon ground allspice
  • 2 tablespoons butter, melted
  • 1 egg
  • 1 cup milk
  • 2 tablespoons turbinado sugar
  • 1 teaspoon vanilla extract
  • Optional: raisins or walnuts

Instructions

  1. Peel and grate the carrots. If you end up having more than 1 cup of grated carrots from the 3-4 medium carrots, that’s OK; this recipe can easily handle up to 1.5 cups.
  2. Microwave the grated carrots for 3 minutes on medium, or until the carrots are soft and partially cooked.
  3. In a large bowl, mix together the dry ingredients: flour, baking powder, salt, and spices.
  4. In another bowl, whisk together the wet ingredients until well combined: melted butter, sugar, egg, milk, and vanilla extract.
  5. Add the wet ingredients to the dry ingredients and whisk together until almost combined.
  6. Add the grated carrots and raisins/walnuts if you’re using them. Stir until everything is combined, but do not overmix!
  7. Heat some oil or butter in a skillet over medium/low heat.
  8. Use heaping tablespoons (or an ice cream scoop) to add the pancake batter to the pan.
  9. Cook for about 2-3 minutes, or until little bubbles start forming on the surface.
  10. Flip each pancake, and cook for about 2-3 minutes on the other side, or until the inside is fully cooked.
  11. Serve warm with butter, syrup, powdered sugar, or whatever toppings you prefer!

Tips

For the best results, ensure your carrots are finely grated. This will help them blend seamlessly into the batter and cook evenly. If you prefer a sweeter pancake, feel free to increase the sugar slightly or add a drizzle of honey to the batter. Remember, the key to fluffy pancakes is not overmixing the batter, so stir just until combined.

Variations & Substitutions

Feel free to get creative with this recipe! You can substitute the white whole wheat flour with all-purpose flour if that’s what you have on hand. For an extra flavor boost, consider adding a handful of shredded coconut or a pinch of ginger. If you’re not a fan of raisins, try adding chopped walnuts or pecans for a delightful crunch.

Storage

Leftover pancakes can be stored in an airtight container in the refrigerator for up to three days. To reheat, simply pop them in the toaster or microwave until they’re warmed through. You can also freeze them for up to two months. Just layer parchment paper between each pancake and place them in a freezer-safe bag.

FAQ

Can I make these pancakes gluten-free?

Yes, you can! Substitute the white whole wheat flour with a gluten-free flour blend. Ensure the blend is suitable for pancakes and baking for the best texture.

What can I use as a dairy-free substitute for milk?

Almond milk, soy milk, or oat milk can be used as a substitute for regular milk. Just ensure the milk is unsweetened to keep the pancakes balanced in flavor.

Can I prepare the batter in advance?

While it’s best to use the batter immediately, you can prepare it a few hours in advance if needed. Store it in the refrigerator and give it a gentle stir before cooking.

Nutrition

These Carrot Cake Pancakes are not only delicious but also packed with nutrients. Carrots add a good dose of beta-carotene, and using whole wheat flour adds fiber. Plus, the optional raisins or nuts provide additional vitamins and healthy fats. Enjoy this nutritious breakfast option guilt-free!

Conclusion

Carrot Cake Pancakes are a delightful twist on a classic breakfast favorite. They bring together the warmth of spices, the sweetness of carrots, and the fluffiness of pancakes into one scrumptious dish. Whether you’re reliving cherished memories or creating new ones, these pancakes are sure to bring joy to your table. So, gather your ingredients, heat up your skillet, and treat yourself to a stack of these delicious pancakes. Happy cooking!

Related update: Carrot Cake Pancakes

Carrot Cake Pancakes | Made by Meaghan Moineau

Carrot Cake Pancakes

Intro

Carrot Cake Pancakes are a delightful twist on a classic breakfast staple, bringing the cozy flavors of carrot cake into the morning routine. I still remember the first time I tasted these pancakes; it was during a family brunch at my grandmother’s house. The aroma of cinnamon and nutmeg wafted through the air as we gathered around her kitchen table. The pancakes were stacked high, dripping with syrup and dusted with a sprinkle of powdered sugar. Each bite was like a warm hug, filled with the sweetness of carrots and the comforting spices that reminded me of the holidays. This recipe is a tribute to those cherished mornings, and I’m thrilled to share it with you.

Why You’ll Love It

These Carrot Cake Pancakes are everything you love about carrot cake, but in pancake form. They’re fluffy, flavorful, and perfect for a leisurely weekend breakfast or brunch. Here’s why you’ll love them:

  • Flavorful: Packed with spices like cinnamon, nutmeg, and allspice, these pancakes are bursting with flavor.
  • Healthy Twist: Made with white whole wheat flour and packed with carrots, they offer a healthier take on traditional pancakes.
  • Customizable: Add raisins or walnuts for extra texture and taste, or top with your favorite syrup and butter.
  • Easy to Make: Simple ingredients and straightforward steps make these pancakes a breeze to whip up.

Ingredients

  • 3-4 medium carrots, peeled and grated (approx. 1 to 1.5 cups)
  • 1 cup white whole wheat flour
  • 1 tablespoon baking powder
  • 1/4 teaspoon salt
  • 1 teaspoon cinnamon
  • 1/4 teaspoon ground nutmeg
  • 1/4 teaspoon ground allspice
  • 3 tablespoons butter, melted
  • 1 large egg
  • 1 cup milk
  • 3 tablespoons turbinado sugar
  • 1 teaspoon vanilla extract
  • Optional: 1/4 cup raisins

Instructions

  1. Peel and grate the carrots. You should have about 1 to 1.5 cups of grated carrots.
  2. Microwave the grated carrots for 3 minutes on medium, or until they are soft and partially cooked.
  3. In a large bowl, mix together the dry ingredients: flour, baking powder, salt, cinnamon, nutmeg, and allspice.
  4. In a separate bowl, whisk together the wet ingredients: melted butter, sugar, egg, milk, and vanilla extract until well combined.
  5. Add the wet ingredients to the dry ingredients and whisk together until almost combined.
  6. Add the grated carrots and raisins, if using, and stir until everything is combined. Avoid overmixing.
  7. Heat some oil or butter in a skillet over medium/low heat.
  8. Use heaping tablespoons or an ice cream scoop to add the pancake batter to the pan.
  9. Cook for about 2-3 minutes, or until little bubbles start forming on the surface. Flip each pancake and cook for another 2-3 minutes, or until the inside is fully cooked.
  10. Serve warm with butter, syrup, powdered sugar, or your preferred toppings.

Tips

  • Grating Carrots: Use a box grater or a food processor to grate the carrots quickly and easily.
  • Microwaving Carrots: This step helps soften the carrots, ensuring they blend seamlessly into the pancake batter.
  • Avoid Overmixing: Overmixing the batter can lead to dense pancakes. Mix just until combined for fluffy results.

Variations & Substitutions

  • Raisins and Walnuts: Add some raisins or chopped walnuts for a delightful texture and flavor boost.
  • Gluten-Free: Substitute the white whole wheat flour with a 1:1 gluten-free flour blend.
  • Dairy-Free: Use almond milk or another non-dairy milk and replace the butter with coconut oil.

Storage

These pancakes can be stored in an airtight container in the refrigerator for up to 3 days. For longer storage, freeze them in a single layer on a baking sheet, then transfer to a freezer-safe bag for up to 3 months. Reheat in the toaster or microwave.

FAQ

Can I make the batter ahead of time?

Yes, you can prepare the batter the night before and store it in the refrigerator. Just give it a good stir before cooking, as the ingredients may settle overnight.

What can I serve with Carrot Cake Pancakes?

These pancakes are delicious with a dollop of cream cheese frosting or a drizzle of maple syrup. Fresh fruit, yogurt, or a sprinkle of cinnamon sugar are also great options.

Nutrition

Each serving of these pancakes is approximately 250 calories, with 8g of fat, 39g of carbohydrates, and 6g of protein. Packed with vitamin A from the carrots, they offer a nutritious and satisfying breakfast option.

Conclusion

Carrot Cake Pancakes are a delightful way to start your day, offering a warm, comforting flavor that’s perfect for any morning. Whether you’re enjoying them as a weekend treat or a special brunch, they bring a touch of nostalgia and a burst of flavor to your table. Try this recipe, and I’m sure it’ll become a beloved part of your breakfast repertoire, just as it has in my family. Enjoy every bite!

Related update: Carrot Cake Pancakes

Related update: Carrot Cake Pancakes

Homemade Broccoli Cheddar Soup | Made by Meaghan Moineau

Homemade Broccoli Cheddar Soup

Intro

There’s something truly comforting about a warm bowl of soup, especially when it carries the nostalgic essence of childhood memories. Growing up, my mother would often make a creamy broccoli soup that filled our home with its rich aroma. Each spoonful was a reminder of cozy evenings spent around the family table, sharing stories and laughter. Today, I’m thrilled to share my take on this classic favorite: a Homemade Broccoli Cheddar Soup that combines the wholesome goodness of broccoli with the savory richness of cheddar cheese.

Why You’ll Love It

This Broccoli Cheddar Soup is the perfect blend of creamy and savory, made with wholesome ingredients that you likely already have in your kitchen. It’s a comforting and satisfying meal that’s easy to prepare, making it ideal for weeknight dinners or a cozy weekend lunch. The soup is naturally thickened with potatoes and yogurt, making it a healthier option without compromising on flavor. Plus, it’s a great way to get your daily dose of greens in a delicious way that the entire family will enjoy.

Ingredients

  • 2 heads of raw broccoli, chopped (florets and stems)
  • 1 shallot, finely chopped
  • Juice of 1 lemon
  • 4 cups vegetable broth
  • Salt and pepper to taste
  • 1 red onion, chopped
  • 1 cup plain yogurt
  • 2 Yukon Gold potatoes, peeled and diced
  • Fresh parsley, chopped
  • 1 bay leaf
  • 2 tablespoons olive oil
  • 1 cup plain almond milk
  • 1 cup shredded cheddar cheese

Instructions

  1. In your soup pot, heat 2 tablespoons of olive oil over medium-high heat. Add the shallot and red onion, sautéing until they are lightly cooked.
  2. Add the lemon juice, vegetable broth, remaining olive oil, salt, and pepper. Reduce the heat to medium.
  3. Add the diced potatoes and bring the broth to a boil. Cook until the potatoes are tender.
  4. Add the chopped broccoli, saving a few florets for later use. Cover the pot, and when the broccoli is tender, turn off the heat.
  5. Transfer the contents of the pot into a large mixing bowl and allow to cool slightly.
  6. Add the fresh parsley, yogurt, and almond milk to the bowl. Fold these ingredients into the hot soup mixture.
  7. In batches, puree the soup in a food processor or high-powered blender until smooth with no lumps or chunks.
  8. In the soup pot, sauté the reserved broccoli florets with a dash of vegetable broth, covered, for about a minute until tender.
  9. Return the pureed soup to the soup pot, add the bay leaf and a few pinches of chopped parsley (optional). Simmer uncovered for at least twenty minutes to cook out all the air bubbles, stirring constantly for the first few minutes.
  10. Remember to remove the bay leaf before serving or storing.

Tips

For a silkier texture, strain the pureed soup through a fine mesh sieve before reheating it in the pot. If you prefer a thicker consistency, reduce the amount of almond milk slightly. Remember not to overcook the broccoli to preserve its vibrant green color and nutrients. Always taste and adjust the seasoning as needed before serving.

Variations & Substitutions

Feel free to experiment with this recipe by adding different herbs like thyme or rosemary for a unique twist. If you’re not a fan of almond milk, you can substitute it with regular milk or coconut milk for a different flavor profile. For a vegan version, replace the cheddar cheese with a plant-based alternative. You can also add some diced carrots or celery for extra depth of flavor and nutrients.

Storage

This soup stores beautifully, making it a great option for meal prep. Once cooled, transfer the soup to an airtight container and store it in the refrigerator for up to 4 days. For longer storage, freeze the soup in portions for up to 3 months. When ready to enjoy, thaw overnight in the fridge and reheat on the stove, stirring occasionally.

FAQ

Can I use frozen broccoli instead of fresh?

Yes, you can use frozen broccoli in this recipe. Just be sure to thaw it first and adjust the cooking time accordingly, as frozen broccoli may cook faster than fresh.

What can I serve with Broccoli Cheddar Soup?

This soup pairs wonderfully with a fresh green salad or a slice of crusty bread. You can also serve it with a classic grilled cheese sandwich for a comforting meal.

How can I make this soup gluten-free?

Great news! This recipe is naturally gluten-free, so no adjustments are necessary. Just ensure that all your ingredients, particularly the vegetable broth, are certified gluten-free.

Nutrition

This Homemade Broccoli Cheddar Soup is not only delicious but also nutritious. It’s packed with vitamins from the broccoli, protein from the yogurt, and healthy fats from the olive oil. Each serving contains approximately:

  • Calories: 250
  • Protein: 8g
  • Carbohydrates: 28g
  • Fat: 12g
  • Fiber: 5g

Conclusion

Crafting a bowl of Homemade Broccoli Cheddar Soup is more than just making a meal; it’s creating a moment of warmth and comfort. Whether you’re reminiscing about family dinners or simply seeking a nutritious and delicious dish, this soup has it all. I hope you enjoy making and savoring this recipe as much as I do. Don’t forget to share your creations and any variations with the community. Happy cooking!

Related update: Homemade Broccoli Cheddar Soup
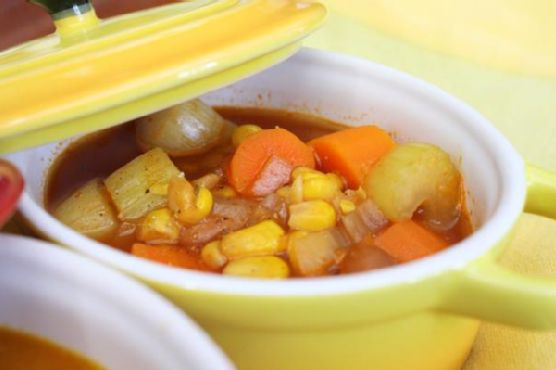
Related update: Shrimp & Orzo

Zucchini Ribbon Caper Salad | Made by Meaghan Moineau

Zucchini Ribbon Caper Salad

Intro

There’s something truly magical about a simple salad that bursts with fresh flavors. For me, the Zucchini Ribbon Caper Salad is more than just a dish; it’s a delightful reminder of the warm summer days spent at my grandmother’s garden. I vividly remember watching her skillfully create ribbons of zucchini with nothing more than a knife and her practiced hands. She’d hum a gentle tune as she tossed them in a mixture of olive oil and lemon, the zest mingling with the sunlit air. This salad is a tribute to those cherished moments and a testament to the beauty of simplicity.

Why You’ll Love It

This Zucchini Ribbon Caper Salad is a celebration of fresh ingredients and bold flavors. It’s perfect for those who appreciate the subtle crunch of raw zucchini, the tangy punch of capers, and the aromatic zest of lemon. It’s a dish that’s both elegant and straightforward, making it ideal for both casual lunches and sophisticated dinner parties. Not only is it visually stunning with its vibrant green and red hues, but it’s also incredibly easy to make. You’ll love how it can be a standalone dish or a delightful side that complements any main course.

Ingredients

  • 2 medium zucchinis, sliced into ribbons using a peeler
  • 2 tablespoons capers, drained
  • 1 clove garlic, minced
  • Zest and juice of 1 lemon
  • 3 tablespoons olive oil
  • Salt and pepper to taste
  • 1 medium tomato, julienned
  • Dried parsley for garnish

Instructions

  1. In a large bowl, toss the zucchini strips with olive oil, lemon zest, lemon juice, and minced garlic.
  2. Season with salt and pepper to taste. Mix well to ensure all ribbons are coated.
  3. Set aside the mixture for 30 minutes, allowing the flavors to meld together.
  4. Divide the marinated zucchini ribbons between 2-3 serving plates.
  5. Top each plate with capers and julienned tomato.
  6. Drizzle any remaining dressing over the top if desired.
  7. Garnish with a pinch of dried parsley for a touch of color and flavor.

Tips

To get the best ribbons, make sure your zucchinis are fresh and firm. A sharp peeler or mandoline can help achieve even, thin slices that are both beautiful and easy to eat. When marinating, occasionally give the mixture a gentle toss to ensure even absorption of the dressing. If you prefer a milder garlic flavor, consider using roasted garlic instead of raw.

Variations & Substitutions

Feel free to personalize this salad to suit your taste preferences. If capers aren’t your favorite, olives can be a delightful substitute, offering a similar briny note. For a touch of sweetness, add a handful of halved cherry tomatoes. If you’re in the mood for some protein, grilled chicken slices or chickpeas make excellent additions, turning this salad into a hearty main course. Vegan friends can substitute the protein with tofu or tempeh for a plant-based twist.

Storage

While this salad is best enjoyed fresh, you can store leftovers in an airtight container in the refrigerator for up to two days. The flavors will continue to develop, but be aware that the zucchini may lose some of its crunch. If planning to store, consider keeping the dressing separate and combining it just before serving to maintain the salad’s texture.

FAQ

Can I make this salad in advance?

Yes, you can prepare the zucchini ribbons and dressing ahead of time. However, it’s best to combine them no more than a few hours before serving to ensure the ribbons remain crisp.

What can I serve with this salad?

This salad pairs beautifully with grilled fish or chicken. It’s also lovely alongside a crusty piece of bread or a light pasta dish for a complete meal.

Can I use a different type of squash?

Absolutely! Yellow summer squash works well in this recipe and adds a lovely color contrast. Just be sure to slice it thinly to match the texture of the zucchini ribbons.

Nutrition

This Zucchini Ribbon Caper Salad is low in calories and high in vitamins such as vitamin C and potassium, thanks to the zucchini and lemon juice. It’s also a great source of healthy fats from olive oil, making it a nutritious choice for those seeking a balanced meal.

Conclusion

The Zucchini Ribbon Caper Salad is more than just a dish; it’s a sensory experience that brings together the best of summer’s bounty. Whether you’re looking to relive cherished memories or create new ones, this salad is sure to delight with its simplicity and depth of flavor. Share it with family and friends, and watch as it becomes a beloved staple in your culinary repertoire. Enjoy each bite as a celebration of freshness and nostalgia, and may it bring warmth and joy to your table as it does to mine.

Related update: Zucchini Ribbon Caper Salad

Related update: Whole Wheat Dinner Rolls

Spiced Apple Cider | Made by Meaghan Moineau

Spiced Apple Cider

Intro

As the leaves begin to turn and the air grows crisp, there’s nothing quite like the comforting warmth of a mug of spiced apple cider. I still remember the autumn afternoons spent at my grandmother’s house, where the scent of cinnamon and apples would fill the air. She would always have a pot simmering on the stove, ready to fill our mugs as we returned from playing in the fallen leaves. Those moments have stayed with me, and now, I find joy in recreating this cozy tradition for my family and friends. Let me share with you my take on this timeless beverage, perfect for any fall gathering or a quiet night in.

Why You’ll Love It

This spiced apple cider is a hug in a mug. It’s incredibly easy to make, filling your home with an inviting aroma that embodies the essence of fall. The combination of freshly pressed apple juice with warming spices like cinnamon, nutmeg, and allspice creates a rich and flavorful drink. Plus, it’s versatile—you can keep it family-friendly or add a splash of dark rum for a grown-up treat. Whether you’re serving it at a festive gathering or sipping it by the fire, this cider is sure to become a seasonal favorite.

Ingredients

  • 1 gallon freshly pressed apple juice
  • 1 tablespoon allspice
  • 4 cinnamon sticks
  • 2 inches fresh ginger, sliced
  • 1/4 cup maple syrup
  • 1/2 teaspoon ground nutmeg
  • 1 orange, sliced
  • 2 cups water

Instructions

  1. In a large non-reactive pot, combine all the ingredients: apple juice, allspice, cinnamon sticks, ginger, maple syrup, nutmeg, orange slices, and water. Stir to mix the spices thoroughly.
  2. Place the pot over medium-high heat and bring the mixture to a boil. Allow it to boil for about 5 minutes to help the flavors meld.
  3. Cover the pot with a lid, reduce the heat, and let it simmer for 30-40 minutes. This will allow the spices to infuse deeply into the cider.
  4. Line a colander with cheesecloth and carefully strain the cider to remove solids. This will leave you with a smooth, spiced liquid.
  5. Serve the cider warm. For an adult version, consider spiking it with a splash of dark rum.

Tips

To enhance the flavor of your cider, try to use freshly pressed apple juice if possible. This makes a significant difference in taste compared to store-bought versions. If you find the cider too sweet, adjust the maple syrup to your liking. Additionally, keep an eye on the simmering time; if you prefer a stronger spice flavor, allow it to simmer longer.

Variations & Substitutions

If you’re missing an ingredient or want to change things up, there are plenty of ways to adapt this recipe. You can substitute honey or brown sugar for the maple syrup if desired. For a citrusy twist, add a few lemon slices along with the orange. If you’re out of fresh ginger, ground ginger can work in a pinch, though fresh is always best for a more robust flavor. For a non-alcoholic zing, consider adding a splash of pomegranate juice before serving.

Storage

Store any leftover cider in an airtight container in the refrigerator for up to a week. To reheat, simply warm it on the stove over low heat, stirring occasionally. Avoid boiling it again to preserve the flavors.

FAQ

Can I make this cider in a slow cooker?

Absolutely! Combine all the ingredients in a slow cooker and cook on low for 4-6 hours. This method is great for keeping the cider warm for a party.

Can I use ground spices instead of whole?

Yes, you can substitute ground spices, but use them sparingly to avoid overpowering the cider. About 1 teaspoon of ground cinnamon and 1/4 teaspoon of ground allspice should suffice.

Is it possible to make this cider sugar-free?

Yes, you can omit the maple syrup if you prefer a sugar-free version. The natural sweetness of the apple juice should still provide plenty of flavor.

Nutrition

While the precise nutritional content can vary based on the specific ingredients used, a typical serving of spiced apple cider (without alcohol) contains approximately:

  • Calories: 120
  • Sugars: 24g
  • Vitamin C: 10% of Daily Value
  • Calcium: 2% of Daily Value

Conclusion

This spiced apple cider is more than just a drink; it’s an experience, a journey back to simpler times when the warmth of a kitchen and the love of family were all you needed to feel at home. Whether you’re serving it at a festive gathering or enjoying a quiet moment by yourself, this cider brings comfort and joy with every sip. I hope this recipe finds a cherished place in your fall traditions, just as it has in mine.

Related update: Spiced Apple Cider

Classy Poached Pear In Spicy Mango Nectar With Mango Ice Cream | Made by Meaghan Moineau

Classy Poached Pear In Spicy Mango Nectar With Mango Ice Cream

Intro

There’s something undeniably enchanting about the delicate, aromatic flavors of poached pears. I remember the first time I tasted a poached pear at my grandmother’s Sunday lunch. It was a cold winter afternoon, and the warmth of the spices filled the room, creating a cozy haven from the chill outside. Each bite was a revelation, the soft fruit yielding to the rich syrup, and it was then that I knew this dessert would hold a special place in my heart.

Fast forward to today, I’ve added my own twist to this classic dessert by pairing it with a spicy mango nectar and a scoop of refreshing mango ice cream. This recipe is simple yet sophisticated, perfect for impressing your dinner guests or treating yourself to a luxurious dessert experience.

Why You’ll Love It

  • Elegantly Simple: Despite its sophisticated appearance, this recipe is straightforward and easy to follow.
  • Exotic Flavors: The combination of pear, mango, and spices creates a unique and tantalizing dessert.
  • Perfect for Any Occasion: Whether it’s a dinner party or a quiet evening at home, this dessert is sure to impress.

Ingredients

  • 4 ripe pears
  • 1/2 cup sugar
  • 1 cup water
  • 1 cup mango pulp
  • 1/2 cup fruit juice (orange or apple)
  • 1 teaspoon lemon juice
  • 1 tablespoon orange rind
  • 1/2 teaspoon ground cinnamon
  • A few strands of saffron
  • Fresh mint leaves for garnish
  • Mango ice cream, for serving

Instructions

  1. Peel the pears and slice a bit off the bottom of each pear to ensure they can stand upright. Keep the stem intact to insert a mint sprig later.
  2. Gently dab some lemon juice over the pears to prevent browning, and set them aside.
  3. In a medium pot, create a simple syrup by combining half a cup of sugar with one cup of water over medium heat. Stir until the sugar dissolves and the mixture thickens slightly.
  4. Add the mango pulp, fruit juice, orange rind, a dash of cinnamon, and saffron strands to the sugar syrup. Stir to combine.
  5. Submerge the peeled pears into the syrup, ensuring they’re completely covered. Allow them to cook on low heat for 15 to 20 minutes, or until the pears are tender and have absorbed the amber hue from the mango syrup.
  6. Once cooked, remove the pears from the syrup and set them on a plate to cool.
  7. Garnish each pear with a fresh mint leaf inserted into the stem and drizzle some of the remaining syrup over the top.
  8. Serve warm or chilled, accompanied by a scoop of mango ice cream.

Tips

  • Choose the Right Pears: Look for ripe but firm pears to ensure they hold their shape while poaching.
  • Monitor the Syrup: Keep an eye on the syrup as it simmers to prevent it from reducing too much or burning.
  • Chilling Option: For a refreshing summer treat, chill the pears before serving.

Variations & Substitutions

  • Spice It Up: Add a pinch of ground nutmeg or cloves for a more robust spice profile.
  • Fruit Juice Options: Experiment with different fruit juices like pineapple or pomegranate for a unique twist.
  • Dairy-Free: Substitute mango sorbet for the ice cream to make this dessert dairy-free.

Storage

Leftover poached pears can be stored in an airtight container in the refrigerator for up to three days. Keep the syrup separate and drizzle it over the pears just before serving to maintain their texture and flavor.

FAQ

Can I make this dessert ahead of time?

Absolutely! You can poach the pears a day in advance and store them in the refrigerator. Simply drizzle with syrup and garnish with mint just before serving.

What type of mango pulp should I use?

Both fresh and canned mango pulp work wonderfully in this recipe. If using canned, ensure it’s pure mango pulp without added sugars or preservatives.

Nutrition

This dessert is a luxurious treat, and while it is not low-calorie, it offers the natural sweetness of fruit with the richness of spices. Pairing it with mango ice cream adds a creamy contrast to the tender pears.

Conclusion

Incorporating the exotic flavors of mango and spices, this poached pear dessert is a testament to how simple ingredients can create a gourmet experience. Whether you’re channeling nostalgia like I do, or simply indulging your taste buds, this recipe is sure to delight. Serve it at your next gathering or enjoy it as a solo treat to make any day a little more special. Remember, cooking is all about sharing love through food, so don’t hesitate to put your own spin on this classic dish. Happy cooking!

Related update: Classy Poached Pear In Spicy Mango Nectar With Mango Ice Cream

Related update: Roasted Asparagus With Bacon and Feta Cheese

Related update: Ginger Molasses Rounds

Chapchae (Korean Stir-Fried Noodles) | Made by Meaghan Moineau

Chapchae (Korean Stir-Fried Noodles)

Intro

Chapchae, a delightful Korean stir-fried noodle dish, has a special place in my heart. I remember the first time I tasted it was during a family trip to Seoul. The vibrant colors of the vegetables, the glossy sheen of the noodles, and the intoxicating aroma of sesame oil filled the air as we sat down at a local eatery. Each bite was a harmony of flavors and textures, and it instantly became a favorite. Inspired by that trip, I’ve recreated this dish at home many times, each instance bringing back fond memories of that culinary adventure.

Why You’ll Love It

Chapchae is a versatile dish that’s not only delicious but also a feast for the eyes. It’s perfect for any season, offering a balance of savory, sweet, and umami flavors that appeal to various palates. This dish is naturally gluten-free when using sweet potato vermicelli, making it a fantastic option for those with dietary restrictions. Additionally, chapchae is packed with vegetables, making it a nutritious choice for a quick lunch or a vibrant side dish.

Ingredients

  • 8 oz sweet potato vermicelli noodles
  • 1 sweet onion, thinly sliced
  • 2 cloves garlic, minced
  • 2 cups baby spinach
  • 1 carrot, julienned
  • 3 scallions, sliced
  • 1 cup mushrooms, sliced
  • 1 zucchini, julienned
  • 2 Tbsp olive oil
  • 2 Tbsp sesame oil, divided
  • 3 Tbsp soy sauce
  • 1 Tbsp sugar
  • Salt to taste

Instructions

  1. Cook the sweet potato vermicelli noodles according to the package directions. Once cooked, drain and set aside.
  2. In a large pan or wok over medium heat, heat the olive oil and 1 tablespoon of the sesame oil.
  3. Add the onion slices and minced garlic, sautéing for about 1 minute until fragrant.
  4. Add the rest of the vegetables: baby spinach, carrots, scallions, mushrooms, and zucchini. Cook for 4-5 minutes until the vegetables are half-cooked and still a bit crispy.
  5. Turn the heat to low and add the cooked noodles to the pan.
  6. Pour in the soy sauce, sugar, and the remaining sesame oil. Mix everything to combine and cook for another 2 minutes.
  7. Taste and add salt or more soy sauce if needed. For a sweeter dish, add a touch more sugar.
  8. If using, sprinkle sesame seeds over the top just before serving for an added nutty flavor and crunch.

Tips

For the best results, ensure that your vegetables are cut uniformly for even cooking. Don’t overcook them; chapchae is best with vegetables that retain a slight crunch. Also, feel free to adjust the seasoning according to your taste preferences. A dash of chili flakes can also add a nice kick if you enjoy a bit of heat.

Variations & Substitutions

Chapchae is incredibly adaptable. You can substitute the vegetables with whatever you have on hand, such as bell peppers or broccoli. For a protein boost, add tofu, beef strips, or chicken. If you prefer a lower-sodium option, use low-sodium soy sauce. For a vegetarian version, ensure your soy sauce is vegetarian-friendly and skip any meat additions.

Storage

Chapchae can be stored in an airtight container in the refrigerator for up to three days. Reheat gently on the stovetop or in the microwave, adding a splash of water or soy sauce to revitalize the noodles. Note that the noodles may absorb more sauce over time, so adjust the seasoning as needed when reheating.

FAQ

Can I make chapchae ahead of time?

Yes, chapchae can be prepared in advance. It’s an excellent dish for meal prep as the flavors meld beautifully over time. Just be sure to store it properly and give it a good stir before serving.

Is chapchae gluten-free?

Chapchae is naturally gluten-free when made with sweet potato vermicelli noodles, which are a common ingredient in Korean cuisine. However, make sure to check the labels on your soy sauce to ensure it’s gluten-free, or opt for tamari as an alternative.

Nutrition

Chapchae is a nutrient-rich dish thanks to its variety of vegetables. It’s high in fiber, vitamins, and minerals, and the sweet potato noodles provide a source of complex carbohydrates. The sesame oil and soy sauce contribute healthy fats and protein, respectively, making chapchae a well-rounded meal.

Conclusion

Chapchae is more than just a dish; it’s a delightful journey through flavors and textures that can transport you to the vibrant streets of Korea. Whether you’re making it for the first time or it’s been a staple on your menu, this recipe is sure to bring joy to your table. So grab your wok, gather your ingredients, and savor a bowl of this Korean classic. Enjoy every bite and perhaps, like me, you’ll find it becomes a cherished part of your culinary repertoire.

Related update: Chapchae (Korean Stir-Fried Noodles)

Related update: Cilantro Lime Halibut

Grilled Guacamole with Pistachios | Made by Meaghan Moineau

Grilled Guacamole with Pistachios

Intro

Welcome to a culinary journey where tradition meets innovation with our Grilled Guacamole with Pistachios. This recipe brings a smoky twist to the classic guacamole, elevating it to a gourmet experience that is perfect for any occasion. I remember the first time I tried grilled guacamole at a summer barbecue hosted by an old friend. The subtle smokiness intertwined with creamy avocado and crunchy pistachios was a revelation. Ever since that day, this dish has become a staple in my summer gatherings. Let me share this delightful recipe with you, and perhaps it will become a cherished part of your culinary repertoire as well.

Why You’ll Love It

This grilled guacamole is not your ordinary dip. Here are a few reasons why you’ll fall head over heels for this recipe:

  • Smoky Flavor: Grilling the vegetables adds a depth of flavor that is both intriguing and satisfying.
  • Texture Heaven: The crunchy pistachios contrast beautifully with the creamy avocado, creating a delightful texture.
  • Fresh and Nutritious: Packed with fresh ingredients and healthy fats, this recipe is both delicious and nutritious.
  • Versatile: Perfect as a dip, a topping for burgers, or even as a side dish.

Ingredients

  • 2 avocados, split
  • 1 teaspoon cumin
  • 1 ear of corn, split
  • 1/4 cup fresh cilantro, chopped
  • 2 cloves garlic, minced
  • 1/4 teaspoon red ground pepper
  • 1/4 teaspoon black fresh ground pepper
  • 2 jalapeño peppers, split
  • 1 lime, juiced
  • Olive oil, for brushing vegetables
  • 1 small onion, split
  • 1/4 cup pistachios, chopped
  • Salt to taste
  • 1/2 cup diced tomatoes

Instructions

  1. Lightly brush the avocado flesh, corn, onion, and jalapeño peppers with olive oil.
  2. Place all vegetables except the avocado in a grill basket and on the grill over medium-high heat.
  3. Place the avocados cut side up directly on the grill and cook for 2 minutes, then flip and cook cut side down for another 2 minutes. Remove and set aside.
  4. Allow the other vegetables to cook, turning, until they are tender and lightly charred (10-12 minutes). The corn may take a few minutes longer.
  5. When the vegetables have cooled enough to touch, cut the corn off the cob and dice the other vegetables.
  6. In a large bowl, combine the tomatoes, corn, onion, peppers, garlic, and cilantro, and toss to mix.
  7. Add the avocado to the mixture, lightly tossing and mashing it.
  8. Add the lime juice, cumin, red and black pepper, and salt. Mix together and adjust seasoning as needed.
  9. Add the pistachios, toss the mixture again, and serve.

Tips

  • Ensure your grill is properly heated before placing the vegetables to get that perfect char.
  • Adjust the level of spiciness by varying the amount of jalapeño and red ground pepper according to your preference.
  • Use ripe avocados for the best texture and flavor.

Variations & Substitutions

There are numerous ways to adapt this recipe to your tastes:

  • Cheese: Add crumbled feta or cotija cheese for an extra burst of flavor.
  • Nuts: Swap pistachios with pecans or almonds for a different nutty twist.
  • Herbs: Replace cilantro with parsley or basil for a different herbal note.

Storage

Store any leftover guacamole in an airtight container in the refrigerator for up to two days. To prevent browning, place a layer of plastic wrap directly on the surface of the guacamole before sealing the container.

FAQ

Can I make this recipe without a grill?

Absolutely! You can achieve a similar effect by using a grill pan on your stovetop. If neither is available, roasting the vegetables in the oven will also work, though you’ll miss a bit of the smoky flavor.

What if I don’t like spicy foods?

No problem! You can reduce or omit the jalapeño and red ground pepper for a milder version. Consider adding bell peppers for a sweet alternative.

Can I prepare this dish in advance?

Yes, you can grill the vegetables ahead of time and store them in the refrigerator. Assemble the guacamole just before serving to ensure the freshest flavor and texture.

Nutrition

This recipe is rich in healthy fats, fiber, and antioxidants. Avocados provide heart-healthy monounsaturated fats while pistachios offer protein and additional healthy fats. The vegetables add vitamins and minerals, making this a nutrient-dense dish perfect for any diet.

Conclusion

Grilled Guacamole with Pistachios is a delightful twist on the classic guacamole that brings a smoky flavor and a satisfying crunch from the pistachios. This dish is perfect for summer barbecues, family gatherings, or as a unique addition to your weeknight meals. With its combination of fresh, nutritious ingredients and vibrant flavors, it’s sure to become a favorite. We hope you enjoy making and sharing this recipe as much as we do!

Related update: Grilled Guacamole with Pistachios

Related update: Savory Slow Roasted Tomatoes with Filet of Anchovy

Caramelized Tofu & Gala Apple Salad | Made by Meaghan Moineau

Caramelized Tofu & Gala Apple Salad

Intro

There’s something magical about the combination of sweet and savory flavors, especially when they come together in a perfectly balanced dish. This Caramelized Tofu & Gala Apple Salad is a delightful example of that harmony. I remember the first time I experimented with this recipe; it was a chilly autumn afternoon, and I was inspired by the abundance of apples from a recent orchard visit with my family. The air was crisp and filled with laughter as we picked apples straight from the trees. This salad brings back those warm memories with every bite, combining the sweetness of Gala apples with the rich, savory notes of caramelized tofu.

Why You’ll Love It

This salad is not only delicious but also incredibly satisfying and nourishing. The caramelized tofu provides a hearty, protein-rich element, while the Gala apples add a fresh, crisp sweetness. The greens and pecans add texture and a nutty flavor that ties everything together. This dish is perfect for a light lunch, a side dish at dinner, or even as a part of a holiday feast.

Ingredients

  • 1/4 cup brown sugar
  • 2 tablespoons butter
  • 1 block extra-firm tofu
  • 1 diced Gala apple
  • 2 cloves garlic, minced
  • 4 cups green lettuce, washed and torn
  • 1/2 cup raw whole pecans
  • 1/4 cup water

Instructions

  1. First thing of action: bake your tofu. Preheat the oven to 350°F. Let the tofu sit on a kitchen towel for 15 minutes, turning once, to absorb moisture.
  2. Cut tofu into 1-inch cubes. Brush them lightly with vegetable oil. Place them on a baking sheet and bake for 35 minutes, turning once.
  3. In a small pan, heat butter and garlic on low until the butter has just almost melted.
  4. Add the apples, tofu, and salt. Bring heat up to medium, and cook for about 4 minutes.
  5. Add the water and stir every minute for the next 6-7 additional minutes, or until there is little moisture left in the pan.
  6. Turn off the heat, and add the brown sugar. Stir to incorporate all of the sugar.
  7. Place the caramelized mixture on top of the salad lettuce and garnish with pecans.

Tips

To get the best texture out of your tofu, make sure to press it adequately to remove excess moisture. This step is crucial for achieving that perfect golden-brown crust when baking. Additionally, using a high-quality non-stick pan will make caramelizing the tofu and apples a breeze.

Variations & Substitutions

Feel free to customize this salad to your liking. If you prefer a different type of apple, Honeycrisp or Fuji would be excellent choices too. For a spicy kick, consider adding a pinch of cayenne pepper to the caramelization process. If you’re aiming for a nut-free version, sunflower seeds offer a similar crunch without the allergens.

Storage

This salad is best enjoyed fresh, but if you have leftovers, store the caramelized tofu and apples separately from the lettuce to prevent wilting. Keep them in an airtight container in the refrigerator for up to three days. When ready to serve, gently reheat the tofu and apples in a pan and toss them with fresh lettuce.

FAQ

Can I make this salad vegan?

Absolutely! Simply substitute the butter with a plant-based alternative, such as margarine or olive oil. The salad will be just as delicious.

What can I use instead of brown sugar?

If you’re looking for a healthier alternative, try using maple syrup or coconut sugar. Both will provide a similar sweetness and caramelization effect.

How can I make the tofu extra crispy?

To achieve extra crispy tofu, ensure that it’s thoroughly pressed to remove moisture and bake it at a slightly higher temperature, around 375°F, for an additional 5-10 minutes.

Nutrition

This Caramelized Tofu & Gala Apple Salad is not only delicious but also packed with nutrients. Tofu is a fantastic source of plant-based protein and contains all nine essential amino acids. Gala apples provide dietary fiber and vitamin C, while pecans are rich in healthy fats and antioxidants. Together, these ingredients make for a balanced and nourishing meal.

Conclusion

With its delightful blend of flavors and textures, the Caramelized Tofu & Gala Apple Salad is sure to become a favorite in your recipe collection. It’s a dish that not only satisfies the palate but also brings back cherished memories of family and nature. I hope this salad brings as much joy to your table as it does to mine. Enjoy!

Related update: Caramelized Tofu & Gala Apple Salad

Related update: Chapchae (Korean Stir-Fried Noodles)

Related update: Zucchini Ribbon Caper Salad

Julia Child’s Vichyssoise | Made by Meaghan Moineau

Julia Child’s Vichyssoise: A Timeless Classic for Every Season

Intro

There’s something incredibly comforting about a bowl of soup, particularly one that carries the rich history and culinary expertise of a legend like Julia Child. When I was a child, my grandmother would often make vichyssoise on Sunday afternoons, filling the kitchen with its soothing aroma. Sitting at the kitchen table, I would eagerly watch her every move, fascinated by how a few simple ingredients transformed into a luxurious dish. This soup not only warms the belly but also the heart, evoking memories of family gatherings and laughter. Today, I share with you the recipe for Julia Child’s Vichyssoise, a chilled soup that’s perfect for any season and situation.

Why You’ll Love It

Julia Child’s Vichyssoise is more than just a soup; it’s a culinary experience. Here’s why you’ll love making and eating it:

  • Simple Ingredients: This recipe uses basic, easily accessible ingredients, making it convenient for any home cook.
  • Rich and Creamy: The combination of leeks and potatoes creates a perfectly smooth and creamy texture.
  • Versatile: Whether served hot or cold, this soup is delightful in any weather.
  • Elegant Presentation: With a simple garnish of chives or parsley, it’s an impressive dish for entertaining.
  • Nostalgic Comfort: Each spoonful is a trip down memory lane for those who grew up with classic French cuisine.

Ingredients

  • White leeks
  • Diced baking potatoes (recommended)
  • Water
  • Salt
  • Sour crème fraîche
  • Fresh chives

Instructions

  1. Bring the leeks, potatoes, and water to the boil in a saucepan.
  2. Salt lightly, cover partially, and simmer for 20-30 minutes, or until the vegetables are tender.
  3. Puree the soup if you wish for a smoother texture.
  4. Taste and correct the seasoning as needed.
  5. Chill the soup thoroughly.
  6. Once chilled, stir in a little more crème fraîche if desired.
  7. Taste carefully again and correct the seasoning.
  8. Top each serving with a sprinkle of chives or parsley and a drizzle or dollop of crème fraîche.

Tips

To ensure your Vichyssoise is perfect every time, keep these tips in mind:

  • Use Fresh Ingredients: The flavor of your soup depends heavily on the freshness of your leeks and potatoes.
  • Chill Thoroughly: For the best flavor, make sure the soup is well chilled before serving.
  • Adjust Consistency: If the soup is too thick, you can thin it out with a bit more water or broth.

Variations & Substitutions

While Julia Child’s original recipe is a classic, there are endless ways to make it your own:

  • Herbs: Add fresh herbs like thyme or basil for an additional layer of flavor.
  • Dairy-Free: Substitute the crème fraîche with a plant-based cream to make the soup vegan-friendly.
  • Broth: Swap water for chicken or vegetable broth for a richer taste.

Storage

This soup is perfect for make-ahead meals. Store it in an airtight container in the fridge for up to three days. If you want to enjoy it later, freeze it for up to two months. Just be sure to thaw it in the fridge overnight before reheating.

FAQ

Can I use other types of potatoes?

Yes, absolutely! While baking potatoes are recommended for their texture, you can use any type of potatoes you have on hand. Just be aware that the texture and flavor may vary slightly.

Is it necessary to puree the soup?

Pureeing the soup is optional but recommended for a smooth, creamy texture. If you prefer a chunkier soup, you can skip this step.

How can I make this recipe vegetarian or vegan?

This recipe is naturally vegetarian if you use vegetable broth in place of water. To make it vegan, replace the crème fraîche with a non-dairy alternative. The rest of the ingredients are already plant-based.

Nutrition

Vichyssoise is a nutritious option, thanks to its vegetable-rich base. While precise nutritional values depend on the specific quantities and brands used, a serving typically contains around 150-200 calories, with a healthy amount of vitamins and minerals derived from the leeks and potatoes. For a lighter version, reduce or omit the crème fraîche.

Conclusion

Julia Child’s Vichyssoise is a testament to the beauty of simplicity in cooking. It’s a dish that transcends time and trends, offering a luxurious yet comforting experience with every spoonful. Whether you’re revisiting childhood memories or creating new ones, this recipe is sure to become a beloved staple in your home. So, gather your ingredients, channel your inner Julia Child, and savor the delight of homemade vichyssoise.

Related update: Julia Child’s Vichyssoise

Related update: Pulled Pork Sandwich with Mango BBQ sauce

Related update: Grilled Guacamole with Pistachios

Related update: Loaded Baked Potato Soup with Crispy-Fried Potato Skins

Penne with Goat Cheese and Basil | Made by Meaghan Moineau

Penne with Goat Cheese and Basil

Intro

There’s something undeniably comforting about a bowl of perfectly cooked pasta, especially when it’s infused with the creamy tang of goat cheese and the aromatic freshness of basil. This Penne with Goat Cheese and Basil recipe is a delightful blend of rich flavors and simple ingredients, creating a dish that’s both elegant and easy to prepare. Every time I make this dish, I’m transported back to a sunlit kitchen in Tuscany, where I first learned the art of making pasta from scratch with my grandmother. The memory of her gentle hands guiding mine through the process is as vivid as the vibrant green basil leaves we picked fresh from her garden. This recipe is my homage to those cherished moments and a reminder of how food can connect us to our past.

Why You’ll Love It

This recipe is a true celebration of simplicity and flavor, perfect for both weeknight dinners and special occasions. Here’s why you’ll adore it:

  • Quick and Easy: It takes less than 30 minutes from start to finish.
  • Minimal Ingredients: You’ll only need five ingredients, all of which are pantry staples.
  • Rich and Creamy: The goat cheese melts beautifully, creating a luscious sauce that coats each piece of pasta.
  • Fresh and Aromatic: Fresh basil adds a burst of flavor and color.
  • Versatile: Perfect for a quiet dinner for two or a festive gathering with friends.

Ingredients

  • Penne pasta
  • Fresh basil leaves
  • Goat cheese
  • Olive oil
  • Salt and pepper

Instructions

  1. Cook the penne pasta according to the package directions until al dente. Drain and set aside.
  2. Arrange the basil leaves in a stack, roll them lengthwise like a cigar, and slice thinly crosswise to create a chiffonade. This technique enhances the basil’s flavor and presentation.
  3. In a large bowl, toss the hot pasta with olive oil and crumbled goat cheese. Stir gently until the cheese melts slightly, coating the pasta.
  4. Allow the pasta to cool for a few minutes. This step helps the flavors meld together.
  5. Add the basil chiffonade, and season with salt and pepper to taste. Toss everything together until well combined.
  6. Serve immediately, garnished with additional basil if desired.

Tips

Here are some handy tips to make your dish even more delightful:

  • Use High-Quality Ingredients: Since this recipe relies on a few key ingredients, using high-quality olive oil and fresh goat cheese will make a noticeable difference.
  • Don’t Overcook the Pasta: Be sure to cook the pasta al dente, as it will continue to soften when tossed with the warm ingredients.
  • Chiffonade Like a Pro: Rolling the basil before slicing helps prevent bruising and keeps your basil looking fresh.

Variations & Substitutions

This recipe is wonderfully adaptable. Here are some variations and substitutions you might consider:

  • Add Protein: Grilled chicken or shrimp would pair beautifully with the creamy goat cheese and fresh basil.
  • Try Different Cheeses: If goat cheese isn’t your preference, feta or ricotta can work as delicious alternatives.
  • Incorporate Vegetables: Cherry tomatoes, roasted red peppers, or spinach can add extra nutrition and flavor.
  • Use Whole Wheat Pasta: For a healthier twist, substitute the penne with whole wheat pasta.

Storage

This dish is best enjoyed fresh, but if you have leftovers, store them in an airtight container in the refrigerator for up to three days. To reheat, gently warm the pasta in a skillet over low heat with a splash of olive oil to help revive the creamy texture.

FAQ

Can I make this dish vegan?

Yes, you can easily make a vegan version by using vegan cheese alternatives available in most grocery stores. Nutritional yeast can also add a cheesy flavor without dairy.

Can I serve this dish cold?

Absolutely! This pasta is also delightful as a cold pasta salad. Simply allow the pasta to cool completely before adding the basil, and enjoy it straight from the fridge.

What type of goat cheese should I use?

A soft, creamy goat cheese works best for this recipe, as it melts well and evenly coats the pasta. You can also experiment with flavored varieties, like herbed or peppered goat cheese for an extra kick.

Nutrition

This dish is a wholesome meal, offering a balanced mix of carbohydrates, healthy fats from the olive oil, and protein from the goat cheese. While exact nutritional values will vary based on the specific brands and quantities used, each serving provides a good source of calcium and vitamins from the basil.

Conclusion

Penne with Goat Cheese and Basil is not just a meal; it’s a comforting reminder of the power of simple ingredients coming together to create something extraordinary. Whether you’re relishing it alone with a glass of wine or sharing it with loved ones around a bustling dinner table, this dish is sure to become a beloved staple in your culinary repertoire. As you savor each bite, may it bring you warmth, joy, and perhaps a touch of nostalgia for the cherished memories created in your own kitchen.

Related update: Penne with Goat Cheese and Basil

HomeMade Hashbrowns with Spinach and Carrots | Made by Meaghan Moineau

Homemade Hashbrowns with Spinach and Carrots

Intro

There’s something incredibly comforting about a plate of crispy hashbrowns. They remind me of weekend breakfasts at my grandmother’s house, where the aroma of frying potatoes would gently wake us up. My grandmother had a knack for adding a little something extra to her hashbrowns, a touch of love that made them irresistible. Inspired by those mornings, I’ve crafted a recipe that not only hits the comfort spot but also packs a nutritious punch with the addition of fresh spinach and carrots. These Homemade Hashbrowns with Spinach and Carrots are a delightful twist on the classic, providing a burst of flavor and a boost of nutrients in every bite.

Why You’ll Love It

This recipe is perfect for those seeking a delicious, healthy meal that doesn’t compromise on taste. The combination of crispy potatoes with the fresh, earthy flavor of spinach and the subtle sweetness of carrots is truly magical. These hashbrowns are versatile and can be served as a hearty breakfast, a delicious side dish, or even a satisfying snack. They’re also vegetarian-friendly and can be easily adapted to suit a variety of dietary needs.

Ingredients

  • 2 large potatoes, grated
  • 1 cup fresh spinach leaves, finely chopped
  • 1 onion, finely chopped
  • 1 carrot, grated
  • 1/2 teaspoon red chili powder
  • 2 tablespoons cornflour
  • 1/2 teaspoon salt, plus more to taste
  • Oil for shallow frying

Instructions

  1. In a large bowl, combine grated potatoes, chopped spinach, chopped onion, and grated carrot.
  2. Add 1/2 teaspoon of salt to the mixture and mix well.
  3. Squeeze the vegetable mixture to remove all the excess moisture.
  4. Stir in the red chili powder and cornflour, mixing until well combined. Adjust salt by tasting the mixture.
  5. Form the mixture into small patties, ensuring they’re compact and hold together.
  6. Heat oil in a pan over medium-high heat for shallow frying.
  7. Gently place the patties in the hot pan, allowing them to brown on both sides for a few minutes.
  8. Lower the heat to medium and cook until the patties are cooked through and crispy.
  9. Remove from the pan and drain on paper towels before serving.

Tips

For the best results, make sure to thoroughly squeeze out any moisture from the vegetable mixture. This ensures your hashbrowns are crispy rather than soggy. Also, be patient while frying; allow each side to brown completely before flipping to achieve that perfect golden crust.

Variations & Substitutions

Feel free to experiment with other veggies such as zucchini or bell peppers for added flavor and nutrition. If you’re avoiding cornflour, you can substitute with all-purpose flour or rice flour. For a spicier kick, consider adding a pinch of cayenne pepper or some finely chopped jalapeños.

Storage

These hashbrowns can be stored in an airtight container in the refrigerator for up to 3 days. To reheat, simply place them in a hot oven or in a pan to restore their crispiness. They can also be frozen for up to a month; just make sure to thaw them thoroughly before reheating.

FAQ

Can I make these hashbrowns gluten-free?

Yes, you can easily make this recipe gluten-free by using a gluten-free flour alternative like rice flour or chickpea flour in place of cornflour.

How can I make these hashbrowns vegan?

This recipe is naturally vegan as it contains no animal products. Just be sure to use a vegetable-based oil for frying.

Can I bake these hashbrowns instead of frying?

Absolutely! To bake, preheat your oven to 400°F (200°C) and line a baking sheet with parchment paper. Arrange the patties on the sheet and bake for about 20-25 minutes, flipping halfway, until they are golden brown and crispy.

Nutrition

These hashbrowns are not only delicious but also nutritious, providing a healthy dose of vitamins and minerals from the spinach and carrots. They’re a great source of dietary fiber and contain a good balance of carbs and protein to fuel your day.

Conclusion

Homemade Hashbrowns with Spinach and Carrots are a versatile and delicious addition to any meal. Whether you serve them for breakfast, as a side dish, or a snack, they are sure to please. This recipe is a nod to the comforting meals of my childhood, with a modern twist that incorporates fresh, nutritious ingredients. I hope you enjoy making and sharing these hashbrowns as much as I do. Happy cooking!

Related update: HomeMade Hashbrowns with Spinach and Carrots

Mashed Potatoes with Garlic, Sage & Goat Cheese | Made by Meaghan Moineau

Mashed Potatoes with Garlic, Sage & Goat Cheese

Intro

There’s a certain magic in the air when the aroma of garlic and sage wafts through the kitchen, bringing back fond memories of family gatherings and celebrations. I remember my grandmother’s cozy kitchen, where we would gather around the table, eagerly waiting for her famous mashed potatoes to be served. The rich, creamy texture and the subtle tang of goat cheese would melt in our mouths, creating a symphony of flavors that lingered long after the meal was over. Today, I’m excited to share with you a recipe that brings those cherished memories to life: Mashed Potatoes with Garlic, Sage & Goat Cheese. This dish is a perfect combination of comfort and elegance, making it a delightful addition to any meal.

Why You’ll Love It

This recipe for Mashed Potatoes with Garlic, Sage & Goat Cheese is a game-changer for several reasons:

  • Rich and Creamy: The addition of goat cheese provides a luxurious creaminess that elevates traditional mashed potatoes.
  • Flavorful: Garlic and sage add depth and complexity, transforming a simple side dish into a gourmet experience.
  • Easy to Make: With just a handful of ingredients and straightforward instructions, you’ll have this dish ready in no time.
  • Versatile: Perfect for holiday feasts, intimate dinners, or as a comforting treat on a chilly evening.

Ingredients

  • 4 large baking potatoes, peeled and cubed
  • 3 cloves of garlic, minced
  • 1 Chavrie goat cheese pyramid (5.3 oz)
  • 2 tablespoons olive oil
  • 1 tablespoon fresh sage, finely chopped
  • Salt and black pepper to taste

Instructions

  1. In a medium saucepan, cook the potatoes in salted water until tender, about 15 minutes.
  2. Drain the potatoes and return them to the saucepan.
  3. While still warm, add the olive oil, garlic, and Chavrie Goat Cheese.
  4. Whip the potatoes with hand-held mixers until the ingredients are blended and the desired consistency is obtained.
  5. Season with salt and black pepper to taste.
  6. Garnish with fresh sage before serving.

Tips

  • Use Starchy Potatoes: Russet or Yukon Gold potatoes work best for this recipe, providing a fluffy and creamy texture.
  • Don’t Overmix: To avoid gummy mashed potatoes, mix just until the ingredients are combined.
  • Infuse the Oil: For an extra flavor boost, gently heat the olive oil with the minced garlic before adding it to the potatoes.

Variations & Substitutions

  • Dairy-Free Option: Substitute the goat cheese with a dairy-free cheese alternative for a lactose-free version.
  • Herb Variations: Experiment with different herbs like rosemary or thyme for a unique twist.
  • Cheese Alternatives: Try using cream cheese or feta for a different flavor profile.

Storage

Store any leftover mashed potatoes in an airtight container in the refrigerator for up to 3 days. To reheat, gently warm them on the stove over low heat, adding a splash of milk or cream to restore their creamy consistency.

FAQ

Can I prepare the mashed potatoes ahead of time?

Yes, you can prepare the mashed potatoes a day in advance. Simply reheat them gently on the stove or in the microwave before serving, adding a little cream or milk to bring back their creamy texture.

What can I serve with these mashed potatoes?

These mashed potatoes are incredibly versatile and pair well with a variety of dishes, including roasted chicken, grilled steak, or even a hearty vegetable stew.

Can I freeze the mashed potatoes?

While it’s possible to freeze mashed potatoes, the texture may change upon thawing. If you choose to freeze them, store in an airtight container and reheat gently, adding cream or milk to improve texture.

Nutrition

Each serving of these mashed potatoes provides approximately:

  • Calories: 230
  • Protein: 5g
  • Carbohydrates: 25g
  • Fat: 12g
  • Fiber: 3g
  • Sugar: 2g

Conclusion

Mashed Potatoes with Garlic, Sage & Goat Cheese are more than just a side dish—they’re a celebration of flavors that bring warmth and joy to any table. Whether you’re hosting a holiday gathering or simply treating yourself to a cozy meal at home, this recipe is sure to impress. With its blend of rich, creamy textures and aromatic herbs, you’ll find yourself returning to this dish time and again. So gather your ingredients, embrace the nostalgia, and savor the comforting taste of these gourmet mashed potatoes. Happy cooking!

Related update: Mashed Potatoes with Garlic, Sage & Goat Cheese

Easy Gluten Free Vegetarian Pasta Salad | Made by Meaghan Moineau

Easy Gluten Free Vegetarian Pasta Salad

Intro

There’s something incredibly heartwarming about the simplicity of a well-made pasta salad. Growing up, summer gatherings at my grandmother’s house were never complete without her famous pasta salad. As kids, we would run around the garden, while the adults chatted over glasses of iced tea, and I can still remember the excitement of finally sitting down to a big bowl of her refreshing creation. With my Easy Gluten Free Vegetarian Pasta Salad, I hope to bring a slice of that nostalgia to your table, offering a dish that’s not only delicious but also mindful of dietary choices.

Why You’ll Love It

This gluten-free vegetarian pasta salad is a delightful blend of flavors and textures that will surely become a staple in your home. Here’s why you’re going to love it:

  • Simple Ingredients: Made with everyday ingredients that are easy to find, this salad is as accessible as it is delicious.
  • Quick to Make: With minimal prep and cooking time, you can have this salad ready in under 30 minutes.
  • Diet-Friendly: Perfect for those following a gluten-free or vegetarian diet, ensuring everyone can enjoy a serving.
  • Versatile: Easily adaptable with various ingredients or substitutions to suit your taste and pantry.
  • Perfectly Balanced: The creamy yogurt dressing, sweet grapes, and zesty citrus create a harmonious flavor profile that’s both refreshing and satisfying.

Ingredients

  • 8 ounces gluten-free pasta
  • 1 cup plain Greek yogurt
  • Zest of one orange
  • 1/4 cup fresh orange juice
  • 2 tablespoons olive oil
  • 1 cup fresh grapes, halved
  • 1/4 cup fresh cilantro, chopped
  • 1 teaspoon sea salt
  • 1/2 teaspoon black pepper

Instructions

  1. Cook the gluten-free pasta according to the package directions. Once cooked, drain the pasta and set it aside to cool for about 10 minutes.
  2. In a large mixing bowl, combine the plain Greek yogurt, orange zest, fresh orange juice, and olive oil. Whisk these ingredients together until you have a smooth dressing.
  3. Add the cooled pasta to the bowl. Then, add the fresh grapes, chopped cilantro, sea salt, and black pepper.
  4. Gently toss all the ingredients together until the pasta is well coated with the dressing, and the ingredients are evenly distributed.
  5. Transfer the pasta salad to four serving bowls. Serve chilled for the best flavor.

Tips

To ensure you get the best results with your pasta salad, consider these helpful tips:

  • Cook Pasta Al Dente: This helps maintain a firmer texture, preventing the pasta from becoming mushy when mixed with the dressing.
  • Cool Pasta Properly: Letting the pasta cool before mixing it with the dressing ensures that the yogurt doesn’t become oily or lose its creaminess.
  • Fresh Ingredients: Use fresh grapes and cilantro for the best flavor and texture. Avoid canned or frozen substitutes.
  • Adjust Seasoning: Taste the salad before serving and adjust the salt and pepper according to your preference.

Variations & Substitutions

This pasta salad is quite versatile, and you can easily customize it to your liking:

  • Fruit Swap: Try using diced apples or pears instead of grapes for a different sweet crunch.
  • Herb Alternatives: If cilantro isn’t your favorite, fresh basil or parsley make excellent alternatives.
  • Dairy-Free Option: Substitute the Greek yogurt with a dairy-free yogurt to make this salad completely dairy-free.
  • Add Protein: For an extra boost, add some chickpeas or chopped nuts like almonds or walnuts.

Storage

This pasta salad stores well and can be made ahead of time. Here’s how to store it:

  • Store the pasta salad in an airtight container in the refrigerator for up to 3 days.
  • If making ahead, you might want to reserve some dressing to mix in just before serving to refresh the flavors.
  • For best results, allow the salad to come to room temperature for about 10 minutes before serving if it’s been chilled for a while.

FAQ

Can I use regular pasta instead of gluten-free pasta?

Absolutely! If you don’t need a gluten-free option, feel free to use your favorite regular pasta. The salad will be just as delicious.

How can I prevent the salad from becoming too dry?

To keep your salad moist and flavorful, ensure the pasta is not overcooked and that you have enough dressing to coat all ingredients. Reserving a bit of dressing to add just before serving can also help refresh the dish.

What can I serve with this pasta salad?

This salad is versatile and pairs well with a variety of dishes. Consider serving it alongside grilled vegetables, a light soup, or as part of a picnic spread with sandwiches and fresh fruit.

Nutrition

While exact nutritional values can vary based on the specific products used, a serving of this gluten-free vegetarian pasta salad is generally a healthy choice, offering a balance of carbohydrates, healthy fats, and proteins. The yogurt provides a good source of probiotics, and the fresh fruits and herbs add nutrients and antioxidants. Always consider portion sizes to align with your dietary needs.

Conclusion

This Easy Gluten Free Vegetarian Pasta Salad is more than just a dish; it’s a reminder of the joy that comes from simple, comforting meals shared with loved ones. Whether you’re looking to recreate a cherished family recipe with a modern twist or seeking a quick and healthy meal option, this salad is sure to please. Serve it at your next gathering, and watch as it becomes a favorite among your family and friends, just as it has in mine. Enjoy the vibrant flavors and the satisfaction of a meal well-made!

Related update: Easy Gluten Free Vegetarian Pasta Salad

Related update: Caramelized Tofu & Gala Apple Salad