Banana in brown sugar ice cream | Made by Meaghan Moineau

It was one of those evenings when nothing seemed to go right. I had just returned from a long day at work, craving something sweet and indulgent. With a sneaky glance at my fruit basket, I realized I had a bunch of slightly overripe bananas begging to be used. That was my eureka moment: Banana in brown sugar ice cream. It’s one of those recipes that sounds super fancy but is actually a delightful twist on your average ice cream. Plus, it’s a fantastic way to transform humble bananas into a rich, creamy treat that’s perfect for any occasion. This recipe strikes the perfect balance between indulgent and comforting, and it’s seriously worth a try.

Jump to Recipe

What You’ll Need

Trust me, you won’t need a shopping cart full of ingredients for this one. Chances are you already have most of these on hand:

  • Bananas – The riper, the better!
  • Light brown sugar
  • Sour full-fat cream or coconut milk for a lighter twist
  • Dark rum
  • Vanilla extract
  • Lemon juice
  • A pinch of sea salt

How to Make Banana in brown sugar ice cream

  1. In a wide skillet or saucepan, heat the light brown sugar with one-quarter of the sour cream. Stir it gently until the mixture becomes smooth and bubbly, filling your kitchen with a caramel-like aroma.
  2. Add the bananas and a pinch of sea salt. Let them cook for about 5 minutes, stirring occasionally. You’re looking for soft, completely cooked-through bananas with a golden touch.
  3. Once the bananas are done, remove the skillet from heat and stir in the remaining sour cream, dark rum, and vanilla extract. Give it a taste, and if it’s a tad too sweet, a few drops of lemon juice will brighten it up.
  4. Pour everything into a blender or food processor, and puree until the mixture is utterly smooth.
  5. Chill it thoroughly for at least an hour, or if patience is a virtue you possess, let it sit overnight.
  6. When you’re ready, pour the chilled mixture into your ice cream maker and follow the manufacturer’s instructions. The anticipation is worth it!
  7. Before serving, let the ice cream sit out for 5-10 minutes, or longer if needed, to reach that perfect scooping consistency.

Cook’s Notes

Making this ice cream is a breeze, but here are a few tips to ensure it turns out perfectly:

  • If you choose sour cream, the mixture might curdle a bit while cooking. Don’t panic! It will all smooth out when blended.
  • This treat is best served in chilled glass or porcelain bowls to keep it from melting too quickly.
  • For effortless scooping, soak your ice cream spoon in boiling water, then dry it before using.
  • Store any leftovers (if there are any!) in an airtight container in the freezer. It’ll stay delicious for a week or two, though I doubt it will last that long.

Make It Your Own

Here are a few ideas to tweak this dessert to suit your fancy:

  • Swap the dark rum for bourbon for a slightly different boozy kick.
  • Add a handful of toasted pecans or walnuts after churning for a nutty crunch.
  • For a chocolatey twist, toss in some chocolate chips or a swirl of chocolate syrup during the final mixing.
  • Not a fan of bananas? Substitute with ripe peaches or mangoes for a tropical spin.

If you try this, I’d love to hear how it turns out — drop a comment or tag me! Let’s share the ice cream joy because we all need a little sweetness in our lives.

Related update: Banana in brown sugar ice cream

Related update: Traditional Banana Bread

Corn Avocado Salsa | Made by Meaghan Moineau

Picture this: It’s a balmy Tuesday evening, and after a long day at work, all you want is something fresh, quick, and a little fun to brighten up your dinner table. You’re standing in the kitchen, barefoot, with the warm breeze tickling your curtains, and that’s when you remember the bag of frozen corn tucked away in the freezer. And oh, the avocado sitting prettily on the counter, just begging to be used! That’s when the idea hits: Corn Avocado Salsa. It’s a dish that’s as vibrant as it is simple, packed with the kind of zesty flavors that say, “Hey, let’s pretend it’s summer all year round.” Plus, it’s the type of recipe that lets you feel like a pro without requiring a culinary degree. Let’s dive in!

Jump to Recipe

What You’ll Need

Here’s the beauty of this dish: It’s made with ingredients you likely already have. It’s about taking the humble and making it shine, and let’s be honest, who doesn’t love a recipe that doesn’t call for a grocery store run?

  • Avocado
  • Balsamic vinegar
  • Cumin
  • Canned frozen corn
  • Garlic
  • Red bell pepper

How to Make Corn Avocado Salsa

  1. Preheat your oven to 375 degrees. The perfect temperature to get that corn just right—golden and slightly crisp, without venturing into burnt territory.
  2. Spread the frozen corn flat on a baking sheet. Give it a light spritz of olive oil spray to help it roast up nicely.
  3. Roast the corn in the oven for about 8-10 minutes. Keep an eye on it; you’re looking for a nice golden hue, not the blackened crunch of forgotten popcorn.
  4. Once roasted, remove the corn from the heat and let it cool. It’s essential to let the corn relax a bit before mixing, or it’ll cook the avocado, turning your salsa into a mushy mess.
  5. While the corn is cooling, finely chop the red bell pepper and garlic. Mix these in a bowl, letting their flavors begin their tango.
  6. Peel and coarsely chop the avocado. Add this beauty to your bowl along with the cooled corn. Try not to mash it; we want chunks, not guac.
  7. Finally, sprinkle in cumin and drizzle in the balsamic vinegar. Blend well, but gently. You’re aiming for harmony in the bowl, not chaos.

Cook’s Notes

Let’s keep it real: Salsas are wonderfully forgiving, but there are still a few things to keep in mind. First off, make sure to give the corn enough time to cool—otherwise, your avocado may start to look more like a green smoothie. If you want to prep ahead, you can roast the corn and chop the veggies a day in advance. Just keep the avocado out until you’re ready to serve to maintain its gorgeous green color. Leftovers might be rare, but if you do have them, the salsa holds up okay for a day or two in the fridge. Just give it a good stir before serving.

Make It Your Own

Here are a few variations to keep your salsa adventures fresh:

  • Swap the red bell pepper for a jalapeño if you like a bit of heat. Just remember to deseed unless you’re feeling particularly daring.
  • Try adding some black beans for a heartier version. It makes for a great taco filler.
  • Throw in some chopped cilantro for an extra burst of freshness. It’s like a little green party in your mouth.
  • If you’re a citrus fan, squeeze in a bit of lime juice for a zesty twist. It pairs beautifully with the avocado.

If you try this, I’d love to hear how it turns out—drop a comment or tag me! Nothing makes my day more than seeing your creations and hearing your thoughts. Happy cooking, friends!

Related update: Corn Avocado Salsa

Related update: Egyptain Cauliflower Side Salad

TROPICAL BANANA GREEN SMOOTHIE | Made by Meaghan Moineau

Okay, picture this: It’s a Wednesday morning, you hit snooze one too many times, and now you’re rushing around trying to make it out the door on time. You want something quick, healthy, and delicious to kick-start your day. That’s exactly how I stumbled upon this Tropical Banana Green Smoothie. I was in dire need of something refreshing and energizing, yet easy enough to throw together in less than five minutes. This smoothie checks all those boxes and more. It’s like a mini tropical vacation in a glass, and while it sounds fancy, it’s really just a few simple ingredients blended into creamy perfection. Trust me, one sip of this and you’ll forget all about your hectic morning. Jump to Recipe

What You’ll Need

This smoothie is all about using what you have on hand and embracing the refreshing flavors of the tropics. Chances are you already have most of this in your kitchen.

  • 1 ripe banana
  • 1 cup pineapple, fresh or frozen
  • 1 cup coconut water
  • 1/2 cup blueberries, fresh or frozen
  • 1 scoop protein powder (vanilla works great!)
  • 1 handful mixed spinach

How to Make TROPICAL BANANA GREEN SMOOTHIE

  1. Peel and slice the banana. If you’re using frozen pineapple, you can skip this step for now. If fresh, chop it into chunks. This will add to the creaminess.
  2. In a blender, add the banana slices and pineapple chunks. Pour in the coconut water. This will be the base of your smoothie, giving it that tropical flair.
  3. Throw in the blueberries and the scoop of protein powder. The blueberries add a pop of color and a hint of sweetness that complements the tropical vibes.
  4. Top it off with a generous handful of mixed spinach. Don’t worry; the taste is so mild, you won’t even notice it’s there (your body will, though!).
  5. Blend on high until the mixture is smooth and creamy. You’ll know it’s ready when there are no more visible chunks and the blend is a beautiful, vibrant green.
  6. Pour into your favorite glass, pop in a fun straw, and savor your mini-vacation in a cup.

Cook’s Notes

This smoothie is incredibly forgiving, so feel free to adjust the ingredient quantities to suit your taste. If you prefer a thicker smoothie, use frozen fruit or add a couple of ice cubes before blending. For those with a sweet tooth, a splash of honey or agave nectar can take it to another level.

It’s best enjoyed fresh, but if you’re in a time crunch, you can make it the night before. Just give it a quick stir or shake in the morning. As for leftovers, store in an airtight container in the fridge for up to one day; beyond that, it tends to lose its vibrancy and freshness.

Make It Your Own

  • Swap the coconut water with almond milk for a creamier texture and a nutty undertone.
  • Add a tablespoon of chia seeds before blending for an extra boost of fiber and omega-3s.
  • Replace the spinach with kale for a more robust green flavor.
  • For a tropical twist, throw in a few mint leaves during blending.

If you try this, I’d love to hear how it turns out — drop a comment or tag me! Let’s turn those chaotic mornings into something a bit more delightful, one smoothie at a time!

Related update: TROPICAL BANANA GREEN SMOOTHIE

Related update: Protein Strawberry Smoothie

Oura Ring 5: Sleeker, Worth the Cost? | Analysis by Brian Moineau

TL;DR

  • Oura Ring 5 trims the metal to 6.1mm wide and 2.28mm thick, claims 6–9 days of battery, and starts at $399 plus a $5.99/month membership; most of its new software also lands on older Oura models, so the case for upgrading is comfort, not capability. [1][3]
  • The three‑year cost reality: Oura Ring 5 at $399 + membership (~$610 total, or ~$710 with the $99 charging case) vs Samsung Galaxy Ring at $399 with no subscription; the gap makes Oura’s pitch hinge on its app’s longitudinal insights. [3][5][6]
  • For sports, Oura is still a non‑starter; even budget watches beat it on workout tracking—so the smart ring fight is really about sleep, stress, and ecosystem lock‑in, not athletics. [1]

What the source said

DC Rainmaker’s in‑depth review says Oura Ring 5 is materially smaller than Ring 4 and feels better day‑to‑day, with slightly better real‑world battery life. The headline hardware changes: width drops from 7.9mm to 6.1mm, thickness from 2.8mm to 2.28mm, and weight drops by roughly 2g; Oura reduces light paths from 18 to 12 but amps LED brightness 4x, with claimed 12% HRV gains at night and up to 19% workout accuracy gains. Pricing rises $50 to $399 (premium finishes $499), and the $5.99/month subscription remains. Critically, most software features also come to previous rings, and sports tracking remains “woefully behind” basic wearables. [1]

Why it matters

Two groups drive the smart ring market in mid‑2026: watch‑averse wellness users who won’t wear a band, and phone‑ecosystem loyalists (Samsung Health, Zepp) who want passive sleep and stress data without a recurring fee. Oura Ring 5 is squarely aimed at the first group, betting that a “world’s smallest” ring and cleaner signal capture will keep churn down and membership retention up. [3]

For Oura Health, hardware is a funnel to recurring revenue. The company’s May 2026 press note pitches scale and adds “Health Radar” (including blood pressure signals) and multi‑ring support to raise switching costs. That is a classic SaaS defense in a category suddenly crowded with subscription‑free rivals at $199–$399 from Samsung, Zepp Health, and RingConn. [3][2][6]

Original analysis

Back‑of‑the‑envelope math: Oura Ring 5 vs subscription‑free rivals

  • Oura Ring 5 base: $399 hardware + $69.99/year membership if billed annually.
    Three‑year total: $399 + 3 × $69.99 ≈ $609.97.
    Add $99 charging case and you’re at ≈ $708.97. [3]
  • Samsung Galaxy Ring: $399, no subscription. Three‑year total: $399. Samsung has already run sustained discounts to $299 in the US, so the likely “street” three‑year total often trends ≈ $299–$399. [5][7]
  • Amazfit Helio Ring: commonly $199, no subscription. Three‑year total: $199. [2]

If Oura’s app‑level guidance and longitudinal trends are worth $210–$310 more than Samsung (or ~$410 more than Amazfit), the Ring 5 wins. If not, the math favors subscription‑free rings—especially when Samsung discounts Galaxy Ring to $299. [7]

Oura Ring 5: a 2×2 on what actually differentiates rings in 2026

Axes for the 2×2 as of 2026: Y = depth of health insights (validated sleep staging, HR/HRV nocturnal stability, proactive Health Radar), and X = ecosystem lock‑in and ongoing cost (subscriptions and phone OS limits such as Android‑only policies). [3][8]

Placement as of 2026:

  • Oura Ring 5: High insights, high lock‑in/cost (membership; works with iOS/Android). [3]
  • Samsung Galaxy Ring: Medium‑high insights, medium lock‑in (no sub but Android‑only; some Galaxy‑exclusive features). [5][8][9][11]
  • Amazfit Helio Ring: Medium insights, low lock‑in/cost (no sub; cheapest credible hardware). [2][8]

This is why the Oura debate isn’t about LEDs or millimeters; it’s about whether Oura’s software moat—a readiness model refined over a decade, new Health Radar cues like “blood pressure signals,” and higher‑touch guidance—earns that premium. [3]

Contrarian read

  • Consensus in gadget coverage: “Oura Ring 5 wins because it’s smaller—and therefore better.”
  • My view: Size is a rounding error next to total cost and platform reach. Most of Ring 5’s new software lands on older rings. In DC Rainmaker’s testing, sports remain a weak spot. If you already wear a Garmin, Apple Watch, or even a budget Amazfit, Ring 5 adds little beyond sleep comfort. Meanwhile, Samsung undercuts Oura’s value story by removing the membership line item entirely at the same $399 MSRP (and often $299 on sale). That reframes Oura’s $5.99/month as a tax on comfort unless you truly use the longitudinal insights every week. [1][3][5][7]

Named‑stakeholder breakdown

  • Oura Health: Betting that “world’s smallest” plus Health Radar will raise perceived value per month and slow churn. Multi‑ring support and a $99 travel charger signal a push for higher ARPU via accessories and multi‑device households. [3]
  • Samsung: Keeps price parity at $399 with no sub, pressures Oura’s TCO, and uses Galaxy‑only features to keep buyers in the phone fold while still working on broader Android. That’s a Trojan horse for Samsung Health’s daily active users. [5][9][11]
  • Zepp Health (Amazfit Helio Ring): Wins the price war at $199, appealing to “value maximizers” who want sleep and basic readiness without subscriptions; risks being perceived as “good enough,” not “best.” [2][8]
  • RingConn: Longer battery claims and no sub create a middle lane, but patent pressure in the US complicates scale. Oura’s ITC actions show it will fight hard to tax or block rivals. [10][12]

The quiet strategic move

Oura’s press release trumpets “Health Radar”—blood pressure signals and nighttime breathing—as a new pillar. That isn’t cuff‑grade BP; it’s a trend‑surfacing feature that nudges you to rest, change behavior, or seek care. [3]

But it widens Oura’s wedge into preventative health, potentially justifying membership even if you rarely start workouts in the app. That is how Oura shifts the conversation from better LEDs to “we’ll tap you on the shoulder before your week goes off the rails.” If those nudges correlate with reduced strain days or illness downtime in members’ own timelines, churn falls—and the $210 three‑year delta vs Samsung becomes a feature, not a bug. [3]

What others are missing

Two design decisions meaningfully narrow the addressable market. First, Ring 5 shrinks the size range to 6–13 (down from 4–15 previously), which quietly excludes smaller and larger fingers; “world’s smallest” doesn’t matter if it doesn’t fit you. Second, Oura changed the charger again and added a separate $99 charging case—great for travelers, but another tax for multi‑ring homes and upgraders. Combine those with the fact that most new features also land on older hardware, and the strategic signal is clear: Oura is optimizing for a profitable core segment (sleep‑first, membership‑sticky users), not universal reach. [1][3]

What to watch next

  1. By Black Friday 2026 (November 27–30), Oura will run a mainstream promo bundling at least six months of membership or the $99 charging case to blunt TCO and accelerate upgrades from Ring 3/4. [3]
  2. By Q1 2027 (March 31), Samsung will normalize Galaxy Ring “street” pricing at $299 in the US outside of launch windows, following multiple nationwide promos in 2025–2026 that already hit that mark. [7]
  3. By H1 2027 (June 30), at least one major US insurer or employer wellness program will name Oura Ring 5 as an approved device with partial reimbursement via HSA/FSA positioning, expanding beyond niche pilots. [3]

My take

I’d buy Oura Ring 5 only if I refuse to wear a watch and I will actually use the readiness and “Health Radar” nudges weekly. The hardware miniaturization is impressive, but the reason to pay Oura’s subscription tax is the software history baked into those scores—not the ring’s silhouette. If you’re already in Samsung’s orbit or you’re a value buyer, the math doesn’t justify Oura. If you want the best passive sleep engine and a long‑term health journal on your phone, this is still the default pick—just budget for three years upfront and make sure you’ll open the app enough to earn the delta. [1][3][5]

Sources

Carrot and Coriander Soup | Made by Meaghan Moineau

Last Tuesday, as I stood in my kitchen, surrounded by an unexpected bounty of carrots I’d picked up on a whim, inspiration hit. Why not make a comforting soup that’s both vibrant and subtly spiced? With a hint of coriander and a splash of orange juice, this carrot and coriander soup is not just a feast for the eyes, but also a delightful dance of flavors perfect for a chilly weeknight. It’s impressively easy, too, so it’s a win-win. The kind of recipe that lets you unwind as it simmers, filling your kitchen with warmth and the promise of a cozy meal. Oh, and it’s lightning fast to whip up! Jump to Recipe

What You’ll Need

Chances are you already have most of these ingredients in your pantry. Here’s what you’ll need to bring this dish to life:

  • Carrots – peeled and ready to brighten up your evening
  • Onion – chopped finely; it’ll lend sweetness as it cooks
  • Olive oil – or butter, for that silky start
  • Ground coriander – the star of the show with its earthy flavor
  • Orange juice – to add a splash of freshness
  • Water – enough to let the veggies dance around in the pot
  • Salt – to taste, always
  • Pepper – for a hint of warmth
  • Fresh coriander – for that final, fragrant flourish

How to Make Carrot and Coriander Soup

  1. In a deep pot, heat the olive oil over medium heat. Toss in the chopped onions, stirring occasionally until they’re soft and translucent, and your kitchen smells like a dream.
  2. Add the peeled carrots to the pot and sauté them for a few minutes until they start to soften slightly and their sweetness gets a chance to shine.
  3. Pour in the water, season with salt and pepper, and cover the pot. Let it all simmer until the carrots are tender and flavorful, about 15-20 minutes.
  4. Stir in the orange juice and ground coriander. Let it cook for an additional 2 minutes, enough for the flavors to mingle and create magic.
  5. Carefully transfer the mixture to a blender and puree until smooth. You’ll want to do this in batches if your blender is on the smaller side.
  6. Return the pureed soup to the pot and give it a final taste test, adjusting the seasoning if needed. Serve hot, garnished with fresh coriander for a pop of color and extra zest.

Cook’s Notes

Here’s the stuff you really want to know: You can totally make this soup ahead of time. Just store it in an airtight container in the fridge for up to three days. When you’re ready to serve, simply reheat it on the stove until it’s piping hot. And a little secret — this soup freezes like a champ! Just skip the fresh coriander before freezing and add it only when serving.

Also, make sure your blender can handle hot liquids; you don’t want a carrot explosion! Let the soup cool a bit before blending, and never fill the blender more than halfway. Trust me on this one.

Make It Your Own

  • Swap the water for veggie broth to amp up the flavor profile.
  • Feeling indulgent? Stir in a splash of cream or coconut milk at the end for a richer texture.
  • Boost the spice by adding a pinch of cayenne or smoked paprika.
  • For a protein hit, toss in some cooked chickpeas when serving.

If you try this, I’d love to hear how it turns out — drop a comment or tag me! Whether you stick to the classic or put your own twist on it, this soup is sure to warm both your heart and your taste buds.

Related update: Carrot and Coriander Soup

Related update: Corn Avocado Salsa

Blast Of Color Mexican Stuffed Bell Peppers | Made by Meaghan Moineau

It was one of those chaotic weeknights when I stumbled back into the kitchen after a long day, only to find a colorful assortment of bell peppers staring back at me from the fridge. They were practically begging to be turned into something delicious. I craved something that was not only quick to whip up but also packed with flavor and just the right amount of comfort. That’s when it hit me – a vibrant, flavor-packed Mexican stuffed bell pepper! These beauties come together effortlessly with a few pantry staples and a rotisserie chicken that I always keep around for emergencies. With a quick trip to the oven, they fill the house with mouthwatering aromas, and in no time, dinner is served. It’s the kind of recipe that feels satisfying and a little bit indulgent, but you know it’s good for you too.

Jump to Recipe

What You’ll Need

Let’s be honest, the best part about this recipe is that you probably have most of these ingredients on hand. Here’s what you’ll need to get started:

  • Bell peppers (any color you love)
  • Cooked brown rice
  • Rotisserie chicken breast, shredded
  • Frozen corn kernels
  • Roma tomato, diced
  • Red diced onion
  • Black beans, drained and rinsed
  • Fire roasted green diced chile
  • Chili seasoning
  • Minced garlic
  • Low-fat shredded cheddar cheese
  • Sour light cream

How to Make Blast Of Color Mexican Stuffed Bell Peppers

  1. Preheat your oven to 400 degrees. Feel that blast of warmth and imagine the deliciousness to come.
  2. In a large mixing bowl, toss together the cooked brown rice, shredded chicken, corn, diced tomato, onion, black beans, half a cup of shredded cheddar, garlic, green chile, and chili seasoning. Mix until everything is evenly distributed and it smells like a fiesta.
  3. Line a baking dish with foil and give it a spritz of cooking spray to prevent sticking.
  4. Take your bell peppers and cut off the tops, then scoop out the seeds. Stuff them generously with the chicken mixture, pressing it down to fill every nook and cranny, and heap some extra on top for good measure.
  5. Sprinkle each pepper with a bit more cheddar cheese, because let’s be honest, you can never have too much cheese.
  6. Bake in the preheated oven for 30 to 40 minutes. When the edges of the peppers start to bubble and the cheese turns golden, you know it’s ready.
  7. Let them cool just a bit, then top each pepper with a dollop of sour light cream before serving. Dig in and enjoy!

Cook’s Notes

These Mexican Stuffed Bell Peppers are a breeze to make, but here are a few things to keep in mind to ensure they turn out perfectly every time. Make sure your baking dish is large enough to fit all the peppers snugly so they stand upright and cook evenly. If you’re prepping ahead, you can mix the stuffing a day in advance and refrigerate it. Just stuff and bake when you’re ready. Leftovers can be stored in an airtight container in the fridge for up to three days. Just pop them in the microwave for a quick reheat.

Make It Your Own

Personalizing this dish is easy, and here are a few ideas to get you started:

  • Swap the chicken for crispy tofu or ground turkey for a different protein option.
  • Add a handful of fresh cilantro or parsley to the stuffing mix for a burst of freshness.
  • If you like it spicy, throw in some jalapeño slices or a dash of hot sauce.
  • Use quinoa instead of brown rice for a protein-packed alternative.

If you try this, I’d love to hear how it turns out — drop a comment or tag me! Cooking is all about experimenting and sharing, and I can’t wait to see your creations. Happy cooking!

Related update: Blast Of Color Mexican Stuffed Bell Peppers

Protein Strawberry Smoothie | Made by Meaghan Moineau

It was one of those mornings where I woke up, looked in the fridge, and realized I was running late for everything. My mind was a blur, but my stomach was loud and clear: it needed something quick, filling, and delicious. Enter the Protein Strawberry Smoothie. It’s like a breakfast hug in a glass, bursting with fruity freshness and a protein punch to keep you going. Plus, it comes together in minutes — perfect for the days when your to-do list is longer than your patience.

Jump to Recipe

What You’ll Need

I bet you already have most of these ingredients in your kitchen, which means you’re just minutes away from sipping on this creamy delight. Here’s what you’ll need:

  • 1 cup almond milk
  • 1 banana
  • 1/2 cup fat-free Greek yogurt
  • 1 tablespoon honey
  • 1 cup ice
  • 1 cup fresh strawberries

How to Make Protein Strawberry Smoothie

  1. Start by grabbing your blender and pouring in the almond milk. This will be the liquid base that helps everything blend smoothly.
  2. Peel the banana and break it into chunks, tossing them into the blender. Bananas add natural sweetness and a creamy texture.
  3. Add the fat-free Greek yogurt next. This is where the protein magic happens, making your smoothie satisfying and rich.
  4. Drizzle in the honey. Adjust the sweetness to your taste, but remember, the strawberries will add their own sweetness too.
  5. Throw in the ice to make it nice and frosty. No one likes a warm smoothie!
  6. Top it all off with the fresh strawberries. They bring a bright, berry flavor that’s completely irresistible.
  7. Blend on high until everything is smooth and the color is a lovely pink. It should only take about a minute. Taste and adjust if needed — maybe a bit more honey or a splash of almond milk if it’s too thick.
  8. Pour into your favorite glass and enjoy immediately. It’s best when fresh and frothy!

Cook’s Notes

So, a few quick things to make sure your smoothie game is on point. If your smoothie ends up too thick, just add a bit more almond milk to loosen it up. Too thin? A few more ice cubes will do the trick. I love using fresh strawberries when they’re in season, but frozen will work in a pinch and will make your smoothie even thicker — just reduce the ice a bit. As for storing it, well, this smoothie is really best made fresh. If you do have leftovers, pop them in the fridge for a few hours, but know they might separate a bit (just give it a good shake or stir before drinking).

Make It Your Own

Here are a few fun ways to switch things up:

  • Swap the almond milk for coconut milk for a tropical twist.
  • Replace the banana with a ripe avocado for a lower-sugar, extra creamy version.
  • Add a tablespoon of chia seeds before blending for an extra boost of fiber and omega-3s.
  • Throw in a handful of spinach to sneak in some greens — you won’t even taste it!

If you try this, I’d love to hear how it turns out — drop a comment or tag me! Whether you’re sipping this on a bustling morning or a lazy afternoon, I hope it adds a bit of joy to your day. Cheers to easy, tasty nutrition!

Related update: Protein Strawberry Smoothie

Related update: TROPICAL BANANA GREEN SMOOTHIE

Switzerland Breaks 88-Year World Cup | Analysis by Brian Moineau

TL;DR

  • Switzerland vs Algeria stats tell a concrete story: less of the ball (44%) but far better shots (2.52 xG from 11 attempts) and a clinical 2-0 that finally snaps an 88-year World Cup knockout drought. [1]
  • Forget the “plucky Switzerland” trope; Murat Yakin has built a vertical side keyed by a 20-year-old breakout, Johan Manzambi, with smart triggers from Denis Zakaria and Granit Xhaka at BC Place in Vancouver. [1]
  • The downstream stakes are real: a Round-of-16 date with Colombia on July 7 in Vancouver, Premier League links swirling around Manzambi, and larger FIFA distributions confirmed in April 2026. [7][4][5]

What the source said

Opta Analyst reports that Switzerland beat Algeria 2-0 at BC Place (Vancouver) to reach the World Cup last 16, their first win in a World Cup knockout tie since 1938. Breel Embolo scored in the 10th minute from a Johan Manzambi burst, and Dan Ndoye added the second just 48 seconds into the second half after a Zakaria interception. Opta’s numbers underline the control-through-chances approach: Switzerland posted 2.52 expected goals (11 shots) to Algeria’s 0.73 (eight shots), despite the Desert Foxes holding 56% possession and having out-possessed opponents in all four of their matches. Xhaka marked his 150th cap while leading Switzerland in duels, possession regains, and fouls won. Manzambi became the youngest Swiss player with five goal contributions on World Cup record (since 1966). [1]

Why it matters

  • For Switzerland, this is a narrative jailbreak with receipts: a 2.52–0.73 xG edge in Vancouver on July 2 and the first knockout win since 1938. FIFA also approved higher team payments in April 2026, adding $100 million across federations; advancing while keeping minutes managed becomes a fiscal strategy for the Swiss FA, not just a feel-good story. [1][5][3]

  • For Algeria and Vladimir Petković—who coached Switzerland from 2014 to 2021—this loss exposes the ceiling of sterile control. The Fennecs owned 56% possession yet produced 0.73 xG, which points to box-entry poverty more than bad luck. If Petković remains through 2028 as reported, staff need a repeatable route to cutbacks and third‑man runs before the next FIFA window. [1][6]

Original analysis

1) Back-of-envelope: shot quality and efficiency

  • Switzerland’s xG per shot: 2.52 xG / 11 shots ≈ 0.229.
  • Algeria’s xG per shot: 0.73 xG / 8 shots ≈ 0.091.
  • Differential in average shot quality: 0.229 – 0.091 ≈ 0.138 xG per attempt.

That gap explains the scoreboard in Vancouver. Switzerland finished 2 goals on 2.52 xG (G–xG = –0.52), which is “par” in a knockout game. Algeria took eight mostly low-quality looks and rarely touched the 0.15–0.20 xG band. Possession without penetration is a July luxury item that doesn’t cash out at BC Place. [1][2]

2) A 2×2: possession vs penetration, applied

Use a simple map for July 2 at BC Place: high possession/high threat = full control; high possession/low threat = sterile control; low possession/high threat = direct damage; low possession/low threat = drift. In this match, Switzerland sat in low possession/high threat (direct damage), and Algeria sat in high possession/low threat (sterile control). Switzerland’s second goal hit 48 seconds after halftime via a midfield trap—Zakaria stepped, stole, and the box filled within three passes—showing structure, not randomness. Algeria built 56% possession across four matches, but they didn’t translate those touches into penalty-box touches when it counted. [1]

3) Historical analogue, with a twist

The last time Switzerland scored two in a World Cup knockout game was that 7–5 chaos-fest vs Austria in 1954 at Lausanne. The 1954 lesson was “can’t close chaos”; the 2026 Vancouver lesson was “control chaos by starving the box.” The xG split (2.52–0.73) and the 48-second second-half strike look more like Euro 2020’s France upset under Petković—only this time with Manzambi’s vertical carries and a tidier Xhaka–Zakaria coverage mesh. That’s why the 88-year drought ended here, not on a coin flip. [1][2][6]

4) Named-stakeholder breakdown

  • SC Freiburg: Manzambi’s club just watched a 20-year-old become the first Swiss player with five World Cup goal involvements on record (since 1966), a July statement that inflates any summer 2026 valuation. [1][5]
  • Newcastle United: Multiple outlets—and Opta Analyst—tie the Magpies to Manzambi; his carry-assist for Embolo and line-breaking touches fit Newcastle’s 2023–2026 recruitment pattern. Expect phone lines to heat up before July 31. [1][4]
  • Swiss FA: The FIFA Council’s April 2026 decisions added $100 million in prep and support; each extra July match in Vancouver boosts youth‑pathway flexibility heading toward 2026–2028 cycles. [5][3]
  • City of Vancouver/BC Place: 52,497 attended Switzerland–Algeria, and Sky’s listings project another sellout on July 7 for Switzerland–Colombia, a tourism and broadcast postcard for British Columbia. [2][7]
  • Algeria and Vladimir Petković: The plan produced control, not chances. With an extension discussed through 2028, Algeria must build second-phase patterns (third-man runs; half‑space cutbacks) or risk repeating a sub‑1.0 xG profile against organized blocks. [6]

5) The contrarian read

  • Consensus: “Switzerland grind, keep it 1-0, and pinch moments.”
  • Reality: Yakin’s Switzerland loaded the box quickly and repeatedly—11 shots yielding 2.52 xG—via Manzambi’s carry past Aïssa Mandi on the opener and a rehearsed Zakaria theft on the second. That’s not grinding; that’s proactive verticality with the handbrake off. [1]

What others are missing

Most write-ups spotlight Manzambi’s age and the 88-year drought, but the engine was the Xhaka–Zakaria axis reimagined in Vancouver. Xhaka’s 150th cap came with team-highs for duels won (10), possession regains (8), and fouls won (5), which freed Zakaria to play “destructor–distributor.” His step to intercept Ramy Bensebaini’s pass at 45:48 triggered the second goal: win on the half-turn, feed a loaded zone, finish in two touches. That pairing lets Yakin keep the back four compact while still flooding the box when Manzambi breaks a line, a blueprint they’ll carry into July 7 vs Colombia. [1][7]

What to watch next

  1. On July 7, Switzerland vs Colombia at BC Place finishes with combined shots under 22, and Switzerland’s xG per shot is ≥ 0.14. [7]
  2. By July 31, 2026, at least one reputable outlet (Sky Sports or The Guardian) reports a formal €40m+ bid for Johan Manzambi from a Premier League club. [2][4]
  3. By March 31, 2027, in Algeria’s next two competitive matches post‑World Cup, average possession remains ≥ 55% while non‑penalty xG per game stays below 1.2, confirming the “sterile control” problem unless system tweaks appear.

My take

I’m buying Switzerland as a goals-first knockout team in 2026: a veteran controller (Xhaka), a rangy hunter–passer (Zakaria), and a 20-year-old accelerator (Manzambi) who turns 40 yards into panic. Against Colombia on July 7 in Vancouver, I expect the Nati to concede the stage and steal the plot. If Manzambi keeps bending games on two touches, Switzerland aren’t just quarterfinal material—they’re the bracket’s quiet disruptor. [7]

Sources

  1. Switzerland 2-0 Algeria Stats: Embolo and Ndoye End 88-Year Wait — Opta Analyst (https://theanalyst.com/articles/switzerland-vs-algeria-stats-world-cup-2026) — Primary match stats and milestones (xG 2.52–0.73, 56% Algeria possession), plus Manzambi and Xhaka notes and the 88-year context.
  2. Switzerland 2-0 Algeria — Sky Sports (https://www.skysports.com/football/switzerland-vs-algeria/report/549848) — Independent match report with attendance (52,497), venue/time, and confirmation of the historic drought ending.
  3. Switzerland 2–0 Algeria (Match 85) — FIFA Training Centre PDF (https://www.fifatrainingcentre.com/media/native/tournaments/fifa-world-cup/2026/PMSR-M85-SUI-V-ALG.pdf) — Official match sheet with date (July 2 local), stadium (BC Place), and stage.
  4. Manzambi dazzles as Switzerland stroll into last 16 with win over Algeria — The Guardian (https://www.theguardian.com/football/2026/jul/03/manzambi-switzerland-world-cup-algeria-match-report) — Reporting on Manzambi’s impact and Premier League links (e.g., Newcastle United).
  5. FIFA to pay out $100M in extra cash to help cover World Cup teams’ costs — The Washington Post (https://www.washingtonpost.com/sports/soccer/2026/04/29/fifa-world-cup-prize-money-raise/bd8ae238-43ac-11f1-b19d-32431046b5b4_story.html) — Confirms April 2026 increases in baseline distributions and preparation money that matter to federation budgets.
  6. Algeria coach will go up against his former team Switzerland in the World Cup knockout round — The Washington Post (https://www.washingtonpost.com/sports/soccer/2026/07/01/world-cup-switzerland-algeria/6993a200-75a7-11f1-b665-5f8be87f3787_story.html) — Establishes Vladimir Petković’s Switzerland history and current Algeria role through 2028 reports.
  7. Colombia 1–0 Ghana: Colombia set up last‑16 tie with Switzerland in Vancouver on July 7 — Sky Sports (https://www.skysports.com/football/news/11095/13558809/world-cup-2026-colombia-x-x-ghana) — Confirms Switzerland’s next opponent, date (July 7), and venue (BC Place, Vancouver).


Related update: We recently published an article that expands on this topic: read the latest post.


Related update: We recently published an article that expands on this topic: read the latest post.

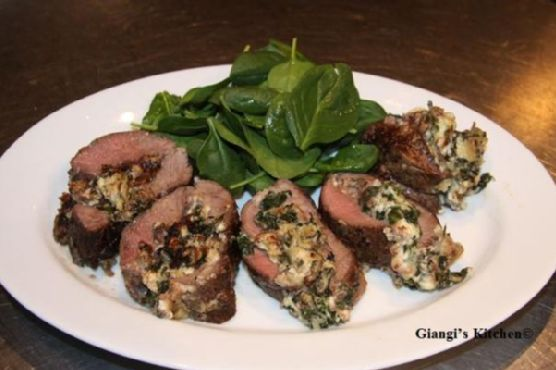
Spinach and Gorgonzola Stuffed Flank Steak | Made by Meaghan Moineau

Picture this: It’s a Wednesday night, the middle of a chaos-filled week, and you’re staring into your fridge, half wishing it would magically produce something other than leftovers or eggs. It’s in moments like these that my Spinach and Gorgonzola Stuffed Flank Steak becomes a lifesaver. This dish is what I like to call my “secret weapon” — it sounds like a mouthful, but it’s surprisingly easy to pull together. Plus, it gives off this vibe that you’ve got your life together, even if you’re just trying to make it to the weekend. Think savory, melty gorgonzola mingling with fresh spinach, all hugged by a tender flank steak. Are you drooling yet?

Jump to Recipe

What You’ll Need

This ingredient list is refreshingly short and sweet, which means you can save that grocery store run for another day.

  • Lean flank steak – the star of the show
  • Olive oil – for a touch of richness
  • Shallot – adds a subtle sweetness
  • Spinach – fresh and vibrant
  • Fresh bread crumbs – gives the stuffing a bit of body
  • Blue gorgonzola – the cheesy dream
  • Salt and pepper – the essentials

How to Make Spinach and Gorgonzola Stuffed Flank Steak

  1. Start by preheating your oven to 375°F (190°C). This is your cue to get things rolling.
  2. Next, butterfly the flank steak. Lay it flat on a cutting board and carefully slice through the long side, stopping just short of cutting it in half. If it’s already thin, just give it a good pounding with a mallet until it’s about 1/2 inch thick. Channel your inner chef!
  3. In a large skillet over medium heat, add 1 tablespoon of olive oil. Toss in the shallots and sauté until they’re soft and fragrant, about 2 minutes.
  4. Now, add the spinach. Stir occasionally until it’s just wilted, roughly 2 to 3 minutes. Transfer this mixture to a colander and let it cool. Once you can handle it, squeeze out all the moisture with your hands. Trust me, this step is crucial.
  5. In a medium bowl, combine the spinach with bread crumbs and gorgonzola. Season generously with salt and pepper, then mix it all up.
  6. Lay the steak flat on a piece of plastic wrap. Spread the spinach mixture evenly over it, leaving about a 1-inch border along the edges to prevent spillage.
  7. Using the wrap as an aid, roll the steak up starting from the edge closest to you. Press gently on the filling as you roll to keep it snug. Tie the roll with twine at 2 to 3-inch intervals to hold it all together.
  8. Season the outside with salt and pepper, then heat the remaining 2 tablespoons of olive oil in a large ovenproof skillet over medium-high heat.
  9. Sear the rolled steak on all sides until browned, about 2 minutes per side. The aroma will be irresistible at this point!
  10. Transfer the skillet to your preheated oven and roast for 20 to 25 minutes. When done, the steak should be firm but springy to the touch.
  11. Remove the steak from the oven, tent it with aluminum foil, and let it rest for 10 minutes. This is the hardest part – the waiting.
  12. When ready to serve, snip off the twine and slice into 1/2 inch to 1-inch thick slices. Voila! Enjoy your culinary masterpiece.

Cook’s Notes

If you’re looking for a shortcut, ask your butcher to butterfly the steak for you — major time saver. This dish works beautifully for make-ahead dinners. Simply prep it up to the point of searing, then chill in the fridge for a few hours, or even overnight. When you’re ready, just pick up where you left off. Leftovers (if there are any!) will keep well in the fridge for a couple of days and are delightful cold in a sandwich or reheated gently.

Make It Your Own

  • Not a fan of gorgonzola? Swap it for creamy goat cheese or a melty Havarti.
  • Add a layer of prosciutto before spreading the spinach mixture for an extra savory note.
  • Throw in some chopped sun-dried tomatoes or roasted red peppers for a pop of color and flavor.
  • For a twist, replace the spinach with arugula or baby kale — it’ll add a peppery kick.

If you try this, I’d love to hear how it turns out — drop a comment or tag me! Cooking should be fun, so let’s keep the conversation going. Happy cooking, friends!

Related update: Spinach and Gorgonzola Stuffed Flank Steak

Related update: Blast Of Color Mexican Stuffed Bell Peppers

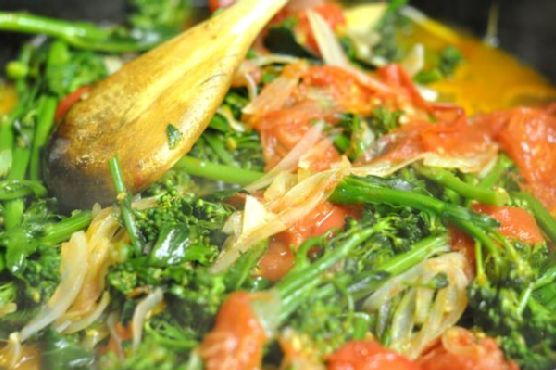
Broccoli Rabe and Breaded Veal Scallopini | Made by Meaghan Moineau

It was one of those chaotic Tuesday nights, you know the kind — the kind where you’re juggling an imaginary circus of tasks, and the last thing you want is to spend hours cooking. As I stood in front of my fridge, eyeing the contents like a puzzle to solve, I remembered a dish that never fails to impress with minimal effort: Broccoli Rabe and Breaded Veal Scallopini. This dish is a lifesaver when you want something that tastes gourmet but doesn’t require a culinary degree to execute. It’s elegant enough for company but simple enough for a weeknight. Plus, there’s the unbeatable combination of crispy breaded veal and the slightly bitter yet vibrant broccoli rabe. Trust me, it’s a winner.

Jump to Recipe

What You’ll Need

I promise, this recipe won’t send you on a scavenger hunt through specialty stores. Chances are you already have most of the ingredients hanging out in your pantry or fridge. Here’s what you’ll need:

  • Broccoli rabe
  • Veal scallopini
  • Butter
  • Egg
  • Olive oil
  • Salt and pepper
  • Yellow onion
  • Garlic clove
  • Tomatoes
  • Bread crumbs

How to Make Broccoli Rabe and Breaded Veal Scallopini

  1. Start by giving the broccoli rabe a good wash. Steam it for about three minutes until it’s a vibrant green but still slightly crisp. If you have a pressure cooker, even better — it’ll be done in no time.
  2. While your broccoli rabe is steaming away, thinly slice the yellow onion and peel a clove of garlic. Cut the garlic in half and remove the stem to mellow out the flavor a bit.
  3. In a deep pan, heat up a tablespoon or two of olive oil over medium heat. Toss in the sliced onion and garlic. Sauté until the onions are translucent and the garlic is fragrant — about three minutes.
  4. Add the steamed broccoli rabe to the pan, cover with a lid, and let it cook for another few minutes. You want it tender but not mushy.
  5. Chop your tomatoes into wedges — four or eight, depending on their size. Add them to the pan and let everything mingle together for a few more minutes. Season with salt and pepper to taste.
  6. Now for the veal: Season each piece of veal scallopini with salt and pepper. Dip them first in a beaten egg, and then in bread crumbs, ensuring an even coat.
  7. In another pan, melt a generous amount of butter over high heat. Pan-fry the veal for 1-2 minutes on each side until they’re golden brown and crispy. Remember, these cook fast, so keep an eye on them!
  8. Serve the veal alongside the broccoli rabe and tomato medley, and enjoy the delicious symphony of flavors.

Cook’s Notes

Okay, let’s chat about some practical stuff. First, make sure your veal is patted dry before you start breading. It helps the crumbs stick better. If you’re making this ahead of time, prepare the broccoli rabe and tomatoes and store them in the fridge. You can bread the veal in advance, but I recommend frying it right before serving for the best crunch. Leftovers? Store them in an airtight container and gently reheat them in a pan — the microwave will make the breading soggy, and nobody wants that.

Make It Your Own

Here are a few fun ways to switch things up!

  • Swap the veal for chicken breast if that’s what you have on hand, or if you prefer chicken. It works just as well!
  • Want a vegetarian version? Use crispy tofu as your protein. Just press it well before breading and frying.
  • Add a sprinkle of grated Parmesan cheese to the bread crumbs for an extra layer of flavor.
  • If you’re not a fan of broccoli rabe, broccolini or kale are great substitutes.

If you try this, I’d love to hear how it turns out — drop a comment or tag me! Cooking is all about experimenting and making it your own, so don’t hold back. Happy cooking!

Related update: Broccoli Rabe and Breaded Veal Scallopini

Related update: Spinach and Gorgonzola Stuffed Flank Steak

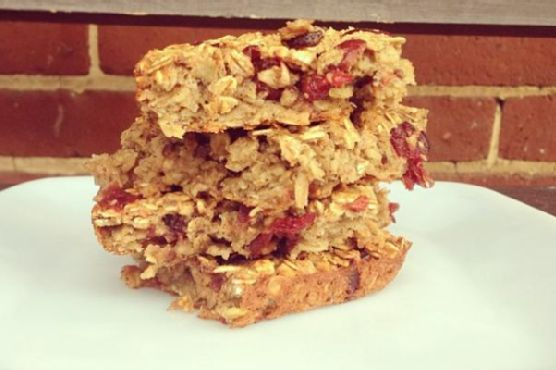
Baked Oatmeal with Dried Cranberries | Made by Meaghan Moineau

It was one of those chilly mornings where you can feel the crisp air sneaking through the cracks of your window, coaxing you to stay under the covers just a little longer. But I was determined to start my day with something as cozy as my fluffy duvet, so I headed to the kitchen and decided to whip up my favorite baked oatmeal with dried cranberries. This dish is a lifesaver on mornings like this because it warms you up from the inside out, and it’s the kind of comfort food that feels indulgent but is actually packed with goodness. Plus, it’s the perfect dish to make ahead for the week. I promise, once you try this, you’ll look forward to getting out of bed just for breakfast!

Jump to Recipe

What You’ll Need

I love this recipe because it uses a lot of pantry staples, so you’re likely to have everything you need on hand. Plus, the dried cranberries add that tart sweetness that makes every bite exciting.

  • 2 cups dry oats
  • 1 teaspoon baking powder
  • 1/2 teaspoon cinnamon
  • 1/4 teaspoon salt
  • 1/4 cup flaxseeds
  • 2 cups unsweetened almond milk
  • 2 bananas, mashed
  • 2 eggs
  • 1 teaspoon vanilla extract
  • 1/2 cup dried cranberries

How to Make Baked Oatmeal with Dried Cranberries

  1. Preheat your oven to 350°F (175°C). The warmth will soon fill your kitchen, hinting at the deliciousness to come.
  2. In a large bowl, mix the dry ingredients: oats, baking powder, cinnamon, salt, and flaxseeds. Stir until everything is well combined — you want the flaxseeds to be evenly distributed like little gems throughout the mixture.
  3. In a separate bowl, whisk together the liquid ingredients: almond milk, mashed bananas, eggs, and vanilla extract. Whisk until the mix is smooth and the bananas are well incorporated, giving off that lovely, sweet aroma.
  4. Pour the liquid mixture into the bowl of dry ingredients. Mix well until the oats are thoroughly soaked and the liquid is evenly distributed. It’ll look like a big, soupy mess, but don’t worry, it will transform in the oven!
  5. Spray a baking pan with non-stick spray. The size of the pan will determine the thickness of your oatmeal bars, so choose according to your preference. I like using a smaller pan to get thicker, chewier bars.
  6. Pour the oatmeal mixture into the prepared pan, spreading it out evenly. Sprinkle the dried cranberries on top, letting them fall where they may, like little jewels peeking out.
  7. Bake in the preheated oven for about 45 minutes. Your kitchen will be filled with the warm, inviting scent of cinnamon and baked bananas. The top should be slightly golden and the center set.
  8. Once done, let it cool for a few minutes before slicing. This is the hardest part, but trust me, it’s worth the wait!
  9. Enjoy a slice warm, perhaps with a drizzle of maple syrup or a dollop of yogurt. It’s the breakfast that feels like a hug!

Cook’s Notes

Baked oatmeal is incredibly forgiving, but here are a few tips to ensure success. If you prefer a sweeter dish, add a bit of honey or maple syrup to the wet ingredients. You can store leftovers in the fridge for up to a week, making it perfect for meal prep. Just reheat a slice in the microwave or enjoy it cold — both ways are delicious. If you find your oatmeal drying out in the fridge, a splash of almond milk during reheating will do the trick.

Make It Your Own

Here’s where you can let your creativity shine! Try these variations to keep things exciting:

  • Swap the dried cranberries for chopped nuts like almonds or walnuts for a bit of crunch.
  • If you’re a chocolate lover, sprinkle in some dark chocolate chips for a decadent twist.
  • Trade the almond milk for coconut milk for a tropical flair.
  • Mix in some fresh berries like blueberries or raspberries before baking for a burst of freshness in every bite.

If you try this, I’d love to hear how it turns out — drop a comment or tag me! I’m always excited to see how you make these recipes your own. Enjoy every cozy, delicious bite!

Related update: Baked Oatmeal with Dried Cranberries

Related update: Broccoli Rabe and Breaded Veal Scallopini

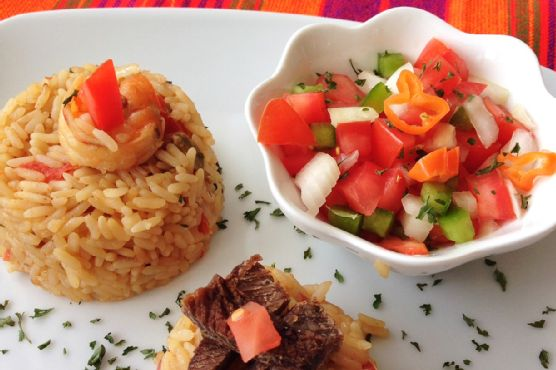
Kenyan Pilau | Made by Meaghan Moineau

Imagine this: It’s a chilly, rainy Tuesday evening. I find myself staring into the pantry, looking for something that’ll warm me up, body and soul. I have a little bit of goat meat, some shrimp, and the usual pantry spices that seem to multiply on their own. It’s the kind of evening where you crave something comforting yet exotic, and that’s when I remember — Kenyan Pilau. It’s one of those dishes that sounds impressive but is surprisingly easy to whip up. The aroma of spices mingling in the kitchen is enough to make anyone feel like a culinary genius. It’s perfect for those weeknight dinners when you want to travel the world without leaving your kitchen.

Jump to Recipe

What You’ll Need

Trust me, you might already have most of these ingredients lounging around in your kitchen. And the hero of this dish? It’s definitely the spice mix that elevates a simple rice dish into something extraordinary.

  • Black whole peppercorns
  • Cardamom pods
  • Cinnamon sticks
  • Cumin seed powder
  • Garlic
  • Ginger
  • Goat meat
  • Onion
  • Canned rice
  • Salt
  • Dressed shrimp
  • Tomatoes
  • Cooking spoon of vegetable oil

How to Make Kenyan Pilau

  1. First things first, season the goat meat well and set it to boil. You want it tender, like it’s ready to fall apart at a fork’s touch.
  2. Chop all your lovely spices — the peppercorns, cardamom, and cinnamon — and give them a good crush. This is where the magic begins.
  3. Heat up a cooking spoon of vegetable oil in a large pot. Once shimmering, add sliced onions and sauté until they’re golden brown, releasing a sweet aroma.
  4. Add the boiled goat meat to the pot and allow it to brown just a little more. This is where you start to feel like a pro chef.
  5. Stir in your crushed spices, letting their fragrance envelop the kitchen. Then, add the canned rice and chopped tomatoes, giving it all a good mix.
  6. Add the dressed shrimp, followed by 2 cups of water. Reduce the heat, cover the pot, and let it steam. Check occasionally to ensure the water is absorbed and the rice is soft.
  7. Once the rice is perfect, increase the heat briefly and stir to ensure all those fantastic spices soak into every grain. Serve it alongside some Kachumbari or your favorite salad.

Cook’s Notes

A little tip from my kitchen to yours: make sure you don’t rush the browning process for the onions and meat. This step deepens the flavor of the Pilau significantly. Feel free to make this dish ahead of time; it keeps well in the fridge for a couple of days and the flavors only get better. Just reheat gently to avoid drying out the rice. If you find yourself with leftovers, good news — they can be transformed into a delightful next-day lunch. Just add a splash of water before reheating to fluff it up again.

Make It Your Own

This Kenyan Pilau is versatile, and you can easily tweak it to fit your taste or pantry stock. Here are some ideas:

  • Swap the goat meat with chicken thighs for a lighter version.
  • Substitute the shrimp with crispy tofu for a vegetarian twist.
  • Try using basmati rice instead of canned rice for a fragrant touch.
  • Add a handful of peas or diced carrots for a pop of color and sweetness.

If you try this, I’d love to hear how it turns out—drop a comment or tag me! Whether you stick to the script or make it your own, this Kenyan Pilau is set to be a crowd-pleaser at your table. Happy cooking!

Related update: Kenyan Pilau

Arroz Con Pollo | Made by Meaghan Moineau

Last Tuesday, I found myself staring into the fridge, bleary-eyed and snacky, with no desire to make a big mess just to satisfy my craving for something warm and flavorful. It had been a long day, and I needed dinner on the table, pronto. Arroz Con Pollo fluttered into my mind like an old friend, promising that elusive blend of comfort and flavor without a crazy ingredient list. This one-pan wonder is my go-to for nights like this—simple enough for a weeknight but lush enough to feel like a treat. The best part? It’s a forgiving recipe that lets you swap in what you’ve got on hand. By the way, if you’re in a rush to get cooking, feel free to skip down to the nitty-gritty details. Jump to Recipe

What You’ll Need

Chances are you already have most of these ingredients chilling in your pantry or fridge. Here’s what you’ll need:

  • Butter
  • Garlic
  • Chicken breasts
  • Ground cumin
  • Ground coriander
  • Ground turmeric
  • Onion
  • Bell pepper
  • Canned diced chiles
  • Canned diced tomatoes
  • Chicken broth
  • Dried rice
  • Chili powder
  • Salt
  • Onion powder
  • Shredded cheese

How to Make Arroz Con Pollo

  1. Start by heating up a large pan over medium heat and melt the butter until it’s sizzling and aromatic.
  2. Add in the garlic and let it cook for a minute or two until it’s fragrant and just beginning to turn golden.
  3. Sprinkle your chicken breasts with about 1 teaspoon each of cumin, coriander, and turmeric. Toss them in the pan and cook until they are browned and cooked through.
  4. Once your chicken is fully cooked, toss in your diced onion and bell pepper. Stir everything together and let it cook for about 3 to 4 minutes, until the veggies start to soften.
  5. Add the canned diced chiles and tomatoes. Give it all a good swirl to combine.
  6. Pour in the chicken broth and add your dried rice. Stir gently to make sure everything is mixed well.
  7. Sprinkle in the remaining teaspoon of chili powder, cumin, and coriander, along with the salt, remaining turmeric, and onion powder.
  8. Bring the pot to a boil, then reduce the heat to low, cover, and let it simmer for about 20 minutes or until the liquid is absorbed and the rice is cooked through.
  9. Once the rice is perfectly cooked, grab your shredded cheese and generously spread it across the top of the chicken mixture. Cover the pan for another minute or two until the cheese melts completely into gooey perfection.

Cook’s Notes

This dish is pretty forgiving, but here are a few notes to make sure it’s perfect every time. If you find your pan getting too dry during the simmer, just add a splash more broth or water. Cooking times can vary depending on your stove and pot, so keep an eye on the rice after the 15-minute mark. If you want to prep ahead, you can chop your veggies and measure out spices a day in advance. Leftovers? They make for an awesome lunch the next day. Just store it in an airtight container in the fridge, and it should be good for about 3 days.

Make It Your Own

  • Swap the chicken for crispy tofu if you’re leaning towards a plant-based version.
  • Add in some frozen peas or corn during the last 5 minutes of cooking for a pop of sweetness and color.
  • Use smoked paprika instead of chili powder for a smoky twist.
  • Throw in some sliced olives or capers for a briny kick.

If you try this, I’d love to hear how it turns out—drop a comment or tag me! Remember, the best part of cooking is making it your own, so don’t be afraid to tweak it to suit your taste buds.

Related update: Arroz Con Pollo

Related update: Kenyan Pilau

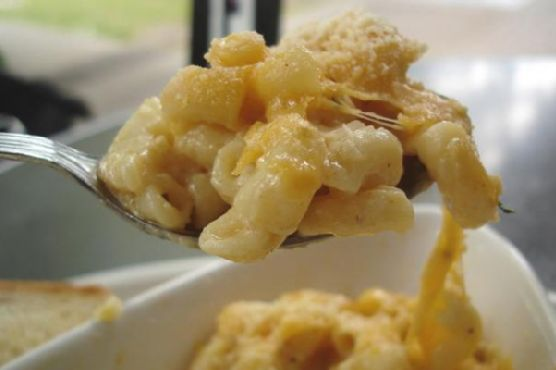
Classic Macaroni and Cheese | Made by Meaghan Moineau

It was one of those Mondays where everything seemed to go sideways. You know the kind — you spill your coffee, your phone dies halfway through the day, and by the time you get home, the last thing you want to do is cook. That’s when it hit me: the ultimate comfort food savior, Classic Macaroni and Cheese. This dish is like a warm, cheesy hug that never lets you down. It’s rich, creamy, and surprisingly easy to whip up even when your day’s gone haywire. Plus, it’s got that golden crust on top that makes everything feel just a little bit better. Trust me, once you dig in, you won’t even remember why you were stressed in the first place.

Jump to Recipe

What You’ll Need

This is one of those recipes where you’ll likely have most of the ingredients chilling in your pantry, just waiting to be transformed into something magical.

  • 6 tablespoons butter
  • 1/4 cup all-purpose flour
  • 1/8 teaspoon cayenne pepper
  • Salt and white pepper, to taste
  • 3 cups hot whole milk
  • 3 cups grated sharp cheddar cheese
  • 1 pound cooked short macaroni
  • 1/2 cup heavy cream
  • 1 cup fresh bread crumbs

How to Make Classic Macaroni and Cheese

  1. Preheat your oven to 350°F. Get your 8″ x 11″ baking dish ready — butter it up like you’re giving it a massage.
  2. Melt 6 tablespoons of butter in a medium saucepan over low heat. Toss in the flour and stir constantly for about 4 minutes until you have a nice roux going. It’ll smell slightly nutty and look golden.
  3. Add the cayenne pepper, and sprinkle in some salt and white pepper. Slowly whisk in the hot milk, 1/2 cup at a time, cooking until your sauce thickens up and coats the back of a spoon. You’re looking for a smooth, luscious texture here.
  4. Reduce the heat and stir in 2 cups of cheddar. Keep stirring until the cheese melts into silky perfection, about 2 minutes.
  5. In a large bowl, combine the cooked macaroni and the cheese sauce. Give it a taste and season with more salt if needed. Cheese loves salt, trust me.
  6. Sprinkle 1/2 cup of cheese at the bottom of your prepared baking dish. Layer a third of the pasta mixture on top, followed by another 1/2 cup of cheese. Repeat the layering process, ending with a final cheese layer.
  7. Pour the heavy cream over the assembled dish — it’s the secret to that extra creamy finish.
  8. Melt the remaining butter in a skillet and toss in the bread crumbs until they’re all buttery and gorgeous. Sprinkle this over the top of your macaroni and cheese.
  9. Bake for about 30 minutes, or until the crust is golden and calling your name. Let it rest for 15 minutes before serving; it’ll firm up a bit as it cools.

Cook’s Notes

Here’s the lowdown: Make sure to taste your sauce before you start layering. It should be slightly more seasoned than you think, as the pasta will absorb some of the saltiness. If you’re in a rush, assemble the mac and cheese earlier in the day and store it in the fridge until you’re ready to bake. Just add an extra 10 minutes to the baking time if it’s coming straight from the fridge. For leftovers (if you have any!), they keep for up to 3 days in the fridge. Reheat in the oven at 300°F until warm and bubbly again. Avoid the microwave unless you’re really in a pinch — it just won’t do this comforting dish justice.

Make It Your Own

Want to put your own spin on this classic? Here are a few fun ideas:

  • Swap the sharp cheddar with a mix of smoked gouda and mozzarella for a smoky, melty twist.
  • Add cooked, crispy bacon bits between the layers for a savory boost.
  • Use panko breadcrumbs instead of fresh for an extra crunchy top layer.
  • For a veggie boost, stir in some sautéed spinach or roasted broccoli with the macaroni.

If you give this Classic Macaroni and Cheese a try, I’d love to hear all about your cheesy adventures — drop a comment or tag me in your gooey masterpiece!

Related update: Classic Macaroni and Cheese

Related update: Arroz Con Pollo

Job Openings Rise but Hiring Lags | Analysis by Brian Moineau

TL;DR

  • US job openings jumped to roughly 7.6 million in May 2026 on the BLS JOLTS report, beating forecasts from outlets like CNN and AP and putting the headline labor market back in the spotlight—but it’s a paper tiger if companies still aren’t actually hiring at scale. [1][2][3]
  • The power metric isn’t openings; it’s quits. With the quits rate stuck at 1.9% and the Conference Board showing 22.5% of consumers say jobs are “hard to get,” workers aren’t acting like they have bargaining power, which blunts wage-and-inflation fears. [2][6]
  • Sector splits matter: construction, manufacturing, and leisure/hospitality raised postings, while finance and information tightened belts—telling CFOs in 2026 to budget for blue-collar scarcity but white-collar slack. [2]

What the source said

CNN reports that US job openings were “much higher than expected” in May 2026, with the JOLTS tally rising for a second straight month to nearly 7.6 million. Economists had anticipated a decline closer to ~7.0 million, but openings instead hovered near a two‑year high. CNN frames the result as evidence the labor market has stabilized despite uncertainty from the Iran war, while also noting layoffs and quits changed little; the layoffs and discharges rate held near 1.0%. The piece highlights differing momentum across industries and argues the “hiring recession” may be ending—albeit tentatively. [1][2]

Why it matters

For the Federal Reserve in Washington, US job openings are a headline indicator that often overstates heat. Monetary policy cares about wages and churn—metrics like a 1.9% quits rate and “modest” wage growth from the Beige Book that actually push prices. A high openings count with flat hires near ~5.2 million and low quits is the definition of “low‑hire, low‑fire,” which pressures neither wages nor inflation. That tilts the 2026 policy debate away from emergency tightening and toward watching three‑to‑six‑month trends. [2][5]

For companies and workers, the distribution is the story. A construction firm in Dallas will feel a tighter market than a fintech in New York. May 2026 JOLTS showed blue‑collar strength (construction, manufacturing, parts of trade) and white‑collar caution (finance, information). That mix determines where signing bonuses return, where ghost postings persist, and who wins the next wage negotiation this year. [2]

Original analysis

Back-of-envelope math

  • Openings-to-unemployed ratio. Openings were 7.594 million in May 2026; the number of unemployed people was about 7.3 million. That pegs the ratio near 1.04 (7.594 ÷ 7.3 ≈ 1.04). Translation: roughly one posted job per job seeker, down from the 1.5–2.0 range at the 2022 peak, but still tighter than 2019’s near‑parity. [2][7][8]

  • The conversion gap. Hires were about 5.18 million in May versus 7.594 million openings, a gap of ~2.41 million postings that did not convert during the month. This isn’t apples‑to‑apples (openings are a stock; hires are a flow), but the gap’s scale helps explain why the quits rate can sit at 1.9% even when openings look lofty. [2][3]

  • If quits normalize. The pre‑pandemic quits rate hovered near 2.3% in 2019; today it’s 1.9%. The delta is 0.4 percentage points (0.023 − 0.019 = 0.004). On a workforce around 160 million, that implies roughly 640,000 additional quits per month if quits returned to the 2019 norm (0.004 × 160,000,000 ≈ 640,000)—material churn that would lift wage pressure; we’re not there. [2][7][8]

A 2×2 for US job openings and hires momentum (May 2026)

  • Rising openings, rising hires (early‑cycle feel)

    • Leisure & hospitality: openings +95k (846k → 941k); hires +15k (976k → 991k). Summer travel demand and services spending support this pulse. [2]
    • Government (state/local): openings +20k (697k → 717k); hires +21k (302k → 323k). Local services normalized post‑pandemic staffing. [2]
  • Rising openings, falling hires (bottlenecks or cautious conversion)

    • Wholesale trade: openings +71k (178k → 249k); hires −20k (141k → 121k). Inventory restocking wants heads, but managers aren’t pulling triggers yet. [2]
  • Falling openings, rising or flat hires (drawdown of backlog)

    • Education & health: openings −119k (1,658k → 1,539k); hires +1k (737k → 738k). Health‑care pipelines keep clearing even as postings cool. [2]
    • Information: openings −6k (82k → 76k); hires +2k (78k → 80k) is basically flat—still post‑AI digestion mode in 2026. [2]
  • Falling openings, falling hires (real softening)

    • Financial activities: openings −29k (405k → 376k); hires −7k (181k → 174k). Margin compression and credit risk discipline curb reqs and fills. [2]

Consensus says “openings beat = tight labor market.” Contrarian read: this is a reposting economy, not a rehiring economy. Hires are stuck near 5.2 million, quits are stuck at 1.9%, and the Fed’s Beige Book keeps calling wage growth “modest.” That triad isn’t inflationary; it’s stasis. [2][5]

What about sentiment? The Conference Board’s June 2026 survey shows the share saying “jobs are hard to get” jumped to 22.5%, the highest since January 2021. If households feel jobs are scarcer, they don’t quit—and if they don’t quit, wage bargaining power stalls. That squares with JOLTS’ 1.9% quits rate and ~5.2 million hires. [2][6]

Geopolitics is the wrinkle. Beige Book districts in 2026 flagged price pressures tied to the Middle East conflict and energy costs, but employment described as “flat to unchanged.” In other words: the war can tax the price level without reigniting labor churn. That’s why the May openings pop coexists with modest wages and still‑constrained hiring. [5]

Named-stakeholder snapshot

  • Federal Reserve: Headline openings buy time but don’t force hikes in 2026. With hires flat near ~5.2 million and quits subdued at 1.9%, wage‑push inflation risk looks contained; the Committee will emphasize trend, not a single data point. [2][5]

  • Blue‑collar employers (D.R. Horton, Caterpillar, Marriott): Brace for tighter local markets as construction, manufacturing, and leisure openings climb in May 2026. Expect spot bonuses and overtime before full‑time net adds. [2]

  • White‑collar employers (JPMorgan, Salesforce, Comcast): Finance and information show cautious demand; use mid‑2026 to upgrade talent quality without overpaying, but avoid ghost postings that damage brand trust. [2]

  • Staffing firms (Robert Half, Adecco): Wholesale trade’s “rising reqs, falling hires” calls for tighter conversion playbooks and clearer comp‑to‑fill timelines in Q3 2026. [2]

What others are missing

Coverage is underweight the “jobs hard to get” surge and what it says about matching quality and trust in 2026. In June, the Conference Board’s share of consumers saying jobs are “hard to get” jumped to 22.5%, a 5½‑year high, even as May JOLTS openings sat at 7.594 million. The specific angle: phantom postings and evergreen reqs create a credibility gap that suppresses quits, which explains why the quits rate stays at 1.9% and why the Beige Book shows “modest” wage growth despite fat postings. If candidates doubt a posting is real or worth the risk, they won’t move; if managers keep reqs evergreen to gauge talent, they won’t convert. That’s why inflation hawks shouldn’t overreact to a single openings print in May 2026. [2][5][6]

What to watch next

  1. By the June 2026 JOLTS release expected in early August 2026, the openings‑to‑unemployed ratio will remain between 0.95 and 1.10, confirming a balanced, not boiling, market. [2][7]

  2. Through the September 2026 JOLTS (due November 2026), the quits rate will stay at or below 2.0%, keeping wage growth near its current “modest” pace rather than re‑accelerating. [2][5]

  3. By the July 2026 JOLTS (due September 2026), wholesale trade openings will retrace from 249k to below 220k, revealing the May spike as inventory noise rather than sustained demand. [2]

My take

Openings got the headline, but hires and quits got the truth: ~5.2 million hires and a 1.9% quits rate in May 2026. This is a stalemate labor market where employers prefer to post and wait rather than hire and train, and workers prefer to stay put rather than jump and risk. That’s not the setup for a wage spiral or a sudden growth bust in 2026. It’s the setup for grind—modest pay gains, selective scarcity, and a lot of “we’re keeping the req open” emails. If you run a business, budget for targeted blue‑collar shortages and white‑collar abundance; if you run the Fed, keep your powder dry and watch churn, not chatter. [2][5][6]

Sources

  1. US job openings were much higher than expected in May, shrugging off uncertainty from Iran war — CNN (https://www.cnn.com/2026/06/30/economy/us-jolts-job-openings-layoffs-may) — Starting point: topline JOLTS beat, two‑year‑high framing, and context around uncertainty.

  2. Job Openings and Labor Turnover Survey (Latest numbers and May 2026 news release) — U.S. Bureau of Labor Statistics (https://www.bls.gov/jlt/) — Authoritative figures for May 2026: openings 7.594M, hires ~5.2M, separations ~5.1M, quits rate 1.9%; plus industry tables.

  3. Job openings stayed at a surprisingly strong 7.6 million in May; U.S. labor market proves resilient — Associated Press (https://apnews.com/article/2947b00cdf3fadacf28c50ad508a6502) — Independent confirmation that openings beat forecasts while hiring remained subdued.

  4. May 2026 JOLTS Report: More of the Same — Indeed Hiring Lab (https://www.hiringlab.org/2026/06/30/may-2026-jolts-report-more-of-the-same/) — Analyst take on low quits, flat dynamism, and why postings don’t equal real opportunities.

  5. Beige Book (May/June 2026 summaries) — Board of Governors of the Federal Reserve System (https://www.federalreserve.gov/monetarypolicy/beigebook202605-summary.htm) — Fed’s national read: employment largely unchanged and wage growth “modest” amid elevated energy costs.

  6. US Consumer Confidence Inched Up in June — The Conference Board (https://www.conference-board.org/topics/consumer-confidence/index.cfm) — “Jobs hard to get” share rose to 22.5% in June 2026, the highest since January 2021.

  7. The Employment Situation — May 2026 — U.S. Bureau of Labor Statistics (https://www.bls.gov/news.release/archives/empsit_06052026.pdf) — Unemployment rate at 4.3% with about 7.3 million unemployed; provides the denominator for openings‑to‑unemployed.

  8. Job openings, hires, and quits set record highs in 2019 — Monthly Labor Review (BLS) (https://www.bls.gov/opub/mlr/2020/article/job-openings-hires-and-quits-set-record-highs-in-2019.htm) — Background on the 2019 quits norm (~2.3%) for benchmarking 2026’s 1.9% rate.


Related update: We recently published an article that expands on this topic: read the latest post.


Related update: We recently published an article that expands on this topic: read the latest post.

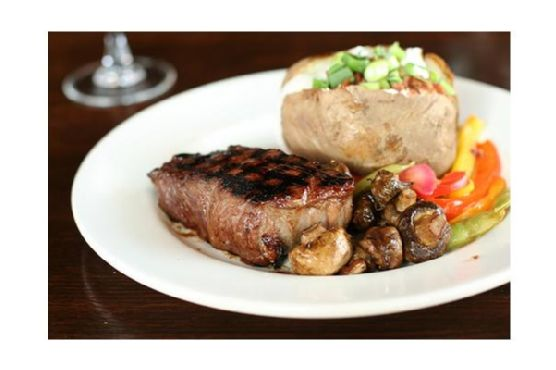
Baked Sirloin Steak | Made by Meaghan Moineau

Last Tuesday, I was staring at a package of sirloin steak, contemplating my usual grill routine, when the weather made its own plans with a sudden downpour. With the rain hammering against the window, I pivoted to a cozy baking approach that turned out to be a game changer. Who knew that throwing sirloin in the oven could result in such tender, flavorful goodness? This Baked Sirloin Steak comes together with ingredients you likely already have lounging in your pantry, and the result is a melt-in-your-mouth, savory dish that’s perfect for any night of the week. Trust me, it’s a keeper when the grill isn’t an option, or you just want to switch things up a bit.

Jump to Recipe

What You’ll Need

This dish leans on the classics, with a few flavor boosters that make it special without any fuss. Chances are you already have most of this in your kitchen:

  • Butter
  • Ketchup
  • Lemon
  • Pepper
  • Salt
  • Water
  • White onions
  • Worcestershire sauce

How to Make Baked Sirloin Steak

  1. Preheat your oven to 425 degrees. You want it nice and hot to seal in all those juicy flavors.
  2. Rub both sides of the steak generously with butter. This not only adds flavor but helps in creating a wonderfully golden exterior.
  3. Place the buttered steak on a greased rack set in a shallow pan. The rack lets the heat circulate, cooking the steak evenly.
  4. Sprinkle the steak with salt and pepper. Be generous; these are your primary seasonings.
  5. Arrange thin slices of lemon directly on top of the steak. Trust me, this step is non-negotiable. The lemon adds a fresh zing that cuts through the richness.
  6. Top the lemon with slices of white onion. As it bakes, the onion softens and sweetens, melding beautifully with the lemon and steak.
  7. In a small bowl, mix together ketchup, Worcestershire sauce, and a splash of water. Pour this saucy goodness over the steak.
  8. Bake for 30 to 45 minutes, depending on how you like your steak. At 30 minutes, it should be medium-rare; extend the time for more doneness. Look for the sauce to be bubbling and the onions golden and fragrant.

Cook’s Notes

Don’t skip the rack inside the shallow pan setup; it’s essential for mimicking that grill-like air circulation. If you’re aiming for a specific doneness, a meat thermometer can be your best friend. For medium-rare, you’re looking for about 135 degrees. If you find yourself with leftovers (unlikely, but hey, it happens), slices of this steak make for killer sandwiches the next day. Just wrap them up tightly and store in the fridge for up to two days.

Make It Your Own

  • Swap the sirloin for a different cut of steak like ribeye or strip for a richer flavor.
  • Try using red onions instead of white for a milder sweetness and a pop of color.
  • Mix in a teaspoon of minced garlic with the butter for a subtle garlicky kick.
  • For a spicy twist, add a dash of hot sauce to the ketchup mixture before pouring it over the steak.

If you try this, I’d love to hear how it turns out — drop a comment or tag me! Your feedback means the world, and I’m always here for a kitchen chat. Enjoy your steak adventure!

Related update: Baked Sirloin Steak

Related update: Classic Macaroni and Cheese

Apricot Clafouti With Lavender & Pecans | Made by Meaghan Moineau

Picture this: It’s a lazy Sunday afternoon, and I’m rummaging through my pantry, longing for something sweet but not overly indulgent. It’s one of those days where you want a little baking therapy but refuse to spend hours in the kitchen. Enter the Apricot Clafouti With Lavender & Pecans. This is the kind of recipe that surprises you with how easy it is, yet it brings such elegance to your table. Imagine delicate apricots mingling with the floral notes of lavender while pecans add that irresistible crunch. It’s like a summer melody in dessert form. Trust me, this is the kind of dish that makes you feel like you’ve been transported to a quaint French cafe.

Jump to Recipe

What You’ll Need

The beauty of this ingredient list is that it’s simple yet feels extravagant, and odds are, you’ve already got most of these on hand.

  • All-natural apricot nectar
  • Apricot preserves
  • Dried California apricots
  • Fresh apricots
  • Cardamom
  • Eggs
  • Honey
  • Dried culinary lavender buds
  • Lemon juice
  • Lemon zest
  • Low fat sour cream
  • Nonfat milk
  • Pecans
  • Salt
  • Unbleached flour
  • Vanilla extract

How to Make Apricot Clafouti With Lavender & Pecans

  1. First thing’s first: preheat your oven to 375°F. We want it nice and hot so that our clafouti bakes to perfection.
  2. In a large mixing bowl, beat the eggs until they’re frothy. This is your base, so put some love into it.
  3. Add in the sour cream, milk, apricot nectar, lemon juice, lemon zest, apricot preserves, honey, and vanilla extract. Mix until everything is beautifully combined and smooth.
  4. Slowly whisk in the flour, a pinch of salt, cardamom, and those aromatic lavender buds. You’ll start to smell the floral notes as you mix—heavenly!
  5. Fold in the diced, dried apricots and pecans. Make sure they’re evenly distributed; you want each slice to have its share of goodies.
  6. Pour the mixture into a glass pie plate. Gently press the fresh apricot halves into the mix, forming a decorative pattern on top. This step is where you can get artsy!
  7. Let it set for 10 minutes. This little rest allows the flavors to mingle and the mixture to thicken slightly.
  8. Pop it into the oven and let it bake for 30-45 minutes. You’ll know it’s done when the edges are golden and the center is set but slightly wobbly—like a good custard.

Cook’s Notes

Alright, so here’s the deal: the clafouti is best served warm, right out of the oven, with maybe a scoop of vanilla ice cream if you’re feeling decadent. But if you have leftovers, they’re still delightful the next day, cold or gently warmed in the oven. Store any extras in an airtight container in the fridge for up to three days. A little note of caution—don’t overdo the lavender; a little goes a long way, and too much can taste soapy. When folding the nuts and apricots, be gentle to avoid deflating your batter.

Make It Your Own

Here’s where the fun begins—customizing your clafouti to suit your mood or what’s in your pantry.

  • Swap the apricots for juicy peaches or nectarines when they’re in season. They work beautifully with lavender as well.
  • If pecans aren’t your thing, use almonds or hazelnuts for a different type of crunch.
  • Add a handful of fresh raspberries before baking for a tart contrast to the sweet apricots.
  • For a more herbal twist, sprinkle in some fresh rosemary to complement the lavender.

If you try this, I’d love to hear how it turns out—drop a comment or tag me! Whether you stick to the script or venture into your own variations, this clafouti is sure to bring a touch of culinary bliss to your table. Bon appétit!

Related update: Apricot Clafouti With Lavender & Pecans

Related update: Banana in brown sugar ice cream

Minecraft Snapshot 26.3: Better | Analysis by Brian Moineau

TL;DR

  • Minecraft 26.3 Snapshot 2 adds an order-independent transparency (OIT) rendering mode that fixes years of glass/water sorting bugs across stained glass, water, and particles, and points to a broader Java renderer refresh. [1][5]
  • Under-the-hood updates—Data Pack v109.0, Resource Pack v90.0, and a new block_transformer component—expand creator power for servers and mapmakers without Java mods, with concrete hooks for sounds, particles, and loot. [1]
  • Vulkan remains experimental and pink-screens on macOS in this build; Mojang is clearly testing a multi-backend path, but OpenGL stays the practical default in 26.2–26.3-era snapshots. [1][2][4]

What the source said

Minecraft 26.3 Snapshot 2 introduces an “Improved Transparency” option that enables order-independent transparency to resolve long-standing translucency issues like viewing entities through stained glass or water. Mojang flags higher performance cost and lists known issues, including a macOS Vulkan pink screen and incorrect entity lighting. [1]

Gameplay tweaks include throttled wandering AI for distant persistent mobs, shields overriding hoe/shovel use on right-click, and Drowned with Tridents switching to melee within three blocks. Technical changes bump Data Pack to v109.0, Resource Pack to v90.0, add a block_transformer data component, and default the server white-list to true; Mojang also credits community contributors for the OIT work. [1]

Why it matters

For players, OIT cleans up daily visual papercuts around slimes, glass panes, particles, nameplates, and water—pain points visible in every stained-glass build and guardian farm. The “higher performance impact” warning means trade-offs on mid-tier GPUs (think GTX 1650 or RX 580), so this path favors correctness over maximum fps in layered scenes. For creators, the pack bumps and block_transformer enable tool-based block transformations and puzzle mechanics in pure data, removing the need for server-side plugins on private realms. [1]

For Mojang and Microsoft, this advances a modern, multi-backend renderer on Java Edition. Vulkan entered snapshots in 26.2 as experimental, and Mojang restored OpenGL as default in a later 26.2 build to stabilize testing cadence; the macOS pink-screen note in 26.3 shows the work-in-progress nature of that backend. The goal is clear: future-proof Java’s graphics pipeline without regressing gameplay. [1][3][4]

Original analysis

Framing: Why Minecraft 26.3 Snapshot 2 matters beyond pretty glass

Consensus take: “OIT is a nice visual upgrade; wake me when we get a new dimension.”
Contrarian read: OIT is the canary for a multi-year Java renderer refit aligned with Vulkan experiments, replacing fragile depth-sorted hacks with an algorithmic approach that fixes slime occlusion, shulker bullets, wind charges, beacon beams, and boat water fill artifacts seen through glass. That simplification sets up later features like volumetric layers and complex particles by reducing transparency-specific technical debt in the core pipeline. [1][5]

Back-of-envelope performance math

  • Frame budget math: 60 fps equals about 1000 ms / 60 ≈ 16.7 ms per frame.
  • Scenario estimate: if OIT adds 2–4 ms in heavy-translucency scenes (Mojang only says “higher performance impact”), the budget becomes ~18.7–20.7 ms, or roughly 53–48 fps in those moments; correctness improves, and you can still toggle OIT off. [1]

This isn’t a blanket penalty; in typical overworld views without stacked glass/water, timings should stay near pre-OIT paths, while aquariums, mangrove lagoons, and stained-glass megabases will cost more but finally render right. Expect shader and resource pack authors to publish per-scene deltas as they profile v90.0 changes over the next snapshot or two. [1]

Historical analogue: 2018’s “Flattening” (Java 1.13) and what it predicts

In 2018, Java 1.13’s “Flattening” replaced numeric IDs with namespaced data and overhauled commands, resources, and packs, which briefly broke tooling but enabled the data-driven era that followed. Similarly, v109.0 (data) and v90.0 (resources) plus block_transformer in 26.3 Snapshot 2 form new scaffolding: items can transform blocks with rule-based state providers, sounds, particles, and loot strategies—no mixins or Forge/Fabric required. If history rhymes, short-term refactors buy long-term velocity for creators. [1][7]

Named-stakeholder breakdown

  • Mojang Java Team: OIT removes entire classes of “transparent things disappear” bugs and lowers maintenance complexity; Vulkan work continues behind a guarded “experimental” flag. [1][3][4]
  • Community modders (Rubén Osorio López, Jozufozu): Their transparency research now lives in vanilla, tightening the loop between popular mod techniques and first-party rendering constraints. [1]
  • Shader/resource pack authors: Resource Pack v90.0 and shader define shifts imply refactors; Mojang cautions that overriding Core Shaders remains unsupported and may break as OIT evolves. [1]
  • Server operators: The white-list defaults to true, improving safety but adding onboarding friction for public hubs; expect panel vendors to surface a toggle promptly. [1]
  • Apple/macOS players: Vulkan on Mac currently pink-screens in this snapshot; stick with OpenGL until Mojang or MoltenVK updates clear the known issue. [1]

A simple 2×2: Where OIT helps the most

  • High translucency density + Cinematic builders: Maximum benefit in aquariums and stained-glass cathedrals seen in Hermitcraft-scale showcases.
  • High translucency density + PvP/PvE: Medium benefit; correctness helps visibility, but fps headroom is tight on competitive Java servers like Hypixel UHC.
  • Low translucency density + Cinematic builders: Low-to-medium benefit; correctness pays off in ReplayMod timelapses and thumbnails.
  • Low translucency density + Survival casuals: Minimal benefit; consider leaving OIT off on older GPUs such as the GTX 1050 Ti.

Versioning context matters

Mojang switched to calendar versioning for 2026, making 26.3 the third drop of the year rather than a monolithic “1.22-sized” release. That cadence explains why foundational tech like OIT, Vulkan backend toggles, and pack-format revisions can headline a drop without a marquee biome or dimension. It also sets expectations: more frequent, lower-risk platform layers that compound over quarters. [7]

What others are missing

The quiet headline is block_transformer in Data Pack v109.0, which lets items transform blocks using data-defined state providers, sounds, particles, loot, and drop strategies. Think hoe-to-path, axe-to-strip, brush-to-reveal—then extend it to custom adventure mechanics and progression gates that feel native on vanilla servers. For mapmakers and educators, this means shipping puzzle logic to Realms with a zip instead of managing plugins. Coverage focused on OIT’s visuals is skipping the creator workflow win that lands the moment v109.0 hits public servers. [1]

What to watch next

  1. By August 31, 2026, Mojang will either resolve the macOS Vulkan pink-screen or keep Vulkan disabled-by-default on Mac in testing builds; pre-releases will show a fix or a clear fallback. [1][3]
  2. By the 26.3 release candidate window (no later than October 2026), OIT remains opt-in via “Improved Transparency,” not default, with Mojang positioning it as a quality-first toggle for higher-end GPUs. [1]
  3. Within two weeks of 26.3’s stable launch, at least three major shader/resource packs publish OIT-compatible updates or guidance referencing Resource Pack v90.0 or shader define changes. [1]

My take

Minecraft 26.3 Snapshot 2 is the unsexy work that keeps a 300‑million‑copy series vibrant in 2026. OIT fixes everyday eyesores, and the pack-format plus block_transformer upgrades push real power to creators—the engine of Java Edition’s longevity. Vulkan hiccups on macOS are the price of modernization; stick to OpenGL on Macs until the pink-screen note clears. If you build worlds, test OIT; if you run servers, prep panels for the white-list default; if you ship packs, budget shader-define time as you did during 1.13’s 2018 churn. [1][6][7]

Sources

  1. Minecraft 26.3 Snapshot 2 — Minecraft (https://www.minecraft.net/en-us/article/minecraft-26-3-snapshot-2) — Official patch notes: OIT option, performance trade-offs, gameplay tweaks, pack version bumps, Mac Vulkan issue, server white-list default, and credited contributors.

  2. Minecraft 26.3 Snapshot 1 — Minecraft (https://www.minecraft.net/en-us/article/minecraft-26-3-snapshot-1) — Confirms the Dappled Forest biome, Poplar trees, Abandoned Camps, and wool stairs/slabs framing the 26.3 content arc.

  3. Minecraft Java Edition — 26.2 Snapshot 1 — Minecraft Feedback (https://feedback.minecraft.net/hc/en-us/articles/44898619266317-Minecraft-Java-Edition-26-2-Snapshot-1) — Documents Vulkan entering Java snapshots as an experimental backend.

  4. Minecraft 26.2 Snapshot 8 — Minecraft (https://www.minecraft.net/en-us/article/minecraft-26-2-snapshot-8) — Notes OpenGL restored as default with Vulkan remaining experimental, signaling a cautious rollout.

  5. Order-independent transparency — Wikipedia (https://en.wikipedia.org/wiki/Order-independent_transparency) — Technical background on OIT methods and why they avoid per-triangle sorting.

  6. Minecraft is the first videogame ever to sell more than 300 million copies — PC Gamer (https://www.pcgamer.com/minecraft-is-the-first-videogame-ever-to-sell-more-than-300-million-copies/) — Sales milestone context with reporting on Mojang’s scale.

  7. Development of Minecraft: Java Edition — Wikipedia (https://en.wikipedia.org/wiki/Development_of_Minecraft%3A_Java_Edition) — Documents 2011 Java release timing, 2018 1.13 “Flattening,” and Mojang’s switch to calendar versioning for 2026.

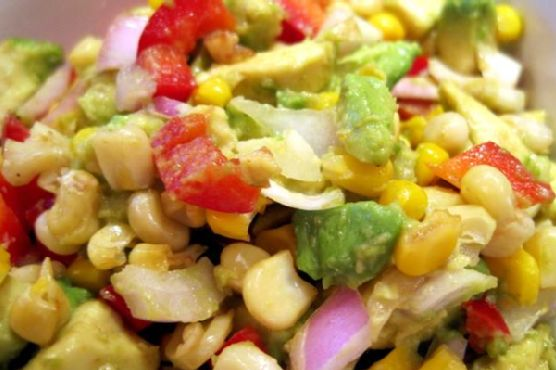
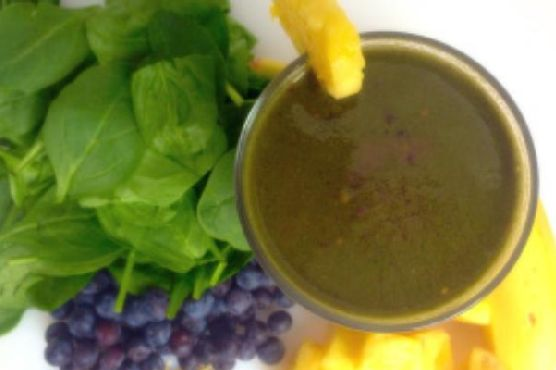


Related update: We recently published an article that expands on this topic: read the latest post.

Banana Milo Milkshake | Made by Meaghan Moineau

I was standing in my kitchen, staring at an overly ripe banana, when the craving hit me. You know the type: the need for something sweet, quick, and just a little nostalgic. It was one of those almost-summer days that call for a cold treat, but I didn’t want to fuss around with anything too elaborate. Enter the Banana Milo Milkshake — a creamy, chocolatey delight that somehow feels both indulgent and a bit healthy (thanks to that banana). This recipe is a breeze to whip up, and trust me, it’s like sipping on a childhood dream.

Jump to Recipe

What You’ll Need

I bet you have most of this stuff hanging out in your kitchen already. That’s my favorite kind of recipe — no need for a last-minute grocery run.

  • Canned almond milk
  • Banana – ideally ripe and sweet
  • Milo chocolate malt powder – the star of the show
  • Vanilla ice-cream – because why not?
  • Strawberries – for a pop of color and flavor
  • Whipped cream – a fluffy finishing touch

How to Make Banana Milo Milkshake

  1. In a blender, pour in about a cup of canned almond milk. It’s the creamy base for our shake.
  2. Add a heaping spoonful of Milo chocolate malt powder. The more, the merrier — but a couple of tablespoons should do the trick.
  3. Peel your banana and break it into chunks before tossing it into the blender. The riper, the sweeter!
  4. Scoop in a generous helping of vanilla ice-cream. One or two scoops, depending on how indulgent you’re feeling.
  5. Blend everything together until it’s smooth and frothy. Listen for that perfect whirring sound and watch as it turns a delightful chocolatey hue.
  6. Pour the luscious mixture into a tall glass. The anticipation is real!
  7. Top with a cloud of whipped cream. Don’t be shy; it’s the cherry-on-top moment without the cherry.
  8. Finally, sprinkle chopped strawberries over the whipped cream. They add a splash of color and a fresh, fruity note.
  9. Serve immediately, preferably with a straw, and let the cool, creamy goodness wash over you.

Cook’s Notes

If you’re anything like me, you’ll want to make sure your banana is at peak ripeness for the best sweetness. This milkshake is versatile, but using canned almond milk brings a lovely creaminess that other milk might not. You can make the whipped cream yourself or grab some from the store — both work wonders. And if you end up with leftovers (unlikely, but it happens), just cover and pop it in the fridge. Stir it up again before drinking, as it might separate a bit. But honestly, it’s best enjoyed fresh.

Make It Your Own

  • For a nutty twist, swap canned almond milk with hazelnut milk.
  • Want more chocolate? Add a drizzle of chocolate syrup before blending.
  • For a tropical vibe, substitute the strawberries with chopped pineapple.
  • Go dairy-free by using coconut milk ice-cream instead of vanilla ice-cream.

If you try this, I’d love to hear how it turns out — drop a comment or tag me! Whether you make it just like this or put your own spin on it, this Banana Milo Milkshake is sure to hit the spot. Stay cool, friends!

Related update: Banana Milo Milkshake

Related update: Protein Strawberry Smoothie

Chouquettes | Made by Meaghan Moineau

It was one of those Tuesdays where everything felt just a little bit off. You know the kind — you spill coffee on your favorite shirt, you’re already late and the cat decides now is the perfect time to puke on the rug. By the time dinner rolled around, I was craving something sweet, delightful, and impossibly easy — something to save the day. Luckily, I remembered the pack of Swedish pearl sugar in the cupboard and thought, “It’s a chouquette night.” I mean, who can resist those airy little puffs topped with crunchy sugar? They make you feel like you’re at a fancy café in Paris, but they’re totally doable at home. Plus, there’s something deeply satisfying about the way they puff up in the oven, like little clouds of happiness. So let’s dive into this, and as they say in France, “C’est parti!”

Jump to Recipe

What You’ll Need

You might find that you already have most of these ingredients lounging in your pantry, waiting for their moment to shine. The only thing you might need to hunt down is that lovely, crunchy Swedish pearl sugar — it’s the secret to these beauties.

  • Butter
  • Sugar
  • Salt
  • Lemon rind
  • Water
  • Flour
  • Vanilla
  • Rum
  • Eggs
  • Swedish pearl sugar

How to Make Chouquettes

  1. First things first, preheat your oven to 400°F and let it get nice and hot for at least 20 minutes — this is key to getting that beautiful rise.
  2. In a medium saucepan, bring the butter, sugar, salt, lemon rind, and water to a boil. The aroma will start lifting your spirits instantly!
  3. Once it’s bubbling away, remove it from the heat and dump all the flour in at once. Stir gently at first, then with some serious vigor, until it all comes together. It’ll be a bit of a workout but hang in there!
  4. Return the pan to medium-high heat and cook for about 3-4 minutes. Stir continuously until the batter clings to the spoon and looks glossy, like it’s showing off a new shiny coat.
  5. Take it off the heat, add the vanilla and rum, then let it cool in the pan. This is a good time to dance around the kitchen.
  6. Beat in the eggs one at a time with a wooden spoon. Don’t worry when it looks like a lumpy, broken mess after each egg — keep stirring and it’ll come back together beautifully, a sticky masterpiece.
  7. Line a baking sheet with parchment paper. Drop quarter-sized balls onto the sheet and go wild with that pearl sugar. Sprinkle generously because more is more here.
  8. Pop them into the oven and bake for 5-20 minutes. Keep an eye out — they need to be completely brown before you rescue them from the heat to ensure they don’t collapse on you.

Cook’s Notes

Chouquettes are best enjoyed fresh from the oven, when they’re crisp and airy. However, if you have leftovers (a big if!), store them in an airtight container at room temperature. They’ll soften a little but are still delicious for about a day. Just give them a quick reheat in a 350°F oven to crisp them back up.

A common pitfall is underbaking. If they look pale, they’re not done. Trust me, patience is a virtue here. Wait for them to reach a deep golden brown.

If you’re planning ahead, the dough can be prepared and piped onto baking sheets, then frozen. When you’re ready to impress, bake them straight from the freezer — just add a few extra minutes to the bake time.

Make It Your Own

  • Chocolate Chouquettes: Add a tablespoon of cocoa powder to the flour for a chocolatey twist. They’re irresistible with a dusting of powdered sugar instead of pearl sugar.
  • Nutty Delights: Sprinkle chopped almonds or hazelnuts along with the pearl sugar for an added crunch and nutty flavor.
  • Spiced Up: Add a pinch of cinnamon or cardamom to the dough to bring a warm, spicy note that pairs beautifully with a hot cup of tea.
  • Citrus Burst: Double up on the lemon by adding a touch of lemon extract along with the rind for an extra zesty kick.

If you try this, I’d love to hear how it turns out — drop a comment or tag me! Chouquettes are one of those sweet treats that can make any day feel special. Happy baking!

Related update: Chouquettes

Related update: Apricot Clafouti With Lavender & Pecans