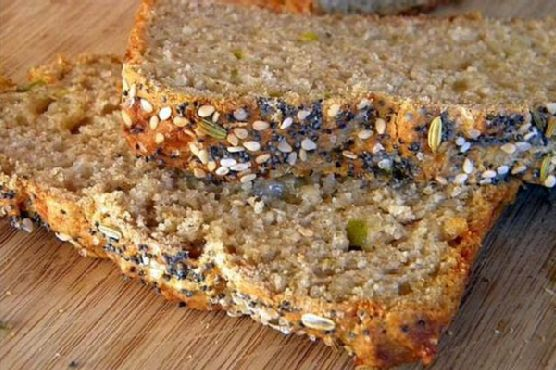
Cheddar Chile Beer Bread | Made by Meaghan Moineau

I remember last fall when I was caught in a total downpour on my way back from the farmers’ market. I dashed inside my apartment, dripping and shivering, with a bag full of local cheese and a can of green chiles I had impulsively picked up. My mind immediately went to a warm, comforting loaf of bread, something easy yet satisfying. Enter Cheddar Chile Beer Bread. This recipe is your best friend when you need something hearty but don’t want to fuss with yeast or kneading. It comes together in a flash, and that extra sharp cheddar paired with the zing from the chiles makes it feel special and cozy. Plus, it’s the kind of bread that fills your kitchen with the most *amazing* aroma, making it worth every second of waiting while it bakes.

Jump to Recipe

What You’ll Need

Chances are, most of these ingredients are lurking in your pantry right now, just waiting for their moment to shine. Here’s what you’ll need:

  • 1 cup whole wheat flour
  • 1 cup all-purpose flour
  • 1 tablespoon baking powder
  • 1 teaspoon salt
  • 1/2 teaspoon dry mustard
  • 1 can (12 oz) beer (use what you love to drink!)
  • 1 cup white shredded extra sharp cheddar cheese
  • 1 can (4 oz) canned green chiles, drained
  • 1 tablespoon sesame seeds
  • 1 tablespoon poppy seeds
  • 1/2 teaspoon caraway seeds
  • 1 teaspoon sea salt

How to Make Cheddar Chile Beer Bread

  1. Preheat your oven to 425 degrees. While it warms up, grease a loaf pan to make sure our bread doesn’t stick.
  2. In a large mixing bowl, whisk together the whole wheat flour, all-purpose flour, baking powder, salt, and dry mustard. This will be the backbone of your bread.
  3. Add the green chiles, shredded cheddar, and the beer to the dry mix. Stir until everything comes together. Expect a super thick batter that’s a good arm workout!
  4. Scrape the thick batter into your prepared loaf pan. Spread it out evenly so it bakes up nice and uniform.
  5. Now for the fun part: sprinkle the sesame seeds, poppy seeds, and caraway seeds over the top. Finish with a sprinkle of sea salt. Use your fingers to gently press these into the batter so they stick while baking.
  6. Lower your oven temperature to 400 degrees and pop the loaf in. Bake for 45-50 minutes, and let the aromas take over. It’s done when a toothpick inserted into the center comes out clean.
  7. Let the bread cool on a wire rack for about 15 minutes, then turn it out of the pan. Try to resist diving in right away, but I give you full permission to sample a slice while it’s still warm!

Cook’s Notes

A few little tips: using a beer you enjoy drinking will really make a difference as it flavors the bread. If the batter feels too thick, that’s totally normal. It might seem like you’ve done something wrong, but trust the process, it will work out. The seeds on top not only add flavor, but also a fun texture contrast to the soft, cheesy bread. This loaf is best the day it’s made, but if you have leftovers, toast them up the next morning with a bit of butter—it’s heavenly!

Make It Your Own

Here are a few ways to switch it up:

  • Spicy Kick: Add a chopped jalapeño to the mix for some extra heat.
  • Herby Twist: Toss in a tablespoon of dried herbs like rosemary or thyme with the dry ingredients.
  • Cheese Swap: Use pepper jack or gouda instead of cheddar for a different cheesy flavor.
  • Gluten-Free Version: Substitute the flours with a 1:1 gluten-free blend.

If you try this, I’d love to hear how it turns out—drop a comment or tag me in your photos! Sharing is caring, especially when it’s as delicious as this. Enjoy every bite, friends!

Related update: Cheddar Chile Beer Bread

Related update: Fenugreek Roti

Related update: Savory Cheese Dill Scones

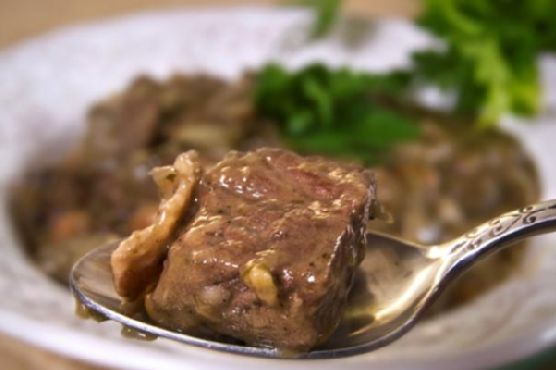
Braised Pork: Filipino Humba | Made by Meaghan Moineau

Picture this: It’s a rainy Tuesday evening, I’m rummaging through my pantry, and the undeniable craving for something warm, sweet, and savory strikes. My go-to? Braised Pork: Filipino Humba. There’s something about the combination of tender pork and the rich, slightly sweet sauce that just screams comfort food. You’d think a dish with such bold flavors requires hours, but this gem is surprisingly weeknight-friendly. The magic lies in the balance of flavors, a little patience, and a hint of adventure. So, let’s dive in and make this delightful dish that captures the heart of Filipino cuisine in every bite.

Jump to Recipe

What You’ll Need

This recipe is the definition of pantry-friendly with a sprinkle of exotic intrigue. Chances are you already have most of what you need.

  • Pork belly – the king of tender, juicy cuts
  • Pork butt shoulder – adds depth with its marbled fat
  • Whole garlic – because who doesn’t love garlic?
  • Vinegar – for that tangy kick
  • Brown sugar – sweetens the pot
  • Soy sauce – umami galore!
  • Bay leaf – subtle fragrance
  • Rice wine – adds complexity
  • Star anise – a whisper of licorice
  • Oregano – for a hint of earthiness
  • Fermented black beans – rich and salty
  • Whole peanuts – crunchy texture
  • Olive oil – just a splash
  • Paprika – a dash for color
  • Water – to bring it all together
  • Fried bananas – for that tropical twist

How to Make Braised Pork: Filipino Humba

  1. In a large mixing bowl, combine the diced pork belly and pork butt shoulder with the whole garlic cloves, vinegar, brown sugar, soy sauce, and rice wine. Give it a gentle stir until everything is well-coated. Pop this into the fridge for about 30 minutes to marinate. You’ll want those flavors to mingle and get cozy.
  2. Once marinated, transfer everything into a heavy-bottomed saucepan. Add water, fermented black beans, and whole peanuts. Bring this beauty to a rolling boil, and then watch as the kitchen fills with an irresistible aroma.
  3. When it reaches a boil, dial the heat down to a gentle simmer. Stir in the bay leaf, star anise, oregano, paprika, and a drizzle of olive oil. Let it simmer away for about an hour. During this time, the sauce will thicken, and the pork will become melt-in-your-mouth tender.
  4. Five minutes before you’re ready to serve, decide if you want the fried bananas in the mix or on the side. Either way, they add a delightful sweetness that complements the savory sauce. Taste and adjust seasoning if needed. Then, plate up and dive in!

Cook’s Notes

Don’t rush the marinating process; it’s where the flavor magic truly begins. If you’re short on time, a quick 15-minute marinade can work, but longer is always better. When simmering, keep the lid on to retain moisture, but check occasionally to ensure nothing sticks. Should you find yourself with leftovers (unlikely as that may be!), store them in an airtight container in the fridge. The flavors deepen overnight, making it even better the next day. You can reheat on the stove or microwave, just add a bit of water to loosen the sauce if needed.

Make It Your Own

  • Swap the pork for chicken thighs if you’re in the mood for poultry. They’ll soak up the sauce beautifully and cook a bit faster.
  • For a vegetarian twist, replace the meat with crispy tofu. Just skip the marinating step and add the tofu in the last 15 minutes of cooking.
  • If peanuts aren’t your thing, try adding cashews for a creamier texture.
  • Want more heat? Toss in a sliced chili or two with the other spices.

If you try this, I’d love to hear how it turns out — drop a comment or tag me! Cooking is all about sharing the joy, and I’m excited to hear your thoughts and twists on this classic dish. Happy cooking!

Related update: Braised Pork: Filipino Humba

Related update: Zucchini & Basil Frittata

Candy Cane Chocolate Marshmallows | Made by Meaghan Moineau

I was in the middle of a marathon of holiday movies when I realized my sweet tooth was acting up. You know that moment when the snow is falling on screen, and you just want something warm and chocolaty to match the vibe? That was me. But I didn’t want just another hot chocolate; I needed something extra special. Enter my Candy Cane Chocolate Marshmallows. These babies are the perfect combination of sweet, crunchy, and gooey goodness, and the best part? They’re super easy to make! Imagine enjoying these with friends, exchanging gifts, or just treating yourself on a chilly night—total bliss.

Jump to Recipe

What You’ll Need

Alright, here’s the good news: you probably have most of this stuff already lurking in your pantry. These marshmallows are all about the simple joys of the holiday season.

  • Candy canes – grab a few from your tree or stash!
  • Dark chocolate – for that rich, decadent coating.
  • Milk chocolate – adds a creamy sweetness.
  • Marshmallows – the stars of the show.

How to Make Candy Cane Chocolate Marshmallows

  1. First, let’s smash those candy canes! Place them in a zip-top bag and use the bottom of a glass or a mallet to crush them into small pieces. You want a mix of dust and tiny chunks.
  2. Now, set up a double boiler on your stove. If you don’t have one, just place a heatproof bowl over a pot of simmering water. Make sure the bowl doesn’t touch the water.
  3. Add the dark chocolate and milk chocolate to the bowl. Stir occasionally until the chocolate is fully melted and smooth. Inhale deeply—the smell is pure heaven.
  4. Grab a marshmallow, dip it halfway into the melted chocolate, spinning it slightly to get a good coat.
  5. Immediately dip the chocolate-covered marshmallow into the crushed candy canes. Press gently so the pieces stick to the chocolate, creating a crunchy layer.
  6. Place the marshmallows on a sheet of wax paper. Let them chill in the fridge for at least an hour, or until the chocolate hardens.

Cook’s Notes

Okay, a few tips from my kitchen to yours. First, make sure your chocolate doesn’t scorch; keep the heat low and steady. If you’re planning to make these ahead, they store beautifully in an airtight container for up to a week. Just keep them in a cool spot to prevent any accidental melting. Also, if you find your candy canes getting sticky, toss them back into the fridge for a bit—they’ll be easier to work with when they’re cool and crisp.

Make It Your Own

Here are some fun twists you can try:

  • Swap out the candy canes for crushed pretzels if you prefer a salty-sweet combo.
  • Use white chocolate instead of milk chocolate for a different flavor profile.
  • Roll the marshmallows in crushed nuts for extra crunch and a nutty flavor.
  • Add a sprinkle of sea salt on top of the chocolate layer for an elevated touch.

If you try this, I’d love to hear how it turns out—drop a comment or tag me in your photos! These little treats are sure to spread some holiday cheer in your home. Enjoy every bite!

Related update: Candy Cane Chocolate Marshmallows

Related update: Vegetarian Scotch Eggs

Related update: Frozen Mojito Pie

SkyFall: Mid‑Air Mars Helicopters 2028 | Analysis by Brian Moineau

TL;DR

What the source said

Space.com reports that NASA/JPL awarded Firefly Aerospace a $13 million subcontract to design and build the aeroshell—backshell plus heat shield—for SkyFall, a nuclear-powered Mars mission slated for 2028. SkyFall will carry three Ingenuity-like helicopters and release them mid-descent to start flying immediately, a technique NASA dubs the “SkyFall Maneuver.” [1][3] (https://www.space.com/space-exploration/missions/nasa-begins-funding-hardware-for-skyfall-mars-helicopter-mission)

Firefly will develop, manufacture, and test the aeroshell in Texas, including work at its Rocket Ranch site in Briggs before shipment to JPL in Pasadena, California for integration. The helicopters will prospect for near-surface water ice to inform future crewed landing sites, extending Ingenuity’s 2021–2024 legacy into resource mapping and site scouting. [2][1] (https://www.globenewswire.com/news-release/2026/07/07/3323174/0/en/firefly-aerospace-receives-13-million-nasa-jpl-subcontract-to-build-aeroshell-for-skyfall-mars-mission.html)

Why it matters

Two communities have the most to gain—or lose—here. For human spaceflight planners at NASA and its partners, a trio of airborne scouts mapping shallow subsurface ice could reset the shortlist of safe, useful landing zones before any habitat lands on Mars in the 2030s. Water ice supports in-situ propellant, life support, and radiation shielding; getting that reconnaissance without landing a full rover or lander first saves mass, money, and years. [1][5] (https://aviationweek.com/space/launch-vehicles-propulsion/firefly-aerospace-produce-shell-nasas-skyfall-mission)

For the commercial deep-space supply chain, Firefly’s aeroshell order is a signal: planetary entry, descent, and landing (EDL) hardware is opening to nontraditional primes. If the Texas-built shell performs and the mid-air release works in 2028, the template—commercial composites plus JPL avionics—could become the go-to stack for “rotorcraft-first” Mars missions this decade. [2][3] (https://www.jpl.nasa.gov/videos/nasas-skyfall-mars-helicopters/)

Original analysis

Contrarian read

  • Consensus: The big story is NASA’s “first nuclear-powered interplanetary spacecraft.”
  • My take: That line muddles history. NASA has flown nuclear-powered (RTG) interplanetary craft for five decades—Voyager (launched 1977), Galileo (1989), Cassini (1997), and New Horizons (2006). The novelty only stands if SkyFall uses a fission reactor rather than an RTG; what’s genuinely new—and risky—is mid-air deployment of helicopters from a 2.65‑meter heritage aeroshell and jetpack, trading a lander’s mass/complexity for the ability to fly immediately at higher-elevation, rougher sites. [4][6] (https://arxiv.org/abs/2203.03704)

Historical analogue (2012: “sky crane” for Curiosity)

  • In 2012, JPL’s sky-crane lowered Curiosity on tethers—a maneuver many thought too exotic until it worked and then became standard for large rovers (Perseverance in 2021). New EDL paradigms that buy mass margins and site access tend to stick. If SkyFall’s mid-air release works, expect a generational pivot: helicopter-first Mars missions for regional surveys, then targeted landers where the copters flag resources or hazards. [9] (https://science.nasa.gov/planetary-science/programs/mars-exploration/mission-timeline/how-we-land-on-mars/)

Back-of-envelope calculation

Named-stakeholder breakdown

Framework: Risks vs. payoffs for the SkyFall Mars helicopter mission

One more useful yardstick: Ingenuity cost about $80M to build and $5M to operate for the demo month, then flew 72 times before its final flight on Jan. 18, 2024. If SkyFall fields three improved helos and each manages 100 flights, that’s 300 sorties. Even if unit hardware cost stayed Ingenuity‑like (assume $80M each), you’d get ~$240M/300 ≈ $0.8M per sortie in pure air‑vehicle capex—already cheaper “per flight” than Ingenuity’s ~$1.18M (=$85M/72). It’s a crude metric, but it shows how scaling the fleet can make exploration economics look less like bespoke stunts and more like air campaigns. [8] (https://www.planetary.org/space-missions/ingenuity)

What others are missing

The hinge isn’t just the helicopters—it’s the aeroshell aperture and packing problem. The MAHD/MAD studies assume a 2.65‑meter, Mars‑heritage aeroshell (Pathfinder/MER/Phoenix/InSight). Fitting a jetpack plus a Mars Science Helicopter inside that diameter already pushes geometry; SkyFall is promising three Ingenuity‑class craft. That implies aggressive stowage, separation sequencing, and debris‑free clearance under dynamic loads during descent. If JPL and Firefly prove repeatable, low‑shock, no‑foul release of multiple flyers from a small capsule, Mars missions gain a new “multi‑drop” logistics primitive. That’s the scalable part—not the nuclear label. [6][2] (https://arxiv.org/abs/2203.03704)

What to watch next

  1. By Q4 2027, Firefly delivers the SkyFall aeroshell to JPL; any slip beyond December 2027 likely punts to the next Earth–Mars synodic window (~26 months later). [5][10] (https://aviationweek.com/space/launch-vehicles-propulsion/firefly-aerospace-produce-shell-nasas-skyfall-mission)
  2. By June 2027, JPL publishes mid‑air deployment drop‑test results (e.g., jetpack‑to‑helicopter separation stability) with video and data, consistent with the MAHD test flow outlined in 2022 and past EDL verification campaigns. [6][9] (https://arxiv.org/abs/2203.03704)
  3. By March 2028, NASA clarifies SkyFall’s power source in public docs—RTG vs. reactor—and aligns comms accordingly; if it’s RTG, expect explicit comparisons to Voyager/Cassini to avoid “first nuclear” backlash. [4] (https://science.nasa.gov/planetary-science/programs/radioisotope-power-systems/missions/)

My take

I’m bullish—on the maneuver, not the marketing. If SkyFall nails a mid‑air release of multiple scouts in 2028 and those aircraft come home with believable subsurface ice maps, this becomes the Curiosity sky‑crane moment for aerial Mars. The aeroshell order signals that JPL intends to build around commercial composites and iterate fast. Don’t get distracted by the nuclear headline; the lasting value is a repeatable way to insert swarms into rough, high‑elevation terrain. If that works in 2028, the next Mars decade belongs to fleets of rotorcraft, not lone mega‑rovers. [2][5][6] (https://www.globenewswire.com/news-release/2026/07/07/3323174/0/en/firefly-aerospace-receives-13-million-nasa-jpl-subcontract-to-build-aeroshell-for-skyfall-mars-mission.html)

Sources

  1. NASA begins funding hardware for “SkyFall” Mars helicopter mission — Space.com (https://www.space.com/space-exploration/missions/nasa-begins-funding-hardware-for-skyfall-mars-helicopter-mission) — News on Firefly’s $13M aeroshell award, 2028 target, and the “SkyFall Maneuver.”

  2. Firefly Aerospace Receives $13 Million NASA JPL Subcontract to Build Aeroshell for SkyFall Mars Mission — GlobeNewswire (https://www.globenewswire.com/news-release/2026/07/07/3323174/0/en/firefly-aerospace-receives-13-million-nasa-jpl-subcontract-to-build-aeroshell-for-skyfall-mars-mission.html) — Confirms contract value, Texas facilities, and mid-air release naming.

  3. NASA’s SkyFall Mars Helicopters — JPL (https://www.jpl.nasa.gov/videos/nasas-skyfall-mars-helicopters/) — Official JPL page describing the mission concept and mid-air deployment approach.

  4. Radioisotope Power Systems Missions — NASA Science (https://science.nasa.gov/planetary-science/programs/radioisotope-power-systems/missions/) — Documents NASA’s RTG-powered interplanetary spacecraft (Voyager, Cassini, New Horizons), crucial for parsing the “first nuclear” claim.

  5. Firefly Aerospace To Produce Shell For NASA’s SkyFall Mission — Aviation Week (https://aviationweek.com/space/launch-vehicles-propulsion/firefly-aerospace-produce-shell-nasas-skyfall-mission) — Adds delivery-by-late-2027 detail and reiterates the three‑helicopter, water‑ice mapping goal.

  6. Mid-Air Helicopter Delivery at Mars Using a Jetpack — arXiv (https://arxiv.org/abs/2203.03704) — JPL/NASA preprint on the MAHD concept, including 2.65‑m aeroshell fit, +150% payload mass, and ~275 kg entry mass modeling.

  7. NASA Pushes Next-Gen Mars Helicopter Rotor Blades Past Mach 1 — JPL (https://www.jpl.nasa.gov/news/nasa-pushes-next-gen-mars-helicopter-rotor-blades-past-mach-1/) — Evidence of AeroVironment-built next-gen rotors and ongoing rotorcraft maturation at JPL.

  8. Ingenuity, NASA’s Mars Helicopter — The Planetary Society (https://www.planetary.org/space-missions/ingenuity) — Establishes Ingenuity’s 72 flights (ending Jan. 18, 2024) and ~$85M development/initial ops cost, used in sortie economics.

  9. How We Land on Mars — NASA Science (https://science.nasa.gov/planetary-science/programs/mars-exploration/mission-timeline/how-we-land-on-mars/) — Curiosity’s 2012 sky-crane and Perseverance’s 2021 EDL context for new paradigms.

  10. Mars Fact Sheet — NASA GSFC (https://nssdc.gsfc.nasa.gov/planetary/factsheet/marsfact.html) — Provides the 779.94‑day Earth–Mars synodic period (~26 months) to frame launch-window slips.


Related update: We recently published an article that expands on this topic: read the latest post.

Gluten-Free Chocolate-Pecan Quickbread | Made by Meaghan Moineau

One chilly evening last fall, I found myself in the kitchen, craving something warm and comforting. My cupboard was a bit of a disaster, full of bits and bobs from baking adventures past. A half-used bag of gluten-free flour, some chocolate chips I had been furtively snacking on, and a nearly empty jar of pecans were calling to me. It was definitely a “use what you have” kind of night. As I pulled ingredients together, a gluten-free chocolate-pecan quickbread was born — a delightful mix of melty chocolate and crunchy pecans, wrapped in a tender, slightly sweet loaf. The best part? It made my entire kitchen smell like a cozy bakery on a crisp autumn day. If you’re looking for something that’s both indulgent and easy to whip up, this quickbread might just be your new favorite.

Jump to Recipe

What You’ll Need

The beauty of this quickbread lies in its simplicity. You likely have most of these ingredients on hand:

  • Butter, for that irresistible richness
  • Gluten-free flour, to keep things friendly for all tummies
  • Sugar and brown sugar, for sweetness and a hint of molasses flavor
  • Baking soda, to give our loaf a little lift
  • Salt, to balance everything out
  • Semi-sweet chocolate chips, because chocolate makes everything better
  • Pecans, for that nutty crunch
  • Eggs, to bind and add moisture
  • Unsweetened applesauce, a sneaky moisture-hero
  • Vanilla-honey Greek yogurt, for tang and tenderness
  • Vanilla extract, because why not double down on vanilla goodness?

How to Make Gluten-Free Chocolate-Pecan Quickbread

  1. First things first, preheat your oven to 350 degrees Fahrenheit. Butter your trusty 5″x9″ loaf pan and set it aside.
  2. Gently heat the butter until it’s just melted. Set it aside to cool — you don’t want scrambled eggs in your bread!
  3. In a large bowl, combine the gluten-free flour, sugar, brown sugar, baking soda, and salt. Give it a good whisk to break up any lumps.
  4. Stir in the semi-sweet chocolate chips and pecans. This is starting to look delicious already, isn’t it?
  5. In a separate bowl, whisk together the eggs, applesauce, yogurt, vanilla extract, and the cooled melted butter.
  6. Pour the wet mixture into the dry ingredients and stir until just combined. Be gentle here; over-mixing is not our friend.
  7. Pour the batter into the prepared loaf pan, smoothing out the top with a spatula.
  8. Bake in your preheated oven for about an hour, or until a toothpick inserted into the center comes out clean. The top should be golden and your kitchen will smell heavenly.
  9. Allow the loaf to cool in the pan for 10 minutes before transferring it to a wire rack to cool completely. Patience, my friend!

Cook’s Notes

Let’s talk about some little tips that make a big difference. First, feel free to use whatever gluten-free flour blend you love; they all work here. Just make sure it has xanthan gum in it, or add a teaspoon if it doesn’t. If your loaf turns out a bit too crumbly, you may have over-mixed, which is easy to do. Treat the batter gently! As for storage, keep your quickbread in an airtight container at room temperature for up to three days. It also freezes beautifully — just slice and wrap individual pieces for easy snacking later.

Make It Your Own

Here’s where you get to play around:

  • Swap the pecans for walnuts if you’re feeling nutty.
  • Use dark chocolate chips for a more intense chocolate experience.
  • Add a teaspoon of cinnamon to the dry mix for a warm, spicy touch.
  • Substitute the vanilla-honey Greek yogurt for plain Greek yogurt and an extra teaspoon of honey if that’s what you have on hand.

If you try this, I’d love to hear how it turns out — drop a comment or tag me! Happy baking, and may your kitchen be filled with the sweet aroma of chocolate-pecan goodness.

Related update: Gluten-Free Chocolate-Pecan Quickbread

Related update: Candy Cane Chocolate Marshmallows

Related update: Braised Pork: Filipino Humba

Dried Cranberry Chocolate Cookies | Made by Meaghan Moineau

It was one of those Thursday evenings when you’re standing in the kitchen, contemplating the universe — or at least what’s left in your pantry. I had a hankering for something sweet but not the patience for an elaborate dessert. You know the feeling? I wanted something that felt a little special, like it could be served with coffee if a friend popped by, yet casual enough to devour in my pajamas. That’s when these Dried Cranberry Chocolate Cookies came into play. They’re the perfect blend of tangy and sweet, a delightful twist on the classic chocolate chip cookie that feels just right for any time of year. Plus, they come together quicker than my favorite TV show, which is saying something. Trust me, you’ll want to keep this recipe up your sleeve for those moments when you need a treat without the fuss.

Jump to Recipe

What You’ll Need

You might be surprised to find that most of these ingredients are already lounging around in your kitchen. The star of the show? Those **dried cranberries** that you bought for a salad and then forgot in your pantry. They’re about to meet their new best friend: **chocolate chips**.

  • 1 cup plain flour
  • 1/2 teaspoon baking powder
  • 1/4 teaspoon baking soda
  • 1/4 teaspoon **kosher salt**
  • 1/2 cup **unsalted butter**, softened
  • 1/3 cup **granulated sugar**
  • 1/3 cup **light brown sugar**, packed
  • 1 large **egg**
  • 1 large **egg yolk**
  • 1 teaspoon **vanilla extract**
  • 1 cup old fashioned **rolled oats**
  • 1/2 cup **semisweet chocolate chips**
  • 1/2 cup **white chocolate chips**
  • 1/2 cup **dried cranberries**

How to Make Dried Cranberry Chocolate Cookies

  1. Preheat your oven to 325°F (165°C). Line two baking sheets with parchment paper, because nobody wants cookies stuck to the tray.
  2. In a medium bowl, whisk together the flour, baking powder, baking soda, and salt. This is your dry team, so make sure they’re well-mixed.
  3. In a stand mixer fitted with a paddle attachment, beat the butter, granulated sugar, and brown sugar on medium speed until the mixture is creamy and fluffy. This should take about 2 minutes.
  4. Add the egg, then the egg yolk, and finally the vanilla extract to the butter mixture, beating well after each addition. Don’t forget to scrape down the sides of the bowl for an even mix.
  5. Slowly incorporate your dry ingredients into the wet mixture, mixing until just combined. The dough should be coming together nicely.
  6. Fold in the chocolate chips and dried cranberries. You want them evenly distributed for the ultimate balance of flavors in every bite.
  7. Scoop heaping teaspoons of dough onto the prepared baking sheets. Keep them about 2 inches apart; they like their personal space as they bake.
  8. Bake in your preheated oven for 12 to 15 minutes. You’re looking for the cookies to brown slightly at the edges and be just set in the middle.
  9. Let the cookies cool on the baking sheets for a couple of minutes before transferring them to a wire rack to cool completely. Or sneak a warm one because life’s too short.

Cook’s Notes

Cookies are a forgiving bunch, but a few tips can make them legendary. Make sure your butter is soft but not too warm to prevent your cookies from spreading too much. If you’re baking on a particularly humid day, you might find the dough a bit sticky—popping it in the fridge for 10 minutes should do the trick. These cookies keep well in an airtight container for up to a week, not that they’ll last that long! If you want to prep ahead, the dough can be frozen after scooping and then baked straight from the freezer—just add a couple of extra minutes to the baking time.

Make It Your Own

Feeling adventurous? Here are some ways to switch things up:

  • Swap the **dried cranberries** for **dried cherries** for a slightly tart note that pairs beautifully with chocolate.
  • Substitute **dark chocolate chips** for the semisweet variety if you’re in the mood for a richer, more intense chocolate flavor.
  • Add a handful of chopped **nuts**, like walnuts or pecans, for a bit of crunch and nuttiness.
  • Love spices? A teaspoon of **cinnamon** or a pinch of **nutmeg** can add a cozy warmth to your cookies.

If you try this, I’d love to hear how it turns out—drop a comment or tag me in your cookie creations! Your feedback is like the chocolate chips in my cookies: essential and sweet. 🍪

Related update: Dried Cranberry Chocolate Cookies

Related update: Gluten-Free Chocolate-Pecan Quickbread

Caramelized cranberries coconut pancakes | Made by Meaghan Moineau

Picture this: It’s a drizzly Saturday morning, and all you want is a breakfast that feels like a cozy hug. Well, these Caramelized Cranberries Coconut Pancakes are exactly that. They’re the perfect blend of sweet, tart, and fluffy, with a tropical twist that feels like a mini-vacation on your plate. I first whipped these up when I was rummaging through my pantry during a random craving for something sweet yet substantial. They came together almost effortlessly, and I realized they were the kind of pancakes that could impress without stress. Whether you’re feeding a crowd or just treating yourself, these bring a little sunshine to your morning, no matter the weather outside. Trust me, you don’t want to miss out on these.

Jump to Recipe

What You’ll Need

The beauty of this ingredient list is that it’s straightforward and likely already in your kitchen. Plus, we’re using a mix of whole wheat and coconut flour for that extra oomph.

  • 1 cup fresh cranberries
  • 1/4 cup brown sugar
  • 1 tsp vanilla extract
  • 1 cup coconut flour
  • 1 cup whole wheat flour
  • 2 tsp baking powder
  • 1/2 tsp salt
  • 2 large eggs
  • 1 1/2 cups coconut milk

How to Make Caramelized Cranberries Coconut Pancakes

  1. Start by heating a nonstick saucepan over medium flame. Toss in the cranberries, brown sugar, and vanilla extract. Stir it up, cover, and let it cook for about 4-5 minutes until the cranberries are soft and juicy. Give them a good mash with your spoon. The aroma will be irresistible.
  2. Once done, take it off the flame and let it cool for a few minutes. This gives you time to gather the rest without burning your taste buds later.
  3. In a mixing bowl, combine all the dry ingredients: coconut flour, whole wheat flour, baking powder, and salt. Give them a good whisk so there are no clumps.
  4. In another bowl, beat the eggs and mix in the coconut milk. Now, add the cooled cranberry mixture to this and beat thoroughly. This will be your magic mixture.
  5. Pour the wet ingredients into the dry ones and mix just until combined. Let it stand for about 2 minutes, so everything gets cozy.
  6. Meanwhile, heat up your griddle or fry pan over medium flame and grease it with a cooking spray or oil of your choice. Let the sizzle tell you it’s ready.
  7. Pour a spoonful of the batter into the pan and shape it round. Let it cook for about 2 minutes or until you see those bubbles on the surface and the edges turning golden. Flip it over like a pro and cook the other side for another 2 minutes.
  8. Repeat with the remaining batter. Finish with a drizzle of your favorite sweetener and a dollop of cream if you’re feeling indulgent. Serve warm and dive in!

Cook’s Notes

Here’s the thing with pancakes: patience is your best friend. Don’t rush the process, and you’ll be rewarded with perfectly golden and fluffy bites. If you find your batter too thick (coconut flour can be tricky), feel free to add a splash more of coconut milk. Leftovers? They’re rare, but if you happen to have any, they store well in the fridge for a couple of days. Just pop them in the toaster or microwave to reheat.

Make It Your Own

  • Nutty Twist: Add a handful of chopped walnuts or pecans to the batter for some crunch.
  • Berry Swap: If cranberries aren’t your thing, try using blueberries instead for a sweeter pop.
  • Dairy-Free Option: Use almond milk instead of coconut milk for a different nutty flavor.
  • Spice It Up: Add a pinch of cinnamon or nutmeg to the dry ingredients for some warmth.

If you try this, I’d love to hear how it turns out. Drop a comment or tag me in your pancake adventures! Your kitchen is about to smell amazing.

Related update: Caramelized cranberries coconut pancakes

Related update: Doughnuts

Minecraft Finally Adds Native Sitting | Analysis by Brian Moineau

TL;DR

  • Minecraft’s next update adds native sitting via a new Cushion item and a one‑use Straw Bed that lets you sleep without resetting spawn; both are live today in Java Snapshot 26.3‑3 and Bedrock Preview 26.40.30, with a broader fall Drop 3 release planned. [1][2][3]
  • The “sit” mechanic is a social‑presence primitive that role‑play servers, creators, and Realm owners can convert into session length and spending, landing just as Xbox’s new chief Asha Sharma says Mojang will report directly to her after major cuts. [3][4]
  • If even a sliver of Minecraft’s 155 million monthly players tries Realms because “hanging out” looks better with seats, that’s meaningful recurring revenue without building a single boss fight. [5][6]

What the source said

IGN reports Mojang is adding a Cushion item (16 colors) you can place and interact with to sit, plus a Straw Bed for one‑night sleeps that don’t change your spawn; both features are available now in preview builds and slated for a fall Drop 3 release that also includes a new biome. Fans—who’ve asked for sitting for 17 years—cheered the reveal, and the coverage frames it amid Microsoft’s Xbox restructuring that moves Mojang’s reporting line to Xbox CEO Asha Sharma. [1][2][3]

Why it matters

Minecraft is not just a survival sandbox; it’s Microsoft’s biggest always‑on social space since the company acquired Mojang for $2.5 billion in 2014, and small mechanics like “sit” shape screenshots, streams, and role‑play rhythms across Java and Bedrock. That’s oxygen for creators selling furniture packs, for Realm owners inviting friends to “hang out,” and for servers that compete on vibe and presence as much as progression. [2][5][9]

For Xbox, the timing is pointed. On July 6, 2026, Asha Sharma announced a top‑to‑bottom restructure and said Mojang will report directly to her, while AP confirmed 4,800 job cuts across Microsoft, many in gaming; a social‑presence roadmap—seats now, better emotes or gestures next—offers low‑risk, high‑surface‑area wins that lift dwell time and Marketplace conversion without changing the game’s DNA. [3][4]

Original analysis

Contrarian read

  • Consensus: “Adding sitting is cute but trivial.”
  • Here’s the rub: sitting is a platform feature, not just a prop. The Cushion is an entity that overlaps non‑full blocks and has no collision, so you can tuck it onto slabs, shelves, or trapdoors to create real living spaces that look good in thumbnails, TikToks, and server hubs—the media that recruits the next player into your Realm or Discord. Mojang just shipped a low‑friction equivalent to Roblox‑style social emotes, baked into vanilla across Java and Bedrock previews. [2]

Back‑of‑envelope math (assumptions stated)

  • Facts: Minecraft reached 155 million monthly active users (MAU), and Realms list at $3.99 (solo) and $7.99 (Plus) per month in the U.S. [6][5]
  • If an incremental 0.1%–0.3% of MAU spins up a new Realm because sitting makes social builds and hangouts feel worth it:
    • 155,000–465,000 incremental subs.
    • At $3.99: $618,450–$1,855,350 in monthly recurring revenue (MRR).
    • At $7.99: $1,238,450–$3,715,350 MRR.
  • This is not a forecast; it shows the order of magnitude for a presence primitive that nudges conversion by tenths of a point, especially when Marketplace furniture packs piggyback on the Cushion. [5][6]

Named‑stakeholder breakdown

  • Mojang Studios: The Cushion and Straw Bed test cross‑edition choreography—Java Snapshot 26.3‑3 and Bedrock Preview 26.40.30 ship near‑simultaneously—hinting at a tighter parity cadence under Sharma’s direct oversight. [2][3]
  • Xbox leadership (Asha Sharma): With Mojang reporting to her and cuts resetting expectations, small social wins that scale to 155M MAU are the cleanest path to “more engagement, higher attach” without AAA risk. [3][4][6]
  • Marketplace creators: Every seat is a set; expect Cushion‑compatible decor packs and sit‑friendly interiors that monetize screenshots as much as survival utility. [2]
  • Realm owners and server hosts: RP towns, school clubs, and SMPs finally get canonical chairs; call‑to‑action is simple—“Come sit by the campfire at 8 PM”—and average session duration should tick up. [5]
  • Modders: Some fast‑follow utility mods get obsoleted (one modder already called their Sitting Pillows redundant), while high‑concept furniture, animations, and datapack integrations gain a better vanilla base. [2][7]

2×2: presence vs. progression, low vs. high scope

  • Low scope × Presence: Vanilla seats (Cushion) and emotes that make hubs and cafés feel inhabited. [2]
  • High scope × Presence: Worldgen that seeds seating in Abandoned Camps and villages, guiding players into social spots. [2][3]
  • Low scope × Progression: Straw Bed enabling tactical sleep in expeditions without spawn reset. [2]
  • High scope × Progression: Full biome drops that alter routes and resource loops, paired with social props for hubs. [1][2]

Concrete design consequences

  • The Cushion’s rules (entity, no collision, overlapping allowed) enable layered builds but constrain redstone motion; you can’t piston‑push a seat like a block, and early feedback already requests a piston‑friendly Seat/Bench variant for flying machines. That is Mojang receiving signal on where “sit” collides with engineering patterns—and it’s fixable. [2][8]
  • Performance risk lives at scale; community testers report lag when spamming thousands of Cushions on lower‑end servers, which means Mojang will need to tune entity budgets and culling if “seating everywhere” becomes the new SMP aesthetic. [7]

What others are missing

The Cushions are entities, not ordinary blocks, and Mojang explicitly allows them to overlap other objects and lack collision; that’s a deliberate “soft‑furniture” layer that avoids rewriting block rules but adds entity‑count costs and redstone limits. Bedrock’s Preview notes even mention Abandoned Camps seeding these items in the world, with a known generation bug right now, which signals Mojang wants seating seen and used rather than buried in crafting menus. Net effect: seating as worldgen affordance, not merely a craftable gimmick, which changes how villages, hubs, and screenshots look at scale. [2][3]

What to watch next

  1. By November 30, 2026, Mojang ships Drop 3 with Cushion and Straw Bed on both Java and Bedrock, and the final release notes retain “sleep without resetting spawn” as a Straw Bed property. Verification: official 26.3 release changelogs. [2][3]
  2. By March 31, 2027, Mojang introduces at least one additional social‑presence feature beyond sitting/sleeping (for example, new emotes or a Seat/Bench variant that supports piston movement), reflecting early Snapshot feedback. Verification: Mojang.net snapshot/release notes. [2][8]
  3. By Q2 FY27 earnings (reported late Q1 FY27 on Microsoft’s calendar), Microsoft cites a new all‑time‑high Minecraft MAU above 155M or calls out increased Realms/Marketplace engagement tied to 2026 social‑presence updates. Verification: Microsoft investor transcripts. [6]

My take

This is Mojang slipping a platform upgrade into a comfort update. Sitting sounds tiny until you remember Minecraft’s real competitor is wherever kids hang out—Roblox, Fortnite Creative, even Discord—and a chair is permission to linger. Under Asha Sharma, Xbox just put Mojang on the front burner; expect more presence primitives that make worlds feel inhabited: seats now, gestures and diegetic emotes next. If I ran a Realm or a Marketplace studio, I’d build for vibe immediately—campfires, cafés, bleachers—because the next wave of growth in a 155‑million‑MAU sandbox won’t be mobs; it will be moments. [3][5][6]

Sources

  1. A New Minecraft Update Will Finally Let Players Sit Down — IGN (https://www.ign.com/articles/new-minecraft-update-finally-allows-players-to-sit-down) — Baseline report on the Cushion sit feature, Straw Bed, player reaction, and fall timing context.
  2. Minecraft 26.3 Snapshot 3 — Mojang (https://www.minecraft.net/en-us/article/minecraft-26-3-snapshot-3) — Primary source confirming Cushion mechanics (entity, overlap, no collision), 16 colors, and Straw Bed behavior.
  3. Resetting XBOX — Xbox Wire (https://news.xbox.com/en-us/2026/07/06/resetting-xbox/) — Official memo by Asha Sharma announcing the restructure and stating Mojang will report directly to her; situates Minecraft strategy.
  4. Microsoft cuts 4,800 jobs, including many at Xbox, in a “reset” — AP News (https://apnews.com/article/5a8f712c531911089dee008b3bbb33c4) — Independent confirmation of the scale and timing of Microsoft’s gaming layoffs and Sharma’s memo.
  5. Realms Servers for Bedrock & Java — Minecraft (https://www.minecraft.net/en-us/realms) — Official pricing and positioning for Realms and Realms Plus, used in the revenue calculation.
  6. Microsoft Fiscal Year 2026 Q1 Earnings Call — Microsoft Investor Relations (https://www.microsoft.com/en-us/investor/events/fy-2026/earnings-fy-2026-q1) — Transcript citing 155M monthly active users for Minecraft, grounding scale assumptions.
  7. With Minecraft adding cushions in the latest snapshot, my Sitting Pillows mod has become rather redundant — Reddit (https://www.reddit.com/r/Minecraft/comments/1upx8eo/with_minecraft_adding_cushions_in_the_latest/) — Community signal that vanilla seating impacts mod utility and points to creator adaptation.
  8. Cushion and Seat — Minecraft Feedback (https://feedback.minecraft.net/hc/en-us/community/posts/47210956510861-Cushion-and-Seat) — Snapshot‑era discussion requesting a piston‑friendly seat variant; evidence of redstone use‑case pressure.
  9. Microsoft to acquire Mojang — Microsoft (https://news.microsoft.com/2014/09/15/minecraft-to-join-microsoft/) — Confirms the 2014 acquisition of Mojang for $2.5 billion, framing Microsoft’s long‑term stake in Minecraft.


Related update: We recently published an article that expands on this topic: read the latest post.

Protein Strawberry Smoothie | Made by Meaghan Moineau

Imagine it’s one of those mornings where you’ve hit snooze one too many times, and now you’re racing through your kitchen in a flurry of panic. Your brain is still in bed but your body is desperately trying to catch up with the clock. It’s on these mornings that my Protein Strawberry Smoothie saves the day. It’s a quick, delicious way to fuel up, with a creamy texture that feels indulgent but is packed with goodness. And let’s be real, anything that helps you avoid a hangry rage before your first meeting is worth its weight in gold. Plus, it’s got that perfect balance of sweet strawberries and the smooth richness of almond milk, making it a versatile favorite you’ll find yourself coming back to again and again.

Jump to Recipe

What You’ll Need

This ingredient list is short and sweet, with a few pantry staples you probably already have on hand. Here’s what you’ll need:

  • 1 cup of almond milk
  • 1 banana
  • 1/2 cup of fat-free Greek yogurt
  • 1 tablespoon of honey
  • 1 cup of ice
  • 1 cup of fresh strawberries

How to Make Protein Strawberry Smoothie

  1. Toss your strawberries, banana, and Greek yogurt into the blender. The fruit should be fresh and ripe, which will give you that vibrant flavor burst.
  2. Pour in the almond milk, which adds a nutty base that balances the sweetness from the fruit.
  3. Add the honey. You’ll want just enough for a hint of sweetness without overpowering the strawberries.
  4. Throw in the ice. This will give your smoothie that chilly, refreshing feel that’s perfect for a morning pick-me-up.
  5. Blend everything on high until it’s smooth and creamy. You’ll know it’s ready when you see a beautifully pink, frothy mixture without any lumps.

Cook’s Notes

Don’t get too caught up in exact measurements here. This smoothie is pretty forgiving, so feel free to adjust based on what you have. If your bananas are smaller, use two. If your strawberries are extra-large, maybe go a bit shy on the cup measurement. Also, I recommend using fresh strawberries, but if you only have frozen, that’s totally fine—just skip the ice so it doesn’t turn into a frozen block! If you’ve got a busy morning ahead, you can prep the fruit the night before and store it in the fridge, then just throw it all in the blender when you’re ready. Leftovers can be stored in the fridge for a day, but be sure to give it a good stir before drinking.

Make It Your Own

  • Swap the almond milk for coconut milk for a tropical twist.
  • Add a tablespoon of your favorite nut butter for some extra protein and a richer flavor.
  • If you’re not a fan of honey, replace it with a splash of maple syrup or agave nectar.
  • For a green boost, toss in a handful of spinach. It won’t change the taste much but will kick up the nutrition!

If you try this, I’d love to hear how it turns out — drop a comment or tag me in your smoothie pics! Nothing makes my day more than seeing someone enjoy a recipe that’s made their morning just a bit brighter. Enjoy, and here’s to more deliciously lazy mornings!

Related update: Protein Strawberry Smoothie

Related update: Caramelized cranberries coconut pancakes

Related update: Green Tea Fruit Medley Smoothie

Egyptain Cauliflower Side Salad | Made by Meaghan Moineau

Last Tuesday, I found myself staring at a head of cauliflower in the fridge, feeling a bit uninspired and yet in desperate need of something fresh and zesty to perk up my weeknight dinner. It was one of those Tuesdays when you’re caught between the comfort of routine and the allure of a little culinary adventure. Enter the Egyptian Cauliflower Side Salad—a dish that’s beautifully simple yet impressively flavorful, perfect for those moments when you want something that’ll surprise your taste buds without complicating your evening. It’s quick, tangy, and lets the humble cauliflower shine with a bit of Middle Eastern flair. Trust me, this is one you’ll want as a regular in your recipe arsenal.

Jump to Recipe

What You’ll Need

This recipe is all about using fresh and vibrant ingredients that you might already have lounging around in your pantry or fridge. Think of it as a happy meeting between global flavors and everyday simplicity.

  • Cauliflower – the star of the show, bring your best one!
  • Cumin – to add that warm, earthy depth.
  • Fresh parsley – for a burst of color and freshness.
  • Lemon juice – for that zippy tang.
  • Olive oil – your salad dressing superhero.
  • Bell pepper – adds sweetness and crunch.
  • Salt – to elevate all other flavors.

How to Make Egyptian Cauliflower Side Salad

  1. First, separate your cauliflower into medium-sized florets. Aim for bite-sized pieces that are easy to manage for both cooking and eating.
  2. Steam the cauliflower in a steamer until just tender. If you don’t have a steamer, no worries! You can boil the whole cauliflower in water until fork-tender and then cut it into pieces. Go for a texture that’s soft but still holds its shape.
  3. Once the cauliflower is cooked, place it in a large mixing bowl. The warmth will help it soak up all those delicious flavors we’re about to add.
  4. In a small bowl, whisk together the olive oil, cumin, lemon juice, and a generous pinch of salt. You want a good balance of zesty and savory here, so taste and adjust if needed.
  5. Pour the dressing over the warm cauliflower and toss gently to coat every piece. The aroma of cumin will start to fill your kitchen—it’s heavenly!
  6. Dice the bell pepper finely and add it to the bowl, tossing everything together once more for good measure.
  7. Finally, garnish with a handful of freshly chopped parsley. This not only adds a vibrant color but also a lovely fresh note to the salad.

Cook’s Notes

This salad is best enjoyed fresh, while the cauliflower is still warm, allowing it to soak up all those lovely flavors. However, it’s also quite forgiving if made in advance. Simply store it in the fridge for up to two days, and let it come to room temperature before serving to revive the flavors a bit. If you find the dressing has thickened upon chilling, a splash of warm water can loosen it right up. Be careful not to overcook the cauliflower—you’re aiming for tender, not mushy. It should have a slight bite to it, creating the perfect texture contrast with the creamy dressing and crunchy bell pepper.

Make It Your Own

  • Swap the parsley for fresh cilantro if you’re a fan of its pungent flavor.
  • For a spicy kick, add a pinch of red chili flakes to the dressing.
  • Mix in some toasted almonds or pine nuts for extra crunch and nuttiness.
  • Use lime juice instead of lemon for a slightly different citrusy edge.

If you try this, I’d love to hear how it turns out—drop a comment or tag me! Your kitchen adventures are always a delight to hear about. Enjoy your culinary trip to Egypt with just a few simple steps and ingredients!

Related update: Egyptain Cauliflower Side Salad

Related update: Charlotte Potato Salad

Gluten-Free Pressed Lemon Butter Cookies | Made by Meaghan Moineau

It was one of those dreary Tuesday afternoons when the sky couldn’t decide whether to rain or shine, so it just hovered in a blah gray. The kind of day that demands something bright and cheerful to rescue you from the monotony. I found myself in the kitchen, eyeing a lonely lemon on the counter. It hit me – pressed lemon butter cookies! They’re the perfect pick-me-up: buttery, zesty, and just the right amount of sweet, without the gluten. These cookies are impressive enough for a tea party yet simple enough for a midweek treat. If you, like me, need a little sunshine on a plate, these cookies are your answer.

Jump to Recipe

What You’ll Need

I bet you’ve got most of these tucked away in your pantry and fridge. It’s a short, sweet list that’s all about that lemony punch and buttery goodness. Here’s what you’ll need:

  • Unsalted butter
  • White sugar
  • Egg yolks
  • Lemon extract
  • Lemon zest
  • Fresh lemon juice
  • Gluten-free flour
  • Xanthan gum

How to Make Gluten-Free Pressed Lemon Butter Cookies

  1. Preheat your oven to 350°F (175°C). This is the perfect moment to get cozy with that mixing bowl and let the anticipation build.
  2. In a world where flour can be tricky, whisk or sift your gluten-free flour with the xanthan gum. This step ensures everything blends smoothly, trust me.
  3. Grab your standing mixer with the paddle attachment and cream the unsalted butter until it’s fluffy and inviting. The butter should look like a pillowy cloud.
  4. Add in the white sugar and continue to cream until the mixture is light and airy. You’re looking for that dreamy consistency.
  5. Introduce the egg yolks to the party, one at a time, making sure each is fully incorporated before adding the next.
  6. Now for the zesty kick: add the lemon zest, lemon extract, and fresh lemon juice. Mix them in until the batter sings with lemony aroma.
  7. Slowly fold in the flour mixture at a gentle speed, then increase the speed until it’s all well-incorporated. Your dough should be soft, but firm enough to hold its shape.
  8. Load your cookie press with the dough and press onto ungreased cookie sheets. This is where the magic happens – each press is a little masterpiece.
  9. Bake one sheet at a time, for about 12-15 minutes, until the edges are lightly browned and your kitchen smells like a citrus grove.
  10. Patience, my friend. Let them cool completely on the sheets before gingerly using a thin spatula to lift them. They’ll be delicate but oh-so-worth-it.

Cook’s Notes

Here’s a little insider scoop: when working with gluten-free flour, sifting is your best friend for a smooth texture. These cookies keep well in an airtight container for up to a week, but let’s be real, they’ll probably disappear way before that. If you’re planning ahead, the dough can be made a day in advance and refrigerated. Just let it come to room temperature before pressing. And whatever you do, don’t skip the cooling step – they’re fragile when fresh out of the oven.

Make It Your Own

With a recipe like this, there’s room to play around. Here are a few ideas to shake things up:

  • Swap the lemon for orange zest and juice for a sweet, floral twist.
  • Add a teaspoon of vanilla extract alongside the lemon for a more rounded flavor.
  • Sprinkle a little coarse sugar on top before baking for a touch of sparkle and crunch.
  • Mix in a tablespoon of poppy seeds for a delightful texture and a nod to classic lemon-poppy duo.

If you try this, I’d love to hear how it turns out — drop a comment or tag me! Knowing these cookies brought a little sunshine to your day would make mine. Enjoy each zesty bite!

Related update: Gluten-Free Pressed Lemon Butter Cookies

Related update: Dried Cranberry Chocolate Cookies

Epic nabs Fortnite leaker, seals deal | Analysis by Brian Moineau

TL;DR

  • Epic settled with ex-contractor Hayden Cohen over Fortnite leaks: a proposed court injunction would permanently bar Cohen from handling Epic Games’ confidential info, with no monetary relief disclosed—deterrence now runs through the Defend Trade Secrets Act (DTSA), not damages [1][2][4].
  • The core risk wasn’t a few skins; it was partner trust—brands like South Park, Minecraft (Mojang/Microsoft), and Overwatch (Blizzard) don’t tolerate surprise-killing leaks that derail synchronized co-marketing plans [1].
  • An injunction-first deal can be smarter than a damages fight: it avoids discovery that could surface partner decks and drafts, while creating a personal tripwire for any future breach under 18 U.S.C. § 1836 [2][4].

What the source said

Video Games Chronicle reported that Epic Games reached a settlement with Hayden Cohen, a former associate producer accused in March 2026 of leaking upcoming collaborations—South Park, Minecraft, and Overwatch—via an X account that gained roughly 13,000 followers before deletion [1]. The deal seeks a stipulated court injunction barring Cohen from possessing, accessing, using, or disclosing Epic’s confidential or trade secret information [1]. PC Gamer corroborated that the filing mentions no monetary relief, and Epic declined to comment on damages [2]. Epic spokesperson Natalie Munoz said the company sought the injunction “to ensure [Cohen] cannot publish or share Epic’s confidential information again” [1].

Why it matters

Three constituencies are on the line. First, Epic’s live-service cadence: Fortnite relies on tightly timed “surprise” drops that lift Item Shop conversions and engagement each season; a reliable insider leak collapses that timing [1]. Second, IP partners like Mojang/Microsoft (Minecraft), Blizzard (Overwatch), and South Park’s rights holders budget around synchronized beats; early spoilers blunt conversion and trigger contractual friction [1]. Third, the creator economy orbiting Fortnite—Support-A-Creator affiliates, Twitch streamers, and YouTube channels—plans sponsor slots and programming around reveal windows.

The settlement also draws a bright line between datamining and insider misappropriation. Datamining scrapes assets already in public builds; insider leaks extract pre-build plans and partner decks. Under the DTSA, federal courts can tailor injunctions to halt threatened misappropriation, which is exactly what Epic is asking the court to endorse here [4].

Original analysis

The consensus—and why it’s wrong

  • Consensus: “No damages? Then the Fortnite leaker settlement is a slap on the wrist.”
  • Contrarian read: a permanent injunction is the sharper penalty. Why?
    • It’s individualized and enforceable: violate it and you face contempt or enhanced DTSA remedies without relitigating liability; courts treat injunction breaches as defiance of the court itself [4].
    • It preserves partner confidence without messy discovery: depositions and brand-deck productions would risk fresh leaks. An injunction locks the door; a damages trial opens the blinds. That trade-off is rational for Epic and for licensors who prefer to stay out of the record [2][4].

Back-of-envelope: what a “spoiled” collab can cost (hypothetical scale)

  • Anchor: Sacra estimates Epic’s 2024 revenue at about $5.7 billion, with Fortnite as the driver [5].
  • Hypothesis: If diminished “surprise” clips even 0.5% of annual monetization across a few anchor drops, then:
    • $5.7B × 0.5% = $28.5M at risk in a year (scale illustration, not a damages claim) [5].

2x2: leak types Epic actually cares about

  • Axis A (Epic info location): internal systems vs. public game builds [4].

  • Axis B (timing window): pre-build plans vs. in-build assets, which dictates DTSA exposure and PR risk [4].

  • Insider pre-build (most severe): Internal roadmaps, partner pitch decks, and code names—what Epic alleged here. Consequence: direct DTSA exposure and reputational damage with licensors [2][4].

  • Insider in-build: Early access to staging/QA branches; still severe (see Epic’s 2019 case vs. a tester who leaked the Chapter 2 map) [6].

  • Public in-build (datamining): Players parse shipped binaries; often tolerated unless it prematurely reveals licensed IP like South Park or Minecraft [1].

  • External partner leak: Retail listings or vendor packshots. Contractual friction and takedowns usually contain it, but timing damage still lands [1].

Cohen’s case sits top-left (insider/pre-build), which explains a push for a permanent injunction rather than a headline damages number that would prolong attention on the leaks [1][2][4][6].

Historical analogue: Pokémon’s 2021 hammer vs. leakers

In 2021, The Pokémon Company secured $150,000 apiece from two Sword and Shield leakers who posted strategy-guide images ahead of launch, showing courts will back meaningful monetary penalties tied to pre-release marketing assets [7]. Epic’s path differs—favoring a stipulated injunction—but the throughline is similar: when surprise becomes product, premature disclosure is framed and treated as trade secret misappropriation under federal or state law [4][7].

Named-stakeholder breakdown

  • Epic Games: An injunction-centric outcome delivers a standing enforcement tool and reduces discovery that could expose internal processes or partner contracts. It also signals to staff and contractors that DTSA remedies—not just NDAs—govern insider conduct [2][4].
  • Microsoft/Mojang and Blizzard (Minecraft, Overwatch): Fewer uncontrolled spoilers mean cleaner timing across Xbox, Battle.net, and social beats, stabilizing conversion models for Item Shop windows and Twitch drops [1].
  • South Park rights holders (e.g., South Park Digital Studios/Paramount affiliates): Comedy IP depends on reveal timing; leaks dull punchlines. A consistent legal posture from Epic lowers brand risk on future crossovers [1].
  • “Leak economy” accounts on X/Discord: A federal injunction targeting an alleged insider shifts risk: amplify a known-insider leak and you may face subpoenas or preservation demands, even if you never touched Epic systems [2][4].
  • Competing publishers: Expect imitation. Nintendo, The Pokémon Company, and Epic are converging on a norm: escalate insider cases under DTSA or equivalents, reserve PR-friendly takedowns for datamining [6][7].

Why the Fortnite leaker settlement is more than PR cleanup

Epic’s complaint was filed March 5, 2026, in the Eastern District of North Carolina (Case No. 5:26-cv-00135-BO) and alleges Cohen—operating AdiraFN/AdiraFNInfo—“repeatedly misappropriated Epic’s trade secret information” via X and Discord while bound by an NDA, seeking injunctive relief plus compensatory damages and fees [3]. The proposed deal delivers the first ask: a court-ordered ban on accessing or sharing Epic’s confidential info, which removes the account’s unique edge [1][2][3]. Without insider pre-build access, any future presence would devolve into ordinary datamining rather than live-plan disclosure [1]. Under 18 U.S.C. § 1836, injunctions must be based on evidence of threatened misappropriation, cannot be used to bar employment per se, and can be paired with royalties or damages for future misuse—deterrence that follows the defendant across jobs and platforms [4].

What others are missing

Coverage focused on the absence of a damages figure. The overlooked angle is discovery risk management: a full-dress damages trial could force emails, roadmaps, or draft licensing terms into the record, compounding exposure for South Park Digital Studios, Mojang, and Blizzard. By securing a stipulated injunction under a federal statute tailored to trade secrets, Epic minimizes the chance of partner materials hitting PACER or the tech press while still obtaining ongoing relief [1][2][4].

What to watch next

  1. By Q3 2026, Epic will update contractor NDAs and onboarding to cite DTSA remedies and ex parte seizure provisions, and at least one hire will publicly reference these changes in job docs or a LinkedIn post.
  2. By Q4 2026, at least one major publisher besides Epic will file a DTSA-centered complaint against an insider leaker tied to a live-service crossover, with the primary prayer for relief being a permanent injunction.
  3. By Q2 2027, a Fortnite partner named in the 2026 leaks (Minecraft, Overwatch, or South Park) will run a synchronized relaunch or “reprise” event, confirming partner retention post-settlement.

My take

Epic picked the right hill to hold. A clean, court-backed injunction beats a pyrrhic damages press release that trades headlines for discovery risk [2][4]. When Fortnite remains a multibillion-dollar franchise on 2024 revenue estimates, even small percentage swings justify aggressive timing protection [5]. I expect more studios to mirror this template: move fast in federal court, lock the injunction, and starve the leak economy of its only real edge [2][4].

Sources

  1. Epic settles with Fortnite leaker who shared South Park, Minecraft and Overwatch collabs — Video Games Chronicle (https://www.videogameschronicle.com/news/epic-settles-with-fortnite-leaker-who-shared-south-park-minecraft-and-overwatch-collabs/) — Baseline report on the settlement, brands implicated, follower count, and Epic’s on-record statement.
  2. Epic reaches lawsuit settlement with former contractor who was also a notorious Fortnite leaker — PC Gamer (https://www.pcgamer.com/games/epic-reaches-lawsuit-settlement-with-former-contractor-who-was-also-a-notorious-fortnite-leaker/) — Confirms proposed settlement terms (permanent bar via injunction), timing, and lack of disclosed monetary relief.
  3. Complaint, Epic Games, Inc. v. Hayden Cohen (Case 5:26-cv-00135-BO) — DocumentCloud (https://s3.documentcloud.org/documents/27772901/epic-games-v-hayden-cohen-complaint.pdf) — Primary filing establishing venue, allegations of insider misappropriation, and requests for injunctive relief and damages.
  4. 18 U.S.C. § 1836 (Defend Trade Secrets Act) — Cornell Law School Legal Information Institute (https://www.law.cornell.edu/uscode/text/18/1836) — Statutory basis for injunctions and remedies in federal trade secret cases; explains the potency of tailored injunctive relief.
  5. Epic Games revenue estimate 2024 — Sacra (https://sacra.com/c/epic-games/) — Independent estimate used to size the hypothetical financial impact from “spoiled” surprise drops.
  6. Epic sues tester over Fortnite Chapter 2 leaks — Video Games Chronicle (https://www.videogameschronicle.com/news/epic-sues-tester-over-fortnite-chapter-2-leaks/) — Context on Epic’s prior insider-leak litigation in 2019 against a QA tester.
  7. Pokémon Sword and Shield leakers to pay $150,000 each — GameSpot (https://www.gamespot.com/articles/pokemon-sword-and-shield-leakers-to-pay-150000-each-to-nintendo-for-damages/1100-6493184/) — Historical analogue showing courts awarding significant damages for pre-release marketing asset leaks.

Classic Boeuf Bourguignon | Made by Meaghan Moineau

Picture this: It’s a chilly Tuesday evening, and I’ve just managed to duck out of the rain and into my cozy kitchen. My cat, Oliver, is curled up on the windowsill, and the whole place is alive with the soft patter of raindrops. It’s the kind of night that calls for something deeply comforting, something that can fill not just the belly but also the soul. Enter Classic Boeuf Bourguignon — my go-to when I crave something hearty and a tad bit indulgent but without spending hours in the kitchen. Honestly, the magic of this dish lies in its ability to transform simple ingredients into something truly extraordinary. The smell of beef simmering with red wine and herbs is, quite literally, poetry in a pot. Plus, it’s the kind of recipe where you can pop it all into a Dutch oven, let it work its magic, and you’ll still have time to catch up on that new series everyone’s been talking about.

Jump to Recipe

What You’ll Need

Just a heads-up: You might already have most of these tucked away in your pantry, and the rest? Well, they’re worth the trip to the store. Trust me.

  • Bacon – Adds a smoky depth to the dish.
  • Olive oil
  • Beef stew meat – The star of the show.
  • Garlic
  • Diced onion
  • Fresh thyme
  • Bay leaves
  • Parsley
  • Pearl onions
  • Button mushrooms
  • Carrot
  • Red wine – Go for something you’d drink.
  • Beef broth
  • All-purpose flour
  • Salt and pepper

How to Make Classic Boeuf Bourguignon

  1. Preheat your oven to 400°F (200°C). Get that Dutch oven ready – it’s about to work its magic.
  2. Heat olive oil over medium heat and toss in the bacon. Let it sizzle for about 2-3 minutes until it’s just perfectly cooked. Transfer the bacon out with a slotted spoon and let it hang out on the side.
  3. Pat the beef dry with paper towels for a better browning. Crank up the heat to medium-high, throw the beef into the bacon fat, and let it sear for 4-5 minutes until every piece is gloriously browned. Spoon them out and set aside.
  4. Lower the heat back to medium. Toss in the carrots, garlic, onions, parsley, thyme, and bay leaves. Give them a good stir for about 2-3 minutes. Out they go with the slotted spoon, into a separate dish.
  5. Add pearl onions and mushrooms to the Dutch oven. Sauté them until the onions start to brown and the mushrooms become tender. Move them to the dish with the bacon.
  6. Return the beef to the pot and sprinkle one tablespoon of flour over it. Give it a good toss to coat. Season generously with salt and pepper. Pop it in the oven for about 4-5 minutes to develop a gorgeous crust.
  7. Remove the pot from the oven and set it on the stovetop. Pour in the red wine and deglaze, scraping up all those tasty bits. Add the beef broth, bring it to a gentle simmer.
  8. Introduce the carrot, onion, and spice mixture back into the pot. Lower the heat, cover, and let it simmer away for an hour, filling your kitchen with the most intoxicating aroma.
  9. After an hour, add the pearl onions, mushrooms, and bacon. Continue to simmer, allowing the beef to tenderize further, about another 30 minutes.
  10. Use a slotted spoon to fish out the solids and set them aside. Crank up the heat; let the sauce come to a rapid boil.
  11. In a small bowl, mix the remaining tablespoon of flour with two tablespoons of sauce. Stir until smooth and lump-free. Add to the pot, stirring constantly until the sauce thickens.
  12. Remove the bay leaves and thyme sprigs. Discard them. Return the solids to the pot, stirring to coat evenly with the enriched sauce. Serve warm, perhaps over a bed of egg noodles or rice if you’re feeling it.

Cook’s Notes

Let’s talk practicalities. This dish is one of those gems that get even better the next day — so if you can resist not devouring it all, it’s perfect for leftovers. Store it in an airtight container in the fridge, and when you reheat, just do it gently over low heat to keep that beef tender and juicy. If you’re prepping ahead, you can cook everything up to the point just before adding the flour in step 10. Refrigerate and proceed with the sauce thickening when you’re ready to serve. Also, don’t skimp on the wine. A good wine makes all the difference. Taste as you go, and adjust the seasoning if needed.

Make It Your Own

Feel free to get creative and put your own spin on this classic:

  • Vegetarian Twist: Swap out the beef for hearty mushrooms like portobello or cremini, and use vegetable broth instead of beef.
  • Poultry Option: Switch the beef out for chicken thighs. They’re just as comforting and cook a bit quicker.
  • Root Veggie Addition: Try adding some parsnips or turnips along with the carrots for a little extra earthy sweetness.
  • Herbaceous Flair: Add rosemary or sage for an aromatic twist that complements the wine beautifully.

If you try this, I’d love to hear how it turns out — drop a comment or tag me! Sharing your kitchen adventures makes my day. Plus, who knows, your twist might just inspire someone else!

Related update: Classic Boeuf Bourguignon

Cauliflower Chickpea Stew | Made by Meaghan Moineau

It was one of those weeks where everything seemed a bit too chaotic, and the weather was veering into that crisp, cozy fall vibe that just screams for comfort food. I was rummaging through my pantry, trying to figure out what on earth I could throw together without needing a last-minute grocery run. There it was, a can of chickpeas and some cauliflower that had been patiently waiting for their moment to shine. Enter the Cauliflower Chickpea Stew: a dish that’s hearty, full of flavor, and surprisingly easy to whip up. It’s one of those recipes that feels like a warm hug after a long day, plus it’s packed with spices that make your kitchen smell absolutely divine. Definitely a go-to for those nights when you need something nourishing but not overwhelming to make.

Jump to Recipe

What You’ll Need

I love this recipe because it relies on pantry staples but still feels a bit exotic thanks to the spices. Chances are you already have most of this hanging around your kitchen.

  • Olive oil
  • Brown rice
  • Twice the amount of water to rice
  • Garlic cloves
  • Turmeric
  • Salt & pepper
  • Onion
  • Canned tomatoes
  • Tomato puree
  • Fresh cm ginger
  • Fresh chili
  • Cinnamon
  • Garam masala
  • Paprika
  • Sweet potatoes
  • Lemon (juice)
  • Additional water
  • Cauliflower
  • Canned chickpeas

How to Make Cauliflower Chickpea Stew

  1. Start by heating some olive oil in a large saucepan over high heat. You’ll want it shimmering but not smoking.
  2. Crush your garlic cloves and toss them in the pan with a generous pinch of turmeric, salt, and pepper. Fry for about a minute until everything is golden and fragrant.
  3. Add the brown rice, stirring occasionally. Let it fry for 4-5 minutes until the grains become slightly translucent.
  4. Pour in water (twice the amount of your rice) and bring it to a boil. Once boiling, reduce the heat to low-medium and let it simmer for 30 minutes. The rice should be tender and the water absorbed.
  5. While the rice does its thing, chop your onion, sweet potatoes, and cauliflower into bite-sized pieces. Grate the ginger and finely slice the chili.
  6. In another pot, heat more olive oil and sauté the onion until it’s soft and just starting to brown.
  7. Add the canned tomatoes, tomato puree, grated ginger, chili, cinnamon, garam masala, and paprika. Stir this mix for a couple of minutes until it’s well blended and aromatic.
  8. Throw in the sweet potatoes and stir them to coat in the sauce. Let them cook for about 5 minutes.
  9. Add the cauliflower and canned chickpeas, followed by a splash of water to help everything come together. Simmer for about 15 minutes until the veggies are tender but not mushy.
  10. Squeeze in the juice of a lemon, give it one last stir, and taste to adjust the seasoning as needed.
  11. Serve the stew over the cooked brown rice, and you’re ready to dig in!

Cook’s Notes

This stew is pretty forgiving, which is what makes it perfect for busy weeknights. A couple of things to keep in mind:

  • Be sure not to rush cooking the garlic and spices at the beginning. This step is key for building flavor.
  • Leftover stew keeps beautifully in the fridge for up to three days. Just reheat gently on the stove or microwave.
  • If you’re prepping ahead, you can chop the veggies and have them ready to go in the fridge—makes the actual cooking a breeze!
  • Remember that simmering times can vary depending on the size of your veggie chunks, so keep an eye on them to achieve that perfect tender texture.

Make It Your Own

This stew is a canvas for your creativity. Here are a few ways to switch it up:

  • Swap the sweet potatoes for butternut squash if that’s more your style.
  • Use coconut milk instead of water for a creamier, richer stew.
  • Add spinach or kale at the end for some extra greens.
  • Top with a dollop of Greek yogurt for a tangy finish.

If you try this, I’d love to hear how it turns out—drop a comment or tag me! Your feedback makes my day and helps others find their new favorite cozy meal. Happy cooking!

Related update: Cauliflower Chickpea Stew

Related update: Classic Boeuf Bourguignon

Grilled Lemongrass Shrimp | Made by Meaghan Moineau

It was one of those evenings where the day seemed to stretch on forever, and all I could think about was something light yet satisfying to cap it off. The sun was setting, casting a warm glow across my kitchen, and I had a sudden craving for something that felt like a mini tropical escape. That’s when the idea of making Grilled Lemongrass Shrimp hit me. It’s the kind of dish that’s deceptively impressive but doesn’t demand hours of your time—perfect for a weeknight treat. The lemongrass adds a citrusy zing, while the chili paste gives it just the right kick. With a short marinating time, it’s as close to instant gratification as you can get with a grill. Plus, there’s something about skewering shrimp that feels like a fun party trick, even if it’s just you and your family.

Jump to Recipe

What You’ll Need

Chances are you already have most of this tucked away in your pantry, aside from maybe the lemongrass. But trust me, it’s worth hunting down for that signature aromatic flavor.

  • Bamboo skewers soaked in water
  • Lemongrass – the star of the show!
  • Garlic
  • Soy sauce
  • Fish sauce
  • Ground chili paste
  • Pinch of salt
  • Sugar
  • Vegetable oil
  • Water
  • Raw shrimp – peeled and deveined

How to Make Grilled Lemongrass Shrimp

  1. Gather all your ingredients and a mixing bowl. Combine the chopped lemongrass, minced garlic, soy sauce, fish sauce, chili paste, salt, sugar, and a drizzle of vegetable oil in the bowl. Stir until it all comes together into a fragrant marinade.
  2. Add the shrimp into the bowl, making sure each one gets coated in the aromatic marinade. Let them marinate for 15 minutes—just enough time to sip on a cool drink and prep your grill.
  3. Thread the shrimp onto the soaked bamboo skewers. It’s all about that balance, so make sure the shrimp are spaced out evenly.
  4. Fire up your grill to moderate heat. If you’re using charcoal, wait until the coals are hot but no longer flaming. For a gas grill, a medium setting will do the trick.
  5. Place the skewers on the grill. The shrimp will cook quickly, so stay close. Turn them after about a minute or so, keeping an eye out for that beautiful pink hue and slightly charred edges. They’re done when they’re opaque and firm, about 2-3 minutes in total.

Cook’s Notes

If you’re like me and tend to get distracted, set a timer for the marinating and grilling time. You don’t want to overdo the shrimp—there’s nothing worse than rubbery seafood. If you don’t have a grill, a griddle pan on the stovetop works surprisingly well. Just make sure it’s hot enough to give you that lovely char. Leftovers, if you have any, are great cold in a salad or tossed into a noodle dish the next day.

Make It Your Own

  • Swap the shrimp for chicken or tofu if you’re looking for a different protein. Adjust cooking times accordingly—chicken will take a bit longer.
  • For a sweeter twist, add a splash of coconut milk to the marinade. It brings a creamy texture that pairs beautifully with the lemongrass.
  • Throw in some chopped cilantro or mint into the marinade for a fresh, herbal kick.
  • If you’re feeling brave, up the chili paste for more heat. Just have a cool drink at the ready!

If you try this, I’d love to hear how it turns out—drop a comment or tag me! It’s always fun to see how different kitchens bring their own flair to a dish. Enjoy your little slice of tropical heaven!

Related update: Grilled Lemongrass Shrimp

Earnings Lift Fuels 2026 Bull Market | Analysis by Brian Moineau

P/E Compression Is the 2026 Bull Market’s Tell

TL;DR

  • In the 2026 bull market, the wrinkle is P/E compression: the S&P 500’s forward P/E sits below where it began the year even as prices climbed, because earnings rose faster than prices [1].
  • FactSet pegs Q2 2026 S&P 500 earnings growth at 23.3%, with 10 of 11 sectors up, led by Energy, Information Technology, and Materials—fuel for prices without needing multiple expansion [2].
  • Math check: with the S&P 500 at 7,499 and a 20.4x forward P/E on June 30, the market discounts roughly $368 in next-12‑month EPS; if forward EPS lifts to $380–$400 by Q4 while the multiple merely holds 20x–21x, you still get 7,600–8,400 [3].

What the source said

Yahoo Finance reported that the 2026 rally left the S&P 500 cheaper on a forward basis than where it started the year, because the “E” outran the “P,” compressing the index’s forward P/E [1]. The article pointed to an “earnings boom,” with back‑to‑back 20%+ EPS growth quarters and a 23.3% estimate for Q2 2026 from FactSet [2]. Ten of eleven GICS sectors should post year‑over‑year profit gains, with Energy, Information Technology, and Materials leading the pack [2]. The takeaway: if Q2 beats again, analysts raise numbers into Q3 2026, while prices can climb even if the multiple stays flat [1][2].

Original analysis

  • Shown work on valuation math using June 30, 2026 inputs: S&P 500 = 7,499; forward P/E = 20.4x [3]. Implied next‑12‑month EPS = 7,499 ÷ 20.4 = $367.6, which rounds to $368 [3]. Scenario A: if forward EPS = $380 and P/E = 20.0x, price = 20.0 × 380 = 7,600 [3]. Scenario B: if forward EPS = $400 and P/E = 21.0x, price = 21.0 × 400 = 8,400 [3]. Risk case: if EPS = $380 and P/E compresses to 19.0x, price = 19.0 × 380 = 7,220, which shows downside even with higher earnings [3].

  • A 2×2 for 2H 2026:

    • High earnings growth + Flat/Down P/E (compression): steady grind higher; resembles mid‑cycle periods like 2004 when profit momentum outpaced sentiment.
    • High earnings growth + Up P/E: melt‑up risk; think of 2013 as a year when both earnings and multiples helped.
    • Low earnings growth + Flat/Up P/E: brittle rally; vulnerable to guidance cuts during October–November 2026 earnings season.
    • Low earnings growth + Down P/E: drawdown; typically follows negative revisions clusters across at least 6 of 11 sectors.
  • Contrarian read: leadership concentration in mega‑cap AI names such as Nvidia, Microsoft, and Alphabet could mean broad EPS beats help equal‑weight indices more than the cap‑weighted S&P 500 in 2H 2026, while pockets like Utilities and Real Estate remain rate‑sensitive even if Energy and Tech print strong results [2].

What others are missing

The market underestimates how 2026 AI data‑center buildouts at Microsoft (Quincy, Washington), Amazon (Hilliard, Ohio), and Alphabet (Council Bluffs, Iowa) flow through GAAP EPS via depreciation schedules that stretch 6–8 years, which can lift reported margins even before full cash returns materialize; that accounting timing could fortify EPS in Information Technology and Communication Services while masking capital‑intensity risk that shows up in free cash flow.

What to watch next

  1. By November 15, 2026, FactSet’s published S&P 500 forward 12‑month EPS will print at or above $390.
  2. On December 31, 2026, if the S&P 500 forward P/E closes between 19.5x and 21.5x, the index will finish between 7,600 and 8,400.
  3. By November 30, 2026, at least 8 of 11 GICS sectors will show positive year‑over‑year EPS growth for Q3 2026 in the FactSet scorecard.

Sources

  1. Yahoo Finance (malaysia.news.yahoo.com) — Summarizes 2026 P/E compression alongside price gains, framing why valuations look less stretched than headlines imply.
  2. FactSet Insight (insight.factset.com) — Provides the Q2 2026 23.3% S&P 500 EPS growth estimate and notes 10 of 11 sectors with positive YoY earnings, plus sector leadership.
  3. J.P. Morgan Asset Management, Guide to the Markets (am.jpmorgan.com) — Supplies the June 30, 2026 forward P/E of 20.4x and context for index‑level valuation math.


Related update: We recently published an article that expands on this topic: read the latest post.

Triple Chocolate Pumpkin Pie | Made by Meaghan Moineau

I was standing barefoot in my kitchen, staring down a can of pumpkin puree with the kind of resolve usually reserved for epic culinary battles. It was mid-October, and my house was awash with the smell of burning leaves from the neighborhood bonfires. I craved something cozy yet indulgent, and not just another pumpkin pie — no, this had to be something with a little extra pizzazz. Enter the Triple Chocolate Pumpkin Pie. It’s the perfect treat for when you need to impress without stress. It’s rich, a bit decadent, and just when everyone thinks they’ve guessed the flavor, the trio of chocolates takes them by surprise. Trust me, this isn’t your average pumpkin dessert.

Jump to Recipe

What You’ll Need

I bet you have most of these ingredients lounging in your pantry already. This pie brings together the familiar comforts of fall spices with the irresistible pull of chocolate.

  • Ground graham cracker crumbs – the base of our crust
  • Unsalted butter
  • Granulated sugar
  • Light-brown sugar
  • Coarse salt
  • Ground cinnamon
  • Bittersweet chocolate
  • Semisweet chocolate
  • Canned solid-pack pumpkin
  • Canned evaporated milk
  • Eggs
  • Cornstarch
  • Vanilla extract
  • Ground ginger
  • Ground nutmeg
  • Milk chocolate – for that final drizzle

How to Make Triple Chocolate Pumpkin Pie

  1. Preheat your oven to 350 degrees. In a bowl, mix together the graham cracker crumbs, butter, sugars, salt, and cinnamon until it resembles wet sand.
  2. Press this crumbly mixture firmly into the bottom and up the sides of a deep, 9 1/2-inch pie dish. It should feel like you’re building a sandy fortress.
  3. Bake the crust until it’s firm, about 8 to 10 minutes. Once done, take it out and immediately sprinkle the bittersweet chocolate over the bottom. Pop it back in the oven for just a minute more to melt.
  4. Spread the melted chocolate in a thin layer along the bottom and up the sides. Let this cool on a wire rack while you move on to the filling.
  5. Reduce the oven temperature to 325 degrees. Set up a double boiler and melt the semisweet chocolate with butter, stirring until smooth and glossy.
  6. In a separate bowl, mix together the pumpkin, evaporated milk, brown sugar, eggs, cornstarch, vanilla, salt, cinnamon, ginger, and nutmeg. This is your spicy pumpkin concoction.
  7. Whisk about a third of the pumpkin mix into the melted chocolate. Once smooth, whisk in the remaining pumpkin mixture until fully combined.
  8. Place your pie dish on a rimmed baking sheet, then pour the pumpkin-chocolate mix into the crust. The anticipation should be building right about now.
  9. Bake until the center is set but still slightly wobbly, roughly 55 to 60 minutes. Let it cool on a wire rack, then refrigerate for at least 8 hours or overnight for best results.
  10. Before serving, melt the milk chocolate and drizzle it over the chilled pie, creating tempting ribbons of sweetness. Serve immediately and watch the magic unfold.

Cook’s Notes

This pie is a breeze, but here are a few thoughts to keep in mind. When pressing the crust into the pie dish, make sure you really pack it down to avoid crumbling later. Letting the pie chill overnight isn’t just a suggestion — it’s a non-negotiable. The flavors deepen, and the texture becomes perfectly set. If your pie cracks a little, don’t sweat it. That chocolate drizzle will cover a multitude of sins, plus a little imperfection just adds to the homemade charm.

Make It Your Own

Here are a few twists to make this pie uniquely yours:

  • Swap the graham cracker crumbs for gingersnaps to add an extra spicy kick.
  • For a nutty twist, add a thin layer of chopped pecans on top of the melted chocolate layer in the crust.
  • Replace semisweet chocolate with dark chocolate for a more intense cocoa hit.
  • Sprinkle a bit of sea salt over the milk chocolate drizzle for a sweet-salty combo.

If you try this, I’d love to hear how it turns out — drop a comment or tag me! I’m already dreaming about that first bite.

Related update: Triple Chocolate Pumpkin Pie

Related update: Gluten-Free Pressed Lemon Butter Cookies

Coconut Macaroons With Chocolate Drizzle | Made by Meaghan Moineau

It was one of those dreary Tuesday afternoons — the kind that has you reaching for something sweet and comforting. And there I was, standing in my kitchen, craving something indulgent yet simple, when I remembered the half-used bag of sweetened coconut tucked away in the pantry. Enter: Coconut Macaroons with Chocolate Drizzle. This recipe is a delightful blend of chewy coconut goodness and rich chocolate, and the best part? You can whip it up with just a handful of ingredients. Perfect for last-minute cravings or impressing guests without breaking a sweat.

Jump to Recipe

What You’ll Need

Honestly, you probably have most of these ingredients lounging around your kitchen, just waiting to be transformed into something magical.

  • 1 cup of flour
  • 3 cups of sweetened coconut
  • 1/2 teaspoon of salt
  • 1 teaspoon of vanilla extract
  • 1 can of sweetened condensed milk
  • Optional: melted semi-sweet chocolate for drizzling

How to Make Coconut Macaroons With Chocolate Drizzle

  1. First, preheat your oven to 350°F (175°C). This is the moment to get your anticipation—and your oven—nice and toasty.
  2. In a large bowl, toss together the flour, coconut, and salt. Get in there with a spoon and make sure everything is mingling well.
  3. In a smaller bowl, mix the vanilla with the can of sweetened condensed milk. This mixture is your sweet elixir; make sure it’s smooth and unified.
  4. Pour the wet mixture into the dry ingredients. Stir together with a wooden spoon or your hands until you have a thick, sticky batter. Resist the urge to use a mixer unless it’s on the lowest speed—trust me on this, you don’t want a coconut explosion.
  5. Line your baking sheets with parchment paper. This will be your best friend for easy cleanup and perfect macaroons.
  6. Using a big spoon or an ice cream scooper, scoop generous mounds of batter onto the prepared baking sheets. Aim for consistency in size so they bake evenly.
  7. Bake in your preheated oven for about 20 minutes, keeping a close eye. You’re looking for that beautiful golden hue and a toasty coconut aroma.
  8. Once out of the oven, let them cool a bit. Then, get artsy with your melted chocolate drizzle. Alternatively, dip them halfway in chocolate for a more decadent treat.

Cook’s Notes

These macaroons are all about that rich, chewy texture with a hint of crispiness on the edges. Make sure not to over-mix your batter; just a few good turns to incorporate everything will do. If you make them ahead, they store well in an airtight container for up to a week—though I bet they’ll disappear much sooner. For freezing, allow them to cool completely and store in layers separated by parchment paper.

Make It Your Own

  • Chocolate Lovers: Double up on the chocolate by mixing mini chocolate chips into the batter before baking.
  • Nuts for Nuts: Add chopped almonds or macadamia nuts for a delightful crunch.
  • Citrus Twist: Add a teaspoon of orange or lemon zest to the wet mixture for a zesty surprise.
  • Spiced Up: Sprinkle a dash of cinnamon or nutmeg into the dry mix for a warm, spiced flavor.

If you try this, I’d love to hear how it turns out — drop a comment or tag me! Whether you stick to the classic or put your twist on it, these macaroons are sure to hit the sweet spot.

Related update: Coconut Macaroons With Chocolate Drizzle

Related update: Triple Chocolate Pumpkin Pie

Related update: Grilled Lemongrass Shrimp

Traditional Banana Bread | Made by Meaghan Moineau

There’s something about the smell of banana bread baking that just instantly transports you to a place of comfort. It was a dreary Tuesday evening, and I was staring at a trio of overripe bananas languishing in my fruit bowl, a scene I suspect is familiar to many. These bananas had been begging to be transformed into something magical, and I knew just the recipe to do it. This traditional banana bread is like a warm hug in edible form—simple, reliable, and incredibly satisfying. Whether you’re trying to impress a last-minute guest or just want to make the most of those spotty bananas, this is the recipe you need. Plus, it’s almost guaranteed you have everything you need already in your pantry.

Jump to Recipe

What You’ll Need

Chances are you already have most of this sitting around your kitchen. We’re keeping it classic and straightforward, letting those bananas truly shine.

  • Granulated sugar
  • Unsalted butter, softened
  • 2 large eggs
  • 3 ripe bananas
  • 2 tablespoons milk
  • 1 teaspoon ground cinnamon
  • 2 cups flour
  • 1 teaspoon baking powder
  • 1/2 teaspoon baking soda
  • 1/2 teaspoon salt

How to Make Traditional Banana Bread

  1. Preheat your oven to 325 degrees F, and butter a 9x5x3-inch loaf pan. This is where your banana bread will take shape, so make sure it’s nicely coated to prevent sticking.
  2. Cream the sugar and butter in a large mixing bowl. You’re looking for a fluffy texture that feels as light as a cloud.
  3. Crack the eggs into the sugar mixture, one by one, beating well after each addition. This helps incorporate air, making your bread rise beautifully.
  4. In a small bowl, mash the bananas with a fork until they’re smooth but with a few small chunks remaining. Stir in the milk and cinnamon, giving your mixture that first hint of the aroma to come.
  5. In another medium-sized bowl, mix together the flour, baking powder, baking soda, and salt. It’s like setting the stage for a perfect bake.
  6. Fold the banana mixture into the butter mixture, stirring just until they’re happily combined.
  7. Add the dry ingredients to the banana mixture, stirring everything just until no flour pockets remain. Be careful not to overmix; we want tender, not tough.
  8. Pour the luscious batter into the prepared loaf pan. Level it out and pop it into the oven.
  9. Bake for about 1 hour, or until a toothpick inserted into the center comes out clean. The top should be golden and your kitchen will smell absolutely divine.
  10. Allow the bread to cool on a rack for at least 15 minutes before slicing. The waiting is hard, but worth it to avoid a crumbly mess when slicing.

Cook’s Notes

Banana bread is pretty forgiving, but a few pointers can make all the difference. Make sure your bananas are really ripe—almost too ripe to eat. They should be speckled brown and slightly mushy. This recipe works best with unsalted butter, but if all you have is salted, just reduce the salt a touch. If you’re baking ahead, this bread keeps well wrapped in foil or an airtight container for up to three days. You can also freeze slices individually for up to a month; just warm them in the oven before serving for that fresh-baked goodness.

Make It Your Own

Here are a few variations to consider if you’re feeling adventurous or just want to use up what you have:

  • Swap the granulated sugar for brown sugar for a deeper, richer flavor.
  • Fold in a handful of chocolate chips or chopped nuts right before baking for added texture and flavor.
  • Add a teaspoon of vanilla extract when you add the eggs for a subtle twist that enhances the banana flavor.
  • Replace the milk with Greek yogurt for a tangy touch and an extra moist crumb.

If you try this, I’d love to hear how it turns out—drop a comment or tag me! Whether you’re a seasoned baker or a newbie, this banana bread is sure to bring a bit of joy to your day. Happy baking!

Related update: Traditional Banana Bread

Related update: Coconut Macaroons With Chocolate Drizzle

Related update: Cheddar Chile Beer Bread

Flemings’ 9:1 Vision Powers Hawks Despite | Analysis by Brian Moineau

TL;DR

  • The Atlanta Hawks’ Summer League OT loss to the Utah Jazz in Salt Lake City featured highlights, but the substance was Kingston Flemings’ decision-making: 9 assists, 1 turnover, and 4 steals despite 4-for-16 shooting. [3]
  • Utah’s No. 2 pick Darryn Peterson scored 28 in his debut at the Huntsman Center on July 4, 2026, yet Atlanta still manufactured a late lead while shooting 38.7% from the field. That hints Flemings’ playmaking already functions as pro scaffolding. [2][3][4]
  • With the NBA testing one–free-throw mechanics for most of regulation and a two-minute OT, processing speed beats polish in July; Flemings’ 9:1 assist-to-turnover line is the real Hawks takeaway. [5][6][3]

What the source said

Peachtree Hoops recapped Atlanta’s July 4, 2026 opener against Utah at the Huntsman Center in Salt Lake City: a choppy first half with 19 combined turnovers, a third-quarter burst from No. 8 pick Kingston Flemings, and a frantic finish that reached a two-minute OT. The piece spotlights Darryn Peterson’s immediate 28-point impact for the Jazz, Asa Newell’s flashes for Atlanta, and Flemings’ late-game sequence—a steal and a corner jumper ruled a three, then changed to a two on review. The Hawks briefly led in the final minute before falling by one in overtime, with first-look contributions from Zuby Ejiofor and Henri Veesaar also noted. [1]

Why it matters

For evaluators like GM Landry Fields and Quin Snyder’s staff, Summer League offers early signals on what scales to NBA spacing and tempo. A 14–9–4 line with one turnover in 27:49 from Flemings points to a guard whose floor is supported by reads, not makes, which stabilizes minutes around Trae Young whether Flemings starts or organizes the second unit. [3]

For the league office, the July lab matters too. With the one–free-throw experiment and a two-minute OT compressing cadence, prospects who process faster win more possessions under pressure. That favors an undersized creator like Flemings in 2026, because anticipation, timing, and clean deliveries travel even when jumpers vary. [5][6]

Original analysis

Atlanta Hawks Summer League overtime loss: signal vs. noise

The official box shows Utah 103, Atlanta 102 in OT on July 4, 2026 at the Huntsman Center, not 102–101 as some early recaps had it. That single point reframes the debut: Flemings didn’t “shine” because he scored; he drove half-court offense, created four steals, and nearly flipped the result in a compressed, experimental environment. [3][2]

  • Back-of-the-envelope calculation 1: points created

    • Flemings scored 14 and logged 9 assists. If we baseline each assist at 2 points, that’s 18 assisted points: 14 + 18 = 32. RealGM lists 13 Atlanta threes; if three of his dimes produced threes, a mixed estimate lands around 35: 14 + (6×2) + (3×3) = 35. That’s roughly one-third of Atlanta’s 102 points touched. [3]
    • Signal: He produced ~35 points while committing 1 turnover, which is scalable usage under NBA pace. [3]
  • Back-of-the-envelope calculation 2: distribution density

    • Per-36 assists: 9 in 27.82 minutes → 9 × (36/27.82) ≈ 11.6.
    • Assist-to-turnover: 9:1 = 9.0.
    • Under one–free-throw timing and a two-minute OT, mistake tolerance shrinks; a 9:1 line outweighs 4-for-16 shooting noise in this rules set. [3][5][6]
  • Historical analogue (2018): the Trae Young Summer League panic

    • Young opened Summer League 4-for-20 (1-for-11 from three) in 2018, then stabilized days later with volume and feel intact. The lesson: July accuracy lies; processing scales. Flemings’ 2026 debut fits that template for Atlanta. [7]
  • A 2×2 typology: Summer League skill signals

    • Translatable + Immediate: On-ball reads, two-man timing, advantage creation. Flemings logged 9 AST, 1 TOV, and 4 STL with clean PnR deliveries to Zuby Ejiofor. [1][3]
    • Translatable + Delayed: Paint finishing vs. NBA length. Flemings went 4–16, but his passing forces help that should open layups by December 2026. [3]
    • Context-Dependent + Immediate: Heat-check shooting spurts that swing quarters without predicting NBA stability; Asa Newell hit timely shots and ran lanes in space. [1]
    • Context-Dependent + Delayed: Wing flashes without star gravity; Henri Veesaar pick-and-pop touches matter less until surrounded by NBA creators. [1]

Consensus after night one says Peterson owned the headline with 28, and Atlanta’s No. 8 pick needs his jumper to fall. The contrarian read: the Hawks already learned the only July lesson that matters about a small creator—Flemings can win possessions with his brain, which scales next to veterans who catch, cut, and space. [2][3][4]

Two tactical notes from this game with forward value:

  • The Flemings–Ejiofor pick-and-roll worked on first contact. That’s a preseason-ready “bench stabilizer” action: empty-corner PnR, short-roll to Ejiofor, spray to a weakside shooter like Asa Newell lifting from the slot. You’re banking on reads, not hero shots. [1][3]

  • Flemings’ four steals show anticipation and gap timing, not random bounces. In a two-minute OT where one possession flips the outcome, that anticipation is currency for a rookie guard. [3][5]

Rules context matters in 2026. Summer League’s one–free-throw rule (worth two or three points) applies until the last two minutes of the fourth, with standard free throws in those final two minutes and in all of OT; OT is two minutes. That compression raises the premium on early-clock reads over late-clock isolations, which aligns with Flemings’ strengths. [6][5]

What others are missing

Most coverage celebrates Peterson’s 28 and the final-minute drama. The neglected angle is how the one–free-throw framework and two-minute OT reshuffle evaluation toward possession-winning micro-skills: screen manipulation, pre-rotation reads, and events like steals or deflections that flip expected value. Flemings posted a 9:1 assist-to-turnover line and 4 steals in 27:49 under those constraints, matching the “travels on command” profile front offices seek in a complementary guard. [3][6][5]

What to watch next

  1. By July 7, 2026, Flemings finishes the Salt Lake City slate with an assist-to-turnover ratio of at least 3.5 across all SLC games. [2]
  2. By July 19, 2026 (Las Vegas Summer League window), Flemings records at least one game with 3 or more made threes as defenses go under more ball screens. [8]
  3. By July 19, 2026, Peterson posts a 30-plus-point Summer League outing as Utah expands his on-ball usage after a 28-point debut. [2][4][8]

My take

I’m buying Atlanta’s takeaway and fading the misses. If I’m the Hawks in 2026, I lock Flemings into second-unit organizer minutes on Opening Night and give him real PnR reps with a hands-y roller like Ejiofor. The jumper can lag; the reads can’t. A 4-for-16 debut stapled to 9 dimes, 4 steals, and late-clock poise under the one–free-throw rules screams “keep him on the ball in Vegas, surround him with shooters, and let volume normalize percentage.” The Hawks didn’t lose a prospect on July 4—they found his identity. [3][6][5]

Sources

  1. Flemings shines in overtime loss as Hawks lose 102-101 in Summer League debut — Peachtree Hoops (https://www.peachtreehoops.com/atlanta-hawks-summer-league/72161/flemings-kingston-atlanta-hawks-summer-league-debut-final-utah-jazz-darryn-peterson) — Possession notes from Atlanta’s opener, including Flemings’ late steal and the reviewed corner jumper.
  2. 2026 Salt Lake City Summer League: Peterson leads Jazz over Hawks — NBA.com (https://www.nba.com/news/2026-salt-lake-city-summer-league-hawks-jazz) — Official recap with final score (103–102 OT), venue, and key stat lines.
  3. Jul 4, 2026 — Atlanta Hawks 102 at Utah Jazz 103 (Box Score) — RealGM (https://basketball.realgm.com/nba/boxscore/2026-07-04/Atlanta-at-Utah/524604) — Box score: Flemings 14-9-4 in 27:49 with 1 TOV; team shooting splits and OT scoring.
  4. Utah Jazz rookie Darryn Peterson shines in Summer League debut, scores 28 points — The Salt Lake Tribune (https://www.sltrib.com/sports/jazz/2026/07/04/utah-jazz-rookie-darryn-peterson/) — Local confirmation of Peterson’s 28 and shot profile detail.
  5. NBA 2K26 Summer League Format Summary & Playing Rules — NBA.com (https://www.nba.com/news/2025-summer-league-format) — Confirms two-minute initial OT and Summer League-specific mechanics.
  6. NBA Summer League to use ‘1 free throw’ rule, “connected basketball” — NBA.com (https://www.nba.com/news/nba-summer-league-free-throw-connected-basketball) — Details when the one–free-throw experiment applies and when it reverts to standard.
  7. Hawks’ Trae Young: Struggles in Summer League debut — CBS Sports (https://www.cbssports.com/fantasy/basketball/news/hawks-trae-young-struggles-in-summer-league-debut/) — 2018 analogue: Young’s 4-for-20 opener and why early July accuracy misleads.
  8. NBA unveils 2026 NBA Summer League Schedule — NBA.com (https://www.nba.com/news/2026-nba-summer-league-schedule) — Las Vegas dates (July 9–19, 2026) to anchor prediction windows.


Related update: We recently published an article that expands on this topic: read the latest post.


Related update: We recently published an article that expands on this topic: read the latest post.