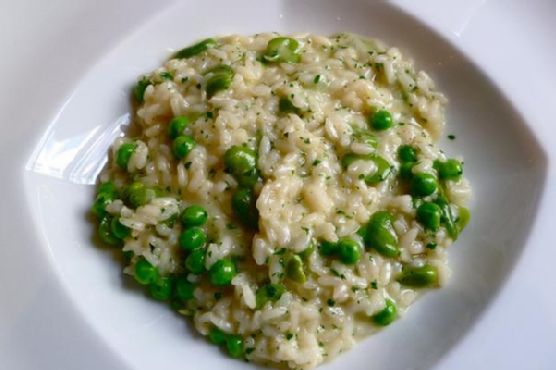
It was one of those unpredictable Tuesdays when everything at work ran late, and by the time I got home, I was craving something comforting yet sophisticated. My pantry didn’t have much, but the bare essentials were there—arborio rice, a bag of frozen peas, and some chicken stock. You know that feeling when you’re just too tired for anything elaborate, yet you want something that feels like a warm hug on your plate? That’s when I knew a creamy risotto with fresh peas would be perfect. This dish has that magical ability to elevate your everyday ingredients into something kinda fancy, without the three-hour prep time. Let’s dive in, shall we?
Jump to Recipe
What You’ll Need
I love how risotto makes you feel like a chef without needing a ton of exotic ingredients. Chances are you already have most of this—except for maybe the arborio rice if you’re not a risotto regular.
- 4 cups of HOT chicken stock
- 2 tablespoons of butter
- 2 tablespoons of extra virgin olive oil
- 1 chopped onion
- 2 minced garlic cloves
- 1 cup of arborio rice
- 1/2 cup of dry white wine
- 1 cup of peas (fresh or thawed frozen)
- 1/2 cup of grated parmesan
- 1 bay leaf
- Salt and pepper to taste
How to Make Risotto With Fresh Peas
- Melt the butter in a heavy large saucepan over medium heat. Add the olive oil, bay leaf, and onions. Season with salt and pepper. Cook until the onions are translucent, filling your kitchen with that irresistible oniony aroma, around 5 minutes.
- Stir in the minced garlic, letting it sauté until tender, roughly 3 more minutes. You’ll know it’s perfect when the garlic starts to mellow and sweeten.
- Add the arborio rice to the pan, stirring it through the buttery onions and garlic. Toast the rice until the grains are glistening, about 2 minutes. It helps develop that nutty flavor we all love.
- Pour in the dry white wine and let it sizzle and cook until the liquid is completely absorbed, stirring often, about 2 minutes. This adds a subtle depth and aroma that’s just dreamy.
- Now, slowly add the hot chicken broth, one cup at a time. Make sure the liquid is absorbed before adding more, stirring often. It’s a bit like babysitting, but it’s worth it. This whole process takes about 28 minutes over medium-low heat. Each addition should take roughly 3 minutes.
- When the rice is tender and the texture is creamy, stir in the peas and parmesan. Watch as the cheese melts into the risotto, making it oozy and silky. Season with more salt and pepper to your liking.
- Cook until the mixture has absorbed all the liquid and has doubled in size. Let it sit for a minute before diving in; I promise it’s worth the wait!
Cook’s Notes
This risotto is pretty forgiving, but here are a few tips to make it foolproof. Always have your chicken stock hot; this helps the rice cook evenly and prevents it from becoming mushy. Got leftover risotto? Lucky you! It can be transformed into risotto cakes the next day. Just form the cold risotto into patties, dust them with flour, and fry them in a little olive oil until crispy and golden. Also, avoid using regular rice; it won’t give you that creamy texture that arborio is famous for.
Make It Your Own
Everyone’s taste is a bit different, and that’s what makes cooking so fun! Here are some ways to play around with this risotto recipe:
- Swap the peas for crispy prosciutto for a salty, meaty twist.
- Replace the parmesan with a tangy goat cheese for something wonderfully creamy and unexpected.
- Add a handful of sautéed mushrooms for an earthy depth that complements the risotto’s creaminess.
- Use vegetable stock instead to make it vegetarian-friendly without losing flavor.
If you try this, I’d love to hear how it turns out — drop a comment or tag me! There’s a special joy in seeing others enjoy a dish that’s become a staple in my kitchen. Happy cooking!
Goes Well With
If you want to round out the meal, here’s what I’d pair it with over on meaghanmoineau.com:
Related update: Risotto With Fresh Peas
Related update: BBQ Beef Brisket
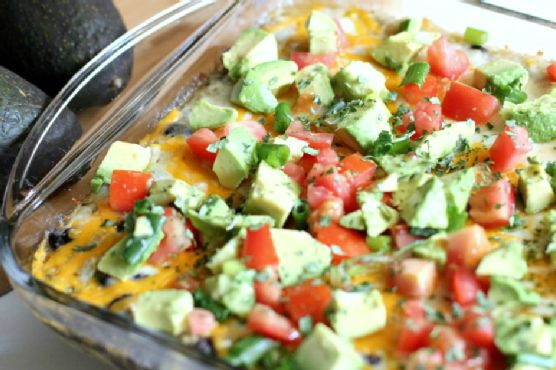
Picture this: It’s a random Tuesday night, and I’m standing in my kitchen, staring blankly at the fridge, wondering how to turn a motley assortment of leftovers and pantry staples into something that doesn’t scream “desperation dinner.” That’s when inspiration struck, as I spied a lonely can of verde enchilada sauce next to last night’s cooked quinoa. What followed was a happy accident of flavors and textures, culminating in my new favorite go-to comfort dish: Cheesy Chicken Enchilada Quinoa Casserole. It’s creamy, cheesy, and bursting with zesty flavors — perfect for those nights when you need something easy but crave-worthy. You’ll be shocked at how quickly it comes together and how it leaves the whole family asking for seconds. Or thirds.
Jump to Recipe
What You’ll Need
This recipe is a pantry hero! If you’ve got a well-stocked spice rack and some leftover chicken, you’re halfway there.
- Cooked quinoa – the fluffy base of this casserole
- Cooked skinless boneless shredded chicken breast – feel free to use rotisserie chicken for a shortcut
- Canned verde enchilada sauce – the tangy key player
- Shredded cheese – use your favorite melting cheese
- Canned tomatoes with chilis
- Canned black beans
- Canned sweet corn
- Salt
- Black pepper
- White pepper
- Chili powder
- Cumin
- Fresh cilantro
- Green onion tops
- Roma tomato
- Avocado
How to Make Cheesy Chicken Enchilada Quinoa Casserole
- Preheat your oven to 350°F and grab an 8×8 inch baking dish. Make sure it’s ready for action.
- Cook the quinoa according to the package instructions. If you haven’t shredded your chicken yet, now’s the time to boil and shred it too.
- In a medium-sized mixing bowl, combine 2 tablespoons of chopped cilantro, 1 cup of shredded cheese, cooked quinoa, canned tomatoes with chilis, black beans, half a can of sweet corn, verde enchilada sauce, cumin, chili powder, white pepper, black pepper, and salt to taste. Stir everything together until well mixed and harmonious.
- Pour your well-mixed concoction into the prepared baking dish, spreading it out evenly. Top with the remaining cup of shredded cheese, covering the surface generously.
- Bake in the preheated oven for about 15 minutes, or until the cheese is delightfully melty and bubbling at the edges. The smell will be irresistible at this point!
- Remove from the oven and let it cool slightly for about 5 minutes. This helps everything set a bit so you can serve neat slices.
- Top your casserole with freshly chopped Roma tomato, avocado chunks, green onion tops, and the remaining 2 teaspoons of cilantro. Serve immediately and bask in the glory of your culinary creation!
Cook’s Notes
This dish is pretty forgiving, but here are a few tips to ensure success. If your quinoa is a bit on the wet side, let it sit in a sieve for a few minutes to drain excess moisture — nobody likes a soggy casserole! When adding salt, remember that the canned ingredients and cheese already bring their own saltiness, so taste as you go. Store any leftovers in an airtight container in the fridge for up to 3 days. It reheats beautifully in the microwave or oven. If you’re planning to make this ahead, assemble everything but wait to add the cheese topping until you’re ready to bake.
Make It Your Own
- Swap the chicken for crispy tofu to make it vegetarian. Just cube the tofu, toss it in a bit of cornstarch, and sauté until golden.
- Add some heat by including a diced jalapeño or a sprinkle of crushed red pepper flakes into the mix.
- If you’re not a fan of cilantro, try using fresh parsley or chives for a milder pop of green.
- More veggies? Toss in some sautéed bell peppers or zucchini to make it even more wholesome.
If you try this, I’d love to hear how it turns out — drop a comment or tag me! This casserole was a happy accident in my kitchen, and I’m excited to see it work its magic in yours. Enjoy every cheesy, tangy bite! 🥑🌿🍅
Goes Well With
If you want to round out the meal, here’s what I’d pair it with over on meaghanmoineau.com:
Related update: Cheesy Chicken Enchilada Quinoa Casserole
Related update: Risotto With Fresh Peas

So, picture this: it’s a drizzly Tuesday evening, the kind that makes you want to curl up with something sweet and comforting. I’m rifling through my pantry, hoping for inspiration, when I spot a bag of walnuts and some dried cranberries tucked behind the flour. Cue the lightbulb moment: Polish Rugelach! This delightful pastry is just the pick-me-up needed—a mix of rich, buttery dough and a warm, spiced filling that feels like a hug for your taste buds. It’s the perfect activity to turn a dreary day into a cozy baking session. Plus, it’s easier than it sounds, trust me. By the end, your kitchen will smell like a slice of heaven.
Jump to Recipe
What You’ll Need
This ingredient list is pretty forgiving—nothing too fancy here. You probably have most of it lounging in your pantry already.
- All purpose flour
- Cocoa powder
- Cream cheese
- Dried cranberries
- Dried raisins
- Ground cinnamon
- Nutmeg
- Sugar
- Unsalted butter
- Walnuts
How to Make Polish Rugelach
- Start by making the dough. In a large bowl, beat the unsalted butter and cream cheese together until the mixture turns light and fluffy—it’ll look like the soft inside of a cloud.
- Add sugar slowly, continuing to beat until everything is well combined and fluffy.
- Gradually mix in the all purpose flour and cocoa powder until the dough starts to come together. It should be smooth but not sticky.
- Divide the dough into quarters, wrap each in plastic, and chill in the fridge for at least an hour. You’re aiming for a dough that’s firm enough to roll out easily.
- Preheat your oven to 350°F (175°C) and line a baking sheet with parchment paper.
- For the filling, mix together the dried cranberries, raisins, walnuts, ground cinnamon, nutmeg, and a little extra sugar for sweetness.
- Roll out each dough quarter into a circle, about 1/8 inch thick. Spread a thin layer of the filling over the dough, pressing it gently to adhere.
- Cut the dough into 8 wedges, like you’re slicing a pizza. Roll each wedge from the wide end to the tip, forming a crescent shape.
- Place the rugelach on the prepared baking sheet, point side down, and bake for 20-25 minutes, until they’re golden and the fillings are bubbling and fragrant.
- Let them cool slightly (but not all the way—you’ll want to experience that warm gooey magic), and then enjoy!
Cook’s Notes
Don’t be intimidated by the chilling step! It makes rolling the dough so much easier and prevents the rugelach from spreading too much in the oven. If you’re in a rush, you can pop the dough in the freezer for about 20 minutes, just enough to firm it up.
- Store your rugelach in an airtight container at room temperature for up to a week. I doubt they’ll last that long, though!
- If you’re planning ahead, you can prepare the dough a day in advance. Just keep it wrapped tightly in the fridge until you’re ready to fill and bake.
- Common mistake: overstuffing the rugelach. A little filling goes a long way, so don’t feel like you have to use all of it if it starts overflowing.
Make It Your Own
- Swap the walnuts for pecans if you’re feeling nutty.
- Try dried apricots or cherries in place of the cranberries for a bit of a tangy twist.
- For a chocolatey version, add some mini chocolate chips to the filling mix. Chocolate lovers, rejoice!
- Use some orange zest in the filling for a fresh, citrusy punch.
If you give this Polish Rugelach a try, I’d love to hear how it turns out for you! Drop a comment below or tag me in your baking adventures on social media. Let’s keep those dreary days at bay, one pastry at a time!
Goes Well With
If you want to round out the meal, here’s what I’d pair it with over on meaghanmoineau.com:
Related update: Polish Rugelach
Related update: Mini-Cherry Pies
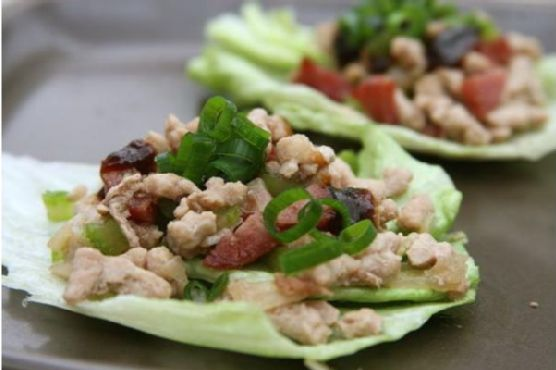
It was one of those Tuesdays when the fridge was filled with random odds and ends, and dinner had to be ready in less than 30 minutes. I was craving something fresh but filling, with just enough spice to make my taste buds dance. Enter the Mexican Chicken Lettuce Wraps. This dish is a hero on busy weeknights and a favorite for when I want to impress without the fuss. It’s quick yet satisfying, delivering a punch of flavor without weighing you down. Perfect for when you want a hearty meal that still feels light and vibrant. Plus, anything you can eat with your hands feels a little more fun, right?
Jump to Recipe
What You’ll Need
This ingredient list is beautifully uncomplicated. You might already have most of these at home! The magic is in the marinade and the fresh, crunchy lettuce that holds everything together.
- Chicken breast
- Lime juice – fresh is best for that zingy taste
- Ground cumin
- Ground chile powder
- Seasoned salt
- Garlic powder
- Olive oil
- Canned black beans – drained and rinsed
- Tomato
- Onion
- Red sweet bell pepper
- Avocado – the creamy topper
- Boston lettuce leaves – for wrapping it all up
How to Make Mexican Chicken Lettuce Wraps
- Start by giving your chicken breast a quick bath in a marinade of lime juice, ground cumin, ground chile powder, seasoned salt, garlic powder, and olive oil. Let it soak for about 30 minutes. This is where all that delightful flavor starts.
- Heat a skillet over medium. Once it’s nice and warm, place your marinated chicken in the skillet. Cook until the chicken is golden brown and cooked through, the scent alone is worth the effort.
- While the chicken is cooking, in a separate bowl, mix your canned black beans, diced tomato, chopped onion, and red sweet bell pepper. This adds a fresh crunch and a pop of color.
- Once the chicken is ready, remove it from the skillet and chop it into bite-sized pieces. Add it to your bean and veggie mix. Give everything a good stir and taste; adjust the seasoning if it needs a little more kick.
- When you’re ready to serve, slice that avocado into thin, luscious slices. Fill each Boston lettuce leaf with the chicken mixture and top with a slice of avocado.
Cook’s Notes
A few things I’ve learned along the way:
– If you’re in a rush, you can marinate the chicken for less time, but try to give it at least 15 minutes to soak up the flavors.
– Taste as you go! You can always add more spice but can’t easily take it away, so adjust that seasoning thoughtfully.
– These wraps are freshest on the day they’re made, but if you have leftovers, store the filling and lettuce separately to prevent sogginess. The filling will last in the fridge for two to three days.
Make It Your Own
Here are some variations if you feel like switching things up:
- Swap the chicken for crispy tofu to make it vegetarian. Just marinate and cook the tofu the same way.
- If you love heat, add some sliced jalapeños to the veggie mix or sprinkle some cayenne in the marinade.
- Try using ground turkey instead of chicken for a different protein profile.
- For an extra layer of flavor, add a sprinkle of fresh cilantro or a dollop of sour cream on top before serving.
And that’s it! If you try this, I’d love to hear how it turns out — drop a comment or tag me! Enjoy those lettuce wraps and the satisfied smiles they’ll bring.
Goes Well With
If you want to round out the meal, here’s what I’d pair it with over on meaghanmoineau.com:
Related update: Mexican Chicken Lettuce Wraps
Related update: Cheesy Chicken Enchilada Quinoa Casserole
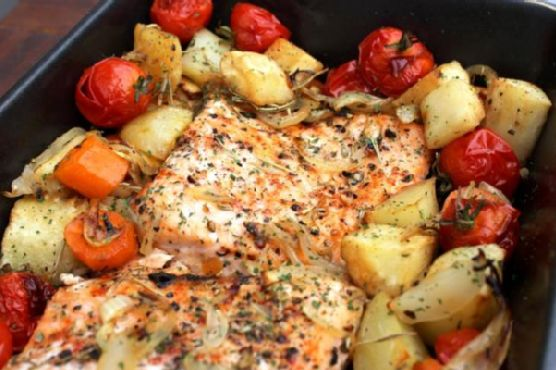
Picture this: it’s a chilly Tuesday evening, and I’m rummaging through my fridge, trying to figure out dinner with what’s left from the weekend. I spot a couple of salmon fillets buried under a mountain of veggies that are begging to be used before they decide to go rogue. Perfect! Salmon with roasted vegetables it is. This dish is my go-to when I need something quick, satisfying, and a little bit fancy without the fuss. The combination of herby, lemony salmon nestled among tender, caramelized veggies is comfort food with a splash of elegance. Plus, it’s a one-pan wonder that leaves me free to pour a glass of wine and relax while the oven does the magic.
Jump to Recipe
What You’ll Need
The great thing about this recipe is it requires no special trips to the grocery store. Chances are, you already have most of these in your kitchen:
- 2 large potatoes
- 2 parsnips
- 2 large carrots
- 1 large onion
- 1 cup cherry tomatoes
- 2 fillets of salmon
- 3 tablespoons olive oil
- Juice of 1 lemon
- Salt and freshly ground black pepper
- Fresh rosemary and thyme
How to Make Salmon with Roasted Vegetables
- First things first, season the salmon fillets with a sprinkle of salt, a dash of pepper, and just a tiny pinch of paprika for that smoky kick. Set them aside while you prep the veggies.
- Preheat your oven to a toasty 200°C (about 400°F). You want it nice and hot so those veggies get that delicious caramelization going.
- Grab your potatoes, parsnips, and carrots. Roughly dice them into bite-sized chunks and toss them into a sturdy roasting tray.
- Drizzle the veggies with olive oil, then season generously with salt and pepper. Use your hands to mix everything until the veggies are well coated. Pop them in the oven and let them roast for about 15 minutes.
- Once the initial roasting is done, add the onions to the tray. Give everything a good stir, and roast for another 10-15 minutes until the veggies start getting golden and toasty on the edges.
- Carefully nestle the salmon fillets and cherry tomatoes between the veggies. Drizzle the lemon juice over everything and sprinkle with the fragrant rosemary and thyme. Season lightly with salt and pepper.
- Return the tray to the oven and roast for an additional 10-15 minutes. You’ll know it’s done when the salmon is tender, and the veggies are cooked through with edges that are perfectly caramelized.
- Scoop everything onto a plate and serve it up with a crisp green salad if you’re feeling virtuous. Enjoy!
Cook’s Notes
Let’s talk about the little things that make a big difference. When it comes to chopping the veggies, aim for uniform sizes so they cook evenly. No one wants a burnt carrot alongside an undercooked potato. If you’re prepping ahead, you can chop the veggies the night before and store them in the fridge. Just keep them in water to prevent browning. Salmon tends to cook quickly, so keep an eye on it to avoid overcooking. Leftovers? Store them in an airtight container in the fridge for up to two days. They make a delightful lunch when tossed into a salad or a wrap.
Make It Your Own
Here are a few fun variations to switch things up:
- Swap the salmon for crispy tofu if you’re in the mood for a plant-based alternative. Just pan-sear the tofu before adding it to the veggies.
- Replace the parsnips with sweet potatoes for a touch of natural sweetness that pairs beautifully with the savory salmon.
- If you love heat, add a pinch of red pepper flakes to the olive oil before tossing it with the veggies.
- Go Mediterranean by adding olives and a sprinkle of feta cheese just before serving. It’s a flavor explosion!
If you try this, I’d love to hear how it turns out — drop a comment or tag me! Your kitchen adventures are always inspiring, and I’m all ears for your creative twists. Happy cooking!
Goes Well With
If you want to round out the meal, here’s what I’d pair it with over on meaghanmoineau.com:
Related update: Salmon with roasted vegetables
Related update: Mexican Chicken Lettuce Wraps

It was one of those weeks when everything feels a bit too much, you know? Work was hectic, my laundry pile was threatening to engulf my sanity, and I was craving something sweet yet sophisticated. That’s when I remembered the Mascarpone & Ricotta Cheese Cake recipe I had scribbled in my notebook. This cake is a revelation — it’s rich but not heavy, creamy yet airy, and the perfect antidote to a busy week. It’s also surprisingly easy to make, which is a necessity for those of us who can barely remember if we brushed our hair this morning. So, if you’re in need of a little culinary therapy, this one’s for you.
Jump to Recipe
What You’ll Need
This recipe doesn’t call for anything too exotic. You’re likely to have most of it on hand, which makes it even more enticing when you’re trying to avoid yet another grocery run.
- Graham crackers
- Almonds
- Butter (melted)
- Salt
- Sugar
- Flour
- Mascarpone cheese
- Ricotta cheese
- Whipped cream cheese
- Eggs
- Lemon juice
- Vanilla extract
How to Make Mascarpone & Ricotta Cheese Cake
- Preheat your oven to 325°F (165°C). This step is your cue to take a deep breath – you’re about to create something amazing.
- For the crust, grind the graham crackers and almonds together. A food processor is effortless, but a mortar and pestle will do if you’re looking for an arm workout.
- Add the melted butter and a pinch of salt to your crumb mixture. Press it firmly into the bottom of a greased springform or deep-dish pie pan. Think of it as the tasty foundation for your masterpiece.
- Bake the crust for about 10 minutes until it’s set and slightly golden. Let it cool while you move on to the filling.
- Mix sugar and flour, then sprinkle this mix over the cooled crust. This tiny step is key to keeping your crust crisp, not soggy.
- In a large bowl, beat the cream cheese, mascarpone, ricotta, and sugar until smooth. This is where the magic begins to happen.
- Add in the lemon juice and vanilla, mixing until they’re just one with the cheese mixture.
- Beat in the eggs one at a time. It’s like a zen exercise, adding them patiently and watching the batter become silky smooth.
- Pour this luscious cheese mixture over your prepared crust, spreading it evenly.
- Bake for about 1 hour and 5 minutes. You’ll know it’s ready when the center is still wobbly when gently shaken, like a deliciously creamy dance.
- Let it cool on your countertop before refrigerating. Overnight is best, giving the flavors a chance to deepen and develop.
Cook’s Notes
A few things I’ve learned from making this cake: First, don’t skip the step of sprinkling flour and sugar over the crust. It’s a game-changer for texture. Second, when beating the cheeses and sugar, make sure everything is at room temperature — your batter will be smoother and easier to work with. Also, if you’re making this for a dinner party, you can absolutely prepare it a day or two in advance. It’ll only get better with a little rest in the fridge. Leftovers (if any!) should be stored in an airtight container and will keep for up to a week.
Make It Your Own
Here are a few ways to switch things up if you’re feeling adventurous:
- Swap the almonds for walnuts or pecans for a different nutty undertone in the crust.
- Use lime juice instead of lemon for a slightly tropical twist.
- Add a tablespoon of cocoa powder to the crust for a subtle chocolatey vibe.
- Top with a berry compote or fresh fruit before serving for an extra burst of color and flavor.
If you try this, I’d love to hear how it turns out — drop a comment or tag me! Whether it’s your first time or your fiftieth, this cake is sure to bring a bit of joy to your day. Happy baking, my friends!
Goes Well With
If you want to round out the meal, here’s what I’d pair it with over on meaghanmoineau.com:
Related update: Mascarpone & Ricotta Cheese Cake
Related update: Polish Rugelach
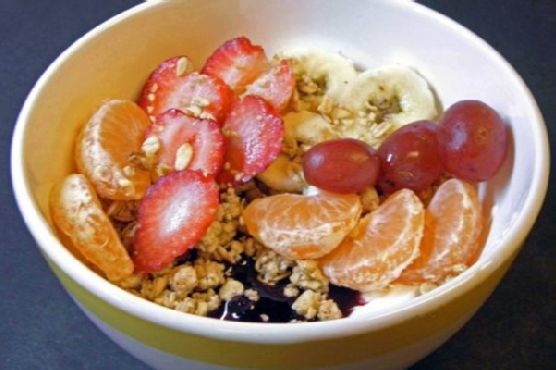
It was a rainy Tuesday afternoon, the kind where the clouds hang low and the air smells like earth. I found myself staring into my pantry, craving something that was both comforting and vibrant. My eyes landed on a jar of maple syrup, and I instantly knew what I needed: a warm batch of homemade granola with a medley of fresh fruit. This isn’t your average breakfast; it’s a hug in a bowl, the perfect blend of sweet and nutty with a touch of tang from dried cranberries. Just knowing that I could whip this up in about an hour, with ingredients I already had, made it even more appealing. By the time the granola was baking, the house smelled like a cozy blend of maple and toasted oats, and I couldn’t wait to dive in.
Jump to Recipe
What You’ll Need
The beauty of this recipe is in its simplicity. Chances are, you already have most of these at home, just waiting to be transformed into something magical:
- Dark brown sugar
- Cashew pieces
- Dried cranberries
- Dried raisins
- Fresh fruit (your choice!)
- Maple syrup
- Vegetable oil; peanut oil preferred
- Rolled oats
- Salt
- Slivered almonds
How to Make Homemade Organic Maple Granola with Fresh Fruit
- Preheat your oven to a cozy 250°F. This low temperature ensures each oat flake toasts evenly without burning.
- In a large mixing bowl, unite the rolled oats, cashew pieces, slivered almonds, a pinch of salt, and a smattering of dark brown sugar. Give it a gentle mix, letting your fingers enjoy the textures.
- Pour in the luscious maple syrup and your choice of vegetable oil. Stir everything thoroughly until every oat and nut is slicked with sweetness.
- Spread the mixture thinly and evenly on two baking tins with sides about an inch high. The secret to perfect granola is even spreading!
- Slide the tins into the oven and let them toast away for 45 to 60 minutes. Every 15 minutes, give them a careful stir and swap the tins’ positions. Your kitchen will soon smell like heaven.
- You’ll know it’s done when the granola has turned a lovely tan color and offers a gentle crunch. Remove the trays and let the granola cool completely.
- Once cooled, toss in the dried cranberries and raisins. Store your masterpiece in sealed plastic bags where it will stay delicious for up to two weeks, unrefrigerated.
- Serve with your favorite fresh fruits. I love a good mix of berries and sliced bananas for a refreshing twist.
Cook’s Notes
Granola is surprisingly forgiving, but here are a few pointers to make sure yours turns out just right:
- Make sure your oats are evenly coated with the sugar, syrup, and oil mixture for ultimate flavor distribution.
- Stirring every 15 minutes might sound like a chore, but it’s essential for that perfect golden tan and even texture.
- If you like chunkier granola, press the mixture down slightly when spreading it on the tins before baking.
- This granola makes a great make-ahead breakfast or snack. Just store it in a cool, dry place, and it’s ready whenever you are!
Make It Your Own
- Swap the cashew pieces for pecans or walnuts if you want an extra buttery crunch.
- Feeling spicy? Add a teaspoon of cinnamon or nutmeg to the oat mixture for a warm, autumnal vibe.
- Experiment with the dried fruits — dried apricots or mangoes add a lovely sweetness.
- Not a fan of maple? Try honey or agave syrup for a different but equally delightful flavor.
If you try this recipe, I’d love to hear how it turns out — drop a comment or tag me in your breakfast photos! I promise, your mornings are about to get a whole lot cozier.
Goes Well With
If you want to round out the meal, here’s what I’d pair it with over on meaghanmoineau.com:
Related update: Home made organic maple granola with fresh fruit
Related update: Healthy Southwestern Oatmeal

It was one of those Thursday afternoons when I found myself staring at the fridge, desperate for something sweet and a little different to snack on. You know the kind of day — a little bit drizzly, and the idea of a fragrant loaf filling the house with warmth seemed like the perfect antidote. I remembered some strawberries and a lonely lemon hanging out in the crisper drawer, and an idea sparked. This Lemon and Strawberry Loaf is a twist on your usual bake — think sweet strawberries mingling with zesty lemon and a hint of coconut. It’s a little slice of sunshine even when the weather outside is anything but. Plus, the recipe is straightforward enough to whip up on a whim.
Jump to Recipe
What You’ll Need
What’s great about this ingredient list is that you might already have most of these at home. It’s the kind of recipe that doesn’t require a last-minute supermarket dash.
- Butter
- Sugar
- Eggs
- Self-raising flour
- Dessicated coconut
- Natural yoghurt
- Lemon (juice and rind)
- Fresh strawberries
How to Make Lemon and Strawberry Loaf
- Preheat your oven to 180°C. While it heats up, line a 23cm x 12cm loaf tin with baking paper. Trust me, it’ll make your life easier when you’re trying to get that loaf out later.
- In a large bowl, beat the butter and sugar together until they’re pale and creamy. You want a texture that feels fluffy and light.
- Add the eggs, one by one, beating well after each addition. This will give you a smooth and well-incorporated mixture.
- Grate the lemon rind into the mixture and squeeze in the juice. That zesty aroma should hit you right in the face — it’s heavenly!
- Fold in the self-raising flour, dessicated coconut, and natural yoghurt with a rubber spatula. Be gentle; you’re aiming for a lovely, airy batter.
- Finally, fold in the fresh strawberries. Try to distribute them evenly so you don’t end up with a surprise berry-less slice.
- Pour the mixture into your prepared loaf tin, smoothing the top with the spatula to ensure it bakes evenly.
- Bake for 50-60 minutes. The loaf is done when a skewer inserted in the center comes out clean, and the top is beautifully golden.
- Let it cool in the tin for about 10 minutes, then turn it out onto a wire rack to cool completely. Waiting is the hardest part, but it’s worth it!
Cook’s Notes
This loaf is a keeper for a couple of days, tightly wrapped at room temperature. If you’re planning to make it ahead, it freezes well too. Just wrap it up snugly in plastic wrap and pop it in a ziplock bag. A tip if you’re in a rush: you can microwave slices directly from frozen — it’s like bringing back freshly baked magic!
- Be careful not to overmix the batter once you’ve added the flour. Overmixing can make the loaf dense instead of light and fluffy.
- For the strawberries, smaller pieces work best. They distribute better through the loaf, giving you a little strawberry burst in each bite.
Make It Your Own
- Swap the strawberries for raspberries if you prefer a different berry twist.
- For a tropical vibe, add a handful of chopped pineapple instead of strawberries, and you’ll feel like you’re on a mini-vacation.
- If you’re out of self-raising flour, use plain flour with an extra teaspoon of baking powder.
- Try adding a teaspoon of vanilla extract to the batter for an extra layer of flavor.
If you try this, I’d love to hear how it turns out — drop a comment or tag me! It’s always a joy to see your creations come to life. Happy baking, and may your kitchen be filled with the delicious aroma of lemon and strawberries!
Goes Well With
If you want to round out the meal, here’s what I’d pair it with over on meaghanmoineau.com:
Related update: Lemon and Strawberry Loaf
Related update: Mascarpone & Ricotta Cheese Cake
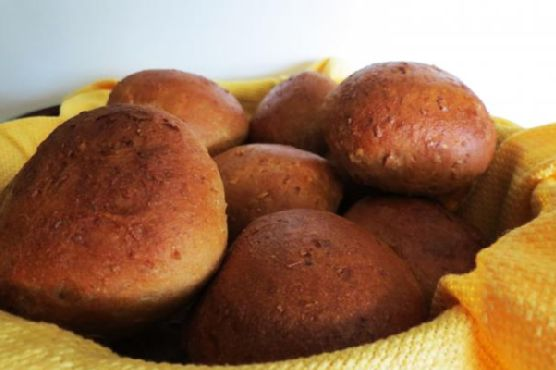
It was one of those Tuesday evenings when I realized I had promised fresh bread for dinner. The sun was setting, casting a warm, golden hue across my kitchen, and I could feel the cool breeze of autumn sneaking through the barely open window. That’s when it hit me — I needed something cozy yet impressive, but also forgiving enough to handle a bit of my mid-week chaos. Enter: these Whole Wheat Dinner Rolls. They’re not just any rolls; they’re the kind that make your kitchen smell like a bakery and your heart feel utterly content. I love how something so wholesome can come from ingredients I usually have stashed away in my pantry. Plus, they’re surprisingly easy to make, with a bit of patience and love.
Jump to Recipe
What You’ll Need
You’ll likely find most of these ingredients are staples in your kitchen, with a few stars that make these rolls stand out. Here’s what you’ll need:
- 1 cup water
- Cracked wheat (or Coaches Oats) – gives that lovely texture
- 1/3 cup warm water
- Dry active yeast – for that perfect rise
- Granulated sugar – just a touch for the yeast
- Butter – because everything is better with butter
- 1 teaspoon table salt
- Molasses – adds depth and color
- Honey – a natural sweetness
- 2 tablespoons wheat germ
- 1 cup milk
- 2 1/4 cups whole wheat flour
- 2 cups all-purpose flour
- Whole egg white – for that glossy finish
How to Make Whole Wheat Dinner Rolls
- In a small saucepan, bring 1 cup of water and the cracked wheat to a boil, then reduce the heat to medium-low and let it simmer for around 6 minutes. The kitchen will fill with a nutty aroma, and you’ll know it’s ready when the mixture has softened. Remove from the heat and allow it to cool to lukewarm.
- In a medium bowl, dissolve the yeast with the 1/3 cup of warm water and a tablespoon of sugar. Give it a quick stir and let it sit for about 10 minutes until it’s foamy and fragrant. It’ll be your sign that the yeast is happy and ready to work its magic.
- Add the cooled cracked wheat mixture to the yeast along with the butter, salt, molasses, honey, wheat germ, and milk in the bowl of an electric mixer. Use the paddle attachment to mix everything until just combined.
- Add 1 cup of the whole wheat flour and 2 cups of the all-purpose flour. Mix until the dough comes together. Switch to the dough hook attachment and gradually add the remaining whole wheat flour, about a quarter cup at a time, until the dough sticks less to the sides of the bowl.
- Let the mixer knead the dough on medium-low for about 8-10 minutes. The dough should be smooth and slightly tacky to the touch.
- Lightly oil a large bowl, place the dough inside, and cover it with a clean towel. Let it rise in a warm spot until it doubles in size — this could take anywhere from 1 to 2 hours, so be patient!
- Punch down the dough to release the air and divide it into 19 equally-sized pieces, about 2.5 ounces each. Shape them into balls and place them on a baking sheet lined with parchment paper. Cover with a towel and let them rise for another 45 minutes.
- While the rolls are rising, preheat your oven to 375°F. Place a dutch oven or oven-safe pot filled with water on the lowest shelf for added steam.
- Brush the risen rolls with an egg wash made by whisking the egg white with a bit of water. This will give them that irresistible sheen.
- Bake for 17-23 minutes until golden brown. The molasses will naturally darken the rolls, so don’t worry if they seem a little darker than expected. Once baked, let them cool on a wire rack.
Cook’s Notes
The key to these rolls is patience. Letting the dough rise properly will reward you with a tender crumb. If your kitchen is chilly, try placing the dough near a warm oven or in an off oven with the light on. For storage, keep them in an airtight container at room temperature for up to three days — if they last that long! To reheat, a quick zap in the microwave or a few minutes in a warm oven will bring them back to life. Freezing is an option too; just make sure they’re completely cooled before popping them in a freezer bag.
Make It Your Own
- Cheesy Rolls: Add a cup of your favorite shredded cheese to the dough for a gooey surprise in every bite.
- Herb-Infused: Mix in a tablespoon of dried rosemary or thyme into the dough for a fragrant herb twist.
- Seeded Top: Sprinkle sesame or poppy seeds on top of the rolls before baking for an added crunch.
- Sweet Cinnamon Swirl: Add a swirl of cinnamon sugar to the dough before shaping for a sweet counterpart to the savory meal.
If you try this recipe, I’d love to hear how it turns out for you — drop a comment or tag me in your photos! Whether they’re part of a holiday spread or a weeknight dinner, these rolls are sure to be a hit. Happy baking!
Goes Well With
If you want to round out the meal, here’s what I’d pair it with over on meaghanmoineau.com:
Related update: Whole Wheat Dinner Rolls
Related update: Cheddar Chile Beer Bread

Picture this: it’s Tuesday night, and I’m staring into the depths of my fridge, trying to conjure up a meal that’s both satisfying and doesn’t involve calling for takeout. I spot a pack of chicken breasts and a couple of sweet potatoes that have been giving me the side-eye for a week. We’ve all been there, right? Enter my Herb Chicken with Sweet Potato Mash and Sautéed Broccoli — a dish that hits the sweet spot between comfort food and healthy eating. It’s the kind of meal that makes you feel like a domestic wizard, even if you’re just winging it on a busy weeknight. Plus, it’s easy on the ingredients and even easier on the prep.
Jump to Recipe
What You’ll Need
With a little luck, you might already have most of these ingredients on hand. It’s all about simple, fresh, and flavorful components that come together in harmony.
- Broccoli
- Mixed pack of Maggi So Juicy herbs
- Olive oil
- Diced russet potato
- Black pepper and salt
- Skinless boneless chicken breasts
- Diced sweet potatoes
- Unsalted butter
How to Make Herb Chicken with Sweet Potato Mash and Sautéed Broccoli
- First things first, preheat your oven to 350°F (180°C) or, if you’re using a convection oven, aim for 320°F (160°C). Follow the instructions on your herb pack to get the chicken prepped and into the oven. The aroma will start to fill your kitchen, and you’ll know you’re on the right track.
- About 15 minutes before the chicken is done, bring a pot of water to a boil. Toss in the diced russet potatoes and let them cook for about 5 minutes. This is when your kitchen starts smelling a bit like a Sunday roast — but on a Tuesday night!
- Add in the sweet potatoes to the boiling pot and cook until both types of potatoes are tender. They should give way easily when pierced with a fork.
- Drain the potatoes, then break out the masher. Add a generous amount of butter, and season with salt and pepper to your liking. Mash until smooth, tasting as you go. The buttery goodness is your reward, so don’t skimp!
- In a separate pan, heat up a splash of olive oil over medium heat. Toss in the broccoli florets and sauté them quickly until they’re tender but still bright green — about 5 minutes. This is where you’ll hear that lovely sizzle.
- Cover the broccoli to keep it warm and cozy while you finish up with the chicken.
- Once the chicken is done, let it cool for a minute before cutting the bag open and transferring it to a dish. Be gentle, the steam can be bossy!
- Slice the chicken breasts into chunky pieces, trying to keep the shape intact. This makes it look fancy when you’re plating, but don’t stress it too much if it falls apart a bit.
- Finally, assemble your plate: start with a generous scoop of sweet potato mash, lay the chicken pieces artfully on top, drizzle any remaining sauce over it, and add a side of that vibrant broccoli.
Cook’s Notes
Let’s chat practical tips. The potatoes can be a bit tricky if you overcook them, turning all mushy instead of mashable, so keep an eye on them. The chicken can be prepared in advance and stored in the fridge for up to 2 days — just reheat gently to keep it juicy. If you have leftovers, they make a perfect packed lunch for the next day. Just keep the components separate until you’re ready to eat to avoid sogginess.
Make It Your Own
Want to switch it up? Here are a few ideas to suit whatever mood you’re in:
- Swap the chicken for crispy tofu for a vegetarian twist.
- Try using cauliflower instead of broccoli for a slightly different flavor profile.
- Spice up the mash with a pinch of cayenne pepper if you like a little heat.
- Add a handful of shredded cheese to the mash for extra indulgence — because why not?
If you try this, I’d love to hear how it turns out — drop a comment or tag me! Let’s keep the kitchen magic alive together.
Goes Well With
If you want to round out the meal, here’s what I’d pair it with over on meaghanmoineau.com:
Related update: Herb chicken with sweet potato mash and sautéed broccoli
Related update: Salmon with roasted vegetables

It was one of those hectic Tuesday nights, the kind where even your sneakers feel mismatched and your to-do list is longer than your grocery receipt. I was rummaging through the fridge, a little desperate but mostly hopeful, when I found a few chicken breasts and some cream cheese. The idea to stuff them hit me like a lightning bolt of culinary genius (or maybe just hungry necessity). The result? A dish that’s become a lifesaver in my weeknight dinner rotation. This Stuffed Chicken Breast is the perfect blend of creamy, savory, and downright comforting — all without needing a pantry full of exotic ingredients. It’s quick, satisfying, and fancy enough to make you feel like a kitchen rockstar.
Jump to Recipe
What You’ll Need
Most of the magic happens with just a handful of ingredients. Chances are, you already have most of these at home:
- 4 **skinless boneless chicken breasts**
- 1 package of **cream cheese** (softened)
- 3 **green onions**, chopped
- Your favorite **chicken seasoning** blend
- Olive oil-based cooking spray
How to Make Stuffed Chicken Breast
- First, give your chicken breasts a good rinse under cold water, then pat them dry with paper towels. This helps the seasoning stick and creates a delicious crispy exterior.
- Place each chicken breast on a cutting board and cut lengthwise. Be careful not to slice all the way through — you’re making a pocket, not a butterflied filet.
- In a small bowl, mix the softened cream cheese with the chopped green onions. The cream cheese should be smooth and the onions evenly distributed.
- Spoon the cream cheese mixture into each chicken breast pocket, then press the edges of the chicken firmly to close them around the filling.
- Spritz the top of each stuffed breast with the olive oil cooking spray. This not only prevents sticking but also helps the seasoning adhere perfectly.
- Liberally rub the chicken seasoning all over the outside of the chicken. Use your favorite blend — the more flavorful, the better!
- Preheat your oven to 375°F (190°C). Arrange the chicken breasts in a baking dish, ensuring they’re not too crowded.
- Bake for 25-30 minutes or until the chicken is cooked through and juices run clear. The edges of the cream cheese might bubble a bit, and the tops should turn a lovely golden brown.
Cook’s Notes
Here’s a little secret: if you overstuff the chicken, they might not close perfectly. Don’t worry! Use some toothpicks to secure them — just remember to remove them before serving. If you’re planning ahead, you can stuff the chicken a few hours before dinner and keep them in the fridge until you’re ready to bake. Leftovers can be stored in an airtight container for up to three days and are delicious reheated in the oven or sliced cold over a salad.
Make It Your Own
- **Swap the Chicken for Crispy Tofu**: For a vegetarian version, use firm tofu. Slice and hollow out a pocket, then proceed with the stuffing and seasoning.
- **Add Some Heat**: Mix a teaspoon of red pepper flakes into the cream cheese for a spicy kick.
- **Herbal Twist**: Add chopped fresh basil or parsley to the cream cheese for an herby flavor boost.
- **Cheese Swap**: Replace cream cheese with goat cheese for a tangier, more robust flavor.
If you try this, I’d love to hear how it turns out — drop a comment or tag me! Can’t wait to see your delicious creations. Happy cooking, friend!
Goes Well With
If you want to round out the meal, here’s what I’d pair it with over on meaghanmoineau.com:
Related update: Stuffed Chicken Breast
Related update: Herb chicken with sweet potato mash and sautéed broccoli
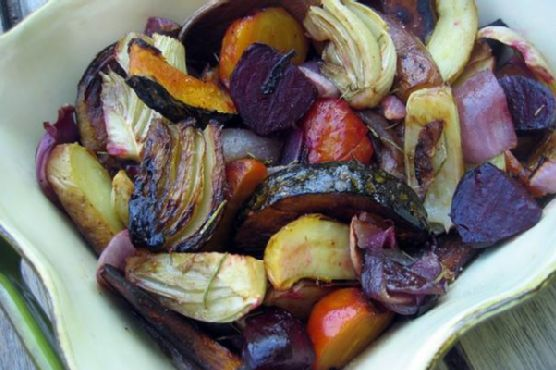
It was one of those evenings when the leaves were just starting to turn, and there was a crisp snap in the air that made you want to stay in and bake something comforting. I was eyeing the mishmash of vegetables in my pantry and fridge, and the thought struck me—why not toss them all together and see what happens? With my trusty bottle of balsamic vinegar in hand, I embarked on a culinary adventure that turned into a beautiful medley of roasted goodness. This Balsamic Roasted Vegetables dish has become my go-to for a weeknight rescue mission—it’s hearty, flavorful, and a feast for the eyes and the palate. You’ll love how the balsamic vinegar caramelizes everything into a sweet-savory delight. Plus, it’s as easy as it is delicious!
Jump to Recipe
What You’ll Need
Chances are you already have most of this in your kitchen, and if not, they’re just a quick grocery trip away. Here’s the line-up:
- Golden beets
- Red beets
- Bulb fennel
- Red onion
- Fingerling potatoes
- Kabocha squash
- Olive oil
- Balsamic vinegar
How to Make Balsamic Roasted Vegetables
- First, give the beets and fingerling potatoes a good rinse and trim off any tops. Drizzle just enough olive oil over them to coat lightly, and place them on a baking sheet.
- Roast whole in a preheated oven at 400°F. After about 30 minutes, they should feel softened when you poke them with a fork but not fully cooked.
- Remove from the oven with some care (they’re hot!), peel the beets gently, and then halve them. You can leave the fingerlings whole or slice them lengthwise—both versions are equally tasty.
- While they cool a bit, quarter the fennel and red onion lengthwise. Slice the kabocha squash into 1/2-inch wedges.
- In a big mixing bowl, combine all the vegetables. Drizzle a generous amount of olive oil to coat them well.
- Add a hearty splash of balsamic vinegar—think about 1/4 cup. Toss in a couple of hearty pinches of Kosher salt, several good turns of fresh ground black pepper, and a small sprig of rosemary.
- Roast the vegetable mixture on the baking sheet for another 30-40 minutes, turning every so often, so everything gets evenly roasted. You’ll know they’re ready when they look golden and smell absolutely divine.
Cook’s Notes
Here’s a little pro-tip: make sure all the vegetables are cut to roughly the same size. This helps them cook evenly and saves you from a few burnt bits. If you’re prepping ahead, you can roast the initial batch of beets and potatoes earlier in the day. Just store them in the fridge and continue with the rest of the recipe when you’re ready to serve. If by some miracle you have leftovers, these veggies keep well in the fridge for up to three days and make a great cold salad topper or sandwich filling.
Make It Your Own
- Swap the kabocha squash for sweet potatoes if you’re craving something a little different. They add a lovely sweetness.
- If you’re out of red onion, try shallots for a milder flavor that caramelizes beautifully.
- Throw in some brussels sprouts in place of or in addition to the fennel for a bit of crunchy texture.
- For a Mediterranean twist, sprinkle some crumbled feta cheese over the warm vegetables just before serving.
If you try this, I’d love to hear how it turns out—drop a comment or tag me! Whether it’s a weeknight dinner or a holiday side, these roasted veggies are sure to impress. Happy cooking!
Goes Well With
If you want to round out the meal, here’s what I’d pair it with over on meaghanmoineau.com:
Related update: Balsamic Roasted Vegetables

It was one of those quiet Sunday afternoons when the weather couldn’t quite decide if it wanted to be spring or cling to the last bits of winter. I was sitting in my kitchen, flipping through a stack of cookbooks, looking for inspiration that felt both nostalgic and fresh. That’s when I stumbled upon the idea of a buttermilk pie—something I hadn’t made in ages but suddenly craved. This pie is the perfect marriage of simplicity and comfort, with a custard-like filling that’s tart yet sweet and a buttery crust that feels like a warm hug. It’s one of those recipes that reminds you why you love to cook; it’s straightforward but yields something that feels much more than the sum of its parts. If you need a dessert that’s easy to make but impressive enough to make people think you spent all day in the kitchen, this is it.
Jump to Recipe
What You’ll Need
Chances are, you already have most of these ingredients lounging around in your pantry and fridge. The beauty of this recipe is its simplicity—no need to hunt down exotic ingredients.
- 1/2 cup of butter, melted
- 1 cup of buttermilk
- 3 large eggs
- 3 tablespoons of flour
- 1 1/2 cups of sugar
- 1 unbaked 9-inch pie shell
- 1 teaspoon of vanilla extract
How to Make Classic Buttermilk Pie
- Preheat your oven to 325 degrees F. You want it nice and warm, ready to transform our ingredients into a slice of heaven.
- In a mixing bowl, beat the eggs slightly. You’re not going for a full-on froth here, just enough to break them up.
- Add the sugar and flour to the eggs, stirring until you have a smooth, pale mixture. This is where the magic begins!
- Next, pour in the melted butter and mix well. It should start to smell a bit like a bakery in your kitchen now.
- Add the buttermilk and vanilla extract, stirring until everything is well combined. The batter will be a lovely, creamy consistency.
- Take your unbaked pie shell and lightly dust the inside with a bit of flour. This helps the filling adhere to the crust without any soggy bottom mishaps.
- Pour the batter into the prepared pie shell, spreading it evenly. Sprinkle just a little more flour on top; it adds a subtle crusty top layer.
- Place the pie on the center rack of your oven and bake for about an hour. You’ll know it’s done when the custard is set and has a light, golden color. Your kitchen should smell like sugar, vanilla, and a hint of nostalgia.
Cook’s Notes
Let’s chat about some real talk here. First, don’t overbeat the eggs; we’re making pie, not meringue. As for the baking, every oven is a little different, so start checking around the 50-minute mark. The center should not jiggle like Jell-O; we want a gentle firmness. If you’re making this ahead of time, know that it keeps well in the fridge for up to three days. Just wrap it tightly in plastic wrap to keep it from drying out.
Make It Your Own
- Lemon Zest Twist: Add a teaspoon of lemon zest for a citrusy lift that pairs wonderfully with the buttermilk.
- Spiced Version: Sprinkle a pinch of nutmeg or cinnamon into the batter for a cozy, warm flavor.
- Nutty Delight: Stir in a handful of toasted pecans for a delightful crunch in every bite.
- Chocolate Lover’s: Drizzle some melted chocolate on top once the pie has cooled for a decadent touch.
If you try this, I’d love to hear how it turns out—drop a comment or tag me! Whether you stick to the classic or put your own spin on it, I’m sure it’ll be a hit. Happy baking!
Goes Well With
If you want to round out the meal, here’s what I’d pair it with over on meaghanmoineau.com:
Related update: Classic Buttermilk Pie
Related update: Lemon and Strawberry Loaf

So there I was, standing in my kitchen on a random Tuesday night, staring at a pack of chicken breasts and feeling utterly uninspired. You know that feeling when you just want to whip up something that’s both comforting and a little zesty? Enter: my Lemon-Garlic Chicken recipe. It’s the kind of dish that makes you feel like a culinary genius with minimal effort. Perfectly tangy from the lemon, with a hint of garlic and freshness from mint, this chicken is a dream come true on a busy weeknight or even for a casual dinner party. And the best part? You likely have most of these ingredients just hanging out in your pantry. Trust me, by the time you’re done, your kitchen will smell like an Italian trattoria.
Jump to Recipe
What You’ll Need
Chances are you already have most of this. It’s all about simple ingredients that shine together.
- Split whole chicken breasts
- Fresh lemon juice
- Olive oil
- Garlic, minced
- Fresh dried mint
- Salt and pepper
- Vegetable oil for grilling
How to Make Lemon – Garlic Chicken
- Start by giving those chicken breasts a good rinse under cold water, then pat them dry with paper towels. This step is key for achieving that perfect golden skin.
- In a shallow glass dish, place your chicken breasts snugly. You want them to mingle with every bit of that delicious marinade.
- In a bowl, whisk together the fresh lemon juice, a generous glug of olive oil, minced garlic, mint, salt, and pepper. The aromas will instantly lift your spirits!
- Pour this zingy marinade over the chicken. Make sure each piece is well-coated by flipping them around a bit. Cover the dish and let the magic happen in the fridge for several hours, or better yet, overnight.
- When you’re ready to grill, brush some vegetable oil on the grill grates. This helps prevent the chicken from sticking and tearing apart.
- Place the chicken on the grill, skin side up, about 6 inches from medium-hot coals. You’ll hear a satisfying sizzle as they hit the grates.
- Cook the chicken, turning it every 8 to 10 minutes, and baste occasionally with the marinade. You’ll know it’s ready when the skin is crispy and the juices run clear.
Cook’s Notes
Don’t rush the marinating process. The longer, the better — think of it as giving the chicken a luxurious spa day. If you’re short on time, even an hour can make a difference. Leftover chicken stores beautifully in the fridge for up to three days and makes for a fantastic salad topping. Avoid overcooking by checking for clear juices or using a meat thermometer for precision. If you’re without a grill, a hot oven works in a pinch — just broil at the end for that grilled vibe.
Make It Your Own
- Swap the chicken for crispy tofu if you’re going plant-based. Marinate and grill as you would with chicken.
- Try fresh thyme instead of mint for a different herbaceous note.
- Add a dash of chili flakes to the marinade if you’re into spicy flavors.
- For a more Mediterranean flair, toss in some olives and capers before grilling.
If you try this, I’d love to hear how it turns out — drop a comment or tag me! There’s nothing like a bit of kitchen creativity to make a recipe truly yours. Happy cooking!
Goes Well With
If you want to round out the meal, here’s what I’d pair it with over on meaghanmoineau.com:
Related update: Lemon – Garlic Chicken
Related update: Stuffed Chicken Breast

Last Tuesday, as a chilly breeze snuck through the window and the sun set a little too early for my liking, I found myself craving something warm and indulgent. I had a pint of fresh figs begging to be the star of a dessert and an evening that called for comforting decadence. That’s when I decided to bake my Fresh Fig, Walnut, Rosemary Upside Down Cake. It’s the kind of cake that impresses with its gorgeous presentation yet is surprisingly easy to whip up on a busy weeknight. The combination of sweet figs, crunchy walnuts, and fragrant rosemary, baked to golden perfection, is perfect for those moments when you need a bit of comfort and a touch of elegance. Plus, nothing pairs better with this cake than a crisp, citrusy Chardonnay to round out the experience. If you’re as intrigued as I was, let’s get started! Jump to Recipe
What You’ll Need
Chances are you already have most of the ingredients for this cake just waiting to be transformed.
- Unsalted butter
- Light brown sugar
- Fresh figs
- Fresh rosemary
- Walnut pieces
- Flour
- Baking powder
- Salt
- Eggs
- Granulated sugar
- Fresh lemon juice
- Lemon extract
- Citron vodka
- Lemon zest
- Vanilla extract
How to Make Fresh Fig, Walnut, Rosemary Upside Down Cake And A Crisp Citrusy Chardonnay
- Position a rack in the center of the oven and preheat it to 350 degrees. Place your trusty 9-inch round baking pan in the oven with the butter until it melts, which should take about 5 minutes.
- Once the butter has melted, carefully remove the pan and sprinkle light brown sugar evenly over the melted goodness. Nestle the figs, flesh side up, into this sugary bed. Add a sprinkle of rosemary—just a teaspoon to start.
- Fill in any gaps with walnut pieces, ensuring no corner is left behind.
- In a medium bowl, sift together flour, baking powder, and salt. In a separate bowl, beat eggs with granulated sugar at medium speed until creamy and inviting.
- Because I preferred using whole eggs, continue to beat the mixture for an additional 3 minutes until frothy and small bubbles form. Trust me, it’s worth it.
- Combine the flour mixture with the creamed mixture and beat until it’s a well-mixed batter that smells like heaven.
- Pour this batter evenly over the fruit in the pan, using a spatula to smooth the top with love and care.
- Bake for 35 to 40 minutes, keeping an eye out for that beautiful golden color and the clean toothpick test.
- Cool the cake on a wire rack for a good 10 minutes. Then, run a blunt knife around the edges, say a little prayer, and carefully invert it onto a serving plate.
- Serve warm or at room temperature, whatever suits your mood. And don’t forget to pair it with a bold cup of coffee or that chilled glass of Edna Valley 2010 Paragon Chardonnay.
Cook’s Notes
- If you’re making this for a dinner party, you can prepare the batter a few hours in advance and refrigerate it. Just bring it back to room temperature before baking.
- Leftovers keep well wrapped in the fridge for up to three days. Just zap a slice in the microwave for about 15 seconds to bring back its cozy warmth.
- Common mistake: Be careful not to over-bake! The key is to pull it out of the oven as soon as a toothpick comes out clean to keep it from drying out.
Make It Your Own
- Swap fresh figs with fresh peaches or pears for a seasonal twist.
- Try using pecans instead of walnuts for a slightly different nutty flavor.
- If you’re not into alcohol, replace the citron vodka with an equal amount of club soda with a dash of lemon extract.
- Add a dash of cinnamon to the batter for a warm, spiced note that pairs wonderfully with the figs.
If you try this recipe, I’d love to hear how it turns out — drop a comment or tag me in your delicious creations! Happy baking, and may your kitchen be filled with the sweet scent of figs and the warmth of a good cake. Cheers!
Related update: Fresh Fig, Walnut, Rosemary Upside Down Cake And A Crisp Citrusy Chardonnay
Related update: Lemon – Garlic Chicken
Related update: Classic Buttermilk Pie

It was one of those days when I opened the fridge and felt like Old Mother Hubbard—empty shelves staring back at me and a gnawing hunger that wouldn’t quit. But there, nestled in the corner, were a dozen eggs and a pack of sausage that I’d forgotten about. That’s when inspiration hit: Scotch Eggs! Crispy on the outside, savory on the inside, and seriously satisfying. They’re perfect for when you want something that’s both comforting and kind of impressive. Plus, they’re easier to make than you’d think, even when you’re low on groceries like I was that day. Feel like giving it a go? It’s the kind of recipe that once you nail it, you’ll keep coming back to it. Seriously, your pantry probably has most of the ingredients already.
Jump to Recipe
What You’ll Need
These Scotch Eggs are all about simplicity and big flavors. Chances are you already have most of this in your kitchen:
- 8 eggs (6 hard-boiled, 1 beaten for coating, and one for binding the sausage)
- 1 pound bulk sausage
- Corn meal, for dusting
- Breadcrumbs, for coating
How to Make Scotch Eggs
- First, let’s get our workspace ready. Sprinkle some corn meal on a clean surface. This will stop the sausage from sticking to your hands and the counter.
- Divide the sausage into 8 portions. Think of them like little patties in waiting. Pat each one out to about 1/8 inch thick. You’re aiming for thin but not so thin that it tears easily.
- Wrap one sausage portion completely around each hard-boiled egg. Make sure to press the edges together to seal the egg in. You want each egg to be entirely encased in sausage goodness.
- Now, dip each sausage-covered egg into the beaten egg. Think of it as giving them a nice eggy bath before their breadcrumb spa treatment.
- Roll each egg in breadcrumbs until they are evenly coated. This is where the crunch factor is born, so don’t skimp on the coverage!
- Choose your cooking method: If you’re deep frying, heat your oil to about 350°F and carefully lower in the eggs, frying until they’re golden and crisp. If you prefer baking, place them on a baking sheet and pop them in a preheated oven at 375°F for about 20 minutes, or until they’re nicely browned and sizzling.
Cook’s Notes
Here’s the thing: Scotch Eggs can be a tiny bit tricky the first time around, but they’re totally worth it. If you’re boiling your own eggs, aim for a soft-boiled center that firms up slightly during cooking. Trust me, a perfectly cooked yolk is a little bit of heaven.
- Make sure your eggs are well sealed. A little patchwork with extra sausage is fine if you spot gaps.
- These bad boys can be made in advance. Just prepare them up to the breadcrumb stage and pop them in the fridge for a day, then cook when you’re ready to eat.
- Leftovers can be reheated in the oven to keep them crispy.
Make It Your Own
- Switch up the sausage for a spicy chorizo or Italian blend. A little heat adds an extra layer of flavor that’s hard to resist.
- Use panko breadcrumbs instead of regular for an even crispier crust. Trust me, the extra crunch is worth it.
- If you’re feeling adventurous, mix some fresh herbs or spices into the sausage before wrapping the eggs. Sage and thyme are killer additions.
- Want a vegetarian option? Swap the sausage for seasoned mashed potatoes and coat in the same way. Bake rather than fry for a delicious crispy bite.
If you try this, I’d love to hear how it turns out—drop a comment or tag me! Happy cooking, and may your Scotch Eggs be as tasty as your dreams are big. Enjoy! 🍳🥚
Related update: Scotch Eggs

It was one of those bone-chilling, rainy Thursdays when all you want is to curl up with something warm and soul-soothing. I found myself rummaging through my pantry, longing for something vibrant and comforting that could whisk me away to somewhere warmer. That’s when the idea of Thai Coconut Curry Soup popped into my head. This dish is like a warm hug with its rich coconut base and tangy lime notes, and the best part? It’s a one-pot wonder that’s ready in under 30 minutes. Perfect for when you want something impressive yet easy, offering a burst of flavors without spending hours in the kitchen.
Jump to Recipe
What You’ll Need
The beauty of this recipe is its simplicity. You might find that many of these ingredients are already lounging in your pantry or fridge, just waiting to be turned into something magical.
- Canned light coconut milk
- Canned worth of water
- Red curry paste
- Fresh ginger paste
- Fresh snow peas
- String beans
- Diced carrot
- Fresh whole Thai basil leaves
- Lime juice
- Low sodium soy sauce
- A few dashes of sesame oil
- Chili powder
- Tofu
- Salt
- Red bell pepper
- Black pepper
How to Make Thai Coconut Curry Soup
- In a large pot, combine the canned light coconut milk and an equal amount of water. Bring this mixture just to a boil over medium-high heat, then reduce the heat to a gentle simmer. You want small bubbles and steam, not a volcanic eruption.
- Add in the red curry paste and fresh ginger paste. Whisk them until they’re well-incorporated—your nose should be greeted with a fragrant, spicy aroma.
- Toss in the diced carrot and sprinkle with salt and chili powder, reserving the basil for later. Cover the pot and let it simmer until the carrots are almost tender. Keep an eye on them; we want them to maintain a bit of bite.
- Add the tofu cubes. Allow them to soak up the curry flavor by covering the pot and simmering for a few more minutes.
- Introduce the fresh snow peas, string beans, lime juice, soy sauce, and sesame oil to the pot. Cover and let them mingle until the beans turn a vivid green and are still crisp to the bite. This only takes a few minutes.
- For garnishing, slice the red bell pepper into thin strips and sprinkle them along with freshly ground black pepper on top before serving. If you’re feeling extra, stir in a couple of tablespoons of coconut oil with the tofu for a richer coconut experience.
Cook’s Notes
This soup is all about balance. Keep the heat low when simmering to maintain the integrity of the vegetables—nobody wants a mushy mess. If you’re making it ahead, store it without the basil. Add it fresh when reheating to keep its vibrant flavor. The soup will keep well in the fridge for up to three days, making it an excellent meal prep option. When reheating, do so gently on the stovetop to avoid overcooking the veggies.
Make It Your Own
- Crispy Tofu Swap: Instead of simmering the tofu, try pan-frying it beforehand until golden and crispy. Then add it to the soup just before serving for an extra texture.
- Shrimp Upgrade: Swap tofu for shrimp if you’re in the mood for seafood. Add them with the snow peas and beans for a quick cook.
- Spicy Twist: If you love heat, add a finely chopped Thai chili or more chili powder to the pot with the carrots.
- Veggie Packed: Include other veggies like bell pepper strips earlier in the cooking process, or add mushrooms for an earthier depth.
If you try this, I’d love to hear how it turns out — drop a comment or tag me! Soup’s on, and I can’t wait to hear your thoughts on this cozy, Thai-inspired bowl of happiness.
Related update: Thai Coconut Curry Soup
Related update: A Post Thanksgiving “sopa De Tortilla”
The other day, I was in one of those “what’s for dinner” ruts, staring at the contents of my fridge as if they’d magically assemble themselves into something fabulous. I had exactly four pork chops and an assortment of condiments eyeing me back. Inspiration struck when I remembered the combination of sweet and spicy flavors that always hit the spot. That’s how these Pork Carnitas with Chipotle BBQ Sauce and Slaw came to life. The beauty of this dish is how it transforms humble ingredients into a plateful of bold, balanced flavors. It’s one of those recipes that’s perfect for a lazy weekend or a weeknight when you want dinner to do all the hard work for you, thanks to the slow cooker magic.
Jump to Recipe
What You’ll Need
This recipe is a pantry-friendly miracle, loaded with bold flavors you probably already have on hand. Here’s what you’ll need:
- 4 bone-in pork chops
- 1 cup orange juice
- 1/2 cup pineapple juice
- 3 cloves garlic, minced
- 1 teaspoon ground coriander
- 1 teaspoon ground cumin
- 1 tablespoon chili powder
- 1 teaspoon garlic powder
- 1 teaspoon onion powder
- Salt and pepper to taste
- 1 cup ketchup
- 1/4 cup brown sugar
- 2 tablespoons dijon mustard
- 1/4 cup white distilled vinegar
- 1/4 cup orange juice
- 2 tablespoons honey
- 2 tablespoons chipotles in adobo, minced
- 2 cups thinly sliced green cabbage
- 1/2 red onion, thinly sliced
- 1/2 cup shredded cilantro
- Juice of 1 lime
- 1/2 cup plain nonfat Greek yogurt
How to Make Pork Carnitas with Chipotle BBQ Sauce and Slaw
- Place the 4 pork chops snugly in your slow cooker. Pour the orange and pineapple juices over the top, letting them pool and marinate the pork.
- Sprinkle the minced garlic, ground coriander, cumin, chili powder, garlic powder, onion powder, salt, and pepper evenly over the chops. The spices will start to meld into a fragrant blend as they begin to cook.
- Cover with the slow cooker lid and set it on low for 6 hours. Halfway through, rotate the pork chops so they cook evenly. Lean back and let the slow cooker work its magic.
- Once the pork is done, let it cool slightly. Then, get in there with two forks and shred the meat into bite-sized pieces. You’ll know it’s perfect when it falls apart effortlessly.
- For the chipotle BBQ sauce, whisk together the ketchup, brown sugar, dijon mustard, white vinegar, orange juice, honey, and chipotles in adobo in a small saucepan. Simmer over medium heat until it thickens, about 10 minutes. Taste and adjust the heat and sweetness to your liking.
- In a large bowl, toss together the green cabbage, red onion, and cilantro. Squeeze over the lime juice and add a dollop of Greek yogurt. Toss until everything is well coated and vibrantly creamy.
- Serve the shredded pork drenched in chipotle BBQ sauce, topped with the slaw on soft tortillas, or as is if you’re feeling low-carb.
Cook’s Notes
Let’s chat about a few things to make this recipe foolproof. First off, using bone-in pork chops really helps to keep the meat tender and juicy. If you only have boneless, that’s okay, just keep an eye on the cooking time as they might cook faster. The BBQ sauce can be stored in an airtight container in the fridge for up to a week, and trust me, you’ll want to pour it on everything. You can easily make the slaw ahead of time, just hold off on mixing in the yogurt until you’re ready to serve to keep it crisp.
Make It Your Own
Flexibility is the name of the game here. Try these variations to switch things up:
- Swap the pork with boneless chicken thighs for a lighter option.
- Use crispy tofu cubes instead of pork for a vegetarian twist.
- Add a handful of sliced jalapeños to the slaw for extra heat.
- Try serving the carnitas on a bed of Mexican rice for a heartier meal.
If you try this, I’d love to hear how it turns out — drop a comment or tag me! And remember, the only rule in the kitchen is to have fun. Happy cooking!
Related update: Pork Carnitas with Chipotle BBQ Sauce and Slaw

It was one of those late summer evenings when the air is still warm, but you can feel the crispness of fall sneaking up on you. I was rummaging through my fridge, craving something that would capture this seasonal transition. That’s when I stumbled on a few ripe peaches, begging to be used, and a hunk of blue cheese just waiting for its moment. This Rustic Grilled Peaches Pizza was born out of necessity and a hint of culinary curiosity. It’s a little sweet, a little savory, and just the right amount of indulgent. The combination of juicy grilled peaches and the tangy sharpness of blue cheese, all on a crispy crust, is a total game-changer. Plus, this recipe is surprisingly easy and quick to throw together, making it perfect for a weeknight dinner that doesn’t feel rushed or routine.
Jump to Recipe
What You’ll Need
I’m willing to bet you have most of these ingredients hanging around your kitchen. The few you might need to grab are totally worth it for this sweet and savory masterpiece.
- Fresh arugula leaves
- Balsamic vinegar
- Blue cheese
- Fresh sage
- Low fat mozzarella cheese
- Onion
- Peach
- Whole wheat uncooked pizza crust
- Salt and pepper
- Walnuts
How to Make Rustic Grilled Peaches Pizza
- In a large skillet over medium heat, cook the onions with a pinch of salt and pepper. You’ll want them very soft and caramelized, which will take about 20-25 minutes. Stir occasionally and add tablespoons of water to deglaze the pan, but only after the previous batch has fully evaporated.
- Meanwhile, in a small saucepan, bring the balsamic vinegar to a boil. Reduce the heat and let it simmer until it transforms into about a tablespoon of syrupy goodness, roughly 15-20 minutes.
- Preheat your grill to medium-high heat. Roll or stretch your pizza dough into a 10-12 inch disc. Brush one side with olive oil so it’s all prepped and ready.
- Toss your pizza dough onto the hot grill, oil side down, and lower the heat to medium. Arrange your peach slices next to the pizza dough. Close the grill lid and let everything cook for about 2-3 minutes.
- Flip the pizza dough and cover it with the caramelized onions and a generous sprinkle of mozzarella cheese. Flip those peach slices, close the lid again, and cook for another 2-3 minutes, until the cheese is melty.
- Remove the pizza from the grill and artfully place those grilled peach slices on top. Crumble over the blue cheese, scatter toasted walnuts, and sprinkle fresh sage and arugula leaves.
- Finish it off with a drizzle of that balsamic reduction, slice into wedges, and savor each bite!
Cook’s Notes
Don’t rush the onions. Their sweet, caramelized nature is an absolute must for this recipe, and it’s worth every minute. If you’re prepping ahead, you can make the caramelized onions and balsamic reduction a day in advance. Just store them in the fridge and warm them slightly before using. Leftovers? They’re delicious cold or reheated. Just store the pizza in an airtight container in the fridge, and it’ll hold up for a couple of days. Keep in mind grilled pizza tends to lose its crispiness, but the flavors will still be spot on.
Make It Your Own
- Swap the blue cheese for goat cheese if you prefer something milder.
- Use crispy prosciutto instead of walnuts for a savory, salty touch.
- Substitute fresh basil for sage if that’s what you have on hand — it adds a lovely fresh note.
- Try a different stone fruit like nectarines or plums to mix it up.
If you try this, I’d love to hear how it turns out — drop a comment or tag me! This pizza is a little slice of late summer heaven, and I can’t wait for you to experience it. Enjoy every bite!
Related update: Rustic Grilled Peaches Pizza
Related update: Scotch Eggs
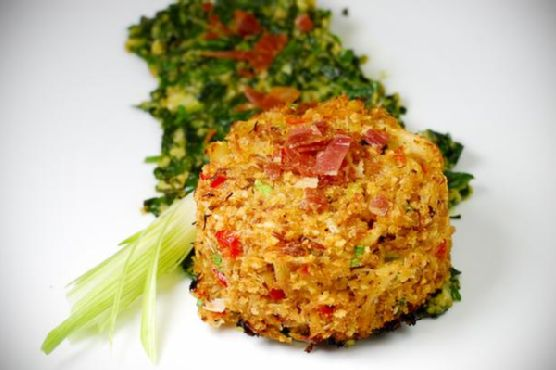
Picture this: It’s a crisp, chilly Sunday afternoon, and I’m standing in my cozy kitchen, trying to channel my inner chef with whatever ingredients I’ve got left. You know those weekends when grocery shopping just seems like too much of a chore? Well, I found myself staring at a can of crab meat, wondering what could possibly be made to brighten up a rather dreary day. And then it hit me — Crab Cakes Rockefeller! This dish is not just about the fancy name; it’s about turning a handful of pantry staples into something spectacular. It’s quick, comforting, and has that wow factor that feels like a mini celebration. Even if you’re working with a toaster oven, you’re in for a treat.
Jump to Recipe
What You’ll Need
This is one of those recipes where you might already have most ingredients lurking in your kitchen. It’s all about transforming simple components into something fabulous.
- Canned lump crab claw meat
- Red diced bell pepper
- Diced green onions
- Bread crumbs
- Honey
- Chili powder
- Unsalted butter
- Bacon
- Baby spinach
- Watercress stems
- Garlic
- Black salt & pepper
How to Make Crab Cakes Rockefeller
- Preheat your oven to 375°F and set the top rack to the middle position. If you’re like me and love using a toaster oven, this recipe is perfect for it too.
- Line a baking sheet with aluminum foil or a nonstick cooking mat. Less mess, more time to enjoy your masterpiece later!
- In a large bowl, combine the crab meat, diced red bell pepper, half of the diced green onions, and half of the bread crumbs. Mix in the honey and chili powder, then season to taste with salt and pepper. You want these flavors to marry beautifully.
- Form your crab cakes by pressing them into a 1/2 cup measure, squeezing tightly to maintain their shape. If molding by hand, be firm but gentle, like handling a delicate soap bubble.
- Arrange your crab cakes on the lined baking sheet, leaving at least an inch between each. This space ensures they brown evenly.
- Lightly coat the outside of each crab cake with olive oil using a sprayer or a drizzle. This little trick gives them a lovely golden crust.
- Bake for 25 minutes, or until golden brown and the aroma drives you wild with anticipation.
- Meanwhile, fry the bacon in a large skillet until crispy. Let it drain on paper towels, then crumble it into delightfully crunchy bits.
- Finely chop the spinach and watercress stems. In another skillet, melt the butter over medium heat. Add the garlic and sauté for about a minute until fragrant.
- Throw in the remaining green onions, bread crumbs, and watercress stems, sautéing for another minute.
- Finally, add the chopped spinach, cooking until wilted, about 1-2 minutes. Season with salt and pepper to your liking.
- To serve, gracefully nestle a crab cake atop a smear of the spinach mixture, and sprinkle with the crumbled bacon for that finishing touch.
Cook’s Notes
Just a few words of wisdom from my kitchen to yours. When forming the crab cakes, make sure they’re compact — it’s the key to them holding together beautifully. If you want to prep ahead, you can assemble the cakes and refrigerate them on the baking sheet for up to a day before baking. If you’ve got leftovers (a rare occurrence, trust me), they reheat well in the oven at 350°F for about 10 minutes. Just don’t microwave them unless you’re into soggy seafood — which I doubt!
Make It Your Own
Nothing is set in stone in my kitchen. Here are a few variations you might want to try:
- Swap the bacon for crispy prosciutto for an Italian twist.
- If you’re feeling fancy, add a sprinkle of parmesan cheese to the spinach mixture for an extra umami kick.
- Replace the watercress with arugula for a peppery punch.
- Try using panko instead of traditional bread crumbs for added crunch.
If you try this, I’d love to hear how it turns out — drop a comment or tag me! Let’s spread the joy of turning pantry staples into a gourmet delight. Here’s to cozy kitchens and culinary adventures!
Related update: Crab Cakes Rockefeller
Related update: Pork Carnitas with Chipotle BBQ Sauce and Slaw