
I was having one of those days where everything seemed to go sideways. You know the kind — you spill your morning coffee, forget your umbrella, and then it starts pouring on your way home. I needed a pick-me-up, pronto. That’s when I remembered these Flour-Less Peanut Butter Cookies. They’re everything I needed: sweet, comforting, and ridiculously easy to make. The best part? You can whip them up with just a few pantry staples, and they’re done in under 20 minutes. Perfect for those days when you need a win, no matter how small.
Jump to Recipe
What You’ll Need
The beauty of these cookies lies in their simplicity. Chances are you have these ingredients tucked away in your kitchen already. Here’s what you need:
- Peanut butter – smooth or chunky, your call
- Honey – adds the perfect sweetness
- Egg – binds it all together
- Baking soda – gives them a little lift
- Vanilla extract – just a splash for depth
How to Make Flour-Less Peanut Butter Cookies
- Preheat your oven to 350°F (175°C). This is crucial to get that perfectly soft center.
- In a large mixing bowl, combine the peanut butter, honey, egg, baking soda, and vanilla extract. Stir until everything is smooth and well-blended.
- Using a spoon, drop dollops of the dough onto a lightly greased cookie sheet. Keep them about 2 inches apart since they’ll spread a little.
- Bake for about 12 minutes. You’ll know they’re ready when the edges are set but the centers are still soft to the touch.
- Let the cookies cool on the sheet for a few minutes, then transfer them to a rack to cool completely. They’ll firm up as they cool, so resist the urge to eat them straight away!
Cook’s Notes
These cookies are incredibly forgiving, but a few tips can ensure they turn out perfect every time. If your peanut butter is particularly oily, give it a good stir before measuring. When mixing, ensure everything is well-combined but don’t overdo it; overmixing can make the cookies tough. If you like your cookies on the sweeter side, you can increase the honey slightly or add a touch of sugar.
Store these cookies in an airtight container at room temperature for up to a week — if they last that long! You can also freeze the dough balls to bake later; just add a couple of minutes to the baking time.
Make It Your Own
Want to mix things up? Here are some tasty variations:
- Chocolate Lovers: Stir in some chocolate chips or chunks before baking for a rich, decadent treat.
- Nuts About Nuts: Swap half the peanut butter for almond butter for a nutty twist.
- Spice It Up: Add a sprinkle of cinnamon or a pinch of cayenne for a warm, spicy note.
- Salty Sweet: Top each cookie with a sprinkle of sea salt right before baking for that perfect salty-sweet balance.
If you try this, I’d love to hear how it turns out — drop a comment or tag me! There’s nothing better than sharing a little cookie joy. Happy baking!
Related update: Flour-Less Peanut Butter Cookies

One evening, after a long day of juggling work and kids’ activities, I found myself staring at a couple of lonely zucchinis in the fridge, wondering what on Earth I could make for dinner that everyone would actually eat. There was no time for anything elaborate, and I really didn’t want to resort to cereal again. That’s when it hit me: Mini Zucchini Bites, or as I affectionately call them, Cuadritos De Calabacin. These little guys are a lifesaver — quick to throw together, they make the perfect savory snack or side, and they’ve got enough bacon and cheese to keep the pickiest eaters happy. Plus, I mean, they’re bite-sized, and who doesn’t love a good two-bite treat?
Jump to Recipe
What You’ll Need
Trust me, chances are you already have most of this in your kitchen, which makes it even better for those spontaneous dinner decisions.
- 2 slices of diced bacon
- 1/2 cup white onion, chopped
- 2 cups grated zucchini
- 1 cup grated gouda cheese
- 1/2 cup flour
- 1 teaspoon baking powder
- 1/4 cup vegetable oil
- 2 eggs
- Salt & pepper to taste
- 1 tablespoon butter, melted
- 1/4 cup plain bread crumbs
How to Make Mini Zucchini Bites (Cuadritos De Calabacin)
- Preheat your oven to 375°F, because nothing kills dinner momentum like a cold oven.
- In a sauté pan, cook the diced bacon until it’s perfectly crisp. The goal here is crispy, not soggy, so let it do its thing. Once done, set the bacon aside but don’t ditch the bacon fat.
- With about 2 tablespoons of that glorious bacon fat, sauté the white onion until it turns transparent. You’ll know it’s ready when your kitchen smells heavenly. Set aside.
- In a large mixing bowl, combine the grated zucchini, gouda cheese, flour, baking powder, vegetable oil, eggs, bacon, and onion. Season generously with salt and pepper and mix it until everything is just combined. The mixture will be slightly thick and that’s exactly what you want.
- Grab a 10 x 7-inch baking pan and brush it thoroughly with the melted butter. Then, sprinkle plain bread crumbs to coat — this will give you a nice, crispy edge.
- Pour the zucchini mixture evenly into the prepared pan, spreading it out as needed. Pop it in the oven and let it bake for 45-60 minutes. It’s done when it’s firm and the top is golden brown.
- Once baked, let it rest for about 10 minutes. This resting time is key to letting everything set before you slice them into 2-inch cubes. Serve them warm or cold, they’re delicious either way!
Cook’s Notes
For best results, make sure to squeeze out any excess moisture from your grated zucchini. You want your bites to be perfectly firm, not soggy. If you’re planning ahead, you can mix the ingredients a few hours early, cover it, and keep it in the fridge until you’re ready to bake. As for leftovers, they store well in an airtight container in the fridge for up to 3 days. Just pop them in the oven to reheat, or enjoy them cold, straight from the fridge.
Make It Your Own
- Swap the gouda for sharp cheddar if you’re after a bolder cheese flavor.
- Replace bacon with crispy tofu for a vegetarian twist that’s still hearty and delicious.
- Add a handful of chopped fresh herbs like parsley or dill for an added burst of freshness.
- For a bit of heat, toss in a finely diced jalapeño or a pinch of red pepper flakes.
If you try this, I’d love to hear how it turns out. Drop a comment or tag me in your photos — especially if you’ve made it your own with any fun variations! Enjoy!
Related update: Mini Zucchini Bites (Cuadritos De Calabacin)
Related update: Garlic & Spice Plantain Chips

Picture this: It’s a rainy Tuesday evening, and my craving for something warm, spicy, and comforting kicks in. The kind of craving that hits you like a hug when you’ve had one of those long days. I glance around my kitchen and spot the usual suspects — a can of coconut milk, some soy sauce, and a lonely block of tofu that’s been waiting for its moment. It’s the perfect setup for my Thai Coconut Curry Soup. This soup is a game-changer. Quick to whip up, it’s one of those recipes that feels a touch exotic but is totally doable on a weeknight. It’s cozy, fragrant, and brings just the right amount of heat. Trust me, it’s the kind of dish you’ll be daydreaming about long after your bowl is empty.
Jump to Recipe
What You’ll Need
The beauty of this recipe is that it doesn’t require a mile-long list of specialty ingredients. Chances are you already have most of these in your pantry or fridge:
- Canned light coconut milk
- One can’s worth of water
- Red curry paste
- Fresh ginger paste
- Fresh snow peas
- String beans
- Diced carrot
- Fresh whole Thai basil leaves
- Lime juice
- Low sodium soy sauce
- A few splashes of sesame oil
- Chili powder
- Tofu
- Salt
- Red bell pepper
- Black pepper
How to Make Thai Coconut Curry Soup
- Start by bringing the coconut milk and a can’s worth of water just to a boil. You’ll know it’s ready when it’s steaming and about to bubble over, so keep an eye on it.
- Reduce the heat to a low simmer. Add in the red curry paste and fresh ginger paste. Give it a good whisk until both are well-incorporated, and your kitchen is filled with that heavenly aroma.
- Now, toss in the diced carrots and spices, except for the basil leaves. Cover and let them simmer until the carrots are almost soft. Keep them a bit firm — nobody likes a mushy carrot!
- Add the tofu. Cover your pot again and let it all simmer for a few more minutes. The tofu will soak up all those delicious flavors.
- Time to add the remaining ingredients — snow peas, string beans, lime juice, soy sauce, sesame oil, and chili powder. Cover again and simmer just until the beans turn bright green but stay crisp.
- Garnish with strips of red bell pepper and freshly ground black pepper. If you’re feeling indulgent, add a couple of tablespoons of coconut oil when you put in the tofu. That extra coconut flavor is truly amazing!
Cook’s Notes
When making this soup, remember that the texture of your vegetables matters. You want them crisp and vibrant, not overcooked. If you plan to make it ahead, stop cooking just before adding the snow peas and string beans, and finish it off when you’re ready to serve. Store leftovers in an airtight container in the fridge for up to three days. Reheat gently on the stovetop, adding a splash of water if the soup thickens too much.
Make It Your Own
- Swap the tofu for crispy baked chicken if you’re not feeling the plant-based vibes.
- Add a handful of shrimp in the last few minutes of cooking for a pescatarian twist.
- Stir in a spoonful of peanut butter with the curry paste and ginger for a nutty depth of flavor.
- Throw in a cup of cooked rice noodles at the end for a heartier meal.
If you try this, I’d love to hear how it turns out — drop a comment or tag me! I’m always excited to see your delicious creations. Happy cooking!
Related update: Thai Coconut Curry Soup
Related update: Lemon Chickpea & Tomato Stew

Picture this: It’s a random Tuesday evening, and I’m staring down a fridge that looks like a ghost town. There’s a near-empty bottle of white wine, a few lonely sage leaves, and some beef flank steaks that I really need to use up. That’s when the idea hit me — Meat rolls with prosciutto and sage. With a quick rustle through my pantry, I realized I had everything I needed. This dish is the ultimate hero for those nights when you crave something comforting yet deceptively fancy. You know what I mean? It comes together faster than you’d think, with the sage giving it an unexpected pop of earthy goodness. And guess what? It only looks fussy.
Jump to Recipe
What You’ll Need
You might find that you’ve got most of this hanging around already. No need for a special trip to the store, which is a win in my book.
- Beef flank steaks – Perfect for rolling and full of flavor.
- Similar seasoning (like Vegeta Natur) – Just a sprinkle for a bit of zing.
- Prosciutto – Salty, savory goodness that wraps the steak in love.
- Sage leaves – The secret ingredient that makes this dish sing.
- Corn starch – Magic thickener for the sauce.
- White wine – Adds a splash of sophistication.
- Olive oil – For that sauté start.
- Butter – Because everything’s better with butter.
- Black bell pepper – Freshly cracked for a bit of heat.
How to Make Meat rolls with prosciutto and sage
- First things first, wash and dry those beef flank steaks. Then, get a bit of a workout by flattening them out. This helps them roll up nice and tight.
- Grab your seasoning of choice and rub one side of each steak — you’re giving it a flavor boost.
- Lay a piece of prosciutto and a sage leaf on the other side of the steak. The prosciutto should cover the whole side like a cozy blanket.
- Time to roll! Start at one end and roll the steak up tightly. Secure it with wooden or metal toothpicks. Channel your inner sculptor here.
- In a bowl, whisk the corn starch into the white wine until it’s all mixed up and smooth. This will be your secret sauce.
- Heat up a mix of olive oil and butter in a pan. Once it’s hot, add the rolls and sauté them on all sides until golden brown. Your kitchen will smell amazing right about now.
- Pour in the wine mixture and season with freshly cracked black bell pepper. Give everything a stir.
- Cover the pan and let the rolls simmer on low heat for about 20 minutes. They should become tender and soak up all those flavors.
- Remove the toothpicks before serving. Trust me, no one likes a surprise toothpick in their dinner.
Cook’s Notes
Make sure to flatten those steaks evenly, or they’ll be tricky to roll. You want them to cook evenly, too. If you’re not into sage, a bit of rosemary can be a lovely swap, though the sage really adds something special here. Don’t rush the simmering stage — that’s when all the magic happens and the flavors meld together. Leftovers can be kept in an airtight container in the fridge for up to three days. A quick reheat, and they’re just as delicious.
Make It Your Own
- Swap the beef flank steaks for chicken breast if you’re feeling poultry instead of red meat.
- If you’re not a fan of prosciutto, try using thinly sliced turkey or ham for a different twist.
- For a non-alcoholic version, substitute the white wine with chicken or vegetable broth. You won’t miss a thing!
- Add a sprinkle of crushed red pepper flakes for some heat if you’re feeling spicy.
If you try this, I’d love to hear how it turns out — drop a comment or tag me! Happy cooking, and remember, it’s all about having fun in the kitchen.
Related update: Meat rolls with prosciutto and sage
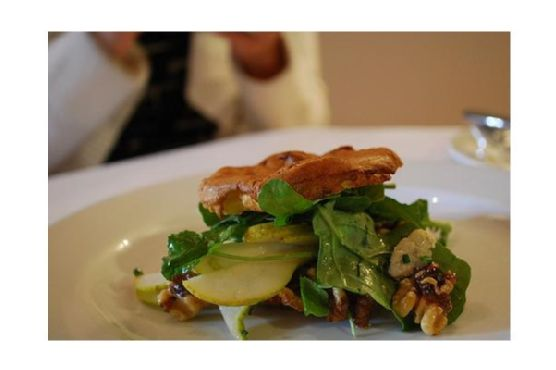
It was one of those fall evenings where the air turned crisp just a little too early for my liking. I found myself staring at a lonely pair of pears on my countertop, wondering how they’d somehow escaped the lunchbox routine all week. Inspired by the chill, a craving for something both comforting and refreshing struck me. This pear salad with walnuts and blue cheese was the answer — a perfect transitional dish that’s light yet satisfying. It’s what happens when you want to feel like you’re eating something fancy, minus the hassle. It’s filling enough for a lunch, or could be a lovely start to a cozy dinner.
Jump to Recipe
What You’ll Need
This salad is the definition of simple elegance, and chances are you already have most of these ingredients at home.
- Pears – ripe but firm enough to hold their shape
- Mixed salad leaves – I’m partial to using a mix that includes curly endive for that extra crunch
- Walnuts – toasted lightly to bring out their nuttiness
- Blue cheese – creamy and tangy, the star of the show
- Lemon juice – for a zesty dressing that cuts through the richness
- Safflower oil – mild and light, perfect for dressings
- Walnut oil – adds a subtle nutty depth
- Chives – delicate oniony flavor
How to Make Pear Salad With Walnuts and Blue Cheese
- Start by prepping your pears. Trim the base of each pear so they can stand upright like little soldiers on your cutting board. This will make slicing them easier and more stable.
- In individual salad bowls, arrange a generous handful of mixed salad leaves. Place one of your sliced pears on top of the greens in each bowl, making sure to fan them out for a bit of flair.
- Now, sprinkle a small handful of celery pieces into each bowl. The celery adds a delightful crunch and freshness to the salad.
- In a small bowl, combine the safflower oil, walnut oil, lemon juice, and a sprinkle of freshly chopped chives. Whisk together until the dressing is emulsified — you’ll know it’s ready when it’s slightly thick and all combined.
- Drizzle the dressing over each salad evenly. You want just enough to coat everything lightly without drowning it.
- Finish by scattering a healthy amount of crumbled blue cheese and toasted walnuts over each salad. These are your flavor bombs, so be generous!
Cook’s Notes
When it comes to choosing your pears, I recommend a variety like Bosc or Anjou for their firmness and sweetness. If your pears are too ripe, they’ll turn mushy in the salad. As for the blue cheese, any creamy variety works, but I find that a strong Roquefort can elevate the dish beautifully. To toast walnuts, simply spread them on a baking sheet and pop them in a 350°F (175°C) oven for about 5-7 minutes, or until they are golden and fragrant. Watch them closely because they can go from perfectly toasted to burnt in seconds! The salad is best served fresh, but you can store leftovers in an airtight container in the fridge for up to a day — just keep the dressing separate to avoid soggy greens.
Make It Your Own
- Swap out the blue cheese for goat cheese if you’re not a fan of strong flavors. It adds a milder creaminess that is just as delightful.
- Use pecans instead of walnuts for a slightly sweeter nutty touch.
- If you’re looking for a bit more protein, add some grilled chicken or crispy tofu to make it a complete meal.
- Drizzle a little balsamic glaze over the top for an added tangy sweetness that complements the pears beautifully.
If you try this, I’d love to hear how it turns out — drop a comment or tag me on Instagram! Your kitchen adventures make my day. Happy cooking!
Related update: Pear Salad With Walnuts and Blue Cheese
Related update: Fall Farro Salad with Pomegranate, Walnut & Truffles
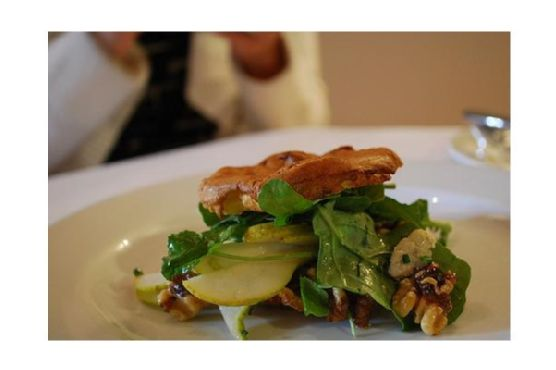
Last Tuesday, I found myself staring into the fridge, the usual weeknight dilemma playing out: what to make that’s quick, refreshing, yet still feels like a treat? I’d been craving something that had all the comforting notes of fall but was light enough to not weigh me down. Enter the pear salad with walnuts and blue cheese, a concoction that seemed to tick every box. This salad is all about contrasts — the creaminess of the blue cheese against the crisp pears, the bitterness of endive softened by the sweet, nutty warmth of walnuts. It’s a symphony of flavors that feels like indulging without the next-day guilt. Ready to dive in? Trust me, it’s a keeper.
Jump to Recipe
What You’ll Need
This recipe doesn’t require a trip to a gourmet store. Odds are you already have most of these ingredients hanging out in your kitchen.
- Pears – Choose ripe, but firm ones.
- Mixed salad leaves – A blend with some curly endive adds a nice bitter touch.
- Lemon juice – For a bright, tangy kick.
- Blue cheese – Go for your fave, the funkier, the better.
- Chives – Finely chopped for a fresh oniony hint.
- Safflower oil – For a neutral base.
- Walnut oil – Adds a toasty depth.
- Walnuts – Toast these for that extra crunch.
How to Make Pear Salad With Walnuts and Blue Cheese
- Start by prepping the pears. Slice a thin piece off their bases so they can stand upright without toppling over. Trust me, this makes the plating look extra fancy.
- In individual bowls, artistically arrange the pears amidst the mixed salad leaves. Think of this as your blank canvas.
- Sprinkle the chopped chives over the leaves, letting them fall where they may — no need for precision here.
- In a small bowl, whisk together the lemon juice, safflower oil, and walnut oil. Aim for a smooth emulsion that coats the back of a spoon.
- Drizzle this dressing lovingly over your salads. You’ll want a nice, even coverage without drowning the ingredients.
- Finish by scattering a generous handful of blue cheese crumbles and toasted walnuts over each salad, letting them nestle into the greens.
Cook’s Notes
Okay, let’s talk about some things to keep in mind. Firstly, when choosing pears, Bartletts or Anjous are my go-to for their texture and sweet flavor. If they’re too ripe, they might collapse under the pressure of the salad fork, so aim for that sweet spot of just ripe.
Toasting the walnuts is a game-changer. Just a few minutes in a dry skillet until they’re golden and fragrant will make a world of difference. Store any leftovers in a sealed container in the fridge, but honestly, this salad is best enjoyed fresh.
If you’re prepping ahead, keep the dressing separate until you’re ready to serve. This keeps the greens from wilting and maintains that fresh, crisp bite.
Make It Your Own
- Don’t love blue cheese? Swap it out for crumbled feta or goat cheese for a milder taste.
- For a protein boost, add some grilled chicken or crispy tofu on top. It turns this salad into a complete meal.
- Try swapping walnuts with pecans for a sweeter, softer crunch.
- If you can’t find curly endive, arugula offers a peppery alternative that pairs wonderfully with the pears and cheese.
If you try this, I’d love to hear how it turns out — drop a comment or tag me! Whether you stick to the script or put your own twist on it, I hope it becomes a staple in your kitchen like it has in mine. Happy cooking!
Related update: Pear Salad With Walnuts and Blue Cheese
Related update: Pear Salad With Walnuts and Blue Cheese
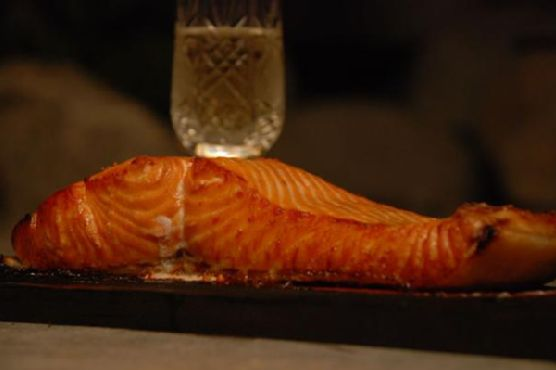
Last Thursday, I found myself staring into the fridge, hoping for inspiration to strike before my toddler demanded dinner. It was one of those days where you need something kinda fancy to feel like an adult—but it also had to be easy enough to not cause a breakdown. Enter: Wildwood Ovens Bourbon Apple Glazed Cedar Plank Salmon. This dish is the answer to those chaotic moments when you want to impress yourself and anyone lucky enough to be at the table. It’s a little sweet, a little smoky, and totally doable on a weeknight. The cedar plank makes it taste like it came from a restaurant, but really you just soaked a piece of wood and turned on the grill. Magic, right?
Jump to Recipe
What You’ll Need
The beauty here is that the ingredient list is straightforward, and there’s a good chance you’ve got most of this hiding in your pantry. A quick run to the store, and you’ll be ready to rock this impressive dish.
- Apple juice
- Brown sugar
- Cedar plank (make sure it’s food-safe!)
- 3-4 garlic cloves, minced
- 1 tsp kosher salt
- Freshly cracked black pepper
- Salmon filet (about 1.5-2 lbs is perfect)
- Bourbon whiskey
How to Make Wildwood Ovens Bourbon Apple Glazed Cedar Plank Salmon
- Start by soaking your cedar plank in water for at least 2 hours. This step is crucial to prevent any unplanned flare-ups and to infuse that lovely woody flavor into your salmon.
- Rinse the salmon under cold water and gently pat it dry with paper towels. This is essential as it helps the seasoning stick better and gives you a nice crisp finish.
- Grab a medium saucepan and set it over medium-high heat. Carefully pour in the bourbon—remember, no free-pouring from the bottle, unless you enjoy spontaneous kitchen pyrotechnics.
- Once the alcohol is reduced and you’ve got just a little left at the bottom of the pan, add in the apple juice, brown sugar, and minced garlic. Keep it on the heat until it’s reduced to about a third of its original volume. You’re looking for something just thinner than syrup.
- Season the salmon generously with salt and freshly cracked black pepper on both sides. Brush the skin side with a bit of olive oil.
- Place the seasoned salmon, skin side down, on the soaked cedar plank. Then, transfer the plank to a medium-high grill or a wood-fired oven preheated to 500°F, positioning it close to the fire for that authentic flavor.
- Using a probe thermometer, start checking the internal temperature of the salmon after about 10 minutes, and then every 5 minutes thereafter. Once it hits at least 100°F, brush on the apple glaze—every few minutes. This layering helps build up that gorgeous, sticky finish.
- Continue cooking until the salmon reaches your desired doneness; I aim for around 135°F for that perfect, juicy flakiness.
Cook’s Notes
Here are some extra tips for nailing this dish every time:
- Make sure your cedar plank is fully submerged while soaking, maybe putting a can or something on top to keep it under water.
- Don’t skimp on the glaze. The more layers you add, the richer the flavor.
- Leftovers (if you have any) can be kept in an airtight container in the fridge for a couple of days. Flake it over a salad for a quick next-day meal!
Make It Your Own
- Swap the bourbon for brandy if you prefer a slightly sweeter glaze.
- For a spicier kick, add a pinch of chili flakes to the glaze.
- No salmon? Try this glaze on chicken breasts or even tofu—just adjust the cooking time accordingly.
- Top with fresh herbs like dill or parsley for a pop of color and flavor right before serving.
If you try this, I’d love to hear how it turns out—drop a comment or tag me on social media! It’s always a win when we can turn a potential kitchen meltdown into a tasty triumph.
Related update: Wildwood Ovens Bourbon Apple Glazed Cedar Plank Salmon
Related update: Meat rolls with prosciutto and sage

Picture this: it’s a Wednesday evening, and you just got home, eyes baggy from the day, craving something that feels like a mini-vacation but without the suitcase hassle. Enter Crunchy Prawn Skewers With Lemony Avocado Dip. These little beauties are my go-to when I need something fresh, quick, and so delightful it erases the mundane right off your plate. I love that they’re impressive enough to make my husband think I’ve been slaving away when really, it’s just a fun little dish that comes together quicker than you can say “takeout.” Plus, that avocado dip? Oh, it’s the zingy, creamy goodness that dreams are made of.
Jump to Recipe
What You’ll Need
I bet you already have most of these staples hanging around your kitchen. You might just need to grab some prawns on your way home.
- Prawns – The star of the show, fresh or thawed from frozen.
- Flesh of Avocado – Creamy and ripe, please.
- Crème Fraiche – For that lush, smooth texture in the dip.
- Lemon (juice) – Bright, zesty, and necessary.
- Bread crumbs – I like the panko kind for extra crunch.
- Olive oil – Just a splash to coat those prawns.
- Bamboo skewers – Don’t let them set your kitchen on fire.
How to Make Crunchy Prawn Skewers With Lemony Avocado Dip
- Start by making the dip: throw the avocado flesh, crème fraiche, and lemon juice into a food processor. Blend until silky smooth. Taste, season, and set it aside.
- In a separate bowl, mix your breadcrumbs with a touch of lemon zest, and season generously. It should smell like a fresh, zesty day.
- Now, coat your prawns in a little olive oil. Give them a gentle massage, then toss them into the breadcrumb mixture, ensuring they’re well-coated.
- Thread three prawns onto each skewer. Trust me, this is easier than threading a needle.
- Time to grill! Place the skewers on a preheated grill for about 2 minutes on each side, until they’re golden and crisp. The smell should be irresistible by now.
- Serve immediately with that luscious avocado dip and watch them disappear quickly.
Cook’s Notes
I can’t stress enough the importance of soaking those bamboo skewers beforehand. Give them at least an hour in cold water, and you’ll avoid any unwelcome flare-ups. If you’re planning to make this dish ahead, prep the dip and breadcrumb mixture in advance, but hold off on breading the prawns until you’re ready to cook. Leftovers? Pop them in an airtight container in the fridge — the dip stays good for a couple of days, but the prawns are best enjoyed fresh while they’re crispy.
Make It Your Own
- Instead of prawns, try using tofu cubes for a vegetarian twist. Just press them well to remove excess moisture before coating.
- Add a pinch of smoked paprika to the breadcrumb mix for a smoky kick.
- Swap the crème fraiche with Greek yogurt if you prefer a tangier dip.
- For a little heat, toss a few chili flakes into the breadcrumb mixture.
If you try this, I’d love to hear how it turns out — drop a comment or tag me! Enjoy making these skewers and watch them become a weeknight favorite in no time!
Related update: Crunchy Prawn Skewers With Lemony Avocado Dip
Related update: Mini Zucchini Bites (Cuadritos De Calabacin)
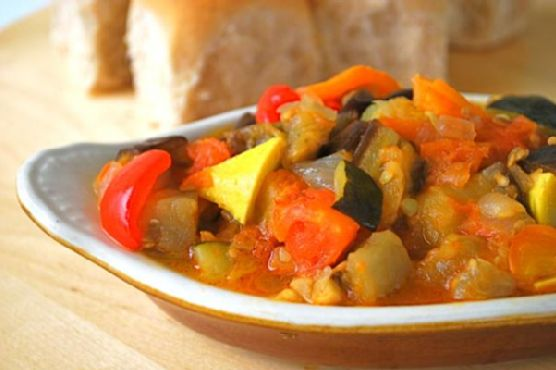
Last Wednesday, I found myself staring into the depths of my fridge, contemplating a lonely eggplant and a couple of sad zucchinis. It was one of those evenings when inspiration was as low as my vegetable crisper’s contents. But then, a little spark hit me—why not whip up a colorful and cozy Vegetarian Ratatouille? It’s one of those dishes that feels like a warm hug after a long day. Plus, it’s a melody of summer veggies that’s simple to throw together, making it a perfect midweek hero. Loaded with fresh flavors, it’s hearty without being heavy, and best of all, it can transform fridge odds and ends into something spectacular. So, if you’re ready to turn that produce drawer into a work of art, keep reading. Or, if you’re raring to get started—Jump to Recipe
What You’ll Need
This ingredient list is refreshingly straightforward. Chances are you already have most of these in your kitchen. Here’s what you’ll need for this vibrant veggie medley:
- Eggplant
- Zucchini
- Yellow squash
- Tomato
- Red bell pepper
- Orange bell pepper
- Onion
- Garlic
- Fresh basil
- Thyme
- Dried oregano
- Extra virgin olive oil
- Sea salt
How to Make Vegetarian Ratatouille
- Start by heating a good glug of extra virgin olive oil in a large saucepan over medium-low heat. Toss in the diced onion and minced garlic. Stir them around until the onions are translucent and the whole kitchen smells like a dream.
- Next, add in the chopped tomatoes. Give them a gentle stir and let them mingle with the onions and garlic until the flavors start to blend together.
- Now, it’s time to add the rest of the gang. Introduce the chopped eggplant, zucchini, yellow squash, red and orange bell peppers to the party. Sprinkle in some sea salt, a few sprigs of thyme, and a pinch of dried oregano.
- Lower the heat and let everything simmer gently for about 30 minutes. Stir occasionally, keeping an eye on the eggplant. You’ll know it’s done when it’s tender and the edges of the vegetables are starting to caramelize a bit.
- Before serving, toss in some freshly torn basil leaves for a burst of freshness. Give everything one last stir and get ready to dig in!
Cook’s Notes
Here’s the deal: Ratatouille is incredibly forgiving. If you have extra veggies on hand, like mushrooms or carrots, feel free to toss them in. Just keep an eye on the cooking time; firmer veggies might need a bit more time to tenderize.
- Worried about mushy vegetables? Make sure your heat is low enough to allow them to cook slowly and evenly.
- This dish can easily be made ahead of time. Store it in an airtight container in the fridge for up to three days. The flavors only deepen as it sits, making it an excellent leftover choice.
- If you’re serving this to guests, you can prepare it in advance and simply reheat gently on the stove before serving.
Make It Your Own
- For a protein boost, add in some chickpeas or white beans during the last 10 minutes of cooking.
- Swap the fresh basil for a handful of chopped parsley if that’s what you have on hand.
- Spice things up with a pinch of red pepper flakes for some heat.
- Transform it into a heartier meal by serving it over a bed of fluffy quinoa or couscous.
If you try this, I’d love to hear how it turns out — drop a comment or tag me! Your feedback means the world to me and keeps the inspiration flowing.
Related update: Vegetarian Ratatouille
Related update: Wildwood Ovens Bourbon Apple Glazed Cedar Plank Salmon

It was one of those chilly evenings when I was ransacking through my pantry and fridge, desperately trying to piece together something warm and spicy. You know the feeling, right? When you want something cozy but you’re in no mood to go out for groceries. That’s when this Spicy Lemongrass Soup was born. It’s a comforting bowl that’s surprisingly easy to whip up with just a few special ingredients, like the invigorating lemongrass and bold red dried peppers. The process might seem like a little kitchen adventure, but I promise, it’s one worth embarking on.
Jump to Recipe
What You’ll Need
If you’re anything like me, you’ll be thrilled to find that you probably have most of the ingredients already lounging in your kitchen. The stars of the show are these bold, aromatic components that bring a delightful zing to this dish.
- Fresh lemongrass – gives it that unmistakable citrusy aroma
- Red dried peppers – these pack the punch
- Ginger – fresh is best for that sharp, spicy edge
- Garlic – because when is garlic not invited?
- Vegetable broth – the canvas for all those flavors
- Canned fresh coconut milk – if you can find it, it’s game-changing
- Tofu cubes – protein power
- Snow peas – for a bit of crunch and color
- Mushrooms – umami goodness
- Rice noodles – the slurp factor
- Lime (juice) – the zesty finish
How to Make Spicy Lemongrass Soup
- Start by chopping the lemongrass into 2-inch pieces. Slice each piece down the center. This will release the oils that give the soup its signature fragrance.
- In a large soup pot, combine the lemongrass, vegetable broth, coconut milk, garlic, and ginger. Bring it to a boil over medium-high heat. You’ll know it’s ready when the aroma makes you want to dive right in.
- Once boiling, reduce the heat to low and let it simmer for 30 minutes. The broth should become a golden, aromatic bath of deliciousness.
- After simmering, strain the broth through a cheesecloth to remove the lemongrass stalks. Trust me, they’re not the chewable kind!
- Return the strained broth to a simmer. Add the tofu, mushrooms, snow peas, and rice noodles. Stir them gently so they mingle and absorb all that flavor.
- Squeeze in the lime juice whenever the mood strikes—early on for a tangy infusion, or at the end for a fresh kick. I like a bit at the start and a bit at the end.
- Simmer until the noodles are soft and the snow peas still have a slight crunch. You’ll see the edges of the pot starting to bubble as the aroma fills the room.
- Serve hot, garnishing with a sprinkle of grated ginger or some fresh scallions if you have them.
Cook’s Notes
Oh, the lemongrass! It’s the heart and soul but remember, it’s not meant to be chewed. Straining it out is crucial unless you enjoy a mouthful of fibrous stalks. This soup can be prepped a day ahead; just store the broth separately and add the noodles when reheating. Leftovers? They keep well in the fridge for a couple of days, but the noodles will get softer, so maybe add those fresh if you’re planning a day-two soup fest.
Make It Your Own
- Swap the tofu for crispy tofu or even shredded cooked chicken for a different texture.
- Throw in some sliced bell peppers for extra color and crunch.
- Use zucchini noodles instead of rice noodles for a lighter, veggie-packed version.
- If you love heat, add an extra handful of red dried peppers or a dash of chili oil on top before serving.
So, there you have it! If you try this Spicy Lemongrass Soup, I’d love to hear how it turns out—drop a comment below or tag me on social media. Happy cooking, my kitchen adventurers!
Related update: Spicy Lemongrass Soup
Related update: Thai Coconut Curry Soup
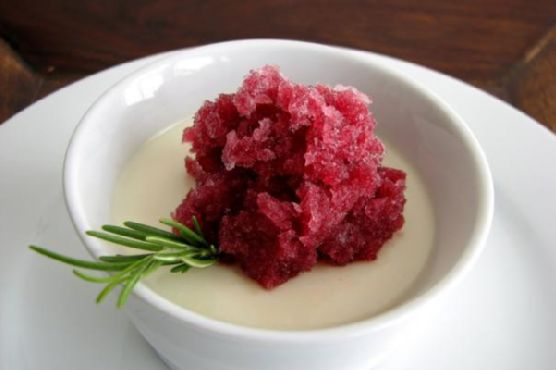
Picture this: It’s a Friday evening, and I’ve just survived one of those weeks where everything feels a bit too much. You know the kind — when the emails pile up and the laundry threatens to become sentient. I’m in the kitchen with my favorite playlist crooning in the background, a glass of wine in hand, and the distinct sense that I need something special, yet fuss-free, to round off this week. Enter: Apothic Granita and Vanilla Panna Cotta. This dessert is my secret weapon; it’s deceptively simple yet so elegant that it could grace any dinner party table. Think of it as a little gift to yourself — creamy, dreamy panna cotta topped with a refreshing, slightly boozy granita that feels like a grown-up snow cone. Trust me, it’s the perfect ending to an imperfect week.
Jump to Recipe
What You’ll Need
The beauty of this recipe is that it feels luxurious while using ingredients you might already have lurking in your pantry. Let’s check the list:
- 1 cup Apothic Red wine
- 1 tablespoon crème de cassis liqueur
- 2 tablespoons sugar
- 1 teaspoon fresh lemon juice
- 1 sprig fresh rosemary
- 1 teaspoon whole black peppercorns
- 1 envelope (2 1/4 teaspoons) unflavored Knox powdered gelatin
- 1 cup half and half
- 1 cup heavy cream
- 1/4 cup sugar
- 1 vanilla bean, split and seeds scraped
- 1/4 cup cold water
How to Make Apothic Granita and Vanilla Panna Cotta
- Start with the granita: In a saucepan over medium-low heat, combine the Apothic Red wine, crème de cassis, 2 tablespoons of sugar, lemon juice, rosemary, and peppercorns. Let it simmer gently for 10 to 15 minutes until the kitchen is filled with a fragrant aroma and the sugar has dissolved completely.
- Once the mixture is infused, remove it from the heat and allow it to cool to room temperature. This is your golden moment of patience — let those flavors meld!
- After cooling, strain the mixture into a shallow airtight container, ensuring all the solids are removed. Cover and place it in the freezer for about 2 hours, or until it’s frozen but not rock solid.
- While the granita is freezing up its magic, let’s tackle the panna cotta. Sprinkle the gelatin over the cold water in a small bowl and let it bloom — this means it should look like a soft, jiggly sponge.
- In another saucepan, combine the half and half, heavy cream, and 1/4 cup of sugar. Add the split vanilla bean and its seeds, then bring the mixture to a gentle simmer over medium heat, stirring occasionally. You’re looking for the moment where it’s steaming but not yet boiling.
- Remove from heat and whisk in the bloomed gelatin until fully dissolved, ensuring a silky smooth texture. Strain the mixture into cups or molds of your choosing, then chill in the refrigerator for at least 4 hours or until set.
- To finish the granita, use a fork to scrape the surface into icy crystals. It should remind you of a snow cone, but with a sophisticated twist.
- Serve the panna cotta topped with a generous scoop of granita, and get ready to impress yourself or any guest lucky enough to join.
Cook’s Notes
Keep an eye on the simmering wine mixture. If it reduces too much, you’ll end up with concentrated flavors that might overpower the delicate panna cotta. If you’re planning ahead, the panna cotta can be made a day in advance and kept chilled. As for leftovers, the granita can be stored in the freezer in an airtight container for up to a week. Just remember to give it a good scrape before serving again.
Make It Your Own
- Swap the Apothic Red: Try a different red wine for a unique flavor profile — maybe a Merlot or Zinfandel.
- Berry Burst: Add a handful of fresh berries to the granita mixture before freezing for a fruity twist.
- Vanilla Twist: Use vanilla extract instead of a vanilla bean if you’re in a pinch, but reduce it to one teaspoon.
- Herbal Infusion: Replace rosemary with fresh thyme for a fresh take on the herbal notes.
If you try this, I’d love to hear how it turns out — drop a comment or tag me! If your week has been anything like mine, this might just be the sweet escape you need.
Related update: Apothic Granita and Vanilla Panna Cotta
Related update: Flour-Less Peanut Butter Cookies
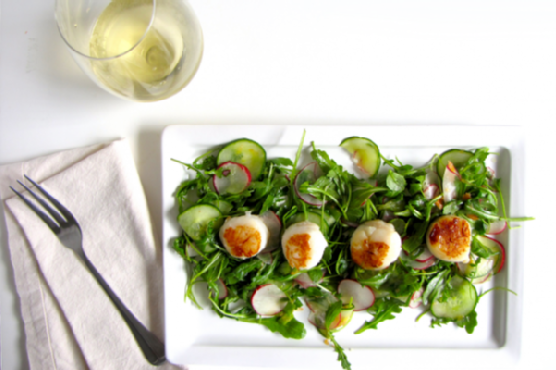
Picture this: It’s a Tuesday evening. You’ve just kicked off your shoes after a whirlwind day, and all you want is something fresh, zesty, and sophisticated on your plate without spending more time in the kitchen than you did in traffic. That’s where my Citrus Arugula Salad with Seared Scallops swoops in to save the day. It’s got that crisp, peppery bite from the arugula that I absolutely crave, the juicy pop of a Cara Cara orange, and the tender, buttery goodness of perfectly seared scallops. It sounds fancy, but trust me, it’s a cinch to throw together—and it’s bound to impress whoever’s lucky enough to join you at the table.
Jump to Recipe
What You’ll Need
Chances are you already have most of this in your kitchen, aside from maybe the scallops. But it’s the simple ingredients that really let those scallops shine.
- Arugula
- Cara Cara orange
- Radish
- English or Persian cucumber
- Green onion
- Salt
- Scallops
How to Make Citrus Arugula Salad with Seared Scallops
- First, thinly slice the radishes and cucumber. You want them delicate enough to complement the scallops, not overshadow them. Dice up the green onion, too.
- In a bowl, squeeze the juice and pulp from half of the Cara Cara orange. Add a pinch of salt and whisk it all together until it’s beautifully blended.
- Add in your radish and cucumber slices, along with a healthy handful of arugula. Toss it all together until every leaf and slice glistens with that citrusy goodness.
- Now, for the scallops: Heat a splash of oil in a pan over high heat. The pan needs to be hot, hot, hot—like sizzling enough that you can almost hear it pleading for the scallops.
- Gently place the scallops flat-side down in the pan. Space is key here, so if you have a lot of scallops, do them in batches. Crowding the pan is the enemy of that golden sear we’re aiming for.
- Let them sear undisturbed. The temptation to peek and prod is real, but resist! After a couple of minutes, check for that caramel-colored crust. Once you see it, flip them over.
- Plate your salad and place about four scallops on top. They should be served immediately to avoid any rubbery disappointments.
Cook’s Notes
Seared scallops are one of those things where less is more. Don’t overdo the seasoning; let their natural sweetness shine. Also, scallops are quick to cook and quick to turn rubbery if left too long. Watch them like a hawk, and you’ll be fine. If you want to make this ahead, prepare the salad components in advance and just sear the scallops right before serving. As for leftovers, the salad keeps well for a day, but the scallops are best enjoyed fresh out of the pan.
Make It Your Own
- Swap the arugula for spinach if you prefer a milder green.
- Replace the Cara Cara orange with blood orange for a deeper color and flavor.
- Try grilling the scallops for a smoky twist.
- For a vegetarian version, swap the scallops for crispy tofu slices.
If you try this, I’d love to hear how it turns out—drop a comment or tag me! Whether it’s a quick weeknight dinner or a date night delight, I hope you find this as much of a joy to make as it is to eat. Enjoy!
Related update: Citrus Arugula Salad with Seared Scallops
Related update: Vegetarian Ratatouille
Related update: Pear Salad With Walnuts and Blue Cheese
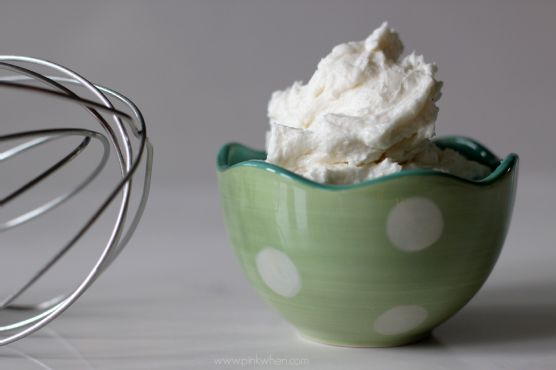
Picture this: It’s one of those afternoons when the craving for something sweet is impossible to ignore. Not just any sweet, but a slice of cake smothered in creamy, luscious frosting. I was halfway through baking a batch of cupcakes when disaster struck—no frosting in sight! With minutes to spare, I whipped out this trusty Old Fashioned Vanilla Buttercream Frosting recipe, and voilà, my cupcakes were saved. It’s quick and easy, with ingredients you probably have on hand, and it never fails to impress with its smooth, rich texture. Plus, there’s something about homemade frosting that just feels like a hug in dessert form.
Jump to Recipe
What You’ll Need
I love this recipe because it uses simple ingredients that work magic together. Chances are you already have most of this sitting in your pantry or fridge:
- Solid vegetable shortening
- Butter
- Vanilla extract
- Confectioners sugar
- Milk
How to Make Old Fashioned Vanilla Buttercream Frosting
- In a large mixing bowl, cream the butter and shortening together using an electric mixer. You’re aiming for a smooth, unified blend that’s a pale yellow in color.
- Add the vanilla extract, and continue mixing. The aroma will instantly start to fill your kitchen.
- Gradually sift in the confectioners sugar, adding it one cup at a time. Beat on medium speed, and scrape down the sides and bottom of the bowl often. This ensures everything is well incorporated.
- Once all the sugar is mixed in, the icing will seem a bit dry—don’t worry, this is normal!
- Add the milk to the mixture. Beat on medium speed for about 3 minutes. You’re looking for a light, fluffy texture that’s easy to spread.
- Keep the icing covered with a damp cloth until you’re ready to use it. This prevents it from drying out.
Cook’s Notes
A little tip I’ve picked up: Keeping the mixing bowl in the fridge when you’re not using it helps maintain the frosting’s consistency, especially if your kitchen tends to be on the warmer side. If you’re making this ahead of time, store it in an airtight container in the fridge for up to a week. When you’re ready to use it, just give it a quick re-whip in your mixer to bring back its creamy texture. Also, be generous with that vanilla—for that classic flavor, it’s key!
Make It Your Own
Here are a few fun variations to try if you’re feeling adventurous:
- Swap out the vanilla for almond extract for a nutty twist.
- Add a few tablespoons of cocoa powder to create a chocolate buttercream.
- Substitute the milk with heavy cream for a richer, thicker frosting.
- Mix in some food coloring to match the theme of your dessert or party.
If you try this, I’d love to hear how it turns out—drop a comment or tag me! There’s nothing more rewarding than seeing your creations come to life. Enjoy every sweet, frosted bite!
Related update: Old Fashioned Vanilla Buttercream Frosting
Related update: Apothic Granita and Vanilla Panna Cotta

So last Tuesday, I found myself staring at a bowl full of apples on my countertop, leftovers from my overly ambitious farmer’s market haul. My mind was set on something sweet and indulgent, but I didn’t want to spend ages prepping a fancy dessert or making a mess of my kitchen. Enter: Easy Homemade Apple Fritters. These little nuggets of joy are perfect for those times when you need a quick treat that feels special but doesn’t involve a ton of effort. They’re crispy on the outside and filled with warm, cinnamon-spiced apple goodness on the inside. Trust me, they’re like a cozy hug on a plate.
Jump to Recipe
What You’ll Need
You’ll love this recipe because chances are, you already have most of the ingredients in your pantry. Plus, it’s really all about letting those apples shine.
- 1 cup all-purpose flour
- 1 apple, peeled, cored, and diced
- 1 teaspoon baking powder
- 1 teaspoon cinnamon
- 1 egg
- 1/3 cup milk
- 1 tablespoon sugar
- 1/4 teaspoon salt
- Oil, for frying (I used vegetable oil)
- 1 cup powdered sugar
- 2 tablespoons milk (for the glaze)
How to Make Easy Homemade Apple Fritters
- In a mixing bowl, whisk together the flour, sugar, salt, baking powder, and cinnamon. You’ll want to inhale deeply because that cinnamon is going to smell divine.
- Gently stir in the milk and egg until the mixture is just combined. Over-mixing is the enemy here! We want it to stay light and fluffy.
- Fold in the diced apple. Make sure those apple pieces are well distributed—every fritter deserves its apple moment!
- Pour oil into a skillet so that it’s about 1 1/2 inches deep. Heat the oil on high. You’ll know it’s ready when a little dough thrown in pops right back up to the surface.
- Carefully drop heaping teaspoons of the dough into the hot oil. Watch them sizzle! Cook until the fritters are brown, about 2 minutes, then flip. Give them another 1-2 minutes to get golden on the other side.
- Transfer the fritters to paper towels to soak up any excess oil. A quick pit stop before they head to a cooling rack.
- For the glaze, stir the powdered sugar and milk together in a small bowl. It’ll be smooth and silky.
- Drizzle the glaze over the fritters. Wait about 3 minutes for the glaze to harden a bit, flip the fritters, and drizzle over the other side. They’re best served warm, so dive in!
Cook’s Notes
Here’s a few things I learned while making these fritters:
- Keep an eye on your oil temperature. If it’s too hot, your fritters will brown too quickly on the outside and stay raw on the inside.
- If you’re making these ahead of time, store them at room temperature in an airtight container for up to a day. Reheat in the oven to crisp them back up.
- Leftovers can be revived by popping them in a toaster oven for a few minutes. They won’t be as good as fresh, but still tasty.
Make It Your Own
- Swap the apple for another fruit like pears or peaches if you’re feeling adventurous!
- Add a pinch of nutmeg or ginger to the batter for an extra layer of spice.
- Try using maple syrup instead of powdered sugar for the glaze for a deeper, richer sweetness.
- For a savory twist, omit the sugar and cinnamon, and add sharp cheddar cheese and bacon bits to the batter.
If you try this, I’d love to hear how it turns out — drop a comment or tag me! Seriously, nothing makes my day more than seeing your kitchen creations. Enjoy every crispy, warm, and cinnamon-sweet bite!
Related update: Easy Homemade Apple Fritters
Related update: Old Fashioned Vanilla Buttercream Frosting
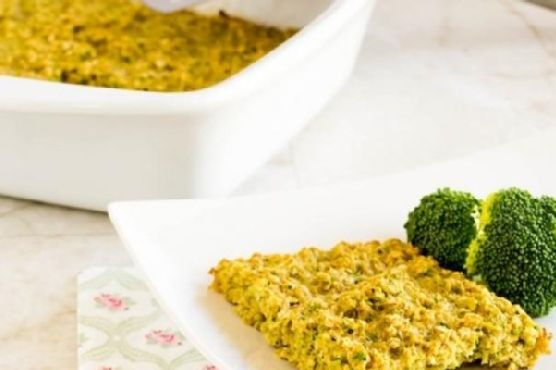
It was one of those mornings when I wanted something warm and filling but couldn’t face another bowl of cereal. I peeked into the fridge and found a half-used bag of broccoli and a carton of eggs. Inspiration struck, and soon my kitchen was filled with the comforting smell of baking oats and the savory tang of broccoli. This Broccoli Oatmeal Breakfast Casserole is exactly what you need when you want something nutritious and satisfying without spending your entire morning in the kitchen. Plus, it’s surprisingly easy to make, so you can enjoy a leisurely breakfast even on a busy day.
Jump to Recipe
What You’ll Need
This recipe is beautifully simple and calls for ingredients you likely have sitting in your pantry. You know I love a recipe where a quick rummage through the cupboard delivers everything you need.
- Broccoli florets
- Dry oats
- Eggs
- Low-fat milk
- Olive oil
- Baking powder
- Salt
- Cayenne pepper
How to Make Broccoli Oatmeal Breakfast Casserole
- Start by preheating your oven to 350°F (175°C). While it warms up, grab your trusty 8-inch square baking dish and give it a light misting of cooking spray to prevent sticking.
- Chop the broccoli florets roughly and blitz them in a food processor until they resemble coarse crumbs. The earthy smell of fresh broccoli will fill the air.
- In a large mixing bowl, combine the ground broccoli, dry oats, a pinch of baking powder, a sprinkle of salt, and a dash of cayenne pepper. Give it a good mix — this is the foundation of your casserole.
- In a separate bowl, whisk together the eggs, low-fat milk, and a generous tablespoon of olive oil. The mixture should be smooth and slightly frothy.
- Pour the wet ingredients into the bowl of dry ingredients. Stir everything together until the oats are fully coated and the broccoli is evenly distributed.
- Spoon the mixture into your prepared baking dish, smoothing the top with a spatula. Slide it into the oven and bake for 25-30 minutes, or until the edges are golden and a fork inserted into the center comes out clean.
- Let it cool slightly before cutting into your desired size and serving it warm. The casserole will be firm yet tender, with a delicious crust formed by the oats.
Cook’s Notes
This casserole is forgiving, so don’t stress if you’re missing an ingredient. If you’re prepping in advance, you can assemble the night before and bake it fresh in the morning—just cover and store in the fridge. Leftovers? Refrigerate them, and they’ll keep for up to three days. Reheat portions in the microwave or the oven. Watch out for over-baking; once it’s golden and a fork comes out clean, it’s ready. The texture should be moist but not soggy.
Make It Your Own
- Cheese Lover’s Twist: Add a handful of grated cheddar or parmesan to the dry ingredients for a cheesy kick.
- Protein Boost: Toss in some cooked, crumbled sausage or crispy bacon bits to the batter for extra protein.
- Veggie Variety: Swap half the broccoli for finely chopped spinach or kale for an extra green boost.
- Spice It Up: Substitute cayenne pepper with smoked paprika or add a pinch of chili flakes for a different heat profile.
If you try this Broccoli Oatmeal Breakfast Casserole, I’d love to hear how it turns out for you. Drop a comment below or tag me in your breakfast creations! Here’s to starting the day with something nutritious and delicious. 🥦✨
Related update: Broccoli Oatmeal Breakfast Casserole

Last Tuesday evening, I was standing in my kitchen, staring into the fridge like it was an oracle with all the answers to my dinner dilemmas. It had been a long day, and I needed to whip up something that felt like a reward for surviving it. That’s when I spotted the pack of pork chops tucked away on the bottom shelf, right beside a wedge of Gruyère cheese that had almost been forgotten. The idea of Cheese Pork Chops was born, and let me tell you, this dish is a midweek savior. It’s got that special touch of comfort with gooey cheese and rich mustard cream, yet it’s simple enough to throw together while you’re half-distracted by a podcast or the kids’ homework.
Jump to Recipe
What You’ll Need
This is one of those recipes where you might just have everything you need already. It’s all about bold flavors with just a handful of ingredients.
- 2 tablespoons olive oil
- 2 tablespoons unsalted butter
- 4 pork chops (about 1 inch thick)
- Salt and pepper, to taste
- 1/2 cup heavy cream
- 2 tablespoons dijon mustard
- 1 cup shredded Gruyère cheese
How to Make Cheese Pork Chops
- Heat a heavy-bottom skillet over medium-high heat. Add the olive oil and butter, swirling them together until the butter melts and starts to slightly foam.
- Carefully place the pork chops in the skillet. Sauté for about 3 minutes on each side, letting them develop a lovely golden crust.
- Reduce the heat to medium. Cook the pork chops for an additional 5 to 6 minutes per side, until they’re just cooked through. Sprinkle with salt and pepper to taste. Remember, the juices should run clear when you test them.
- While the chops finish cooking, preheat your broiler. In a small bowl, whisk together the heavy cream, dijon mustard, and shredded Gruyère cheese until well combined.
- Transfer the cooked pork chops to an ovenproof dish. Spread the cheese-cream mixture generously over each chop.
- Place the dish under the preheated broiler for about 5 minutes. Keep a close eye on them—the cheese should be bubbly and slightly browned.
Cook’s Notes
One of the best things about this dish is how forgiving it is. If your chops are a bit thicker or thinner, just adjust cooking time accordingly. You want them juicy, not dry.
If you’re making this ahead of time, you can prepare the cheese mixture in advance and even sear the chops the night before. Just store them separately in the fridge and bring to room temperature before broiling.
Got leftovers? Lucky you! They’re fabulous sliced thin and tossed into a salad, or reheated gently in the microwave for a next-day lunch that will make your coworkers jealous.
Make It Your Own
- Spice it up: Add a teaspoon of chili flakes to the cheese mixture for a spicy kick.
- Herbaceous twist: Mix a tablespoon of chopped fresh herbs like thyme or rosemary into the cheese mixture.
- Cheese swap: Try shredded sharp cheddar or even blue cheese for a different flavor profile.
- Dijon alternative: Experiment with whole grain mustard for a bit more texture and tang.
If you try this, I’d love to hear how it turns out — drop a comment or tag me in your cheesy creations! Happy cooking, friends!
Related update: Cheese Pork Chops
Last Tuesday was one of those days where everything felt a little off-kilter. You know, the kind where your morning coffee just doesn’t hit right, and your afternoon is a blur of tasks that never seem to end? By the time dinner rolled around, I was craving something that would transport me far from the daily grind—something warm, comforting, and just a tad exotic. Enter: paella. Not only is it a dish that sounds fancy enough to impress, but it’s surprisingly simple to whip up. It’s got this amazing way of bringing a little Spanish sunshine to your table, even on the dreariest of evenings. Plus, it’s a one-pan wonder, so less time spent cleaning up means more time for Netflix or a good book. Trust me, once you’ve tasted this, you’ll see what all the fuss is about. Jump to Recipe
What You’ll Need
If your pantry’s got some basics and your local grocery store has a seafood section, you’re pretty much set. I love that this recipe starts with stuff you likely already have on hand!
- Smoky paprika
- Dried oregano
- Kosher salt
- Black pepper
- Chicken wings
- Littleneck clams
- Solid chorizo sausage
- Shrimp
- Extra virgin olive oil
- White diced onion
- Diced garlic
- Italian parsley leaves
- Whole .5 oz tomatoes
- Canned Spanish short grain rice
- Water
- Saffron
- Salt and pepper
- Green peas
- Lemon wedges
How to Make Paella for Four; A Wonderful Spanish Mixed Seafood Stew
- Start by mixing the smoky paprika, dried oregano, kosher salt, and black pepper. Rub this spice mix all over the chicken wings and let them chill in the fridge for an hour. This is where the magic begins—infusing the chicken with all those bold, earthy flavors.
- Take the chicken out of the fridge about 30 minutes before you’re ready to cook. They should be close to room temp, which helps them cook evenly.
- Heat half of the olive oil in your trusty 12-inch All-Clad stainless steel pan over medium-high heat. Toss in the chorizo rounds and let them sizzle away until they’re browned and fragrant. Remove them from the pan and set aside.
- Add the rest of the oil to the pan, then brown the chicken on all sides, savoring that sizzling sound. Once they’re golden brown, take them out and keep them with the chorizo.
- Turn the heat down to medium and add the onions, garlic, and parsley. This is your sofrito—a flavor-packed base that’s the heart of the dish. Cook until the onions are translucent and everything smells irresistible, about 2-3 minutes.
- Next, add the crushed and drained tomatoes. Give everything a good stir and let it cook for about 3 minutes until the flavors meld together.
- Stir in the rice, making sure it’s all cozy with the sofrito, for about 2 minutes. You want each grain to be coated with that delicious base.
- Return the sausage and chicken to the pan. Pour in the hot water and bring the mixture to a gentle simmer, cooking for about 5 minutes. Give it a stir now and then to keep everything mingling nicely.
- Now, place the clams artfully atop the rice. Resist the urge to stir! You want them just so.
- Let the paella cook for another 5 minutes, then position the shrimp, tails up, so they can steal the show. Continue to cook for about 10 minutes, until the clams have popped open, the shrimp are a lovely pink, and the rice is fluffy yet moist.
- Finally, check for socarrat. With a fork, gently feel the bottom of the pan. If you detect that legendary crispy crust, you’re golden. If not, crank up the heat for 30-45 seconds to get that perfect crackling finish, then serve immediately.
Cook’s Notes
Here are a few little nuggets of wisdom to ensure your paella is perfecto:
- If you’re short on time, you can season the chicken and let it sit while you prep the rest of the ingredients. It won’t be exactly the same, but life necessitates shortcuts sometimes!
- Leftovers? Pop them in an airtight container and they’ll keep in the fridge for up to two days. Paella is one of those dishes that tastes even better the next day, I promise.
- Be patient with the socarrat. It’s the best bit, but it requires a little trust in the process. If you don’t hear a slight crackle when you turn up the heat, give it a bit more time.
Make It Your Own
Feeling creative? Here are some twists to make this paella uniquely yours:
- Swap out the chicken wings for crispy tofu to make a pescatarian version.
- Substitute the clams with mussels if that’s what you’ve got on hand or prefer.
- Feeling spicy? Use a hot chorizo for an extra kick.
- Not a fan of saffron? Add a pinch of turmeric for a golden hue without the floral notes.
If you try this, I’d love to hear how it turns out—drop a comment or tag me! Your feedback keeps this kitchen creativity going. Enjoy the taste of Spain at your own table!
Related update: Paella for Four; A Wonderful Spanish Mixed Seafood Stew
Related update: Cheese Pork Chops

Picture this: it’s a rainy Wednesday evening, and I’m staring at my fridge like it’s going to magically suggest what I should make for dinner. Ever have those moments when nothing feels right, but takeout seems too tragic? That’s when I stumbled upon the perfect antidote — My Drunken Fish Fillet. It’s this crispy, golden, comforting dish that feels like a hug on a plate, without the takeout guilt. The beer in the batter makes everything delightfully light and airy, and honestly, it’s low-key impressive when you pull it off. Plus, who doesn’t love cooking with wine and beer? The kitchen smells divine, and it’s as much fun to make as it is to devour.
Jump to Recipe
What You’ll Need
Okay, so let’s talk about the magic ingredient list. The cool part? You probably have a bunch of this stuff hanging out in your pantry already. Here’s the breakdown:
- Fish – whatever fillet you’ve got; think tilapia or cod.
- Salt – to season the fish and the batter.
- White ground pepper – trust me, it adds just the right kick.
- Rice wine – this is where the magic (and the name) starts.
- Beer – pick something light, like a lager.
- White eggs – you’ll need both the yolk and the whites, separately.
- All-purpose flour – plus a little more for dusting if you’re feeling fancy.
- Oil – for frying, of course.
How to Make My Drunken Fish Fillet
Let’s break this down step-by-step so you can nail it every time:
- Start by combining your beer, egg yolk, flour, and half a teaspoon of salt. Whisk it well until you’ve got a thick, smooth batter. Pop this into the fridge for a good hour. This rest is crucial for texture!
- Meanwhile, sprinkle your fish fillets with salt and white ground pepper. Give them a pat so they’re nicely coated. Then, splash on the rice wine and let them marinate for about 15 to 20 minutes. The fragrance alone will brighten your day!
- When you’re ready to fry, beat the egg whites until they’re soft and foamy. Gently fold these into your chilled batter. This is where the light, airy magic happens.
- Heat up your oil until it’s shimmering. Dip your marinated fish fillets into the batter, ensuring they’re fully enveloped in that luscious mix. Fry them three pieces at a time, so they’re not overcrowded. Cook until they’re a beautiful golden brown and oh-so-crispy.
- For a quick dip, mix Yamasa soy sauce with a bit of wasabi from the tube and a squeeze of lemon juice. Simple but absolute perfection.
Cook’s Notes
Here’s the tea on making this dish truly sing. First off, make sure your oil is hot enough before you start frying. You want that sizzle! If it’s too cool, the batter soaks up oil and gets greasy. You can make the batter ahead (up to a day), just keep it covered in the fridge because that chill time is key. Leftover fillets (if you have any!) can be reheated in an oven to crisp them back up — avoid the microwave unless you love soggy regrets.
Make It Your Own
Want to switch things up? Here are some variations that keep things exciting:
- Swap the fish for crispy tofu. Just be sure to press the tofu well before marinating.
- Go gluten-free by using a gluten-free flour blend in place of all-purpose flour.
- Add a spicy twist by mixing a pinch of cayenne into the batter for a bit of heat.
- Try an Asian twist with panko breadcrumbs mixed into the batter for extra crunch.
If you try this, I’d love to hear how it turns out — drop a comment or tag me! I’m always here for your kitchen triumphs and even the occasional mishap. Happy frying!
Related update: My Drunken Fish Fillet
Related update: Paella for Four; A Wonderful Spanish Mixed Seafood Stew
Related update: Crunchy Prawn Skewers With Lemony Avocado Dip

It was one of those chilly Tuesday evenings when the sun decided to call it quits early, and the only way to combat the creeping cold was with something warm and comforting. As I rummaged through my pantry, I stumbled upon a bag of carrots that had been waiting patiently for their turn to shine. It struck me right then — Moroccan Carrot Soup! A bowlful of this would feel like a cozy hug, yet it’s surprisingly easy to whip up on a weeknight when you’re not in the mood for fussing over a stove. This soup is perfect for those nights when you want something hearty but can’t be bothered with a long list of ingredients or complicated steps. Stick with me here, and you’ll be ladling this aromatic beauty in no time.
Jump to Recipe
What You’ll Need
Chances are, you already have most of this. It’s all about letting just a few ingredients shine.
- 2 tablespoons of butter
- 1 yellow onion, chopped
- 6 cups of carrots, peeled and chopped
- 4 cups of low sodium chicken stock
- 1 tablespoon of cumin seeds
- 1 tablespoon of honey
- 1 tablespoon of fresh lemon juice
- 1/4 teaspoon of allspice
- Salt and pepper to taste
- 1/2 cup of sour plain yogurt
How to Make Moroccan Carrot Soup
- In a large saucepan, melt the butter over medium-high heat. Once it’s bubbly and aromatic, toss in the chopped onion. Sauté for about 2 minutes until the onion starts turning translucent and your kitchen smells heavenly.
- Add the carrots and pour in the chicken stock. Bring this orange-hued mixture to a boil. Then, reduce the heat to low, cover the pot, and let it simmer. In about 20 minutes, the carrots should be tender enough to yield to a fork.
- Meanwhile, grab a small skillet and toast the cumin seeds over medium-high heat. Keep an eye on them, stirring occasionally, until they are golden and releasing their nutty aroma — about 4 to 5 minutes.
- Once toasted, finely grind the cumin seeds in a spice mill or with a mortar and pestle. The fresh grind makes a world of difference, trust me!
- Remove the soup from the heat. Carefully, in batches, purée it in a blender until it’s silky smooth. Return the blended soup to the saucepan.
- Whisk in the honey, lemon juice, and allspice, stirring until everything is well combined. Give it a taste and season with salt and pepper to your liking.
- To serve, ladle the soup into bowls. You can either sprinkle the ground cumin on top or, for an extra creamy finish, mix the cumin with sour cream and dollop that goodness right in the center of the soup. Enjoy!
Cook’s Notes
Let’s talk storage first: This soup keeps like a champ. Store it in an airtight container in the fridge, and you’ve got a delicious lunch or dinner for up to 4 days. If you’re meal prepping or just want to savor the flavors later, it freezes beautifully for up to 3 months. Just thaw and reheat gently on the stove.
Avoid the temptation to add the honey and lemon while it’s still boiling — you don’t want to lose those delicate flavors. And when blending the hot soup, please be cautious; do not overfill the blender as the steam can cause it to splatter. Patience is key here!
Make It Your Own
- Spice it up: Add a pinch of cayenne pepper or a swirl of harissa for a bit of heat.
- Veggie twist: Swap half of the carrots for sweet potatoes. It gives the soup an even richer texture.
- Herbaceous hit: Stir in some fresh chopped cilantro or mint just before serving for a fresh burst of flavor.
- Vegan swap: Use coconut oil instead of butter and vegetable broth in place of chicken stock. Skip the yogurt or use a plant-based alternative.
If you try this, I’d love to hear how it turns out — drop a comment or tag me! Happy cooking, and may your kitchen be filled with the warmth of this delightful Moroccan Carrot Soup.
Related update: Moroccan Carrot Soup
Related update: Spicy Lemongrass Soup
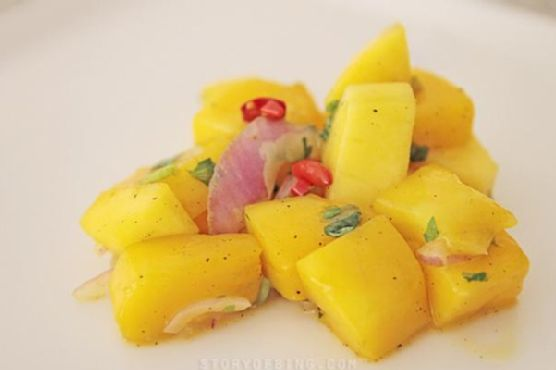
I remember the first time I tried to make Bing’s Mango Salsa. It was one of those sweltering summer days where the air conditioner is doing its best but you’re still considering just living in the fridge. I was craving something refreshing yet spicy to liven up my grilled chicken, and I had a bunch of mangoes sitting on the counter looking a bit too ripe. So, I dove into making this salsa, which turned out to be not only insanely delicious but also incredibly easy to whip up. It’s the kind of recipe you love because it makes you look like a culinary rock star with minimal effort—and it’s perfect for those last-minute BBQ invites. The combination of the sweet mangoes, zesty lime, and spicy chilis is like a little tropical vacation in a bowl. You know you need this in your life.
Jump to Recipe
What You’ll Need
The best part? Chances are you already have most of these ingredients, and they’re all about celebrating fresh, vibrant flavors.
- Sweet mangoes — the star of the show, ripe but not mushy
- Lime zest and juice — for that zesty punch
- A handful of mint leaves — or swap with coriander if you’re feeling rebellious
- 1-2 shallots or a small red onion — sliced paper-thin
- Salt and black pepper — to taste
- A sprinkle of sugar — just a pinch to balance things out
- Fresh chili — dial up the heat as per your taste
How to Make Bing’s Mango Salsa
- Start by dicing the mangoes into small cubes, about 1.5cm each. This size is perfect for ensuring every bite is juicy and flavorful.
- Toss the mango cubes into a large mixing bowl and grate the zest of one lime over them. The fragrance will hit you immediately — heaven!
- Squeeze the juice from half a lime into the bowl. Stir well, and remember, a little more lime juice can be added later if needed.
- Finely chop a bunch of mint leaves (or coriander if you’re in that camp). Add these to the bowl and give it a good mix.
- Slice the shallots or red onion as thin as you can and mix them into the mango concoction. Stir after each addition, trust me, it’s magical.
- Season with 1/2 teaspoon of salt and black pepper. Add 1 teaspoon of sugar, then stir and taste. Adjust these to your liking — it should be a delightful balance of savory, sweet, and tangy.
- Finally, chop the chillis and add them cautiously. Mix well, and taste as you go to achieve your preferred spice level.
- Cover the bowl with cling wrap and let it chill in the fridge for at least 30 minutes. This chilling time lets the flavors meld beautifully.
- Keep it chilled until you’re ready to serve. It’s best enjoyed fresh!
Cook’s Notes
Here’s a few things I’ve learned along the way:
- If you make this ahead of time, give it a good stir before serving as the juices tend to settle at the bottom.
- Leftovers can be stored in the fridge for up to 2 days, but trust me, it rarely lasts that long!
- Be mindful of the type of chili you use. Some can be much spicier than others, so add them slowly until you reach your desired heat level.
- This salsa is versatile. While it’s heavenly with grilled chicken or fish, it also makes a fantastic topping for tacos or a dip with tortilla chips.
Make It Your Own
Want to switch things up? Here are some fun variations:
- Swap the mint leaves with cilantro if you’re a fan of its bold flavor.
- Try adding some diced avocado for an extra creamy texture.
- Use pineapple or peach instead of mango for a different sweet twist.
- If you’re not a fan of heat, replace chilis with bell peppers for a milder version.
If you try this, I’d love to hear how it turns out—drop a comment or tag me! Let’s keep the kitchen adventures going. 🍍🌶️
Related update: Bing's Mango Salsa