Chocolate Crinkle Cookies | Made by Meaghan Moineau

It was a typical Wednesday evening, and I found myself rummaging through the pantry, desperately seeking something to satisfy my sweet tooth. The weather outside was chilly, the kind of evening that begged for something cozy and chocolatey. In the midst of my search, I stumbled upon a forgotten container of dark cocoa powder wedged between bags of flour and sugar. It was then that the idea struck me — Chocolate Crinkle Cookies. These cookies are like a warm hug: comforting, slightly crunchy on the outside, chewy on the inside, and oh-so-chocolaty. Perfect for a spontaneous midweek baking session, especially when they’re this easy to make. Within an hour, my kitchen was filled with the scent of rich cocoa, and I knew I’d found my new favorite go-to treat for those cold, restless evenings.

Jump to Recipe

What You’ll Need

Imagine the delight of realizing that you already have most of these ingredients lounging in your pantry. Here’s what you need to create these delightful cookies:

  • Vegetable oil – keeps the cookies moist
  • Sugar – for sweetness and texture
  • Vanilla extract – adds a lovely aroma
  • Eggs – the glue that binds
  • Dark cocoa powder – the heart of the chocolatey goodness
  • Flour – the base of any good cookie
  • Baking powder – gives those crinkles their puff
  • Confectioners’ sugar – for that signature snowy look

How to Make Chocolate Crinkle Cookies

Ready to dive into the wonderful world of crinkly cookies? Here’s the step-by-step:

  1. Start by mixing the vegetable oil, sugar, and vanilla extract in a mixing bowl. You’ll know it’s right when the mixture looks like wet sand glistening in the sun.
  2. Add the eggs one at a time, mixing well after each addition until the batter is silky and smooth.
  3. Incorporate the dark cocoa powder into the mixture, slowly stirring until it turns into a rich, dark chocolate color.
  4. Combine the flour and baking powder with the wet ingredients. Continue mixing until you have a smooth dough that’s slightly thicker than cake batter.
  5. Chill the dough in the refrigerator for at least 4 hours. This step isn’t just a suggestion — it’s crucial for achieving perfect crinkles.
  6. When you’re ready, preheat your oven to 350°F. Line a cookie sheet with greaseproof paper or a nonstick silicone mat.
  7. Using an ice cream scooper, scoop out the dough and roll each ball generously in confectioners’ sugar. Make sure they’re well-coated for that iconic crinkle effect.
  8. Place the dough balls on the cookie sheet, leaving about 2 inches of space between each to allow for spreading.
  9. Bake for 12 minutes. You’ll know they’re done when the edges are firm and the tops have a cracked, powdered sugar crust.
  10. Let the cookies cool on the sheet initially, then transfer them to a wire rack to finish cooling completely. This helps them firm up nicely.

Cook’s Notes

Let’s chat kitchen wisdom for a second. The dough is sticky, and that’s normal — resist the urge to add more flour! Chilling the dough helps it firm up enough to handle, so don’t skip that step. If you’re in a pinch, you can speed-chill in the freezer for about 30 minutes. These cookies are best enjoyed fresh, but they’ll keep in an airtight container for about a week. To revive day-old cookies, zap them in the microwave for a few seconds — they’ll taste freshly baked!

Make It Your Own

Feeling adventurous? Here are a few ways to tweak these cookies to suit your mood:

  • Swap out the dark cocoa powder for regular cocoa powder if you prefer a milder chocolate flavor.
  • Add a teaspoon of espresso powder to the dough for a subtle coffee kick that pairs beautifully with the cocoa.
  • Fold in some chocolate chips or chunks just before chilling for an extra burst of chocolate in every bite.
  • For a festive twist, mix in a teaspoon of peppermint extract or a handful of crushed candy canes.

If you try this, I’d love to hear how it turns out — drop a comment or tag me! Whether you’re indulging alone or sharing with loved ones, these Chocolate Crinkle Cookies are sure to bring a smile. Happy baking!

Related update: Chocolate Crinkle Cookies

Related update: Mangoes with Rum and Ice Cream

Stuffed Pork Tenderloin with Marsala-Port Sauce | Made by Meaghan Moineau

The other night, I found myself aimlessly scrolling through my pantry, wanting something that felt both fancy and comforting. You know those days when takeout just won’t do, but you don’t want to slave away in the kitchen either? Well, that was me. I stumbled on this Stuffed Pork Tenderloin with Marsala-Port Sauce recipe, and let me tell you, it hit every craving. It’s one of those dishes that sounds impressive (trust me, it is), but it’s actually pretty straightforward. Plus, talk about using up those dried fruits that have been lingering in the cupboard! Juicy pork, rich sauce, and a stuffing that makes you feel like you’re indulging at a fancy restaurant—all without breaking a sweat.

Jump to Recipe

What You’ll Need

The magic of this recipe lies in its simplicity—most of these ingredients might already be lounging in your kitchen. It’s all about those pantry staples coming together in the most delightful way. Check it out:

  • 1 shallot, finely chopped
  • 1 yellow onion, diced
  • 1 cup mushrooms, chopped
  • 1/4 cup dried apricots
  • 1/4 cup raisins
  • 1/4 cup dried cranberries
  • 1/4 cup flat leaf parsley, chopped
  • 2 pounds pork tenderloin
  • 1/2 cup Marsala wine
  • 1/2 cup Port wine
  • 2 tablespoons butter
  • 1/4 cup heavy cream
  • 2 tablespoons olive oil
  • Salt and pepper to taste

How to Make Stuffed Pork Tenderloin with Marsala-Port Sauce

  1. Preheat your oven to 450°F (230°C). This is crucial to get that perfect sear and juicy interior.
  2. Warm 1 tablespoon of olive oil in a large skillet over medium heat. Toss in the onions, shallots, and mushrooms. Stir occasionally until the onions are translucent and everything smells mouthwateringly fragrant.
  3. Remove the skillet from heat. In a small food processor, combine the cooked onion mixture with the dried apricots, raisins, cranberries, and parsley. Pulse just enough to achieve a minced, well-combined filling.
  4. Cut the pork tenderloin in half crosswise. Butterfly each section, being careful not to cut all the way through the meat. Generously season both sides with salt and pepper.
  5. Spread the onion-mushroom mixture onto one side of each butterflied section. Place the other half over the mixture, sealing the edges with toothpicks. Give both sides another generous seasoning with salt and pepper.
  6. In the same skillet, warm another teaspoon of olive oil over medium heat. Carefully sear the pork tenderloin on each side for 3-5 minutes until it’s gorgeously brown.
  7. Transfer the skillet to your hot oven. Roast for 20-30 minutes, or until the juices run clear. This is your cue that the pork is perfectly cooked.
  8. Remove from the oven, transferring the pork to a dish. Cover it with foil to let it rest and lock in those juicy flavors.
  9. Discard any excess fat or stubborn bits in the skillet. Pour in the Marsala and Port wines. Bring to a boil, gently scraping up those flavorful browned bits from the bottom.
  10. Pour in any juices from the resting pork, reducing the sauce until it measures about 1/2 cup. Remove from heat and swirl in the butter and cream until melted and luxurious.
  11. Remove the toothpicks from the pork, slice it crosswise, and plate it up. Drizzle that divine sauce over the top or serve it on the side for dipping.

Cook’s Notes

Let’s chat practicalities! This dish is perfect for a special dinner, but it can definitely be prepped ahead. You can assemble the pork with the stuffing a day before—just wrap it up tightly and refrigerate, then bring it to room temperature before cooking. Keep an eye on your sauce; don’t let it reduce too much, or you’ll end up with something more akin to caramel than sauce. Leftovers? They’re even better the next day. Store them in an airtight container in the fridge for up to three days. Reheat gently, so the pork doesn’t dry out.

Make It Your Own

You can totally switch things up depending on what you’ve got lying around or what you’re in the mood for. Here are a few ideas:

  • Swap the pork for chicken breast if you’re feeling poultry. Just adjust the cooking time accordingly.
  • No Marsala? A dry sherry or even a splash of brandy can stand in beautifully.
  • Try adding some crushed walnuts to the stuffing for a crunchy surprise.
  • If dried fruit isn’t your thing, substitute with chopped apples for a fresh twist.

If you give this a whirl, let me know how it turns out! Drop a comment or tag me in your culinary creations. I can’t wait to hear what you think. Enjoy every flavorful bite!

Related update: Stuffed Pork Tenderloin with Marsala-Port Sauce

Related update: Cream Cheese Stuffed Chicken Breasts

Whole Wheat Blueberry Brownies | Made by Meaghan Moineau

It was one of those days where the clouds just wouldn’t quit, and the afternoon seemed to stretch on forever. I was staring at a ridiculously overripe banana when inspiration struck — not banana bread, but something unexpected, and maybe even a little healthier. That’s when I thought of these Whole Wheat Blueberry Brownies. They’re the perfect mix of indulgence and nourishment, with a tangy twist thanks to the blueberries. A little dense, definitely chocolaty, and oh-so-simple to whip up. You’re gonna love the way the whole wheat adds a subtle nuttiness, and if you happen to have a pint of fresh blueberries sitting around, well then, my friend, you’re in for a treat.

Jump to Recipe

What You’ll Need

Most of these goodies are probably hanging out in your pantry already, just waiting to become besties in this delightful treat. Let’s make it happen:

  • 1 cup whole wheat pastry flour
  • 1/2 cup cocoa powder
  • 1/2 teaspoon salt
  • 1/2 teaspoon baking powder
  • 1/4 teaspoon baking soda
  • 1/2 teaspoon cinnamon
  • 1/2 cup sugar
  • 1/2 cup brown sugar
  • 1 large egg
  • 1/2 cup low fat sour cream
  • 1/4 cup almond milk
  • 1 teaspoon vanilla extract
  • 1 cup fresh blueberries

How to Make Whole Wheat Blueberry Brownies

  1. Preheat your oven to a cozy 350 degrees Fahrenheit. While it warms up, grab an 8 x 8 x 2-inch baking pan and give it a good coat of cooking spray. You don’t want these beauties sticking!
  2. In one bowl, whisk together the dry stuff: whole wheat pastry flour, cocoa powder, salt, baking powder, baking soda, and cinnamon. Take a moment to marvel at the chocolatey goodness forming already.
  3. In a separate bowl, beat the egg, then mix in the low fat sour cream, almond milk, and vanilla extract. It should be smooth and slightly glossy.
  4. Now, gently fold the wet ingredients into the dry mix. Stir until you can no longer see streaks of flour, and everything looks like a harmonious, silky batter.
  5. Time to bring in the stars of the show — fold in those plump blueberries with the same care you’d show a friend running a relay race. You want them evenly distributed but not squished.
  6. Pour the batter into your prepared pan, spreading it with a spatula so it’s nice and even. Slide it into your preheated oven and let it bake for 20-25 minutes. You’ll know it’s ready when a toothpick inserted in the center comes out clean.
  7. Let them cool in the pan for a bit. The waiting is hard, but trust me, it’s worth it for that first bite that won’t burn your tongue.

Cook’s Notes

These brownies are a bit more rustic (in a good way) due to the whole wheat flour. If your taste buds are a little shy of tang, swap the low fat sour cream for full-fat or even Greek yogurt. They’ll keep in an airtight container for about four days, assuming there are any leftovers. If you’re planning ahead, you can make the batter the night before and bake them fresh in the morning. Just fold in the blueberries right before you bake!

Make It Your Own

  • For a more decadent treat, replace the almond milk with full-fat coconut milk and get a subtle tropical twist.
  • Substitute the fresh blueberries with raspberries for a tart and tangy variation that cuts through the chocolate beautifully.
  • If you’re feeling nutty, toss in a handful of chopped walnuts or pecans for some extra crunch.
  • For a touch of spice, add a pinch of cayenne pepper to the mix. Chocolate and spice are a match made in dessert heaven.

If you try this, I’d love to hear how it turns out — drop a comment or tag me! There’s nothing better than sharing a sweet success. Enjoy every chewy, blueberry-filled bite!

Related update: Whole Wheat Blueberry Brownies

Related update: Chocolate Crinkle Cookies

Fast Tiramisu | Made by Meaghan Moineau

Last Tuesday, in the midst of an unexpected craving for something sweet and slightly elegant, I found myself in a mini kitchen dilemma. I had promised myself a chill evening with something decadent but not labor-intensive. As I rummaged through my pantry, a vision of tiramisu danced through my mind. But not just any tiramisu — a faster, weeknight-friendly version with all the indulgence and none of the fuss. This recipe is my go-to for those dessert emergencies; it’s quick to whip up, doesn’t require baking, and is a surefire way to impress anyone who happens to drop by (or just yourself, let’s be real). It’s creamy, rich, and perfectly layered with just a hint of coffee and liqueur. Trust me, you’ll wonder why you haven’t always made tiramisu this way.

Jump to Recipe

What You’ll Need

If you’re anything like me, you’ll likely find most of these ingredients already nestled in your pantry or fridge. Here’s what you’ll need to create this dreamy dessert:

  • Egg yolks – the foundation of our creamy filling.
  • Cane sugar – to sweeten things up.
  • Mascarpone cheese – the star of the show, lending that iconic tiramisu flavor.
  • 35% heavy whipping cream – for that luscious texture.
  • Ladyfingers – to soak up all that goodness.
  • Rum, brandy, or coffee liqueur – your choice for a boozy touch.
  • Coffee – the essential bitter balance.
  • Unsweetened cocoa powder – for dusting and drama.
  • Vanilla sugar – adds a subtle hint of vanilla without the fuss.

How to Make Fast Tiramisu

  1. First, brew a fresh cup of coffee and let it cool to room temperature. Once cooled, add a splash of your chosen liqueur for a warm, aromatic twist.
  2. In a mixing bowl, whip the 35% heavy whipping cream until soft peaks form. If you have vanilla sugar on hand, toss it in for a hint of sweetness. Then, pop it in the fridge to chill.
  3. In another bowl, beat the egg yolks with 6 tablespoons of cane sugar until the mixture is thick and has taken on a lovely lemon color.
  4. Fold in the mascarpone cheese into the egg yolk mixture and continue to beat until everything is smooth and well-mixed. Add vanilla sugar if you haven’t already.
  5. Gently fold in the whipped cream from the fridge, taking care not to deflate the mixture. You want it light and airy.
  6. Quickly dip each ladyfinger into the cooled coffee mixture, ensuring they’re soaked but not soggy. Arrange them snugly in a 26cm x 40cm pan.
  7. Spread half of the mascarpone mixture over the ladyfingers, smoothing it out with a spatula.
  8. Repeat the process with another layer of coffee-soaked ladyfingers, but this time, lay them in the opposite direction.
  9. Top with the remaining mascarpone mixture, spreading it evenly to cover all the ladyfingers.
  10. Sprinkle a generous dusting of unsweetened cocoa powder over the top. This not only adds flavor but gives that classic tiramisu look.
  11. Refrigerate for at least 6 hours to let the flavors meld and the dessert set. Patience is key here!

Cook’s Notes

Chilling is crucial for tiramisu; it allows the flavors to develop and the layers to set, so resist the urge to dive in too early. If you’re in a time crunch, 4 hours will do, but 6 is ideal. This tiramisu keeps well in the fridge for up to 3 days, making it a great make-ahead dessert for gatherings. Just be sure to store it in an airtight container to prevent it from absorbing any fridge odors. When serving, a sharp knife and a clean spatula will ensure neat slices. And while it’s not traditional, a sprinkle of shaved dark chocolate can add a delightful flavor touch.

Make It Your Own

Sometimes, it’s fun to shake things up. Here are a few ideas:

  • Swap the coffee for strong chai tea and the liqueur for spiced rum for a chai-inspired twist.
  • Use chocolate ladyfingers for an extra hit of cocoa goodness.
  • For a non-alcoholic version, substitute the liqueur with vanilla extract for that added depth of flavor.
  • Try topping with matcha powder instead of cocoa for a unique, earthy flavor profile.

If you try this, I’d love to hear how it turns out — drop a comment or tag me online! Whether it’s a quiet night in or a dinner party finale, this tiramisu is set to impress. Happy indulging!

Related update: Fast Tiramisu

Related update: Whole Wheat Blueberry Brownies

5 Minute Gluten Free Wonder Buns | Made by Meaghan Moineau

It was one of those days where I had absolutely nothing planned for dinner. You know the kind — when you open the fridge door for the third time hoping something magical will appear? Well, inspiration didn’t strike until I dug through my pantry and found a bag of sorghum flour tucked behind the lentils. It was like a lightbulb went off. I needed something quick and easy, and what’s better than a warm, freshly made bun that’s gluten-free and takes just five minutes? This recipe is not only a lifesaver for those rushed evenings but also a bit like magic in a mug. It’s comforting, satisfying, and, let’s be honest, it feels like a tiny victory to whip up bread in mere minutes.

Jump to Recipe

What You’ll Need

The beauty of these buns lies in their simplicity. Most of these ingredients are likely sitting in your pantry already, making this recipe a great go-to without a trip to the store. Here’s what you’ll gather:

  • Almond meal
  • Baking powder
  • Cocoa powder
  • Egg
  • Ground flax seed
  • Molasses
  • Salt
  • Sesame seeds
  • Sorghum flour

How to Make 5 Minute Gluten Free Wonder Buns

  1. In a small bowl, crack open an egg and whisk it together with the molasses until well combined. You’ll smell the sweet earthy aroma of molasses starting to come through.
  2. In another small bowl, combine the sorghum flour, almond meal, ground flax seed, baking powder, and cocoa powder. Stir thoroughly, ensuring the mixture is even and free of clumps. The last thing you want is a surprise burst of bitter baking soda or unmixed cocoa powder.
  3. Pour the whisked eggs into the dry ingredient mixture and stir until the batter is smooth and glossy.
  4. Grab a 10 oz Pyrex custard cup, oil it lightly, and sprinkle sesame seeds on the bottom and sides. This not only prevents sticking but also adds a delightful nutty crunch to every bite.
  5. Pour the batter into the prepared cup, smoothing the top with a spoon. Sprinkle more sesame seeds on top for good measure.
  6. Pop the cup into the microwave and cook for 90 seconds. Watch as the batter rises and sets, emitting a warm and inviting aroma. Once done, let it cool for a moment before diving in.

Cook’s Notes

This recipe is pretty forgiving, but here are a few tips to keep in mind. Make sure your baking powder is fresh; otherwise, your buns won’t rise as much. If you don’t have a Pyrex custard cup, any microwave-safe mug should work, though cooking times may vary a bit. Feel free to experiment with the amount of molasses if you prefer a sweeter or less sweet bun. As for storage, these buns are best enjoyed fresh out of the microwave, but they can be stored in an airtight container for up to a day. Reheat them in the microwave for a few seconds to bring back that fresh-baked warmth.

Make It Your Own

These wonder buns are a blank canvas, ready for your culinary creativity. Here are a few ideas:

  • Swap the cocoa powder for cinnamon to create a spiced bun that pairs beautifully with morning coffee.
  • Add a tablespoon of grated cheese to the batter for a savory twist.
  • Replace sesame seeds with sunflower seeds for a different crunch and flavor.
  • For a sweeter treat, add a handful of chocolate chips before microwaving.

If you try this, I’d love to hear how it turns out — drop a comment or tag me! Whether you stick to the original recipe or put your spin on it, these wonder buns are sure to become a staple in your gluten-free recipe repertoire. Enjoy every bite!

Related update: 5 Minute Gluten Free Wonder Buns

Related update: Stuffed Pork Tenderloin with Marsala-Port Sauce

Penne Arrabiata | Made by Meaghan Moineau

So there I was, standing in my kitchen on a chilly Tuesday evening, feeling like a culinary daredevil — or maybe just a hungry one. My pantry was looking a bit sparse, but fate (or my recent grocery run) had left me with the essentials for one of my all-time favorite dishes: Penne Arrabiata. This spicy, comforting pasta is like a warm hug with a side of sass. It’s perfect for those nights when you need something quick but full of flavor, and it definitely delivers. I promise, even if your spice tolerance is on the lower side, this dish has a way of pulling you in. Grab your apron, and let’s dive in!

Jump to Recipe

What You’ll Need

The beauty of Penne Arrabiata is in its simplicity. Chances are, you already have most of the ingredients, but it’s the combination that makes the magic happen.

  • 1 packet of penne pasta
  • 1 can of whole tomatoes (Pomi boxed tomatoes work well too)
  • 5 cloves of fresh garlic, minced
  • 3 tablespoons of olive oil
  • 1 teaspoon of red dried peppers
  • 2 tablespoons of fresh Italian parsley, minced
  • Coarsely chopped fresh basil (optional, but highly recommended)
  • Salt, to taste

How to Make Penne Arrabiata

  1. First, get a large pot of water on the stove and bring it to a boil. Add a generous pinch of salt. This is your pasta’s time to shine.
  2. In a skillet, heat 3 tablespoons of olive oil over medium heat. Toss in about a teaspoon of dried red pepper. Let it sizzle gently, releasing its spicy aroma, but keep it from burning.
  3. Add the minced garlic and 2 tablespoons of parsley to the oil. Stir it around until the garlic is golden and fragrant, filling your kitchen with the most tantalizing, spicy scent.
  4. Now, it’s time for the star of the show: add the can of chopped tomatoes to the skillet. Stir everything together, cover, and let it cook until the sauce is heated through. The edges will start to bubble, and that’s your cue!
  5. Meanwhile, the pasta water should be boiling. Add the penne and cook until it’s al dente — tender but with a firm bite.
  6. Drain the pasta and add it straight into the sauce. The penne will soak up all that spicy, garlicky goodness as you mix it thoroughly.
  7. Just before serving, sprinkle some coarsely chopped fresh basil and a bit more parsley on top. Serve immediately and enjoy the aroma of fresh herbs mingling with the rich, spicy sauce.

Cook’s Notes

Ah, the joys and perils of making Penne Arrabiata! A couple of things to keep in mind: don’t go overboard with the dried red pepper unless you’re ready for a fiery experience. Also, be patient with your garlic; you want it golden, not brown. If your sauce seems too thick, a splash of the pasta cooking water can help thin it out without losing flavor.

Got leftovers? Lucky you! This dish reheats beautifully, just make sure to add a splash of water before microwaving to keep it from drying out. You could even make the sauce ahead of time and store it in the fridge for up to three days. When you’re ready, just cook the pasta and combine — dinner done in a snap.

Make It Your Own

Here are a few ways to switch things up if you’re feeling adventurous:

  • For a protein boost, swap the penne for a whole-grain version. The nutty flavor pairs wonderfully with the spicy sauce.
  • Make it vegan by adding sautéed mushrooms instead of cheese for an umami hit.
  • Swap the penne for zucchini noodles if you’re in the mood for something lighter and low-carb.
  • For a heartier dish, add cooked and crumbled Italian sausage just before serving.

If you try this, I’d love to hear how it turns out! Drop a comment or tag me in your culinary creations. Happy cooking, and may your pasta always be perfectly saucy!

Related update: Penne Arrabiata

Wild Blueberry Lemon Muffins | Made by Meaghan Moineau

I was having one of those hectic weeks—work deadlines piling up, laundry mountain growing taller by the minute—and all I wanted was a moment of pure joy. Enter my savior: these Wild Blueberry Lemon Muffins. A burst of tart lemon and sweet summer blueberries wrapped up in a soft, buttery muffin. They’re the perfect blend of comforting and feel-good indulgence, but super easy to put together. The best part? They make your kitchen smell like heaven and taste even better! Whether you’re whipping them up for a weekend brunch or a quick weekday treat, these muffins are a little slice of bliss.

Jump to Recipe

What You’ll Need

You’re going to love how most of these ingredients are probably already sitting in your pantry or fridge. Here’s what you need:

  • 2 1/2 cups all-purpose flour
  • 2 1/2 teaspoons baking powder
  • 1/2 teaspoon salt
  • 1 cup granulated sugar
  • 1/2 cup unsalted butter, softened
  • 1 large egg
  • 1/2 cup buttermilk
  • 1 teaspoon vanilla extract
  • 1 tablespoon fresh lemon juice
  • 1 tablespoon lemon zest
  • 1/8 cup sugar (for mashing with lemon zest)
  • 1 can wild blueberries, drained
  • 1/2 cup powdered sugar (for glaze)

How to Make Wild Blueberry Lemon Muffins

  1. Start by preheating your oven to 375°F (190°C). Line 16 muffin cups with paper liners to make cleanup a breeze.
  2. In a small bowl, mash 1/8 cup sugar with the lemon zest until the sugar is moistened and fragrant. This will amp up the lemony goodness.
  3. In a medium-sized bowl, whisk together the flour, baking powder, and salt. This dry mix is the backbone of your muffins.
  4. Using an electric mixer, cream the cup of sugar and butter together until light and fluffy, about 3 minutes. Add the egg, buttermilk, vanilla, and the fragrant lemon sugar, beating each in one at a time.
  5. Slowly incorporate the flour mixture into the wet ingredients. The batter should be smooth and inviting at this point.
  6. Gently fold in the wild blueberries with a large spatula. Try not to crush them—you’re aiming for bursts of berry goodness!
  7. Divide the batter equally into the prepared muffin tins, filling each about 3/4 full. This leaves room for them to rise beautifully.
  8. Bake in the preheated oven for about 35 minutes, or until a cake tester comes out clean and muffins are golden.
  9. Let the muffins cool for a few minutes in the pan before transferring them to a wire rack.
  10. While the muffins cool, whip up your glaze by combining the lemon juice, zest, and powdered sugar. Stir until smooth.
  11. Spoon about 1 tablespoon of glaze over each muffin, allowing it to drizzle down the sides for that enticing sweet-tangy finish.

Cook’s Notes

If you can, use wild blueberries—they have a more intense flavor and smaller size, making them perfect for muffins. Make sure to drain them well before adding to the batter to keep it from getting too wet. Store your muffins in an airtight container; they stay fresh on the counter for up to three days or can be frozen for up to a month. If you want to prepare ahead, mix the dry ingredients the night before to save time.

Make It Your Own

  • Swap canned wild blueberries for fresh ones if they’re in season for a less sugary taste.
  • Replace the lemon with orange zest and juice for a citrusy twist.
  • Use almond extract instead of vanilla for a nutty undertone.
  • Try adding a teaspoon of poppy seeds to the batter for an extra crunch.

If you try this, I’d love to hear how it turns out—drop a comment or tag me on social media! Happy baking, and may your week be as sweet as these muffins.

Related update: Wild Blueberry Lemon Muffins

Related update: Penne Arrabiata

Related update: Fast Tiramisu

Related update: Blueberry Almond Crescent Rolls

Moosewood Lentil Soup | Made by Meaghan Moineau

It was one of those chilly Tuesday evenings when my fridge looked more like a barren land than a source of inspiration. I had a long day, and there was no way I was going out again. As I rummaged through the scant produce and pantry items, the idea of a comforting pot of soup materialized like magic. That’s when Moosewood Lentil Soup came to the rescue. It’s the kind of recipe where simplicity meets warmth, and it rewards you with a bowl of deliciousness that feels like a hug from the inside. Plus, everything you need is probably already sitting in your kitchen, waiting to transform into something fabulous.

Jump to Recipe

What You’ll Need

The beauty of this recipe is its accessibility. Chances are you already have most of this list on hand, just waiting for their moment in the spotlight. Here’s what you’ll need:

  • Lentils
  • Water
  • Grapeseed oil (or butter, if you’re feeling indulgent)
  • Onion
  • Celery
  • Carrots
  • Garlic
  • Salt
  • Black pepper
  • Dried herbs (your choice!)
  • Fresh lemon juice
  • Brown sugar
  • Red wine vinegar
  • Tomatoes

How to Make Moosewood Lentil Soup

  1. Start by placing the lentils and water in a soup pot or Dutch oven. Bring it to a boil, then lower the heat to a simmer. Let the lentils cook until they’re mushy; this should take about 45 minutes. Keep an eye on the pot and add more water as needed until you get your favorite soup consistency.
  2. While the lentils are doing their thing, heat some oil in a medium-sized skillet. Add in the chopped onion, celery, and carrots. Sauté over medium heat for about 10 minutes; you’ll know it’s ready when the veggies are soft and the kitchen smells heavenly.
  3. Add the minced garlic, along with some salt, pepper, and any dried herbs you fancy. Keep sautéing for another 5 minutes to let all those flavors meld and get cozy.
  4. Transfer your aromatic veggie mixture into the pot with the lentils. Stir in the lemon juice and a touch of brown sugar. If you’re in the mood, add a splash of red wine vinegar.
  5. Taste your creation to adjust the seasonings. Let the soup simmer for at least another 15 minutes. This is where the magic happens as all the flavors marry together beautifully.
  6. Serve your soup piping hot, with a drizzle of vinegar on each serving and a sprinkle of minced scallions or parsley if you’re feeling fancy.

Cook’s Notes

Here’s the deal: this soup is forgiving. If you find the lentils have soaked up more water than anticipated, just add a bit more to reach the consistency you love. It’s not an exact science. For those who adore a bit of heat, a pinch of red pepper flakes does wonders. The soup keeps well in an airtight container in the fridge for up to 5 days, making it perfect for meal prep. It also freezes beautifully, so don’t hesitate to make a double batch.

Make It Your Own

  • Swap the lentils for split peas or even chickpeas for a different texture and flavor.
  • Substitute the grapeseed oil with olive oil for a richer taste.
  • Add spinach or kale in the last few minutes of cooking for an extra boost of greens.
  • Replace the red wine vinegar with apple cider vinegar for a slightly sweeter tang.

If you try this, I’d love to hear how it turns out—drop a comment or tag me! Whether it warms you up on a cold night or becomes your go-to comfort dish, this Moosewood Lentil Soup is sure to find a special place in your recipe repertoire. Happy cooking, friends!

Related update: Moosewood Lentil Soup

Related update: Homemade Broccoli Cheddar Soup

Hush Puppies | Made by Meaghan Moineau

Imagine this: it’s a rainy Tuesday evening, and I’m staring into my pantry like it’s going to magically whip up dinner for me. You know those days when the fridge is playing hard to get and the clock is laughing in your face? Well, that’s when I turn to my trusty Hush Puppies recipe. These little golden nuggets save the day every time — they’re crispy, comforting, and the kind of simple that feels like a win even when everything else is chaos. Plus, they come together in a flash, which is exactly what you need when the hangry hits.

Jump to Recipe

What You’ll Need

There’s a good chance you’ve already got most of these on standby. That’s the beauty of this dish: minimal ingredients with maximum flavor payoff. Check out what you’ll need:

  • 1 small onion, finely chopped
  • 1 cup cornmeal
  • 1/4 cup flour
  • 1 tablespoon baking powder
  • 1 teaspoon salt
  • 1 egg
  • 1/2 cup milk
  • Oil for frying (vegetable or canola works best!)

How to Make Hush Puppies

  1. Start by grabbing a large mixing bowl and toss in your cornmeal, flour, baking powder, and salt. Give it a good stir until everything is well combined.
  2. In a separate medium bowl, crack in the egg and beat it with a fork until it’s all mixed up. Add in the chopped onion and milk, then stir until it’s nice and smooth.
  3. Pour the eggy onion mixture into the dry ingredients. Stir until it’s all combined into a thick, slightly lumpy batter. You’re aiming for a texture that holds its shape.
  4. Heat up about 2-3 inches of oil in your deep-fat fryer or a heavy skillet over medium-high heat. You want it to shimmer but not smoke — that’s your cue it’s hot enough.
  5. Once the oil is ready, drop heaping teaspoons of batter into the pan. They’ll plummet to the bottom but magically rise to the top as they cook. Fry about 5-6 at a time without overcrowding.
  6. Keep an eye out — after 1-2 minutes, the puppies should be a gorgeous golden brown. That’s when you’ll know they’re done. Use a slotted spoon to fish them out and let them drain on paper towels.

Cook’s Notes

Don’t overmix the batter; a few lumps are perfectly fine and keep the texture just right. The oil needs to be hot enough to ensure the hush puppies cook quickly and don’t soak up excess oil. If you’re making them ahead, you can fry them lightly and finish them off in a hot oven just before serving. They’re best enjoyed fresh but keep well in an airtight container for a day or two. Reheat them in the oven to maintain that crunch.

Make It Your Own

Here’s where you can get creative:

  • Spice it up: Add a pinch of cayenne pepper or a chopped jalapeño for a kick.
  • Cheesy twist: Stir in a handful of shredded cheddar cheese to the batter for some gooey goodness.
  • Herbal accents: Mix in some chopped chives or parsley for a fresh pop of flavor.
  • Sweet spin: Swap out the onion for corn kernels and add a teaspoon of sugar for a sweet-savory combo.

If you try this, I’d love to hear how it turns out — drop a comment or tag me! Remember, the best recipes are the ones you make your own. Enjoy your hush puppies and all the cozy vibes they bring.

Related update: Hush Puppies

Chimichurri Skirt Steak with Grilled Asparagus | Made by Meaghan Moineau

Last Tuesday, I found myself standing in front of the fridge, aimlessly scrolling through takeout options on my phone. It was one of those evenings, you know? The kind where the day just takes a toll, and the thought of cooking seems exhausting. But as I eyed a bunch of asparagus that was just on the brink of wilting, I decided to make something quick yet comforting. Chimichurri Skirt Steak with Grilled Asparagus it was! This dish is a flavor bomb — the kind of meal that feels like a mini celebration, but really comes together with minimal fuss. Plus, the chimichurri sauce? It’s like a magic potion that instantly elevates anything you drizzle it on.

Jump to Recipe

What You’ll Need

The beauty of this dish is in its simplicity. Chances are, you already have most of what you’ll need in your kitchen. Here’s what you’ll be grabbing:

  • Skirt steaks – about 1.5 pounds
  • Flat leaf parsley – a generous handful
  • Fresh mint leaves – a small handful
  • Fresh oregano leaves – a small handful
  • Garlic cloves – 4 to 5, because more is more
  • Shallot – 1 medium-sized
  • Red wine vinegar – a splash for that tangy kick
  • Olive oil – enough to get things silky
  • Lemon juice – a squeeze
  • Kosher salt
  • Black freshly cracked pepper
  • Chili pepper flakes – optional, for a bit of heat
  • Green or white asparagus – a bundle, ready for grilling

How to Make Chimichurri Skirt Steak with Grilled Asparagus

  1. First, let’s tackle the chimichurri sauce. Place all the ingredients except for the olive oil — parsley, mint, oregano, garlic, shallot, red wine vinegar, lemon juice, salt, pepper, and a pinch of chili flakes — in a food processor. Pulse until everything is well chopped.
  2. With the processor running, slowly drizzle in the olive oil until you have a smooth, vibrant green sauce. Remember to reserve half of this for serving.
  3. Season both sides of the skirt steaks with salt and pepper. Generously spoon the remaining chimichurri sauce over the steaks, making sure they’re well coated. Let them marinate for at least 30 minutes or even overnight in the fridge if you have the time.
  4. While your steaks are soaking in all that flavor, pre-heat your grill to a cozy 350-400°F.
  5. In a large resealable plastic bag, toss your asparagus with a glug of olive oil, a clove of minced garlic, and a sprinkle of salt and pepper. Shake it like you’re in a dance-off to ensure everything’s coated, then place the asparagus in a grill basket.
  6. When the grill is hot, place the steak and the basket of asparagus directly over the flames. Turn the asparagus occasionally, basting with the garlic oil for about 10 minutes, until tender.
  7. Grill the steaks to your liking — about 5 to 8 minutes per side should do it for medium-rare. Let them rest for 10 minutes before slicing against the grain into long, juicy strips.
  8. Finally, spoon the reserved chimichurri sauce over the steak slices and serve with the beautifully grilled asparagus. Enjoy the symphony of flavors!

Cook’s Notes

This dish is seriously forgiving. If you don’t have a food processor, no worries — a blender or some good knife skills will get you there. Just chop everything finely and mix. Resting the steak after grilling is key — it lets the juices redistribute, so your meat isn’t dry.

  • If you’re marinating overnight, let the steaks come to room temperature before grilling for even cooking.
  • Leftover chimichurri can be stored in the fridge for up to a week and is perfect for drizzling over roasted veggies or mixing into scrambled eggs.

Make It Your Own

  • Swap the skirt steak with a flank steak for a slightly leaner option. Just keep an eye on the cooking time.
  • If mint isn’t your thing, use cilantro instead — it adds a nice, fresh twist.
  • For a vegetarian version, use thick slices of portobello mushrooms in place of the steak.
  • Mix it up with rainbow carrots instead of asparagus for a colorful plate.

If you try this, I’d love to hear how it turns out — drop a comment or tag me in your photos! Cooking is all about sharing the love, and I can’t wait to see your take on this dish. Happy grilling!

Related update: Chimichurri Skirt Steak with Grilled Asparagus

Beef, Poblano & Cheese Tamales | Made by Meaghan Moineau

The first time I attempted to make tamales, it was a classic case of my eyes being bigger than my expertise. I had this craving for something hearty yet comforting, and tamales seemed like the perfect challenge. Spoiler alert: the kitchen looked like a masa massacre by the end of it. But with a little patience and practice, these Beef, Poblano & Cheese Tamales have become my go-to for impressing friends without losing my mind in the process. They’re just the right mix of savory and spicy, with a cheesy twist that keeps you coming back for more. Plus, the aroma that fills your kitchen is like a warm hug from a friend you haven’t seen in ages.

Jump to Recipe

What You’ll Need

You might already have most of these staples in your pantry. And if you don’t, trust me, it’ll be worth the grocery run.

  • Dried corn husks
  • Dried California chili pods
  • Ground beef
  • Shredded mozzarella cheese
  • Diced poblano pepper
  • Garlic, minced
  • Olive oil
  • Goya seasoning
  • Salt
  • Chili powder

How to Make Beef, Poblano & Cheese Tamales

  1. Start by soaking the corn husks in hot water in a large bowl. They need to be pliable, so give them at least 20 minutes.
  2. In a large saucepan, bring 4 cups of water to a boil. Remove any string-like bits from the chili pods and throw them into the boiling water with half a packet of Goya seasoning. Cover it up and let it all simmer for about 20 minutes.
  3. Once the chili pods have softened, blend them with 2 cups of the chili stock until you get a smooth sauce. Drain the rest of the stock from the saucepan, but keep it handy.
  4. Put the saucepan back on medium heat. When any leftover stock evaporates, add a splash of olive oil, then toss in the onion and beef. Break apart the beef as it cooks.
  5. Season the beef with a packet of Goya seasoning and chili powder, then let it cook for about 5 minutes until it gets a bit brown.
  6. Pour in the chili sauce, followed by the garlic and about 2 teaspoons of salt. Add the diced poblano pepper now for the best flavor. Turn the heat down to medium-low, partially cover the pan, and let it simmer for an hour. The sauce should thicken nicely.
  7. While the beef is simmering, make the corn masa mix. In a large bowl, combine the instant corn masa mix, water, baking powder, salt, and olive oil. Mix until it’s spongy.
  8. Now for assembly: spread the masa mix thinly on the right side of a corn husk, leaving about 2 inches at the left edge clear. Spoon about 2 tablespoons of the meat mixture and a sprinkle of cheese onto the masa. Roll it up starting with the right-hand side, and fold the left flap over.
  9. If you’ve got a double boiler, great! If not, a metal colander in a large pot will do. Arrange the tamales so they’re snug but not squashed.
  10. Boil 2 cups of water in the pot (or about 1 inch high), then reduce the heat and add the tamales. Place a towel between the colander and lid to keep the steam in. Let them steam for 30 minutes.

Cook’s Notes

Soaking the corn husks longer is better than less, so patience pays off here. When blending the chili pods, you might have to stop and scrape the sides of the blender to get a smooth sauce. And hey, don’t stress if your masa isn’t perfectly even when you spread it — it’s homemade charm we’re going for, not factory precision.

Leftovers? Store them in an airtight container in the fridge; they’ll last up to a week. Reheat them by steaming again or even in the microwave wrapped in a damp paper towel to keep them from drying out. You can also freeze them for up to three months, just make sure they’re cool before you pack them up.

Make It Your Own

  • Swap the ground beef for shredded chicken or even pulled pork for a different protein punch.
  • Try smoked gouda or Monterey Jack instead of mozzarella for a unique cheesy twist.
  • If you’re a veggie lover, add in some sautéed mushrooms or zucchini with the poblano for extra texture.
  • For a spicy kick, mix in some diced jalapeños or serrano peppers when you add the poblano.

And there you have it! If you try this, I’d love to hear how it turns out — drop a comment or tag me! These tamales are a labor of love, but trust me, they are totally worth it. Enjoy every bite!

Related update: Beef, Poblano & Cheese Tamales

Related update: Chimichurri Skirt Steak with Grilled Asparagus

Moroccan Spiced Chicken Under A Brick | Made by Meaghan Moineau

It was one of those weeks where everything felt like a mad dash. The kind where your to-do list is longer than your patience, and the only thing you’re craving is something that feels like a warm hug on a plate. Enter: Moroccan Spiced Chicken Under A Brick. It sounds fancy, right? But trust me, it’s deceptively simple and perfect for when you want to impress without the stress. Plus, there’s something deeply satisfying about the way the flavors meld together, transporting you somewhere far more exotic than your messy kitchen. This dish is all about that crispy skin and bold, aromatic spices. You’ll see why it’s become a favorite weeknight escape for me.

Jump to Recipe

What You’ll Need

Let’s talk about the ingredient list. It’s one of those recipes where you’re likely to have most items already. And the ones you don’t? Well, they’re worth the trip to the store because they pack a punch.

  • Whole chicken
  • 3-4 garlic cloves
  • Fresh cilantro leaves
  • Sea salt
  • Lemon zest
  • Saffron threads
  • Olive oil
  • Paprika
  • Ground cumin
  • Black pepper
  • Cayenne (if you like a little heat)

How to Make Moroccan Spiced Chicken Under A Brick

  1. First, grab your mortar and pestle. Combine the garlic, a handful of cilantro leaves, one teaspoon of salt, lemon zest, and a pinch of saffron. Smash it all into a fragrant paste. It should smell like a garden in full bloom.
  2. Stir in about 3 tablespoons of olive oil until everything is beautifully combined. This is your flavor-packed paste of dreams.
  3. Take your chicken and rub it all over with the paste. Don’t be shy — get it everywhere, even between the skin and breast meat. This is where the magic happens.
  4. Place the chicken on a tray or platter, skin side up, and cover it loosely with plastic wrap. Refrigerate for at least 2 hours. If you’ve got the time, let it go up to 6 hours. This step lets the flavors really sink in.
  5. About 30 minutes before you’re ready to roast, take the chicken out of the fridge. Let it come to room temperature; this helps it cook evenly.
  6. Preheat your oven to 450°F (230°C). While it heats, place a heavy pan (like cast iron) on top of the chicken to press it down. This is the “brick” part — it ensures that golden crispy skin you’re after.
  7. Roast the chicken for about 35-45 minutes. You’ll know it’s done when the skin is a deep, enticing golden brown, and the kitchen smells like you’ve been transported to the heart of a Moroccan spice market.

Cook’s Notes

Let’s keep it real: the saffron might be a splurge, but it’s worth it for that unique, earthy aroma. If you don’t have a mortar and pestle, a small food processor will do in a pinch. Just don’t overblend — we want a paste, not a smoothie! Store any leftovers in an airtight container in the fridge for up to 3 days. Reheat gently in the oven to keep that skin crisp. Pro tip: You can make the paste the day before, which is a real time-saver on a busy day.

Make It Your Own

  • Swap the chicken for crispy tofu for a vegetarian take. Just press the tofu to remove excess water before marinating.
  • Out of cilantro? Try parsley or even mint for a different herbaceous twist.
  • If saffron’s not your thing, a pinch of turmeric will give you that lovely color and an earthy flavor.
  • Want more heat? Double up on the cayenne or add a bit of smoked paprika for a smoky kick.

If you try this, I’d love to hear how it turns out — drop a comment or tag me! Cooking is all about sharing and experimenting, so let me know how you make this dish your own. Enjoy every bite!

Related update: Moroccan Spiced Chicken Under A Brick

Related update: Beef, Poblano & Cheese Tamales

Tasty Easy Meatloaf | Made by Meaghan Moineau

The other night I found myself staring at a package of ground beef and the clock ticking closer to dinner. You know that moment when you want something comforting but don’t want to commit to a culinary marathon? Well, meatloaf was calling my name. But not just any meatloaf—this was going to be the kind that gets the family excited, the kind that leaves everyone asking for seconds. It’s not just easy; it’s tasty, satisfying, and oh-so-worth it. A perfect blend of savory and a hint of sweet, this meatloaf turns the usual into the extraordinary.

Jump to Recipe

What You’ll Need

If you’re like me, chances are you already have most of this tucked away in your kitchen. Let’s make this as fuss-free as possible!

  • 1 lb ground beef
  • 1/2 lb bulk sausage
  • 1/2 cup breadcrumbs
  • 1 small diced onion
  • 1 egg
  • 1 teaspoon salt
  • 1/2 teaspoon pepper
  • 1 teaspoon cumin
  • 1 teaspoon garlic powder
  • 1 cup canned tomato sauce, divided
  • 2 tablespoons cider vinegar
  • 2 tablespoons brown sugar
  • 2 tablespoons whole grain mustard
  • 2 tablespoons Worcestershire sauce
  • 1/4 cup water

How to Make Tasty Easy Meatloaf

  1. Preheat your oven to 350°F (175°C). This is the start of something wonderful.
  2. In a large bowl, mix together the ground beef, sausage, breadcrumbs, onion, egg, salt, pepper, cumin, garlic powder, and half of the tomato sauce. The trick is not to over-mix—keep it gentle to avoid a dense loaf.
  3. Shape your mixture into a loaf and place it in a shallow ovenproof pan. The sides should slope down gently, like a little hill of deliciousness.
  4. In a separate bowl, combine the remaining tomato sauce, cider vinegar, brown sugar, mustard, Worcestershire sauce, and water. Stir until the sugar is dissolved and the sauce is smooth.
  5. Pour this sauce over the meatloaf, letting it cascade down like a savory waterfall.
  6. Pop the pan into the oven and let it bake for about 1 hour. Every 20 minutes, spoon some of the sauce resting in the pan over the top of the loaf. This keeps it moist and full of flavor.
  7. Once baked through, the edges will look caramelized and the top glossy. Take it out of the oven and let it rest for 10 minutes. This pause lets the juices settle so each slice stays juicy.

Cook’s Notes

Making a meatloaf isn’t rocket science, but a few tips can make all the difference. First, don’t overwork the meat mixture; it’s tempting, but less is more for a tender loaf. If you like your meatloaf with a bit more of a kick, add a dash more Worcestershire sauce to the mix. Leftovers? Store them in an airtight container in the fridge for up to 3 days. They make wicked meatloaf sandwiches, trust me.

Make It Your Own

Here are some simple swaps to keep things interesting:

  • Go Turkey: Substitute the ground beef and sausage with ground turkey for a lighter version.
  • Spice It Up: Add a chopped jalapeño to the meat mixture if you like a bit of heat.
  • Cheesy Delight: Mix in a cup of shredded cheddar cheese for an oozy surprise.
  • Herby Twist: Toss in some chopped fresh herbs like parsley or thyme for an extra layer of flavor.

If you try this, I’d love to hear how it turns out—drop a comment or tag me in your meatloaf adventure! Happy cooking!

Related update: Tasty Easy Meatloaf

Related update: Moroccan Spiced Chicken Under A Brick

Cherry-Berry Pie With Agave Nectar All-Butter Crust | Made by Meaghan Moineau

It was one of those lazy Sunday afternoons when the world seemed to move a little slower, a gentle breeze fluttering through the open window, the kind that makes you crave something comforting and sweet but not too complicated. My sweet tooth was whispering “pie” in my ear, but I wasn’t up for a full-blown kitchen marathon. Enter my Cherry-Berry Pie with Agave Nectar All-Butter Crust—a delightful, not-too-sweet pie that’s as satisfying to make as it is to eat. It’s my go-to when I need that perfect mix of summery fruitiness and buttery crust without spending all day in the kitchen. Trust me, this pie is a game-changer, and the addition of agave nectar gives it a uniquely mellow sweetness that pairs beautifully with the tart berries. Jump to Recipe

What You’ll Need

The beauty of this pie is its simple ingredient list, many of which you likely have on hand. Plus, the mix of flours and agave nectar gives the crust an irresistible texture and flavor.

  • Agave nectar
  • Sweet agave nectar
  • Almond flour
  • Frozen mixed berries
  • Butter
  • Frozen cherries
  • Coconut flour
  • Flour
  • Lemon juice
  • Orange extract
  • Tapioca flour
  • Whole wheat pastry flour

How to Make Cherry-Berry Pie With Agave Nectar All-Butter Crust

  1. Start by making the crust: In a food processor, pulse the dry ingredients about 5-6 times. This helps them blend evenly.
  2. Add 2 sticks of very cold butter, which you’ve cut into cubes. Pulse until the mixture resembles a very coarse meal, tiny butter bits are a good thing here!
  3. Add the agave nectar and either the fiore di Sicilia flavoring or its substitute, orange extract, one tablespoon at a time. Watch carefully for the dough to just come together.
  4. Divide the dough into two parts, one slightly larger than the other. This larger portion will be your base.
  5. Form each into a flat, round shape, wrap tightly in plastic, and refrigerate for at least 2 hours to let the butter firm up and flavors meld.
  6. While the dough is chilling, whip up the filling. In a large bowl, combine all the filling ingredients thoroughly. It’s going to be quite soupy, so don’t worry!
  7. Once the dough has chilled, let it sit out just long enough to be rollable. Roll out the larger dough disk to fit your pie dish, patching as needed.
  8. Wrap the pie dish with the crust in plastic and chill for another 30 minutes to set.
  9. Pour the berry filling into the chilled crust, then wrap the whole pie in plastic again and pop it back in the fridge.
  10. Roll out the remaining dough disk and use cookie cutters to cut pieces for the top crust. Get creative with shapes!
  11. Remove the pie from the fridge and decorate with your cut-out dough pieces, leaving some gaps for steam to escape.
  12. Cover the edges with foil to prevent over-browning and bake in a preheated 325°F oven for 40 minutes.
  13. Remove the foil and continue baking until the top is golden brown and the filling is bubbling enticingly.
  14. Let the pie cool slightly before slicing in to let the filling set a bit more. Enjoy!

Cook’s Notes

Here’s the scoop: keeping the butter super cold is crucial for that flaky crust we all adore. I like to freeze mine and work quickly to keep it from warming up. If you find the dough a bit too firm after chilling, let it sit out a few minutes until it’s manageable. When it comes to storage, this pie is a champ! Cover it well and it keeps nicely in the fridge for up to 4 days. If you’re making it ahead, bake it a day early; the flavors meld beautifully overnight.

Make It Your Own

Feel free to play around with the recipe a bit to suit your taste or pantry:

  • Swap out the frozen cherries for fresh ones if they’re in season; just pit and halve them.
  • Try maple syrup instead of agave for a more robust sweetness.
  • Use a gluten-free flour blend in place of the wheat and pastry flours for a gluten-free version.
  • Add a teaspoon of cinnamon or nutmeg to the filling for a spiced twist.

I hope you give this pie a whirl and let it bring a bit of sunshine into your kitchen. If you try this recipe, I’d love to hear how it turns out—drop a comment or tag me on social media! Happy baking, friends!

Related update: Cherry-Berry Pie With Agave Nectar All-Butter Crust

Potatoes Smothered with Egg Sauce (Cariucho) | Made by Meaghan Moineau

Just the other day, I found myself in that all-too-familiar midweek dinner scramble. You know, staring into the fridge with the existential weight of “What am I going to make tonight?” hanging over my head. That’s when I remembered this gem of a recipe—a comforting, heartwarming dish that feels like a hug in food form: Potatoes Smothered with Egg Sauce, or Cariucho. It’s the kind of dish that feels special enough for a weekend but easy enough to whip up on a Wednesday night. With a creamy sauce that hugs tender potatoes and a spicy kick from jalapeños, it’s the perfect blend of comfort and a little spice to keep things interesting. Plus, it’s one of those recipes where you might just have everything you need already hanging out in your pantry.

Jump to Recipe

What You’ll Need

This recipe is straightforward and relies on a few key ingredients to shine. Chances are, you already have most of this in your kitchen:

  • Big red russet potatoes
  • 1 scallion, chopped
  • Unsalted butter
  • Canned achiote seeds
  • Scallions
  • Flour
  • Fresh cilantro
  • Salt & pepper
  • Milk
  • Heavy cream
  • Hard-boiled eggs, chopped
  • Jalapeño, chopped
  • Cooked bacon, crumbled

How to Make Potatoes Smothered with Egg Sauce (Cariucho)

  1. Start by cooking your potatoes. Place them in a large pot, cover with water, and toss in a tablespoon of salt and the chopped scallion. Cook until the potatoes are tender when pierced with a fork, then turn off the heat and let them sit in the warm water.
  2. While the potatoes are cooking, melt the butter in a pan or sauce pot over medium heat. Add in the achiote seeds, stirring gently to extract their vibrant color into the butter.
  3. Once the butter turns a yellowish-orange hue, remove the achiote seeds with a spoon. They’ve done their job!
  4. Throw in the scallions and sauté them for 2-3 minutes until they’re soft and fragrant.
  5. Add the flour and cilantro to the pan, stirring constantly for about a minute, just enough to cook out the raw flour taste.
  6. Pour in the milk, season with salt and pepper, and let it cook for another minute. The sauce should start to thicken up a bit.
  7. Add the heavy cream and continue cooking until the sauce reaches a creamy, luscious consistency.
  8. Once the sauce is thickened to your liking, gently stir in the chopped hard-boiled eggs and jalapeño. This is where the magic happens!
  9. To plate, peel the skins off the warm potatoes. It’s a bit messy, but trust me, it’s worth it.
  10. Arrange the peeled potatoes on your serving platter and generously pour over the egg sauce. Finish with a sprinkle of crumbled bacon for that irresistible smoky touch.

Cook’s Notes

A couple of tips to keep your cooking stress-free:
– If you’re worried about overcooking the potatoes, check them a few minutes before you think they’re done. A fork should slide in easily but not split them apart.
– The achiote seeds are just for color, so don’t panic if you can’t find them. Your sauce will still taste delish without that sunny hue.
– Make sure the sauce thickens nicely before adding the eggs; you want it to coat those potatoes like a dream.

For leftovers, keep them in an airtight container in the fridge. Reheat on the stovetop and maybe add a splash of milk or cream to bring back that silky sauce.

Make It Your Own

The beauty of this dish is its flexibility. Here are some ideas to switch it up:

  • For a vegetarian version, swap the bacon with crispy tofu, giving you that same delightful crunch.
  • If you’re not a fan of cilantro, try using fresh parsley or chives for a different herbal note.
  • For a more robust flavor, switch out the russet potatoes for sweet potatoes. The sweetness pairs beautifully with the creamy, spicy sauce.
  • If you’re a cheese lover, sprinkle some grated cheddar or crumbled feta over the top right before serving.

If you try this, I’d love to hear how it turns out—drop a comment or tag me in your culinary adventures! Enjoy the creamy, comforting goodness of this dish.

Related update: Potatoes Smothered with Egg Sauce (Cariucho)

Related update: Tasty Easy Meatloaf

Pasta With Butternut Parmesan Sauce @ Dw Magazine.Com | Made by Meaghan Moineau

So there I was, staring at the butternut squash I’d ambitiously bought a week ago, thinking I’d make soup but never did. It was one of those drizzly evenings when the couch was calling louder than the kitchen, but the idea of a warm, creamy pasta dish was too tempting to ignore. Pasta with Butternut Parmesan Sauce was a perfect solution. This dish is a cozy, comforting hug in a bowl, and it’s deceptively simple to make. It’s the kind of recipe that feels special enough for a dinner party, but easy enough for a Tuesday night when you’re just trying to feed yourself without ordering takeout again. Plus, who doesn’t love a recipe that transforms a stubborn squash into a silky sauce?

Jump to Recipe

What You’ll Need

Chances are, you already have most of what you need in your kitchen. The magic comes from a few key ingredients that turn a humble vegetable into something seriously crave-worthy.

  • Butternut squash (about 2 pounds, give or take)
  • Bow-tie pasta (or your favorite shape)
  • Olive oil
  • Shallots
  • Parmesan cheese, freshly grated if possible
  • Heavy cream
  • Nutmeg
  • Fresh parsley
  • Lemon juice
  • Salt and pepper
  • Water (or chicken stock) to thin the sauce

How to Make Pasta With Butternut Parmesan Sauce @ Dw Magazine.Com

  1. Start by preheating your oven to 350°F. Trust me, this is the hardest part—waiting for it to heat up!
  2. Carefully slice the butternut squash in half lengthwise. To keep things safe, cut a bit off both ends first so it stands upright without wobbling. Scoop out the seeds and guts and toss them.
  3. Place the squash halves cut side down in a baking dish with about 1/4 cup of water. Roast them for about 40 minutes, or until a fork slides easily through the flesh. Let cool for about 10 minutes.
  4. Once cooled, scoop the squash flesh into a blender or bowl if you’re using an immersion blender. Puree until smooth and set aside. This is where the magic starts to happen!
  5. Meanwhile, bring a large pot of salted water to a rolling boil. Add your pasta and cook until just al dente. Drain and set aside.
  6. While the pasta is cooking, heat olive oil in a large skillet over medium heat. Add the shallots and sauté until they become soft and translucent, about 5 minutes, wafting that lovely aroma.
  7. Add the butternut squash puree to the shallots, stirring until it’s all mixed together. Cook for about a minute.
  8. Stir in the heavy cream a tablespoon at a time, watching as it transforms the puree into a luscious sauce. Add the Parmesan and stir until it melts into the mix.
  9. Season the sauce with nutmeg, salt, and pepper. Add water or stock to thin it to your desired consistency—think silky, not soupy.
  10. Remove from heat and stir in fresh parsley and a splash of lemon juice for brightness. This is the moment it all comes together!
  11. Plate your pasta, ladle the sauce generously over it, and garnish with extra parsley and Parmesan. Serve immediately, because who can wait at this point?

Cook’s Notes

A few tips to keep your pasta game strong: First, make sure to season your pasta water well. It’s your first chance to flavor the pasta itself. When thinning the sauce, go slow—it’s easier to add more liquid than to take it away. If you’re planning ahead, the sauce can be made a day in advance and kept in the fridge. Just reheat it gently on the stove, adding a splash of water or stock if it’s too thick. Leftovers? Store them in an airtight container in the fridge for up to 3 days. To reheat, warm gently on the stove, adding a bit of water to loosen the sauce if needed.

Make It Your Own

  • Swap bow-tie pasta for whole wheat spaghetti for a nuttier flavor and a little extra fiber.
  • For a protein boost, toss in some cooked chicken or crispy tofu before serving.
  • Want to sneak in more veggies? Add some sautéed spinach or kale to the sauce just before serving.
  • Feeling fancy? Drizzle a little truffle oil over the top before serving for an indulgent touch.

If you try this, I’d love to hear how it turns out—drop a comment or tag me on social media! Your version might just become my new favorite. Enjoy every creamy, dreamy bite!

Related update: Pasta With Butternut Parmesan Sauce @ Dw Magazine.Com

Curry and Sage Roast Chicken | Made by Meaghan Moineau

It was one of those frantic weeknights when I stared into my fridge, hoping for a dinner miracle. You know those nights, right? When you need something comforting and full of flavor but don’t have the energy to tackle a complex recipe? That’s when I stumbled upon the delightful harmony of curry and sage roast chicken. This dish is the perfect blend of aromatic spices and fresh herbs, with a hint of sweetness from honey and citrusy brightness from lemon and orange. It’s one of those recipes that sounds fancy but is so straightforward you’ll be able to pull it off without breaking a sweat. Plus, your kitchen will smell amazing.

Jump to Recipe

What You’ll Need

Do you ever have those happy moments when you realize you actually have most of the ingredients you need? That’s this recipe for you. It’s likely most of these are already sitting in your pantry or fridge.

  • Whole chicken
  • Curry powder
  • Fresh sage
  • Garlic
  • Honey
  • Lemon juice
  • Orange juice
  • Olive oil
  • Black pepper
  • Turmeric

How to Make Curry and Sage Roast Chicken

  1. Preheat your oven to 350°F. Take a moment to breathe in that pre-cooking calm.
  2. Clean the chicken inside and out, patting it dry with paper towels. Think of it as giving the chicken a mini spa day.
  3. In a small bowl, mix olive oil, lemon juice, orange juice, crushed garlic, honey, curry powder, black pepper, and turmeric. The mixture should smell like a small slice of heaven.
  4. Rub the chicken thoroughly with this vibrant mixture. Don’t be shy—get in there and make sure every nook and cranny is covered.
  5. Gently lift the skin and stuff some garlic and sage underneath. This is like a hidden treasure of flavor that will infuse the meat.
  6. Place the chicken in a baking pan, breast side up. Pop it into the oven and let it bake. The skin will become golden and fragrant, a sure sign it’s nearly time to eat.

Cook’s Notes

Keep an eye on your chicken as it roasts; baking time can vary depending on size. A good rule of thumb is about 20 minutes per pound, but make sure the internal temp hits at least 165°F. If the skin starts to get too dark before the meat is cooked through, tent some foil over the top. Leftovers will keep well in the fridge for a few days, and trust me, they’re perfect for a quick lunch salad or sandwich. You can also mix the rub and prep the chicken a day ahead, leaving it to marinate in the fridge for even more flavor.

Make It Your Own

  • Swap the chicken for crispy tofu by marinating tofu slices in the same spice mixture and baking until golden.
  • Try adding a sprinkle of cumin for a deeper, earthier vibe if that’s your thing.
  • If you’re not a fan of sage, rosemary could be a delightful substitute.
  • For a spicier kick, toss in some crushed red pepper flakes to the marinade.

If you try this, I’d love to hear how it turns out—drop a comment or tag me! Your kitchen is about to be filled with aromatic joy, and I’m excited for you to experience it. Happy cooking!

Related update: Curry and Sage Roast Chicken

Related update: Pasta With Butternut Parmesan Sauce @ Dw Magazine.Com

Related update: Potatoes Smothered with Egg Sauce (Cariucho)

Breaded Shrimp and Spicy Mayo Appetizer | Made by Meaghan Moineau

It was one of those evenings when you open the fridge and just sigh, you know what I mean? It had been a long day, and I wanted something delicious but low-key. There it was, a can of shrimp I had almost forgotten about. That’s when inspiration hit—breaded shrimp with a spicy mayo dip! It’s the kind of dish that feels like a cheat: super quick to make, but everyone will think you’re some kind of kitchen wizard. Perfect for when friends drop by unannounced or when you’re just craving something crispy and spicy. Trust me, this Breaded Shrimp and Spicy Mayo Appetizer is about to become your new go-to.

Jump to Recipe

What You’ll Need

You probably have most of these ingredients hanging out in your pantry already, and if not, they’re easy enough to grab at any grocery store. Here’s what you’ll need:

  • All-purpose flour
  • Bread crumbs
  • Chili powder
  • Egg
  • Garlic powder
  • Mayonnaise
  • Onion powder
  • Suya pepper
  • Salt
  • Canned shrimps
  • Sriracha sauce

How to Make Breaded Shrimp and Spicy Mayo Appetizer

  1. Start by peeling and deveining your shrimp. You can leave the tails on for a bit of extra crunch and a nicer presentation if you like.
  2. Season the shrimp with suya pepper and set them aside to let the flavors sink in.
  3. Whisk the egg in a small bowl and set it aside as your dipping station.
  4. In another bowl, combine your all-purpose flour with onion powder, garlic powder, salt, and chili powder.
  5. Take each seasoned shrimp and dredge it in the seasoned flour, making sure it’s well-coated. The spices should cling to every curve.
  6. Dunk the floured shrimp into the egg mixture, ensuring they’re nice and gooey.
  7. Coat them in the bread crumbs; press gently so the crumbs stick fully.
  8. Heat up a pan with oil for frying until it’s hot but not smoking. Fry the shrimp until golden brown on both sides, about 2-3 minutes per side.
  9. For the spicy mayo, mix 2 tablespoons of mayonnaise with 1 tablespoon of sriracha sauce until well combined. It should be a lovely salmon pink color.
  10. Serve your crispy shrimp with the spicy mayo on the side for dipping. Enjoy the crunchy, spicy goodness!

Cook’s Notes

You want to make sure your oil is hot enough before you start frying; otherwise, your shrimp will absorb too much oil and become soggy. If you’re making this for a crowd, you can fry the shrimp earlier and keep them warm in a low oven. Leftovers can be stored in an airtight container in the fridge and reheated in the oven to keep them crispy. I wouldn’t recommend microwaving them—no one likes limp shrimp!

Make It Your Own

  • Swap the shrimp for crispy tofu if you’re catering to vegetarians. Just make sure to press the tofu well before seasoning.
  • If you love extra heat, add more sriracha or even a dash of hot sauce to the spicy mayo.
  • Try using panko instead of regular bread crumbs for an extra-crunchy texture.
  • If you’re out of suya pepper, a mix of cayenne and paprika can add that smoky heat.

If you try this, I’d love to hear how it turns out—drop a comment or tag me! I’m always excited to see how you guys make these recipes your own. Happy cooking!

Related update: Breaded Shrimp and Spicy Mayo Appetizer

Related update: Hush Puppies

Jumbo Blueberry Muffins | Made by Meaghan Moineau

Picture this: it’s a lazy Sunday morning, and the sun’s just lazily peeking through your kitchen window. I was in my coziest pajamas, craving something warm and sweet that didn’t involve leaving the house. Enter these Jumbo Blueberry Muffins. They’re like a giant hug in muffin form—a bit of a show-off with their size, but oh so easy to whip up. With a crunchy lemon-sugar topping and bursting with blueberries, they’re the hero of any breakfast spread or spontaneous brunch. Plus, they’re quick enough to make on a weekday morning when you’re feeling a bit extra. Ready to bake? Let’s dive in.

Jump to Recipe

What You’ll Need

You probably have most of this stuff lounging in your pantry. Here’s what you’ll need:

  • 2 cups all-purpose flour
  • 2 teaspoons baking powder
  • 1/2 teaspoon salt
  • 1/3 cup granulated sugar + 1 cup separate
  • 2 large eggs
  • 1/4 cup unsalted butter, melted
  • 1/4 cup vegetable oil
  • 1 cup buttermilk
  • 1 teaspoon vanilla extract
  • Zest of one fresh lemon
  • 1 1/2 cups fresh blueberries

How to Make Jumbo Blueberry Muffins

  1. Preheat your oven to 425°F (220°C). Give a 6-cup large-sized muffin tin a light spritz of cooking spray, and set it aside.
  2. In a small bowl, combine the lemon zest and 1/3 cup of sugar. Use a fork to mix them thoroughly, creating a fragrant lemon-sugar mixture.
  3. Grab a large bowl and whisk together the flour, baking powder, and salt. Try to distribute everything evenly—it’ll make for a fluffier muffin.
  4. In another medium bowl, whisk the remaining 1 cup of sugar with the eggs. Go at it for about 45 seconds until the mixture is thick and homogeneous.
  5. Slowly pour in the melted butter and oil, then whisk in the buttermilk and vanilla extract. The mixture should be smooth and creamy.
  6. Add the liquid ingredients and the blueberries to the dry ingredients. Gently fold everything together until just combined. Resist the urge to over-mix!
  7. Fill the muffin tins with the batter, right up to the top. Sprinkle the tops generously with the lemon-sugar mixture for a crunchy finish.
  8. Bake the muffins at 425°F for 5 minutes. Then, lower the heat to 375°F and bake for another 25 minutes. Remember to rotate the pan halfway through to ensure even baking.
  9. The muffins are done when a toothpick inserted near the center comes out with just a few crumbs attached. Let them cool in the pan for about 5 minutes before transferring them to a wire rack to cool completely.

Cook’s Notes

Here’s the scoop: the key to these muffins is not over-mixing the batter. Too much mixing leads to tough muffins, and nobody wants that. These muffins are best enjoyed fresh, but if you’re making them ahead, they stay good in an airtight container at room temperature for up to three days. You can also freeze them! Just wrap them tightly in plastic wrap and pop them in a freezer bag. They’ll last for about three months, and all you have to do is let them thaw at room temp or give them a quick zap in the microwave.

Make It Your Own

Feel like experimenting? Here are a few variations:

  • Mixed Berry Muffins: Swap half of the blueberries with raspberries or chopped strawberries.
  • Nutty Twist: Add a handful of chopped walnuts or almonds to the batter for some crunch.
  • Citrus Punch: Substitute the lemon zest with orange zest for a different citrusy flavor.
  • Chocolate Indulgence: Replace some of the blueberries with chocolate chips for a sweet surprise.

So, are you ready to go jumbo? If you try this, I’d love to hear how it turns out—drop a comment or tag me! Let’s make your kitchen smell like a bakery, one muffin at a time. Happy baking! 💙

Related update: Jumbo Blueberry Muffins

Related update: Wild Blueberry Lemon Muffins

Related update: Home made organic maple granola with fresh fruit

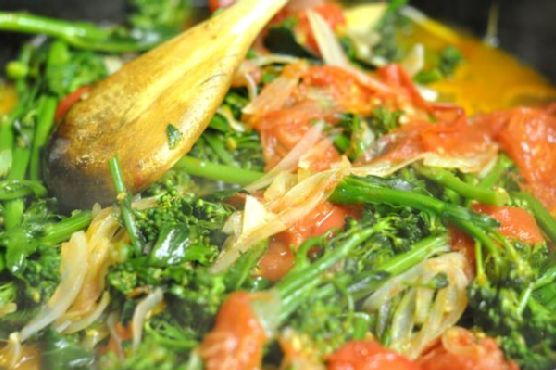
Broccolini Quinoa Pilaf | Made by Meaghan Moineau

It was one of those evenings when the clouds rolled in, and the rain tapped softly against the windows, turning my kitchen into a cozy haven. I was craving something warm and hearty, something that didn’t require a grocery run in the drizzle. Enter Broccolini Quinoa Pilaf—a dish that’s both comforting and surprisingly simple. What I love about this dish is how effortlessly it balances health and flavor. The nutty quinoa paired with tender broccolini and crunchy walnuts is just the kind of meal that warms both your heart and your belly. Plus, it’s almost a one-pan wonder, which means fewer dishes—always a win in my book.

Jump to Recipe

What You’ll Need

This ingredient list is delightfully short, and chances are you already have most of this in your pantry.

  • Broccolini, trimmed
  • 1 garlic clove, minced
  • 2 tablespoons olive oil
  • 1 small onion, diced
  • 1 cup quinoa, rinsed
  • 2 cups vegetable broth
  • 1/4 cup walnuts, chopped
  • Salt and pepper to taste

How to Make Broccolini Quinoa Pilaf

  1. In a large pan with a lid, heat the olive oil over medium-high heat. Once shimmering, add the diced onions and cook for about a minute. You’ll notice the onions start to sizzle and soften.
  2. Add the minced garlic and continue to cook, stirring occasionally, until the onions become translucent and the garlic is wonderfully fragrant—this should take about 2-3 minutes.
  3. Pour in the quinoa and stir to coat it with the oil, garlic, and onion mixture. Let it toast for a minute to bring out its nutty flavor.
  4. Slowly add the vegetable broth, stirring as you pour. Increase the heat to bring it all to a boil.
  5. Once boiling, cover the pan and reduce the heat to low. Let the quinoa simmer for about 15 minutes.
  6. In the last 2-3 minutes of cooking, gently lay the broccolini on top of the quinoa. Don’t stir! Just cover it back up and let the steam work its magic.
  7. After 15 minutes, uncover the pan and toss the broccolini and quinoa together. The broccolini should be bright green and tender-crisp.
  8. Season with salt and pepper to your liking. Finish by sprinkling the chopped walnuts over the top for a delightful crunch.
  9. Serve hot and enjoy the medley of flavors and textures.

Cook’s Notes

A few tips to help you along: Make sure to rinse your quinoa under cold water before cooking to remove any bitterness. This dish is pretty forgiving, so feel free to let the onions cook a bit longer for a richer flavor. If you’re making this ahead, keep the broccolini separate until you’re about to serve, then warm everything up and integrate it at the end to keep the veggies vibrant. Leftovers? Store them in an airtight container in the fridge for up to 3 days, though I doubt they’ll last that long!

Make It Your Own

Here are some tweaks to keep things exciting:

  • Swap the broccolini for asparagus tips if you’re in a pinch. They cook similarly and add a nice touch.
  • For a protein boost, stir in some chickpeas when you add the vegetable broth. They’ll soak up the flavors beautifully.
  • If you’re a cheese lover, a sprinkle of feta or parmesan over the top before serving can add a deliciously creamy element.
  • For a nut-free version, use toasted pumpkin seeds for an equally satisfying crunch.

If you give this Broccolini Quinoa Pilaf a try, I’d love to hear how it turns out! Drop a comment below or tag me in your photos. Happy cooking, friends!

Related update: Broccolini Quinoa Pilaf