
I was in the middle of a marathon of holiday movies when I realized my sweet tooth was acting up. You know that moment when the snow is falling on screen, and you just want something warm and chocolaty to match the vibe? That was me. But I didn’t want just another hot chocolate; I needed something extra special. Enter my Candy Cane Chocolate Marshmallows. These babies are the perfect combination of sweet, crunchy, and gooey goodness, and the best part? They’re super easy to make! Imagine enjoying these with friends, exchanging gifts, or just treating yourself on a chilly night—total bliss.
Jump to Recipe
What You’ll Need
Alright, here’s the good news: you probably have most of this stuff already lurking in your pantry. These marshmallows are all about the simple joys of the holiday season.
- Candy canes – grab a few from your tree or stash!
- Dark chocolate – for that rich, decadent coating.
- Milk chocolate – adds a creamy sweetness.
- Marshmallows – the stars of the show.
How to Make Candy Cane Chocolate Marshmallows
- First, let’s smash those candy canes! Place them in a zip-top bag and use the bottom of a glass or a mallet to crush them into small pieces. You want a mix of dust and tiny chunks.
- Now, set up a double boiler on your stove. If you don’t have one, just place a heatproof bowl over a pot of simmering water. Make sure the bowl doesn’t touch the water.
- Add the dark chocolate and milk chocolate to the bowl. Stir occasionally until the chocolate is fully melted and smooth. Inhale deeply—the smell is pure heaven.
- Grab a marshmallow, dip it halfway into the melted chocolate, spinning it slightly to get a good coat.
- Immediately dip the chocolate-covered marshmallow into the crushed candy canes. Press gently so the pieces stick to the chocolate, creating a crunchy layer.
- Place the marshmallows on a sheet of wax paper. Let them chill in the fridge for at least an hour, or until the chocolate hardens.
Cook’s Notes
Okay, a few tips from my kitchen to yours. First, make sure your chocolate doesn’t scorch; keep the heat low and steady. If you’re planning to make these ahead, they store beautifully in an airtight container for up to a week. Just keep them in a cool spot to prevent any accidental melting. Also, if you find your candy canes getting sticky, toss them back into the fridge for a bit—they’ll be easier to work with when they’re cool and crisp.
Make It Your Own
Here are some fun twists you can try:
- Swap out the candy canes for crushed pretzels if you prefer a salty-sweet combo.
- Use white chocolate instead of milk chocolate for a different flavor profile.
- Roll the marshmallows in crushed nuts for extra crunch and a nutty flavor.
- Add a sprinkle of sea salt on top of the chocolate layer for an elevated touch.
If you try this, I’d love to hear how it turns out—drop a comment or tag me in your photos! These little treats are sure to spread some holiday cheer in your home. Enjoy every bite!
Related update: Candy Cane Chocolate Marshmallows
Related update: Vegetarian Scotch Eggs
Related update: Frozen Mojito Pie
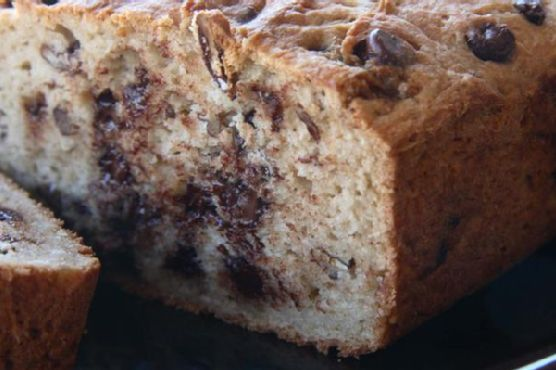
One chilly evening last fall, I found myself in the kitchen, craving something warm and comforting. My cupboard was a bit of a disaster, full of bits and bobs from baking adventures past. A half-used bag of gluten-free flour, some chocolate chips I had been furtively snacking on, and a nearly empty jar of pecans were calling to me. It was definitely a “use what you have” kind of night. As I pulled ingredients together, a gluten-free chocolate-pecan quickbread was born — a delightful mix of melty chocolate and crunchy pecans, wrapped in a tender, slightly sweet loaf. The best part? It made my entire kitchen smell like a cozy bakery on a crisp autumn day. If you’re looking for something that’s both indulgent and easy to whip up, this quickbread might just be your new favorite.
Jump to Recipe
What You’ll Need
The beauty of this quickbread lies in its simplicity. You likely have most of these ingredients on hand:
- Butter, for that irresistible richness
- Gluten-free flour, to keep things friendly for all tummies
- Sugar and brown sugar, for sweetness and a hint of molasses flavor
- Baking soda, to give our loaf a little lift
- Salt, to balance everything out
- Semi-sweet chocolate chips, because chocolate makes everything better
- Pecans, for that nutty crunch
- Eggs, to bind and add moisture
- Unsweetened applesauce, a sneaky moisture-hero
- Vanilla-honey Greek yogurt, for tang and tenderness
- Vanilla extract, because why not double down on vanilla goodness?
How to Make Gluten-Free Chocolate-Pecan Quickbread
- First things first, preheat your oven to 350 degrees Fahrenheit. Butter your trusty 5″x9″ loaf pan and set it aside.
- Gently heat the butter until it’s just melted. Set it aside to cool — you don’t want scrambled eggs in your bread!
- In a large bowl, combine the gluten-free flour, sugar, brown sugar, baking soda, and salt. Give it a good whisk to break up any lumps.
- Stir in the semi-sweet chocolate chips and pecans. This is starting to look delicious already, isn’t it?
- In a separate bowl, whisk together the eggs, applesauce, yogurt, vanilla extract, and the cooled melted butter.
- Pour the wet mixture into the dry ingredients and stir until just combined. Be gentle here; over-mixing is not our friend.
- Pour the batter into the prepared loaf pan, smoothing out the top with a spatula.
- Bake in your preheated oven for about an hour, or until a toothpick inserted into the center comes out clean. The top should be golden and your kitchen will smell heavenly.
- Allow the loaf to cool in the pan for 10 minutes before transferring it to a wire rack to cool completely. Patience, my friend!
Cook’s Notes
Let’s talk about some little tips that make a big difference. First, feel free to use whatever gluten-free flour blend you love; they all work here. Just make sure it has xanthan gum in it, or add a teaspoon if it doesn’t. If your loaf turns out a bit too crumbly, you may have over-mixed, which is easy to do. Treat the batter gently! As for storage, keep your quickbread in an airtight container at room temperature for up to three days. It also freezes beautifully — just slice and wrap individual pieces for easy snacking later.
Make It Your Own
Here’s where you get to play around:
- Swap the pecans for walnuts if you’re feeling nutty.
- Use dark chocolate chips for a more intense chocolate experience.
- Add a teaspoon of cinnamon to the dry mix for a warm, spicy touch.
- Substitute the vanilla-honey Greek yogurt for plain Greek yogurt and an extra teaspoon of honey if that’s what you have on hand.
If you try this, I’d love to hear how it turns out — drop a comment or tag me! Happy baking, and may your kitchen be filled with the sweet aroma of chocolate-pecan goodness.
Related update: Gluten-Free Chocolate-Pecan Quickbread
Related update: Candy Cane Chocolate Marshmallows
Related update: Braised Pork: Filipino Humba

It was one of those Thursday evenings when you’re standing in the kitchen, contemplating the universe — or at least what’s left in your pantry. I had a hankering for something sweet but not the patience for an elaborate dessert. You know the feeling? I wanted something that felt a little special, like it could be served with coffee if a friend popped by, yet casual enough to devour in my pajamas. That’s when these Dried Cranberry Chocolate Cookies came into play. They’re the perfect blend of tangy and sweet, a delightful twist on the classic chocolate chip cookie that feels just right for any time of year. Plus, they come together quicker than my favorite TV show, which is saying something. Trust me, you’ll want to keep this recipe up your sleeve for those moments when you need a treat without the fuss.
Jump to Recipe
What You’ll Need
You might be surprised to find that most of these ingredients are already lounging around in your kitchen. The star of the show? Those **dried cranberries** that you bought for a salad and then forgot in your pantry. They’re about to meet their new best friend: **chocolate chips**.
- 1 cup plain flour
- 1/2 teaspoon baking powder
- 1/4 teaspoon baking soda
- 1/4 teaspoon **kosher salt**
- 1/2 cup **unsalted butter**, softened
- 1/3 cup **granulated sugar**
- 1/3 cup **light brown sugar**, packed
- 1 large **egg**
- 1 large **egg yolk**
- 1 teaspoon **vanilla extract**
- 1 cup old fashioned **rolled oats**
- 1/2 cup **semisweet chocolate chips**
- 1/2 cup **white chocolate chips**
- 1/2 cup **dried cranberries**
How to Make Dried Cranberry Chocolate Cookies
- Preheat your oven to 325°F (165°C). Line two baking sheets with parchment paper, because nobody wants cookies stuck to the tray.
- In a medium bowl, whisk together the flour, baking powder, baking soda, and salt. This is your dry team, so make sure they’re well-mixed.
- In a stand mixer fitted with a paddle attachment, beat the butter, granulated sugar, and brown sugar on medium speed until the mixture is creamy and fluffy. This should take about 2 minutes.
- Add the egg, then the egg yolk, and finally the vanilla extract to the butter mixture, beating well after each addition. Don’t forget to scrape down the sides of the bowl for an even mix.
- Slowly incorporate your dry ingredients into the wet mixture, mixing until just combined. The dough should be coming together nicely.
- Fold in the chocolate chips and dried cranberries. You want them evenly distributed for the ultimate balance of flavors in every bite.
- Scoop heaping teaspoons of dough onto the prepared baking sheets. Keep them about 2 inches apart; they like their personal space as they bake.
- Bake in your preheated oven for 12 to 15 minutes. You’re looking for the cookies to brown slightly at the edges and be just set in the middle.
- Let the cookies cool on the baking sheets for a couple of minutes before transferring them to a wire rack to cool completely. Or sneak a warm one because life’s too short.
Cook’s Notes
Cookies are a forgiving bunch, but a few tips can make them legendary. Make sure your butter is soft but not too warm to prevent your cookies from spreading too much. If you’re baking on a particularly humid day, you might find the dough a bit sticky—popping it in the fridge for 10 minutes should do the trick. These cookies keep well in an airtight container for up to a week, not that they’ll last that long! If you want to prep ahead, the dough can be frozen after scooping and then baked straight from the freezer—just add a couple of extra minutes to the baking time.
Make It Your Own
Feeling adventurous? Here are some ways to switch things up:
- Swap the **dried cranberries** for **dried cherries** for a slightly tart note that pairs beautifully with chocolate.
- Substitute **dark chocolate chips** for the semisweet variety if you’re in the mood for a richer, more intense chocolate flavor.
- Add a handful of chopped **nuts**, like walnuts or pecans, for a bit of crunch and nuttiness.
- Love spices? A teaspoon of **cinnamon** or a pinch of **nutmeg** can add a cozy warmth to your cookies.
If you try this, I’d love to hear how it turns out—drop a comment or tag me in your cookie creations! Your feedback is like the chocolate chips in my cookies: essential and sweet. 🍪
Related update: Dried Cranberry Chocolate Cookies
Related update: Gluten-Free Chocolate-Pecan Quickbread

Picture this: It’s a drizzly Saturday morning, and all you want is a breakfast that feels like a cozy hug. Well, these Caramelized Cranberries Coconut Pancakes are exactly that. They’re the perfect blend of sweet, tart, and fluffy, with a tropical twist that feels like a mini-vacation on your plate. I first whipped these up when I was rummaging through my pantry during a random craving for something sweet yet substantial. They came together almost effortlessly, and I realized they were the kind of pancakes that could impress without stress. Whether you’re feeding a crowd or just treating yourself, these bring a little sunshine to your morning, no matter the weather outside. Trust me, you don’t want to miss out on these.
Jump to Recipe
What You’ll Need
The beauty of this ingredient list is that it’s straightforward and likely already in your kitchen. Plus, we’re using a mix of whole wheat and coconut flour for that extra oomph.
- 1 cup fresh cranberries
- 1/4 cup brown sugar
- 1 tsp vanilla extract
- 1 cup coconut flour
- 1 cup whole wheat flour
- 2 tsp baking powder
- 1/2 tsp salt
- 2 large eggs
- 1 1/2 cups coconut milk
How to Make Caramelized Cranberries Coconut Pancakes
- Start by heating a nonstick saucepan over medium flame. Toss in the cranberries, brown sugar, and vanilla extract. Stir it up, cover, and let it cook for about 4-5 minutes until the cranberries are soft and juicy. Give them a good mash with your spoon. The aroma will be irresistible.
- Once done, take it off the flame and let it cool for a few minutes. This gives you time to gather the rest without burning your taste buds later.
- In a mixing bowl, combine all the dry ingredients: coconut flour, whole wheat flour, baking powder, and salt. Give them a good whisk so there are no clumps.
- In another bowl, beat the eggs and mix in the coconut milk. Now, add the cooled cranberry mixture to this and beat thoroughly. This will be your magic mixture.
- Pour the wet ingredients into the dry ones and mix just until combined. Let it stand for about 2 minutes, so everything gets cozy.
- Meanwhile, heat up your griddle or fry pan over medium flame and grease it with a cooking spray or oil of your choice. Let the sizzle tell you it’s ready.
- Pour a spoonful of the batter into the pan and shape it round. Let it cook for about 2 minutes or until you see those bubbles on the surface and the edges turning golden. Flip it over like a pro and cook the other side for another 2 minutes.
- Repeat with the remaining batter. Finish with a drizzle of your favorite sweetener and a dollop of cream if you’re feeling indulgent. Serve warm and dive in!
Cook’s Notes
Here’s the thing with pancakes: patience is your best friend. Don’t rush the process, and you’ll be rewarded with perfectly golden and fluffy bites. If you find your batter too thick (coconut flour can be tricky), feel free to add a splash more of coconut milk. Leftovers? They’re rare, but if you happen to have any, they store well in the fridge for a couple of days. Just pop them in the toaster or microwave to reheat.
Make It Your Own
- Nutty Twist: Add a handful of chopped walnuts or pecans to the batter for some crunch.
- Berry Swap: If cranberries aren’t your thing, try using blueberries instead for a sweeter pop.
- Dairy-Free Option: Use almond milk instead of coconut milk for a different nutty flavor.
- Spice It Up: Add a pinch of cinnamon or nutmeg to the dry ingredients for some warmth.
If you try this, I’d love to hear how it turns out. Drop a comment or tag me in your pancake adventures! Your kitchen is about to smell amazing.
Related update: Caramelized cranberries coconut pancakes
Related update: Doughnuts

Imagine it’s one of those mornings where you’ve hit snooze one too many times, and now you’re racing through your kitchen in a flurry of panic. Your brain is still in bed but your body is desperately trying to catch up with the clock. It’s on these mornings that my Protein Strawberry Smoothie saves the day. It’s a quick, delicious way to fuel up, with a creamy texture that feels indulgent but is packed with goodness. And let’s be real, anything that helps you avoid a hangry rage before your first meeting is worth its weight in gold. Plus, it’s got that perfect balance of sweet strawberries and the smooth richness of almond milk, making it a versatile favorite you’ll find yourself coming back to again and again.
Jump to Recipe
What You’ll Need
This ingredient list is short and sweet, with a few pantry staples you probably already have on hand. Here’s what you’ll need:
- 1 cup of almond milk
- 1 banana
- 1/2 cup of fat-free Greek yogurt
- 1 tablespoon of honey
- 1 cup of ice
- 1 cup of fresh strawberries
How to Make Protein Strawberry Smoothie
- Toss your strawberries, banana, and Greek yogurt into the blender. The fruit should be fresh and ripe, which will give you that vibrant flavor burst.
- Pour in the almond milk, which adds a nutty base that balances the sweetness from the fruit.
- Add the honey. You’ll want just enough for a hint of sweetness without overpowering the strawberries.
- Throw in the ice. This will give your smoothie that chilly, refreshing feel that’s perfect for a morning pick-me-up.
- Blend everything on high until it’s smooth and creamy. You’ll know it’s ready when you see a beautifully pink, frothy mixture without any lumps.
Cook’s Notes
Don’t get too caught up in exact measurements here. This smoothie is pretty forgiving, so feel free to adjust based on what you have. If your bananas are smaller, use two. If your strawberries are extra-large, maybe go a bit shy on the cup measurement. Also, I recommend using fresh strawberries, but if you only have frozen, that’s totally fine—just skip the ice so it doesn’t turn into a frozen block! If you’ve got a busy morning ahead, you can prep the fruit the night before and store it in the fridge, then just throw it all in the blender when you’re ready. Leftovers can be stored in the fridge for a day, but be sure to give it a good stir before drinking.
Make It Your Own
- Swap the almond milk for coconut milk for a tropical twist.
- Add a tablespoon of your favorite nut butter for some extra protein and a richer flavor.
- If you’re not a fan of honey, replace it with a splash of maple syrup or agave nectar.
- For a green boost, toss in a handful of spinach. It won’t change the taste much but will kick up the nutrition!
If you try this, I’d love to hear how it turns out — drop a comment or tag me in your smoothie pics! Nothing makes my day more than seeing someone enjoy a recipe that’s made their morning just a bit brighter. Enjoy, and here’s to more deliciously lazy mornings!
Related update: Protein Strawberry Smoothie
Related update: Caramelized cranberries coconut pancakes
Related update: Green Tea Fruit Medley Smoothie
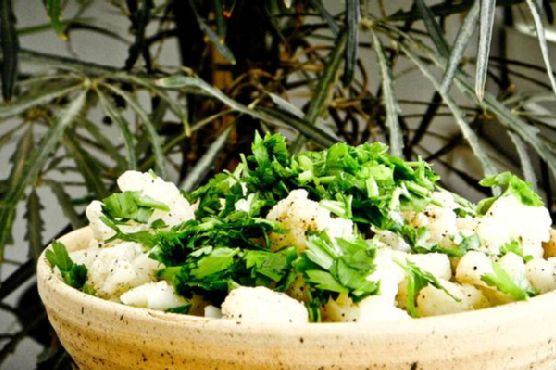
Last Tuesday, I found myself staring at a head of cauliflower in the fridge, feeling a bit uninspired and yet in desperate need of something fresh and zesty to perk up my weeknight dinner. It was one of those Tuesdays when you’re caught between the comfort of routine and the allure of a little culinary adventure. Enter the Egyptian Cauliflower Side Salad—a dish that’s beautifully simple yet impressively flavorful, perfect for those moments when you want something that’ll surprise your taste buds without complicating your evening. It’s quick, tangy, and lets the humble cauliflower shine with a bit of Middle Eastern flair. Trust me, this is one you’ll want as a regular in your recipe arsenal.
Jump to Recipe
What You’ll Need
This recipe is all about using fresh and vibrant ingredients that you might already have lounging around in your pantry or fridge. Think of it as a happy meeting between global flavors and everyday simplicity.
- Cauliflower – the star of the show, bring your best one!
- Cumin – to add that warm, earthy depth.
- Fresh parsley – for a burst of color and freshness.
- Lemon juice – for that zippy tang.
- Olive oil – your salad dressing superhero.
- Bell pepper – adds sweetness and crunch.
- Salt – to elevate all other flavors.
How to Make Egyptian Cauliflower Side Salad
- First, separate your cauliflower into medium-sized florets. Aim for bite-sized pieces that are easy to manage for both cooking and eating.
- Steam the cauliflower in a steamer until just tender. If you don’t have a steamer, no worries! You can boil the whole cauliflower in water until fork-tender and then cut it into pieces. Go for a texture that’s soft but still holds its shape.
- Once the cauliflower is cooked, place it in a large mixing bowl. The warmth will help it soak up all those delicious flavors we’re about to add.
- In a small bowl, whisk together the olive oil, cumin, lemon juice, and a generous pinch of salt. You want a good balance of zesty and savory here, so taste and adjust if needed.
- Pour the dressing over the warm cauliflower and toss gently to coat every piece. The aroma of cumin will start to fill your kitchen—it’s heavenly!
- Dice the bell pepper finely and add it to the bowl, tossing everything together once more for good measure.
- Finally, garnish with a handful of freshly chopped parsley. This not only adds a vibrant color but also a lovely fresh note to the salad.
Cook’s Notes
This salad is best enjoyed fresh, while the cauliflower is still warm, allowing it to soak up all those lovely flavors. However, it’s also quite forgiving if made in advance. Simply store it in the fridge for up to two days, and let it come to room temperature before serving to revive the flavors a bit. If you find the dressing has thickened upon chilling, a splash of warm water can loosen it right up. Be careful not to overcook the cauliflower—you’re aiming for tender, not mushy. It should have a slight bite to it, creating the perfect texture contrast with the creamy dressing and crunchy bell pepper.
Make It Your Own
- Swap the parsley for fresh cilantro if you’re a fan of its pungent flavor.
- For a spicy kick, add a pinch of red chili flakes to the dressing.
- Mix in some toasted almonds or pine nuts for extra crunch and nuttiness.
- Use lime juice instead of lemon for a slightly different citrusy edge.
If you try this, I’d love to hear how it turns out—drop a comment or tag me! Your kitchen adventures are always a delight to hear about. Enjoy your culinary trip to Egypt with just a few simple steps and ingredients!
Related update: Egyptain Cauliflower Side Salad
Related update: Charlotte Potato Salad

It was one of those dreary Tuesday afternoons when the sky couldn’t decide whether to rain or shine, so it just hovered in a blah gray. The kind of day that demands something bright and cheerful to rescue you from the monotony. I found myself in the kitchen, eyeing a lonely lemon on the counter. It hit me – pressed lemon butter cookies! They’re the perfect pick-me-up: buttery, zesty, and just the right amount of sweet, without the gluten. These cookies are impressive enough for a tea party yet simple enough for a midweek treat. If you, like me, need a little sunshine on a plate, these cookies are your answer.
Jump to Recipe
What You’ll Need
I bet you’ve got most of these tucked away in your pantry and fridge. It’s a short, sweet list that’s all about that lemony punch and buttery goodness. Here’s what you’ll need:
- Unsalted butter
- White sugar
- Egg yolks
- Lemon extract
- Lemon zest
- Fresh lemon juice
- Gluten-free flour
- Xanthan gum
How to Make Gluten-Free Pressed Lemon Butter Cookies
- Preheat your oven to 350°F (175°C). This is the perfect moment to get cozy with that mixing bowl and let the anticipation build.
- In a world where flour can be tricky, whisk or sift your gluten-free flour with the xanthan gum. This step ensures everything blends smoothly, trust me.
- Grab your standing mixer with the paddle attachment and cream the unsalted butter until it’s fluffy and inviting. The butter should look like a pillowy cloud.
- Add in the white sugar and continue to cream until the mixture is light and airy. You’re looking for that dreamy consistency.
- Introduce the egg yolks to the party, one at a time, making sure each is fully incorporated before adding the next.
- Now for the zesty kick: add the lemon zest, lemon extract, and fresh lemon juice. Mix them in until the batter sings with lemony aroma.
- Slowly fold in the flour mixture at a gentle speed, then increase the speed until it’s all well-incorporated. Your dough should be soft, but firm enough to hold its shape.
- Load your cookie press with the dough and press onto ungreased cookie sheets. This is where the magic happens – each press is a little masterpiece.
- Bake one sheet at a time, for about 12-15 minutes, until the edges are lightly browned and your kitchen smells like a citrus grove.
- Patience, my friend. Let them cool completely on the sheets before gingerly using a thin spatula to lift them. They’ll be delicate but oh-so-worth-it.
Cook’s Notes
Here’s a little insider scoop: when working with gluten-free flour, sifting is your best friend for a smooth texture. These cookies keep well in an airtight container for up to a week, but let’s be real, they’ll probably disappear way before that. If you’re planning ahead, the dough can be made a day in advance and refrigerated. Just let it come to room temperature before pressing. And whatever you do, don’t skip the cooling step – they’re fragile when fresh out of the oven.
Make It Your Own
With a recipe like this, there’s room to play around. Here are a few ideas to shake things up:
- Swap the lemon for orange zest and juice for a sweet, floral twist.
- Add a teaspoon of vanilla extract alongside the lemon for a more rounded flavor.
- Sprinkle a little coarse sugar on top before baking for a touch of sparkle and crunch.
- Mix in a tablespoon of poppy seeds for a delightful texture and a nod to classic lemon-poppy duo.
If you try this, I’d love to hear how it turns out — drop a comment or tag me! Knowing these cookies brought a little sunshine to your day would make mine. Enjoy each zesty bite!
Related update: Gluten-Free Pressed Lemon Butter Cookies
Related update: Dried Cranberry Chocolate Cookies
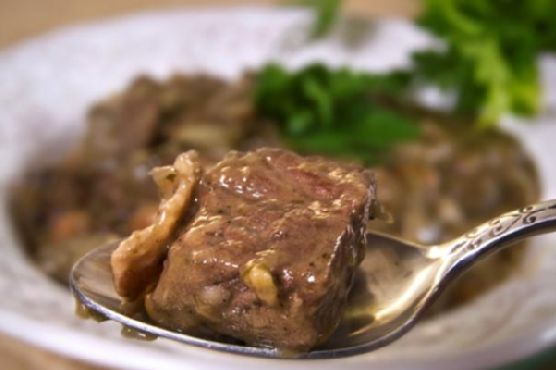
Picture this: It’s a chilly Tuesday evening, and I’ve just managed to duck out of the rain and into my cozy kitchen. My cat, Oliver, is curled up on the windowsill, and the whole place is alive with the soft patter of raindrops. It’s the kind of night that calls for something deeply comforting, something that can fill not just the belly but also the soul. Enter Classic Boeuf Bourguignon — my go-to when I crave something hearty and a tad bit indulgent but without spending hours in the kitchen. Honestly, the magic of this dish lies in its ability to transform simple ingredients into something truly extraordinary. The smell of beef simmering with red wine and herbs is, quite literally, poetry in a pot. Plus, it’s the kind of recipe where you can pop it all into a Dutch oven, let it work its magic, and you’ll still have time to catch up on that new series everyone’s been talking about.
Jump to Recipe
What You’ll Need
Just a heads-up: You might already have most of these tucked away in your pantry, and the rest? Well, they’re worth the trip to the store. Trust me.
- Bacon – Adds a smoky depth to the dish.
- Olive oil
- Beef stew meat – The star of the show.
- Garlic
- Diced onion
- Fresh thyme
- Bay leaves
- Parsley
- Pearl onions
- Button mushrooms
- Carrot
- Red wine – Go for something you’d drink.
- Beef broth
- All-purpose flour
- Salt and pepper
How to Make Classic Boeuf Bourguignon
- Preheat your oven to 400°F (200°C). Get that Dutch oven ready – it’s about to work its magic.
- Heat olive oil over medium heat and toss in the bacon. Let it sizzle for about 2-3 minutes until it’s just perfectly cooked. Transfer the bacon out with a slotted spoon and let it hang out on the side.
- Pat the beef dry with paper towels for a better browning. Crank up the heat to medium-high, throw the beef into the bacon fat, and let it sear for 4-5 minutes until every piece is gloriously browned. Spoon them out and set aside.
- Lower the heat back to medium. Toss in the carrots, garlic, onions, parsley, thyme, and bay leaves. Give them a good stir for about 2-3 minutes. Out they go with the slotted spoon, into a separate dish.
- Add pearl onions and mushrooms to the Dutch oven. Sauté them until the onions start to brown and the mushrooms become tender. Move them to the dish with the bacon.
- Return the beef to the pot and sprinkle one tablespoon of flour over it. Give it a good toss to coat. Season generously with salt and pepper. Pop it in the oven for about 4-5 minutes to develop a gorgeous crust.
- Remove the pot from the oven and set it on the stovetop. Pour in the red wine and deglaze, scraping up all those tasty bits. Add the beef broth, bring it to a gentle simmer.
- Introduce the carrot, onion, and spice mixture back into the pot. Lower the heat, cover, and let it simmer away for an hour, filling your kitchen with the most intoxicating aroma.
- After an hour, add the pearl onions, mushrooms, and bacon. Continue to simmer, allowing the beef to tenderize further, about another 30 minutes.
- Use a slotted spoon to fish out the solids and set them aside. Crank up the heat; let the sauce come to a rapid boil.
- In a small bowl, mix the remaining tablespoon of flour with two tablespoons of sauce. Stir until smooth and lump-free. Add to the pot, stirring constantly until the sauce thickens.
- Remove the bay leaves and thyme sprigs. Discard them. Return the solids to the pot, stirring to coat evenly with the enriched sauce. Serve warm, perhaps over a bed of egg noodles or rice if you’re feeling it.
Cook’s Notes
Let’s talk practicalities. This dish is one of those gems that get even better the next day — so if you can resist not devouring it all, it’s perfect for leftovers. Store it in an airtight container in the fridge, and when you reheat, just do it gently over low heat to keep that beef tender and juicy. If you’re prepping ahead, you can cook everything up to the point just before adding the flour in step 10. Refrigerate and proceed with the sauce thickening when you’re ready to serve. Also, don’t skimp on the wine. A good wine makes all the difference. Taste as you go, and adjust the seasoning if needed.
Make It Your Own
Feel free to get creative and put your own spin on this classic:
- Vegetarian Twist: Swap out the beef for hearty mushrooms like portobello or cremini, and use vegetable broth instead of beef.
- Poultry Option: Switch the beef out for chicken thighs. They’re just as comforting and cook a bit quicker.
- Root Veggie Addition: Try adding some parsnips or turnips along with the carrots for a little extra earthy sweetness.
- Herbaceous Flair: Add rosemary or sage for an aromatic twist that complements the wine beautifully.
If you try this, I’d love to hear how it turns out — drop a comment or tag me! Sharing your kitchen adventures makes my day. Plus, who knows, your twist might just inspire someone else!
Related update: Classic Boeuf Bourguignon
It was one of those weeks where everything seemed a bit too chaotic, and the weather was veering into that crisp, cozy fall vibe that just screams for comfort food. I was rummaging through my pantry, trying to figure out what on earth I could throw together without needing a last-minute grocery run. There it was, a can of chickpeas and some cauliflower that had been patiently waiting for their moment to shine. Enter the Cauliflower Chickpea Stew: a dish that’s hearty, full of flavor, and surprisingly easy to whip up. It’s one of those recipes that feels like a warm hug after a long day, plus it’s packed with spices that make your kitchen smell absolutely divine. Definitely a go-to for those nights when you need something nourishing but not overwhelming to make.
Jump to Recipe
What You’ll Need
I love this recipe because it relies on pantry staples but still feels a bit exotic thanks to the spices. Chances are you already have most of this hanging around your kitchen.
- Olive oil
- Brown rice
- Twice the amount of water to rice
- Garlic cloves
- Turmeric
- Salt & pepper
- Onion
- Canned tomatoes
- Tomato puree
- Fresh cm ginger
- Fresh chili
- Cinnamon
- Garam masala
- Paprika
- Sweet potatoes
- Lemon (juice)
- Additional water
- Cauliflower
- Canned chickpeas
How to Make Cauliflower Chickpea Stew
- Start by heating some olive oil in a large saucepan over high heat. You’ll want it shimmering but not smoking.
- Crush your garlic cloves and toss them in the pan with a generous pinch of turmeric, salt, and pepper. Fry for about a minute until everything is golden and fragrant.
- Add the brown rice, stirring occasionally. Let it fry for 4-5 minutes until the grains become slightly translucent.
- Pour in water (twice the amount of your rice) and bring it to a boil. Once boiling, reduce the heat to low-medium and let it simmer for 30 minutes. The rice should be tender and the water absorbed.
- While the rice does its thing, chop your onion, sweet potatoes, and cauliflower into bite-sized pieces. Grate the ginger and finely slice the chili.
- In another pot, heat more olive oil and sauté the onion until it’s soft and just starting to brown.
- Add the canned tomatoes, tomato puree, grated ginger, chili, cinnamon, garam masala, and paprika. Stir this mix for a couple of minutes until it’s well blended and aromatic.
- Throw in the sweet potatoes and stir them to coat in the sauce. Let them cook for about 5 minutes.
- Add the cauliflower and canned chickpeas, followed by a splash of water to help everything come together. Simmer for about 15 minutes until the veggies are tender but not mushy.
- Squeeze in the juice of a lemon, give it one last stir, and taste to adjust the seasoning as needed.
- Serve the stew over the cooked brown rice, and you’re ready to dig in!
Cook’s Notes
This stew is pretty forgiving, which is what makes it perfect for busy weeknights. A couple of things to keep in mind:
- Be sure not to rush cooking the garlic and spices at the beginning. This step is key for building flavor.
- Leftover stew keeps beautifully in the fridge for up to three days. Just reheat gently on the stove or microwave.
- If you’re prepping ahead, you can chop the veggies and have them ready to go in the fridge—makes the actual cooking a breeze!
- Remember that simmering times can vary depending on the size of your veggie chunks, so keep an eye on them to achieve that perfect tender texture.
Make It Your Own
This stew is a canvas for your creativity. Here are a few ways to switch it up:
- Swap the sweet potatoes for butternut squash if that’s more your style.
- Use coconut milk instead of water for a creamier, richer stew.
- Add spinach or kale at the end for some extra greens.
- Top with a dollop of Greek yogurt for a tangy finish.
If you try this, I’d love to hear how it turns out—drop a comment or tag me! Your feedback makes my day and helps others find their new favorite cozy meal. Happy cooking!
Related update: Cauliflower Chickpea Stew
Related update: Classic Boeuf Bourguignon

It was one of those evenings where the day seemed to stretch on forever, and all I could think about was something light yet satisfying to cap it off. The sun was setting, casting a warm glow across my kitchen, and I had a sudden craving for something that felt like a mini tropical escape. That’s when the idea of making Grilled Lemongrass Shrimp hit me. It’s the kind of dish that’s deceptively impressive but doesn’t demand hours of your time—perfect for a weeknight treat. The lemongrass adds a citrusy zing, while the chili paste gives it just the right kick. With a short marinating time, it’s as close to instant gratification as you can get with a grill. Plus, there’s something about skewering shrimp that feels like a fun party trick, even if it’s just you and your family.
Jump to Recipe
What You’ll Need
Chances are you already have most of this tucked away in your pantry, aside from maybe the lemongrass. But trust me, it’s worth hunting down for that signature aromatic flavor.
- Bamboo skewers soaked in water
- Lemongrass – the star of the show!
- Garlic
- Soy sauce
- Fish sauce
- Ground chili paste
- Pinch of salt
- Sugar
- Vegetable oil
- Water
- Raw shrimp – peeled and deveined
How to Make Grilled Lemongrass Shrimp
- Gather all your ingredients and a mixing bowl. Combine the chopped lemongrass, minced garlic, soy sauce, fish sauce, chili paste, salt, sugar, and a drizzle of vegetable oil in the bowl. Stir until it all comes together into a fragrant marinade.
- Add the shrimp into the bowl, making sure each one gets coated in the aromatic marinade. Let them marinate for 15 minutes—just enough time to sip on a cool drink and prep your grill.
- Thread the shrimp onto the soaked bamboo skewers. It’s all about that balance, so make sure the shrimp are spaced out evenly.
- Fire up your grill to moderate heat. If you’re using charcoal, wait until the coals are hot but no longer flaming. For a gas grill, a medium setting will do the trick.
- Place the skewers on the grill. The shrimp will cook quickly, so stay close. Turn them after about a minute or so, keeping an eye out for that beautiful pink hue and slightly charred edges. They’re done when they’re opaque and firm, about 2-3 minutes in total.
Cook’s Notes
If you’re like me and tend to get distracted, set a timer for the marinating and grilling time. You don’t want to overdo the shrimp—there’s nothing worse than rubbery seafood. If you don’t have a grill, a griddle pan on the stovetop works surprisingly well. Just make sure it’s hot enough to give you that lovely char. Leftovers, if you have any, are great cold in a salad or tossed into a noodle dish the next day.
Make It Your Own
- Swap the shrimp for chicken or tofu if you’re looking for a different protein. Adjust cooking times accordingly—chicken will take a bit longer.
- For a sweeter twist, add a splash of coconut milk to the marinade. It brings a creamy texture that pairs beautifully with the lemongrass.
- Throw in some chopped cilantro or mint into the marinade for a fresh, herbal kick.
- If you’re feeling brave, up the chili paste for more heat. Just have a cool drink at the ready!
If you try this, I’d love to hear how it turns out—drop a comment or tag me! It’s always fun to see how different kitchens bring their own flair to a dish. Enjoy your little slice of tropical heaven!
Related update: Grilled Lemongrass Shrimp
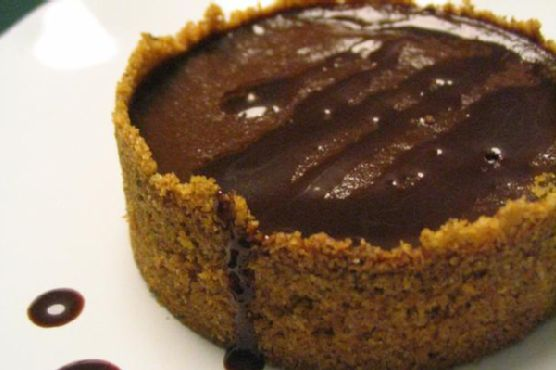
I was standing barefoot in my kitchen, staring down a can of pumpkin puree with the kind of resolve usually reserved for epic culinary battles. It was mid-October, and my house was awash with the smell of burning leaves from the neighborhood bonfires. I craved something cozy yet indulgent, and not just another pumpkin pie — no, this had to be something with a little extra pizzazz. Enter the Triple Chocolate Pumpkin Pie. It’s the perfect treat for when you need to impress without stress. It’s rich, a bit decadent, and just when everyone thinks they’ve guessed the flavor, the trio of chocolates takes them by surprise. Trust me, this isn’t your average pumpkin dessert.
Jump to Recipe
What You’ll Need
I bet you have most of these ingredients lounging in your pantry already. This pie brings together the familiar comforts of fall spices with the irresistible pull of chocolate.
- Ground graham cracker crumbs – the base of our crust
- Unsalted butter
- Granulated sugar
- Light-brown sugar
- Coarse salt
- Ground cinnamon
- Bittersweet chocolate
- Semisweet chocolate
- Canned solid-pack pumpkin
- Canned evaporated milk
- Eggs
- Cornstarch
- Vanilla extract
- Ground ginger
- Ground nutmeg
- Milk chocolate – for that final drizzle
How to Make Triple Chocolate Pumpkin Pie
- Preheat your oven to 350 degrees. In a bowl, mix together the graham cracker crumbs, butter, sugars, salt, and cinnamon until it resembles wet sand.
- Press this crumbly mixture firmly into the bottom and up the sides of a deep, 9 1/2-inch pie dish. It should feel like you’re building a sandy fortress.
- Bake the crust until it’s firm, about 8 to 10 minutes. Once done, take it out and immediately sprinkle the bittersweet chocolate over the bottom. Pop it back in the oven for just a minute more to melt.
- Spread the melted chocolate in a thin layer along the bottom and up the sides. Let this cool on a wire rack while you move on to the filling.
- Reduce the oven temperature to 325 degrees. Set up a double boiler and melt the semisweet chocolate with butter, stirring until smooth and glossy.
- In a separate bowl, mix together the pumpkin, evaporated milk, brown sugar, eggs, cornstarch, vanilla, salt, cinnamon, ginger, and nutmeg. This is your spicy pumpkin concoction.
- Whisk about a third of the pumpkin mix into the melted chocolate. Once smooth, whisk in the remaining pumpkin mixture until fully combined.
- Place your pie dish on a rimmed baking sheet, then pour the pumpkin-chocolate mix into the crust. The anticipation should be building right about now.
- Bake until the center is set but still slightly wobbly, roughly 55 to 60 minutes. Let it cool on a wire rack, then refrigerate for at least 8 hours or overnight for best results.
- Before serving, melt the milk chocolate and drizzle it over the chilled pie, creating tempting ribbons of sweetness. Serve immediately and watch the magic unfold.
Cook’s Notes
This pie is a breeze, but here are a few thoughts to keep in mind. When pressing the crust into the pie dish, make sure you really pack it down to avoid crumbling later. Letting the pie chill overnight isn’t just a suggestion — it’s a non-negotiable. The flavors deepen, and the texture becomes perfectly set. If your pie cracks a little, don’t sweat it. That chocolate drizzle will cover a multitude of sins, plus a little imperfection just adds to the homemade charm.
Make It Your Own
Here are a few twists to make this pie uniquely yours:
- Swap the graham cracker crumbs for gingersnaps to add an extra spicy kick.
- For a nutty twist, add a thin layer of chopped pecans on top of the melted chocolate layer in the crust.
- Replace semisweet chocolate with dark chocolate for a more intense cocoa hit.
- Sprinkle a bit of sea salt over the milk chocolate drizzle for a sweet-salty combo.
If you try this, I’d love to hear how it turns out — drop a comment or tag me! I’m already dreaming about that first bite.
Related update: Triple Chocolate Pumpkin Pie
Related update: Gluten-Free Pressed Lemon Butter Cookies

It was one of those dreary Tuesday afternoons — the kind that has you reaching for something sweet and comforting. And there I was, standing in my kitchen, craving something indulgent yet simple, when I remembered the half-used bag of sweetened coconut tucked away in the pantry. Enter: Coconut Macaroons with Chocolate Drizzle. This recipe is a delightful blend of chewy coconut goodness and rich chocolate, and the best part? You can whip it up with just a handful of ingredients. Perfect for last-minute cravings or impressing guests without breaking a sweat.
Jump to Recipe
What You’ll Need
Honestly, you probably have most of these ingredients lounging around your kitchen, just waiting to be transformed into something magical.
- 1 cup of flour
- 3 cups of sweetened coconut
- 1/2 teaspoon of salt
- 1 teaspoon of vanilla extract
- 1 can of sweetened condensed milk
- Optional: melted semi-sweet chocolate for drizzling
How to Make Coconut Macaroons With Chocolate Drizzle
- First, preheat your oven to 350°F (175°C). This is the moment to get your anticipation—and your oven—nice and toasty.
- In a large bowl, toss together the flour, coconut, and salt. Get in there with a spoon and make sure everything is mingling well.
- In a smaller bowl, mix the vanilla with the can of sweetened condensed milk. This mixture is your sweet elixir; make sure it’s smooth and unified.
- Pour the wet mixture into the dry ingredients. Stir together with a wooden spoon or your hands until you have a thick, sticky batter. Resist the urge to use a mixer unless it’s on the lowest speed—trust me on this, you don’t want a coconut explosion.
- Line your baking sheets with parchment paper. This will be your best friend for easy cleanup and perfect macaroons.
- Using a big spoon or an ice cream scooper, scoop generous mounds of batter onto the prepared baking sheets. Aim for consistency in size so they bake evenly.
- Bake in your preheated oven for about 20 minutes, keeping a close eye. You’re looking for that beautiful golden hue and a toasty coconut aroma.
- Once out of the oven, let them cool a bit. Then, get artsy with your melted chocolate drizzle. Alternatively, dip them halfway in chocolate for a more decadent treat.
Cook’s Notes
These macaroons are all about that rich, chewy texture with a hint of crispiness on the edges. Make sure not to over-mix your batter; just a few good turns to incorporate everything will do. If you make them ahead, they store well in an airtight container for up to a week—though I bet they’ll disappear much sooner. For freezing, allow them to cool completely and store in layers separated by parchment paper.
Make It Your Own
- Chocolate Lovers: Double up on the chocolate by mixing mini chocolate chips into the batter before baking.
- Nuts for Nuts: Add chopped almonds or macadamia nuts for a delightful crunch.
- Citrus Twist: Add a teaspoon of orange or lemon zest to the wet mixture for a zesty surprise.
- Spiced Up: Sprinkle a dash of cinnamon or nutmeg into the dry mix for a warm, spiced flavor.
If you try this, I’d love to hear how it turns out — drop a comment or tag me! Whether you stick to the classic or put your twist on it, these macaroons are sure to hit the sweet spot.
Related update: Coconut Macaroons With Chocolate Drizzle
Related update: Triple Chocolate Pumpkin Pie
Related update: Grilled Lemongrass Shrimp
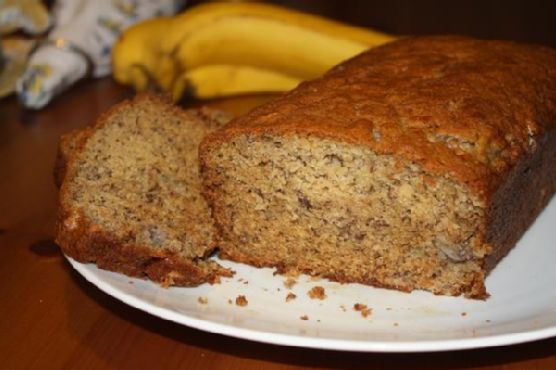
There’s something about the smell of banana bread baking that just instantly transports you to a place of comfort. It was a dreary Tuesday evening, and I was staring at a trio of overripe bananas languishing in my fruit bowl, a scene I suspect is familiar to many. These bananas had been begging to be transformed into something magical, and I knew just the recipe to do it. This traditional banana bread is like a warm hug in edible form—simple, reliable, and incredibly satisfying. Whether you’re trying to impress a last-minute guest or just want to make the most of those spotty bananas, this is the recipe you need. Plus, it’s almost guaranteed you have everything you need already in your pantry.
Jump to Recipe
What You’ll Need
Chances are you already have most of this sitting around your kitchen. We’re keeping it classic and straightforward, letting those bananas truly shine.
- Granulated sugar
- Unsalted butter, softened
- 2 large eggs
- 3 ripe bananas
- 2 tablespoons milk
- 1 teaspoon ground cinnamon
- 2 cups flour
- 1 teaspoon baking powder
- 1/2 teaspoon baking soda
- 1/2 teaspoon salt
How to Make Traditional Banana Bread
- Preheat your oven to 325 degrees F, and butter a 9x5x3-inch loaf pan. This is where your banana bread will take shape, so make sure it’s nicely coated to prevent sticking.
- Cream the sugar and butter in a large mixing bowl. You’re looking for a fluffy texture that feels as light as a cloud.
- Crack the eggs into the sugar mixture, one by one, beating well after each addition. This helps incorporate air, making your bread rise beautifully.
- In a small bowl, mash the bananas with a fork until they’re smooth but with a few small chunks remaining. Stir in the milk and cinnamon, giving your mixture that first hint of the aroma to come.
- In another medium-sized bowl, mix together the flour, baking powder, baking soda, and salt. It’s like setting the stage for a perfect bake.
- Fold the banana mixture into the butter mixture, stirring just until they’re happily combined.
- Add the dry ingredients to the banana mixture, stirring everything just until no flour pockets remain. Be careful not to overmix; we want tender, not tough.
- Pour the luscious batter into the prepared loaf pan. Level it out and pop it into the oven.
- Bake for about 1 hour, or until a toothpick inserted into the center comes out clean. The top should be golden and your kitchen will smell absolutely divine.
- Allow the bread to cool on a rack for at least 15 minutes before slicing. The waiting is hard, but worth it to avoid a crumbly mess when slicing.
Cook’s Notes
Banana bread is pretty forgiving, but a few pointers can make all the difference. Make sure your bananas are really ripe—almost too ripe to eat. They should be speckled brown and slightly mushy. This recipe works best with unsalted butter, but if all you have is salted, just reduce the salt a touch. If you’re baking ahead, this bread keeps well wrapped in foil or an airtight container for up to three days. You can also freeze slices individually for up to a month; just warm them in the oven before serving for that fresh-baked goodness.
Make It Your Own
Here are a few variations to consider if you’re feeling adventurous or just want to use up what you have:
- Swap the granulated sugar for brown sugar for a deeper, richer flavor.
- Fold in a handful of chocolate chips or chopped nuts right before baking for added texture and flavor.
- Add a teaspoon of vanilla extract when you add the eggs for a subtle twist that enhances the banana flavor.
- Replace the milk with Greek yogurt for a tangy touch and an extra moist crumb.
If you try this, I’d love to hear how it turns out—drop a comment or tag me! Whether you’re a seasoned baker or a newbie, this banana bread is sure to bring a bit of joy to your day. Happy baking!
Related update: Traditional Banana Bread
Related update: Coconut Macaroons With Chocolate Drizzle
Related update: Cheddar Chile Beer Bread

It was one of those evenings when nothing seemed to go right. I had just returned from a long day at work, craving something sweet and indulgent. With a sneaky glance at my fruit basket, I realized I had a bunch of slightly overripe bananas begging to be used. That was my eureka moment: Banana in brown sugar ice cream. It’s one of those recipes that sounds super fancy but is actually a delightful twist on your average ice cream. Plus, it’s a fantastic way to transform humble bananas into a rich, creamy treat that’s perfect for any occasion. This recipe strikes the perfect balance between indulgent and comforting, and it’s seriously worth a try.
Jump to Recipe
What You’ll Need
Trust me, you won’t need a shopping cart full of ingredients for this one. Chances are you already have most of these on hand:
- Bananas – The riper, the better!
- Light brown sugar
- Sour full-fat cream or coconut milk for a lighter twist
- Dark rum
- Vanilla extract
- Lemon juice
- A pinch of sea salt
How to Make Banana in brown sugar ice cream
- In a wide skillet or saucepan, heat the light brown sugar with one-quarter of the sour cream. Stir it gently until the mixture becomes smooth and bubbly, filling your kitchen with a caramel-like aroma.
- Add the bananas and a pinch of sea salt. Let them cook for about 5 minutes, stirring occasionally. You’re looking for soft, completely cooked-through bananas with a golden touch.
- Once the bananas are done, remove the skillet from heat and stir in the remaining sour cream, dark rum, and vanilla extract. Give it a taste, and if it’s a tad too sweet, a few drops of lemon juice will brighten it up.
- Pour everything into a blender or food processor, and puree until the mixture is utterly smooth.
- Chill it thoroughly for at least an hour, or if patience is a virtue you possess, let it sit overnight.
- When you’re ready, pour the chilled mixture into your ice cream maker and follow the manufacturer’s instructions. The anticipation is worth it!
- Before serving, let the ice cream sit out for 5-10 minutes, or longer if needed, to reach that perfect scooping consistency.
Cook’s Notes
Making this ice cream is a breeze, but here are a few tips to ensure it turns out perfectly:
- If you choose sour cream, the mixture might curdle a bit while cooking. Don’t panic! It will all smooth out when blended.
- This treat is best served in chilled glass or porcelain bowls to keep it from melting too quickly.
- For effortless scooping, soak your ice cream spoon in boiling water, then dry it before using.
- Store any leftovers (if there are any!) in an airtight container in the freezer. It’ll stay delicious for a week or two, though I doubt it will last that long.
Make It Your Own
Here are a few ideas to tweak this dessert to suit your fancy:
- Swap the dark rum for bourbon for a slightly different boozy kick.
- Add a handful of toasted pecans or walnuts after churning for a nutty crunch.
- For a chocolatey twist, toss in some chocolate chips or a swirl of chocolate syrup during the final mixing.
- Not a fan of bananas? Substitute with ripe peaches or mangoes for a tropical spin.
If you try this, I’d love to hear how it turns out — drop a comment or tag me! Let’s share the ice cream joy because we all need a little sweetness in our lives.
Related update: Banana in brown sugar ice cream
Related update: Traditional Banana Bread
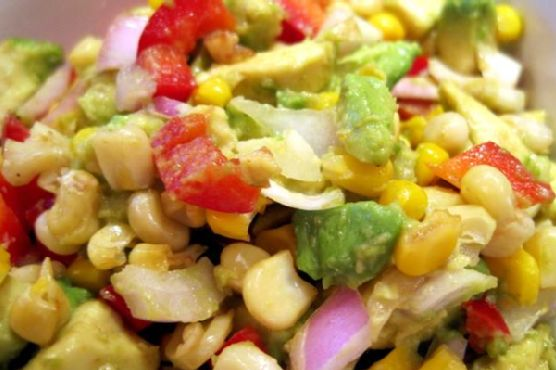
Picture this: It’s a balmy Tuesday evening, and after a long day at work, all you want is something fresh, quick, and a little fun to brighten up your dinner table. You’re standing in the kitchen, barefoot, with the warm breeze tickling your curtains, and that’s when you remember the bag of frozen corn tucked away in the freezer. And oh, the avocado sitting prettily on the counter, just begging to be used! That’s when the idea hits: Corn Avocado Salsa. It’s a dish that’s as vibrant as it is simple, packed with the kind of zesty flavors that say, “Hey, let’s pretend it’s summer all year round.” Plus, it’s the type of recipe that lets you feel like a pro without requiring a culinary degree. Let’s dive in!
Jump to Recipe
What You’ll Need
Here’s the beauty of this dish: It’s made with ingredients you likely already have. It’s about taking the humble and making it shine, and let’s be honest, who doesn’t love a recipe that doesn’t call for a grocery store run?
- Avocado
- Balsamic vinegar
- Cumin
- Canned frozen corn
- Garlic
- Red bell pepper
How to Make Corn Avocado Salsa
- Preheat your oven to 375 degrees. The perfect temperature to get that corn just right—golden and slightly crisp, without venturing into burnt territory.
- Spread the frozen corn flat on a baking sheet. Give it a light spritz of olive oil spray to help it roast up nicely.
- Roast the corn in the oven for about 8-10 minutes. Keep an eye on it; you’re looking for a nice golden hue, not the blackened crunch of forgotten popcorn.
- Once roasted, remove the corn from the heat and let it cool. It’s essential to let the corn relax a bit before mixing, or it’ll cook the avocado, turning your salsa into a mushy mess.
- While the corn is cooling, finely chop the red bell pepper and garlic. Mix these in a bowl, letting their flavors begin their tango.
- Peel and coarsely chop the avocado. Add this beauty to your bowl along with the cooled corn. Try not to mash it; we want chunks, not guac.
- Finally, sprinkle in cumin and drizzle in the balsamic vinegar. Blend well, but gently. You’re aiming for harmony in the bowl, not chaos.
Cook’s Notes
Let’s keep it real: Salsas are wonderfully forgiving, but there are still a few things to keep in mind. First off, make sure to give the corn enough time to cool—otherwise, your avocado may start to look more like a green smoothie. If you want to prep ahead, you can roast the corn and chop the veggies a day in advance. Just keep the avocado out until you’re ready to serve to maintain its gorgeous green color. Leftovers might be rare, but if you do have them, the salsa holds up okay for a day or two in the fridge. Just give it a good stir before serving.
Make It Your Own
Here are a few variations to keep your salsa adventures fresh:
- Swap the red bell pepper for a jalapeño if you like a bit of heat. Just remember to deseed unless you’re feeling particularly daring.
- Try adding some black beans for a heartier version. It makes for a great taco filler.
- Throw in some chopped cilantro for an extra burst of freshness. It’s like a little green party in your mouth.
- If you’re a citrus fan, squeeze in a bit of lime juice for a zesty twist. It pairs beautifully with the avocado.
If you try this, I’d love to hear how it turns out—drop a comment or tag me! Nothing makes my day more than seeing your creations and hearing your thoughts. Happy cooking, friends!
Related update: Corn Avocado Salsa
Related update: Egyptain Cauliflower Side Salad
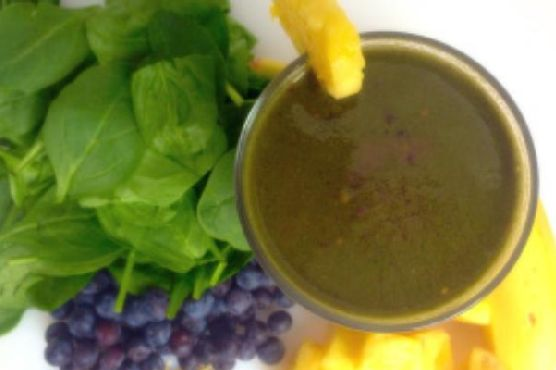
Okay, picture this: It’s a Wednesday morning, you hit snooze one too many times, and now you’re rushing around trying to make it out the door on time. You want something quick, healthy, and delicious to kick-start your day. That’s exactly how I stumbled upon this Tropical Banana Green Smoothie. I was in dire need of something refreshing and energizing, yet easy enough to throw together in less than five minutes. This smoothie checks all those boxes and more. It’s like a mini tropical vacation in a glass, and while it sounds fancy, it’s really just a few simple ingredients blended into creamy perfection. Trust me, one sip of this and you’ll forget all about your hectic morning. Jump to Recipe
What You’ll Need
This smoothie is all about using what you have on hand and embracing the refreshing flavors of the tropics. Chances are you already have most of this in your kitchen.
- 1 ripe banana
- 1 cup pineapple, fresh or frozen
- 1 cup coconut water
- 1/2 cup blueberries, fresh or frozen
- 1 scoop protein powder (vanilla works great!)
- 1 handful mixed spinach
How to Make TROPICAL BANANA GREEN SMOOTHIE
- Peel and slice the banana. If you’re using frozen pineapple, you can skip this step for now. If fresh, chop it into chunks. This will add to the creaminess.
- In a blender, add the banana slices and pineapple chunks. Pour in the coconut water. This will be the base of your smoothie, giving it that tropical flair.
- Throw in the blueberries and the scoop of protein powder. The blueberries add a pop of color and a hint of sweetness that complements the tropical vibes.
- Top it off with a generous handful of mixed spinach. Don’t worry; the taste is so mild, you won’t even notice it’s there (your body will, though!).
- Blend on high until the mixture is smooth and creamy. You’ll know it’s ready when there are no more visible chunks and the blend is a beautiful, vibrant green.
- Pour into your favorite glass, pop in a fun straw, and savor your mini-vacation in a cup.
Cook’s Notes
This smoothie is incredibly forgiving, so feel free to adjust the ingredient quantities to suit your taste. If you prefer a thicker smoothie, use frozen fruit or add a couple of ice cubes before blending. For those with a sweet tooth, a splash of honey or agave nectar can take it to another level.
It’s best enjoyed fresh, but if you’re in a time crunch, you can make it the night before. Just give it a quick stir or shake in the morning. As for leftovers, store in an airtight container in the fridge for up to one day; beyond that, it tends to lose its vibrancy and freshness.
Make It Your Own
- Swap the coconut water with almond milk for a creamier texture and a nutty undertone.
- Add a tablespoon of chia seeds before blending for an extra boost of fiber and omega-3s.
- Replace the spinach with kale for a more robust green flavor.
- For a tropical twist, throw in a few mint leaves during blending.
If you try this, I’d love to hear how it turns out — drop a comment or tag me! Let’s turn those chaotic mornings into something a bit more delightful, one smoothie at a time!
Related update: TROPICAL BANANA GREEN SMOOTHIE
Related update: Protein Strawberry Smoothie

Last Tuesday, as I stood in my kitchen, surrounded by an unexpected bounty of carrots I’d picked up on a whim, inspiration hit. Why not make a comforting soup that’s both vibrant and subtly spiced? With a hint of coriander and a splash of orange juice, this carrot and coriander soup is not just a feast for the eyes, but also a delightful dance of flavors perfect for a chilly weeknight. It’s impressively easy, too, so it’s a win-win. The kind of recipe that lets you unwind as it simmers, filling your kitchen with warmth and the promise of a cozy meal. Oh, and it’s lightning fast to whip up! Jump to Recipe
What You’ll Need
Chances are you already have most of these ingredients in your pantry. Here’s what you’ll need to bring this dish to life:
- Carrots – peeled and ready to brighten up your evening
- Onion – chopped finely; it’ll lend sweetness as it cooks
- Olive oil – or butter, for that silky start
- Ground coriander – the star of the show with its earthy flavor
- Orange juice – to add a splash of freshness
- Water – enough to let the veggies dance around in the pot
- Salt – to taste, always
- Pepper – for a hint of warmth
- Fresh coriander – for that final, fragrant flourish
How to Make Carrot and Coriander Soup
- In a deep pot, heat the olive oil over medium heat. Toss in the chopped onions, stirring occasionally until they’re soft and translucent, and your kitchen smells like a dream.
- Add the peeled carrots to the pot and sauté them for a few minutes until they start to soften slightly and their sweetness gets a chance to shine.
- Pour in the water, season with salt and pepper, and cover the pot. Let it all simmer until the carrots are tender and flavorful, about 15-20 minutes.
- Stir in the orange juice and ground coriander. Let it cook for an additional 2 minutes, enough for the flavors to mingle and create magic.
- Carefully transfer the mixture to a blender and puree until smooth. You’ll want to do this in batches if your blender is on the smaller side.
- Return the pureed soup to the pot and give it a final taste test, adjusting the seasoning if needed. Serve hot, garnished with fresh coriander for a pop of color and extra zest.
Cook’s Notes
Here’s the stuff you really want to know: You can totally make this soup ahead of time. Just store it in an airtight container in the fridge for up to three days. When you’re ready to serve, simply reheat it on the stove until it’s piping hot. And a little secret — this soup freezes like a champ! Just skip the fresh coriander before freezing and add it only when serving.
Also, make sure your blender can handle hot liquids; you don’t want a carrot explosion! Let the soup cool a bit before blending, and never fill the blender more than halfway. Trust me on this one.
Make It Your Own
- Swap the water for veggie broth to amp up the flavor profile.
- Feeling indulgent? Stir in a splash of cream or coconut milk at the end for a richer texture.
- Boost the spice by adding a pinch of cayenne or smoked paprika.
- For a protein hit, toss in some cooked chickpeas when serving.
If you try this, I’d love to hear how it turns out — drop a comment or tag me! Whether you stick to the classic or put your own twist on it, this soup is sure to warm both your heart and your taste buds.
Related update: Carrot and Coriander Soup
Related update: Corn Avocado Salsa

It was one of those chaotic weeknights when I stumbled back into the kitchen after a long day, only to find a colorful assortment of bell peppers staring back at me from the fridge. They were practically begging to be turned into something delicious. I craved something that was not only quick to whip up but also packed with flavor and just the right amount of comfort. That’s when it hit me – a vibrant, flavor-packed Mexican stuffed bell pepper! These beauties come together effortlessly with a few pantry staples and a rotisserie chicken that I always keep around for emergencies. With a quick trip to the oven, they fill the house with mouthwatering aromas, and in no time, dinner is served. It’s the kind of recipe that feels satisfying and a little bit indulgent, but you know it’s good for you too.
Jump to Recipe
What You’ll Need
Let’s be honest, the best part about this recipe is that you probably have most of these ingredients on hand. Here’s what you’ll need to get started:
- Bell peppers (any color you love)
- Cooked brown rice
- Rotisserie chicken breast, shredded
- Frozen corn kernels
- Roma tomato, diced
- Red diced onion
- Black beans, drained and rinsed
- Fire roasted green diced chile
- Chili seasoning
- Minced garlic
- Low-fat shredded cheddar cheese
- Sour light cream
How to Make Blast Of Color Mexican Stuffed Bell Peppers
- Preheat your oven to 400 degrees. Feel that blast of warmth and imagine the deliciousness to come.
- In a large mixing bowl, toss together the cooked brown rice, shredded chicken, corn, diced tomato, onion, black beans, half a cup of shredded cheddar, garlic, green chile, and chili seasoning. Mix until everything is evenly distributed and it smells like a fiesta.
- Line a baking dish with foil and give it a spritz of cooking spray to prevent sticking.
- Take your bell peppers and cut off the tops, then scoop out the seeds. Stuff them generously with the chicken mixture, pressing it down to fill every nook and cranny, and heap some extra on top for good measure.
- Sprinkle each pepper with a bit more cheddar cheese, because let’s be honest, you can never have too much cheese.
- Bake in the preheated oven for 30 to 40 minutes. When the edges of the peppers start to bubble and the cheese turns golden, you know it’s ready.
- Let them cool just a bit, then top each pepper with a dollop of sour light cream before serving. Dig in and enjoy!
Cook’s Notes
These Mexican Stuffed Bell Peppers are a breeze to make, but here are a few things to keep in mind to ensure they turn out perfectly every time. Make sure your baking dish is large enough to fit all the peppers snugly so they stand upright and cook evenly. If you’re prepping ahead, you can mix the stuffing a day in advance and refrigerate it. Just stuff and bake when you’re ready. Leftovers can be stored in an airtight container in the fridge for up to three days. Just pop them in the microwave for a quick reheat.
Make It Your Own
Personalizing this dish is easy, and here are a few ideas to get you started:
- Swap the chicken for crispy tofu or ground turkey for a different protein option.
- Add a handful of fresh cilantro or parsley to the stuffing mix for a burst of freshness.
- If you like it spicy, throw in some jalapeño slices or a dash of hot sauce.
- Use quinoa instead of brown rice for a protein-packed alternative.
If you try this, I’d love to hear how it turns out — drop a comment or tag me! Cooking is all about experimenting and sharing, and I can’t wait to see your creations. Happy cooking!
Related update: Blast Of Color Mexican Stuffed Bell Peppers

It was one of those mornings where I woke up, looked in the fridge, and realized I was running late for everything. My mind was a blur, but my stomach was loud and clear: it needed something quick, filling, and delicious. Enter the Protein Strawberry Smoothie. It’s like a breakfast hug in a glass, bursting with fruity freshness and a protein punch to keep you going. Plus, it comes together in minutes — perfect for the days when your to-do list is longer than your patience.
Jump to Recipe
What You’ll Need
I bet you already have most of these ingredients in your kitchen, which means you’re just minutes away from sipping on this creamy delight. Here’s what you’ll need:
- 1 cup almond milk
- 1 banana
- 1/2 cup fat-free Greek yogurt
- 1 tablespoon honey
- 1 cup ice
- 1 cup fresh strawberries
How to Make Protein Strawberry Smoothie
- Start by grabbing your blender and pouring in the almond milk. This will be the liquid base that helps everything blend smoothly.
- Peel the banana and break it into chunks, tossing them into the blender. Bananas add natural sweetness and a creamy texture.
- Add the fat-free Greek yogurt next. This is where the protein magic happens, making your smoothie satisfying and rich.
- Drizzle in the honey. Adjust the sweetness to your taste, but remember, the strawberries will add their own sweetness too.
- Throw in the ice to make it nice and frosty. No one likes a warm smoothie!
- Top it all off with the fresh strawberries. They bring a bright, berry flavor that’s completely irresistible.
- Blend on high until everything is smooth and the color is a lovely pink. It should only take about a minute. Taste and adjust if needed — maybe a bit more honey or a splash of almond milk if it’s too thick.
- Pour into your favorite glass and enjoy immediately. It’s best when fresh and frothy!
Cook’s Notes
So, a few quick things to make sure your smoothie game is on point. If your smoothie ends up too thick, just add a bit more almond milk to loosen it up. Too thin? A few more ice cubes will do the trick. I love using fresh strawberries when they’re in season, but frozen will work in a pinch and will make your smoothie even thicker — just reduce the ice a bit. As for storing it, well, this smoothie is really best made fresh. If you do have leftovers, pop them in the fridge for a few hours, but know they might separate a bit (just give it a good shake or stir before drinking).
Make It Your Own
Here are a few fun ways to switch things up:
- Swap the almond milk for coconut milk for a tropical twist.
- Replace the banana with a ripe avocado for a lower-sugar, extra creamy version.
- Add a tablespoon of chia seeds before blending for an extra boost of fiber and omega-3s.
- Throw in a handful of spinach to sneak in some greens — you won’t even taste it!
If you try this, I’d love to hear how it turns out — drop a comment or tag me! Whether you’re sipping this on a bustling morning or a lazy afternoon, I hope it adds a bit of joy to your day. Cheers to easy, tasty nutrition!
Related update: Protein Strawberry Smoothie
Related update: TROPICAL BANANA GREEN SMOOTHIE

Picture this: It’s a Wednesday night, the middle of a chaos-filled week, and you’re staring into your fridge, half wishing it would magically produce something other than leftovers or eggs. It’s in moments like these that my Spinach and Gorgonzola Stuffed Flank Steak becomes a lifesaver. This dish is what I like to call my “secret weapon” — it sounds like a mouthful, but it’s surprisingly easy to pull together. Plus, it gives off this vibe that you’ve got your life together, even if you’re just trying to make it to the weekend. Think savory, melty gorgonzola mingling with fresh spinach, all hugged by a tender flank steak. Are you drooling yet?
Jump to Recipe
What You’ll Need
This ingredient list is refreshingly short and sweet, which means you can save that grocery store run for another day.
- Lean flank steak – the star of the show
- Olive oil – for a touch of richness
- Shallot – adds a subtle sweetness
- Spinach – fresh and vibrant
- Fresh bread crumbs – gives the stuffing a bit of body
- Blue gorgonzola – the cheesy dream
- Salt and pepper – the essentials
How to Make Spinach and Gorgonzola Stuffed Flank Steak
- Start by preheating your oven to 375°F (190°C). This is your cue to get things rolling.
- Next, butterfly the flank steak. Lay it flat on a cutting board and carefully slice through the long side, stopping just short of cutting it in half. If it’s already thin, just give it a good pounding with a mallet until it’s about 1/2 inch thick. Channel your inner chef!
- In a large skillet over medium heat, add 1 tablespoon of olive oil. Toss in the shallots and sauté until they’re soft and fragrant, about 2 minutes.
- Now, add the spinach. Stir occasionally until it’s just wilted, roughly 2 to 3 minutes. Transfer this mixture to a colander and let it cool. Once you can handle it, squeeze out all the moisture with your hands. Trust me, this step is crucial.
- In a medium bowl, combine the spinach with bread crumbs and gorgonzola. Season generously with salt and pepper, then mix it all up.
- Lay the steak flat on a piece of plastic wrap. Spread the spinach mixture evenly over it, leaving about a 1-inch border along the edges to prevent spillage.
- Using the wrap as an aid, roll the steak up starting from the edge closest to you. Press gently on the filling as you roll to keep it snug. Tie the roll with twine at 2 to 3-inch intervals to hold it all together.
- Season the outside with salt and pepper, then heat the remaining 2 tablespoons of olive oil in a large ovenproof skillet over medium-high heat.
- Sear the rolled steak on all sides until browned, about 2 minutes per side. The aroma will be irresistible at this point!
- Transfer the skillet to your preheated oven and roast for 20 to 25 minutes. When done, the steak should be firm but springy to the touch.
- Remove the steak from the oven, tent it with aluminum foil, and let it rest for 10 minutes. This is the hardest part – the waiting.
- When ready to serve, snip off the twine and slice into 1/2 inch to 1-inch thick slices. Voila! Enjoy your culinary masterpiece.
Cook’s Notes
If you’re looking for a shortcut, ask your butcher to butterfly the steak for you — major time saver. This dish works beautifully for make-ahead dinners. Simply prep it up to the point of searing, then chill in the fridge for a few hours, or even overnight. When you’re ready, just pick up where you left off. Leftovers (if there are any!) will keep well in the fridge for a couple of days and are delightful cold in a sandwich or reheated gently.
Make It Your Own
- Not a fan of gorgonzola? Swap it for creamy goat cheese or a melty Havarti.
- Add a layer of prosciutto before spreading the spinach mixture for an extra savory note.
- Throw in some chopped sun-dried tomatoes or roasted red peppers for a pop of color and flavor.
- For a twist, replace the spinach with arugula or baby kale — it’ll add a peppery kick.
If you try this, I’d love to hear how it turns out — drop a comment or tag me! Cooking should be fun, so let’s keep the conversation going. Happy cooking, friends!
Related update: Spinach and Gorgonzola Stuffed Flank Steak
Related update: Blast Of Color Mexican Stuffed Bell Peppers