
It was one of those evenings when the fridge seemed to have its own agenda. You know, the kind where you open the door, and despite it being packed, you can’t find the makings of a straightforward dinner. I spotted some forlorn leeks and a half-full bottle of porter leftover from the weekend, and inspiration hit me like a bolt of lightning. Enter my Cheese and Leek Strata—a dish that’s an absolute game-changer for those nights when you don’t want to keep oscillating between the fridge and the pantry. This strata is comfort in a casserole, layered with flavors and textures that promise to turn your evening around. It’s like a savory bread pudding, but with a cheesy, leeky twist. Perfect for brunch or a cozy dinner, it’s a make-ahead marvel that gives you more time to curl up on the couch with a good book or Netflix series.
Jump to Recipe
What You’ll Need
With ingredients you likely have lurking around your kitchen, this dish won’t require a mad dash to the grocery store. Here’s the lowdown:
- 6 large eggs
- 2 cups milk
- 1/2 cup porter (or any dark beer)
- 1 garlic clove, minced
- Salt and pepper, to taste
- 1 loaf sourdough bread, cut into cubes
- 1 large leek, thinly sliced
- 1 red bell pepper, diced
- 1 cup shredded cheddar cheese
- 1 cup shredded Swiss cheese
How to Make Cheese and Leek Strata
- Preheat your oven to 350 degrees Fahrenheit. As it warms, the kitchen fills with a cozy promise of what’s to come.
- In a large mixing bowl, combine the eggs, milk, porter, minced garlic, and a generous pinch of salt and pepper. Beat this mixture well until it’s beautifully blended, creamy and slightly frothy.
- Grease a 2.5-quart round baking dish. Place half of the sourdough bread cubes at the bottom, forming the first layer of your strata.
- Sprinkle half of the sliced leeks and diced red bell pepper over the bread layer. The veggies should look like colorful confetti scattered across the bread.
- Top this veggie layer with half of the Swiss and cheddar cheeses, letting it snow over the vibrant layer beneath.
- Repeat the layering process with the remaining ingredients—bread, leeks, bell pepper, and cheeses—ending with a delightful blanket of cheddar cheese on top.
- Pour the egg mixture evenly over the entire dish, ensuring the liquid seeps through to all corners.
- Cover the dish tightly with foil or plastic wrap and weigh it down with a slightly smaller baking dish. This step helps everything meld together beautifully.
- Refrigerate for at least 2 hours or, even better, overnight. This waiting period lets the flavors mingle and intensify.
- When you’re ready to bake, remove the cover and place it in the oven for about 40 minutes. The strata is done when the center is set and the top is golden and enticingly fragrant.
- Serve warm, and let the compliments roll in!
Cook’s Notes
You’ll want to give this strata time in the fridge. Trust me, it makes all the difference in flavor and texture. If you’re strapped for time, a minimum of 2 hours will do, but overnight is optimal. If you have leftovers, they store beautifully in the fridge for up to three days. Just reheat them gently in the oven. Be sure to use a crusty sourdough—it holds up better against the liquid soaking. And if you find the center isn’t setting after 40 minutes, give it another 5-10 minutes until it’s firm.
Make It Your Own
- Swap the cheddar cheese for some sharp Gruyère if you’re feeling fancy.
- Not a fan of leeks? Try using caramelized onions for a sweeter touch.
- Give it a meaty twist by adding cooked bacon or sausage between the layers.
- For a spicy kick, toss in some jalapeños alongside the bell peppers.
If you try this, I’d love to hear how it turns out—drop a comment or tag me! Happy cooking, and may your fridge always surprise you in the best possible way.
Related update: Cheese and Leek Strata
Related update: Chorizo and Beef Quinoa Stuffed Pepper

It was a rainy Wednesday evening when my kitchen turned into a culinary battleground. I was battling the clock, the weather, and my own growling stomach. In the chaos, I discovered a family classic that would become my weekday hero: Braised Pork, known in the Philippines as Humba. This dish is like a warm hug — cozy, flavorful, and so much easier than you’d think. The secret? It’s all in the marination and the slow simmering that transforms humble ingredients into something magical. Trust me, this one’s a keeper for when you need something hearty but don’t want to spend all day cooking.
Jump to Recipe
What You’ll Need
You might be surprised to find that the ingredient list reads like a pantry inventory. It’s a delightful mix of familiar staples and a few special twists that make all the difference.
- Pork belly – for that melt-in-your-mouth texture.
- Pork butt shoulder – adds a bit more substance and chew.
- Whole garlic – because vampires aren’t the only ones who appreciate its charm.
- Vinegar – gives the dish its signature tang.
- Brown sugar – balances the tang with a sweetness that caramelizes beautifully.
- Soy sauce – adds umami and color.
- Bay leaf – for a subtle aroma.
- Rice wine – it’s like the secret handshake of Asian cooking.
- Star anise – provides that warm, licorice-like hint.
- Oregano – a little herbal depth.
- Fermented black beans – those little flavor bombs.
- Whole peanuts – adds a nutty crunch.
- Olive oil – gets everything going.
- Paprika – a smoky whisper.
- Water – to help everything meld together.
- Fried bananas – trust me on this one.
How to Make Braised Pork: Filipino Humba
- In a large bowl, toss together the pork belly, pork butt shoulder, garlic, vinegar, brown sugar, soy sauce, and rice wine. Give it a good mix and let it marinate for about 30 minutes in the fridge. This is where the magic starts.
- After marinating, transfer everything from the bowl into a saucepan. Add water, fermented black beans, and peanuts. Cover the pan and bring it to a boil. You’ll start to smell the savory-sweet aroma—it’s heavenly.
- Once it’s boiling, lower the heat to a gentle simmer. Add the bay leaf, star anise, oregano, paprika, and a splash of olive oil. Stir gently, then cover and let it simmer for about an hour or until the sauce is thick and glossy.
- Five minutes before finishing, decide on the bananas. If you’re feeling adventurous, add them in. Otherwise, serve them on the side. They add sweetness and a fun twist.
Cook’s Notes
So, here’s the deal: this dish loves time. The longer it simmers, the more the flavors develop. But don’t overdo it—an hour is usually perfect. If you find the sauce too thick, add a bit of water to loosen it up. Store leftovers in an airtight container and they’ll keep beautifully in the fridge for up to three days. Reheating brings the flavors back to life, just add a splash of water to keep it from drying out.
Make It Your Own
Here are some fun ways to switch things up without losing the essence of the dish:
- Swap the pork for crispy tofu if you’re going for a vegetarian vibe. Just adjust the marinating time a bit shorter.
- Try using coconut vinegar for a milder, slightly tropical twist.
- Add some pineapple chunks during the last ten minutes of simmering for a sweet and tangy flair.
- Replace the peanuts with cashews for an even richer nutty note.
If you try this, I’d love to hear how it turns out — drop a comment or tag me on social media! This dish has become a weeknight favorite in my house, and I hope it does in yours too. Happy cooking!
Related update: Braised Pork: Filipino Humba

There was this one time, smack in the middle of a hectic Wednesday, when I found myself staring into the abyss of my fridge, promising my hungry self something quick and satisfying. You know those days, right? When you want something homemade but don’t really have the bandwidth for a culinary marathon. That’s when Charlotte Potato Salad came to the rescue. It’s like that best friend who stops by unannounced but always brings wine. This dish is vibrant, with just the right amount of zing from the mustard and lemon, balanced by the comforting notes of bacon and potatoes. Perfect for elevating a mundane weeknight or impressing a surprise guest.
Jump to Recipe
What You’ll Need
Here’s the best part — this recipe involves a handful of ingredients, many of which might already be sitting in your pantry or fridge. Just a few essentials come together to deliver a flavor-packed salad that feels both sophisticated and homey.
- Charlotte potatoes
- Bacon cubes
- Dijon mustard
- Dried parsley
- Lemon juice
- Olive oil
- Black salt and pepper
- Spring onions
How to Make Charlotte Potato Salad
- Begin by boiling the Charlotte potatoes in salted water until they are just tender. You’ll know they’re ready when a fork easily pierces through. Drain them and let them cool just enough to handle, then peel off the skins.
- In a small bowl, whisk together the lemon juice, Dijon mustard, black salt, and pepper until smoothly blended. Start to beat in the olive oil slowly, creating a creamy dressing. Add the finely chopped spring onions at this point, letting the sharpness infuse the sauce.
- In a dry frying pan over low heat, dry fry the bacon cubes. Let them sizzle and release their fat, crisping up for about 5 minutes. The smell will be irresistible!
- Add these golden bacon cubes to your dressing, stirring well to ensure each piece is coated in mustardy goodness.
- Thickly slice the warm potatoes and place them in a serving bowl. Pour the bacon-infused dressing over the potatoes, tossing gently to coat each slice.
- Finish with a generous sprinkle of dried parsley for a pop of color and added flavor, then serve warm or at room temperature.
Cook’s Notes
Alright, so here’s the scoop on making this dish even more seamless. If you’re prepping in advance, boil and peel the potatoes, then store them in the fridge. Just make sure everything comes to room temperature before you toss it together. This salad is best enjoyed warm but still delightful if served cold. Avoid over-boiling the potatoes — we want them soft but not mushy. The potato slices should hold their own and not turn into mashed potatoes as you mix.
Make It Your Own
You can riff on this salad in a few fun ways:
- Swap the bacon for crispy tofu cubes to make it vegetarian — simply fry the tofu until golden and proceed with the recipe.
- Try using fresh herbs like dill or chives instead of dried parsley for a fresh twist.
- For a richer flavor, substitute half of the olive oil with melted butter in the dressing.
- Mix in some capers for a briny kick that beautifully counterbalances the richness of the bacon and potatoes.
If you try this, I’d love to hear how it turns out — drop a comment or tag me! Cooking is all about sharing those delicious moments, and this one is too good not to share. Enjoy!
Related update: Charlotte Potato Salad
Related update: Quinoa Salad with Barberries & Nuts
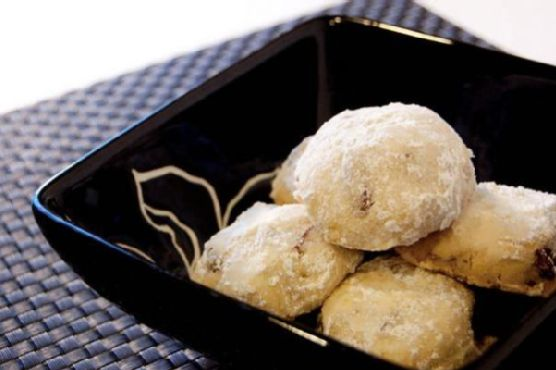
I was standing in my kitchen one Sunday afternoon, staring at the latest cookbook I’d impulsively bought. You know the feeling — you’ve got that itch to bake something, but the ingredients list reads like a novel. So there I was, craving something sweet, but not ready for a grocery run. A little lightbulb moment hit me when I remembered these Mexican Wedding Cookies — they’re a breeze to make and taste like pure joy wrapped in sugar. The kind of recipe that makes you feel accomplished without breaking a sweat. They’re like a warm hug, perfect for when you need a bit of comfort. Now, imagine sinking your teeth into a buttery, nutty cookie, with a snowy coating of sugar. You’re welcome.
Jump to Recipe
What You’ll Need
Honestly, you probably have most of these right in your kitchen. These cookies are all about keeping it simple yet delicious. Here’s what you need:
- Butter – The star of the show for that rich flavor.
- Powdered sugar – Twice; once for the dough, once for rolling.
- Vanilla extract – Just a splash for depth.
- All-purpose flour – The backbone of any good cookie.
- Pecans – Coarsely chopped for that lovely crunch.
- Ground cinnamon – For a little warmth in the sugar coating.
How to Make Authentic Mexican Wedding Cookies
- Start by beating the butter in a large bowl using an electric mixer. You want it to be light and fluffy, like clouds on a summer day.
- Add 1/2 cup of powdered sugar and a splash of vanilla. Keep beating until everything is well blended and smells heavenly.
- Mix in the flour bit by bit, then fold in the pecans. The dough should come together nicely — feel free to steal a taste test!
- Divide the dough in half and roll each into a ball. Wrap them in plastic and let them chill in the fridge for about 30 minutes.
- Preheat your oven to 350°F (or 180°C if you’re in my neck of the woods).
- While waiting, whisk the remaining 1 1/2 cups of powdered sugar with the cinnamon in a pie dish. This will be your magical coating.
- Take half of the chilled dough and roll it into small balls, about 2 teaspoons each. Line them up on a baking sheet, giving them a little room to breathe.
- Bake for about 18 minutes. You’re looking for golden brown bottoms and just a hint of gold on top.
- Let them cool on the sheet for 5 minutes, then gently toss in the cinnamon sugar while still warm. It’s like a sugar spa treatment.
- Transfer to a rack to cool completely, then repeat with the other half of the dough. Dust any leftover cinnamon sugar over the cookies before serving.
Cook’s Notes
Grab a good-quality vanilla extract, it makes a difference. Pecans can be swapped out for walnuts if you’re in a pinch, but pecans do have that melt-in-your-mouth quality that’s hard to beat. To store, keep them in an airtight container — if they last that long! They freeze well too, just defrost at room temperature. If you’re making ahead, you can chill the dough overnight. But be warned, you might start sneaking little bites from the fridge.
Make It Your Own
- Almond Lovers: Swap pecans for almonds, and maybe add a dash of almond extract for a nutty twist.
- Chocolate Dream: Add mini chocolate chips to the dough for a sweet surprise in every bite.
- Orange Zest: Add a teaspoon of orange zest to the dough for a citrusy zing.
- Gluten-Free: Use a cup-for-cup gluten-free flour blend — easy peasy!
If you try these, I’d love to hear how they turn out for you — drop a comment or tag me! There’s something magical about sharing a recipe and seeing it come to life in other kitchens. Enjoy, lovely bakers!
Related update: Authentic Mexican Wedding Cookies
Related update: Layered Poppy Seed Pastries

Picture this: It’s a Wednesday night, and I’ve got a craving — not just any craving, but a very specific desire for something that feels lavish but doesn’t require me to spend two hours in the kitchen. That’s when I think of Béarnaise sauce. It’s rich, velvety, and makes any dish feel like it’s straight out of a fancy restaurant. Whether I’m drizzling it over grilled steak or spooning it onto roasted vegetables, it’s the magic touch that elevates a meal from “meh” to “marvelous.” Plus, the whole process feels like a fun science experiment with all the whisking and bubbling. Seriously, once you nail this, you’ll never go back to store-bought.
Jump to Recipe
What You’ll Need
Let’s talk ingredients. Chances are, you already have most of these hanging out in your kitchen. It’s all about bringing them together in a way that sings.
- 1/2 cup melted butter
- 1/4 cup dry white wine
- 3 egg yolks
- 1 tablespoon lemon juice
- 1 tablespoon chopped parsley
- Salt and pepper to taste
- 2 tablespoons minced shallots
- 1 teaspoon chopped fresh tarragon
- 1 tablespoon tarragon vinegar
How to Make Béarnaise Sauce
- In the top of a double boiler, whisk together the egg yolks and lemon juice. It’ll look thick and creamy, almost like a custard that’s waiting to be transformed.
- Place this over simmering water, making sure the water doesn’t actually touch the bowl. We want gentle heat, not a sauna for our eggs.
- Slowly stream in the melted butter while whisking constantly. You’ll see the mixture start to thicken and get glossy in the process. This part feels like magic! Keep it slow, and your sauce won’t break.
- Season with salt and a generous grind of pepper. Add the tarragon, shallots, parsley, vinegar, and the white wine. Whisk until everything is beautifully blended and the sauce has a lush, velvety texture.
- Keep whisking for another minute or so, allowing the flavors to meld together. You’ll know it’s ready when the sauce clings to the back of a spoon and smells like something you’d get at a five-star joint.
Cook’s Notes
Here’s the deal: Béarnaise sauce can be a bit temperamental, but don’t let that scare you. The key is patience and whisking. If you find your sauce is getting too thick, whisk in a teaspoon of warm water to loosen it. Also, remember that this sauce doesn’t love to wait around; make it just before serving for the best texture and flavor.
- If you’re not serving it immediately, keep it warm in a thermos or a warmed bowl. Just avoid reheating directly on the stove as it tends to separate.
- This sauce is best fresh, but if you have leftovers, store them in the fridge and use within a day. Gently reheat it in a double boiler, whisking vigorously to bring it back together.
Make It Your Own
- Herb Swap: Not a fan of tarragon? Swap it out for basil or dill for a different herbal note. Each will give your Béarnaise a unique twist.
- Citrus Twist: Replace the lemon juice with orange or lime for a subtle citrus variation.
- Spicy Kick: Add a pinch of cayenne or a dash of hot sauce for a spicy Béarnaise that pairs beautifully with grilled meats.
- Vegan Alternative: Use vegan butter and replace egg yolks with a tablespoon of nutritional yeast and a teaspoon of cornstarch for a plant-based version.
If you try this, I’d love to hear how it turns out — drop a comment or tag me! Béarnaise sauce has this wonderful way of making any dish feel like a special occasion. So go ahead, treat yourself!
Related update: Béarnaise Sauce

It all started on a rainy Tuesday afternoon when my snack cravings were at an all-time high. I stared at the bunch of overripe bananas on the counter, contemplating yet another loaf of banana bread, when inspiration struck. What if I could combine the comforting flavors of a peanut butter banana sandwich with the indulgence of a chocolate chip cookie? That’s how these Chocolate Chip Peanut Butter Banana Cookies came to be. They’re a delightful twist on the usual, bringing together the creamy, nutty goodness of peanut butter with the sweet, decadent charm of chocolate chips—all in a soft, banana-infused cookie package. Perfect for a quick treat or a cozy moment with a cup of tea, these cookies hit the sweet spot every time.
Jump to Recipe
What You’ll Need
You won’t need a fancy trip to the grocery store for this recipe. Chances are, you’ve got most of these goodies in your pantry and fridge already. Here’s what you’ll need:
- 2 ripe bananas
- 1/2 cup butter, softened
- 1/2 cup creamy peanut butter
- 1/2 cup brown sugar
- 1/2 cup granulated sugar
- 1 large egg
- 1 teaspoon vanilla extract
- 1 and 1/2 cups flour
- 1 teaspoon baking powder
- 1/2 teaspoon baking soda
- 1/2 teaspoon cinnamon
- 1/4 teaspoon salt
- 1 cup mini chocolate chips
- 1/4 cup sugar (for sprinkling)
- 1/2 teaspoon cinnamon (for sprinkling)
How to Make Chocolate Chip Peanut Butter Banana Cookies
- Preheat your oven to 350°F. This is non-negotiable—no cold oven surprises here!
- In a large mixing bowl, mash the ripe bananas until smooth-ish. Don’t worry about small lumps; they’re just character.
- Add the softened butter, creamy peanut butter, both sugars, egg, and vanilla to the bananas. Stir until everything’s nicely combined and smelling heavenly.
- In a separate bowl, whisk together the flour, baking powder, baking soda, cinnamon, and salt. This dry blend will give our cookies structure and a hint of spice.
- Gently fold the dry ingredients into the banana mixture. Stir just until everything comes together—overmixing makes for tough cookies, and we want these to be soft and tender.
- Toss in those mini chocolate chips and give a few more gentle stirs to distribute them evenly.
- Using a large spoon, drop dollops of dough onto a parchment-lined baking sheet. Aim for about 2 inches apart to avoid cookie collisions.
- In a small bowl, combine the sugar and cinnamon for sprinkling. Give those dough mounds a generous dusting of cinnamon sugar magic.
- Bake in the preheated oven for 10-12 minutes, or until the edges are slightly golden brown and your kitchen smells like a dream. My oven runs hot, so keep an eye out; 10 minutes could be plenty.
Cook’s Notes
These cookies are best enjoyed fresh out of the oven (aren’t they all?), but they do keep well for a couple of days in an airtight container. If you’re planning ahead, you can make the dough and chill it for up to two days before baking. Just remember, cold dough might need an extra minute or two in the oven. And if you end up with leftovers that have lost their day-one freshness, a quick zap in the microwave will revive their warm, gooey glory.
Make It Your Own
Here are a few fun tweaks to shake things up:
- Swap the mini chocolate chips for dark chocolate chunks for a richer, more intense chocolate hit.
- If you’re nuts for nuts, add a handful of chopped walnuts or pecans to the dough for an extra crunch.
- Turn up the tropical vibes by adding a half cup of shredded coconut to the mix.
- For a gluten-free version, use a 1-to-1 gluten-free flour blend. Texture might vary slightly, but the flavor will still be on point.
If you give these cookies a whirl, I’d love to hear about it! Drop a comment below or tag me in your sweet creations. Happy baking, and remember, life’s too short to skip dessert!
Related update: Chocolate Chip Peanut Butter Banana Cookies
Related update: Authentic Mexican Wedding Cookies
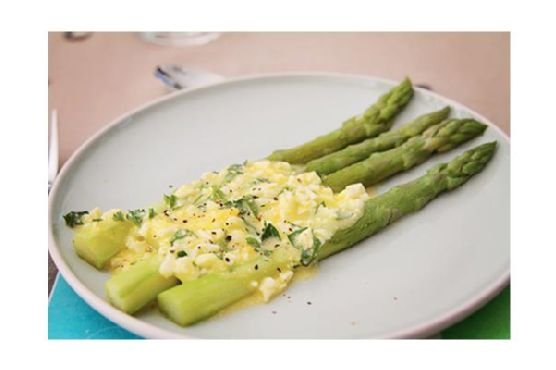
Picture this: it’s a busy weeknight, the kind where everything that could go wrong does—my cat decided to knock over a plant, and I swear the vacuum cleaner is giving me side-eye for not using it. That’s when I remember the bundle of asparagus I impulsively bought at the market, and suddenly, the night doesn’t seem so impossible. This Flemish Style Asparagus Side Dish is everything you need it to be—quick, comforting, and just fancy enough to make you feel like you’ve got things under control. It’s got that buttery, lemony vibe that I can’t get enough of, and it’s one of those dishes that somehow manages to elevate your mood and your meal. So, let’s dive in and get cooking!
Jump to Recipe
What You’ll Need
You’re going to love how simple and stress-free this ingredient list is. Chances are, you already have most of these goodies lounging in your kitchen:
- Green and white fresh asparagus
- Butter
- Hardboiled eggs
- Italian flat parsley
- Lemon (just the juice!)
- Salt and pepper
How to Make Flemish Style Asparagus Side Dish
- Start by peeling the asparagus at their ends, leaving their heads untouched. This helps with texture and makes them more palatable.
- Place the asparagus in a large saucepan and cover them with boiling water. Add a pinch of salt. Let them simmer until they’re tender—about 3 to 4 minutes. You’ll know they’re perfect when they turn a vibrant green and are fork-tender.
- While the asparagus is cooking, chop the flat parsley into fine bits. Trust me, this will add a fresh, herby kick that’s just perfect.
- Boil three eggs till they’re hard, then peel them. Use a fork to mash them into fine crumbs—they should resemble coarse sand.
- In a separate saucepan, melt the butter over medium heat. Add the juice of half a lemon, and whisk constantly. It should smell like heaven and have a smooth, silky texture.
- Stir in the mashed eggs into your butter-lemon mixture. The mixture should be thick and luscious. Add the chopped parsley and stir to combine.
- Plate the dish by laying a few stalks of cooked asparagus on a plate and drizzling the sauce generously over the stalk ends. Season with salt and pepper to taste. Serve warm and enjoy every bite!
Cook’s Notes
Okay, real talk: the key to nailing this dish is all about timing. Make sure your asparagus is not overcooked—aim for that sweet spot where it’s tender but still has a bit of crunch. If you’re prepping in advance, you can boil the eggs and chop the parsley earlier in the day. The sauce, however, is best fresh. Leftovers are rare because it’s just that good, but if you find yourself with any, store the asparagus and sauce separately. The asparagus can go in an airtight container, and you can reheat the sauce gently on the stove. It keeps well for up to two days.
Make It Your Own
Want to put your personal spin on this dish? Here are a few variations to consider:
- Swap the butter for ghee if you’re feeling adventurous—it adds a nutty richness.
- Try adding a pinch of smoked paprika or cayenne to the sauce for a little heat.
- If parsley isn’t your thing, fresh dill or chives would also be delightful.
- For a bit of extra texture, toss in some toasted pine nuts or almonds before serving.
If you try this, I’d love to hear how it turns out—drop a comment or tag me! Whether you’re having a chaotic day or just need a little culinary pick-me-up, this dish is your new best friend.
Related update: Flemish Style Asparagus Side Dish
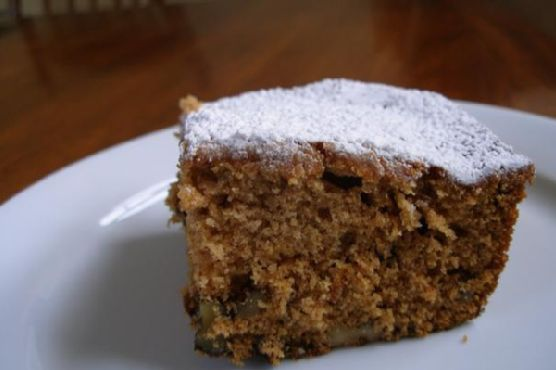
It was one of those chilly fall afternoons where the sky promised a drizzle, but I had a craving that promised warmth—something comforting to fill the kitchen with cozy scents. As I rummaged through my pantry, I found a jar of applesauce that sparked the idea of a nostalgic, spiced cake. This applesauce cake is the kind of recipe that wraps you in a hug from the first bite. It’s ridiculously easy to whip up, and before you know it, your kitchen will smell like pure autumn bliss. Trust me, this cake is the one you’ll want to cozy up with a hot cup of tea.
Jump to Recipe
What You’ll Need
This cake is built on pantry staples, so there’s a good chance you won’t need to run to the store. It’s all about the applesauce and cinnamon—they’re the stars of the show.
- 1 cup brown sugar
- 1 teaspoon cinnamon
- 1 teaspoon baking soda
- 1/2 cup raisins
- 1/2 cup red cherries (reserve some for decoration)
- 1 cup white sugar
- 1 cup butter, softened
- 2 eggs
- 2 cups applesauce
- 3 cups plain flour
- 1 cup nuts (pecans work beautifully, reserve some for decoration)
- 1 teaspoon vanilla extract
How to Make Applesauce Cake
- Preheat your oven to 325°F. Grab your trusty cake pan and give it a generous greasing, followed by a dusting of flour. This ensures no tragic sticking incidents later.
- In a mixing bowl, cream together the butter and both sugars. The mixture should be light and fluffy, almost like a sweet cloud.
- Add in the eggs, one at a time, beating well after each addition. You’re aiming for a smooth, unified batter here.
- Stir in the pure vanilla extract and the applesauce. You’ll notice the batter starts to look luscious and inviting.
- In a separate bowl, whisk together the flour, cinnamon, and baking soda. Carefully fold this dry mixture into the wet ingredients until just combined.
- Gently fold in the raisins, cherries, and nuts. The batter should look speckled with fruity and nutty goodness.
- Pour this aromatic batter into your prepared cake pan. Smooth out the top and sprinkle on those reserved cherries and nuts for a pop of color and texture.
- Bake in the preheated oven for about 1 1/2 hours. The cake is done when it’s golden and a skewer inserted into the center comes out clean.
- Let the cake cool in the pan for a few minutes before transferring it to a wire rack. The wait will be the hardest part!
Cook’s Notes
This cake keeps beautifully, making it an excellent make-ahead option. Just wrap it tightly in plastic wrap and store it in the fridge, where it can last for several days. It actually tastes even better the next day as the flavors meld together. If you find yourself with leftovers (a rarity, let me assure you), they’re perfect with a scoop of vanilla ice cream.
- Don’t skip greasing and flouring the pan; it saves you from the heartbreak of half the cake sticking.
- If your raisins are a bit dry, soak them in hot water for about 10 minutes and then drain them before adding to the batter.
- Feel free to substitute pecans with walnuts if you have those on hand.
Make It Your Own
- If you’re not into pecans, swap them out for walnuts or even hazelnuts for a different nutty note.
- For a boozy twist, soak the raisins in rum before adding them to the batter.
- Replace half the flour with whole wheat flour to add a rustic texture and flavor.
- Try adding a teaspoon of ground ginger or nutmeg for an extra spice kick.
If you try this, I’d love to hear how it turns out—drop a comment or tag me! I’m already excited to see your takes on this cozy classic. Happy baking!
Related update: Applesauce Cake
Related update: Chocolate Chip Peanut Butter Banana Cookies
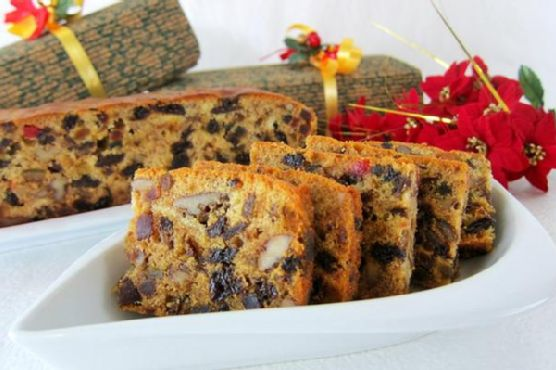
It was one of those December weekends when the chill in the air nudges you to do something cozy and delicious. I found myself in the kitchen, rummaging for ideas to fill the house with the quintessential aroma of the holidays. That’s when I remembered the Christmas Fruit Cake — a recipe that’s not only indulgent and rich but also incredibly forgiving. This cake becomes the centerpiece of any celebration, and the best part? You can make it ahead, giving you more time to sip on that mulled wine while the cake matures into something truly spectacular.
Jump to Recipe
What You’ll Need
Before we dive into the holiday spirit, let’s gather the goods. What I adore about this recipe is that it often feels like a treasure hunt in your pantry. You might already have most of these ingredients, waiting to transform into something magical.
- Butter – for that undeniable richness
- Sugar – sweetens and balances the spices
- Eggs – to give the cake structure
- Plain flour – sifted with baking powder for a light crumb
- Baking powder – keeps things lofty
- Mixed spice – the heart of any Christmas bake
- Dried mixed fruit – the star of the show
- Pitted prunes – cut into pieces for extra moisture
- Walnuts – chopped, adding a delightful crunch
- Rum – because holiday cheer is essential
- Orange juice – for a zesty kick
- Orange zest – from one orange, to enhance the citrus notes
- Vanilla extract – a warm, sweet background
- Two layers of parchment paper – to line an 8″ square cake tin
How to Make Christmas Fruit Cake
Here’s where the magic happens. Each step is designed not just to guide you but to make you feel confident and capable.
- Start by lining your 8″ square cake tin with two layers of parchment paper. This ensures your cake doesn’t stick and makes for a smooth release.
- In a large bowl, mix the dried mixed fruit and pitted prunes with about 8 tablespoons of rum. Cover this mixture with cling wrap and let it sit overnight. This soak is where the fruits absorb all that boozy goodness.
- The following day, beat the butter and sugar together until light and fluffy. This should take on a pale yellow hue as air is incorporated.
- Slowly add in the rum, orange juice, orange zest, and vanilla extract. Mix until everything is well combined, and a sweet, citrusy aroma fills the air.
- Add the eggs one at a time, ensuring they are well incorporated before adding the next. Scrape down the sides of the bowl as you go.
- Take 1/4 of the flour and coat the soaked fruit mixture. This helps the fruit stay suspended while baking.
- Gradually add the remaining flour and mixed spice to the butter mixture. Mix until the batter comes together; it should be thick and fragrant.
- Fold in the fruit mixture and chopped walnuts using a rubber spatula. Pour the batter into the prepared cake tin and bang it on the table once to settle the contents evenly.
- Bake in a preheated oven at 160°C for about 1 1/2 hours. When the cake starts to turn brown after 30-40 minutes, cover it loosely with foil to prevent over-browning, and continue baking.
- As soon as you take the cake out of the oven, pour 3-4 tablespoons of rum over it. Let it cool, then turn it out from the tin. Wrap it in cling wrap and store in the fridge.
- For the next few days, pour 2-3 tablespoons of rum over the cake every three days until it’s time to serve or gift it. This keeps the cake moist and enhances the flavor.
Cook’s Notes
This cake is your holiday secret weapon. It’s forgiving if you need to make substitutions or if you forget to soak the fruit overnight. If you’re short on time, you can microwave the fruit and rum for a few seconds to help the process along. This cake stores beautifully in the fridge, wrapped tightly in cling wrap or foil. It actually tastes better as it sits, so don’t worry about making it a week or so ahead. Freezing is also an option; just make sure you bring it to room temperature and add a fresh splash of rum before serving.
Make It Your Own
While this cake is fantastic as is, sometimes a little twist is just what you need:
- Swap the rum for brandy if you prefer a different kind of warmth.
- Replace walnuts with pecans for a softer crunch.
- Add in some shredded coconut with the fruit for a tropical flair.
- Use dried cherries or cranberries instead of some of the mixed fruit for a tangy zip.
If you try this, I’d love to hear how it turns out — drop a comment or tag me on social media! Your holiday table just got a whole lot more festive. Happy baking!
Related update: Christmas Fruit Cake
Related update: Applesauce Cake

It was one of those chilly evenings when nothing but a steaming bowl of comfort would do. My kitchen counter was a mess of ingredients that promised warmth and nostalgia: ramen packets, a handful of mussels I had ambitively picked up at the market, and that last lonely scallion in the crisper. This, I decided, was the night for Neoguri (Spicy Seafood Ramen). Quick enough for a weeknight yet impressive with its depth of flavor, this dish is all about minimal effort with maximum impact. And honestly, who doesn’t love a meal that comes together in under 15 minutes but feels like a hug in a bowl?
Jump to Recipe
What You’ll Need
You probably have most of these already lurking in your kitchen. Just a quick note, make sure to use fresh mussels for the best experience.
- Neoguri ramen (spicy seafood flavor)
- 1 egg
- Mussels (fresh, ideally)
- 1 green scallion
- Seaweed (gim sheets are perfect)
How to Make Neoguri (Spicy Seafood Ramen)
- Start by bringing a pot of water to a rolling boil. This is the moment for a deep breath because things are about to get exciting.
- Add the mussels and the sauce packets from the Neoguri ramen. Let them party in the pot for about 5 minutes. If you’re using fresh mussels, watch them closely: they should open up. Any stubborn, closed mussels deserve to be tossed.
- Time to add the ramen noodles. Give them 2 to 3 minutes to soften and soak up all that spicy goodness.
- For the egg, you have options: beat it and drizzle while swirling the noodles for those lovely egg ribbons or slide it in gently to poach. Both ways are dreamy.
- While everything mingles and cooks, grab your scallion and seaweed. Slice the scallion thinly and tear or cut up your seaweed into munchable pieces.
- Transfer your ramen to a serving bowl, putting the mussels on display like the treasures they are, and sprinkle generously with scallion and seaweed.
Cook’s Notes
The wonderful thing about this ramen is how forgiving it is. If you’re using dried seaweed snacks instead of gim, it works just as well. For those planning ahead, fresh mussels can be stored in the fridge for a day or two if they’re kept cool and moist. Once cooked, the ramen doesn’t fare well as leftovers (it tends to become a soggy sea of sadness), so plan to savor it in one sitting. If you find yourself with extra scallions or seaweed, these make great additions to salads or other soups you’ll whip up during the week.
Make It Your Own
- Swap out the mussels for shrimp or clams if that’s what you have on hand.
- Use crispy tofu instead of mussels for a delightful vegetarian spin that’s still packed with protein.
- If you’re not a fan of spicy, try mixing in a little coconut milk or cream to mellow out the heat.
- Want more greens? Toss in some spinach or bok choy just before the noodles finish cooking for extra nutrients.
If you try this, I’d love to hear how it turns out — drop a comment or tag me on social media! Whether you’re a ramen novice or a seasoned pro, this dish is bound to hit the spot. Enjoy your bowl of cozy goodness!
Related update: Neoguri (Spicy Seafood Ramen)
Related update: Braised Pork: Filipino Humba
Related update: Cauliflower, Leek and Cheddar Cheese Soup
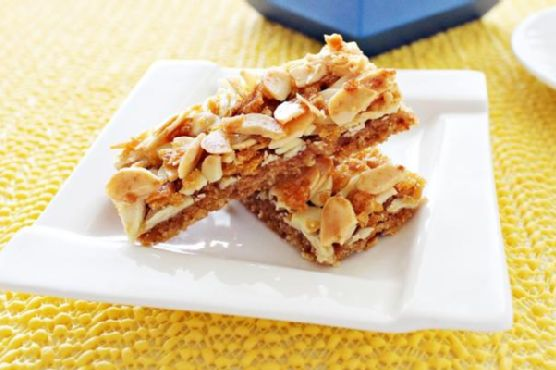
I remember one of those whirlwind Wednesday evenings, you know the type — when you get home, realize you need something sweet to take to the office the next day, and have approximately no time to do it. Enter these Almond Cookie Bars. They’re like the lovely offspring of a tempting cookie and a sophisticated tart, but they’re actually super simple to make. Just the right amount of nutty crunch meets a hint of sweet apricot. Plus, they look kind of fancy for something that doesn’t require any complicated steps. Seriously, if I can pull these off during a midweek scramble, you can too!
Jump to Recipe
What You’ll Need
Chances are you already have most of this at home, except maybe the almond flakes. The rest? Probably hanging out in your pantry or fridge.
- 100g butter, softened
- 50g brown sugar
- 70g plain flour
- 70g wholemeal flour
- 2 tbsp fresh milk
- 100g oatmeal cornflakes
- 50g almond flakes
- 100g apricot gel/jam
- 400g cookie base
How to Make Almond Cookie Bar
- Start by beating the butter and brown sugar together until the mixture is light and fluffy. This should take about 2 minutes with an electric mixer — it’s all about that creamy texture.
- In a separate bowl, combine the plain flour and wholemeal flour. Then, gently fold this dry mixture into the butter-sugar mixture using a rubber spatula. Knead it gently until you have a soft dough.
- Turn the dough out onto a floured surface or sandwich it between two plastic sheets (trust me, it’s less messy!). Roll it into a square shape and chill it for at least an hour. This helps the dough firm up for easier handling.
- Once chilled, place the dough on non-stick paper and roll it out to about 3mm thick. Prick all over with a fork—this keeps it from puffing up in weird places.
- Bake in a preheated oven at 180°C for about 15-18 minutes, or until the edges are just turning brown and the kitchen smells like buttery heaven. Set aside to cool.
- Once the biscuit base is cool, spread the apricot gel/jam over the top, ensuring an even layer.
- Mix the oatmeal cornflakes and almond flakes. Spread this topping evenly over the apricot layer using a palette knife, pressing down gently.
- Return the whole thing to the oven and bake for another 15 minutes until the topping is golden and fragrant. Let it cool completely before cutting into bars — patience is key here for neat slices!
Cook’s Notes
These bars are pretty forgiving, but here’s what I’ve learned along the way:
- Make sure your butter is truly softened, not melted. This affects the dough texture and baking consistency.
- Chilling the dough isn’t optional — it helps prevent spreading and keeps your bars nice and thick.
- You can store these in an airtight container for up to a week, but let’s be real, they probably won’t last that long. They also freeze well for longer storage.
- For a quick fix, you can even make the dough a day ahead and leave it in the fridge overnight.
Make It Your Own
Want to switch things up? Here are a few variations to keep things interesting:
- Berry Swap: Substitute the apricot gel with raspberry or blackberry jam for a different fruity twist.
- Nutty Overload: Add a handful of chopped pecans or walnuts to the almond-oat topping for extra crunch.
- Spice It Up: Stir a teaspoon of cinnamon or cardamom into the flour mixture for a warm spice note.
- Chocolate Drizzle: Once cooled, drizzle with melted dark chocolate for a fancy finish.
If you try this, I’d love to hear how it turns out — drop a comment or tag me! These bars have become a staple in my sweet treat rotation, and I hope they bring a little almond-y joy to your day too.
Related update: Almond Cookie Bar
Related update: Christmas Fruit Cake

Okay, so picture this: it’s a dreary Tuesday morning, and I’m dragging myself into the kitchen with one eye barely open, the other desperately seeking caffeine. The thought of another bland bowl of oatmeal is honestly more than I can handle. Enter: Tropical Breakfast Quinoa. This dish has become my sunshine in a bowl — it’s like a mini-vacation for your taste buds, without the hassle of airport security. It’s quick to whip up, comforting in all the right ways, and just fancy enough that you feel like you’ve got your life together (at least until lunch). Whether you’re rushing off to work or settling down for a lazy Sunday brunch, this vibrant breakfast will transport you to a sunny beach with every bite. No passport required!
Jump to Recipe
What You’ll Need
This recipe is basically a tropical party for your pantry. Chances are you already have most of this hanging around.
- 2 cups of cooked quinoa
- 1 cup of light coconut milk
- 1/2 cup of crushed pineapple (canned or fresh)
- 1/2 teaspoon of cinnamon
- 2 tablespoons of maple syrup
- 1/4 cup of toasted coconut
- 1/4 cup of chopped pecans
- 1/2 cup of sliced strawberries
- A drizzle of balsamic vinegar (trust me, it works!)
How to Make Tropical Breakfast Quinoa
- Start by grabbing a medium-sized pot and tossing in your cooked quinoa, coconut milk, crushed pineapple, cinnamon, and maple syrup. Give it a good stir until everything is well combined and all the flavors are mingling like guests at a really great party.
- Turn up the heat until the mixture reaches a gentle boil. Then, reduce the heat to a simmer. Let it cook for about 5 minutes, stirring occasionally. You’ll know it’s ready when your kitchen smells like a tropical paradise and the mixture has thickened just a bit.
- Once your quinoa is ready, grab a bowl and spoon in a generous serving of the warm, tropical mixture.
- Top it off with a sprinkle of toasted coconut and chopped pecans for some crunch. Add a handful of sliced strawberries for freshness, and finish with a surprising drizzle of balsamic vinegar. The vinegar might sound weird, but it ties everything together with a subtle tang that just works.
Cook’s Notes
Here’s the deal with this recipe: it’s super forgiving. Don’t stress if your pineapple is fresh or canned; either works. The key is just to make sure your quinoa is cooked ahead of time. If you’re not a morning person, like me, make the quinoa the night before and save yourself some hassle. Leftovers can be stored in the fridge and reheated gently on the stove with a splash more coconut milk. Just remember, the strawberries and balsamic drizzle are best added fresh, right before serving to keep things vibrant and pretty.
Make It Your Own
- Nut Swap: If pecans aren’t your jam, try almonds or walnuts for a different crunch.
- Fruit Fiesta: Swap out the strawberries for mango or kiwi for an even more tropical twist.
- Sweet Tooth: Add a dollop of Greek yogurt or a scoop of vanilla ice cream (yes, for breakfast) if you’re feeling indulgent.
- Spice It Up: Add a pinch of nutmeg or cardamom for a bit of extra warmth and depth.
If you try this, I’d love to hear how it turns out — drop a comment or tag me in your breakfast masterpiece! Catch you in the kitchen. 😊
Related update: Tropical Breakfast Quinoa
Related update: Neoguri (Spicy Seafood Ramen)
Related update: Cheese and Leek Strata
Related update: Easy Weekday Breakfast Muffins

Picture this: It’s the first truly warm day of spring, and I’m staring at my pantry, craving something fresh and zingy. My mind drifts to the mojitos I adore sipping by the pool, and suddenly, I have an idea. Meet my Frozen Mojito Pie, where your favorite cocktail meets a no-bake dessert. It’s the perfect mix of tangy lime and refreshing mint, all wrapped up in a salty-sweet pretzel crust. It’s basically summer on a plate, and trust me, your friends are going to be asking you for the recipe after the first bite. And the best part? It’s deceptively simple to whip up. You don’t even need to turn on the oven! Let’s dive into how you can bring a little sunshine to your table.
Jump to Recipe
What You’ll Need
This recipe is a breeze, and chances are, you’ve got most of it sitting in your kitchen already. Here’s what you’ll need to make this frosty delight:
- 2 cups of **pretzels**, crushed into crumbs
- 1/2 cup of **butter**, melted
- 8 oz of **cream cheese**, softened
- 1/2 cup of sugar
- **Zest from 2 limes**
- **Juice from 2 limes**
- 1/4 cup of fresh mint, chopped
- 8 oz of whipped topping, thawed
How to Make Frozen Mojito Pie
- Start by mixing the pretzel crumbs and melted butter in a medium-sized bowl. You want the mixture to resemble wet sand, which will form our crust. Press this mixture firmly onto the bottom of an 8-inch springform pan or a round pan lined with plastic wrap. Pop it in the freezer for at least an hour to set.
- Now, let’s work on the filling. In your mixer’s bowl, combine the cream cheese, sugar, lime zest, lime juice, and fresh mint. Beat them together until the mixture is smooth and the mint is nicely distributed. It should smell like a mojito at this point!
- Gently fold the whipped topping into the cream cheese mixture. Resist the urge to over-mix; you want it to stay light and fluffy.
- Spoon the filling over the frozen pretzel crust, smoothing the top with a spatula. Cover it and return it to the freezer for at least 6 hours, but overnight is best if you can wait that long.
- When you’re ready to serve, carefully remove the pie from the pan. If you lined it with plastic wrap, it should lift out easily. Garnish with crushed pretzels and thin slices of lime for that extra pizzazz. Keep any leftovers frozen.
Cook’s Notes
Here’s a little secret: the longer you let this pie chill, the more pronounced the flavors become, so patience pays off. If you don’t have a springform pan, lining a regular round pan with plastic wrap works wonders. Just pull up the edges to lift the pie out when it’s time to serve. For leftovers, keep them covered tightly in the freezer to avoid that dreaded freezer burn. And a quick tip: Use a hot knife to slice through the pie cleanly. Just run it under hot water and dry it off before cutting.
Make It Your Own
Here are a few fun ways to jazz up your pie:
- Swap the **pretzels for graham crackers** if you prefer a sweeter crust.
- Add a **splash of rum** to the filling for an adults-only twist.
- Top with **sliced strawberries** or **kiwi** for a fruity touch.
- Mix some **chocolate chips** into the crust for a chocolate-lovers’ version.
If you try this, I’d love to hear how it turns out — drop a comment or tag me! Let’s spread the joy of mojitos in pie form. Happy chilling! 🍋🌿
Related update: Frozen Mojito Pie
Related update: Almond Cookie Bar

Picture this: It’s a lazy Sunday morning, and I’m still in my pajamas with zero plans to change that anytime soon. The weather outside is just right, and there’s a soft playlist humming in the background. Suddenly, a craving hits—something sweet, something warm, something that will make the house smell like a dream. Doughnuts! But not just any doughnuts. These are the kind of doughnuts that make you feel like you’ve conquered a small kingdom right from your kitchen. They’re golden, fluffy, and just the right amount of sweet without veering into dessert territory. Best part? These homemade wonders come together without any fancy equipment or ingredients you don’t already have. So, if you’re ready to make your kitchen smell like a bakery and indulge in some deliciously fluffy doughnuts, let’s get started!
Jump to Recipe
What You’ll Need
Who doesn’t love it when a recipe calls for things you likely already have on hand? We’re talking pantry staples here, folks.
- 2 cups of flour
- 1/4 cup of honey
- 1/4 cup of powdered milk
- 1 teaspoon of salt
- 1 cup of warm water
- 2 1/4 teaspoons of yeast
How to Make Doughnuts
- Start by mixing the warm water with the yeast and honey in a bowl. Whisk it all together and let it sit for about 15 minutes, or until the mixture becomes foamy. This is your yeast proving it’s ready to party!
- In a separate bowl, combine the flour, salt, and powdered milk. Pour the bubbly yeast mixture into this bowl.
- Knead the dough until it feels elastic and not sticky. This is your chance to work out any stress—think of it as dough therapy. Cover the bowl and let the dough rise until it doubles in size, which usually takes 1-2 hours. Patience is key here!
- Once your dough has risen to the occasion, roll it out on a lightly floured surface, but don’t make it too thin—you want them fluffy, not flat. Cut the dough into circles. If you have a doughnut cutter, great! If not, improvise with a small bowl or the mouth of a plastic bottle for the center hole.
- Let these cut-out beauties rise for another 45 minutes. You’re in the home stretch now!
- Heat up your oil to fry the doughnuts until they’re a delicious golden brown on both sides. This is where the magic happens, and your kitchen starts smelling irresistible.
- For a Vanilla Glaze, whisk 1 cup of powdered sugar with 30ml of milk and a teaspoon of vanilla. Drizzle over your doughnuts and add sprinkles if you’re feeling fancy.
- For a Chocolate Glaze, simply drizzle some chocolate sauce over the doughnuts and top with sprinkles. Voilà!
Cook’s Notes
When you’re knee-deep in doughnut making, a few insider tips go a long way. First, make sure your water is warm, not hot, to keep that yeast alive and thriving. If the dough feels too sticky, dust your hands with a bit of flour rather than adding more to the dough itself, which can make the doughnuts tough. These doughnuts are best eaten fresh, but if you have leftovers (lucky you!), store them in an airtight container. Just pop them in the microwave for a few seconds to bring them back to life.
Make It Your Own
The best part about doughnuts? They’re a blank canvas waiting for your creative touch.
- Spiced Doughnuts: Add a teaspoon of cinnamon and a pinch of nutmeg to the flour mixture for a cozy twist.
- Lemon Zest: Mix in a tablespoon of fresh lemon zest to the dough for a zesty kick.
- Coconut Glaze: Use coconut milk instead of regular milk in the glaze and sprinkle shredded coconut on top.
- Maple-Bacon: Drizzle with a maple glaze and top with crispy bacon bits for a sweet and savory delight.
If you try this recipe, I’d love to hear how it turns out—drop a comment or tag me in your doughnut adventures! Trust me, once you start making these at home, you’ll be finding excuses to whip them up just about every weekend. Enjoy the sweet smell of success!
Related update: Doughnuts
Related update: Tropical Breakfast Quinoa

The other day, I found myself on a typical Wednesday evening with a sudden, fierce craving for something warm, cheesy, and a little herby. The kind of comfort food you can savor with a cup of tea while staring out the window on a rainy day. As my pantry was a bit sparse, I knew I needed something quick and easy, yet utterly satisfying. That’s when Savory Cheese Dill Scones came to mind. They’re those magical little bites that feel fancy enough for company but are secretively easy to pull together. The kind of bake that makes you feel like a kitchen genius with minimal effort. So, let’s get scone-ing!
Jump to Recipe
What You’ll Need
You might be surprised how many of these you already have in your kitchen! The usual suspects of baking are here, alongside the stars of the show: cheese and dill. Here’s what you’ll need:
- 2 cups unbleached flour
- 1/2 cup whole wheat flour
- 1 tablespoon baking powder
- 1/4 teaspoon baking soda
- 1/2 teaspoon black pepper
- 1 tablespoon sugar
- 1/2 cup cold butter, cut into small pieces
- 3/4 cup buttermilk
- 1/2 cup coarsely shredded cheddar cheese
- 1/2 cup cottage cheese
- 3 tablespoons chopped fresh dill
- 1 small shallot, finely chopped
How to Make Savory Cheese Dill Scones
- Preheat your oven to 375°F, placing the rack in the middle position. This gives your scones the perfect balance of heat, making them rise nicely while staying tender and light.
- In a large bowl, whisk together the unbleached flour, whole wheat flour, baking powder, baking soda, black pepper, and sugar. This dry mix is your scone foundation.
- Add the chopped butter into the flour mixture. Use your fingers or a pastry cutter to blend until the mix resembles coarse crumbs. You want to see little bits of butter peeking through.
- Stir in both the cheddar and cottage cheese, followed by the fresh dill and shallot. The aroma will start making promises your taste buds will thank you for later.
- Pour in the buttermilk and gently fold the mixture with a spatula until just combined. Avoid overmixing; a rough dough will yield tender scones.
- Turn the dough out onto a floured surface and knead gently, just enough to bring it together — about 4 or 5 times.
- Pat the dough into a circle, approximately 1 inch thick. Cut into 8 wedges and place them on a baking sheet lined with parchment paper.
- Bake in your preheated oven for 20-25 minutes, until the scones are golden and the kitchen smells like heaven. Serve warm and swoon.
Cook’s Notes
These scones are best on the day they’re made, but if you have leftovers (lucky you!), store them in an airtight container for a day or two. They make a delightful breakfast, slightly warmed with a pat of butter. You can also freeze the unbaked scones on a tray, then transfer them to a bag once they’re solid. Bake them from frozen, adding a few extra minutes to the cooking time. Common pitfalls? Overworking the dough or letting the butter soften too much. Keep it chill for the chillest scones!
Make It Your Own
Here are some delicious twists to customize your scones:
- Swap the dill for chopped chives if you’re in a more oniony mood.
- Use gruyere instead of cheddar for a rich, nutty take.
- Add a handful of crispy bacon bits for a savory delight.
- Mix in some sun-dried tomatoes for a Mediterranean vibe.
If you try this, I’d love to hear how it turns out — drop a comment or tag me! Remember, cooking is just like life: best when shared and savored. Enjoy your baking adventure!
Related update: Savory Cheese Dill Scones
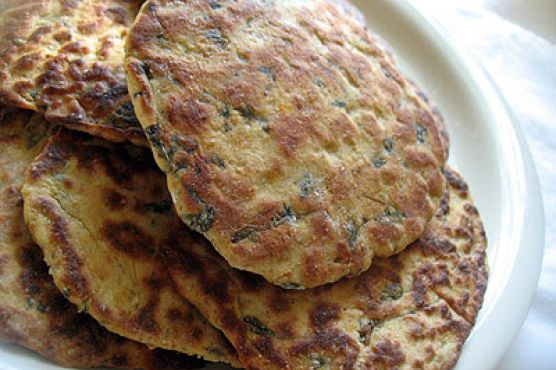
Picture this: It’s a gloomy Wednesday evening, and the rain has been tapping on the windows since noon. I’m scouring the pantry for something interesting but comforting, and there it is—an unopened bag of dried fenugreek leaves. This is the perfect excuse to whip up a batch of warm, aromatic Fenugreek Roti. It’s one of those recipes that’s a total lifesaver when you want something homemade but don’t feel like spending hours in the kitchen. The subtle bitterness of the fenugreek combined with the spices makes this dish irresistibly flavorful and oh-so-satisfying. You’ll be hooked at the first bite, I promise.
Jump to Recipe
What You’ll Need
I bet you’ve got most of these goodies stashed away in your spice cabinet. Here’s what you’ll need:
- 1 cup whole wheat flour
- 1/2 cup chickpea flour
- 1/2 teaspoon baking soda
- 1 teaspoon sea salt
- 1/2 teaspoon chili powder
- 1/4 teaspoon cayenne
- 1/2 teaspoon ground cumin
- 1/2 teaspoon ground coriander
- 1 teaspoon ajwain seeds
- 1/4 teaspoon asafetida
- 1 cup dried fenugreek leaves
- 1/2 cup plain yogurt
- Ghee or oil for cooking
How to Make Fenugreek Roti
- Start by soaking the dried fenugreek leaves in some warm water for about 5 to 10 minutes. This will soften them up a bit. Once they’re ready, drain and give them a good squeeze to get rid of excess water.
- In a medium bowl, sift together the whole wheat flour, chickpea flour, and baking soda. This helps keep the batter smooth and lump-free.
- Stir in the sea salt, chili powder, cayenne, cumin, coriander, ajwain seeds, and asafetida. The aroma at this point is already promising!
- Add the soaked fenugreek leaves and plain yogurt to the dry ingredients. Mix everything up nicely.
- Gradually add about 1/4 cup of water to the mixture to form a semi-hard batter. Cover the bowl and let it sit at room temperature for an hour. The rest is crucial for the flavors to meld together.
- After the resting period, dust your hands with some flour and divide the dough into 10 to 12 small balls.
- Roll out each ball into a roughly 3-inch circle. It doesn’t have to be perfect—think rustic charm!
- Heat a non-stick pan over medium heat and brush it lightly with ghee or oil. When it’s hot, place a rolled-out roti on the pan.
- Cook for about 4 minutes or until the bottom is beautifully browned. You’ll start to see some bubbles forming on the surface.
- Sprinkle a little more oil or ghee, flip, and fry for another 2 to 3 minutes until both sides are nicely browned.
- Transfer the cooked roti to a plate and keep it warm in a 150°F oven. Repeat with the remaining dough.
Cook’s Notes
Don’t skip the rest time! It’s tempting to rush, but allowing the dough to rest lets the flavors deepen. You can keep leftovers wrapped in foil and stored in an airtight container in the fridge for up to 3 days. When reheating, a quick toss on a hot pan will bring them back to life. Avoid using too much flour when rolling out, or it might mess with the taste. If you’re making these ahead, par-cook them and finish them off just before serving for the freshest taste.
Make It Your Own
- Spice it up: Add a teaspoon of garam masala for an extra kick.
- Herby twist: Swap fenugreek for freshly chopped cilantro if you want a less bitter flavor.
- Gluten-free option: Use a gluten-free flour blend instead of whole wheat flour, and you’re good to go.
- Cheesy love: Add some grated paneer or cheddar to the dough for a cheesy delight!
If you try this, I’d love to hear how it turns out—drop a comment or tag me! Your kitchen adventures inspire me, and I hope this cozy dish becomes a new favorite in your home. Happy cooking!
Related update: Fenugreek Roti
Related update: Flemish Style Asparagus Side Dish
Related update: Whole Wheat Dinner Rolls

It was one of those Tuesday nights when the fridge was looking scarily empty, and yet, the thought of braving the grocery store felt like too much. That’s when I spotted the lone zucchini in the crisper drawer, looking like it might be the hero of dinner. With some eggs, a handful of basil, and a bit of cheese, this Zucchini & Basil Frittata came to life. It’s like an Italian hug in a skillet, perfect for a weeknight when you need something cozy but also have about 20 minutes of energy left in you. The beauty of this frittata is how it transforms humble ingredients into something that feels a bit more special.
Jump to Recipe
What You’ll Need
You probably have most of these on hand, which makes this recipe a lifesaver when you need a quick meal. Here’s what you’ll gather:
- Zucchini
- Salt
- Green onions
- Basil
- Cheddar cheese
- Eggs
- Grapeseed oil (or olive oil)
How to Make Zucchini & Basil Frittata
- First, shred your zucchini using a box grater or food processor. Place the shredded zucchini into a colander set over a bowl. Sprinkle with a little salt and let it sit for about 20 minutes to draw out the water. If you’re short on time, give it a squeeze with your hands to speed up the process.
- In a large mixing bowl, combine the shredded zucchini, chopped green onions, fresh basil, and grated cheddar cheese. Season with a bit more salt and stir everything until it’s well mixed.
- Crack the eggs into a separate bowl and beat them until smooth. Pour the beaten eggs into the vegetable mixture and stir until everything is happily combined.
- Preheat your oven to 350°F (175°C). While it’s warming up, heat 1 to 2 tablespoons of grapeseed oil in a 10-inch cast iron skillet over medium heat, ensuring the bottom and sides are well-coated.
- Pour the egg and veggie mixture into the skillet, spreading it out evenly. Let it cook for about 3 to 5 minutes, until the edges start to set and cook.
- Carefully transfer the skillet to the preheated oven. Bake for 12 to 15 minutes, or until the center is set and a toothpick comes out clean.
Cook’s Notes
Let’s talk about getting the most out of your frittata. It’s crucial to get rid of excess water from the zucchini; otherwise, the frittata might end up watery. If you’re planning ahead, you can shred the zucchini the night before, which makes assembling the dish a breeze the next day. Leftovers can be stored in an airtight container in the fridge for up to three days. Reheat gently in a skillet or microwave when ready to enjoy again.
Make It Your Own
Feel free to get creative with this recipe! Here are some swap ideas:
- Switch out the cheddar cheese for feta for a tangy twist.
- Substitute basil with fresh dill or parsley for a different herbal note.
- Add sliced cherry tomatoes for a burst of color and sweetness.
- Replace the zucchini with shredded carrots or thinly sliced bell peppers if you’re out of zucchini.
If you try this, I’d love to hear how it turns out — drop a comment or tag me! Can’t wait to see your delicious frittatas!
Related update: Zucchini & Basil Frittata

Last Tuesday, I found myself in a bit of a culinary pickle. It was one of those chaotic weeknights where all I wanted was something comforting yet not too heavy. But, with my pantry looking a little uninspired, the options seemed limited. As I rummaged through my fridge, I spotted some fresh herbs and eggs. That’s when inspiration struck – Vegetarian Scotch Eggs. They’re not only a playful twist on a classic favorite, but they also satisfy that comforting craving without being overly indulgent. Plus, they’re surprisingly easy to whip up, even when you’re short on time. So, if you’re juggling a busy schedule but still want something delicious, this recipe is your golden ticket.
Jump to Recipe
What You’ll Need
If you’re like me, you probably have most of these ingredients already hanging out in your kitchen. Simple yet flavorful, these are the stars of our dish:
- Fresh breadcrumbs
- Fresh dessert spoon chives
- 5 eggs (4 for boiling, 1 for coating)
- Fresh dessert spoon flat-leaf parsley
- Black salt and pepper
- Vegetable oil
How to Make Vegetarian Scotch Eggs
- Preheat your oven to 325°F (170°C). This step is key to ensure our Scotch eggs are perfectly warm and crisp.
- Place 4 eggs in a medium-sized pan and cover them entirely with cold water. It’s like giving them a little bath before the magic happens.
- Bring the water to a gentle boil, then reduce the heat and let them simmer for exactly 4 minutes. We’re aiming for that slightly soft, golden center.
- Immediately transfer the eggs to a bowl of cold water. This stops the cooking process and makes them easier to peel. Trust me, your fingers will thank you.
- Peel the cooled eggs carefully. It’s like unwrapping a delicate little gift.
- In a small bowl, whisk the remaining egg until it’s all sunshine-y and smooth.
- Mix the chopped chives and parsley with the fresh breadcrumbs. Season with a pinch of black salt and pepper. Feel free to get a little generous here; seasoning is key.
- Gently roll each peeled egg in a bit of flour. This helps the coating stick like a dream.
- Dip the floured eggs in the whisked egg mixture, ensuring they’re well coated. Now, roll them in the herby breadcrumbs. This is where they get their magical cloak of flavor.
- Pour vegetable oil into a pan, about 2 inches deep, and heat it up. You’re looking for it to shimmer slightly – that’s when you know it’s ready.
- Carefully fry the coated eggs in the hot oil. Turn them occasionally to get an even golden color all around. This takes about 2-3 minutes. They’ll start to look irresistibly crunchy.
- Use a slotted spoon to remove the eggs from the oil and place them in an ovenproof dish. Pop them in the oven for another 3-4 minutes to make sure they’re heated through.
Cook’s Notes
Here’s the deal: the fresher your breadcrumbs, the better the crunch you’ll get. If you can make them at home, do it! And when it comes to frying, make sure your oil is hot enough before you lower in the eggs – a little test with a breadcrumb should tell you if it sizzles right. If the coating starts to brown too quickly, the oil is too hot. Just turn down the heat a bit.
Leftovers? Although these are best enjoyed fresh, you can store any extras in the fridge for up to two days. Just pop them in a preheated oven for about 10 minutes to heat them up again – they’ll be almost as delightful as the first time.
Make It Your Own
Here are some fun ways to switch things up and keep it interesting:
- Spicy Kick: Add a teaspoon of crushed red pepper flakes to the breadcrumb mix for a little heat.
- Cheesy Delight: Mix in some grated Parmesan or cheddar with the breadcrumbs for a cheesy crust.
- Herb Lovers: Switch up the herbs – basil and dill can add a fresh twist.
- Vegan Version: Use a flaxseed egg (1 tablespoon flaxseed meal + 2.5 tablespoons water) instead of a regular egg for the coating.
If you try this, I’d love to hear how it turns out — drop a comment or tag me! It’s always a joy to see how my favorite recipes are enjoyed by others. Happy cooking!
Related update: Vegetarian Scotch Eggs
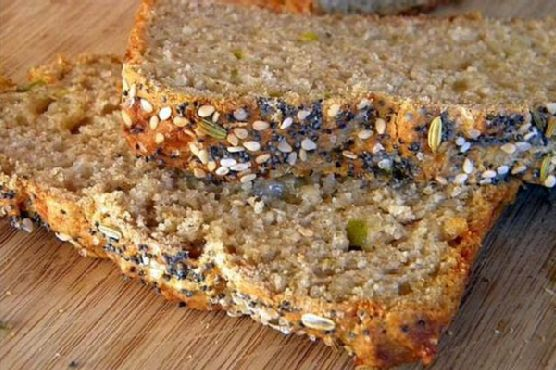
I remember last fall when I was caught in a total downpour on my way back from the farmers’ market. I dashed inside my apartment, dripping and shivering, with a bag full of local cheese and a can of green chiles I had impulsively picked up. My mind immediately went to a warm, comforting loaf of bread, something easy yet satisfying. Enter Cheddar Chile Beer Bread. This recipe is your best friend when you need something hearty but don’t want to fuss with yeast or kneading. It comes together in a flash, and that extra sharp cheddar paired with the zing from the chiles makes it feel special and cozy. Plus, it’s the kind of bread that fills your kitchen with the most *amazing* aroma, making it worth every second of waiting while it bakes.
Jump to Recipe
What You’ll Need
Chances are, most of these ingredients are lurking in your pantry right now, just waiting for their moment to shine. Here’s what you’ll need:
- 1 cup whole wheat flour
- 1 cup all-purpose flour
- 1 tablespoon baking powder
- 1 teaspoon salt
- 1/2 teaspoon dry mustard
- 1 can (12 oz) beer (use what you love to drink!)
- 1 cup white shredded extra sharp cheddar cheese
- 1 can (4 oz) canned green chiles, drained
- 1 tablespoon sesame seeds
- 1 tablespoon poppy seeds
- 1/2 teaspoon caraway seeds
- 1 teaspoon sea salt
How to Make Cheddar Chile Beer Bread
- Preheat your oven to 425 degrees. While it warms up, grease a loaf pan to make sure our bread doesn’t stick.
- In a large mixing bowl, whisk together the whole wheat flour, all-purpose flour, baking powder, salt, and dry mustard. This will be the backbone of your bread.
- Add the green chiles, shredded cheddar, and the beer to the dry mix. Stir until everything comes together. Expect a super thick batter that’s a good arm workout!
- Scrape the thick batter into your prepared loaf pan. Spread it out evenly so it bakes up nice and uniform.
- Now for the fun part: sprinkle the sesame seeds, poppy seeds, and caraway seeds over the top. Finish with a sprinkle of sea salt. Use your fingers to gently press these into the batter so they stick while baking.
- Lower your oven temperature to 400 degrees and pop the loaf in. Bake for 45-50 minutes, and let the aromas take over. It’s done when a toothpick inserted into the center comes out clean.
- Let the bread cool on a wire rack for about 15 minutes, then turn it out of the pan. Try to resist diving in right away, but I give you full permission to sample a slice while it’s still warm!
Cook’s Notes
A few little tips: using a beer you enjoy drinking will really make a difference as it flavors the bread. If the batter feels too thick, that’s totally normal. It might seem like you’ve done something wrong, but trust the process, it will work out. The seeds on top not only add flavor, but also a fun texture contrast to the soft, cheesy bread. This loaf is best the day it’s made, but if you have leftovers, toast them up the next morning with a bit of butter—it’s heavenly!
Make It Your Own
Here are a few ways to switch it up:
- Spicy Kick: Add a chopped jalapeño to the mix for some extra heat.
- Herby Twist: Toss in a tablespoon of dried herbs like rosemary or thyme with the dry ingredients.
- Cheese Swap: Use pepper jack or gouda instead of cheddar for a different cheesy flavor.
- Gluten-Free Version: Substitute the flours with a 1:1 gluten-free blend.
If you try this, I’d love to hear how it turns out—drop a comment or tag me in your photos! Sharing is caring, especially when it’s as delicious as this. Enjoy every bite, friends!
Related update: Cheddar Chile Beer Bread
Related update: Fenugreek Roti
Related update: Savory Cheese Dill Scones

Picture this: It’s a rainy Tuesday evening, I’m rummaging through my pantry, and the undeniable craving for something warm, sweet, and savory strikes. My go-to? Braised Pork: Filipino Humba. There’s something about the combination of tender pork and the rich, slightly sweet sauce that just screams comfort food. You’d think a dish with such bold flavors requires hours, but this gem is surprisingly weeknight-friendly. The magic lies in the balance of flavors, a little patience, and a hint of adventure. So, let’s dive in and make this delightful dish that captures the heart of Filipino cuisine in every bite.
Jump to Recipe
What You’ll Need
This recipe is the definition of pantry-friendly with a sprinkle of exotic intrigue. Chances are you already have most of what you need.
- Pork belly – the king of tender, juicy cuts
- Pork butt shoulder – adds depth with its marbled fat
- Whole garlic – because who doesn’t love garlic?
- Vinegar – for that tangy kick
- Brown sugar – sweetens the pot
- Soy sauce – umami galore!
- Bay leaf – subtle fragrance
- Rice wine – adds complexity
- Star anise – a whisper of licorice
- Oregano – for a hint of earthiness
- Fermented black beans – rich and salty
- Whole peanuts – crunchy texture
- Olive oil – just a splash
- Paprika – a dash for color
- Water – to bring it all together
- Fried bananas – for that tropical twist
How to Make Braised Pork: Filipino Humba
- In a large mixing bowl, combine the diced pork belly and pork butt shoulder with the whole garlic cloves, vinegar, brown sugar, soy sauce, and rice wine. Give it a gentle stir until everything is well-coated. Pop this into the fridge for about 30 minutes to marinate. You’ll want those flavors to mingle and get cozy.
- Once marinated, transfer everything into a heavy-bottomed saucepan. Add water, fermented black beans, and whole peanuts. Bring this beauty to a rolling boil, and then watch as the kitchen fills with an irresistible aroma.
- When it reaches a boil, dial the heat down to a gentle simmer. Stir in the bay leaf, star anise, oregano, paprika, and a drizzle of olive oil. Let it simmer away for about an hour. During this time, the sauce will thicken, and the pork will become melt-in-your-mouth tender.
- Five minutes before you’re ready to serve, decide if you want the fried bananas in the mix or on the side. Either way, they add a delightful sweetness that complements the savory sauce. Taste and adjust seasoning if needed. Then, plate up and dive in!
Cook’s Notes
Don’t rush the marinating process; it’s where the flavor magic truly begins. If you’re short on time, a quick 15-minute marinade can work, but longer is always better. When simmering, keep the lid on to retain moisture, but check occasionally to ensure nothing sticks. Should you find yourself with leftovers (unlikely as that may be!), store them in an airtight container in the fridge. The flavors deepen overnight, making it even better the next day. You can reheat on the stove or microwave, just add a bit of water to loosen the sauce if needed.
Make It Your Own
- Swap the pork for chicken thighs if you’re in the mood for poultry. They’ll soak up the sauce beautifully and cook a bit faster.
- For a vegetarian twist, replace the meat with crispy tofu. Just skip the marinating step and add the tofu in the last 15 minutes of cooking.
- If peanuts aren’t your thing, try adding cashews for a creamier texture.
- Want more heat? Toss in a sliced chili or two with the other spices.
If you try this, I’d love to hear how it turns out — drop a comment or tag me! Cooking is all about sharing the joy, and I’m excited to hear your thoughts and twists on this classic dish. Happy cooking!
Related update: Braised Pork: Filipino Humba
Related update: Zucchini & Basil Frittata