
Picture this: it’s a rainy Tuesday, and I’m standing in my kitchen with a craving for something sweet but sophisticated. I rummage around the pantry and notice a few oranges and a lonely bar of dark chocolate. This is the moment Chocolate Orange Madeleines were born in my home. These little French beauties are quick to make — perfect for when you want to impress without the fuss. The combination of citrusy brightness with rich chocolate is just irresistible. These madeleines are not only a treat for the taste buds but also super simple to whip up. Just a few steps and you’ll have a plate full of elegant cookies that taste like a warm hug on a cold day.
Jump to Recipe
What You’ll Need
Chances are, you already have most of these ingredients tucked away in your pantry. Here’s what you’ll need:
- 1 cup all-purpose flour
- 1 teaspoon baking powder
- Pinch of sea salt
- 2 large eggs
- 1/2 cup granulated sugar
- 2 tablespoons orange juice
- 1 tablespoon orange zest
- 1/2 cup melted butter
- 1/2 cup dark chocolate, for dipping
How to Make Chocolate Orange Madeleines
- Preheat your oven to 374°F (190°C). Carefully, yet generously, grease and flour your madeleine tin. No skimping here — you want those little cakes to slide right out!
- In a small bowl, whisk together the flour, baking powder, and sea salt. Set this dry mix aside as it waits for its turn to join the party.
- In a medium bowl, beat the eggs and sugar on medium-high speed. You’re looking to triple the volume — a thick, creamy ribbon of batter should form when you lift the beaters.
- Once you’ve got that gorgeous ribbon, gently stir in the orange juice and zest. Inhale deeply — the aroma is divine!
- Time to bring it all together: Alternate adding the flour mixture and melted butter into your egg and sugar batter. Mix gently. You don’t want to overdo it!
- Refrigerate this lovely batter for 45 minutes to an hour. This step is crucial for that perfect madeleine hump!
- Drop rounded teaspoonfuls of batter into the center of each madeleine mold. It’s okay if it doesn’t fill the whole space — they’ll puff up beautifully.
- Bake for 10-12 minutes. You’ll know they’re done when the edges are a delicate gold and the centers spring back with a gentle touch. Your kitchen will smell like heaven!
- Once out of the oven, tap the tin on the counter to help the madeleines loosen. Carefully remove them and allow them to cool completely.
- For the finishing touch, melt the dark chocolate and pour into a wide dish. Dip each madeleine halfway or a quarter into the chocolate. Let them set on parchment paper.
Cook’s Notes
There’s a certain magic to timing when baking madeleines. Keeping the batter cold is key to getting that iconic hump during baking, so don’t skip that chill time in the fridge. When it comes to storage, these are best enjoyed fresh, but they can be stored in an airtight container for a day or two. If you’re planning on making them ahead, you can freeze the unbaked batter after the chill, and bake them fresh when needed.
- If you find your madeleines sticking, make sure to grease the tin well. Sometimes, adding a little flour to ensure they’re non-stick can make a world of difference.
- Your madeleine tin’s size can affect how much batter you need per mold. Don’t stress — a bit of experimentation will lead to a delicious outcome!
Make It Your Own
- Swap the orange zest and juice for lemon, and you’ll have a zesty, tangy twist!
- Try white chocolate instead of dark for a creamy, sweet coating that pairs well with the citrus.
- Add a teaspoon of vanilla extract to the batter for a comforting vanilla-orange flavor.
- Go nuts by sprinkling chopped pistachios on the freshly dipped chocolate for a crunchy, nutty addition.
If you try this, I’d love to hear how it turns out — drop a comment or tag me! Unleash your inner baker and enjoy these delightful bites of chocolatey-orange goodness. 🍊🍫
Goes Well With
If you want to round out the meal, here’s what I’d pair it with over on meaghanmoineau.com:
Related update: Chocolate Orange Madeleines
Related update: Arroz Con Leche
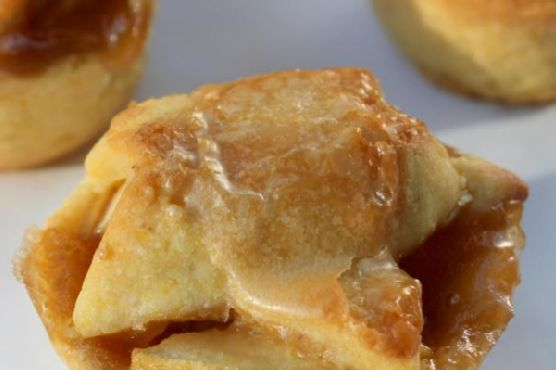
Okay, picture this: it’s a crisp fall afternoon, and I’ve just come back from the farmer’s market with a bag full of tart green apples. There’s something about the combination of brandy, apples, and that buttery cornmeal crust that screams cozy and indulgent, yet is surprisingly easy to make. I had one of those “aha!” moments when trying to figure out what to do with all these apples, and trust me, these mini pies are the perfect solution. They’re delightfully portable and make your kitchen smell like an autumn dream. Plus, who can resist a cute mini pie? Not me! So, grab your apron, and let’s dive into these Brandy-Apple Mini Pies with Cornmeal Crust. Jump to Recipe
What You’ll Need
This recipe is magical because it mostly uses ingredients you probably already have lurking in your pantry.
- 1 1/4 cups flour
- 1/4 cup yellow cornmeal
- 1/4 cup powdered sugar
- 1/2 tsp salt
- 1/4 cup vegetable shortening
- 3 Tb. ice water (plus more if needed)
- 4 cups diced tart green apples
- 3 Tb. unsalted butter
- 1/4 cup brandy
- 1/4 cup brown sugar
- 1/4 cup sugar
- 1 Tb. pumpkin pie spice
How to Make Brandy-Apple Mini Pies With Cornmeal Crust
- Add the flour, cornmeal, powdered sugar, and salt to the food processor. Give it a couple of quick pulses to mix.
- Cube the shortening and pulse it into the dry mixture until it resembles coarse crumbs.
- Drizzle in 3 tablespoons of ice water and pulse until the dough holds together. Add a touch more water if needed.
- Turn the dough onto plastic wrap and divide it into a large and a small piece, roughly 80/20. Shape each into a disk, wrap, and chill in the fridge for at least 30 minutes.
- While the dough chills, peel and dice the apples. Preheat your oven to 425°F (220°C).
- In a saucepan, combine butter, brandy, brown sugar, granulated sugar, and pumpkin pie spice over medium heat. Stir until it simmers and the aroma is irresistible.
- Toss the diced apples in this syrup, ensuring every piece gets a nice coat.
- Roll out the larger dough disk on a floured surface to about 1/8 inch thick. Use a glass with a 3-4 inch rim to cut out circles for your muffin tin.
- Press these dough circles into the muffin tins, gathering and re-rolling scraps to yield 14-16 pie bases.
- Fill each pie base with the apple mixture, dividing it equally.
- Roll out the smaller dough disk, and use a 2-3 inch decorative cutter to create tops for your pies. Top each pie and brush with leftover syrup.
- Bake for 15 minutes, then reduce the oven temperature to 350°F (175°C) and bake another 15 minutes. If the tops are golden after the first 15, shield them with foil.
- Let the pies cool completely in the tins before attempting to remove them.
Cook’s Notes
If you’ve got a silicone muffin pan, you’re in luck! Getting the mini pies out is a breeze. For metal pans, carefully run a small sharp knife around each pie before nudging them out one by one.
Feel like going big? This recipe adapts beautifully into a single 9-inch pie. Just remember to double the apple and syrup quantities and follow the same baking instructions but for a full-size pie.
These mini wonders can be made ahead; simply store them in an airtight container at room temperature for up to two days. And let’s be honest, they’re even better the next day!
Make It Your Own
- Swap the brandy for bourbon for a deeper, smokier flavor that pairs beautifully with the apples.
- Love cranberries? Toss in half a cup of dried cranberries with the apples for a tart twist.
- Prefer a nutty crunch? Add a handful of chopped walnuts or pecans to the apple mixture.
- For a more traditional flavor profile, replace the pumpkin pie spice with cinnamon and nutmeg.
If you try this recipe, I’d love to hear how it turns out. Share your pie pics or drop a comment below. Happy baking, friends!
Goes Well With
If you want to round out the meal, here’s what I’d pair it with over on meaghanmoineau.com:
Related update: Brandy-Apple Mini Pies With Cornmeal Crust
Related update: Chocolate Orange Madeleines
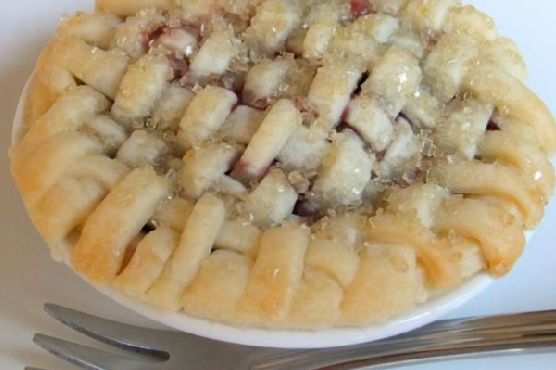
It was one of those late-summer afternoons when the air was just starting to hint at autumn, but the sun was still holding onto its golden warmth. I found myself with a surplus of sour cherries, thanks to an overly ambitious trip to the farmer’s market. Faced with a mountain of cherries and not much time, the answer was clear: mini-cherry pies. They’re the perfect little treat that balances the tartness of the cherries with a buttery, flaky crust. Plus, they’re just the right size for a sweet pick-me-up without the commitment of a full pie. These pies come together surprisingly quickly, and their rustic charm makes them just as impressive as they are easy to put together. So, let’s dive in and make some magic with those cherries.
Jump to Recipe
What You’ll Need
Good news: chances are you already have most of this at home. These mini-cherry pies rely on simple ingredients that pack a punch.
- Sour cherries – the star of the show, bringing that perfect tart bite
- Cornstarch – to thicken the cherry filling
- Flour – for that tender, flaky crust
- Granulated sugar – just a dash to balance the cherries
- Heavy whipping cream – for brushing that gives a beautiful golden finish
- Fresh lemon juice – a little zing to elevate the flavors
- Pecans – optional, for a bit of crunch if you fancy it
- Turbinado sugar – for sprinkling on top, adding sweetness and texture
- Unsalted butter – because butter is life
- Vanilla extract – a splash for warmth and depth
- Water – to bring the dough together
How to Make Mini-Cherry Pies
- In a food processor, add butter to the flour mixture and pulse until you see a crumbly texture, about 30 seconds. You want those bits of butter to still be visible.
- With the processor running, slowly add 2/3 cup of cold water through the lid opening until the dough forms a ball. Flatten dough into two disks, wrap in plastic, and refrigerate for an hour.
- Preheat your oven to 350°F (175°C). Roll one pastry disk on a lightly floured surface to about 1/8-inch thickness. Fit the dough into twelve 2-1/2-inch mini pie plates, trimming the edges. Freeze them until firm, around 10 minutes.
- Prick the bottoms and sides of the dough with a fork and bake until they’re golden, about 6 to 8 minutes. Let the aroma guide you—it should smell toasty but not burnt.
- In a small bowl, stir together cornstarch and the remaining 2 tablespoons of cold water until blended. In a large saucepan, combine cherries, cornstarch mixture, sugar, and a pinch of salt. Cook over medium heat until cherries soften and the mixture thickens. Stir in lemon juice and vanilla.
- Now, for the fun part! Roll out the remaining pastry disk to 1/8-inch thickness. Cut dough into thin strips, about 1/8 to 1/4-inch wide, and weave them into lattice tops for the pies.
- Carefully transfer the lattice tops onto each pie and trim the edges. Gently press to seal. Brush the tops and edges with a bit of cream, then sprinkle generously with turbinado sugar.
- Bake until the crusts turn a gorgeous golden brown, about 18 to 24 minutes. They should be fragrant and inviting. Serve warm with a scoop of vanilla ice cream, if you’re feeling indulgent.
Cook’s Notes
If you’re like me and tend to rush through things, resist the urge to skip chilling the dough. It’s crucial for that perfect flaky texture. Also, when making the lattice tops, it’s more about the rustic charm than perfection, so don’t worry if they’re a bit uneven. These mini pies are best enjoyed fresh, but they can be stored in an airtight container for up to two days. You can also prepare the dough a day in advance, just be sure to let it sit out for a bit to soften before rolling it out.
Make It Your Own
- Swap the sour cherries for blueberries or raspberries for a berry twist.
- Mix in some cinnamon or nutmeg to the cherry filling for a spiced variation.
- Top with streusel instead of lattice for a crumbly topping.
- For a nutty flavor, add chopped pecans to the dough or sprinkle them on top before baking.
If you whip up these mini-cherry pies, I’d love to hear how they turn out! Drop a comment below or tag me on social media. Your kitchen adventures make my day!
Goes Well With
If you want to round out the meal, here’s what I’d pair it with over on meaghanmoineau.com:
Related update: Mini-Cherry Pies
Related update: Brandy-Apple Mini Pies With Cornmeal Crust

So, picture this: it’s a drizzly Tuesday evening, the kind that makes you want to curl up with something sweet and comforting. I’m rifling through my pantry, hoping for inspiration, when I spot a bag of walnuts and some dried cranberries tucked behind the flour. Cue the lightbulb moment: Polish Rugelach! This delightful pastry is just the pick-me-up needed—a mix of rich, buttery dough and a warm, spiced filling that feels like a hug for your taste buds. It’s the perfect activity to turn a dreary day into a cozy baking session. Plus, it’s easier than it sounds, trust me. By the end, your kitchen will smell like a slice of heaven.
Jump to Recipe
What You’ll Need
This ingredient list is pretty forgiving—nothing too fancy here. You probably have most of it lounging in your pantry already.
- All purpose flour
- Cocoa powder
- Cream cheese
- Dried cranberries
- Dried raisins
- Ground cinnamon
- Nutmeg
- Sugar
- Unsalted butter
- Walnuts
How to Make Polish Rugelach
- Start by making the dough. In a large bowl, beat the unsalted butter and cream cheese together until the mixture turns light and fluffy—it’ll look like the soft inside of a cloud.
- Add sugar slowly, continuing to beat until everything is well combined and fluffy.
- Gradually mix in the all purpose flour and cocoa powder until the dough starts to come together. It should be smooth but not sticky.
- Divide the dough into quarters, wrap each in plastic, and chill in the fridge for at least an hour. You’re aiming for a dough that’s firm enough to roll out easily.
- Preheat your oven to 350°F (175°C) and line a baking sheet with parchment paper.
- For the filling, mix together the dried cranberries, raisins, walnuts, ground cinnamon, nutmeg, and a little extra sugar for sweetness.
- Roll out each dough quarter into a circle, about 1/8 inch thick. Spread a thin layer of the filling over the dough, pressing it gently to adhere.
- Cut the dough into 8 wedges, like you’re slicing a pizza. Roll each wedge from the wide end to the tip, forming a crescent shape.
- Place the rugelach on the prepared baking sheet, point side down, and bake for 20-25 minutes, until they’re golden and the fillings are bubbling and fragrant.
- Let them cool slightly (but not all the way—you’ll want to experience that warm gooey magic), and then enjoy!
Cook’s Notes
Don’t be intimidated by the chilling step! It makes rolling the dough so much easier and prevents the rugelach from spreading too much in the oven. If you’re in a rush, you can pop the dough in the freezer for about 20 minutes, just enough to firm it up.
- Store your rugelach in an airtight container at room temperature for up to a week. I doubt they’ll last that long, though!
- If you’re planning ahead, you can prepare the dough a day in advance. Just keep it wrapped tightly in the fridge until you’re ready to fill and bake.
- Common mistake: overstuffing the rugelach. A little filling goes a long way, so don’t feel like you have to use all of it if it starts overflowing.
Make It Your Own
- Swap the walnuts for pecans if you’re feeling nutty.
- Try dried apricots or cherries in place of the cranberries for a bit of a tangy twist.
- For a chocolatey version, add some mini chocolate chips to the filling mix. Chocolate lovers, rejoice!
- Use some orange zest in the filling for a fresh, citrusy punch.
If you give this Polish Rugelach a try, I’d love to hear how it turns out for you! Drop a comment below or tag me in your baking adventures on social media. Let’s keep those dreary days at bay, one pastry at a time!
Goes Well With
If you want to round out the meal, here’s what I’d pair it with over on meaghanmoineau.com:
Related update: Polish Rugelach
Related update: Mini-Cherry Pies
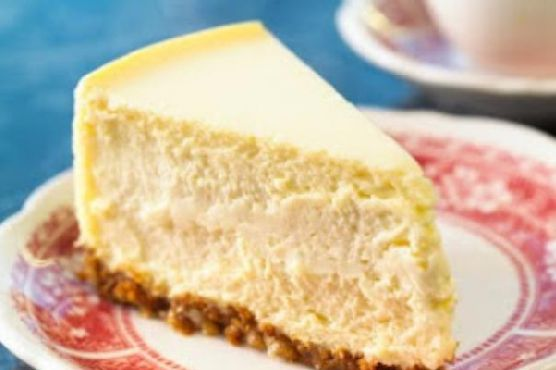
It was one of those weeks when everything feels a bit too much, you know? Work was hectic, my laundry pile was threatening to engulf my sanity, and I was craving something sweet yet sophisticated. That’s when I remembered the Mascarpone & Ricotta Cheese Cake recipe I had scribbled in my notebook. This cake is a revelation — it’s rich but not heavy, creamy yet airy, and the perfect antidote to a busy week. It’s also surprisingly easy to make, which is a necessity for those of us who can barely remember if we brushed our hair this morning. So, if you’re in need of a little culinary therapy, this one’s for you.
Jump to Recipe
What You’ll Need
This recipe doesn’t call for anything too exotic. You’re likely to have most of it on hand, which makes it even more enticing when you’re trying to avoid yet another grocery run.
- Graham crackers
- Almonds
- Butter (melted)
- Salt
- Sugar
- Flour
- Mascarpone cheese
- Ricotta cheese
- Whipped cream cheese
- Eggs
- Lemon juice
- Vanilla extract
How to Make Mascarpone & Ricotta Cheese Cake
- Preheat your oven to 325°F (165°C). This step is your cue to take a deep breath – you’re about to create something amazing.
- For the crust, grind the graham crackers and almonds together. A food processor is effortless, but a mortar and pestle will do if you’re looking for an arm workout.
- Add the melted butter and a pinch of salt to your crumb mixture. Press it firmly into the bottom of a greased springform or deep-dish pie pan. Think of it as the tasty foundation for your masterpiece.
- Bake the crust for about 10 minutes until it’s set and slightly golden. Let it cool while you move on to the filling.
- Mix sugar and flour, then sprinkle this mix over the cooled crust. This tiny step is key to keeping your crust crisp, not soggy.
- In a large bowl, beat the cream cheese, mascarpone, ricotta, and sugar until smooth. This is where the magic begins to happen.
- Add in the lemon juice and vanilla, mixing until they’re just one with the cheese mixture.
- Beat in the eggs one at a time. It’s like a zen exercise, adding them patiently and watching the batter become silky smooth.
- Pour this luscious cheese mixture over your prepared crust, spreading it evenly.
- Bake for about 1 hour and 5 minutes. You’ll know it’s ready when the center is still wobbly when gently shaken, like a deliciously creamy dance.
- Let it cool on your countertop before refrigerating. Overnight is best, giving the flavors a chance to deepen and develop.
Cook’s Notes
A few things I’ve learned from making this cake: First, don’t skip the step of sprinkling flour and sugar over the crust. It’s a game-changer for texture. Second, when beating the cheeses and sugar, make sure everything is at room temperature — your batter will be smoother and easier to work with. Also, if you’re making this for a dinner party, you can absolutely prepare it a day or two in advance. It’ll only get better with a little rest in the fridge. Leftovers (if any!) should be stored in an airtight container and will keep for up to a week.
Make It Your Own
Here are a few ways to switch things up if you’re feeling adventurous:
- Swap the almonds for walnuts or pecans for a different nutty undertone in the crust.
- Use lime juice instead of lemon for a slightly tropical twist.
- Add a tablespoon of cocoa powder to the crust for a subtle chocolatey vibe.
- Top with a berry compote or fresh fruit before serving for an extra burst of color and flavor.
If you try this, I’d love to hear how it turns out — drop a comment or tag me! Whether it’s your first time or your fiftieth, this cake is sure to bring a bit of joy to your day. Happy baking, my friends!
Goes Well With
If you want to round out the meal, here’s what I’d pair it with over on meaghanmoineau.com:
Related update: Mascarpone & Ricotta Cheese Cake
Related update: Polish Rugelach
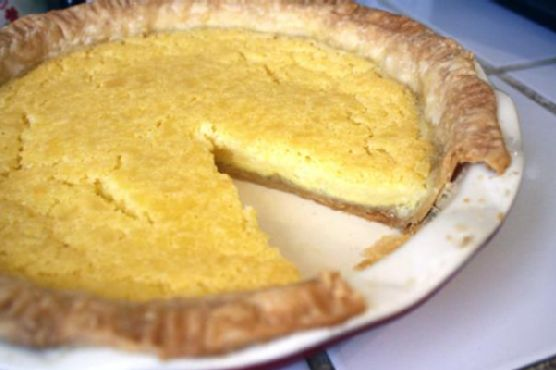
It was one of those quiet Sunday afternoons when the weather couldn’t quite decide if it wanted to be spring or cling to the last bits of winter. I was sitting in my kitchen, flipping through a stack of cookbooks, looking for inspiration that felt both nostalgic and fresh. That’s when I stumbled upon the idea of a buttermilk pie—something I hadn’t made in ages but suddenly craved. This pie is the perfect marriage of simplicity and comfort, with a custard-like filling that’s tart yet sweet and a buttery crust that feels like a warm hug. It’s one of those recipes that reminds you why you love to cook; it’s straightforward but yields something that feels much more than the sum of its parts. If you need a dessert that’s easy to make but impressive enough to make people think you spent all day in the kitchen, this is it.
Jump to Recipe
What You’ll Need
Chances are, you already have most of these ingredients lounging around in your pantry and fridge. The beauty of this recipe is its simplicity—no need to hunt down exotic ingredients.
- 1/2 cup of butter, melted
- 1 cup of buttermilk
- 3 large eggs
- 3 tablespoons of flour
- 1 1/2 cups of sugar
- 1 unbaked 9-inch pie shell
- 1 teaspoon of vanilla extract
How to Make Classic Buttermilk Pie
- Preheat your oven to 325 degrees F. You want it nice and warm, ready to transform our ingredients into a slice of heaven.
- In a mixing bowl, beat the eggs slightly. You’re not going for a full-on froth here, just enough to break them up.
- Add the sugar and flour to the eggs, stirring until you have a smooth, pale mixture. This is where the magic begins!
- Next, pour in the melted butter and mix well. It should start to smell a bit like a bakery in your kitchen now.
- Add the buttermilk and vanilla extract, stirring until everything is well combined. The batter will be a lovely, creamy consistency.
- Take your unbaked pie shell and lightly dust the inside with a bit of flour. This helps the filling adhere to the crust without any soggy bottom mishaps.
- Pour the batter into the prepared pie shell, spreading it evenly. Sprinkle just a little more flour on top; it adds a subtle crusty top layer.
- Place the pie on the center rack of your oven and bake for about an hour. You’ll know it’s done when the custard is set and has a light, golden color. Your kitchen should smell like sugar, vanilla, and a hint of nostalgia.
Cook’s Notes
Let’s chat about some real talk here. First, don’t overbeat the eggs; we’re making pie, not meringue. As for the baking, every oven is a little different, so start checking around the 50-minute mark. The center should not jiggle like Jell-O; we want a gentle firmness. If you’re making this ahead of time, know that it keeps well in the fridge for up to three days. Just wrap it tightly in plastic wrap to keep it from drying out.
Make It Your Own
- Lemon Zest Twist: Add a teaspoon of lemon zest for a citrusy lift that pairs wonderfully with the buttermilk.
- Spiced Version: Sprinkle a pinch of nutmeg or cinnamon into the batter for a cozy, warm flavor.
- Nutty Delight: Stir in a handful of toasted pecans for a delightful crunch in every bite.
- Chocolate Lover’s: Drizzle some melted chocolate on top once the pie has cooled for a decadent touch.
If you try this, I’d love to hear how it turns out—drop a comment or tag me! Whether you stick to the classic or put your own spin on it, I’m sure it’ll be a hit. Happy baking!
Goes Well With
If you want to round out the meal, here’s what I’d pair it with over on meaghanmoineau.com:
Related update: Classic Buttermilk Pie
Related update: Lemon and Strawberry Loaf
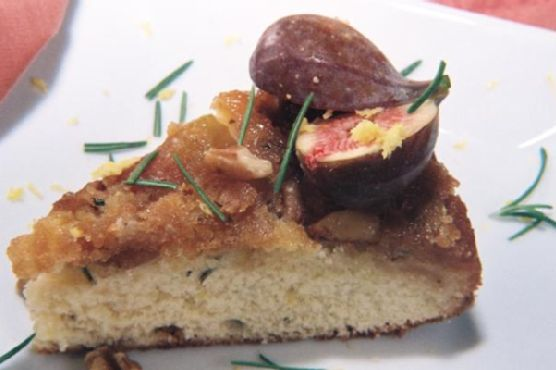
Last Tuesday, as a chilly breeze snuck through the window and the sun set a little too early for my liking, I found myself craving something warm and indulgent. I had a pint of fresh figs begging to be the star of a dessert and an evening that called for comforting decadence. That’s when I decided to bake my Fresh Fig, Walnut, Rosemary Upside Down Cake. It’s the kind of cake that impresses with its gorgeous presentation yet is surprisingly easy to whip up on a busy weeknight. The combination of sweet figs, crunchy walnuts, and fragrant rosemary, baked to golden perfection, is perfect for those moments when you need a bit of comfort and a touch of elegance. Plus, nothing pairs better with this cake than a crisp, citrusy Chardonnay to round out the experience. If you’re as intrigued as I was, let’s get started! Jump to Recipe
What You’ll Need
Chances are you already have most of the ingredients for this cake just waiting to be transformed.
- Unsalted butter
- Light brown sugar
- Fresh figs
- Fresh rosemary
- Walnut pieces
- Flour
- Baking powder
- Salt
- Eggs
- Granulated sugar
- Fresh lemon juice
- Lemon extract
- Citron vodka
- Lemon zest
- Vanilla extract
How to Make Fresh Fig, Walnut, Rosemary Upside Down Cake And A Crisp Citrusy Chardonnay
- Position a rack in the center of the oven and preheat it to 350 degrees. Place your trusty 9-inch round baking pan in the oven with the butter until it melts, which should take about 5 minutes.
- Once the butter has melted, carefully remove the pan and sprinkle light brown sugar evenly over the melted goodness. Nestle the figs, flesh side up, into this sugary bed. Add a sprinkle of rosemary—just a teaspoon to start.
- Fill in any gaps with walnut pieces, ensuring no corner is left behind.
- In a medium bowl, sift together flour, baking powder, and salt. In a separate bowl, beat eggs with granulated sugar at medium speed until creamy and inviting.
- Because I preferred using whole eggs, continue to beat the mixture for an additional 3 minutes until frothy and small bubbles form. Trust me, it’s worth it.
- Combine the flour mixture with the creamed mixture and beat until it’s a well-mixed batter that smells like heaven.
- Pour this batter evenly over the fruit in the pan, using a spatula to smooth the top with love and care.
- Bake for 35 to 40 minutes, keeping an eye out for that beautiful golden color and the clean toothpick test.
- Cool the cake on a wire rack for a good 10 minutes. Then, run a blunt knife around the edges, say a little prayer, and carefully invert it onto a serving plate.
- Serve warm or at room temperature, whatever suits your mood. And don’t forget to pair it with a bold cup of coffee or that chilled glass of Edna Valley 2010 Paragon Chardonnay.
Cook’s Notes
- If you’re making this for a dinner party, you can prepare the batter a few hours in advance and refrigerate it. Just bring it back to room temperature before baking.
- Leftovers keep well wrapped in the fridge for up to three days. Just zap a slice in the microwave for about 15 seconds to bring back its cozy warmth.
- Common mistake: Be careful not to over-bake! The key is to pull it out of the oven as soon as a toothpick comes out clean to keep it from drying out.
Make It Your Own
- Swap fresh figs with fresh peaches or pears for a seasonal twist.
- Try using pecans instead of walnuts for a slightly different nutty flavor.
- If you’re not into alcohol, replace the citron vodka with an equal amount of club soda with a dash of lemon extract.
- Add a dash of cinnamon to the batter for a warm, spiced note that pairs wonderfully with the figs.
If you try this recipe, I’d love to hear how it turns out — drop a comment or tag me in your delicious creations! Happy baking, and may your kitchen be filled with the sweet scent of figs and the warmth of a good cake. Cheers!
Related update: Fresh Fig, Walnut, Rosemary Upside Down Cake And A Crisp Citrusy Chardonnay
Related update: Lemon – Garlic Chicken
Related update: Classic Buttermilk Pie
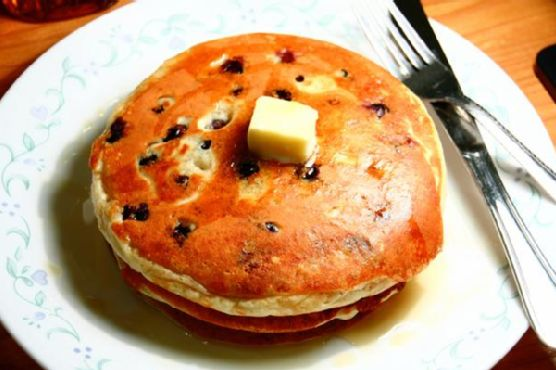
The other morning, as the autumn leaves whispered secrets through the slight breeze outside my window, I found myself in a breakfast conundrum. You know, the kind of morning where you crave something different but comforting, something that feels like a warm hug yet won’t leave you feeling weighed down. Enter: Oatmeal Pancakes. These beauties are both wholesome and satisfying, perfect for those busy weekdays when you still want to start your day with intention. They’ve quickly become my go-to because they’re not just heart-healthy; they’re heartwarming. Plus, they’re surprisingly simple to whip up. Seriously, you might already have everything you need in your kitchen!
Jump to Recipe
What You’ll Need
I love that these pancakes come together with just a handful of ingredients, most of which are probably chilling in your pantry or fridge right now.
- Irish oats
- Fat-free milk
- Whole wheat multi-purpose flour
- Baking powder
- Egg whites
- Agave (or sugar, if that’s your jam)
- Blueberries
- 100% maple syrup, for serving
How to Make Oatmeal Pancake (Yummy & Heart Healthy)
- Start by soaking your irish oats in the fat-free milk for a good 3-4 hours, or even better, let them get cozy overnight in the fridge. This is where the magic begins, softening up those oats for the perfect pancake texture.
- When you’re ready to get cooking, add the egg whites, whole wheat flour, baking powder, and agave to your oat and milk mixture. Blend everything together in a food processor or coffee grinder until you’ve got a smooth batter.
- Heat up a non-stick pan over medium heat. No need for any greasing here—these pancakes are low-maintenance!
- Pour 5 to 7 spoonfuls of your batter onto the heated pan. You’ll know it’s time to flip when the edges start to bubble and the bottom is a dreamy golden color.
- Flip and let the other side cook for another minute or two until puffed up and beautifully golden.
- Serve them warm, drizzled with 100% pure maple syrup, and maybe a handful of fresh blueberries if you’ve got them. Dig in and enjoy the cozy vibes!
Cook’s Notes
These pancakes are pretty forgiving, which I love. If you’re not a fan of soaking oats overnight, a few hours will do the trick, but the longer soak really gives the best texture. Once cooked, they’ll keep in the fridge for a couple of days. Just pop them in the microwave or toaster to reheat. Oh, and if you’re making these ahead, you can freeze them! Just layer parchment paper between each pancake and seal them in a freezer bag. Easy peasy.
Make It Your Own
- Boost the protein by swapping half of the egg whites for a scoop of your favorite protein powder.
- Not a fan of agave? Use honey or a tablespoon of brown sugar for a deeper sweetness.
- For a nutty twist, throw in a handful of chopped nuts like almonds or walnuts to the batter.
- Make it a berry bonanza by adding raspberries or strawberries instead of blueberries.
If you try this, I’d love to hear how it turns out — drop a comment or tag me! Enjoy your breakfast adventure and let these pancakes be your morning muse.
Related update: Oatmeal Pancake (Yummy & Heart Healthy)
Related update: Spicy Black-Eyed Pea Curry with Swiss Chard and Roasted Eggplant
Related update: Home made organic maple granola with fresh fruit
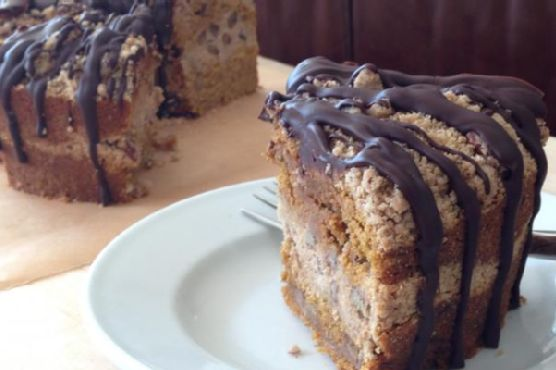
Picture this: It’s a chilly autumn afternoon, the kind where the crisp air practically begs you to be cozy. I’m staring at a can of pumpkin puree I’ve had since last fall (I know, I know), and a craving for something sweet hits me like a ton of bricks. But I want something special—something that feels like a big warm hug in cake form. Enter the Pumpkin Pecan Streusel Cake. It’s gluten-free, soy-free, vegan, and everything in between. You’ll love how it fills your kitchen with the warm spices of fall and bakes into a stunning centerpiece that’s almost too beautiful to eat. Almost.
Jump to Recipe
What You’ll Need
I bet you already have most of these ingredients hanging out in your pantry, just waiting to be transformed into this autumnal delight. Here’s what you’ll need:
- Roasted pumpkin puree
- Pecans
- Gluten free oat flour
- Sorghum flour
- White rice flour
- Red brown rice flour
- Earth Balance soy free spread
- Light firmly packed brown sugar
- Ground cinnamon
- Ground ginger
- Ground nutmeg
- Apple cider vinegar
- Mashed bananas
- Aluminum free baking powder
- Aluminum free baking soda
- Kosher salt
- Enjoy Life brand chocolate chips
- Coconut yogurt
- Tapioca flour
How to Make Pumpkin Pecan Streusel Cake – gluten free, soy free, vegan
- Start by making the streusel. Combine the flours, brown sugar, cinnamon, and kosher salt in a small bowl. Gently work the Earth Balance spread into the mix with your hands until you get coarse crumbs. Toss in the pecans and give it a good stir. Set this mixture aside.
- For the batter, measure your coconut milk and add the apple cider vinegar. Don’t stir, just let it transform into a sour-cream-like concoction.
- In a separate medium bowl, sift or whisk together your flours, baking powder, baking soda, cinnamon, ginger, nutmeg, and kosher salt.
- Grab the bowl of your electric mixer and beat together the Earth Balance spread with brown sugar until they’re well acquainted. Add in the mashed banana, scraping the sides of the bowl as you go.
- Mix in the pumpkin puree and your now-thickened coconut milk mixture. Keep the mixer on low speed and gradually add your flour mixture. The batter should be thick and luxurious.
- Spread half of this thick batter into your prepared baking pan. Sprinkle half of the streusel evenly over the batter, then top with the remaining batter. Smooth it out evenly and finish with the rest of the streusel on top.
- Bake for 55-60 minutes, or until a toothpick inserted into the center comes out clean. Let the cake cool on your stovetop for about 40 minutes.
- Once cooled, gently work a knife around the edges of the cake to release it from the pan. Chill the cake in the fridge for about an hour to firm up.
- For the chocolate glaze, melt the chocolate chips with some Earth Balance spread in a glass bowl over simmering water. Stir until glossy, then let it cool for a bit before drizzling over your cake. Serve chilled or at room temperature.
Cook’s Notes
Okay, real talk: don’t skip that chilling step before the glaze. It makes all the difference in getting a clean cut when serving. If your batter isn’t as thick as you’d like, just add a bit more white rice flour until it reaches the right consistency. And for leftovers (if there are any), store the cake in an airtight container in the fridge for up to a week—it’s even better the next day, I swear!
Make It Your Own
Want to put a personal spin on this cake? Here are a few ideas:
- Swap the pecans for walnuts if you’re feeling nutty.
- Try adding a handful of dried cranberries to the batter for a sweet-tart twist.
- For a spicier cake, increase the ginger and nutmeg to your taste.
- If you prefer a sweeter glaze, mix in a tablespoon of maple syrup with the melted chocolate.
If you try this, I’d love to hear how it turns out — drop a comment or tag me! Your kitchen deserves to smell like fall, and this cake is your ticket. Happy baking, my friend! 🍂🍰
Related update: Pumpkin Pecan Streusel Cake – gluten free, soy free, vegan
Related update: Carrot Raisin Chocolate Chip Cookies

Last Tuesday, I found myself staring at the fridge at 7 a.m., coffee in hand, trying to muster some inspiration for breakfast before the day spiraled into chaos. There they were: a half-empty bag of potato tots, some bell peppers, and a few eggs that desperately needed a purpose. In that moment of breakfast indecision, Easy Weekday Breakfast Muffins were born. These muffins are the perfect balance of savory, cheesy goodness, and they’re surprisingly simple to whip up. Plus, they can be made ahead, making those rushed weekdays just a tad more bearable. Trust me, once you try these, weekday mornings will feel like a breeze.
Jump to Recipe
What You’ll Need
Most of these ingredients are probably lounging in your kitchen already, just waiting to become something delicious.
- Bell pepper, chopped
- Eggs – 6 of them, whisked
- Milk – just a splash
- Small onion, chopped
- Potato tots – because who doesn’t love them?
- Salt and pepper, to taste
- Shredded cheese – the more, the merrier
- Turkey – diced or shredded
How to Make Easy Weekday Breakfast Muffins
- Preheat your oven to 350°F (180°C). This gives you time to prep everything while it heats up.
- In a medium-sized bowl, whisk together the eggs and a splash of milk until they’re well combined and a lovely shade of pale yellow.
- Fold in the chopped bell pepper and onion. Season this mixture with a good pinch of salt and a couple of cracks of pepper.
- Stir in a generous handful of shredded cheese. This will add that irresistible gooeyness and flavor.
- Lightly grease a muffin tin or line it with muffin cups, then fill each cup halfway with the egg mixture.
- Drop a few pieces of turkey into each cup. It’s like a little protein surprise!
- Place a single potato tot in the center of each cup, pressing it lightly into the egg mixture.
- Sprinkle a bit more shredded cheese on top of each muffin for that golden, bubbly top.
- Pop the muffin tin into the oven for about 20 minutes, or until the muffins are set and the tops are gloriously golden.
- Let them cool for a few minutes before serving or storing for later.
Cook’s Notes
If you’re short on time in the morning, these muffins can be made the night before and stored in the fridge. Just reheat them in the microwave for about 20-30 seconds, and they’ll taste like you just pulled them out of the oven.
- When whisking the eggs, ensure they’re completely blended to avoid any streaks of egg whites in your muffins.
- These muffins keep well in the fridge for up to 3 days. For longer storage, freeze them and thaw overnight in the fridge before reheating.
- Be careful not to overfill the muffin cups. They’ll expand as they cook, and you don’t want egg mixture overflowing in your oven!
Make It Your Own
- Swap the turkey for crispy tofu for a vegetarian version that’s just as satisfying.
- Try adding cooked bacon bits to each muffin for an extra savory kick.
- Use different cheeses like sharp cheddar or feta for a flavor twist.
- If you’re feeling a bit adventurous, sprinkle some chopped jalapeños into the mix for a spicy morning pick-me-up.
If you try this, I’d love to hear how it turns out — drop a comment or tag me! Breakfast doesn’t have to be a hassle; let’s make it delicious and fun together.
Related update: Easy Weekday Breakfast Muffins
Related update: Chimichurri Skirt Steak with Grilled Asparagus
Related update: Healthy Southwestern Oatmeal
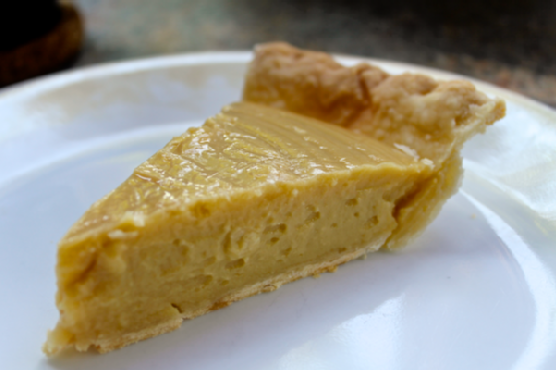
So, picture this: I just got home after a dreary, rainy day, and all I wanted was a slice of something indulgent, something that instantly warms you up from the inside. That’s when I remembered my Irish Whiskey Pie recipe. It’s a comfort wrapped in a buttery crust, with a deliciously rich filling that makes you feel like you’re being hugged by a cozy blanket. The best part? It’s one of those pies that seems super fancy but is actually pretty easy to pull off. Trust me, once you try it, you’ll be making excuses to bake it over and over again. Oh, and if you’re in a rush to dive into the pie-making, go ahead and Jump to Recipe
What You’ll Need
Don’t worry, this list looks longer than it feels. Chances are you already have most of it chilling in your pantry—or, you know, your liquor cabinet.
- Condensed milk
- Cornstarch
- Egg yolks
- Light brown sugar
- Homogenized milk
- Pastry flour
- Salt
- Unsalted butter
- Vodka
- Water
- Irish whiskey
How to Make Irish Whiskey Pie
- For the crust, sift the pastry flour and salt together in a large bowl. This is the backbone of your pie, so make sure it’s all airy and smooth.
- Using a food processor, pastry blender, or two knives—whatever floats your boat—cut the butter into the flour until you have a crumbly, pebbly texture.
- Add water and vodka a little at a time, mixing after each addition until the dough just comes together. Trust me, you’ll know when it happens.
- Form the dough into a ball, cut it in half, and flatten each half into a disc. Wrap them in wax paper and refrigerate for at least half an hour. Freeze one for later—you won’t regret having a backup!
- Preheat your oven to 375°F. Roll out one disc of the pastry on a well-floured surface to fit a 9-inch pie plate. Trim and crimp the edges to make it look all pretty.
- Prick the bottom with a fork, wrap it with tin foil, and fill it with pie weights or dried beans. Bake for 25 minutes in the oven’s center.
- Remove the weights and foil, and bake for another nine minutes until the crust turns golden brown and smells like heaven. Let it cool while you whip up the filling.
- For the filling, whisk together the condensed milk, cornstarch, and salt in a medium-sized bowl. Add egg yolks one at a time, whisking thoroughly after each addition. Set aside.
- Melt butter over moderate heat in a saucepan. Add brown sugar and let it bubble slightly, giving off a glorious caramel aroma.
- Slowly whisk in the homogenized milk, then add the egg mixture gradually, whisking constantly to avoid scrambling those yolks.
- Bring it all to a boil, stirring the whole time. Once boiling, let it cook for about a minute until it’s thick and luscious.
- Remove from heat and stir in the Irish whiskey—it’s the star of the show, after all. Pour the filling into your cooled pie shell, cover with plastic wrap, and refrigerate for at least four hours to set.
Cook’s Notes
Here’s a pro tip: if you’re making this pie ahead, leave the whipped cream off until just before serving. It helps keep everything fresh and light. Store any leftovers covered in the fridge. They’ll keep for a couple of days, assuming you don’t devour the whole thing in one sitting. Also, don’t rush the cooling process—give the pie its chill time in the fridge, or the filling might not set properly. Patience is key here!
Make It Your Own
- Swap the Irish whiskey with a smooth bourbon for a different kind of warmth and aroma.
- Add a tablespoon of cocoa powder to the filling for a chocolatey twist that complements the whiskey perfectly.
- Introduce a spiced element by sprinkling a dash of nutmeg or cinnamon into the filling for a cozy, holiday vibe.
- Try a graham cracker crust instead of traditional pastry for a sweeter, more rustic taste.
If you try this, I’d love to hear how it turns out—drop a comment or tag me on social media! Your feedback makes my day and helps me keep sharing recipes you’ll love. Enjoy your baking adventure!
Related update: Irish Whiskey Pie
Related update: Pumpkin Pecan Streusel Cake - gluten free, soy free, vegan
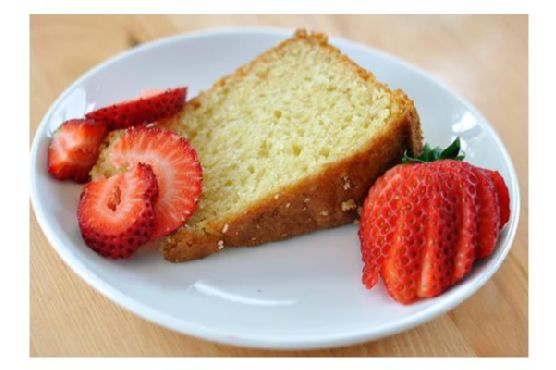
Some days, you just need a cake that feels like a warm hug, you know? It was one of those dreary Sunday afternoons when I found myself staring at the contents of my pantry, craving something sweet but not too fussy. The kind of cake you can whip up without a trip to the store, and this Yogurt Cake was the answer. It’s the sort of bake that feels like it should take a whole afternoon but actually comes together in just an hour. Light and airy with just a hint of nutmeg, it’s a comforting treat that’s perfect for any day of the week — especially when life is a little hectic and you need a quick, no-brainer dessert.
Jump to Recipe
What You’ll Need
This cake is all about simplicity. Chances are you already have most of these ingredients hanging out in your pantry or fridge:
- Full-fat yogurt
- Olive oil
- Sugar
- Eggs
- Vanilla
- Flour
- Baking powder
- Baking soda
- Salt
- Nutmeg
How to Make Yogurt Cake
- Preheat your oven to 350°F. Trust me, you don’t want to forget this step and then wait impatiently while the batter sits there looking at you.
- Lightly grease a 9-inch springform pan with baking spray or a little bit of oil. Then, line the bottom with parchment to avoid any sticky situations.
- In a good-sized bowl, whisk together the yogurt, olive oil, sugar, eggs, and vanilla. The mixture should be smooth and slightly frothy.
- Now, sprinkle the flour, baking powder, baking soda, salt, and nutmeg over your wet ingredients. Stir until you’ve got a smooth batter that’s lump-free. Don’t go overboard with stirring, though — just enough to bring it all together.
- Pour the batter into your prepped pan. Slide it into the oven and let the magic happen for 50 to 60 minutes. If it looks like the top is browning too fast, just cover it with some foil.
- The cake is done when a tester or toothpick inserted in the center comes out clean. Let it cool on a rack for about 10 minutes before removing it from the pan.
Cook’s Notes
Here’s a little tip: make sure your eggs and yogurt are at room temperature for the best texture. And don’t skip the parchment paper lining — it makes removing the cake so much easier. If you’re planning to serve it later, this cake stays wonderfully moist for up to three days when tightly wrapped and stored at room temperature. You can also freeze slices wrapped individually — they’ll keep for about a month.
Make It Your Own
- Berry Burst: Fold in a cup of fresh or frozen berries (no need to thaw) for a burst of fruity goodness.
- Citrus Twist: Add the zest of a lemon or orange to the batter for a citrusy kick.
- Nuttier Flavor: Swap out some of the olive oil for melted coconut oil if that’s more your vibe.
- Spice It Up: Add a teaspoon of cinnamon along with the nutmeg for a spicier, warmer flavor profile.
If you try this, I’d love to hear how it turns out — drop a comment or tag me! Let’s make baking fun and delicious together, one yogurt cake at a time. Happy baking!
Related update: Yogurt Cake
Related update: Irish Whiskey Pie
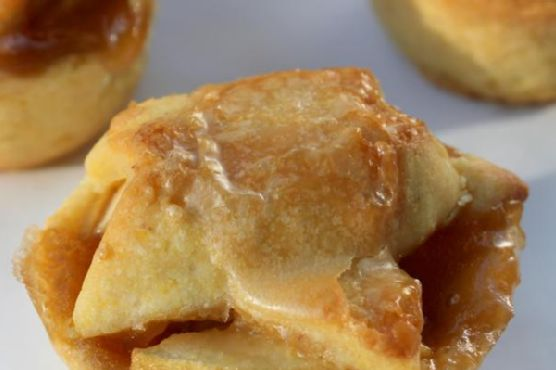
Okay, so picture this: It’s a chilly autumn afternoon, and I’ve just returned from the farmer’s market with a bag full of crisp, tart apples. I’m totally in the mood for some fall baking therapy, but I need something that doesn’t have me glued to the oven for hours. Enter these adorable Brandy-Apple Mini Pies with Cornmeal Crust. They’re the perfect mix of cozy and impressive, with a buttery, cornmeal crust that crumbles just right and a filling that’s sweet with a hint of boozy warmth. They’re just the ticket for a quick baking session that still feels special—plus, they make your whole kitchen smell like the best parts of fall. And the best part? They’re mini, so you can totally have more than one. Intrigued? Jump to Recipe
What You’ll Need
You’re in luck, because there’s a good chance you’ve got most of these goodies chilling in your pantry or fridge already. Here’s what you’ll need:
- 1 cup all-purpose flour
- 1/2 cup yellow cornmeal
- 1/4 cup powdered sugar
- 1/2 tsp salt
- 1/4 cup vegetable shortening
- 3-4 Tb. ice water
- 3 cups green diced tart apples (like Granny Smith)
- 1/2 cup unsalted butter
- 2 Tb. brandy
- 1/2 cup brown sugar
- 1 tsp pumpkin pie spice
- 1 Tb. sugar
How to Make Brandy-Apple Mini Pies With Cornmeal Crust
- Start by tossing the flour, cornmeal, powdered sugar, and salt into your food processor. Pulse it a couple of times to mix everything together.
- Cut the shortening into small cubes and add it to the processor. Pulse again until the mixture resembles coarse crumbs.
- Add 3 tablespoons of ice water and pulse until the dough starts to come together. If it looks a little dry, add another tablespoon of water.
- Lay out a sheet of plastic wrap and turn the dough onto it. Divide it into two pieces—one larger and one smaller, about 80/20 split.
- Shape each piece into a disk, wrap them snugly, and pop them into the fridge for at least 30 minutes.
- While the dough chills, peel and dice your apples. Preheat your oven to 425°F.
- In a small saucepan over medium heat, blend together the butter, brandy, brown sugar, pumpkin pie spice, and sugar. Stir until it simmers, then pour this sweet mixture over the apples, tossing to coat.
- Take the larger dough disk out of the fridge and roll it out on a well-floured surface to about 1/8 inch thick.
- Use a drinking glass with a 3-4 inch rim to cut out circles of dough. Press these into your muffin tins. Gather and re-roll the dough scraps to get 14-16 crusts.
- Fill each mini crust with a generous scoop of the apple mixture.
- Roll out the smaller dough piece and use a cute 2-3 inch cookie cutter to make tops. Place these over each pie and brush with any leftover syrup from the apple bowl.
- Bake for 15 minutes, then lower the oven temp to 350°F and bake an additional 15 minutes. If they look perfectly golden after the first 15, cover them with foil to prevent over-browning.
- Cool the pies completely in the muffin tin before attempting to remove them. Trust me, no one wants to see these beauties fall apart!
Cook’s Notes
Silicone muffin pans are your best friend here—they make getting the pies out a breeze. If you’re using metal pans, gently run a sharp knife around the edges, and oh-so-carefully ease each pie out into your hand one at a time. If you’re eyeing a full-size pie instead of minis, just double the apples and syrup. Roll out the dough into a bottom crust and top, bake at 425°F for 30 minutes, then 350°F for another 30.
Make It Your Own
- Swap the brandy for a splash of bourbon or whiskey for a deeper, smokier flavor.
- Try using pears instead of apples for a sweet, juicy twist.
- Add a handful of chopped pecans to the apple mixture for some nutty crunch.
- Sprinkle a little coarse sea salt on top before baking for that sweet-salty combo we all secretly obsess over.
If you give these mini pies a spin, I’d love to hear how they turn out for you! Drop a comment below or tag me in your delicious creations. Happy baking!
Related update: Brandy-Apple Mini Pies With Cornmeal Crust
Related update: Yogurt Cake
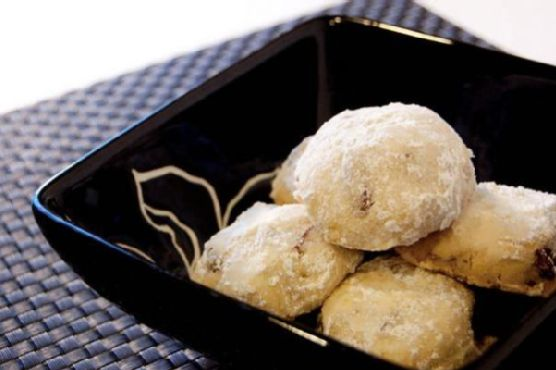
I was standing in my kitchen one Sunday afternoon, staring at the latest cookbook I’d impulsively bought. You know the feeling — you’ve got that itch to bake something, but the ingredients list reads like a novel. So there I was, craving something sweet, but not ready for a grocery run. A little lightbulb moment hit me when I remembered these Mexican Wedding Cookies — they’re a breeze to make and taste like pure joy wrapped in sugar. The kind of recipe that makes you feel accomplished without breaking a sweat. They’re like a warm hug, perfect for when you need a bit of comfort. Now, imagine sinking your teeth into a buttery, nutty cookie, with a snowy coating of sugar. You’re welcome.
Jump to Recipe
What You’ll Need
Honestly, you probably have most of these right in your kitchen. These cookies are all about keeping it simple yet delicious. Here’s what you need:
- Butter – The star of the show for that rich flavor.
- Powdered sugar – Twice; once for the dough, once for rolling.
- Vanilla extract – Just a splash for depth.
- All-purpose flour – The backbone of any good cookie.
- Pecans – Coarsely chopped for that lovely crunch.
- Ground cinnamon – For a little warmth in the sugar coating.
How to Make Authentic Mexican Wedding Cookies
- Start by beating the butter in a large bowl using an electric mixer. You want it to be light and fluffy, like clouds on a summer day.
- Add 1/2 cup of powdered sugar and a splash of vanilla. Keep beating until everything is well blended and smells heavenly.
- Mix in the flour bit by bit, then fold in the pecans. The dough should come together nicely — feel free to steal a taste test!
- Divide the dough in half and roll each into a ball. Wrap them in plastic and let them chill in the fridge for about 30 minutes.
- Preheat your oven to 350°F (or 180°C if you’re in my neck of the woods).
- While waiting, whisk the remaining 1 1/2 cups of powdered sugar with the cinnamon in a pie dish. This will be your magical coating.
- Take half of the chilled dough and roll it into small balls, about 2 teaspoons each. Line them up on a baking sheet, giving them a little room to breathe.
- Bake for about 18 minutes. You’re looking for golden brown bottoms and just a hint of gold on top.
- Let them cool on the sheet for 5 minutes, then gently toss in the cinnamon sugar while still warm. It’s like a sugar spa treatment.
- Transfer to a rack to cool completely, then repeat with the other half of the dough. Dust any leftover cinnamon sugar over the cookies before serving.
Cook’s Notes
Grab a good-quality vanilla extract, it makes a difference. Pecans can be swapped out for walnuts if you’re in a pinch, but pecans do have that melt-in-your-mouth quality that’s hard to beat. To store, keep them in an airtight container — if they last that long! They freeze well too, just defrost at room temperature. If you’re making ahead, you can chill the dough overnight. But be warned, you might start sneaking little bites from the fridge.
Make It Your Own
- Almond Lovers: Swap pecans for almonds, and maybe add a dash of almond extract for a nutty twist.
- Chocolate Dream: Add mini chocolate chips to the dough for a sweet surprise in every bite.
- Orange Zest: Add a teaspoon of orange zest to the dough for a citrusy zing.
- Gluten-Free: Use a cup-for-cup gluten-free flour blend — easy peasy!
If you try these, I’d love to hear how they turn out for you — drop a comment or tag me! There’s something magical about sharing a recipe and seeing it come to life in other kitchens. Enjoy, lovely bakers!
Related update: Authentic Mexican Wedding Cookies
Related update: Layered Poppy Seed Pastries
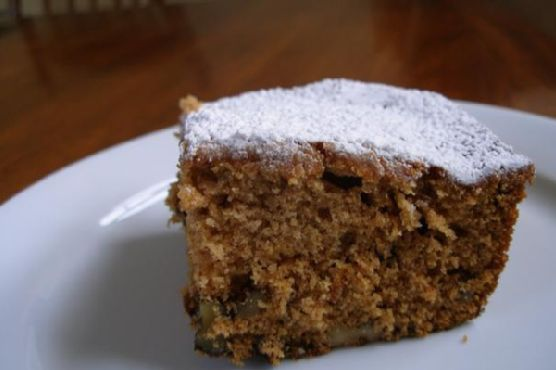
It was one of those chilly fall afternoons where the sky promised a drizzle, but I had a craving that promised warmth—something comforting to fill the kitchen with cozy scents. As I rummaged through my pantry, I found a jar of applesauce that sparked the idea of a nostalgic, spiced cake. This applesauce cake is the kind of recipe that wraps you in a hug from the first bite. It’s ridiculously easy to whip up, and before you know it, your kitchen will smell like pure autumn bliss. Trust me, this cake is the one you’ll want to cozy up with a hot cup of tea.
Jump to Recipe
What You’ll Need
This cake is built on pantry staples, so there’s a good chance you won’t need to run to the store. It’s all about the applesauce and cinnamon—they’re the stars of the show.
- 1 cup brown sugar
- 1 teaspoon cinnamon
- 1 teaspoon baking soda
- 1/2 cup raisins
- 1/2 cup red cherries (reserve some for decoration)
- 1 cup white sugar
- 1 cup butter, softened
- 2 eggs
- 2 cups applesauce
- 3 cups plain flour
- 1 cup nuts (pecans work beautifully, reserve some for decoration)
- 1 teaspoon vanilla extract
How to Make Applesauce Cake
- Preheat your oven to 325°F. Grab your trusty cake pan and give it a generous greasing, followed by a dusting of flour. This ensures no tragic sticking incidents later.
- In a mixing bowl, cream together the butter and both sugars. The mixture should be light and fluffy, almost like a sweet cloud.
- Add in the eggs, one at a time, beating well after each addition. You’re aiming for a smooth, unified batter here.
- Stir in the pure vanilla extract and the applesauce. You’ll notice the batter starts to look luscious and inviting.
- In a separate bowl, whisk together the flour, cinnamon, and baking soda. Carefully fold this dry mixture into the wet ingredients until just combined.
- Gently fold in the raisins, cherries, and nuts. The batter should look speckled with fruity and nutty goodness.
- Pour this aromatic batter into your prepared cake pan. Smooth out the top and sprinkle on those reserved cherries and nuts for a pop of color and texture.
- Bake in the preheated oven for about 1 1/2 hours. The cake is done when it’s golden and a skewer inserted into the center comes out clean.
- Let the cake cool in the pan for a few minutes before transferring it to a wire rack. The wait will be the hardest part!
Cook’s Notes
This cake keeps beautifully, making it an excellent make-ahead option. Just wrap it tightly in plastic wrap and store it in the fridge, where it can last for several days. It actually tastes even better the next day as the flavors meld together. If you find yourself with leftovers (a rarity, let me assure you), they’re perfect with a scoop of vanilla ice cream.
- Don’t skip greasing and flouring the pan; it saves you from the heartbreak of half the cake sticking.
- If your raisins are a bit dry, soak them in hot water for about 10 minutes and then drain them before adding to the batter.
- Feel free to substitute pecans with walnuts if you have those on hand.
Make It Your Own
- If you’re not into pecans, swap them out for walnuts or even hazelnuts for a different nutty note.
- For a boozy twist, soak the raisins in rum before adding them to the batter.
- Replace half the flour with whole wheat flour to add a rustic texture and flavor.
- Try adding a teaspoon of ground ginger or nutmeg for an extra spice kick.
If you try this, I’d love to hear how it turns out—drop a comment or tag me! I’m already excited to see your takes on this cozy classic. Happy baking!
Related update: Applesauce Cake
Related update: Chocolate Chip Peanut Butter Banana Cookies
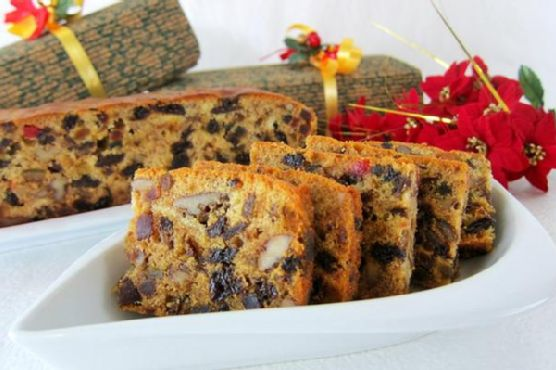
It was one of those December weekends when the chill in the air nudges you to do something cozy and delicious. I found myself in the kitchen, rummaging for ideas to fill the house with the quintessential aroma of the holidays. That’s when I remembered the Christmas Fruit Cake — a recipe that’s not only indulgent and rich but also incredibly forgiving. This cake becomes the centerpiece of any celebration, and the best part? You can make it ahead, giving you more time to sip on that mulled wine while the cake matures into something truly spectacular.
Jump to Recipe
What You’ll Need
Before we dive into the holiday spirit, let’s gather the goods. What I adore about this recipe is that it often feels like a treasure hunt in your pantry. You might already have most of these ingredients, waiting to transform into something magical.
- Butter – for that undeniable richness
- Sugar – sweetens and balances the spices
- Eggs – to give the cake structure
- Plain flour – sifted with baking powder for a light crumb
- Baking powder – keeps things lofty
- Mixed spice – the heart of any Christmas bake
- Dried mixed fruit – the star of the show
- Pitted prunes – cut into pieces for extra moisture
- Walnuts – chopped, adding a delightful crunch
- Rum – because holiday cheer is essential
- Orange juice – for a zesty kick
- Orange zest – from one orange, to enhance the citrus notes
- Vanilla extract – a warm, sweet background
- Two layers of parchment paper – to line an 8″ square cake tin
How to Make Christmas Fruit Cake
Here’s where the magic happens. Each step is designed not just to guide you but to make you feel confident and capable.
- Start by lining your 8″ square cake tin with two layers of parchment paper. This ensures your cake doesn’t stick and makes for a smooth release.
- In a large bowl, mix the dried mixed fruit and pitted prunes with about 8 tablespoons of rum. Cover this mixture with cling wrap and let it sit overnight. This soak is where the fruits absorb all that boozy goodness.
- The following day, beat the butter and sugar together until light and fluffy. This should take on a pale yellow hue as air is incorporated.
- Slowly add in the rum, orange juice, orange zest, and vanilla extract. Mix until everything is well combined, and a sweet, citrusy aroma fills the air.
- Add the eggs one at a time, ensuring they are well incorporated before adding the next. Scrape down the sides of the bowl as you go.
- Take 1/4 of the flour and coat the soaked fruit mixture. This helps the fruit stay suspended while baking.
- Gradually add the remaining flour and mixed spice to the butter mixture. Mix until the batter comes together; it should be thick and fragrant.
- Fold in the fruit mixture and chopped walnuts using a rubber spatula. Pour the batter into the prepared cake tin and bang it on the table once to settle the contents evenly.
- Bake in a preheated oven at 160°C for about 1 1/2 hours. When the cake starts to turn brown after 30-40 minutes, cover it loosely with foil to prevent over-browning, and continue baking.
- As soon as you take the cake out of the oven, pour 3-4 tablespoons of rum over it. Let it cool, then turn it out from the tin. Wrap it in cling wrap and store in the fridge.
- For the next few days, pour 2-3 tablespoons of rum over the cake every three days until it’s time to serve or gift it. This keeps the cake moist and enhances the flavor.
Cook’s Notes
This cake is your holiday secret weapon. It’s forgiving if you need to make substitutions or if you forget to soak the fruit overnight. If you’re short on time, you can microwave the fruit and rum for a few seconds to help the process along. This cake stores beautifully in the fridge, wrapped tightly in cling wrap or foil. It actually tastes better as it sits, so don’t worry about making it a week or so ahead. Freezing is also an option; just make sure you bring it to room temperature and add a fresh splash of rum before serving.
Make It Your Own
While this cake is fantastic as is, sometimes a little twist is just what you need:
- Swap the rum for brandy if you prefer a different kind of warmth.
- Replace walnuts with pecans for a softer crunch.
- Add in some shredded coconut with the fruit for a tropical flair.
- Use dried cherries or cranberries instead of some of the mixed fruit for a tangy zip.
If you try this, I’d love to hear how it turns out — drop a comment or tag me on social media! Your holiday table just got a whole lot more festive. Happy baking!
Related update: Christmas Fruit Cake
Related update: Applesauce Cake
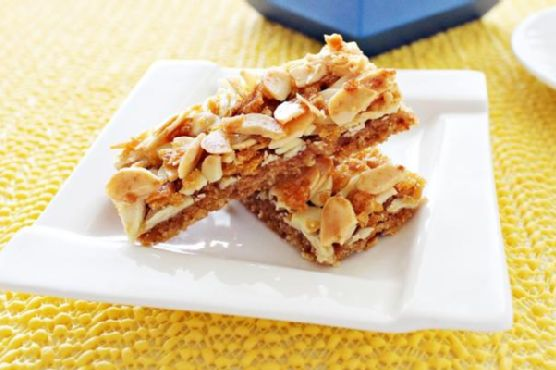
I remember one of those whirlwind Wednesday evenings, you know the type — when you get home, realize you need something sweet to take to the office the next day, and have approximately no time to do it. Enter these Almond Cookie Bars. They’re like the lovely offspring of a tempting cookie and a sophisticated tart, but they’re actually super simple to make. Just the right amount of nutty crunch meets a hint of sweet apricot. Plus, they look kind of fancy for something that doesn’t require any complicated steps. Seriously, if I can pull these off during a midweek scramble, you can too!
Jump to Recipe
What You’ll Need
Chances are you already have most of this at home, except maybe the almond flakes. The rest? Probably hanging out in your pantry or fridge.
- 100g butter, softened
- 50g brown sugar
- 70g plain flour
- 70g wholemeal flour
- 2 tbsp fresh milk
- 100g oatmeal cornflakes
- 50g almond flakes
- 100g apricot gel/jam
- 400g cookie base
How to Make Almond Cookie Bar
- Start by beating the butter and brown sugar together until the mixture is light and fluffy. This should take about 2 minutes with an electric mixer — it’s all about that creamy texture.
- In a separate bowl, combine the plain flour and wholemeal flour. Then, gently fold this dry mixture into the butter-sugar mixture using a rubber spatula. Knead it gently until you have a soft dough.
- Turn the dough out onto a floured surface or sandwich it between two plastic sheets (trust me, it’s less messy!). Roll it into a square shape and chill it for at least an hour. This helps the dough firm up for easier handling.
- Once chilled, place the dough on non-stick paper and roll it out to about 3mm thick. Prick all over with a fork—this keeps it from puffing up in weird places.
- Bake in a preheated oven at 180°C for about 15-18 minutes, or until the edges are just turning brown and the kitchen smells like buttery heaven. Set aside to cool.
- Once the biscuit base is cool, spread the apricot gel/jam over the top, ensuring an even layer.
- Mix the oatmeal cornflakes and almond flakes. Spread this topping evenly over the apricot layer using a palette knife, pressing down gently.
- Return the whole thing to the oven and bake for another 15 minutes until the topping is golden and fragrant. Let it cool completely before cutting into bars — patience is key here for neat slices!
Cook’s Notes
These bars are pretty forgiving, but here’s what I’ve learned along the way:
- Make sure your butter is truly softened, not melted. This affects the dough texture and baking consistency.
- Chilling the dough isn’t optional — it helps prevent spreading and keeps your bars nice and thick.
- You can store these in an airtight container for up to a week, but let’s be real, they probably won’t last that long. They also freeze well for longer storage.
- For a quick fix, you can even make the dough a day ahead and leave it in the fridge overnight.
Make It Your Own
Want to switch things up? Here are a few variations to keep things interesting:
- Berry Swap: Substitute the apricot gel with raspberry or blackberry jam for a different fruity twist.
- Nutty Overload: Add a handful of chopped pecans or walnuts to the almond-oat topping for extra crunch.
- Spice It Up: Stir a teaspoon of cinnamon or cardamom into the flour mixture for a warm spice note.
- Chocolate Drizzle: Once cooled, drizzle with melted dark chocolate for a fancy finish.
If you try this, I’d love to hear how it turns out — drop a comment or tag me! These bars have become a staple in my sweet treat rotation, and I hope they bring a little almond-y joy to your day too.
Related update: Almond Cookie Bar
Related update: Christmas Fruit Cake

The other day, I found myself on a typical Wednesday evening with a sudden, fierce craving for something warm, cheesy, and a little herby. The kind of comfort food you can savor with a cup of tea while staring out the window on a rainy day. As my pantry was a bit sparse, I knew I needed something quick and easy, yet utterly satisfying. That’s when Savory Cheese Dill Scones came to mind. They’re those magical little bites that feel fancy enough for company but are secretively easy to pull together. The kind of bake that makes you feel like a kitchen genius with minimal effort. So, let’s get scone-ing!
Jump to Recipe
What You’ll Need
You might be surprised how many of these you already have in your kitchen! The usual suspects of baking are here, alongside the stars of the show: cheese and dill. Here’s what you’ll need:
- 2 cups unbleached flour
- 1/2 cup whole wheat flour
- 1 tablespoon baking powder
- 1/4 teaspoon baking soda
- 1/2 teaspoon black pepper
- 1 tablespoon sugar
- 1/2 cup cold butter, cut into small pieces
- 3/4 cup buttermilk
- 1/2 cup coarsely shredded cheddar cheese
- 1/2 cup cottage cheese
- 3 tablespoons chopped fresh dill
- 1 small shallot, finely chopped
How to Make Savory Cheese Dill Scones
- Preheat your oven to 375°F, placing the rack in the middle position. This gives your scones the perfect balance of heat, making them rise nicely while staying tender and light.
- In a large bowl, whisk together the unbleached flour, whole wheat flour, baking powder, baking soda, black pepper, and sugar. This dry mix is your scone foundation.
- Add the chopped butter into the flour mixture. Use your fingers or a pastry cutter to blend until the mix resembles coarse crumbs. You want to see little bits of butter peeking through.
- Stir in both the cheddar and cottage cheese, followed by the fresh dill and shallot. The aroma will start making promises your taste buds will thank you for later.
- Pour in the buttermilk and gently fold the mixture with a spatula until just combined. Avoid overmixing; a rough dough will yield tender scones.
- Turn the dough out onto a floured surface and knead gently, just enough to bring it together — about 4 or 5 times.
- Pat the dough into a circle, approximately 1 inch thick. Cut into 8 wedges and place them on a baking sheet lined with parchment paper.
- Bake in your preheated oven for 20-25 minutes, until the scones are golden and the kitchen smells like heaven. Serve warm and swoon.
Cook’s Notes
These scones are best on the day they’re made, but if you have leftovers (lucky you!), store them in an airtight container for a day or two. They make a delightful breakfast, slightly warmed with a pat of butter. You can also freeze the unbaked scones on a tray, then transfer them to a bag once they’re solid. Bake them from frozen, adding a few extra minutes to the cooking time. Common pitfalls? Overworking the dough or letting the butter soften too much. Keep it chill for the chillest scones!
Make It Your Own
Here are some delicious twists to customize your scones:
- Swap the dill for chopped chives if you’re in a more oniony mood.
- Use gruyere instead of cheddar for a rich, nutty take.
- Add a handful of crispy bacon bits for a savory delight.
- Mix in some sun-dried tomatoes for a Mediterranean vibe.
If you try this, I’d love to hear how it turns out — drop a comment or tag me! Remember, cooking is just like life: best when shared and savored. Enjoy your baking adventure!
Related update: Savory Cheese Dill Scones
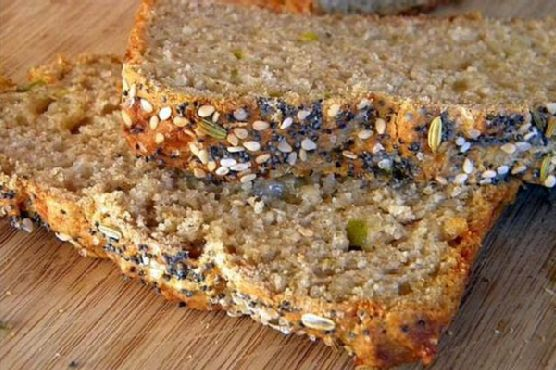
I remember last fall when I was caught in a total downpour on my way back from the farmers’ market. I dashed inside my apartment, dripping and shivering, with a bag full of local cheese and a can of green chiles I had impulsively picked up. My mind immediately went to a warm, comforting loaf of bread, something easy yet satisfying. Enter Cheddar Chile Beer Bread. This recipe is your best friend when you need something hearty but don’t want to fuss with yeast or kneading. It comes together in a flash, and that extra sharp cheddar paired with the zing from the chiles makes it feel special and cozy. Plus, it’s the kind of bread that fills your kitchen with the most *amazing* aroma, making it worth every second of waiting while it bakes.
Jump to Recipe
What You’ll Need
Chances are, most of these ingredients are lurking in your pantry right now, just waiting for their moment to shine. Here’s what you’ll need:
- 1 cup whole wheat flour
- 1 cup all-purpose flour
- 1 tablespoon baking powder
- 1 teaspoon salt
- 1/2 teaspoon dry mustard
- 1 can (12 oz) beer (use what you love to drink!)
- 1 cup white shredded extra sharp cheddar cheese
- 1 can (4 oz) canned green chiles, drained
- 1 tablespoon sesame seeds
- 1 tablespoon poppy seeds
- 1/2 teaspoon caraway seeds
- 1 teaspoon sea salt
How to Make Cheddar Chile Beer Bread
- Preheat your oven to 425 degrees. While it warms up, grease a loaf pan to make sure our bread doesn’t stick.
- In a large mixing bowl, whisk together the whole wheat flour, all-purpose flour, baking powder, salt, and dry mustard. This will be the backbone of your bread.
- Add the green chiles, shredded cheddar, and the beer to the dry mix. Stir until everything comes together. Expect a super thick batter that’s a good arm workout!
- Scrape the thick batter into your prepared loaf pan. Spread it out evenly so it bakes up nice and uniform.
- Now for the fun part: sprinkle the sesame seeds, poppy seeds, and caraway seeds over the top. Finish with a sprinkle of sea salt. Use your fingers to gently press these into the batter so they stick while baking.
- Lower your oven temperature to 400 degrees and pop the loaf in. Bake for 45-50 minutes, and let the aromas take over. It’s done when a toothpick inserted into the center comes out clean.
- Let the bread cool on a wire rack for about 15 minutes, then turn it out of the pan. Try to resist diving in right away, but I give you full permission to sample a slice while it’s still warm!
Cook’s Notes
A few little tips: using a beer you enjoy drinking will really make a difference as it flavors the bread. If the batter feels too thick, that’s totally normal. It might seem like you’ve done something wrong, but trust the process, it will work out. The seeds on top not only add flavor, but also a fun texture contrast to the soft, cheesy bread. This loaf is best the day it’s made, but if you have leftovers, toast them up the next morning with a bit of butter—it’s heavenly!
Make It Your Own
Here are a few ways to switch it up:
- Spicy Kick: Add a chopped jalapeño to the mix for some extra heat.
- Herby Twist: Toss in a tablespoon of dried herbs like rosemary or thyme with the dry ingredients.
- Cheese Swap: Use pepper jack or gouda instead of cheddar for a different cheesy flavor.
- Gluten-Free Version: Substitute the flours with a 1:1 gluten-free blend.
If you try this, I’d love to hear how it turns out—drop a comment or tag me in your photos! Sharing is caring, especially when it’s as delicious as this. Enjoy every bite, friends!
Related update: Cheddar Chile Beer Bread
Related update: Fenugreek Roti
Related update: Savory Cheese Dill Scones
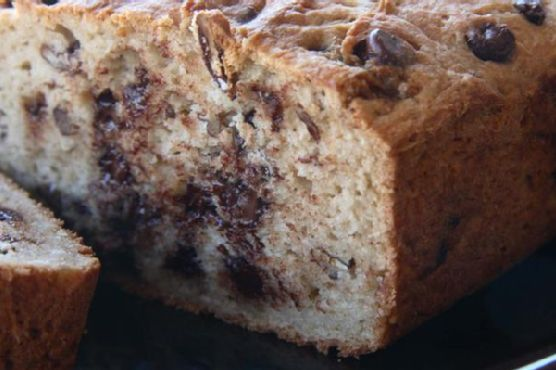
One chilly evening last fall, I found myself in the kitchen, craving something warm and comforting. My cupboard was a bit of a disaster, full of bits and bobs from baking adventures past. A half-used bag of gluten-free flour, some chocolate chips I had been furtively snacking on, and a nearly empty jar of pecans were calling to me. It was definitely a “use what you have” kind of night. As I pulled ingredients together, a gluten-free chocolate-pecan quickbread was born — a delightful mix of melty chocolate and crunchy pecans, wrapped in a tender, slightly sweet loaf. The best part? It made my entire kitchen smell like a cozy bakery on a crisp autumn day. If you’re looking for something that’s both indulgent and easy to whip up, this quickbread might just be your new favorite.
Jump to Recipe
What You’ll Need
The beauty of this quickbread lies in its simplicity. You likely have most of these ingredients on hand:
- Butter, for that irresistible richness
- Gluten-free flour, to keep things friendly for all tummies
- Sugar and brown sugar, for sweetness and a hint of molasses flavor
- Baking soda, to give our loaf a little lift
- Salt, to balance everything out
- Semi-sweet chocolate chips, because chocolate makes everything better
- Pecans, for that nutty crunch
- Eggs, to bind and add moisture
- Unsweetened applesauce, a sneaky moisture-hero
- Vanilla-honey Greek yogurt, for tang and tenderness
- Vanilla extract, because why not double down on vanilla goodness?
How to Make Gluten-Free Chocolate-Pecan Quickbread
- First things first, preheat your oven to 350 degrees Fahrenheit. Butter your trusty 5″x9″ loaf pan and set it aside.
- Gently heat the butter until it’s just melted. Set it aside to cool — you don’t want scrambled eggs in your bread!
- In a large bowl, combine the gluten-free flour, sugar, brown sugar, baking soda, and salt. Give it a good whisk to break up any lumps.
- Stir in the semi-sweet chocolate chips and pecans. This is starting to look delicious already, isn’t it?
- In a separate bowl, whisk together the eggs, applesauce, yogurt, vanilla extract, and the cooled melted butter.
- Pour the wet mixture into the dry ingredients and stir until just combined. Be gentle here; over-mixing is not our friend.
- Pour the batter into the prepared loaf pan, smoothing out the top with a spatula.
- Bake in your preheated oven for about an hour, or until a toothpick inserted into the center comes out clean. The top should be golden and your kitchen will smell heavenly.
- Allow the loaf to cool in the pan for 10 minutes before transferring it to a wire rack to cool completely. Patience, my friend!
Cook’s Notes
Let’s talk about some little tips that make a big difference. First, feel free to use whatever gluten-free flour blend you love; they all work here. Just make sure it has xanthan gum in it, or add a teaspoon if it doesn’t. If your loaf turns out a bit too crumbly, you may have over-mixed, which is easy to do. Treat the batter gently! As for storage, keep your quickbread in an airtight container at room temperature for up to three days. It also freezes beautifully — just slice and wrap individual pieces for easy snacking later.
Make It Your Own
Here’s where you get to play around:
- Swap the pecans for walnuts if you’re feeling nutty.
- Use dark chocolate chips for a more intense chocolate experience.
- Add a teaspoon of cinnamon to the dry mix for a warm, spicy touch.
- Substitute the vanilla-honey Greek yogurt for plain Greek yogurt and an extra teaspoon of honey if that’s what you have on hand.
If you try this, I’d love to hear how it turns out — drop a comment or tag me! Happy baking, and may your kitchen be filled with the sweet aroma of chocolate-pecan goodness.
Related update: Gluten-Free Chocolate-Pecan Quickbread
Related update: Candy Cane Chocolate Marshmallows
Related update: Braised Pork: Filipino Humba