
Last Tuesday, I found myself staring into the fridge at 6 p.m. with a growling stomach and no dinner plans. You know the feeling, right? That weeknight scramble where you’re just trying to conjure up something quick yet satisfying. Lucky for me, an almost forgotten can of tuna and some leftover boiled eggs saved the day. Enter these deliciously simple Tuna Stuffed Hard-Boiled Eggs—a perfect blend of creamy and tangy, ready in a flash and impressive enough that you might actually look forward to making them again. Whether you’re crafting a light lunch or a snack for a spontaneous get-together, these little bites are exactly what you need.
Jump to Recipe
What You’ll Need
The beauty here is that you probably have all these ingredients lounging in your kitchen. It’s a simple yet delightful list that packs a punch.
- 6 hard-boiled eggs
- 1 can of tuna, drained
- 1/4 cup finely chopped onion
- 1/4 cup grated carrot
- 2 tablespoons chopped parsley
- 1 tablespoon fresh lemon juice
- 1/4 cup corn kernels for garnish
How to Make Tuna Stuffed Hard-Boiled Eggs
- Start by peeling those perfectly boiled eggs and slicing them in half lengthwise. Scoop the yolks into a bowl and place the whites on a plate.
- In the bowl with the yolks, add the drained tuna, chopped onion, grated carrot, parsley, and a squeeze of fresh lemon juice. Mash everything together with a fork until it’s well combined and creamy.
- Spoon or pipe the tuna mixture back into the egg whites, filling each hollow generously. You’ll want the filling to have a slightly mounded look.
- To finish, sprinkle the tops with corn kernels. They add a sweet pop and a dash of color—plus, who doesn’t love a little crunch?
Cook’s Notes
If you’re boiling the eggs specifically for this recipe, a 9-minute boil should give you that perfect firm yolk. To prevent overcooking them (nobody likes a green-tinged yolk!), immediately plunge them into an ice bath after boiling.
- For a smoother filling, try blending the mixture in a food processor. It’s not necessary, but it adds a touch of elegance.
- You can make the filling a day ahead—just store it in an airtight container in the fridge. Stuff the eggs just before serving for the freshest result.
- Leftovers can be stored in the fridge for up to 2 days, but honestly, they’re so good, you probably won’t have any!
Make It Your Own
- Swap the tuna for canned salmon or even shredded chicken for a different flavor profile.
- Love a bit of heat? Add a spoonful of sriracha or a pinch of cayenne pepper to the tuna mixture for a spicy kick.
- If you’re a fan of herbs, try swapping parsley for dill or basil for a fresh twist.
- For added creaminess, mix in a tablespoon of mayo or Greek yogurt with the tuna filling.
If you try this, I’d love to hear how it turns out—drop a comment or tag me! These eggs might just become your new go-to when you’re in a pinch. Happy cooking!
Related update: Tuna Stuffed Hard-Boiled Eggs
Related update: Warm Spinach Artichoke Dip

One Thursday evening, I found myself staring at my pantry, hoping for culinary inspiration to jump out at me. You know how it goes — those nights when you’re craving something more exciting than a sandwich but don’t want to spend hours in the kitchen. That’s when my memory flashed back to a street food adventure in Vietnam. I remembered devouring these crispy, savory pancakes called Bánh Xèo, filled with fresh veggies and a fragrant dipping sauce that tingled the senses. It was the perfect balance of crispy, soft, and tangy. So, I decided to recreate that magic. This recipe is both comforting and impressive without demanding too much of your time. Perfect for when you want to feel like you’ve traveled the world from your kitchen!
Jump to Recipe
What You’ll Need
Ever had one of those moments when you think you have nothing to cook, but then realize you actually have the makings of a feast? This is one of those recipes. Chances are you already have most of this in your kitchen, and the rest are worth adding to your pantry!
- Brown rice flour – the backbone for a gluten-free batter.
- Coconut milk – for that creamy texture and subtle sweetness.
- Tamari sauce – adds depth to the dipping sauce.
- Egg – helps bind the batter.
- Sea salt
- Turmeric – for color and a hint of earthiness.
- Cayenne – just a pinch for a touch of heat.
- Green fresh chili – adds freshness and zing.
- Carrot, daikon radish, and snow peas – for the filling, adding crunch and nutrition.
- Mung bean sprouts – because they make everything better.
- Fresh basil, mint, and parsley leaves – an aromatic, herbal trio.
- Trimmed enoki mushrooms – delicate and perfect for texture.
- Garlic and fresh ginger – because no good dish is complete without them.
- Red fresh chilies – for a spicy kick in the sauce.
- Lime juice – lifts everything with its citrusy zest.
- Rice vinegar – for a tang in the sauce.
- Sesame oil – for richness in the sauce.
How to Make Vietnamese Pancakes with Vegetables, Herbs and a Fragrant Dipping Sauce (Bánh Xèo)
- Start by making the pancake batter: In a mixing bowl, whisk together the rice flour, egg, sea salt, turmeric, cayenne, and green chili. Gradually add the coconut milk, whisking as you go. Aim for a smooth, pourable consistency. If it’s too thick, a splash of water does wonders. Cover the bowl and set it aside to rest.
- Now, onto the sauce: Combine the tamari sauce, lime juice, rice vinegar, minced garlic, grated ginger, chopped red chilies, and a drizzle of sesame oil. Whisk until all the flavors meld together and set aside. This fragrant sauce will take your pancakes to another level.
- For the filling, mix the julienned carrot, daikon radish, thinly sliced green onions, chopped green chilies, and sliced snow peas in a bowl. In another bowl, gather the chopped fresh herbs and have the mung bean sprouts and enoki mushrooms ready to go.
- Time to cook the pancakes! Heat a teaspoon of sesame oil in a non-stick skillet over medium heat. Once hot, pour in about 1/2 cup of batter. Use the bottom of the ladle to spread it into a 6 to 8-inch circle. Cook for 6 to 8 minutes, waiting for small bubbles to pop and the edges to turn crispy and golden brown. Flip and cook the other side for another couple of minutes. Repeat with the remaining batter, keeping the cooked pancakes warm in a 150°F oven.
- To serve, layer a portion of the vegetable mixture and herbs on one half of the pancake. Drizzle with some sauce, fold the pancake over, and give it another light drizzle of sauce. Voilà, your culinary journey to Vietnam is served!
Cook’s Notes
Don’t rush the pancake batter; a little rest allows the flour to hydrate fully, giving you that perfect texture. When cooking the pancakes, medium heat is your best friend. Too high, and you’ll burn them before they’re cooked through. If making ahead, the batter can rest in the fridge for a few hours, just give it a gentle stir before using. Leftover pancakes are a treat; reheat them in a hot pan to regain the crispiness. The sauce and filling can be prepped in advance, making your cooking process even smoother.
Make It Your Own
- Swap the enoki mushrooms for shiitake if you like a meatier texture.
- Use crispy tofu instead of, or alongside, the veggies for a protein-packed version.
- For a spicier kick, add an extra green chili or some Sriracha to the batter.
- Play with the herbs: cilantro lovers, feel free to add it into the mix!
If you try this, I’d love to hear how it turns out — drop a comment or tag me! Making Bánh Xèo is like taking a mini vacation right from your kitchen. Enjoy every crispy, savory bite.
Related update: Vietnamese Pancakes with Vegetables, Herbs and a Fragrant Dipping Sauce (Bánh Xèo)
Related update: Grilled Chicken Hunter Style

Picture this: It’s a breezy Sunday afternoon, my playlist is on shuffle, and I’m craving something snacky yet a little indulgent. I open the pantry, and there they are, my trusty canned chickpeas staring back at me like they know they’re about to be transformed. Last week, I had a major kitchen mishap with a new bread recipe that turned out more like a weapon than a loaf, so today I’m sticking to something foolproof and fabulous—Cinnamon & Sugar Roasted Chickpeas. These little morsels are not only super easy to whip up, but they also bring that sweet, crunchy magic that’s like a hug for your taste buds, without any of the guilt. Plus, they make my whole kitchen smell like a cinnamon wonderland, which is a win-win for everyone involved.
Jump to Recipe
What You’ll Need
What’s great about this recipe is that you likely already have most of these gems hanging around in your kitchen. We’re talking pantry staples with a sweet twist!
- 1 can of garbanzo beans (aka chickpeas)
- 1 tablespoon olive oil
- 1 tablespoon maple syrup
- 1 teaspoon cinnamon
- 1 tablespoon cane sugar
How to Make Cinnamon & Sugar Roasted Chickpeas
- First things first, preheat your oven to 425°F. Trust me, having it nice and hot is key for the perfect crunch.
- Line a baking sheet with parchment paper or a silicone mat. It makes cleanup super easy and keeps the chickpeas from sticking.
- Drain and rinse the chickpeas thoroughly. This is your chance to say goodbye to that canning liquid!
- Take two sheets of paper towels, lay one down, spread the chickpeas out, and use the other to gently pat them dry. You want them as dry as possible to achieve that crispy texture.
- While you’re drying, pick out any skins that have come loose. It’s not a big deal if you can’t get them all—just do your best!
- In a small bowl, mix the dried chickpeas with olive oil, maple syrup, and cinnamon until every little bean is well-coated and looking scrumptious.
- Spread the chickpeas on your prepared baking sheet in a single layer. Bake for 15 minutes, enjoy a dance break or clean up the kitchen.
- After 15 minutes, stir the chickpeas to ensure even baking. Return them to the oven, baking in 3-4 minute increments until they’re beautifully browned and dried to your liking. Remember, the longer they roast, the crunchier they’ll get, but keep an eye out to prevent burning.
- Once out of the oven, let them cool for a bit. Then, sprinkle the cane sugar over them while they’re still warm but not hot. Toss them gently to coat.
- Now, dig in and enjoy these delightful nuggets of crunchy sweetness!
Cook’s Notes
If you’re anything like me, you’ll want to store these in an airtight container if they last longer than a day (spoiler: they might not!). They generally stay fresh and crunchy for a couple of days, but after that, they tend to soften up. No worries though—they’re still tasty! For the impatient snackers, remember the necessity of drying the chickpeas; moisture is the enemy of crunch. Also, I wouldn’t recommend skipping the parchment paper unless you want a sticky mess on your hands.
Make It Your Own
- Feeling spicy? Add a pinch of cayenne pepper to the mix for a sweet and spicy combo that’ll keep you on your toes.
- Swap the maple syrup for honey if you’re after a deeper, richer sweetness.
- Use coconut oil instead of olive oil for a subtle tropical twist that pairs beautifully with the cinnamon.
- For a festive flair, sprinkle a bit of nutmeg or pumpkin pie spice into the mix. Hello, holiday vibes!
If you try this, I’d love to hear how it turns out—drop a comment or tag me in your snack-tastic creations! Your oven and chickpeas await, my friend. Snack on!
Related update: Cinnamon & Sugar Roasted Chickpeas
Related update: Tuna Stuffed Hard-Boiled Eggs
So there I was, staring at the contents of my fridge, wondering how I could whip up something that felt more like a brunch celebration and less like a “what’s-left-in-the-fridge” scramble. It was one of those days when you crave something cozy yet impressive, especially when your best friend calls and says she’s popping over in half an hour. Enter: Mini Spinach and Feta Quiches. They’re this magical combination of simplicity and elegance, bursting with savory flavors and just the right amount of cheese. Plus, they bake up quickly, so you can spend more time chatting and less time cooking. Trust me, these little quiches are worth every moment spent waiting for them to puff up in the oven. Perfect for a casual get-together or a solo treat with a cup of coffee.
Jump to Recipe
What You’ll Need
What’s great about these quiches is that they’re made with ingredients you probably have on hand or are easy to grab on a quick grocery run. Here’s the lineup:
- Eggs – because what is a quiche without eggs?
- Half-and-half – for that creamy, luscious texture.
- Garlic – a subtle kick with lots of flavor.
- Frozen spinach – convenient and just right for this dish.
- Onion – for a touch of sweetness and depth.
- Basil – fresh and aromatic, a lovely herbaceous note.
- Low-fat shredded cheddar cheese – because cheese is life.
- Feta cheese – tangy, crumbly, and oh-so-delicious.
- Salt and pepper – essential for balancing flavors.
How to Make Mini Spinach and Feta Quiches
- Preheat your oven to 375°F (190°C). This is your time to collect your thoughts and maybe sip on some coffee, knowing deliciousness is coming soon.
- Set a large skillet over medium heat and coat it well with olive oil spray. Wait until the oil shimmers like a little lake under the sun.
- Add the garlic. Stir it around for about 30 seconds, just until it releases that irresistible aroma. No burnt garlic here!
- Add the chopped onion with a sprinkle of salt and pepper. Turn the heat up slightly to medium-high and cook, stirring often, until the onion turns a light golden brown.
- Now, fold in the spinach, chopped basil, and another pinch of salt and pepper. Lower the heat to medium and let it all mingle for about 10 to 15 minutes, stirring occasionally. Taste and adjust the seasoning if needed.
- Meanwhile, in a large bowl, whisk together the eggs, feta cheese, half-and-half, some more salt and pepper. Make sure it’s well blended, like a team of flavors ready to win.
- Spray your mini muffin pans generously with more olive oil spray. You don’t want any quiches sticking around here when it’s time to serve.
- Distribute the spinach mixture evenly among the muffin cups, about a tablespoon each. Follow this up with a tablespoon of the egg mixture in each cup.
- Bake in your preheated oven for 15 minutes, until the edges start to set and the tops look a little puffy.
- Pull out the pans and sprinkle each quiche with a touch of reserved shredded cheddar. Pop them back in the oven for about 5 more minutes, until the cheese on top is a beautiful golden brown.
- Let them cool slightly before serving. They’re delightful warm or at room temperature, with the flavors singing together perfectly.
Cook’s Notes
These quiches are ultra flexible, which is what I love most about them. You can make them a day ahead if you’re planning for a brunch or party. Just store them in an airtight container in the fridge and reheat gently in the oven or microwave. They stay good for about 3 days, though they rarely last that long at my house!
- Don’t overfill the muffin cups. The filling puffs up a bit during baking, so leave a little space to avoid spillage.
- If you’re chopping onions and they make you cry, try chilling them in the fridge for a bit beforehand. It helps, promise!
Make It Your Own
- Protein Punch: Swap out the spinach for sautéed mushrooms and add some cooked, crumbled bacon for a heartier bite.
- Spice it Up: Sprinkle a little smoked paprika or cayenne into the egg mixture for an unexpected kick.
- Go Green: Use kale or Swiss chard instead of spinach for a different leafy green vibe.
- Cheese Swap: Try sharp cheddar or even a nutty Gruyère if you’re out of feta. It’ll change the flavor profile in the best way.
If you try this, I’d absolutely love to hear how it turns out — drop a comment or tag me! May your kitchen be filled with the aroma of baking goodness and the satisfaction of a job deliciously done. 🍴✨
Related update: Mini Spinach and Feta Quiches

It was one of those chilly evenings when the wind seemed to sneak its way into my kitchen despite all the windows being tightly shut. I had a craving for something sweet but not overly indulgent, the kind of dessert that feels luxurious without leaving you with a sugar hangover. Rummaging through my pantry and fridge, I realized I had everything I needed to make this Baked Caramel Custard. It’s one of those recipes that sounds fancy enough to impress but is simple enough to whip up on a weeknight. A little bit of whisking, a touch of caramelizing, and you’ve got yourself a smooth, silky dessert that hits the spot.
Jump to Recipe
What You’ll Need
Trust me, you might already have most of these ingredients lounging around in your kitchen. Here’s what you’ll need to gather:
- Egg substitute
- 1 egg yolk
- Evaporated skim milk
- Port wine
- Skim milk
- Sugar plus extra for caramelizing
- Vanilla extract
How to Make Baked Caramel Custard
- First things first, preheat your oven to 350 degrees. Your kitchen will be all toasty and inviting in no time.
- In a heavy saucepan, scald the evaporated skim milk and skim milk together. You’ll want to heat them until tiny bubbles form around the edge — don’t let it boil!
- Now, let’s get caramelizing. In a skillet over medium heat, let the extra sugar melt until it becomes a golden brown liquid, like liquid gold. Keep an eye on it so it doesn’t burn.
- Slowly add your scalded milk to the caramel. Stir constantly until the sugar is completely dissolved. The mixture will bubble and foam a bit, just keep stirring until it calms down.
- In a medium bowl, beat together the egg substitute and egg yolk until they’re a lovely lemon color. This is where the magic begins!
- Pour the milk mixture into the bowl with the eggs. Add in the port wine and vanilla extract, mixing until smooth and well combined.
- Divide this creamy dream into six custard cups. Place the cups in a baking dish, then pour boiling water into the dish until it reaches halfway up the sides of the cups.
- Bake the custard in the oven for about 35 to 40 minutes. You’ll know it’s done when you give a little jiggle to the cups, and the centers just barely wobble.
- Remove the custard cups from the oven and let them cool completely in the refrigerator. Patience is key here — you want them nice and chilled.
- When ready to serve, place a dessert plate on top of each custard cup, then boldly invert. The custard should slide out with a little coaxing, revealing its luscious caramel top.
Cook’s Notes
Want to make this ahead of time? You totally can! This custard keeps well in the fridge for up to two days, which makes it a perfect make-ahead dessert for entertaining. Just remember to pop them out of their cups right before serving. And hey, don’t rush the caramelizing process — it’s tempting to crank up the heat, but slow and steady wins the race here. If your caramel seizes up when you add the milk, just return it to the heat and stir until smooth.
Make It Your Own
Feel like switching things up? Here are a few variations to try:
- Swap the port wine for a splash of rum for a slightly different boozy note.
- For a non-alcoholic version, omit the port wine and add a teaspoon of orange zest for a citrusy kick.
- Use whole milk instead of skim for a richer custard if you’re feeling indulgent.
- For a nutty twist, sprinkle the top with toasted chopped hazelnuts before serving.
If you try this, I’d love to hear how it turns out — drop a comment or tag me on social media! Happy baking, and may your custard always be silky and your caramel perfectly golden.
Related update: Lemon Bars

It was one of those evenings where the fridge seemed to be giving me the silent treatment—half-empty, a bunch of odds and ends staring back at me. I was craving something warm and comforting, but not the usual suspects. Enter: Japanese Chicken Donburi. It’s the kind of dish that feels luxurious but is secretly a weeknight warrior, ready in under 30 minutes. Plus, it’s a one-pan wonder, which means less time scrubbing pots and more time enjoying a cozy meal. The mix of tender chicken, silky eggs, and a touch of soy sauce can turn any ordinary evening into a mini celebration. Spoiler: It’s about to become your new dinner staple.
Jump to Recipe
What You’ll Need
Here’s the kicker—chances are, you’ll find most of these ingredients in your kitchen already. This recipe is all about bringing simple items together for a meal that’s anything but ordinary.
- 2 tablespoons salad oil
- 1 small onion, chopped
- 1 tablespoon fresh ginger, minced
- 2 cups **fat-skimmed chicken broth**
- 2 tablespoons **soy sauce**
- 1 tablespoon sugar
- 1 pound **boned, skinned chicken breast**, cut into bite-size pieces
- 4 cups baby spinach leaves
- 4 large eggs
- 2 cups **cooked rice**
- 1 **diced roma tomato**
How to Make Japanese Chicken Donburi
- In a deep 10-inch or 12-inch frying pan over high heat, stir the salad oil, onion, and ginger until the onion is lightly browned and fragrant, about 2 minutes.
- Add the chicken broth, soy sauce, and sugar to the pan. Stir until the sugar dissolves.
- Gently introduce the chicken pieces to the pan. Bring the mixture to a boil, ensuring the chicken is cooked through yet tender.
- Add the baby spinach on top, cover the pan, and cook until wilted, about 1 minute.
- While waiting, beat the eggs in a small bowl until blended.
- Reduce the heat to low. Evenly distribute the mixture in the pan and pour in the eggs. Use a spatula to nudge the vegetables and chicken slightly so the egg can seep through the sauce.
- Cover and cook until the eggs are softly set, about 2 to 2 1/2 minutes.
- Spoon the cooked rice into bowls, creating a cozy bed.
- Top each bowl with the egg-spinach mixture, making sure to include some of that savory sauce.
- For a fresh finish, sprinkle the diced roma tomato over each serving.
Cook’s Notes
This dish is a dance of flavors and textures, and it’s pretty forgiving. If you like your eggs a little firmer, let them cook just a bit longer under the lid. And if you’re making this ahead, store the components separately; the rice, chicken, and egg mixture will keep well in the fridge for up to two days. When you’re ready to enjoy, just heat them up and assemble. A quick note: If your chicken pieces are on the thicker side, make sure they’re cooked through by cutting into the largest piece to check.
Make It Your Own
Consider these variations to fit your mood or what you have on hand:
- Swap the **chicken** for crispy tofu to keep it vegetarian but still satisfying.
- Use **quinoa** instead of rice for a protein-packed twist.
- For a spicier kick, mix a bit of **sriracha** into the broth before adding the chicken.
- Replace **baby spinach** with bok choy for a more traditional touch.
If you try this, I’d love to hear how it turns out — drop a comment or tag me! Cooking is about creativity and connection, and I’m excited to see how Japanese Chicken Donburi finds a spot at your table. 🍚🥢
Related update: Japanese Chicken Donburi
Related update: Vietnamese Pancakes with Vegetables, Herbs and a Fragrant Dipping Sauce (Bánh Xèo)
Related update: Oxtail Ragout
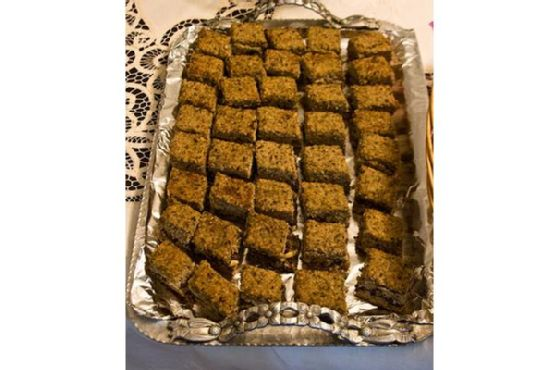
It was one of those Wednesday evenings when the fridge was looking particularly uninspiring, and the clock was ticking towards dinner time. My mind was juggling between making something quick, comforting, and, above all, something that wouldn’t require a trip to the store. That’s when I decided to whip up some Lebanese Kibbeh. With its flavorful layers and aromatic spices, it’s like a warm hug on a plate — quick to assemble but impressive enough to make you feel like a culinary genius. Plus, the way the kitchen smells when the Kibbeh is baking — it’s like a magical invitation for everyone to gather around the table.
Jump to Recipe
What You’ll Need
This recipe is all about transforming simple pantry staples into something extraordinary. Chances are you already have most of these ingredients in your kitchen:
- Bulgur wheat
- Lean lamb or veal
- Onion
- Butter
- Salt & fresh ground pepper
- Sprig of mint
- Oil
- Pine nuts
- Ground allspice
- Greek yogurt
- Garlic
- Fresh mint for garnish
How to Make Lebanese Kibbeh
- Preheat your oven to 375°F. This way, it’ll be all set to go once your Kibbeh is assembled.
- Rinse the bulgur wheat in a sieve, giving it a good shake to remove excess moisture. You want it just damp enough to blend easily.
- In a large bowl, mix the lean lamb, onion, and a generous seasoning of salt and pepper. Roll up your sleeves and knead until you get a thick, cohesive paste.
- Add the rinsed bulgur wheat into this meaty mix and blend until it’s all one happy family.
- For the filling, warm up the oil in a frying pan over medium heat. Toss in the onion and cook until golden — your kitchen should start smelling amazing right about now.
- Add the lamb (or veal) to the pan, stirring occasionally until the meat is evenly browned. Mix in the pine nuts, allspice, and another hit of salt and pepper.
- Oil up a large baking dish and spread half of the lamb and bulgur mix over the bottom, pressing it down to form an even layer.
- Spoon the flavorful filling over this layer, then top it with the remaining lamb and bulgur mix. Press down firmly using the back of a spoon for a neat finish.
- Pour melted butter over the top. Trust me, this is the magic touch that will make the top irresistibly crispy and golden.
- Slide the dish into the oven and let it bake for 40-45 minutes, until the top is beautifully browned.
- While the Kibbeh bakes, whip up a quick yogurt dip by blending Greek yogurt with crushed garlic. Spoon it into a bowl and finish with a sprinkle of chopped mint.
- Once your Kibbeh is done, let it rest for a few minutes before cutting into squares or rectangles. Serve it up with the yogurt dip and garnish with fresh mint.
Cook’s Notes
Making Kibbeh is quite forgiving if you keep a few things in mind. First, if your bulgur wheat seems too wet, squeeze it out well; excess moisture can make the layers soggy. When layering in the baking dish, press down firmly to avoid any air pockets. If you’re making this ahead, you can easily assemble the dish a few hours earlier, refrigerate it, and pop it in the oven when you’re ready. Leftovers are delightful for lunch the next day — simply reheat in a low oven until warm.
Make It Your Own
- Switch up the protein: Try using ground beef or turkey for a different twist on the classic.
- Nutty variation: Substitute the pine nuts with chopped walnuts for a different crunch.
- Spice it up: Add a pinch of cayenne pepper to the filling if you like a bit of heat.
- Herbaceous twist: Mix in some chopped parsley or cilantro into the bulgur mix for extra freshness.
If you try this, I’d love to hear how it turns out — drop a comment or tag me on social media! Cooking is all about sharing the love, after all. Let me know what variations you come up with. Happy cooking!
Related update: Lebanese Kibbeh
Related update: Japanese Chicken Donburi
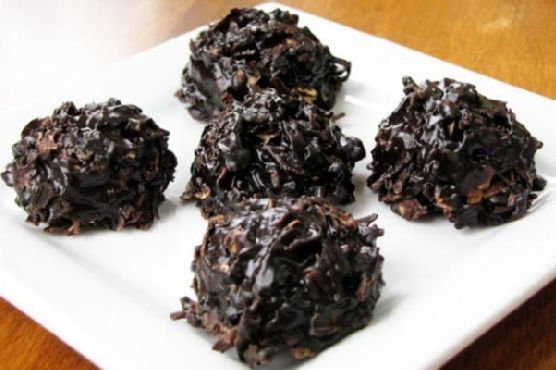
There I was, staring into my pantry on a rainy Wednesday afternoon, feeling the familiar pang of craving something sweet but not wanting to turn on the oven. You know those days when you just need a chocolate fix without all the fuss? That’s when I remembered these delightful little bites of joy: Xocai Oatmeal Dark Chocolate No-Bake Cookies. They’re the perfect balance of chocolatey goodness and wholesome oats, plus a breeze to whip up. What’s not to love about a recipe that feels like a treat but is secretly kind of healthy?
Jump to Recipe
What You’ll Need
This ingredient list is all about simplicity and, chances are, you already have most of these hanging out in your kitchen. Here’s what you’ll need:
- Butter substitute (for that creamy texture without the extra calories)
- Xocai healthy chocolate nugget (the star of the show with its rich, dark chocolate flavor)
- Oats (old-fashioned or quick oats both work perfectly)
- Peanut butter (for that nutty, irresistible taste)
- Soy milk
- Sugar substitute (to keep things sweet but light)
- Vanilla (a splash for that extra depth of flavor)
How to Make Xocai Oatmeal Dark Chocolate No-Bake Cookies
- In a medium saucepan, combine the butter substitute, Xocai chocolate nugget, oats, and peanut butter. Heat this mixture over medium heat, stirring gently to keep things smooth.
- Once everything is well-mixed and starting to melt together, increase the heat slightly and bring the mixture to a gentle boil. Keep stirring, and let it boil for five minutes. The mixture should become glossy and aromatic, like the best kind of hug in a pot.
- Remove the saucepan from the heat and stir in the soy milk, sugar substitute, and vanilla. This is where the mixture starts to transform into cookie magic.
- Finally, fold in the remaining Xocai chocolate nugget pieces. You want them to stay somewhat intact for that delightful chocolate burst in every bite.
- Spoon the mixture onto wax paper or foil, allowing the cookies to cool and harden. They’ll set as they cool, becoming perfectly chewy and rich.
Cook’s Notes
These cookies are incredibly forgiving, but here are a few tips to make them extra perfect:
- Make sure to stir constantly while boiling; this prevents the mixture from sticking to the pan or burning.
- If the cookies aren’t hardening, pop them in the fridge for a quicker set.
- Store the cookies in an airtight container at room temperature for up to a week, but I bet they won’t last that long!
Make It Your Own
- Swap the peanut butter for almond or cashew butter for a different nutty twist.
- Use almond milk instead of soy milk if that’s what you have on hand.
- Add a handful of shredded coconut to the mix for a tropical flair.
- Try adding a pinch of sea salt on top before they set for a sweet and salty combo.
If you try this, I’d love to hear how it turns out — drop a comment or tag me! There’s nothing better than sharing these little pieces of happiness with you all. Happy no-baking!
Related update: Xocai Oatmeal Dark Chocolate No-Bake Cookies
Related update: Cinnamon & Sugar Roasted Chickpeas
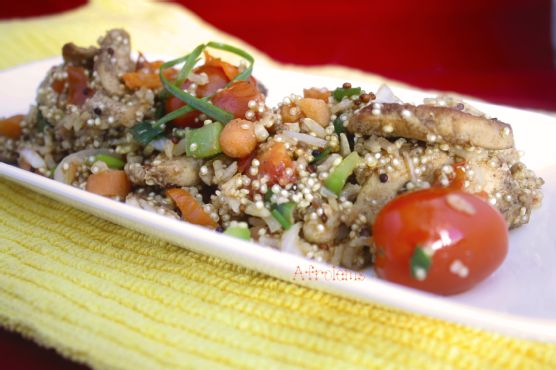
It was one of those Tuesday evenings when the fridge was looking pretty sparse, and my energy levels were even lower. You know the kind — a long day at work, the sun setting a bit too early, and a craving for something warm and satisfying but not a culinary marathon. That’s when my Stir Fried Quinoa, Brown Rice, and Chicken Breast came to the rescue. It’s a dish that seems fancy enough to impress anyone joining you at the table, but quick and easy enough that you won’t dread making it even after the most exhausting day. Plus, those spicy and savory flavors always hit the spot!
Jump to Recipe
What You’ll Need
This recipe is all about simplicity without sacrificing flavor. Chances are, you might already have most of these ingredients lying around, waiting to be transformed into something magical.
- Suya spice
- Quinoa and brown rice mix
- Butter
- Carrots
- Whole cherry tomatoes
- Chicken breast
- Garlic
- Seasoning cubes
- Green bell pepper
- Roma tomato
- Scotch bonnet pepper
- Spring onion
- Vegetable oil
- Water
How to Make Stir Fried Quinoa, Brown Rice and Chicken Breast
- Start by seasoning the chicken breast with the seasoning cubes and suya spice. Ideally, let it marinate for 2 hours, but if hunger strikes hard, go ahead and use it right away.
- In a pot, bring 1 cup of water to a boil. Add the quinoa and brown rice mix along with a teaspoon of oil. Cook until the grains are soft, approximately 5-7 minutes. Once cooked, transfer to a bowl and set aside.
- Melt the butter in a pan over medium heat, then add the marinated chicken breast. Pan fry, turning constantly, until it’s golden brown and fragrant on both sides. If the pan gets too dry, add 2 tablespoons of water to keep things juicy. Cover the pan and let the chicken cook through.
- While the chicken is cooking, chop up your veggies: carrots, green bell pepper, scotch bonnet pepper, spring onion, and the roma tomato.
- Once the chicken is nearly done, stir in the chopped vegetables. Let them cook until they’re vibrant and just tender, releasing a melody of aromas.
- Finally, fold in the cooked quinoa and brown rice mix. Stir everything together, ensuring that every grain is coated in flavor. Serve hot and enjoy the delicious medley!
Cook’s Notes
Cooking isn’t just about following steps; it’s about feeling the process. Here are a few tips to make this dish even better:
- If you’re short on time, skip the marination, but if you can spare those 2 hours, it makes the chicken extra flavorful.
- Leftover potential? Oh yes! Store in an airtight container and it’ll be good for up to 3 days in the fridge. Just reheat gently on the stove or in the microwave.
- If you’re new to using suya spice, start with a smaller amount and adjust to your heat preference.
- Don’t stress if you don’t have scotch bonnet peppers. They add a nice kick, but you can tone it down or swap with a milder pepper.
Make It Your Own
Cooking is all about personal touches. Here are some fun variations:
- Swap the chicken for crispy tofu for a vegetarian twist.
- Add a handful of spinach with the veggies for a burst of green goodness.
- Use coconut oil instead of butter for a slight tropical vibe.
- Mix in a spoonful of peanut butter with the suya spice for a creamy, nutty flavor.
If you try this, I’d love to hear how it turns out — drop a comment or tag me! Enjoy every bite of this simple yet satisfying dish, and remember, the best recipes are the ones that work for you. Happy cooking!
Related update: Stir Fried Quinoa, Brown Rice and Chicken Breast
Related update: Lebanese Kibbeh
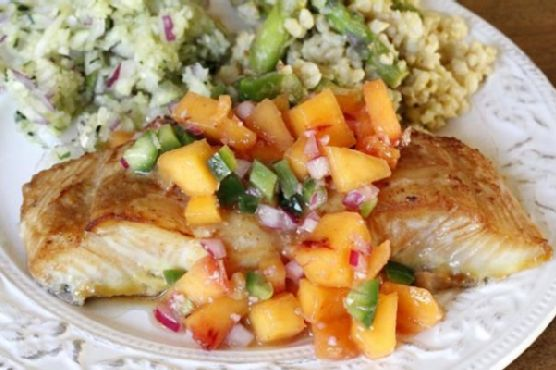
Picture this: it’s a Wednesday evening, my fridge looks like a ghost town except for a couple of halibut fillets staring back at me, and I’m craving something a bit more exciting than the usual mid-week fare. I’m also avoiding another last-minute dash to the store because, you know, life. So, I decided to bring some brightness and zing to the table with a Soy Ginger Glazed Halibut, topped with a Ginger Peach Relish that’s basically summer in a spoon. This recipe is the answer to impressing your taste buds without needing a culinary degree—or a packed pantry. Easy yet striking, this dish is the perfect combo of sweet, spicy, and savory. Trust me, you’ll want to keep this one in your recipe stash.
Jump to Recipe
What You’ll Need
Chances are, you already have most of what you need for this dish in your kitchen, especially if you’re a fan of Asian-inspired flavors. Here’s what to gather:
- Halibut fillets – the star of the show, make sure they’re nice and fresh
- Fresh ginger – adds that spicy zing we all love
- Soy sauce – for that umami depth
- White wine – adds a touch of elegance and acidity
- Olive oil – a smooth base for our marinade
- Peach – sweet and juicy, perfect for the relish
- Red onion – brings in a sharp, savory note
- Jalapeno – for a kick of heat
- Apple cider vinegar – a tangy counterbalance
- Lime – freshens everything up
How to Make Soy Ginger Glazed Halibut with Ginger Peach Relish
- Peel and roughly chop a piece of fresh ginger. You’re looking for that sharp, spicy aroma to fill your kitchen. Place all marinade ingredients—soy sauce, white wine, olive oil, and 1 tablespoon of chopped ginger—in a blender and blend until smooth. This ensures the ginger infuses its flavor beautifully.
- In a zip-lock bag or bowl with a secure cover, add the halibut fillets and pour in the marinade. Massage the bag gently to ensure the fillets are fully coated. Let them soak up all that goodness for at least 20 minutes, though a few hours would make them sing.
- Preheat your oven to broil. Once heated, place the fish in a casserole dish along with all the marinade. Set the dish on one of the top racks and bake for about 10-12 minutes. You’re aiming for a nice brown glaze on top and perfectly cooked-through fish.
- For the relish, chop up the peach, red onion, and jalapeno. Combine them in a bowl with apple cider vinegar, the juice of half a lime, and 1 tablespoon of ginger. Stir and refrigerate. The longer it sits, the more the flavors meld into a vibrant accompaniment.
Cook’s Notes
Let’s get practical for a second. First off, if you forget to marinate the fish ahead of time, don’t panic—it’ll still be delicious after just 20 minutes. However, if you can plan ahead, the flavors really deepen with a longer soak. When broiling, keep an eye on the fish to avoid burning, especially if your oven runs hot. As for the relish, it’s a make-ahead’s best friend. If you want, prepare it in the morning or even the night before. The flavors only get better with time, and it keeps beautifully in the fridge for a couple of days.
Make It Your Own
Feeling adventurous? Here are a few swaps that keep the spirit of the dish alive but shake things up a bit:
- Swap the halibut for salmon if you’re feeling more like a buttery fish vibe.
- If peaches are out of season, try using mango for the relish—a tropical twist that pairs beautifully with the heat of the jalapeno.
- Not a fan of heat? Leave out the jalapeno or swap it for a milder pepper like a poblano.
- For a gluten-free version, use tamari in place of soy sauce.
If you try this, I’d love to hear how it turns out—drop a comment or tag me! Seeing your creations is the best part of sharing these recipes. Bon appétit!
Related update: Soy Ginger Glazed Halibut with Ginger Peach Relish
Related update: Stir Fried Quinoa, Brown Rice and Chicken Breast

Last Tuesday, I found myself staring at an array of mismatched jars and half-opened cans in my pantry, curiously wondering, “What can I whip up for dinner that’s both comforting and easy?” The answer came in the form of this delightful Curry-Braised Chicken. It’s one of those glorious dishes where the simplicity of ingredients belies its depth of flavor. I’m all about recipes that make you look like a kitchen wizard without breaking a sweat, and this one’s a total weeknight win. The chicken turns out tender and juicy, and the creamy coconut curry sauce is pure magic over a bed of fluffy basmati rice. It’s the kind of dinner that makes you want to sit down, take a deep breath, and savor every bite. Plus, your home will smell incredible.
Jump to Recipe
What You’ll Need
This recipe is a pleasant surprise because chances are you already have most of these ingredients chilling in your kitchen.
- Skinless boneless chicken breasts – these soak up the curry flavors like a dream.
- Vegetable oil – just enough to get the party started in your Dutch oven.
- Salt – essential for seasoning the chicken.
- Yellow, red, or green curry paste – your choice here will define the dish’s character.
- Canned unsweetened coconut milk – the creamy backbone of our sauce.
- Fish sauce – brings a subtle umami depth.
- Brown sugar – a pinch of sweetness to balance the spice.
- Fresh lime juice – adds freshness and zing at the end.
- Basmati rice – perfect to soak up all that curry goodness.
- Bell pepper – optional, but adds a pop of color and texture.
How to Make Curry-Braised Chicken
- Preheat your oven to 325 degrees Fahrenheit. This ensures the magic happens slowly, making everything tender.
- Cut your chicken breasts in half. Season them with salt and a dash of pepper, massaging it in like you’re giving the chicken a spa day.
- Heat some vegetable oil over medium-high heat in a trusty Dutch oven. You want it hot enough that the chicken sizzles on contact.
- Brown the chicken on both sides for 1-2 minutes per side. You’re not cooking it through here; just giving it a lovely golden crust. Work in batches if needed.
- Remove the chicken and add your chosen curry paste to the same pot. Use a wooden spoon to break it up, getting the paste to meld beautifully with the leftover oil.
- Once the curry paste is fragrant and slightly darker, pour in the coconut milk. Stir with your spoon to scrape up any golden bits stuck to the bottom of the pot.
- Add the fish sauce and brown sugar, stirring until everything’s a harmonious blend.
- Return the chicken to the pot, snuggling it into the sauce. Cover with a lid and place the Dutch oven in the preheated oven.
- Bake for 45-55 minutes or until the chicken is cooked through and no longer pink. The sauce should be bubbling enticingly around the edges.
- Right before serving, stir in the fresh lime juice. Trust me, this is the zingy magic touch.
- Serve the curry-braised chicken over steaming basmati rice and, if using, sprinkle with sliced bell peppers for a crisp contrast.
Cook’s Notes
A few things I’ve learned along the way: don’t rush the browning step. That lovely golden crust adds layers of flavor. If you plan on making this ahead, you can pop it into the fridge after step 8 and finish baking when you’re ready to eat. Leftovers taste even better the next day, as the flavors have more time to mingle. Reheat gently on the stove, and add a splash of water if the sauce has thickened too much.
Make It Your Own
Looking to switch things up? Here are a few ideas:
- Swap the chicken for crispy tofu for a vegetarian version. Just brown the tofu pieces before adding them to the curry.
- Use shrimp instead of chicken. Adjust the cooking time – shrimp cooks much faster!
- Throw in some diced sweet potatoes along with the chicken. They’ll soak up the curry flavor wonderfully.
- Add a handful of spinach or kale at the end for a dose of greens.
If you try this, I’d love to hear how it turns out — drop a comment or tag me! Cooking is all about sharing, so let’s swap stories and tips. Happy cooking, friends!
Related update: Curry-Braised Chicken
Related update: Soy Ginger Glazed Halibut with Ginger Peach Relish

It was one of those foggy evenings in San Francisco where the mist hangs thick like a cozy, damp blanket. I was craving something that would bring all the warmth of the ocean into my little kitchen, something that felt like a tight hug for the soul. Enter: San Francisco Cioppino. This dish is not just a seafood stew; it’s a symphony of fresh catches and bold flavors that feel both hearty and impressively easy. You’ll find this cioppino is perfect for those nights you want to channel your inner fisherwoman without having to dive into the deep blue yourself. Trust me, it’s worth every delicious drop.
Jump to Recipe
What You’ll Need
You may be surprised to learn that despite sounding fancy, this ingredient list is mostly straightforward and filled with things you might already have. The key is in the freshness — it makes all the difference.
- Fresh canned tomatoes
- Clams
- Dry white wine
- Cooked freshly Dungeness crabs
- White fresh fish
- Fresh basil
- Fresh parsley
- Garlic
- Black fresh ground pepper
- Olive oil
- Fresh oregano
- Raw shrimp
- Scallops
- Tomato paste
- Yellow onion
How to Make San Francisco Cioppino
- Start by prepping the star of the show: the crabs. Gently remove the legs and claws, then break the body in half, making sure to keep as much of the “crab butter” (the delightful yellow center) as you can. Set the crab pieces aside and press the crab butter through a sieve into a small bowl. Set aside.
- For the clams, place them in a pan and add 1 cup of dry white wine. Cover and steam over medium heat for about 5 minutes, until their shells open wide like they’re waving hello. Discard any clams that refuse to open, then strain the stock through a cheesecloth and keep the liquid gold that’s left.
- Now, in your trusty 8-quart saucepan, heat up some olive oil. Toss in the onions and garlic, letting them dance over medium heat until they’re soft but not brown — think of it as just waking them up.
- Stir in the fresh canned tomatoes, tomato paste, the rest of your wine, pepper, herbs, and that flavorful clam stock you reserved. Partially cover the pot and let it simmer for a solid 20 minutes, letting those flavors mingle and get cozy.
- Add in your seafood: the fish, scallops, shrimp, crab, and the sacred crab butter. Simmer for about 5 minutes, but resist the urge to stir, as you want the fish to stay whole and proud. Then, add the clams and heat for another scant minute.
- Top with fresh parsley and serve immediately from the pot while everything is still joyously warm and inviting.
Cook’s Notes
Here’s the deal: freshness is key with cioppino, especially with the seafood. If you can get it from the market the day of, do it. As for the wine, choose a decent dry white that you’d actually enjoy sipping — it makes a big difference. And remember, don’t stir the stew after adding the fish. You want those chunks intact for a beautiful presentation. Leftovers can be stored in the fridge for up to two days and gently reheated over low heat. If you’re making it ahead of time, keep the seafood separate until you’re ready to serve, and add it in the last 5-6 minutes of reheating.
Make It Your Own
Here’s where you can play around with this seaside classic:
- Swap the white fish with salmon for a richer flavor.
- Trade the scallops for mussels if you fancy a different texture.
- Add a pinch of red pepper flakes for a bit of a kick.
- Use a splash of Pernod instead of wine for a slight anise twist that pairs beautifully with seafood.
If you try this, I’d love to hear how it turns out — drop a comment or tag me! Let’s keep sharing those warm, delicious moments. 🌊🍅🍲
Related update: San Francisco Cioppino
Related update: Curry-Braised Chicken

It was one of those unpredictable spring mornings where the sky couldn’t decide if it wanted to rain or shine. I found myself craving something that felt like a warm hug, something that would fill the house with the spicy sweet scent of comfort. Enter Hot Cross Buns. They’re perfect for those “in-between” days, bridging the gap between winter’s end and spring’s full bloom. What I adore about these buns is how deceptively simple they are to make; they sound fancy, but they’re actually pretty forgiving. You just mix, knead, roll, and bake. They’re like little pillows of happiness, complete with a sweet cross on top that’s practically begging to be photographed. Trust me, once you try them, these buns will become a regular request in your household.
Jump to Recipe
What You’ll Need
There’s a good chance you already have most of these ingredients lurking in your pantry. The combination of spices gives the buns their signature warmth, and the sour milk keeps them tender.
- Flour
- Sugar
- Baking powder
- Baking soda
- Salt
- Cinnamon
- Nutmeg
- Shortening
- Raisins
- Sour milk (or add a splash of vinegar or lemon juice to regular milk)
How to Make Hot Cross Buns
- Sift the flour once, then measure it out into a large bowl. Add the baking soda, baking powder, salt, sugar, and spices. Trust me, the double sifting might sound extra, but it makes the buns incredibly light.
- Cut in the shortening. You want to mix until the flour looks like coarse crumbs. This is your time to channel the patient, zen gardener within.
- Stir in the raisins. These little gems add pockets of sweetness in every bite.
- Add enough sour milk to create a stiff dough. You want it just moist enough to hold together without being sticky.
- Turn the dough onto a floured board and knead it slightly—just enough to bring it all together. Don’t overdo it!
- Roll the dough out to about 1/2 inch thickness. Use a 2-inch cutter to cut out your buns. It’s oddly satisfying, like cutting out cookies.
- Place the buns close together in a shallow pan. With a sharp knife, cut a cross into the top of each bun. This is where the magic happens.
- Brush the tops with a mixture of milk and sugar. This will give them a lovely gloss and help them brown beautifully.
- Bake in a hot oven at 475 degrees for 20 minutes. You’ll know they’re done when they’re golden and fragrant.
- Once out of the oven, brush them again with the milk and sugar solution. Fill the cross with plain frosting if desired. Serve them warm and watch them disappear.
Cook’s Notes
Here’s the scoop: these buns are best served warm, fresh out of the oven, but they do reheat well if you find yourself with leftovers (unlikely, but possible). Just pop them in the oven for a few minutes, wrapped in foil, to refresh them. You can make the dough ahead and keep it in the fridge overnight if you want to do the hard part in advance. Just be sure to let it come back to room temperature before rolling and cutting.
Make It Your Own
Feel free to play around with the recipe a bit. Here are some variations to consider:
- Swap raisins for dried cranberries for a tart twist.
- Add orange zest to the dough for a citrusy zing.
- Replace the frosting with a cream cheese glaze for a tangy finish.
- Throw in some chopped nuts if you’re in the mood for a bit of crunch.
If you try these Hot Cross Buns, I’d absolutely love to hear how they turn out for you! Drop a comment below or tag me on social media with your bun pics. Happy baking!
Related update: Hot Cross Buns
Related update: Xocai Oatmeal Dark Chocolate No-Bake Cookies
Related update: Simply Amazing Cinnamon Swirl Wheat Bread

Picture this: It’s a chilly weekday evening, and I find myself staring into the abyss of my pantry, longing for something hearty, something that feels like a warm hug after a long day. My eyes land on a bottle of cognac, nestled between spices and canned goods, and a light bulb goes off. Boeuf Bourgignon. It’s one of those dishes that sounds fancy but is deceptively simple — perfect for a night when I want to impress myself (or my family) without breaking a sweat. This recipe is rich in flavor, comforting, and surprisingly doable. Trust me, once you’ve got a pot of this simmering on the stove, the cozy aroma alone will make you feel like a culinary genius.
Jump to Recipe
What You’ll Need
It’s amazing how such a luxurious meal can come together with things you probably already have. You might need a quick trip for beef stock or fresh herbs, but that’s about it.
- Button mushrooms
- Butter
- Un-smoked bacon
- Vegetable oil
- Boneless well-trimmed beef chuck
- Yellow onion
- Shallots
- Carrots
- Black salt and pepper
- Flour
- Cognac
- Beef stock
- Unsweetened cocoa powder
- Garlic cloves
- Fresh thyme
- Fresh flat-leaf parsley leaves
- Tomato paste
- Bay leaf
How to Make Boeuf Bourgignon
- Preheat your oven to 160°C (325°F). This is crucial for getting that low and slow cook that makes the beef melt-in-your-mouth tender.
- In a pan, sauté the button mushrooms in butter until they’re brown and soft. Set them aside. You’re going to love their nutty aroma.
- In a large, deep-bottomed pot, sauté the bacon in 1 tablespoon of oil over moderate heat for 2 to 3 minutes. You’re looking for a light brown color that brings out the bacon’s savory goodness.
- Remove the bacon with a slotted spoon and set it aside. Don’t clean the pan — that bacon fat is flavor gold.
- Reheat the pan until the fat is almost smoking, then sauté the beef in batches. Give the pieces space to brown properly on all sides, and resist the urge to stir too soon.
- Add your browned beef to the reserved bacon. Lower the heat to medium.
- In the same flavorful fat, add the onions, shallots, and carrots. Cook them until the carrots soften and the onions are translucent.
- Combine the cooked veggies with the beef and bacon. Pour out the excess fat, but don’t wipe the pot — every bit of flavor is needed.
- Return the beef mixture to the pot. Sprinkle on the flour and toss everything to coat. Stir until the flour has cooked and you see no white traces.
- Season with salt and pepper, then stir in the cognac and just enough beef stock to barely cover the meat.
- Add the garlic, thyme, parsley, tomato paste, and bay leaf. Bring everything to a simmer on the stove.
- Cover the pot and set it in the oven. Cook for 2 ½ to 3 hours, checking about an hour in to add the mushrooms and stir in the cocoa powder, which gives a subtle depth of flavor.
- The stew is ready when the meat is fork-soft and your kitchen smells like heaven.
Cook’s Notes
Don’t be shy with the cognac. It adds such a lovely depth, but if it’s not your thing, red wine works in a pinch. Be sure to use a heavy-bottomed pot or casserole dish that can transition from stovetop to oven seamlessly. If you make this ahead, it only gets better the next day — those flavors really come together after a night in the fridge. Reheat gently on the stove, adding a splash of water or stock to loosen things up if needed.
Make It Your Own
- Swap the beef chuck for lamb shoulder for a different take on this classic stew.
- If mushrooms aren’t your thing, try adding pearl onions instead — they’ll add a lovely sweetness.
- Replace the bacon with pancetta for a slightly different, yet delicious, flavor profile.
- Make it vegetarian by using hearty vegetables like potatoes and turnips. Replace beef stock with a veggie version, and skip the bacon.
If you try this, I’d love to hear how it turns out — drop a comment or tag me! Enjoy the cozy vibes and maybe a glass of wine while you’re at it. Cheers to the perfect night in!
Related update: Boeuf Bourgignon
Related update: San Francisco Cioppino

Last Wednesday, as the rain tapped against my kitchen window, a sudden craving for something rich, chocolatey, and indulgent hit me hard. It was one of those evenings where comfort food felt less like an option and more of a necessity. I rifled through my pantry, feeling the urge to concoct something that was both decadent and a tad boozy—a treat just for me. That’s when the idea of Fudgy Chocolate Cream Cheese Brownies with Baileys popped into my head. This is the kind of recipe that turns a gloomy night into a cozy one, with swirls of cream cheese dancing through the chocolate, accented by the warmth of Baileys. It’s not just dessert; it’s the dessert you make when you want to treat yourself to something special.
Jump to Recipe
What You’ll Need
Before you start, take a quick peek in your pantry. You might already have most of what you need. This ingredient list is straightforward, with a couple of stars to give it that wow factor.
- Bittersweet chocolate
- Butter
- Cream cheese
- Eggs
- Flour
- Espresso powder (optional, but it does wonders to elevate the chocolate flavor!)
- Sugar
- Vanilla extract
- Baileys Irish Cream
- Non-stick spray or butter and flour for the pan
How to Make Fudgy Chocolate Cream Cheese Brownies with Baileys
Let’s get down to business! Here’s how to bring this luscious creation to life:
- To whip up the chocolate layer, toss your bittersweet chocolate and butter into a large glass dish. Microwave them for about 1.5 minutes. Don’t panic if the chocolate looks like it hasn’t melted; give it a good stir, and it will melt into a velvety pool. If it’s still stubbornly chunky, give it a few more seconds in the microwave. Just avoid overheating—it’s a slippery slope to a burnt mess.
- Once your chocolate is all dreamy and melted, stir in the sugar and vanilla extract with a whisk. Let it cool down a tad; you don’t want scrambled eggs in your brownies.
- Now, beat in the eggs, one at a time, making sure each is well incorporated before adding the next. This is where the magic begins.
- Sift the flour over the chocolate mixture slowly, mixing as you go. The batter will start to look like a chocolate lover’s dream. Set this chocolatey goodness aside for a moment.
- For the cream cheese layer, pop the cream cheese in a bowl and give it a whirl with a hand mixer until it’s smooth and ready to mingle. Add sugar and mix again until it’s sweet and creamy.
- Beat in an egg and give it a splash of Baileys. Mix until everything’s just right.
- Prep your baking pan. Spray it with non-stick spray or butter and flour it. You can line it with parchment for easy lifting later—trust me, you’ll want to.
- Pour the chocolate mixture evenly into the pan, then drizzle the cream cheese mixture over it. Use a fork to create swirls so the cream cheese peeks through the chocolate. Don’t overdo it; you want distinct marbled patterns.
- Pop the pan into your preheated 350°F oven. Let it bake for about 35 minutes or until a knife comes out clean. The aroma will drive you wild, but patience, my friend—it’ll be worth it.
- Once baked, let it cool before slicing into perfect squares of indulgence. Enjoy!
Cook’s Notes
Here’s the inside scoop on making sure these brownies come out just right. Be patient with the chocolate melting process; stirring is your friend. If you rush and overheat, you’ll get a grainy texture—not cool. When blending the batters, gentle swirling is key for that beautiful marbled look. These brownies store well in an airtight container at room temperature for up to three days, but let’s be honest—they won’t last that long. If you’re thinking ahead, they freeze beautifully too. Just wrap them tightly in parchment and foil.
Make It Your Own
Want to add your own twist? Here are a few ideas:
- Swap the Baileys for your favorite flavored liqueur like Kahlua or Amaretto for a different, yet delightful, boozy touch.
- Add a handful of crushed nuts to the chocolate layer for a crunchy surprise in every bite.
- Mix in a teaspoon of cinnamon into the chocolate for a warm, spicy note that pairs beautifully with the Baileys.
- Looking for a non-alcoholic version? Use a splash of coffee instead of Baileys to deepen the chocolate flavor without the booze.
If you give this a go, I’d love to hear how it turns out for you. Drop me a comment or tag me with your brownie pics. Let’s share the love and the chocolate!
Related update: Fudgy chocolate cream cheese brownies with Baileys
Related update: Hot Cross Buns

Last Tuesday night, I had one of those cravings that you can’t shake off, no matter how many other snacks you try. You know the kind — rich, chocolaty, and just decadent enough to feel like a little celebration in the middle of your week. I found myself rummaging through the pantry, determined to whip up something that would hit all the right notes. That’s when I landed on these fudgy chocolate cream cheese brownies with a twist of Baileys. These are not your average brownies; they marry the dense, chocolatey goodness we all love with a lush swirl of cream cheese and a hint of Irish cream for a bit of grown-up indulgence. Perfect for a cozy night in or an impressive dessert when you’re hosting friends.
Jump to Recipe
What You’ll Need
It’s likely you already have most of these ingredients lying around, which means you’re just a few steps away from brownie heaven. A few key players make this dish truly special.
- Bittersweet chocolate
- Butter
- Cream cheese
- Eggs
- Flour
- Espresso powder (trust me on this)
- Sugar
- Vanilla extract
- Baileys Irish Cream
How to Make Fudgy Chocolate Cream Cheese Brownies with Baileys
- First, let’s make the chocolate layer. Grab a large glass dish and toss in your bittersweet chocolate and butter. Give it a go in the microwave for about 1.5 minutes. It might still look whole when you take it out, but trust me, it’s ready to be stirred until smooth. If it’s stubborn, zap it for a few more seconds — just don’t overdo it, we don’t want scorched chocolate.
- Once the chocolate is silky, add in the sugar and vanilla. Stir with a whisk until it’s all well blended. Let it cool a little — you don’t want scrambled eggs in your brownies!
- After it’s cooled a bit, whisk in the eggs one by one. Make sure each egg is fully mixed in before adding the next.
- Now, sift the flour over your chocolate concoction, little by little, and fold it in gently. Set this aside; we’ll come back to it soon.
- For the cream cheese layer, grab a bowl and whip your cream cheese with a hand mixer until it’s nice and soft. Mix in the sugar until it’s well combined.
- Next, add the egg and beat until it’s just incorporated, followed by a generous splash of Baileys. Stir it all together until smooth.
- Now, it’s time to assemble! Prepare an 8″ square baking pan by spraying it with non-stick spray or lining it with parchment paper, making sure the paper hangs over the edges for easy lifting later.
- Pour the chocolate layer into your prepared pan and smooth it out. Then, pour the cream cheese mixture over the top. Use a fork to swirl the two layers together, creating pretty marble patterns. Just swirl — don’t mix them entirely!
- Pop it into a preheated oven at 350°F for about 35 minutes. You want a knife to come out clean from the center, but don’t let it overbake. Let it cool completely before slicing into indulgent squares.
Cook’s Notes
Don’t skimp on the chocolate quality — using a good bittersweet chocolate makes a world of difference. And while it might be tempting to skip the espresso powder, it actually enhances the chocolate flavor without making it taste like coffee. These brownies store well in an airtight container at room temperature for up to three days, or wrap them up and freeze for a longer treat stash. If you’re planning ahead, you can make these the day before and let them sit overnight — some say they taste even better the next day as the flavors meld!
Make It Your Own
- Nutty Addition: Add a handful of chopped walnuts or pecans to the chocolate layer for a bit of crunch.
- Spice It Up: Mix in a teaspoon of cinnamon or a pinch of cayenne to the chocolate batter for a warm, spicy kick.
- Minty Fresh: Swap the Baileys for peppermint extract in the cream cheese layer for a refreshing twist.
- Berry Bliss: Add a swirl of raspberry jam on top of the cream cheese for a fruity contrast.
If you give these brownies a whirl, let me know how they turn out! I’d love to hear your thoughts or see your creations — drop a comment or tag me in your posts. Happy baking, friends!
Related update: Fudgy chocolate cream cheese brownies with Baileys
Related update: Fudgy chocolate cream cheese brownies with Baileys

It was one of those days when you’re juggling a million things and realize it’s almost dinner time with nothing planned. The kids were cranky, I was craving something fresh and light, and the pantry was looking a little uninspired. That’s when the idea for this Zesty Lime Marinated Chicken with Homemade Watermelon Salsa popped into my head. It’s quick and full of bright flavors, a perfect match for a warm summer evening—or to trick yourself into thinking it’s summer when it’s absolutely not. Plus, that sweet and spicy watermelon salsa is a total game-changer, trust me.
Jump to Recipe
What You’ll Need
Just a few fresh ingredients and some pantry staples, chances are you already have most of what you need! Here’s the lineup:
- Diced watermelon
- Diced cucumber
- Sweet fresh ear corn
- Extra virgin olive oil
- Fresh cilantro
- Garlic powder
- Fresh ground pepper
- Honey
- Fresh lime juice
- Yellow sweet diced orange pepper
- Red diced onion
- Crushed red pepper flakes
- Salt
- Skinless boneless chicken breasts
- Tabasco sauce
How to Make Zesty Lime Marinated Chicken with Homemade Watermelon Salsa
- Start with the salsa: In a medium bowl, toss together the watermelon, cucumber, orange pepper, corn, cilantro, and red onion. It’s already looking colorful and fresh!
- In a small bowl, whisk together ¼ cup lime juice, a tablespoon of honey, a pinch of red pepper flakes, and a bit of salt. Pour this over the salsa mix, give it a good stir, and pop it in the fridge for at least an hour to let the flavors meld.
- Now, onto the chicken! In a shallow bowl, place the chicken breasts, drizzling them with 3 tablespoons of lime juice. Sprinkle each side with garlic powder, salt, and pepper. Cover and let them marinate in the fridge for about 30 minutes.
- Time to cook: Heat a large nonstick pan over medium heat. Add a splash of extra virgin olive oil. Once it’s shimmering, add the chicken breasts. Cook them covered, flipping once, until they’re browned and cooked through—about 10-12 minutes.
- Remove the chicken from the pan and set aside. In the same pan, pour in a mixture of ¼ cup lime juice, 2 tablespoons of honey, and a dash of Tabasco. Stir for about 30 seconds until it’s all nice and melted into a glaze.
- Return the chicken to the pan, flipping each piece once so they’re fully coated in that sweet, tangy glaze. Remove from the pan and plate the chicken.
- Spoon generous amounts of the watermelon salsa over each chicken breast and serve with extra salsa on the side. It’s a fiesta of flavors and colors!
Cook’s Notes
Here’s the scoop on making this go smoothly and taste amazing:
– Marinating tip: If you’re short on time, even 15 minutes in the lime marinade will do wonders for the chicken.
– When making the salsa, aim for uniform dice on the watermelon and cucumber so you get a bit of everything in each bite.
– Storage: The salsa keeps well in the fridge for up to two days, but it’s best fresh. The chicken can be stored in an airtight container for up to three days.
– Leftovers: Thinly slice any leftover chicken and toss it in a wrap with some of the salsa for a quick and delicious lunch.
Make It Your Own
Feel like experimenting? Here are a few variations to try:
- Swap the chicken for crispy tofu if you’re going for a vegetarian vibe.
- Add some diced avocado to the salsa for extra creaminess.
- If spicy isn’t your thing, omit the red pepper flakes and Tabasco, and try a sprinkle of smoked paprika instead.
- Use mango instead of watermelon for a tropical twist.
If you try this, I’d love to hear how it turns out—drop a comment or tag me! It’s always fun to see what creative spins you put on it. Enjoy the burst of summer in every bite!
Related update: Zesty Lime Marinated Chicken with Homemade Watermelon Salsa
Related update: Boeuf Bourgignon
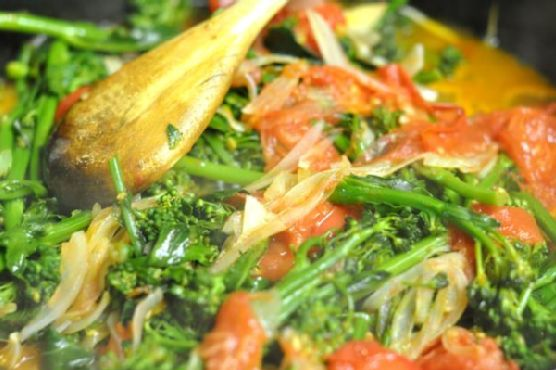
It was one of those Wednesday nights. You know the kind where the clock seems to race faster than your energy levels? I glanced into the fridge, feeling the kind of lazy where takeout menus begin to call your name. But I wasn’t ready to give in. Instead, I decided to whip up something that felt indulgent but wouldn’t have me stuck in the kitchen all night. Enter: Broccoli Rabe and Breaded Veal Scallopini. This dish is the perfect balance of earthy greens and crispy, golden veal. It’s a little fancy, but still approachable enough for a hectic midweek dinner. Plus, it makes your kitchen smell like an Italian bistro, which is never a bad thing.
Jump to Recipe
What You’ll Need
The best part? You might already have most of these ingredients lounging around in your kitchen! Here’s what you’ll need to create this lovely dish:
- Broccoli rabe – our powerhouse green
- Butter – for that rich, golden crust
- Egg – helps breadcrumbs stick like a culinary glue
- Olive oil – gives a subtle fruitiness to our sauté
- Salt and pepper – because seasoning is everything!
- Yellow onion – for a sweet, smooth base
- Garlic clove
- Tomatoes
- Veal scallopini – the star attraction
- Bread crumbs – for that irresistible crunch
How to Make Broccoli Rabe and Breaded Veal Scallopini
- First, wash and steam the broccoli rabe for about 3 minutes, or until it becomes a vibrant green. If you’re in a rush, a pressure cooker works wonders in no time.
- Thinly slice the onion. Grab a garlic clove, peel it, cut it in half and remove the stem. This will mellow out its strong bite.
- In a deep pan, heat 1 or 2 tablespoons of olive oil over medium heat. Sauté the onion and garlic until they’re soft and the kitchen is filled with a mouth-watering aroma.
- Add the steamed broccoli rabe to the pan, cover with a lid, and let it cook for a few more minutes until tender but still crisp.
- Quarter your tomatoes into wedges, depending on their size, and toss them into the pan. Cook for a few more minutes, mixing them gently with the greens until everything melds beautifully.
- Season with salt and pepper to your liking. Trust your taste buds here!
- For the veal scallopini, start by seasoning each piece with a sprinkle of salt and pepper.
- Dip each piece into a beaten egg, then coat it thoroughly with breadcrumbs. Make sure every inch is covered for maximum crunch.
- Heat a generous pat of butter in a pan over high heat. Once it’s sizzling, add the veal. Fry each side for 1 to 2 minutes until the scallopini is crisp and golden. Don’t skimp on the butter when flipping – those breadcrumbs are thirsty and need their drink!
Cook’s Notes
When buying broccoli rabe, look for bunches with deep green leaves and firm stalks. If you can’t find veal scallopini, thinly sliced chicken or turkey works just as well. If you make a bit extra, both the broccoli rabe and veal can be stored in an airtight container in the fridge for up to two days. Reheat the veal in a hot pan to keep that crispy goodness alive. For the greens, a quick zap in the microwave does the trick.
Make It Your Own
- If veal isn’t your thing, swap it out for chicken breast or even crispy tofu for a vegetarian twist.
- Boost the flavor by adding a sprinkle of parmesan cheese to your breadcrumbs before coating the veal.
- For a little heat, toss in some red pepper flakes when cooking the onions and garlic.
- Swap the broccoli rabe for spinach or kale if you’re in a pinch. They’ll give a slightly different texture but still work well.
If you try this, I’d love to hear how it turns out — drop a comment or tag me! Whether it becomes your midweek savior or a special weekend treat, I hope it brings a little joy to your table. Happy cooking!
Related update: Broccoli Rabe and Breaded Veal Scallopini
Related update: Zesty Lime Marinated Chicken with Homemade Watermelon Salsa

Picture this: It’s a blustery Tuesday evening, and I’ve just come home from work, craving something warm and savory to take the chill off. The kind of dish that fills the house with tantalizing aromas and makes you feel like you’re getting a hug from the inside. Enter my baked Indian samosas — golden, flaky, and just spicy enough to keep things interesting. These little parcels of joy are surprisingly easy to whip up, even on a weeknight, thanks to the magic of puff pastry. And trust me, your taste buds won’t know what hit them. Plus, they’re baked, not fried, so we can feel a little virtuous, right? These samosas have become my go-to comfort food, especially when I want to impress without too much hassle. Jump to Recipe
What You’ll Need
The ingredient list is refreshingly straightforward, and chances are you already have most of this in your pantry.
- Puff pastry
- 1 egg
- Water
- 1 russet potato, peeled and diced
- Salt
- 2 bay leaves
- 1 teaspoon coriander seeds, divided
- 1 teaspoon black peppercorns
- 1 teaspoon red chili flakes
- 1 skinless boneless chicken breast
- 1/2 cup diced mango
- 1/4 cup peas
- Juice of 1 lime
- 2 tablespoons chipotle sauce
- 1 teaspoon cumin seeds
- 1/4 cup chopped cilantro leaves
- Black salt and pepper, to taste
How to Make Baked Indian Samosas
- Preheat your oven to 425 degrees F. This is your golden ticket to perfectly baked samosas.
- In a small saucepan, combine the diced potato and enough cold water to cover. Add a generous pinch of salt. Bring it to a boil over medium heat, then reduce to a simmer until the potato is tender, about 12 to 15 minutes.
- In another pot, bring 4 cups of water to a simmer. Toss in a pinch of salt, the bay leaves, 1 teaspoon of coriander seeds, peppercorns, chili flakes, and the chicken breast. Let it simmer until the chicken is cooked through, about 8 to 10 minutes.
- Drain the cooked potato and mash it until smooth. Shred the chicken finely. Combine both in a large mixing bowl.
- Add the peas, diced mango, lime juice, chipotle sauce, remaining coriander seeds, cumin, cilantro, and salt and pepper to the bowl. Mix everything together until well incorporated, using a spoon or your hands. Taste and adjust the seasoning as needed.
- Roll out the puff pastry slightly to flatten the seams. Use a paring knife to cut the dough into 8 (7-inch wide) rounds. Cut each round into 2 semicircles.
- Place a tablespoon of filling in the center of each semicircle. Keep a small bowl of water nearby. Dip your finger in the water and run it along the edges of the dough.
- Fold the left corner over the filling in a triangular motion, landing the corner on the bottom right. Repeat with the other corner, then squeeze the bottom shut. Seal with water and press with a fork for good measure.
- Arrange the samosas on a lightly greased baking sheet. In a small bowl, whisk together the egg with 1 teaspoon of water. Brush the tops of the samosas with this egg wash.
- Bake for 15 minutes at 425 degrees F, then lower the heat to 375 degrees F and bake for another 10 minutes. If you’re feeling adventurous, flip them just before turning the heat down.
- Serve warm with your favorite chutney and bask in the deliciousness.
Cook’s Notes
The magic of these samosas is in their versatility. You can make the filling a day in advance, which makes assembly a breeze on a busy day. Just keep it chilled in an airtight container. As for leftovers, if there are any, you can store them in the fridge for up to three days. Reheat them in the oven to restore their crispness — microwaving makes them soggy, and nobody wants that. One common mistake is overfilling the samosas, which can lead to leaks. Less is more here, trust me.
Make It Your Own
- Swap the chicken breast for crispy tofu for a vegetarian version that’s equally satisfying.
- Replace the mango with diced apples for a subtly sweet twist.
- Add a handful of chopped spinach to sneak in some greens.
- For a spicier kick, mix in some diced jalapeños with the filling.
If you try this, I’d love to hear how it turns out — drop a comment or tag me! Nothing makes my day like seeing your kitchen adventures. Enjoy your samosa-making journey!
Related update: Baked Indian Samosas

It was a chilly Tuesday, and I found myself rummaging through my pantry, yearning for something warm and satisfying. As I sifted through the usual suspects, my eyes caught a glimpse of a pack of Neoguri ramen — my secret weapon for those mid-week cravings. The spicy seafood aroma from this dish has always been my go-to comfort, especially when I’m in the mood for something quick yet soul-satisfying. The best part? It’s like taking a mini-trip to a seaside ramen bar without leaving my kitchen. Trust me, you don’t need much time or experience to whip this up, but the flavor will have you thinking you’re some kind of ramen master.
Jump to Recipe
What You’ll Need
You know what’s great about this recipe? You probably have most of these ingredients lounging in your pantry or fridge. No wild goose chase required!
- 1 pack of Neoguri ramen (spicy seafood flavor)
- Mussels (fresh or pre-cooked, your choice)
- 1 egg
- 1 green scallion
- 1 sheet of gim (seaweed)
How to Make Neoguri (Spicy Seafood Ramen)
- First, get a pot of water boiling. Toss in the mussels and the sauce packets from the Neoguri ramen. Let it roll on medium heat for about 5 minutes. The broth should smell like spicy seafood heaven.
- If you’re using fresh mussels, keep an eye on them. Once they open, they’re ready. Any stubborn closed ones? Toss them out — they’re not invited to this party.
- Now, add the ramen noodles. Let them mingle with the broth for 2 to 3 minutes. You’ll know it’s time when they’re perfectly tender.
- Time for the egg! Beat it lightly and pour it in while stirring the noodles in a circular motion. This creates that lovely, flaky egg drop texture. If you’re more of a poached egg fan, gently slip the egg off to the side of the pot instead.
- While the pot is doing its thing, slice your scallion into thin pieces and tear up the gim (seaweed). Prep done!
- Scoop everything into a serving bowl. Sprinkle with the scallions and gim, and get ready to dive in.
Cook’s Notes
Let me share a few nuggets of wisdom to make your ramen experience even better. If you’re prepping this ahead, keep the broth and noodles separate until you’re ready to eat — nobody likes mushy noodles. For leftovers (if there are any), store the broth and noodles individually. They’ll keep in the fridge for a day or two. Reheat gently on the stove for best results. Watch your mussels — overcooked ones turn rubbery, which is less than ideal.
Make It Your Own
Want to put a personal spin on this ramen? Here are some ideas:
- Swap the mussels for crispy tofu for a vegetarian twist. Just pan-fry the tofu until golden and add it when your noodles are done.
- Spice it up a notch by adding a spoonful of your favorite chili paste or sriracha to the broth.
- For a heartier meal, toss in some cooked shrimp or sliced fish cake along with the mussels.
- Throw in a handful of baby spinach or bok choy for a dose of greens. They’ll wilt beautifully in the hot broth.
If you try this, I’d love to hear how it turns out — drop a comment or tag me! Once your friends get a taste, they’ll be begging you for the recipe, and you can be all smug and mysterious about your ramen secrets.
Related update: Neoguri (Spicy Seafood Ramen)
Related update: Broccoli Rabe and Breaded Veal Scallopini
Related update: Roasted Garlic & Butternut Parmesan Soup