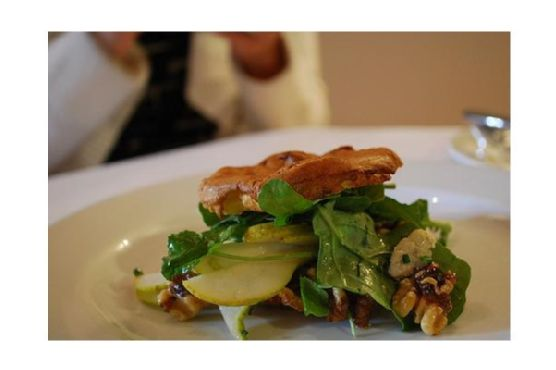
Pear Salad With Walnuts and Blue Cheese | Made by Meaghan Moineau

It was one of those fall evenings where the air turned crisp just a little too early for my liking. I found myself staring at a lonely pair of pears on my countertop, wondering how they’d somehow escaped the lunchbox routine all week. Inspired by the chill, a craving for something both comforting and refreshing struck me. This pear salad with walnuts and blue cheese was the answer — a perfect transitional dish that’s light yet satisfying. It’s what happens when you want to feel like you’re eating something fancy, minus the hassle. It’s filling enough for a lunch, or could be a lovely start to a cozy dinner.

Jump to Recipe

What You’ll Need

This salad is the definition of simple elegance, and chances are you already have most of these ingredients at home.

  • Pears – ripe but firm enough to hold their shape
  • Mixed salad leaves – I’m partial to using a mix that includes curly endive for that extra crunch
  • Walnuts – toasted lightly to bring out their nuttiness
  • Blue cheese – creamy and tangy, the star of the show
  • Lemon juice – for a zesty dressing that cuts through the richness
  • Safflower oil – mild and light, perfect for dressings
  • Walnut oil – adds a subtle nutty depth
  • Chives – delicate oniony flavor

How to Make Pear Salad With Walnuts and Blue Cheese

  1. Start by prepping your pears. Trim the base of each pear so they can stand upright like little soldiers on your cutting board. This will make slicing them easier and more stable.
  2. In individual salad bowls, arrange a generous handful of mixed salad leaves. Place one of your sliced pears on top of the greens in each bowl, making sure to fan them out for a bit of flair.
  3. Now, sprinkle a small handful of celery pieces into each bowl. The celery adds a delightful crunch and freshness to the salad.
  4. In a small bowl, combine the safflower oil, walnut oil, lemon juice, and a sprinkle of freshly chopped chives. Whisk together until the dressing is emulsified — you’ll know it’s ready when it’s slightly thick and all combined.
  5. Drizzle the dressing over each salad evenly. You want just enough to coat everything lightly without drowning it.
  6. Finish by scattering a healthy amount of crumbled blue cheese and toasted walnuts over each salad. These are your flavor bombs, so be generous!

Cook’s Notes

When it comes to choosing your pears, I recommend a variety like Bosc or Anjou for their firmness and sweetness. If your pears are too ripe, they’ll turn mushy in the salad. As for the blue cheese, any creamy variety works, but I find that a strong Roquefort can elevate the dish beautifully. To toast walnuts, simply spread them on a baking sheet and pop them in a 350°F (175°C) oven for about 5-7 minutes, or until they are golden and fragrant. Watch them closely because they can go from perfectly toasted to burnt in seconds! The salad is best served fresh, but you can store leftovers in an airtight container in the fridge for up to a day — just keep the dressing separate to avoid soggy greens.

Make It Your Own

  • Swap out the blue cheese for goat cheese if you’re not a fan of strong flavors. It adds a milder creaminess that is just as delightful.
  • Use pecans instead of walnuts for a slightly sweeter nutty touch.
  • If you’re looking for a bit more protein, add some grilled chicken or crispy tofu to make it a complete meal.
  • Drizzle a little balsamic glaze over the top for an added tangy sweetness that complements the pears beautifully.

If you try this, I’d love to hear how it turns out — drop a comment or tag me on Instagram! Your kitchen adventures make my day. Happy cooking!

Related update: Pear Salad With Walnuts and Blue Cheese

Related update: Fall Farro Salad with Pomegranate, Walnut & Truffles

Student Loan Shakeup: Costs, Caps, Markets | Analysis by Brian Moineau

TL;DR

  • Federal student loan changes take effect July 1, 2026: SAVE is gone, RAP and Tiered Standard become the default architecture, grad/Parent PLUS borrowing is capped, and autopay yields a 1% interest cut through June 30, 2028. [1][2][3]
  • The real economic shock isn’t $10 RAP minimums; it’s the hard $20,000/year Parent PLUS cap and the end of Grad PLUS for new borrowers, which will force families and universities to rethink pricing, packaging, and private credit—fast. [3][5]
  • Expect a surge in private lending products pitched at the “PLUS gap,” selective tuition resets in master’s programs, and a messy two‑year scramble as about 7.5 million ex‑SAVE borrowers pick new plans under higher 2026–27 rates. [1][4][7]

What the source said

PBS NewsHour reported that major federal student loan changes start on July 1, 2026. The segment highlighted four headliners: higher interest rates on most new federal loans, a temporary 1% interest discount for borrowers in autopay through June 30, 2028, the elimination of the Biden‑era SAVE plan affecting roughly 7.5 million borrowers, and new borrowing caps for graduate and Parent PLUS loans. PBS previewed the new Repayment Assistance Plan (RAP), noting a $10 minimum payment and an interest subsidy for on‑time payers, while warning of potential payment hikes, rising delinquencies, and borrower confusion. It also flagged caps on graduate/Parent PLUS borrowing as a structural shift that will ripple through household budgets. [1]

Why it matters

  • Households: Parent PLUS caps of $20,000 per year/$65,000 lifetime end the “borrow the rest” era. For any school whose net price exceeds that cap, families must fill the difference from income, savings, institutional aid, or private loans. This creates a predictable, recurring “funding gap” problem for middle‑ and upper‑middle‑income parents starting with the 2026–27 year. [3]

  • Institutions: Eliminating new Grad PLUS and capping Parent PLUS attack two quiet revenue valves that subsidized high‑price master’s programs and undergraduate enrollment smoothing. Schools with high dependence on graduate tuition or on PLUS‑driven yield will feel the cash crunch first, particularly in 2026–27 and 2027–28 as higher fixed rates (e.g., 6.52% undergrad, 8.07% grad unsub, 9.07% PLUS for 2026–27) bite. [3][7]

Original analysis

Consensus says “RAP softens the blow.” I disagree: the real economywide effect is a funding‑source rotation—away from federal parent/grad credit toward family cash, institutional discounting, and private loans—while payments rise modestly for ex‑SAVE borrowers who lose $0 payments. The policy aims to constrain borrowing; it will, but not without second‑order effects in 2026–27 and 2027–28 as private lenders and bursars reset offers. [2][3][4][7]

Named typology: who wins, who loses

  • High‑income, high‑debt graduates (>$100k AGI, >$100k debt): Better off choosing Tiered Standard with a 25‑year term; RAP takes up to 10% of AGI and can cost more monthly, though it’s PSLF‑qualifying. [7]
  • Low‑income borrowers (<$35k AGI): RAP’s $10 minimum plus interest‑waiver mechanics prevent balance creep; total time to forgiveness is 30 years, not 20–25. [3]
  • New Parent PLUS borrowers (all incomes): Locked out of income‑driven plans and PSLF; only Tiered Standard applies, which hardens monthly obligations. [5]
  • Universities reliant on Grad PLUS/Parent PLUS: Revenue risk starts day one of 2026–27; program‑level loan limits that colleges can set add a new internal brake on debt‑fueled enrollment. [3][6]

Back‑of‑envelope math 1: the autopay “1% off”

  • Example: $30,000 undergraduate Direct loan first disbursed in 2026–27 at 6.52% (fixed). Standard 10‑year amortization → monthly ≈ $340; total interest ≈ $10,777. With the temporary autopay 1% rate reduction (to 5.52%) from July 1, 2026 through June 30, 2028, assume autopay for two full years, then reversion to 6.52%. Savings: Year‑1 average balance ≈ $28,500 → ≈ $285 saved; Year‑2 average ≈ $26,100 → ≈ $261 saved; total ≈ $546 before compounding. Order of magnitude: $500–$600 if you stay in autopay. [2][7]

Back‑of‑envelope math 2: the Parent PLUS “gap”

  • Parent PLUS for new borrowers: $20,000 per year cap. Suppose net price after grants and the student’s own federal loans is $35,000 per year at a regional private university. Pre‑cap, a parent could borrow the full $35,000. Post‑cap, annual funding gap = $35,000 − $20,000 = $15,000. Over four years, that’s a $60,000 hole to fill from cash, 529s, institutional plans, or private loans. At $60,000 financed privately at 9% over 10 years, monthly ≈ $760. Families will notice. [3]

2×2: Choosing RAP vs Tiered Standard (new borrowers on/after July 1, 2026)

Debt size Income level Likely better plan Why
Low debt (<$25k) Low income (<$35k) RAP $10 minimum and interest subsidy keep payments tiny and balances from growing; 30‑year horizon is acceptable at low debt. [3]
Low debt (<$25k) High income (>$100k) Tiered Standard (10 years) Short term → less total interest; RAP could demand up to 10% of AGI, which may exceed a 10‑year fixed payment. [7]
High debt (>$100k) Low income (<$35k) RAP The only path that avoids negative amortization; PSLF‑qualifying if borrower is in public service. [3][7]
High debt (>$100k) Mid/high income ($60k–$120k) It depends; many tilt Tiered Standard (20–25 years) RAP scales with income and runs 30 years; Tiered Standard fixes the cost and ends 5–10 years sooner unless pursuing PSLF. [7]

Historical analogue: 2012 and 2013 quietly reshaped graduate financing. In 2012, subsidized Stafford loans for graduate students were eliminated, shifting grads fully to unsubsidized credit. In 2013, Congress tied new loan rates to the 10‑year Treasury via Public Law 113–28, introducing annual rate resets that reappear in 2026–27 rate tables (6.52% undergrad, 8.07% grad unsub, 9.07% PLUS). Those shifts didn’t collapse graduate enrollment, but they raised costs and nudged borrowers toward PLUS and private loans. Today’s elimination of new Grad PLUS for 2026–27 is that earlier ratchet, turned further. [9][8][7]

Named‑stakeholder breakdown: what this means for them

  • U.S. Department of Education: The autopay carrot (1% cut through June 30, 2028) is a portfolio‑health bet to pull borrowers back into on‑time payments as RAP launches and SAVE sunsets, with delinquency rates and IDR uptake as scorecards. [2]
  • NASFAA and campus aid offices: They become translators of the new regime—especially “limited exception” grandfathering rules through mid‑2028—while fielding calls about PLUS caps and RAP eligibility. [3][5]
  • Private lenders (SoFi, Sallie Mae, Discover): The $20,000 Parent PLUS ceiling and the end of Grad PLUS are product‑development gifts; expect “Parent Loan Gap” and “Graduate Bridge” offerings around $15k–$40k annual shortfalls at 8–12% APRs. [3][7]
  • Loan servicers (Aidvantage, Nelnet): Two years of operational churn—autopay enrollments, SAVE exits, RAP onboarding, and plan sunsets by July 1, 2028—will stress call centers and websites; error rates become a reputational risk. [2][3]
  • State flagships and tuition‑dependent privates: Parent PLUS caps will hit high‑net‑price campuses harder; smaller privates that leaned on PLUS to close budget gaps may counter with deeper merit aid or cohort caps in 2026–27. [3][7]

What others are missing

Institutions now have explicit authority to set program‑level federal loan caps below new federal maximums. That change lets colleges limit borrowing for, say, a 12‑month master’s with a weak debt‑to‑income track record by setting a program cap that applies to every enrollee in that program. This tool lets CFOs and provosts “de‑risk” debt outcomes but shifts more cost to students or private markets if tuition doesn’t adjust. Expect uneven adoption: tuition‑dependent master’s and professional programs will move first to manage cohort risk and regulatory optics, while brand‑name programs wait. [3][6]

What to watch next

  1. By December 31, 2026, at least three top private student‑loan brands publicly launch or rebrand “Parent Gap” or “Graduate Bridge” products explicitly marketing around the $20,000 PLUS cap.
  2. By June 30, 2027, at least 10 accredited institutions publicly adopt program‑level federal loan caps below federal maximums for specific master’s programs, citing new authority in the 2026 final rule.
  3. By March 31, 2027, RAP becomes the single largest repayment plan by borrower count in ED’s portfolio reports, surpassing legacy IBR/ICR/PAYE as ex‑SAVE borrowers complete transitions.

My take

I’m bullish on RAP as a stabilizer and bearish on universities’ near‑term revenue across 2026–27 and 2027–28. The two‑year window to June 30, 2028—with the autopay sweetener and legacy plan sunsets—gives borrowers a workable glidepath. But the Parent PLUS and Grad PLUS pivots are the real tectonic plates because they cap the federal spigot that masked tuition inflation after 2013. If your business model depended on unlimited parent and graduate federal credit, the next admissions cycle is your stress test. Cut price, boost aid, or prepare to shrink. The policy intent is to constrain borrowing; it will.

Sources

  1. How the federal student loan changes could impact borrowers — PBS NewsHour (https://www.pbs.org/newshour/show/how-the-federal-student-loan-changes-could-impact-borrowers) — Broadcast explainer that flags SAVE’s end, RAP’s $10 minimum, higher rates, caps, and an estimated 7.5 million affected SAVE borrowers.

  2. U.S. Department of Education Announces Student Loan Interest Rate Reduction — U.S. Department of Education (https://www.ed.gov/about/news/press-release/us-department-of-education-announces-student-loan-interest-rate-reduction) — Official press release confirming the 1% autopay interest reduction through June 30, 2028 and the RAP/Tiered Standard framework.

  3. Federal Student Aid Changes from the One Big Beautiful Bill Act — NASFAA (https://www.nasfaa.org/uploads/documents/Federal_Student_Aid_Change_OB3.pdf) — Detailed summary of final regulations: Parent PLUS $20,000/year and $65,000 lifetime caps, graduate/professional caps, $257,500 lifetime limit, RAP mechanics ($10 minimum; 1–10% of AGI), plan sunsets, and Parent PLUS ineligibility for RAP.

  4. Education Department directs student loan borrowers in SAVE plan to prepare for repayment — Associated Press (https://apnews.com/article/f4e383b6e80f8f4954a1f17404eea199) — News report that more than 7 million SAVE enrollees received notices to choose a new plan starting July 1, 2026.

  5. Federal Parent PLUS Loan Changes: What New Parent Borrowers Need to Know — NASFAA (https://www.nasfaa.org/uploads/documents/OB3_PPLUS_Changes_New_Parent_Borrowers.pdf) — Two‑page brief confirming $20,000/year and $65,000 lifetime caps for Parent PLUS, Tiered Standard as the only repayment, and PSLF implications.

  6. Federal Student Loan Program Changes to Take Effect on July 1, Pending Litigation Outcomes or Legislative Action — Faegre Drinker (https://www.faegredrinker.com/en/insights/publications/2026/6/federal-student-loan-program-changes-to-take-effect-on-july-1-pending-litigation-outcomes-or-legislative-action) — Legal analysis summarizing the May 1, 2026 final rule, repayment plan structures, and ongoing lawsuits that could affect implementation.

  7. Interest Rates and Origination Fees — Iowa State University Office of Student Financial Aid (https://financialaid.iastate.edu/types-of-aid/loans/federal-loan-resources/interest-rates-and-fees/) — Year‑over‑year federal loan rate table showing 2026–27 increases (6.52% undergrad, 8.07% grad unsub, 9.07% PLUS).

  8. Bipartisan Student Loan Certainty Act of 2013 (Public Law 113–28) — Congress.gov (https://www.congress.gov/bill/113th-congress/senate-bill/1334) — Statute that ties new federal loan rates to the 10‑year Treasury, creating annual rate resets.

  9. Graduate Students No Longer Eligible for Subsidized Loans — NACUBO (https://www.nacubo.org/News/2012/3/Graduate-Students-No-Longer-Eligible-for-Subsidized-Loans) — 2012 policy change summary confirming elimination of subsidized Stafford loans for graduate students.


Related update: We recently published an article that expands on this topic: read the latest post.


Related update: We recently published an article that expands on this topic: read the latest post.

Pear Salad With Walnuts and Blue Cheese | Made by Meaghan Moineau

Last Tuesday, I found myself staring into the fridge, the usual weeknight dilemma playing out: what to make that’s quick, refreshing, yet still feels like a treat? I’d been craving something that had all the comforting notes of fall but was light enough to not weigh me down. Enter the pear salad with walnuts and blue cheese, a concoction that seemed to tick every box. This salad is all about contrasts — the creaminess of the blue cheese against the crisp pears, the bitterness of endive softened by the sweet, nutty warmth of walnuts. It’s a symphony of flavors that feels like indulging without the next-day guilt. Ready to dive in? Trust me, it’s a keeper.

Jump to Recipe

What You’ll Need

This recipe doesn’t require a trip to a gourmet store. Odds are you already have most of these ingredients hanging out in your kitchen.

  • Pears – Choose ripe, but firm ones.
  • Mixed salad leaves – A blend with some curly endive adds a nice bitter touch.
  • Lemon juice – For a bright, tangy kick.
  • Blue cheese – Go for your fave, the funkier, the better.
  • Chives – Finely chopped for a fresh oniony hint.
  • Safflower oil – For a neutral base.
  • Walnut oil – Adds a toasty depth.
  • Walnuts – Toast these for that extra crunch.

How to Make Pear Salad With Walnuts and Blue Cheese

  1. Start by prepping the pears. Slice a thin piece off their bases so they can stand upright without toppling over. Trust me, this makes the plating look extra fancy.
  2. In individual bowls, artistically arrange the pears amidst the mixed salad leaves. Think of this as your blank canvas.
  3. Sprinkle the chopped chives over the leaves, letting them fall where they may — no need for precision here.
  4. In a small bowl, whisk together the lemon juice, safflower oil, and walnut oil. Aim for a smooth emulsion that coats the back of a spoon.
  5. Drizzle this dressing lovingly over your salads. You’ll want a nice, even coverage without drowning the ingredients.
  6. Finish by scattering a generous handful of blue cheese crumbles and toasted walnuts over each salad, letting them nestle into the greens.

Cook’s Notes

Okay, let’s talk about some things to keep in mind. Firstly, when choosing pears, Bartletts or Anjous are my go-to for their texture and sweet flavor. If they’re too ripe, they might collapse under the pressure of the salad fork, so aim for that sweet spot of just ripe.

Toasting the walnuts is a game-changer. Just a few minutes in a dry skillet until they’re golden and fragrant will make a world of difference. Store any leftovers in a sealed container in the fridge, but honestly, this salad is best enjoyed fresh.

If you’re prepping ahead, keep the dressing separate until you’re ready to serve. This keeps the greens from wilting and maintains that fresh, crisp bite.

Make It Your Own

  • Don’t love blue cheese? Swap it out for crumbled feta or goat cheese for a milder taste.
  • For a protein boost, add some grilled chicken or crispy tofu on top. It turns this salad into a complete meal.
  • Try swapping walnuts with pecans for a sweeter, softer crunch.
  • If you can’t find curly endive, arugula offers a peppery alternative that pairs wonderfully with the pears and cheese.

If you try this, I’d love to hear how it turns out — drop a comment or tag me! Whether you stick to the script or put your own twist on it, I hope it becomes a staple in your kitchen like it has in mine. Happy cooking!

Related update: Pear Salad With Walnuts and Blue Cheese

Related update: Pear Salad With Walnuts and Blue Cheese

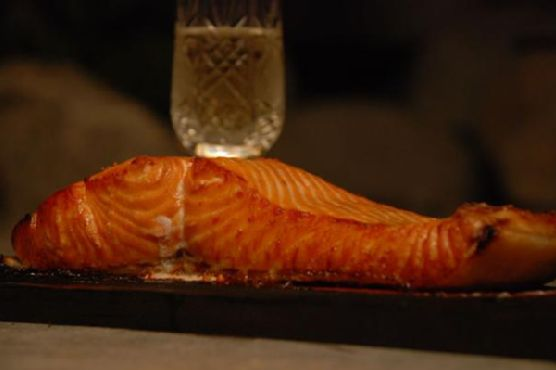
Wildwood Ovens Bourbon Apple Glazed Cedar Plank Salmon | Made by Meaghan Moineau

Last Thursday, I found myself staring into the fridge, hoping for inspiration to strike before my toddler demanded dinner. It was one of those days where you need something kinda fancy to feel like an adult—but it also had to be easy enough to not cause a breakdown. Enter: Wildwood Ovens Bourbon Apple Glazed Cedar Plank Salmon. This dish is the answer to those chaotic moments when you want to impress yourself and anyone lucky enough to be at the table. It’s a little sweet, a little smoky, and totally doable on a weeknight. The cedar plank makes it taste like it came from a restaurant, but really you just soaked a piece of wood and turned on the grill. Magic, right?

Jump to Recipe

What You’ll Need

The beauty here is that the ingredient list is straightforward, and there’s a good chance you’ve got most of this hiding in your pantry. A quick run to the store, and you’ll be ready to rock this impressive dish.

  • Apple juice
  • Brown sugar
  • Cedar plank (make sure it’s food-safe!)
  • 3-4 garlic cloves, minced
  • 1 tsp kosher salt
  • Freshly cracked black pepper
  • Salmon filet (about 1.5-2 lbs is perfect)
  • Bourbon whiskey

How to Make Wildwood Ovens Bourbon Apple Glazed Cedar Plank Salmon

  1. Start by soaking your cedar plank in water for at least 2 hours. This step is crucial to prevent any unplanned flare-ups and to infuse that lovely woody flavor into your salmon.
  2. Rinse the salmon under cold water and gently pat it dry with paper towels. This is essential as it helps the seasoning stick better and gives you a nice crisp finish.
  3. Grab a medium saucepan and set it over medium-high heat. Carefully pour in the bourbon—remember, no free-pouring from the bottle, unless you enjoy spontaneous kitchen pyrotechnics.
  4. Once the alcohol is reduced and you’ve got just a little left at the bottom of the pan, add in the apple juice, brown sugar, and minced garlic. Keep it on the heat until it’s reduced to about a third of its original volume. You’re looking for something just thinner than syrup.
  5. Season the salmon generously with salt and freshly cracked black pepper on both sides. Brush the skin side with a bit of olive oil.
  6. Place the seasoned salmon, skin side down, on the soaked cedar plank. Then, transfer the plank to a medium-high grill or a wood-fired oven preheated to 500°F, positioning it close to the fire for that authentic flavor.
  7. Using a probe thermometer, start checking the internal temperature of the salmon after about 10 minutes, and then every 5 minutes thereafter. Once it hits at least 100°F, brush on the apple glaze—every few minutes. This layering helps build up that gorgeous, sticky finish.
  8. Continue cooking until the salmon reaches your desired doneness; I aim for around 135°F for that perfect, juicy flakiness.

Cook’s Notes

Here are some extra tips for nailing this dish every time:

  • Make sure your cedar plank is fully submerged while soaking, maybe putting a can or something on top to keep it under water.
  • Don’t skimp on the glaze. The more layers you add, the richer the flavor.
  • Leftovers (if you have any) can be kept in an airtight container in the fridge for a couple of days. Flake it over a salad for a quick next-day meal!

Make It Your Own

  • Swap the bourbon for brandy if you prefer a slightly sweeter glaze.
  • For a spicier kick, add a pinch of chili flakes to the glaze.
  • No salmon? Try this glaze on chicken breasts or even tofu—just adjust the cooking time accordingly.
  • Top with fresh herbs like dill or parsley for a pop of color and flavor right before serving.

If you try this, I’d love to hear how it turns out—drop a comment or tag me on social media! It’s always a win when we can turn a potential kitchen meltdown into a tasty triumph.

Related update: Wildwood Ovens Bourbon Apple Glazed Cedar Plank Salmon

Related update: Meat rolls with prosciutto and sage

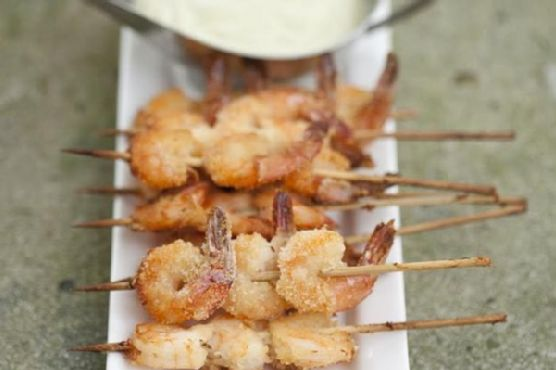
Crunchy Prawn Skewers With Lemony Avocado Dip | Made by Meaghan Moineau

Picture this: it’s a Wednesday evening, and you just got home, eyes baggy from the day, craving something that feels like a mini-vacation but without the suitcase hassle. Enter Crunchy Prawn Skewers With Lemony Avocado Dip. These little beauties are my go-to when I need something fresh, quick, and so delightful it erases the mundane right off your plate. I love that they’re impressive enough to make my husband think I’ve been slaving away when really, it’s just a fun little dish that comes together quicker than you can say “takeout.” Plus, that avocado dip? Oh, it’s the zingy, creamy goodness that dreams are made of.

Jump to Recipe

What You’ll Need

I bet you already have most of these staples hanging around your kitchen. You might just need to grab some prawns on your way home.

  • Prawns – The star of the show, fresh or thawed from frozen.
  • Flesh of Avocado – Creamy and ripe, please.
  • Crème Fraiche – For that lush, smooth texture in the dip.
  • Lemon (juice) – Bright, zesty, and necessary.
  • Bread crumbs – I like the panko kind for extra crunch.
  • Olive oil – Just a splash to coat those prawns.
  • Bamboo skewers – Don’t let them set your kitchen on fire.

How to Make Crunchy Prawn Skewers With Lemony Avocado Dip

  1. Start by making the dip: throw the avocado flesh, crème fraiche, and lemon juice into a food processor. Blend until silky smooth. Taste, season, and set it aside.
  2. In a separate bowl, mix your breadcrumbs with a touch of lemon zest, and season generously. It should smell like a fresh, zesty day.
  3. Now, coat your prawns in a little olive oil. Give them a gentle massage, then toss them into the breadcrumb mixture, ensuring they’re well-coated.
  4. Thread three prawns onto each skewer. Trust me, this is easier than threading a needle.
  5. Time to grill! Place the skewers on a preheated grill for about 2 minutes on each side, until they’re golden and crisp. The smell should be irresistible by now.
  6. Serve immediately with that luscious avocado dip and watch them disappear quickly.

Cook’s Notes

I can’t stress enough the importance of soaking those bamboo skewers beforehand. Give them at least an hour in cold water, and you’ll avoid any unwelcome flare-ups. If you’re planning to make this dish ahead, prep the dip and breadcrumb mixture in advance, but hold off on breading the prawns until you’re ready to cook. Leftovers? Pop them in an airtight container in the fridge — the dip stays good for a couple of days, but the prawns are best enjoyed fresh while they’re crispy.

Make It Your Own

  • Instead of prawns, try using tofu cubes for a vegetarian twist. Just press them well to remove excess moisture before coating.
  • Add a pinch of smoked paprika to the breadcrumb mix for a smoky kick.
  • Swap the crème fraiche with Greek yogurt if you prefer a tangier dip.
  • For a little heat, toss a few chili flakes into the breadcrumb mixture.

If you try this, I’d love to hear how it turns out — drop a comment or tag me! Enjoy making these skewers and watch them become a weeknight favorite in no time!

Related update: Crunchy Prawn Skewers With Lemony Avocado Dip

Related update: Mini Zucchini Bites (Cuadritos De Calabacin)

Vegetarian Ratatouille | Made by Meaghan Moineau

Last Wednesday, I found myself staring into the depths of my fridge, contemplating a lonely eggplant and a couple of sad zucchinis. It was one of those evenings when inspiration was as low as my vegetable crisper’s contents. But then, a little spark hit me—why not whip up a colorful and cozy Vegetarian Ratatouille? It’s one of those dishes that feels like a warm hug after a long day. Plus, it’s a melody of summer veggies that’s simple to throw together, making it a perfect midweek hero. Loaded with fresh flavors, it’s hearty without being heavy, and best of all, it can transform fridge odds and ends into something spectacular. So, if you’re ready to turn that produce drawer into a work of art, keep reading. Or, if you’re raring to get started—Jump to Recipe

What You’ll Need

This ingredient list is refreshingly straightforward. Chances are you already have most of these in your kitchen. Here’s what you’ll need for this vibrant veggie medley:

  • Eggplant
  • Zucchini
  • Yellow squash
  • Tomato
  • Red bell pepper
  • Orange bell pepper
  • Onion
  • Garlic
  • Fresh basil
  • Thyme
  • Dried oregano
  • Extra virgin olive oil
  • Sea salt

How to Make Vegetarian Ratatouille

  1. Start by heating a good glug of extra virgin olive oil in a large saucepan over medium-low heat. Toss in the diced onion and minced garlic. Stir them around until the onions are translucent and the whole kitchen smells like a dream.
  2. Next, add in the chopped tomatoes. Give them a gentle stir and let them mingle with the onions and garlic until the flavors start to blend together.
  3. Now, it’s time to add the rest of the gang. Introduce the chopped eggplant, zucchini, yellow squash, red and orange bell peppers to the party. Sprinkle in some sea salt, a few sprigs of thyme, and a pinch of dried oregano.
  4. Lower the heat and let everything simmer gently for about 30 minutes. Stir occasionally, keeping an eye on the eggplant. You’ll know it’s done when it’s tender and the edges of the vegetables are starting to caramelize a bit.
  5. Before serving, toss in some freshly torn basil leaves for a burst of freshness. Give everything one last stir and get ready to dig in!

Cook’s Notes

Here’s the deal: Ratatouille is incredibly forgiving. If you have extra veggies on hand, like mushrooms or carrots, feel free to toss them in. Just keep an eye on the cooking time; firmer veggies might need a bit more time to tenderize.

  • Worried about mushy vegetables? Make sure your heat is low enough to allow them to cook slowly and evenly.
  • This dish can easily be made ahead of time. Store it in an airtight container in the fridge for up to three days. The flavors only deepen as it sits, making it an excellent leftover choice.
  • If you’re serving this to guests, you can prepare it in advance and simply reheat gently on the stove before serving.

Make It Your Own

  • For a protein boost, add in some chickpeas or white beans during the last 10 minutes of cooking.
  • Swap the fresh basil for a handful of chopped parsley if that’s what you have on hand.
  • Spice things up with a pinch of red pepper flakes for some heat.
  • Transform it into a heartier meal by serving it over a bed of fluffy quinoa or couscous.

If you try this, I’d love to hear how it turns out — drop a comment or tag me! Your feedback means the world to me and keeps the inspiration flowing.

Related update: Vegetarian Ratatouille

Related update: Wildwood Ovens Bourbon Apple Glazed Cedar Plank Salmon

Spicy Lemongrass Soup | Made by Meaghan Moineau

It was one of those chilly evenings when I was ransacking through my pantry and fridge, desperately trying to piece together something warm and spicy. You know the feeling, right? When you want something cozy but you’re in no mood to go out for groceries. That’s when this Spicy Lemongrass Soup was born. It’s a comforting bowl that’s surprisingly easy to whip up with just a few special ingredients, like the invigorating lemongrass and bold red dried peppers. The process might seem like a little kitchen adventure, but I promise, it’s one worth embarking on.

Jump to Recipe

What You’ll Need

If you’re anything like me, you’ll be thrilled to find that you probably have most of the ingredients already lounging in your kitchen. The stars of the show are these bold, aromatic components that bring a delightful zing to this dish.

  • Fresh lemongrass – gives it that unmistakable citrusy aroma
  • Red dried peppers – these pack the punch
  • Ginger – fresh is best for that sharp, spicy edge
  • Garlic – because when is garlic not invited?
  • Vegetable broth – the canvas for all those flavors
  • Canned fresh coconut milk – if you can find it, it’s game-changing
  • Tofu cubes – protein power
  • Snow peas – for a bit of crunch and color
  • Mushrooms – umami goodness
  • Rice noodles – the slurp factor
  • Lime (juice) – the zesty finish

How to Make Spicy Lemongrass Soup

  1. Start by chopping the lemongrass into 2-inch pieces. Slice each piece down the center. This will release the oils that give the soup its signature fragrance.
  2. In a large soup pot, combine the lemongrass, vegetable broth, coconut milk, garlic, and ginger. Bring it to a boil over medium-high heat. You’ll know it’s ready when the aroma makes you want to dive right in.
  3. Once boiling, reduce the heat to low and let it simmer for 30 minutes. The broth should become a golden, aromatic bath of deliciousness.
  4. After simmering, strain the broth through a cheesecloth to remove the lemongrass stalks. Trust me, they’re not the chewable kind!
  5. Return the strained broth to a simmer. Add the tofu, mushrooms, snow peas, and rice noodles. Stir them gently so they mingle and absorb all that flavor.
  6. Squeeze in the lime juice whenever the mood strikes—early on for a tangy infusion, or at the end for a fresh kick. I like a bit at the start and a bit at the end.
  7. Simmer until the noodles are soft and the snow peas still have a slight crunch. You’ll see the edges of the pot starting to bubble as the aroma fills the room.
  8. Serve hot, garnishing with a sprinkle of grated ginger or some fresh scallions if you have them.

Cook’s Notes

Oh, the lemongrass! It’s the heart and soul but remember, it’s not meant to be chewed. Straining it out is crucial unless you enjoy a mouthful of fibrous stalks. This soup can be prepped a day ahead; just store the broth separately and add the noodles when reheating. Leftovers? They keep well in the fridge for a couple of days, but the noodles will get softer, so maybe add those fresh if you’re planning a day-two soup fest.

Make It Your Own

  • Swap the tofu for crispy tofu or even shredded cooked chicken for a different texture.
  • Throw in some sliced bell peppers for extra color and crunch.
  • Use zucchini noodles instead of rice noodles for a lighter, veggie-packed version.
  • If you love heat, add an extra handful of red dried peppers or a dash of chili oil on top before serving.

So, there you have it! If you try this Spicy Lemongrass Soup, I’d love to hear how it turns out—drop a comment below or tag me on social media. Happy cooking, my kitchen adventurers!

Related update: Spicy Lemongrass Soup

Related update: Thai Coconut Curry Soup

Apothic Granita and Vanilla Panna Cotta | Made by Meaghan Moineau

Picture this: It’s a Friday evening, and I’ve just survived one of those weeks where everything feels a bit too much. You know the kind — when the emails pile up and the laundry threatens to become sentient. I’m in the kitchen with my favorite playlist crooning in the background, a glass of wine in hand, and the distinct sense that I need something special, yet fuss-free, to round off this week. Enter: Apothic Granita and Vanilla Panna Cotta. This dessert is my secret weapon; it’s deceptively simple yet so elegant that it could grace any dinner party table. Think of it as a little gift to yourself — creamy, dreamy panna cotta topped with a refreshing, slightly boozy granita that feels like a grown-up snow cone. Trust me, it’s the perfect ending to an imperfect week.

Jump to Recipe

What You’ll Need

The beauty of this recipe is that it feels luxurious while using ingredients you might already have lurking in your pantry. Let’s check the list:

  • 1 cup Apothic Red wine
  • 1 tablespoon crème de cassis liqueur
  • 2 tablespoons sugar
  • 1 teaspoon fresh lemon juice
  • 1 sprig fresh rosemary
  • 1 teaspoon whole black peppercorns
  • 1 envelope (2 1/4 teaspoons) unflavored Knox powdered gelatin
  • 1 cup half and half
  • 1 cup heavy cream
  • 1/4 cup sugar
  • 1 vanilla bean, split and seeds scraped
  • 1/4 cup cold water

How to Make Apothic Granita and Vanilla Panna Cotta

  1. Start with the granita: In a saucepan over medium-low heat, combine the Apothic Red wine, crème de cassis, 2 tablespoons of sugar, lemon juice, rosemary, and peppercorns. Let it simmer gently for 10 to 15 minutes until the kitchen is filled with a fragrant aroma and the sugar has dissolved completely.
  2. Once the mixture is infused, remove it from the heat and allow it to cool to room temperature. This is your golden moment of patience — let those flavors meld!
  3. After cooling, strain the mixture into a shallow airtight container, ensuring all the solids are removed. Cover and place it in the freezer for about 2 hours, or until it’s frozen but not rock solid.
  4. While the granita is freezing up its magic, let’s tackle the panna cotta. Sprinkle the gelatin over the cold water in a small bowl and let it bloom — this means it should look like a soft, jiggly sponge.
  5. In another saucepan, combine the half and half, heavy cream, and 1/4 cup of sugar. Add the split vanilla bean and its seeds, then bring the mixture to a gentle simmer over medium heat, stirring occasionally. You’re looking for the moment where it’s steaming but not yet boiling.
  6. Remove from heat and whisk in the bloomed gelatin until fully dissolved, ensuring a silky smooth texture. Strain the mixture into cups or molds of your choosing, then chill in the refrigerator for at least 4 hours or until set.
  7. To finish the granita, use a fork to scrape the surface into icy crystals. It should remind you of a snow cone, but with a sophisticated twist.
  8. Serve the panna cotta topped with a generous scoop of granita, and get ready to impress yourself or any guest lucky enough to join.

Cook’s Notes

Keep an eye on the simmering wine mixture. If it reduces too much, you’ll end up with concentrated flavors that might overpower the delicate panna cotta. If you’re planning ahead, the panna cotta can be made a day in advance and kept chilled. As for leftovers, the granita can be stored in the freezer in an airtight container for up to a week. Just remember to give it a good scrape before serving again.

Make It Your Own

  • Swap the Apothic Red: Try a different red wine for a unique flavor profile — maybe a Merlot or Zinfandel.
  • Berry Burst: Add a handful of fresh berries to the granita mixture before freezing for a fruity twist.
  • Vanilla Twist: Use vanilla extract instead of a vanilla bean if you’re in a pinch, but reduce it to one teaspoon.
  • Herbal Infusion: Replace rosemary with fresh thyme for a fresh take on the herbal notes.

If you try this, I’d love to hear how it turns out — drop a comment or tag me! If your week has been anything like mine, this might just be the sweet escape you need.

Related update: Apothic Granita and Vanilla Panna Cotta

Related update: Flour-Less Peanut Butter Cookies

SpaceX Monetizes Colossus for AI Compute | Analysis by Brian Moineau

TL;DR

  • SpaceX just turned “Colossus” into a real business line: Reflection will pay $150 million per month for GB300‑class compute starting July 1, 2026—up to $6.3 billion through December 2029—on a contract both sides can cancel with 90 days’ notice after the first quarter. [1], [4]
  • This is not “more cloud.” It’s asset‑backed AI utilities: 72‑GPU GB300 NVL72 racks with 130 TB/s NVLink domains selling time like power plants sell megawatt‑hours; scarcity is the product. [2]
  • The open‑source angle is strategic, not ideological: Reflection (seeking a ~$25B valuation) gets sovereign‑grade control without building hyperscale, while SpaceX monetizes idle Colossus cycles alongside existing Anthropic capacity commitments from Colossus 1. [1], [3], [9]

What the source said

CNBC reports that SpaceX signed a computing power agreement with Reflection AI, an open‑source lab, for access to Nvidia GB300 chips at SpaceX’s Colossus data center near Memphis, Tennessee. Reflection will pay $150 million monthly starting July 1, 2026, through 2029, implying ~$6.3 billion if the deal runs full term; either party can terminate with 90 days’ notice after the first three months. CNBC frames the deal as SpaceX productizing Colossus—built initially to train Grok—and notes prior compute arrangements with Anthropic, Google and Cursor, plus SpaceX’s post‑IPO push into AI infrastructure. Reflection positions the move as “American open intelligence,” courting government and national security buyers who want inspectable models and deployment control. [1]

Why it matters

The real stakeholders here are not just SpaceX and Reflection. They’re governments with procurement needs, enterprises chafing under closed‑model terms, chipmakers like Nvidia, and utilities in Tennessee and Mississippi that must deliver hundreds of megawatts on tight timelines. The Colossus platform already hosted more than 220,000 Nvidia GPUs and >300 MW at Colossus 1 for Anthropic—evidence of a compute market reallocating capital from model labs to whoever controls dense power and racks. [3]

SpaceX’s record IPO in June 2026 set the financial stage to package data centers as a revenue line alongside launch and Starlink. Deals like this convert capex into contracted cash flows and push “AI compute” toward a utility model: long‑dated offtake, power‑first engineering, and stickiness via NVLink/InfiniBand fabric topologies in GB300 NVL72 clusters. [6], [2]

Original analysis

SpaceX–Reflection compute deal: the economics and the bet

  • Back‑of‑envelope calculation for 2026–2029 cash flows

    • Total value if it runs full term: $150 million × 42 months (Jul 2026–Dec 2029) ≈ $6.3 billion. That’s $900 million for 2H26 and $1.8 billion per full year thereafter. [1], [4]
    • Capacity lens: If Colossus 1 was ~220,000 Nvidia GPUs across >300 MW for Anthropic, Reflection’s tranche likely targets Colossus 2’s newer GB300 inventory. GB300 NVL72 packs 72 Blackwell Ultra GPUs per rack with an in‑rack 130 TB/s NVLink domain; selling time slices of such tightly coupled racks commands premium pricing because many training runs don’t decompose across disjoint clusters without heavy efficiency penalties. [3], [2]
  • A 2×2 to decode the 2026–2029 market

    • Axis A: Model strategy
      • Open models (Reflection, select academia/defense pilots)
      • Closed models (OpenAI, Anthropic, Google)
    • Axis B: Compute sourcing
      • Asset‑light buyers (rent compute): Reflection today; many Series B–D labs
      • Asset‑heavy builders (own DCs): Microsoft, Google; portions of OpenAI
    • Where this deal sits: Open × Asset‑light. Advantages: speed to train, procurement optionality, and political palatability for U.S. government buyers who want source‑inspectable systems. Risks: termination rights (90‑day clause after the initial quarter) and renewal pricing exposure if GB300 supply tightens further. [1], [2], [4]
  • Named‑stakeholder breakdown (2026–2029)

    • SpaceX: Proves Colossus is not a vanity project. It’s monetizable, modular, and now diversified across Anthropic (Colossus 1) and Reflection (Colossus 2). Post‑IPO, it becomes a credible third pillar beside Starlink and launch, with utility‑like revenue visibility. [3], [6]
    • Reflection: Gains frontier‑class compute without a decade of data‑center capex and permitting. That turns its ~$25B valuation ambition from story into schedule: models out sooner, pilots with DOE and defense in a posture consistent with open procurement. [9], [1]
    • Nvidia: Sells the picks and shovels, then benefits twice as labs rent time on GB300 NVL72 racks that entrench Nvidia’s full stack (NVLink, Quantum‑X, libraries). Every GB300 domain increases switching costs away from Nvidia. [2]
    • Anthropic: Counter‑intuitively benefits from SpaceX scaling as a neutral lessor; its own deal locked up Colossus 1, and a bigger, healthier lessor reduces counterparty risk—until queues collide. [3]
    • Utilities and regulators (TVA, MLGW; Mississippi Southaven build): Must keep adding firm power, water, and interconnects to maintain SLAs tied to Colossus near Memphis and the new Mississippi site. Delays would hit SpaceX’s compute P&L as contracted racks sit idle. [3], [5]
  • Contrarian read in 2026

    • Consensus: “SpaceX is becoming a cloud provider.”
    • My take: SpaceX is becoming an AI utility, not a cloud. Clouds multiplex VMs; Colossus monetizes whole‑rack, high‑bandwidth NVLink islands engineered for tightly coupled training and reasoning. The product isn’t elastic compute; it’s guaranteed access to a specific fabric topology with deterministic latency and power—closer to capacity offtake in energy markets than AWS‑style instances, and the contract form (fixed monthly, cancelable after a lock‑in) looks more like a power purchase agreement. [2], [1], [4]

What others are missing

Coverage fixates on the $6.3 billion headline but glosses over topology risk: GB300 NVL72’s value lies in the 72‑GPU NVLink domain and 130 TB/s in‑rack bandwidth. If SpaceX overbooks or slices domains poorly, customers eat efficiency losses that can turn an eight‑week run into twelve, erasing savings from list‑price discounts. Because GB300 clusters reward scale‑up over scale‑out, the real moat is scheduler sovereignty over complete NVL72 “islands” and the power‑and‑cooling envelopes that keep them pinned. This is why Reflection is paying for guaranteed monthly access to full domains, not just ad‑hoc GPU hours, and why adding megawatts in Tennessee and Mississippi without derating capacity is existential to the SKU. [2], [7], [3]

What to watch next

  1. By Q4 2026, SpaceX discloses at least one more third‑party Colossus 2 customer with GB300 access on contracts ≥$100 million/year, signaling a standing product SKU rather than one‑offs. [2], [4]

  2. By mid‑2027, Reflection ships a publicly usable open‑weight model trained primarily on SpaceX GB300 infrastructure, with documented reproducibility and optional on‑prem deployment terms for U.S. agencies. [1], [4], [9]

  3. By 2027 year‑end, SpaceX files or announces at least 500 MW of additional power procurement tied to Colossus expansions in Tennessee/Mississippi, pairing long‑term interconnects with gas or renewables behind‑the‑meter to stabilize rack uptime SLAs. [5]

My take

SpaceX just priced compute like infrastructure, not software, and that’s the pivot the AI market needed in 2026. Renting GB300 NVL72 islands with hard SLAs will beat best‑effort cloud for anyone training state‑of‑the‑art models—or serving high‑stakes reasoning—where 72‑GPU NVLink domains matter. If Reflection turns this capacity into a credible, open‑weight alternative, the procurement map inside agencies and critical industries flips faster than expected by late 2027.

Sources

  1. SpaceX signs computing power deal with open-source AI startup Reflection worth up to $6.3 billion — CNBC (https://www.cnbc.com/2026/06/22/spacex-ai-colossus-data-center-reflection.html) — Original report with contract value, $150M/month schedule from July 1, 2026, and 90‑day termination clause.

  2. Designed for AI Reasoning Performance & Efficiency | NVIDIA GB300 NVL72 — NVIDIA (https://www.nvidia.com/en-us/data-center/gb300-nvl72/) — Official GB300 NVL72 specs: 72 Blackwell Ultra GPUs per rack and 130 TB/s NVLink domain; explains why full‑rack topology matters.

  3. Anthropic to use all of SpaceX‑xAI’s Colossus 1 data center compute — Data Center Dynamics (https://www.datacenterdynamics.com/en/news/anthropic-to-use-all-of-spacex-xais-colossus-1-data-center-compute/) — Establishes prior Colossus 1 commitments (~220,000 GPUs; >300 MW) and the Anthropic leasing context.

  4. Open‑source AI gets more compute from SpaceX — Axios (https://www.axios.com/2026/06/22/open-source-ai-gets-more-compute-from-spacex) — Independent confirmation of the Reflection deal terms, timing, and cancellation mechanics; frames open‑source rationale.

  5. Musk’s xAI to invest over $20 billion in Mississippi data center — Reuters via Investing.com (https://www.investing.com/news/economy-news/musks-xai-to-invest-over-20-billion-in-mississippi-data-center-4438483) — Corroborates the broader Colossus footprint (Mississippi build) and regional power expansion linked to xAI/SpaceX data centers.

  6. Musk’s SpaceX prices record IPO at $135 a share — Reuters via Moneycontrol (https://www.moneycontrol.com/news/business/musk-s-spacex-prices-record-75-billion-ipo-at-135-a-share-13947633.html) — Confirms SpaceX’s June 2026 record IPO, relevant to financing the Colossus expansion and compute commercialization narrative.

  7. Microsoft Azure Unveils World’s First NVIDIA GB300 NVL72 Supercomputing Cluster for OpenAI — NVIDIA Blog (https://blogs.nvidia.com/blog/microsoft-azure-worlds-first-gb300-nvl72-supercomputing-cluster-openai/) — Provides GB300 context in the wider market, including NVLink bandwidth and scale‑up behavior.

  8. Open‑source AI startup Reflection locks in SpaceXAI compute — Axios (https://www.axios.com/2026/06/22/open-source-ai-gets-more-compute-from-spacex) — Used for cross‑validation of the $150M/month and 90‑day cancellation clause; notes industry positioning among open‑source labs.

  9. Nvidia‑backed Reflection AI seeks $25B valuation — Investing.com (https://www.investing.com/news/stock-market-news/nvidiabacked-reflection-ai-seeks-25-bln-valuation-wsj-reports-4581362) — Documents Reflection’s funding target and Nvidia backing, grounding the “open‑source at scale” capital story.


Related update: We recently published an article that expands on this topic: read the latest post.


Related update: We recently published an article that expands on this topic: read the latest post.


Related update: We recently published an article that expands on this topic: read the latest post.

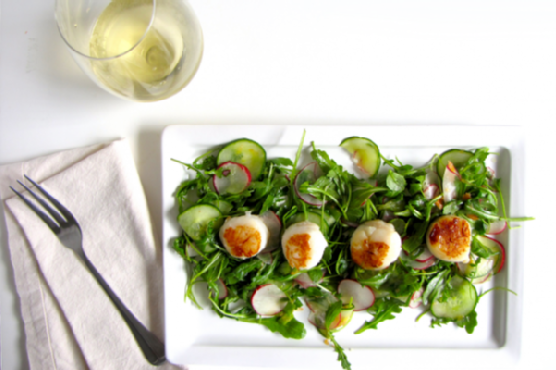
Citrus Arugula Salad with Seared Scallops | Made by Meaghan Moineau

Picture this: It’s a Tuesday evening. You’ve just kicked off your shoes after a whirlwind day, and all you want is something fresh, zesty, and sophisticated on your plate without spending more time in the kitchen than you did in traffic. That’s where my Citrus Arugula Salad with Seared Scallops swoops in to save the day. It’s got that crisp, peppery bite from the arugula that I absolutely crave, the juicy pop of a Cara Cara orange, and the tender, buttery goodness of perfectly seared scallops. It sounds fancy, but trust me, it’s a cinch to throw together—and it’s bound to impress whoever’s lucky enough to join you at the table.

Jump to Recipe

What You’ll Need

Chances are you already have most of this in your kitchen, aside from maybe the scallops. But it’s the simple ingredients that really let those scallops shine.

  • Arugula
  • Cara Cara orange
  • Radish
  • English or Persian cucumber
  • Green onion
  • Salt
  • Scallops

How to Make Citrus Arugula Salad with Seared Scallops

  1. First, thinly slice the radishes and cucumber. You want them delicate enough to complement the scallops, not overshadow them. Dice up the green onion, too.
  2. In a bowl, squeeze the juice and pulp from half of the Cara Cara orange. Add a pinch of salt and whisk it all together until it’s beautifully blended.
  3. Add in your radish and cucumber slices, along with a healthy handful of arugula. Toss it all together until every leaf and slice glistens with that citrusy goodness.
  4. Now, for the scallops: Heat a splash of oil in a pan over high heat. The pan needs to be hot, hot, hot—like sizzling enough that you can almost hear it pleading for the scallops.
  5. Gently place the scallops flat-side down in the pan. Space is key here, so if you have a lot of scallops, do them in batches. Crowding the pan is the enemy of that golden sear we’re aiming for.
  6. Let them sear undisturbed. The temptation to peek and prod is real, but resist! After a couple of minutes, check for that caramel-colored crust. Once you see it, flip them over.
  7. Plate your salad and place about four scallops on top. They should be served immediately to avoid any rubbery disappointments.

Cook’s Notes

Seared scallops are one of those things where less is more. Don’t overdo the seasoning; let their natural sweetness shine. Also, scallops are quick to cook and quick to turn rubbery if left too long. Watch them like a hawk, and you’ll be fine. If you want to make this ahead, prepare the salad components in advance and just sear the scallops right before serving. As for leftovers, the salad keeps well for a day, but the scallops are best enjoyed fresh out of the pan.

Make It Your Own

  • Swap the arugula for spinach if you prefer a milder green.
  • Replace the Cara Cara orange with blood orange for a deeper color and flavor.
  • Try grilling the scallops for a smoky twist.
  • For a vegetarian version, swap the scallops for crispy tofu slices.

If you try this, I’d love to hear how it turns out—drop a comment or tag me! Whether it’s a quick weeknight dinner or a date night delight, I hope you find this as much of a joy to make as it is to eat. Enjoy!

Related update: Citrus Arugula Salad with Seared Scallops

Related update: Vegetarian Ratatouille

Related update: Pear Salad With Walnuts and Blue Cheese

Old Fashioned Vanilla Buttercream Frosting | Made by Meaghan Moineau

Picture this: It’s one of those afternoons when the craving for something sweet is impossible to ignore. Not just any sweet, but a slice of cake smothered in creamy, luscious frosting. I was halfway through baking a batch of cupcakes when disaster struck—no frosting in sight! With minutes to spare, I whipped out this trusty Old Fashioned Vanilla Buttercream Frosting recipe, and voilà, my cupcakes were saved. It’s quick and easy, with ingredients you probably have on hand, and it never fails to impress with its smooth, rich texture. Plus, there’s something about homemade frosting that just feels like a hug in dessert form.

Jump to Recipe

What You’ll Need

I love this recipe because it uses simple ingredients that work magic together. Chances are you already have most of this sitting in your pantry or fridge:

  • Solid vegetable shortening
  • Butter
  • Vanilla extract
  • Confectioners sugar
  • Milk

How to Make Old Fashioned Vanilla Buttercream Frosting

  1. In a large mixing bowl, cream the butter and shortening together using an electric mixer. You’re aiming for a smooth, unified blend that’s a pale yellow in color.
  2. Add the vanilla extract, and continue mixing. The aroma will instantly start to fill your kitchen.
  3. Gradually sift in the confectioners sugar, adding it one cup at a time. Beat on medium speed, and scrape down the sides and bottom of the bowl often. This ensures everything is well incorporated.
  4. Once all the sugar is mixed in, the icing will seem a bit dry—don’t worry, this is normal!
  5. Add the milk to the mixture. Beat on medium speed for about 3 minutes. You’re looking for a light, fluffy texture that’s easy to spread.
  6. Keep the icing covered with a damp cloth until you’re ready to use it. This prevents it from drying out.

Cook’s Notes

A little tip I’ve picked up: Keeping the mixing bowl in the fridge when you’re not using it helps maintain the frosting’s consistency, especially if your kitchen tends to be on the warmer side. If you’re making this ahead of time, store it in an airtight container in the fridge for up to a week. When you’re ready to use it, just give it a quick re-whip in your mixer to bring back its creamy texture. Also, be generous with that vanilla—for that classic flavor, it’s key!

Make It Your Own

Here are a few fun variations to try if you’re feeling adventurous:

  • Swap out the vanilla for almond extract for a nutty twist.
  • Add a few tablespoons of cocoa powder to create a chocolate buttercream.
  • Substitute the milk with heavy cream for a richer, thicker frosting.
  • Mix in some food coloring to match the theme of your dessert or party.

If you try this, I’d love to hear how it turns out—drop a comment or tag me! There’s nothing more rewarding than seeing your creations come to life. Enjoy every sweet, frosted bite!

Related update: Old Fashioned Vanilla Buttercream Frosting

Related update: Apothic Granita and Vanilla Panna Cotta

Easy Homemade Apple Fritters | Made by Meaghan Moineau

So last Tuesday, I found myself staring at a bowl full of apples on my countertop, leftovers from my overly ambitious farmer’s market haul. My mind was set on something sweet and indulgent, but I didn’t want to spend ages prepping a fancy dessert or making a mess of my kitchen. Enter: Easy Homemade Apple Fritters. These little nuggets of joy are perfect for those times when you need a quick treat that feels special but doesn’t involve a ton of effort. They’re crispy on the outside and filled with warm, cinnamon-spiced apple goodness on the inside. Trust me, they’re like a cozy hug on a plate.

Jump to Recipe

What You’ll Need

You’ll love this recipe because chances are, you already have most of the ingredients in your pantry. Plus, it’s really all about letting those apples shine.

  • 1 cup all-purpose flour
  • 1 apple, peeled, cored, and diced
  • 1 teaspoon baking powder
  • 1 teaspoon cinnamon
  • 1 egg
  • 1/3 cup milk
  • 1 tablespoon sugar
  • 1/4 teaspoon salt
  • Oil, for frying (I used vegetable oil)
  • 1 cup powdered sugar
  • 2 tablespoons milk (for the glaze)

How to Make Easy Homemade Apple Fritters

  1. In a mixing bowl, whisk together the flour, sugar, salt, baking powder, and cinnamon. You’ll want to inhale deeply because that cinnamon is going to smell divine.
  2. Gently stir in the milk and egg until the mixture is just combined. Over-mixing is the enemy here! We want it to stay light and fluffy.
  3. Fold in the diced apple. Make sure those apple pieces are well distributed—every fritter deserves its apple moment!
  4. Pour oil into a skillet so that it’s about 1 1/2 inches deep. Heat the oil on high. You’ll know it’s ready when a little dough thrown in pops right back up to the surface.
  5. Carefully drop heaping teaspoons of the dough into the hot oil. Watch them sizzle! Cook until the fritters are brown, about 2 minutes, then flip. Give them another 1-2 minutes to get golden on the other side.
  6. Transfer the fritters to paper towels to soak up any excess oil. A quick pit stop before they head to a cooling rack.
  7. For the glaze, stir the powdered sugar and milk together in a small bowl. It’ll be smooth and silky.
  8. Drizzle the glaze over the fritters. Wait about 3 minutes for the glaze to harden a bit, flip the fritters, and drizzle over the other side. They’re best served warm, so dive in!

Cook’s Notes

Here’s a few things I learned while making these fritters:

  • Keep an eye on your oil temperature. If it’s too hot, your fritters will brown too quickly on the outside and stay raw on the inside.
  • If you’re making these ahead of time, store them at room temperature in an airtight container for up to a day. Reheat in the oven to crisp them back up.
  • Leftovers can be revived by popping them in a toaster oven for a few minutes. They won’t be as good as fresh, but still tasty.

Make It Your Own

  • Swap the apple for another fruit like pears or peaches if you’re feeling adventurous!
  • Add a pinch of nutmeg or ginger to the batter for an extra layer of spice.
  • Try using maple syrup instead of powdered sugar for the glaze for a deeper, richer sweetness.
  • For a savory twist, omit the sugar and cinnamon, and add sharp cheddar cheese and bacon bits to the batter.

If you try this, I’d love to hear how it turns out — drop a comment or tag me! Seriously, nothing makes my day more than seeing your kitchen creations. Enjoy every crispy, warm, and cinnamon-sweet bite!

Related update: Easy Homemade Apple Fritters

Related update: Old Fashioned Vanilla Buttercream Frosting

Fox-Roku Deal: Streaming Power Shift | Analysis by Brian Moineau

TL;DR

  • The Fox–Roku deal doesn’t just add content; it seizes the TV “home screen,” giving Fox bargaining power over discovery, data, and ad flows across tens of millions of U.S. living rooms. [2][5]
  • If DOJ lets Paramount–WBD close, David Ellison would consolidate two national newsrooms (CBS and CNN) while Fox consolidates distribution—an inverted barbell of power that squeezes everyone in the middle. [7][8]
  • Expect higher ad yields, tougher carriage terms for rival streamers, and regulatory flashpoints around “default bias” on Roku’s OS—the new choke point of the streaming wars. [3][5][7]

What the source said

Salon argues that Fox’s $22 billion acquisition of Roku and DOJ’s treatment of Ellison’s $111 billion bid to merge Paramount with Warner Bros. Discovery shift the fight from content to distribution power. [1][2][3][7][8]

The piece cites Pew’s 36% pay‑TV figure in 2025 as context for cord‑cutting, and points to Paramount’s refusal to air an advocacy ad as an example of consolidation’s real‑world effects. The thesis: control the pipe, shape the message. [4][16]

Why it matters

Two chokepoints are emerging in U.S. video in 2026. On one end, Fox buys Roku and, with it, the default interface and first‑party data that steer what Americans watch via Roku OS. On the other, Ellison’s Paramount–WBD deal would centralize CBS and CNN alongside major studios under a single balance sheet. [2][5][7][8]

Real stakeholders aren’t just “the audience.” They’re the streamers (Disney, Netflix, Amazon) that rent Roku’s shelf space; advertisers shifting budget into connected TV; and regulators (DOJ, FCC, state AGs) weighing whether TV‑OS defaults and self‑preferencing echo the Microsoft browser‑bundling fights in 2001. Local broadcasters, smaller FASTs, and publishers face worse negotiating power if they lack a gateway. [4][5][10]

Original analysis

The consensus take says “Fox bought Roku to bulk up streaming; Ellison’s Paramount–WBD is another mega‑merger.” That’s surface‑level. The deeper story is a pivot from programming to power over defaults on the TV home screen. That is exactly what Roku already sells—and what Fox just bought. [2][3][5]

In connected TV, defaults drive outcomes at scale. The company that sets the home screen, controls the search graph, and allocates promotional tiles determines which shows get sampled, which subscriptions renew, and which ad impressions clear. Those choices turn into revenue and bargaining power against every app on the platform. [2][5]

Historical analogue (what it predicts): United States v. Microsoft (2001) centered on bundling Internet Explorer into Windows to maintain OS power; courts upheld monopoly‑maintenance findings under Sherman Act §2 and scrutinized tying. Replace Windows with Roku OS and IE with house channels (Tubi, The Roku Channel), and the rhyme is obvious: default placement and self‑preferencing can foreclose rivals without banning them outright. Expect complainants to frame “home screen promos” and search ranking as a connected‑TV version of browser bundling. [7][10]

Back‑of‑envelope math (distribution economics):

  • Roku platform revenue in 2025 was roughly $4.15B; Roku guided high‑teens platform growth for 2026—assume +18% to ~$4.90B. [11][12][13][14]
  • If 70–80% of platform revenue is ad‑driven, apply +5% yield uplift from Fox‑controlled self‑preferencing to the midpoint (75%) of $4.90B: 0.75 × $4.90B = $3.675B ad base → +5% ≈ +$184M incremental annual ad revenue before partner concessions; even if half materializes, that’s ~$90M of low‑capex uplift tied to UI nudges. [11][12]
  • Share math: In Feb. 2026, The Roku Channel captured 2.9% of streaming viewership vs. Tubi at 2.2%; in ad‑supported streaming, Tubi ranked No. 1 at 6.2% in Q4 2025. If Fox diverts even one point of FAST discovery toward Tubi while IAB projects 2026 U.S. digital video at $80B+ (CTV a ~$20B slice), a 1‑point FAST share swing can translate into nine‑figure revenue depending on CPMs and sell‑through. Direction beats precision. [6][9][15][16]

A named typology: The TV Gatekeeper Matrix

  • Owned Content × Owned Distribution: Fox + Roku (Tubi, The Roku Channel inside Roku OS). Advantage: default bias, first‑party data, ad stack. Risk: antitrust scrutiny of self‑preferencing. [2][3][5]
  • Owned Content × Rented Distribution: Paramount–WBD (post‑deal) still reliant on third‑party platforms while building its own apps. Advantage: IP scale across CBS, CNN, and studios. Risk: platform tolls and discovery dependence. [7][8]
  • Rented Content × Owned Distribution: Samsung Tizen, LG webOS—OS control with thinner originals. Advantage: OEM reach into U.S. households. Risk: monetization frictions with app partners. [5]
  • Rented Content × Rented Distribution: Niche FASTs and SVODs living on others’ OSes. Advantage: focus. Risk: margin squeeze and limited shelf space.

Stakeholder breakdown (one‑liners):

  • Disney/Netflix/Amazon: Higher platform taxes and tougher placement negotiations on Roku; hedge with Samsung, LG, and Google TV distribution. [5]
  • NBCU/Peacock and YouTube: Near‑term winners—YouTube’s share lead holds across OSes; Peacock can still buy top‑shelf tiles but at rising prices. [6]
  • Samsung/LG: Counter with subsidized smart‑TV bundles and revenue‑share promos to pry apps from Roku‑centric funnels. [5]
  • Advertisers (P&G, GM, SMEs): Better cross‑screen targeting via Roku’s first‑party graph—if Fox preserves openness; CTV’s double‑digit growth in 2026 strengthens this pull. [13][15]
  • Regulators/State AGs: The case file writes itself: defaults, house‑channel boosting, and discovery throttling—citing Microsoft 2001 on page one. [10]

Contrarian read: The fear is Fox will blatantly stack the deck for Tubi and Fox News on Roku. My read: Fox will publicly preach “open platform” to keep Netflix, Disney, Amazon, and OEMs cooperative. The bias will creep in via subtle defaults—autoplay rows, search ranking, “continue watching” tiles, and cross‑app identity prompts that privilege Fox properties without visibly burying rivals. Those nudges are harder to litigate and more powerful commercially. [3][5][10]

What others are missing

The overlooked variable is ad‑tech plumbing, not just app placement. Roku controls native formats (home‑screen marquees, channel rails), measurement hooks, and self‑serve demand tools; Fox inherits those primitives and can bind them to Tubi’s inventory, sports shoulder‑programming, and news clips. Price those units as outcomes (site visits, app installs) instead of impressions, and the multiple expands. If Roku’s 2026 reporting split highlights double‑digit ad growth, Fox can ride a faster re‑rating because Wall Street values ad‑tech like software, not like TV. [11][13][14]

What to watch next

  1. By Q4 2026, at least one top‑5 streamer (YouTube, Netflix, Prime Video, Disney+, Max) publicly alleges or files comments about discriminatory placement or search treatment on Roku’s home screen.

  2. By Q2 2027, Fox integrates Tubi and The Roku Channel demand into a single ad‑buy surface with unified targeting and measurement, and discloses on an investor call a synergy run‑rate uplift of $100M+ tied to this integration. [11][14]

  3. By Q1 2027, a multistate AG coalition opens a probe into connected‑TV “default bias” and self‑preferencing on TV operating systems, naming Roku and at least one OEM OS as targets. [10]

My take

If you think the Fox–Roku deal is “about content,” you’re missing the real grab: owning the map—defaults, search, identity, and ad signal—on the living‑room OS in 2026. Per Nielsen’s Gauge reporting cited by Cord Cutters News, streaming’s share of viewing keeps rising, and IAB projects U.S. digital video ad spend to surpass $80B in 2026. Ellison’s roll‑up may grab headlines, but Fox just bought the steering wheel. I’d be long the gatekeepers and wary of any content company renting shelf space without an OS‑level fallback. [6][9][3][4][5][15]

Sources

  1. With Roku, Fox just won the streaming wars for the right — Salon (https://www.salon.com/2026/06/21/with-roku-fox-just-won-the-streaming-wars-for-the-right/) — The starting thesis that Fox’s Roku buy and Ellison’s bid are a shift from content to distribution.

  2. Fox Corporation to Acquire Roku, Inc. — Fox Corporation (https://www.foxcorporation.com/news/corp-press-releases/2026/fox-corporation-to-acquire-roku-inc/) — Confirms the $22B deal and states the “third‑largest by viewing share” claim.

  3. Fox to buy Roku for $22 billion — Axios (https://www.axios.com/2026/06/15/fox-roku-22-billion) — Independent confirmation of the deal terms and strategic framing.

  4. 83% of U.S. adults use streaming; only 36% subscribe to cable/satellite — Pew Research Center (https://www.pewresearch.org/short-reads/2025/07/01/83-of-us-adults-use-streaming-services-far-fewer-subscribe-to-cable-or-satellite-tv/) — Cord‑cutting baseline used in the analysis.

  5. Roku 28% and Samsung 23% of U.S. broadband‑household CTV usage — Parks Associates (press release) (https://www.prnewswire.com/news-releases/parks-associates-roku-28-and-samsung-23-dominate-connected-tv-platforms-controlling-access-to-streaming-audiences-in-the-us-market-302749732.html) — OS‑level market power data.

  6. The Roku Channel 2.9% vs. Tubi 2.2% of streaming in Feb. 2026 — Cord Cutters News (https://cordcuttersnews.com/the-roku-channel-is-the-most-watched-free-streaming-service-beating-tubi-pluto-tv-according-to-nielsen/) — Comparative FAST viewing shares cited from Nielsen’s Gauge.

  7. DOJ will “absolutely not” fast‑track Paramount–WBD for political reasons — Variety (https://au.variety.com/2026/film/news/doj-paramount-warner-bros-deal-review-fast-track-review-political-reasons-34449/) — Regulatory posture and ongoing scrutiny.

  8. U.S. clears Paramount’s $111B Warner Bros. takeover (report) — Moneycontrol (https://www.moneycontrol.com/world/us-clears-paramount-s-111-billion-warner-bros-takeover-article-13948430.html) — Report of DOJ clearance juxtaposed with continued reviews; shows contested status.

  9. IAB: U.S. digital video ad spend to surpass $80B in 2026 — IAB (https://www.iab.com/insights/video-ad-spend-report-2026/) — Ad‑market context underpinning the revenue math.

  10. Microsoft antitrust: Court of Appeals opinion (default bundling precedent) — U.S. DOJ (https://www.justice.gov/atr/cases/f204400/204468.htm) — The historical analogue for default‑driven platform power.

  11. Fellow Shareholders: 4Q25 letter — Roku (https://image.roku.com/bWFya2V0aW5n/4Q25-Shareholder-Letter.pdf) — Platform revenue of ~$4.15B and channel share commentary.

  12. Roku 10‑K and 8‑K excerpts on platform growth and home screen monetization — SEC (https://www.sec.gov/Archives/edgar/data/1428439/000162828026008114/roku-20251231.htm) — Definitions and revenue mix context.

  13. Roku Q1 2026 ad revenue split (reporting change) — MediaPost (https://www.mediapost.com/publications/article/414752/roku-q1-ad-spend-up-27-to-613m.html) — Ad‑revenue growth and disclosure useful for back‑of‑envelope math.

  14. Roku Q1 2026 earnings summary (third‑party extract) — StockTitan (https://www.stocktitan.net/sec-filings/ROKU/10-q-roku-inc-quarterly-earnings-report-05c5a40d6823.html) — Additional color on how platform revenue is earned.

  15. Tubi expands Nielsen deal; 6.2% of ad‑supported streaming in Q4 2025 — MediaPost (https://www.mediapost.com/publications/article/412569/tubi-expands-nielsen-deal-now-accounts-for-62-o.html) — FAST strength data for the revenue scenario.

  16. Paramount refused to air FPF’s ad critical of its merger — The Guardian (https://www.theguardian.com/us-news/2026/jun/16/paramount-rejects-ad-on-warner-bros-acquisition) — Concrete example of consolidation effects cited in the post.


Related update: We recently published an article that expands on this topic: read the latest post.


Related update: We recently published an article that expands on this topic: read the latest post.

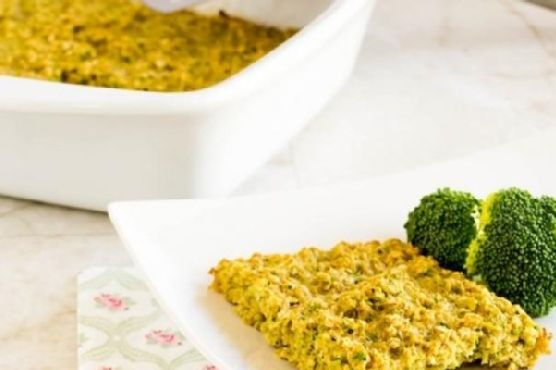
Broccoli Oatmeal Breakfast Casserole | Made by Meaghan Moineau

It was one of those mornings when I wanted something warm and filling but couldn’t face another bowl of cereal. I peeked into the fridge and found a half-used bag of broccoli and a carton of eggs. Inspiration struck, and soon my kitchen was filled with the comforting smell of baking oats and the savory tang of broccoli. This Broccoli Oatmeal Breakfast Casserole is exactly what you need when you want something nutritious and satisfying without spending your entire morning in the kitchen. Plus, it’s surprisingly easy to make, so you can enjoy a leisurely breakfast even on a busy day.

Jump to Recipe

What You’ll Need

This recipe is beautifully simple and calls for ingredients you likely have sitting in your pantry. You know I love a recipe where a quick rummage through the cupboard delivers everything you need.

  • Broccoli florets
  • Dry oats
  • Eggs
  • Low-fat milk
  • Olive oil
  • Baking powder
  • Salt
  • Cayenne pepper

How to Make Broccoli Oatmeal Breakfast Casserole

  1. Start by preheating your oven to 350°F (175°C). While it warms up, grab your trusty 8-inch square baking dish and give it a light misting of cooking spray to prevent sticking.
  2. Chop the broccoli florets roughly and blitz them in a food processor until they resemble coarse crumbs. The earthy smell of fresh broccoli will fill the air.
  3. In a large mixing bowl, combine the ground broccoli, dry oats, a pinch of baking powder, a sprinkle of salt, and a dash of cayenne pepper. Give it a good mix — this is the foundation of your casserole.
  4. In a separate bowl, whisk together the eggs, low-fat milk, and a generous tablespoon of olive oil. The mixture should be smooth and slightly frothy.
  5. Pour the wet ingredients into the bowl of dry ingredients. Stir everything together until the oats are fully coated and the broccoli is evenly distributed.
  6. Spoon the mixture into your prepared baking dish, smoothing the top with a spatula. Slide it into the oven and bake for 25-30 minutes, or until the edges are golden and a fork inserted into the center comes out clean.
  7. Let it cool slightly before cutting into your desired size and serving it warm. The casserole will be firm yet tender, with a delicious crust formed by the oats.

Cook’s Notes

This casserole is forgiving, so don’t stress if you’re missing an ingredient. If you’re prepping in advance, you can assemble the night before and bake it fresh in the morning—just cover and store in the fridge. Leftovers? Refrigerate them, and they’ll keep for up to three days. Reheat portions in the microwave or the oven. Watch out for over-baking; once it’s golden and a fork comes out clean, it’s ready. The texture should be moist but not soggy.

Make It Your Own

  • Cheese Lover’s Twist: Add a handful of grated cheddar or parmesan to the dry ingredients for a cheesy kick.
  • Protein Boost: Toss in some cooked, crumbled sausage or crispy bacon bits to the batter for extra protein.
  • Veggie Variety: Swap half the broccoli for finely chopped spinach or kale for an extra green boost.
  • Spice It Up: Substitute cayenne pepper with smoked paprika or add a pinch of chili flakes for a different heat profile.

If you try this Broccoli Oatmeal Breakfast Casserole, I’d love to hear how it turns out for you. Drop a comment below or tag me in your breakfast creations! Here’s to starting the day with something nutritious and delicious. 🥦✨

Related update: Broccoli Oatmeal Breakfast Casserole

Cheese Pork Chops | Made by Meaghan Moineau

Last Tuesday evening, I was standing in my kitchen, staring into the fridge like it was an oracle with all the answers to my dinner dilemmas. It had been a long day, and I needed to whip up something that felt like a reward for surviving it. That’s when I spotted the pack of pork chops tucked away on the bottom shelf, right beside a wedge of Gruyère cheese that had almost been forgotten. The idea of Cheese Pork Chops was born, and let me tell you, this dish is a midweek savior. It’s got that special touch of comfort with gooey cheese and rich mustard cream, yet it’s simple enough to throw together while you’re half-distracted by a podcast or the kids’ homework.

Jump to Recipe

What You’ll Need

This is one of those recipes where you might just have everything you need already. It’s all about bold flavors with just a handful of ingredients.

  • 2 tablespoons olive oil
  • 2 tablespoons unsalted butter
  • 4 pork chops (about 1 inch thick)
  • Salt and pepper, to taste
  • 1/2 cup heavy cream
  • 2 tablespoons dijon mustard
  • 1 cup shredded Gruyère cheese

How to Make Cheese Pork Chops

  1. Heat a heavy-bottom skillet over medium-high heat. Add the olive oil and butter, swirling them together until the butter melts and starts to slightly foam.
  2. Carefully place the pork chops in the skillet. Sauté for about 3 minutes on each side, letting them develop a lovely golden crust.
  3. Reduce the heat to medium. Cook the pork chops for an additional 5 to 6 minutes per side, until they’re just cooked through. Sprinkle with salt and pepper to taste. Remember, the juices should run clear when you test them.
  4. While the chops finish cooking, preheat your broiler. In a small bowl, whisk together the heavy cream, dijon mustard, and shredded Gruyère cheese until well combined.
  5. Transfer the cooked pork chops to an ovenproof dish. Spread the cheese-cream mixture generously over each chop.
  6. Place the dish under the preheated broiler for about 5 minutes. Keep a close eye on them—the cheese should be bubbly and slightly browned.

Cook’s Notes

One of the best things about this dish is how forgiving it is. If your chops are a bit thicker or thinner, just adjust cooking time accordingly. You want them juicy, not dry.

If you’re making this ahead of time, you can prepare the cheese mixture in advance and even sear the chops the night before. Just store them separately in the fridge and bring to room temperature before broiling.

Got leftovers? Lucky you! They’re fabulous sliced thin and tossed into a salad, or reheated gently in the microwave for a next-day lunch that will make your coworkers jealous.

Make It Your Own

  • Spice it up: Add a teaspoon of chili flakes to the cheese mixture for a spicy kick.
  • Herbaceous twist: Mix a tablespoon of chopped fresh herbs like thyme or rosemary into the cheese mixture.
  • Cheese swap: Try shredded sharp cheddar or even blue cheese for a different flavor profile.
  • Dijon alternative: Experiment with whole grain mustard for a bit more texture and tang.

If you try this, I’d love to hear how it turns out — drop a comment or tag me in your cheesy creations! Happy cooking, friends!

Related update: Cheese Pork Chops

Paella for Four; A Wonderful Spanish Mixed Seafood Stew | Made by Meaghan Moineau

Last Tuesday was one of those days where everything felt a little off-kilter. You know, the kind where your morning coffee just doesn’t hit right, and your afternoon is a blur of tasks that never seem to end? By the time dinner rolled around, I was craving something that would transport me far from the daily grind—something warm, comforting, and just a tad exotic. Enter: paella. Not only is it a dish that sounds fancy enough to impress, but it’s surprisingly simple to whip up. It’s got this amazing way of bringing a little Spanish sunshine to your table, even on the dreariest of evenings. Plus, it’s a one-pan wonder, so less time spent cleaning up means more time for Netflix or a good book. Trust me, once you’ve tasted this, you’ll see what all the fuss is about. Jump to Recipe

What You’ll Need

If your pantry’s got some basics and your local grocery store has a seafood section, you’re pretty much set. I love that this recipe starts with stuff you likely already have on hand!

  • Smoky paprika
  • Dried oregano
  • Kosher salt
  • Black pepper
  • Chicken wings
  • Littleneck clams
  • Solid chorizo sausage
  • Shrimp
  • Extra virgin olive oil
  • White diced onion
  • Diced garlic
  • Italian parsley leaves
  • Whole .5 oz tomatoes
  • Canned Spanish short grain rice
  • Water
  • Saffron
  • Salt and pepper
  • Green peas
  • Lemon wedges

How to Make Paella for Four; A Wonderful Spanish Mixed Seafood Stew

  1. Start by mixing the smoky paprika, dried oregano, kosher salt, and black pepper. Rub this spice mix all over the chicken wings and let them chill in the fridge for an hour. This is where the magic begins—infusing the chicken with all those bold, earthy flavors.
  2. Take the chicken out of the fridge about 30 minutes before you’re ready to cook. They should be close to room temp, which helps them cook evenly.
  3. Heat half of the olive oil in your trusty 12-inch All-Clad stainless steel pan over medium-high heat. Toss in the chorizo rounds and let them sizzle away until they’re browned and fragrant. Remove them from the pan and set aside.
  4. Add the rest of the oil to the pan, then brown the chicken on all sides, savoring that sizzling sound. Once they’re golden brown, take them out and keep them with the chorizo.
  5. Turn the heat down to medium and add the onions, garlic, and parsley. This is your sofrito—a flavor-packed base that’s the heart of the dish. Cook until the onions are translucent and everything smells irresistible, about 2-3 minutes.
  6. Next, add the crushed and drained tomatoes. Give everything a good stir and let it cook for about 3 minutes until the flavors meld together.
  7. Stir in the rice, making sure it’s all cozy with the sofrito, for about 2 minutes. You want each grain to be coated with that delicious base.
  8. Return the sausage and chicken to the pan. Pour in the hot water and bring the mixture to a gentle simmer, cooking for about 5 minutes. Give it a stir now and then to keep everything mingling nicely.
  9. Now, place the clams artfully atop the rice. Resist the urge to stir! You want them just so.
  10. Let the paella cook for another 5 minutes, then position the shrimp, tails up, so they can steal the show. Continue to cook for about 10 minutes, until the clams have popped open, the shrimp are a lovely pink, and the rice is fluffy yet moist.
  11. Finally, check for socarrat. With a fork, gently feel the bottom of the pan. If you detect that legendary crispy crust, you’re golden. If not, crank up the heat for 30-45 seconds to get that perfect crackling finish, then serve immediately.

Cook’s Notes

Here are a few little nuggets of wisdom to ensure your paella is perfecto:

  • If you’re short on time, you can season the chicken and let it sit while you prep the rest of the ingredients. It won’t be exactly the same, but life necessitates shortcuts sometimes!
  • Leftovers? Pop them in an airtight container and they’ll keep in the fridge for up to two days. Paella is one of those dishes that tastes even better the next day, I promise.
  • Be patient with the socarrat. It’s the best bit, but it requires a little trust in the process. If you don’t hear a slight crackle when you turn up the heat, give it a bit more time.

Make It Your Own

Feeling creative? Here are some twists to make this paella uniquely yours:

  • Swap out the chicken wings for crispy tofu to make a pescatarian version.
  • Substitute the clams with mussels if that’s what you’ve got on hand or prefer.
  • Feeling spicy? Use a hot chorizo for an extra kick.
  • Not a fan of saffron? Add a pinch of turmeric for a golden hue without the floral notes.

If you try this, I’d love to hear how it turns out—drop a comment or tag me! Your feedback keeps this kitchen creativity going. Enjoy the taste of Spain at your own table!

Related update: Paella for Four; A Wonderful Spanish Mixed Seafood Stew

Related update: Cheese Pork Chops

Buc-ee’s Entry Could Reshape Indy Traffic | Analysis by Brian Moineau

TL;DR

  • Buc-ee’s filed plans for its first Indiana store in Greenwood, targeting the I-65/Worthsville Road interchange that the city has been positioning with DDI work since 2015 and TIF moves in 2025. [1][7][6]
  • The real story isn’t beaver nuggets; it’s how one mega travel center could redirect I-65 spend, test Greenwood’s Worthsville Road network, and push rivals Wally’s, Sheetz, and Wawa to adjust Greater Indy strategies in 2026–2028. [2][5]
  • If Greenwood nails a development agreement that shares costs for Worthsville/CR 250E upgrades, the site can turn net-fiscal positive fast, given comparable Buc-ee’s are engineered for millions of annual visits. [4][11]

What the source said

WTHR reported that Buc-ee’s submitted plans for a Greenwood location near the Worthsville Road/I-65 interchange in Johnson County, advancing the project from rumor to formal filings. The piece notes a standard local review path—plan commission followed by possible council action—before construction starts. The report frames the move as a Midwest expansion milestone for the Texas brand but does not specify pump counts, square footage, or incentives. The emphasis is the public act of “plans submitted” in the Indianapolis metro’s south side. [1]

Why it matters

Greenwood taxpayers along the I-65 corridor already see weekend surges, while small retailers on U.S. 31 face a likely spend shift if Buc-ee’s concentrates demand near Worthsville Road. City leaders have been building toward this moment with the Diverging Diamond Interchange that opened in 2015 and an expanded Worthsville allocation area in 2025—this filing pressure-tests a decade of positioning. [7][6]

Buc-ee’s bans 18-wheelers, which makes its sites high-volume passenger-car magnets that can jam peak-hour approaches without turn-lane and signal work at CR 250E and Worthsville. Comparable proposals in Oak Creek, Wisconsin show why cities tie approvals to off-site road fixes and traffic-impact analyses. [14][11]

Original analysis

The Buc-ee’s Greenwood play

Consensus says, “It’s just a big gas station that brings traffic.” Contrarian read: Buc-ee’s is an interstate capture machine that, paired with pre-funded approach-lane and signal upgrades, becomes a recurring sales-tax engine anchored to I-65 mileposts 95–99. [7]

  • Proven demand nearby. CSP Daily News reported an April 6 opening date for Huber Heights, Ohio, while Dayton Daily News detailed a proposed $46 million, 30-year TIF district for infrastructure around that site—municipalities see durable fiscal upside from these nodes. [10][13]
  • Greenwood has laid groundwork. INDOT opened the Worthsville DDI in 2015, and the city expanded the Worthsville allocation area via a 2025 resolution to support corridor build-out with TIF—exactly the toolkit a mega-format requires. [7][6]
  • Competitive context is peaking. Wally’s plans an 84-fuel-position, 54,000-square-foot site in Whitestown off I-65, while Sheetz and Wawa continue Indiana entries; a south-side Buc-ee’s counterbalances a north-side cluster. [5][2]

Back-of-envelope: what a Greenwood Buc-ee’s could throw off

Use an external benchmark for visit volume and standard industry basket math. Oak Creek planning materials cite around 5 million visitors per year at maturity for a comparable Buc-ee’s, and NACS pegs a 2023 average in-store basket at $7.80. Indiana’s statewide sales tax rate is 7%. [11][12][15]

  • Assumptions
    • Annual visits: 5,000,000 (Oak Creek benchmark). [11]
    • Average in-store basket: $7.80 (2023 NACS). [12]
    • Indiana sales tax: 7% statewide. [15]
  • Math
    • Gross in-store sales ≈ 5,000,000 × $7.80 = $39,000,000.
    • Annual sales tax ≈ $39,000,000 × 0.07 = $2,730,000.

Interpretation: Even with conservative inputs, a Greenwood Buc-ee’s could remit low- to mid-seven figures in annual sales tax at maturity, before fuel margins, property tax increment, and adjacent pad-site spillover add to the ledger. Prior Worthsville corridor investments—like the $17 million project celebrated in 2016—position the area to capture secondary spend. [8][11]

Named-stakeholder breakdown

  • City of Greenwood: Lock a development agreement that funds Worthsville/CR 250E turn lanes, signal timing, and signage before ribbon-cutting; the expanded Worthsville TIF is the mechanism. [4][6]
  • Buc-ee’s: Gains the Indianapolis metro’s south gateway with a passenger-car-only model that preserves throughput and restroom standards by excluding 18-wheelers. [14]
  • Wally’s/Sheetz/Wawa: Indiana shifts from beachhead to battleground; expect foodservice price signaling and site selection along I-65/I-69 to bookend Buc-ee’s. [5][2]
  • INDOT: The 2015 DDI reduces conflict points, but holiday peaks will likely require channelization tweaks or added storage near the ramps, not a full interchange rebuild. [7]
  • EV networks: Mercedes-Benz High-Power Charging (HPC) is co-locating hubs at Buc-ee’s sites; if Greenwood lands one, the node becomes a “charge-and-spend” anchor on I-65’s south side. [9]

A 2x2: “Format gravity” vs “Infrastructure readiness”

  • High gravity / High readiness: Greenwood (if its development agreement funds approach lanes and signals) → fastest ramp to net-positive tax flow.
  • High gravity / Low readiness: Oak Creek–style debates over cost sharing and traffic studies → delays and conditions. [11][16]
  • Low gravity / High readiness: Smaller c-stores along Worthsville that ride spillover without clogging the interchange.
  • Low gravity / Low readiness: Rural exits where gridlock sparks political backlash with limited fiscal return.

What others are missing

EV dwell economics will set the winner’s margin. Mercedes-Benz’s 2023 partnership indicates 350–400 kW-class HPC at Buc-ee’s sites, which shifts stop lengths from quick restroom breaks to multi-minute visits that lift baskets beyond NACS’s $7.80 average via hot food and merch. If Greenwood secures on-site HPC, the store converts charging time into taxable receipts rather than handing that spend to I-465 or downtown Indianapolis. [9][12]

What to watch next

  1. By December 2026, Greenwood advances a development agreement that includes defined funding for Worthsville Road/CR 250 East intersection improvements tied to Buc-ee’s traffic impacts. [4][6]
  2. By June 2027, Buc-ee’s or Mercedes-Benz HPC files permits for a fast-charging hub on or adjacent to the Greenwood site; absent filings by then, expect weaker non-fuel capture versus EV-enabled peers. [9]
  3. By Q4 2028, the Greenwood Buc-ee’s opens; if not, expect the delay to trace to off-site roadwork sequencing and TIA conditions rather than vertical construction, as seen in Oak Creek–type cases. [11][16]

My take

Build it—smartly. Greenwood should greenlight Buc-ee’s only with a tight infrastructure and signage package that protects the DDI’s peak-hour flow and bakes in EV charging upside. Tie approvals to phasing—turn lanes and signals before opening day, EV hubs early, and a holiday operations plan—and the city keeps I-65 dollars local while setting a 2026–2028 template that rivals on the north side must answer. The south side can turn one store into a clean fiscal engine if the agreement matches the format’s gravity. [7][9]

Sources

[1] Plans submitted to build first Buc-ee’s in Indiana — WTHR (https://www.wthr.com/article/news/local/bucees-travel-center-gas-station-shopping-greenwood-indiana-beaver-nuggets/531-837efe6f-8afc-4318-9825-8f34b676d39b) — Confirms filing for a Greenwood location near I-65/Worthsville.

[2] UPDATE: Buc-ee’s eyes Indianapolis area for first Indiana location — Indianapolis Business Journal (https://www.ibj.com/articles/buc-ees-plans-first-indiana-location-in-greenwood) — Adds market context and competitor posture (Sheetz/Wawa) in Central Indiana.

[3] Buc-ee’s is eyeing Indiana — CSP Daily News (https://www.cspdailynews.com/company-news/buc-ees-eyeing-indiana) — Trade press corroboration that Buc-ee’s circled Greenwood/Johnson County.

[4] Buc-ee’s eyes Greenwood area for first Indiana location — The Republic (Columbus, Ind.) (https://www.therepublic.com/2025/11/06/buc-ees-eyes-greenwood-area-for-first-indiana-location/) — Notes anticipated development agreement scope, including Worthsville/CR 250E design.

[5] Wally’s eyes June debut for first Indiana site — C-Store Dive (https://www.cstoredive.com/news/wallys-eyeing-mid-june-debut-for-first-indiana-site/817373/) — Details Whitestown site scale: 84 fueling positions and a 54,000-square-foot building on I-65.

[6] Resolution 2025-07 enlarging Worthsville Road allocation area — City of Greenwood (https://www.greenwood.in.gov/egov/apps/document/center.egov?id=10271&view=detail) — Shows Greenwood expanding TIF coverage for the Worthsville corridor in 2025.

[7] I-65 at Worthsville Road Diverging Diamond Interchange — INDOT (https://www.in.gov/indot/about-indot/central-office/welcome-to-the-seymour-district/i-65-at-worthsville-road/) — Confirms the DDI and its 2015 opening.

[8] City of Greenwood celebrates completion of $17M Worthsville Road project — Indy Chamber (https://indychamber.com/2016/09/20/city-greenwood-celebrates-completion-17-million-worthsville-road-project/) — Documents prior corridor investment that underpins current development.

[9] Mercedes-Benz announces EV charging partnership with Buc-ee’s — Business Wire (https://www.businesswire.com/news/home/20231107930689/en/Mercedes-Benz-Announces-Strategic-Agreement-with-Buc-ees-to-Join-Forces-to-Deliver-Premium-EV-Charging-Experience-at-Buc-ees-Locations-Nationwide) — Establishes HPC co-location strategy at Buc-ee’s sites and charging capabilities.

[10] Ohio’s first Buc-ee’s to open April 6 in Huber Heights — CSP Daily News (https://www.cspdailynews.com/company-news/buc-ees-sets-opening-date-its-first-ohio-travel-center) — Verifies a reported April 6 opening date for the Huber Heights, Ohio store.

[11] Oak Creek Plan Commission report (Buc-ee’s tourism volumes and conditions) — City of Oak Creek (https://www.oakcreekwi.gov/home/showpublisheddocument/20209/638938786958070000) — Provides benchmark annual and peak daily visit counts and site plan conditions.

[12] U.S. convenience in-store sales top $340B; average basket $7.80 in 2023 — NACS (https://www.convenience.org/Media/Daily/2024/April/4/1-US-C-Store-Sales-Hit-860-Billion_Research) — Supplies industry basket size used in the revenue estimate.

[13] Buc-ee’s TIF district could generate $46M for infrastructure — Dayton Daily News (https://www.daytondailynews.com/local/buc-ees-proposed-tif-district-could-generate-46m-over-30-years-for-infrastructure-work/KTELRRTXBZFX5CFX4CXG6TEQUQ/) — Details a proposed 30-year, $46 million TIF for Huber Heights infrastructure.

[14] Buc-ee’s truck policy excludes 18-wheelers — Houston Chronicle (https://www.chron.com/texas/article/bucees-truckers-parking-texas-22218226.php) — Confirms the passenger-car focus and no-semis rule.

[15] Indiana Sales Tax Rate — SalesTaxAPI (https://www.salestaxapi.io/sales-tax-by-state/indiana) — Confirms the statewide 7% sales tax rate used in the calculation.

[16] Oak Creek plan approvals and conditions — Citizen Portal (https://citizenportal.ai/articles/6465174/Oak-Creek/Milwaukee-County/Wisconsin/Plan-Commission-approves-final-site-plans-for-Buc-ees-travel-center-with-conditions) — Summarizes plan commission actions and conditions relevant to infrastructure readiness.
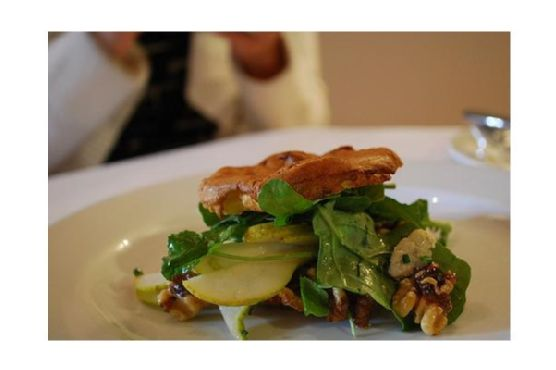

My Drunken Fish Fillet | Made by Meaghan Moineau

Picture this: it’s a rainy Wednesday evening, and I’m staring at my fridge like it’s going to magically suggest what I should make for dinner. Ever have those moments when nothing feels right, but takeout seems too tragic? That’s when I stumbled upon the perfect antidote — My Drunken Fish Fillet. It’s this crispy, golden, comforting dish that feels like a hug on a plate, without the takeout guilt. The beer in the batter makes everything delightfully light and airy, and honestly, it’s low-key impressive when you pull it off. Plus, who doesn’t love cooking with wine and beer? The kitchen smells divine, and it’s as much fun to make as it is to devour.

Jump to Recipe

What You’ll Need

Okay, so let’s talk about the magic ingredient list. The cool part? You probably have a bunch of this stuff hanging out in your pantry already. Here’s the breakdown:

  • Fish – whatever fillet you’ve got; think tilapia or cod.
  • Salt – to season the fish and the batter.
  • White ground pepper – trust me, it adds just the right kick.
  • Rice wine – this is where the magic (and the name) starts.
  • Beer – pick something light, like a lager.
  • White eggs – you’ll need both the yolk and the whites, separately.
  • All-purpose flour – plus a little more for dusting if you’re feeling fancy.
  • Oil – for frying, of course.

How to Make My Drunken Fish Fillet

Let’s break this down step-by-step so you can nail it every time:

  1. Start by combining your beer, egg yolk, flour, and half a teaspoon of salt. Whisk it well until you’ve got a thick, smooth batter. Pop this into the fridge for a good hour. This rest is crucial for texture!
  2. Meanwhile, sprinkle your fish fillets with salt and white ground pepper. Give them a pat so they’re nicely coated. Then, splash on the rice wine and let them marinate for about 15 to 20 minutes. The fragrance alone will brighten your day!
  3. When you’re ready to fry, beat the egg whites until they’re soft and foamy. Gently fold these into your chilled batter. This is where the light, airy magic happens.
  4. Heat up your oil until it’s shimmering. Dip your marinated fish fillets into the batter, ensuring they’re fully enveloped in that luscious mix. Fry them three pieces at a time, so they’re not overcrowded. Cook until they’re a beautiful golden brown and oh-so-crispy.
  5. For a quick dip, mix Yamasa soy sauce with a bit of wasabi from the tube and a squeeze of lemon juice. Simple but absolute perfection.

Cook’s Notes

Here’s the tea on making this dish truly sing. First off, make sure your oil is hot enough before you start frying. You want that sizzle! If it’s too cool, the batter soaks up oil and gets greasy. You can make the batter ahead (up to a day), just keep it covered in the fridge because that chill time is key. Leftover fillets (if you have any!) can be reheated in an oven to crisp them back up — avoid the microwave unless you love soggy regrets.

Make It Your Own

Want to switch things up? Here are some variations that keep things exciting:

  • Swap the fish for crispy tofu. Just be sure to press the tofu well before marinating.
  • Go gluten-free by using a gluten-free flour blend in place of all-purpose flour.
  • Add a spicy twist by mixing a pinch of cayenne into the batter for a bit of heat.
  • Try an Asian twist with panko breadcrumbs mixed into the batter for extra crunch.

If you try this, I’d love to hear how it turns out — drop a comment or tag me! I’m always here for your kitchen triumphs and even the occasional mishap. Happy frying!

Related update: My Drunken Fish Fillet

Related update: Paella for Four; A Wonderful Spanish Mixed Seafood Stew

Related update: Crunchy Prawn Skewers With Lemony Avocado Dip

Moroccan Carrot Soup | Made by Meaghan Moineau

It was one of those chilly Tuesday evenings when the sun decided to call it quits early, and the only way to combat the creeping cold was with something warm and comforting. As I rummaged through my pantry, I stumbled upon a bag of carrots that had been waiting patiently for their turn to shine. It struck me right then — Moroccan Carrot Soup! A bowlful of this would feel like a cozy hug, yet it’s surprisingly easy to whip up on a weeknight when you’re not in the mood for fussing over a stove. This soup is perfect for those nights when you want something hearty but can’t be bothered with a long list of ingredients or complicated steps. Stick with me here, and you’ll be ladling this aromatic beauty in no time.

Jump to Recipe

What You’ll Need

Chances are, you already have most of this. It’s all about letting just a few ingredients shine.

  • 2 tablespoons of butter
  • 1 yellow onion, chopped
  • 6 cups of carrots, peeled and chopped
  • 4 cups of low sodium chicken stock
  • 1 tablespoon of cumin seeds
  • 1 tablespoon of honey
  • 1 tablespoon of fresh lemon juice
  • 1/4 teaspoon of allspice
  • Salt and pepper to taste
  • 1/2 cup of sour plain yogurt

How to Make Moroccan Carrot Soup

  1. In a large saucepan, melt the butter over medium-high heat. Once it’s bubbly and aromatic, toss in the chopped onion. Sauté for about 2 minutes until the onion starts turning translucent and your kitchen smells heavenly.
  2. Add the carrots and pour in the chicken stock. Bring this orange-hued mixture to a boil. Then, reduce the heat to low, cover the pot, and let it simmer. In about 20 minutes, the carrots should be tender enough to yield to a fork.
  3. Meanwhile, grab a small skillet and toast the cumin seeds over medium-high heat. Keep an eye on them, stirring occasionally, until they are golden and releasing their nutty aroma — about 4 to 5 minutes.
  4. Once toasted, finely grind the cumin seeds in a spice mill or with a mortar and pestle. The fresh grind makes a world of difference, trust me!
  5. Remove the soup from the heat. Carefully, in batches, purée it in a blender until it’s silky smooth. Return the blended soup to the saucepan.
  6. Whisk in the honey, lemon juice, and allspice, stirring until everything is well combined. Give it a taste and season with salt and pepper to your liking.
  7. To serve, ladle the soup into bowls. You can either sprinkle the ground cumin on top or, for an extra creamy finish, mix the cumin with sour cream and dollop that goodness right in the center of the soup. Enjoy!

Cook’s Notes

Let’s talk storage first: This soup keeps like a champ. Store it in an airtight container in the fridge, and you’ve got a delicious lunch or dinner for up to 4 days. If you’re meal prepping or just want to savor the flavors later, it freezes beautifully for up to 3 months. Just thaw and reheat gently on the stove.

Avoid the temptation to add the honey and lemon while it’s still boiling — you don’t want to lose those delicate flavors. And when blending the hot soup, please be cautious; do not overfill the blender as the steam can cause it to splatter. Patience is key here!

Make It Your Own

  • Spice it up: Add a pinch of cayenne pepper or a swirl of harissa for a bit of heat.
  • Veggie twist: Swap half of the carrots for sweet potatoes. It gives the soup an even richer texture.
  • Herbaceous hit: Stir in some fresh chopped cilantro or mint just before serving for a fresh burst of flavor.
  • Vegan swap: Use coconut oil instead of butter and vegetable broth in place of chicken stock. Skip the yogurt or use a plant-based alternative.

If you try this, I’d love to hear how it turns out — drop a comment or tag me! Happy cooking, and may your kitchen be filled with the warmth of this delightful Moroccan Carrot Soup.

Related update: Moroccan Carrot Soup

Related update: Spicy Lemongrass Soup

Bing’s Mango Salsa | Made by Meaghan Moineau

I remember the first time I tried to make Bing’s Mango Salsa. It was one of those sweltering summer days where the air conditioner is doing its best but you’re still considering just living in the fridge. I was craving something refreshing yet spicy to liven up my grilled chicken, and I had a bunch of mangoes sitting on the counter looking a bit too ripe. So, I dove into making this salsa, which turned out to be not only insanely delicious but also incredibly easy to whip up. It’s the kind of recipe you love because it makes you look like a culinary rock star with minimal effort—and it’s perfect for those last-minute BBQ invites. The combination of the sweet mangoes, zesty lime, and spicy chilis is like a little tropical vacation in a bowl. You know you need this in your life.

Jump to Recipe

What You’ll Need

The best part? Chances are you already have most of these ingredients, and they’re all about celebrating fresh, vibrant flavors.

  • Sweet mangoes — the star of the show, ripe but not mushy
  • Lime zest and juice — for that zesty punch
  • A handful of mint leaves — or swap with coriander if you’re feeling rebellious
  • 1-2 shallots or a small red onion — sliced paper-thin
  • Salt and black pepper — to taste
  • A sprinkle of sugar — just a pinch to balance things out
  • Fresh chili — dial up the heat as per your taste

How to Make Bing’s Mango Salsa

  1. Start by dicing the mangoes into small cubes, about 1.5cm each. This size is perfect for ensuring every bite is juicy and flavorful.
  2. Toss the mango cubes into a large mixing bowl and grate the zest of one lime over them. The fragrance will hit you immediately — heaven!
  3. Squeeze the juice from half a lime into the bowl. Stir well, and remember, a little more lime juice can be added later if needed.
  4. Finely chop a bunch of mint leaves (or coriander if you’re in that camp). Add these to the bowl and give it a good mix.
  5. Slice the shallots or red onion as thin as you can and mix them into the mango concoction. Stir after each addition, trust me, it’s magical.
  6. Season with 1/2 teaspoon of salt and black pepper. Add 1 teaspoon of sugar, then stir and taste. Adjust these to your liking — it should be a delightful balance of savory, sweet, and tangy.
  7. Finally, chop the chillis and add them cautiously. Mix well, and taste as you go to achieve your preferred spice level.
  8. Cover the bowl with cling wrap and let it chill in the fridge for at least 30 minutes. This chilling time lets the flavors meld beautifully.
  9. Keep it chilled until you’re ready to serve. It’s best enjoyed fresh!

Cook’s Notes

Here’s a few things I’ve learned along the way:

  • If you make this ahead of time, give it a good stir before serving as the juices tend to settle at the bottom.
  • Leftovers can be stored in the fridge for up to 2 days, but trust me, it rarely lasts that long!
  • Be mindful of the type of chili you use. Some can be much spicier than others, so add them slowly until you reach your desired heat level.
  • This salsa is versatile. While it’s heavenly with grilled chicken or fish, it also makes a fantastic topping for tacos or a dip with tortilla chips.

Make It Your Own

Want to switch things up? Here are some fun variations:

  • Swap the mint leaves with cilantro if you’re a fan of its bold flavor.
  • Try adding some diced avocado for an extra creamy texture.
  • Use pineapple or peach instead of mango for a different sweet twist.
  • If you’re not a fan of heat, replace chilis with bell peppers for a milder version.

If you try this, I’d love to hear how it turns out—drop a comment or tag me! Let’s keep the kitchen adventures going. 🍍🌶️

Related update: Bing's Mango Salsa