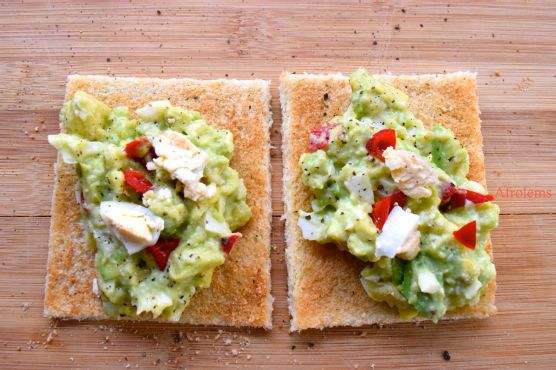
There’s something about a Saturday morning when I’m craving something simple yet satisfying, and this avocado egg salad hits just the right spot. Last week, I found myself staring into the fridge, half-awake and in dire need of coffee, when I realized I had everything I needed for a quick, hearty brunch. This recipe is a lifesaver for lazy mornings or when you just need something nourishing but don’t want to spend an hour in the kitchen. With creamy avocado and the perfect hint of spice from the scotch bonnet pepper, it’s a fresh take on a classic. Plus, you can have it ready in under 30 minutes. Trust me, you’ll want to keep coming back to this one.
Jump to Recipe
What You’ll Need
Chances are you already have most of this in your pantry or fridge, making it a breeze to whip up without a grocery run.
- 4 large eggs
- 1 ripe avocado pear
- 1 lemon
- 1/2 teaspoon black pepper
- 1 small seasoning cube
- 1 small scotch bonnet pepper
- 4 slices of whole wheat bread
How to Make Avocado Egg Salad
- Boil your eggs in a pot of water for about 10 minutes until they’re hard-boiled. Once cooked, immerse them in cold water to cool. This makes peeling a breeze.
- While the eggs cool, peel your avocado and mash it in a large bowl until smooth but with a few chunks for texture.
- Cut your lemon in half and squirt the juice over the mashed avocado. This keeps it from browning and adds a nice tangy kick.
- Once the eggs are cool, peel and chop them into bite-sized pieces, then add them to the avocado mixture.
- In a small bowl, mix the black pepper, crumbled seasoning cube, and finely chopped scotch bonnet pepper. Adjust pepper to taste if you’re not into too much heat.
- Add the spice mixture to your avocado and egg and gently combine until everything is well mixed.
- Toast your whole wheat bread until crisp and golden. The aroma alone will make your mouth water.
- Roll over the toasted bread with a rolling pin, cut the edges off for a neat presentation, and serve with a generous helping of the avocado egg salad on top.
Cook’s Notes
Here are a few nuggets of wisdom to keep in mind while making this dish:
- If your avocados are slightly underripe, you can microwave them for 30 seconds to soften.
- Scotch bonnet peppers pack a punch, so handle them carefully if you’re not a heat enthusiast. You can always start with half and add more to taste.
- This salad can be made a few hours ahead of time. Just cover it tightly with plastic wrap to keep the avocado from browning.
- Leftovers can be stored in an airtight container in the fridge for a day, although it’s best enjoyed fresh.
Make It Your Own
- Swap the whole wheat bread for a crusty baguette or sourdough for a different texture.
- Replace the scotch bonnet with jalapeños if you prefer a milder heat.
- Add a handful of cherry tomatoes, halved, for a burst of freshness.
- Mix in a spoonful of Greek yogurt for a creamier texture and a hint of tang.
If you try this, I’d love to hear how it turns out — drop a comment or tag me! Enjoy your meal, and remember, the best recipes are those you make your own.
Related update: Avocado Egg Salad
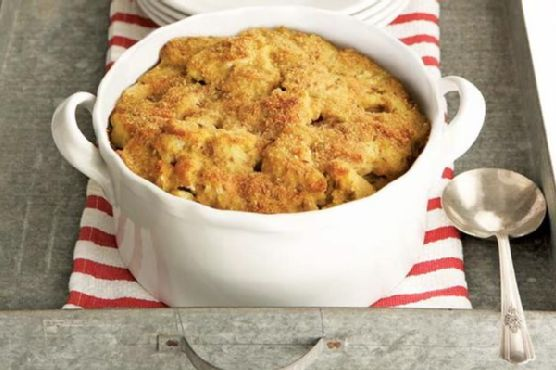
It was one of those chilly evenings when I found myself standing in front of the fridge, staring at a lonely head of cauliflower. It was one of those days when you crave something warm and cozy but can’t muster the energy for an elaborate meal. That’s when it hit me: Curried Cauliflower Gratin. It’s the perfect union of creamy, spicy, and crispy. This dish is like a comforting hug on a plate, yet it’s surprisingly easy to put together. Plus, it turns the humble cauliflower into something extraordinary, making it a weeknight favorite. Trust me, your taste buds will thank you later.
Jump to Recipe
What You’ll Need
You probably have most of these ingredients in your pantry already. The magic comes from how they all come together to elevate a simple vegetable.
- Cauliflower – the star of the show!
- Canned coconut milk
- Peanut oil
- Shallot
- Fresh ginger
- Garlic
- Curry powder
- Ground cumin
- Ground cardamom
- Ground nutmeg
- Cinnamon
- Flour
- Kosher salt
- Unsalted butter
- Breadcrumbs
- Cumin seeds
- Fresh garnish: cilantro
How to Make Curried Cauliflower Gratin
- Preheat your oven to 400°F. Grease an 8×8-inch baking dish with a bit of butter and set it aside. This will help with easy cleanup later and ensure nothing sticks.
- Steam the whole cauliflower until it’s tender but still holds its shape, about 15 minutes. Once done, let it cool a bit and then slice horizontally into thick slabs.
- In a saucepan over medium heat, warm the peanut oil. Toss in the ginger, shallot, and garlic, and sauté them until they’re soft and aromatic, around 3 to 4 minutes. Your kitchen should start smelling amazing about now!
- Add in the dry spices: curry powder, cumin, cardamom, nutmeg, and cinnamon. Sauté these for another 3 minutes until the spices are fragrant and toasty.
- Sprinkle the flour over the spice mixture and stir it in, cooking for about 2 minutes. This forms the base of your sauce.
- Slowly whisk in the coconut milk and salt. Keep stirring until the mixture simmers and thickens, about 3 to 5 minutes. You’ll want it to be creamy but not too thick.
- Arrange a layer of cauliflower slices in your prepared baking dish. Pour about half of your curry cream over this layer. Repeat with remaining cauliflower and curry cream.
- In a small bowl, mix the breadcrumbs and cumin seeds. Sprinkle this over the top of the dish, then drizzle with melted butter for that crispy finish.
- Bake in the preheated oven for 25 to 30 minutes. You’ll know it’s done when the top is golden brown and the edges are bubbly.
- Once out of the oven, sprinkle with fresh cilantro for an extra pop of color and flavor. Serve warm and dig in!
Cook’s Notes
This dish is pretty forgiving, so feel free to adjust the spice levels to your liking. If you want a bit more heat, you could add a pinch of cayenne or chili flakes with the other spices. Leftovers can be stored in an airtight container in the fridge for up to three days. Reheat in the oven to bring back the crispiness rather than using the microwave, which can make it soggy. You can also make the curry cream a day ahead. Just keep it refrigerated and assemble the dish when you’re ready to bake.
Make It Your Own
- Swap the cauliflower for broccoli if you want a different flavor profile or if that’s what you have on hand.
- For a nut-free version, replace the peanut oil with olive oil.
- If you’re not a fan of coconut milk, heavy cream can be used as a substitute, though it will change the flavor slightly.
- Add a layer of sautéed mushrooms between the cauliflower slices for an earthy twist.
If you try this, I’d love to hear how it turns out — drop a comment or tag me! I’m always excited to see how you make these recipes your own. Happy cooking!
Related update: Curried Cauliflower Gratin
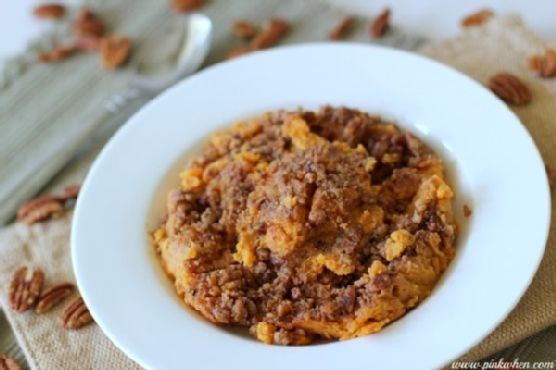
It was one of those chilly fall afternoons when the idea of a cozy dinner just felt right. I had spent the morning raking leaves, my nose cold, my fingers tingling, and all I could think about was something warm and comforting for dinner. My mind wandered to sweet potatoes, with their vibrant orange hue and naturally sweet flavor. And that’s how this Sweet Potato Casserole came to be. It’s the perfect blend of creamy, sweet, and crunchy, thanks to a delightful pecan topping that just makes it irresistible. Whether you’re preparing for a family gathering or simply want to treat yourself to a homemade delight, this casserole is bound to bring warmth and smiles to the table.
Jump to Recipe
What You’ll Need
This dish is a breeze to make, and chances are you already have most of these ingredients tucked away in your pantry or fridge. Here’s what you’ll need:
- 5 sweet potatoes (or you can use cooked yams)
- 2 eggs
- 1 teaspoon ground cinnamon
- 1 cup heavy cream
- Sugared pecans (make these the day before for best results)
- 1/2 teaspoon salt
- 1/2 cup unsalted butter
- 2 teaspoons vanilla extract
- 1 cup white sugar
How to Make The BEST Sweet Potato Casserole
- Preheat your oven to 350°F (175°C). Prepare a 9 x 13 glass baking dish with a light coat of butter or cooking spray.
- In a medium-sized mixing bowl, place your cooked sweet potatoes. Add the salt, butter, eggs, vanilla extract, ground cinnamon, white sugar, and heavy cream. Mix thoroughly for about a minute until smooth and well-combined.
- Take your sugared pecans and place them in a blender or food processor. Chop them until they’re small and easy to sprinkle, but be careful not to turn them into dust!
- Spoon the sweet potato mixture into the prepared baking dish, spreading it out evenly. Then, cover the top with your finely chopped sugared pecans, making sure every inch is covered.
- Bake in the preheated oven for 30 minutes or until the topping is lightly browned and the edges start to bubble slightly. Let it cool for a few minutes before serving to allow the casserole to set.
Cook’s Notes
Here’s a little secret: if you boil your sweet potatoes rather than bake them, they become super easy to mash, and the flavor remains delightfully sweet. If you’re running short on time, you can even prep the sweet potatoes and pecans a day ahead. Just keep them in airtight containers in the fridge. When it comes to leftovers, they can be stored in the fridge for up to three days and reheated in the oven at 325°F (160°C) for about 15 minutes. Avoid the microwave, as it tends to make the topping less crunchy.
Make It Your Own
- Nut swap: If pecans aren’t your thing, try using chopped walnuts or almonds for a slightly different texture and flavor.
- Spice it up: Add a pinch of nutmeg or cloves to the sweet potato mixture for an extra layer of warmth and spice.
- Go dairy-free: Swap the heavy cream with coconut milk and use a plant-based butter alternative. Still totally delicious!
- Add a twist: Mix in a handful of shredded coconut to the pecan topping for a tropical touch.
If you try this, I’d love to hear how it turns out — drop a comment or tag me on social media! Let your kitchen adventures begin!
Related update: The BEST Sweet Potato Casserole
Related update: Curried Cauliflower Gratin

Picture this: It’s a chilly February evening, and my kitchen is filled with the aroma of something sweet and promising. I had just returned from a hectic day at work, my scarf still draped haphazardly around my neck, when I realized Valentine’s Day was a mere twenty-four hours away. Inspired by the spirit of love and a bit of a sweet tooth, I decided to whip up something special yet uncomplicated — Valentine Hearts. These delightful little treats are the perfect blend of flaky, creamy, and fruity, with a touch of chocolate for good measure. They’re not just easy on the eyes, but they’re a breeze to make — perfect for those of us who don’t have hours to spend in the kitchen. Whether you’re planning a romantic dinner or just want to indulge yourself, these hearts are bound to win over anyone’s heart.
Jump to Recipe
What You’ll Need
Trust me, you probably have most of this in your pantry already. Just a quick trip to the store for a couple of fresh items, and you’re ready to go.
- Puff pastry – store-bought is perfect for this quick recipe.
- 1 egg – for that perfect golden glaze.
- Castor sugar – for a touch of sweetness on the crust.
- Canned crème fraiche – this creamy goodness holds everything together.
- Fresh strawberries – because what’s a Valentine treat without a bit of berry love?
- Plain chocolate – for drizzling on top. Decadent and delightful!
How to Make Valentine Hearts
- Preheat your oven to 220°C (425°F). Trust me, this is the sweet spot for puff pastry perfection.
- Thaw the puff pastry sheet according to the package instructions. You don’t want it too soft, just enough to handle.
- Unroll the pastry sheet gently. Use a medium-sized heart-shaped cookie cutter to cut out about 8 hearts. Go ahead, it’s okay to indulge in a little love here.
- Prick each heart with a fork to prevent them from puffing up too much. This step is crucial to keep them in shape.
- Brush each heart with beaten egg, then sprinkle lightly with castor sugar. This will give them a beautiful golden shine and a touch of sweetness.
- Place the hearts on a greased baking sheet and pop them in the oven for about 10 minutes, or until they’re risen and golden brown. Your kitchen will start smelling absolutely heavenly, I promise.
- Let them cool completely. Patience, my friend, patience.
- Slice the strawberries while the hearts cool. Once cooled, carefully split each heart horizontally using a sharp knife.
- Sandwich each heart with a generous dollop of crème fraiche and a few slices of strawberry.
- Finally, drizzle melted plain chocolate over the top and dust with a little more castor sugar. Voilà! Your Valentine Hearts are ready to impress.
Cook’s Notes
Here’s a little wisdom from my kitchen to yours. Keeping the pastry cold is key to achieving that flaky texture, so don’t let it sit out for too long. If you see the pastry getting sticky, pop it back in the fridge for a few minutes. When slicing the hearts, be gentle to avoid breaking them; a serrated knife usually does the trick. If you’re making these in advance, you can prepare the puff pastry hearts and store them in an airtight container for up to two days. Just assemble with strawberries and crème fraîche right before serving for the freshest taste.
Make It Your Own
Feeling adventurous? Here are some fun variations:
- Swap the strawberries with raspberries or blueberries for a different fruity twist.
- Use lemon curd instead of crème fraiche for a tangy surprise.
- Try white chocolate drizzle instead of plain for a sweeter, creamier finish.
- Add a pinch of cinnamon to the sugar before sprinkling on the pastry for a warm, spicy note.
If you try this, I’d love to hear how it turns out — drop a comment or tag me in your pictures! Whether you’re sharing with a loved one or treating yourself, these Valentine Hearts are sure to bring a smile. Enjoy every flaky, creamy, chocolaty bite!
Related update: Valentine Hearts
Related update: The BEST Sweet Potato Casserole
Related update: Peach Pie
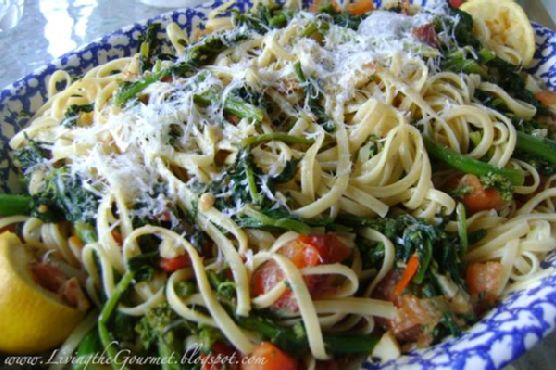
It was one of those whirlwind Tuesdays, you know, the kind where you look up and suddenly it’s 7 PM and you’re staring at your fridge like it’s a magic portal to dinner. The last thing I wanted was a complicated meal, but I was craving something a little more special than the usual weeknight pasta. That’s when I remembered this Broccoli Rabe with Tomatoes, Anchovies & Spaghetti recipe. It’s the perfect combination of quick, comforting, and just a touch fancy — like your favorite pair of jeans that still manage to make you feel dressed up. The best part? It comes together in no time, leaving you with a warm, savory bowl of goodness that feels like a little triumph over the chaos of the day.
Jump to Recipe
What You’ll Need
Before you make a mad dash to the grocery store, take a peek into your pantry. Chances are, you already have most of what you need. Here’s the simple lineup:
- 1 bunch of broccoli rabe
- 1 can of anchovies
- 3 cloves of garlic
- Juice of 1 lemon
- 1/2 teaspoon red pepper flakes
- 1/2 cup grated Romano cheese
- 12 ounces of spaghetti
- 1 cup cherry or grape tomatoes
- Olive oil
How to Make Broccoli Rabe with Tomatoes, Anchovies & Spaghetti
Ready to transform these humble ingredients into something spectacular? Here’s how:
- Start by prepping the broccoli rabe. Trim about 1 inch off the stems and then give them a quick blanch in boiling water for 3-4 minutes. This will take out the bitterness and keep that lovely green color. Drain and set aside.
- In a large frying pan, heat a couple of drizzles of olive oil over medium heat. Toss in the garlic, red pepper flakes, and tomatoes. Sauté until the tomatoes are soft and the garlic is fragrant — think of it as the kitchen’s way of saying “hello, deliciousness!”
- Add the blanched broccoli rabe to the pan and continue to sauté for a few more minutes. This step gets all those flavors mingling.
- Now, for the umami punch: add the anchovies to the pan. They’ll melt into the dish, leaving behind a savory depth that’s pure magic.
- Meanwhile, cook your spaghetti in a large pot of salted boiling water. Before draining, scoop out about 1/2 cup of the pasta water and add it to the broccoli rabe mixture. This starchy water helps create a luscious sauce.
- Drain the spaghetti and get ready to plate. On a serving platter, drizzle a bit of olive oil and sprinkle some grated Romano cheese. Add the spaghetti, top with the broccoli rabe mix, then give it a final drizzle of olive oil, a squeeze of lemon juice, and a generous dusting of Romano cheese.
Cook’s Notes
A couple of things to keep in mind: If you’re new to cooking with anchovies, don’t be scared! They dissolve beautifully and add a savory backbone without a fishy taste. Make sure not to overcook the broccoli rabe initially; you want it vibrant, not mushy.
Got leftovers? Store them in an airtight container and they’ll keep well in the fridge for a couple of days. If you plan to make this ahead, keep the lemon juice out until serving to keep everything fresh and bright.
Make It Your Own
Feel free to play around with this recipe. Here are some ideas to get you started:
- Swap the anchovies for crispy tofu to make it vegetarian-friendly.
- Add a handful of toasted pine nuts for a bit of crunch and nuttiness.
- Switch out the Romano cheese for Parmesan if that’s what you have on hand.
- Try using kale instead of broccoli rabe for a slightly milder, less bitter green.
If you try this, I’d love to hear how it turns out — drop a comment or tag me! Cooking is all about making it work for you and having a little fun along the way. Enjoy your dinner, friend!
Related update: Broccoli Rabe with Tomatoes, Anchovies & Spaghetti
Related update: Bibimbab (Korean Rice w Vegetables & Beef)

It was one of those rainy afternoons when the only thing that could rival the soothing sound of raindrops was the comfort of a warm, spicy dish. I found myself staring at a bunch of baby eggplants in my kitchen, and that’s when the craving hit me—Hyderabadi baghara Baingan. It’s the kind of dish that feels like a warm hug, rich in flavor yet deceptively simple to make. This recipe is a lifesaver on days when you want to impress without spending hours in the kitchen. The combination of spices and the texture of the eggplants creates a symphony of flavors that dance around your taste buds. Trust me, this is one recipe you’ll find yourself going back to, rain or shine. Jump to Recipe
What You’ll Need
The ingredient list is delightfully short and sweet. Chances are you already have most of this in your pantry, which means fewer trips to the grocery store.
- Baby eggplants – 10-12
- Red Kashmiri chilies – 3-4
- Coconut
- Coriander seeds
- Cumin seeds
- Curry leaves – 8-10
- Garlic
- Ginger – 1 piece
- Tamarind – a lime-sized ball
- Oil
- Onion
- Salt
- Nigella seeds
- Sesame seeds
- Turmeric
- Jaggery
- Peanuts
- Cashew nuts
How to Make Hyderabadi baghara Baingan
- First, wash the baby eggplants and pat them dry. Carefully slit each one lengthwise into four sections, ensuring the stems are still intact. This gives the dish its signature look where the eggplants remain joined at the stem.
- In a pan, heat a teaspoon of oil and toss in the cumin seeds, peanuts, and cashew nuts. Sauté for a few seconds until you can smell their toasty aroma.
- Add in the ginger, garlic, and chopped onion. Sauté for about a minute until the onion becomes translucent and the mixture is fragrant.
- Now, add the turmeric, coriander seeds, coconut, and red Kashmiri chilies. Fry this mixture until it turns a rich brown color. Your kitchen will smell absolutely divine!
- Allow this aromatic mixture to cool completely before blending it into a fine paste, adding just a little water to get the right consistency. Set the paste aside.
- Heat some oil in a thick-bottomed pan. Fry the eggplants until they are brown and tender. Remove them carefully and set aside.
- In the same oil, add the nigella seeds and let them crackle. Toss in the curry leaves and fry briefly for a few seconds.
- Stir in the prepared ground paste, tamarind pulp, salt, and jaggery. Mix everything well before adding the fried eggplants back to the pan.
- Add half a cup of water, cover, and let it cook over low heat until the eggplants are thoroughly cooked and soft. This should take a few minutes.
- Serve this delectable curry hot, paired perfectly with either rice or rotis.
Cook’s Notes
This dish is all about balancing flavors. The tanginess from the tamarind and the sweetness from the jaggery complement the spicy, nutty base perfectly. Be sure not to rush the roasting of the spices and nuts; it’s this step that builds the foundation of the dish’s flavor. If you’re preparing it ahead of time, the curry can be stored in the refrigerator for up to three days. Simply reheat it gently on the stove before serving. And the best part? The flavors intensify overnight, making for even tastier leftovers!
Make It Your Own
- For a nuttier flavor, swap peanuts for almonds. Just make sure to toast them lightly for that extra crunch.
- Not a fan of eggplants? Use zucchini as an alternative, though they cook faster, so keep an eye on them.
- Add a handful of raisins for an unexpected pop of sweetness that complements the spices beautifully.
- If you want to up the spice level, include some green chilies along with the red ones for a fiery kick.
If you try this, I’d love to hear how it turns out — drop a comment or tag me! Nothing makes me happier than seeing different takes on my favorite recipes. Enjoy cooking and savor every bite!
Related update: Hyderabadi baghara Baingan
Related update: Chorizo and egg bake
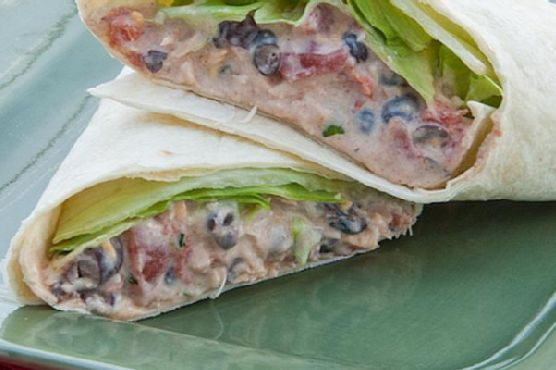
Picture this: It’s a Tuesday night, and you’re dead set on making dinner happen without a trip to the store. As I rummaged through my pantry, I found a can of Swanson Premium Chicken and thought, “Well, this could be interesting!” That’s how these Chicken Enchilada Salad Wraps came to life. They’re the kind of dish that feels like you’ve put way more effort into dinner than you really have. Perfect for when you want something comforting yet fresh and vibrant. These wraps are my go-to when I need a quick meal that doesn’t skimp on flavor. Trust me, they’re a keeper! Jump to Recipe
What You’ll Need
There’s a good chance you already have most of these ingredients hiding in your kitchen. It’s all about those pantry staples coming together to make magic.
- Light cream cheese
- Sour light cream
- Chili powder
- Cumin
- Garlic
- Canned Swanson Premium Chicken
- Shredded cheddar cheese
- Diced canned tomatoes
- Diced green onions
- Fresh cilantro
- Lettuce
- Burrito-sized tortillas
How to Make Chicken Enchilada Salad Wraps
- In a medium-sized bowl, blend together the light cream cheese, sour cream, chili powder, cumin, and garlic until smooth. You’ll want the mixture to be creamy with a little bit of a kick – smell those spices bloom!
- Gently fold in the shredded cheddar cheese, Swanson Premium Chicken, diced tomatoes, green onions, and fresh cilantro. Make sure everything is evenly mixed so you get a bit of everything in each bite.
- Divide the mixture evenly between the tortillas, making sure to spread it to the edges for maximum flavor coverage.
- Top each tortilla with a handful of lettuce. This adds a nice crunch and keeps things fresh and light.
- Roll up each tortilla burrito-style, tucking in the edges as you go to keep all the goodness inside.
- Slice in half if you’re feeling fancy and serve immediately. Enjoy the meld of textures and flavors, from cool and creamy to warm and savory.
Cook’s Notes
These wraps are pretty forgiving, so feel free to adjust the spices to your liking. If you’re a spice lover, a dash of cayenne wouldn’t hurt. They’re best enjoyed fresh but will keep in the fridge for a day or so. Just wrap them tightly in foil or plastic wrap to keep them from drying out.
- If you’re making them ahead for a lunchbox, keep the lettuce separate until you’re ready to eat to avoid it getting soggy.
- Got leftovers? They make a surprisingly good quesadilla filling. Just heat a pan and crisp them up until golden!
Make It Your Own
- Swap the chicken for crispy tofu for a vegetarian twist that still packs in the protein.
- Use spinach instead of lettuce for a slight nutritional boost and a different kind of crunch.
- If you’re out of tortillas, this mix works wonderfully as a dip with some crispy tortilla chips.
- Add some sliced avocado for an extra creamy dimension and a touch of healthy fat.
If you try this, I’d love to hear how it turns out — drop a comment or tag me! Your kitchen adventures always make my day.
Related update: Chicken Enchilada Salad Wraps
Related update: Hyderabadi baghara Baingan
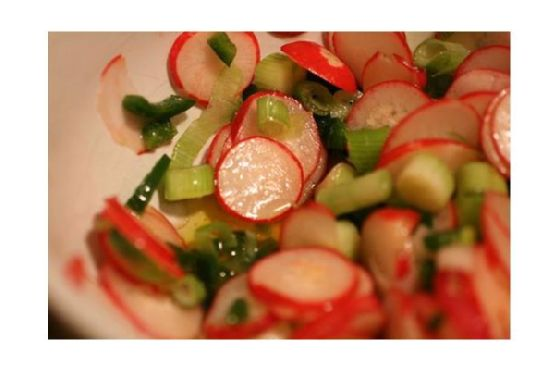
Picture this: it’s midweek, and I’ve just wrapped up a marathon day of work calls and last-minute errands. The fridge is looking a bit sparse, and my energy levels are even lower. I need something quick and bright to lift my spirits and keep me from calling for takeout. Enter my Radish and Watercress Salad. This dish is like a little burst of sunshine — crisp, peppery, and so darn easy to throw together that it almost feels like cheating. It’s the kind of salad that makes you feel like you’ve got your life together, even when you really don’t. It’s refreshing and light, yet robust in flavor, making it the perfect pick-me-up any day of the week.
Jump to Recipe
What You’ll Need
This recipe is all about fresh, vibrant flavors, and chances are, you’ve got most of these ingredients hanging around already. Here’s what you’ll need:
- Salt
- Garlic powder
- Dijon mustard — the kickstarter of flavor here
- Red wine vinegar — for that tangy bite
- Olive oil
- Lemon juice
- Watercress — peppery and fresh, the star of the salad
- Red radishes — crisp and colorful
How to Make Radish and Watercress Salad
- In a screw-top jar, combine a pinch of salt and a sprinkle of garlic powder. Add in the Dijon mustard, red wine vinegar, olive oil, and a dash of lemon juice. Secure the lid and give it a vigorous shake until everything is well blended and the dressing looks smooth and slightly thickened.
- Rinse the watercress thoroughly under cool, running water. Pat it dry with a clean kitchen towel or paper towels — no one likes a soggy salad, right?
- Thinly slice the red radishes. You want them to be thin enough to be translucent but still have a good crunch.
- In a large salad bowl, toss the watercress and sliced radishes together. Pour your freshly shaken dressing over the top, and toss again gently until everything is evenly coated.
Cook’s Notes
This salad is as straightforward as it gets, but a few tips can make it even better. When shaking the dressing, make sure the jar is sealed tight, or you’ll end up with a vinegar-scented kitchen. If you’re making this ahead, keep the dressing and salad separate until just before serving to prevent the greens from wilting. Leftovers can be stored in the fridge for a day, but honestly, this salad is best enjoyed fresh. The peppery bite of the watercress and the crunch of the radishes are what make it sing.
Make It Your Own
- Swap the watercress for arugula if you want a slightly milder peppery flavor.
- Add sliced almonds or walnuts for some extra crunch and protein.
- Throw in some crumbled feta or goat cheese for a creamy contrast.
- Mix in some thinly sliced cucumbers or avocados for additional freshness and creaminess.
If you try this, I’d love to hear how it turns out — drop a comment or tag me! Your midweek dinner game is about to get a whole lot brighter and a little bit fancier. Happy cooking!
Related update: Radish and Watercress Salad
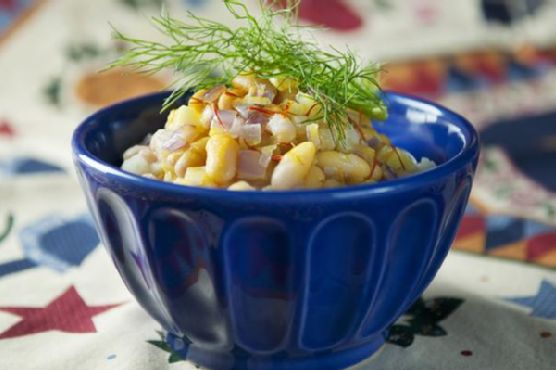
I found myself in the kitchen on one of those unexpectedly chilly evenings, the kind that sneaks up on you after a week of golden autumn days. As I rummaged through the pantry, I came across a can of cannellini beans tucked away behind the lentils – a forgotten gem in my usual dinner rotation. The scene was set: I had a craving for something warm and comforting, yet light enough not to tip into winter stews. A quick glance in the fridge revealed a bulb of fennel and a red onion that had been waiting patiently for their moment to shine. In no time, I whipped up this Cannellini Bean Side Dish with Fennel, Red Onion, and Saffron. It’s a dish that’s as fragrant as it is colorful, and blissfully easy to pull together. It’s perfect for a weeknight, yet elegant enough to grace a dinner party table.
Jump to Recipe
What You’ll Need
The magic of this dish is that it leans heavily on pantry staples, with just a few fresh ingredients to elevate the flavors. Chances are you already have most of this on hand!
- Cannellini beans – cooked and ready to go
- Extra virgin olive oil – for a rich, flavorful base
- Fennel – adds a lovely anise flavor
- Flat parsley – for a fresh, herby finish
- Red onion – brings sweetness and color
- Saffron threads – a pinch of luxury
- Black salt and pepper – to season
- Vegetable broth – to adjust consistency
- Water – for soaking the saffron
How to Make Cannellini Bean Side Dish With Fennel, Red Onion, and Saffron
- Start by combining the saffron threads with a few tablespoons of boiling water in a small, heat-proof bowl or measuring cup. Let this steep for about 5 minutes. You’ll notice the water turning a lovely golden hue.
- In a large nonstick skillet, heat the extra virgin olive oil over medium heat. Toss in the fennel and red onion, and cook them, stirring occasionally, until they’re tender and the kitchen smells like heaven – about 5 minutes.
- Add the cannellini beans and the saffron water to the skillet. Stir everything together until the beans are coated with that gorgeous saffron color.
- Season to taste with black salt and freshly cracked pepper. If the mixture starts to look a bit dry, splash in some vegetable broth or the liquid from the beans until you achieve the consistency you like.
- Finish by sprinkling freshly chopped flat parsley or fennel fronds over the top. Serve immediately while it’s still gloriously warm.
Cook’s Notes
This dish is forgiving and flexible, which is part of its charm. If you don’t have saffron, don’t panic – just add a pinch of turmeric for a hint of color. Store any leftovers in an airtight container in the fridge for up to three days. To reheat, simply add a splash of broth or water to loosen everything back up. This dish is also perfect for making ahead; the flavors deepen as they sit, so it tastes even better the next day.
Make It Your Own
Here are a few ways to switch things up and make this dish your own:
- Swap the cannellini beans for chickpeas or butter beans for a different texture.
- Replace the fennel with celery if you prefer a milder flavor.
- For a protein boost, add crispy tofu cubes or cooked shredded chicken towards the end of cooking.
- Sprinkle some crumbled feta or goat cheese on top for a creamy finish.
If you try this, I’d love to hear how it turns out — drop a comment or tag me! There’s nothing better than seeing a little corner of my kitchen magic make its way into another home. Enjoy!
Related update: Cannellini Bean Side Dish With Fennel, Red Onion, and Saffron

It was a Wednesday evening, and I’d just returned home after a long day that seemed to have no end in sight. You know the one — where you’re too exhausted to even scroll through your takeout apps. I peered into the fridge, hoping for a miracle, and voilà, the ingredients for Farfalle with Shrimps, Tomatoes Basil Sauce all but jumped out at me. It was like they were whispering, “We got you.” There’s something magical about pulling together a meal that feels indulgent and comforting but comes together in the blink of an eye. This dish is that kind of magic. Perfect for those nights when you want something special without the hassle.
Jump to Recipe
What You’ll Need
You might already have most of these ingredients lounging in your pantry or fridge, just waiting to become something delicious. Farfalle pasta is the star of the show, and everything else is there to make it shine even brighter.
- 1 tablespoon of butter
- 8 ounces of farfalle pasta
- 1 cup of fresh tomatoes, chopped
- 1/2 pound of fresh shrimp, peeled and deveined
- 1/2 cup of fresh basil leaves
- Salt and freshly ground black pepper, to taste
How to Make Farfalle with Shrimps, Tomatoes Basil Sauce
- Bring a large pot of salted water to a boil. Add the farfalle and cook until al dente, which should take about 10-12 minutes. You’ll know it’s ready when it’s firm to the bite yet tender.
- While the pasta cooks, melt the butter in a large frying pan over medium-high heat. Once the butter starts to bubble and gives off a nutty aroma, toss in the tomatoes.
- Sauté the tomatoes for about a minute, just until they start to soften and their juices mingle with the butter, creating a simple, vibrant sauce.
- Add the shrimp to the pan. Cook them until they turn a beautiful light pink and are cooked through, about 3-4 minutes. Sprinkle with salt and freshly ground black pepper to taste.
- Toss in the fresh basil leaves and give everything a gentle stir, letting the basil release its fragrant oils.
- Once your pasta is perfectly cooked, drain it and add it directly to the skillet with the shrimp and tomatoes. Toss everything together so the pasta is well-coated in the buttery tomato sauce.
- Serve immediately while it’s still hot, and watch as the room fills with the comforting aroma of basil and buttery goodness.
Cook’s Notes
This dish is forgiving, which is a blessing if you’re prone to distractions like I am. Keep an eye on the shrimp; they cook fast and go from perfect to rubbery in a blink. If you find your sauce getting too thick, a splash of the pasta cooking water will loosen it right up.
Leftovers can be stored in an airtight container in the refrigerator for up to two days. Reheat gently in a skillet over low heat, adding a little water to bring back the sauce’s creaminess.
Make It Your Own
- Swap out the shrimp for crispy tofu if you’re in the mood for a vegetarian twist.
- Add a handful of baby spinach along with the basil for a boost of greens.
- If you love a bit of heat, a pinch of red pepper flakes will do wonders.
- For a citrusy finish, add a squeeze of lemon juice just before serving.
If you try this, I’d love to hear how it turns out — drop a comment or tag me! Cooking is such a shared joy, and I can’t wait to hear your tales from the kitchen.
Related update: Farfalle with Shrimps, Tomatoes Basil Sauce
Related update: Cannellini Bean Side Dish With Fennel, Red Onion, and Saffron
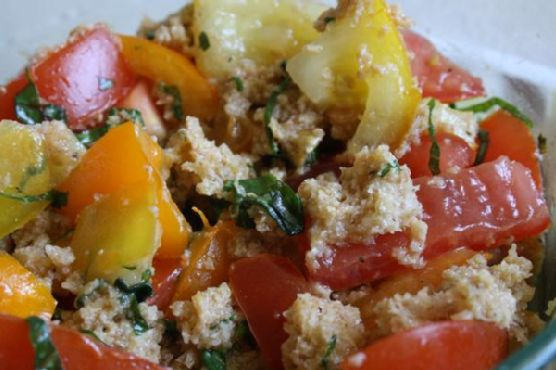
Picture this: It’s the kind of sweltering summer day where the thought of turning on the oven makes you break into a sweat. My garden was overgrown with tomatoes begging to be picked, and the loaf of Tuscan bread on the counter was a day away from becoming an even more petrified artifact of the kitchen. That’s when I remembered the glory of Panzanella. This Tuscan bread salad is not only a perfect way to beat the heat, but it’s also a deliciously resourceful way to use up what you might already have at home. The magic of it lies in its simplicity: juicy tomatoes, aromatic basil, and chewy-crunchy bread brought to life with a glug of olive oil and a tangy splash of vinegar. It’s a dish that’s as comforting as it is impressive, and trust me, the flavors are anything but humble.
Jump to Recipe
What You’ll Need
The beauty of Panzanella is its simplicity. Chances are you already have most of these ingredients cozying up in your kitchen:
- Six slices of day-old Tuscan bread
- Extra virgin olive oil
- Fresh basil leaves
- Red onion
- Red wine vinegar
- Salt and pepper
- Tomatoes (as ripe as you can find, trust me!)
How to Make Traditional Panzanella
- First up, grab a large bowl and submerge your day-old bread in water. Let it lounge in its little pool for about 20 minutes. You’re aiming for soft, but not soggy.
- Once soaked, drain the bread and give it a good squeeze to get rid of all that water. Crumble the bread into a serving bowl; think large, rustic chunks rather than breadcrumbs.
- Now, scatter your chopped tomatoes, thinly sliced red onion, and fragrant basil leaves over the bread. The colors should already be making you smile.
- Dress the salad with a generous drizzle of extra virgin olive oil and a splash of red wine vinegar. Salt and pepper to taste, then toss everything together like you’re giving it a gentle hug.
- Give it a taste and adjust with more oil, salt, or vinegar as your taste buds demand. Let the Panzanella sit for 15 minutes to let the flavors mingle and serve it up at room temperature.
Cook’s Notes
So here’s the deal: Panzanella is all about that bread absorbing the tomato juices and dressing. Use the sturdiest day-old bread you can find for the best texture—soggy bread is a no-go. If you can, make this a bit ahead of time; the flavors only get better as they sit together. Store any leftovers in the fridge, but honestly, Panzanella is best on the day it’s made. If you need to refresh it the next day, add a bit more olive oil and vinegar to bring it back to life.
Make It Your Own
Here are a few ideas to switch things up while still keeping that classic Panzanella vibe:
- Swap the red onion for thinly sliced shallots for a milder flavor.
- Add cucumbers for extra crunch and freshness.
- Throw in some capers for a briny kick that plays nicely with the tomatoes.
- For a bit of protein, toss in some creamy mozzarella balls or crispy tofu.
If you try this, I’d love to hear how it turns out — drop a comment or tag me! Your kitchen stories make my day. Here’s to celebrating simple ingredients and the joy of letting them shine.
Related update: Traditional Panzanella
Related update: Radish and Watercress Salad
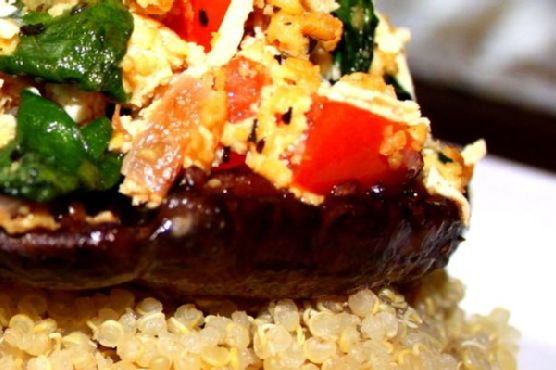
Picture this: It’s a Tuesday evening, and I’m staring into my fridge, hunting for inspiration. It’s been a chaotic day with back-to-back meetings and a toddler who thinks naptime is optional. I need something quick, something comforting. My eyes land on a pack of portobello mushrooms and a forgotten block of tofu in the freezer. A lightbulb moment! Vegan Stuffed Portobello Mushrooms over Quinoa. It’s not only going to save dinner but also my sanity. This dish is a godsend on nights like these. It’s hearty, packed with flavor, and gives me that little victory dance moment because it feels way fancier than the effort it demands.
Jump to Recipe
What You’ll Need
This recipe is a pantry hero — chances are, you already have most of this on hand.
- Cooked quinoa
- Large portobello mushrooms
- Frozen tofu
- Diced tomato
- Fresh spinach
- Red diced onion
- Garlic
- Dried oregano
- Dried basil
- Nutritional yeast
- Lemon juice
- Daiya vegan mozzarella “cheese”
- Olive oil
- Balsamic vinaigrette
- Salt and pepper
How to Make Vegan Stuffed Portobello Mushroom over Quinoa
- Start off by cooking your quinoa according to package instructions and set it aside. This will be your bed of deliciousness.
- Thaw the tofu, then drain and squeeze out all that excess water. You want it as dry as possible to soak up all the flavors.
- Gently brush off any dirt from the portobello mushrooms and remove the stems. Set them aside for stuffing.
- Whip up a quick marinade for the mushrooms: mix together 3 tablespoons of olive oil, 3 tablespoons of balsamic vinaigrette, and season it with salt and pepper. Taste as you go — you want a balance of tangy and salty.
- In a pan, heat 3 tablespoons of olive oil over medium heat. Add diced onions, minced garlic, a pinch of dried oregano, and basil. Cook until the onions are soft and fragrant.
- Now, crumble the tofu with your hands directly into the pan. Stir it around, letting it cook on medium heat for about 15 to 20 minutes. This step fills your kitchen with a mouthwatering aroma.
- Add nutritional yeast, fresh spinach, diced tomato, and a splash of lemon juice to the tofu. Stir everything together, cooking for just another minute, then set aside.
- Dip each mushroom cap into the marinade, ensuring it’s nicely coated, and place them top side down on a baking pan.
- Stuff each mushroom with the tofu and veggie mixture. This is where the magic happens — don’t be shy, pack them full!
- Top it all off with a generous sprinkle of vegan mozzarella cheese. Because why not?
- Preheat your oven to 370 degrees Fahrenheit. Once it’s ready, bake the stuffed mushrooms for 15 to 20 minutes, until the cheese is melty and bubbly.
- Serve your glorious stuffed mushrooms over a fluffy bed of quinoa and take a moment to admire your creation.
Cook’s Notes
Here are a few nuggets of wisdom to keep this dish a breeze. The marinade is key — don’t skimp on it; it infuses the mushrooms with so much flavor. Cooking the tofu until it’s golden and crispy is another must-do for an added texture contrast. If you’re planning ahead, you can stuff the mushrooms in advance, then bake them right before serving. Leftovers keep well for a couple of days in the fridge, and they reheat beautifully in the oven.
Make It Your Own
Here are some fun swaps and additions to keep things interesting:
- Swap the frozen tofu for crispy baked chickpeas for a different texture.
- Add a sprinkle of pine nuts on top before baking for a nutty crunch.
- Use zucchini ribbons instead of spinach if you’re in the mood for something a bit different.
- For a spicy kick, mix some sriracha or your favorite hot sauce into the tofu mixture.
If you try this, I’d love to hear how it turns out — drop a comment or tag me! Cooking for you is like sharing a piece of my heart, and I hope you feel that love in every bite.
Related update: Venison Stew
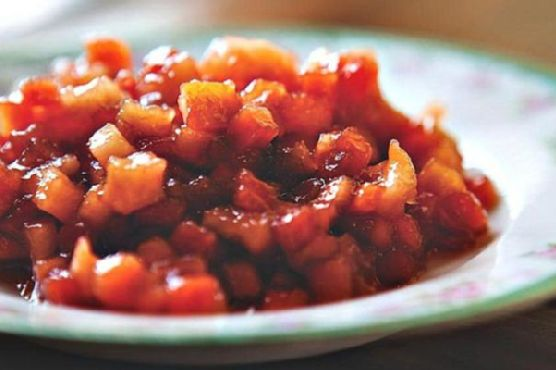
Picture this: It’s a crisp Saturday morning in late October, and the air smells like fallen leaves and the promise of something delicious bubbling on the stove. I’d just come back from the local farmers’ market with a basket full of honeycrisp apples and ripe pears, when I had this sudden inspiration to make something that feels like a warm hug for your taste buds. That’s how this Fall Fruit Compote came to life! It’s the perfect combination of sweet and tangy with a hint of spice from the cinnamon, making it a cozy companion for just about any dish. Whether you’re spooning it over pancakes, pairing it with savory potato latkes, or just nibbling it straight from the jar (guilty as charged), this compote is a must-try for the season.
Jump to Recipe
What You’ll Need
This recipe is all about embracing the flavors of fall, with ingredients that are probably hanging out in your pantry already or easy to snag at the store.
- Butter – for that rich, dreamy base
- Diced honeycrisp apples – sweet and crispy, the star of this show
- Diced pears – a soft, juicy partner for the apples
- Dried cherries – they add a pop of color and tartness
- Apple cider vinegar – just a splash to bring out the flavors
- Apple juice – keeps everything juicy and flavorful
- Brown sugar – for a deep, molasses-y sweetness
- Cinnamon stick – the essential fall spice
How to Make Fall Fruit Compote
- Melt the butter in a medium saucepan over high heat until it starts to bubble and sizzle. You want that nutty aroma to fill the air.
- Toss in the diced apples, pears, and dried cherries, followed by the apple cider vinegar, apple juice, brown sugar, and cinnamon stick. Give it all a good stir to make sure everyone’s getting along in the pot.
- Cook this fruit medley for about 5 minutes. The apples and pears should start to soften, and the cherries will begin plumping up.
- Lower the heat to medium. Let it cook for a few minutes more, keeping a watchful eye as the liquid reduces and the fruit becomes tender. Stir occasionally to prevent sticking.
- If the mixture looks like it’s drying out too quickly, trickle in a bit more apple juice. You want the fruit tender and the liquid mostly gone, leaving a thick, syrupy goodness.
Cook’s Notes
Alright, here’s the scoop on perfecting this compote. First off, keep an eye on your heat levels. It’s easy for the sugars to burn if the heat’s too high, especially towards the end when the liquid is nearly evaporated. If you’re making this ahead, know that it keeps wonderfully in the fridge for up to a week. Just pop it in a jar or airtight container. When you’re ready for a warm serving, a quick zap in the microwave or a gentle reheat on the stove works like a charm. And remember, if you find yourself with leftovers (rare, but it happens), this compote is a dream swirled into yogurt or spread over toast.
Make It Your Own
Get creative and switch things up with these ideas:
- Swap the dried cherries for dried cranberries for a tarter twist.
- Add a splash of bourbon or rum for a grown-up, boozy version.
- For a spicier kick, throw in a pinch of ground ginger or nutmeg with the cinnamon.
- Use maple syrup instead of brown sugar for a different layer of sweetness.
If you try this, I’d love to hear how it turns out — drop a comment or tag me! Enjoy the cozy vibes, and happy cooking! 🍎🍐
Related update: Fall Fruit Compote
Related update: Ginger Cookies- gluten free, soy free, vegan
Related update: Dandelion pesto

I remember that evening vividly. It was a Wednesday, and the kind of humid that makes your hair curl up at the edges. I was standing in my kitchen, staring at the half-empty fridge, and wondering what on earth I could throw together without making a trip to the grocery store. That’s when I spotted the zucchini and eggplant I’d been meaning to use. The idea clicked like a lightbulb switching on—vegetarian ratatouille! It’s the kind of dish that feels like a warm hug at the end of a long day: rustic, hearty, and packed with seasonal veggies. Plus, it’s surprisingly simple, with most ingredients already hanging out in the pantry or crisper drawer. Let’s dive in!
Jump to Recipe
What You’ll Need
This recipe is blessedly straightforward. Chances are, you already have most of these in your kitchen. Here’s what you’ll gather:
- 1 eggplant, diced
- 2 zucchinis, sliced
- 1 yellow squash, sliced
- 3 large tomatoes, chopped
- 1 red bell pepper, diced
- 1 orange bell pepper, diced
- 1 onion, finely chopped
- 3 cloves of garlic, minced
- A handful of fresh basil leaves, torn
- 1 tsp thyme
- 1 tsp dried oregano
- 2 tbsp extra virgin olive oil
- Sea salt, to taste
How to Make Vegetarian Ratatouille
- Heat the extra virgin olive oil in a large saucepan over medium-low heat. Toss in the chopped onion and minced garlic. Sauté until the onions turn translucent and the garlic is fragrant, about 5 minutes.
- Add the chopped tomatoes to the pan and give it a good stir, letting them meld with the onion and garlic for about 2 minutes.
- Add the diced eggplant, zucchini, yellow squash, and both bell peppers to the pan. Stir everything together and lower the heat to low.
- Sprinkle in the thyme, dried oregano, and sea salt. Stir to coat all the veggies in the herby goodness.
- Cover the saucepan and let it all simmer for about 30 minutes, stirring occasionally. You’ll know it’s ready when the eggplant is tender and the flavors have melded beautifully.
- Finish it off with those fresh torn basil leaves right before serving, for a burst of fresh flavor.
Cook’s Notes
Here’s the thing about ratatouille — it’s a forgiving dish. You can let it simmer a bit longer if you prefer your veggies softer, just keep an eye on the moisture level. If it starts to dry out, add a splash of water or stock. Store any leftovers in an airtight container in the fridge, and they’ll be even more flavorful the next day. Just reheat on the stove over low heat or enjoy it cold as a salad topping — it’s surprisingly versatile. If you’re planning ahead, you can chop the veggies the night before and store them in the fridge, so you just have to toss them in the pan when you’re ready.
Make It Your Own
Feeling adventurous or just need a change? Here are a few ways to mix things up:
- Add some heat: Throw in a pinch of red pepper flakes when adding the spices for a little kick.
- Protein punch: Toss in a can of drained chickpeas with the tomatoes for extra protein and heartiness.
- Herb swap: If you’re out of fresh basil, a touch of fresh parsley or even cilantro can give it a unique twist.
- Cheesy finish: Sprinkle some crumbled feta or grated Parmesan on top when serving for a tangy finish.
If you try this, I’d love to hear how it turns out — drop a comment or tag me! Whether you stick to the basics or put your own spin on it, I hope this ratatouille brings a little warmth and simplicity to your table. Enjoy!
Related update: Vegetarian Ratatouille
Related update: Fall Fruit Compote

It was one of those evenings when I stared blankly into my fridge, wondering what could possibly come together in 30 minutes or less. A couple of beefsteak tomatoes were teetering on the edge of being too ripe, alongside a baby eggplant that seemed to whisper, “Use me or lose me.” That’s when the idea of Tomato Cutlets hit me—a dish that feels both unexpected and comforting. It’s the kind of meal where crispy meets juicy, with just the right amount of tang from a squeeze of lemon. And the best part? You probably have most of the ingredients already lounging in your pantry or fridge, waiting to shine.
Jump to Recipe
What You’ll Need
Alright, let’s dive into the good stuff. You’ll find this ingredient list both accessible and forgiving. If you cook often, chances are you already have most of this hanging around.
- 2 beefsteak tomatoes, sliced into thick rounds
- 1 baby eggplant, halved
- 1 cup Italian bread crumbs
- 2 eggs, beaten
- Juice of 1 lemon
- 2 tablespoons olive oil
- 1/4 cup fresh Italian parsley, chopped
- Salt and freshly ground pepper to taste
- 1/4 cup grated fresh Romano cheese
How to Make Tomato Cutlets
- Start by setting up your breading station. In one bowl, have your beaten eggs ready. In another, spread out the Italian bread crumbs. This is where the magic begins.
- Dip each tomato slice into the egg wash, letting any excess drip off, and then press it into the bread crumbs. If you’ve got extra egg wash and crumbs, feel free to double-dip for an extra crunchy coating.
- Heat the olive oil in a large frying pan over medium heat. Once it shimmers, carefully place the breaded tomato slices into the pan. You should hear a satisfying sizzle.
- Cook the tomatoes for about 3-4 minutes on each side, until they’re golden and fragrant. Flip gently to keep the breading intact.
- Next, nestle the halved eggplant into the pan. Sprinkle with salt and pepper. Sauté for about 3-4 minutes on each side, aiming for a beautiful golden color.
- Once everything is cooked to perfection, transfer the tomatoes and eggplant to a serving plate. Drizzle with fresh lemon juice, scatter with chopped parsley, and finish with a generous sprinkle of Romano cheese.
Cook’s Notes
Here’s what I’ve learned along the way: When breading, don’t rush. Let the egg wash and crumbs work their coating magic. If you’re running low on egg wash or crumbs, just whisk another egg or toss in more crumbs—it’s not an exact science. As for the frying, medium heat is your friend; too hot, and the crumbs burn before the tomatoes are ready.
Got leftovers? Store them in an airtight container in the fridge, and they’ll last a couple of days. To reheat, a quick stint in the oven will bring back some of that initial crispiness. If you like to plan ahead, you can prep the breaded tomatoes and store them in the fridge for up to a day before frying.
Make It Your Own
Feel free to get creative with these cutlets. Here are a few ideas:
- Swap the tomatoes for zucchini slices for a different take on the cutlet vibe.
- Add a little kick by mixing red pepper flakes into the bread crumbs.
- Try using panko instead of regular bread crumbs for extra crunch.
- Replace Romano with Parmesan if that’s what you have on hand—it’s all about using what you’ve got.
If you try this, I’d love to hear how it turns out—drop a comment or tag me! Your kitchen adventures are what make this fun. Happy cooking!
Related update: Tomato Cutlets

Last Tuesday, I found myself staring at a lonely cabbage and some tomatoes in my fridge, wondering how I was going to transform these humble ingredients into something more exciting than their usual salad gig. I was craving something warm, comforting, and surprisingly quick because, you know, not all weeknight dinners should feel like a marathon. That’s when I remembered my fail-safe stir fry trick. This Stir Fried Cabbage and Tomatoes dish is like a warm hug on a chilly day — it’s savory, a touch sweet, and comes together faster than you can decide what to watch on Netflix. Trust me, this is the kind of dish that makes you look like you’ve got your life together, even if it’s just dinner.
Jump to Recipe
What You’ll Need
Gathering ingredients for this recipe is almost as easy as making it. Most of them are probably sitting quietly in your kitchen, waiting for their moment to shine.
- Beijing cabbage – coarsely shredded
- Diced tomatoes – as fresh as you can get
- Gloves garlic – because garlic is life
- Salt
- Sugar
- Ketchup – yes, the condiment extraordinaire
- Water
How to Make Stir Fried Cabbage and Tomatoes
- Start by giving your cabbage a good rinse and then coarsely shred it. You want the pieces to be bite-sized but not too tiny, allowing them to retain a slight crunch.
- Dice your tomatoes. The juicier, the better, as they’ll add a wonderful freshness to the dish.
- Heat a wok over medium-high heat, adding a splash of oil. When the oil shimmers, toss in the garlic. Sauté until golden and fragrant, about 30 seconds. Your kitchen should smell amazing already!
- Throw in the shredded cabbage. Stir-fry until it begins to soften. If it looks a bit dry, don’t hesitate to add a tablespoon or two of water to help it along.
- Now, add your diced tomatoes along with a pinch of salt, a dash of sugar, and a nice squirt of ketchup for that umami-rich depth. Pour in 2-3 tablespoons of water to create a light sauce.
- Stir everything together until well combined. The mixture should be juicy but not soupy. Cook until the tomatoes have broken down slightly and everything is melded together. This is when you taste and adjust seasoning if needed.
- Serve immediately. Your stir fry should be vibrant and steaming hot.
Cook’s Notes
This dish is all about balance. The sugar helps offset the acidity of the tomatoes and ketchup, so don’t skip it. If your cabbage feels too crunchy, just add a touch more water and give it a few more minutes — patience is key.
- This stir fry doesn’t hold up beautifully as leftovers, so try to enjoy it fresh. But if you do have some left, store it in an airtight container in the fridge and reheat gently.
- If you’re planning a dinner party, you can prep the cabbage and tomatoes ahead of time. Just keep them in separate containers in the fridge until you’re ready to cook.
Make It Your Own
- Add protein: Toss in some sliced chicken or crispy tofu for a heartier version.
- Switch up the veggies: Bell peppers or shredded carrots would be a lovely addition for some color and sweetness.
- Spice it up: Introduce a bit of heat with a sliced chili or a dash of hot sauce if you like things spicy.
- Herb it up: Finish with fresh cilantro or basil for an aromatic lift.
If you try this, I’d love to hear how it turns out — drop a comment or tag me! Cooking is all about experimenting and having fun, so make this stir fry your own and enjoy every bite.
Related update: Stir Fried Cabbage and Tomatoes
Related update: Tomato Cutlets
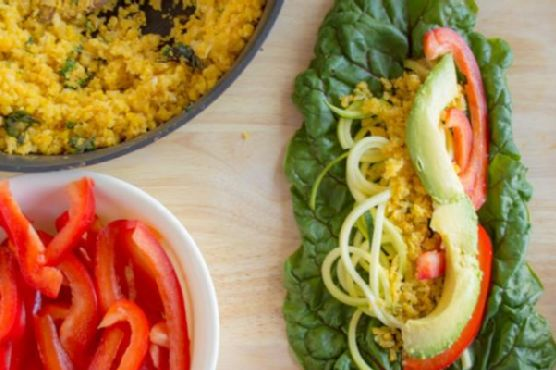
So, the other day, I found myself staring at a lonely bunch of swiss chard in my fridge. You know that moment when you think, “I really should use up those greens before they wilt and vanish into the abyss”? Well, that was me. I wanted something fresh, colorful, and honestly, something quick because who has time on a Tuesday night? Enter, my Swiss Chard Wraps. They’re light, vibrant, and let’s be real, they’re just so satisfying to munch on. These wraps are perfect for those nights when you’re craving something fresh but comforting. Plus, they can totally impress your dinner guests without you breaking a sweat.
Jump to Recipe
What You’ll Need
Most of these ingredients are probably chilling in your kitchen right now — no wild goose chase required. Here’s what you need:
- Dried swiss chard leaves
- Orange cauliflower
- Olive oil
- Garlic
- Salt
- Fresh basil
- Zucchini
- Red bell pepper
- Avocado
- Trader Joe’s spicy peanut vinaigrette
How to Make Swiss Chard Wraps
- First things first, chop off the stems of the swiss chard where they meet the leaf. If you’re feeling adventurous, leave a bit of stem for that extra crunch and structure.
- Take your orange cauliflower, chop it up into small pieces and pulse in a food processor until it resembles rice. Trust me, this orange beauty gives the wraps a gorgeous color and subtle sweetness.
- Heat some olive oil in a sauté pan over medium-high heat. When the oil is shimmering, toss in the garlic. Let it sizzle for a minute or two, releasing that heavenly aroma, until it starts to brown.
- Add the cauliflower rice to the pan. Stir for about 2-3 minutes until it softens and takes on an even more vibrant yellow-orange hue. Season it with a pinch of salt and some fresh basil. Stir it around a bit more so all those flavors mingle.
- Now, spiralize the zucchini using Blade B to make noodles. Don’t worry if you don’t have a spiralizer. Just use a vegetable peeler to create ribbon-like strips.
- To assemble, lay a swiss chard leaf flat. Layer with the sautéed cauliflower, zucchini noodles, red bell pepper slices, and avocado. Drizzle a bit of that spicy peanut vinaigrette over the top.
- Roll it up snugly, and voila! Your wraps are ready to be devoured. Serve them with your favorite protein or just enjoy as is.
Cook’s Notes
These wraps are best when fresh, but if you’ve got leftovers, just pop them in an airtight container and refrigerate them. I’d recommend consuming them within a day to keep the veggies crisp. If you want to prep ahead, you can make the cauliflower rice and spiralize the zucchini a day in advance. Just keep them separated in the fridge and assemble when ready to eat.
Make It Your Own
- Swap the orange cauliflower with purple or white cauliflower for a different hue and flavor profile.
- Try replacing the Trader Joe’s spicy peanut vinaigrette with a tangy balsamic glaze for a sweeter note.
- If you’re feeling like a protein boost, toss in some shredded chicken or crispy tofu.
- For an extra crunch, sprinkle some toasted sesame seeds or chopped nuts over the veggies before wrapping.
Alrighty, that’s all from me! If you give these wraps a whirl, I’d love to hear how they turn out. Drop me a comment or tag me in your wrap-tastic creations! Enjoy every bite, my friends!
Related update: Swiss Chard Wraps

It was a typical Tuesday evening, and I found myself staring into the depths of my fridge, hoping for inspiration to magically appear. You know those days when you just want something cozy and satisfying without embarking on a full-blown culinary adventure? That’s when I stumbled across a lonely head of cauliflower. With a little bit of cheese and some pantry staples, I knew I could transform it into something special. My Cheesy Cauliflower recipe is the perfect blend of comfort and simplicity. It’s one of those dishes that feels indulgent but won’t have you spending hours in the kitchen. Curious yet? Trust me, one bite of this creamy, cheesy goodness and you’ll be hooked.
Jump to Recipe
What You’ll Need
This recipe is super forgiving, and chances are, you already have most of these ingredients hanging out in your kitchen:
- Cauliflower – a medium head, about 2 pounds
- 2 tablespoons unsalted butter
- 2 tablespoons all-purpose flour
- 1 teaspoon mustard powder
- A pinch of cayenne pepper
- 2 cups whole milk
- Cheese – 1 ½ cups shredded, plus 2 tablespoons for topping (cheddar works great!)
- Salt and black pepper to taste
How to Make Cheesy Cauliflower
- Preheat your oven to 400°F (200°C). This gives you the perfect time to prep everything else.
- Trim the cauliflower florets from the stalk and discard the stalk. Aim to cut the florets into 1-2 inch pieces so they cook evenly.
- Steam the cauliflower for about 10 minutes. You want them firm but tender — think al dente if cauliflower could be pasta.
- Spread the steamed florets out onto a paper towel. This ensures they’re not waterlogged when the cheese sauce coats them.
- In a medium saucepan, melt the butter over medium-high heat. Add the flour and whisk to combine, cooking for 1-2 minutes to get rid of that raw flour taste.
- Stir in the mustard powder, a pinch of cayenne (or more if you like a kick), and black pepper. Feel that aroma dancing around?
- Gradually drizzle in the milk, whisking continuously to keep things smooth and creamy. Bring this mixture to a simmer while stirring; it should thicken beautifully.
- Once thickened, add the cheese one handful at a time. Let each addition melt fully before the next. Taste and adjust with salt and pepper if needed.
- Spread the cauliflower into a 2-quart baking dish or an iron skillet, then spoon the rich cheese sauce over the top. Oh, yes!
- Sprinkle the reserve 2 tablespoons of cheese over everything, then bake for about 30 minutes or until it’s browned and bubbly.
- Garnish with fresh herbs if you fancy, and enjoy every cheesy, comforting bite!
Cook’s Notes
Don’t rush the sauce; taking your time to whisk it ensures a creamy consistency without lumps. If you’re making this ahead of time, you can assemble everything and then pop it in the fridge. Just extend the baking time slightly if you’re starting from cold. Leftovers (if there are any!) keep well in the fridge for up to three days. Reheat them gently in the oven to keep the texture lovely.
Make It Your Own
- Swap out the cauliflower for broccoli or do a mix of both for a bit of variety.
- If you’re in the mood for something heartier, add cooked chicken pieces before pouring over the cheese sauce.
- Want more kick? Replace the cayenne with smoked paprika for a smoky twist.
- Try sprinkling in some crisped bacon bits before baking for a savory boost.
If you try this, I’d love to hear how it turns out — drop a comment or tag me! This Cheesy Cauliflower is a little slice of happiness, and I hope it brings some warmth to your table. Enjoy!
Related update: Cheesy Cauliflower

Okay, imagine this: It’s a Wednesday night, and I’m standing in my kitchen, staring at a bunch of bell peppers I bought on impulse. You know the feeling, right? That moment of “What am I even going to do with these?” My brain whispers, “Stuff them!” But not just any stuffing — let’s infuse them with a fiesta of flavors. Enter these Mini Stuffed Mexican Bell Peppers. They’re a little spicy, a little tangy, and oh-so-satisfying. Perfect for those nights when you want something quick but super flavorful. Trust me, after you try this, you’ll wonder why you don’t have canned bell peppers permanently on your shopping list.
Jump to Recipe
What You’ll Need
Honestly, you’ve probably got most of this lounging around in your pantry. Here’s what you’ll need to create some magic:
- Canned bell peppers
- Lean ground turkey
- Canned black beans
- Chili powder
- Chipotles in adobo
- Fire roasted canned tomatoes
- Garlic
- Canned green chilies
- Tsp ground coriander
- Ground cumin
- Paprika
- Tomatillos
- Yellow onion
How to Make Mini Stuffed Mexican Bell Peppers
- Preheat your oven to 400°F (200°C). Let’s get those veggies nice and roasted.
- Slice the tomatillos in half and the onion into 1/2-inch slices. Peel the garlic cloves.
- Spread the tomatillos, onions, and garlic on a baking sheet. Roast them in the oven until the tomatillos are tender and start to brown, about 20 minutes.
- While the veggies roast, get a large skillet and start cooking the ground turkey over medium heat. Break it up with a spatula until it’s no longer pink and just beginning to brown.
- Add the chili powder, ground coriander, ground cumin, and paprika to the turkey. Stir until everything is coated with those warm spices.
- Stir in the fire roasted tomatoes, black beans, chipotles in adobo, and green chilies. Let it simmer until the mixture thickens, about 5-7 minutes.
- By now, your kitchen should smell amazing. Once the veggies are done roasting, chop them up and mix them into the turkey concoction.
- Drain the canned bell peppers and arrange them on a baking tray, cut side up.
- Spoon the turkey and veggie mixture into each bell pepper evenly. Don’t be shy — pack them full!
- Pop the stuffed peppers into the oven for about 10 minutes. You’ll know they’re ready when the tops start to look a bit crispy.
- Let them cool slightly before digging in, but the anticipation is half the fun!
Cook’s Notes
Here’s a heads-up: Avoid overfilling the peppers, or they might collapse — they’re mini, after all! If you’re making this ahead, store the filling separately and stuff the peppers just before baking. Leftovers? Toss them in an airtight container; they’ll be good for about 3 days in the fridge. Reheat them gently, so you don’t lose any of that lovely texture.
Make It Your Own
- Vegetarian Twist: Swap the turkey for crumbled firm tofu. Just make sure to press it well to get that nice crumbly texture.
- Cheesy Version: Stir in some shredded Monterey Jack or sprinkle it on top before the final bake for a melty finish.
- Spice It Up: Add some diced jalapeños or a dash of cayenne pepper if you’re craving extra heat.
- Fresh Hit: Top with chopped cilantro or a squeeze of fresh lime juice right before serving for a zesty lift.
If you try this, I’d love to hear how it turns out — drop a comment or tag me! Cooking is all about sharing, and I can’t wait to see your takes on this spicy little number. Enjoy, my pepper-loving friends!
Related update: Mini Stuffed Mexican Bell Peppers
Related update: Bigoli with smoked salmon
Related update: How to make the World’s Greatest Lasagna Roll Ups
Related update: Cheesy Cauliflower

Last Tuesday, I found myself staring into the depths of my pantry, desperately seeking inspiration for dinner. It was one of those weeks where time slipped through my fingers, and suddenly, it was 6 PM, and my stomach was growling loud enough to scare the cat. That’s when I stumbled upon my trusty bag of brown rice and a can of mushrooms. With a bit of onion, a splash of oil, and a pinch of this and that, I transformed these humble staples into a warm, fragrant Brown Rice Mushroom Pilaf. It’s the kind of dish that feels cozy and effortless, yet tastes like you put in way more effort than you actually did. Perfect for those busy nights when you need something quick but also crave-worthy.
Jump to Recipe
What You’ll Need
This dish relies on a few simple ingredients, and chances are you already have most of them lurking in your kitchen.
- 1 tablespoon unrefined sunflower oil
- 1 medium onion, chopped
- 1 can (about 12 oz) of fresh mushrooms, drained and sliced
- 1 cup brown rice
- 2 cups water
- Sea salt to taste
- Ground pepper to taste
How to Make Brown Rice Mushroom Pilaf
- Start by heating the sunflower oil in a large saucepan over medium heat. You want the oil to be shimmering but not smoking.
- Add the chopped onion and sliced mushrooms. Sauté for about 5 minutes, stirring occasionally, until the onion is translucent and the mushrooms are golden and fragrant.
- Stir in the brown rice, ensuring every grain is coated with the oil and mingling with the onions and mushrooms.
- Pour in the water, then sprinkle with sea salt and ground pepper. Give it a gentle stir to combine.
- Bring the mixture to a boil. Once it’s bubbling, reduce the heat to low, cover the pan, and let it simmer for 30 minutes.
- After 30 minutes, remove the pan from the heat but keep it covered. Let it rest for about 10 minutes, allowing the rice to absorb any remaining liquid.
- Fluff the pilaf with a fork before serving. Taste and adjust the seasoning if needed.
Cook’s Notes
If you find that the rice hasn’t absorbed all the water after resting, simply return it to the heat for a few more minutes. This dish can be made ahead of time and stored in the fridge for up to four days. Just reheat it gently on the stove or in the microwave, adding a splash of water to prevent it from drying out. Avoid using high heat when reheating, as it might make the rice too tough.
Make It Your Own
- Swap the canned mushrooms for fresh ones, like cremini or shiitake, for a richer flavor.
- Stir in a handful of frozen peas during the last few minutes of cooking for a pop of color and sweetness.
- For a protein boost, add cooked shredded chicken or crispy tofu just before serving.
- Mix in some chopped fresh herbs like parsley or thyme to brighten the dish.
If you try this, I’d love to hear how it turns out — drop a comment or tag me! Cooking is all about experimenting and making a dish your own, so don’t be shy to tweak it to your taste. Enjoy every bite!
Related update: Brown Rice Mushroom Pilaf