
Picture this: It’s a Friday night, and you’ve had one of those weeks where everything felt like a never-ending to-do list. You’re craving something special, a little dramatic even, to kick off your weekend with flair. That’s when I remembered Baked Alaska. It’s one of those desserts that looks like a total showstopper but is actually super manageable to whip up. I love how it combines the coolness of ice cream, the soft texture of cake, and a toasty meringue that you can’t help but admire. It’s great because you can make it ahead of time, and it doesn’t require any fancy equipment. Seriously, if I can do it, anyone can. You just have to get over the idea that baking something on top of ice cream is somehow impossible — spoiler: it’s not, and it’s ridiculously fun. Jump to Recipe
What You’ll Need
Let’s be real: you’ve probably got most of this stuff on hand already, except maybe the ice cream. But hey, any excuse to grab a pint, right?
- A round cake (store-bought or homemade, your call!)
- Ice cream (about 1/2 gallon of your favorite flavor)
- Egg whites (from about 3 large eggs)
- Cream of tartar
- Powdered sugar
How to Make Baked Alaska
- Start by greasing a 7-inch bowl with a flavorless oil or unsalted butter. This bowl should be just big enough to snugly hold half a gallon of ice cream, but no wider than your cake round.
- Let your ice cream soften a bit so it’s workable. Then pack it tightly into the bowl. Pop it back into the freezer until it hardens — about an hour should do.
- For the meringue, beat your egg whites until they are foamy. Add a pinch of cream of tartar and keep whipping until you see stiff peaks. This is when the meringue holds its shape firmly.
- Gently fold in the powdered sugar, a bit at a time, to avoid deflating all that nice air you just whipped in.
- Once you’re ready to assemble, place your round cake on a plate that’s slightly larger than the cake itself.
- To unmold the ice cream, center it over the cake. If it’s being stubborn and won’t release from the bowl, run a bit of warm water over the outside of the bowl for a few seconds.
- Time to “frost” it! Cover the cake and ice cream completely with meringue, going wild with a spoon to create peaks and swirls. Don’t be shy — more is more with meringue.
- Bake your masterpiece in a preheated oven at 450°F for about 6-7 minutes, until those meringue peaks are beautifully golden brown.
- Pop it back in the freezer until you’re ready to serve. It’ll keep just fine for a day or two.
Cook’s Notes
A couple of quick tips to save your sanity: First, make sure your bowl is really cold to help the ice cream set faster. If you’re nervous about the meringue deflating, sift the powdered sugar first; it makes a surprising difference. And for those moments when the ice cream just won’t release, a quick dip in warm water works like magic!
Baked Alaska is a dream to make ahead. You can do all the components a day or two before and just assemble it the day of. Leftovers can be stored in the freezer, but they might lose a bit of their magic.
Make It Your Own
- Switch out the vanilla ice cream for something more adventurous like coffee or pistachio for a gourmet spin.
- Use a chocolate or lemon cake base instead of vanilla to complement or contrast your ice cream choice.
- Add a layer of jam between the cake and ice cream for a fruity surprise that cuts through the richness.
- Feeling nutty? Toss some toasted almonds or hazelnuts into the meringue for a crunchy texture.
If you try this, I’d love to hear how it turns out — drop a comment or tag me in your photos! Let’s see how your Baked Alaska stacks up. Happy baking, friends!
Related update: Baked Alaska
Related update: Rugelach
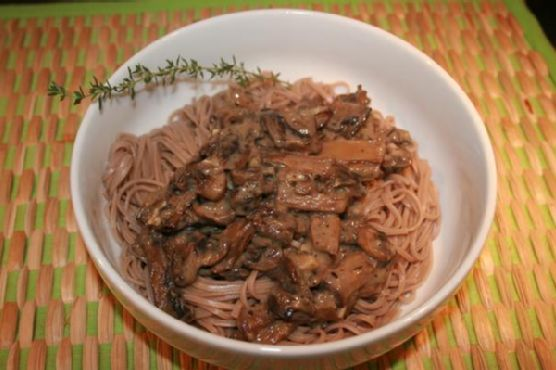
Last Tuesday, I found myself staring into the abyss of my fridge after what felt like the longest day ever. You know the kind — the kind where your brain feels like mush and you just want something cozy and satisfying. That’s when I concocted this dreamy dish: Creamy Mushrooms Over Soba Noodles. It’s a lifesaver for those nights when you crave comfort without the fuss. This recipe is incredibly creamy, perfectly garlicky, and has just the right amount of freshness from the lemon and thyme. Plus, it’s all vegan! Trust me, this is one you’ll want to keep in your back pocket for any occasion.
Jump to Recipe
What You’ll Need
I bet you already have most of these on hand. It’s all about those mushrooms and the creamy sauce that makes this dish sing.
- Earth Balance buttery spread – 2 tablespoons, divided
- Cremini and white mushrooms – a mix, sliced
- Garlic – 3 cloves, minced
- All-purpose flour – 1 tablespoon
- Unsweetened soy milk – 1 cup
- White wine – 1/4 cup (optional, but highly recommended!)
- Fresh thyme – a few sprigs plus more for garnish
- Lemon juice – from half a lemon
- Salt and pepper – to taste
- Soba noodles – 8 ounces
How to Make Creamy Mushrooms Over Soba Noodles (Vegan)
- Start by melting 1 tablespoon of the Earth Balance in a large sauté pan over medium heat. Toss in the mushrooms and garlic, stirring occasionally until the mushrooms are dark, reduced, and oh-so-fragrant. This should take about 5-7 minutes.
- Set those lovely mushrooms aside. In the same pan, melt the remaining tablespoon of Earth Balance. Sprinkle in the flour and stir continuously for about a minute to form a roux. It should smell slightly nutty and golden.
- Slowly pour in the soy milk, whisking as you go to avoid any lumps. Keep stirring until the mixture is smooth and has thickened into a luscious sauce.
- Return the mushrooms to the pan, and add the lemon juice, thyme, salt, and pepper. Pour in the white wine and let the sauce simmer until it’s reduced and has reached a consistency that coats the back of a spoon.
- Meanwhile, cook your soba noodles according to the package instructions. Drain and divide them among your bowls.
- Ladle the creamy mushroom sauce over the noodles, garnish with extra thyme if you’re feeling fancy, and dig in!
Cook’s Notes
Here’s the deal: this dish is forgiving, so don’t stress too much. If you accidentally add too much soy milk, just let it reduce a bit longer. It might be tempting to skip the white wine, but it really adds depth to the sauce. If you’re cooking for one, the leftovers are a blessing — the flavors meld beautifully overnight. Just store them in an airtight container in the fridge, and reheat gently on the stove or microwave with a splash of soy milk to loosen the sauce.
Make It Your Own
- Swap the soba noodles for zucchini noodles if you’re keeping it low-carb.
- Add a handful of spinach or arugula when you add the mushrooms back to the sauce for extra greens.
- If you’re out of white wine, a splash of vegetable broth can add that needed umami punch.
- For a nutty twist, sprinkle toasted sesame seeds over the finished dish.
If you try this, I’d love to hear how it turns out — drop a comment or tag me! Happy cooking, and remember that sometimes the best dishes come from those moments of pure inspiration in front of an open fridge. Enjoy!
Related update: Creamy Mushrooms Over Soba Noodles (Vegan)
Related update: Polenta Pie With Italian Toppings
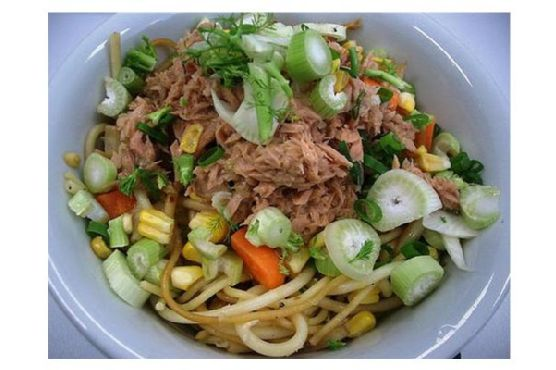
I was standing in my kitchen one Tuesday night, craving something hearty yet low-key — you know, that sweet spot between weeknight ease and weekend indulgence. I scoured my pantry for inspiration and stumbled upon a can of tuna. That’s when it hit me: Pasta With Tuna. This dish is like a warm hug on a plate, combining the creamy comfort of a sauce with the lightness of seafood. It’s quick, it’s satisfying, and yes, it’s got a little kick, thanks to that dash of hot pepper sauce. Perfect when you need to whip up something scrumptious without a ton of fuss.
Jump to Recipe
What You’ll Need
The beauty of this dish is in its simplicity. Chances are you already have most of these lying around in your kitchen:
- Olive oil
- 1 onion, chopped
- Flour
- Non-fat milk
- 1 can water-packed tuna, drained and shredded into chunks
- 1 cup frozen peas
- A bunch of fresh parsley, chopped
- 2-3 green onions, sliced
- 1 cup parmesan cheese, grated
- A dash of pepper sauce
- 1 pound of tubular pasta of your choice
How to Make Pasta With Tuna
- Start by cooking your pasta in a large pot of boiling water until it’s perfectly al dente. You want it to have a nice bite — not too soft.
- Once done, drain the pasta and return it to the warm pot. This keeps it cozy while you work on the sauce.
- Grab a saucepan and heat up a drizzle of olive oil over medium heat. Toss in the chopped onion and sauté until it’s transparent, releasing its sweet aroma.
- Sprinkle in the flour and give it a good stir. Cook for just a few seconds to take off that raw edge.
- Whisk in the non-fat milk, stirring constantly. You’ll see it start to thicken into a creamy base — that’s the magic happening!
- Add in the frozen peas, and let them mingle with the sauce for a couple of minutes until they’re vibrant and heated through.
- Introduce the tuna, breaking it into chunks as you go, followed by the parsley, green onions, and a generous amount of parmesan. Don’t forget that dash of pepper sauce for some zing!
- Pour this delightful sauce over the pasta and stir gently to mix everything together. You want each piece of pasta to be lovingly coated.
- Serve it up immediately, preferably with extra parmesan on top — because why not?
Cook’s Notes
Let’s get real — this dish is pretty forgiving. Don’t sweat the small stuff. If your onions are more golden than transparent, it’s all good. The key is stirring the sauce constantly; it keeps it smooth and prevents lumps. Make it ahead by prepping the sauce and storing it separately from the pasta. When you’re ready to eat, simply reheat them together on the stove. Leftovers? They keep well for up to two days in the fridge. Just note that the pasta will continue to absorb the sauce, so it may be less saucy but still deliciously flavorful.
Make It Your Own
Feeling adventurous? Here are some fab twists to try:
- Swap the tuna for crispy tofu chunks for a vegetarian spin.
- Add a squeeze of lemon juice for a citrusy pop that brightens the flavor.
- Replace the parmesan with feta cheese for a tangy twist.
- Throw in a handful of cherry tomatoes for a burst of sweetness and color.
If you give this pasta dish a try, I’d love to know how it turns out for you! Drop a comment below or tag me on social media with your culinary creations. Bon appétit!
Related update: Pasta With Tuna
Related update: Creamy Mushrooms Over Soba Noodles (Vegan)
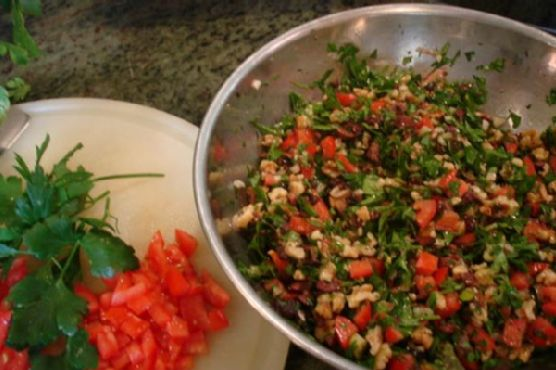
Oh, let me tell you about last Thursday. I was knee-deep in emails, the dog barking at god-knows-what, and all I could think about was how much I didn’t want to spend hours in the kitchen. You know those days, right? So, I opened the fridge and saw a half-empty bunch of parsley and some lonely tomatoes — the lightbulb went off. Middle Eastern Chopped Salad. Crisp, refreshing, and quick to throw together, it’s the perfect escape from the chaos. With the zesty lemon and a hint of cumin, this salad is a breath of fresh air on a hectic day. Ideal for those nights when you want something nourishing but can’t be bothered with a long recipe.
Jump to Recipe
What You’ll Need
The beauty of this salad is how simple and versatile it is. You might have most of these in your kitchen already:
- Walnuts – for a lovely crunch.
- Italian parsley – the star of the show, make sure it’s fresh!
- Niçoise olives – bring a briny depth.
- Scallion – adds a mild onion flavor.
- Tomato – adds juiciness and color.
- Extra virgin olive oil – for that luscious texture.
- Fresh squeezed lemon juice – a must for that zesty punch.
- Cumin powder – just a touch for warmth.
- Red chili flake – for a subtle kick.
- Black kosher salt and coarsely ground pepper – to taste.
How to Make Middle Eastern Chopped Salad
- Preheat your oven to 325°F and place the walnuts on a baking sheet. Toast them for about 10 minutes until you catch that delicious nutty aroma wafting through your kitchen. Let them cool completely before chopping.
- While the nuts are cooling, prep your parsley. Remove the stems and finely mince the leaves. If you’re using a food processor, pulse gently — we want fluffy, not mushy.
- Chop the niçoise olives, cooled walnuts, and scallions into a rough dice. This isn’t about perfection, it’s rustic and charming with its rough edges.
- Dice your tomatoes and give them a quick drain to avoid a watery salad. No soggy salads here!
- In a large wooden bowl (or any roomy bowl you’ve got), combine all your chopped ingredients. The colors should already be making you smile.
- Drizzle in olive oil and fresh lemon juice, then sprinkle with cumin and red chili flakes. Give it a gentle toss until everything’s coated and shiny.
- Finally, season to your liking with kosher salt and black pepper. Taste and adjust — don’t be shy!
Cook’s Notes
Okay, a few things I’ve learned making this salad a million times. First, don’t skip toasting the walnuts. It deepens their flavor and adds that wow factor. The parsley is the foundation, so fresh and finely minced is key. And, if you find your salad is a bit too lemony, balance it with a tad more olive oil. Leftovers? They hold up well for a day but are best fresh. If making ahead, keep the dressing and chopped ingredients separate until just before serving to keep it crisp.
Make It Your Own
Here’s where the fun begins. This salad is a canvas waiting for your personal touch:
- Swap the walnuts for almonds or pistachios for a different nutty vibe.
- If you’re not into olives, try diced cucumbers for a fresh crunch.
- Replace red chili flakes with smoked paprika for a smoky warmth.
- Add a sprinkle of feta cheese for a creamy, tangy finish.
So there you have it, a delightful salad that’s both a sidekick and a star on its own. If you try this, I’d love to hear how it turns out — drop a comment or tag me! Enjoy the little escape this salad offers, even if life’s a bit chaotic.
Related update: Middle Eastern Chopped Salad
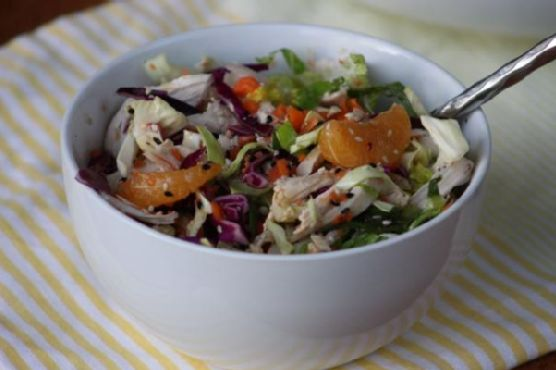
Picture this: it’s a chilly Tuesday evening, and I’m rummaging through my pantry, hoping to conjure up something light yet filling for dinner. The usual suspects—pasta, rice, potatoes—just weren’t cutting it. I craved something crunchy, vibrant, and tangy, but with one big catch: it had to fit in with my gluten-free, dairy-free, and sugar-free lifestyle. That’s when the idea struck! A Chinese Chicken Salad, but not just any salad—one packed with flavors, textures, and a zing that makes your taste buds do a happy dance. This salad is a savior for those nights when you need something quick to whip up yet impressive enough to make you feel like a gourmet chef. Plus, all you need is a handful of ingredients you probably already have lurking in your fridge and pantry. Trust me, this is not your average salad—it’s a celebration in a bowl!
Jump to Recipe
What You’ll Need
Chances are you already have most of this. Here’s what you’ll need to gather:
- Green cabbage
- Red cabbage
- Romaine lettuce hearts
- Scallions
- Carrots
- Fresh satsuma mandarins
- 1 mandarin (cut crosswise then tablespoon into jar over a strainer) (juice)
- Bone-in shredded chicken breasts, roasted
- Sesame oil
- Extra virgin olive oil
- Apple cider vinegar
- White sesame seeds
- Black sesame seeds
- Kosher salt
- Black pepper
- Xylitol
How to Make Gluten Free Dairy Free Sugar Free Chinese Chicken Salad
- Start by prepping the veggies. Finely slice the red and green cabbage and the romaine lettuce hearts. You want them to be thin and delicate, so they soak up all the dressing goodness.
- Trim the ends off the scallions, then finely slice both the white and green parts. This will add a lovely sharpness to the salad.
- Peel and grate the carrots. If you’ve got a mini food processor, throw them in there for a quick chop.
- Peel the satsuma mandarins, then carefully remove the pith from the slices. This step is key to ensure that you don’t get any bitter bites in your salad.
- In a large bowl, combine all your prepped veggies and the shredded chicken. Toss them together to mix it up nicely.
- For the dressing, whisk together the mandarin juice, sesame oil, apple cider vinegar, extra virgin olive oil, and a touch of xylitol for sweetness. Add a pinch of kosher salt and a crack of black pepper for seasoning.
- Drizzle the dressing over your salad and give it a thorough toss, ensuring every piece is coated beautifully.
- Sprinkle the white and black sesame seeds over the top for that perfect finishing touch.
Cook’s Notes
One thing I’ve learned with this salad is that the fresher your ingredients, the better it will taste. If you’re making it ahead of time, keep the dressing and the salad separate until you’re ready to serve; this will keep everything crunchy and fresh. Leftovers can be stored in an airtight container in the fridge for up to two days, but trust me, it’s so delicious it might not last that long! Common mistakes include over-dressing or not balancing the flavors, so taste as you go. If you’re not a fan of xylitol, feel free to adjust the sweetness with another sugar substitute of your choice.
Make It Your Own
- Swap the chicken for crispy tofu to make it vegetarian and just as satisfying.
- Use napa cabbage instead of romaine for a different take on texture.
- Add a sprinkle of roasted almonds for a nutty crunch.
- For a spicier kick, toss in some thinly sliced jalapeños.
If you try this, I’d love to hear how it turns out—drop a comment or tag me! This salad is a little bowl of joy that can brighten any day, and I can’t wait for you to experience it. Enjoy!
Related update: Gluten Free Dairy Free Sugar Free Chinese Chicken Salad
Related update: Middle Eastern Chopped Salad

I was having one of those days where everything was just a bit off. You know, the kind where you realize the night before that you’ll have zero time to cook because every second is spoken for? Yep, that was me. Between juggling work and the kids’ activities, I needed something simple yet satisfying. Enter: Crockpot “Refried” Beans. It’s the perfect blend of effort-saving and comfort-inducing — a culinary hug when you need it most. Plus, it’s a lifesaver for those impulsive taco nights or unexpected guests. There’s something magical about the way this dish makes the whole house smell like you’ve been cooking for hours, even when you haven’t. Cozy, rich, and oh-so-easy.
Jump to Recipe
What You’ll Need
Trust me, you might already have most of these goodies chilling in your pantry. And if not, they’re probably on your next grocery list.
- Pinto beans – the star of this show, bringing that creamy, earthy flavor we crave
- Water – keeps things from drying out
- Canned garlic – because chopping garlic on a busy day? No, thanks
- Onion – for that sweet, savory backdrop
- Cumin – a must-have for that warm, smoky depth
- Black pepper – a touch of heat
- Salt – brings everything together
How to Make Crockpot “Refried” Beans
- Start by rinsing the pinto beans in a colander. Feel each bean quickly as you do this, and pick out any that feel off or look suspiciously shriveled.
- Combine the beans, water, canned garlic, onion, cumin, black pepper, and salt in your trusty crockpot. Give it all a gentle stir to mingle those flavors.
- Watch for any beans that float to the top — these are the slackers, and we don’t need them here. Skim them off and toss ’em.
- Cover the crockpot and let it do its magic on HIGH for 4 hours. Switch to LOW for 2 more hours. Your kitchen will smell amazing by now — the kind of aroma that makes you want to curl up with a good book.
- Once the time is up, uncover and assess the liquid situation. Remove any excess, leaving just enough to mash into your perfect consistency. Aim for somewhere between soupy and stiff.
- Grab a potato masher and mash away! The beans should be buttery soft and mash to your desired texture without much effort.
- Serve them warm, maybe with a sprinkle of cheese or a dollop of sour cream if you’re feeling extra.
Cook’s Notes
Let’s chat practicalities. First, make sure to store these in air-tight containers, where they’ll keep in the fridge for up to 2 weeks. Or, portion them into ziplock bags, squeeze out the air, and pop them in the freezer for those nights you just can’t. Defrost in the fridge or microwave, and they’ll taste like you just made them.
Avoid adding acidic ingredients like tomatoes or lime juice before the beans are fully cooked, or they might stay a little too firm. And one more thing — taste as you go! The right amount of salt can vary depending on your beans and personal taste.
Make It Your Own
Here are a few ideas to switch things up and keep those taste buds entertained:
- Swap the pinto beans for black beans for a darker, richer version.
- Add a can of diced green chilies for a hint of heat and tang.
- Stir in some cooked crumbled bacon for a smoky, meaty twist.
- Top with cotija cheese and fresh cilantro to make it restaurant-fancy.
If you try this, I’d love to hear how it turns out — drop a comment or tag me! There’s nothing better than seeing your delicious creations. Enjoy those cozy vibes, my friend. 🌮❤️
Related update: Crockpot “Refried” Beans
Related update: Eggplant Fries with Tzatziki Sauce
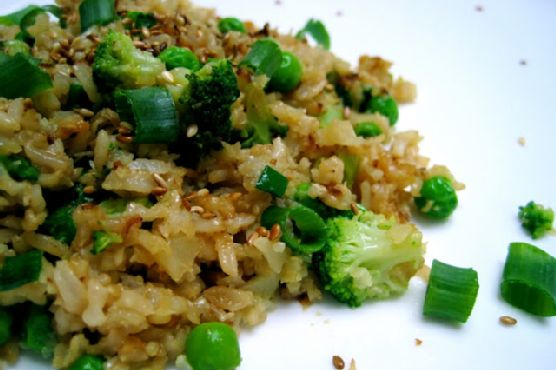
Last Thursday, I found myself staring at a lonely head of cauliflower in the fridge, debating if a second night of sad salad was a culinary sin. With a craving for something warm and satisfying, I decided to whip up a Cauliflower, Brown Rice, and Vegetable Fried Rice. This dish is a lifesaver when you need a quick meal that doesn’t compromise on flavor. It’s like your favorite takeout but with a healthy twist and minimal guilt. Plus, it easily adapts to whatever veggies are hanging out in your fridge. It’s perfect for those busy weeknights when you need something fast but still want to feel like you ate a real meal.
Jump to Recipe
What You’ll Need
The beauty of this recipe is that chances are you already have most of these ingredients tucked away in your kitchen. It’s simple, straightforward, and oh-so-delicious.
- 1 tablespoon grapeseed oil
- 1 tablespoon coconut oil
- 4 stalks green scallions (white and light green parts, chopped; reserve dark tops)
- 2 cloves garlic, minced
- 1 medium head of raw cauliflower, stem removed and florets processed into “rice”
- 2 cups cooked brown rice
- 1 cup cooked broccoli
- 1 cup frozen peas
- 3 tablespoons low sodium soy sauce
- 1 tablespoon sesame oil
- Toasted sesame seeds
- Salt, to taste
How to Make Cauliflower, Brown Rice, and Vegetable Fried Rice
- Remove the tough stem from the cauliflower and reserve it for another use. Pulse the cauliflower florets in a food processor until they resemble rice or couscous, yielding about four cups of “cauliflower rice.”
- Heat 1 tablespoon each of coconut oil and grapeseed oil in a large skillet over medium heat. Add the minced garlic and chopped white and light green scallion parts. Sauté for about a minute until they’re fragrant.
- Add the cauliflower rice to the skillet. Stir to coat with oil, then spread it out in the pan and let it sit undisturbed for a couple of minutes. This encourages caramelization, bringing out its natural sweetness.
- Add the cold, cooked brown rice to the skillet along with an additional tablespoon of grapeseed oil or coconut oil. Raise the heat to medium-high. Toss everything together, spreading the mixture out over the whole pan and pressing it into the bottom. Let it sit again for about two minutes to allow the rice to toast slightly.
- Add the cooked broccoli and frozen peas to the pan, stirring everything to combine.
- Drizzle the soy sauce and sesame oil over the rice mixture. Cook for another minute, then turn off the heat. Stir in the chopped dark scallion tops.
- In a separate dry pan, toast some sesame seeds and sprinkle them over the fried rice along with extra raw, chopped scallion tops for an added crunch and flavor boost. Season to taste with salt and additional soy sauce if needed.
Cook’s Notes
This recipe is forgiving and flexible, perfect for those who like to improvise in the kitchen. Start by ensuring your cauliflower is well pulsed; the smaller the bits, the better they’ll absorb the flavors. Don’t rush the caramelization of the cauliflower rice—this step enhances its sweetness and adds depth to the dish.
If you’re planning to make this ahead, you can prepare the cauliflower rice and store it in an airtight container in the fridge for up to two days. The completed fried rice will keep well in the fridge for 3-4 days, making it ideal for meal prep.
Avoid over-salting. Remember that soy sauce adds its own saltiness, so it’s best to season gradually and taste as you go. If you find your fried rice is clumping together, gently break it apart with a spatula.
Make It Your Own
- Swap the broccoli for snap peas or bell peppers for a different veggie profile.
- Replace the brown rice with quinoa for an extra protein boost.
- Try adding a beaten egg to the pan after the garlic for a more traditional fried rice texture.
- Love heat? Toss in some red pepper flakes or a splash of sriracha for a fiery kick.
If you try this, I’d love to hear how it turns out—drop a comment or tag me on social media! Let’s make sure no more lonely heads of cauliflower go to waste.
Related update: Cauliflower, Brown Rice, and Vegetable Fried Rice
Related update: Crockpot “Refried” Beans
Related update: How to make the World’s Greatest Lasagna Roll Ups
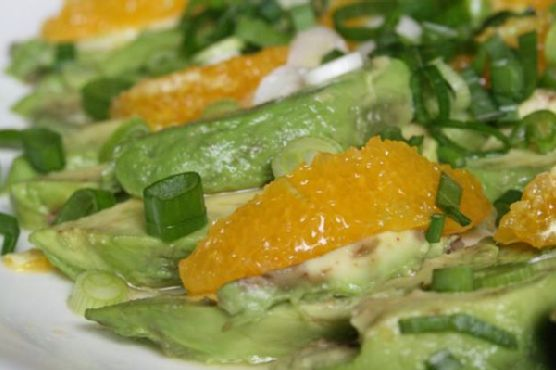
Imagine this: it’s midweek, and your brain is fried from a day full of emails and Zoom calls. You open the fridge, and there it is, an avocado teetering on the edge of overripeness and a couple of oranges sitting pretty but untouched. Suddenly, inspiration strikes—why not combine these beauties into a refreshing salad that screams “spring” without actually requiring a season change? This Avocado and Orange Salad, dressed with a zingy Orange-Ginger Dressing, is like a mini-vacation for your taste buds. It’s quick, colorful, and destined to make you fall in love with simple ingredients all over again. Jump to Recipe
What You’ll Need
The beauty of this ingredient list is how effortlessly it combines pantry staples with fresh produce to create something magical.
- Avocados – Perfectly ripe.
- Oranges – Sweet and juicy.
- Green onions – For a hint of sharpness.
- Orange juice – Freshly squeezed, for that extra punch.
- Lemon (juice) – To add a bit of zing.
- Fresh ginger paste – Trust me, it’s worth it.
- Agave syrup – For a touch of sweetness.
- Olive oil – Smooth and lush.
- Salt and pepper – To taste.
How to Make Avocado and Orange Salad With Orange-Ginger Dressing
- Begin by slicing your avocados and oranges. Let them overlap on a platter as if they’re chatting at a party.
- Don’t waste that orange carcass! Squeeze its juice over your arranged slices, letting it mingle and soften the edges of the avocado.
- Sprinkle green onions artfully over the top, like confetti, and add a pinch of salt to awaken those flavors.
- Cover the platter with cling film, tucking it into the fridge, so the salad chills out while you prepare the dressing.
- In a blender, combine orange juice, lemon juice, fresh ginger paste, agave syrup, and olive oil. Blend until the mixture is smooth and the ginger’s aroma wafts up deliciously.
- Season the dressing with salt and pepper, tasting it to find your perfect balance of sweet, spicy, and tangy.
- Just before serving, unveil your masterpiece from the fridge and drizzle the dressing generously over the salad.
Cook’s Notes
Here’s the lowdown on making this salad work like a charm:
- Make sure your avocados are ripe but firm enough to hold their shape when sliced.
- If you’re making this ahead, keep the dressing separate until just before serving to prevent the avocados from getting too mushy.
- Leftovers? Unlikely. But if you do have some, store them in an airtight container and consume within a day for best results.
- Be cautious with the salt. Remember, you can always add more, but you can’t take it out!
Make It Your Own
This salad is versatile enough to play with, so go ahead and shake things up:
- Swap the oranges for grapefruit slices if you’re after a slightly more tart flavor.
- Add some toasted almonds or walnuts for a crunchy contrast.
- For a spicy kick, sprinkle in some red pepper flakes to the dressing.
- Try a honey drizzle in place of agave if that’s more your style.
If you try this, I’d love to hear how it turns out—drop a comment or tag me! There’s nothing better than seeing your creations light up someone else’s table. Happy cooking!
Related update: Gluten Free Dairy Free Sugar Free Chinese Chicken Salad
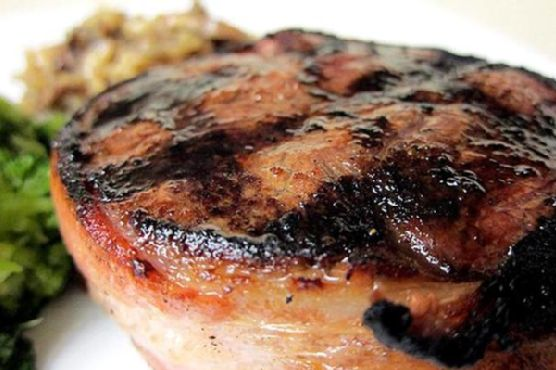
Last Tuesday, I found myself staring blankly into the fridge, desperately seeking inspiration for dinner after a long day of wrangling emails and chasing after my two-border collie pups, who were determined to shred every toy they own. Suddenly, a craving for something luxurious yet simple struck me—Bacon Wrapped Filet Mignon. It’s one of those dishes that sounds super fancy but is surprisingly easy to pull off. The genius pairing of tender beef with smoky bacon just hits all the right notes for a cozy, indulgent meal that feels like a mini celebration. And let’s be honest, we all need more of those! Plus, you can grill these beauties in under 30 minutes—perfect for when you’re short on time but still want to impress.
Jump to Recipe
What You’ll Need
I bet you have most of these already lurking in your pantry, just waiting to transform into something spectacular. No need for a lengthy grocery list here!
- 2 beef tenderloin steaks
- 2 slices of smoked bacon (room temperature)
- 4 cloves of garlic
- Salt & pepper to taste
How to Make Bacon Wrapped Filet Mignon
- First things first, get those tenderloins out and place them on a large dish. Now, take a deep breath and wrap a slice of room-temperature bacon around each filet. Gently stretch the bacon if needed, and secure its ends with a toothpick. It’s like giving your steak a delicious porky hug.
- Next, grab the garlic cloves. Cut them in half and rub both sides of each filet with the cut ends of the garlic. Trust me, this step infuses the steaks with a subtle, aromatic punch that’s absolutely divine.
- Season generously with salt and pepper on both sides—don’t be shy here, this is where the flavor magic starts to happen.
- Pre-heat your grill to very hot. You want it sizzling like a summer sidewalk.
- Using tongs, place each steak on the grill. For that perfect medium-rare, cook them for 3-4 minutes, rotating the steaks halfway through 90 degrees to achieve those Instagram-worthy grill marks.
- Flip the steaks over and grill the other side for another 3-4 minutes. The anticipation is killing me at this point.
- Remove the steaks from the grill and let them rest, loosely covered, for about 5 minutes. This step is crucial for locking in those juicy flavors before you remove the toothpicks and dive in.
Cook’s Notes
Let’s talk steak secrets! Always let your steaks rest at room temperature for about 20 minutes before you start wrapping them in bacon. This helps them cook more evenly. If you like your steak a bit more well-done, simply add a minute or two to each side. Got leftovers? Wrap them up and store them in the fridge—they make a killer steak salad the next day. And remember, sharp toothpicks are your friend for bacon security!
Make It Your Own
Why stop at classic when you can have fun experimenting? Here are a few ideas to jazz up your mignon:
- Swap the garlic rub for a herb butter spread before grilling for a luscious, buttery finish.
- Try using prosciutto instead of bacon for a slightly sweeter, more delicate wrap.
- Add a sprinkle of blue cheese crumbles on top right after grilling for a tangy twist.
- Serve alongside a creamy peppercorn sauce for an extra layer of flavor.
If you try this, I’d love to hear how it turns out—drop a comment or tag me on social media! Your gourmet adventure awaits, and I can’t wait to see where it takes you! 🍽️
Related update: Bacon Wrapped Filet Mignon
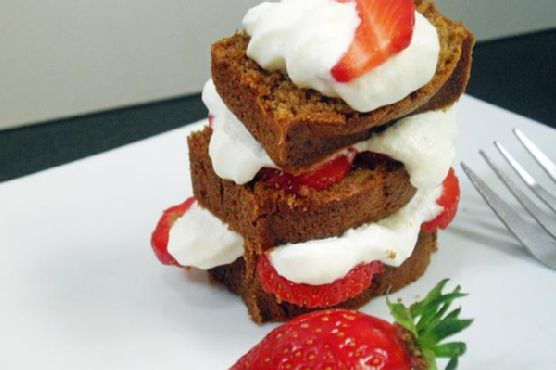
It was one of those blustery autumn afternoons when the wind just howls around your windows, and all you want is something to make the house smell amazing and your soul feel cozy. I was rummaging through my pantry, craving something spicy and sweet, when I realized I had everything I needed for gingerbread. You know that feeling when you stumble upon a recipe that makes your kitchen feel like a warm hug? This gingerbread is exactly that. It’s quick enough for a weeknight treat but feels special with its aromatic spices and deep molasses goodness. Plus, the glaze? Pure magic. Once you make it, you’ll want to drizzle it over everything.
Jump to Recipe
What You’ll Need
This gingerbread recipe is so forgiving and made with ingredients you probably already have hanging out in your kitchen.
- Molasses
- Salt
- Eggs
- Salad oil
- Sugar
- Soda
- Water
- Flour
- Ginger
- Cinnamon
How to Make Gingerbread
- In a large bowl, mix together the molasses, salad oil, sugar, ginger, cinnamon, and salt until the sugar dissolves and everything smells like holiday cheer.
- Add the eggs and beat the mixture until it becomes smooth and glossy.
- Dissolve the soda in 1/8 cup of boiling water, then stir it into the molasses mixture. You’ll see the batter start to bubble a little.
- Gradually add in the flour, alternating with the remaining water, stirring gently until the batter is smooth. It will be pretty thin, almost like pancake batter, but trust the process!
- Pour the batter into a greased 9″x13″ pan and bake at 350 degrees until the top is firm and a toothpick comes out clean. The edges will pull away slightly from the sides of the pan.
- While the gingerbread bakes, make the glaze: melt the butter, then stir in the milk and brown sugar. Bring to a boil and let it bubble away for about 4 minutes, stirring occasionally. It’ll thicken a bit as it cools.
- Once the gingerbread is done, let it cool slightly before drizzling the glaze over the top. Serve warm or wait until it’s cold—your call!
Cook’s Notes
This gingerbread can be stored covered at room temperature for up to 3 days, though it’s usually gone by day two in my house! If you want to make it ahead, it freezes beautifully. Just wrap it tightly in plastic wrap, and when you’re ready to enjoy, let it thaw at room temperature.
Watch out for overbaking. Because the batter is thin, it might cook faster than you think, especially if your oven runs hot. Check it a bit earlier than you’d expect.
- For extra flavor depth, consider adding a pinch of nutmeg or cloves along with the ginger and cinnamon.
- If you want to make the glaze ahead of time, you can reheat it gently before drizzling over the gingerbread.
Make It Your Own
- Swap the salad oil with melted butter for a richer flavor.
- Replace half of the flour with whole wheat flour for a heartier texture.
- Add a handful of chopped walnuts or pecans for a nutty crunch.
- Add a teaspoon of vanilla extract to the glaze for a hint of vanilla sweetness.
If you try this, I’d love to hear how it turns out—drop a comment or tag me! I promise this gingerbread will make your kitchen feel like the coziest place on earth.
Related update: Gingerbread
Related update: 2 Minute Chocolate Yum
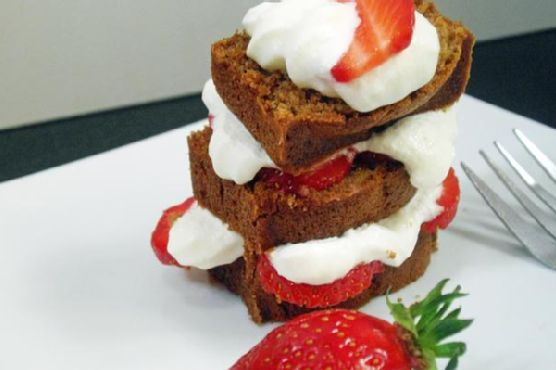
It was one of those unexpectedly chilly evenings when I found myself craving warmth, not just from the heater but from something I could savor. The kind of evening where you want to wrap yourself in a cozy sweater and let your kitchen fill with the scent of baking spices. That’s when gingerbread came to mind — the kind that’s rich with molasses and spices, yet so simple to whip up that you almost wonder if you missed a step. This recipe is one of those gems; it’s quick but doesn’t skimp on flavor, comforting with just the right amount of sweetness, and impressive enough if you decide last-minute to invite a friend over for tea. Trust me, you won’t regret letting this gingerbread become part of your chilly evening rituals.
Jump to Recipe
What You’ll Need
Gingerbread is all about those warm, inviting flavors that make your house smell like a dream. Chances are, you’ll already have most of these ingredients tucked away in your pantry:
- Molasses
- Salt
- Eggs
- Salad oil (use what you have — canola or vegetable oil works great)
- Sugar
- Baking soda
- Boiling water
- Flour
- Ground ginger
- Cinnamon
How to Make Gingerbread
- Start by mixing the molasses, salad oil, sugar, ground ginger, cinnamon, and a pinch of salt in a large bowl. Stir them together until the mixture looks smooth and the spices are beautifully fragrant.
- Add the eggs into the mix and beat them well. You want the batter to be uniform and glossy.
- Dissolve the baking soda in 1/8 cup of boiling water. This step is crucial as it activates the soda, giving your gingerbread the rise it needs. Stir this into your batter.
- Gradually add the flour and the rest of the water into the mixture. The batter will be thin, but that’s exactly what you’re aiming for.
- Pour the batter into a 9″x13″ pan, spreading it evenly. Bake in a preheated oven at 350°F until the top is done and lightly springy to the touch — your kitchen will smell divine!
- If you’re feeling extra indulgent, make the glaze: combine a stick of butter, 1/4 cup milk, and 1 cup brown sugar in a saucepan. Bring the mixture to a boil and let it bubble away for about 4 minutes. Drizzle this heavenly glaze over your gingerbread once it’s out of the oven.
Cook’s Notes
Here’s the thing about gingerbread: it’s forgiving. If you find yourself without ground ginger, a bit of allspice or nutmeg can pinch-hit in a hurry. Store any leftovers tightly wrapped in foil, and they’ll keep well at room temperature for a few days — if they last that long. To really appreciate its flavor, serve it either hot or cold; each temperature brings out different notes in the spices and molasses.
If you’re planning ahead, the gingerbread can be made a day in advance. Just keep it covered and apply the glaze right before serving to maintain that perfect texture.
Make It Your Own
- Switch up the spices: Add a bit of ground cloves or nutmeg for an extra spice twist.
- Nutty addition: Stir in a handful of chopped walnuts or pecans for some delightful crunch.
- Fruity flair: Toss in a handful of raisins or chopped dried apricot before baking for a fruity surprise.
- Lemon zest: For a citrusy zing, add the zest of a lemon to the batter before baking.
If you try this gingerbread, I’d truly love to know how it turns out — drop a comment or tag me in a post! Your kitchen will thank you for the delightful aroma, and your taste buds will be doing a happy dance. Happy baking!
Related update: Gingerbread
Related update: Gingerbread
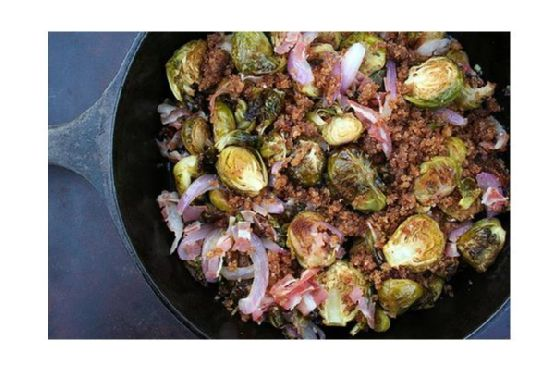
It was one of those Thursday evenings when the world felt like it was spinning a bit faster than usual. I had finally wrangled the kids to bed, and there I was staring at a fridge that seemed emptier by the minute. But from somewhere in the depths of that fridge, a bag of Brussels sprouts peeked back at me. Paired with some pancetta I had tucked away (a gift from my last “I’m going to learn charcuterie” phase), I realized a deliciously satisfying dinner was just a roast away. These Roasted Brussels Sprouts with Red Onions and Pancetta are the perfect way to coax out the caramelized sweetness of Brussels sprouts, make your kitchen smell heavenly, and use up those random pantry ingredients. Honestly, it’s a little bit of magic in under an hour.
Jump to Recipe
What You’ll Need
This dish is as much about what’s not in it as what is. Simple, fresh ingredients that you probably have hiding in your kitchen already.
- 1 lb of **Brussels sprouts**, halved
- 3-5 cloves of **garlic**, pressed
- 1/4 cup and 2 tablespoons of **olive oil**, divided
- 1 slice of **bread**
- 1/2 cup of **red onions**, sliced
- 1/4 cup of **pancetta**, diced
- Salt and pepper to taste
How to Make Roasted Brussels Sprouts With Red Onions and Pancetta
- Preheat your oven to 350°F (175°C). While it warms up, grab a large plastic zippered bag. Toss in the halved Brussels sprouts, 3 cloves of pressed garlic, and 2 tablespoons of olive oil. Give it a good shake until everything’s nicely coated.
- Spread the Brussels sprouts out in an ovenproof dish. Pop it in the oven and roast for about 40 minutes. They should come out tender with a golden brown hue and a heavenly aroma.
- Meanwhile, take a pan and heat up 1/4 cup of olive oil over medium heat. Once it’s warm, fry the slice of bread until it’s golden on both sides. Trust me, this will be our crispy topping magic in just a bit.
- Set that bread aside. In the still-warm pan, add the sliced red onions. Give them a quick sauté for about 3 minutes until they slightly soften but still have a bite. You’re aiming for them to be fragrant but not mushy.
- Toss in the diced pancetta with the onions and let them mingle for another minute. The pancetta should release its flavors but not get overly crispy.
- When the Brussels sprouts have roasted to perfection, add them to the pan. Heat everything together for about 3 minutes, stirring gently so the flavors blend without turning into a mushy mess.
- In a food processor, blitz the fried bread with 1-2 cloves of garlic until you have a coarse crumb. Sprinkle this over your Brussels sprouts and finish with a final drizzle of olive oil for good measure.
Cook’s Notes
Roasting Brussels sprouts is all about the timing. Make sure they’re cut evenly so they cook at the same rate. You want them tender but not mushy, with just enough caramelization to bring out their natural sweetness. This dish is fantastic fresh out of the oven, but if you have leftovers (and that’s a big if), they keep well in the fridge for about two days. Just reheat them gently so you don’t lose that delightful texture. And if you’re a planner, you can prep the Brussels sprouts and onions in advance—store them separately and combine everything just before serving for peak freshness.
Make It Your Own
- Substitute the pancetta with **crispy tofu** for a vegetarian version that’s just as satisfying.
- Swap the red onions for **shallots** if you want a milder, slightly sweeter flavor.
- Add a handful of **parmesan cheese** just before serving for a cheesy twist.
- Mix in some **dried cranberries** after roasting for a pop of sweetness that pairs wonderfully with the savory elements.
If you try this, I’d love to hear how it turns out—drop a comment or tag me! Nothing makes me happier than seeing your versions of these dishes come to life. Till next time, happy cooking!
Related update: Roasted Brussels Sprouts With Red Onions and Pancetta
Related update: Bacon Wrapped Filet Mignon
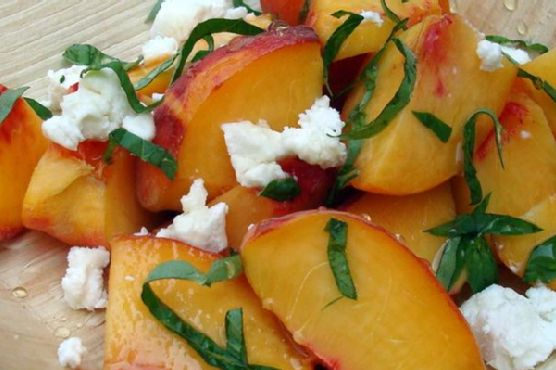
It was one of those sticky summer afternoons, the kind where even the shade feels warm and inviting. I had a couple of peaches lounging on the counter, looking like they might start a protest if not eaten soon. That’s when inspiration struck! I wanted something refreshing but also satisfying, and that’s how this Fresh Peach With Goat Cheese Side Salad came to life. It’s such a delightful surprise: juicy peaches balanced by creamy goat cheese, accented with fragrant basil and a hint of honey sweetness. Plus, it only takes a few minutes to whip up, making it perfect for a spontaneous lunch or a quick dinner side.
Jump to Recipe
What You’ll Need
I bet you have most of these hanging around your kitchen. Here’s what you need for this bite of sunshine:
- 4 ripe peaches – the juicier, the better
- 1 tablespoon of honey – for that sweet, sticky goodness
- Pinch of salt – to make all the flavors sing
- 1/2 cup of crumbled goat cheese – creamy and tangy
- A handful of fresh basil leaves – torn for maximum aroma
How to Make Fresh Peach With Goat Cheese Side Salad
- Halve and pit the peaches, then slice them into wedges. Place these sun-drenched beauties into a large mixing bowl.
- Drizzle the honey over the peach slices. Use your hands to gently toss them until they’re evenly coated. Feel free to sneak a taste here; it’s irresistible!
- Sprinkle a pinch of salt over the honeyed peaches. This simple move really brightens up the flavors, trust me.
- Now for the aromatic part: gently fold in the torn basil leaves. The smell is going to be like a mini vacation.
- Finally, crumble the goat cheese over the top and give it one last gentle toss. The cheese should cling lovingly to the peaches.
Cook’s Notes
Here’s a little secret: no need to be too precise with this salad. It’s all about the balance of sweet and tangy meeting fresh and creamy. If you don’t have ripe peaches, you might need a bit more honey to bring out their sweetness. This salad doesn’t keep well, so aim to enjoy it right away. But if you have leftovers, they’ll still be tasty for a day if stored in the fridge — just expect the basil to do a little wilting dance.
Make It Your Own
Looking to customize this salad? Here are some fun tweaks:
- Swap the peaches for nectarines or even grilled apricots for a smoky twist.
- Try using a soft blue cheese instead of goat cheese if you’re feeling adventurous.
- For a nutty crunch, add a handful of toasted pistachios or sliced almonds.
- If basil isn’t your thing, mint leaves could bring a refreshing coolness instead.
If you try this, I’d love to hear how it turns out — drop a comment or tag me! I hope this salad brings a burst of sunshine to your table as it did mine. Enjoy every juicy, creamy bite!
Related update: Fresh Peach With Goat Cheese Side Salad
Related update: Roasted Brussels Sprouts With Red Onions and Pancetta
Picture this: It’s a Wednesday evening, you’re staring blankly into your fridge, mentally calculating the time it takes to defrost a chicken breast versus the desire to just order takeout. Sound familiar? That’s when I stumbled upon the beauty of Swiss Chard Wraps. The first time I made these, I had a surplus of swiss chard and exactly zero motivation to cook anything I couldn’t make in less than 30 minutes. These wraps are fresh, flavorful, and unexpectedly satisfying, and they completely saved dinner that night. They’re packed with vibrant veggies and a spicy kick, and the best part is — they’re ridiculously easy to put together. Plus, they feel like a little bit of a kitchen adventure. Curious yet?
Jump to Recipe
What You’ll Need
Okay, here’s the best part. You likely have most of these ingredients on hand, and if not, they’re easy to grab. Plus, they’re all about that fresh, vibrant taste!
- Dried swiss chard leaves
- Orange cauliflower
- Olive oil
- Garlic
- Salt
- Fresh basil
- Zucchini
- Red bell pepper
- Avocado
- Trader Joe’s spicy peanut vinaigrette
How to Make Swiss Chard Wraps
- Chop off the stems of the swiss chard right where they meet the leaf. I like to leave a little bit of the stem attached to give the wraps some backbone, but you do you.
- Take that orange cauliflower, chop it into small pieces, and pulse in a food processor until it resembles rice. Florets and stalks are both fair game.
- Heat some olive oil in a sauté pan over medium-high heat. Once it’s shimmering, toss in the garlic and let it sizzle for a minute or two until you smell that glorious aroma and see it start to brown.
- Add your cauliflower rice to the pan and cook for about 2-3 minutes. You’ll know it’s done when it turns a vibrant yellow-orange. Sprinkle in a pinch of salt and some chopped basil, then give it a good stir.
- If you have a spiralizer, use Blade B to create zucchini noodles. No spiralizer? No problem. Just use a vegetable peeler to make ribbons.
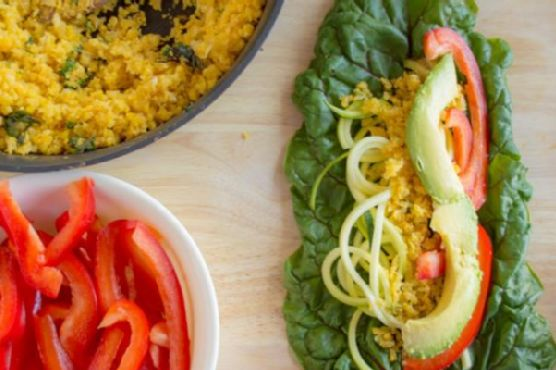
- To assemble the wraps, lay a large swiss chard leaf flat. Add some sautéed cauliflower, zucchini noodles, red bell pepper slices, and avocado down the center along the stalk.
- Drizzle everything with a bit of spicy peanut vinaigrette and wrap it up tightly. Take a moment to admire your handiwork before diving in.
- These wraps are fantastic as a side dish to your favorite protein or even as a light main course. Enjoy them right away for the best experience!
Cook’s Notes
These wraps are freshest when made and eaten right away, but if you’re looking to prep ahead, you can make the cauliflower rice and chop the veggies in advance. Store them separately and assemble the wraps when you’re ready to eat. Leftovers? Pop them in an airtight container and refrigerate. They’ll keep for a day, but trust me, they’ll be long gone before you know it. If you’re watching the salt, taste as you go, especially if your vinaigrette is already salty.
Make It Your Own
Get creative with these wraps! Here are a few ways to mix things up:
- Swap the avocado for hummus for a creamy, Mediterranean twist.
- Use crispy tofu instead of the spicy peanut vinaigrette for a protein-packed version.
- Throw in some shredded carrots for an extra crunch.
- Experiment with different herbs — mint or cilantro can add new dimensions of flavor.
If you try this, I’d love to hear how it turns out — drop a comment or tag me! These wraps are a staple in my kitchen now, and I hope they become one in yours, too. Happy wrapping!
Related update: Swiss Chard Wraps
Related update: Fresh Peach With Goat Cheese Side Salad
Related update: Escarole & Beans

Picture this: it’s a bustling Tuesday evening and I’m standing in my kitchen, rifling through the pantry for dinner inspiration when I stumble upon a bunch of cute, little eggplants. A light bulb moment hits—Hyderabadi baghara Baingan! This dish is like a warm hug, perfect for when you’re craving something rich and tangy yet surprisingly easy to whip up. The eggplants soak up the spiced, nutty goodness, leaving you with a delicious meal that feels like it took hours, but really didn’t. Trust me, even on the busiest days, this is a dish that delivers on flavor with every bite.
Jump to Recipe
What You’ll Need
This isn’t one of those crazy ingredient lists that sends you to five different stores. Chances are you already have most of these at home.
- 10-12 baby eggplants
- 3-4 red Kashmiri chilies
- Coconut
- Coriander seeds
- Cumin seeds
- 8-10 curry leaves
- Garlic
- 1 piece of ginger
- Tamarind, about a lime-sized ball
- Oil
- Onion
- Salt
- Nigella seeds
- Sesame seeds
- Turmeric
- Jaggery
- Peanuts
- Cashews
How to Make Hyderabadi baghara Baingan
- First things first—wash those baby eggplants and pat them dry. You’re going to slit them lengthwise into fours, but keep the stems intact. This way, they hold together nicely in the dish.
- In a separate pan, heat a teaspoon of oil. Toss in the cumin seeds, peanuts, and cashews and fry them for a few seconds until fragrant.
- Add in the ginger, garlic, and chopped onion. Cook this down for about a minute until everything turns soft and golden.
- Sprinkle in the turmeric, coriander seeds, coconut, and Kashmiri red chilies. Keep frying till the mixture turns a lovely brown. Let this cool completely and then blend it into a fine paste with a little water.
- Now, in a thick-bottomed pan, heat some oil and fry the eggplants until they’re brown and tender. This is where they get all soft and lovely. Remove them and set aside.
- In the same oil, add the nigella seeds and let them crackle before stirring in those aromatic curry leaves. Fry for a few seconds to release their flavors.
- Add the ground paste you prepared, along with the tamarind pulp, salt, and jaggery. Mix it all up until it becomes a fragrant, bubbling sauce.
- Gently add the sautéed eggplants and about half a cup of water. Cover the pan and let everything simmer over low heat until the eggplants are cooked through and super soft.
- Serve this hot with rice or rotis, and savor each mouthful of that rich, tangy curry.
Cook’s Notes
Cooking Hyderabadi baghara Baingan is a breeze if you keep a few things in mind. First, ensure the eggplants are fresh and firm for the best taste. If you don’t have Kashmiri red chilies, substitute with any mild red chili for that vibrant color, but be mindful of the spice level. This dish is great the next day too as the flavors deepen overnight, so don’t hesitate to make it ahead of time. Store leftovers in an airtight container in the fridge for up to 3 days. Reheat gently, adding a splash of water if needed to loosen the sauce.
Make It Your Own
Looking to shake things up a bit? Here are a few ways to switch up this recipe:
- Swap the eggplants for zucchini or baby bell peppers for a different twist.
- For a nut-free version, omit the peanuts and cashews and add a tablespoon of almond butter to the paste for richness.
- Dial up the heat by adding a green chili or two to the paste if you’re in the mood for something spicier.
- For a heartier meal, toss in some boiled potatoes along with the eggplants.
If you try this, I’d love to hear how it turns out—drop a comment or tag me! Your feedback makes my day and helps fellow food lovers. Enjoy the cooking adventure!
Related update: Hyderabadi baghara Baingan
Related update: Lamb & Sweet Potato Pot Pie
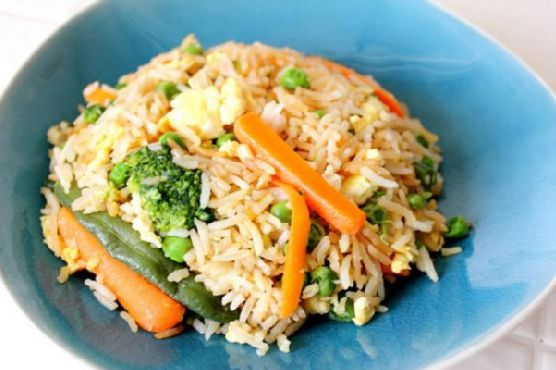
Ever have one of those days where you open the fridge, and it feels like a barren wasteland of half-used vegetables and random leftovers? Last Tuesday was precisely that for me. I had a craving for something comforting yet quick, and the idea of ordering takeout for the third time that week wasn’t sitting well with my wallet—or my waistline. That’s when I remembered my go-to Easy Vegetable Fried Rice. It’s one of those recipes that feels like a kitchen miracle, turning odds and ends into something spectacularly satisfying. Plus, it’s quicker than waiting for delivery and way more rewarding.
Jump to Recipe
What You’ll Need
This recipe’s magic lies in its versatility and simplicity. Chances are you already have most of these ingredients lurking in your kitchen:
- Broccoli – The more the merrier!
- Butter – Because everything’s better with it.
- Carrots – Sweet and crunchy.
- Cooked rice – Preferably a day old, but fresh works too.
- Egg – For that authentic fried rice finish.
- Garlic – Minced, for a punch of flavor.
- Ginger – Freshly grated, if possible.
- Green beans – Snappy and fresh.
- Peas – Sweet, lovely little peas.
- Soy sauce – This is your salt and savory magic.
- Sesame oil – For that nutty, toasted aroma.
- Sugar – Just a touch for balance.
How to Make Easy Vegetable Fried Rice
- Start by bringing a pot of water to a boil. Toss in the green beans and broccoli. Let them blanch for about two minutes, then drain them immediately to keep that vibrant color. If you’re using frozen veggies, ease off the package instructions by three minutes—no one likes mushy veggies.
- In a large pan or wok, heat your sesame oil over medium heat. Toss in the garlic and ginger. Stir them around for about a minute until your kitchen smells irresistibly fragrant.
- Add the carrots and give them a quick stir for one to two minutes—just enough to soften them a bit but still keep that crunch.
- Now, add the rice. The key here is using rice that’s a day old, but if you’re in a pinch, fresh rice works too. Pour in your soy sauce; adjust based on how salty you like it.
- While the rice warms up, beat the egg in a small bowl. Push the rice to the sides of the pan, creating a little space in the middle. Pour in the egg and scramble it right there, blending it in with the rice once it’s almost cooked.
- Throw in the blanched broccoli, peas, and any other veggies you fancy. Sprinkle in the sugar and stir everything together for a couple of minutes.
- Add the butter and let it melt through the rice mixture. This is where the magic happens—let the rice sit and sizzle just a bit to get those delightful crispy bits.
- Give it one last toss before serving. Dive in and enjoy your homemade fried rice!
Cook’s Notes
Fried rice is forgiving, but a few things can elevate your dish from good to great. First, cold, day-old rice is ideal since it’s less sticky and more likely to fry up nicely. If using fresh rice, spread it out on a baking sheet to cool and dry a bit. Feel free to adjust the soy sauce to your taste—every brand varies in saltiness. If you’re making this ahead of time, store it in an airtight container in the fridge for a couple of days. Reheat in a pan for the best texture, adding a splash of water if it seems dry.
Make It Your Own
- For protein, swap the egg for crispy tofu cubes. Just pan-fry them before adding the garlic and ginger.
- Add a kick by tossing in a teaspoon of chili paste or Sriracha along with the soy sauce.
- Switch out the green beans for snap peas for an even sweeter crunch.
- For a nutty twist, sprinkle toasted sesame seeds over the top before serving.
If you try this, I’d love to hear how it turns out—drop a comment or tag me on your social media adventures! Enjoy every spoonful of your kitchen creativity.
Related update: Easy Vegetable Fried Rice
Related update: Hyderabadi baghara Baingan

It was one of those gloomy Tuesday evenings when the thought of another sad salad was just too much to bear. I glanced at the dozen eggs I had forgotten in my fridge and thought, “We can do better than this, guys!” Thus, the Hard-Boiled Egg Gratin In A Béchamel Sauce was born. This dish is the perfect marriage of creamy comfort and accessible elegance. It’s like giving your humble eggs a posh makeover, and believe me, it’s way easier than you’d think. Plus, it’s the kind of dish that makes you feel like you can handle anything the week throws at you.
Jump to Recipe
What You’ll Need
You might already have most of this in your kitchen, just waiting to become something delightfully decadent. Here’s what you’ll gather:
- 6 large eggs
- 4 tablespoons butter, divided
- 1 small onion, finely chopped
- 3 tablespoons flour
- 2 cups milk
- Nutmeg, a pinch
- Salt and white pepper to taste
- 1 cup grated gruyère cheese
How to Make Hard-Boiled Egg Gratin In A Béchamel Sauce
- Start with hard-boiling your eggs. Bring a saucepan of salted water to a boil, add the eggs gently, then reduce the heat and let them simmer for 10 minutes. Once done, transfer the eggs to a bowl of cold water to cool slightly, then peel them. Trust me, rolling them gently with your palm on a hard surface makes peeling a breeze.
- In a small frying pan, melt 2 tablespoons of the butter over low heat and add the chopped onion. Cook, stirring frequently, until the onion is tender but not colored — you want that sweet onion aroma wafting through your kitchen.
- Now for the béchamel sauce: In a medium saucepan, melt the remaining 2 tablespoons of butter over low heat. Add the flour and whisk it for about 2 minutes. Keep an eye on it; you want a smooth blend without any color change.
- Slowly whisk in the milk and bring the mixture to a boil. Keep whisking to avoid lumps. Season the sauce with nutmeg, salt, and white pepper to your liking. Lower the heat and let it simmer for 10 minutes, continuing to whisk and scrape the sides for a silky finish.
- Stir in the cooked onions and let it all meld together for another 5 minutes, stirring occasionally.
- Preheat your grill. While it heats, slice the eggs about 1 cm thick. Spread a thin layer of béchamel sauce on the bottom of a gratin dish, then layer in the sliced eggs. Coat the slices generously with the remaining sauce.
- Top it all off with a generous sprinkle of grated gruyère cheese. Pop it under the grill and watch closely — turn the dish if needed to ensure an even, golden-brown crust. Serve immediately and bask in the glory of your culinary creation.
Cook’s Notes
A few things to keep in mind: The béchamel can be made ahead and stored in the fridge for up to two days. Just reheat gently before assembling the gratin. If you find your sauce is too thick after reheating, add a splash of milk to loosen it up. Leftovers (if you have any!) can be kept in the fridge and reheated in the oven at a low temperature. Just be mindful that the eggs can toughen slightly as they are reheated.
Make It Your Own
The joy of this dish is in its flexibility. Here are some fun variations:
- For a smoky twist, swap the gruyère for smoked gouda.
- If you’re feeling fancy, add a layer of sautéed mushrooms between the eggs and the sauce.
- For a fresh hit, sprinkle chopped chives or parsley over the top before serving.
- Try adding a thin layer of spinach under the eggs for a pop of color and nutrition.
If you try this, I’d love to hear how it turns out — drop a comment or tag me! Whip it up, make it your own, and most importantly, enjoy every creamy forkful. Happy cooking, friends!
Related update: Hard-Boiled Egg Gratin In A Bechamel Sauce

So there I was, staring at a pantry full of canned goods and feeling absolutely uninspired. You know those moments, right? When dinner needs to magically appear, but the motivation to whip up something grand is nowhere to be found? That’s when my trusty crockpot became my salvation, and this Crockpot “Refried” Beans recipe was born. Packed with hearty pinto beans and a kiss of cumin, it’s the kind of dish that mellows me out on a hectic Tuesday evening. Not to mention, it’s an absolute breeze to prepare. Whether you’re looking for a simple side or a filling for your tacos, this dish has you covered.
Jump to Recipe
What You’ll Need
Picture this: a short list of ingredients, most of which are probably lurking in your pantry right now. We’re talking about pantry staples here, folks, nothing too fancy.
- Pinto beans – the star of our show, dried and ready for action
- Water – simple enough
- Canned garlic – because chopping fresh is overrated (or maybe just too much effort today)
- Onion – for that subtle depth of flavor
- Cumin – gives that warm, earthy vibe to our beans
- Black pepper – just enough to make things interesting
- Salt – essential seasoning, obviously
How to Make Crockpot “Refried” Beans
- Rinse those pinto beans in a colander. Seriously, give them a good rinse until the water runs clear, and make sure to pick out any bad beans that are looking questionable.
- Combine all of the ingredients into your trusty crockpot. Toss the rinsed beans in, add the water, canned garlic, onion, cumin, black pepper, and salt. Give it a little stir to distribute the flavors.
- Notice any beans floating to the top? Go ahead and remove those. Floating beans often mean they’re not quite right, and we’re all about quality here.
- Cover the crockpot, set it on HIGH, and let it work its magic for 4 hours. The kitchen will start to smell warm and inviting — almost like a hug.
- After the 4 hours are up, switch the setting to LOW and let it continue to cook for another 2 hours. Patience, my friend, is key.
- Once cooked, uncover the crockpot and assess the liquid situation. Remove any excess liquid, but leave enough to reach your desired consistency when mashed. Remember, we’re aiming for somewhere between very liquidy, restaurant-style beans and the thicker, canned kind.
- Mash the beans using a potato masher. Go as smooth or chunky as you like — it’s your masterpiece.
- Serve them warm, and soak in the satisfaction of a meal well-crafted with minimal effort.
Cook’s Notes
So, a few things to keep in mind: using dried beans means you get to control the texture and sodium levels, which is a total win-win. As for storage, pop any leftovers into air-tight containers and they’ll chill in the fridge for up to 2 weeks. If you’re more of a plan-ahead person, freeze the beans in ziplock bags to enjoy at a later date. Just remember to thaw them in the fridge overnight before reheating.
Make It Your Own
Experimenting is half the fun, right? Here are a few ways to switch things up:
- Swap the pinto beans for black beans for a subtly different flavor profile.
- Feeling adventurous? Add a diced jalapeño to the crockpot for a spicy kick.
- Toss in a handful of chopped cilantro after mashing for a fresh, herbaceous finish.
- For a smoky twist, stir in a teaspoon of smoked paprika with the other spices.
If you try this recipe, I’d love to hear how it turned out! Drop a comment or tag me in your kitchen adventures. Happy cooking!
Related update: Crockpot "Refried" Beans
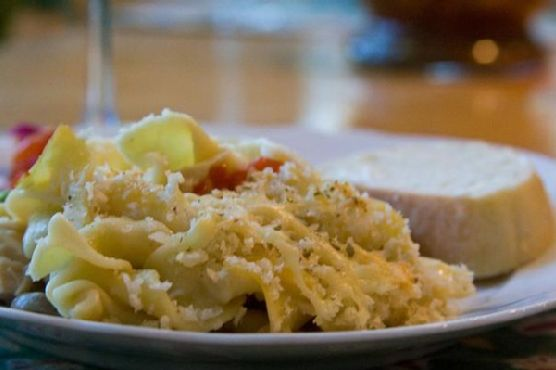
One chilly evening last fall, I found myself rummaging through the pantry, desperate for something delicious but low-effort. Honestly, it had been one of those days where the last thing I wanted was a complicated dinner. That’s when I stumbled across a can of tuna and a pack of egg noodles — and like magic, the comforting idea of a Tuna Noodle Casserole bubbled to the surface. It’s the kind of dish that wraps you in a warm, cozy hug, yet is simple enough to pull together on a weeknight. With just a bit of chopping, stirring, and baking, the whole family can gather around a meal that feels like home. Trust me, this is a dinner worth diving into.
Jump to Recipe
What You’ll Need
The beauty of this recipe is that most of these ingredients are pantry staples. You might not even need a grocery run.
- 1 cup bread crumbs
- 5 tablespoons butter, divided
- 1 can mushrooms, drained
- 1 can peas, drained
- 2 cans tuna in water, drained
- 2 celery sticks, diced
- 1 cup shredded cheese (cheddar works great!)
- 1 cup chicken broth
- 12 ounces cooked egg noodles
- 1/4 cup flour
- 3 cloves garlic, minced
- 1 cup milk
- 1 small onion, diced
- 2 tablespoons chopped parsley
- 1/4 cup pimientos, diced
- Salt and pepper to taste
- 1/4 cup sherry (optional, but adds depth)
How to Make Tuna Noodle Casserole: Mommie Cooks
- Melt 1 tablespoon of the butter in a skillet over medium heat. Toss in the garlic, onion, celery, mushrooms, and a pinch of salt and pepper. Cook for about 3 to 4 minutes until everything is soft and fragrant.
- Remove the veggies from the pan and turn the heat down to medium-low. Melt the remaining 4 tablespoons of butter in the skillet. Once melted, sprinkle in the flour and mix it up to create a roux.
- To the roux, slowly add in the milk, sherry, and chicken broth. Stir continuously and bring the mixture to a boil until it thickens, about 5 minutes.
- Reduce the heat to low and return the cooked veggies to the pan. Add in the tuna, peas, and pimientos. Give it a good stir to combine everything.
- Fold in the cooked egg noodles, ensuring they’re coated with the creamy goodness. Pour the mixture into an oven-safe dish.
- Top the casserole with bread crumbs and shredded cheese. Sprinkle with parsley for a pop of color.
- Bake in a preheated oven at 350°F for about 20 minutes, or until the cheese is bubbly and golden-brown.
Cook’s Notes
This casserole is pretty forgiving, so give yourself some grace if you’re not exact with measurements. Leftovers can be stored in the fridge for up to 3 days — just pop them in the microwave for a quick reheat. If you fancy making it ahead, prepare the casserole up to the baking step, then cover and refrigerate. When you’re ready to eat, bake it for an extra 10 minutes or so to ensure it’s heated through.
Watch out for overcooking the noodles initially; they’ll soften further as they bake, so aim for al dente. Also, if you’re not into sherry, simply leave it out or replace it with a bit more broth.
Make It Your Own
- Swap the tuna for crispy tofu for a vegetarian spin.
- Add a spicy kick with a teaspoon of red pepper flakes mixed into the sauce.
- Trade the canned mushrooms for fresh ones, sautéing them with the onions and celery for an earthier flavor.
- Use gluten-free noodles and flour to make this dish gluten-friendly.
If you try this recipe, I’d love to hear how it turns out for you! Drop a comment or tag me in your culinary adventures. Happy cooking, friends!
Related update: Tuna Noodle Casserole: Mommie Cooks
Related update: Apple Cheddar Turkey Burgers With Chipotle Yogurt Sauce
Related update: Crockpot "Refried" Beans
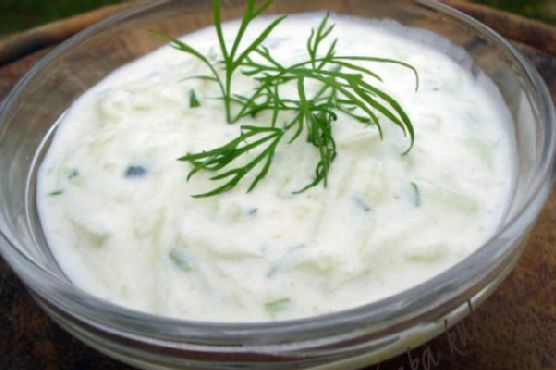
Oh, the joys of summer! Last week, I found myself standing in the kitchen, windows wide open, a warm breeze sneaking in with the scent of freshly cut grass. It was the kind of day that begged for something cool, creamy, and refreshing. That’s when it hit me—I needed tzadziki in my life, like, immediately. This is the kind of dish that doesn’t just fill your belly; it feels like a mini-vacation to the Mediterranean. It’s quick and straightforward but has that “made from scratch” vibe that’ll make you feel like a kitchen wizard. Seriously, if you’re looking for something to dollop on just about anything, tzadziki is your go-to. Jump to Recipe
What You’ll Need
You might already have most of these on hand, especially if you’re a fan of Greek cooking. Here’s what you’ll need:
- Cucumbers – The crunchy base of our dip.
- Sea salt – To draw out that extra moisture from the cuke.
- Yogurt – The creamy heart of the tzadziki.
- Sour cream – Adds a little tang and extra creaminess.
- Olive oil – Just a drizzle for richness.
- Vinegar – A splash to brighten up the flavors.
- Garlic – Because what’s tzadziki without garlic?
- White pepper – For a subtle heat that doesn’t overpower.
- Fresh dried dill – The herb that ties it all together.
How to Make Tzadziki
- Start by lightly salting the cucumbers. This isn’t just seasoning; it’ll help draw out the water. Let them sit for about 5 minutes.
- Once they’ve had a good cry, take small handfuls of the cucumbers and squeeze out as much water as you can. You’ll be surprised how much comes out!
- In a bowl, mix the yogurt, sour cream, olive oil, vinegar, garlic, and white pepper. You’re looking for a smooth, creamy blend here.
- Add the drained cucumbers and dill to your creamy mixture. Give it a good stir until everything’s well combined.
- Taste and adjust the seasoning. It might need a pinch more salt or a dash of vinegar to suit your taste.
- Chill the tzadziki in the fridge for at least two hours. This is where the magic happens as the flavors meld together.
Cook’s Notes
Ah, the art of tzadziki making! It’s all about getting those cucumbers nice and dry, so don’t skimp on the squeezing. Trust me, the less water, the creamier your dip. And while you’re at it, make sure you let it chill long enough. The flavors need time to develop, and patience is key here. Planning ahead? Make it the day before your gathering, and it’ll be even better! Store any leftovers in an airtight container in the fridge, and they’ll last a good three days. Just give it a stir before serving because the water might separate a bit.
Make It Your Own
- Spicy Kick – Add a pinch of cayenne pepper for a hint of heat.
- Herb Swaps – Try mint or parsley instead of dill for a different herbal note.
- Extra Creamy – Use full-fat Greek yogurt for an even richer texture.
- Vegan Twist – Swap the yogurt and sour cream for coconut yogurt to make it vegan-friendly.
If you give this a whirl, I’d absolutely love to hear how it turns out for you. Drop a comment or tag me in your creations. Happy dipping!
Related update: Tzadziki
Related update: Hummus with roasted orange peppers