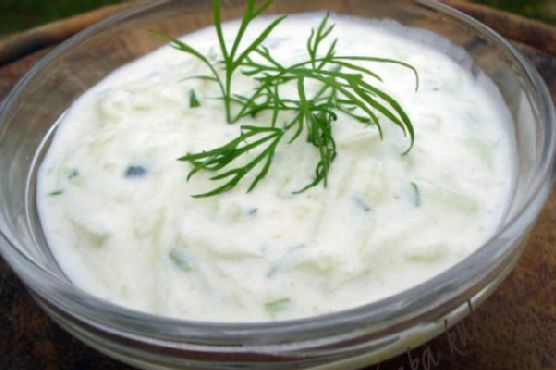
Oh, the joys of summer! Last week, I found myself standing in the kitchen, windows wide open, a warm breeze sneaking in with the scent of freshly cut grass. It was the kind of day that begged for something cool, creamy, and refreshing. That’s when it hit me—I needed tzadziki in my life, like, immediately. This is the kind of dish that doesn’t just fill your belly; it feels like a mini-vacation to the Mediterranean. It’s quick and straightforward but has that “made from scratch” vibe that’ll make you feel like a kitchen wizard. Seriously, if you’re looking for something to dollop on just about anything, tzadziki is your go-to. Jump to Recipe
What You’ll Need
You might already have most of these on hand, especially if you’re a fan of Greek cooking. Here’s what you’ll need:
- Cucumbers – The crunchy base of our dip.
- Sea salt – To draw out that extra moisture from the cuke.
- Yogurt – The creamy heart of the tzadziki.
- Sour cream – Adds a little tang and extra creaminess.
- Olive oil – Just a drizzle for richness.
- Vinegar – A splash to brighten up the flavors.
- Garlic – Because what’s tzadziki without garlic?
- White pepper – For a subtle heat that doesn’t overpower.
- Fresh dried dill – The herb that ties it all together.
How to Make Tzadziki
- Start by lightly salting the cucumbers. This isn’t just seasoning; it’ll help draw out the water. Let them sit for about 5 minutes.
- Once they’ve had a good cry, take small handfuls of the cucumbers and squeeze out as much water as you can. You’ll be surprised how much comes out!
- In a bowl, mix the yogurt, sour cream, olive oil, vinegar, garlic, and white pepper. You’re looking for a smooth, creamy blend here.
- Add the drained cucumbers and dill to your creamy mixture. Give it a good stir until everything’s well combined.
- Taste and adjust the seasoning. It might need a pinch more salt or a dash of vinegar to suit your taste.
- Chill the tzadziki in the fridge for at least two hours. This is where the magic happens as the flavors meld together.
Cook’s Notes
Ah, the art of tzadziki making! It’s all about getting those cucumbers nice and dry, so don’t skimp on the squeezing. Trust me, the less water, the creamier your dip. And while you’re at it, make sure you let it chill long enough. The flavors need time to develop, and patience is key here. Planning ahead? Make it the day before your gathering, and it’ll be even better! Store any leftovers in an airtight container in the fridge, and they’ll last a good three days. Just give it a stir before serving because the water might separate a bit.
Make It Your Own
- Spicy Kick – Add a pinch of cayenne pepper for a hint of heat.
- Herb Swaps – Try mint or parsley instead of dill for a different herbal note.
- Extra Creamy – Use full-fat Greek yogurt for an even richer texture.
- Vegan Twist – Swap the yogurt and sour cream for coconut yogurt to make it vegan-friendly.
If you give this a whirl, I’d absolutely love to hear how it turns out for you. Drop a comment or tag me in your creations. Happy dipping!
Related update: Tzadziki
Related update: Hummus with roasted orange peppers
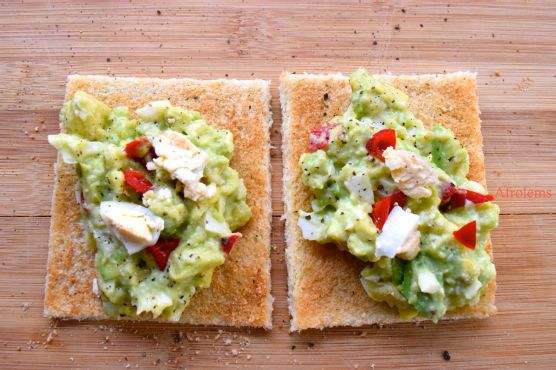
There’s something about a Saturday morning when I’m craving something simple yet satisfying, and this avocado egg salad hits just the right spot. Last week, I found myself staring into the fridge, half-awake and in dire need of coffee, when I realized I had everything I needed for a quick, hearty brunch. This recipe is a lifesaver for lazy mornings or when you just need something nourishing but don’t want to spend an hour in the kitchen. With creamy avocado and the perfect hint of spice from the scotch bonnet pepper, it’s a fresh take on a classic. Plus, you can have it ready in under 30 minutes. Trust me, you’ll want to keep coming back to this one.
Jump to Recipe
What You’ll Need
Chances are you already have most of this in your pantry or fridge, making it a breeze to whip up without a grocery run.
- 4 large eggs
- 1 ripe avocado pear
- 1 lemon
- 1/2 teaspoon black pepper
- 1 small seasoning cube
- 1 small scotch bonnet pepper
- 4 slices of whole wheat bread
How to Make Avocado Egg Salad
- Boil your eggs in a pot of water for about 10 minutes until they’re hard-boiled. Once cooked, immerse them in cold water to cool. This makes peeling a breeze.
- While the eggs cool, peel your avocado and mash it in a large bowl until smooth but with a few chunks for texture.
- Cut your lemon in half and squirt the juice over the mashed avocado. This keeps it from browning and adds a nice tangy kick.
- Once the eggs are cool, peel and chop them into bite-sized pieces, then add them to the avocado mixture.
- In a small bowl, mix the black pepper, crumbled seasoning cube, and finely chopped scotch bonnet pepper. Adjust pepper to taste if you’re not into too much heat.
- Add the spice mixture to your avocado and egg and gently combine until everything is well mixed.
- Toast your whole wheat bread until crisp and golden. The aroma alone will make your mouth water.
- Roll over the toasted bread with a rolling pin, cut the edges off for a neat presentation, and serve with a generous helping of the avocado egg salad on top.
Cook’s Notes
Here are a few nuggets of wisdom to keep in mind while making this dish:
- If your avocados are slightly underripe, you can microwave them for 30 seconds to soften.
- Scotch bonnet peppers pack a punch, so handle them carefully if you’re not a heat enthusiast. You can always start with half and add more to taste.
- This salad can be made a few hours ahead of time. Just cover it tightly with plastic wrap to keep the avocado from browning.
- Leftovers can be stored in an airtight container in the fridge for a day, although it’s best enjoyed fresh.
Make It Your Own
- Swap the whole wheat bread for a crusty baguette or sourdough for a different texture.
- Replace the scotch bonnet with jalapeños if you prefer a milder heat.
- Add a handful of cherry tomatoes, halved, for a burst of freshness.
- Mix in a spoonful of Greek yogurt for a creamier texture and a hint of tang.
If you try this, I’d love to hear how it turns out — drop a comment or tag me! Enjoy your meal, and remember, the best recipes are those you make your own.
Related update: Avocado Egg Salad

It was one of those Tuesday evenings where everything felt a little upside down. My oven was on the fritz, my dinner plans had gone awry, and yet, that familiar sweet craving hit me like clockwork. As I rummaged through my pantry, the thought of something warm and comforting felt like the perfect antidote to my topsy-turvy day. Enter, cinnamon sugar fried apples. Not only are these little guys a quick fix for any sweet tooth, but they also bring a cozy vibe that feels like a warm hug on a plate. And honestly, who doesn’t love a recipe that transforms humble ingredients into something downright delicious?
Jump to Recipe
What You’ll Need
This recipe is all about simplicity — chances are you’ve got most of this in your kitchen already. Here’s what you’ll need:
- All-purpose flour
- Apples (crisp varieties like Granny Smith or Honeycrisp work great!)
- Brown sugar
- Cinnamon
- Eggs
- Granulated sugar
- Lemon zest
- Milk
- Oil (for frying)
- Salt
- Unsalted butter
How to Make Cinnamon Sugar Fried Apples
- In a large bowl, whisk together the all-purpose flour, a pinch of salt, granulated sugar, milk, lightly beaten eggs, lemon zest, and melted unsalted butter until the batter is smooth to the touch. Cover the bowl with plastic wrap and let it rest for 30 minutes to ensure the flour fully hydrates and the flavors meld beautifully.
- While the batter is resting, core and slice your apples into 1 cm thick rings. Aim for even slices as this will help them cook uniformly. Set them aside and start heating the oil in your preferred frying vessel over medium heat.
- Once your batter has rested and your oil is shimmering and ready, dip each apple slice into the batter, allowing any excess to drip back into the bowl. Gently lay the slices into the hot oil.
- Fry the apple slices until they are golden and fragrant, about 2-3 minutes per side. You’ll know they’re ready when the edges turn a beautiful golden hue and your kitchen is filled with the nostalgic aroma of apples and cinnamon.
- As each batch finishes, transfer the fried apples to a plate lined with double-layered paper towels to drain any excess oil.
- In a small bowl, combine the brown sugar and cinnamon. Sprinkle this delightful cinnamon sugar mixture generously over the warm apple slices. Serve immediately for that perfect combination of crispy, sweet, and spiced.
Cook’s Notes
Here’s the thing: frying can be a bit of a mess, but it’s so worth it. Make sure your oil is hot enough before dipping in the apples; otherwise, they’ll soak up too much oil and get soggy. A small kitchen thermometer can be handy if you’re unsure. If you’re planning to make these ahead of time, I’d recommend just prepping the batter and slicing the apples. Frying is best done right before serving to maintain that delightful crispiness. If you do end up with leftovers, a quick reheat in the oven at 350°F should do the trick.
Make It Your Own
Want to put your own spin on these cinnamon sugar fried apples? Here are some fun ideas:
- Instead of apples, try using firm pears for a slightly different but equally delicious twist.
- For a nutty crunch, toss in some chopped pecans or walnuts after sprinkling the cinnamon sugar.
- Want a caramel vibe? Drizzle some homemade or store-bought caramel sauce over the fried apples for an extra indulgent treat.
- Looking for a boozy kick? Add a splash of spiced rum to the batter for a grown-up version.
If you try this recipe, I’d love to hear how it turns out — drop a comment or tag me in your delicious creations! Whatever you do, make sure to enjoy each crispy, sweet bite. Happy cooking! 🍏✨
Related update: Cinnamon Sugar Fried Apples
Related update: Roasted Red Pepper & Tomato Salsa
Related update: Bacon Brownie Cupcakes
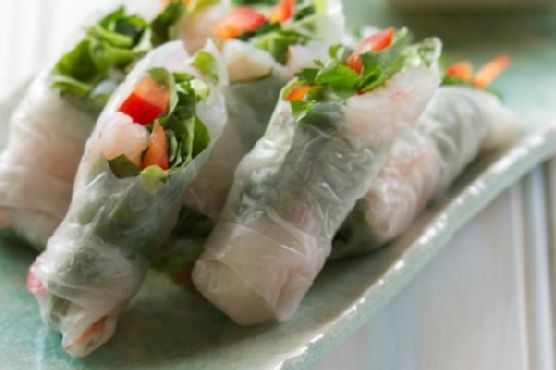
On one of those bustling weekday evenings when time seems to slip away faster than you can say “dinner,” I found myself staring into the fridge, hoping for a miracle. What I really wanted was something fresh and light but also satisfying. That’s when I remembered these Easy To Make Spring Rolls. They’re perfect for those nights when you want something delicious and impressive-looking without the fuss. Plus, they have this uncanny ability to make you feel like you’ve got your life together. Not bad for a dish that’s ready in under 30 minutes!
Jump to Recipe
What You’ll Need
This recipe is the epitome of a grab-and-go grocery list. Most of these ingredients are probably already lounging in your kitchen. Here’s what you’ll need to whip up these fresh bites of joy:
- Rice paper wrappers
- Cooked shrimp, halved
- Boston lettuce leaves
- Fresh basil, mint, and coriander leaves
- Red bell pepper, sliced into thin strips
- Chili pepper, thinly sliced (optional for a kick)
- Garlic, minced
- Fresh lime juice
- Nuoc cham for dipping
- Fish sauce
- Rice vinegar
- Sugar
- Water
How to Make Easy To Make Spring Rolls
- First, get all your ingredients prepped and within arm’s reach. Trust me, this will save you a lot of scrambling later.
- Fill a large bowl with warm water. Dip a rice paper wrapper in the water just until it softens—this means a couple of swishes should do it. It might feel slightly stiff as you take it out, but don’t worry.
- Lay the softened wrapper flat on a clean surface. In the center, line up two shrimp halves. It’s like creating a little shrimp runway!
- Top the shrimp with a few leaves of basil, mint, and cilantro. Add a layer of Boston lettuce, and maybe some red bell pepper strips and a slice of chili if you’re feeling spicy.
- Fold the sides of the wrapper inward over the filling. Start rolling from the end with the lettuce, tucking in the filling as you go for a snug little spring roll.
- Repeat with the remaining wrappers and ingredients. Once you’ve got your little spring roll soldiers lined up, cut them in half for easy handling.
- Serve them at room temperature with some nuoc cham for dipping. Don’t skip the dipping sauce—it’s the secret weapon!
Cook’s Notes
Dealing with rice paper wrappers can be a bit like handling a delicate flower. Too much time in the water and they’ll become a soggy mess. Not enough and they’ll tear when you try to roll. My trick? A quick dip and a confident hand. They’ll soften up perfectly by the time you start rolling. These rolls are best enjoyed fresh, but you can prepare all the components ahead of time and roll them just before serving. If you have leftovers, wrap them tightly in plastic wrap to keep them from drying out.
Make It Your Own
Feel free to get creative with these spring rolls. Here are some variations to consider:
- Swap the shrimp for crispy tofu to make it vegetarian-friendly.
- Add in slivers of cooked pork or chicken for a meatier bite.
- Include julienned carrots for an extra crunch and pop of color.
- Spice things up by adding a dash of Sriracha to the dipping sauce.
If you try this, I’d love to hear how it turns out—drop a comment or tag me on social media! Whether you’re a spring roll pro or a first-timer, I hope these become a fun and tasty part of your meal rotation. Enjoy every bite!
Related update: Easy To Make Spring Rolls

You know those mornings when you hit the snooze button one too many times, and suddenly you’re in a mad dash, wishing breakfast would magically appear? Yep, been there! That’s exactly how I stumbled upon these Simple Protein Pancakes. I was running late for a Saturday brunch with friends, craving something hearty yet wholesome. What I love about this recipe is how it comes together in a flash—just a quick blend, pour, and flip—but the end result feels like a treat. It’s perfect for lazy weekend mornings or even a speedy weekday breakfast when you need something filling yet fuss-free. Bonus: they’re nutritious and satisfyingly delicious, so you won’t even feel guilty drizzling on a bit of maple syrup. Jump to Recipe
What You’ll Need
This recipe is a pantry rescue mission! Chances are you already have most of these ingredients on hand, which means fewer grocery runs and more relaxed mornings.
- 1 banana, ripe and full of natural sweetness
- 2 eggs, because binding is key
- 1/2 cup of oats, to keep you energized
- 1/4 cup of greek yogurt, adds creaminess and protein
- 1/2 cup of almond milk, or your favorite plant-based alternative
- 1 scoop of Premier Protein powder, vanilla flavored for that extra protein punch
- 1 teaspoon of vanilla extract, pure magic in a bottle
- 1 teaspoon of baking powder, for a bit of lift
How to Make Simple Protein Pancakes
- Start by gathering all your ingredients. Toss the banana, eggs, oats, greek yogurt, almond milk, Premier Protein powder, vanilla extract, and baking powder into a blender. Blend for about a minute until you get a smooth, well-mixed batter.
- Let the pancake mixture sit for a couple of minutes. This allows the batter to thicken slightly, thanks to the oats soaking up some liquid.
- Meanwhile, heat your skillet over medium-high heat. You want it nice and hot before you pour the batter, so those pancakes get that delightful golden crust.
- Pour small amounts of batter onto the hot skillet. Watch for those small bubbles along the edges, your cue that it’s time to flip. This usually takes about 2 minutes.
- Flip the pancakes carefully and let them cook for another minute or two on the other side until they’re golden and cooked through.
- Stack the pancakes high, and top with your favorite fruits, nuts, or a drizzle of maple syrup for that breakfast bliss.
Cook’s Notes
These pancakes are forgiving, so don’t stress if your banana is more green than yellow. Just add a smidge of honey or maple syrup to the batter for sweetness. If you’re planning ahead, the batter can be made the night before and kept in the fridge. Just give it a good stir before using. Leftovers (if any!) keep well in the fridge for a couple of days and reheat beautifully in a toaster for a quick breakfast. Avoid over-blending to keep the batter from getting too thin.
Make It Your Own
- Swap the almond milk for coconut milk to add a tropical twist.
- If you’re out of oats, try using whole wheat flour for a similar hearty texture.
- For a chocolatey version, add a tablespoon of cocoa powder and a handful of chocolate chips—your inner child will thank you!
- Switch out the banana for half a cup of pumpkin puree and a dash of cinnamon for a fall-inspired flavor.
If you try this, I’d love to hear how it turns out—drop a comment or tag me! These pancakes have become a staple in my morning routine, and I hope they bring a little joy to your table, too. Happy flipping!
Related update: Simple Protein Pancakes
Related update: Blueberry, Chocolate & Cocao Superfood Pancakes – Gluten-Free/Paleo/Vegan
Related update: Avocado Egg Salad

Picture this: It’s a chilly February evening, and my kitchen is filled with the aroma of something sweet and promising. I had just returned from a hectic day at work, my scarf still draped haphazardly around my neck, when I realized Valentine’s Day was a mere twenty-four hours away. Inspired by the spirit of love and a bit of a sweet tooth, I decided to whip up something special yet uncomplicated — Valentine Hearts. These delightful little treats are the perfect blend of flaky, creamy, and fruity, with a touch of chocolate for good measure. They’re not just easy on the eyes, but they’re a breeze to make — perfect for those of us who don’t have hours to spend in the kitchen. Whether you’re planning a romantic dinner or just want to indulge yourself, these hearts are bound to win over anyone’s heart.
Jump to Recipe
What You’ll Need
Trust me, you probably have most of this in your pantry already. Just a quick trip to the store for a couple of fresh items, and you’re ready to go.
- Puff pastry – store-bought is perfect for this quick recipe.
- 1 egg – for that perfect golden glaze.
- Castor sugar – for a touch of sweetness on the crust.
- Canned crème fraiche – this creamy goodness holds everything together.
- Fresh strawberries – because what’s a Valentine treat without a bit of berry love?
- Plain chocolate – for drizzling on top. Decadent and delightful!
How to Make Valentine Hearts
- Preheat your oven to 220°C (425°F). Trust me, this is the sweet spot for puff pastry perfection.
- Thaw the puff pastry sheet according to the package instructions. You don’t want it too soft, just enough to handle.
- Unroll the pastry sheet gently. Use a medium-sized heart-shaped cookie cutter to cut out about 8 hearts. Go ahead, it’s okay to indulge in a little love here.
- Prick each heart with a fork to prevent them from puffing up too much. This step is crucial to keep them in shape.
- Brush each heart with beaten egg, then sprinkle lightly with castor sugar. This will give them a beautiful golden shine and a touch of sweetness.
- Place the hearts on a greased baking sheet and pop them in the oven for about 10 minutes, or until they’re risen and golden brown. Your kitchen will start smelling absolutely heavenly, I promise.
- Let them cool completely. Patience, my friend, patience.
- Slice the strawberries while the hearts cool. Once cooled, carefully split each heart horizontally using a sharp knife.
- Sandwich each heart with a generous dollop of crème fraiche and a few slices of strawberry.
- Finally, drizzle melted plain chocolate over the top and dust with a little more castor sugar. Voilà! Your Valentine Hearts are ready to impress.
Cook’s Notes
Here’s a little wisdom from my kitchen to yours. Keeping the pastry cold is key to achieving that flaky texture, so don’t let it sit out for too long. If you see the pastry getting sticky, pop it back in the fridge for a few minutes. When slicing the hearts, be gentle to avoid breaking them; a serrated knife usually does the trick. If you’re making these in advance, you can prepare the puff pastry hearts and store them in an airtight container for up to two days. Just assemble with strawberries and crème fraîche right before serving for the freshest taste.
Make It Your Own
Feeling adventurous? Here are some fun variations:
- Swap the strawberries with raspberries or blueberries for a different fruity twist.
- Use lemon curd instead of crème fraiche for a tangy surprise.
- Try white chocolate drizzle instead of plain for a sweeter, creamier finish.
- Add a pinch of cinnamon to the sugar before sprinkling on the pastry for a warm, spicy note.
If you try this, I’d love to hear how it turns out — drop a comment or tag me in your pictures! Whether you’re sharing with a loved one or treating yourself, these Valentine Hearts are sure to bring a smile. Enjoy every flaky, creamy, chocolaty bite!
Related update: Valentine Hearts
Related update: The BEST Sweet Potato Casserole
Related update: Peach Pie
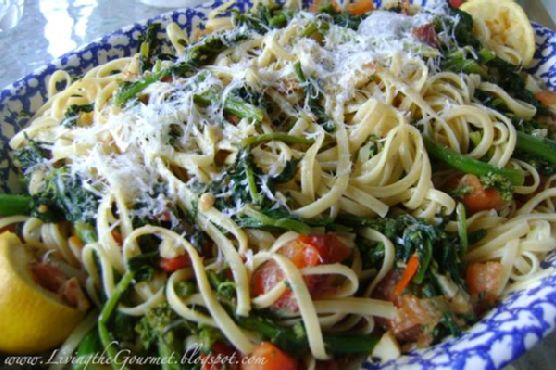
It was one of those whirlwind Tuesdays, you know, the kind where you look up and suddenly it’s 7 PM and you’re staring at your fridge like it’s a magic portal to dinner. The last thing I wanted was a complicated meal, but I was craving something a little more special than the usual weeknight pasta. That’s when I remembered this Broccoli Rabe with Tomatoes, Anchovies & Spaghetti recipe. It’s the perfect combination of quick, comforting, and just a touch fancy — like your favorite pair of jeans that still manage to make you feel dressed up. The best part? It comes together in no time, leaving you with a warm, savory bowl of goodness that feels like a little triumph over the chaos of the day.
Jump to Recipe
What You’ll Need
Before you make a mad dash to the grocery store, take a peek into your pantry. Chances are, you already have most of what you need. Here’s the simple lineup:
- 1 bunch of broccoli rabe
- 1 can of anchovies
- 3 cloves of garlic
- Juice of 1 lemon
- 1/2 teaspoon red pepper flakes
- 1/2 cup grated Romano cheese
- 12 ounces of spaghetti
- 1 cup cherry or grape tomatoes
- Olive oil
How to Make Broccoli Rabe with Tomatoes, Anchovies & Spaghetti
Ready to transform these humble ingredients into something spectacular? Here’s how:
- Start by prepping the broccoli rabe. Trim about 1 inch off the stems and then give them a quick blanch in boiling water for 3-4 minutes. This will take out the bitterness and keep that lovely green color. Drain and set aside.
- In a large frying pan, heat a couple of drizzles of olive oil over medium heat. Toss in the garlic, red pepper flakes, and tomatoes. Sauté until the tomatoes are soft and the garlic is fragrant — think of it as the kitchen’s way of saying “hello, deliciousness!”
- Add the blanched broccoli rabe to the pan and continue to sauté for a few more minutes. This step gets all those flavors mingling.
- Now, for the umami punch: add the anchovies to the pan. They’ll melt into the dish, leaving behind a savory depth that’s pure magic.
- Meanwhile, cook your spaghetti in a large pot of salted boiling water. Before draining, scoop out about 1/2 cup of the pasta water and add it to the broccoli rabe mixture. This starchy water helps create a luscious sauce.
- Drain the spaghetti and get ready to plate. On a serving platter, drizzle a bit of olive oil and sprinkle some grated Romano cheese. Add the spaghetti, top with the broccoli rabe mix, then give it a final drizzle of olive oil, a squeeze of lemon juice, and a generous dusting of Romano cheese.
Cook’s Notes
A couple of things to keep in mind: If you’re new to cooking with anchovies, don’t be scared! They dissolve beautifully and add a savory backbone without a fishy taste. Make sure not to overcook the broccoli rabe initially; you want it vibrant, not mushy.
Got leftovers? Store them in an airtight container and they’ll keep well in the fridge for a couple of days. If you plan to make this ahead, keep the lemon juice out until serving to keep everything fresh and bright.
Make It Your Own
Feel free to play around with this recipe. Here are some ideas to get you started:
- Swap the anchovies for crispy tofu to make it vegetarian-friendly.
- Add a handful of toasted pine nuts for a bit of crunch and nuttiness.
- Switch out the Romano cheese for Parmesan if that’s what you have on hand.
- Try using kale instead of broccoli rabe for a slightly milder, less bitter green.
If you try this, I’d love to hear how it turns out — drop a comment or tag me! Cooking is all about making it work for you and having a little fun along the way. Enjoy your dinner, friend!
Related update: Broccoli Rabe with Tomatoes, Anchovies & Spaghetti
Related update: Bibimbab (Korean Rice w Vegetables & Beef)
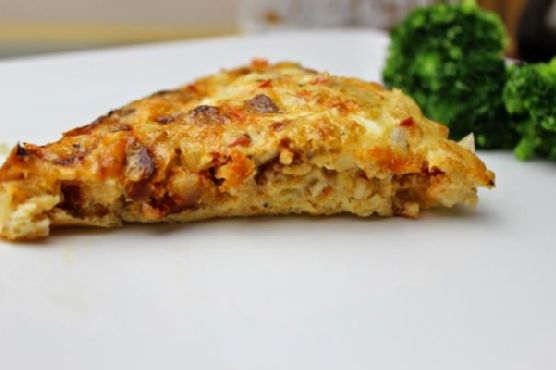
Picture this: it’s one of those hectic Tuesday nights where you’ve got about 45 minutes to get something on the table before the whole evening devolves into chaos. The fridge is looking sparse, but you’ve got a pack of chorizo, some eggs, and a block of cheddar that’s been patiently waiting for its moment in the spotlight. That’s when this Chorizo and Egg Bake comes to the rescue. It’s one of those dishes that’s deceptively simple but packs a punch of flavor that’s sure to convince everyone you planned it all along. Plus, it’s all about that melty cheese and spicy kick that makes life feel just a bit more exciting.
Jump to Recipe
What You’ll Need
The beauty of this recipe is its simplicity—you’re likely to have almost everything you need ready to go!
- 4 large eggs
- 1 cup grated cheddar cheese
- 200g smoked chorizo sausage, diced
- 1 medium onion, finely chopped
- 2 cloves garlic, minced
- 1 can red and green chillies, drained
- Salt and pepper to taste
How to Make Chorizo and Egg Bake
- Preheat your oven to 170°C. You’ll want it nice and warm to get that cheese melted just right.
- In a mixing bowl, crack the eggs and whisk them until the yolks and whites are fully combined. This is going to ensure a fluffy texture.
- Add the grated cheddar cheese, chopped onion, diced chorizo, minced garlic, and chopped chillies to the bowl. Give it all a good stir until everything’s evenly mixed. The aroma should already be enticing!
- Season generously with salt and pepper. Remember, the chorizo will add a bit of saltiness, so don’t go too wild.
- Lightly grease a baking dish to prevent sticking. Pour your eggy mixture into the dish, spreading it out evenly.
- Pop it into the oven and bake for about 20 minutes. You’ll know it’s ready when the edges start to bubble and turn a light golden brown.
Cook’s Notes
This dish is wonderfully forgiving, so feel free to tweak the ingredient amounts based on what you have. If you’re preparing it in advance, you can whisk together all the ingredients the night before and store them in the fridge. Just pour it into the baking dish and bake when you’re ready. Leftovers can be stored in an airtight container in the fridge for up to three days and are just as delicious when reheated—perfect for a quick lunch or a lazy breakfast.
Make It Your Own
- Vegetarian Twist: Swap the chorizo for your favorite meat-free sausage or sautéed mushrooms.
- Extra Veggies: Throw in some bell peppers or spinach for added color and nutrients.
- Spicy Kick: Add a pinch of cayenne pepper or a few dashes of hot sauce to the egg mixture.
- Different Cheese: Try swapping the cheddar with Monterey Jack or pepper jack for a different flavor profile.
If you give this recipe a whirl, I’d love to hear how it turns out for you! Drop a comment below or tag me on social media to share your delicious creations. Happy cooking!
Related update: Chorizo and egg bake
Related update: Broccoli Rabe with Tomatoes, Anchovies & Spaghetti
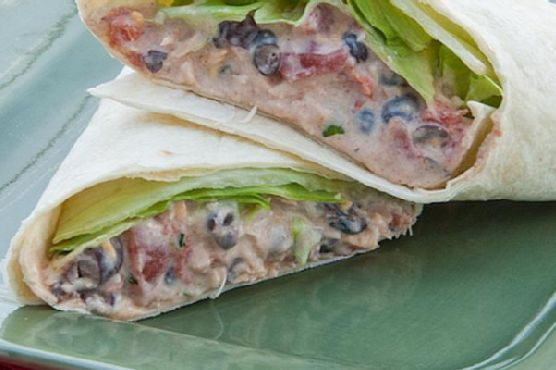
Picture this: It’s a Tuesday night, and you’re dead set on making dinner happen without a trip to the store. As I rummaged through my pantry, I found a can of Swanson Premium Chicken and thought, “Well, this could be interesting!” That’s how these Chicken Enchilada Salad Wraps came to life. They’re the kind of dish that feels like you’ve put way more effort into dinner than you really have. Perfect for when you want something comforting yet fresh and vibrant. These wraps are my go-to when I need a quick meal that doesn’t skimp on flavor. Trust me, they’re a keeper! Jump to Recipe
What You’ll Need
There’s a good chance you already have most of these ingredients hiding in your kitchen. It’s all about those pantry staples coming together to make magic.
- Light cream cheese
- Sour light cream
- Chili powder
- Cumin
- Garlic
- Canned Swanson Premium Chicken
- Shredded cheddar cheese
- Diced canned tomatoes
- Diced green onions
- Fresh cilantro
- Lettuce
- Burrito-sized tortillas
How to Make Chicken Enchilada Salad Wraps
- In a medium-sized bowl, blend together the light cream cheese, sour cream, chili powder, cumin, and garlic until smooth. You’ll want the mixture to be creamy with a little bit of a kick – smell those spices bloom!
- Gently fold in the shredded cheddar cheese, Swanson Premium Chicken, diced tomatoes, green onions, and fresh cilantro. Make sure everything is evenly mixed so you get a bit of everything in each bite.
- Divide the mixture evenly between the tortillas, making sure to spread it to the edges for maximum flavor coverage.
- Top each tortilla with a handful of lettuce. This adds a nice crunch and keeps things fresh and light.
- Roll up each tortilla burrito-style, tucking in the edges as you go to keep all the goodness inside.
- Slice in half if you’re feeling fancy and serve immediately. Enjoy the meld of textures and flavors, from cool and creamy to warm and savory.
Cook’s Notes
These wraps are pretty forgiving, so feel free to adjust the spices to your liking. If you’re a spice lover, a dash of cayenne wouldn’t hurt. They’re best enjoyed fresh but will keep in the fridge for a day or so. Just wrap them tightly in foil or plastic wrap to keep them from drying out.
- If you’re making them ahead for a lunchbox, keep the lettuce separate until you’re ready to eat to avoid it getting soggy.
- Got leftovers? They make a surprisingly good quesadilla filling. Just heat a pan and crisp them up until golden!
Make It Your Own
- Swap the chicken for crispy tofu for a vegetarian twist that still packs in the protein.
- Use spinach instead of lettuce for a slight nutritional boost and a different kind of crunch.
- If you’re out of tortillas, this mix works wonderfully as a dip with some crispy tortilla chips.
- Add some sliced avocado for an extra creamy dimension and a touch of healthy fat.
If you try this, I’d love to hear how it turns out — drop a comment or tag me! Your kitchen adventures always make my day.
Related update: Chicken Enchilada Salad Wraps
Related update: Hyderabadi baghara Baingan
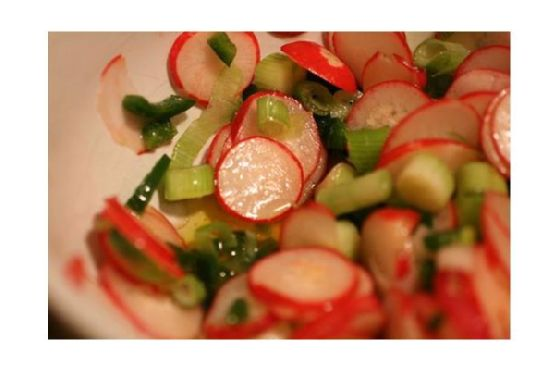
Picture this: it’s midweek, and I’ve just wrapped up a marathon day of work calls and last-minute errands. The fridge is looking a bit sparse, and my energy levels are even lower. I need something quick and bright to lift my spirits and keep me from calling for takeout. Enter my Radish and Watercress Salad. This dish is like a little burst of sunshine — crisp, peppery, and so darn easy to throw together that it almost feels like cheating. It’s the kind of salad that makes you feel like you’ve got your life together, even when you really don’t. It’s refreshing and light, yet robust in flavor, making it the perfect pick-me-up any day of the week.
Jump to Recipe
What You’ll Need
This recipe is all about fresh, vibrant flavors, and chances are, you’ve got most of these ingredients hanging around already. Here’s what you’ll need:
- Salt
- Garlic powder
- Dijon mustard — the kickstarter of flavor here
- Red wine vinegar — for that tangy bite
- Olive oil
- Lemon juice
- Watercress — peppery and fresh, the star of the salad
- Red radishes — crisp and colorful
How to Make Radish and Watercress Salad
- In a screw-top jar, combine a pinch of salt and a sprinkle of garlic powder. Add in the Dijon mustard, red wine vinegar, olive oil, and a dash of lemon juice. Secure the lid and give it a vigorous shake until everything is well blended and the dressing looks smooth and slightly thickened.
- Rinse the watercress thoroughly under cool, running water. Pat it dry with a clean kitchen towel or paper towels — no one likes a soggy salad, right?
- Thinly slice the red radishes. You want them to be thin enough to be translucent but still have a good crunch.
- In a large salad bowl, toss the watercress and sliced radishes together. Pour your freshly shaken dressing over the top, and toss again gently until everything is evenly coated.
Cook’s Notes
This salad is as straightforward as it gets, but a few tips can make it even better. When shaking the dressing, make sure the jar is sealed tight, or you’ll end up with a vinegar-scented kitchen. If you’re making this ahead, keep the dressing and salad separate until just before serving to prevent the greens from wilting. Leftovers can be stored in the fridge for a day, but honestly, this salad is best enjoyed fresh. The peppery bite of the watercress and the crunch of the radishes are what make it sing.
Make It Your Own
- Swap the watercress for arugula if you want a slightly milder peppery flavor.
- Add sliced almonds or walnuts for some extra crunch and protein.
- Throw in some crumbled feta or goat cheese for a creamy contrast.
- Mix in some thinly sliced cucumbers or avocados for additional freshness and creaminess.
If you try this, I’d love to hear how it turns out — drop a comment or tag me! Your midweek dinner game is about to get a whole lot brighter and a little bit fancier. Happy cooking!
Related update: Radish and Watercress Salad
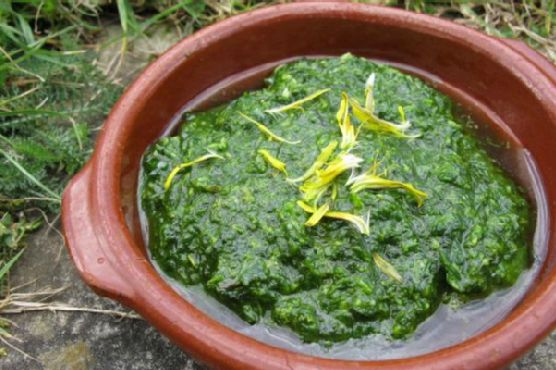
Picture this: it’s a sunny Saturday morning, and I’m wandering through my backyard, coffee in hand, when I notice these bright, cheerful dandelion heads smiling up at me. Normally, I’d think of them as weeds, but today, they spark an idea. What if I harness their vibrant energy into something delicious? That’s how I stumbled upon the magic of dandelion pesto. It’s one of those recipes that sounds a bit daring, but trust me, it’s a total game-changer. Perfect for when you want something quick but with a twist of the unexpected. The fresh bite of dandelion greens mixed with the nutty richness of pine and macadamia nuts, rounded off with a zesty lemon kick—seriously, you’ve got to try this.
Jump to Recipe
What You’ll Need
I love this recipe because it’s both adventurous and practical. Chances are, you’ll already have most of these ingredients hanging out in your kitchen or garden, just waiting to show off.
- Dandelion greens — freshly foraged, if you can!
- Fresh basil leaves
- Spinach
- The petals from dandelion flowers
- Garlic — the more, the merrier!
- Sea salt — to taste
- Pine nuts
- Macadamia nuts — they add a buttery smoothness
- Enough extra virgin olive oil to bind the sauce together
- Lemon — juice, not zest
- Nutritional yeast flakes — for that cheesy vibe without the cheese
How to Make Dandelion Pesto
- Start by washing the dandelion greens well in a solution of water and raw cider vinegar. Use a couple of tablespoons of vinegar to about a litre of water. This will help remove any lingering bitterness.
- Wash and spin dry all the greens. You want them dry enough to not water down your pesto but still glistening with freshness.
- Pop all the ingredients into a pestle and mortar or, for a quicker route, a food processor. Blitz until nearly smooth, but I like to leave it a bit chunky. The texture gives it a homemade charm.
- Taste and adjust the seasoning. Maybe a pinch more salt or a drop more lemon juice? It’s all about finding that balance that dances on your tongue.
- And that’s it! It’s simple, a little bit scrummy, and oh so rewarding.
Cook’s Notes
Here’s the deal with dandelions: you want them young and tender. As they age, they can turn bitter, and no one wants that. Also, make sure you’re picking from areas that aren’t sprayed with pesticides—keep it organic! If you’re making this ahead, store your pesto in the fridge in an airtight container with a slick of olive oil on top to keep it from browning. It’ll last about a week, but I doubt it’ll stay uneaten for that long. And if you have leftovers, toss it with pasta, spread it on a sandwich, or even swirl it into soup for an herby punch.
Make It Your Own
- Swap the pine nuts for walnuts if you want a more robust, earthy flavor.
- Add a handful of parmesan if you’re not keeping it vegan—it adds a creamy depth.
- If you’re out of spinach, arugula can step in for a peppery twist.
- Feeling spicy? Throw in a pinch of red pepper flakes for a little heat.
If you try this, I’d love to hear how it turns out—drop a comment or tag me in your pesto adventures! Happy foraging and blending!
Related update: Dandelion pesto
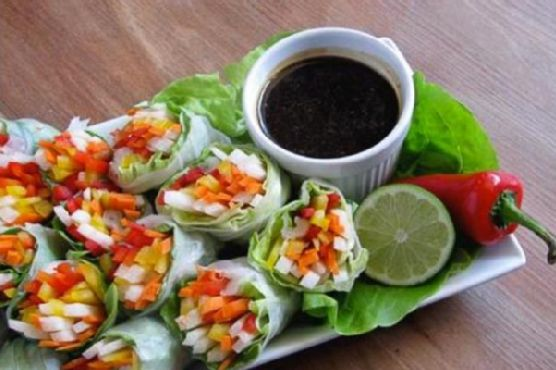
It was one of those frantic weeknights when the thought of cooking anything complicated felt like a Herculean task. The kids were hungry, my partner was stuck in traffic, and the fridge looked like it had been raided by a group of snack-hungry gremlins. That’s when I spotted the package of rice paper hiding behind the milk. In a flash, I knew what to do. These Vegetarian Spring Rolls with Garlic Lime Sauce were going to be our savior. They’re colorful, crunchy, and somehow manage to make you look like a culinary genius with minimal effort. Perfect for a quick dinner fix or when you want to impress without breaking a sweat.
Jump to Recipe
What You’ll Need
The beauty of this recipe is its simplicity — chances are, you already have most of these ingredients lurking around.
- Rice paper
- Butter leaf lettuce
- Carrots
- Jicama
- Red bell pepper
- Yellow bell pepper
- Thai basil
- Ginger
- Garlic
- Lime
- Hoisin sauce
- Sriracha
How to Make Vegetarian Spring Rolls With Garlic Lime Sauce
- First, julienne the red and yellow bell peppers, carrots, jicama, and Thai basil. Aim for strips about 1/8 inch thick and 2 inches long, like colorful little matchsticks.
- Fill a round pie pan or shallow plate with warm water. Delicately dip one piece of rice paper in the water, ensuring both sides are soaked — but no need to drown them!
- Carefully lay the rice paper on a flat, flour towel cloth. Wait about ten seconds for it to soften — it should feel silky and pliable.
- Gently peel the rice paper off the cloth and place half a butter leaf lettuce on top. Discard the ribbing to keep things smooth and easy to roll.
- Add a delicate layer of each vegetable on top of the lettuce, finishing with a sprinkle of Thai Basil. It’s like art — have fun with it!
- To roll: start at one end, fold the edge toward the middle, and repeat with the parallel side. Give it a little 90-degree turn and roll it snugly, like wrapping up a little gift.
- Cut each roll diagonally and arrange them on a serving platter, so they look all fancy and inviting.
- For the Garlic Lime Hoisin Sauce, use a mortar and pestle to crush the garlic and ginger together until fragrant. The aroma should make you smile.
- Whisk in fresh lime juice and a modest splash of Sriracha for that zingy, spicy kick. Finally, add the hoisin sauce and whisk until combined. Taste and adjust as needed.
Cook’s Notes
Rolling these can be a bit of a learning curve, but once you get the hang of it, you’re golden. Rice paper can be temperamental, so if it tears, just keep going — a little imperfection never hurt anyone. If you want to prep these in advance, keep the veggies prepped in the fridge and roll them just before serving to keep everything fresh. Leftover rolls can be stored in an airtight container in the fridge for a day, but the rice paper will lose some of its magic over time. The sauce, however, can be made days ahead and will only get better as the flavors mingle.
Make It Your Own
- Swap the jicama for cucumber for a refreshing twist.
- Replace Thai basil with cilantro if that’s more your vibe.
- For a protein boost, add slices of crispy tofu or tempeh.
- Feeling nutty? Toss in some crushed peanuts for extra crunch.
If you try this, I’d love to hear how it turns out — drop a comment or tag me! Whether it’s a weeknight fix or a dinner party appetizer, these spring rolls are sure to brighten your table and your tastebuds. Enjoy!
Related update: Vegetarian Spring Rolls With Garlic Lime Sauce
Related update: Easy To Make Spring Rolls

Picture this: It’s a dreary Wednesday morning, and my cravings for something sweet yet comforting are through the roof. I rummage through my pantry, and lo and behold, a bag of coconut flour winks at me from the back. My mind immediately darts to these heavenly Coconut Flour Pancakes with Blueberry Honey Compote. They’re a delightful balance of fluffy and fruity, perfect for when you need a little breakfast pick-me-up. Plus, they’re naturally gluten-free, so no need to worry about that! These pancakes are like a warm hug on a chilly day and are surprisingly easy to whip up. If you’re in the mood for a quick, fuss-free breakfast that’ll impress even the sleepiest of taste buds, you’ve got to try this.
Jump to Recipe
What You’ll Need
This ingredient list is straightforward and (almost) guaranteed to be stocked in your kitchen. The flavor comes from simple, wholesome ingredients and a touch of creativity.
- Coconut flour – the star of the show, bringing that fluffy texture
- Coconut milk – adds creaminess and enhances the coconut flavor
- Eggs – for structure and richness
- Honey
- Olive oil
- Baking powder
- Salt
- Frozen blueberries – juiciness and a pop of color
- Agave nectar
- Cinnamon
How to Make Coconut Flour Pancakes with Blueberry Honey Compote
- Start with the compote. In a small saucepan over low heat, add the frozen blueberries and agave nectar, then cover with a lid. If using fresh blueberries, throw in a tablespoon of water. After about 3 minutes, peek under the lid — once those juices start seeping out, add the cinnamon and stir it all up. Cover again and let it do its thing for another 10 to 15 minutes. You’ll know it’s ready when the juices become syrupy, and the berries are plump and hot. For a thicker syrup, mash the blueberries with a fork as they cook. Once perfect, remove from heat and keep covered to stay warm.
- While the compote simmers, prep the pancake batter. In a mixing bowl, combine all the wet ingredients and give them a good mix. Toss in the coconut flour, baking powder, and salt, then mix until smooth. The batter should be thick, so let it sit for about 5 minutes to thicken further.
- Heat a large skillet on medium-low and spread a little butter evenly over it. Spoon out about a third of the batter, shaping it into a pancake on the skillet. Coconut flour pancakes are a bit more stubborn, so you’ll need to shape them. If the edges of your pancakes start to spread too much, add a teaspoon of coconut flour to your batter.
- Repeat the last step for the remaining batter, ensuring each pancake has enough space to flip. Let them sit on the skillet for about 7 to 10 minutes. They’re ready to flip when the edges look set. Carefully slide a large spatula under each pancake and gently flip — be gentle as these beauties are fragile!
- Cook the pancakes for an additional 2 to 3 minutes on the other side. Once they’re golden and divine, remove them from the heat. Top the pancakes with your blueberry compote and a dusting of confectioners sugar. For an extra touch of sweetness, drizzle with agave nectar, honey, or pure maple syrup.
Cook’s Notes
Okay, let’s talk practicalities. Coconut flour is a bit finicky because it absorbs liquid like a sponge. So, if your batter is too runny, just add a teaspoon of coconut flour until you’re happy with the consistency. These pancakes can be made ahead of time — simply store them in an airtight container in the fridge for up to three days. Reheat in a skillet or microwave for a quick breakfast. Leftover compote? Drizzle it over yogurt or oatmeal for a sweet twist!
Make It Your Own
- Berry Swap: No blueberries on hand? Swap them out for raspberries or blackberries for a different flavor profile.
- Nutty Addition: Add a handful of chopped nuts into the batter for some crunch and extra protein.
- Chocolate Dream: Toss in a few dark chocolate chips to the batter for an indulgent touch.
- Spice It Up: Add a pinch of ground ginger or cardamom to the blueberry compote for a spicy kick.
If you try this, I’d love to hear how it turns out — drop a comment or tag me! These pancakes are a constant morning delight in my home, and I can’t wait for you to experience the joy they bring. Happy flipping!
Related update: Coconut Flour Pancakes with Blueberry Honey Compote
Related update: Simple Protein Pancakes
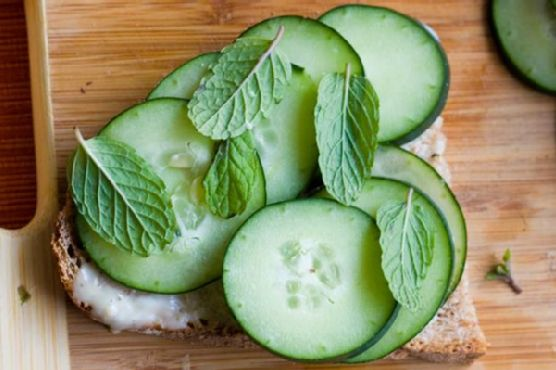
It was one of those gloriously lazy Sunday afternoons when the sun was streaming through the kitchen window, painting everything in a warm, golden hue. I found myself craving something simple yet sophisticated to nibble on while sipping a freshly brewed pot of Earl Grey. That’s when the idea of Cucumber Mint Tea Sandwiches popped into my head. These little bites are like a garden party in your mouth — refreshing, slightly spicy, and with a hint of sweet earthiness. They’re perfect for when you want to impress your friends but also fit perfectly into a no-fuss, no-mess vibe. Trust me, once you try these, they’ll become your go-to for every casual gathering or solo indulgence.
Jump to Recipe
What You’ll Need
Honestly, you probably have most of these ingredients lounging in your pantry or fridge already. And if not, they’re super easy to find on your next grocery run.
- Bread (your choice – think classy yet sturdy)
- Cucumber (cool, crisp, and refreshing)
- Wasabi Maple Spread (the secret zing)
- Black pepper grinder (for that fresh, subtle heat)
- Fresh mint leaves (fragrant and cooling)
- Fresh dill (herbaceous and bright)
- Vegenaise (creamy and delightful)
- Maple syrup (just a touch of sweetness)
- Wasabi powder (for that kick)
How to Make Cucumber Mint Tea Sandwiches
- Start by whipping together the wasabi maple spread. Combine vegenaise, a dash of maple syrup, and a sprinkle of wasabi powder until it’s smooth and slightly spicy.
- Thinly slice the cucumber. You can go for thick, crunchy slices if you’re feeling bold, or thin, silky ones for a more delicate bite. Either way, they should be refreshingly crisp.
- Gather your fresh mint leaves and dill. Rinse them under cold water and pat them dry with a clean kitchen towel. You want them to be fresh and vibrant.
- Spread a very thin layer of your wasabi maple spread on all the inside surfaces of the bread slices. It’s all about that flavor balance, not overpowering.
- Layer your cucumber slices neatly on top of the spread. Feel free to overlap them slightly. It’s like building a little cucumber brick wall.
- Add a layer of mint and dill. You can mix them up in each sandwich or go half mint, half dill if you like to keep your flavors organized.
- Grind some fresh black pepper over the top of the herbs and cucumbers. This will tie all the flavors together beautifully.
- Close each sandwich with another piece of bread and gently press down. Then, slice them into charming quarter cubes or triangles. Presentation is key!
- Plate the sandwiches, and if you’re feeling fancy, sprinkle a few edible flowers around for a pop of color and whimsy.
Cook’s Notes
These sandwiches are meant to be a fresh and light snack, so fresh ingredients are key. Make sure your cucumber is firm and your herbs are not wilting. Want to make them a few hours ahead? No problem! Just cover the platter with a slightly damp paper towel and wrap tightly with plastic wrap to keep everything moist and fresh. Leftovers (if you have any, which I doubt) can be stored in an airtight container in the fridge for up to a day — but they’re best fresh.
Make It Your Own
- Swap out the bread for a whole grain or seed variety for extra texture and flavor.
- Replace the wasabi maple spread with a spicy sun-dried tomato spread for a Mediterranean twist.
- Add a layer of thinly sliced radishes for an extra peppery crunch.
- Sprinkle a dash of red pepper flakes inside for those who love an extra spicy kick.
If you try this, I’d love to hear how it turns out — drop a comment or tag me in your tea-time creations! Happy sandwich making!
Related update: Cucumber Mint Tea Sandwiches
Related update: Vegetarian Spring Rolls With Garlic Lime Sauce

It was a Wednesday evening, and I’d just returned home after a long day that seemed to have no end in sight. You know the one — where you’re too exhausted to even scroll through your takeout apps. I peered into the fridge, hoping for a miracle, and voilà, the ingredients for Farfalle with Shrimps, Tomatoes Basil Sauce all but jumped out at me. It was like they were whispering, “We got you.” There’s something magical about pulling together a meal that feels indulgent and comforting but comes together in the blink of an eye. This dish is that kind of magic. Perfect for those nights when you want something special without the hassle.
Jump to Recipe
What You’ll Need
You might already have most of these ingredients lounging in your pantry or fridge, just waiting to become something delicious. Farfalle pasta is the star of the show, and everything else is there to make it shine even brighter.
- 1 tablespoon of butter
- 8 ounces of farfalle pasta
- 1 cup of fresh tomatoes, chopped
- 1/2 pound of fresh shrimp, peeled and deveined
- 1/2 cup of fresh basil leaves
- Salt and freshly ground black pepper, to taste
How to Make Farfalle with Shrimps, Tomatoes Basil Sauce
- Bring a large pot of salted water to a boil. Add the farfalle and cook until al dente, which should take about 10-12 minutes. You’ll know it’s ready when it’s firm to the bite yet tender.
- While the pasta cooks, melt the butter in a large frying pan over medium-high heat. Once the butter starts to bubble and gives off a nutty aroma, toss in the tomatoes.
- Sauté the tomatoes for about a minute, just until they start to soften and their juices mingle with the butter, creating a simple, vibrant sauce.
- Add the shrimp to the pan. Cook them until they turn a beautiful light pink and are cooked through, about 3-4 minutes. Sprinkle with salt and freshly ground black pepper to taste.
- Toss in the fresh basil leaves and give everything a gentle stir, letting the basil release its fragrant oils.
- Once your pasta is perfectly cooked, drain it and add it directly to the skillet with the shrimp and tomatoes. Toss everything together so the pasta is well-coated in the buttery tomato sauce.
- Serve immediately while it’s still hot, and watch as the room fills with the comforting aroma of basil and buttery goodness.
Cook’s Notes
This dish is forgiving, which is a blessing if you’re prone to distractions like I am. Keep an eye on the shrimp; they cook fast and go from perfect to rubbery in a blink. If you find your sauce getting too thick, a splash of the pasta cooking water will loosen it right up.
Leftovers can be stored in an airtight container in the refrigerator for up to two days. Reheat gently in a skillet over low heat, adding a little water to bring back the sauce’s creaminess.
Make It Your Own
- Swap out the shrimp for crispy tofu if you’re in the mood for a vegetarian twist.
- Add a handful of baby spinach along with the basil for a boost of greens.
- If you love a bit of heat, a pinch of red pepper flakes will do wonders.
- For a citrusy finish, add a squeeze of lemon juice just before serving.
If you try this, I’d love to hear how it turns out — drop a comment or tag me! Cooking is such a shared joy, and I can’t wait to hear your tales from the kitchen.
Related update: Farfalle with Shrimps, Tomatoes Basil Sauce
Related update: Cannellini Bean Side Dish With Fennel, Red Onion, and Saffron
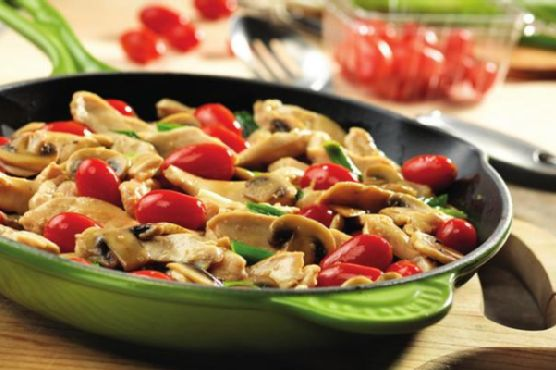
It was one of those evenings where the fridge seemed determined to sabotage my dinner plans. A random mix of odds and ends stared back at me — a handful of grape tomatoes about to bid farewell, a shy pack of mushrooms, and the ever-reliable chicken breast. I was craving something that felt like comfort but didn’t require a culinary degree. And just like that, this Chicken with Grape Tomatoes and Mushrooms came to life. It’s simple, a bit rustic, and oh, the flavors! You can whip it up in about 30 minutes, and it’s perfect for those nights when you want something special but don’t want to break a sweat.
Jump to Recipe
What You’ll Need
This dish is all about fresh simplicity. You might already have most of these beauties in your kitchen:
- 2 tablespoons olive oil
- 4 skinless boneless chicken breast halves
- 2 cups fresh mushrooms, sliced
- 2 cloves garlic, minced
- 1 cup grape tomatoes, halved
- 2 green onions, sliced
- 1 packet flavor concentrated chicken broth
- 1/4 cup water
How to Make Chicken with Grape Tomatoes and Mushrooms
- Start by heating 1 tablespoon of the olive oil in a 12-inch skillet over medium-high heat. Once the oil shimmers, add the chicken and let it sizzle until well browned, turning occasionally to get an even golden crust. This should take about 5-7 minutes. Remove the chicken and set it aside.
- In the same skillet, pour in the remaining tablespoon of oil. Toss in the mushrooms and let them cook, stirring occasionally, until they’re tender and releasing their juices, about 5 minutes.
- Reduce the heat to medium and add the garlic, grape tomatoes, and green onions to the skillet. Stir everything together for about a minute until the garlic is fragrant and the tomatoes start to soften slightly.
- Nestle the browned chicken back into the skillet. Pour in the flavor boost and water, stirring gently to combine all the flavors. Let everything simmer together for another 5-7 minutes, or until the chicken is cooked through and no longer pink in the middle.
Cook’s Notes
When cooking chicken, keep an eye on the heat. If it’s too high, the chicken can dry out and the vegetables might scorch. If you’re not a fan of mushrooms, swap them out for zucchini or bell peppers. This dish can be made ahead of time and stored in the fridge for up to 3 days in a sealed container. To reheat, simply warm it in a skillet over low heat until heated through. Avoid using the microwave if you can — it tends to make the chicken rubbery.
Make It Your Own
- Swap the chicken for crispy tofu for a vegetarian version. Just be sure to press the tofu to remove excess moisture.
- Add a splash of white wine when you add the garlic for a richer flavor profile. Let it cook off slightly before proceeding to the next step.
- If you love a bit of heat, throw in a pinch of red pepper flakes along with the garlic and tomatoes.
- For a creamier sauce, stir in a tablespoon of heavy cream right at the end.
If you try this, I’d love to hear how it turns out — drop a comment or tag me! I’m always curious to see how you make it your own. Happy cooking!
Related update: Chicken with Grape Tomatoes and Mushrooms
Related update: Farfalle with Shrimps, Tomatoes Basil Sauce
Related update: Chicken Enchilada Salad Wraps

It was one of those chaotic Tuesday mornings when everything seemed to be on fast forward. The email inbox was overflowing, the laundry was giving me side-eye, and breakfast needed to be something more inspiring than a bowl of cereal. Enter Strawberry Shortcake Pancakes. They’re like a breakfast dessert that feels a little indulgent but is grounded enough in wholesome ingredients to keep the weekday guilt at bay. These pancakes are the perfect blend of light and fluffy, with a burst of strawberry goodness that just screams “summer.” Whether you’re trying to impress your brunch guests or just need a pick-me-up to tackle the day, this dish has got you covered. Plus, it’s quick enough to throw together before that first Zoom call.
Jump to Recipe
What You’ll Need
You’d be surprised at how many of these ingredients are already sitting in your pantry, just waiting to be transformed into something fabulous.
- Greek yogurt
- Egg whites
- Whole-wheat flour
- Baking soda
- Almond extract
- Sugar
- Salt
- Dried freeze strawberries
- Fresh strawberries
- Sugar
- Fat-free whip cream
How to Make Strawberry Shortcake Pancakes
- In a small bowl, mix together the Greek yogurt, egg whites, and a splash of almond extract. The aroma of the almond extract will make you want to dive right in, but resist—it’s worth the wait.
- In another bowl, whisk together the whole-wheat flour, baking soda, sugar, and salt. This mixture should feel light and airy, the foundation of pancake perfection.
- Combine the wet and dry ingredients, whisking until just mixed. You want a smooth batter, but don’t overdo it. Stir in the dried strawberries—these little gems will add an unexpected pop of flavor in every bite.
- In a small saucepan, cook the fresh strawberries with a teaspoon of sugar over medium heat. Stir occasionally until they’re thawed and juicy, about 5-7 minutes. The kitchen will start to smell like a strawberry field and you’ll feel like a domestic goddess.
- Meanwhile, heat a skillet over medium heat and lightly coat with cooking spray. Pour 1/4 cup of batter onto the skillet. Once you see bubbles forming on the surface, it’s time to flip—aim for about 1-2 minutes per side. Flatten the batter slightly with a spatula for even cooking.
- Top your stacks with that luscious strawberry sauce, a drizzle of maple syrup, and a generous dollop of fat-free whip cream. You’ve just created a masterpiece in about 20 minutes.
Cook’s Notes
Let’s get real: even a pro can end up with a few duds in the bunch. If your pancakes are sticking, lower the heat a notch. If you’re prepping for the week, these pancakes freeze like a dream. Just make sure they’re cool before you stack them between sheets of parchment paper and seal them up for the freezer. Need a quick breakfast fix later? Pop them in the toaster to reheat!
Make It Your Own
If you’re feeling adventurous, here are a few tweaks to personalize your pancakes:
- Swap the almond extract with vanilla extract for a more classic flavor profile.
- Make it tropical with dried mango instead of strawberries and top with coconut whip.
- Add a handful of mini chocolate chips to the batter for a sweet surprise.
- For a nutty twist, toss in some crushed almonds or walnuts for added crunch.
If you try this, I’d love to hear how it turns out—drop a comment or tag me in your pancake selfies! There’s nothing better than sharing a bit of kitchen magic. Enjoy!
Related update: Strawberry Shortcake Pancakes
Related update: Chicken with Grape Tomatoes and Mushrooms
Related update: Apple Pie Smoothie
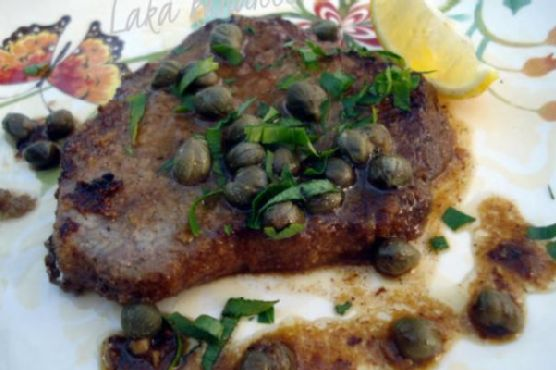
I kid you not, last Tuesday, I found myself staring blankly into my fridge, halfway between a “what’s for dinner?” crisis and the daily grind of life. You know those days, right? Everything feels like it’s at a standstill, but you need something comforting and quick to lift your spirits. Enter my trusty Steak with Lemon and Capers. It’s one of those recipes you stumble upon in desperation, fall in love with, and then never forget. The bright, tangy kick from the lemon and capers mixed with the savory goodness of a perfectly cooked steak—trust me, it’s the midweek hero we all need.
Jump to Recipe
What You’ll Need
The beauty of this dish is in its simplicity. Chances are you already have most of this in your kitchen. Here’s what you need to gather:
- Beef steak
- Butter
- Capers
- Dry white wine
- Flour
- Garlic
- Ground black pepper
- Lemon juice
- Lemon wedges
- Olive oil
- Parsley
- Salt
How to Make Steak with Lemon and Capers
- Start by giving your steaks a light pounding with a meat mallet. We’re not trying to flatten them into oblivion, just enough to tenderize.
- In a shallow dish, mix together flour, a pinch of salt, and black pepper. Dip each steak into this mixture, ensuring both sides are nicely coated.
- Heat a generous tablespoon of butter and a splash of olive oil in a skillet over medium heat. Once the mixture is hot and slightly shimmering, sauté the steaks for about 4 minutes on each side. You’re looking for a nice golden crust.
- Remove the steaks and set them aside. They’ll finish cooking in a bit, so no stress if they’re still a tad pink.
- In the same pan, toss in the minced garlic. Let it sizzle in the fragrant fat for about a minute, stirring to avoid burning.
- Pour in the dry white wine and lemon juice. Stir and let simmer for 5 minutes, letting the liquid reduce slightly and concentrate those flavors.
- Stir in the capers, letting them mingle with the sauce. The smell at this point should be divine.
- Return the steaks to the pan. Cover and let them simmer over low heat for another 4 minutes, until they’re cooked to your liking.
Cook’s Notes
Let’s talk practical here. If your steaks are on the thicker side, you might need an extra minute or two per side when searing. Don’t panic if your garlic burns a little; it happens to the best of us, and it won’t ruin the dish. For storage, keep leftovers in an airtight container in the fridge for up to 2 days. Reheat gently on the stove to avoid toughening the steak. Prepping ahead? You can coat the steaks with flour and seasoning and keep them in the fridge until you’re ready to cook.
Make It Your Own
Here are a few ideas to jazz up your steak with lemon and capers:
- Swap the beef steak for crispy tofu slabs for a vegetarian twist.
- Use lime juice instead of lemon for a sharper zing.
- Add a pinch of red pepper flakes to the sauce for a hint of heat.
- Try adding a handful of cherry tomatoes to the sauce for extra freshness and color.
If you try this, I’d love to hear how it turns out — drop a comment or tag me! Whether it’s a simple weeknight dinner or an impromptu dinner party dish, it never disappoints. Happy cooking!
Related update: Steak with lemon and capers
Related update: Vegetarian Ratatouille
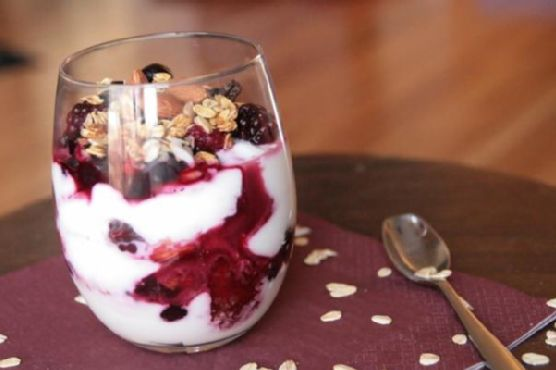
It was one of those mornings where everything seemed to go wrong. I woke up late, the cat knocked over my coffee, and I realized we were out of milk. You know those days, right? But hey, sometimes the universe gives you lemons so you can find a creative and tasty solution. On this particular day, I discovered my savior: Mixed Berry Yogurt with Almonds. It’s the kind of dish that feels luxurious without much effort—perfect for those hectic mornings or even as a healthy dessert when you want something a bit more special. The best part? It’s quick, comforting, and feels like a little scoop of joy.
Jump to Recipe
What You’ll Need
You might already have most of these ingredients nestled in your pantry and freezer, which is a huge win in my book.
- 1 cup frozen mixed berries
- 1/2 cup whole oats
- 1 cup plain Greek yogurt
- 1/4 cup whole almonds
How to Make Mixed Berry Yogurt with Almonds
- Start by toasting the almonds in a dry skillet over medium heat. Shake the skillet occasionally until they turn golden and fragrant. This should take about 3-5 minutes. Keep an eye on them; they can go from perfect to burnt in no time!
- While the almonds are toasting, scoop the Greek yogurt into a bowl or glass cup. I love using a clear glass because it shows off the layers and makes me feel like an artist.
- Evenly sprinkle the oats over the yogurt. If you want them a bit softer, you can let them sit for a minute or two to soak up some of the yogurt’s moisture.
- Microwave the frozen berries for about 30 seconds to thaw them slightly, then layer them over the oats. The warmth from the berries will start to melt into the yogurt, creating a beautiful marbled effect.
- Finally, top it all off with those perfectly toasted almonds. The crunchiness will be a lovely contrast to the creamy yogurt and juicy berries.
Cook’s Notes
This dish is super flexible, so you can tweak it based on what you have. If you want to prepare it in advance, layer the yogurt and oats first and keep the berries and almonds separate until you’re ready to serve. Leftovers can be stored in an airtight container in the fridge for up to two days, but I recommend keeping the almonds separate to maintain their crunch.
Watch out for the almond toasting process—they toast quickly and can easily burn if you’re not paying attention. Trust me, I’ve been there. If you want to make it even quicker in the morning, toast the almonds the night before!
Make It Your Own
- Swap the Greek yogurt for a creamier vanilla yogurt if you’re serving this as a dessert.
- Layer in a drizzle of maple syrup over the yogurt for an extra touch of sweetness.
- Try using walnuts or pecans if you’re out of almonds, toasting them just the same for that essential crunch.
- If berries aren’t your thing, this works beautifully with sliced peaches, bananas, or even a medley of whatever fruits you have hanging out in your fridge.
If you try this, I’d love to hear how it turns out—drop a comment or tag me! There’s nothing quite like seeing your take on these tasty creations. Enjoy every spoonful!
Related update: Mixed Berry Yogurt with Almonds
Related update: Beet Greens and Poached Eggs

It was one of those evenings where the craving for takeout hits hard, but the thought of delivery fees makes you cringe. I remember standing in my kitchen, staring at a lonely chicken breast and a couple of oranges, thinking, “Could I… maybe… make orange chicken from scratch?” Spoiler: I did, and it was magic. It turns out, whipping up a healthier version of this takeout classic is not only doable but downright satisfying. The best part? It’s a whirlwind of citrusy freshness, subtle heat, and a sweet tangy glaze that hugs every bite of tender chicken.
Jump to Recipe
What You’ll Need
So, what’s the secret sauce (pun intended) to this homemade wonder? A lot of it is probably already chillin’ in your pantry or fridge. Here’s what you’ll need:
- Chicken breast – the star; make sure it’s fresh and juicy.
- Vegetable oil
- Orange juice – squeezed or store-bought, but fresh is fab.
- Rice vinegar
- Rice wine
- Soy sauce – it’s gotta be the good stuff.
- Chili sauce
- Garlic – because what is even life without garlic?
- Brown sugar
- Orange zest – that’s where the zing comes from!
- Green onions
- Water
- Corn starch
- Salt and pepper
- White rice – fluffy and perfect for soaking up all that goodness.
How to Make Healthy Orange Chicken
- First, cut the chicken breast into bite-sized cubes. This is where the magic begins.
- In a mixing bowl, combine the chicken with orange juice, rice vinegar, rice wine, chili sauce, brown sugar, and minced garlic. Mix it up and let those flavors marinate.
- Cover the bowl with plastic wrap, pressing it down so the marinade really gets to know the chicken. Pop it in the fridge for about an hour.
- While the chicken is getting cozy in the marinade, chop up your veggies. Cut the onion into square pieces and separate the white and green parts of the green onions. Don’t forget to zest that orange!
- Heat vegetable oil in a sauté pan over high heat. Toss in the marinated chicken and sauté for about a minute. Toss it around and give it another minute until it’s golden and caramelized.
- Transfer the chicken to a dish and, in the same sizzling pan, add the chopped onion. Sauté until they’re soft and aromatic.
- Add the chicken back into the pan along with the white parts of the green onion and your glorious orange zest. Let them mingle for about 30 seconds.
- Pour in the marinade liquid and let it simmer. This is where things get saucy!
- Add the remaining green onion and let the sauce thicken to your liking. A little patience here goes a long way.
- Once the sauce has reached your preferred consistency, season with salt and pepper. Serve it over a bed of fluffy white rice, and voilà, your orange chicken masterpiece is ready!
Cook’s Notes
– Make sure not to skip the marinating process. It’s what gives the chicken all that flavor you love.
– If you’re short on time, you can marinate for less, but an hour is ideal.
– Store leftovers in an airtight container. They’ll keep in the fridge for up to three days, and honestly, the flavors get even better!
– To reheat, just pop it in a pan over medium heat. Add a splash of water if the sauce gets too thick.
Make It Your Own
- Swap the chicken for crispy tofu to keep it vegetarian. Just prep the tofu the same way!
- Add some bell pepper slices or broccoli florets for extra crunch and color.
- Switch up the sauce with a few dashes of sesame oil for a nutty twist.
- Fancy a bit more heat? A sprinkle of crushed red pepper or a drizzle of sriracha should do the trick!
If you try this, I’d love to hear how it turns out — drop a comment or tag me! And remember, cooking is all about experimenting, so don’t be afraid to put your own spin on it. Happy cooking! 🍊🍗
Related update: Healthy Orange Chicken
Related update: Cheddar Polenta With Bacon Wrapped Asparagus