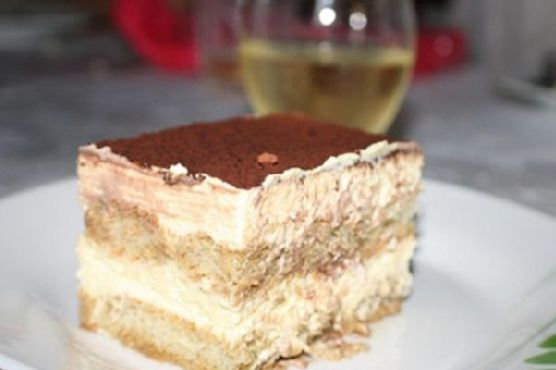
Fast Tiramisu | Made by Meaghan Moineau

Last Tuesday, in the midst of an unexpected craving for something sweet and slightly elegant, I found myself in a mini kitchen dilemma. I had promised myself a chill evening with something decadent but not labor-intensive. As I rummaged through my pantry, a vision of tiramisu danced through my mind. But not just any tiramisu — a faster, weeknight-friendly version with all the indulgence and none of the fuss. This recipe is my go-to for those dessert emergencies; it’s quick to whip up, doesn’t require baking, and is a surefire way to impress anyone who happens to drop by (or just yourself, let’s be real). It’s creamy, rich, and perfectly layered with just a hint of coffee and liqueur. Trust me, you’ll wonder why you haven’t always made tiramisu this way.

Jump to Recipe

What You’ll Need

If you’re anything like me, you’ll likely find most of these ingredients already nestled in your pantry or fridge. Here’s what you’ll need to create this dreamy dessert:

  • Egg yolks – the foundation of our creamy filling.
  • Cane sugar – to sweeten things up.
  • Mascarpone cheese – the star of the show, lending that iconic tiramisu flavor.
  • 35% heavy whipping cream – for that luscious texture.
  • Ladyfingers – to soak up all that goodness.
  • Rum, brandy, or coffee liqueur – your choice for a boozy touch.
  • Coffee – the essential bitter balance.
  • Unsweetened cocoa powder – for dusting and drama.
  • Vanilla sugar – adds a subtle hint of vanilla without the fuss.

How to Make Fast Tiramisu

  1. First, brew a fresh cup of coffee and let it cool to room temperature. Once cooled, add a splash of your chosen liqueur for a warm, aromatic twist.
  2. In a mixing bowl, whip the 35% heavy whipping cream until soft peaks form. If you have vanilla sugar on hand, toss it in for a hint of sweetness. Then, pop it in the fridge to chill.
  3. In another bowl, beat the egg yolks with 6 tablespoons of cane sugar until the mixture is thick and has taken on a lovely lemon color.
  4. Fold in the mascarpone cheese into the egg yolk mixture and continue to beat until everything is smooth and well-mixed. Add vanilla sugar if you haven’t already.
  5. Gently fold in the whipped cream from the fridge, taking care not to deflate the mixture. You want it light and airy.
  6. Quickly dip each ladyfinger into the cooled coffee mixture, ensuring they’re soaked but not soggy. Arrange them snugly in a 26cm x 40cm pan.
  7. Spread half of the mascarpone mixture over the ladyfingers, smoothing it out with a spatula.
  8. Repeat the process with another layer of coffee-soaked ladyfingers, but this time, lay them in the opposite direction.
  9. Top with the remaining mascarpone mixture, spreading it evenly to cover all the ladyfingers.
  10. Sprinkle a generous dusting of unsweetened cocoa powder over the top. This not only adds flavor but gives that classic tiramisu look.
  11. Refrigerate for at least 6 hours to let the flavors meld and the dessert set. Patience is key here!

Cook’s Notes

Chilling is crucial for tiramisu; it allows the flavors to develop and the layers to set, so resist the urge to dive in too early. If you’re in a time crunch, 4 hours will do, but 6 is ideal. This tiramisu keeps well in the fridge for up to 3 days, making it a great make-ahead dessert for gatherings. Just be sure to store it in an airtight container to prevent it from absorbing any fridge odors. When serving, a sharp knife and a clean spatula will ensure neat slices. And while it’s not traditional, a sprinkle of shaved dark chocolate can add a delightful flavor touch.

Make It Your Own

Sometimes, it’s fun to shake things up. Here are a few ideas:

  • Swap the coffee for strong chai tea and the liqueur for spiced rum for a chai-inspired twist.
  • Use chocolate ladyfingers for an extra hit of cocoa goodness.
  • For a non-alcoholic version, substitute the liqueur with vanilla extract for that added depth of flavor.
  • Try topping with matcha powder instead of cocoa for a unique, earthy flavor profile.

If you try this, I’d love to hear how it turns out — drop a comment or tag me online! Whether it’s a quiet night in or a dinner party finale, this tiramisu is set to impress. Happy indulging!

Related update: Fast Tiramisu

Related update: Whole Wheat Blueberry Brownies

5 Minute Gluten Free Wonder Buns | Made by Meaghan Moineau

It was one of those days where I had absolutely nothing planned for dinner. You know the kind — when you open the fridge door for the third time hoping something magical will appear? Well, inspiration didn’t strike until I dug through my pantry and found a bag of sorghum flour tucked behind the lentils. It was like a lightbulb went off. I needed something quick and easy, and what’s better than a warm, freshly made bun that’s gluten-free and takes just five minutes? This recipe is not only a lifesaver for those rushed evenings but also a bit like magic in a mug. It’s comforting, satisfying, and, let’s be honest, it feels like a tiny victory to whip up bread in mere minutes.

Jump to Recipe

What You’ll Need

The beauty of these buns lies in their simplicity. Most of these ingredients are likely sitting in your pantry already, making this recipe a great go-to without a trip to the store. Here’s what you’ll gather:

  • Almond meal
  • Baking powder
  • Cocoa powder
  • Egg
  • Ground flax seed
  • Molasses
  • Salt
  • Sesame seeds
  • Sorghum flour

How to Make 5 Minute Gluten Free Wonder Buns

  1. In a small bowl, crack open an egg and whisk it together with the molasses until well combined. You’ll smell the sweet earthy aroma of molasses starting to come through.
  2. In another small bowl, combine the sorghum flour, almond meal, ground flax seed, baking powder, and cocoa powder. Stir thoroughly, ensuring the mixture is even and free of clumps. The last thing you want is a surprise burst of bitter baking soda or unmixed cocoa powder.
  3. Pour the whisked eggs into the dry ingredient mixture and stir until the batter is smooth and glossy.
  4. Grab a 10 oz Pyrex custard cup, oil it lightly, and sprinkle sesame seeds on the bottom and sides. This not only prevents sticking but also adds a delightful nutty crunch to every bite.
  5. Pour the batter into the prepared cup, smoothing the top with a spoon. Sprinkle more sesame seeds on top for good measure.
  6. Pop the cup into the microwave and cook for 90 seconds. Watch as the batter rises and sets, emitting a warm and inviting aroma. Once done, let it cool for a moment before diving in.

Cook’s Notes

This recipe is pretty forgiving, but here are a few tips to keep in mind. Make sure your baking powder is fresh; otherwise, your buns won’t rise as much. If you don’t have a Pyrex custard cup, any microwave-safe mug should work, though cooking times may vary a bit. Feel free to experiment with the amount of molasses if you prefer a sweeter or less sweet bun. As for storage, these buns are best enjoyed fresh out of the microwave, but they can be stored in an airtight container for up to a day. Reheat them in the microwave for a few seconds to bring back that fresh-baked warmth.

Make It Your Own

These wonder buns are a blank canvas, ready for your culinary creativity. Here are a few ideas:

  • Swap the cocoa powder for cinnamon to create a spiced bun that pairs beautifully with morning coffee.
  • Add a tablespoon of grated cheese to the batter for a savory twist.
  • Replace sesame seeds with sunflower seeds for a different crunch and flavor.
  • For a sweeter treat, add a handful of chocolate chips before microwaving.

If you try this, I’d love to hear how it turns out — drop a comment or tag me! Whether you stick to the original recipe or put your spin on it, these wonder buns are sure to become a staple in your gluten-free recipe repertoire. Enjoy every bite!

Related update: 5 Minute Gluten Free Wonder Buns

Related update: Stuffed Pork Tenderloin with Marsala-Port Sauce

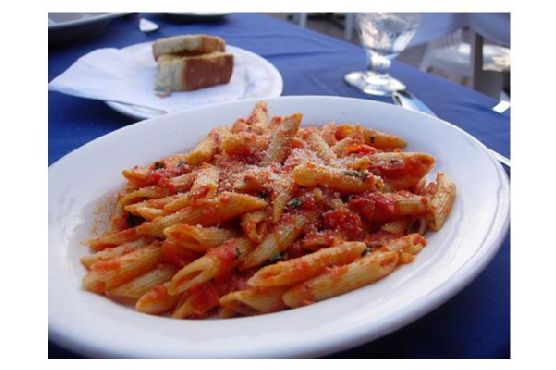
Penne Arrabiata | Made by Meaghan Moineau

So there I was, standing in my kitchen on a chilly Tuesday evening, feeling like a culinary daredevil — or maybe just a hungry one. My pantry was looking a bit sparse, but fate (or my recent grocery run) had left me with the essentials for one of my all-time favorite dishes: Penne Arrabiata. This spicy, comforting pasta is like a warm hug with a side of sass. It’s perfect for those nights when you need something quick but full of flavor, and it definitely delivers. I promise, even if your spice tolerance is on the lower side, this dish has a way of pulling you in. Grab your apron, and let’s dive in!

Jump to Recipe

What You’ll Need

The beauty of Penne Arrabiata is in its simplicity. Chances are, you already have most of the ingredients, but it’s the combination that makes the magic happen.

  • 1 packet of penne pasta
  • 1 can of whole tomatoes (Pomi boxed tomatoes work well too)
  • 5 cloves of fresh garlic, minced
  • 3 tablespoons of olive oil
  • 1 teaspoon of red dried peppers
  • 2 tablespoons of fresh Italian parsley, minced
  • Coarsely chopped fresh basil (optional, but highly recommended)
  • Salt, to taste

How to Make Penne Arrabiata

  1. First, get a large pot of water on the stove and bring it to a boil. Add a generous pinch of salt. This is your pasta’s time to shine.
  2. In a skillet, heat 3 tablespoons of olive oil over medium heat. Toss in about a teaspoon of dried red pepper. Let it sizzle gently, releasing its spicy aroma, but keep it from burning.
  3. Add the minced garlic and 2 tablespoons of parsley to the oil. Stir it around until the garlic is golden and fragrant, filling your kitchen with the most tantalizing, spicy scent.
  4. Now, it’s time for the star of the show: add the can of chopped tomatoes to the skillet. Stir everything together, cover, and let it cook until the sauce is heated through. The edges will start to bubble, and that’s your cue!
  5. Meanwhile, the pasta water should be boiling. Add the penne and cook until it’s al dente — tender but with a firm bite.
  6. Drain the pasta and add it straight into the sauce. The penne will soak up all that spicy, garlicky goodness as you mix it thoroughly.
  7. Just before serving, sprinkle some coarsely chopped fresh basil and a bit more parsley on top. Serve immediately and enjoy the aroma of fresh herbs mingling with the rich, spicy sauce.

Cook’s Notes

Ah, the joys and perils of making Penne Arrabiata! A couple of things to keep in mind: don’t go overboard with the dried red pepper unless you’re ready for a fiery experience. Also, be patient with your garlic; you want it golden, not brown. If your sauce seems too thick, a splash of the pasta cooking water can help thin it out without losing flavor.

Got leftovers? Lucky you! This dish reheats beautifully, just make sure to add a splash of water before microwaving to keep it from drying out. You could even make the sauce ahead of time and store it in the fridge for up to three days. When you’re ready, just cook the pasta and combine — dinner done in a snap.

Make It Your Own

Here are a few ways to switch things up if you’re feeling adventurous:

  • For a protein boost, swap the penne for a whole-grain version. The nutty flavor pairs wonderfully with the spicy sauce.
  • Make it vegan by adding sautéed mushrooms instead of cheese for an umami hit.
  • Swap the penne for zucchini noodles if you’re in the mood for something lighter and low-carb.
  • For a heartier dish, add cooked and crumbled Italian sausage just before serving.

If you try this, I’d love to hear how it turns out! Drop a comment or tag me in your culinary creations. Happy cooking, and may your pasta always be perfectly saucy!

Related update: Penne Arrabiata

Switch 1 & 2 Summer Game Fest Wrap-up | Analysis by Brian Moineau

TL;DR

What the source said

Nintendo Life compiled every Switch‑relevant reveal from the Summer Game Fest 2026 weekend, spanning Geoff Keighley’s opener and adjacent shows like Day of the Devs and Wholesome Direct. The roundup lists major beats such as Capcom’s Resident Evil: Code Veronica remake, Fortnite Chapter 7 Season 3 (“Runners”), Cuphead updates, Alien: Isolation 2, and several regional spotlights with Switch tags. Items are grouped by showcase with links and clear notes on platform targeting (Switch 1, Switch 2, or both). Nintendo Life positioned the post as a live index for Switch owners tracking SGF‑weekend news in early June 2026. [1] (https://www.nintendolife.com/news/2026/06/round-up-every-switch-1-and-2-announcement-from-summer-game-fests-weekend-showcases)

Why it matters

The real stakeholders are not just Nintendo fans; they include publishers allocating porting budgets in year two of a platform transition, retailers planning 2026 physical shelf space, and live‑service teams deciding which installed base gets priority for feature rollouts. SGF’s slate pointed to a pragmatic answer: ship cross‑gen when it keeps total addressable market high; claim Switch 2‑only when fidelity, AI, or CPU budgets make it worthwhile. [1][3][4] (https://www.nintendolife.com/news/2026/06/round-up-every-switch-1-and-2-announcement-from-summer-game-fests-weekend-showcases)

For Nintendo, the risk is software‑drought optics if a June 2026 Direct underdelivers. For third parties, the risk is leaving revenue on the table by going Switch 2‑only too early while 155.92 million Switch 1 owners still buy games; the weekend’s cadence suggests the industry will split the difference through 2027. [2][5] (https://www.gematsu.com/2026/05/switch-2-worldwide-sales-top-19-86-million-switch-tops-155-92-million)

Original analysis

Consensus says “Switch 2 needs wall‑to‑wall first‑party exclusives to take off.” Contrarian read: SGF 2026 hinted third parties can carry the middle of Nintendo’s 2026 calendar while Kyoto spaces out first‑party tentpoles. Capcom anchoring with Resident Evil: Code Veronica and Epic pushing Fortnite’s Runners season on Nintendo hardware together do more for platform momentum than a single Direct sizzle reel. [3][4] (https://www.gamespot.com/articles/resident-evil-code-veronica-remake-gets-first-reveal-at-summer-game-fest/)

Named‑stakeholder breakdown

Back‑of‑envelope calculation (attach‑rate math)

Historical analogue

  • In 2018, Fortnite’s Switch arrival filled calendar gaps between first‑party drops and normalized “always‑on” third‑party content on Nintendo; SGF 2026 echoes that moment with Runners bringing a modern extraction‑style loop and Code Veronica supplying a prestige horror headline. Doom (2017 Switch port) and Diablo III (2018 Switch release) steadied the eShop in 2018–2019; expect similar 2026–2027 chart stability with live‑service cadence plus one or two headline remakes. [1][4] (https://www.nintendolife.com/news/2026/06/round-up-every-switch-1-and-2-announcement-from-summer-game-fests-weekend-showcases)

Typology: Four pipelines now powering Nintendo’s 2026–2027 slate

What others are missing

The quiet power play is anti‑fragmentation across 2026–2027: publishers repeatedly labeled “Switch 1 and 2,” signaling they will treat the family as one monetizable audience for at least 18 months. That decision shapes production in concrete ways—teams build to a Switch 1 minimum spec for CPU/IO while Switch 2 lifts resolution, framerate, and AI density via higher clocks and memory headroom. This approach reduces QA risk in Nintendo Lotcheck and stabilizes revenue curves at the expense of jaw‑dropping Switch 2 exclusives in the short term. With 155.92M Switch and 19.86M Switch 2 in market, the trade is rational for live‑service titles and evergreen indies until late 2027. [1][2] (https://www.nintendolife.com/news/2026/06/round-up-every-switch-1-and-2-announcement-from-summer-game-fests-weekend-showcases)

What to watch next

  1. By September 30, 2026, Nintendo’s IR will show Switch 2 lifetime sell‑in at ≥25M and combined Switch family at ≥182M, reinforcing a long dual‑support window. [2] (https://www.gematsu.com/2026/05/switch-2-worldwide-sales-top-19-86-million-switch-tops-155-92-million)
  2. By Tokyo Game Show 2026 (September 2026), Capcom will publish Resident Evil: Code Veronica’s Switch 2 performance targets (resolution/framerate modes) alongside platform‑specific feature notes. [3] (https://www.gamespot.com/articles/resident-evil-code-veronica-remake-gets-first-reveal-at-summer-game-fest/)
  3. By December 31, 2026, at least 50% of the SGF‑listed Switch games in Nintendo Life’s roundup will have shipped on both Switch 1 and Switch 2, confirming publishers’ cross‑gen strategy. [1] (https://www.nintendolife.com/news/2026/06/round-up-every-switch-1-and-2-announcement-from-summer-game-fests-weekend-showcases)

My take

SGF 2026 did the de‑risking Nintendo needed: Capcom supplied a prestige remake, Epic refreshed the platform’s largest live‑service loop, and the indie conveyor belt stayed full across June showcases. I don’t need a June or September Direct stuffed with twenty first‑party megatons to stay bullish on Switch 2’s software curve into 2027. I need a steady mix of “runs everywhere” and “looks best here,” and the weekend set that up with Code Veronica, Runners, and a deep indie slate. If Nintendo drops one or two surprise exclusives into the fall Directs, Switch 2’s attach rate will climb without sacrificing the broader 175.78M‑device opportunity. [2] (https://www.gematsu.com/2026/05/switch-2-worldwide-sales-top-19-86-million-switch-tops-155-92-million)

Sources

  1. Round Up: Every Switch 1 & 2 Announcement From Summer Game Fest’s Weekend Showcases — Nintendo Life — The master list of Switch 1/2 announcements across SGF weekend. (https://www.nintendolife.com/news/2026/06/round-up-every-switch-1-and-2-announcement-from-summer-game-fests-weekend-showcases)
  2. Switch 2 worldwide sales top 19.86 million; Switch tops 155.92 million — Gematsu — Installed‑base numbers framing the cross‑gen business case as of March 31, 2026. (https://www.gematsu.com/2026/05/switch-2-worldwide-sales-top-19-86-million-switch-tops-155-92-million)
  3. Resident Evil: Code Veronica Remake Gets First Reveal at Summer Game Fest — GameSpot — Confirms Capcom’s SGF reveal and situates it within RE’s remake cadence. (https://www.gamespot.com/articles/resident-evil-code-veronica-remake-gets-first-reveal-at-summer-game-fest/)
  4. When does Fortnite Season 3 in Chapter 7 start? — GamesRadar — Verifies the Runners season timing in June 2026 and Epic’s in‑game communications. (https://www.gamesradar.com/games/fortnite/fortnite-season-3-chapter-7/)
  5. Everything announced at Summer Game Fest 2026 — TechRadar — Live blog corroborating the opener’s shape and Switch‑relevant beats across showcases. (https://www.techradar.com/news/live/summer-game-fest-2026-live)
  6. Every Xbox and PC game shown during Summer Game Fest 2026 — Windows Central — Cross‑checks reveal order (including Code Veronica) and the broader 2026 SGF context. (https://www.windowscentral.com/gaming/xbox/every-xbox-and-pc-game-shown-during-summer-game-fest-2026)

Wild Blueberry Lemon Muffins | Made by Meaghan Moineau

I was having one of those hectic weeks—work deadlines piling up, laundry mountain growing taller by the minute—and all I wanted was a moment of pure joy. Enter my savior: these Wild Blueberry Lemon Muffins. A burst of tart lemon and sweet summer blueberries wrapped up in a soft, buttery muffin. They’re the perfect blend of comforting and feel-good indulgence, but super easy to put together. The best part? They make your kitchen smell like heaven and taste even better! Whether you’re whipping them up for a weekend brunch or a quick weekday treat, these muffins are a little slice of bliss.

Jump to Recipe

What You’ll Need

You’re going to love how most of these ingredients are probably already sitting in your pantry or fridge. Here’s what you need:

  • 2 1/2 cups all-purpose flour
  • 2 1/2 teaspoons baking powder
  • 1/2 teaspoon salt
  • 1 cup granulated sugar
  • 1/2 cup unsalted butter, softened
  • 1 large egg
  • 1/2 cup buttermilk
  • 1 teaspoon vanilla extract
  • 1 tablespoon fresh lemon juice
  • 1 tablespoon lemon zest
  • 1/8 cup sugar (for mashing with lemon zest)
  • 1 can wild blueberries, drained
  • 1/2 cup powdered sugar (for glaze)

How to Make Wild Blueberry Lemon Muffins

  1. Start by preheating your oven to 375°F (190°C). Line 16 muffin cups with paper liners to make cleanup a breeze.
  2. In a small bowl, mash 1/8 cup sugar with the lemon zest until the sugar is moistened and fragrant. This will amp up the lemony goodness.
  3. In a medium-sized bowl, whisk together the flour, baking powder, and salt. This dry mix is the backbone of your muffins.
  4. Using an electric mixer, cream the cup of sugar and butter together until light and fluffy, about 3 minutes. Add the egg, buttermilk, vanilla, and the fragrant lemon sugar, beating each in one at a time.
  5. Slowly incorporate the flour mixture into the wet ingredients. The batter should be smooth and inviting at this point.
  6. Gently fold in the wild blueberries with a large spatula. Try not to crush them—you’re aiming for bursts of berry goodness!
  7. Divide the batter equally into the prepared muffin tins, filling each about 3/4 full. This leaves room for them to rise beautifully.
  8. Bake in the preheated oven for about 35 minutes, or until a cake tester comes out clean and muffins are golden.
  9. Let the muffins cool for a few minutes in the pan before transferring them to a wire rack.
  10. While the muffins cool, whip up your glaze by combining the lemon juice, zest, and powdered sugar. Stir until smooth.
  11. Spoon about 1 tablespoon of glaze over each muffin, allowing it to drizzle down the sides for that enticing sweet-tangy finish.

Cook’s Notes

If you can, use wild blueberries—they have a more intense flavor and smaller size, making them perfect for muffins. Make sure to drain them well before adding to the batter to keep it from getting too wet. Store your muffins in an airtight container; they stay fresh on the counter for up to three days or can be frozen for up to a month. If you want to prepare ahead, mix the dry ingredients the night before to save time.

Make It Your Own

  • Swap canned wild blueberries for fresh ones if they’re in season for a less sugary taste.
  • Replace the lemon with orange zest and juice for a citrusy twist.
  • Use almond extract instead of vanilla for a nutty undertone.
  • Try adding a teaspoon of poppy seeds to the batter for an extra crunch.

If you try this, I’d love to hear how it turns out—drop a comment or tag me on social media! Happy baking, and may your week be as sweet as these muffins.

Related update: Wild Blueberry Lemon Muffins

Related update: Penne Arrabiata

Related update: Fast Tiramisu

Related update: Blueberry Almond Crescent Rolls

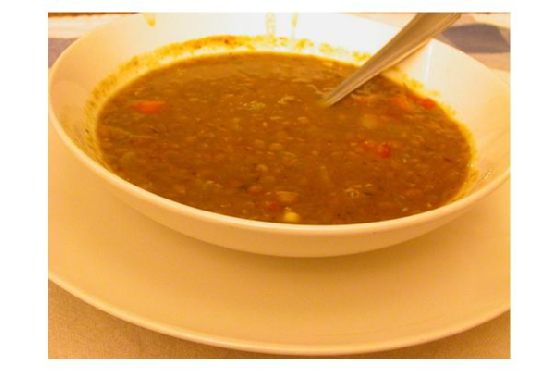
Moosewood Lentil Soup | Made by Meaghan Moineau

It was one of those chilly Tuesday evenings when my fridge looked more like a barren land than a source of inspiration. I had a long day, and there was no way I was going out again. As I rummaged through the scant produce and pantry items, the idea of a comforting pot of soup materialized like magic. That’s when Moosewood Lentil Soup came to the rescue. It’s the kind of recipe where simplicity meets warmth, and it rewards you with a bowl of deliciousness that feels like a hug from the inside. Plus, everything you need is probably already sitting in your kitchen, waiting to transform into something fabulous.

Jump to Recipe

What You’ll Need

The beauty of this recipe is its accessibility. Chances are you already have most of this list on hand, just waiting for their moment in the spotlight. Here’s what you’ll need:

  • Lentils
  • Water
  • Grapeseed oil (or butter, if you’re feeling indulgent)
  • Onion
  • Celery
  • Carrots
  • Garlic
  • Salt
  • Black pepper
  • Dried herbs (your choice!)
  • Fresh lemon juice
  • Brown sugar
  • Red wine vinegar
  • Tomatoes

How to Make Moosewood Lentil Soup

  1. Start by placing the lentils and water in a soup pot or Dutch oven. Bring it to a boil, then lower the heat to a simmer. Let the lentils cook until they’re mushy; this should take about 45 minutes. Keep an eye on the pot and add more water as needed until you get your favorite soup consistency.
  2. While the lentils are doing their thing, heat some oil in a medium-sized skillet. Add in the chopped onion, celery, and carrots. Sauté over medium heat for about 10 minutes; you’ll know it’s ready when the veggies are soft and the kitchen smells heavenly.
  3. Add the minced garlic, along with some salt, pepper, and any dried herbs you fancy. Keep sautéing for another 5 minutes to let all those flavors meld and get cozy.
  4. Transfer your aromatic veggie mixture into the pot with the lentils. Stir in the lemon juice and a touch of brown sugar. If you’re in the mood, add a splash of red wine vinegar.
  5. Taste your creation to adjust the seasonings. Let the soup simmer for at least another 15 minutes. This is where the magic happens as all the flavors marry together beautifully.
  6. Serve your soup piping hot, with a drizzle of vinegar on each serving and a sprinkle of minced scallions or parsley if you’re feeling fancy.

Cook’s Notes

Here’s the deal: this soup is forgiving. If you find the lentils have soaked up more water than anticipated, just add a bit more to reach the consistency you love. It’s not an exact science. For those who adore a bit of heat, a pinch of red pepper flakes does wonders. The soup keeps well in an airtight container in the fridge for up to 5 days, making it perfect for meal prep. It also freezes beautifully, so don’t hesitate to make a double batch.

Make It Your Own

  • Swap the lentils for split peas or even chickpeas for a different texture and flavor.
  • Substitute the grapeseed oil with olive oil for a richer taste.
  • Add spinach or kale in the last few minutes of cooking for an extra boost of greens.
  • Replace the red wine vinegar with apple cider vinegar for a slightly sweeter tang.

If you try this, I’d love to hear how it turns out—drop a comment or tag me! Whether it warms you up on a cold night or becomes your go-to comfort dish, this Moosewood Lentil Soup is sure to find a special place in your recipe repertoire. Happy cooking, friends!

Related update: Moosewood Lentil Soup

Related update: Homemade Broccoli Cheddar Soup

Hush Puppies | Made by Meaghan Moineau

Imagine this: it’s a rainy Tuesday evening, and I’m staring into my pantry like it’s going to magically whip up dinner for me. You know those days when the fridge is playing hard to get and the clock is laughing in your face? Well, that’s when I turn to my trusty Hush Puppies recipe. These little golden nuggets save the day every time — they’re crispy, comforting, and the kind of simple that feels like a win even when everything else is chaos. Plus, they come together in a flash, which is exactly what you need when the hangry hits.

Jump to Recipe

What You’ll Need

There’s a good chance you’ve already got most of these on standby. That’s the beauty of this dish: minimal ingredients with maximum flavor payoff. Check out what you’ll need:

  • 1 small onion, finely chopped
  • 1 cup cornmeal
  • 1/4 cup flour
  • 1 tablespoon baking powder
  • 1 teaspoon salt
  • 1 egg
  • 1/2 cup milk
  • Oil for frying (vegetable or canola works best!)

How to Make Hush Puppies

  1. Start by grabbing a large mixing bowl and toss in your cornmeal, flour, baking powder, and salt. Give it a good stir until everything is well combined.
  2. In a separate medium bowl, crack in the egg and beat it with a fork until it’s all mixed up. Add in the chopped onion and milk, then stir until it’s nice and smooth.
  3. Pour the eggy onion mixture into the dry ingredients. Stir until it’s all combined into a thick, slightly lumpy batter. You’re aiming for a texture that holds its shape.
  4. Heat up about 2-3 inches of oil in your deep-fat fryer or a heavy skillet over medium-high heat. You want it to shimmer but not smoke — that’s your cue it’s hot enough.
  5. Once the oil is ready, drop heaping teaspoons of batter into the pan. They’ll plummet to the bottom but magically rise to the top as they cook. Fry about 5-6 at a time without overcrowding.
  6. Keep an eye out — after 1-2 minutes, the puppies should be a gorgeous golden brown. That’s when you’ll know they’re done. Use a slotted spoon to fish them out and let them drain on paper towels.

Cook’s Notes

Don’t overmix the batter; a few lumps are perfectly fine and keep the texture just right. The oil needs to be hot enough to ensure the hush puppies cook quickly and don’t soak up excess oil. If you’re making them ahead, you can fry them lightly and finish them off in a hot oven just before serving. They’re best enjoyed fresh but keep well in an airtight container for a day or two. Reheat them in the oven to maintain that crunch.

Make It Your Own

Here’s where you can get creative:

  • Spice it up: Add a pinch of cayenne pepper or a chopped jalapeño for a kick.
  • Cheesy twist: Stir in a handful of shredded cheddar cheese to the batter for some gooey goodness.
  • Herbal accents: Mix in some chopped chives or parsley for a fresh pop of flavor.
  • Sweet spin: Swap out the onion for corn kernels and add a teaspoon of sugar for a sweet-savory combo.

If you try this, I’d love to hear how it turns out — drop a comment or tag me! Remember, the best recipes are the ones you make your own. Enjoy your hush puppies and all the cozy vibes they bring.

Related update: Hush Puppies

Surface Laptop Ultra: Nvidia‑Powered AI | Analysis by Brian Moineau

TL;DR

  • Microsoft’s Surface Laptop Ultra is the first flagship Windows laptop built around Nvidia’s RTX Spark SoC, advertising up to 1 PFLOP of local AI compute and 128GB unified memory, but a 110W design target signals “desktop-class” throughput will hit battery walls in mobile use [2][3][5].
  • The story is stack control in 2026: Microsoft and Nvidia are bringing CUDA and Blackwell‑class GPU tech to Windows on Arm, a strategic end‑run around Intel and AMD and a direct challenge to Apple’s MacBook Pro line [2][5].
  • If RTX Spark laptops ship in volume and key ISVs optimize Windows‑on‑Arm CUDA paths, 2026–2027 could echo Apple’s 2020 M1 inflection—only with Nvidia setting the cadence for PC “AI laptops” [5][6].

What the source said

ZDNET’s hands‑on from Taipei at Computex 2026 calls Surface Laptop Ultra the standout RTX Spark device, noting a 15‑inch 3:2 PixelSense Ultra mini‑LED panel rated at 2000 nits HDR and 262 ppi, plus creator‑friendly I/O (2×USB‑C, USB‑A, HDMI, SD, 3.5 mm) in a metal chassis [1]. It reports Nvidia’s ARM‑based RTX Spark pairing a 20‑core CPU with GPU performance “roughly equivalent” to a GeForce RTX 5070, and configurations up to 128GB unified memory aimed at local AI [1]. Thermal changes include a dual‑fan, dual‑heat‑pipe layout and a slightly raised base to improve airflow in the 15‑inch form factor [1]. Open items include price tiers, RAM options, measured battery life, and preorder timing signaled as “late summer/early fall” 2026 [1].

Why it matters

For Microsoft in 2026, Surface Laptop Ultra is public proof that Windows on Arm can lead the “AI PC” story with CUDA, fifth‑gen‑class Tensor Cores, and unified memory, rather than trailing x86 laptops on battery life alone [2][5]. The device provides a credible counter to Apple’s MacBook Pro narrative in creative and on‑device inference workloads just as developers decide where to target Stable Diffusion, Llama‑3, and NeRF pipelines for client compute [2][5].

For Nvidia, Spark PCs extend its data‑center CUDA dominance into client devices on Windows, which could bind independent software vendors to CUDA toolchains across 2026–2027 [3][5]. If the bet pays off, Intel and AMD face a squeeze from an Arm+Blackwell package while Apple maintains its integrated stack; studios and consumers win on local LLMs and video tools—if battery life and price don’t dull the pitch [3][6].

Original analysis

Surface Laptop Ultra is a stack play masquerading as a laptop

The spec sheet grabs attention—1 PFLOP AI, 20 Arm CPU cores, and up to 128GB unified memory—but the strategic move is CUDA on Windows on Arm delivered via a Blackwell‑class GPU in a unified‑memory SoC [2][4][5]. That gives Microsoft a first‑party flagship where ISVs can ship the same CUDA kernels across workstation, data center, and laptop without re‑architecting for disparate memory models [2][5].

Consensus take: “Surface Laptop Ultra is a MacBook Pro killer because it matches performance with AI flair” [1]. Contrarian read: this is a CUDA land grab on Windows, not a copy‑paste of Apple’s 16‑inch formula [2][5].

Apple’s edge remains vertically integrated silicon, hardware media engines, and battery efficiency proven since the M1 in 2020; Microsoft’s counter is a developer‑first path where Stable Diffusion XL, Llama‑3 variants, NeRFs, and video upscaling run on familiar CUDA code in 2026 [2][5]. For teams already standardized on CUDA for training and inference, developer gravity favors Spark even if Metal and Core ML perform well in Apple’s ecosystem [2][5].

Back‑of‑envelope: battery reality check

Assume an 84 Wh battery; display at ~350 nits draws ~7 W; platform idle ~5 W; sustained AI/video averages ~55 W on a 110 W‑TDP Spark SoC under creator workloads [3].

  • Total draw ≈ 5 + 7 + 55 = ~67 W.
  • Heavy AI runtime ≈ 84 Wh / 67 W ≈ 1.25 hours.
  • Mixed creator session (35 W average) ≈ 84 / (5 + 7 + 35) ≈ 1.9 hours.
    Takeaway: expect “AI at the desk” performance and short unplugged runs in 2026 unless workloads throttle or displays dim aggressively [3].
2×2: Where Surface Laptop Ultra sits

Axes: Y = AI throughput; X = mobility/endurance.

  • High throughput, low endurance: Surface Laptop Ultra (RTX Spark, 110 W target) and creator rigs like Razer Blade 15 with H‑class CPUs/GPUs [3].
  • High throughput, high endurance: MacBook Pro with M3 Max‑class efficiency and media engines for ProRes/HEVC/AV1 workflows [1].
  • Low throughput, high endurance: Snapdragon X‑class ultrabooks tuned for office tasks and light copilots at <20 W sustained.
  • Low throughput, low endurance: Legacy thin‑and‑lights with small dGPUs that throttle under sustained loads.

The trade: Ultra prioritizes CUDA‑grade throughput on Windows over battery endurance, which fits desk‑bound creator sessions in 2026 [3][6].

Historical analogue: 2020’s M1 reset

In 2020, Apple’s M1 unified CPU+GPU+NPU and memory architecture shifted laptop performance‑per‑watt, but the win crystallized when Final Cut Pro, Logic Pro, and Metal‑optimized Adobe/Blender updates arrived in the same year [2020][1]. Spark laptops echo that pattern in 2026: silicon is newsworthy, yet success hinges on ISVs shipping Windows‑on‑Arm CUDA builds and model toolchains that “just work” [2][5]. Nvidia’s advantage is portability from DGX/GeForce to client via CUDA and Blackwell Tensor Cores, while Microsoft supplies Windows compatibility and Surface industrial design [2][5].

Named‑stakeholder breakdown
  • Microsoft: Gains a flagship to anchor Windows on Arm for creators; must defend pricing and battery optics in 2026 channel reviews [1][2].
  • Nvidia: Extends CUDA from DGX and GeForce into “AI PCs,” setting de facto client inference standards during the 2026–2027 cycle [5].
  • Apple: Retains endurance and media‑engine leadership on MacBook Pro, but faces CUDA gravity nudging cross‑platform studios toward Windows.
  • Intel/AMD: Risk losing high‑margin creator tiers if OEMs adopt Arm+Blackwell; need clear x86 AI acceleration roadmaps before CES 2027.
  • Qualcomm: Remains vital for mainstream Arm laptops, but Spark grabs the performance spotlight at Computex 2026 [6].
  • ISVs (Adobe, Blackmagic, Topaz, Autodesk): Biggest upside is one CUDA pipeline scaling from RTX desktop to Spark laptops; challenge is engineering Windows‑on‑Arm releases on 2026 timelines [2][5].

What others are missing

Unified memory at “up to 128GB” is not a vanity spec; it eliminates costly PCIe host‑to‑device copies for multi‑gigabyte KV caches and tiles in LLM/VLM and 4K–8K video pipelines that blow past VRAM limits on split‑memory designs [2][5]. Diffusion models with long context windows, multi‑stream color‑managed timelines, and 16‑bit float buffers gain when CPU and GPU share a coherent pool in 2026 workflows [2][5]. Nvidia’s messaging highlights a coherent CPU‑GPU memory model with full CUDA on Windows on Arm; Microsoft echoes this in its Surface Ultra post [2][5]. If ISVs expose that coherency in their schedulers, Spark laptops can outperform similar‑TFLOP rivals on memory‑bound tasks even at the same wattage [2][5].

What to watch next

  1. By Q4 2026, independent reviews will record under‑2‑hour battery life for sustained local AI video upscaling on Surface Laptop Ultra at default panel brightness, using repeatable benchmarks [3][6].
  2. By December 31, 2026, at least two top creative ISVs (for example, Adobe or Blackmagic) will ship Windows‑on‑Arm CUDA builds that beat their own x86 Windows versions on identical workloads at matched power settings by a statistically significant margin [2][5].
  3. By CES 2027 (January 2027), three or more major OEMs beyond Microsoft will announce second‑wave RTX Spark laptops with ≤80 W TDP bins aimed at all‑day assistant and light‑creator use cases [6].

My take

Surface Laptop Ultra aims to be the CUDA laptop you can carry to a 2026 shoot, not the longest‑lasting notebook in a 12‑hour flight [2][5]. If I’m editing 6K ProRes, iterating Gen‑2 diffusion shots, and fine‑tuning a 13B LLM locally, identical CUDA code paths on a premium Windows machine beat two extra hours of battery for my workflow [2][5]. Microsoft and Nvidia are betting creators will plug in at the desk and want accelerated local inference at home and studio [3][5]. If ISVs deliver Arm‑CUDA builds this year, the “AI PC” label graduates from marketing to measurable gains in 2026 [2][5].

Sources

  1. ZDNET — Hands‑on with Microsoft Surface Laptop Ultra at Computex 2026 — What this contributes: concrete display specs (2000‑nit HDR, 262 ppi), ports, thermal layout, and open questions on pricing and battery.

  2. Microsoft Devices Blog — Introducing Surface Laptop Ultra (May 2026) — What this contributes: official confirmation of RTX Spark on Windows on Arm, Blackwell‑class GPU, CUDA support, and up to 128GB unified memory.

  3. Tom’s Hardware — Surface Laptop Ultra targets 110W TDP for RTX Spark Superchip (2026) — What this contributes: reported 110 W design target and realistic performance/power trade‑offs for the 15‑inch chassis.

  4. TechSpot — Microsoft unveils Surface Laptop Ultra with Nvidia RTX Spark and up to 128GB RAM (2026) — What this contributes: launch summary including 20‑core Arm CPU and 15‑inch form factor context.

  5. NVIDIA Newsroom — NVIDIA and Microsoft bring RTX Spark PCs with up to 1 PFLOP AI and unified memory (2026) — What this contributes: Nvidia’s framing of CUDA, Blackwell‑class Tensor Cores, and the Windows client stack.

  6. Tom’s Guide — I tested Microsoft Surface Laptop Ultra at Computex 2026 — What this contributes: independent hands‑on and confirmation that multiple Spark laptops debuted at the Taipei show.
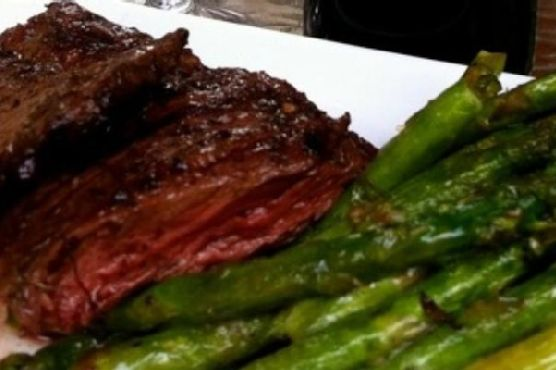
Chimichurri Skirt Steak with Grilled Asparagus | Made by Meaghan Moineau

Last Tuesday, I found myself standing in front of the fridge, aimlessly scrolling through takeout options on my phone. It was one of those evenings, you know? The kind where the day just takes a toll, and the thought of cooking seems exhausting. But as I eyed a bunch of asparagus that was just on the brink of wilting, I decided to make something quick yet comforting. Chimichurri Skirt Steak with Grilled Asparagus it was! This dish is a flavor bomb — the kind of meal that feels like a mini celebration, but really comes together with minimal fuss. Plus, the chimichurri sauce? It’s like a magic potion that instantly elevates anything you drizzle it on.

Jump to Recipe

What You’ll Need

The beauty of this dish is in its simplicity. Chances are, you already have most of what you’ll need in your kitchen. Here’s what you’ll be grabbing:

  • Skirt steaks – about 1.5 pounds
  • Flat leaf parsley – a generous handful
  • Fresh mint leaves – a small handful
  • Fresh oregano leaves – a small handful
  • Garlic cloves – 4 to 5, because more is more
  • Shallot – 1 medium-sized
  • Red wine vinegar – a splash for that tangy kick
  • Olive oil – enough to get things silky
  • Lemon juice – a squeeze
  • Kosher salt
  • Black freshly cracked pepper
  • Chili pepper flakes – optional, for a bit of heat
  • Green or white asparagus – a bundle, ready for grilling

How to Make Chimichurri Skirt Steak with Grilled Asparagus

  1. First, let’s tackle the chimichurri sauce. Place all the ingredients except for the olive oil — parsley, mint, oregano, garlic, shallot, red wine vinegar, lemon juice, salt, pepper, and a pinch of chili flakes — in a food processor. Pulse until everything is well chopped.
  2. With the processor running, slowly drizzle in the olive oil until you have a smooth, vibrant green sauce. Remember to reserve half of this for serving.
  3. Season both sides of the skirt steaks with salt and pepper. Generously spoon the remaining chimichurri sauce over the steaks, making sure they’re well coated. Let them marinate for at least 30 minutes or even overnight in the fridge if you have the time.
  4. While your steaks are soaking in all that flavor, pre-heat your grill to a cozy 350-400°F.
  5. In a large resealable plastic bag, toss your asparagus with a glug of olive oil, a clove of minced garlic, and a sprinkle of salt and pepper. Shake it like you’re in a dance-off to ensure everything’s coated, then place the asparagus in a grill basket.
  6. When the grill is hot, place the steak and the basket of asparagus directly over the flames. Turn the asparagus occasionally, basting with the garlic oil for about 10 minutes, until tender.
  7. Grill the steaks to your liking — about 5 to 8 minutes per side should do it for medium-rare. Let them rest for 10 minutes before slicing against the grain into long, juicy strips.
  8. Finally, spoon the reserved chimichurri sauce over the steak slices and serve with the beautifully grilled asparagus. Enjoy the symphony of flavors!

Cook’s Notes

This dish is seriously forgiving. If you don’t have a food processor, no worries — a blender or some good knife skills will get you there. Just chop everything finely and mix. Resting the steak after grilling is key — it lets the juices redistribute, so your meat isn’t dry.

  • If you’re marinating overnight, let the steaks come to room temperature before grilling for even cooking.
  • Leftover chimichurri can be stored in the fridge for up to a week and is perfect for drizzling over roasted veggies or mixing into scrambled eggs.

Make It Your Own

  • Swap the skirt steak with a flank steak for a slightly leaner option. Just keep an eye on the cooking time.
  • If mint isn’t your thing, use cilantro instead — it adds a nice, fresh twist.
  • For a vegetarian version, use thick slices of portobello mushrooms in place of the steak.
  • Mix it up with rainbow carrots instead of asparagus for a colorful plate.

If you try this, I’d love to hear how it turns out — drop a comment or tag me in your photos! Cooking is all about sharing the love, and I can’t wait to see your take on this dish. Happy grilling!

Related update: Chimichurri Skirt Steak with Grilled Asparagus

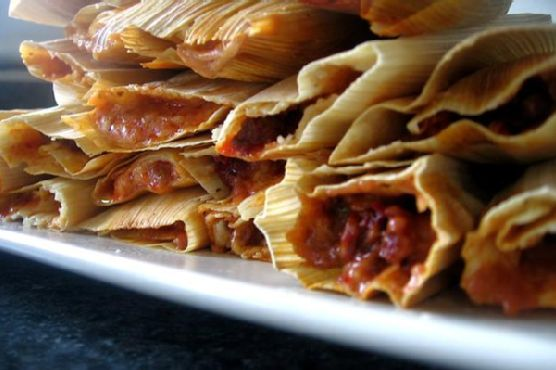
Beef, Poblano & Cheese Tamales | Made by Meaghan Moineau

The first time I attempted to make tamales, it was a classic case of my eyes being bigger than my expertise. I had this craving for something hearty yet comforting, and tamales seemed like the perfect challenge. Spoiler alert: the kitchen looked like a masa massacre by the end of it. But with a little patience and practice, these Beef, Poblano & Cheese Tamales have become my go-to for impressing friends without losing my mind in the process. They’re just the right mix of savory and spicy, with a cheesy twist that keeps you coming back for more. Plus, the aroma that fills your kitchen is like a warm hug from a friend you haven’t seen in ages.

Jump to Recipe

What You’ll Need

You might already have most of these staples in your pantry. And if you don’t, trust me, it’ll be worth the grocery run.

  • Dried corn husks
  • Dried California chili pods
  • Ground beef
  • Shredded mozzarella cheese
  • Diced poblano pepper
  • Garlic, minced
  • Olive oil
  • Goya seasoning
  • Salt
  • Chili powder

How to Make Beef, Poblano & Cheese Tamales

  1. Start by soaking the corn husks in hot water in a large bowl. They need to be pliable, so give them at least 20 minutes.
  2. In a large saucepan, bring 4 cups of water to a boil. Remove any string-like bits from the chili pods and throw them into the boiling water with half a packet of Goya seasoning. Cover it up and let it all simmer for about 20 minutes.
  3. Once the chili pods have softened, blend them with 2 cups of the chili stock until you get a smooth sauce. Drain the rest of the stock from the saucepan, but keep it handy.
  4. Put the saucepan back on medium heat. When any leftover stock evaporates, add a splash of olive oil, then toss in the onion and beef. Break apart the beef as it cooks.
  5. Season the beef with a packet of Goya seasoning and chili powder, then let it cook for about 5 minutes until it gets a bit brown.
  6. Pour in the chili sauce, followed by the garlic and about 2 teaspoons of salt. Add the diced poblano pepper now for the best flavor. Turn the heat down to medium-low, partially cover the pan, and let it simmer for an hour. The sauce should thicken nicely.
  7. While the beef is simmering, make the corn masa mix. In a large bowl, combine the instant corn masa mix, water, baking powder, salt, and olive oil. Mix until it’s spongy.
  8. Now for assembly: spread the masa mix thinly on the right side of a corn husk, leaving about 2 inches at the left edge clear. Spoon about 2 tablespoons of the meat mixture and a sprinkle of cheese onto the masa. Roll it up starting with the right-hand side, and fold the left flap over.
  9. If you’ve got a double boiler, great! If not, a metal colander in a large pot will do. Arrange the tamales so they’re snug but not squashed.
  10. Boil 2 cups of water in the pot (or about 1 inch high), then reduce the heat and add the tamales. Place a towel between the colander and lid to keep the steam in. Let them steam for 30 minutes.

Cook’s Notes

Soaking the corn husks longer is better than less, so patience pays off here. When blending the chili pods, you might have to stop and scrape the sides of the blender to get a smooth sauce. And hey, don’t stress if your masa isn’t perfectly even when you spread it — it’s homemade charm we’re going for, not factory precision.

Leftovers? Store them in an airtight container in the fridge; they’ll last up to a week. Reheat them by steaming again or even in the microwave wrapped in a damp paper towel to keep them from drying out. You can also freeze them for up to three months, just make sure they’re cool before you pack them up.

Make It Your Own

  • Swap the ground beef for shredded chicken or even pulled pork for a different protein punch.
  • Try smoked gouda or Monterey Jack instead of mozzarella for a unique cheesy twist.
  • If you’re a veggie lover, add in some sautéed mushrooms or zucchini with the poblano for extra texture.
  • For a spicy kick, mix in some diced jalapeños or serrano peppers when you add the poblano.

And there you have it! If you try this, I’d love to hear how it turns out — drop a comment or tag me! These tamales are a labor of love, but trust me, they are totally worth it. Enjoy every bite!

Related update: Beef, Poblano & Cheese Tamales

Related update: Chimichurri Skirt Steak with Grilled Asparagus

Moroccan Spiced Chicken Under A Brick | Made by Meaghan Moineau

It was one of those weeks where everything felt like a mad dash. The kind where your to-do list is longer than your patience, and the only thing you’re craving is something that feels like a warm hug on a plate. Enter: Moroccan Spiced Chicken Under A Brick. It sounds fancy, right? But trust me, it’s deceptively simple and perfect for when you want to impress without the stress. Plus, there’s something deeply satisfying about the way the flavors meld together, transporting you somewhere far more exotic than your messy kitchen. This dish is all about that crispy skin and bold, aromatic spices. You’ll see why it’s become a favorite weeknight escape for me.

Jump to Recipe

What You’ll Need

Let’s talk about the ingredient list. It’s one of those recipes where you’re likely to have most items already. And the ones you don’t? Well, they’re worth the trip to the store because they pack a punch.

  • Whole chicken
  • 3-4 garlic cloves
  • Fresh cilantro leaves
  • Sea salt
  • Lemon zest
  • Saffron threads
  • Olive oil
  • Paprika
  • Ground cumin
  • Black pepper
  • Cayenne (if you like a little heat)

How to Make Moroccan Spiced Chicken Under A Brick

  1. First, grab your mortar and pestle. Combine the garlic, a handful of cilantro leaves, one teaspoon of salt, lemon zest, and a pinch of saffron. Smash it all into a fragrant paste. It should smell like a garden in full bloom.
  2. Stir in about 3 tablespoons of olive oil until everything is beautifully combined. This is your flavor-packed paste of dreams.
  3. Take your chicken and rub it all over with the paste. Don’t be shy — get it everywhere, even between the skin and breast meat. This is where the magic happens.
  4. Place the chicken on a tray or platter, skin side up, and cover it loosely with plastic wrap. Refrigerate for at least 2 hours. If you’ve got the time, let it go up to 6 hours. This step lets the flavors really sink in.
  5. About 30 minutes before you’re ready to roast, take the chicken out of the fridge. Let it come to room temperature; this helps it cook evenly.
  6. Preheat your oven to 450°F (230°C). While it heats, place a heavy pan (like cast iron) on top of the chicken to press it down. This is the “brick” part — it ensures that golden crispy skin you’re after.
  7. Roast the chicken for about 35-45 minutes. You’ll know it’s done when the skin is a deep, enticing golden brown, and the kitchen smells like you’ve been transported to the heart of a Moroccan spice market.

Cook’s Notes

Let’s keep it real: the saffron might be a splurge, but it’s worth it for that unique, earthy aroma. If you don’t have a mortar and pestle, a small food processor will do in a pinch. Just don’t overblend — we want a paste, not a smoothie! Store any leftovers in an airtight container in the fridge for up to 3 days. Reheat gently in the oven to keep that skin crisp. Pro tip: You can make the paste the day before, which is a real time-saver on a busy day.

Make It Your Own

  • Swap the chicken for crispy tofu for a vegetarian take. Just press the tofu to remove excess water before marinating.
  • Out of cilantro? Try parsley or even mint for a different herbaceous twist.
  • If saffron’s not your thing, a pinch of turmeric will give you that lovely color and an earthy flavor.
  • Want more heat? Double up on the cayenne or add a bit of smoked paprika for a smoky kick.

If you try this, I’d love to hear how it turns out — drop a comment or tag me! Cooking is all about sharing and experimenting, so let me know how you make this dish your own. Enjoy every bite!

Related update: Moroccan Spiced Chicken Under A Brick

Related update: Beef, Poblano & Cheese Tamales

Caleb Williams Channels Michael Jordan | Analysis by Brian Moineau

TL;DR

  • Caleb Williams’s Madden NFL 27 cover mirrors Michael Jordan’s Chicago-skyline iconography, dropping a Bears QB into the city’s MJ canon on day one [1], [2].
  • This is a multi-brand swing: EA Sports gets a fresh Chicago narrative, the Bears get first-ever cover validation, and Williams pushes bold IP amid an “Iceman” trademark dispute with George Gervin [1], [4], [6].
  • The headline worry is a “Madden Curse,” but the real risk is brand overreach; if on-field results dip or the Gervin clash escalates, the Jordan homage flips from accelerant to flashpoint [1], [4].

What the source said

NBC Sports and the Associated Press report that the standard Madden NFL 27 cover places the Chicago skyline behind Caleb Williams as he recreates his jump pass against Green Bay, with Williams saying he wanted to “pay respect to MJ” and that a meeting with Jordan is “in the works” [1], [2]. He shrugged off the “Madden Curse” by pointing to Patrick Mahomes’s win after his own cover appearance, a precedent that aired on NFL.com in past discussions of the trope [1], [5]. EA’s deluxe edition leans into Williams’s “Iceman” nickname with a white-jersey, snow-flake motif, even as he acknowledged George Gervin’s prior claim to the moniker in NBA lore [1], [3], [4]. Williams joins the short list of recent NFL cover stars, a club that includes league-MVP caliber names since 2019 [1], [5].

Why it matters

The core stakeholders are EA Sports, the Chicago Bears, and Williams’s camp, and each has a different scoreboard. EA gains a cover star tied to Chicago’s Jordan mythology, perfect for launch trailers and Madden Ultimate Team beats that can visually echo the skyline across the 2026 cycle [1], [3]. The Bears, based at Halas Hall in Lake Forest, Illinois, finally place a player on the main cover, a first that signals national relevance beyond the NFC North and sells well to sponsors who buy reach through 17 regular-season weeks [6].

For Williams, the upside is cultural shorthand from day zero and a clear merchandising lane around the “Iceman” persona—if he can secure clean rights. The catch is legal: George Gervin’s filings and public statements raise a USPTO fight that could surface as an opposition or coexistence deal in 2026, with headlines that might shadow every Soldier Field home game [4]. When the cover is a thesis statement, every Sunday in Chicago becomes a brand audit.

Original analysis

Historical analogue: the “Mahomes exception,” 2019 → 2020

The “Madden Curse” narrative bent in 2019 when Patrick Mahomes fronted Madden NFL 20 and then won the Super Bowl that season, reframing the cover as a heat check for rising QBs rather than a hex [5]. That sequence proved the cover can add lift if the on-field arc holds—image plus wins equals lore, not noise [5]. Williams’s Chicago skyline play borrows that template: fuse a city’s myth with a present-tense ascent so the art becomes inseparable from the player’s 2026 story [1]. The bet is simple: performance converts homage into history.

Contrarian read

Consensus says the risk is a curse or too-soon pressure for a rookie in 2026. The sharper risk sits in IP and iconography management: Williams’s “Iceman” nickname faces conflict with George Gervin’s prior use and filings, which can trigger an opposition window or co-branding carve-out during the game’s promo cadence [4]. If the USPTO file goes loud in Q3 2026, EA loses a clean deluxe-edition motif and Williams forfeits a tidy merchandising spine just as national broadcasts spike attention [3], [4]. Superstition doesn’t crater a brand; courtroom paper and muddled rights can.

Named-stakeholder breakdown

  • EA Sports (EA Tiburon + publishing): Gains a Chicago-led storyworld that can echo across Ultimate Team, loading screens, and promos from August to January 2026 [1], [3].
  • Chicago Bears (front office, marketing): Land their first main-cover athlete, a recruiting and sponsor talking point that travels beyond Illinois and Wisconsin [6].
  • Caleb Williams’s camp: Gets a national platform and a Jordan-adjacent silhouette; risks a forced retreat from “Iceman” if a 2026 office action or opposition lands [1], [4].
  • George Gervin (and counsel): Holds leverage through prior “Iceman” fame and filings, making coexistence talks or a narrow license a rational 2026 outcome [4].
  • Nike/Jordan Brand (indirect): No formal tie-in announced, but the skyline homage speaks their Chicago dialect and keeps the MJ aura in circulation without new product [1].
  • NFL + NFLPA (licensing): A Chicago-centric cover can broaden casual reach and support player-licensing narratives through the 2026 season window [3], [6].

A typology for cover bets

  • Myth Tappers: Anchor to city canon for instant resonance (Williams → MJ skyline → Chicago) [1].
  • Skill Showcases: Pose equals archetype (Lamar Jackson’s speed; Josh Allen’s arm) [5].
  • Dynasty Signals: Coronate multi-year dominance (Tom Brady; Patrick Mahomes) [5].
  • Redemption Pitches: Recast after injury or slump (rarer, higher variance).

Williams is a Myth Tapper by design, which is potent but binary. If he’s playoff-good in 2026, the image cements into lore; if he’s scattershot in two Bears–Packers tilts, it reads as cosplay [1], [2].

What others are missing

EA and the Bears pinned the main cover to a single rivalry snapshot—a fourth-down jump pass against the Green Bay Packers—thereby staking claim to the most charged street in Illinois–Wisconsin sports, not just Chicago’s skyline [1], [2]. That decision forces every 2026 Bears–Packers meeting to re-litigate the cover in real time on FOX, CBS, or NBC, which amplifies either triumph or trolling. The creative is efficient mythology that can print on Wabash Avenue billboards and Lambeau Field signs, but it’s brittle because the frame ties Williams to one opponent with receipts. If Green Bay sweeps the 2026 series, the art becomes a meme accelerator, not a banner [2].

What to watch next

  1. By September 30, 2026, EA deploys at least one in-game presentation package or Ultimate Team cosmetic that reproduces the Chicago-skyline/MJ silhouette motif across Madden NFL 27 menus or cards [3].
  2. By Week 12 of the 2026 NFL season, a national broadcast (FOX, CBS, NBC, or ESPN/ABC) runs a split-screen of the Williams cover next to a current-season Bears–Packers highlight, explicitly calling out the homage on-air [1], [2].
  3. By December 31, 2026, the “Iceman” trademark dispute triggers a visible USPTO step—an office action, opposition, or coexistence filing—followed by a public comment from Williams’s or Gervin’s representatives [4].

My take

I like the audacity because Chicago in 2026 needs a singular QB image as much as it needs third-down conversions on the Lakefront. Williams stapled the city’s Jordan star to a global title from EA Sports and dared the NFC North to measure him against it [1], [3]. That courage carries brand debt; every Soldier Field prime-time throw becomes a ledger entry. If Williams stacks wins, the cover turns into wallpaper across Illinois and beyond; if the season wobbles or “Iceman” stalls at the USPTO, the art ages in dog years [4].

Sources

  1. Caleb Williams pays homage to Michael Jordan on Madden 27 cover — NBC Sports (https://www.nbcsports.com/nfl/profootballtalk/rumor-mill/news/caleb-williams-pays-homage-to-michael-jordan-on-madden-27-cover) — Core report with Williams’s quotes, skyline concept, “Iceman” nod, and curse context.
  2. Caleb Williams strikes jump-throw pose for Madden NFL 27 cover — Associated Press (https://apnews.com/article/51bcc01f6b4a60b75aa91e0d34386a8c) — Independent confirmation of the cover, pose, and Green Bay framing.
  3. Caleb Williams Named EA SPORTS Madden NFL 27 Cover Athlete — EA (press release) (https://news.ea.com/press-releases/press-releases-details/2026/Caleb-Williams-Named-EA-SPORTS-Madden-NFL-27-Cover-Athlete/default.aspx) — Publisher strategy backdrop and feature set cues for live-service tie-ins.
  4. The Budding ‘Iceman’ Trademark Dispute Between Caleb Williams and George Gervin, Explained — Sports Illustrated (https://www.si.com/nfl/bears/budding-iceman-trademark-dispute-caleb-williams-george-gervin-explained) — Details on competing filings, potential oppositions, and legal timelines.
  5. Bears QB Caleb Williams channels Michael Jordan on ‘Madden NFL 27’ cover — NFL.com (https://www.nfl.com/_amp/madden-nfl-27-cover-caleb-williams-bears-qb) — League context on the MJ homage and the Mahomes precedent for post-cover success.
  6. Bears QB Caleb Williams’ ‘Madden 27’ cover revealed — Chicago Sun-Times (https://chicago.suntimes.com/bears/2026/06/03/bears-caleb-williams-madden-27-cover-revealed-quarterback-video-game-nfl-ea-sports) — Local verification that Williams is the first Bears player to front the main Madden cover.


Related update: We recently published an article that expands on this topic: read the latest post.


Related update: We recently published an article that expands on this topic: read the latest post.


Related update: We recently published an article that expands on this topic: read the latest post.

Tasty Easy Meatloaf | Made by Meaghan Moineau

The other night I found myself staring at a package of ground beef and the clock ticking closer to dinner. You know that moment when you want something comforting but don’t want to commit to a culinary marathon? Well, meatloaf was calling my name. But not just any meatloaf—this was going to be the kind that gets the family excited, the kind that leaves everyone asking for seconds. It’s not just easy; it’s tasty, satisfying, and oh-so-worth it. A perfect blend of savory and a hint of sweet, this meatloaf turns the usual into the extraordinary.

Jump to Recipe

What You’ll Need

If you’re like me, chances are you already have most of this tucked away in your kitchen. Let’s make this as fuss-free as possible!

  • 1 lb ground beef
  • 1/2 lb bulk sausage
  • 1/2 cup breadcrumbs
  • 1 small diced onion
  • 1 egg
  • 1 teaspoon salt
  • 1/2 teaspoon pepper
  • 1 teaspoon cumin
  • 1 teaspoon garlic powder
  • 1 cup canned tomato sauce, divided
  • 2 tablespoons cider vinegar
  • 2 tablespoons brown sugar
  • 2 tablespoons whole grain mustard
  • 2 tablespoons Worcestershire sauce
  • 1/4 cup water

How to Make Tasty Easy Meatloaf

  1. Preheat your oven to 350°F (175°C). This is the start of something wonderful.
  2. In a large bowl, mix together the ground beef, sausage, breadcrumbs, onion, egg, salt, pepper, cumin, garlic powder, and half of the tomato sauce. The trick is not to over-mix—keep it gentle to avoid a dense loaf.
  3. Shape your mixture into a loaf and place it in a shallow ovenproof pan. The sides should slope down gently, like a little hill of deliciousness.
  4. In a separate bowl, combine the remaining tomato sauce, cider vinegar, brown sugar, mustard, Worcestershire sauce, and water. Stir until the sugar is dissolved and the sauce is smooth.
  5. Pour this sauce over the meatloaf, letting it cascade down like a savory waterfall.
  6. Pop the pan into the oven and let it bake for about 1 hour. Every 20 minutes, spoon some of the sauce resting in the pan over the top of the loaf. This keeps it moist and full of flavor.
  7. Once baked through, the edges will look caramelized and the top glossy. Take it out of the oven and let it rest for 10 minutes. This pause lets the juices settle so each slice stays juicy.

Cook’s Notes

Making a meatloaf isn’t rocket science, but a few tips can make all the difference. First, don’t overwork the meat mixture; it’s tempting, but less is more for a tender loaf. If you like your meatloaf with a bit more of a kick, add a dash more Worcestershire sauce to the mix. Leftovers? Store them in an airtight container in the fridge for up to 3 days. They make wicked meatloaf sandwiches, trust me.

Make It Your Own

Here are some simple swaps to keep things interesting:

  • Go Turkey: Substitute the ground beef and sausage with ground turkey for a lighter version.
  • Spice It Up: Add a chopped jalapeño to the meat mixture if you like a bit of heat.
  • Cheesy Delight: Mix in a cup of shredded cheddar cheese for an oozy surprise.
  • Herby Twist: Toss in some chopped fresh herbs like parsley or thyme for an extra layer of flavor.

If you try this, I’d love to hear how it turns out—drop a comment or tag me in your meatloaf adventure! Happy cooking!

Related update: Tasty Easy Meatloaf

Related update: Moroccan Spiced Chicken Under A Brick

Cherry-Berry Pie With Agave Nectar All-Butter Crust | Made by Meaghan Moineau

It was one of those lazy Sunday afternoons when the world seemed to move a little slower, a gentle breeze fluttering through the open window, the kind that makes you crave something comforting and sweet but not too complicated. My sweet tooth was whispering “pie” in my ear, but I wasn’t up for a full-blown kitchen marathon. Enter my Cherry-Berry Pie with Agave Nectar All-Butter Crust—a delightful, not-too-sweet pie that’s as satisfying to make as it is to eat. It’s my go-to when I need that perfect mix of summery fruitiness and buttery crust without spending all day in the kitchen. Trust me, this pie is a game-changer, and the addition of agave nectar gives it a uniquely mellow sweetness that pairs beautifully with the tart berries. Jump to Recipe

What You’ll Need

The beauty of this pie is its simple ingredient list, many of which you likely have on hand. Plus, the mix of flours and agave nectar gives the crust an irresistible texture and flavor.

  • Agave nectar
  • Sweet agave nectar
  • Almond flour
  • Frozen mixed berries
  • Butter
  • Frozen cherries
  • Coconut flour
  • Flour
  • Lemon juice
  • Orange extract
  • Tapioca flour
  • Whole wheat pastry flour

How to Make Cherry-Berry Pie With Agave Nectar All-Butter Crust

  1. Start by making the crust: In a food processor, pulse the dry ingredients about 5-6 times. This helps them blend evenly.
  2. Add 2 sticks of very cold butter, which you’ve cut into cubes. Pulse until the mixture resembles a very coarse meal, tiny butter bits are a good thing here!
  3. Add the agave nectar and either the fiore di Sicilia flavoring or its substitute, orange extract, one tablespoon at a time. Watch carefully for the dough to just come together.
  4. Divide the dough into two parts, one slightly larger than the other. This larger portion will be your base.
  5. Form each into a flat, round shape, wrap tightly in plastic, and refrigerate for at least 2 hours to let the butter firm up and flavors meld.
  6. While the dough is chilling, whip up the filling. In a large bowl, combine all the filling ingredients thoroughly. It’s going to be quite soupy, so don’t worry!
  7. Once the dough has chilled, let it sit out just long enough to be rollable. Roll out the larger dough disk to fit your pie dish, patching as needed.
  8. Wrap the pie dish with the crust in plastic and chill for another 30 minutes to set.
  9. Pour the berry filling into the chilled crust, then wrap the whole pie in plastic again and pop it back in the fridge.
  10. Roll out the remaining dough disk and use cookie cutters to cut pieces for the top crust. Get creative with shapes!
  11. Remove the pie from the fridge and decorate with your cut-out dough pieces, leaving some gaps for steam to escape.
  12. Cover the edges with foil to prevent over-browning and bake in a preheated 325°F oven for 40 minutes.
  13. Remove the foil and continue baking until the top is golden brown and the filling is bubbling enticingly.
  14. Let the pie cool slightly before slicing in to let the filling set a bit more. Enjoy!

Cook’s Notes

Here’s the scoop: keeping the butter super cold is crucial for that flaky crust we all adore. I like to freeze mine and work quickly to keep it from warming up. If you find the dough a bit too firm after chilling, let it sit out a few minutes until it’s manageable. When it comes to storage, this pie is a champ! Cover it well and it keeps nicely in the fridge for up to 4 days. If you’re making it ahead, bake it a day early; the flavors meld beautifully overnight.

Make It Your Own

Feel free to play around with the recipe a bit to suit your taste or pantry:

  • Swap out the frozen cherries for fresh ones if they’re in season; just pit and halve them.
  • Try maple syrup instead of agave for a more robust sweetness.
  • Use a gluten-free flour blend in place of the wheat and pastry flours for a gluten-free version.
  • Add a teaspoon of cinnamon or nutmeg to the filling for a spiced twist.

I hope you give this pie a whirl and let it bring a bit of sunshine into your kitchen. If you try this recipe, I’d love to hear how it turns out—drop a comment or tag me on social media! Happy baking, friends!

Related update: Cherry-Berry Pie With Agave Nectar All-Butter Crust

Potatoes Smothered with Egg Sauce (Cariucho) | Made by Meaghan Moineau

Just the other day, I found myself in that all-too-familiar midweek dinner scramble. You know, staring into the fridge with the existential weight of “What am I going to make tonight?” hanging over my head. That’s when I remembered this gem of a recipe—a comforting, heartwarming dish that feels like a hug in food form: Potatoes Smothered with Egg Sauce, or Cariucho. It’s the kind of dish that feels special enough for a weekend but easy enough to whip up on a Wednesday night. With a creamy sauce that hugs tender potatoes and a spicy kick from jalapeños, it’s the perfect blend of comfort and a little spice to keep things interesting. Plus, it’s one of those recipes where you might just have everything you need already hanging out in your pantry.

Jump to Recipe

What You’ll Need

This recipe is straightforward and relies on a few key ingredients to shine. Chances are, you already have most of this in your kitchen:

  • Big red russet potatoes
  • 1 scallion, chopped
  • Unsalted butter
  • Canned achiote seeds
  • Scallions
  • Flour
  • Fresh cilantro
  • Salt & pepper
  • Milk
  • Heavy cream
  • Hard-boiled eggs, chopped
  • Jalapeño, chopped
  • Cooked bacon, crumbled

How to Make Potatoes Smothered with Egg Sauce (Cariucho)

  1. Start by cooking your potatoes. Place them in a large pot, cover with water, and toss in a tablespoon of salt and the chopped scallion. Cook until the potatoes are tender when pierced with a fork, then turn off the heat and let them sit in the warm water.
  2. While the potatoes are cooking, melt the butter in a pan or sauce pot over medium heat. Add in the achiote seeds, stirring gently to extract their vibrant color into the butter.
  3. Once the butter turns a yellowish-orange hue, remove the achiote seeds with a spoon. They’ve done their job!
  4. Throw in the scallions and sauté them for 2-3 minutes until they’re soft and fragrant.
  5. Add the flour and cilantro to the pan, stirring constantly for about a minute, just enough to cook out the raw flour taste.
  6. Pour in the milk, season with salt and pepper, and let it cook for another minute. The sauce should start to thicken up a bit.
  7. Add the heavy cream and continue cooking until the sauce reaches a creamy, luscious consistency.
  8. Once the sauce is thickened to your liking, gently stir in the chopped hard-boiled eggs and jalapeño. This is where the magic happens!
  9. To plate, peel the skins off the warm potatoes. It’s a bit messy, but trust me, it’s worth it.
  10. Arrange the peeled potatoes on your serving platter and generously pour over the egg sauce. Finish with a sprinkle of crumbled bacon for that irresistible smoky touch.

Cook’s Notes

A couple of tips to keep your cooking stress-free:
– If you’re worried about overcooking the potatoes, check them a few minutes before you think they’re done. A fork should slide in easily but not split them apart.
– The achiote seeds are just for color, so don’t panic if you can’t find them. Your sauce will still taste delish without that sunny hue.
– Make sure the sauce thickens nicely before adding the eggs; you want it to coat those potatoes like a dream.

For leftovers, keep them in an airtight container in the fridge. Reheat on the stovetop and maybe add a splash of milk or cream to bring back that silky sauce.

Make It Your Own

The beauty of this dish is its flexibility. Here are some ideas to switch it up:

  • For a vegetarian version, swap the bacon with crispy tofu, giving you that same delightful crunch.
  • If you’re not a fan of cilantro, try using fresh parsley or chives for a different herbal note.
  • For a more robust flavor, switch out the russet potatoes for sweet potatoes. The sweetness pairs beautifully with the creamy, spicy sauce.
  • If you’re a cheese lover, sprinkle some grated cheddar or crumbled feta over the top right before serving.

If you try this, I’d love to hear how it turns out—drop a comment or tag me in your culinary adventures! Enjoy the creamy, comforting goodness of this dish.

Related update: Potatoes Smothered with Egg Sauce (Cariucho)

Related update: Tasty Easy Meatloaf

Destiny 2’s Peaceful Farewell Update | Analysis by Brian Moineau

TL;DR

  • Destiny 2’s last trailer tees up Monument of Triumph on June 9, 2026, with Ikora Rey’s “rest now, Guardian” sendoff as Bungie ends active development while keeping servers online for the Last City faithful. [1][2]
  • This is a freeze, not a funeral: Sony booked roughly $765–766 million of Bungie impairments for FY2025 (ended March 31, 2026), so halting Destiny 2’s update treadmill caps burn and preserves goodwill for a long‑tail “collection” product. [4][5]
  • The patch rewires the economy and access model—daily Bright Dust rotations, a single Destiny 2: The Collection SKU, and Sparrow Racing League’s return—signaling a playable museum that’s stable, light‑touch, and still monetizable. [2]

What the source said

Forbes reported on June 5, 2026 that Bungie released what is likely Destiny 2’s final trailer, pairing the June 9 Monument of Triumph update with imagery of the healed Traveler over the Last City and narration from Ikora Rey. The article lists reprised weapons and new armor sets, emphasizes Sparrow Racing League’s return as the “last new mode,” and notes lingering lore threads like “bind the Nine” left unresolved. It captures a tone of elegy and finality while acknowledging players’ hope for a hypothetical Destiny 3 that isn’t greenlit in 2026. [1]

Why it matters

  • Bungie is shifting from “forever updates” to preservation: on May 21, 2026, the studio said Monument of Triumph on June 9, 2026 marks the end of active development for Destiny 2, with servers staying online—echoing Destiny 1’s museum state after Age of Triumph in 2017. That reframes Destiny 2 as an evergreen product, not a growth treadmill. [2][1]
  • The portfolio math is visible in Sony’s filings: across FY2025, Sony recorded about $765–766 million in impairment losses tied to Bungie, including a $204 million hit disclosed in Q2 FY2025. In that light, ending Destiny 2’s live ops looks like risk containment while Bungie incubates new games such as Marathon. [4][5]

Original analysis

Consensus says: “Ending updates for Destiny 2 is a tragedy driven by corporate missteps.” Contrarian read: freezing Destiny 2 now is the least‑bad option that preserves the IP’s cultural equity and stops a cost spiral as engagement slid on PC; in March 2026, Steam concurrency hit all‑time lows per third‑party trackers, a trend that contextualizes Sony’s impairments and Bungie’s pivot. [7][5]

Named‑stakeholder breakdown

  • Bungie: Converts Destiny 2 into a curated museum with a lean maintenance team while staking the studio’s future on “next games.” The blog’s concrete changes—daily Bright Dust rotations, Destiny 2: The Collection, and permanent markdowns—optimize for a low‑friction, long‑tail economy. [2]
  • Sony Interactive Entertainment: Halting live updates caps opex and narrows reputational damage while SIE absorbs ~$765 million of write‑downs, testing whether Marathon or other bets can justify the $3.6 billion Bungie acquisition announced in 2022. [5][4]
  • Competitors (Warframe/Digital Extremes; Ubisoft’s The Division 2): They can court disaffected Guardians, but they also receive a warning about expensive content treadmills; Warframe’s creative director publicly called Destiny 2’s end “unthinkable,” underscoring the shock inside the live‑service cohort. [3]

2×2 framework: How live‑services “end”

  • High trust, Low burn: Curate and freeze (Destiny 2: Monument of Triumph in 2026).
  • High trust, High burn: Reinvent live (FFXIV: A Realm Reborn–style reboot; rare and risky).
  • Low trust, Low burn: Silent maintenance (servers on, minimal comms; reputational rot).
  • Low trust, High burn: Grind on with weak cadence (players churn; money vanishes).

Historical analogue (2017): Destiny 1’s Age of Triumph

  • In March 2017, Bungie closed Destiny 1’s update era with Age of Triumph—a celebration patch with revived raids and a pledge to keep servers on—then shifted momentum to Destiny 2’s September 2017 launch. Monument of Triumph echoes that playbook in 2026, but without a sequel waiting; Bungie frames this as the studio’s “new beginning,” not Destiny’s. Expect the museum to retain a core while attention migrates to whatever Bungie ships next. [1][2]

Back‑of‑envelope calculation (illustrative, not a forecast)

  • Assume a live‑ops Destiny 2 team of 300 developers at a loaded cost of $180,000/year each (salary, benefits, tools) = ~$54,000,000/year.
  • If the freeze reduces to a 60‑person maintenance crew at the same loaded rate = ~$10,800,000/year.
  • Implied opex relief ≈ $43,200,000/year, before savings on contractor art pipelines, external QA, and seasonal marketing; even at ±25%, the order of magnitude explains a freeze after ~$765–766 million in impairments. [5]
  • On revenue, a maintenance‑state Eververse plus a “Collection” bundle can still generate mid‑single‑digit millions annually; the new daily Bright Dust rotations and broader ornament access point to slow‑drip, goodwill‑first monetization. [2]

Why this isn’t just a content funeral

  • The Bungie post reads like product management, not an epitaph: a refreshed Director, Pantheon 2.0, set bonuses across raids/dungeons, Distortions on destinations, and Sparrow Racing League as a permanent pillar, all free for every platform on June 9, 2026. That ships years of asks at once so the final “frozen” state feels generous. [2]
  • PC and console press also confirm an explicit in‑game goodbye rather than a fade‑out—“yes, there’s story; yes, we get to say goodbye”—which gives The Final Shape era emotional closure and tempers petitions for a last‑minute Destiny 3. [6][1]

What others are missing

The endgame is economic design, not lore closure: Bungie reworked the reward economy and access model to minimize weekly FOMO and support tickets—daily Bright Dust rotations, Bright Engram focusing, tiered armor/weapon parity across legacy raids/dungeons, and a single Destiny 2: The Collection SKU with permanent markdowns across Steam, PlayStation, and Xbox. That cocktail compresses balance work into clear tiers, broadens cosmetic access without constant store overhauls, and yields a preservation‑first monetization scheme that can run for years with low staffing and low controversy. [2]

What to watch next

  1. By September 30, 2026, after the “Immortal” title deadline, Destiny 2’s Steam 7‑day average concurrency will be ≥20% below its June 9–16, 2026 7‑day average, and October 2026’s day‑to‑day standard deviation will be lower than any Episode month in 2024–2025 (per SteamCharts or similar trackers). [2]
  2. By December 31, 2026, Sony IR materials will report no new Bungie‑specific impairment charge ≥$50 million beyond the ~$765–766 million recorded for FY2025; any additional write‑down above that threshold would falsify this. [4][5]
  3. By March 31, 2027, Destiny 2: The Collection will either be priced at $29.99 USD MSRP or less on at least two storefronts (Steam, PSN, Xbox), or will include all remaining expansion SKUs at no extra charge inside the bundle. [2]

My take

If you love Destiny, log in on June 9, 2026 and savor Monument of Triumph, because Bungie is closing a 2017–2026 era with uncommon grace. The studio is making the only defensible move after a brutal FY2025: lock an iconic game in a generous, fan‑friendly state and move on from an opex‑heavy treadmill that no longer cleared the bar. Sony’s ~$765 million impairments forced a sober reset; the museum model protects Destiny’s cultural equity while Bungie builds something that actually merits a fresh runway. [2][5]

Sources

  1. Destiny 2’s Last Trailer Ever Is Heartbreaking — Forbes (https://www.forbes.com/sites/paultassi/2026/06/05/destiny-2s-last-trailer-ever-is-heartbreaking/) — Frames the June 9, 2026 trailer, Ikora’s narration, and Sparrow Racing’s return.
  2. Destiny 2: Every End is a New Beginning — Bungie.net (https://www.bungie.net/7/en/News/Article/d2_may_21_2026) — Confirms June 9, 2026 end of active development and details economy changes and The Collection.
  3. Destiny 2 Ending New Content Is “Unthinkable,” Warframe Dev Says — GameSpot (https://www.gamespot.com/articles/destiny-2-ending-new-content-is-unthinkable-warframe-dev-says/) — Provides a peer studio’s on‑record reaction.
  4. FY2025 Q2 Earnings Announcement Q&A — Sony IR (https://www.sony.com/en/SonyInfo/IR/library/presen/er/pdf/25q2_qa.pdf) — Discloses a $204 million impairment tied to Bungie in Q2 FY2025 and related commentary.
  5. Sony records a $766 million impairment loss against Bungie for the 2025 financial year — PC Gamer (https://www.pcgamer.com/gaming-industry/sony-records-a-usd766-million-impairment-loss-against-bungie-for-the-2025-financial-year-a-1-2-punch-of-destiny-2-and-marathon-failing-to-meet-its-expectations/) — Aggregates the ~$765–766 million FY2025 impairment total and Marathon context.
  6. Destiny 2 lead says the final update won’t just fade out — GamesRadar (https://www.gamesradar.com/games/destiny/destiny-2-lead-says-the-final-update-wont-just-fade-out-yes-theres-story-yes-we-get-to-say-goodbye/) — Confirms the “say goodbye” narrative inside Monument of Triumph.
  7. Destiny 2 player counts drop to lowest point ever on Steam — TweakTown (https://www.tweaktown.com/news/110476/destiny-2-player-counts-drop-to-lowest-point-ever-on-steam/index.html) — Documents March 2026 Steam lows to illustrate engagement decline.


Related update: We recently published an article that expands on this topic: read the latest post.

Pasta With Butternut Parmesan Sauce @ Dw Magazine.Com | Made by Meaghan Moineau

So there I was, staring at the butternut squash I’d ambitiously bought a week ago, thinking I’d make soup but never did. It was one of those drizzly evenings when the couch was calling louder than the kitchen, but the idea of a warm, creamy pasta dish was too tempting to ignore. Pasta with Butternut Parmesan Sauce was a perfect solution. This dish is a cozy, comforting hug in a bowl, and it’s deceptively simple to make. It’s the kind of recipe that feels special enough for a dinner party, but easy enough for a Tuesday night when you’re just trying to feed yourself without ordering takeout again. Plus, who doesn’t love a recipe that transforms a stubborn squash into a silky sauce?

Jump to Recipe

What You’ll Need

Chances are, you already have most of what you need in your kitchen. The magic comes from a few key ingredients that turn a humble vegetable into something seriously crave-worthy.

  • Butternut squash (about 2 pounds, give or take)
  • Bow-tie pasta (or your favorite shape)
  • Olive oil
  • Shallots
  • Parmesan cheese, freshly grated if possible
  • Heavy cream
  • Nutmeg
  • Fresh parsley
  • Lemon juice
  • Salt and pepper
  • Water (or chicken stock) to thin the sauce

How to Make Pasta With Butternut Parmesan Sauce @ Dw Magazine.Com

  1. Start by preheating your oven to 350°F. Trust me, this is the hardest part—waiting for it to heat up!
  2. Carefully slice the butternut squash in half lengthwise. To keep things safe, cut a bit off both ends first so it stands upright without wobbling. Scoop out the seeds and guts and toss them.
  3. Place the squash halves cut side down in a baking dish with about 1/4 cup of water. Roast them for about 40 minutes, or until a fork slides easily through the flesh. Let cool for about 10 minutes.
  4. Once cooled, scoop the squash flesh into a blender or bowl if you’re using an immersion blender. Puree until smooth and set aside. This is where the magic starts to happen!
  5. Meanwhile, bring a large pot of salted water to a rolling boil. Add your pasta and cook until just al dente. Drain and set aside.
  6. While the pasta is cooking, heat olive oil in a large skillet over medium heat. Add the shallots and sauté until they become soft and translucent, about 5 minutes, wafting that lovely aroma.
  7. Add the butternut squash puree to the shallots, stirring until it’s all mixed together. Cook for about a minute.
  8. Stir in the heavy cream a tablespoon at a time, watching as it transforms the puree into a luscious sauce. Add the Parmesan and stir until it melts into the mix.
  9. Season the sauce with nutmeg, salt, and pepper. Add water or stock to thin it to your desired consistency—think silky, not soupy.
  10. Remove from heat and stir in fresh parsley and a splash of lemon juice for brightness. This is the moment it all comes together!
  11. Plate your pasta, ladle the sauce generously over it, and garnish with extra parsley and Parmesan. Serve immediately, because who can wait at this point?

Cook’s Notes

A few tips to keep your pasta game strong: First, make sure to season your pasta water well. It’s your first chance to flavor the pasta itself. When thinning the sauce, go slow—it’s easier to add more liquid than to take it away. If you’re planning ahead, the sauce can be made a day in advance and kept in the fridge. Just reheat it gently on the stove, adding a splash of water or stock if it’s too thick. Leftovers? Store them in an airtight container in the fridge for up to 3 days. To reheat, warm gently on the stove, adding a bit of water to loosen the sauce if needed.

Make It Your Own

  • Swap bow-tie pasta for whole wheat spaghetti for a nuttier flavor and a little extra fiber.
  • For a protein boost, toss in some cooked chicken or crispy tofu before serving.
  • Want to sneak in more veggies? Add some sautéed spinach or kale to the sauce just before serving.
  • Feeling fancy? Drizzle a little truffle oil over the top before serving for an indulgent touch.

If you try this, I’d love to hear how it turns out—drop a comment or tag me on social media! Your version might just become my new favorite. Enjoy every creamy, dreamy bite!

Related update: Pasta With Butternut Parmesan Sauce @ Dw Magazine.Com

Curry and Sage Roast Chicken | Made by Meaghan Moineau

It was one of those frantic weeknights when I stared into my fridge, hoping for a dinner miracle. You know those nights, right? When you need something comforting and full of flavor but don’t have the energy to tackle a complex recipe? That’s when I stumbled upon the delightful harmony of curry and sage roast chicken. This dish is the perfect blend of aromatic spices and fresh herbs, with a hint of sweetness from honey and citrusy brightness from lemon and orange. It’s one of those recipes that sounds fancy but is so straightforward you’ll be able to pull it off without breaking a sweat. Plus, your kitchen will smell amazing.

Jump to Recipe

What You’ll Need

Do you ever have those happy moments when you realize you actually have most of the ingredients you need? That’s this recipe for you. It’s likely most of these are already sitting in your pantry or fridge.

  • Whole chicken
  • Curry powder
  • Fresh sage
  • Garlic
  • Honey
  • Lemon juice
  • Orange juice
  • Olive oil
  • Black pepper
  • Turmeric

How to Make Curry and Sage Roast Chicken

  1. Preheat your oven to 350°F. Take a moment to breathe in that pre-cooking calm.
  2. Clean the chicken inside and out, patting it dry with paper towels. Think of it as giving the chicken a mini spa day.
  3. In a small bowl, mix olive oil, lemon juice, orange juice, crushed garlic, honey, curry powder, black pepper, and turmeric. The mixture should smell like a small slice of heaven.
  4. Rub the chicken thoroughly with this vibrant mixture. Don’t be shy—get in there and make sure every nook and cranny is covered.
  5. Gently lift the skin and stuff some garlic and sage underneath. This is like a hidden treasure of flavor that will infuse the meat.
  6. Place the chicken in a baking pan, breast side up. Pop it into the oven and let it bake. The skin will become golden and fragrant, a sure sign it’s nearly time to eat.

Cook’s Notes

Keep an eye on your chicken as it roasts; baking time can vary depending on size. A good rule of thumb is about 20 minutes per pound, but make sure the internal temp hits at least 165°F. If the skin starts to get too dark before the meat is cooked through, tent some foil over the top. Leftovers will keep well in the fridge for a few days, and trust me, they’re perfect for a quick lunch salad or sandwich. You can also mix the rub and prep the chicken a day ahead, leaving it to marinate in the fridge for even more flavor.

Make It Your Own

  • Swap the chicken for crispy tofu by marinating tofu slices in the same spice mixture and baking until golden.
  • Try adding a sprinkle of cumin for a deeper, earthier vibe if that’s your thing.
  • If you’re not a fan of sage, rosemary could be a delightful substitute.
  • For a spicier kick, toss in some crushed red pepper flakes to the marinade.

If you try this, I’d love to hear how it turns out—drop a comment or tag me! Your kitchen is about to be filled with aromatic joy, and I’m excited for you to experience it. Happy cooking!

Related update: Curry and Sage Roast Chicken

Related update: Pasta With Butternut Parmesan Sauce @ Dw Magazine.Com

Related update: Potatoes Smothered with Egg Sauce (Cariucho)

Breaded Shrimp and Spicy Mayo Appetizer | Made by Meaghan Moineau

It was one of those evenings when you open the fridge and just sigh, you know what I mean? It had been a long day, and I wanted something delicious but low-key. There it was, a can of shrimp I had almost forgotten about. That’s when inspiration hit—breaded shrimp with a spicy mayo dip! It’s the kind of dish that feels like a cheat: super quick to make, but everyone will think you’re some kind of kitchen wizard. Perfect for when friends drop by unannounced or when you’re just craving something crispy and spicy. Trust me, this Breaded Shrimp and Spicy Mayo Appetizer is about to become your new go-to.

Jump to Recipe

What You’ll Need

You probably have most of these ingredients hanging out in your pantry already, and if not, they’re easy enough to grab at any grocery store. Here’s what you’ll need:

  • All-purpose flour
  • Bread crumbs
  • Chili powder
  • Egg
  • Garlic powder
  • Mayonnaise
  • Onion powder
  • Suya pepper
  • Salt
  • Canned shrimps
  • Sriracha sauce

How to Make Breaded Shrimp and Spicy Mayo Appetizer

  1. Start by peeling and deveining your shrimp. You can leave the tails on for a bit of extra crunch and a nicer presentation if you like.
  2. Season the shrimp with suya pepper and set them aside to let the flavors sink in.
  3. Whisk the egg in a small bowl and set it aside as your dipping station.
  4. In another bowl, combine your all-purpose flour with onion powder, garlic powder, salt, and chili powder.
  5. Take each seasoned shrimp and dredge it in the seasoned flour, making sure it’s well-coated. The spices should cling to every curve.
  6. Dunk the floured shrimp into the egg mixture, ensuring they’re nice and gooey.
  7. Coat them in the bread crumbs; press gently so the crumbs stick fully.
  8. Heat up a pan with oil for frying until it’s hot but not smoking. Fry the shrimp until golden brown on both sides, about 2-3 minutes per side.
  9. For the spicy mayo, mix 2 tablespoons of mayonnaise with 1 tablespoon of sriracha sauce until well combined. It should be a lovely salmon pink color.
  10. Serve your crispy shrimp with the spicy mayo on the side for dipping. Enjoy the crunchy, spicy goodness!

Cook’s Notes

You want to make sure your oil is hot enough before you start frying; otherwise, your shrimp will absorb too much oil and become soggy. If you’re making this for a crowd, you can fry the shrimp earlier and keep them warm in a low oven. Leftovers can be stored in an airtight container in the fridge and reheated in the oven to keep them crispy. I wouldn’t recommend microwaving them—no one likes limp shrimp!

Make It Your Own

  • Swap the shrimp for crispy tofu if you’re catering to vegetarians. Just make sure to press the tofu well before seasoning.
  • If you love extra heat, add more sriracha or even a dash of hot sauce to the spicy mayo.
  • Try using panko instead of regular bread crumbs for an extra-crunchy texture.
  • If you’re out of suya pepper, a mix of cayenne and paprika can add that smoky heat.

If you try this, I’d love to hear how it turns out—drop a comment or tag me! I’m always excited to see how you guys make these recipes your own. Happy cooking!

Related update: Breaded Shrimp and Spicy Mayo Appetizer

Related update: Hush Puppies

Shokz’s Lighter OpenDots Amp Sound | Analysis by Brian Moineau

TL;DR

  • Shokz’s new OpenDots 2 ($199.95) and budget OpenDots Air ($129.95) advance clip-on open earbuds with IP boosts, Dolby Audio on the flagship, and a lighter Air model that undercuts the $299 Bose Ultra Open by $100 while keeping an awareness‑first design. [1][8][5][15]
  • The headline isn’t “Dolby and Bluetooth 6.1”; it’s daily‑carry credibility: IP57 on the buds (IP54 case), Find My/“Find Hub” breadcrumbing, and a bone‑conduction mic that finally makes open earbuds decent for calls on city streets. [8][2][9][4]
  • If clip‑ons claim even 1% of the ~300M‑unit TWS market in 2026, Shokz could be staring at a ~$170M annual run‑rate from this subline alone; the pricing, features, and retail push support the math. [7][3][5]

What the source said

On June 4, 2026, The Verge reported that Shokz introduced two clip‑on open earbuds, OpenDots 2 ($199.95) and OpenDots Air ($129.95), that project sound toward the ear canal without sealing it. Air is lighter at 6.3g/earbud, uses dual 11.8mm drivers (“Bassphere”), and runs nine hours (36 with case), while OpenDots 2 adds Dolby Audio, a bone‑conduction call mic, 10 hours of battery (40 with case), Qi wireless charging, and support for Google’s “Find Hub” app for last‑seen location. Both models support Bluetooth 6.1, multipoint (two devices), app EQ (including a “privacy mode”), and app‑based find‑my within Bluetooth range; neither includes ANC. Colors differ by model and region across US/Canada retail listings. [1][3][4][5]

Why it matters

Three stakeholders are on the hook here. First, commuters and hybrid workers in 2026 who avoid sealed tips need call‑worthy, awareness‑preserving audio that doesn’t look like a gym band at a desk; IP57 buds, a bone‑conduction mic, and last‑known location tracking answer that brief in concrete ways. [8][2] Second, retailers like REI and B&H get a credible Bose Ultra Open alternative under $200: OpenDots 2 sits under Bose’s $299 MSRP while the Air captures budget buyers at $129.95. [5][15][3] Third, Google’s Find My Device network (labeled “Find Hub” in product copy) gains more headphones that “remember where you last had them,” even if full network tracking still varies by device type and OS version. [9][10][2]

Original analysis

Shokz upgraded its open earbuds: what really changed

Consensus says “Dolby + Bluetooth 6.1 = big leap.” Here’s the contrarian read: the practical wins are ingress protection, call quality, and findability—not a codec badge. OpenDots 2 bumps the buds to IP57 and the case to IP54, adds a dedicated bone‑conduction mic to tame street noise, and integrates last‑known location via Google’s “Find Hub.” Those switches move the category from jogger‑toy to all‑day wearable across US office commutes and urban errands. [8][2][4]

Dolby on open earbuds is nice, but keep perspective. Dolby processing here is app‑enabled spatial/voicing enhancement, not a hardware‑codec cure‑all for leakage. Meanwhile, Bluetooth 6.1 is real—Bluetooth SIG lists the 6.1 core spec as adopted—yet the SIG cautions against consumer‑facing version marketing because features like LC3 or Auracast still depend on chipset and OS stacks. Translation: a “6.1” badge doesn’t guarantee LE Audio perks across iOS/Android/Windows in 2026, though platform support is improving quarter by quarter. [11][12][13][16]

Back‑of‑envelope calculation

  • Baseline: Canalys data (via MacTech) pegged TWS shipments at 78.3M units in Q1 2025; annualized, that implies ~313M units before seasonality. Haircut to 300M for conservatism. [7]
  • If clip‑on open‑ear grabs 1% share in 2026, that’s ~3.0M units. Assume Shokz takes one‑third on brand lead and retail breadth, or ~1.0M units. Blend ASP across Air ($129.95) and OpenDots 2 ($199.95) to a round $170. Revenue ≈ 1.0M × $170 ≈ $170M; at 2% niche share, ~$340M. The shelf now hosts Bose Ultra Open, Shokz, and coverage from SoundGuys on competitive models, which signals real category pressure. [3][5][6][15]

Named‑stakeholder breakdown

  • Shokz: Raises ceiling with IP57 buds, IP54 case, a bone‑conduction mic, and Find Hub tie‑in; protects margin at $199.95 while opening the door at $129.95; spans fitness (OpenRun heritage), earhook (OpenFit lineage), and daily clip‑on (OpenDots). [5][8][3]
  • Bose: Ultra Open Earbuds carry a $299 MSRP and brand halo; visible price pressure undercuts that spread when $199.95 and $129.95 alternatives sit on the same shelf at REI or Amazon. [15][3]
  • Soundcore (Anker): AeroClip competes around $129–$169 street and looks strong on discount cycles, but it lacks the “IP57 + Find Hub + Dolby” trio Shokz now touts on its flagship. [6]
  • Google: More headphone SKUs feeding Find My Device/“Find Hub” increase Android stickiness—even if most models today only show last‑known spots vs Apple’s AirPods‑grade network ubiquity. [9][2][10]
  • Bluetooth SIG and silicon vendors: The 6.x cadence adds features and lowers latency on paper, but fragmented OS adoption keeps the story messy; expect OEM boxes to print “6.1” while reviewers footnote what actually works on Pixel, Galaxy, and Windows PCs. [11][12][13]

Comparison table (specs that matter)

  • Price: OpenDots Air $129.95; OpenDots 2 $199.95; Bose Ultra Open $299; Soundcore AeroClip $129–$169 street. [5][15][6]
  • IP: Air IP55 (case not rated publicly); OpenDots 2 IP57 buds, IP54 case; Bose lists water resistance without a formal IP code; AeroClip typically IP55. [5][4][6][15]
  • Battery (per charge/with case): Air 9h/36h; OpenDots 2 10h/40h; AeroClip 8h/32h. [3][8][6]
  • Mics: OpenDots 2 adds a bone‑conduction element to a 3‑mic array; Air uses dual mics; Bose uses beamforming mics. [5][8][15]
  • Findability: OpenDots 2 shows last‑known location in Google’s Find Hub app; both models support in‑app “ring to find” within Bluetooth range. [2][4][5]
  • Weight: Air 6.3g/earbud; OpenDots 2 6.4g/earbud. [1][4][5]

2×2: Open‑ear buyers by primary job‑to‑be‑done

  • Calls‑heavy + public spaces: OpenDots 2 (bone‑conduction mic, IP57 buds, Find Hub breadcrumbing). [8][2]
  • Music/podcasts + budget: OpenDots Air (dual 11.8mm drivers; $129.95; 6.3g/earbud). [5][1]
  • Sound‑first + brand cachet: Bose Ultra Open (voicing and industrial design at $299 MSRP). [15]
  • Gym/running + earhook stability: Shokz’s broader open‑ear line (OpenFit/OpenRun heritage) remains the sport default for 5K‑to‑marathon training. [3]

The subtle but important shift is interchangeability and wear intelligence. Air inherits Dynamic Ear Detection—left/right auto‑swap and multipoint—so you grab a bud, clip it, and it just orients and routes across two devices, reducing daily friction on Android and Windows. That small workflow win matters more than a codec badge on a retail box in 2026. [5][1][3]

What others are missing

The Find My Device/“Find Hub” wrinkle. Product pages and retailers call out “Google’s Find Hub app,” which shows last known location for OpenDots 2 even when you’re out of Bluetooth range, while the Shokz app can ring the buds if you’re nearby; that middle tier is weaker than Apple’s AirPods‑class network tracking but stronger than nothing. For a form factor that can pop off a collar or vanish into a jacket pocket on the F train in New York, this reduces the perceived risk of trying clip‑ons and directly supports sell‑through at chains like REI. The wording mismatch (“Find Hub” vs “Find My Device”) mirrors Google’s own Android Help pages that now reference a “Find Hub network,” so expect that branding to persist through 2026. [2][9][10]

What to watch next

  1. By Black Friday 2026, Bose Ultra Open Earbuds will see a permanent MSRP cut or evergreen $249 price at major US retailers to defend share against OpenDots 2; confirm via historical pricing trackers and Bose’s own site. [15]
  2. By Q1 2027, Shokz will ship a mid‑tier OpenDots model with Dolby Audio at ≤$149 to close the price/spec gap between Air and 2; watch Shokz’s regional product pages and PR wires for new SKUs. [5][3][8]
  3. By mid‑2027, at least one Shokz clip‑on model will explicitly advertise LE Audio features (LC3 and/or Auracast) as Android and Windows stabilize Bluetooth 6.x feature support; verify via SIG qualifications and OS release notes. [11][12][13]

My take

I’d buy the OpenDots 2 over Bose Ultra Open in mid‑2026. The $100 delta funds features you feel daily—IP57 buds, wireless charging, last‑seen location in Google’s app, and better call pickup—while preserving the awareness advantage that makes open earbuds safer in traffic on Market Street in San Francisco. Dolby is garnish; the meat is that Shokz removed enough friction to make clip‑ons a credible default for work and commute. If Shokz moves faster on LE Audio and cleans up the “Find Hub vs Find My Device” messaging, it can own this form factor by early 2027 and force Bose to compete on price, not just polish. [8][2][11]

Sources

  1. Shokz upgraded its open earbuds with better sound and a lighter design — The Verge (https://www.theverge.com/tech/942054/shokz-clip-on-opendots-2-air-earbuds-wireless-headphones) — Launch details, pricing, battery, weight, Dolby on 2, Dynamic Ear Detection, Find Hub mention.
  2. SHOKZ OpenDots 2 product page — B&H Photo (https://www.bhphotovideo.com/c/product/1975297-REG/shokz_e320_st_bk_us_opendots_2_open_ear_clip_on.html) — Confirms Bluetooth 6.1, Find Hub last‑known location, app features.
  3. Shokz Introduces OpenDots 2 and OpenDots Air — PR Newswire (https://www.prnewswire.com/news-releases/shokz-introduces-opendots-2-and-opendots-air-expanding-open-ear-clip-on-earbuds-for-everyday-listening-302791659.html) — Official launch (June 4, 2026), model positioning, key features.
  4. OpenDots 2 overview — Shokz Canada (https://ca.shokz.com/pages/opendots-2) — Bassphere 2.0, Dolby on 2, triple‑mic with bone‑conduction, Bluetooth 6.1, IP57/IP54, weight 6.4g.
  5. OpenDots Air product page — Shokz Canada (https://ca.shokz.com/products/opendots-air) — Air pricing, Bassphere (no Dolby), feature comparison vs OpenDots 2, Dynamic Ear Detection.
  6. Shokz expands its clip-on earbuds with the OpenDots 2 and affordable OpenDots Air — SoundGuys (https://www.soundguys.com/shokz-clip-on-earbuds-opendots-2-air-158377/) — Independent confirmation of prices, IP ratings, and competitor context (e.g., AeroClip).
  7. Apple continues to dominate the global true wireless stereo market with 23% market share — MacTech (https://www.mactech.com/2025/05/21/apple-continues-to-dominate-the-global-true-wireless-stereo-market-with-23-market-share/) — Cites Canalys: 78.3M TWS units shipped in Q1 2025 for market sizing math.
  8. The Shokz OpenDots 2 open earbuds offer new controls, upgraded Dolby Audio and better bass — What Hi‑Fi (https://www.whathifi.com/headphones/wireless-earbuds/the-shokz-opendots-2-open-earbuds-offer-new-controls-upgraded-dolby-audio-and-better-bass) — Confirms Dolby, IP57/IP54, wireless charging on OpenDots 2.
  9. Android Help: Be ready to find a lost Android device — Google (https://support.google.com/android/answer/3265955?hl=en-en) — Explains “Find Hub network” and last‑known locations in Google’s ecosystem.
  10. Shokz OpenDots 2 — REI (https://www.rei.com/product/C13271/shokz-opendots-2-open-ear-clip-on-earbuds) — Retail copy referencing “Google Find Hub” and Fast Pair/Swift Pair support.
  11. Core Specification 6.1 Adopted — Bluetooth SIG (https://www.bluetooth.com/specifications/specs/core-specification-6-1/) — Official status for Bluetooth 6.1.
  12. Bluetooth Core 6.1 is here (SIG blog) — Bluetooth SIG (https://www.bluetooth.com/blog/delivering-on-the-bi-annual-release-schedule-bluetooth-core-6-1-is-here/) — Confirms 6.1 timing and cautions on consumer version marketing.
  13. Bluetooth Core 6.0 feature overview — Bluetooth SIG (https://www.bluetooth.com/core-specification-6-feature-overview/) — High‑level features in the 6.x family, including LE Audio context.
  14. I tested the new Shokz OpenDots 2 for three weeks — Tom’s Guide (https://www.tomsguide.com/audio/headphones/shokz-opendots-2-review) — Hands‑on impressions, pricing, and position vs Bose.
  15. Shop Bose Ultra Open Earbuds — Bose (https://www.bose.com/p/earbuds/bose-ultra-open-earbuds/ULT-HEADPHONEOPN.html) — Official $299 MSRP and product positioning.
  16. Bluetooth Core Specification v6.1 — Reference document for 6.1 feature deltas and adoption details (no direct URL provided).


Related update: We recently published an article that expands on this topic: read the latest post.